HANDBOOK HOMEGROWER
Your determination to cultivate a plant long scrutinized and outlawed for generations... has brought you this book.
Seed vs Clone
Spectrum, HPS vs LED, PAR
Setting Parameters, VPD, Airflow
Grower Checklist, Phase Considerations, Maintenance
Nutrient Breakdown, Feed Schedule


FEED SCHEDULE
First, read through the CULTIVATION PRINCIPLES above to understand the fundamentals of cultivating and then follow the CULTIVATION STEP-BY-STEP along the way. Make sure to follow the reference docs on the left to ensure success. Feed Schedule P.37 , and Grower Checklist P.31
Seed Germination, Tissue Culture Germination
Initial Inspection, Quarantine
Canopy Management , Low Stress Training, IPM
Weeks
Runoff Monitoring, End of IPM, Adjust PAR
Weeks
Tapering Nutrients, Check Ripeness
Weeks
Cut and Harvest, Setting Environment, Trimming


Clean & Sanitize Room
Numbers displayed below are weeks.
GROWING TERMS
SUBSTRATE
The medium where plants grow, like soil, rockwool or DWC.


ACTIVE RADIATION)


The specific range of light wavelengths (400–700 nm) that plants use for photosynthesis.
A measure of how acidic or basic a solution is. pH affects nutrient availability in the growing medium.
Highly purified water, free of minerals, salts, and impurities.


A measure of the intensity of PAR light reaching a specific area.
The difference between humidity and temperature affecting plant transpiration.
Soil Rockwool DWC
FULLY SOAKED
GROWING TERMS
RUNOFF


The maximum water a substrate can hold, often identified by the start of runoff during watering. FEED EC
The concentration of nutrients that is fed to your plants.
DRYBACK
The period between feedings when the substrate is drying out. This is usually at night, but can occur for days.


Water that is drained from the bottom of a substrate.


RUNOFF EC

The concentration of the nutrients that is leached from the substrate after a watering.
LOW STRESS TRAINING (LST)
Bending and tying branches to enhance light distribution, ensure even growth, and boost yield with minimal stress.
WHAT YOU NEED

GROW TENT & TRAY
HUMIDIFIER
COCO FILLED POTS
ROCKWOOL CUBES
AC UNIT
BATCH TANK
SEEDS
CONTAINER
XACTO
TRELLIS
GLOVES
PAPER TOWELS
MICROSCOPE
CLONE DOME PLASTIC SYRINGE
BUCKET
CLONES
For each phase, you will need slightly different tools. Make sure you have these tools below before getting started.


HPS LIGHT


SPRAYER
STERILE PLASTIC BAG
TWEEZERS
FANS
SECONDS


PAR METER
SCISSORS
LARGE SCISSORS
HYGROMETER
CLEANING RAGS
BAGGIES
50X JEWELER SCOPE
MASON JARS TIME
DRAIN BUCKET
HOURS DAYS WEEKS
Icons in this book indicate task duration: Red for seconds , Orange for hours , Yellow for days , and Green for weeks —helping you plan tasks at a glance.
This handbook demonstrates how to cultivate a 1-light grow, but these principles can be used across 20 lights.
The chart above demonstrates the order of importance from the bottom up within a grow. Below is the breakdown.
1 GENETICS : Genetics shape yield, flavor, and potency in cannabis. The plant’s potential hinges on its genetic blueprint, which makes great genetics crucial for a successful harvest.
2 LIGHTING : Proper lighting is crucial for cannabis growth, as intensity, duration, and spectrum influence development. The right setup ensures plants get the light they need at each stage.
3 ENVIRONMENT : A stable environment is key to cannabis cultivation. Proper temperature, humidity, and air circulation ensure plant health and high-quality buds.
4 GROWER : A grower’s knowledge and attention to detail is crucial. Understanding plant needs and making timely adjustments ensure optimal growth and yield.
5 NUTRIENTS : Nutrients are crucial but should follow genetics, lighting, environment, and grower skill. They boost yield only when other factors are optimal.
In cannabis cultivation, the saying “Genetics are everything” rings true. While soil, nutrients, and climate play a role, a plant’s genetic blueprint ultimately determines its potential. Whether aiming for abundant flowers, edibles, or potent extracts, understanding genetics is key to success.
GROWTH PHASES:
SEED
LIMITING PRINCIPLES
The chart below shows how all factors are capped by genetic potential, no matter how good the rest of your bases are covered.
Genetics Lighting Environment Grower Nutrients
Now that you understand the importance of genetics, let’s figure out if you are starting with seeds or with clones. Below is a breakdown of why you might want to start with a seed vs why you would want to start with a clone. There are pros and cons to each.
SEED
CLONE
Genetic Variety: Seeds offer diverse genetics, leading to unique phenotypes and exceptional plants.
Stronger Roots: Seed-grown plants typically have stronger roots and more vigorous growth.
Uncertainty: Non-feminized seeds may produce male plants, requiring culling for bud production.
Legality: Seeds are easier to acquire legally and store longer without losing viability.
Disease-Free Start: Seeds reduce contamination risk as they generally don’t carry diseases or pests.
Time-Consuming: Seeds take longer to mature due to the germination process.
Limited Diversity: Clones limit genetic diversity, reducing resilience over time.
Weaker Roots: Clones can develop weaker roots, resulting in less vigorous growth.
Consistency: Clones ensure uniform growth, potency, and yield by replicating the mother plant.
Reliable Traits: Clones replicate desired traits exactly, such as yield or pest resistance.
Disease Risk: Clones can carry pathogens from the mother plant, affecting the entire grow.
Faster Start: Clones bypass the seedling stage, speeding up growth.
Starting with seeds allows for a chance of discovery and an opportunity to curate what you like best out of a strain. The challenge is this process can take up to 7 months to find a keeper. This is strain dependant.
Seeds offer more variance in these key areas:
Here is a breakdown of the selection process:
Grow your plant to 12” to select your female clones and remove any males.
Veg your clones for 2-4 weeks.
Male cannabis plants show small pollen sacs.
Flower your plants to select a keeper to then use as your mother stock.
Female plants develop tiny pistils (hair-like structures).
Male Female
Starting with clones ensures consistent genetics, allowing for refined runs. Strains like Z or Sour Diesel need precise nutrients, while resilient ones like Superboof and Apple Fritter can thrive in varied conditions.
Grow Legendary Strains
Consider starting with clones if you like particular cultivars based on familiarity or characteristics.
Quarantine Before Production
WARNING:
There is always a risk of pests and disease when attaining clones from unknown growers.
Quarantine, clean, and dip in IPM . Check for bugs and make sure it is healthy before you go.
Apple Fritter
Super Boof Sour Diesel
Cannabis lighting plays a crucial role in plant growth and development. During the Veg phase , an 18/6 light cycle (18 hours of light, 6 hours of darkness) is commonly used to encourage vigorous growth, while the 12/12 light cycle (12 hours of light, 12 hours of darkness) is essential for triggering the Flower phase . The balance of light spectrum is also important: Blue light promotes strong, compact vegetative growth, while Red light is critical during flowering to enhance bud development and resin production. Managing the light cycle and spectrum ensures healthy plants and optimal yields. These concepts are simply to mimic nature.
Use blue light during this growth period to mimic Spring/Summer.


Use blue light during this growth period to mimic Spring/Summer.


LIGHT CYCLE & SPECTRUM
Both light cycle and spectrum are crucial to achieving optimal plant growth. The light cycle regulates the plant’s growth stages— Clone , Veg , Flower , and Finish —while the spectrum influences the type of growth.
• Blue Light fosters Vegetative development.
• Red Light enhances Flower production.
Proper management of both ensures healthy plants and maximized yields.
12/12
Use red light during this growth period to mimic Summer/Fall.


12/12
Use red light during this growth period to mimic Summer/Fall.


LIGHT BENEFITS
When choosing between HPS (High-Pressure Sodium) and LED lighting for cannabis cultivation, it’s essential to understand the unique benefits each offers. HPS has long been a popular choice for its high light intensity, while LED technology has gained traction for its efficiency and spectrum control. Both lighting types can significantly impact your grow, from heat output and energy usage to overall plant health.


HPS

LED


HIGH YIELDS, HIGH HEAT
HPS lights deliver intense, broadspectrum light for high yields but require significant heat management, making them less ideal for beginners.


EFFICIENT, COOL, COST EFFECTIVE
LEDs are energy-efficient, customizable, and emit less heat, boosting growth while saving electricity. Though costly upfront, they’re worth it long-term.


More susceptible to tip bleaching.


Less susceptible to tip bleaching.
HPS LEDS VS
Now that you understand the differences between the different types of lights, let’s decide which makes the most logical sense for your current scenario. The table below highlights the key differences to help you determine which option best suits your growing environment and goals.


Photosynthetically Active Radiation (PAR) is vital for plant health, as it fuels photosynthesis. The correct distance between the light source and plants ensures optimal PAR exposure and prevents stress. Adjust light intensity based on growth stages: Seeds / Clone , Veg , and Flower , to support healthy development and maximize yield.
Use a PAR meter (at about this height) to establish PPFD readings for the growth phase you are in below:


- 300
SEED/CLONE


24-36”


LIGHT PLACEMENT


from the top of the plant.
NOTE: Don’t wait too long to flower, plants will double in size at full size from flip.


18-24” 12-18” VEG
from the top of the plant.


WARNING: LIGHTS TOO CLOSE TO THE FLOWER BUDS MAY CAUSE BLEACHING.
AIR EXCHANGE
Optimal cannabis growth requires understanding the interplay of temperature, humidity, and Vapor Pressure Deficit (VPD). VPD reflects the moisture difference between air and leaves, influencing plant transpiration. The chart to the right illustrates ideal VPD levels based on temperature and humidity, highlighting zones of excess or insufficient transpiration. Maintaining ideal VPD promotes healthy growth, nutrient uptake, and higher yields.
Oxygen In


Oxygen Out
Humidity In
Humidity Out


HUMIDIFIERS


Depending on the region, you may need a humidifer or a dehumidifier. The purpose is to control the amount of moisture within the air. The temperature and humidity should match the growth stage’s optimal range indicated in the chart on the right to achieve ideal VPD.
WARNING: REDUCE VECTORS FOR CONTAMINATION BY NOT OPENING THE TENT OFTEN ONLY OPEN IF YOU HAVE TO.
VPD RANGE
It is extremely important to manage the proper VPD (Vapor Pressure Deficit) You want to keep your VPD within this optimal range above. The below chart illustrates what happens when you fall outside of the suggested range.
CLIMATE
Climate control is vital for indoor cannabis grow rooms as it directly impacts plant health and growth. Cannabis needs specific temperature, humidity, and air circulation levels to thrive. Deviations can lead to stunted growth, disease, or plant death. For instance, high humidity promotes mold, while low humidity causes dehydration. Temperature fluctuations can also affect potency and yield. Growers must monitor and regulate the environment using tools like air conditioners, humidifiers, dehumidifiers, and ventilation systems to ensure optimal conditions.
SEEDS/ CLONES
LIGHT SCHEDULE
TEMP: 75° - 80° F (Room)
RH: 65 - 75% (Room)
DH: 80 - 95% (Dome)
VPD: 0.8 kPa (Room)
PPFD: 100 - 150 (Canopy)
TEMP: 72° - 82° F (Room)
RH: 58 - 75% (Room)
VPD: 0.8 - 1.0 kPa (Room)
PPFD: 300 - 600 (Canopy)
24 HRS: ON
TEMP: 75° - 82° F (Room)
RH: 60 - 72% (Room)
VPD: 1.0 - 1.2 kPa (Room)
PPFD: 600 - 1000 (Canopy)
CO2: 1200 - 1500 (Canopy)
6 HRS: OFF 18 HRS: ON
LIGHT SCHEDULE LIGHT SCHEDULE
Week 1 - Week 7
12 HRS: OFF 12 HRS: ON
OPTIMAL RANGE


During the Veg and Mother plant growth phases, higher temperatures and humidity levels are ideal. Aim for indoor temperatures of 72-82°F with humidity up to 75%, which helps maintain the proper VPD.


For the Flower phase, indoor temperatures should be slightly lower, ranging from 75-82°F during the light cycle. In the last 10 days before harvest, gradually decrease the temperature by 1°F each night to encourage the plant’s natural fade, enhancing the final quality of your buds.


FINISH
TEMP: 65° - 72° F (Room)
RH: 50 - 60% (Room)
VPD: 1.0 - 1.2 kPa (Room)
PPFD: 600 - 800 (Canopy)
CO2: 500 - 800 (Canopy)
DRY/CURE CLIMATE
TEMP: 60° - 65° F (Room)
RH: 55 - 60% (Room)
Week 8 - Week 9
Time: 14 Days
SOIL ROCKWOOL DWC
Different substrates affect your cultivation goals in unique ways. Soil (or coco coir) is forgiving and nutrient-rich, ideal for beginners. Rockwool offers great aeration but needs careful pH management. DWC provides rapid growth through direct access to nutrient-rich water, though it requires more technical setup.
For a detailed comparison, see the table below.
SUBSTRATE TYPE
NUTRIENT CONTROL
EASE OF USE
Limited control, nutrients can build up in the medium
High nutrient control, requires careful management
Careful Watering
Maximum nutrient control via nutrient solution
Close Monitoring
SUBSTRATE SIZES
In cannabis cultivation, substrate size is key to healthy roots, water retention, and overall plant growth. Fine to coarse substrates differ in nutrient retention, root oxygenation, and moisture control, impacting yield and quality. Here’s a quick guide to help you choose the right substrate size.
Substrate Watering Frequency
More Frequent Waterings
Less Frequent Waterings
Gal
mL
Only use 1 gal p ot with automated irrigation systems. Not recommended for hand water.
Gal
mL
Gal
mL
Pot Size Affects Watering Frequency: Smaller pots require daily watering to prevent excessive drybacks. To reduce drybacks and align with your schedule, use larger pots to retain more water.
Watering Frequency Over Life Cycle
Watering frequency will increase as the plant matures and consumes more water due to its higher metabolic rate. The example below provides a broad overview of how watering frequency changes throughout the plant’s life cycle.
Watering Event
The grower plays a key role in plant growth by providing essential care, maintaining the environment, performing stress training, and following an IPM spray procedure during each growth phase.
SEED / CLONE CONSIDERATIONS
Root Development:
Allow proper drybacks and avoid overfeeding for explosive roots.
Training:
Start LST or topping to shape plants and optimize light exposure.
Minimal Stress:
Handle gently and maintain high humidity to prevent dehydration.
VEG CONSIDERATIONS
Pest Management:
Keep the cloning environment sterile and monitor closely.


Bud Care: Space plants to prevent overcrowding and improve airflow.


Growth Height: Monitor closely to avoid overcrowding or excessive stretch.
Pest Scouting: Regularly inspect for pests or mildew as plants grow denser.
FLOWER / FINISH CONSIDERATIONS
Trichome Monitoring: Inspect trichomes and hairs to determine harvest.
Clean Environment: Maintain a spotless grow room to avoid dust and mold.

GROWER CHECKLIST
DAILY CHECKS
Check RO system output for daily water needs.
Record temperature and humidity twice daily.
Ensure airflow to prevent hotspots and mildew.
Confirm pH of irrigation water and nutrients.
Check runoff pH for root zone consistency.
Inspect for pests or mildew; act quickly.
Check moisture levels; adjust irrigation as needed.
Monitor plant height to avoid light issues.
Use LST to improve light exposure and airflow.
Inspect for light leaks during dark periods.
Verify timers are working properly.
Mop floors and wipe walls for cleanliness.
Change into clean clothes before entering.
WEEKLY CHECKS
Plant Health Review growth, height, and overall health.
Environment Calibrate humidity and temperature systems.
Runoff Record runoff EC and pH to track nutrient balance.
Timers Check irrigation and light timers.
Sanitation Deep clean floors, walls, and tools.
PAR Record PAR levels; adjust lights as needed.
WARNING: WEAR PROPER PPE AND MAINTAIN SANITIZATION TO ENSURE HEALTHY PLANT PRODUCTION.


Red Light: Flower/Finish
Blue Light: Clone/Veg
ONE LIGHT LEGEND
Fan: Maintains airflow and prevents stagnant air, promoting healthy plant growth by reducing the risk of mold and pests.

Light: Provides essential light for photosynthesis, simulating sunlight to support plant development and flowering stages.
Temp: Monitors and regulates the grow room temperature and humidity to ensure plants thrive in optimal conditions.
Grow Tent: A controlled environment that houses plants and helps regulate light, humidity, and temperature.
AC Unit: Cools the grow room to prevent overheating and maintain an ideal growing climate for plants.
Trellis: Supports plants as they grow, ensuring even light distribution and maximizing canopy space for better yields.
Batch Tank: Stores water and nutrients, ensuring an even and consistent supply for your plants.
Grow Tray: Collects runoff and supports plant containers, keeping the grow space clean and organized.
Drain Bucket: Captures excess water and nutrient runoff to prevent overflow and maintain a tidy grow area.
Humidifier: Adds moisture to the air, maintaining ideal humidity levels for plant health and growth.
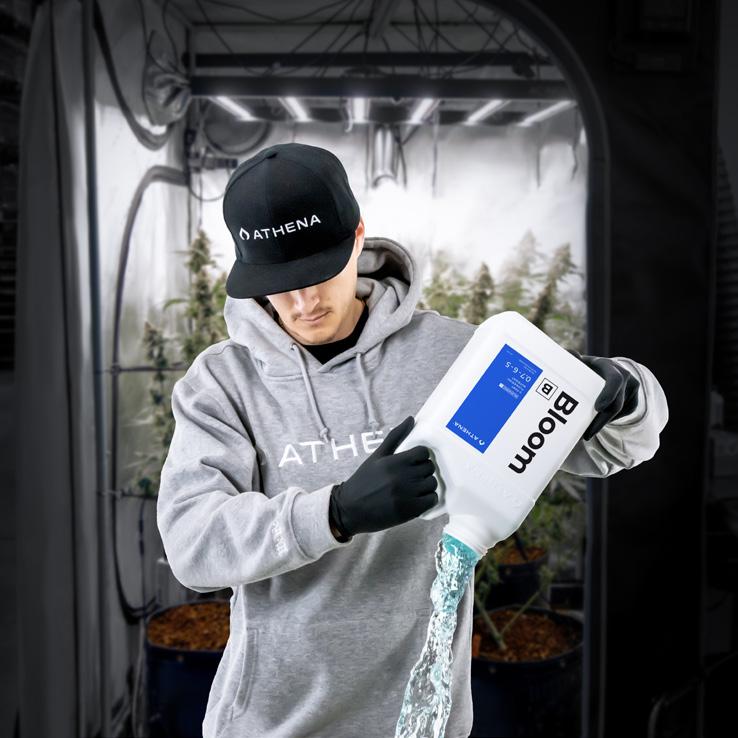
Base Fertilizers


Athena ® Grow A/B
2-Part Vegetative Nutrient
Athena ® Bloom A/B
Flowering Nutrient
Additives


PROGRAM
ALL PHASES
Athena ® Balance pH Adjuster
Water Conditioners Spray Program

Athena ® Cleanse Water Stabilizer
CLONE / VEG / FLOWER

Athena ® IPM
Broad Spectrum Insecticide & Fungicide
Athena ® Stack Bloom Enhancer
Availability varies based on jurisdiction.
BLENDED PROGRAM BREAKDOWN
On the right is the Blended Feed Program . This shows the recipe you will need for each week in the exact order that it should be mixed.
WEEKLY RECIPE
Add the specified mL for each product in the listed order, starting from the top and proceeding downward for each week.
2 You then need to ensure that the EC matches the value for that week (using an EC meter).
Follow the Batch Tank Preparation Procedure on P.44 for step-by-step instructions on how to properly prepare and validate your weekly recipe.
WARNING: INCORRECT MIXING ORDER MAY CAUSE PRECIPITATION AND BATCH FAILURE.


This is your spray program. Follow the Preventative IPM line and mix with Stack . Spray 2x per week to prevent pests and to maximize your yield. If you need to cure pests from your garden, we recommend a higher use rate and to follow the Curative IPM line .
The Pre-Soak is what you should feed to your media prior to placing plants in.
The Flush is at the end of the life cycle of the plant when nutrients should be flushed out.
BLENDED PROGRAM
All measurements are
Use the balance procedure and note your values for each week on the line below.
DISCLAIMER : This is a baseline recommendation. Any adjustments made are at the growers discretion. Adjust the feed chart according to weeks needed to complete a run. Strain dependent.


WATER QUALITY
Start with Reverse Osmosis (RO) Water
Use RO water whenever possible for a clean, impurity-free base that supports nutrient uptake. If RO water isn’t available, tap water may be acceptable as long as its EC is below 1.0. EC above 1.0 may lead to nutrient deficiencies due to mineral imbalance.
TAP
RO
Tap water starting EC is higher because of minerals in the water.
PRO TIP:
RO water starting EC should be close to 0.0 and a better starting point.
Below 0.4 EC is generally safe, but test within 0.4–1.0 EC to monitor plant response, adjusting pH to 5.6 if needed for better nutrient absorption.

Athena ® Cleanse
Incorporate a product like Cleanse in your watering regimen. Cleanse helps improve water quality by breaking down minerals and preventing them from building up in the root zone. This step can significantly reduce the likelihood of issues related to water contamination. Use Cleanse up to 2-5 mL per gallon every time you water.
MANAGING EC
This chart shows how your Feed EC will increase over the life cycle of the plant and then decrease towards the end. Maintaining the right EC levels ensures that plants receive the appropriate concentration of nutrients, while controlling pH is crucial for nutrient uptake and overall plant health.
Runoff volume will change from 1-16% depending on growth phase.
RUNOFF VOLUME
Runoff volume will range from 1% to 16% of the substrate volume, depending on the level of EC buildup in the substrate. Increasing the runoff volume will decrease substrate EC, while decreasing runoff volume will increase substrate EC.
CROP STEERING
There are two types of crop steering techniques that you can use to help promote growth within the plant, VEGETATIVE and GENERATIVE . These tables below break down the differences between both techniques.
2 Types of Crop Steering
A smaller dryback (low substrate EC) promotes Vegetative Growth , resulting in taller plants and swelling of the buds. A larger dryback (high substrate EC) encourages Generative Growth , leading to quicker flower site formation and compact plants.
EC AND RUNOFF% BY GROWTH PHASE
This chart demonstrates the relationship between Substrate EC (gathered by Watering EC Runoff Checks) and Runoff% throughout the life cycle of the plant. You can also see which crop steering technique is needed for each growth phase, VEGETATIVE or GENERATIVE .
Longer and shorter drybacks allow us to achieve a different EC in the substrate to help steer the plant to grow during particular phases in the growth cycle.
Taller Plants
Flower Sites
Bud Swell Compact plant
DRYBACK SCALE
Crop steering lets growers control plant growth by adjusting irrigation, dryback, and substrate EC to focus on VEGETATIVE or GENERATIVE growth, maximizing yield and meeting specific goals.
VEGETATIVE
MORE RUNOFF
DECREASED RUNOFF EC
SMALL DRYBACK
GENERATIVE
LESS RUNOFF
LARGE DRYBACK VS VS VS
INCREASED RUNOFF EC
DRYBACK SCALE
LESS STRESS MORE STRESS
The above chart represents the wetness or drieness level within the substrate, the amount of runoff, and the relation between each crop steering technique.
WARNING: DON’T DRY BACK TO THE POINT OF WILTING. IF YOUR PLANTS START TO WILT, THEN YOU ARE DRYING BACK TOO FAR, THIS MAY EFFECT YIELD, HARVEST AND QUALITY. DRYING BACK TOO HARD MAY KILL YOUR PLANTS.


STEP-BY-STEP
1 RO
Fill your res with RO water.
BATCH TANK
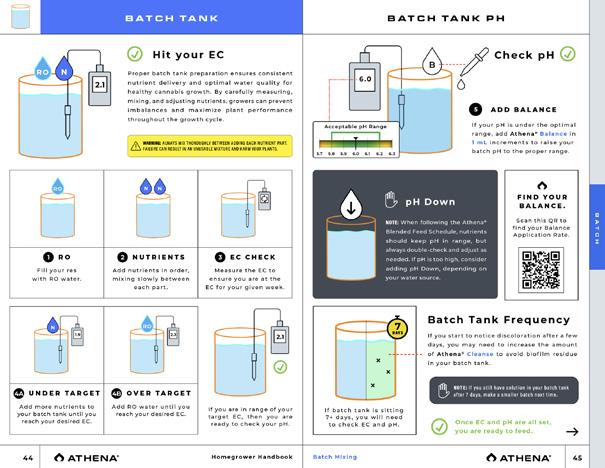
Hit your EC
Proper batch tank preparation ensures consistent nutrient delivery and optimal water quality for healthy cannabis growth. By carefully measuring, mixing, and adjusting nutrients, growers can prevent imbalances and maximize plant performance throughout the growth cycle.
2 NUTRIENTS
Add nutrients in order, mixing slowly between each part.
3 EC CHECK
Measure the EC to ensure you are at the EC for your given week.
4A IF UNDER TARGET
Add more nutrients to your batch tank until you reach your desired EC.
4B IF OVER TARGET
Add RO water until you reach your desired EC.
If you are in range of your target EC, then you are ready to check your pH.
BATCH TANK PH
Check pH

If your pH is under the optimal range, add Athena ® Balance in 1 mL increments to raise your batch pH to the proper range.
pH Down
NOTE: When following the Athena® Blended Feed Schedule, nutrients should keep pH in range, but always double-check and adjust as needed. If pH is too high, consider adding pH Down, depending on your water source.
Scan this QR to find your Balance Application Rate.

Batch Tank Frequency
If you start to notice discoloration after a few days, you may need to increase the amount of Athena ® Cleanse to avoid residue in your batch tank.
NOTE: If you still have solution in your batch tank after 7 days, make a smaller batch next time.
If batch tank is sitting 7+ days, you will need to check EC and pH.
Once EC and pH are all set, you are ready to feed.
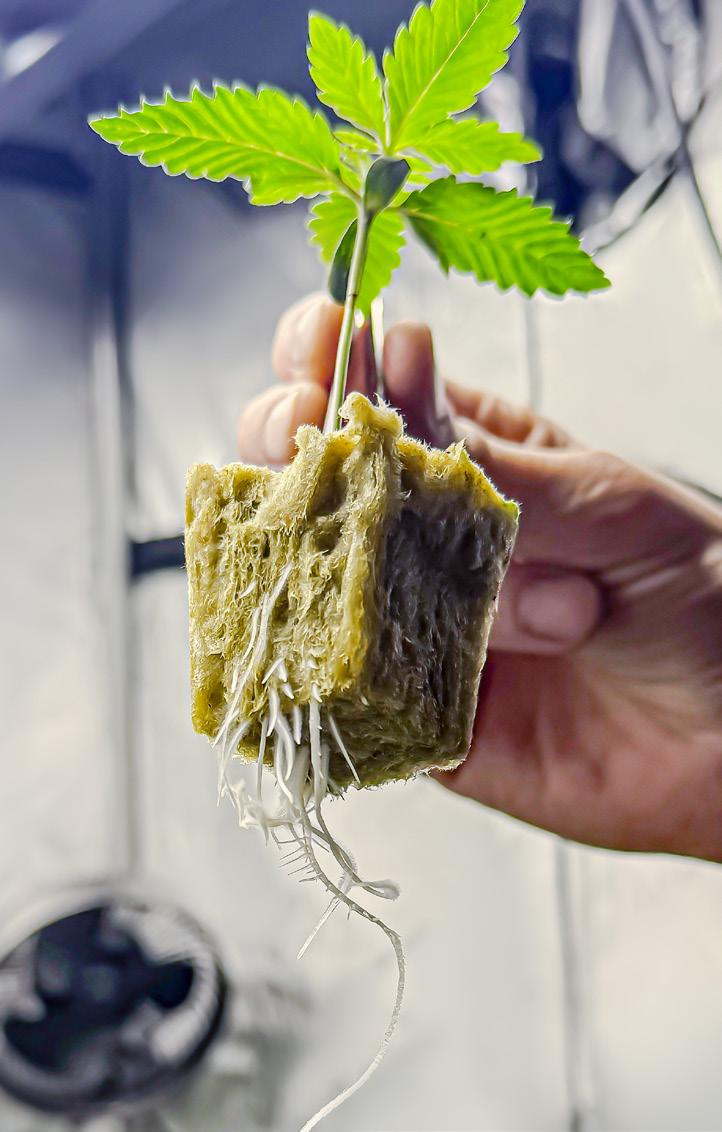
SEED GERMINATION
Germination is the start of a plant’s journey, as seeds awaken and grow into vibrant seedlings. High-quality seeds and ideal conditions are key to a successful harvest. This guide covers the essentials to help your seeds sprout strong and healthy.
2 SOAK
Place seeds on a paper towel soaked in 1.0 EC Clone Pre-Soak Recipe
Adjust with pH Down if needed.
WARNING: HANDLE SEEDS WITH CARE: SEEDS ARE DELICATE; AVOID ROUGH HANDLING THAT CAN DAMAGE THEIR VIABILITY.
Remove seeds from the package and soak for 15 seconds in 2mL/gal of Cleanse . CLEANSE
3
SEAL
Fold the seeds into the soaked paper towel and place into a plastic sandwich bag & seal.
4 STORE
Place in a warm dark place, drawer recommended, out of reach of children.
5 CHECK
Check for root development after 24 hours. It may take up to 48 hours.
6 SOAK
3-4 DAYS
7 TRANSPLANT
Once seeds have a 2” root, transplant into media, placing the root tip down and the shell up for leaf formation.
8 DOME
Place in a dome for 3-4 days with vents closed to retainhumidity, wiping it daily.
NOTE: Follow rockwool manufacturer instructions for initial pH buffer. Should be 5.5. 2 HRS
Soak cubes in a bucket of pre-soak mix for 2 hours.
9 READY
Once a web of roots arrives, you are now ready for transplant.
Clone intake is a critical step in setting your plants up for success. Proper handling and acclimation ensure healthy, resilient clones ready to thrive. This guide outlines the essentials for seamless clone intake and optimal growth.
2 LAB TEST
Send plant samples to a lab for virus/ viroid testing to ensure cleanliness.
INSPECT
Use a 100x scope to inspect clones for tiny pests like russet or broad mites, as lower magnification may miss them. WARNING: DISPOSE OF
3 IPM
Mix a batch of Athena® IPM: Use mild/ medium dosage if no bugs are present, or max dosage for bugs or damage. Limit plant dunks to 10 seconds.
DUNK, PLUG, MONITOR
5 GEL
Squeeze Cuts gel into a shot glass.
6 CUT
Cut the clone to expose new growth at a 45° angle.


2 WKS


READY
ROCKWOOL SOAK
Soak Rockwool cubes in your pre-soak nutrient solution for about 30 mins - 1 hour. Follow manufacturer instructions for initial pH buffer.
7 DIP
Dip cutting into the Cuts gel.
8 PLUG
Plug dipped clone into soaked cube.
light cycle should be 24 using Blue light .
MONITOR
Gradually remove the dome starting on day 4, beginning with 10 minutes and increasing the time slightly each day. Wipe away moisture when removing the dome. Continue until clones no longer wilt and are ready for transplant.
Ensure to maintain your spray program, treating and monitoring for any outbreaks. Turn lights off during this time.

After 14 days, if no pests or signs of disease are detected, your cuttings can be moved into the grow tent.
The Vegetative stage is where plants build the foundation for healthy growth and high yields. During this phase, they focus on developing strong roots, stems, and leaves. This section covers the essentials of veg care, from lighting and nutrients to training techniques, ensuring your plants thrive and are ready for flowering.
Irrigation Strategy:
VEGETATIVE


We will now be irrigating Vegetively , increasing our runoff, shortening our drybacks and keeping our Runoff EC low.


Switch light cycle to be 18/6 using Blue light .
ENVIRONMENT
Ensure your grow tent is all set up with the proper environmentals before getting started.
SCISSORS
VEG TRANSPLANT
PRE-SOAK
MIXING ORDER VEG (mL/gal)
Balance pH up
Grow B 20
Grow A 20
CaMg 5
Cleanse 2 - 5
3.5 - 4.0
5.8
SOAK
Place the pots in the tote and soak them with Veg W1 Pre-Soak recipe until they fully expand.
NOTE: Soak media in a tote to prevent tent flooding; a sink or tub works as an alternative.
2 FLUFF
Mix the coco by hand to aerate, then place the pots in the tent.
3 DIG
Make a hole in the center of the soil, about three knuckles deep.


4 PLUG
Place your clones in the holes just made.
5
BACKFILL
Backfill the media around the clone.
VEG DRYBACK #1

PLANT HEIGHT
Ensure the light is 18-24” away from the top of the plants and the PAR is 300-600 .

WARNING: IF YOUR PLANT WILTS, AVOID FEEDING UNTIL THE SUBSTRATE DRIES OUT.
18-24”
from the top of the plant.
NOTE: Plants may droop for the next 2 days due to being shocked from transplant and getting acclimated.
7 MONITOR Now, focus on monitoring your environment and lighting to achieve the ideal dryback. During this process, make sure to take daily notes in your journal and refer to the Grower Checklist to stay on track.
DRYBACK
Allow the substrate to dry back about 30-40% before feeding next.
SOIL COLOR
A clear sign of dryback is fully dry soil on top.
FINGER CHECK
Check with your fingers; if it’s dry to the second knuckle, it’s time to feed.
VEG BATCH TANK
Prepare a batch tank calculating roughly 0.5 – 1 gallon per plant depending on pot size.
Follow these steps below and repeat for each nutrient part in the Veg Recipe chart above.
1 FILL Fill batch tank with RO.
4 MIX Mix the batch tank thoroughly.
2 MEASURE
Measure your nutrient.
5 CLEAN Clean the syringe in the cleaning bucket. 3 ADD Add nutrient to batch tank.
REPEAT
Wait 30 seconds, repeat.
Once your EC is accurate, you are ready to feed.
FEED
Water the plants with the Veg recipe.
NOTE: If the batch you prepared to charge the media is still viable, you can reuse it.


8-16% Runoff


WATERING TECHNIQUE


Water at the center for instant root hydration, then along the edges to encourage root expansion and growth.


CHANNELING
Water slowly to prevent channeling, taking at least 60 seconds to complete.
VEG RUNOFF CHECK


CHECK RUNOFF


Check the runoff EC and pH to ensure that the solution is accurate.
Runoff EC Runoff
PH 3.5 - 3.7 5.8 - 6.4
NOTE: Collect 25% of the substrate size at a time and dispose between every runoff check. Before collecting additional runoff, dispose.
IF HIGH RUNOFF EC
Water your pots with additional nutrient solution at your target feed EC until you reach your target runoff EC.
IF LOW RUNOFF EC
Increase your Feed 0.5 - 1.0 EC higher on your next feeding and push less runoff to allow the EC to stack .
NOTE: Using Athena ® Blended Line allows substrate EC to rise to 6.0 in a slow controlled manner at specific times during the flowering phase.
VEG IPM


Once the plants are happily fed and the lights are off, spray IPM and Stack following the Spray Procedure on the Blended Feed Schedule


WARNING: DO NOT SPRAY IPM ON PLANTS UNLESS THE MEDIA IS WET AND LIGHTS ARE OFF.


Add IPM and Stack to a sprayer.


NOTE: Day 5 is an ideal time to resume your IPM routine. The clone dunk should provide sufficient protection until then.
Thoroughly mix the solution.


Spray under sides of leaves thoroughly. Spray the canopy thoroughly until plants are dripping.


VEG DRYBACK &
12 MONITOR Now, focus on monitoring your environment and lighting to achieve the ideal dryback. During this process, make sure to take daily notes in your journal and refer to the Grower Checklist to stay on track.

DRYBACK
Allow the substrate to dry back about 30-40% before feeding next.
SOIL COLOR
A clear sign of dryback is fully dry soil on top.
FINGER CHECK
Check with your fingers; if it’s dry to the second knuckle, it’s time to feed.


Once your dryback has been achieved, water the plants using the same nutrient mix and watering technique as last time.


CHECK RUNOFF


Ensure that your runoff targets are met by validating with an EC/pH meter.
Around day 5, top your plants.
4 DAYS
Snip the newest growth at the top, down to the start of the nodes below it.
The two new tops will grow within 3-4 days replacing the snipped growth. This accelerates overall plant growth.
Topping is a key plant training technique that promotes bushier growth and maximizes canopy potential. Removing the main growth tip redirects energy to side branches, creating more bud sites and a balanced canopy, while improving yields, light penetration, and airflow.
This illustration shows the progression of a plant from untopped to topped, highlighting how topping helps create a full, robust canopy. For best results, top your plants early during the vegetative stage, allowing ample time for recovery and growth before flowering.
NOTE: If allowed within your local jurisdiction, increase your plant count instead of topping.
FIRST TRELLIS
16 MAINTENANCE


Monitor the plants new growth to ensure health, maintain substrate EC and proper drybacks until day 14. Be aware that the plants will be eating more as they grow, so you may need to water more frequently.


DRYBACK
Allow the substrate to dry back about 30-40% before feeding next.
FEED
Waterings with 8-16% runoff
14 DAY


SPRAY
Follow the spray program.
TRELLIS
Place trellis at the determined height while pulling the stem and leaves through each square of the trellis.
NOTE: Plants typically double in size, so position your trellis low enough to prevent them from growing too close to the light, avoiding burns or damage.
VEG LST
Weaving plants through the trellis creates an even canopy, maximizes light, and improves spacing and airflow. It supports heavy branches and promotes uniform growth for better yields and healthier plants.
TRELLIS WEAVING
1 SPREAD
Spread the largest nodes to the next square to expose smaller growth to light.
2 WEAVE
Once the smaller growth catches up to the trellis, weave it to the next square over.
3 REPEAT
Repeat until the majority of the canopy is filled out.
Weaving helps lower branches catch up, creating a full canopy before flowering.
WARNING: DO NOT OVER BEND YOUR PLANT, YOU CAN SNAP BRANCHES AND DAMAGE POTENTIAL BUD SITES AND TOPS.
19 MAINTENANCE
Continue to monitor the plant, ensuring to achieve your proper drybacks, feedings, and spray procedure. Continue logging in your journal and following the Grower Checklist. Do this all the way until you are ready to flip to flower.
DRYBACK
Allow the substrate to dry back about 30-40% before feeding next.
FEED
Waterings with 8-16% runoff
21 DAY 20
SPRAY
Follow the spray program.
SECOND TRELLIS
Ensure there is a second trellis up not to damage the buds during the upcoming flowering process.
Once trellis is up, you are now ready for flower.
FLOWER
The Flower stage is the most rewarding phase of a plant’s life cycle, where all the care and preparation come to fruition. This is when plants shift their energy to producing buds, requiring precise environmental control, proper feeding, and careful monitoring. In this section, we’ll cover everything you need to know to maximize your yield and achieve top-quality flower.
Irrigation Strategy:
GENERATIVE


We will now be irrigating Generatively , raising our Runoff EC allowing the plant to have longer drybacks and less runoff. Do this until W4 Flower.


Switch light cycle to be 12/12 using Red light .
ENVIRONMENT


Ensure your grow tent is all set up with the proper environmentals before getting started. Most importantly, you need your light cycle to change to 12/12.
WEEK 1 FLOWER BATCH TANK
Prepare a batch tank calculating roughly 0.5 – 1 gallon per plant depending on pot size.
as pH up
Follow these steps below and repeat for each nutrient part in the Flower Recipe chart above.
Measure your nutrient.
ADD Add nutrient to batch tank.
Clean the syringe in the cleaning bucket.
Wait 30 seconds, repeat.
Water the plants with the Flower recipe.
CHECK RUNOFF
Check the runoff EC and runoff pH to ensure that the solution is accurate.


Note that your dryback for Week 1 Flower is 30-40%. Runoff EC Runoff PH


You will apply IPM through the first 3 weeks of Flower. After that, no IPM should be used.


WARNING: DO NOT SPRAY IPM ON PLANTS UNLESS THE MEDIA IS WET AND LIGHTS ARE OFF.


Add IPM and Stack to a sprayer.


Thoroughly mix the solution.
Spray under sides of leaves thoroughly. Spray the


Once you hit your dryback feed your plants again with the same recipe as W1 Flower.


CHECK RUNOFF


Ensure that your runoff targets are met by validating with an EC/pH meter.
Runoff EC Runoff PH
5.0 - 6.0 5.9 - 6.3
7 MAINTENANCE
Continue to monitor the plant, ensuring to achieve your proper drybacks, feedings, and spray procedure. Do this through week 3 of Flower.


DRYBACK
Dry back 50-60% before the next feed (3 knuckles this time).
FEED
Waterings with 1-7% runoff


SPRAY
Follow the spray program.


FLOWER W3
Once you hit your dryback, feed. Note that you have a new recipe for this week.
9 MAINTENANCE
Dry back 50-60% before the next feed (3 knuckles this time).
Waterings with 1-7%
Continue to monitor the plant, ensuring to achieve your proper drybacks, feedings, and spray procedure. This is the last week of your spray procedure.
Follow the spray program.


FLOWER DELEAF

DELEAF


WEEK 3
Identify and remove large fan leaves blocking light to the lower canopy.


This improves light penetration, encourages more bud sites, and helps them mature evenly with the top canopy.

Depending on cultivar, this can be allowed up to two times. Research cultivar before planting your next grow site.


Notice how the large fan leaves in red (Image 1) are blocking the light from penetrating the new growth areas. Remove these leaves to allow proper light penetration.


Once the fan leaves are removed, you can now see the new growth areas have proper light penetration. (Image 3)


Pre-Deleaf
Post-Deleaf A B
Image 1
Image 2
Image 3


4


Remove small leaves and bud sites below the trellis, as they are too far from optimal PAR levels to fully mature during flowering.


5


Removing underdeveloped sites prevents larf and redirects energy to main colas, producing denser, higher-quality buds.


Notice how the lower branches and small bud sites in red (Image 4) remain, receiving little light and producing low-quality, airy buds.

Lollipop in late veg or early flower to reduce stress and boost top cola growth. To avoid causing multiple days of stress, perform this on the same day as deleaf.


The lower canopy is now cleared, redirecting energy to the top colas for better airflow, light penetration, and denser, high-quality buds. (Image 6)


Image
Image
Image 6
FLOWER W4
Once you hit your dryback, feed. Note that you have a new recipe for this week. FEED


Check PAR numbers and verify they are within spec. 600-900.


Stem Node Split
NOTE: By now, the buds should be large enough to be weaved through the trellis allowing it to support each bud individually. One cola per cube is the general rule of thumb.
Once you hit your dryback, feed. Note that you have a new recipe for this week.


Deleaf any leaves covering bud sites to ensure canopy does not get too dense to avoid powdery mildew.


Buds are stacking up, gaining density and starting to swell.
DELEAF 15
FLOWER W6
Once you hit your dryback, feed. Note that you have a new recipe for this week.
Watch out for powdery mildew during this stage. This can occur when the canopy is too dense and there is not enough airflow within the canopy.
Flowers pack on weight, trichomes ramp up production.
FLOWER W7
Once you hit your dryback, feed. Note that you have a new recipe for this week.
ENVIRONMENT
Watch out for powdery mildew during this stage. This can occur when the canopy is too dense and there is not enough airflow within the canopy.
Major bulking phase—buds are noticeably denser and resinous.
FINISH
FINISH


Irrigation Strategy: JEWELER SCOPE
We are now flushing out the media of excess nutrients, encouraging the plant to express its full genetic potential.


Keep the light cycle at 12/12 using Red light .
ENVIRONMENT


Tapering nutrients at the end of the lifecycle helps plants utilize stored nutrients, improving flavor, aroma, and smoke quality.
This practice ensures a cleaner, smoother final product by reducing excess nutrient buildup.
Over the course of 2 weeks you should increase bud size and density.
You should notice a fade developing within your leaves.
TRICHOMES
You will taper your nutrient mix down to flush the plant of its food.


INSPECT
With a jeweler scope, you will notice the trichomes turn amber in color. WEEK
READY


Once the trichomes are 90% amber, you are ready for harvest.
LARGE SCISSORS
The dry and cure process is the final step in producing high-quality cannabis. Properly drying and curing your harvest preserves potency, enhances flavor, and ensures a smooth experience.

STERILE PLASTIC BAG
Switch light cycle to be 24 lights off.
ENVIRONMENT


JAR SCISSORS


1 LIFT


Lift first trellis up revealing one plant.


2 HANDLE
Carefully remove the trellis from each branch.


3 CUT
Cut the plant stem .
4 LAY
Lay the plants on sterile plastic until finished.
7 FLIP


Flip the trellis vertically.


5 REPEAT
Repeat the process until all plants are removed.
6 REMOVE
Remove the light, grow tray, bucket, and one trellis.
8 HANG
Hang the plants using both sides of the trellis and dry for 12-14 days.
DRY WEEK 1
It’s important not to harvest too early—allow it to dry until stems snap and buds feel dry to the touch. Proper drying ensures optimal potency, flavor, and smoothness, preventing harsh smoke caused by excess moisture.
If branches bend, keep drying. Even if a few snap, moisture remains.
Once all branches snap, you are ready to start separating branches from main stem.
9 CUT
Cut and separate each stem.
10 SEPARATE
Cut and separate each branch from stem.
11
REPEAT
Repeat until all branches are removed from the main stem.
BUCK & CURE
12 LAY DOWN
Lay down on sterile plastic.
13 BUCK
Cut and buck each bud from each branch.
WEEK 2
Allow extra headspace for gassing off.
WARNING: IF YOU DO NOT DRY AND BURP PROPERLY, THE BUDS CAN PRODUCE MOLD INSIDE YOUR JAR AND BAG FROM EXCESS MOISTURE LEFT IN THE MIDDLE OF EACH BUD ENSURING THAT SOME PRODUCTION AND QUALITY WILL BE RUINED.
14 REPEAT
Repeat until all buds are removed from the branch.


15 BURP
Open the lid for 10-15 minutes, 1-2x daily. Repeat for 2 weeks until humidity levels are balanced between each bud.
When the bud’s humidity reaches 58-62%, it’s ready to smoke.


ROOM RESET
Reset Your Room
Cleaning is one of the most important steps you take to eliminate pathogens in your garden. Use bleach 20%/gal in between cycles to clean, disinfect, and sanitize tables, floors, trellis, any hard surface you or your plants touch. Follow the procedures below in between crop cycles to ensure you start clean every time!
Start by removing all of the pots, fans, exhaust ducting, light, cords, and growing tray. Sterilize tray. Sterilize equipment. Wipe walls and floors.
WARNING: ENSURE YOU WEAR A MASK AND THE PROPER PPE BEFORE CLEANING.


Refill your grow tent with your tray, pots, and equipment.You are now ready for another run.


THE TECH TEAM
At Athena ®, not only do we have a qualified team of advisors, but we also have the best in the game offering technical support via phone and through comments/DMs to our social media following through Instagram, Facebook, Youtube, LinkedIn and more. The tech support team is led up by Steve Huff and two other support technicians. Steve has over 30 years of experience in the cannabis industry and has managed
over 30,000 sqft of canopy. His areas of expertise are nutrient management, irrigation, and IPM SOPs. He worked the counter of a large Hydroponics retailer for 8 years where he guided and helped local growers become successful. Now he guides and helps growers nationwide and internationally. Our goal is to help growers become successful by giving advice based on generations of cultivation experience.


WE THE GROWERS
A growers podcast hosted by a panel of growers based out of Southern California. We bring you perspective, best practices, and discuss the latest technology in the Industry.

EPISODE 21 BRUCE BUGBEE

LISTEN FOR
• B EST PRA CTICES
• LATEST TECHNOLOGY
• INDUSTRY EXPERIENCE

SCAN FOR

POWERED BY: AVAILABLE NOW ON: