


Connecting with nature can be done even within the confines of home, as ikebana materials can be found in the most unlikely of places. Cold and rainy, or snow-filled days provide an opportunity to explore the house, challenging children to find items to incorporate in arrangements, or searching for everyday items that can be used as vases. You don’t have to go far to find materials for ikebana. Even within the home, interesting items and makeshift vases can be found or repurposed from everyday kitchen items. Kitchen utensils make for brightly coloured, indestructible, waterproof additions to arrangements, and the recycle bin is a never-ending source of inexpensive materials. Using household items in ikebana arrangements enables younger children to connect with ikebana through familiar items. A variety of cheap and inexpensive ‘vases’ can be found around the home. Tealight holders or even ice-cream cones can be repurposed as vases. Empty eggshells, empty perfume bottles, shells collected from the beach, vases from thrift stores, empty bottles, recycled yogurt containers, and even tall milkshake tumblers all make cheap and interesting vases for children to use to create ikebana. Using items from the kitchen in ikebana arrangements provides an opportunity for children to view everyday items with a different lens, expanding their imaginations as to the use of everyday items, such as using drinking straws as fixations, or pasta as an armature. Incorporating items from the kitchen into ikebana enables children to see the beauty in the things that we would normally throw away, as well as a newfound appreciation of everyday kitchen utensils.

It isn’t necessary to use expensive or valuable vases when creating ikebana with children. Kitchen utensils and food items provide inspiration for so many different ikebana arrangements as cheap and cheerful vases can be adapted from everyday kitchen items.
While living in Spain, my family and I endured many hot summers. Seeking refuge from the hot Spanish sun, my young daughters played in the shade of our garden. They happily danced under the sprinkler, dodging the droplets of water as they ate rapidly melting ice-creams. While scooping the ice-cream into their cones, an idea came to me. The cones would make inexpensive, fun and portable ikebana vases.
For young children, this arrangement incorporates a variety of fine motor skills from bending the malleable aluminum wire to cutting and placing delicate flowers.
MATERIAL
Ice-cream cone, wire, floral tubes, buttercup, forget-me-not


1 Using flat nosed pliers, bend the wire at a 90-degree angle.

4 Repeat steps 1 to 3 creating a smaller form.

7 Place the second ice-cream cone on the smaller wire base.

10 Add forget-me-nots to the vase.

2 Continue to bend the wire at 90-degree angles.

5 Insert a water filled floral tube into the ice-cream cones..
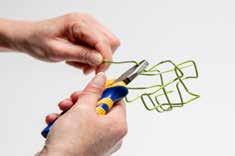
3 Continue bending the wire until the shape is large enough to provide a stable base for your ice-cream cone.

6 Place the ice-cream cone on the wire base.


8 Cut the stems of the flowers in water.

11 Place a buttercup in the second vase. The flower should be a different size to the first buttercup

9 Place a buttercup in the ice-cream cone ‘vase’.

12 Finally add a small sprig of forget-me-not to the second vase. The flowers should be placed closer to the rim of the vase.
Within the Sogetsu ikebana curriculum, unconventional materials are often incorporated into ikebana arrangements, either on their own, or alongside plant material.
The kitchen is a wonderful source of ‘unconventional’ materials. Kitchen gadgets are often made of plastic and are brightly coloured, providing an unbreakable and colourful source of materials for children to use in ikebana arrangements.
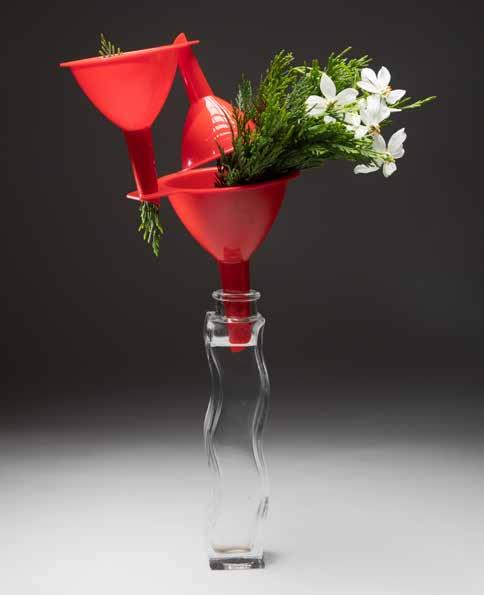
The use of kitchen funnels provides a fun fine-motor skill activity for children. The funnels are carefully balanced and inserted into one another creating a quick and fun arrangement for both younger and older children.


1 Choose a vase, for this arrangement a glass vase works well as it will give the illusion that the funnels are floating in the air.

4 Balance the second funnel in the first.

7 Add the flowers to the conifer
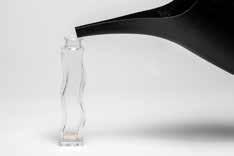
2 Fill the vase with water.

5 Balance the third funnel in the second.

8 Add a small amount of conifer to the top and bottom of the small funnel. This will give the arrangement balance so that it’s not too heavy on one side.

3 Add the first funnel.

6 Add some conifer to the rim of the first funnel.

A more complex approach to the previous komiwara technique is to create a komiwara using cinnamon sticks.
Older children may enjoy using a small saw to cut the cinnamon sticks to size. If a glass vase is used, they can study how water, when it is added to the arrangement, distorts and magnifies the shape of the cinnamon sticks. The use of a glass vase creates a visual effect in which the arrangement is seen inside the vase as well as above it. The komiwara isn’t hidden, as it would have been in ancient times, but becomes an important focal point in the arrangement.
MATERIAL


1 Cut a cinnamon stick so that it is visible above the mouth of the vase.
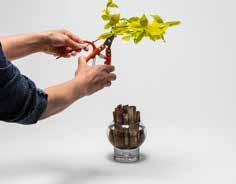
4 Cut a stem of mock orange to fit the vase.

7 Negative space has been created by trimming the stem.

10 The finished arrangement.

2 Place cinnamon sticks in the vase until the mouth of the vase is full.

5 Insert the stem into one of the cinnamon sticks.

8 Cut the stem of the flower in water and insert it in one of the cinnamon sticks.

3 Add water to the vase.
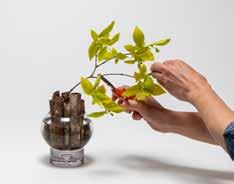
6 If necessary, trim the stem.

9 Add a small stem of mock orange in front of the flower.

When my daughters were very young, they would often come home from kindergarten proudly wearing self-made macaroni necklaces. These necklaces would appear in our home throughout the year, on special occasions such as Mother’s Day, or adorned in glitter as ornaments for our Christmas tree. No matter what country we have lived in, threading food items (macaroni, fruit loops, cheerios) on to elastic is a quintessential part of kindergarten education. Many early childhood educators will agree, it is a fun way for young children to practice fine motor skills and hand-eye coordination. Although my daughters have long left kindergarten, they were also reminded of their long forgotten macaroni necklaces when we came across brightly coloured lentil and pea pasta at our local supermarket.
MATERIAL


1 Thread the macaroni onto elastic.

4 Twist the elastic to form triangles.

7 Place the structure on the vase.

10 Add water to the vase.

13 Insert the bulrush into the structure.

2 Continue threading the macaroni onto the elastic. You may also alternate colours.
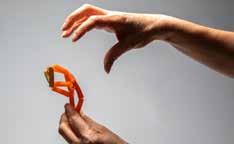
5 Continue twisting the form.

8 Twist the structure so that it sits securely on the vase.

11 Bend the bulrush.

14 Cut the stem of the flower in water.

3 Tie the end of the elastic together to form a necklace.

6 Continue to twist the structure to create an interesting form.

9 The structure provides a secure armature for floral materials.

12 Continue to bend the bulrush to form several triangles.

15 Add the gerbera and to finish place a smaller piece of bent bulrush to the opposite side of the arrangement.
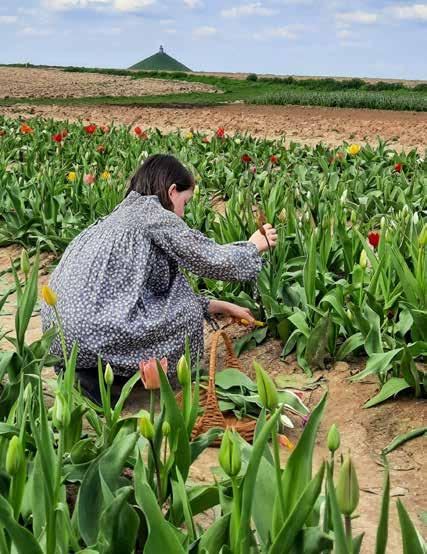


…“When floral materials cannot be obtained …it does not mean that the pleasure of ikebana cannot be enjoyed”…
YOKOI Toshie, 1986, Ikebana - Fruits and Vegetables, Shufunotomo Co., Ltd. Tokyo Japan, p3
To create ikebana arrangements, it isn’t necessary to buy store bought flowers. Throughout the year, there is an abundance of seasonal material to be found in nature. Even in the city, small allotments, school vegetable patches, or vacant lots can be a source of materials. Collecting their own materials enables children to have ownership of the whole process in creating ikebana arrangements. They are able to choose and discover the materials that ‘speak to them’ and in doing so develop a deeper connection with the natural world.
No matter where we have lived in the world, my family has always been drawn to the countryside. Even in the years spent living in the hustle and bustle of Yokohama, Japan, I was fortunate to have friends that lived in the countryside. While visiting friends in Niigata prefecture, I had the opportunity to not only assist planting rice by hand, but also to harvest the crop at the end of the season. Hands-on experiences with the growth and development of plants lead to a deeper appreciation of seasonality, and the vitality and individuality of plants and flowers. While my own children have yet to experience the joy of planting and harvesting rice, we often seek out urban farms, or opportunities to pick our own fruit, vegetables, and flowers from local growers. Wildflowers from the fields and hedgerows provide bountiful sources of materials for ikebana. Often overlooked, even fruit and vegetables can be incorporated into traditional and modern ikebana arrangements. The traditional style of incorporating fruit and vegetables in ikebana is called Morimono, or piling fruits and vegetables. Many contemporary ikebana schools have developed and expanded the idea of Morimono arrangements to also include lessons on incorporating fruit and vegetables in arrangements. Unlike Morimono arrangements, which are placed on a tray, the materials may be placed in a vase and combined with branches and flowers. Using fruit and vegetables as ikebana materials encourages children to look at fruit and vegetables in a different way. Rather than associating vegetables with taste, they are free to explore sensory elements such as texture, colour and shape and combine these to create fun ikebana arrangements. For children with access to urban farms, or home gardens, a pre-activity may involve the children carefully harvesting their own fruit and vegetables to use in their arrangements. Or even harvesting vegetables they may have grown at home, or in a school vegetable garden. Follow up activities might include tasting different fruits and vegetables and describing their taste such as sweet, bitter, sour. Both younger and older children may also enjoy cooking with some of the fruit and vegetables from their arrangements. Transforming their ikebana arrangements into salads, soups, stews or even muffins, and “healthy” cakes such as carrot cake, banana/ zucchini/ or beet bread.

The literal translation of Morimono, means to pile up. Morimono style arrangements are created by many of the different ikebana schools or ryu’s. Although the rules for creating Morimono arrangements may differ slightly between the ikebana schools, the underlying principle is that fruit and vegetables are incorporated in Morimono arrangements and are arranged on a wooden base (dai), tray, mat, or shallow basket. For younger children Morimono arrangements may also assist with hand-eye coordination, as they employ fine motor skills whilst balancing or ‘piling up’ their fruits and vegetables.
Within an educational context, Morimono arrangements may be incorporated into lessons on nutrition and healthy eating, as well as urban farm programs, or even home gardens. An introduction to Morimono may include a lesson incorporating the ideas of MyPlate, a healthy eating and nutrition initiative developed by the U.S. Department of Agriculture, with support from the Former First Lady of the USA Michelle Obama. Reinforcing the idea that fruit and vegetables should constitute half of our plate, children could place their Morimono arrangements on a paper plate instead of a base or dai.
Padron peppers, radish, onion, red pepper, tray/plate
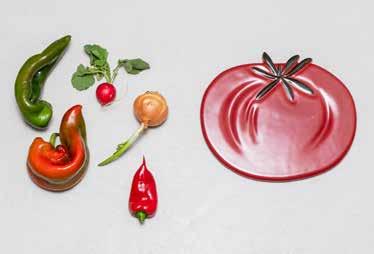
STEP BY STEP

1 Choose a plate or a mat.

4 Select another fruit or vegetable and place it on the tray.

2 Select fruit or vegetables with an interesting shape and colour and place it on the tray.

5 Continue to select and balance your chosen fruit or vegetables.

3 Select another fruit or vegetable with a contrasting colour and balance it on the first.

6
Finally add your last selected fruit or vegetable.

1 Select an appropriate vase.

4 The gourd should be placed so that it feels as though it’s floating on the vase.

7 Bend the bulrush.

10 Add another bent bulrush to the vase.
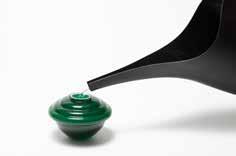
2 Fill the vase with water.

5 Cut the stem of the flower in water.

8 Continue to bend the bulrush so that it forms an interesting shape.

11 Cut the end from a piece of bulrush.

3 Balance the gourd on the vase.

6 Place the flower in the vase.

9 Place the bulrush in the vase.

12 Place the cut bulrush into the center of the gerbera.

After the fun of Halloween, we would often dry our leftover gourds to use as inexpensive self-made vases. Once the top of the gourd is removed, children can easily scoop out the seeds. Left to dry, the gourds can be painted in a child’s favourite colour and varnished, or sealed with bathroom tile sealer, to make them watertight. Making their own vases is a fun way for children of all ages to engage with a holistic approach to ikebana, as well as a way for teachers to consider alternatives to fragile or store-bought vases when designing ikebana workshops for children.


1 Place

4 Trim the conifer to create a mass.

7 Wrap

10 Insert the coil into the conifer.

2 Add water to the vase.

5 Add the catkins to create movement through the conifer.

8 Select a single aucuba

11 Give the conifer a final trim.
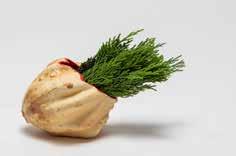
3 Place conifer in the vase.

6 Cut a 15 cm (7 inch) length of wire.

9 Place the berry on the wire

Early summer is always a joyful time. The warmer, longer summer days provide opportunities for spending late afternoons exploring fields and slow walks down country lanes. My daughters usually while away these long afternoon walks by busying themselves carefully selecting a variety of wild flowers and weeds growing along the edgeways. Great care is always taken over these treasures, as they are gingerly carried home to be transformed into a delicate ikebana arrangement.
Bamboo basket, forest pansy, buttercups, forget-me-not, weeds


The influence of Shintoism in Japan is profound, with specific plants and flowers playing a significant and symbolic role in many festivals. Even in modern day Japan, the symbolic and spiritual meaning associated with certain plants dictates not only how and when they are used in festival decorations, but also how and when they are disposed of.
In Japan, January is often referred to as the month of pine. In the lead up to, and during the New Year period, pine is often used in New Year’s ikebana arrangements, and decorations.
In Shintoism, evergreens such as pine, cedar or cypress are considered sacred as the gods (Toshigami-sama 年神様) would inhabit them during the New Year period, bringing luck.
Pairs of decorations called Kadomatsu 門松, flank doorways and entrances, providing the gods a welcome place to reside (yorishiro) during the first month of the year.
Traditionally pine, bamboo and plum are used in Kadomatsu. Considered to be auspicious, they each hold symbolic meaning. Evergreens such as pine represent eternity, bamboo symbolises good luck, longevity, strength and flexibility, while plum blossoms appear, against all adversity, in the depths of winter. These three plants are often referred to as the “Three Friends of Winter”.
As it is believed that the gods reside in the Kadomatsu during the New Year period, there is a specific ritual for their disposal. When I lived in Yokohama, Kadomatsu were removed from the entrance ways of homes and businesses after the 7th January. New Year’s decorations were taken to our local temple where we were able to burn them in a specially designated area. This ritual burning of all New Year’s decorations meant that the gods could be released from their earthly abode.
In Japan, New Years Day is one of the five seasonal festivals (五節句, gosekku) held on auspicious dates throughout the year (1st January, 3rd March, 5th May, 7th July, 9th September). Hina-matsuri (雛祭り), Girls’ Day/ Dolls’ Day is celebrated on March 3rd, Children’s Day (Kodomo no hi), previously known as Boy’s Day (Tango-no-Sekku), is celebrated in Japan on 5th of May, Tanabata (七夕), the Star Festival on the 7th of July, and Chrysanthemum Day on the 9th of September. Since 2021, the 6th of June has been designated as Ikebana Day. The date was chosen by the Japan Ikebana Arts Association to promote the spread of ikebana. It is also a day which is considered auspicious for 6 year olds to commence artistic endeavors, particularly the traditional arts.
Creating ikebana arrangements for these different seasonal festivals is a fun way for children to gain a deeper understanding of Japanese culture. However, it is also interesting for children to understand how ikebana can relate to their own culture, as well as the customs and festivals of others. Arrangements celebrating spring might include festivals such as Carnivale or Holi (the Festival of Colours). Christmas ikebana arrangements may add an extra festive touch to the decorations that adorn many homes during December.