How To Dry Curly Hair Perfectly: 5 Best Ways | Curly Spirit
How to Dry Curly Hair Perfectly: Tips & Techniques
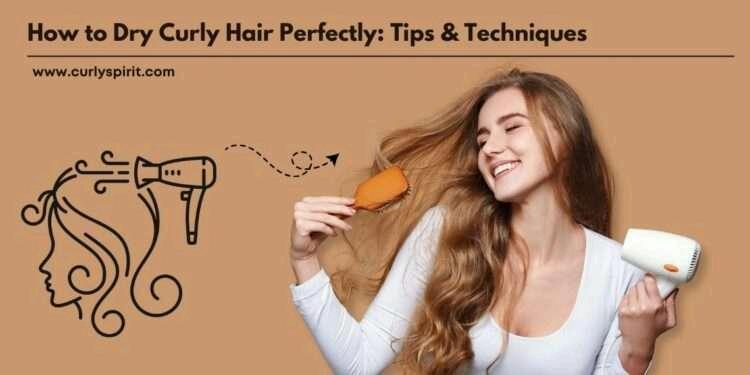
How to Dry Curly Hair Perfectly Tips & Techniques
Taking care of curls is one of the important things that every curly-haired woman does. Apart from washing curls with good shampoo and conditioner, the way you dry your curls also matters most. So, how to dry curly hair? Well, curly hair should be dried in a way that it does not become frizzy and tangled.
Recommended Post
10 Ways to Brush Your Curly Hair
How to Blow Dry Curly Hair in 10 Steps: A Step-by-Step Guide | Curly Spirit
Drying your curly hair takes most of the time and is very important, as it decides how your curls will look after drying. Drying curly hair is more than just removing moisture – it’s an art form that directly impacts the health, appearance, and longevity of your curls. Research suggests that up to 60% of curl definition and hair health depends on the drying method you choose.
Choosing the traditional method to dry your curls can cause hair breakage, frizz and curl disruption.
Let’s understand different ways to dry curly hair-
5 Best Ways to Dry Curly
Hair
Without wasting a single time, let’s start with 5 best ways to dry curly hair-
1. Air Drying-
As the name suggests, this means letting your curls dry naturally without the use of any heating tool.
How to dry curly hair with Air-drying-
■ Wash your curls with sulfate-free shampoo and conditioner.
■ Remove the excess water from the hair
■ Apply a leave-in conditioner on your wet curls and scrunch it.
■ Let your curls dry naturally
2. Diffusing-
Diffusing means, drying your curls by blow drying by using a diffuser as an attachment. The diffuser helps to distribute the heat evenly and define the curls.
How to dry curly hair with Diffusing-
■ Wash your curls and remove the excess water from it.
■ Apply curly hair styling products on your sectioned curls.
■ Take a diffuser and start diffusing.
■ Cup sections of hair into the diffuser, bringing it to the scalp
■ Dry on low heat and low-speed settings.
3. Clip the Roots-
This method of drying curls is for those who have bouncy curls at the end, but flatter curls on the head. For such type, you may want to clip your roots when they dry.
How to dry curly hair with Clip the Roots-
■ After your hair is washed and dried 80%, you start with root clipping.
■ Grab some root-enhancing clips.
■ Gently grab the hair at your roots and lift it up. Grab a clip and secure it in your hair Make sure your curls at the root are lifted up.
■ Do this for your entire root hair
■ Keep it for 30-45 minutes and then remove it.
4. Hooded Dryer-
A hooded dryer provides gentle, even heat distribution for drying curls. They are not only an investment but also saves lot of time when drying hair.
How to dry curly hair with Hooded Dryer-
■ Apply curly hair styling products and set curls as desired
■ Sit under the hooded dryer on low or medium heat
■ Allow hair to dry completely or until mostly dry.
5. Stretched-
This means stretching your wet hair and styling it in a braid or different hairstyle. Drying your curls this way helps to give it a different pattern and style. It also prevents hair breakage and tangles.
How to dry curly hair with Stretched method-
■ Wash your curls with hydrating shampoo and conditioner
■ Now, stretch your curls and tie them in a braid, bantu knots or a twisted ponytail.
■ Keep them this way, until your curls get dry
■ This will prevent hair from breakage and tangles.
Air-Drying vs Blow-Drying:
In the above section, I described about best ways on how to dry curly hair. Now, let’s cut it down to air-drying and blow-drying. Curly hair requires special care and attention, especially when it comes to drying. The method you choose can significantly impact the health, appearance, and manageability of your curls.
1. Air-Drying-
This means allowing curls to dry naturally without the use of heat.
Pros:
■ Air-drying eliminates the risk of heat-related damage, helping maintain the health and texture of your curls.
■ This method allows curls to form naturally, showcasing their unique texture.
■ It’s a hands-off approach that requires minimal effort and no special tools.
■ No need for specialized equipment or electricity
Cons:
■ It can take several hours for curls to fully dry, especially for those with thick or long hair
■ Without the control of a diffuser, air-drying can sometimes lead to increased frizz, particularly in humid conditions.
■ You have limited control over the final outcome. You just have to rely on your curls to look good.
■ Less volume at the roots can happen in most cases, as you have not used any diffuser
■ Prolonged dampness can create an environment conducive to fungal growth, potentially leading to scalp issues.
2. Blow-Drying-
Blow-drying means drying your curls with the help of a diffuser. The diffuser helps to disperse the air on all your curls enhancing the natural pattern.
Pros:
■ Significantly speeds up the drying process, making it convenient for those with limited time.
■ Allows you to control airflow and heat levels for achieving specific styles or curl definition.
■ Adds volume and bounce
■ Helps to reduces frizz and enhance curl definition.
Cons:
■ Excessive or high heat settings can damage curls over time.
■ It may take practice to master the technique for optimal results.
■ Over-manipulation can lead to frizz or uneven curls.
■ Can cause split ends: Regular use of heat can contribute to breakage and split ends.
Which method to use in how to dry curly hair?
1. Time availability: If you’re short on time, blow-drying with a diffuser is more efficient than air-drying.
2. Desired style: For a more polished look or when you need more volume, opt for blow-drying.
3. Hair health: If your hair is damaged or prone to breakage, you should go for air-drying, it is more gentler.
4. Weather conditions: In humid environments, blow-drying with a diffuser may help control frizz better than air-drying.
Plopping: What Is It?
Plopping is a way to dry curly hair without the use of any heating tool. It involves wrapping wet curls on top of the head using a microfiber towel or cotton t-shirt to enhance curl definition and reduce frizz. Plopping curly hair helps the curl to maintain its natural shape and promotes volume at the roots.
Benefits of Plopping
There are several advantages of Plopping curly hair-
1. Enhanced Curl Definition-
By gently bundling curls, plopping encourages them to maintain their natural pattern, resulting in more defined and bouncy curls.
2. Reduced Frizzy Hair-
Using the plopping method on your curls helps to reduce the frizz. It minimizes friction and keeps the curls defined.
3. Keep Curls Moisturized-
Unlike blow-drying, plopping removes excess water without stripping the hair of essential moisture, this keeps the curls hydrated and moisturized.
4. Enhances Volume-
By drying curls on top of the head, plopping lifts the roots, preventing gravity from weighing down the hair and giving the curls more volume.
5. Time-Efficient-
Plopping accelerates the drying process by absorbing excess moisture, this makes it easy for people who don’t have time to dry hair
Why Plopping is the best way to dry curly hair?
There are several reasons, which prove that plopping is the best technique to dry curly hair because-
■ It is a heat-free technique.
■ Plopping is gentle on curls, so it reduces the chance of hair breakage and split ends.
■ It works with gravity, not against it, allowing curls to form and set in their natural state.
How to Plop Curly Hair?
After understanding, how plopping is good for hair. Let’s see how to plop curly hair effectively-
1. Wash and Condition-
After you have washed and conditioned your curls with sulfate-free shampoo, remove the excess water from the curls.
2. Apply good styling products-
While curls are still wet, you should apply a leave-in conditioner so that it gets absorbed properly.
3. Position your hair-
Bend forward and lower your curls onto the center of the towel or t-shirt, away from the neckline.
4. Wrap your hair-
Wrap your hair in a microfiber towel or cotton t-shirt. This helps to reduce the frizz from the curls.
5. Stay patient-
After you have wrapped your curls, stay patient and relaxed for 10-15 minutes. Then remove the wrap from the curls and style it as you want.
FAQs on how to dry curly hair
1. Should I blow-dry curly hair or let it air-dry?
There is a pros and cons of both. When you let your curls air-dry, you are being gentle, enhancing the curl pattern. On the other hand, blow-drying curly hair with the help of a diffuser helps to add volume to the curls and reduces frizz.
2. Is it okay to blow-dry curly hair every day?
No, never blow-drying curly hair every day is never recommended. Although safe, blow-drying requires heating the curls, which can damage curls, leading to dryness and breakage. Always blow-dry curls 1-2 times in a week.
3. Can I dry curly hair with a towel?
You can dry curly hair with a towel, but only if you are using a microfiber towel. Using a microfiber towel or a cotton t-shirt reduces the chances of frizz.
4. What’s the difference between air-drying and diffusing curly hair?
Air-drying curly hair means giving your curls time to dry themselves naturally without the use of heat or any other tool. This process takes time but it does not damage curls. On the other hand, Diffusing curly hair uses a special blow dryer attachment to dry curls faster while maintaining their shape. It adds volume and definition to the curls.
5. How long should I air-dry curly hair?
Drying curly hair is one of the things that takes the longest time, but is still very necessary and important. Air-drying curly hair typically takes 2 to 4 hours, depending on hair thickness and length. To speed up the process, you should gently squeeze out the excess water before drying.