9 minute read
Attachingto Anchors continued


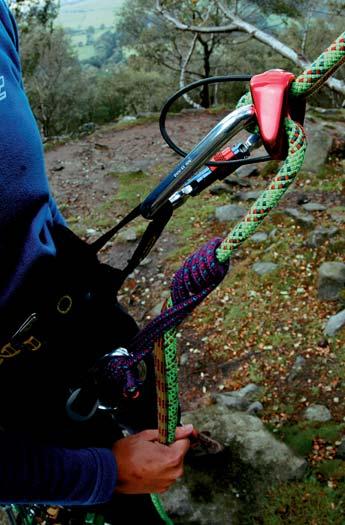
Two anchors out of reach Clip both anchors and move towards desired position holding the middle bit of rope between the anchors and the slack rope. Clove hitch the middle bit of rope from the first anchor, get into position and adjust tension before adding a clovehitch from the second anchor. Alarge HMS karabiner may be sufficient to seat two clove hitches but if there is any concern of creating a load too wide for the karabiner two separate screwgate karabiners should be used instead.
Top roping
Advertisement
At climbing walls you either top-rope routes that have ropes already in place, or you bring your own rope and lead routes. With trad climbing normal practice is to lead, not toprope. Most climbers have probably top-roped a route at some point, but there are others who take exception to this practice; they believe top-roping is against the sport’s ethos as it reduces the challenge. The obvious attraction of top-roping is that much of the risk is eliminated, but being able to manage risk is not only central to the sport, but one of its most exciting and satisfying aspects.
If you do top-rope a route be quick and discreet, as a common annoyance felt by other climbers is top-roping parties hogging routes –so do not leave your rope hanging for a long time. Another issue to be aware of is that some rock is extremely soft, the sandstone outcrops in Sussex have been permanently damaged due to poor top-rope practices, for example. Ensure that the karabiner at the top of the cliff is extended over the edge to prevent the rope sawing through any rock or vegetation, and consider using a rope protector, carpet-square or empty rucksack as padding.
When you have finished a climb consider untying and walking down to the cliff bottom. This eliminates the real risk of being dropped as you are lowered, and reduces erosion to ropes, rock and vegetation.
Clubs and instructors
If you are keen to learn but none of your friends are experienced enough to try these tactics, you might find a willing teacher at your local BMC Club. Check out your local climbing wall for adverts, or see the directory on the BMC website. Another way to learn is to recruit a qualified instructor. The minimum qualification for teaching leading is the Mountaineering Instructor Award (MIA), so look for people holding MIA, MIC or British Mountain Guide qualifications. Alternatively book yourself on a course such as those run by Plas y Brenin, the National Mountain Centre.
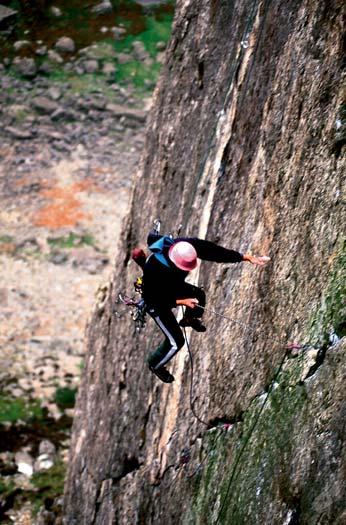
Falling off
The ultimate goal of a successful lead is to reach the top without falling off. Whilst it’s normal to see sport climbers taking falls, this approach is more dangerous on traditional climbs and a clean on-sight ascent is not only ideal but also advisable. If you are unable to complete a move, try reversing back to a resting spot – you can then piece together a sequence of moves until you are ready to go for it. If this doesn’t happen, down climb until below a couple of reasonable runners and get lowered to the ground. Stripping gear as you go down is not a good idea as your top runners could fail, so it’s best to retrieve it allby abseil. If you leave some equipment behind, so be it. It’s replaceable, but your health isn’t.
If you do take a leader fall don’t grab runners because the loading will then be outward rather than simply downward, so they could rip out. Consider what you might hit if you fall off, as anything less than vertical is going to involve a collision once you’re airborne. Be extremely careful not to lead with your rope behind your leg as it could become tangled if you fall, flipping you backwards and head first. Wearing a helmet when climbing could save you from serious head injuries.
Multi-pitch climbs
Leading multi-pitch climbs is a more committing proposition, and before embarking on the route you should consider how you will get off, whether or not you complete the route. It’s a good idea to carry some spare cord and a karabiner that you are willing to abandon on an abseil retreat if necessary. You may well be able to “swing” leads with your partner. This gives a great team spirit to the climb, and allows you to choose pitches that suit
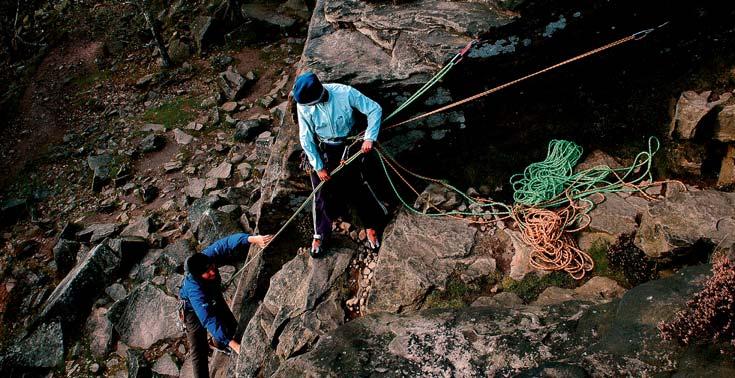
11 Abseiling
Half way up a long mountain route the heavens openhalting your progress. How do you get out of this one?!
If you intend to progress beyond very simple crags you will need to learn how to abseil safely and efficiently. Climbers regard
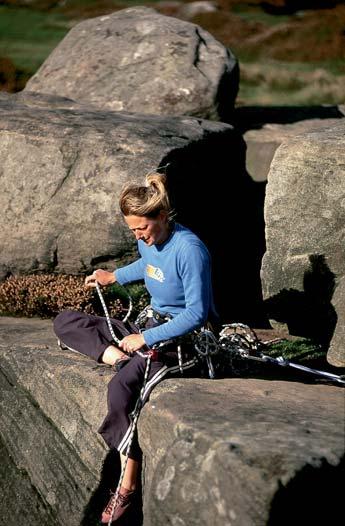
Trad Leading Check List
•Understand the risks involved –Preparefor them
•Start easy, VERY VERY easy!
•Organise the gear on your harness
•Place lots of runners –Stack everything in your favour individual skills – your mate will hopefully behappier than you on that poorly protected overhanging crack pitch! abseiling as a mundane but potentially dangerous task, observing with wry amusement that it is presented as a glamorous activity in some quarters. Abseiling has caused more fatalities than any other mountaineering activity.
•Don’t fall off!
At the end of each pitch a belay must be constructed, strong enough to hold the potentially greater forces involved if the leader should fall off on the following pitch. If runners fail, the leader could fall beyond the belay, resulting in a very high shock loading. Alternatively, a heavy leader can pull a light belayer upwards or sideways, so the anchors need to be chosen with this in mind. A couple of low spikes may be fine for bringing somebody up a pitch but might be lifted off when holding a heavy leader. If the runner subsequently were to fail, the team would be left with no belay! In this situation, high anchors are preferable and multi-directional anchors such as threads are ideal.
Long multi-pitch climbs are best treated like an expedition, and you should aim to be independent in the event of unexpected changes in the weather or incidents. It’s a good idea for at least one of you, usually the person seconding each pitch, to have a small rucksack carrying some drink, snacks and lightweight waterproofs.
Abseiling involves descending rope(s) using a friction device attached to your harness, such as your belay device. Terrain that would be too dangerous or time-consuming to descend by foot is descended by abseiling. This may be to escape a route beyond your ability, to get off a pinnacle you have just climbed up, or to approach the start of a sea cliff route. Even steep grassy slopes can feel a lot safer on an abseil rope!
If you have never abseiled before start at ground level down a shallow slope, before doing it ‘for real’ on a cliff.
Abseiling for real
Be careful – remember that you are atthe top of a cliff!
Practice on a small cliff, but not down a popular route on a sunny day! You should be able to look over the edge to check no one is below and see that the ropes reach the ground.
Be careful when throwing your ropes from the cliff top. With one end attached stack the rest into a neat pile, then holding the last few metres in coils throw them out and down. Shout ‘Rope below!’ very loudly so that everyone is duly warned.
Attach the belay device to the central loop of your harness with the rope running through it, just as when belaying. With both hands locking off the control rope adopt the same body position as when lowered off a route: lean back and legs apart. In this position you will gracefully abseil down the cliff as you let the rope slide through your hands. Or you may judder nervously if it’s your first time!
The take-off is often the hardest part of abseiling as you are leaving the horizontal cliff top for the vertical cliff face. If you find it awkward consider sitting on the edge and slowly sliding off. This lowers your centre of gravity making you more stable – part of the knack of abseiling confidently comes down to your balance skills.
Making it safer
When abseiling you can easily slip and let go of the rope – not a good idea! – but with an autobloc you can have a safety back up. This is a clutch that when correctly set up should hold the control rope if your hands let go.
The most common autobloc employed is aFrench Prusik, which is made using a prusik loop. This is so effective and yet simple to tie that you have to ask yourself, “Why ever travelwithout it?”
To make a French prusik wrap the prusik loop around the control rope four or five times. Clip both ends with a karabiner and attach that to the leg loop of your dominant hand. Ifyou have too many turns it can be very hardto release it, so get to know how manyyou need.
When held in your hand the knot is loose allowing the rope to slide freely, but if released it grips the rope and prevents further progress. The prusik is not fail-safe, it could rub against something and release, so always try to keep hold of the control rope.
Multi-pitched abseil
If retreating from a longer climb when more than one rope length above the ground, then abseiling on doubled ropes will be necessary. This allows one end to be carefully pulled once everyone is down, and in this way the cliff is descended in stages. Try to pull the rope slowly and treat spikes directly below the anchor with suspicion. They are likely to snag the rope as the free end falls causing a tangle that may well be difficult and dangerous to reach. Almost all commonly used belay devices have two holes to allow you to belay or abseil using double ropes.
One advantage of climbing with double ropes is that when making a multi-pitched descent off a cliff face you can tie your two ropes together and so abseil a full rope length at a time. It is common to tie them together with an overhand knot, as this will be less likely to jam in cracks when retrieving your ropes.
If at all unsure whether your ropes will reach the ground there is a real risk of abseiling off the end of them. In these cases it is always best to tie a knot in the end of them.
Anchors and attachments
Roped descents rely on sound anchors and careful checks of all attachments. An inadequate anchor negates the entire system, and if anything becomes detached the consequences are often fatal.
Bouncing should be minimised, despite the popular television image of the commandostyle descent! Shock loading a belay strains the system unnecessarily; an abseil descent should be steady and avoid sudden drops.
If an existing abseil point is used, all equipment should be carefully inspected for secure anchors, signs of serious corrosion, and damage to slings. Retrieving a rope after abseiling can drastically weaken slings by melting them, sometimes after only a single abseil. This is not a problem if you are leaving your own gear behind, but you may be using someone else’s already damaged sling. It is preferable to link the abseil rope to the anchor arrangement with a reliable metal link such as a karabiner.
Most climbers have at some point made an emergency descent off a cliff face. It’s not a sign of failure! If you do find yourself in that position then do not panic – easy to say of course! The large majority of popular climbing cliffs in Britain can be descended in three long abseils at most, so just do a stage at a time.
If you do have to retreat off a multi pitch climb then consider abseiling down your line of ascent – at least it will be familiar territory.
French Prusik
A versatile prusik that can be released under load so can therefore be used as anautobloc in situations where it is loadedand then subsequently needs to beslackened, as with protecting an abseilor escaping the system.
1 2 3
If there are solid spikes or threads you can trust then maybe only a sling will be left behind. Even better buy a few metres of sparerope and with a knife cut bits off to tie into loops as you descend. Do not hesitate in leaving climbing gear behind, as losing any amount of equipment is incomparable to losinga life.
Just remember that abseiling is dressed up at outdoor centres as asafe and fun activity, which in that setting it is. However, when used by climbers as a means ofdescent it is a much more seriousundertaking.
Abseiling Checklist
•Harness tied correctly?
•Are you 100% confident in your anchor?
•Rope(s) threaded through anchor and abseil device correctly?
•Karabiner screwed up?
•Do your ropes reach the ground? If in doubt, knot the ends
•Make it Safe – Think about wearing a helmet and using a prusik loop