






Turning on the heat may be the furthest thing from homeowners’ minds come the end of summer or early fall. After all, there are plenty more days of comfortable temperatures to expect over the weeks to come. However, failing to inspect a furnace prior to when it is needed could lay a foundation for cold evenings.


Many HVAC experts recommend that homeowners get their furnaces tuned up before the first cold spell arrives. When the heat is needed for the first time, it will be guaranteed to work if it’s been examined and any underlying issues have been addressed.
HVAC technicians are busy at the start of summer and winter. If a furnace is not working correctly, it could take some time before a professional can make a service call. Having the furnace and related equipment checked prior to when it’s time to turn on the furnace means homeowners will not be left in the lurch or potentially spending premium prices for repairs.
It is important to get a furnace check-


up for a variety of reasons. Doing so can make the HVAC system run more efficiently, which could result in savings over the winter. Regular maintenance also can help the furnace last longer, delaying the need for a costly replacement. No one wants the furnace to break down in the middle of a frigid night. Annual checkups can help reduce the risk of that happening. In addition, many furnace manufacturers offer warranties on their systems that require annual maintenance from a professional. Failure to have the system inspected could void the warranty. Even if homeowners are floating in the pool and cranking up the air conditioning, they should give consideration to having their furnaces inspected and serviced soon to prepare for the colder months ahead.


asps, hornets and yellowjackets can be a serious nuisance and even pose health risks if not properly managed. However, with the right knowledge and steps, you can keep your outdoor living spaces pestfree.
Identify Which Pest You’re Dealing With
Wasps, hornets and yellowjackets may look similar, but they have distinct characteristics. Though they all often build nests in trees or under eaves, wasps tend to have slender bodies with narrow waists while hornets are generally more robust. Yellowjackets, which are ground nesters, are smaller, stockier and have bright yellow and black stripes.
Eliminate Nesting Sites


ets can be sprayed directly at the nest during dusk or dawn when the insects are less active.
Avoid Pests Entering Your Home
Planting mint, eucalyptus, wormwood or citronella around your home can help deter wasps, hornets and yellowjackets. Additionally, installing screens on windows and doors can prevent them from entering your home. For ongoing prevention, consider traps and baits that attract and capture pests.
Deal with Stings


Regularly inspect and seal any cracks or gaps in walls, eaves and roofs, and trim bushes and trees. Keep food sources, such as garbage cans and pet food, sealed and clean up food spills immediately, as these insects are attracted to sugary and protein-rich foods. If you discover a small nest, a ready-to-use insecticidal spray specifically formulated for wasps, hornets and yellowjack-
Even when taking preventative measures, stings can still happen. If you get stung, remove the stinger (if it’s visible) and wash the area with soap and water. Over-the-counter pain relievers and antihistamines can alleviate pain and itching while applying an ice pack can help reduce swelling. (Family Features & eLivingtoday.com)


Timber frame pavilions - Pool houses - Decks - Roofs
Backyard structures - Outdoor furniture and lots more
People considering buying or selling a home are facing a unique market. The real estate market has been in flux for several years, and high interest rates have made it more expensive to borrow.
The Mortgage Bankers Association is projecting that 30-year mortgage rates will level out to 6.5 percent for the foreseeable future. That means that people
who have been waiting for changes in the real estate market could be disappointed, and hesitant buyers may finally just bite the bullet and buy even if mortgage rates are not where they hoped they’d be in 2025. Homeowners with properties they are considering listing for sale would be wise to make certain changes that will help garner the best prices from buyers. Make kitchen and bath improve-


ments
The kitchen is the heart of many homes. Real estate agents may recommend that homeowners make minor to moderate kitchen upgrades like resurfacing cabinets, upgrading countertops and changing fixtures or hardware to give the room an overhaul.
Homeowners also should look to bathroom updates as smart investments that can improve home value. Katie Severance, author of The Brilliant Home Buyer, characterizes kitchens and baths as “money rooms” that add the most value to a home.
Declutter the home
Homeowners should clean out items they no longer need. Decluttering can make a space feel bigger, which is beneficial in a market where open concept floor plans remain popular among home buyers.
When buyers walk through a prospective home, they want to envision themselves living there, something that is more easily done if the home isn’t overrun with the current homeowner’s belongings.
Get to painting
Painting a home is a cost-effective renovation with a lot of oomph. Freshly painted rooms appear clean and up-


dated, says HGTV, and that can appeal to buyers. Homeowners should choose neutral colors to accommodate the widest array of potential buyers. Improve the landscaping
The exterior of a home is the first thing potential buyers will see as they roll up to view a property or look at a listing online. Homeowners should start by evaluating and enhancing the landscaping. Ensure the lawn is well-maintained and add plants that provide color without a lot of maintenance.
Expand usable space
Homeowners can think about adding to the usable space in a home. This translates into finishing basements or attics or even converting garages to rooms. Or it may involve adding a three-season room.
Homeowners can consider a number of improvements to increase the resale value of their properties.


Homes are often characterized as sanctuaries for their residents. Though such characterizations often are made in reference to humans and their domiciles, homes also should be safe spaces for pets.
Pet owners go to great lengths to ensure their pets are healthy and happy, and that typically includes efforts to ensure their home interiors are free
of hazards that could affect their furry friends. But there are various threats to pet health in a yard as well. Recognition of those threats and what can be done to minimize them can ensure exterior spaces are as safe for pets as areas inside the home.
Mulch: Mulch is found in many yards, as it adds aesthetic appeal to a landscape and helps soil retain moisture, which can safeguard trees, plants

and flowers from drought and the dog days of summer. But some mulch contains theobromine, a chemical compound that can be toxic and may even be lethal to dogs when ingested. Pet owners are urged to use mulch that does not contain theobromine, which is typically found in cocoa mulch.
Flower: The mulch around flowers can be toxic to pets, and so can the blooms themselves. Lilies, tulips, hydrangeas, and azaleas are just some of the popular flowers that can cause stomach upset in pets. Pet owners are urged to speak with their veterinarians about flowers and plants native to their areas that might be toxic to pets.
Wildlife: A collaborative study from researchers at the University of Michigan, the University of Washington and University College London published in 2024 warned that the overlap between humans and animals will increase considerably over the next half century. Climate change and human population growth are driving forces behind that increase, which suburban homeowners may already be witnessing. As more and more wooded areas are leveled to create additional housing, wildlife such as deer, racoons,


opossum, foxes, and more are losing their habitats and subsequently being seen with greater frequency in suburban neighborhoods. Wildlife can carry disease that can make domesticated animals sick, and some wildlife might go on the attack when they encounter cats or dogs in backyards. Monitoring pets whenever they’re outside, sealing garbage cans so wildlife is not attracted to the yard and keeping compost piles free of foods that might draw wildlife to a yard are some of the ways to reduce the chances of interactions between wild animals and domesticated pets.
These are just a handful of threats to pet health that might be lurking in your backyard. Always keep an eye on pets when they’re outdoors and speak with a veterinarian to identify ways to minimize backyard threats.


hen temperatures drop, the risk of water freezing and damaging your pool structure and equipment increases. Proper winterization can help prevent costly repairs, minimize algae growth and keep your pool’s water clean and balanced, making reopening it when the warm weather returns easier.
Prepare your pool to weather the cold months with these steps.
Clean and Balance Pool Water
Start the winterization process by thoroughly cleaning your pool. Remove any debris using a skimmer net, vacuum the pool floor and brush the walls to ensure all dirt and algae are eliminated. Next, conduct a water test and balance the water chemistry by adjusting the pH, alkalinity and calcium hardness levels. Then add chemicals such as algaecide, chlorine and a winterizing pool shock to keep the water clean and clear throughout the winter months.
Lower the water level below the skimmer and return lines to prevent freezing and potential damage. Use a pool


air blower or shop vacuum to blow out any remaining water from the plumbing lines then seal them with winter plugs. Disconnect and store all equipment, including pumps, filters, heaters and chlorinators. Ensure they are clean and dry before storing in a dry, frostfree location.
Use a high-quality winter cover to protect your pool from debris, sunlight and harsh winter weather. Make sure the cover is securely fastened and fits snugly around the pool’s edges to prevent wind from getting underneath. For additional protection, consider a leaf net over the winter cover to make it easier to remove leaves and debris throughout the winter months. (Family Features & eLivingtoday.com)








If you have large or unexpected expenses on the horizon, you may have access to an untapped resource: your home. You could use some of the equity you’ve built up in your house to meet financial goals, depending on how much equity you have and how you use it.
Here’s a guide from the experts at Navy Federal Credit Union to explain how home equity loans work and when you should — or shouldn’t — use your home’s equity.
What is a home equity loan?
In basic terms, a home equity loan is money you’re borrowing using your home as collateral. The equity in your home equals how much of your home’s value you actually own (not counting the mortgage you’re still paying off).
Home equity loans are frequently offered at lower interest rates than other loans, so they may be a great option for consolidating debt on higher interest credit cards, or large home improvement projects.
You can determine how much equity you have in your home, and how much your home equity loan payments are likely to be, using online calculators.


Here are the two most common types of home equity loans:
Fixed-rate equity loan: This is a lump sum amount you’ll draw from your home’s equity, paying back monthly at a fixed interest rate for the life of the loan, so you’ll know exactly what to expect. Fixed-rate home equity loans are typically used for:
– Home improvements/repairs
– Debt consolidation
– Large purchases
– Life events
Home equity line of credit (HELOC): This is a line of credit secured by the home, which lets you borrow funds if and when needed, up to a set maximum credit limit. You only have to repay the funds you borrow. HELOCs are typically used for:
– Home improvements
– Emergency funds
– Medical expenses
– Debt consolidation
The best use of a home equity loan or home equity line of credit is when the money you borrow increases your home’s value via renovations or repairs, as this continues building the equity you’re borrowing against. You may also


have tax benefits for using the loan toward home improvements, so it’s recommended to consult a tax professional.
When NOT to use a home equity loan or HELOC
Because these loans use your home as collateral, remember that you’ll want to be sure you can stay on track with loan repayments. For this reason, financial experts advise against using home equity to borrow for things including: A car purchase: An auto loan is usually a better choice for purchasing a new or used vehicle. Interest rates on auto loans tend to be similar or lower than home equity loans, and auto loans usually require little paperwork and fewer fees.
Vacations: It’s better to save up for near-term wants like vacations or large-screen TVs than using your home’s equity for something offering no financial return.
College: Consider all options — including federal student loans, scholarships, grants and private student loans - before tapping into home equity. A home equity loan may be a consideration if current mortgage rates are significantly lower than federal student loan rates, especially for graduate or professional degrees. But unlike federal student loans, if you use home equity to


pay for college, you won’t qualify for income-driven repayment plans or loan forgiveness programs.
Starting a business: Your best bet for launching a business is a business loan through a financial institution or the U.S. Small Business Administration (SBA). If your business fails and you have a home equity loan or HELOC you can’t repay, you’re putting your home on the line.
Recurring expenses: Using home equity to cover everyday bills can be a slippery slope. Consider your longterm ability to repay the loan. Since your home is your collateral, missed payments could lead to foreclosure. Make a smart plan
Your home equity is a valuable resource for managing your finances. Planning ahead and understanding your repayment responsibilities is crucial for making the best use of a home equity loan or home equity line of credit.


Tankless electric water heaters are transforming the way households experience hot water by offering energy-efficient, space-saving solutions that deliver heated water on demand. These compact units can be up to 98% smaller than traditional storage water heaters. They may be installed in tight spaces or even mounted to a wall, freeing up valuable space while reducing energy consumption.
Selecting the right model requires preparation and research. Homeowners should consider key elements of their home’s design, including the number of occupants, bathrooms and hot water appliances - paired with overall water usage - to ensure the correct tankless electric water heater is installed.
Tip 1: Estimate household hot water demand
A critical first step is properly esti-
mating the household’s hot water demand. A tankless electric water heater’s flow rate, measured in gallons per minute (GPM), determines its size. Calculating how many hot water GPMs the household typically uses is essential and is done by adding up the flow rates of fixtures, such as faucets and showers, that run at the same time.
After determining the GPM required to meet all the household’s simultaneous needs, the homeowner can choose the right size tankless electric water heater. For example, if someone uses the shower while two faucets are running, the home will need a tankless electric water heater with at least a 5 GPM capacity.
Another important consideration is the number of bathrooms and typical usage patterns of occupants. Larger families or homes with multiple bathrooms may require a higher-capacity unit, whereas smaller households can often rely on a more compact solution. For example, the Rheem RTEX and EcoSmart models under the Rheem® family of brands cater to a wide range of needs, from point-ofuse (POU) units for single fixtures, to whole-home options designed to han-


dle multiple fixtures concurrently.
Tip 2: Factor in regional climate
Groundwater temperatures vary across the country. In northern regions of the U.S., which tend to be colder, the ground water is also colder. This means that a higher temperature rise (difference between the ground water temperature and the desired output water temperature) is required compared to warmer southern areas. For example, in southern areas where the groundwater temperature is 62° F, to reach a desired output water temperature of 105° F, the temperature rise would be 43° F. Whereas, in northern regions, if the groundwater temperature is 40° F to reach 105° F, the temperature rise is much higher


at 65° F. The unit has to work harder to achieve this temperature. For this reason, certain models will work well in southern climates, but a similar household in a northern region may need a larger tankless electric water heater to achieve the degree rise needed to meet household hot water requirements.
Tip 3: Account for water temperature and flow rate
Water temperature and flow rate are equally crucial when determining the appropriate tankless electric water heater size. Higher flow rates demand more powerful models to maintain consistent hot water output. Some residences may be accommodated by one whole-home unit, while others may require multiple point-of-use systems.
Tip 4: Evaluate electrical capacity
The home’s electrical capacity is another essential consideration when selecting a tankless electric water heater. For most homes, the average available amp service is either 100-, 200-, or 300-amps. While a 200-amp service panel typically suffices for average households, new construction, larger homes and high-demand systems may require a higher 300-amp service panel. Additionally, older homes with low-
er amp service may require an electric panel upgrade to meet the needs of a tankless electric water heater.
Higher-capacity tankless electric water heaters require more power, so be sure to assess the capability of the home’s electric service panel to accommodate additional circuit breakers before installation. Consult a licensed electrician or contractor to evaluate the home, circuit breaker size and wiring gauge to ensure the service panel can handle the load, prevent overloads and ensure a safe, efficient operation.
There are many benefits to tankless electric water heaters, including the ease of installation. Tankless electric models simplify installation by eliminating the need for venting, but sizing is key. If the unit is undersized, it may not fully meet demand during simultaneous water use. An oversized unit can lead to unnecessary energy consumption and higher utility costs.
Follow these tips and use a manufacturer’s guide, such as Rheem’s online sizing resource, to confidently select a tankless electric water heater model, then work with a professional to guarantee a safe and efficient installation for endless hot water and energy-efficient operation. (BPT)





Call


Homeowners know the work related to their homes is never done. Tasks ranging from routine maintenance to minor tweaks to large projects are part of homeownership.
Some of the work related to a home focuses on functionality, while other tasks might be all about aesthetic appeal. Potential health concerns related to a home also merit homeowners’ attention. Mold is one such issue. Though it’s impossible to pinpoint how much mold poses a
health problem to a home’s inhabitants, it’s fair to suggest homeowners feel that no mold is ideal. According to the New York State Department of Health, exposure to indoor mold can cause nasal and sinus congestion; eye irritation marked by itchy, red and watery eyes; wheezing and difficulty breathing; cough and other types of throat irritation; skin irritation, including rash; and headache.
The potentially harmful consequences of a mold infestation inside a home underscore how important it can be for

homeowners to learn to identify when they have a mold issue at home.
Learn what mold looks like. Mold patches increase in size the longer an infestation goes unchecked, so it might be easier to stop an issue after it’s been around awhile. The NYSDOH notes that mold typically appears as fuzzy patches that may be discolored or even slimy.
Recognize that mold also can be malodorous. Mold produces a distinct musty smell that is often the first symptom people recognize when they have n infestation at home. If a musty smell is present in a room, try to follow it to its source. That may involve some trial and error, as mold can grow behind and even underneath surfaces, including carpets, wallpaper and cabinets. Mold also can grow behind walls, a situation that may necessitate working with a remediation professional.
Know where to look. Though mold can grow anywhere in a home, certain areas in a home are more vulnerable to an infestation than others. Rooms affected by moisture are susceptible to mold growth. In bathrooms, mold may grow around sinks, shower stalls and curtains, and tiles. In kitchens, mold can grow on tiles and even on the seal around a refrigerator door. Mold also can grow on and around window air conditioner units.
The NYSDOH notes that certain people may be more vulnerable to mold-re-


lated health problems than others. Such individuals include people with existing respiratory conditions and those with compromised immune systems. Homeowners can prioritize safeguarding their homes from mold infestations and, when necessary, work with remediation professionals to eliminate existing issues and reduce infestation risks going forward.
Protecting a home against a mold infestation is a simple yet important task homeowners can look to in an effort to keep their homes safe and healthy.

• Shade Trees • Flowering Trees
• Evergreens
• Flowering Shrubs


• Grape Vines (Seeded & Seedless) • Blueberries • Nursery Fertilizers and Sprays • Nursery Mix Potting Soil • Peat Moss • Rose Bushes


Homeownership is a goal that many people aspire to. However, a complicated housing market in the United States, marked by high prices and high interest rates, has led the homeownership rate to dip to 65.1 percent in the first quarter of 2025. This decline marked a five-year low, and younger homeowners, particularly those under age 35, have found buying a home particularly challenging, according to the U.S. Census Bureau and the Federal Reserve Economic Data. Those who have been successful with their homeownership endeavors can benefit from all the help they can get to offset rising costs. The excitement of a new space often comes with a long list of home needs, making housewarming gifts practical and appealing this holiday season. The following are a selection of items that can benefit any new homeowner.
Practical essentials
New homeowners will need to outfit their homes with basic household items. As repairs and remodeling might be the first tasks to tackle, a high-quality tool kit and some key power tools will be invaluable. Additional practical gifts include a fire extinguisher, smart home devices, a sturdy step stool, and painting equipment.
Kitchen gadgets
Plenty of action takes place in the kitchen, and this room often is referred to as the heart of a home. Upgrading the space with an arsenal of culinary tools is often slow-going for new homeowners. That’s when gifts of a


durable coffee maker, a set of mixing bowls, a cutlery set, cast-iron cookware, or stylish serving platters can help get homeowners established.
Cozy corners
A new home may seem stark at the outset. Gifts of creature comforts like throw blankets, lush bedding, luxurious soaps, scented candles, accent lighting, low-maintenance houseplants, or a Bluetooth smart speaker can create a welcoming retreat.
Helping hands
New homeowners likely will appreciate a little help by way of services that can take some of the work off of their shoulders. A gift of lawn care or cleaning services will get the property and home looking its best. For the security-minded, gifting security cameras or access to a remote security monitoring service will be thoughtful. Homeowners who have pools or spas may appreciate a maintenance service that helps with cleaning and water balancing.
New homeowners have much on their plates, so well-intentioned holiday gifts can fill in the gaps as they begin life in their new abodes.


4
1
4
1


If your basement feels muggy, the air is damp or it’s a bit on the stinky side, you may have a humidity issue. Addressing and correcting the problem won’t just make your basement more comfortable; it’ll also create a cleaner, healthier environment.
To help ensure your home — and basement — remains in good health, experts offer these insights and tips. By nature, basements are prime candidates for humidity problems. They’re underground and surrounded by dirt, a notoriously bad conductor of heat. Because of that, basements are naturally cooler than the other rooms in your house. When warm, moist air from outside or upstairs comes into your cool basement, the moisture in the air cools and turns into water droplets.
In addition, the soil around your basement can hold a lot of water, which can seep through cracks or concrete pores. Because basements don’t typically have many windows or doors, there isn’t a lot of fresh air moving. Appliances like washing machines, dryers and showers can contribute to humidity, too.
Signs You May Have a Humidity Problem
Detecting high humidity in your basement early can save you a lot of trouble. It’s not just about discomfort; excessive moisture can lead to bigger issues like damage to your home and health problems for your family.
Physical signs of humidity include condensation on windows; wet stains on the walls or floors; a white, chalky substance on the walls; damp, humid air; a musty or mildew smell; and wood rot.
You may also experience health symptoms that suggest a problem, including allergic reactions, difficulty breathing or asthma.
Correcting Humidity Issues in Your Basement
If you’re dealing with high humidity, the experts at Thrasher Foundation Repair offer these tips:
1. Improve Ventilation: “When the weather allows, open basement windows to let fresh air in,” said Dan Thrasher, CEO of Thrasher Foundation Repair. “You can also place fans strategically to circulate air and move moisture out.”
Other steps you can take include making sure moisture-producing appliances vent outdoors and using an air purifi-



er to improve air quality, reduce mold growth and alleviate allergy symptoms.
2. Seal Leaks and Cracks: Check your basement walls and floor regularly for any signs of cracks or leaks. Apply a waterproof sealant to any cracks you find and patch larger gaps. If you’re dealing with significant moisture, you may need to enlist help from a professional.
3. Maintain Gutters and Downspouts:
Clogged or damaged gutters and downspouts can cause water to pool around your home, increasing the risk of it seeping into your basement. Clean gutters regularly and check for damage. If necessary, extend your downspouts so water runs farther away from your house. If your gutters clog frequently, consider installing gutter guards.
More Advanced Humidity Control Solutions
While simple solutions like opening windows and using fans can work, sometimes you need to take more extreme measures with an advanced humidity control plan.
Invest in a Dehumidifier: A dehumidifier sucks in damp air, removes moisture and blows back drier air. Desiccant models, which use absorbent material to remove moisture, are ideal for extremely humid environments and work well


in cold basements, whereas refrigerant models are more common and affordable. Use the right size for the space and choose a central location for best results.
Consider a Basement Waterproofing System: If your basement has structural issues that let water in, you may need to explore interior waterproofing or foundation repair. One option is applying a waterproof vapor barrier on interior walls. However, installing a sump pump and waterproofing system is among the least disruptive and most effective ways to manage water in the basement. Together, a sump pump or perimeter drainage system can help manage water that collects around or under your basement and keep it permanently dry.
(Family Features & Thrasher Foundation Repair, Photo courtesy of Shutterstock)


Hardwood floors are coveted features in many homes. The National Wood Flooring Association says wood floors are the most environmentally friendly flooring options available. In the United States, the hardwood forests that provide flooring products are growing twice as fast as they are being harvested. Furthermore, wood floors can last for many generations and require fewer raw materials to produce than oth-
er flooring options. That means less waste may end up in landfills.
Hardwood floors can endure for decades in a home, but over time those same floors may need some tender loving care to keep them looking good and working as they should. Squeaky floors are a common nuisance that homeowners may experience. Squeaking is often caused by movement and friction between floorboards. Treating the problem involves identifying the underlying

issue.
Loose hardware
Squeaky floors may be due to the loosening of the hardware holding the floor in place, says The Home Depot. When nails or screws no longer are secured tightly, the boards can rub together. The noise heard is the sound produced by rubbing. Tightening or replacing the hardware can help reduce the squeaking.
Counter-snap kit method
This Old House says this kit method is a great way to fix squeaks without damaging the floor. Once the source of the squeak is located, drill a 3/32inch pilot hole through the hardwood flooring. Then insert a screw through the kit’s depth-control fixture and into the pilot hole, and drive it until it automatically snaps off below the wood surface. Follow this up by filling the hole with wood putty that matches the floor color. Once the putty is dry, lightly sand the area to blend.
Use a shim or shims
Sometimes the floor may squeak because of a gap between the joists and the subfloor. Filling the gap with a small piece of wood called a shim can help alleviate the gap or gaps.
Drive up screws


If a squeak is just in one spot, The Home Depot says that you may be able to drive short screws from below into the subfloor.
Small gaps
For small gaps between boards, sprinkle talcum powder or powdered graphite between squeaky boards to reduce friction. Wood filler applied with a putty knife also may work. For larger gaps, use a liquid filler designed for wood floors.
Homeowners also can visit their local home improvement center for other hardware solutions designed for underfloor repairs to remedy squeaks. Many work from underneath the floor and involve mounting plates or brackets to sure up the floor.
Squeaky floors can be problematic, but noises can be banished with some repair work.


hen the summer entertaining season draws to a close, homeowners need to ensure their outdoor living areas can handle weather that’s right around the corner. Although outdoor furniture and other items tend to be durable, the impact snow, wind and ice can have on them may lead to damage over time. That is why many homeowners take steps to winterize their outdoor spaces and protect their belongings. Here’s a look at how to prepare for the winter to come.
Furniture: Cover or store furniture to protect it from the elements. Covering it with weather-proof covers can be adequate if storing items indoors is not possible.
Deep clean: Items that will be covered or stored should be thoroughly cleaned prior to being removed from spaces for the season. Lingering dirt and moisture can cause damage.
Insulate and drain: Don’t risk damage to pipes, which can freeze and crack in the cold. Shut off the water supply to exterior faucets and drain water lines to prevent pipes from freezing and bursting. Use foam pipe insulation to prevent freezing and cover any exposed pipes.
Apply mulch: After cleaning up garden debris, think about applying mulch to garden beds and cover tender plants to protect them from the weather.
Check gutters: Be sure that gutters and downspouts are clear of leaves and any additional debris. If gutters and downspouts


are not cleaned, ice dams may form on the roof and cause water damage.
Inspect and repair: Inspect walkways and driveways for any damage and make repairs now so water will not seep in and cause further issues with freeze-thaw cycles. Consider applying a sealant to protect surfaces from snow and ice.
Pools and spas: It’s essential to follow the industry or manufacturer recommendations for closing down swimming pools and spas for the season. While covers may not be essential in all climates, covering can help prevent leaves and other debris from getting in the water. Water should be expelled from pipes and tubing to prevent freezing and bursting. If space allows, consider moving the pool pump indoors to prolong its longevity. Turn off the electricity to the outlet where the filter is plugged in.
There may be additional, region-specific steps to winterize a property, but these pointers are a good starting point to protect outdoor spaces.


Homeownership is often characterized as a fulfillment of a dream. Indeed, many homeowners feel their ability to buy a home is a reflection of their discipline and commitment to saving money. That discipline and dedication can set homeowners up for long-term financial health, providing a unique sense of security along the way. Firsttime home buyers may not know what to expect upon buying a home, and since each home is unique, it’s impossible for
even long-time homeowners to say with certainty exactly how things will unfold once those new to home ownership get the keys to their first house. Various expenses might be the only common variable when it comes to homeownership, and some of those expenses may surprise first-time buyers. With that in mind, the following are some expenses first-time buyers can expect once their offers are accepted.
Down payment: Conventional wisdom long suggested home buyers should sub-
mit a down payment of at least 20 percent of the overall purchase price upon buying a home. Buyers who want to follow that advice would need a down payment of $80,000 when buying a $400,000 home. But many home buyers now submit down payments considerably less than 20 percent, particularly in the modern real estate market, which is characterized by high prices and low inventory. The lower the down payment, the higher your monthly mortgage payment will be, so it’s best to save as much as possible toward a down payment.
Primary mortgage insurance (PMI): Buyers who cannot come up with a down payment of 20 percent or more will have to pay for primary mortgage insurance, which is typically a set fee that is incorporated into the mortgage payment each month. PMI fees are typically waived once the balance on the mortgage reaches 79 percent or less of the purchase price, though some lenders may waive PMI prior to that if the value of the home increases considerably before the loan balance reaches the predetermined marker.


sale becomes official and buyers sign on the (many) dotted lines. Application and credit fees, title fees, underwriting fees, appraisal fees, and transfer tax are among the various fees that fall under the umbrella of closing costs.

Closing costs: The amount of closing costs varies widely depending on a host of variables, but Bankrate.com notes it’s not uncommon for these costs to come in at somewhere between 2 and 5 percent of the loan principal. Closing costs must be paid no later than when the

Moving: It’s also important that firsttime home buyers budget for moving costs. Moving costs vary and may depend on how much buyers already own and how far they’re moving. The home renovation experts at Angi estimate that local moves typically cost somewhere between $883 and $2,568, while long-distance moves may run buyers anywhere from $2,700 to $10,000 or more. These costs are some of the upfront fees aspiring homeowners can expect when buying a home. Long-term costs, including homeowners’ insurance (which is separate from PMI), property taxes, homeowners’ association fees, and maintenance are some additional expenses buyers can plan for as they try to determine their home buying budgets.


Who couldn’t use a little more closet space at home? As individuals accumulate more belongings, they need places to store all of these items. While modern homes may be built with extra storage in mind, older homes often place a premium on closet space. Homes built earlier than the 1980s may have small closets in bedrooms and only one or two additional closets around the home for linens and other items.
The most obvious solution to a lack of closet space is to build more closets. But too often home floor plans cannot accommodate new closets. Therefore, homeowners may have to get creative to maximize their space.
Sort and discard
Individuals can take some time to empty closets and assess what is in them. Sometimes more space can come from simply thinning out belongings that are no longer used. Take off the plastic coverings on dry cleaning and discard bulky shoe boxes.
Invest in thinner hangers
Clothes hangers come in all types, but the thinnest and most durable ones tend to be the no-slip velvet variety. Such hangers keep garments from slipping off and feature an ultra-thin design, says Real Simple magazine.
Use storage containers
Grouping items together and condensing them can free up space. Tuck belts, handbags and other items into storage bins that can be labeled and stacked. Loose items can look more cluttered and even take up more space when spread out.


For those with enough space, hanging a few shelves in unused areas in the closet can provide more storage space. If there is sufficient space above the rod, install a shelf and place seldom-used items up high.
Get a closet system
A customized closet system will certainly provide the best chances to maximize closet space. These companies will measure the closet and assess the contents to draw up a design that will give homeowners what they need. Closet systems also can adjust and grow with lifestyle changes.
Choose other storage solutions
In addition to closets, people can identify other spaces to store items. This can include bins under beds, storage benches or ottomans, the back sides of doors, or in furniture with built-in drawers. Individuals also can purchase free-standing closets or armoires that can fill in when rooms do not have enough closet space or no closet at all.
Maximizing closet space comes down to some creativity, de-cluttering and utilizing additional furniture to meet needs.




No one enjoys being in cramped quarters. Whether a person battles a legitimate case of claustrophobia when confined in tight spaces or simply prefers a place to stretch out, there’s no denying the appeal of a little extra room. That’s particularly so at home, where cramped spaces can make it hard to unwind.
When homeowners feel their walls are closing in on them, many choose to build space via a room addition. Room addition projects are extensive and expensive

undertakings, with the home renovation experts at Angi estimating the average add-on costs $48,000. But Angi estimates such projects can cost as much as $72,600, or even more depending on the size of the space and the features chosen.
The financial commitment when adding a room is significant, but homeowners and residents also will need to prepare for a potentially lengthy disruption to their daily routines. Various online resources, including Angi, suggest room addition projects typically take around


three to four months. With so much at stake, homeowners who think they might benefit from a room addition can look for various signs to help them determine if such a project is right for them. Increasingly cluttered spaces: Cramped quarters without much space for people are perhaps the most notable sign that residents can benefit from some additional space in a home. Cluttered spaces suggest homeowners may have run out of room for their stuff, and a custom addition can provide that extra room while contributing to a more calming ambiance in common spaces that may no longer be overwhelmed by papers, toys and other items that can quickly take over a home that lacks space.
Lifestyle hurdles: Millions of homeowners like to entertain friends and family, and that’s more manageable for some than it is for others. If interior or exterior spaces do not accommodate hosting, a room addition that expands an existing kitchen or living room might be the ideal renovation project.
Functionally challenged: A home that no longer has enough space to meet your needs is another sign a room addition might be in order. This very issue emerged for millions of professionals during the COVID-19 pandemic and has remained a challenge ever since. Indeed, an increase in days spent working remotely has left many homeowners grateful to work from home but desirous of a designated remote work space. A room


addition to accommodate a home office can be just what remote workers need to restore fully functional status to their homes.
Cost: While the sticker price of a home addition may (or may not) raise an eyebrow, the project is almost certain to prove more cost-effective than moving. According to data from the U.S. Census Bureau and the U.S. Department of Housing and Urban Development, the average sale price of a home in the United States reached $503,800 in January 2025. While that marked a roughly $16,000 decrease from a year earlier, it’s still a high figure that many homeowners aren’t willing to pay. A cost comparison detailing the price to move versus the price to build an addition may indicate that the latter option is a homeowner’s best bet.
A room addition could be the perfect renovation project for homeowners who need more space but still prefer to stay put.


Spring is the season most often associated with lawn care, and for good reason. Grass starts growing in spring, and the season is a great time to fertilize many grasses in the hopes lawns can look their best and endure the hotter, dryer weather of summer.
Spring might mark the time when many homeowners begin tending to their lawns each year, but it’s important to recognize the significance of fall lawn care as well. Grasses vary, and homeowners are urged to identify which type of grass is in their lawn so they can ensure it gets the care it needs before winter’s first frost. Cool-season grasses like perennial ryegrass and Kentucky bluegrass are common in various regions, and the following strategies can help homeowners with these types of grasses tend to their lawns this fall.
Stick to your recommended fertilization schedule. Homeowners who have been fertilizing since spring are urged to continue doing so in fall at the recommended interval. It’s easy to forget to fertilize in fall thanks to cooler temperatures that don’t call lawn care to mind and busier schedules after school starts again and summer vacation season ends. But many fertilizer manufacturers advise users of their products to fertilize several
times over the course of the year, including in fall. Stick to the intervals recommended on the packaging of the fertilizer you’ve been using, making sure not to forget to fertilize this fall.
Conduct a soil test. A soil test can determine if the soil is lacking any nutritive elements it needs to come back strong in spring. Certain amendments can restore pH balance if necessary and foster stronger growth when lawns come back in spring.
Aerate, if necessary. Soil can become compacted over time, and that can cause a range of problems for a lawn. Compacted soil can make it harder for water to reach the roots of grass, which weakens grass and makes it more vulnerable to damage during adverse weather events like drought. Compacted soil also makes it harder for nutrients in fertilizer to get into the soil. Aerating is best left to professionals, particularly in larger lawns, as the job can foster strong root development when done properly.
Remove thatch where it’s excessive. Thin layers of thatch can benefit lawns by delivering nutrients from glass clippings and leaves to a lawn. However, when thatch is excessive, it can block air, water and even fertilizer from reaching the soil. Thatch often can be removed with


a rake, but lawns with especially thick layers of thatch may need to be scarified.
Homeowners can take a DIY approach to scarifying or hire a landscaping professional to dethatch the lawn and remove the thatch from their properties.
Continue to water the lawn. A cool-sea-
son grass will continue to require water into the fall. Though the lawn won’t need to be watered as frequently in fall as in summer, various lawn care professionals note cool-season grasses still need roughly an inch of water each week in fall.
Remove leaves as they fall. Fallen leaves can affect a lawn in much the same way as excessive amounts of thatch, blocking water and nutrients from reaching the soil. So it’s best to remove fallen leaves, especially when they begin to fall in large quantities.
Fall is an opportune time to tend to a lawn to increase the chances grass grows back strong in spring.


The longer a person resides in a particular home, the greater the likelihood that various components of that residence will need to be replaced. Driveways, roofs, HVAC systems, and even appliances all have expiration dates.
Although siding on a home can be quite durable, there may be specific reasons why homeowners choose to or need to replace it at some point. Understanding what’s to come of the job can help homeowners prepare. No two siding jobs are
exactly the same, and each project will be dictated by a host of variables, including which type of siding homeowners choose. However, these general steps are commonplace during siding replacement projects.
Choose siding: Homeowners are urged to consult with various siding installation companies about which products are available and ask each for an estimate. Budget, climate and other factors will narrow down siding materials. The Home Depot says popular siding types


include vinyl, wood, fiber cement, metal, and stone. Siding can have almost any color or texture as well.
Remove and relocate: Outdoor items close to the perimeter of the home will have to be moved out of the way so workers can access the siding. The job will require a dumpster to be dropped in front of the home or in the driveway to collect debris, so homeowners should be prepared to leave space for it.
Siding delivery: The new siding should be delivered prior to the installation start day. These materials will take up a lot of room and space should be made available so the installation team can access them without difficulty.
Interior decor: Siding installation will include hammering, which can disrupt items on interior walls. It is best to have all wall hangings taken down to prevent damage.
Old siding removal: On the first day of installation, removal of the old siding will happen first, according to Smart Exteriors. Siding, insulation and trim will be removed. In the event that older, asbestos-based siding is on a home, contractors may safely remove and discard it, or go over that type of siding. Homeowners should inquire about this step during the company vetting process.
Home inspection: Once all old material is gone, the exterior sheathing will be inspected to ensure it is in good shape. Signs of rot or loose boards will be con-

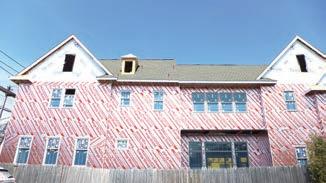
sidered and repaired, if necessary.
New siding install: First workers will put on house wrap or some sort of insulation/water barrier product. Afterwards, siding boards are layered on in the design chosen. Nails or screws are used to attach the siding and seams will be caulked to prevent moisture penetration. If the homeowner has chosen to have gutters and downspouts installed during the siding job, those will be fitted and installed as well.
Clean up: The installation team will begin the process of thoroughly cleaning up the property. All tools will be removed and the property will be swept or blown to clean away debris. Crews typically use powerful magnets to grab stray nails and screws that have fallen into the lawn and elsewhere. The dumpster will be taken away shortly after the work is completed.
Siding replacement is a big job but one that can offer immediate curb appeal once completed. It typically is not a doit-yourself project since it requires specific skills to ensure durability.


Few images capture the spirit of a season as well as a family gathered around a fireplace embodies winter. Winter is indeed a time when families spend more time together indoors, and there’s no better gathering spot than around a warm fireplace.
Heartwarming scenes around a fireplace are even more enjoyable when safety has been prioritized. While natural fireplaces with roaring flames are notable safety risks, it’s important that individuals with gas fireplaces embrace fire safety as well. The following are some gas fireplace safety strategies everyone can embrace.
Avoid the DIY installation route. Even the most skilled do-it-yourselfers are urged to let the professionals install a new gas fireplace. Gas lines are nothing to mess around with, and professional installation teams have ample experience setting up new gas fireplaces in a home.
Be sure to install a carbon monoxide detector on the same floor as the fireplace. During the gas fireplace installation, ask that a carbon monoxide detector with battery backup is installed on the same floor. The detector alarm will alert individuals if something is amiss,
like a gas leak. Periodically inspect the detector to ensure it’s working properly. Periodically inspect your safety screen. Glass panels are standard features on many gas fireplaces. Such panels separate the fire within the fireplace from the people and items outside of it. Glass panels can become extremely hot, which is why most gas fireplaces come with safety screens as well. These mesh safety screens can keep curious kids and pets from touching hot glass panels, and also protect adults. Inspect the safety screens periodically to ensure they’re still intact and up to the job, replacing them if necessary.
Keep objects a safe distance away from the fireplace. Experts advise keeping objects a minium of three feet away from the fireplace at all times. Fabrics and other materials that contact the glass pose a fire hazard, so keep the area in front of the fireplace clear. Make the fireplace off limits to children and pets. Though the aforementioned safety screens are a vital safety feature that can keep kids and pets safe, it’s still best that kids and pets are kept away from the fireplace at all times. Turn off the fireplace if kids are playing in the room, and use safety gates to keep kids and pets away when the fire-
place is in use.
Book annual fireplace inspections. Annual inspections of the fireplace can ensure everything is working properly. Professional inspections may detect potentially harmful gas leaks, and annual checkups also can help individuals extend the life of their fireplaces.
Recognize outdoor gas fireplaces have their own safety protocols. Outdoor fireplaces have become wildly popular in recent years. Homeowners who install outdoor gas fireplaces on their properties must recognize these awe-inspiring features require their own unique safety measures, including


turning off the gas supply at the end of outdoor entertaining season and protecting the fireplace from the elements when necessary.
Gas fireplace safety strategies can protect residents and also increase the life expectancy of these sought-after features.


Buying a home is the most expensive purchase many people make in their lifetime. Some people do it only once, while others are in the market with greater frequency. In any instance when the home buying process involves securing a mortgage, buyers can benefit from knowing a thing or two about mortgage interest rates.
A mortgage interest rate can help buyers determine if a given home is
affordable or beyond their budget. Rocket Mortgage says mortgage interest rates can have a major impact on long-term costs, so it is imperative to seek the lowest rates possible. However, an assortment of economic variables affect mortgage interest rates, and conditions unique to each buyer also can affect the rate they’re eligible to obtain. Understanding home loan rates can help potential buyers better navigate the complex process of buying a home.


When a person buys a home with a mortgage, he or she doesn’t just pay back the amount borrowed, which is called the principal. The loan also requires paying interest, which is essentially the cost of borrowing money. Mortgage interest is calculated as a percentage of the remaining principal, says Investopedia. How are mortgage rates set? Mortgage rates are not determined by a single variable. They are derived from a combination of factors that includes the Federal Reserve’s monetary policy, economic conditions and a borrower’s personal financial situation. The Federal Reserve (in the United States) influences the overall rates by adjusting the federal funds rate, or the rate at which banks lend


to each other overnight. This not only impacts mortgage rates, but also additional interest rates, according to Fannie Mae. Lenders will ultimately decide on the specific rates to offer borrowers.
How does a borrower’s financial situation affect mortgage rates?
Lenders will conduct a thorough assessment of a potential borrower’s creditworthiness. They will look at, among other things, a borrower’s credit score and debt-to-income ratio. A higher credit score typically results in a lower interest rate. A low-


er DTI indicates a lower risk to the lender, also potentially resulting in a lower interest rate. Squaring away finances well in advance of applying for a mortgage can help home buyers secure lower interest rates that could save them considerable sums of money over the life of their mortgages.
How do loan types affect mortgage interest?
A home buyer will pay interest no matter the mortgage type, but there are options to select a fixed or adjustable interest rate, or even interest-on-
ly mortgages.
According to Bankrate, with a fixedrate mortgage, the interest rate remains the same throughout the life of the loan, meaning the payment for principal and interest will remain consistent. Additional charges that are wrapped into mortgage payments could change, however. Property taxes and homeowners’ insurance charges could increase, for example. Fixed rates tend to be lower when the term of the mortgage is shorter. So borrowers can opt for a 20-year mortgage over a 30-year to save some
money on interest.
An adjustable-rate mortgage (ARM) will see the interest rate change during the repayment period. It may start with a low introductory rate for the first several years of the loan, but then can go up or down depending on market indexes and benchmarks. Many lenders put a cap on how high the interest rate can go, however. Various factors determine mortgage interest rates for home buyers, including market conditions, credit standing, federal rates, the type of loan, and term length.



Home improvement projects run the gamut from complex undertakings like room additions to simpler renovations like a new front door. Some home renovations excite homeowners more than others, but all improvements are a way to make a home safer, more comfortable and/or more functional.
A gutter replacement might not inspire the same level of excitement as a room addition or an overhaul of an
outdoor living space, but new gutters can help to prevent roof damage and make properties safer by ensuring rain water is directed away from walkways. Homeowners who suspect it might be time for a gutter replacement can look for these signs of fading gutters.
Cracks or splits: Cracks or splits at the seams of the gutters where two pieces connect is a telltale sign they need to be replaced. Cracks or splits are can slowly lead to separation of gutter pieces, which will lead to leaks.


But not all cracks or splits are found at the seams. In fact, some homes feature seamless gutters, which also can crack or split. Regardless of where they’re found, cracks or splits are a warning signs of fading gutters.


Rust: Rust is rarely a good sign whether you’re looking at a vehicle or even garden tools. Rust also is a bad sign in relation to gutters. Gutters are painted, and not only for aesthetic purposes. Paint on gutter also serves to protect them from water. When paint begins to flake, gutters will begin to rust and may even produce noticeable rust flakes on the ground below. Rust on gutters and rust flakes beneath them are indicative of gutters that need to be replaced.
Gutters pulling away from the home: Gutters that appear to be pulling away from the home is a sign that
they need to be replaced. Gutters are fastened to a home during installation, which ensures they can withstand rain and water. Over time, those fasteners can wear down, ultimately leading to gutters that appear to be pulling away from the home. Though gutters can be refastened, eventually they will need to be replaced.
Pooling water: Pooling water in a gutter may just be a sign that gutters need to be cleaned. However, pooling water on the ground directly beneath gutters indicates they’re not effectively directing water away from the home. Water damage inside: A home’s interior might not be the first place homeowners look when inspecting for damaged gutters, but a flooded basement or crawl space could indicate a gutter problem. Gutters and downspouts are designed to direct water away from a home when functioning properly. When that isn’t happening, water can pool beneath the foundation, leading to pooling water and other water damage in basements and crawl spaces. Gutter replacement projects may not be exciting, but new gutters can make a home safer and prolong the life of a roof and other features on a property.

Renovations around the house require an investment of time and often considerable amounts of money. Findings from the 2024 U.S. Houzz & Home Study show that home renovations are becoming more expensive. The median renovation spending for homeowners has gone up 60 percent since 2020. Angi, a home services website, reports the average renovation cost for homes between 1,250 and 1,600 square feet is $51,772, but the final cost of home renovations depends on the scope of the project.
Homeowners who are conserving funds can rest assured that it is possible to make meaningful changes both inside and outside a home without breaking the bank. Here are some ways to renovate a home on a budget. Create a budget and don’t waver.
Maximize an existing floor plan. This Old House suggests looking for ways to maximize your current layout before you invest in major renovations like an expansion. Bring in a designer with an eye for utilizing space. For example, see how you might be able to replace shelves with pull-out drawers in the kitchen. Moving furniture around or rethinking floor plans also can help to lower costs.
Balance DIY with hiring contractors. You can save money by tackling some projects yourself, but only if you are confident in your renovation skills. Rather than risk making costly mistakes and having to redo things, hire well-vetted professionals but ask if there’s any DIY work you can do to cut costs.
Check clearance and resale stores. Shop discount stores for building ma-
find certain home improvement materials and furnishings.
Take advantage of free services. Certain stores may offer things like free consultations with designers who can show you what a renovation can look like. This is advantageous to the stores because once you see the potential you’re more likely to buy the products, even if it’s not mandatory.
Resurface instead of redo. Certain items can be made to look new with minimal effort. Paint is a relatively inexpensive tool that can transform walls and more. A good hardwood flooring company can buff out a floor and put a new coating instead of an


entirely new floor. Kitchen cabinets can be resurfaced instead of replaced as well.
Finding ways to perform home renovations on a budget may require some creative thinking, but it’s possible to get results at the right price point.


Home renovations happen for a variety of reasons — whether to reflect personal style preferences, replace worn out materials or adapt to a family’s evolving functional needs. Among the most popular upgrades homeowners tackle, bathroom renovations can be a smart and worthwhile investment.
Updating a bathroom, even a small one, requires careful planning to ensure both aesthetic appeal and long-term functionality. To maximize the value of your investment, focus on a design
that is timeless and products that offer a blend of beauty, comfort and performance.
“As a designer and renovator, I know firsthand the impact fixtures can have on a home,” said Keith Bynum, home renovation expert, designer and HGTV star. “American Standard has been my go-to for renovation projects because their products are built to last, beautiful and timeless. The brand’s approach aligns with my own — creating stylish, convenient spaces with high-quality products that cater to real-life needs


and improve the way we live.”
Discover these expert tips for selecting the perfect products for your bathroom upgrade from American Standard, a trusted leader in bathroom and kitchen plumbing fixtures that is celebrating 150 years of designing innovative products that are truly “built for life.”


A vessel sink resembles a standalone basin, often used as a decorative and contemporary alternative to traditional sinks in powder rooms. The sleek and clean design of a pedestal sink makes it a perfect solution for smaller spaces, although additional storage may be needed.
Once you decide on the sink, you’ll also need to determine what furniture to pair with it. Some popular options to complete the look and enhance usability include a console, vanity top, floating vanity or washstand.
When considering a toilet, performance is essential. It should meet your everyday needs, operate efficiently and provide additional features that make daily maintenance easier.


Your sink should not only enhance the visual appeal of your bathroom but also meet your practical, everyday needs. Striking the right balance between aesthetics and practicality is essential when choosing the perfect sink for your space. If you’ve never shopped for a sink before, you may not realize how many styles there are to choose from.


An undermount sink sits with its edge below the level of the countertop, creating a seamless surface that makes it easier to clean while hiding from view. A drop-in sink is placed into an opening with the rim creating a lip that forms a barrier between your sink and counter.
You’ll find most toilets on the market fall into one of three categories: onepiece, two-piece or smart. One-piece toilets have a seamless design, with the tank and bowl fused together for a look that is sleek and easier to clean. Two-piece toilets consist of a separate tank and bowl, making them a popular choice for easy installation and maintenance. Smart toilets offer advanced features like bidet functions, automatic flushing, self-cleaning capabilities and customizable settings designed to enhance user comfort, hygiene and convenience.


Another important consideration is your toilet’s shape and height. Elongated bowls provide added comfort while round bowls are a space-saving solution for smaller bathrooms. When it comes to height, standard toilets are suitable for most people, but higher toilets allow for easier standing and sitting accessibility.
An option like American Standard’s line of Champion toilets, engineered to never clog and powerful enough to flush a bucket of golf balls in a single flush, provide cleaner, more efficient flushes so nothing disrupts your daily routine. These DIY-friendly, low-flow toilets use just 1.28 gallons per flush to conserve water. They also feature PowerWash rim technology, which scrubs the bowl with every flush, and unique EverClean Antimicrobial Surface protection to guard against mold, mildew and odor- and stain-causing bacteria. Faucets
Bathroom faucets come in a variety of styles and configurations to suit any design preference. Durable finishes resist tarnishing and scratches, keeping your faucet looking new for years to come. Many models also feature ceramic disc valves for silky-smooth handle operation and water-saving technology to help conserve resources and lower water bills.
A variety of bathroom faucet configurations can meet your bathroom design needs. Designed for sinks with a single-hole or four-inch escutcheon, the monoblock faucet provides easy use with a single-handle design for controlling water volume and temperature. Sinks with three faucet holes spaced four inches apart pair well with a centerset design, providing a compact and space-efficient solution ideal for undermount bathroom sink installations.
If your sink holes are spaced 8-16 inches apart, a widespread design will coordinate well with undermount and vessel style sinks that feature a deck, offering both style and practicality. The vessel faucet is designed for above-counter or vessel sinks, delivering a sleek, contemporary aesthetic that enhances modern bathrooms.
Bathtubs
Whether used for daily hygiene or as a relaxing retreat, the bathtub is a focal point of bathroom design. From classic

alcove and elegant freestanding tubs to convenient walk-in options, each type caters to different needs and aesthetics. The secret is determining how you’ll use the tub so you can maximize the features and functionality while complementing your overall design.
You can expect to find a range of features, including ADA compliance for enhanced accessibility, deep soak capabilities for a luxurious bathing experience and slip-resistant surfaces for added safety.
The trim and faucets also play a crucial role in your tub’s overall look and performance. For families, one practical choice is the Aspirations Waterfall


Tub Spout from American Standard, which is designed with rounded edges for kid-friendly safety while creating a soothing, spa-like cascade. It also conveniently doubles as a storage shelf or leg rest for shaving. (Family Features & American Standard)


Windows in a home are easily taken for granted. Even though residents look through their windows every day, it’s only when issues arise that people tend to give the windows much thought.
Even if windows may not be foremost on the minds of homeowners, they are a notable component of every home. New windows also can be an expensive addition to a home, so it benefits all homeowners to gain an understanding of win-
dow replacement projects before they start shopping around for new windows.
Windows are more complex than new homeowners may realize. Homeowners will need to choose between three commonly available window materials when picking new windows for their homes.
Vinyl windows typically are the most affordable option, and opinions vary considerably regarding these products.
Some tout their resistance to moisture, but others feel they lack the aesthetic appeal of costlier alternatives like fiber-

glass. Vinyl windows also can’t be painted, which some homeowners may find problematic. Fiberglass windows can be painted and are known for their strength and durability. Aluminum windows are strong and durable as well, but they may not provide as much thermal protection as some other options. Each window type has its own unique pros and cons, and homeowners are urged to do their homework to determine the best fit for them.
Consider variables unique to your home. Climate is an important consideration when choosing windows, and that of course is unique to each homeowner. How hot or cold the local climate can be will affect how well windows insulate a home, so a window that’s best for one particular region may not be ideal for another. Homeowners are urged to investigate which window materials are best suited to their local climates. All windows protect against the elements, but some might provide more adequate insulation, which can help keep utility bills low and everyone inside a home more comfortable.
Homeowners may need to decide between replacement windows or new construction windows. The window experts at Pella note that new construction windows are the primary option for newly constructed homes or room additions. Replacement windows are typically installed when homeowners need new windows but do not want or need to remove existing exterior cladding or


trim. Replacement windows tend to be considerably less expensive than new construction windows, but the latter option merits consideration before making a final decision.
It can be budget-friendly to replace more than one window at a time. Some, though not all, window installation companies charge a non-negotiable project fee, so it can be more financially savvy to replace more than one window at a time. Replacing windows piecemeal may require homeowners to pay the project fee for each installation, whereas homeowners who replace multiple windows at the same time will only incur that fee once. If homeowners know many windows in their home are in need of replacement, it can be financially advantageous to replace all that need it at once rather than breaking the project up and paying multiple project fees.
Window replacement projects require careful consideration so homeowners identify the best products for their home.




Homeowners know that the work of maintaining a home is never done. Cleaning is a daily task associated with homeownership, and such sessions can reveal more than dust buildup or dirty walls and surfaces.
When cleaning a home, homeowners can pull double duty and look for potentially hazardous situations. For example, vacuuming and dusting sessions can present a great opportunity to spot electrical hazards that might otherwise go unseen. With that in mind, homeowners can keep an eye out for these four signs of potential electrical hazards when working around the house.
1. Tingling when touching an electrical appliance: The National Fire Protection Association (NFPA) advises homeowners to call a qualified electrician immediately if they experience a tingling feeling when touching an electrical appliance. The Electrical Safety Office notes experiencing a tingle or the feeling of being shocked is not normal. Homeowners who experience such a feeling should avoid the location and warn others in the home to do the same.
2. Wall outlets that look or feel un-

usual: Wall outlets do not garner much attention, as many are low enough to be out of sight or even behind furniture. So a cleaning session might be the only time homeowners will notice issues with wall outlets. The NFPA notes discolored outlets or outlets that feel warm to the touch is a sign of an electrical problem. Various issues can cause outlets to look or feel unusual. An outlet could be short-circuiting or wires could be damaged, and each issue merits the attention of a qualified electrician.
3. Foul odors: An odor that calls to mind burning rubber is another indicator of an electrical problem. Various electrical experts indicate such odors can be indicative of damaged wiring, an overloaded circuit or loose connections, each of which poses a significant safety hazard. The NFPA urges homeowners to contact a qualified electrician immediately if they sense a smell of burning rubber in their homes.
4. Flickering lights: Homeowners won’t need to wait until cleaning sessions to notice flickering lights. Such flickering is hard to miss regardless of what residents are doing inside a home. Sometimes lights flicker because of a


loose bulb, so homeowners who notice flickering should first turn off the light, let the bulb cool down if need be and then check to make sure it isn’t loose. If the bulb isn’t loose, then lights could be flickering for a multitude of reasons. A loose connection can cause



flickering, as can an overloaded circuit. Homeowners also may not realize that not all bulbs and dimmer switches are designed to work together. For example, modern LED light bulbs often require the installation of specific dimmer switches or the lights won’t operate properly. Flickering can result if these products are not compatible. If a home is old, then flickering lights could be due to old wiring that needs to be replaced.
Daily and weekly cleaning sessions can be a good time for homeowners to perform a quick audit of electrical outlets and lights to ensure everything is safe and working properly.


Asuccessful kitchen renovation project requires careful planning and a detailed vision of what the space will look like upon completion. Whether a homeowner is thinking about giving the kitchen a major overhaul or just a minor refresh, bringing that vision to life doesn’t happen overnight. There is a process that must go into a kitchen renovation. Embarking on a kitchen remodel can be an exciting venture and homeowners may be eager to dive right in, but familiarizing oneself with


what to expect prior to the start can help property owners navigate the process more smoothly.
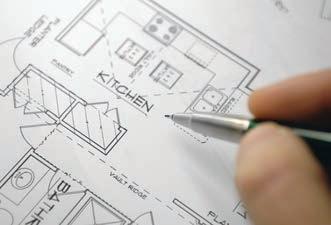
Inspiration and design: The first phase involves dreaming up kitchen plans and making practical decisions regarding efficiency and functionality. Considerable time may be spent working with a designer and architect, which will involve choosing materials and a color scheme.
Creating a budget: According to Angi, the average kitchen remodel costs $26,934, but price ultimately varies


depending on the scope of the work. Costs may be less or more depending on the size of the kitchen and the materials chosen.
Demolition: Before a homeowner can have a new kitchen, the old one must be removed. The real physical transformation begins with the demolition, which tends to be quick but messy. It is essential to set up an alternative “mini kitchen” elsewhere, or expect to be dining out throughout the remodel. The demo process may reveal any issues that will need to be remedied before the real work can begin, such as structural damage, leaks, mold, or other hiccups.
Contractor work begins: It can take one to three weeks for contractors to install plumbing, mechanical components, electrical wiring, ductwork, and more, followed by structural needs and drywall, according to sink and faucet manufacturer Blanco. Flooring and
cabinets will follow, and can take another week or more. Fabricating custom countertops is a lengthy process and can represent the bulk of a kitchen renovation timeline. Expect a few weeks for countertops to be measured, made and then installed.
Appliances and finishing touches: Appliances will be delivered and hooked up at the tail end of the renovation. Finally, the backsplash, fixtures and lighting are put into place. The last leg of the remodel will include painting, trim work and installation of hardware on cabinets and drawers.
Once all the work is done, it is essential for homeowners to make sure everything is to their liking. According to HGTV and Kitchy Crouse of CK Interior Design, a regular kitchen renovation can take anywhere from six to 12 weeks. With so much time devoted to the space, homeowners should ensure it lives up to their expectations. As the renovation begins, homeowners should remember that unexpected issues can arise, including delays due to material availability or unforeseen challenges. Maintaining an open communication with the contractor, asking questions and remaining flexible helps. Although a kitchen remodel is initially disruptive, it is an investment that ultimately enhances a home’s value.


Ahome is the most expensive purchase many people ever make. Buyers understand that certain costs come with home ownership. However, some of the costs associated with home ownership can catch even the most savvy savers off-guard. And in recent years, those extra costs have been surging. The following are some of the unexpected expenses that come with living the homeowner dream.
Property taxes: Depending on where you live, property taxes can comprise a large portion of monthly expenses. Some people pay their property taxes separate from their mortgage payments. Others wrap the tax burden into their mortgage bill. Either way, Business Insider reports that New Jersey currently has the highest effective property tax rate in the United States, with a median Garden State property tax bill at $9,000 annually. The lowest property tax rate is found in Hawaii, and the average homeowner there pays only $2,000 in property taxes annually. Zoocasa reports that annual property taxes in Canada can cost anywhere from $2,500 to $10,000 depending on the province’s property tax rate and average cost of homes.
Home insurance: CNN Business reports that home insurance premiums have surged in recent years, in large part due to extreme weather. In the U.S., insur-
ance rates jumped 11.3 percent nationally last year, according to S&P Global. Severe storms, including hurricanes and wildfires, cost homeowners insurance agencies nearly $101.3 billion last year, and those losses have been passed on to policy holders through higher prices.
Mortgage insurance: Many people do not have the standard 20 percent down payment necessary to buy a home. To circumvent this, lenders will require borrowers to take out mortgage insurance, also called PMI, to offset their risk. Credit Karma says PMI depends on factors such as down payment and borrowers’ credit scores, but typically it’s around 0.2 to 2 percent of the loan amount per year. You can remove PMI from your monthly payment once you have 20 percent equity in your home.
Maintenance: Even a brand new home will require some measure of maintenance and routine upkeep. Bankrate indicates one of the biggest costs of owning a home is maintenance, coming in at roughly $3,018 a year and an additional $3,300 for improvements. Lawn care, home cleaning, pest prevention, replacing smoke alarms and batteries, roof repair, and clearing rain gutters are some of those costs. HOA and CDD fees: Some communities impose homeowners association fees on those who live within the neighborhood.


fees cover items like maintenance in and around the community and snow removal. A Community Development District Fee is imposed by the developer of a neighborhood or subdivision to finance the cost of amenities in a neighborhood. Homeowners should be aware of these fees before buying in an HOA community. Apart from these expenses, annual utility payments can be quite expensive. Utilizing utility plans that offer a fixed cost per month can help homeowners budget for utility expenses more readily.
Home ownership can be costly. Buyers would be wise to familiarize themselves with some of the hidden costs of owning a home prior to purchasing one of their own.


