NZ INSTALLATION MANUAL
PRIMELOK WEATHERBOARDS

Family owned and manufactured in the Hunter region, NSW since 1939.
Weathertex is part of the Declare Label Program by the Living Future Institute Australia. This recognition highlights our commitment to product transparency and sustainability.
Better than zero carbon footprint with Third Party CredentialsGreenTag certification, PHD, PEFC. Low embodied energy.
DURABLE
Termite Resistant. Warranty tried and tested not to rot, split or crack for up to 25 years. 1000 kg/m3 product density with a minimum 32MPa rating.
Low VOC. Meets New Zealand Building Standards. 100% natural product. BRANZ appraised. No added silica, resins or formaldehydes.
No special tools required for cutting. Lightweight product - reduces labour costs.

A wide selection of profiles available in various styles, textures and sizes. Easy to incorporate the natural with primed profiles together to offer multiple design options. PRIMED RANGE IS GOLD GREENTAG CERTIFIED.
9.5mm thickness and matching accessories across all products making it easier to mix multiple profiles within a project. Easier to paint than other materials on the market due to its smoother surface.
Weathertex products and installation methods have been comprehensively evaluated and deemed fit for purpose and Building Code Compliant in New Zealand.
Weathertex products are covered under four BRANZ Appraisals:
• 511 Weathertex Direct Fixed Weatherboard Cladding Systems
• 512 Weathertex Cavity Fixed Weatherboard Cladding Systems
(2020)
NOTES:
1. Manufacturing and installation tolerances apply
2. Weathertex Selflok and all Primelok profiles have set Weatherboard laps. The top row of Weatherboards may require cutting to fit to the eaves
3. At the wall/eave intersection a timber cover strip may be fixed for a tidy finish
4. Checking row height alignment around corners is important to avoid creep due to small differences in board tolerances and tightness of installation
WEATHERTEX WEATHERBOARDS
Weathertex weatherboards have been comprehensively tested to New Zealand and International Standards for verification of compliance to the New Zealand Building Code.
MATERIAL DURABILITY PROPERTIES
The Product Specification Standard for Weathertex is AS/NZS1859.4 - Wet Processed Fibreboard for Exterior Conditions (HB.E).
Dimensions AS NZS 4266.1 PASS
Density AS NZS 4266.1 1000 kg/m3
Bending Strength AS NZS 4266.1 32 MPa
Modulus of Elasticity AS NZS 4266.1 4500 MPa > 2900 MPa
Equilibrium Moisture Content AS NZS 4266.1 7.5%
Dimensional Stability –Hygro-Expansivity AS/NZS 4266.1 0.16% change in face dimensions over the range of 35%-80% relative humidity N/A Moisture Resistance
± 1% @ Factory gate
THERMAL AND ACOUSTIC PROPERTIES
Thermal Conductivity 0.22 W/mK
Thermal Resistance 0.04 m2K/W
Acoustic Properties (Rw) System Dependant
• Suitable with SH Risk Group classification
Where thermal and acoustically rated walls are required: Weathertex can be used as part of wall systems to meet your specific performance requirements.
• Suitable with building height of <= 10m and >= 1m to relevant boundry.
• Refer to NZBC Acceptable Solutions C/AS1 and C/AS2 Paragraph 5.8.1 for the specific exterior surface finishes requirements for other building risk groups.
• Separation or protection must be provided to the Weathertex Sheet Cavity system from heat sources such as fire places, heating appliances, flues and chimneys
• Part 7 of NZBC Acceptable solutions C/AS1 and C/AS2 and NZBC Verification method C/VM1 provide methods for separation and protection of combustible materials from heat sources.
FIRE PROPERTIES
Average Specific Extinction Area
Material Group Number
Fire Resistance Rating (FRR)
MISCELLANEOUS PROPERTIES
AS/NZS 3837
AS/NZS 5637.1
AS1530.4
38.7 m2/kg
Group 3
60/60/60 and 90/90/90 Systems Available
Formaldehyde Classification AS/NZS 4266.16 Test Method: <0.07 mg/L - Emission Class Super EO
Weathertex contains no silica, resins, binders or added formaldehydes and the results above confirm the amount naturally present in hardwood timber is negligible and well below the acceptance level of 1.0mg/L (E1).
The manufacturer’s installation requirements are in addition to local and national codes and regulations. Weathertex provides a suite of Construction Details, available for download on the Weathertex Website which should be used in conjunction with this manual. Note: All diagrams in this installation manual are for demonstration purposes and diagrams may omit some components for clarity.
Deviation from standard applications and requirements detailed in this Installation Manual and supplementary Weathertex Construction Details will void the manufacturer’s product warranty.
The product specific installation instructions in this manual are applicable to steel and timber frames for both direct fix and cavity systems. Preparation steps must be followed for direct fix to timber frame, ventilated cavity construction and steel frame construction and are given in the Frame Preparation Section.
Weathertex timber products must be stored flat, under cover and on timber bearers spaced at maximum 600mm centres. When storing Weathertex outside, keep the stack minimum 100mm clear of the ground and cover with waterproof materials to prevent water staining. Note: Weathertex factory stretch wrap is not designed to keep stored product weatherproof and should not be relied upon for primary weather protection.
Anodised aluminium products should be stored in a dry and flat position away from any potentially corrosive or incompatible materials. Timber or soft bearers at a distance no more than one metre apart should be used to support the product. Continuous exposure to moisture will promote corrosion. Metal edges and cut corners can be sharp and may cause personal injury if not handled safely. Wear eye protection and gloves to protect skin and when cutting to avoid airborne metal fragments.
Weathertex products are easy to cut and shape with a normal hand or power saw. Primelok Weatherboards should be cut individually to protect the aligning spline. Weathertex may be stacked two or three high for multiple cutting. Where required, edges may be trimmed with a smoothing plane or sandpaper. Holes are easily drilled with high speed drills or clean cutter bits.
Standard health and safety precautions should be taken when working with timber products. Machine tools should be fitted with dust extractors and work areas kept clean and adequately ventilated. If dust levels exceed New Zealand safe work standards, the wearing of a dust mask (AS/NZS 1715 and AS/NZS 1716) and safety glasses (AS/NZS 1337) is recommended. A Safety Data Sheet is available for download on the Weathertex Website.
1.3.3
The site on which the building is situated must comply with NZBC Acceptable Solution E1/AS1 - Surface Water. Foundation design must comply with requirements of NZS 3604 for timber frames building or NASH Standard Part for light steel framed building or must be to a specific engineering design. The grade of adjacent finished ground must slope away from the building to avoid the possibility of water accumulating.
Timber framing must comply with NZS 3604. Buildings or parts of buildings outside the scope limitations of NZS 3604 must be to a specific design in accordance with NZS 3603 and AS/NZS 1170. Where specific design is required, framing must be of at least equivalent stiffness to the framing provisions of NZS 3604. All framing sizes and layout must comply with NZS 3604 in addition to maximum stud and dwang/nogging centres required by the Weathertex Installation Manual.
1.3.4
The floor level must have a minimum clearance to paved or unprotected ground as required by NZBC Acceptable Solution E2/ AS1 or E2/AS4 (NASH Building Envelope Solutions 2019). Weathertex Weatherboards must overhang the bottom plate on a concrete slab and timber frame floors by 50mm. The bottom edge of Weatherboards must be kept clear of paved surfaces by a minimum of 100mm and a minimum of 175mm above unprotected ground (i.e. grass, gardens, etc).
Weathertex Weatherboards are intended for use as internal and external cladding in standard stud wall systems. It is the responsibility of the Designer or Specifier to identify moisture related risks associated with any particular building design.
Wall construction design must effectively manage moisture, considering both the interior and exterior environments of the building, particularly in buildings that have a high risk of wind driven rain or are artificially heated or cooled. Adequate design of ventilation, flashings and moisture management systems must ensure that the wall cavity and the back of the Weathertex board will remain dry at all times.
Walls shall include provisions as required by the NZBC Acceptable Solution E2/AS1 - External Moisture. In addition, all wall openings, penetrations, junctions, vertical and horizontal joins, connections, window heads, sills and jambs or other components, must incorporate compliant flashing for weatherproofing.
Flashing must have a minimum 15 degree fall away from the cladding, and the Weathertex must be installed with a minimum 10mm gap between the Weathertex and the flashing. Weathertex, under no circumstances permits the installation of the drip edge into end stops or other U-channels
Weathertex Weatherboard systems have been appraised by BRANZ for weathertightness on timber or steel framed walls situated in NZS 3604 Wind Zones up to and including Extra High. The choice of system should be appropriate to the risk score calculated in accordance with NZBC Acceptable Solution E2/AS1 Table 2:
Vapour Permeable Building Wrap must be used under all Weathertex external wall systems. The vapour permeable wrap allows for the controlled escape of vapour from within the building whilst restricting the ingress of liquid moisture. Compliant building wrap must be installed in accordance with NZBC Acceptable Solution E2/AS1, and the wrap manufacturer’s installation instructions.
The permeability and vapour resistance of materials should be considered in the context of their application. The designer/architect/ engineer should consider strategies to mitigate condensation risks in the design with relevance to local climate conditions. Suitable products for moisture control in hot wet and humid conditions should be discussed with the building wrap manufacturer.
Soft compressible insulation installed directly between the front of the wall studs and Weathertex cladding is not compatible with Weathertex products and will void the product warranty.
Material Standard NZS 2295
Installation Standard E2/AS1
Mandatory Properties (as per AS/NZS 4200.1)
Vapour Resistance ≤ 7MNs/g (Class 3 or 4)
Water Barrier HIGH
PRIMER:
Weathertex factory primer is designed to be painted within 60 days of installation. Failure to do so can result in poor topcoat adhesion and will void warranty. Lightly sand any nibs or blemishes which have occurred during fixing. Sawn edges, holes and countersinks must be re-primed with high quality tannin blocking exterior primer (water or solvent based). A spray primer is the most efficient method. It is also good practice to prime any timber mouldings, including corner stops and trims.
Trimtec aluminium accessories are protected by an anodised coating and can be left unpainted if desired. Due to their smooth surface, aluminium accessories should be etch primed if a topcoat is to be applied.
Once boards are installed, clean all surfaces with a mild sugar soap solution using soft broom or lint free cloth to remove salt, dirt, dust, oils, grease and other airborne contaminates. Isopropyl alcohol and a cloth may also be used to remove stubborn oil, grease or waxy contaminants.
Do not vigorously scrub the surface nor use corrosive cleaners as this may burnish the paint surface and mark the primer finish. Wash down with fresh water and allow to completely dry. Not allowing the board to dry before painting is a common cause of paint failure. Failure to properly prepare the surface may result in poor adhesion with topcoat and may void the paint manufacturer’s warranty. Never use high pressure washers as this can cause coating damage and water ingress into the wall cavity.
The primed surfaces of Weathertex products are suitable for the application of exterior grade water or solvent based topcoat paint systems. It is recommended to apply selected coating to a test area to confirm suitability. If compatibility of the selected topcoat is an issue, the surface may be primed with a suitable tannin blocking exterior primer per the coating manufacturer’s recommendation before painting. Contact the paint manufacturer for advice or information.
When top coating, apply a minimum of two coats of paint in accordance with the paint manufacturer instructions for mixing, film build, coverage and drying between coats. Temperature, coating thickness and humid conditions will affect curing of coatings and consideration of site conditions at the time of painting is essential to ensure proper curing, adhesion & to avoid surfactant leaching. Incorrect curing conditions will void the manufacturers warranty. Paint additives may adversely affect the coating adhesion and durability and should only be used with the endorsement of the coating manufacturer.
Weathertex hardboard products have 50 years proven durability in the harshest of climate zones. While there is a vast array of colours to paint your home, it is important to understand the effect paint colours can have on the performance of construction products. As Weathertex is a timber product, its dimensions will expand and contract with changes in moisture content. Dark paint colours can allow surfaces in warmer climates to become very hot in direct sunlight leading to loss of moisture and subsequent shrinkage of the weatherboard. Selection of light paint colours with high Light Reflectance Values (LRV) will lead to better thermal efficiency of the building, improve the maintenance cycles of paint coatings and sealants while minimising the thermal expansion and contraction of all construction components. With darker paint colours we recommend pre-painting the ends of the weatherboard prior to installation of joining/corner accessories. Screw with filler can be used with dark colours, however due to the additional movement of construction components with dark paint colours, filler may be prone to moving and becoming visible. Weathertex recommends nail fixing with dark paint colours.
Darker paint colours require a longer curing time in ideal temperature & humidity. Temperature, coating thickness and humid conditions have an increased effect on the curing of darker paint coatings. Consideration of site conditions at the time of painting is essential to ensure proper curing, adhesion & to avoid surfactant leaching. Incorrect curing conditions will void the manufacturers warranty.
The extent and nature of maintenance will depend on the geographical location and exposure of the installation. Regularly wash the painted surface with mild soapy water to remove dirt and grime to improve the performance of the coating. Never use high pressure washers as this can cause coating damage and water ingress into the wall cavity.
Thoroughly inspect topcoat paint work at the end of year 1 and repair areas of damage/coating breakdown according to the original paint specification or approved equivalent. Repeat inspection process at year 5 and based on the results of this condition survey make a decision on future maintenance actions, which may include touch up/repair of areas or a full recoat.
Additional basic maintenance tasks include but are not limited to controlling vegetation and garden beds close to the installation, keeping gutters and pipes clear, addressing potential moisture damage due to overflows and replacement of penetrations, flashings and sealants used in installation as required. Generally, exterior surface coatings deteriorate by chalking rather than flaking. When repainting becomes necessary and the surface is unbroken, remove loose chalk by lightly sanding and follow the preparation steps above. Reapply new coatings in accordance with the paint manufacturer’s instructions.
Weathertex has been assessed by an Accredited Testing Laboratory to AS 1530.4, that the attachment of Weathertex 9.5mm cladding systems detailed in Table 1.1.2 over plasterboard timber and steel plasterboard lined walls that has been either tested or assessed to meet NZBC Acceptable Solutions C/AS1 and C/AS2 and NZBC Verification Method C/VM1, would not detrimentally affect the FRR of the underlying wall system.
Weathertex can be used over systems such as the GIB FRR plasterboard systems. Contact the system manufacturer for further advice. AS 1530.4 report available on request.

Frames must be straight and true. Studs must be at a maximum 600mm centres - see product specific structural wind loading for system details. Internal corners may require additional stud work - refer to Weathertex Construction Details. Dwangs/ Noggings must be provided as per 1.3.3.
• Building wrap must be installed in accordance with E2/AS1 and the manufacturer’s installation instructions building wrap.
• For cavity installations building wrap must be installed in between the frame and cavity battens/thermal break battens.
• Building wrap must have a minimum overlap of 100mm at horizontal joins and 150mm at vertical joins and corner junctions.
• Weathertex must be separated from concrete/masonry. Where separation is required, then a damp proof course (DPC) must be used.
• Building wrap must be tightly secured to prevent bulging of bulk insulation from impinging on the ventilated drainage cavity in accordance with NZBC E2/AS1 paragraph 9.1.8.5.
• Flexible flashing tape required to be installed around windows and penetrations see below example.
All windows and penetrations must be appropriately flashed in accordance with E2/AS1 before cladding is installed. Head flashings are required to be installed to ensure any water is draining away from the window and is not draining into the wall. Head flashings will change based on the selected window, the use of a cavity etc. Below is where window flashing tape is required and typical head flashing used for window installation. See Weathertex Construction Details available on the Weathertex website for further details.
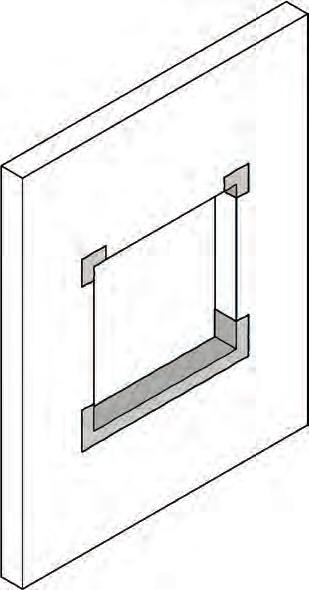
Flexible Flashing Tape
Weathertex Cladding
Flashing Wall Wrap
See E2/AS1 for further requirements
Board Clearance 10mm to flashing
*Direct fix example shown

Trimtec Aluminium Corner Accessories are installed over the cavity battens and before Weathertex Cladding is installed. Aluminium is subject to thermal expansion/contraction and it is recommended that 1mm expansion gaps be used.
• To stop vermin entering the cavity, a Weathertex Large/custom Cavity Closer must first be fitted to the base of the wall and above window head flashings.
• Cavity battens must be installed vertically on all studs and will overlap into the cavity closer.
• Castellated cavity battens or cavity spacers must be installed horizontally on all dwangs/noggings and top/bottom plates when installing Weathergroove Products.
• Cavity battens must be installed as to not obstruct the drainage plane or openings in the cavity closer.
• NZBC Acceptable Solution E2/AS4 (NASH Building Envelope Solutions 1.1.2) requires a thermal break batten to be installed between light weight external cladding and steel frames to prevent thermal bridging and subsequent loss of energy efficiency of the wall system.
• To stop vermin entering the cavity, a Weathertex Large/custom Cavity Closer must first be fitted to the base of the wall and above window flashings.
• Thermal break battens must be installed vertically on all studs and will overlap into the cavity closer.
• Thermal break battens must be installed horizontally on all dwangs/noggings and top/bottom plates when installing ventilated thermal break batten Weathergroove Products.
• Cavity battens must be installed as to not obstruct the drainage plane or openings in the cavity closer.
To ensure a free draining cavity when installing horizontal cavity battens on to the noggins/dwangs when installing Trimtec Long Vertical joiners there are 3 options available as shown below (building wrap omitted for clarity).
• Cavity spacer—installed on a 5° angle with 50mm gap between the spacer and vertical battens. Batten to be temporarily tacked into place as the final board fastening will secure it.
• Bevelled double castellated cavity batten sloping towards the cladding
• Ventilated cavity battens— Thermally rated battens to be used on steel Frames
Ventilated battens—installed as per manufacturers instructions
Timber Castellated batten
*Sarking and fasteners omitted for clarity 50mm 5o Angle
Cavity spacer installed on a minimum 5° angle with a 50mm gap between stud batten and spacer
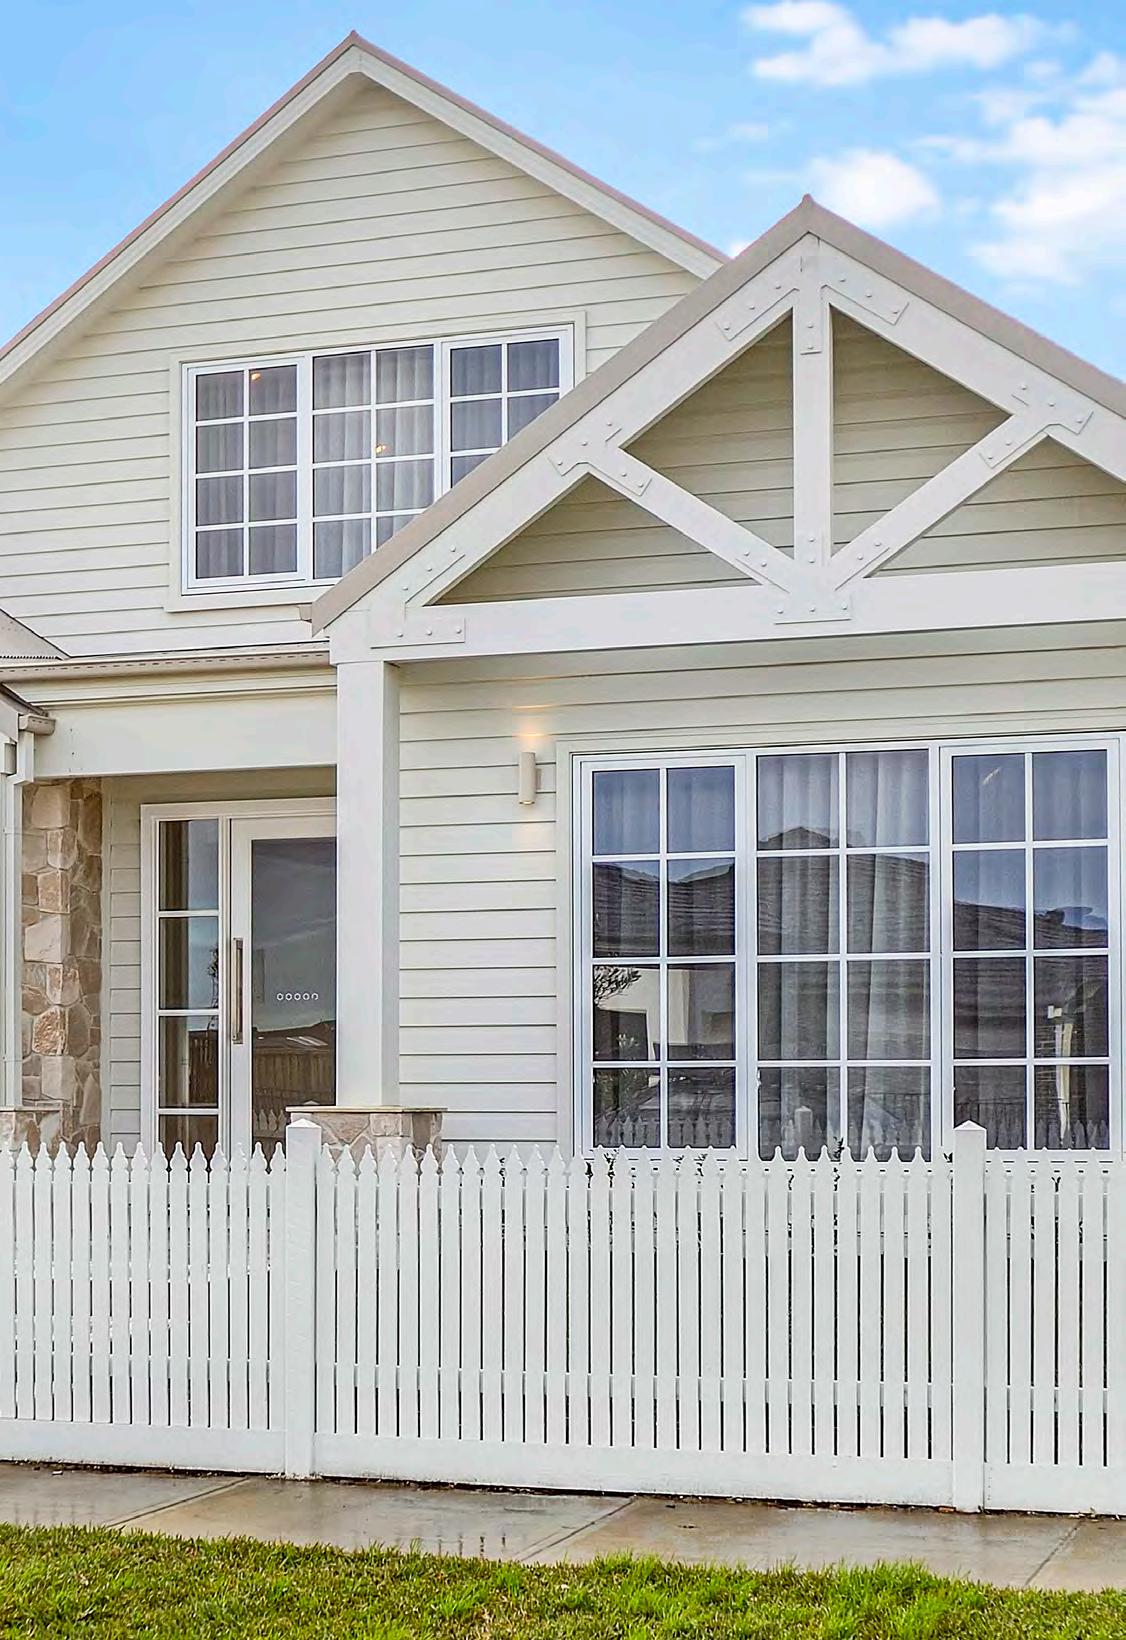
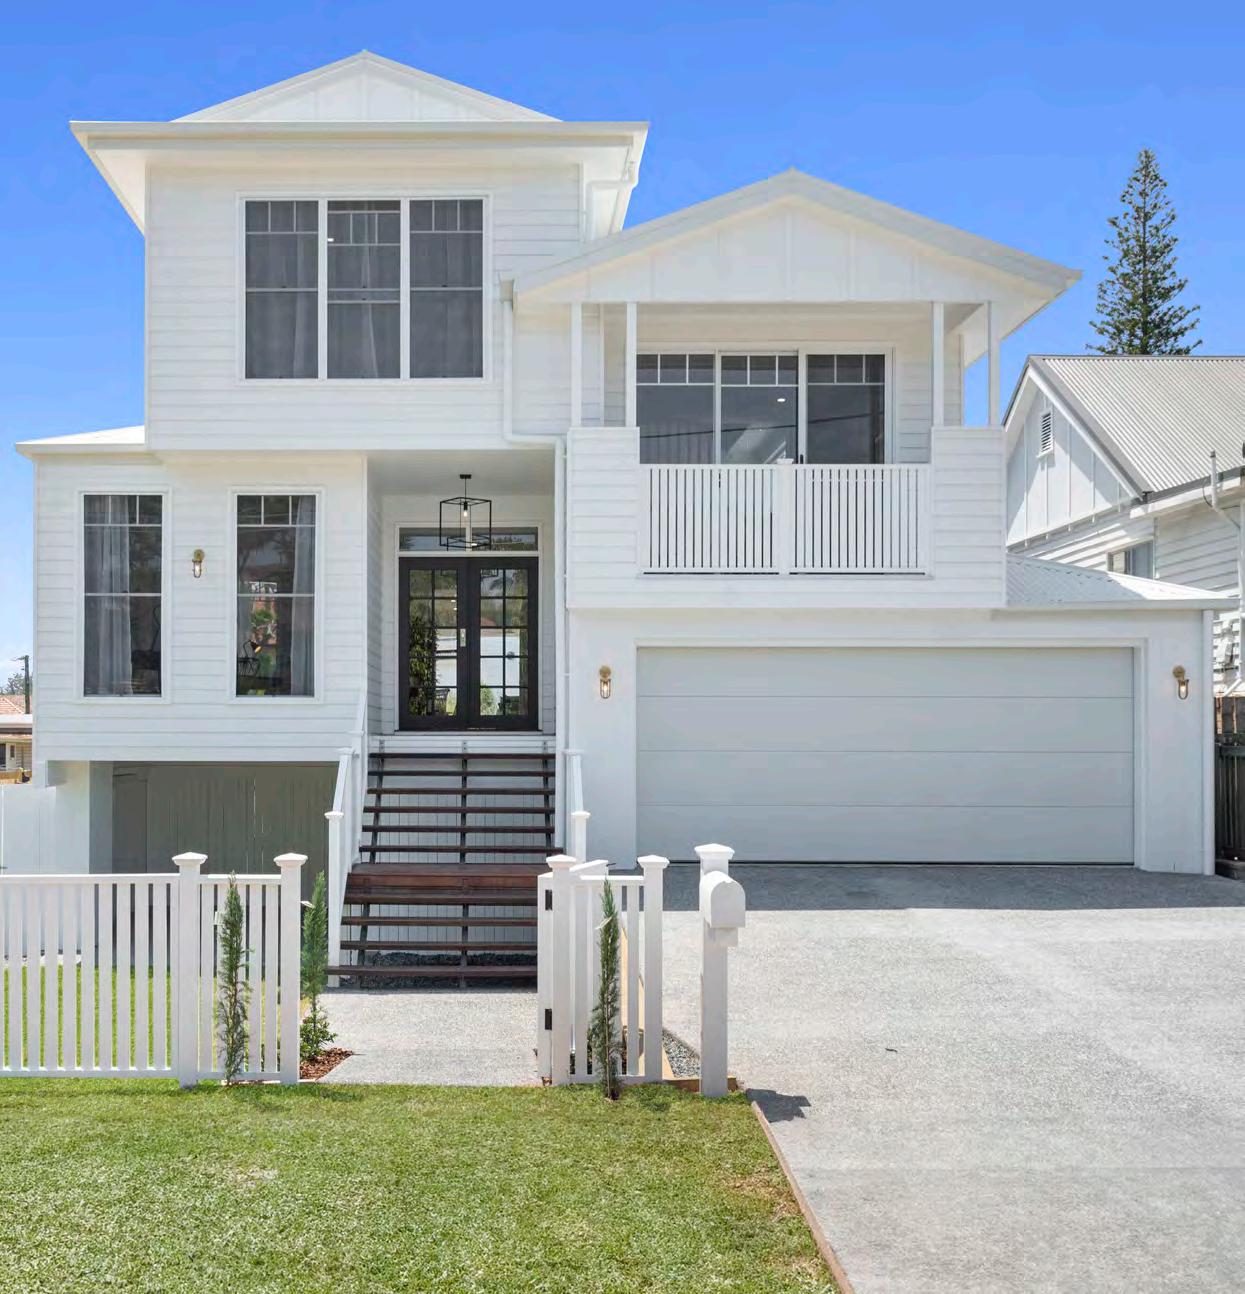
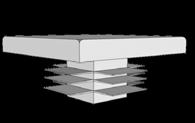
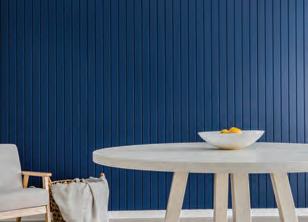
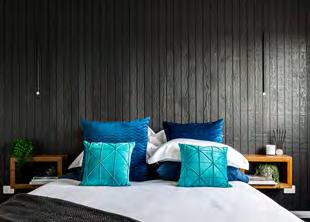
Primelok is our most popular range for achieving traditional sophistication and elegance. Build your dream Hamptons style home with Primelok, available in a range of profiles and textures, and perfect for your next project.
Features & Benefits
• Lapping of board conceals fixings.
• Durable with a 25 year warranty.
• Exclusive easy-aligning boards saving time and labour costs.
• Single person install.
• Made from real Australian hardwoods.
Cladding is 3660 mm in length and 9.5 mm in thickness.

PRIMELOK SMOOTH
Width: 197mm
Code: 500010
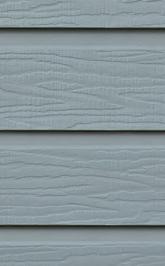
PRIMELOK FEDERATION RUFF-SAWN
Width: 168mm Code: 500012
PRIMELOK WOODSMAN
Width: 197mm Code: 126850

PRIMELOK SHADOWOOD SMOOTH
Width: 168mm Code: 500014

PRIMELOK FEDERATION SMOOTH
Width: 168mm Code: 500011
PEFC CERTIFIED
Promoting Sustainable Forest Management
RESPONSIBLE WOOD CERTIFIED
This product is from sustainably managed forests and controlled sources.
PEFC CERTIFIED
Promoting Sustainable Forest Management
RESPONSIBLE WOOD CERTIFIED
This product is from sustainably managed forests and controlled sources.
*Made from Polycarbonate/ABS
TRADITIONAL OFF STUD JOINER
Available in 200 Smooth (code: 139942) & Woodgrain (code: 154092).
300mm, 3660mm Smooth 190mm Smooth 190mm Woodgrain
FEDERATION JOINERS
SHADOWOOD JOINERS
Available in Smooth (code: 129536) or Ruff-Sawn (code: 146686)
For traditional joining of Primelok 200 smooth or Primelok Woodsman
For traditional joining of Primelok Federation Smooth or Primelok Federation RuffSawn
(code: 148900)
For traditional joining of Primelok Shadowood Smooth
PRIMELOK STARTER STRIP
(code: WJ3000PS)
For: ALL Primelok weatherboards L = 3000mm
2.2.2
CAVITY CLOSER
L = 3000mm
a = 20mm or 30mm
b = 50mm
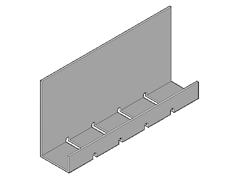
*Made from anodised aluminium
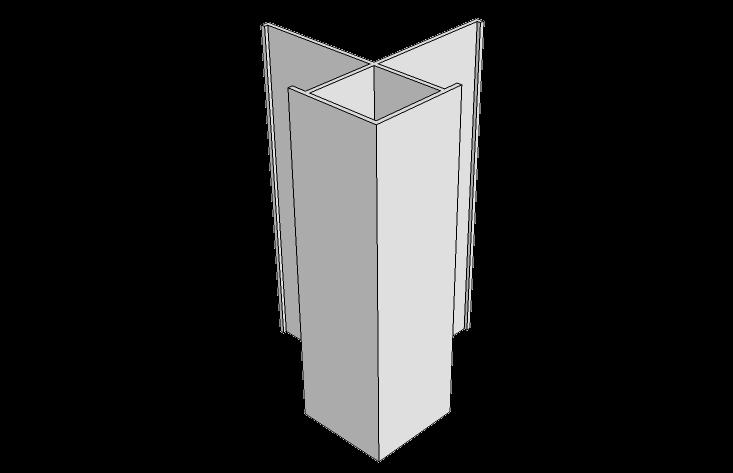
LARGE EXTERNAL CORNER (code: 149800)
LARGE INTERNAL CORNER (code: 149600)
LARGE END STOP (code: 150255)
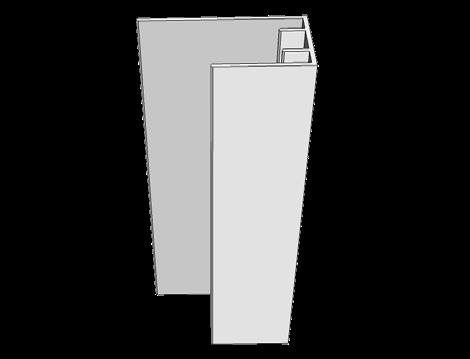
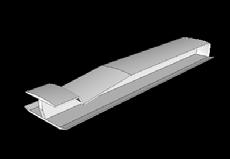
LARGE LONG VERTICAL JOINER (code: 150650)
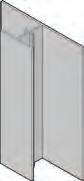
INTERNAL COMBO CORNER
a= Primelok
b= Weathergroove/Selflok (code: 146900)
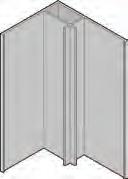
EXTERNAL COMBO CORNER
b= Primelok
c= Weathergroove/Selflok (code: 146950)
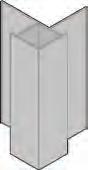
LARGE CORNER PLUG (code: 149850)
L = 3000mm a = 27mm
b = 21mm c = 35mm
L = 3000mm a = 4mm b = 21mm c = 35mm
L = 3660mm a = 27mm
= 21mm c = 45mm
L = 3000mm a = 27mm b = 70mm c = 20.9 mm
L = 3660mm a = 20.9mm
b = 10.7mm
c = 58.3mm
d = 48.3mm
e = 4mm
L = 3660mm a = 27.3mm
b = 20.9mm
c = 10.7mm
d = 35mm e = 45mm
Use with Large External corner *made from PVC
The table below displays the maximum allowable wind zone according to frame type, fasteners and fastening pattern used to install Weathertex Primelok Weatherboards. Maximum wind zone classifications have been evaluated for lined walls (Cp,i = 0) within 1200mm of the building corner using ultimate limit state design pressures in accordance with AS/NZS 1170 and NZS 3604.
2.3.1 TABLE: SG8 TIMBER FRAME
Fastener Type and Gauge
Direct Fixed/Structural Cavity Batten
Flat Head Ring Shank Nail
2.3.2
x 50mm Minimum Countersunk Coarse Thread metal Screw
Max 20mm Nonstructural Cavity Batten with Max 9mm additional packing/RAB General Within 1200mm of building corners
* This wind table does not account for any additonal packing
FASTENER NOTES (notes apply to tables: 2.3.1 - 2.3.2):
1. Fasteners must meet the minimum durability requirements of the NZBC. All fasteners must be suitably coated to resist corrosion in external application. When installed in high corrosion zones, fastener material must be selected to meet the appropriate design life of the system and geographical location.
2. Minimum fastener dimensions are specified in the fixing table. Fastener length must be increased by the thickness or additional thickness of any packing or battens to ensure the same penetration into the structural subframe.
3. Nails and screws must be finished flush to the board surface as not to interfere with interlocking of planks. Nails must not be punched as punching will significantly reduce the holding capacity of the fastener.
4. ND Bradnail must not be used for Primelok installation.
5. Fastener length for steel frames must be of suitable length to allow three threads penetration through the steel and allow for packing and thermal break battens.
Nails must be finished flush to the board surface and not be punched and filled. Punching will significantly reduce the holding capacity of the fastener and damage the integrity of the board surface. Screw holes should be spray primed after screwing.
The following product specific installation instructions are applicable for both direct fix (timber frame) and cavity fix (timber and steel frame). Installation instructions in this section are to be used in conjunction with information and requirements given in previous sections and the national and local building codes.
Check and straighten sub-structures as required. Establish ground clearance and weatherboard overhang requirements. For cavity installation see cavity systems (section 1.7). For direct fix install wall wrap prior to installation, refer to E2/AS1 table 23.
Set a horizontal datum or baseline 30-40mm from the top of the slab around the perimeter of the building. Align the bottom of the Primelok starter strips to the datum and fasten at 300mm centres. Allow a max 2mm gap before installing additional strips.
When installing on Cavity System, the Large Cavity Closer is used as a starter strip instead of the Primelok Starter Strip. When using custom cavity closers with the Primelok system, ensure the chosen material provides adequate restraint for Primelok boards under the wind load for your project. Weathertex recommends steel cavity closers. A 30mm cavity closer may be used with a 20mm cavity batten to create a starting edge for the first Primelok Plank. Otherwise, when using the Weathertex Large (20mm) Cavity closer with a 20mm cavity batten, install the Primelok Starter strip by aligning the bottom edge with the bottom edge of the cavity closer.
First Row: Position the first weatherboard so that the spline locks over the Primelok starter strip or cavity closer. Press the weatherboard down into the strip and fasten along the top edge of the board to every stud. Keep fasteners 15mm from the top edge so that they will be hidden by the overlapping board above and fit joiners as work proceeds. To fit joiners to cut ends, trim back the spline on the back of the weatherboard using a hacksaw or sharp knife.
Successive Rows: Simply position each weatherboard so that the spline locks over the splayed top edge on the preceding row. Commence fixing at one end of the weatherboard pressing down to fully engage the boards and fix along the top edge at every stud. Alternatively, start midway along the weatherboard and work outwards towards the ends. Keep fasteners 15mm down from the top edge so that they will be hidden by the overlapping weatherboard and check rows for level.
Please refer to construction details found on the Weathertex website for all window, doors and penetrations.
NOTE: The Primelok plastic spline can flex up to 2mm under pressure and care must be taken in measuring row heights as work progresses to avoid misaligned rows.
Building wrap (Refer 1.3.6, 1.7.2
Building wrap requirements & installation)
Fasteners 15mm down from top edge. Finish flush to avoid creep.
Primelok Starter Strip Cavity System (Optional) Datum 50 - 60mm
Ground clearance (Refer to general requirements section 1.3.4)
To accommodate movement, Weathertex’s joining methods have been designed to provide the correct spacing between adjoining planks, and cover changes in dimensions of the product for specific wall lengths.
NOTE: Avoid penetrating PC/ABS joiners with fixings during the installation process. This may cause the joiner to crack after the installation. Where necessary predrill the fixing position through the joiner prior to fixing. Also avoid positioning fixings directly opposite each other across a join as this too may cause joiner damage after installation.
Any cut ends entering corner accessories, traditional or large long vertical joiners must be primed with a high quality tannin blocking exterior timber primer (water or solvent based).
Form joins between weatherboard ends using the relevant joiners for the selected profile - refer to the Accessories Section. Stagger joins randomly or brick lay throughout the wall with joins being formed midway between the studs. When fitting the joiner, bring the ends into moderate contact with the splayed edges or nibs within the joiner. Do not force ends tightly together. It is advisable to prepaint plank ends when using Traditional Joiners to avoid white lines either side of the Accessory after possible contraction of construction components in dry conditions. Simply cut joiners to fit at window heads, sills and eaves as required.
NOTES: To fit joiners to cut ends of Primelok weatherboards it is necessary to trim back the plastic spline.

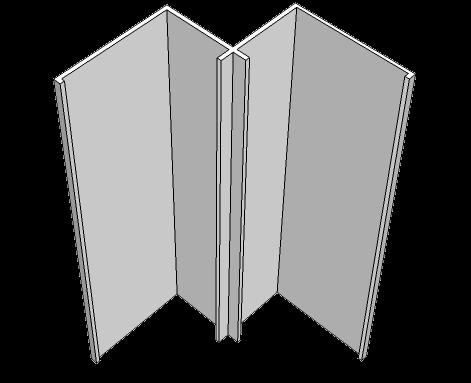
For quick and sleek installation, align weatherboards to form a single vertical off-stud control joint using the Trimtec Large Long Vertical Joiner. It is advisable to prepaint plank ends when using Long Vertical Joiners to avoid white lines either side of the Accessory after possible contraction of construction components in dry conditions.
• Joiner must be supported by noggins/dwangs at maximum 600mm centres or positioned on a double stud.
• Joiner may be etch primed and painted or left as the original uncoated anodised aluminium finish.
• Attach the aluminium joiner to the stud frame through the back flange at 1200 centres with a flat head nail.
• Nibs in the joiner provide correct control joint spacing. Do not install tight to the nibs.
• Planks may be slightly bowed to fit between two vertical joiners or slid in place from the top before fastening off.
Noggins/dwangs at maximum 600mm centres fastened every 1200mm.

Weathertex Construction Details are BRANZ appaised. You can download the suite of details in easy PDF documents by product range. Each range is split by either Direct Fix or Cavity Installation methods, and have a range of details including but not limited to ground clearance, eaves, meter boxes, over brick and veneer.

Visit any of the product pages on our website and simply add a sample to your cart, and we will deliver it to you for FREE!
To learn more information on painting and staining Weathertex products or to find painting technical sheets view our dedicated website page. We have information available on recommended New Zealand painting and staining brands.
Building Information Modelling (BIM) system are files that allows for collaboration between building professionals to generate a much more intellectual information-rich, virtual building. Weathertex has Revit and DWG files to assist you designing your next Weathertex project.
Simply fill in your details, attach your plans and we’ll do the rest. We will be able to provide you with a full free takeoff report on Weathertex products and accessories required for your project.
1. Weathertex Pty Ltd A.B.N 67 084 713 986 (“Weathertex”) warrants that the Products supplied are of first quality, free from material defect in materials, design and workmanship, and in conformity with the technical specifications detailed in the published Weathertex Installation Manual that is current at the date of purchase. This statutory warranty applies for a period of 12 months from the date of purchase in addition to the following clauses.
2. Natural Board - Weathertex warrants that its Natural (Brown) Board Products will not rot, split or crack for a period of 15 (fifteen) years from the date of purchase when installed and maintained in accordance with Weathertex’s current published materials.
Pre Primed Board - Weathertex warrants that its pre primed board Products (Selflok, Primelok & Weathergroove Primed Ranges) will not rot, split or crack for a period of 25 (twenty-five) years from the date of purchase when prepared, installed and maintained in accordance with Weathertex’s current published materials.
3. A reference to Products in these warranty terms and conditions does not include accessory products listed “Accessories” in the Weathertex Price List (“Accessory Products”). Weathertex warrants that the Accessory Products will be free from defect in material and workmanship for a period of 15 years from the date of purchase. For the purposes of clarity, the warranties provided in clause 1 and 2 do not apply to Accessory Products.
4. The benefits to the purchaser given by the warranties set out in clauses 1 to 3 are in addition to other rights and remedies of the purchaser under New Zealand Consumer Law in relation to the Weathertex products and accessories.
5. The warranties provided in clauses 1, 2 and 3 are only available to the original purchaser (“Purchaser”) who provides Weathertex with proof of purchase and who makes the claim in writing within 30 days from the point in time when the defect becomes apparent or should have become apparent.
6. Weathertex will not be liable for any warranty claims made under clauses 1, 2 and 3 if any of the following apply:
(a) the Products are not installed used or maintained in accordance with applicable instructions and/or specifications, including installation and site conditions provided by Weathertex (including the published Weathertex Installation Manual that is current at the date of purchase);
(b) the building in which the Products are installed does not comply with all relevant Building Codes and Regulations, Standards, and Council/ Authority/Regulator requirements;
(c) the Purchaser has not complied with any service instructions which Weathertex may give or any subsequent request as to a modification of the Products which Weathertex may make from time to time in writing;
(d) the defect is caused by the use of materials, parts or accessory products that are not supplied, recommended, or approved by Weathertex;
(e) the Products are not maintained, prepared or installed by authorised installation contractors in circumstances where Weathertex has directed the Purchaser to ensure that the Products are maintained, prepared or installed by such authorised installation contractors; or
(f) the repair, rectification or replacement of the Products is required as a result of normal wear and tear or necessitated in whole or in part by the fault or negligence of any person other than Weathertex.
7. Further to clause 6 and without limiting clause 6, Weathertex under no circumstances will be liable for any claims, damages, or defects arising from or in any way attributable to:
(a) acts of God, fire, flood or other severe weather conditions or unusual climatic conditions;
(b) performance of paint/coatings applied to the Products;
(c) development of any algae, bacteria or fungi on the Products (whether on the exposed or unexposed surfaces);
(d) poor workmanship; or
(e) any other losses or damages (whether direct or indirect) including property damage or personal injury, consequential loss, economic loss or loss of profits arising in contract or negligence.
8. The Product is subject to natural variation in finish and presentation as a result of the manufacturing process. The purchaser / builder / installer must ensure the Product meets aesthetic expectations prior to installation. Subject to the terms and conditions of this warranty, after installation of the Product, Weathertex is not liable for claims arising from aesthetic surface variations if such variations were, or would upon reasonable inspection have been apparent prior to the installation.
REMEDIES
9. Should the Purchaser’s warranty claim made under clauses 1 and/or 2 be valid within the relevant warranty period, then the remedy provided by Weathertex will be limited to either of the following (where possible) as chosen by Weathertex:
(a) Weathertex replacing the Products provided the claim is accepted by Weathertex and subject to such replacement Products being available in the manufacturing inventory at the time the claim is accepted by Weathertex Otherwise Weathertex will provide such replacement Products when they become available.
(b) Weathertex repairing the Products provided the claim is accepted by Weathertex.
10. Should the Purchaser’s warranty claim made under clause 3 be valid, then the remedy provided by Weathertex will be limited to Weathertex replacing the Accessory Products provided the claim is accepted by Weathertex and subject to such replacement Accessory Products being available in the manufacturing inventory at the time the claim is accepted by Weathertex.
Otherwise, Weathertex will provide such replacement Accessory Products when they become available.
11. The Purchaser is not entitled to any other remedies (that is apart from the remedies detailed in clauses 9 and 10) with respect to a warranty claim under clauses 1, 2 or 3.
12. This warranty cannot be relied upon by any other person and is not transferable.
13. Any replacement works will be conducted in accordance with the Building Codes and Regulations, Standards, and Council/Authority Regulator requirements applicable at the time of construction. Where the Building Codes and Regulations, Standards, and Council/ Authority Regulator requirements have changed after the Products were purchased, Weathertex will not be responsible for any costs associated with ensuring that the replacement works comply with the updated Building Codes and Regulations, Standards, and Council/Authority Regulator requirements.
14. Where an approved claim requires re-coating of the Products the Purchaser acknowledges and agrees to accept minor colour variations between the existing or original colour and the re-coated replacement Products or rectification areas.
15. Except as provided for in these terms and to the fullest extent permitted by law, all terms, statements, warranties and conditions whether express, implied, statutory or otherwise, relating to the Products, the Accessory Products, the subject matter of these terms or to these terms generally are excluded. Nothing contained herein excludes or modifies any rights the Purchaser may have under the Australian Competition and Consumer Act 2010 (or equivalent in other countries as determined by Weathertex in its sole discretion).
16. Recommendations made by Weathertex are based on good building practice and are not a complete statement of all relevant data. As the installation of the Products is influenced by and relies on factors outside the control of Weathertex, Weathertex assumes no responsibility for works/ systems used in connection with the installation of the Products and their suitability to satisfy relevant Building Codes and Regulations, Standards, and Council/Authority /Regulator requirements.
17. Unless specifically stated otherwise, the warranties under clauses 1, 2 and 3 apply only to Weathertex products purchased and installed according to the Weathertex Installation Guide in Australia, New Zealand and the Weathertex International Installation Manuals.
NEW ZEALAND CONSUMER LAW
18. Our goods come with guarantees that cannot be excluded under the New Zealand Consumer Law. You are entitled to a replacement or refund for a major failure and compensation for any other reasonably foreseeable loss or damage. You are also entitled to have the goods repaired or replaced if the goods fail to be of acceptable quality and the failure does not amount to a major failure.
19. The claimant (being the Purchaser) must make all warranty claims in writing. The claimant must be the original purchaser of the Weathertex product and must retain the purchase receipt (in relation to the purchase of the product) as proof of purchase. Proof of purchase must be provided to Weathertex as part of the warranty claim. Warranty claims (and claims for reasonable costs and expenses in making the claim as referred to in clause 18) can be addressed to Weathertex by post, fax or via e-mail as follows:
The Manager Weathertex Pty Ltd PO Box 21 Raymond Terrace NSW 2324 Ph: 1800 040 080 | Fax 1800 647 926 | warranty@weathertex.com.au
20. Weathertex will respond to all warranty claims. This response may include an inspection by a Weathertex representative of the installed Product. The claimant will bear all costs and expenses of making the claim. However reasonable costs and expenses will be reimbursed to the claimant in the event that the claim is accepted by Weathertex.
As of 12th March 2018