Before getting started Before you get started, you will need three pieces of information from the PHO (supplied at end of this document) 1. The Code to use 2. The GST incl amount to add 3. A Description to use (although you can modify to suit)
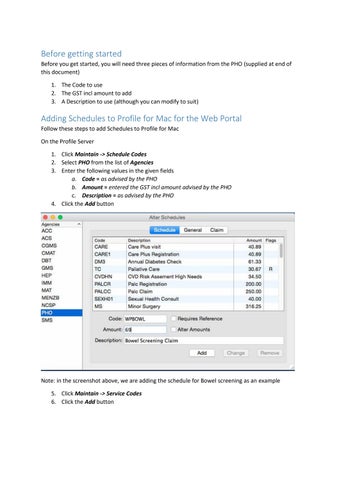
Adding Schedules to Profile for Mac for the Web Portal Follow these steps to add Schedules to Profile for Mac On the Profile Server 1. Click Maintain -> Schedule Codes 2. Select PHO from the list of Agencies 3. Enter the following values in the given fields a. Code = as advised by the PHO b. Amount = entered the GST incl amount advised by the PHO c. Description = as advised by the PHO 4. Click the Add button
Note: in the screenshot above, we are adding the schedule for Bowel screening as an example 5. Click Maintain -> Service Codes 6. Click the Add button