
Reflection & Exposition
VARUN GUPTA


GRID SYSTEM
Columns Rows
Column Spacing
Row Spacing
At the bottom, giving first look glance, covering 2 rows
In the right side of each document Always following the grid system Does not apply in case there is an image placed.
At the top, giving first look glance, covering 1 rows
In the lest side of each document
1 image with text, and the 2nd page only for images
Casadia, also known as Cascadia Code, is a mono-spaced font that is often praised for its design qualities, especially in contexts where clear readability of code and technical details is essential.
CASADIA SEMI LIGHT ITALIC
CASADIA SEMI LIGHT CASADIA SEMI LIGHT ITALIC
Elegantly lightweight, perfect for subtle emphasis and fine detail.
Casadia Code
Casadia Extra light
Casadia Light
Casadia SemiLight
Casadia Regualar
Casadia Semi Bold
Casadia Bold
Casadia Extra Light Italic
Casadia Light Italic
Casadia Semi Light Italic
Casadia Italic
Casadia Semi Bold Italic
Casadia Bold Italic
aCasadia Code
CASADIA BOLD
Strong and assertive, ideal for standout headings and impactful statements.
Gracefully slanted, enhancing your text with a touch of sophistication.
CASADIA BOLD ITALIC
Bold yet restrained, offering clarity with a lighter touch.

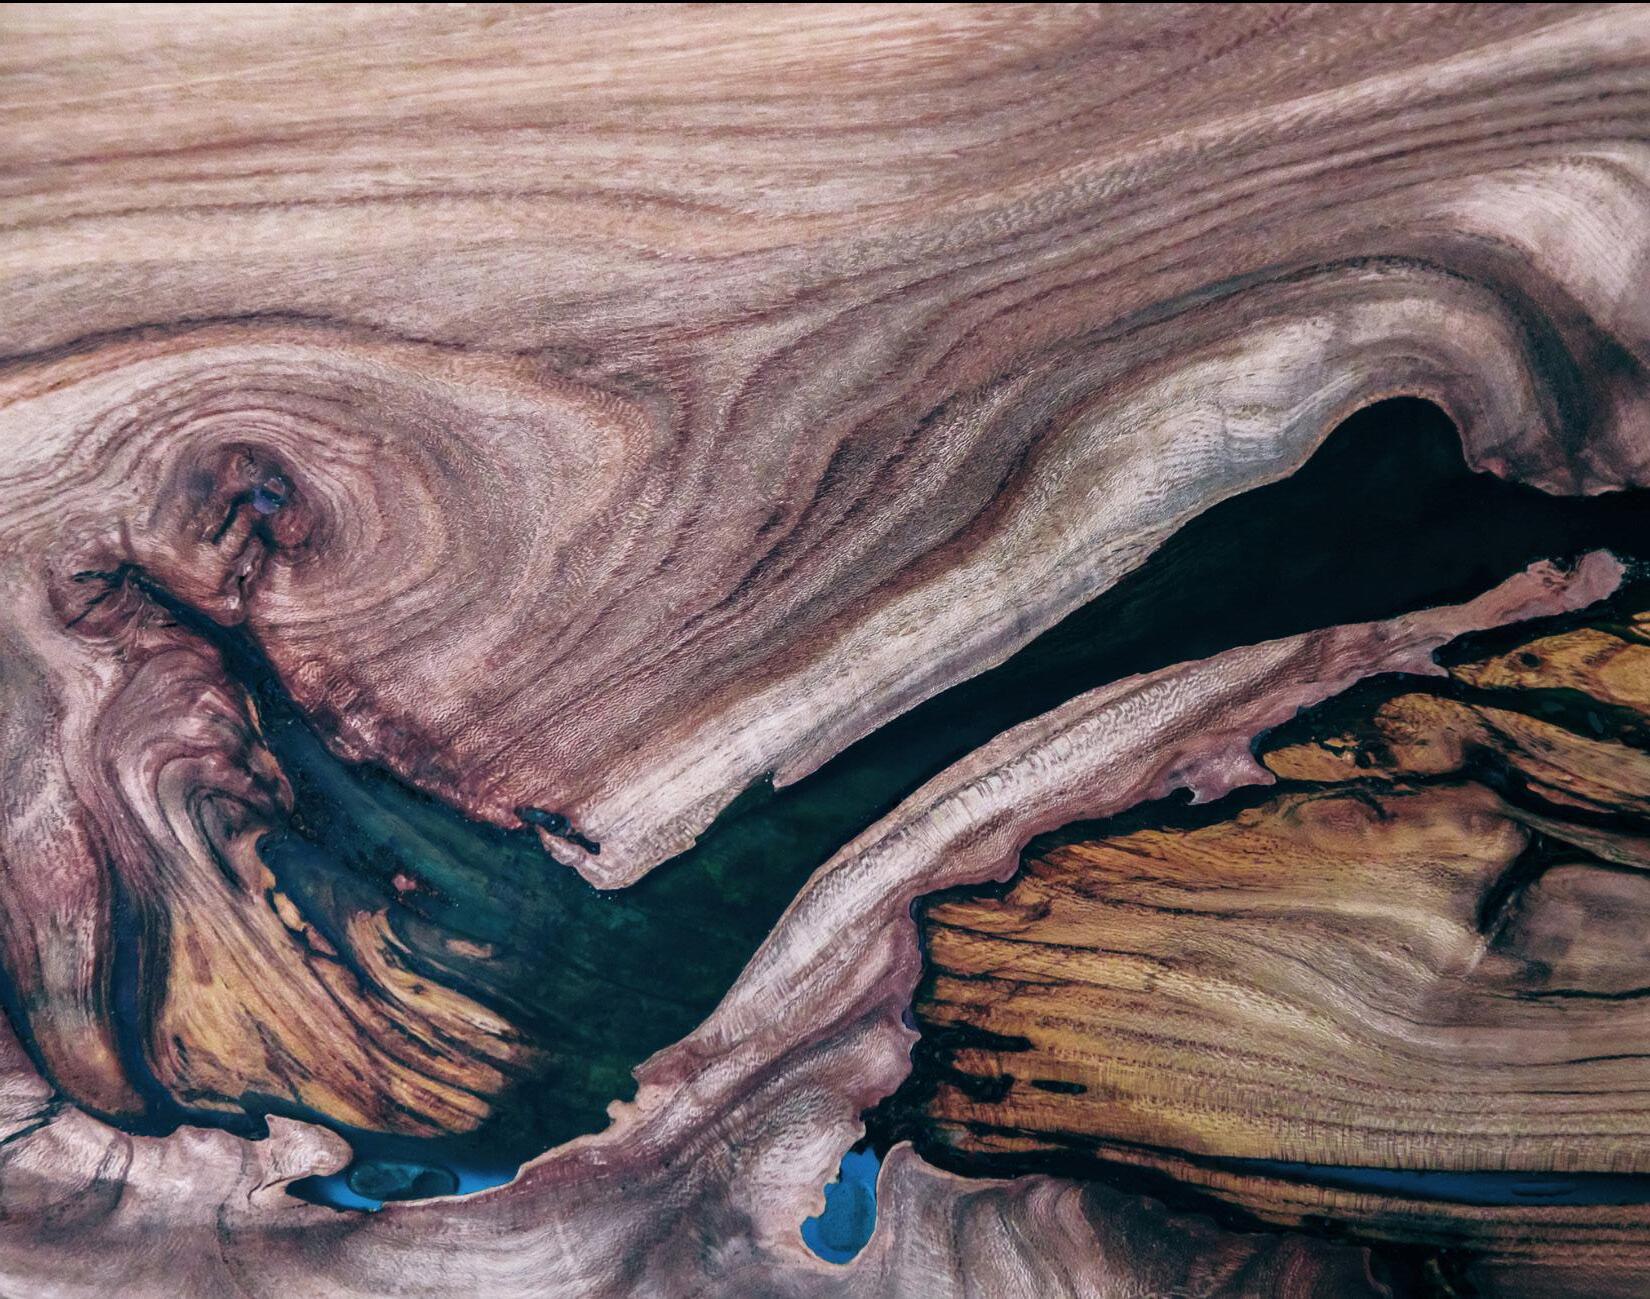


I was highly keen on getting my modular furniture made, but I had many challenges. Discussing all the challenges point by point, I would like to point the first one, which was “how to make the amalgamation of Wood and Epoxy modular.” Going through various hooks and nooks, I came across 4 Joint methods, I would like to mention all of them: -
• Threaded Inserts and Bolts: You can install threaded inserts into the wooden pieces. These allow you to screw in bolts from the epoxy side, which can be tightened to hold the pieces together and unscrewed when you need to separate them.
• Dowels and Dowel Nuts: Use wooden dowels aligned with dowel nuts (a type of threaded insert) for alignment and strength. This will require precise drilling but can be a strong and invisible joint when assembled.
• Metal Connectors: Depending on the design, you could use flat metal plates or angle brackets on the underside or backside of the leg, attaching them with screws. These can be removed when necessary.
• Knock-Down Hardware: This specialized furniture hardware is designed for creating strong joints that can be easily taken apart. Cam lock connectors are a common type of knockdown hardware used in flat-pack furniture.
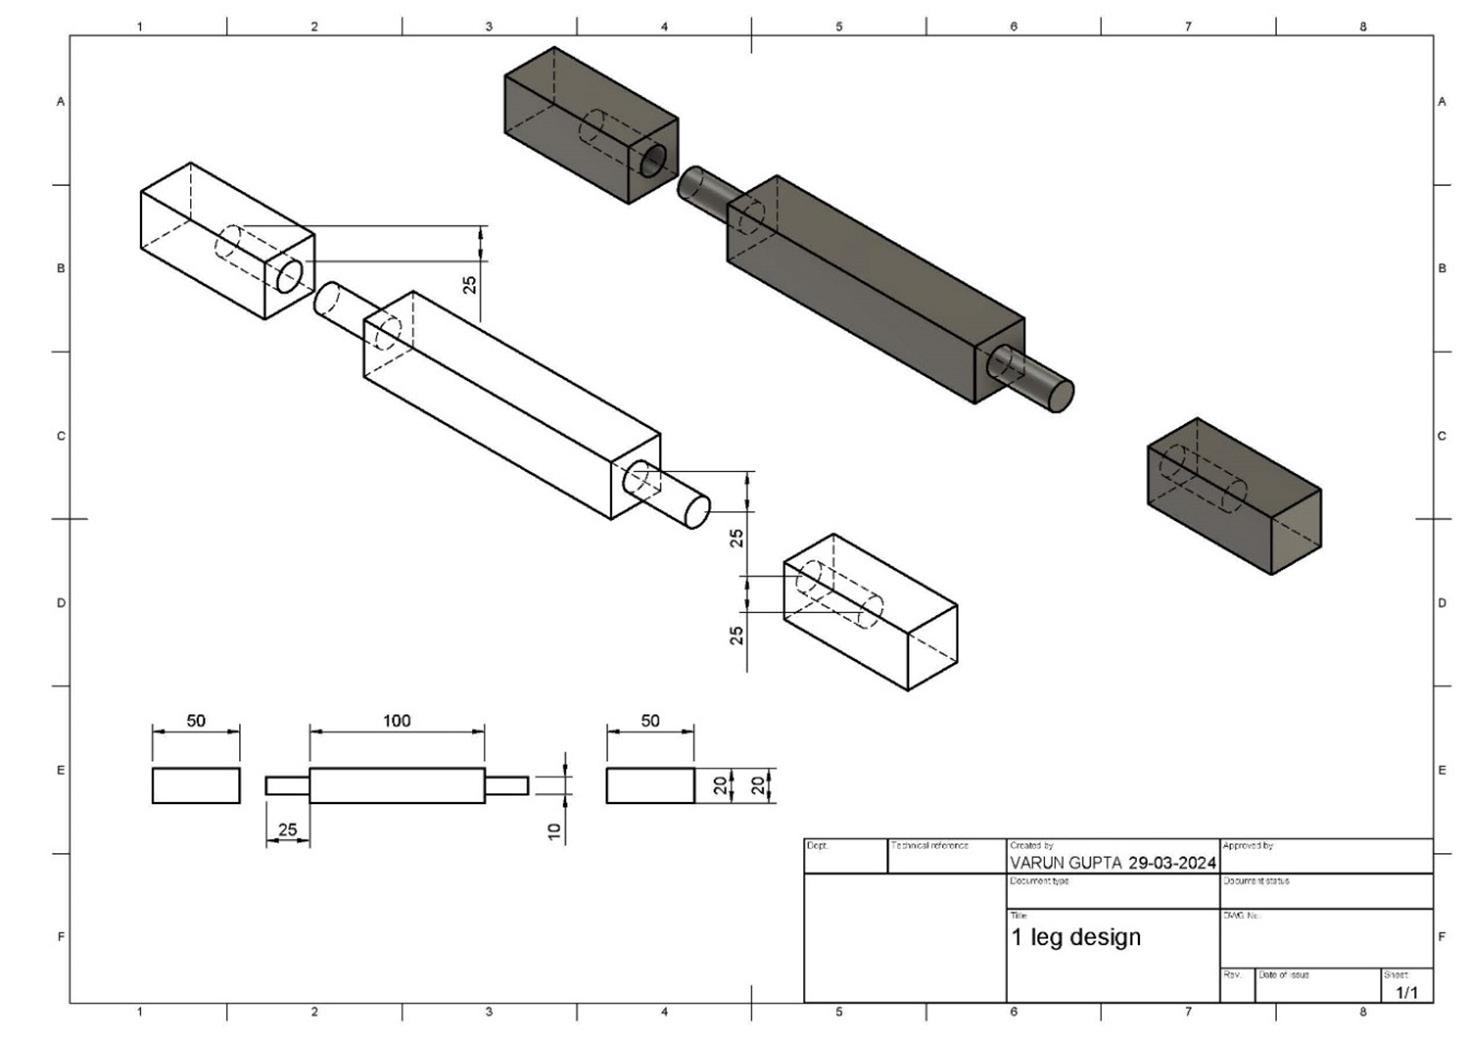

Fig.9 Design Itterations for failure 1
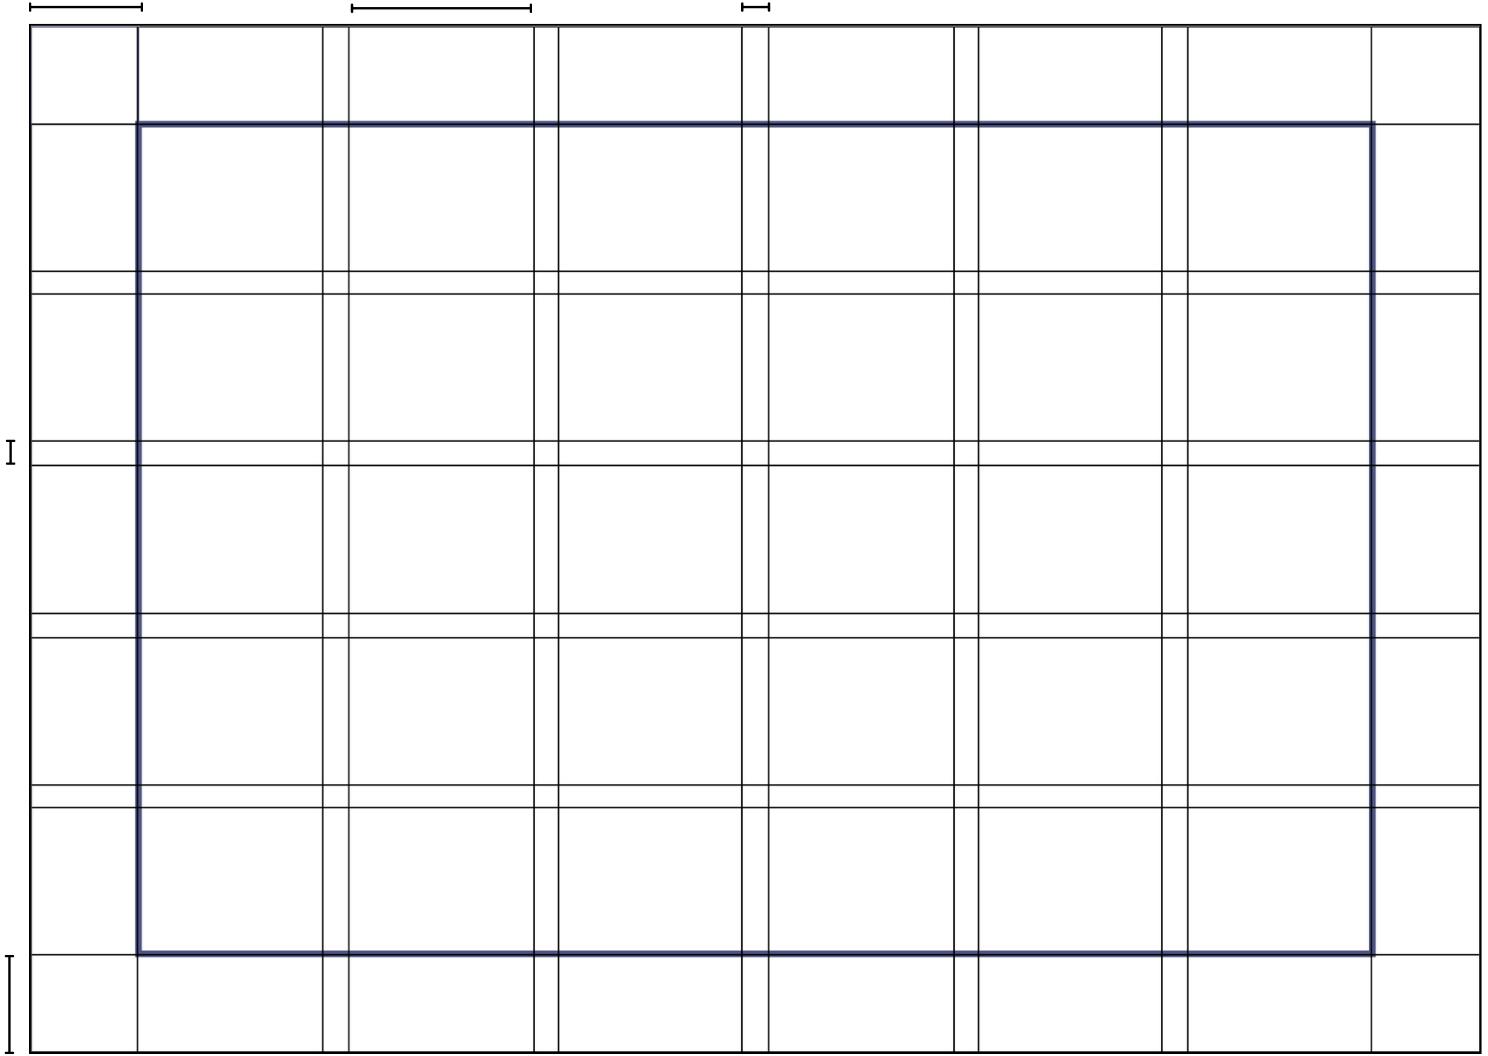
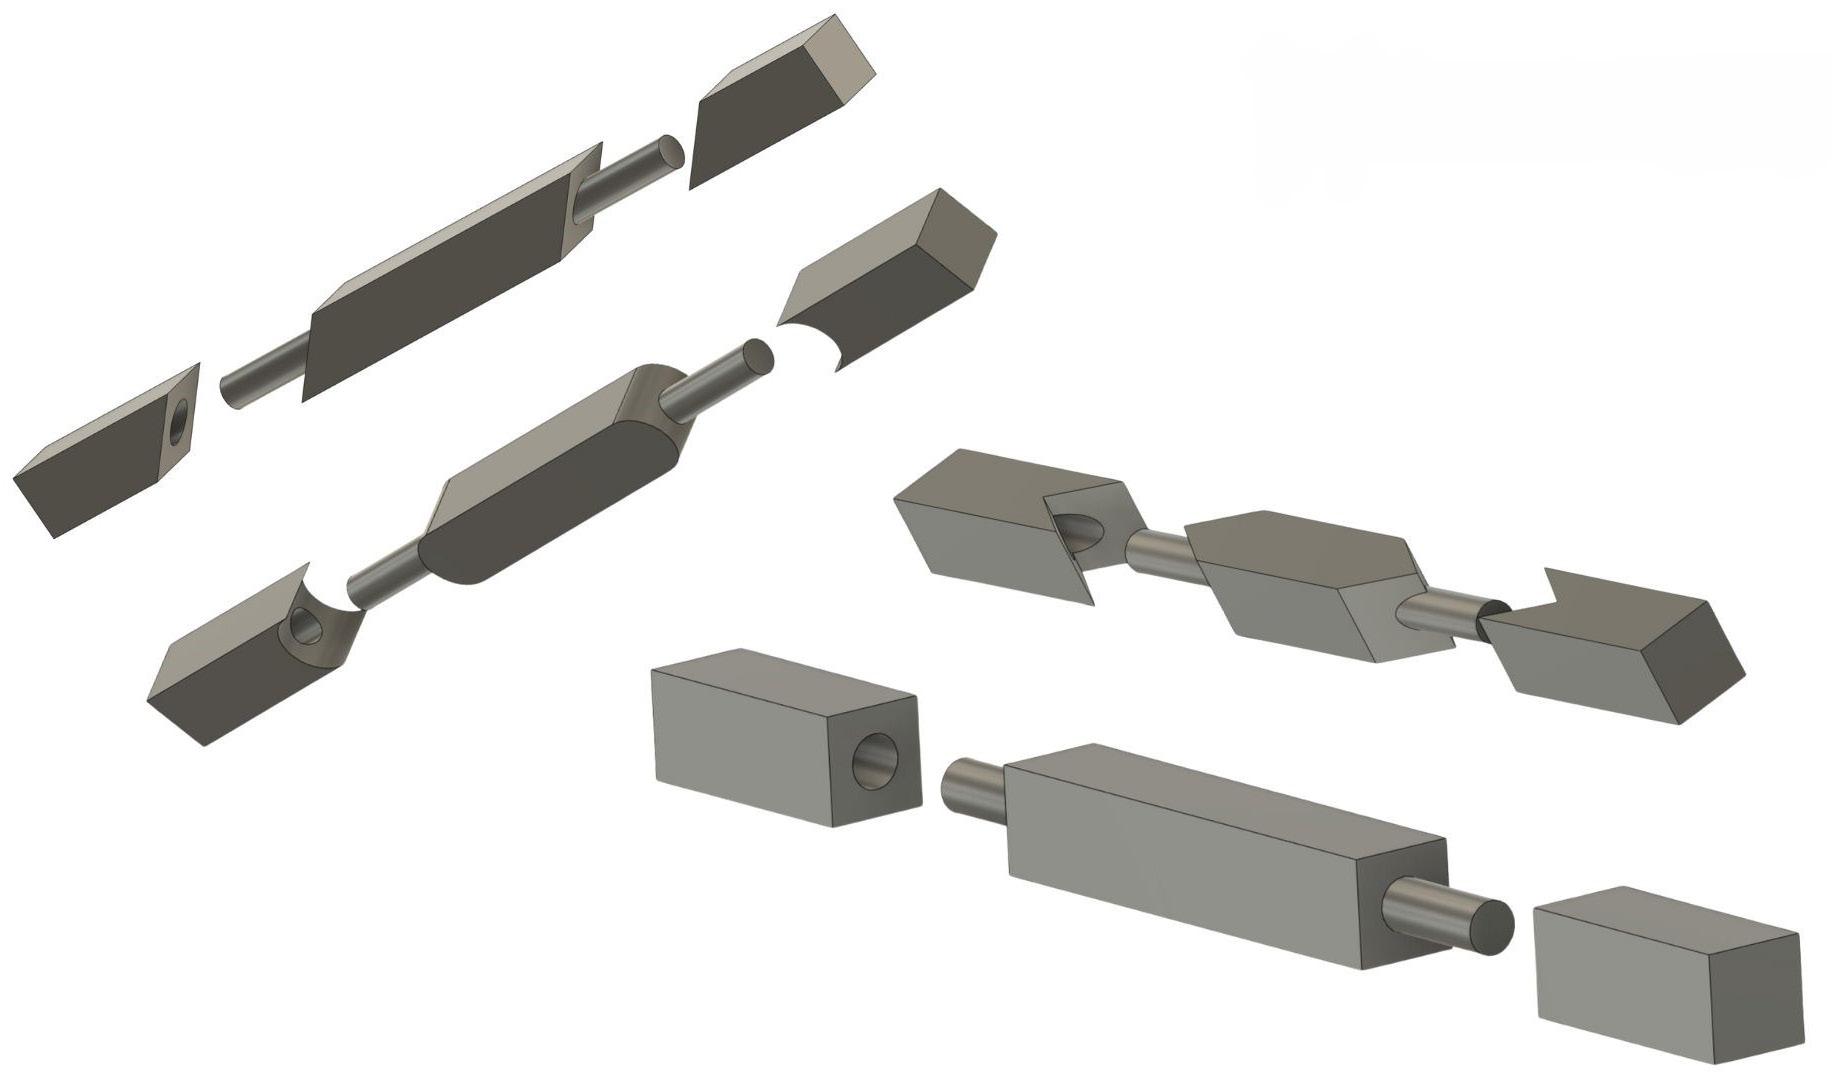
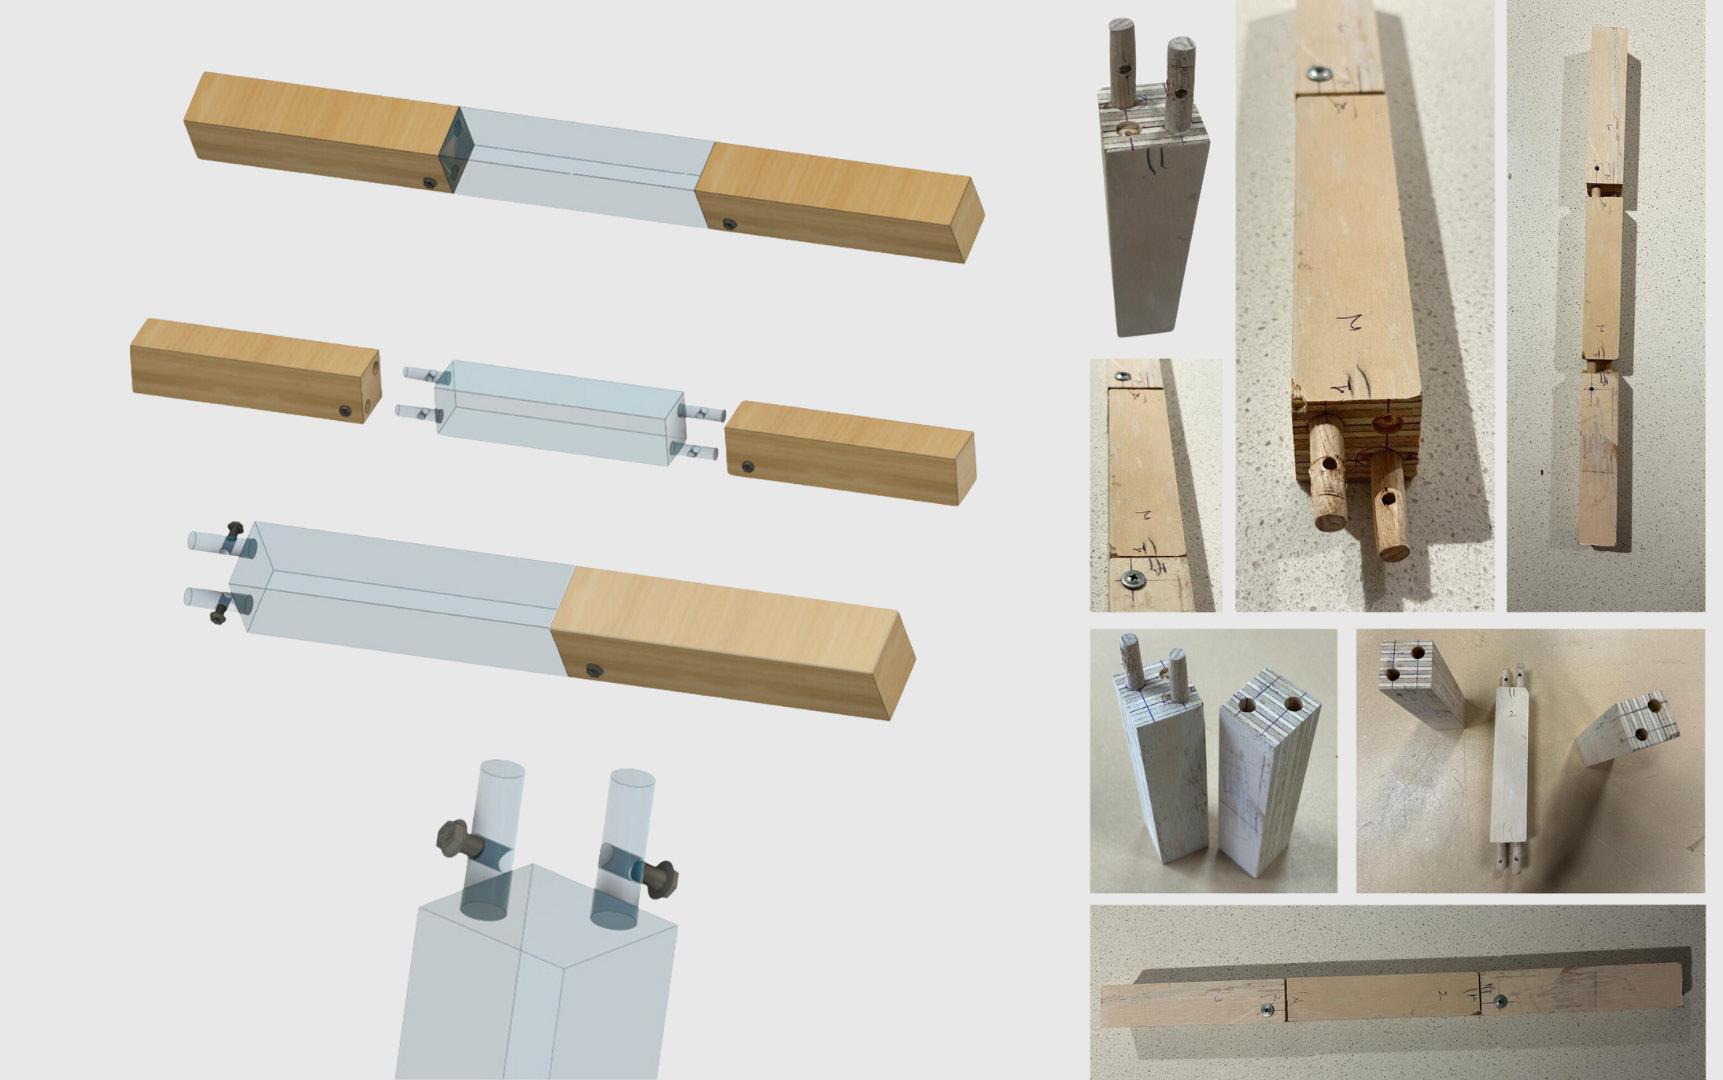
From the Dowel and Dowel Nuts method, I thought of getting a dowel attached to the epoxy frame, with holes in wood frames, and the epoxy dowel can be casted with Silicone, and from there I innovated prefitted dowel made out of epoxy in epoxy, thus creating a roller like structure, in which 2 pieces of timber with 1 separate hole in each, would go in this epoxy roller. The roller can be further customized in various designs, depending on the needs and trend of the society. The creation of a roller that would slide in 2 pieces of wood, was a major challenge from me. At first, I had 4 designs of epoxy roller, and the wood pieces, which were these following: -
2 of the designs were really hard to prototype, so I was convinced by one of the lab technician, to get them made through CNC (Computer numerical control,) thus I got these CAD files ready, and applied for getting them CNC. Upon collection day, I was told that my designs cannot be CNC- FAILURE 1

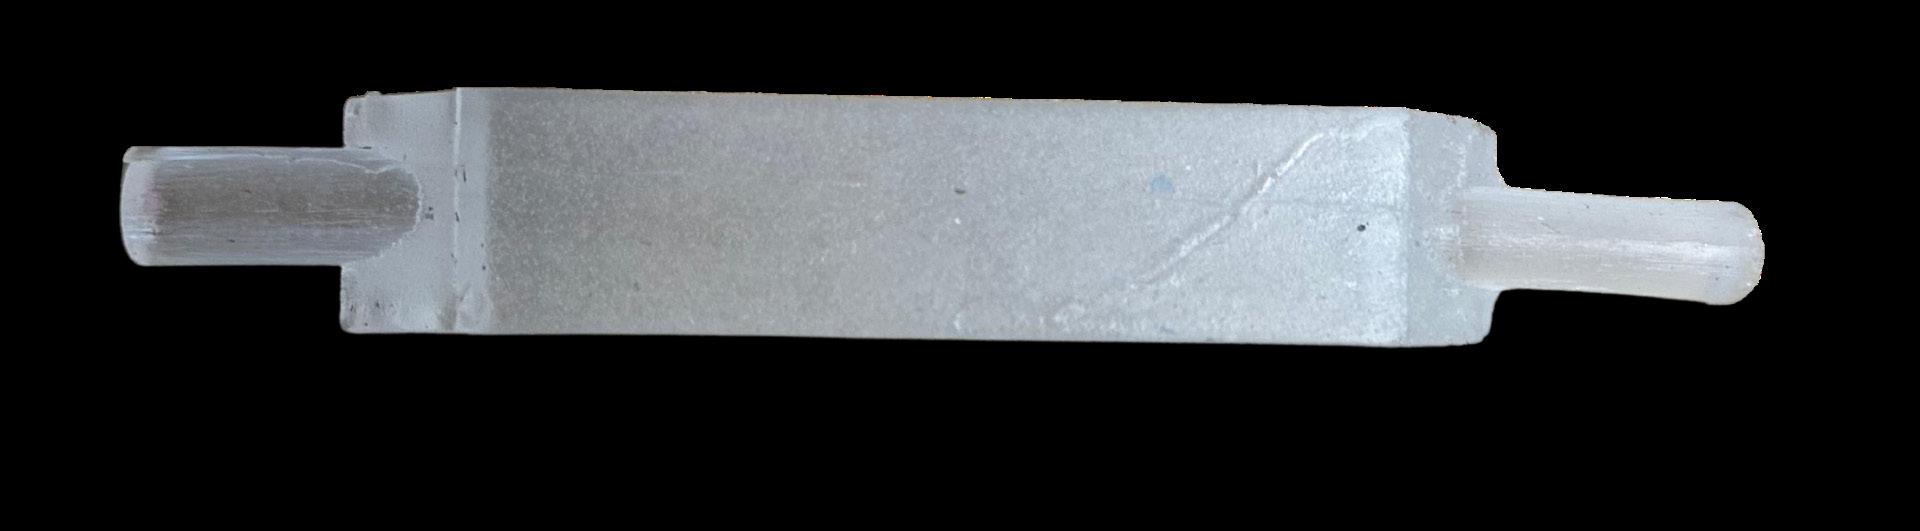
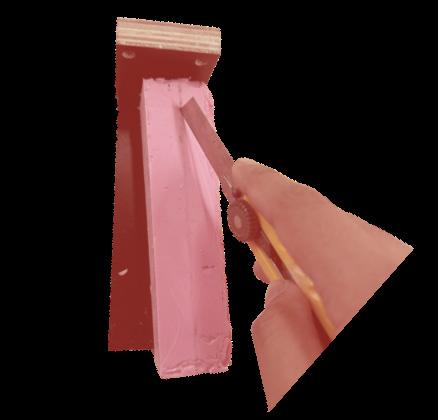
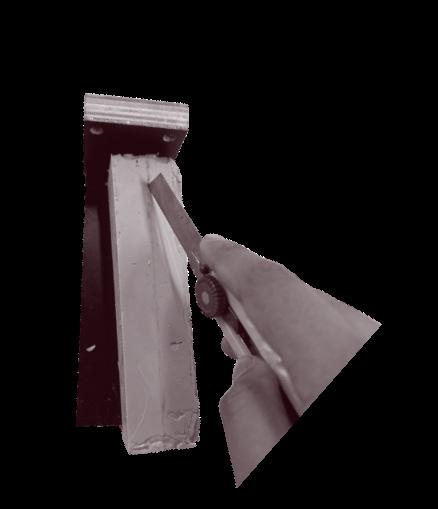
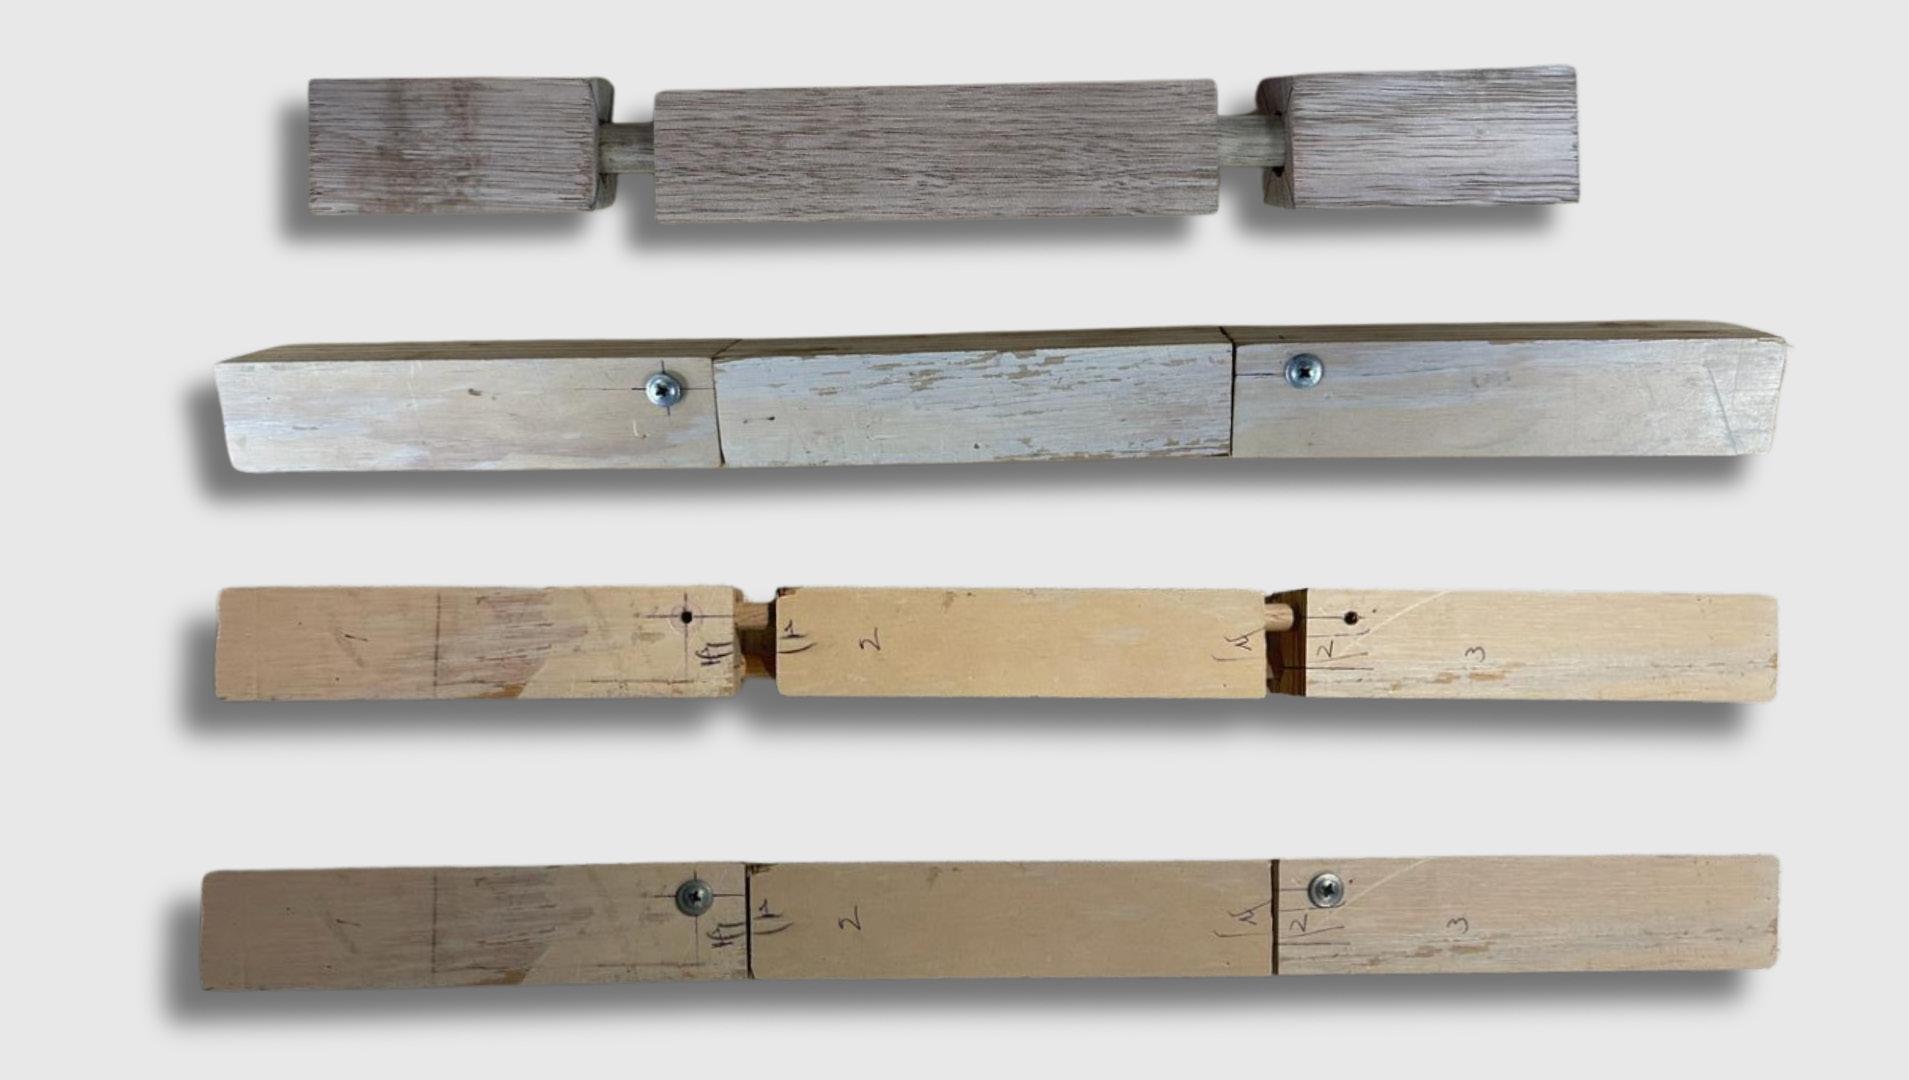
My designs were ready, and I was well determined to trust on my prototyping skills, and I started to create my wooden rollers, which I will further use to in my silicone mold, to create epoxy rollers. I started with Black wood timber, and created these figures: -
Now the challenge was to drill, in these red fittings, I was supposed to drill a circle of 10mm, and drill 25mm inside the wooden block. For this I used the help of machine drill, I inserted a 10mm slot, and set the drill distance to 25 mm, thus giving me a perfect hole. After this I inserted the 10mm domino stick inside the hole, and cut the stick at the distance of 70mm (25mm inside the red fitting + 45mm extra which will go in the other wooden fitting). Now, I inserted a 10mm slot, and set the drill distance to 45 mm, and made the holes in the other 2 wooden parts. After the whole process, I had all my parts ready, and was ready to check the connection, upon putting all the parts together, parts were fitting well, but all the parts started revolving, thus not creating a one-piece legFailure2

Now I had to think of a lock, that will help connect and keep all the 3 fittings together. I looked at some of these joints/locks and here are some of these: -
• Mortise and Tenon: Consists of a square or rectangular post (tenon) fitting into a matching hole (mortise).
• Scarf Joint: Consists of a square or rectangular post (tenon) fitting into a matching hole (mortise).
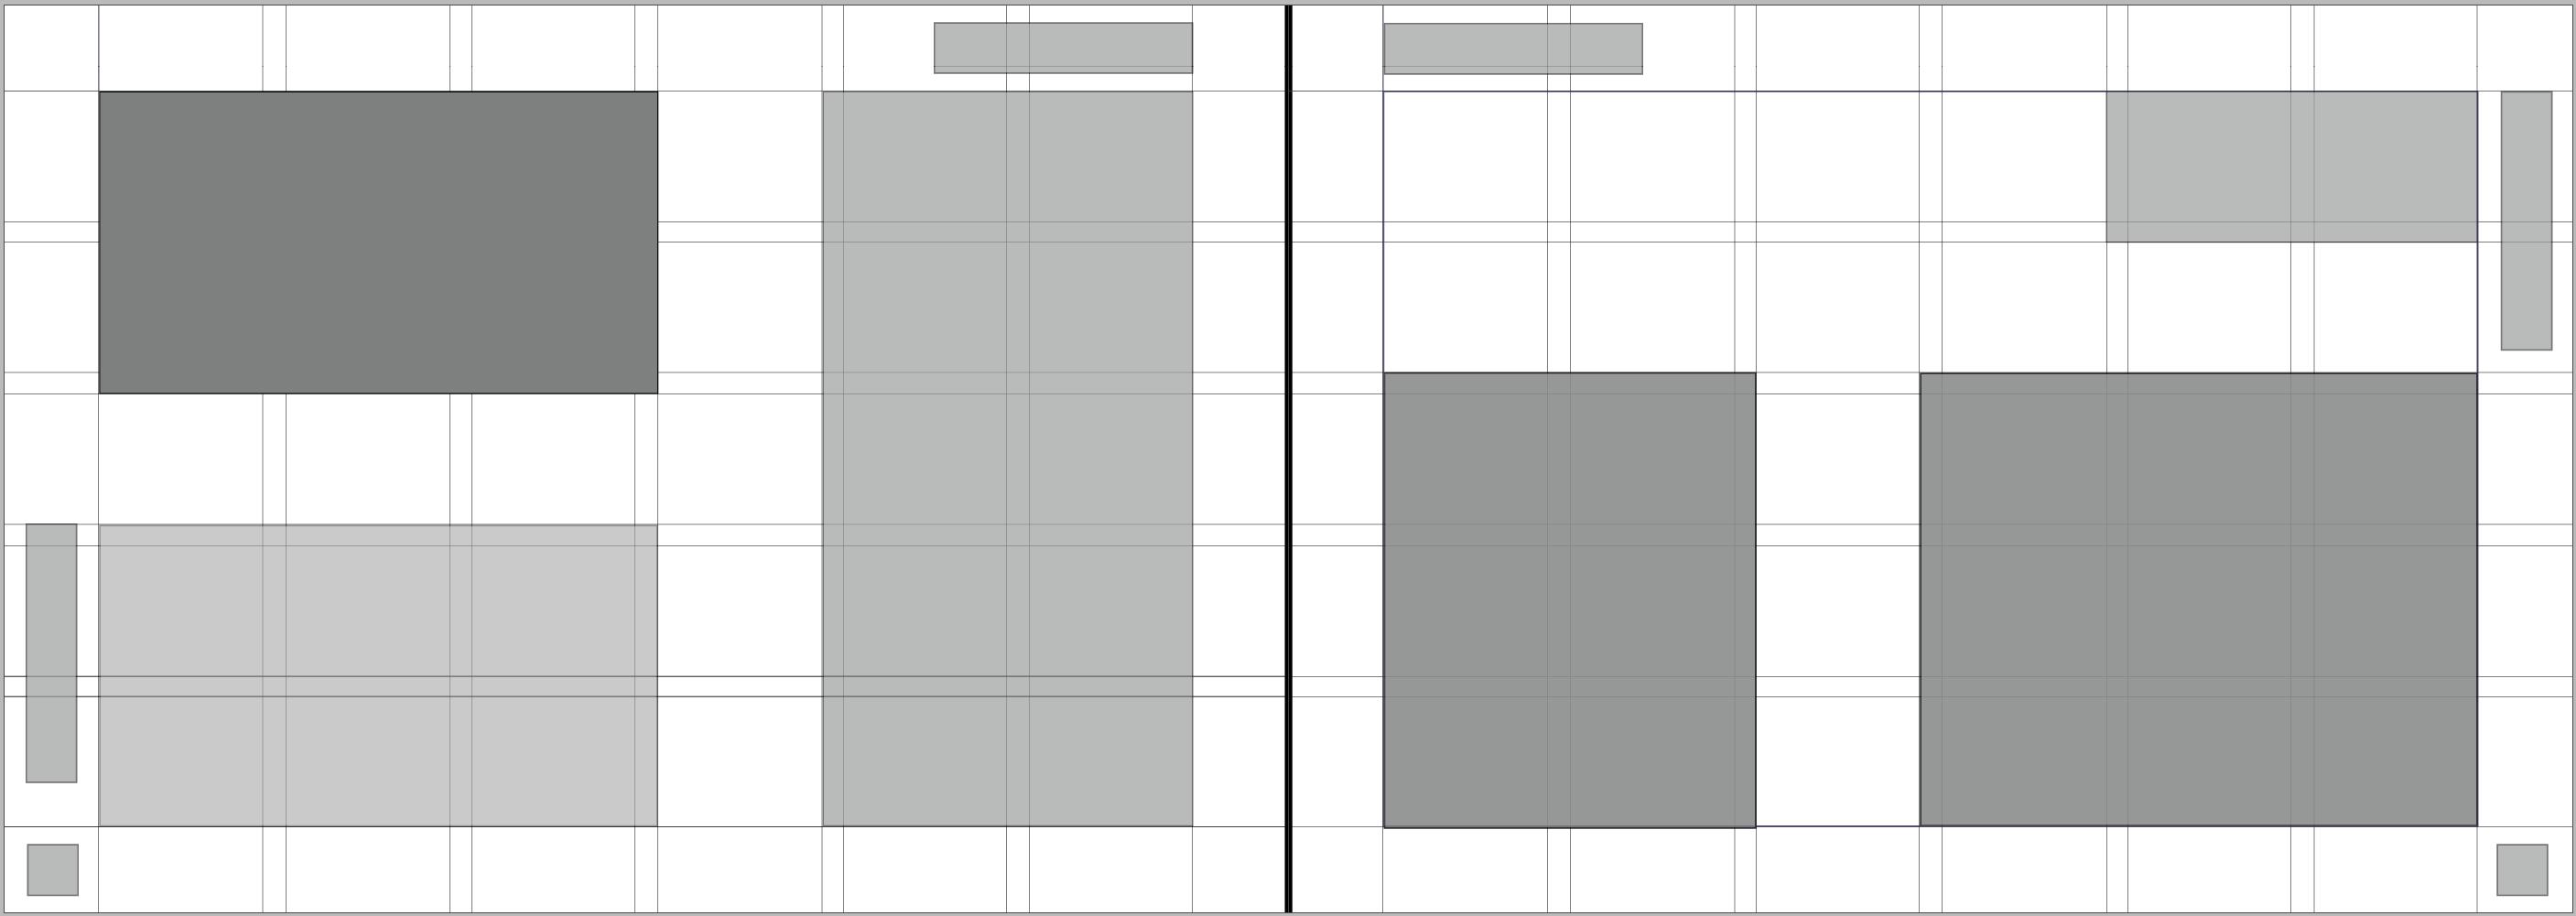
From this research on joints, I got a basic idea on joints and how does it work. I took the Mortise and Tenon joint as my base concept, and decided to change my original joining system a bit, and replaced one dowel with 2 dowels, followed by a insertion through the wood into the dowel, making the 3 piece leg compact, not rotatable, and sleek. 2 bolts on each side will be added to make the 3piece leg into one. Now, the leg pieces can be taken apart easily, and can be joint back together easily, thus making it a modular design. This concept came out to be a failure as well, cause according to the feedback given by the technicians, the middle epoxy component cannot be moulded, and even if I somehow moult it, the dowels won’t last and won’t hold timber together for a longer time. – Failure 3
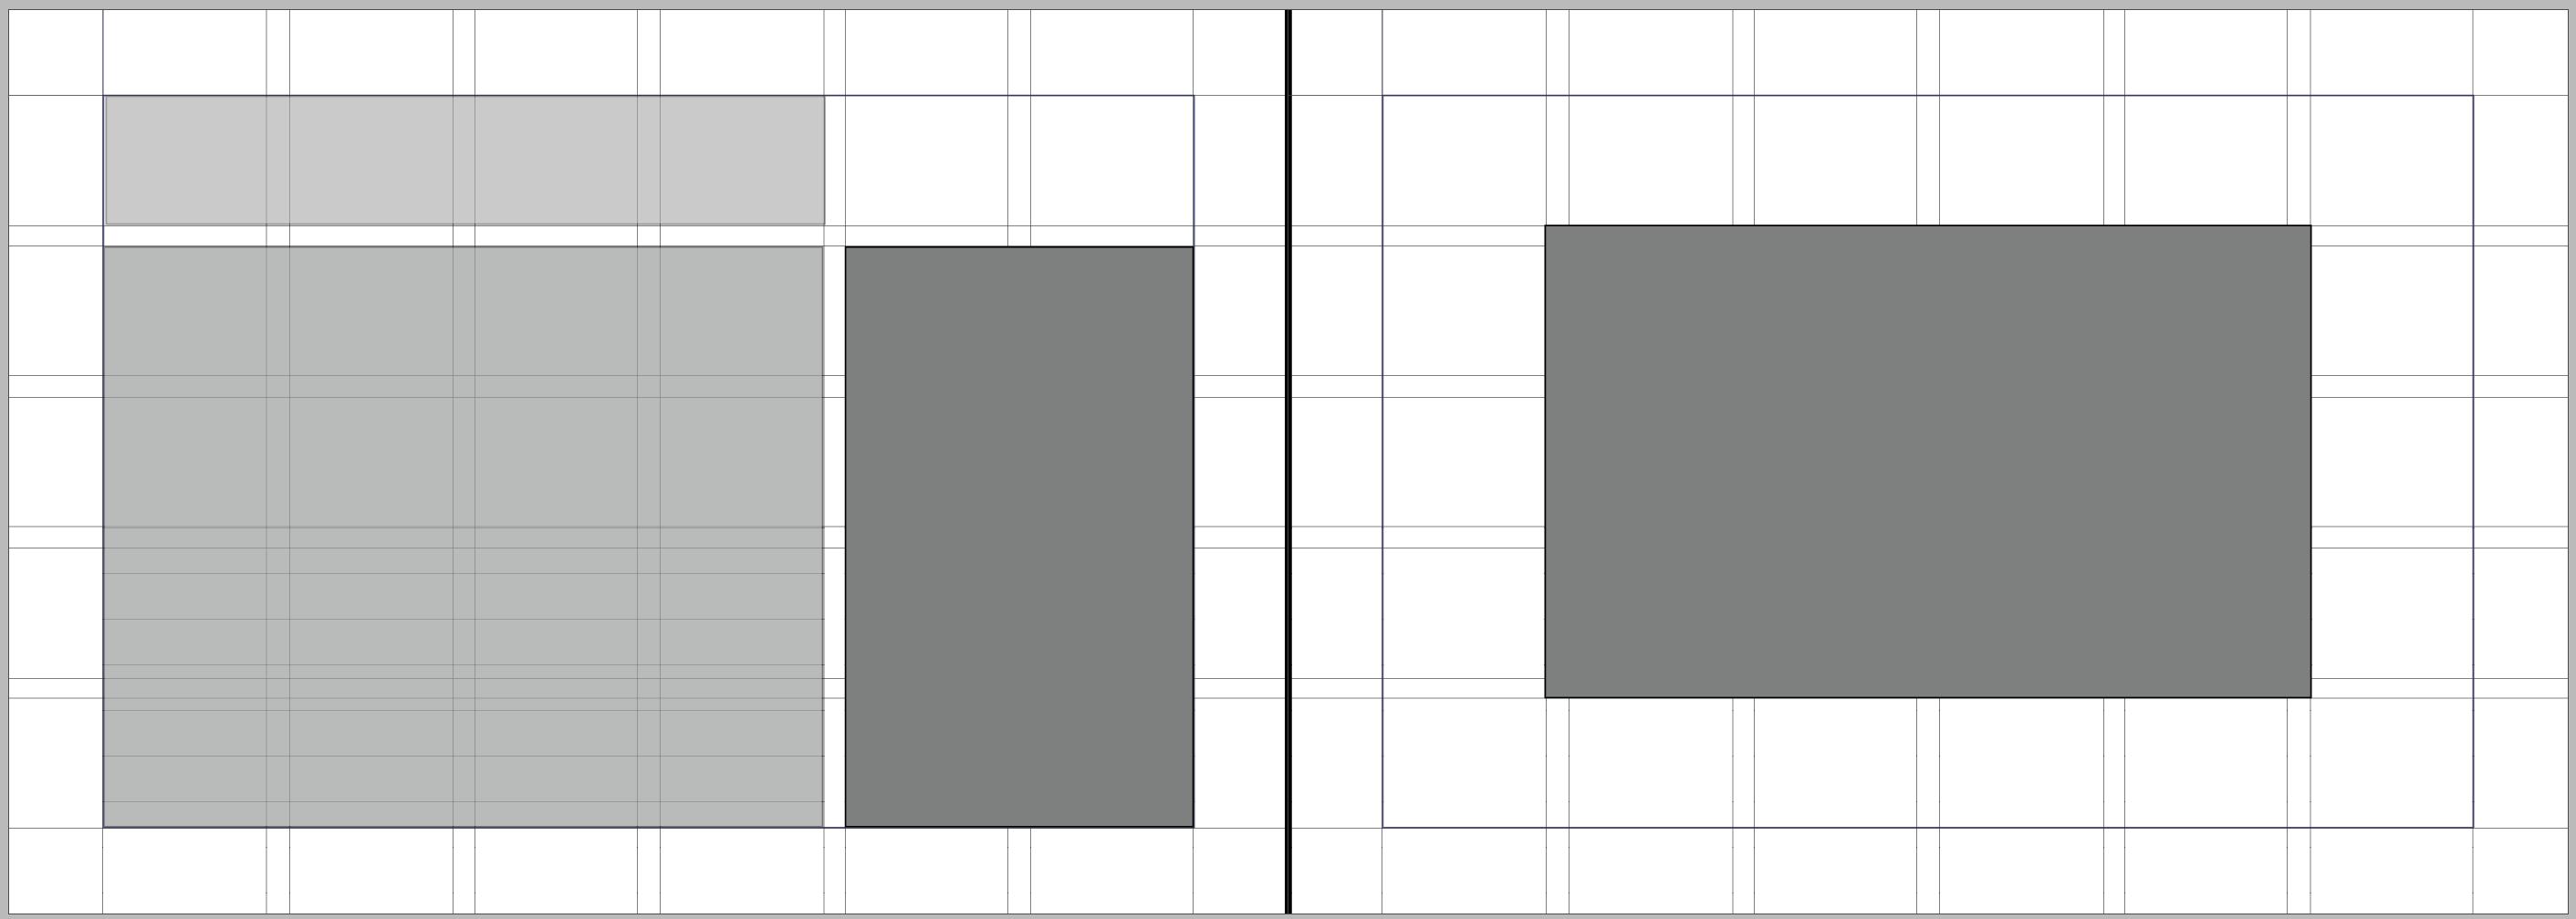
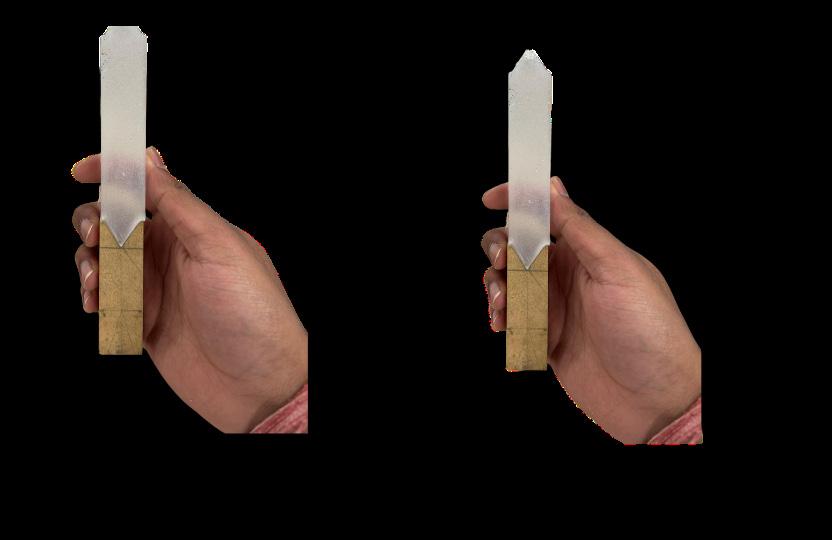
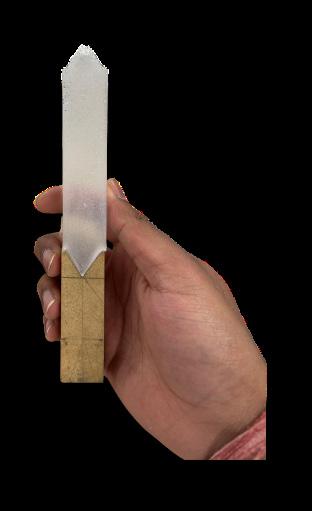
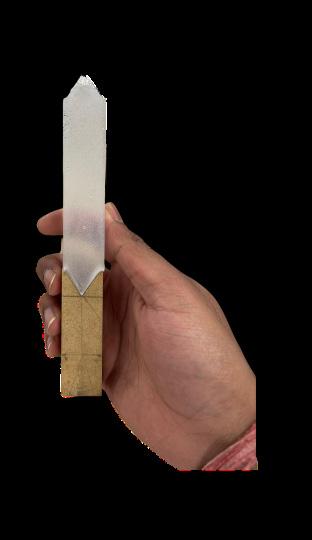
After keen research and lots of ideations, I landed up with success, I changed my design to triangular ends, to make the look more appealing, and to stop the rotation of the modular epoxy component.
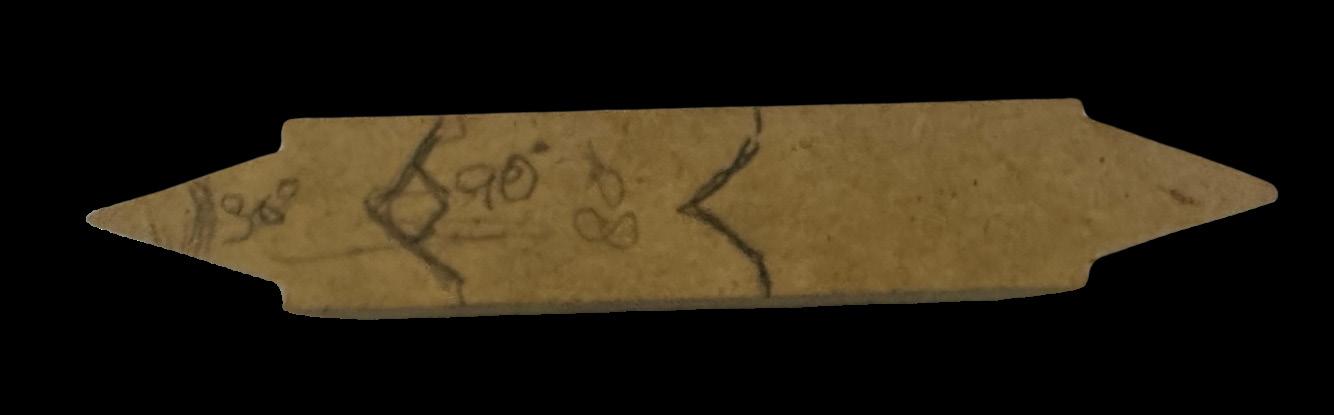
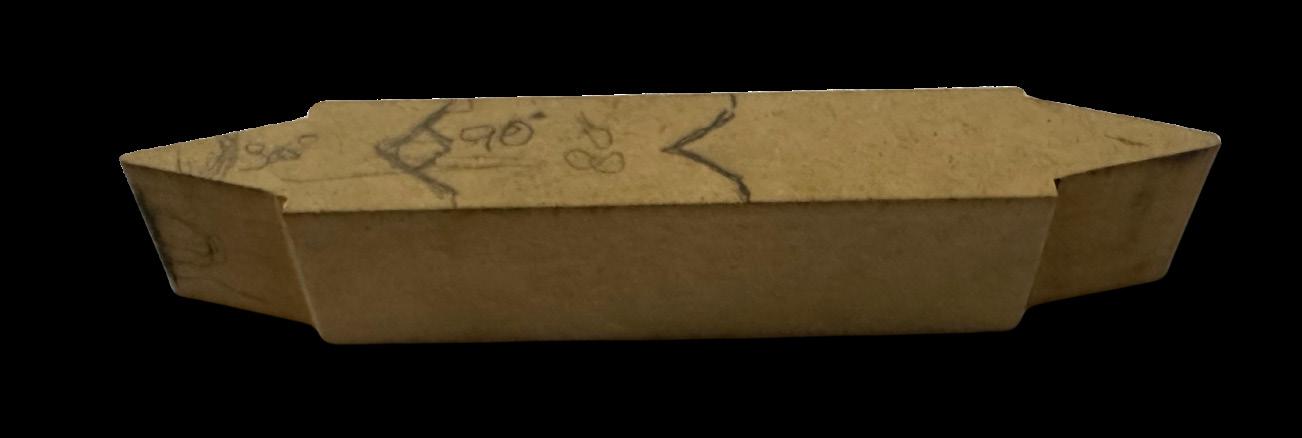
Next task was to crate holes in it, in which I would inserting dowels to complete the design. Since the edges were triangular, drilling directly from top would have resulted in breaking the triangle from top. So I was suggested by my technicians to make mock cutouts for top triangle, thus making a square shaped top, which can be used for drilling and can later by thrown away, once the hole is made.
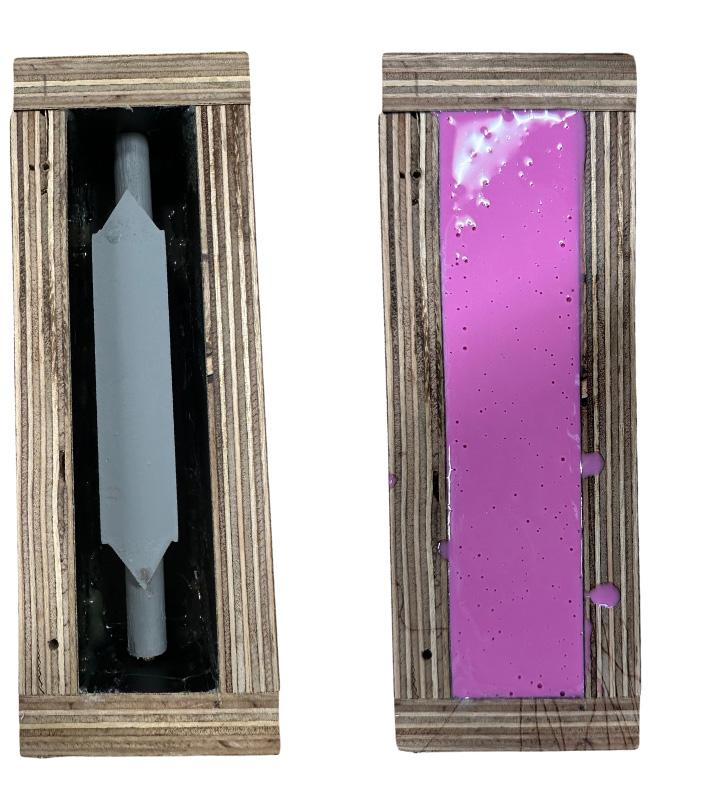
The cutout was joined to the original body by tape, and a hole was drilled in it, later a dowel was inserted to complete the component. Now the component was ready, the next step I had was to get the silicone mould ready. I made a wooden box, that worked as my mould cage, and got the Barnes Pinky seal.
Once the mould was ready, and screwed in, the last step was to spray proof the component from moisture, and for that I used the sealant.
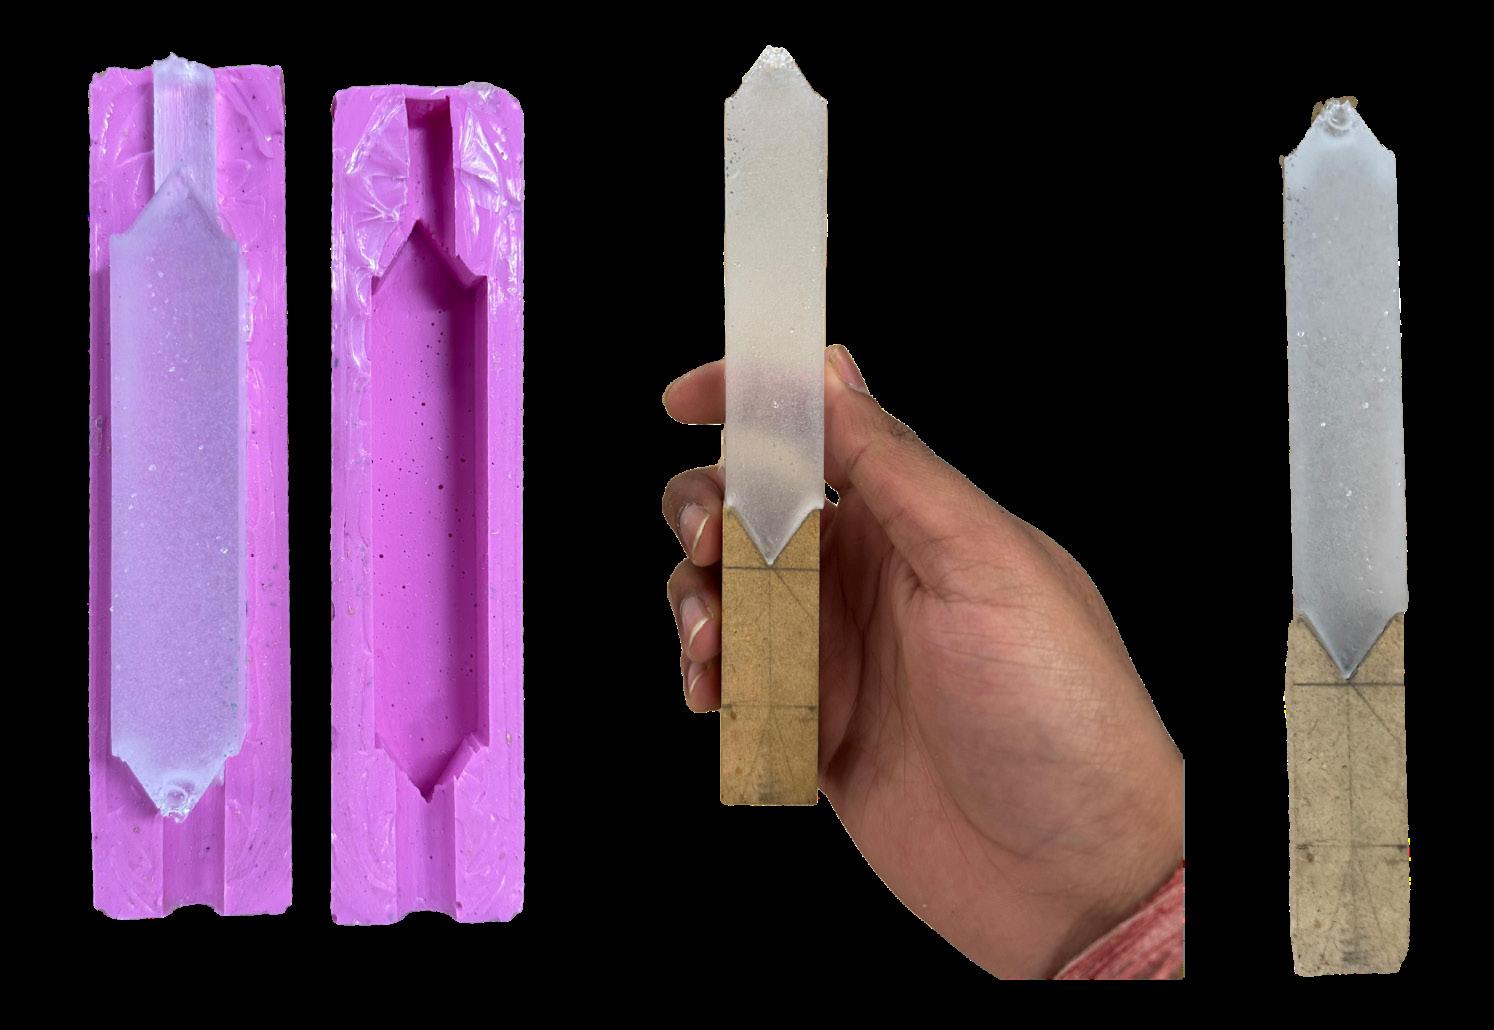
Now the component is sealed, and ready to be filled with the Pinky seal. After 1 hour, the cast dried up, and the results were wonderful. I unscrewed the wooden mould, and got a block of hardened Pinky Seal, I carefully cut it into half.
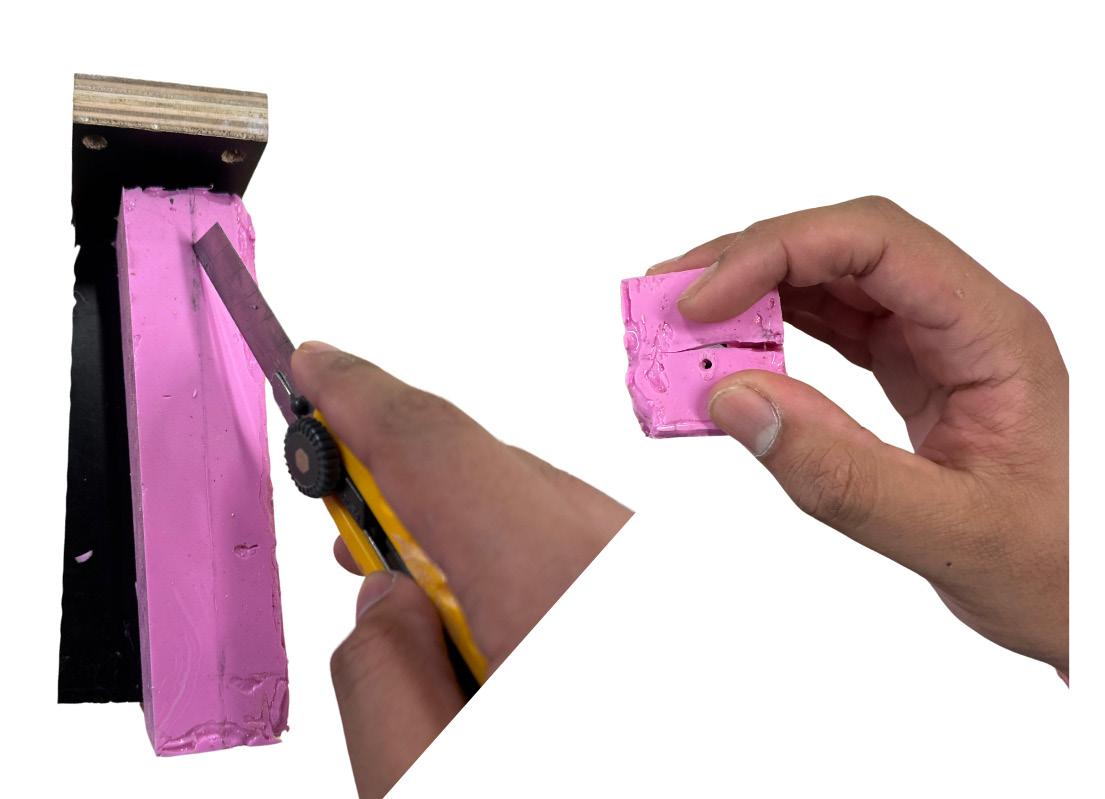
When I opened up the cast, I got a perfect mould to lay down my epoxy cast.
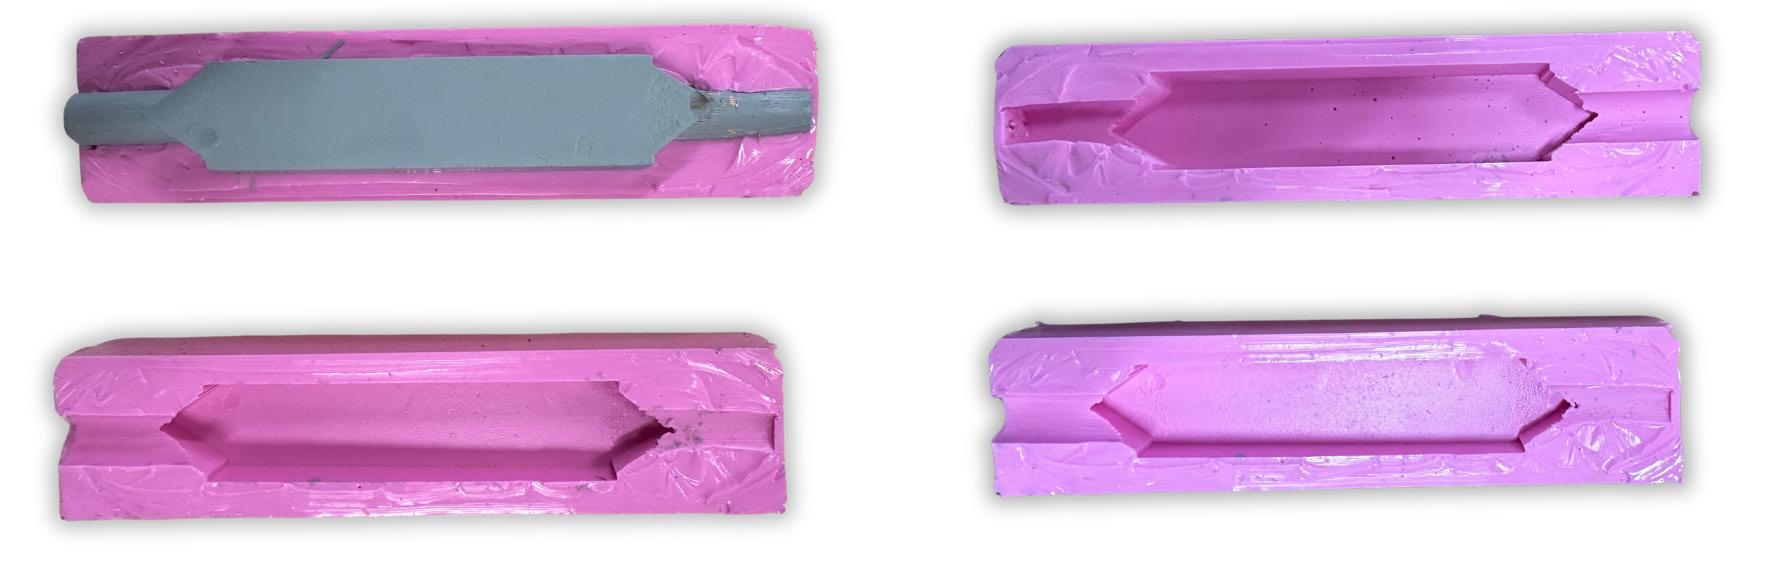
I re-screwed the cast in the wooden cast, sealed one of the side holes, and made the other side hole bigger, to fill in the epoxy, and poured in 250ml of epoxy.
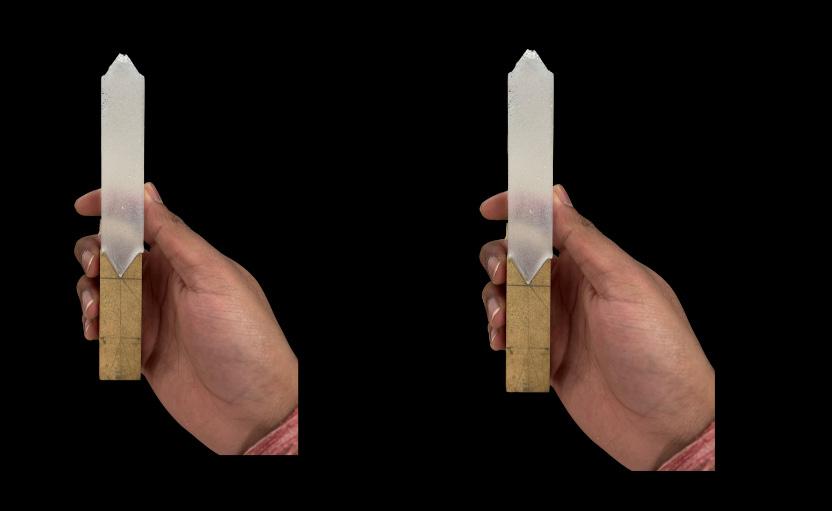
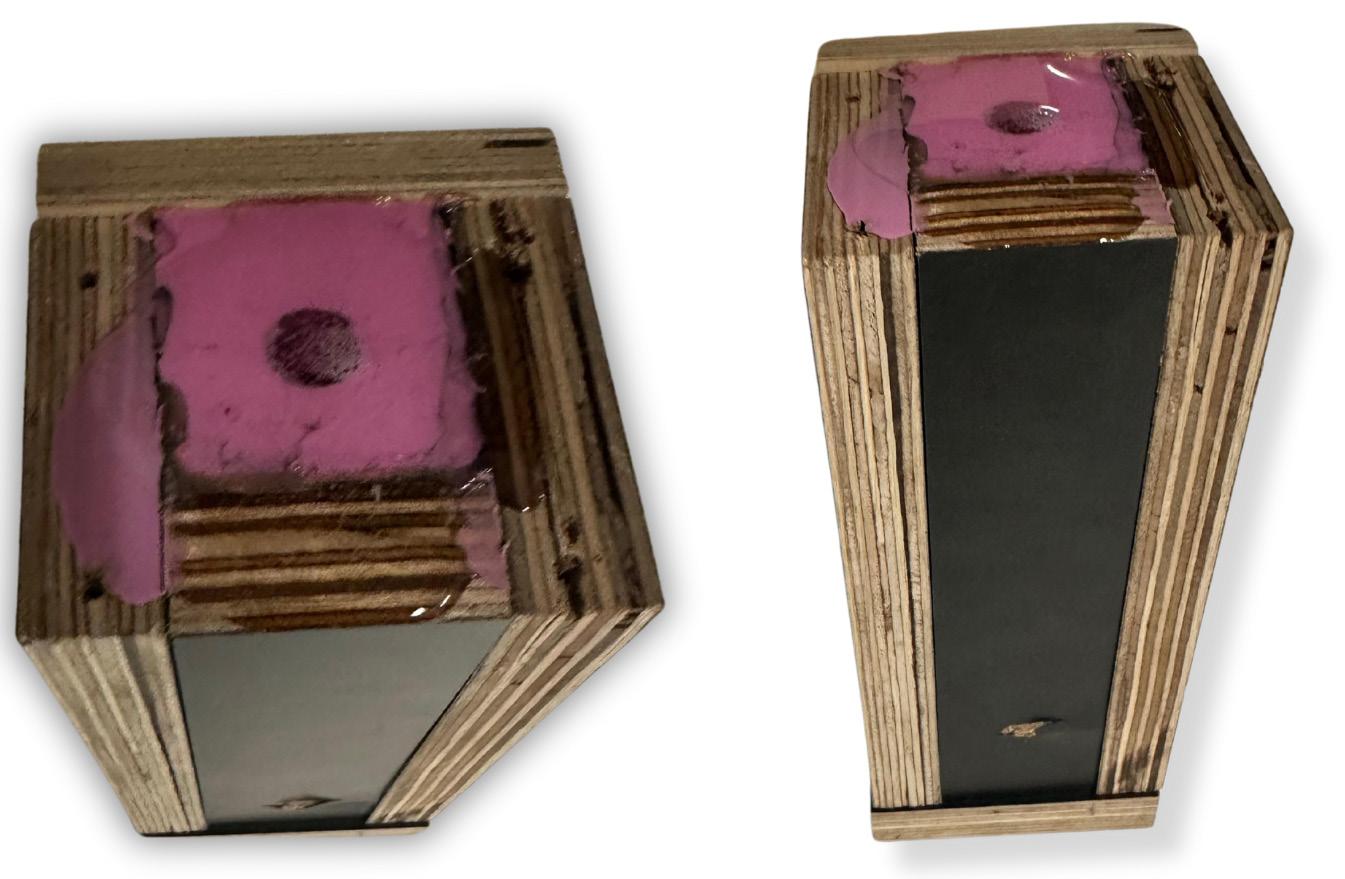
After 24 hours of drying, the final result came to be a first of a kind modular epoxy leg component.
There was a leakage in the mould, hence one side of the component didn’t cast as I wanted it to be. So, I had to re-screw the wooden mould again, and had to pour another 50 ml of epoxy. I had to wait for another 24 hours, but at last, I got the entire component, in the manner I wanted it to be. – Success 1