VADEMECUM CERAMIC TILES

ABOUT US
After many years of presence on the Polish and international markets we have become – according to many rankings – the leaders of the most dynamically developing production companies in Europe. We manufacture unique porcelain and clinker tiles that fit the highest standards – both in terms of design and quality.
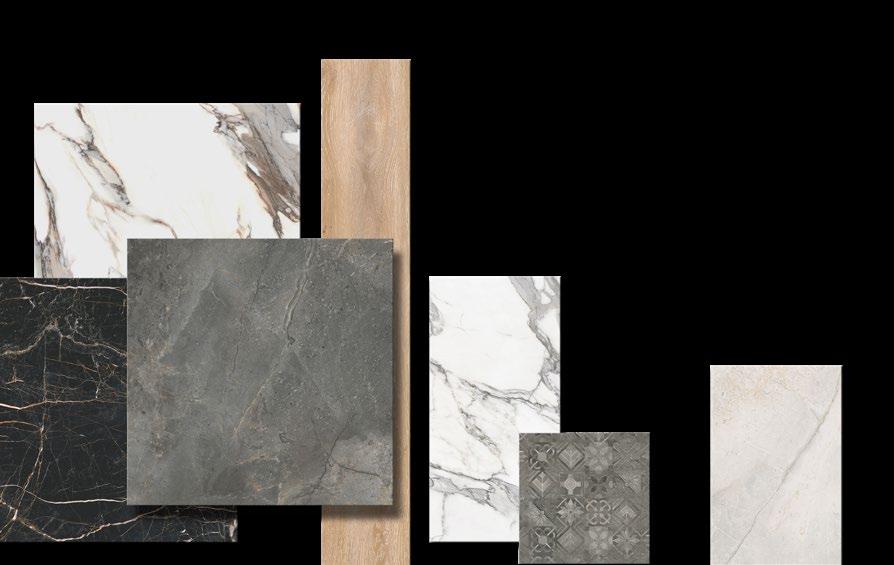
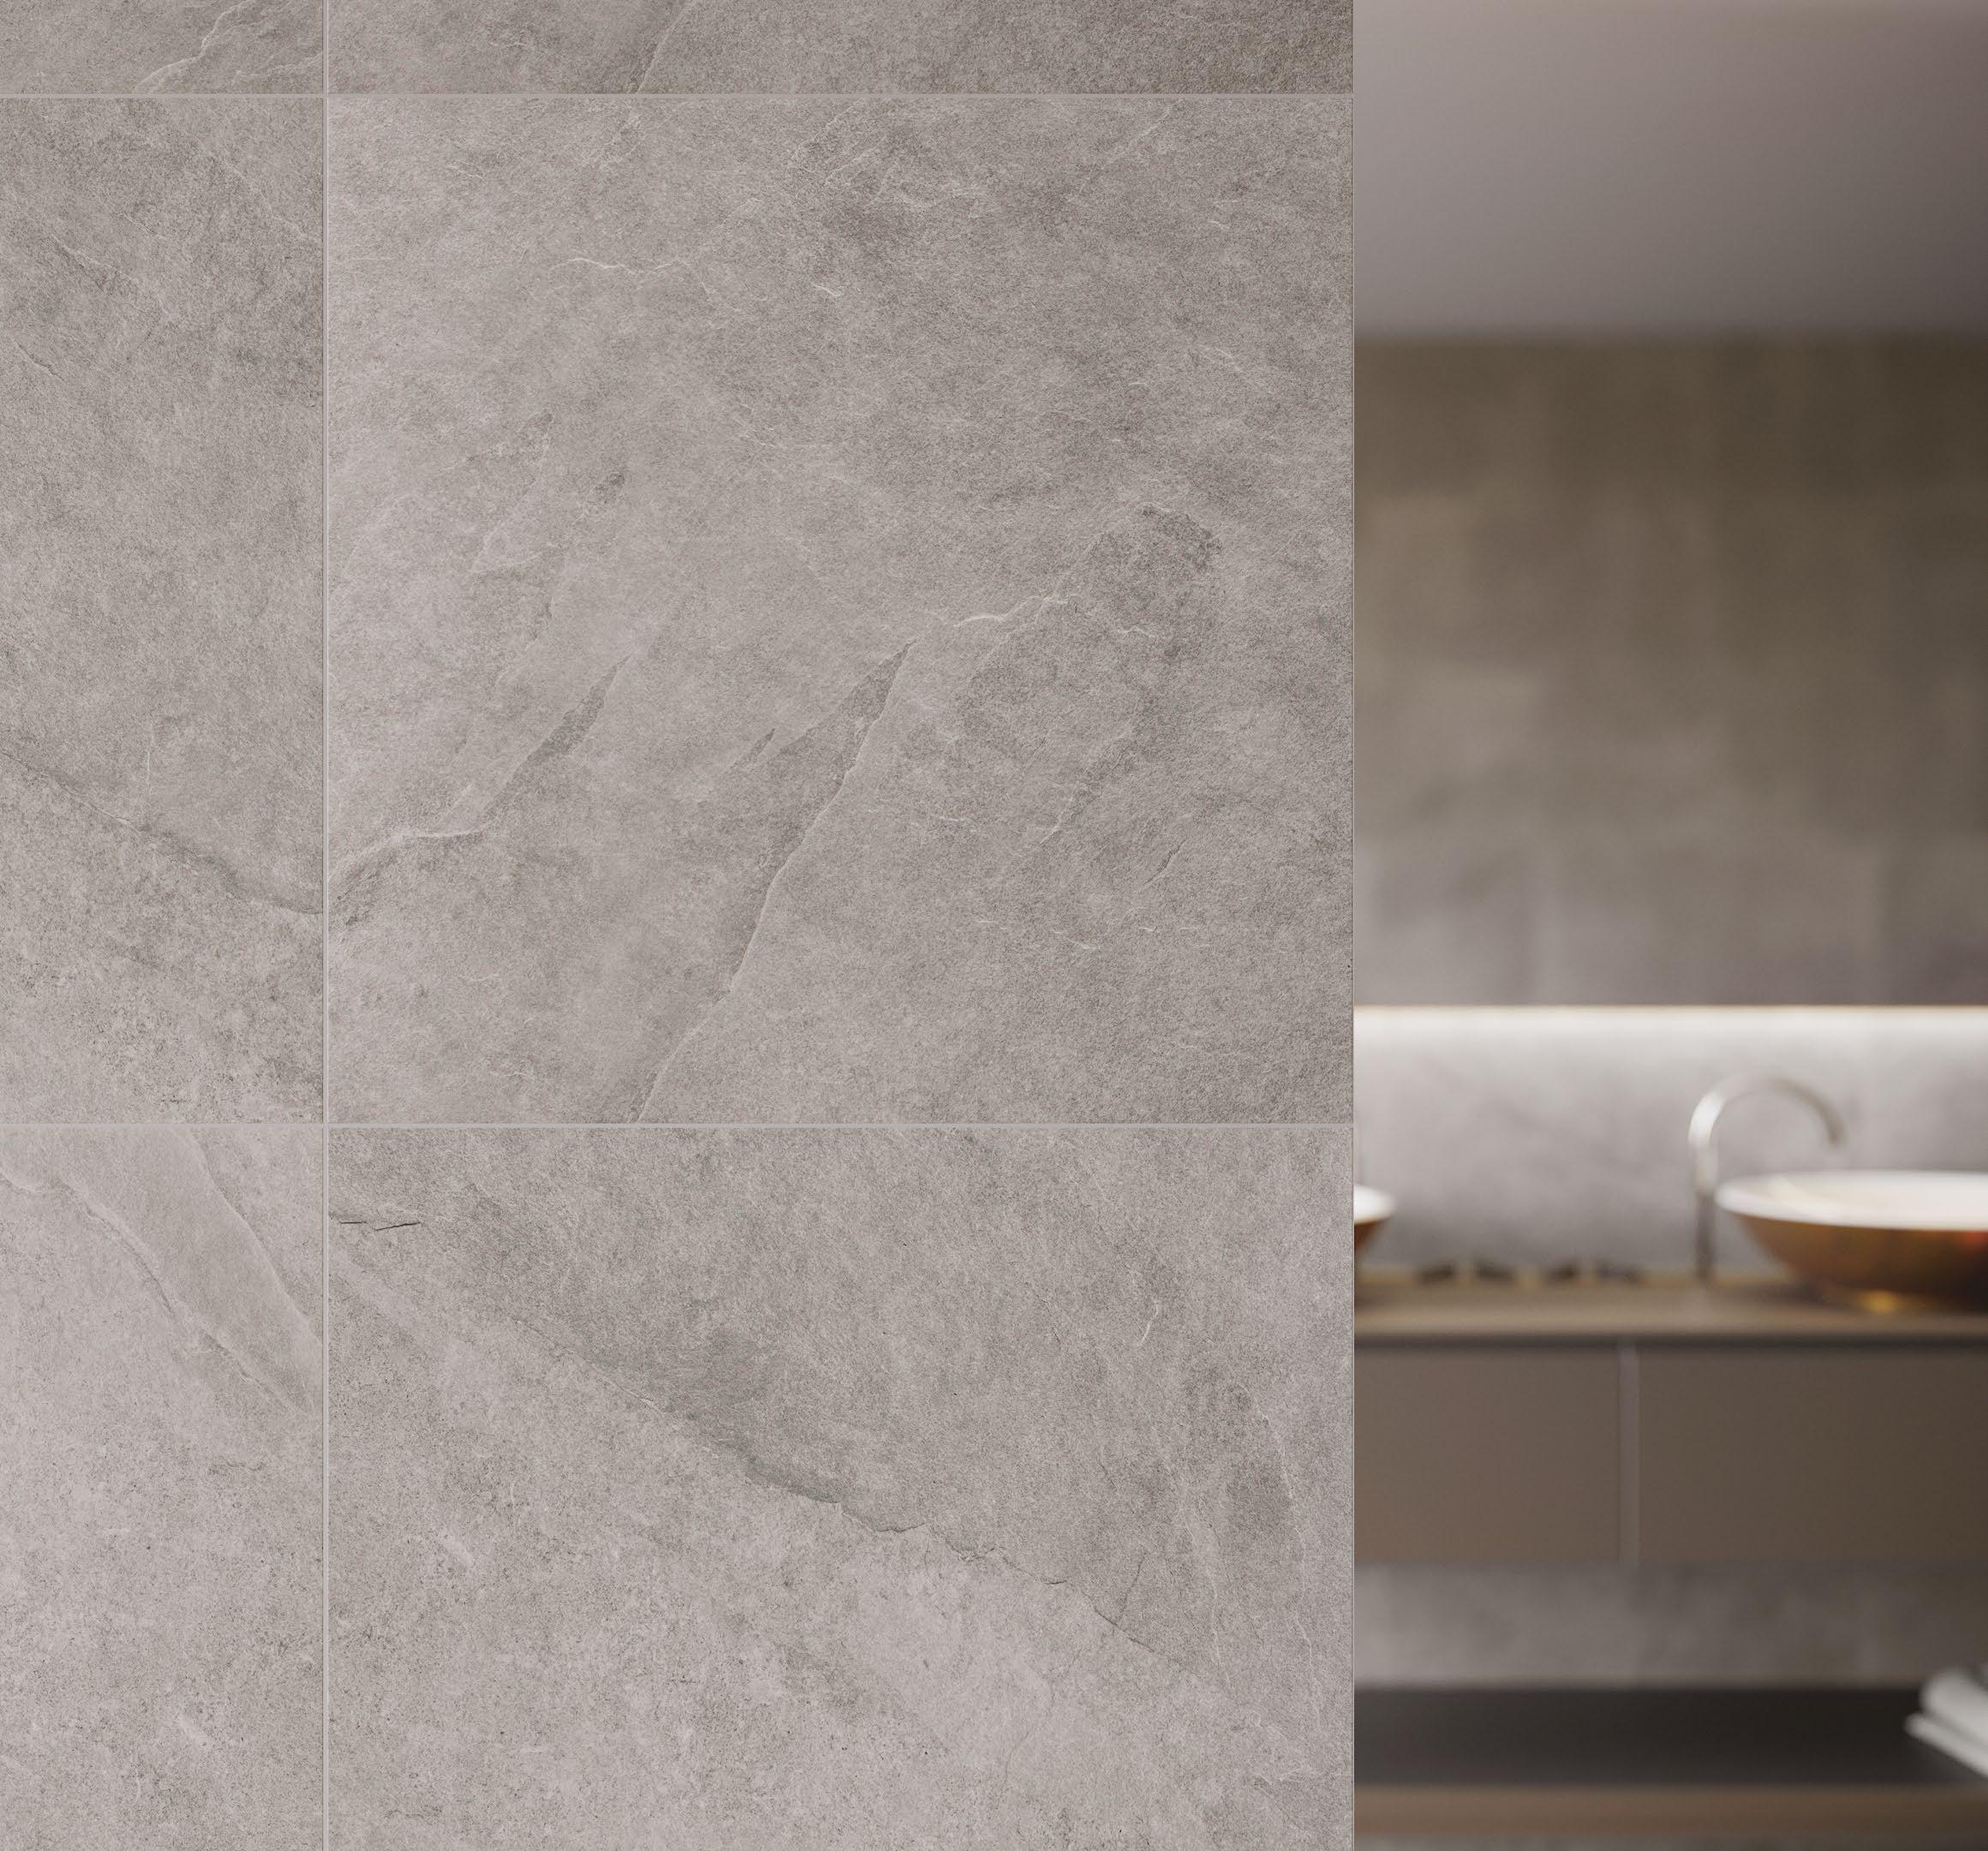
Over the years we have created a sophisticated porcelain and clinker tiles portfolio with unique designs, wide colour palette, excellent technical parameters and many assorted formats and surface finishes. We are sure that what’s best is reflected in nature, which is why our products draw on the combination of modernity and the world around us. Our portfolio is regularly enriched with new collections of tiles inspired by the look of wood, the minimalistic surface of concrete, the beauty of natural stone and the elegance of marble.
Consistent implementation strategies and investments in modern technologies allowed us to take on ambitious projects and set an innovative path for the company. In 2018 we completed the construction of the third, fully automated production plant in Starachowice. As part of the investment, worth nearly 120 million PLN, we were able to establish one of the most advanced ceramic tile factories in the world – the home of ULTIME brand.
Our portfolio includes large-format tiles with unique dimensions of 162x324 cm, 120x280 cm and 20x240 cm, manufactured by using the specialized Lamgea production line.
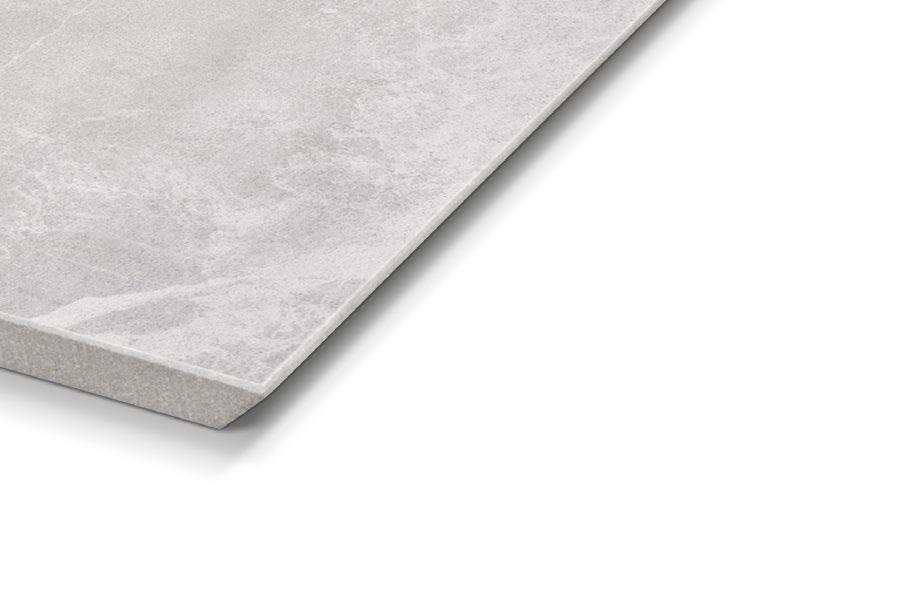
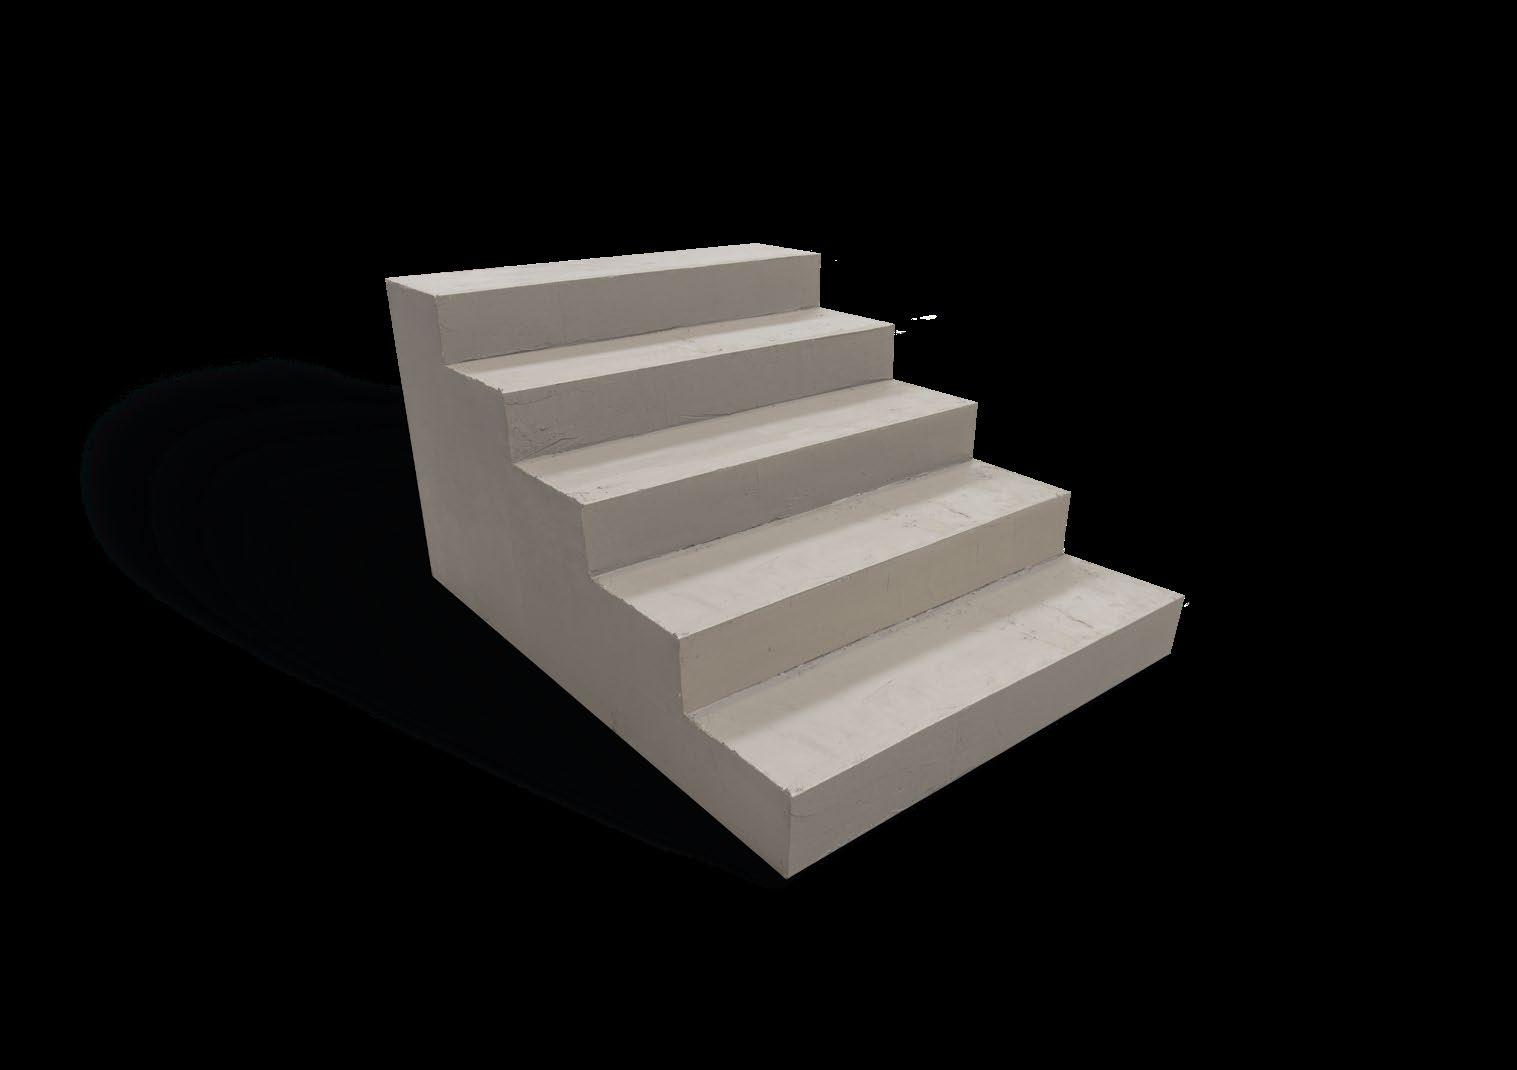
We have also introduced an innovative line of 6 mm thick tiles and V-shape treads as part of our portfolio.
In 2019 we became the strategic investor in companies Ceramika Nowa Gala and Ceramica Gres Perfectly complementary brand product portfolios and increased production capacity gave us the opportunity to prepare even wider offer of innovative products that meet the needs of our customers best. Our full body colored porcelain tiles are one of the main product features in the portfolio, fitting ideal for use in the demanding investment sector.
A consistent and well thought strategy opens up new markets for us, both Polish and global. Cerrad Group tile collections are appreciated by customers from over fifty countries worldwide. We know that the combination of functionality, durability and timeless aesthetics are the key to success, which is why we present our offer at the most important international trade fairs, such as: Cersaie, Coverings, Cevisama, BAU, Eurobaustoff every year.
01 TECHNOLOGY
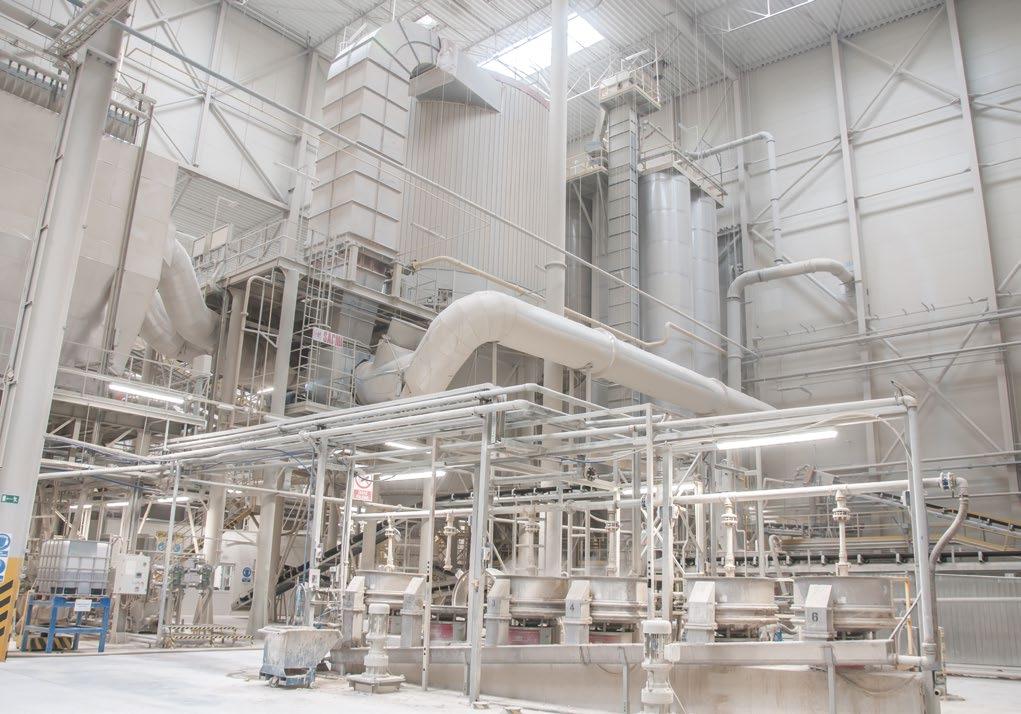
MASS PROCESSING PLANT
Stockpiled raw mineral resources are measured by computer’s calculated weighting systems in exact proportions. The minerals then go to mass processing plant, where they are combined with water in large mills, and blended until they reach liquid form. The resulting mass is homogenized and mixed in tanks, to subsequently evaporate the water in the next step. Extracted solids have the form of granulate, which is stored in silos until desired physical properties are achieved. After that it is transported directly to pressing machines.
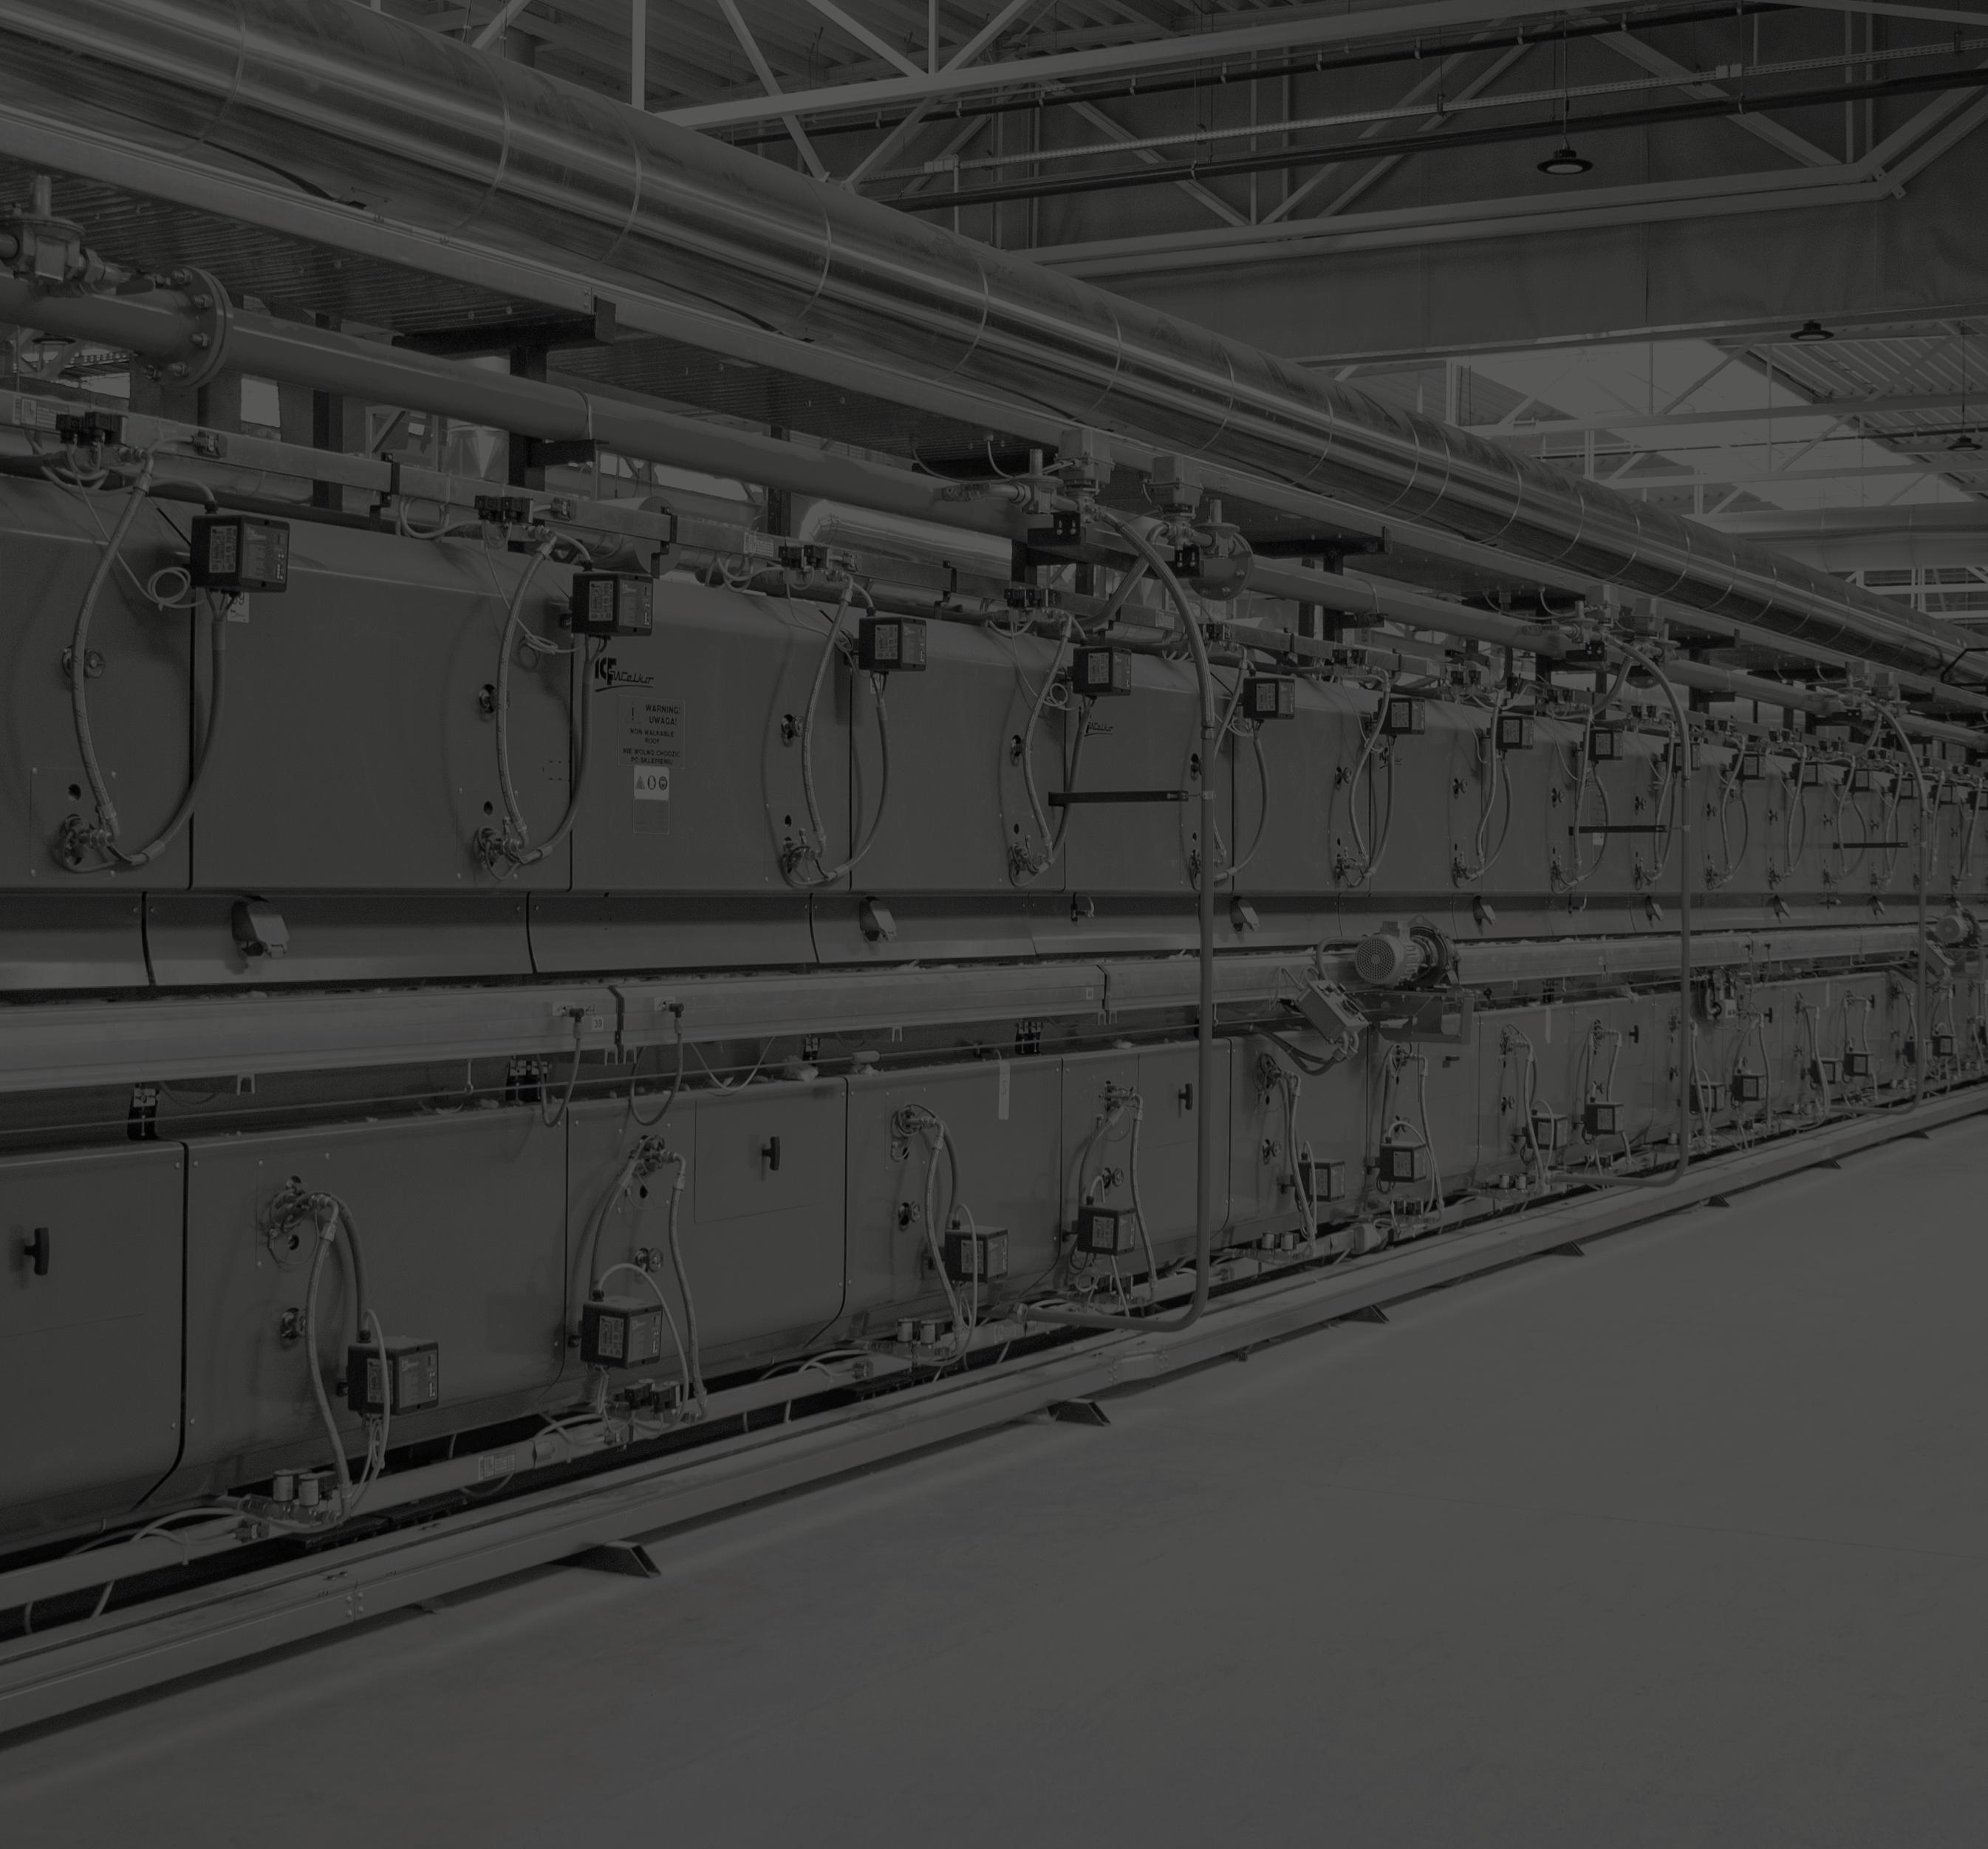
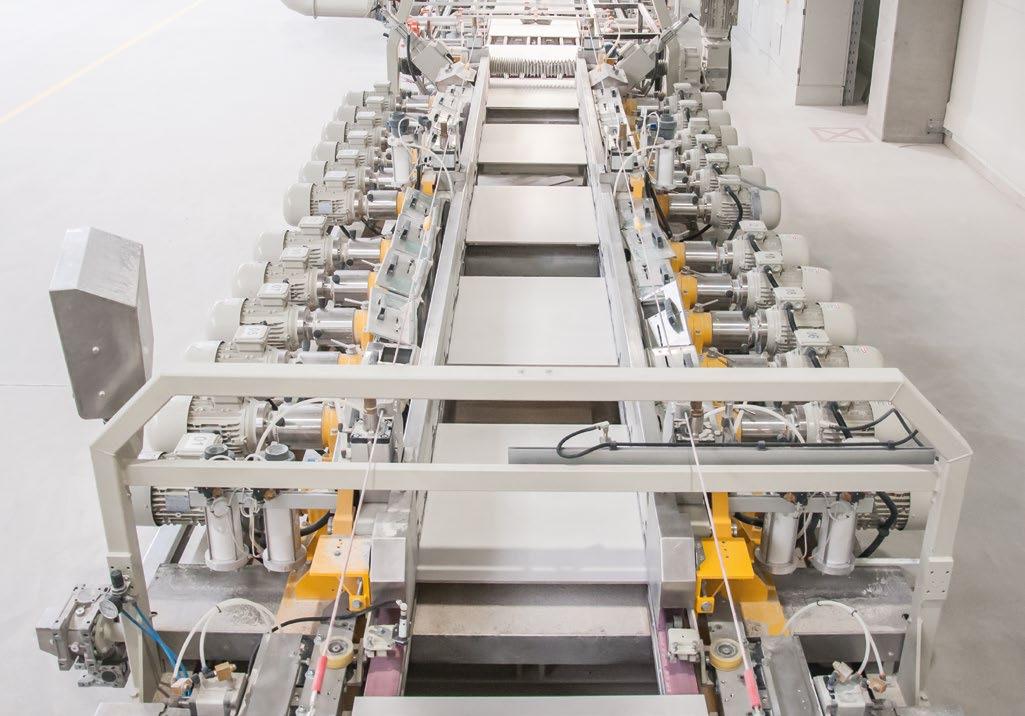
TILE FORMATION
The first stage during which tiles take their shape is compression with use of heavy pressure. The purpose is to mold the granulate into desired format. After the tiles come out of the press and after their drying, they can be covered with: glaze, a protective layer or a contact layer for printing, made by the use of digital printers. The printing technology gives us almost unlimited possibilities to obtain many different tile graphics within a given collection.
Tile making requires use of minerals, the most important of which are clays and feldspars.
After their delivery, a well planned ceramic tile making process begins.
04 CERAMIC TILES PRODUCTION PROCESS
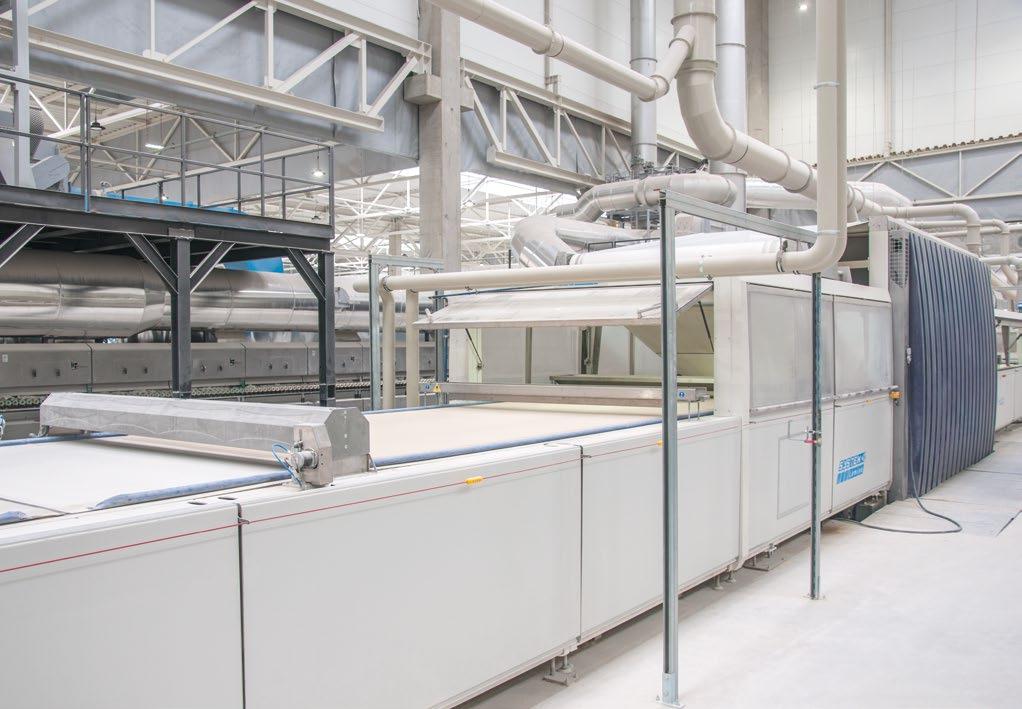
ADDITIONAL TILE PROCESSING
An obligatory operation for the most of porcelain tiles produced at Cerrad Group is rectification. Depending on the collection, tiles may also be processed in polishing modules in order to obtain a polished, semi-polished or satin variants, which result in different surface finishes.
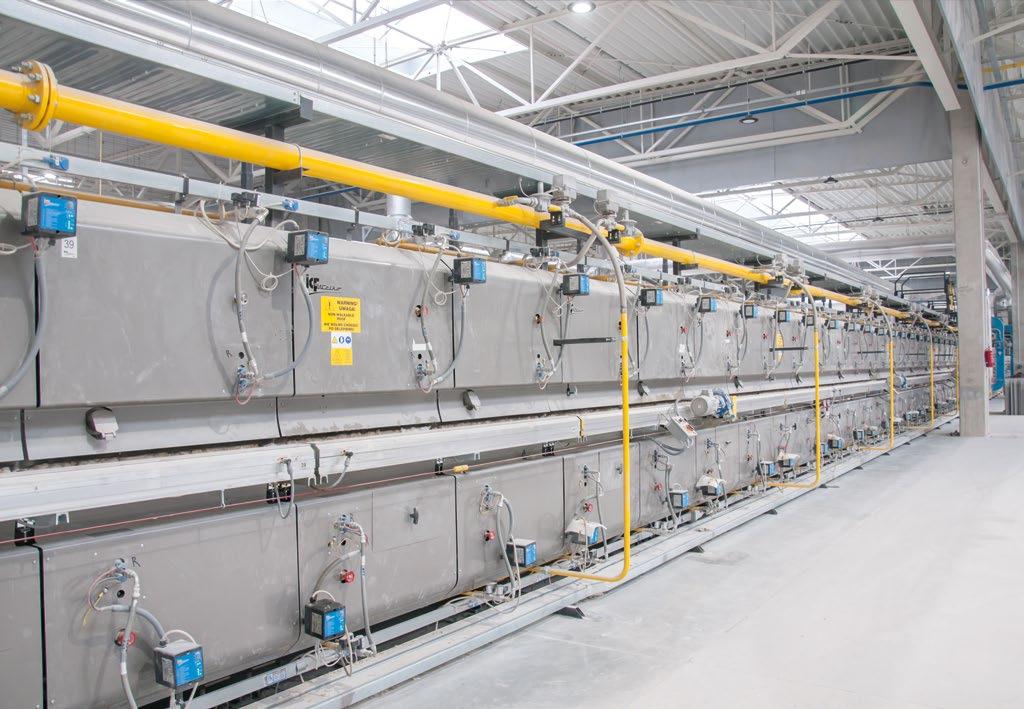
Firing process is the most important stage in the production of ceramics. Tiles are moved through the furnace until the formed granulate combines into a uniform body. The firing time depends on the format and type of ceramics being made. Right after tiles exits the furnace, they are left to cool down in specially prepared places, before they can pass through to the next stage. 03
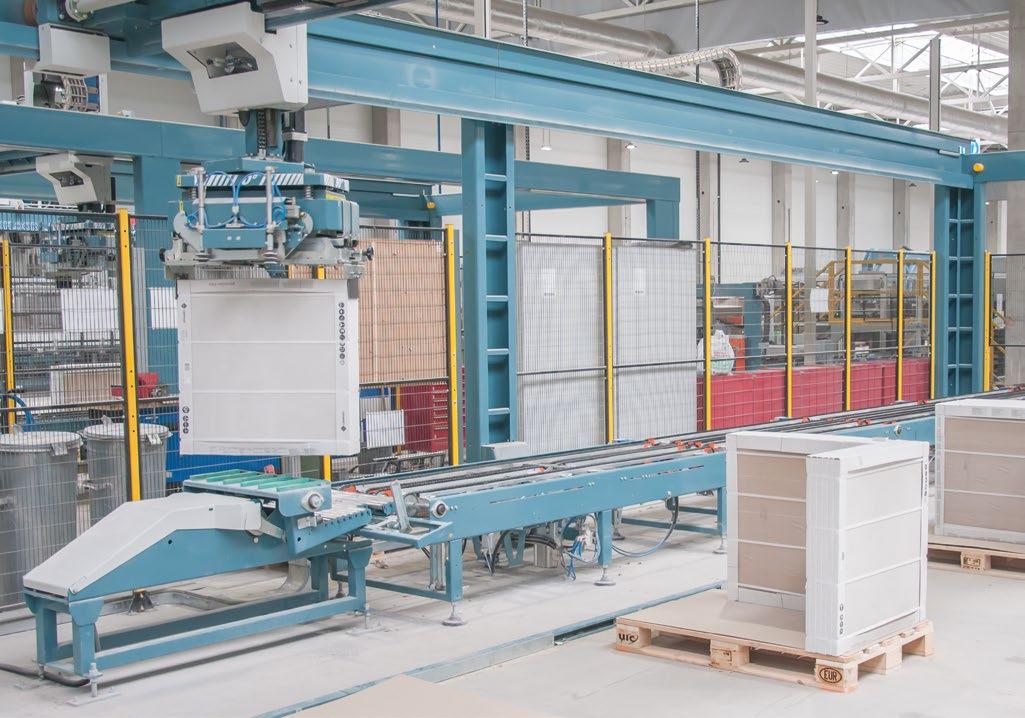
SORTING AND PACKAGING
Each tile coming off the production line is a subject to inspection, which is conducted by both, professional measuring devices and specially trained employees. This quality control results in the division of finished products into quality grades and calibers, and the rejection of those that do not meet required quality standards. In the next stage the assortment is divided into specific groups, packed, labeled and covered with foil for protection. Products prepared in such way await in our warehouses for ordering by the Customers.
DIVISION OF THE ASSORTMENT
The basic criterion for division of ceramic tiles is water absorption The separation of tiles into specific groups is regulated by the PN-EN 14411 standard: Ceramic tiles. Definitions, classification, characteristics, conformity assessment and marking.
Glazed and unglazed products
Another important criterion for the division of ceramic tiles into groups is the distinction between glazed and unglazed products. This division is contingent upon technological process in the ceramic tile production stage, which either applies the glaze onto the tile surface, or doesn’t. The choice between glazed or unglazed tiles should be made based on where they will be used.
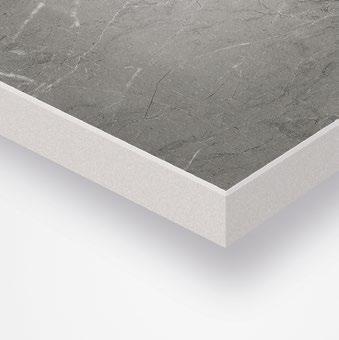
GLAZED PORCELAIN TILES – decorative effect is achieved by applying a coat of paint to the tile surface (glaze, print); applications can be made on both – dyed and standard masses.
unlimited design possibilities true imitation of natural materials high stain resistance
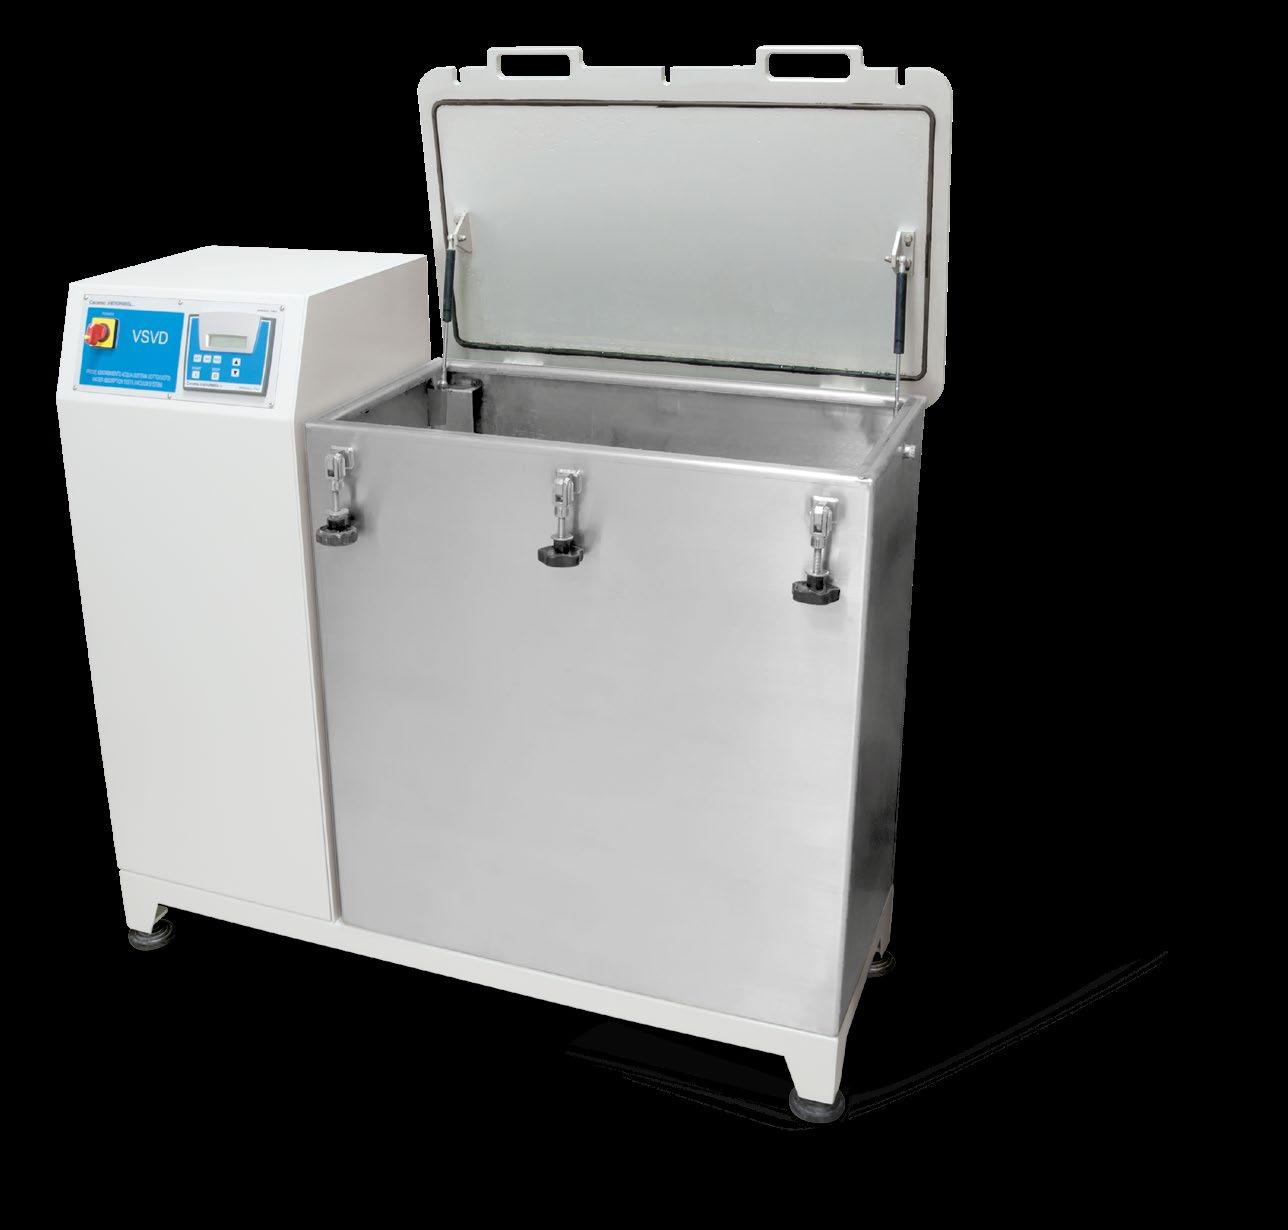
Methods of determining water absorption are specified in PN-EN ISO 10545-3 standard. There are two ways to conduct this test: boiling (filling of easily accessible open pores with water) and vacuum immersion (filling of almost all open pores). The measure of water absorption is expressed as the percentage of water content in relation to the dry mass of the sample.
Group BIa : Eb ≤ 0,5%
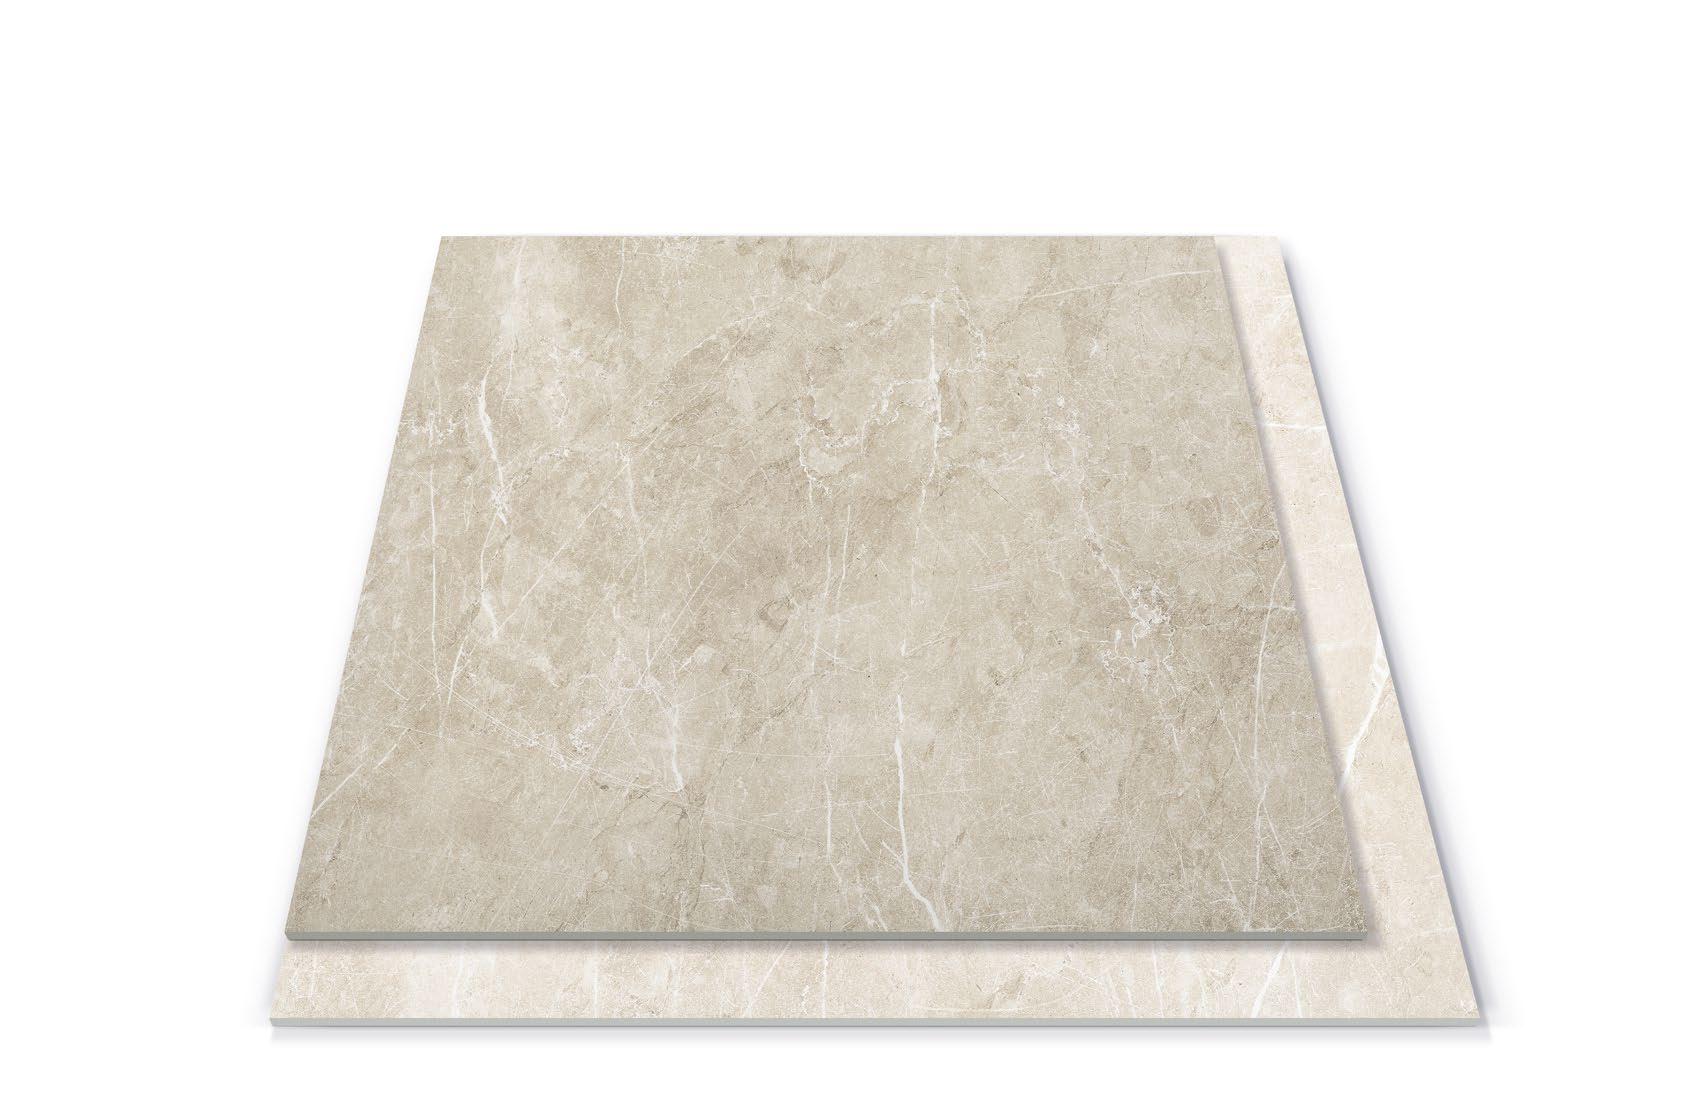
The water absorption of not more than 0.5% is the main characteristic feature of porcelain tiles They are distinguished from other ceramic products because of their high strength parameters. They work perfectly in places exposed to intensive use or high mechanical loads. Thanks to their very low water absorption rate, porcelain tiles are also characterized by frost-resistance.
Nowadays, it is the most popular assortment in the group of ceramic tiles, designed for indoor and outdoor applications. Porcelain tiles can also be divided according to type of surface finish: polished, semi-polished (lappato) and matt.
Group BIb : 0,5% < Eb ≤ 3%
Clinker has the water absorption capacity of no more than 3%. It gains its characteristic colour thanks to the presence of red clay. Like porcelain tiles, clinker is manufactured by using great physical pressure and high firing temperatures, which helps it to obtain great frost-resistant properties and excellent resistance to mechanical loads. A very frequent addition to the clinker collections are finishing components for external areas, which include elements such as: step treads and window sills.
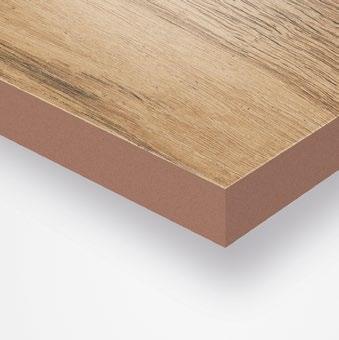
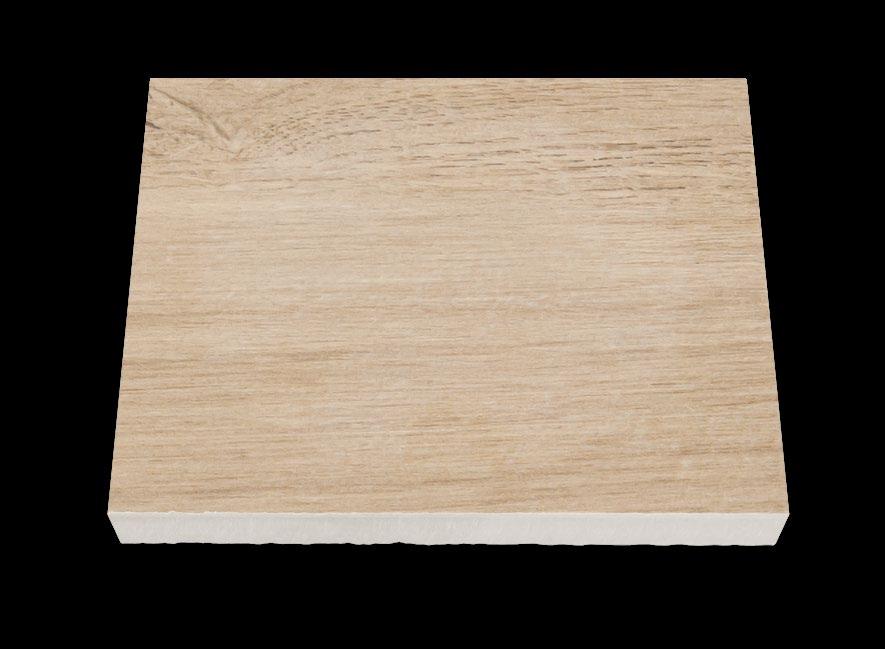
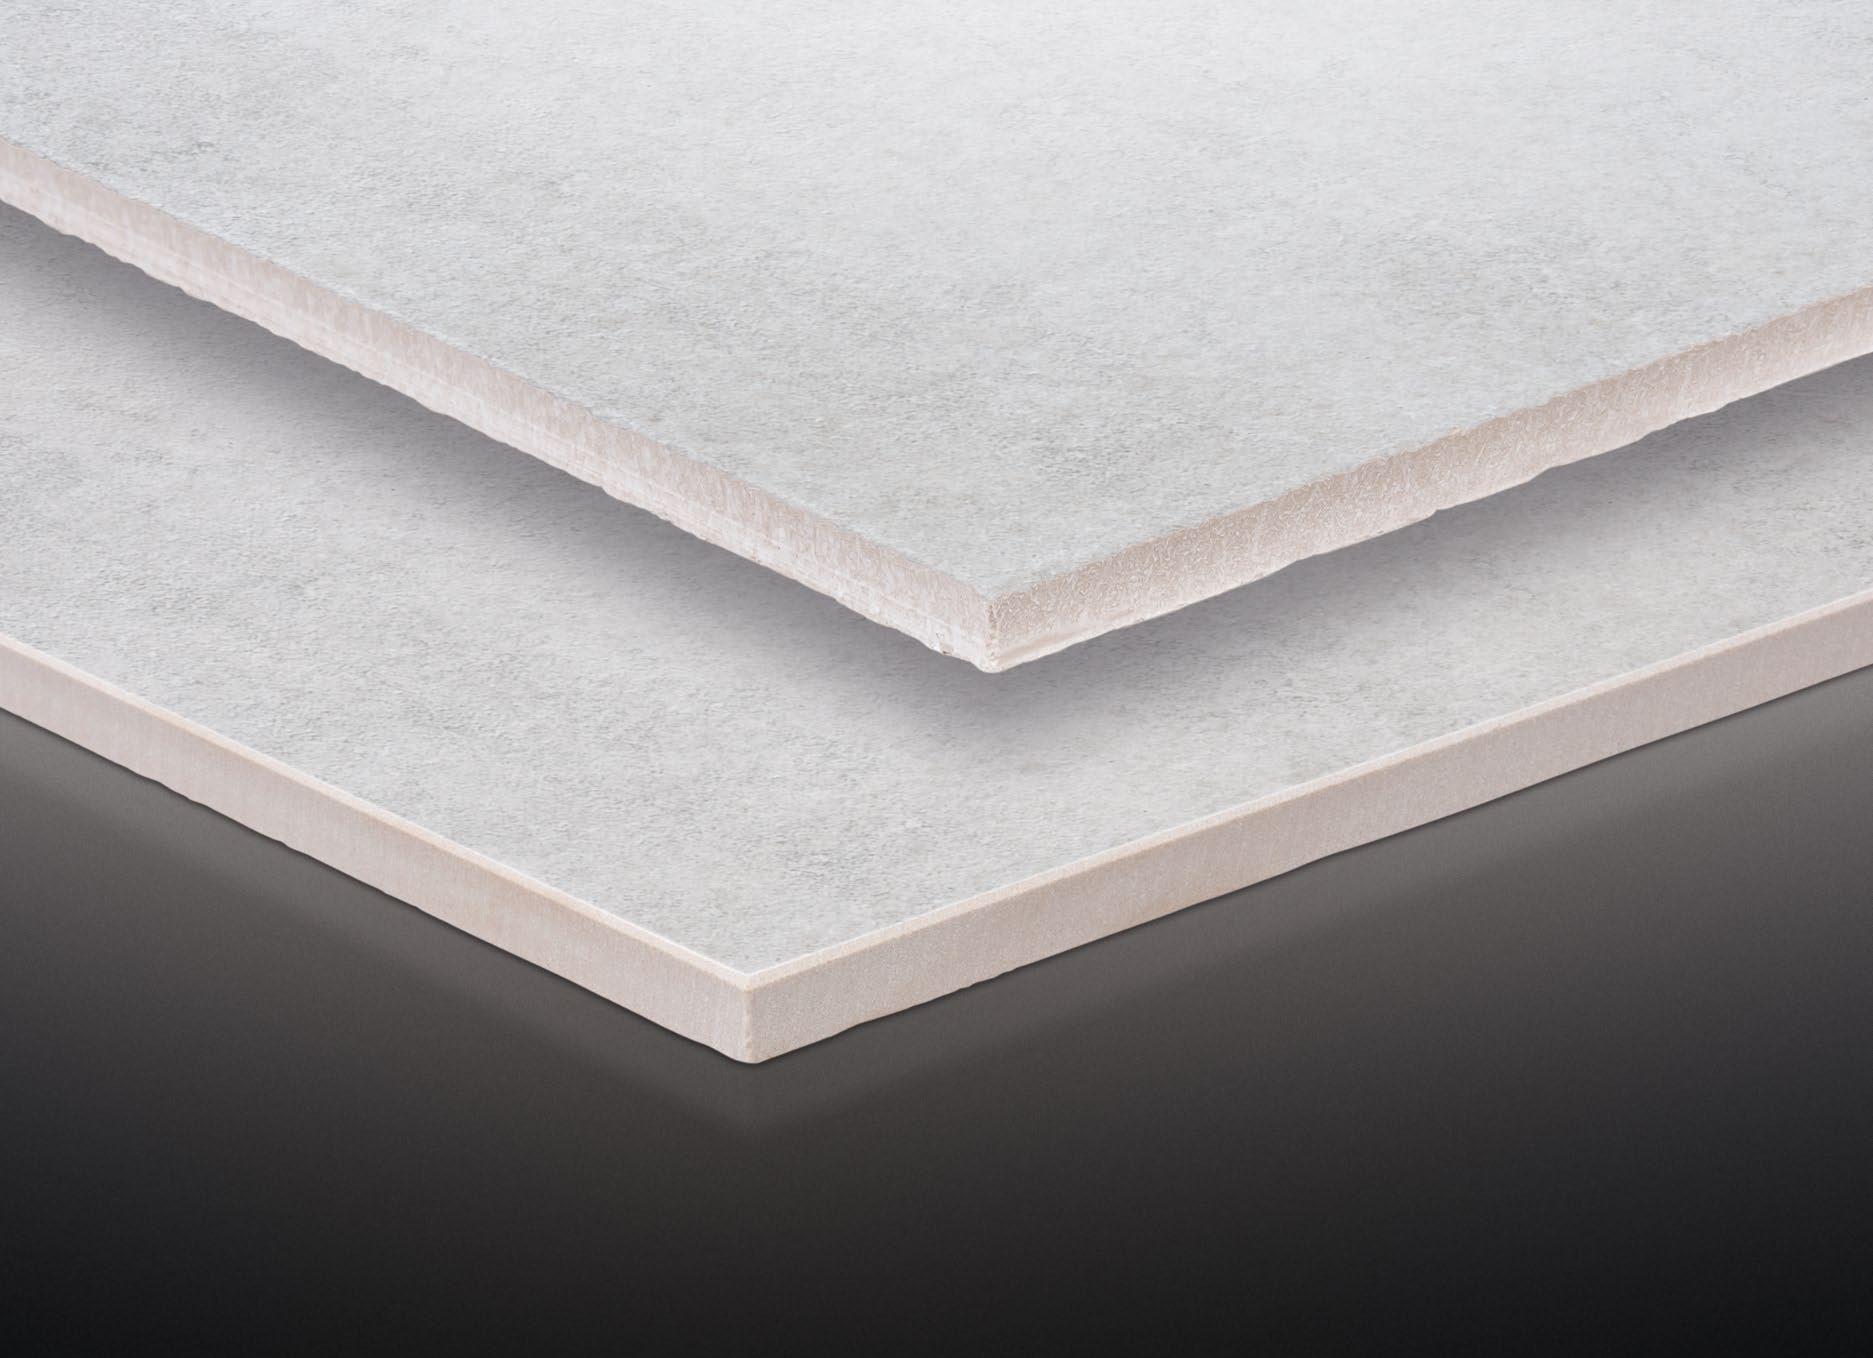
UNGLAZED PORCELAIN TILES – decorative effect is obtained by mixing and arranging of different coloured masses in a specific way.
uniform mass colour throughout the entire cross section of the tile* uniqueness of design high resistance to abrasion and mechanical damage *
PORCELAIN TILE CLINKER TILE
THE MOST IMPORTANT UTILITY PARAMETERS
Surface abrasion resistance (PEI)
The PEI parameter determines the class of abrasion resistance for glazed tiles Apart from the slippery resistance properties, it is one of the two most important utility parameters. In theory, it determines time interval after which traces of glazing wear may be noticed on tile surface. In practice, however, it is a matter of determining the hardness of tile in order to select the correct assortment for a specific room. Determination of the PEI abrasion class is carried out by means of a test, the goal of which is the removal of glaze from tile surface. The number of rotations of measuring equipment is determined according to tile class division established by the norm.
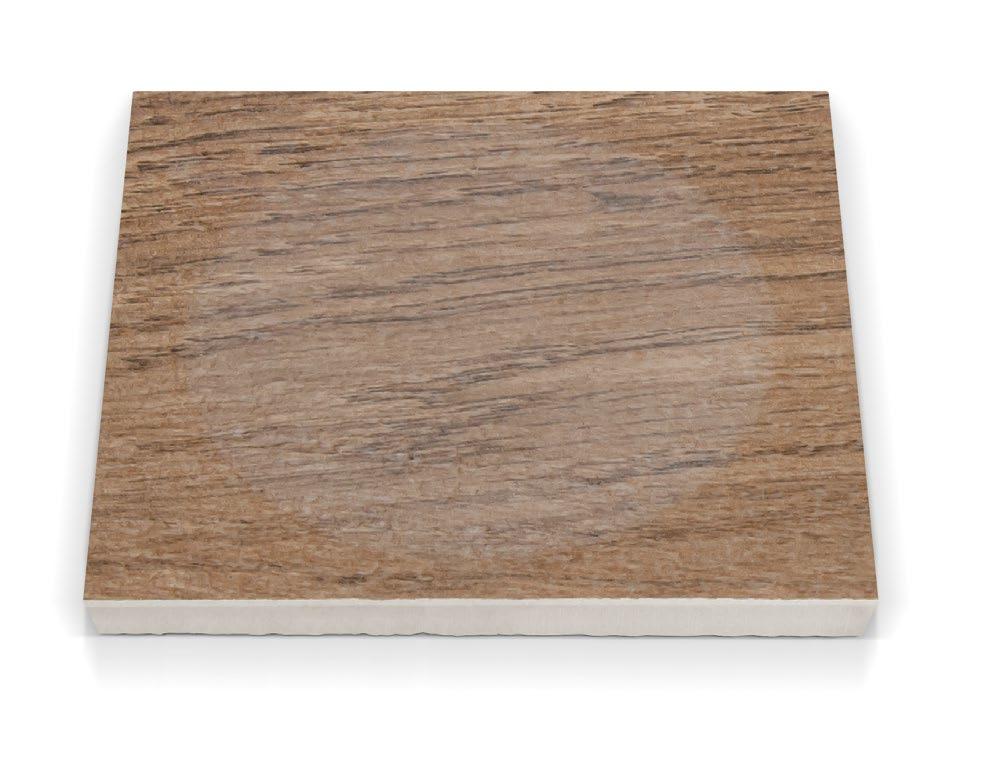
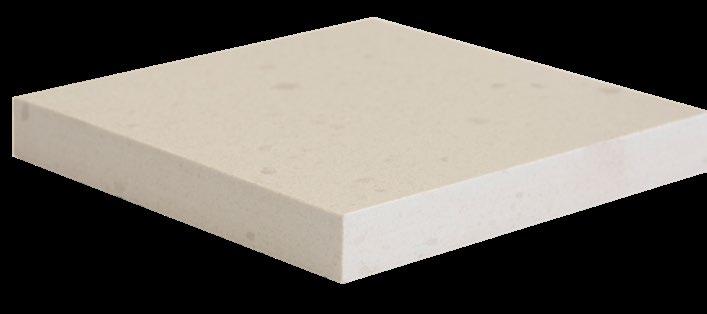
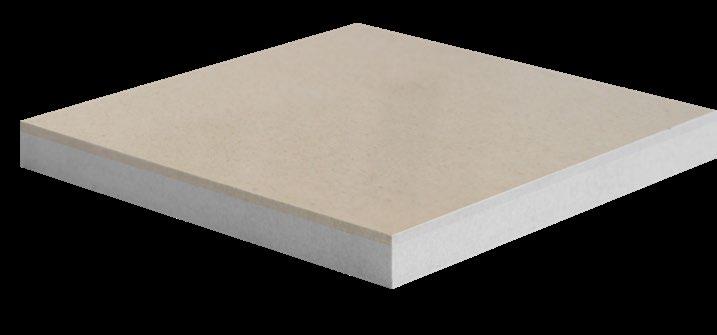
Comparison of two tile fragments after the surface abrasion test (number of rotations – 2100)
Classification of the surface abrasion resistance:
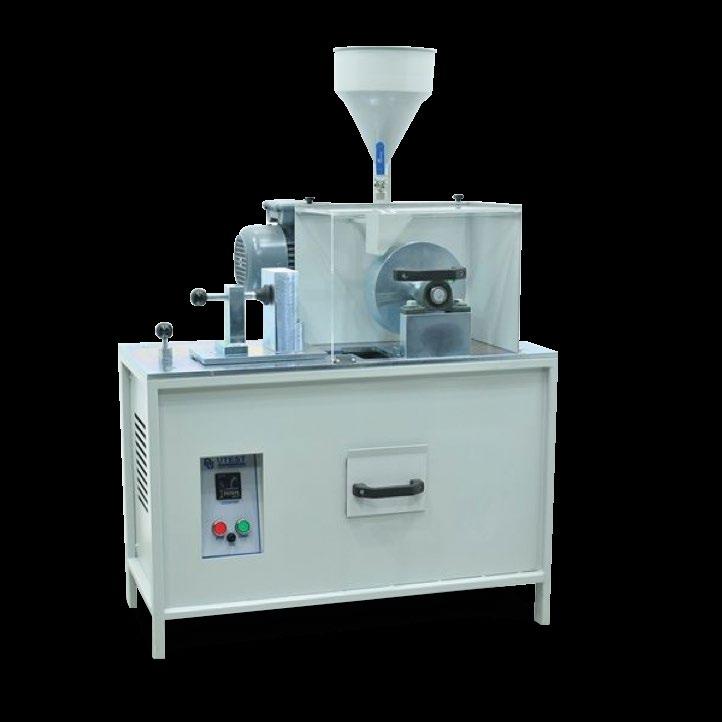
Depth abrasion resistance / mass dyeing
This parameter determines abrasion resistance class of unglazed products. In contrast to the surface abrasion test, this one is done within the depth of a tile. Vertically rotating disc with addition of abrasive material is designed to make a furrow in a tile, the scale of which is determined in detail by a mathematical formula. The amount of ceramic mass loss is expressed in cubic millimeters –a specific physical size measurement, as opposed to the organoleptic surface abrasion determination.
Tiles not suitable for installation on the floor.


Floors on which we walk barefoot or in shoes with soft soles (bathroom, bedrooms).
Floors on which we walk in soft or normally soled shoes, such as living rooms in flats and appartments (with the exception of kitchens, entrances and all high-traffic areas).
Floors on which we walk in normally soled shoes, such as kitchens, corridors, hallways and terraces in homes.
Areas, where sand and small rocks can occur, such as areas outside of buildings or areas directly adjacent to them (terraces, balconies, entrance stairs).
Places with the most demanding conditions for glazed tiles, exposed to increased pedestrian traffic (public spaces, garages, driveways, workshops).
Remember!
Even though two tiles may be in the same surface abrasion class, the brighter one will visually show fewer scratches.
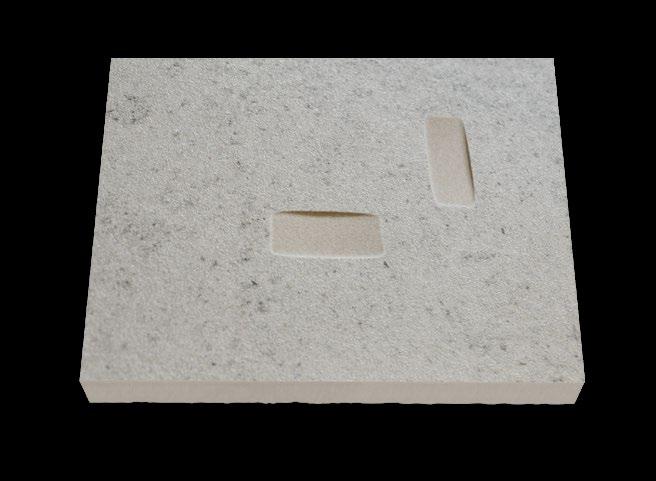
Determining volume of grated material – no more than 175 mm³
The test described above was designed because products belonging to the unglazed group are products that are made with wet-dyed mass. Thanks to this technology, the tiles have the highest resistance to mechanical ware.

In addition to dyeing tile mass using a wet method, it can also be dyed using a dry method used more and more often with glazed products. The pigments are added in dry form to the base granulate, which in turn determines its colour. This method strengthens depth of print and can also mask the glaze damage on small fragments of tiles surface.
Info-circle
There are rare examples of combining wet-dyed mass technology with digital printing (like the Mirador, Stonehenge, Ebro collections). These products are classified as glazed porcelain tiles, but in their case both, the surface and depth abrasion resistance parameters are given. This is the most versatile type of porcelain that combines the advantages of both groups, and works great both in residential spaces as well as in the public ones.
Anti-slippery
The key parameter for safe tile use is determined by laboratory tests and is regulated by two norms: DIN 51130 for standard conditions and DIN 51097 for special conditions.
The former determines anti-slippery class in daily use areas and is marked by the letter R with addition of a number ( 9-13 ). The latter specifies the anti-slippery class for wet zones and is marked by a letter ( A-C ). In both cases, the result depends on the slope angle of measuring apparatus (ramp), where a person conducts a physical slippery test. Slippery resistance of tiles depends on the type of surface structure, type of glaze used, additional applications or type of finish (polished, semi-polished, matt). In addition,
where sensitive areas are of concern (such as stairs or balconies) additional safety features such as groves are often implemented.
The values obtained during the slippery resistance test are a reference to actual conditions. For residential areas, it is recommended that tiles with designations R9 and R10 are used, as they will provide an excellent compromise between anti-slippery properties and easy cleaning attributes. When service and production spaces are of concern, the following approximate distribution of successive slippery resistance classes can be used:
Tiles with surfaces that are rough to touch have a higher anti-slippery class, but they require greater care in keeping them clean. It’s worth to keep this in mind when purchasing tiles.
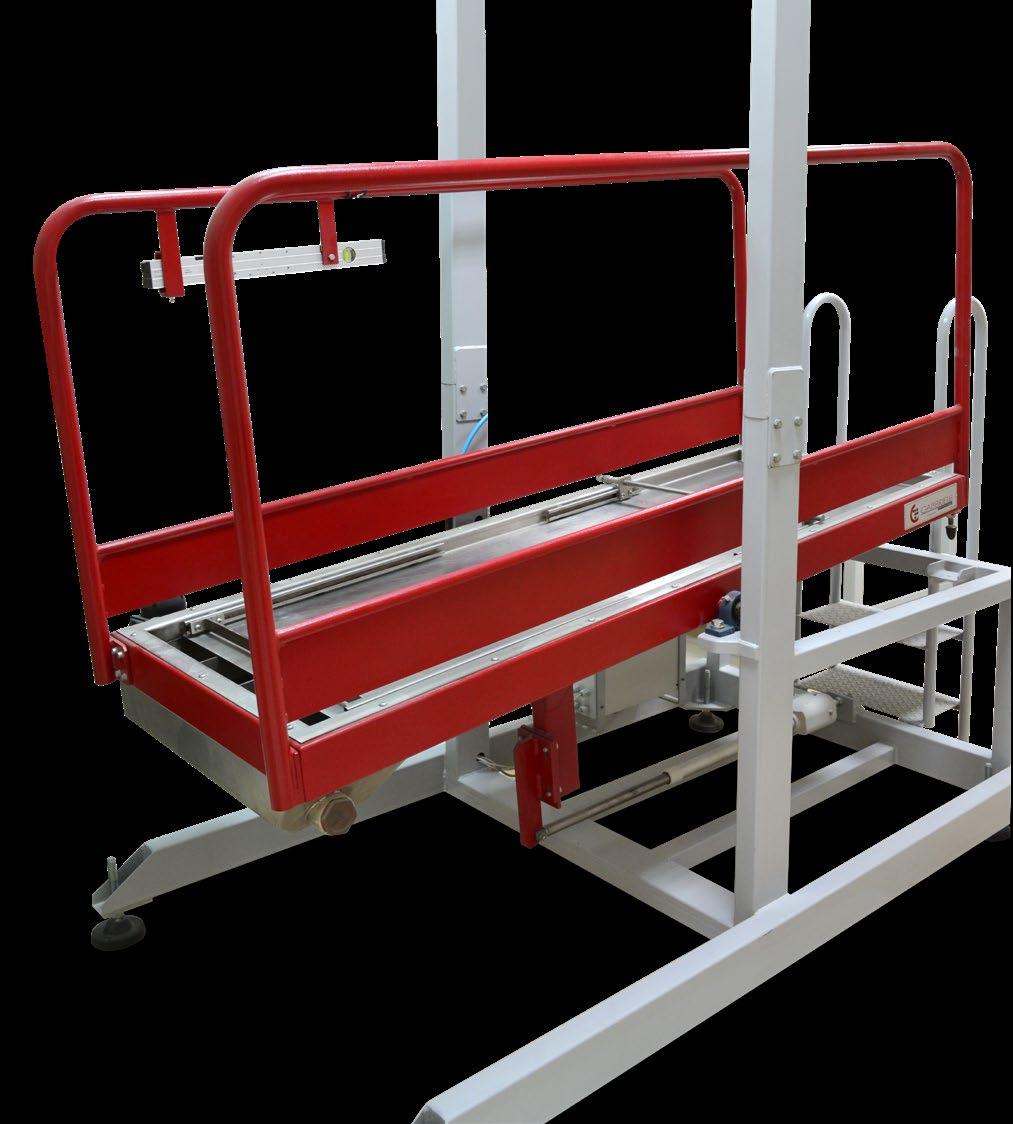
Slippery resistance Acceptable angle
12°
18°
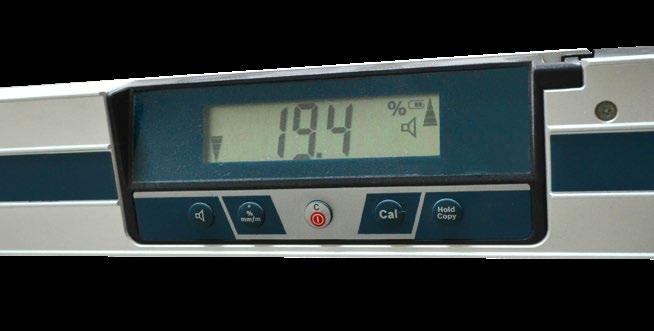
24° Examples of usage Ramp used to test anti-slippery properties
• Locker rooms, wading pools, and pools with flat bottoms.
• Floors in showers, saunas, pools and stairs around the pools;
• Areas around the pools, where the floors may get wet.
• Stairs leading to water or under water;
• Steep perimeters around pools and swimming areas designated for children, elderly and the disabled;
• Special zones such as stairs, starting bars, steps on ladders or ladder stairs.
It’s worth remembering that the anti-slippery class is especially important for investment projects, and should be specified in detail by the investor and/or the supervising construction/renovation authority in the technical documentation.
Surface finish types
At the stage of designing a ceramic tile collection, a decision is made as to what kind of surface finish will be used. The most common are: matt, polished, semi-polished and satin.
Matt surface is characterized by a small degree of light reflection, though it doesn’t exclude the possibility to have a delicate shine to it. Matt tiles can be smooth or structural.
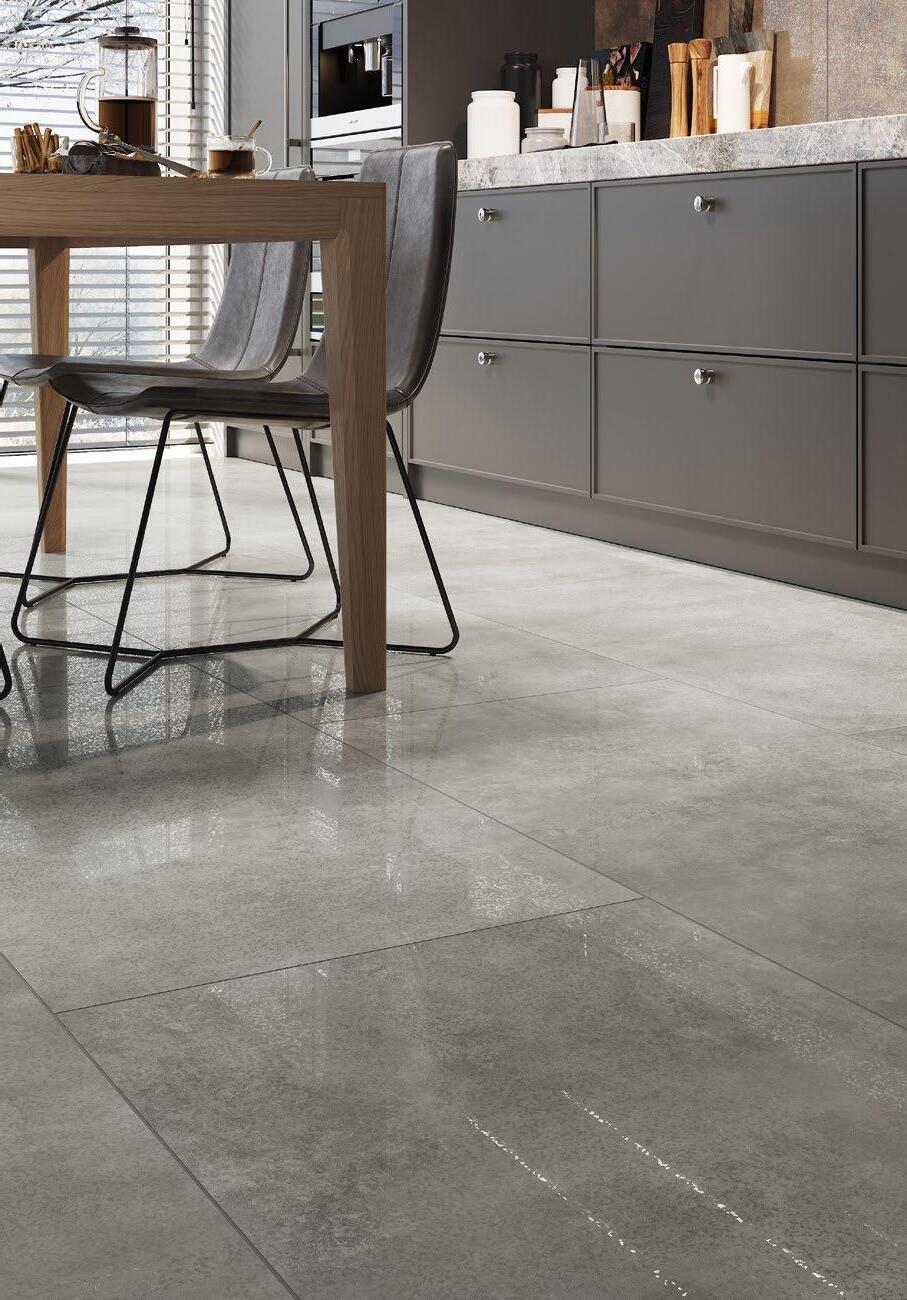
Polished surfaces, as opposed to matt surfaces, are characterized by high gloss and smoothness, which are achieved during polishing process.
The mirror effect gives tiles a very attractive appearance, thanks to which they are often chosen by customers.
Polishing of tiles is a purely aesthetic procedure, though from a technological point of view, it leads to decline of utility parameters like: decrease of slippery resistance class and – in case of unglazed products – resistance to staining. In addition, polished surfaces require the use of safety features in order to protect tiles against scratching.
Semi-polished surfaces (lappato) are a type of surface which reflects light partially. This appearance is achieved by partial polishing of the glaze on tile surface. The visual effect of the reflection achieved by semi-polished surfaces can be compared to that of a reflection in a shimmering water surface. In addition, if the light source is correctly positioned in relation to tiles, lappato surfaces give off a shimmering effect. Due to their texture, semi-polished tiles used on floors may require some more effort with cleaning.
Satin surface (so called baby face) is a combination of features of a polished tile (smoothness) and a matt tile (lack of light reflection). Unusually pleasant, velvet-like structure, makes it feel nice to the touch. Thanks to these features, it is a perfect compromise between matt and polished tiles.
Frost resistance
Frost resistance of tiles is directly related to water absorption. The lower the water absorption capacity, the higher the resistance of tiles to cyclic temperature changes. This parameter is crucial in places where multiple temperature transitions over 0 degree Celsius occur during winter season.
Number of 0°C transitions as noted in January 2019 (Poland)
Frost resistant assortment includes tiles with water absorption of no more than 3%
Frost resistance test consists of soaking a tile with water, which is then subject to 100 cycles of freezing (up to –5°C) and defrosting (up to +5°C).
Polished unglazed tiles require impregnation, unlike polished glazed tiles. More information on this topic on page 37.
Apparatus used for laboratory testing of frost resistance of ceramic tiles.
Changing weather conditions impact not only ceramic tiles, but also layers of screeds or binders. That’s why it’s important to choose the proper installation products.
MATT
SATIN
LAPPATO
POLISHED
Calibration
A significant occurrence during firing process is the shrinkage of ceramic mass. In spite of a carefully selected mixture of raw materials and a precisely programmed process of tile formation at all stages of production, it is not possible to achieve products of ideally matching sizes. This applies in particular to tiles intended for use on floors – those which are firmly pressed and fired at high temperatures. In order to avoid size variances between tiles, sorting groups have been created, where tiles with similar or identical dimensions are grouped together. These groups are called calibers and the tiles are called calibrated A calibration table included on the packaging will be of use.
By purchasing tiles of the same caliber it is possible to lay them on one surface, while minimizing the risk of incompatible joints. If you need to buy additional tiles, purchase ones with the same calibration mark, as those already owned.
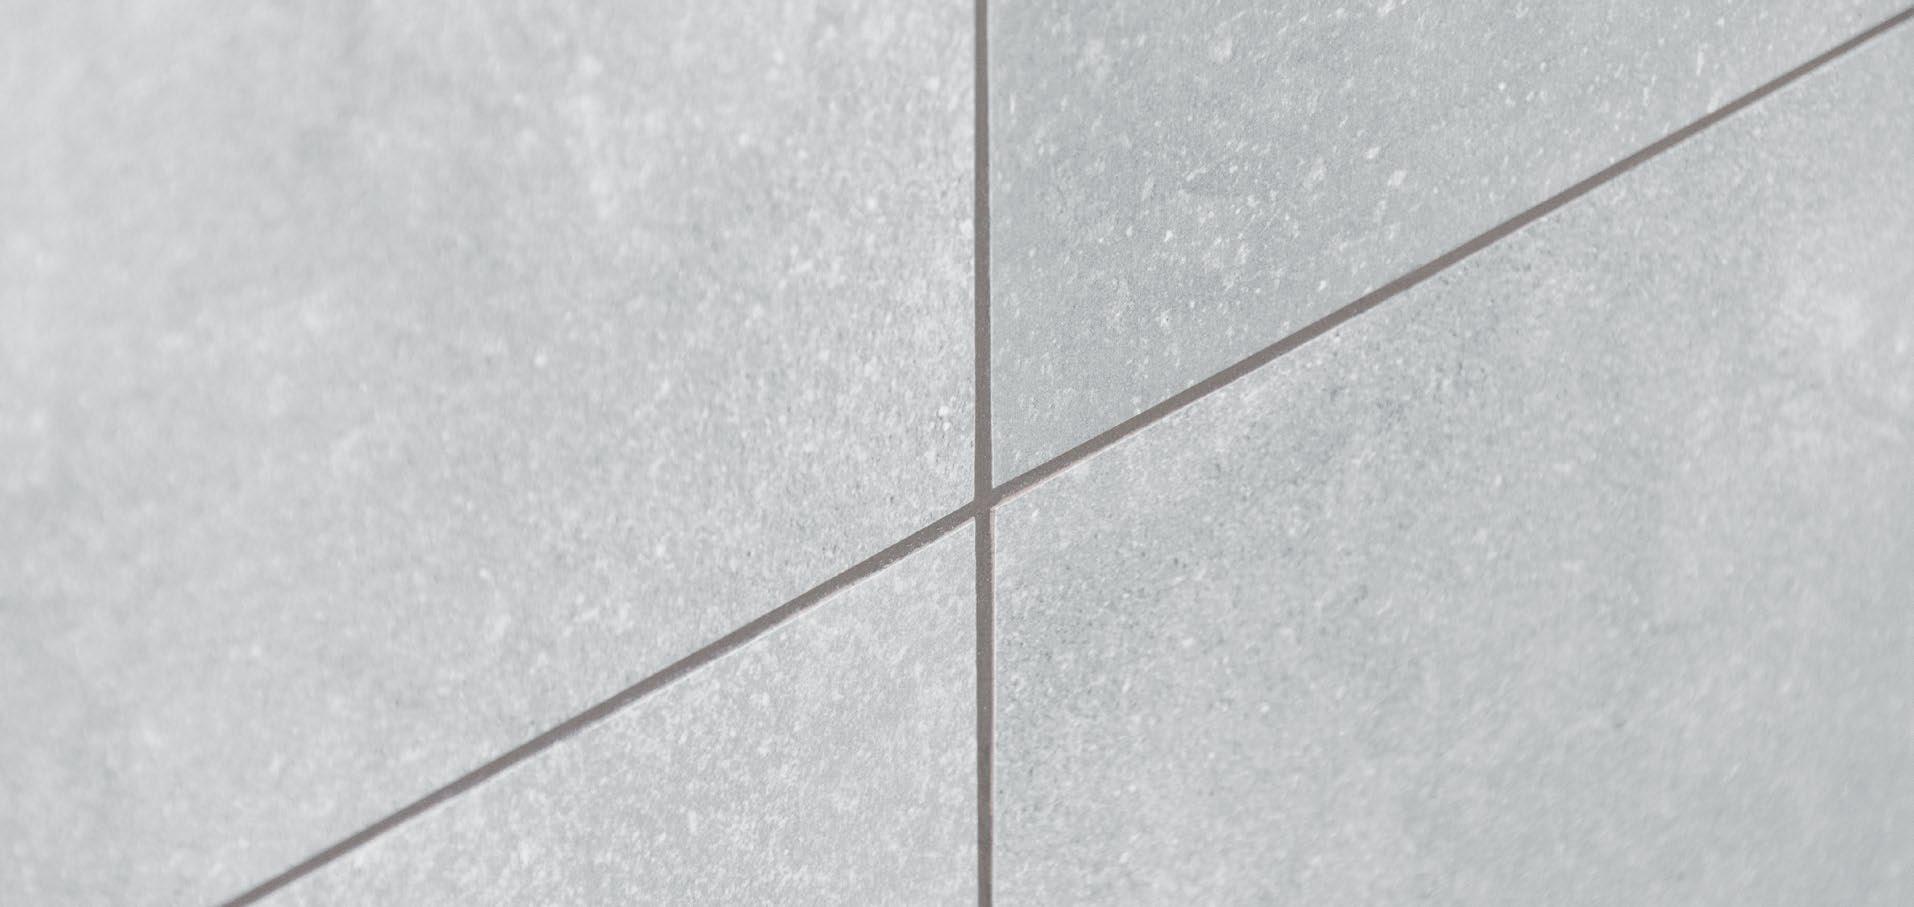
Rectification
The rectification process is a mechanical treatment of tile edges, during which the edge of tile is grind in order to achieve very precise measurements, usually to within ±0.3 mm margin. Rectified tiles have a much higher accuracy of dimensions than unrectified ones – that are sorted into calibers. Minimal dimensional differences after rectification allow to minimize joint spaces even up to 2 mm.
In exceptional situations it is possible to combine tiles with different calibers. However, its recommended then, that tiles from adjacent caliber groups are used.
Remember!
Rectified tiles are not meant for mounting without grout. We recommend the use of grout 2 mm thick at a minimum, which will protect tiles from cracking due to possible shrinking and expanding of base. Damages caused due to groutless mounting are not a subject to complaints.
BEFORE RECTIFICATION
AFTER RECTIFICATION
Exclamation-Circle
Variability of graphic designs
What is best is reflected in nature, that’s why our products draw on the combination of modernity and the world around us. Just like in nature, each piece of wood is different, each piece of marble has a different veining pattern – our collections have many graphic designs („faces”) within one collection. Thanks to this, tiles can be laid without worrying about the „stamp effect”, or in another words – the risk of pattern repetition.
OTHER PRODUCT INFORMATION
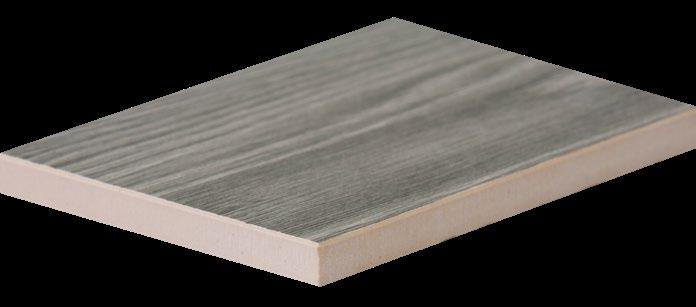
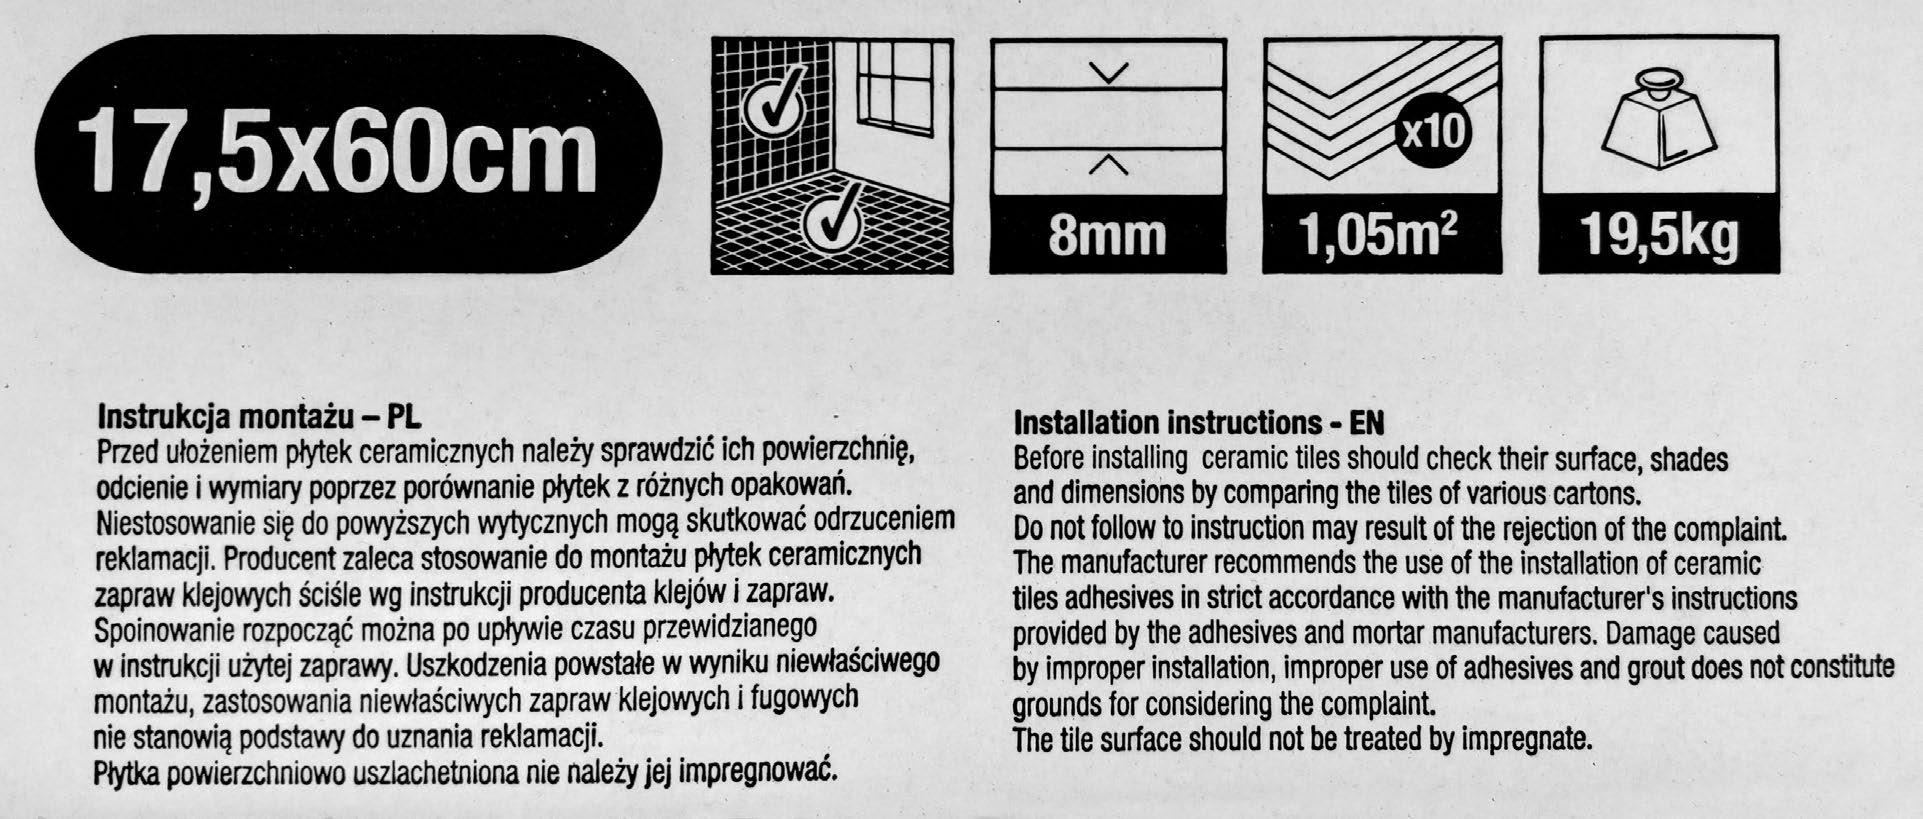
THICKNESS
Ceramic tiles are characterized by their different thicknesses – so they can be used in various places. Depending on collection and format, Cerrad Group portfolio has tiles that differ in thickness from 6 to 20 mm.
In order to eliminate repetition, it’s worth noticing if tiles with the same faces are in close proximity to one another.
DIMENSIONS
Ceramic tiles are divided into calibrated and rectified categories. Cerrad Group rectified tiles are characterized by nominal size given with the precision of a tenth of centimeter (19.3 x 159.7 cm).
Dry-dyed mass – mass achieved through dyeing with dry pigments.
Wet-dyed mass – mass achieved through dyeing with liquid pigments.
DRY-DYED MASS TILES
WET-DYED
SURFACE
MASS COLOUR
Marquina Gold collection holds the record in graphic design variations with 80 different „faces”.
PIATTO COLLECTION
TILES SELECTION FOR THE ROOMS
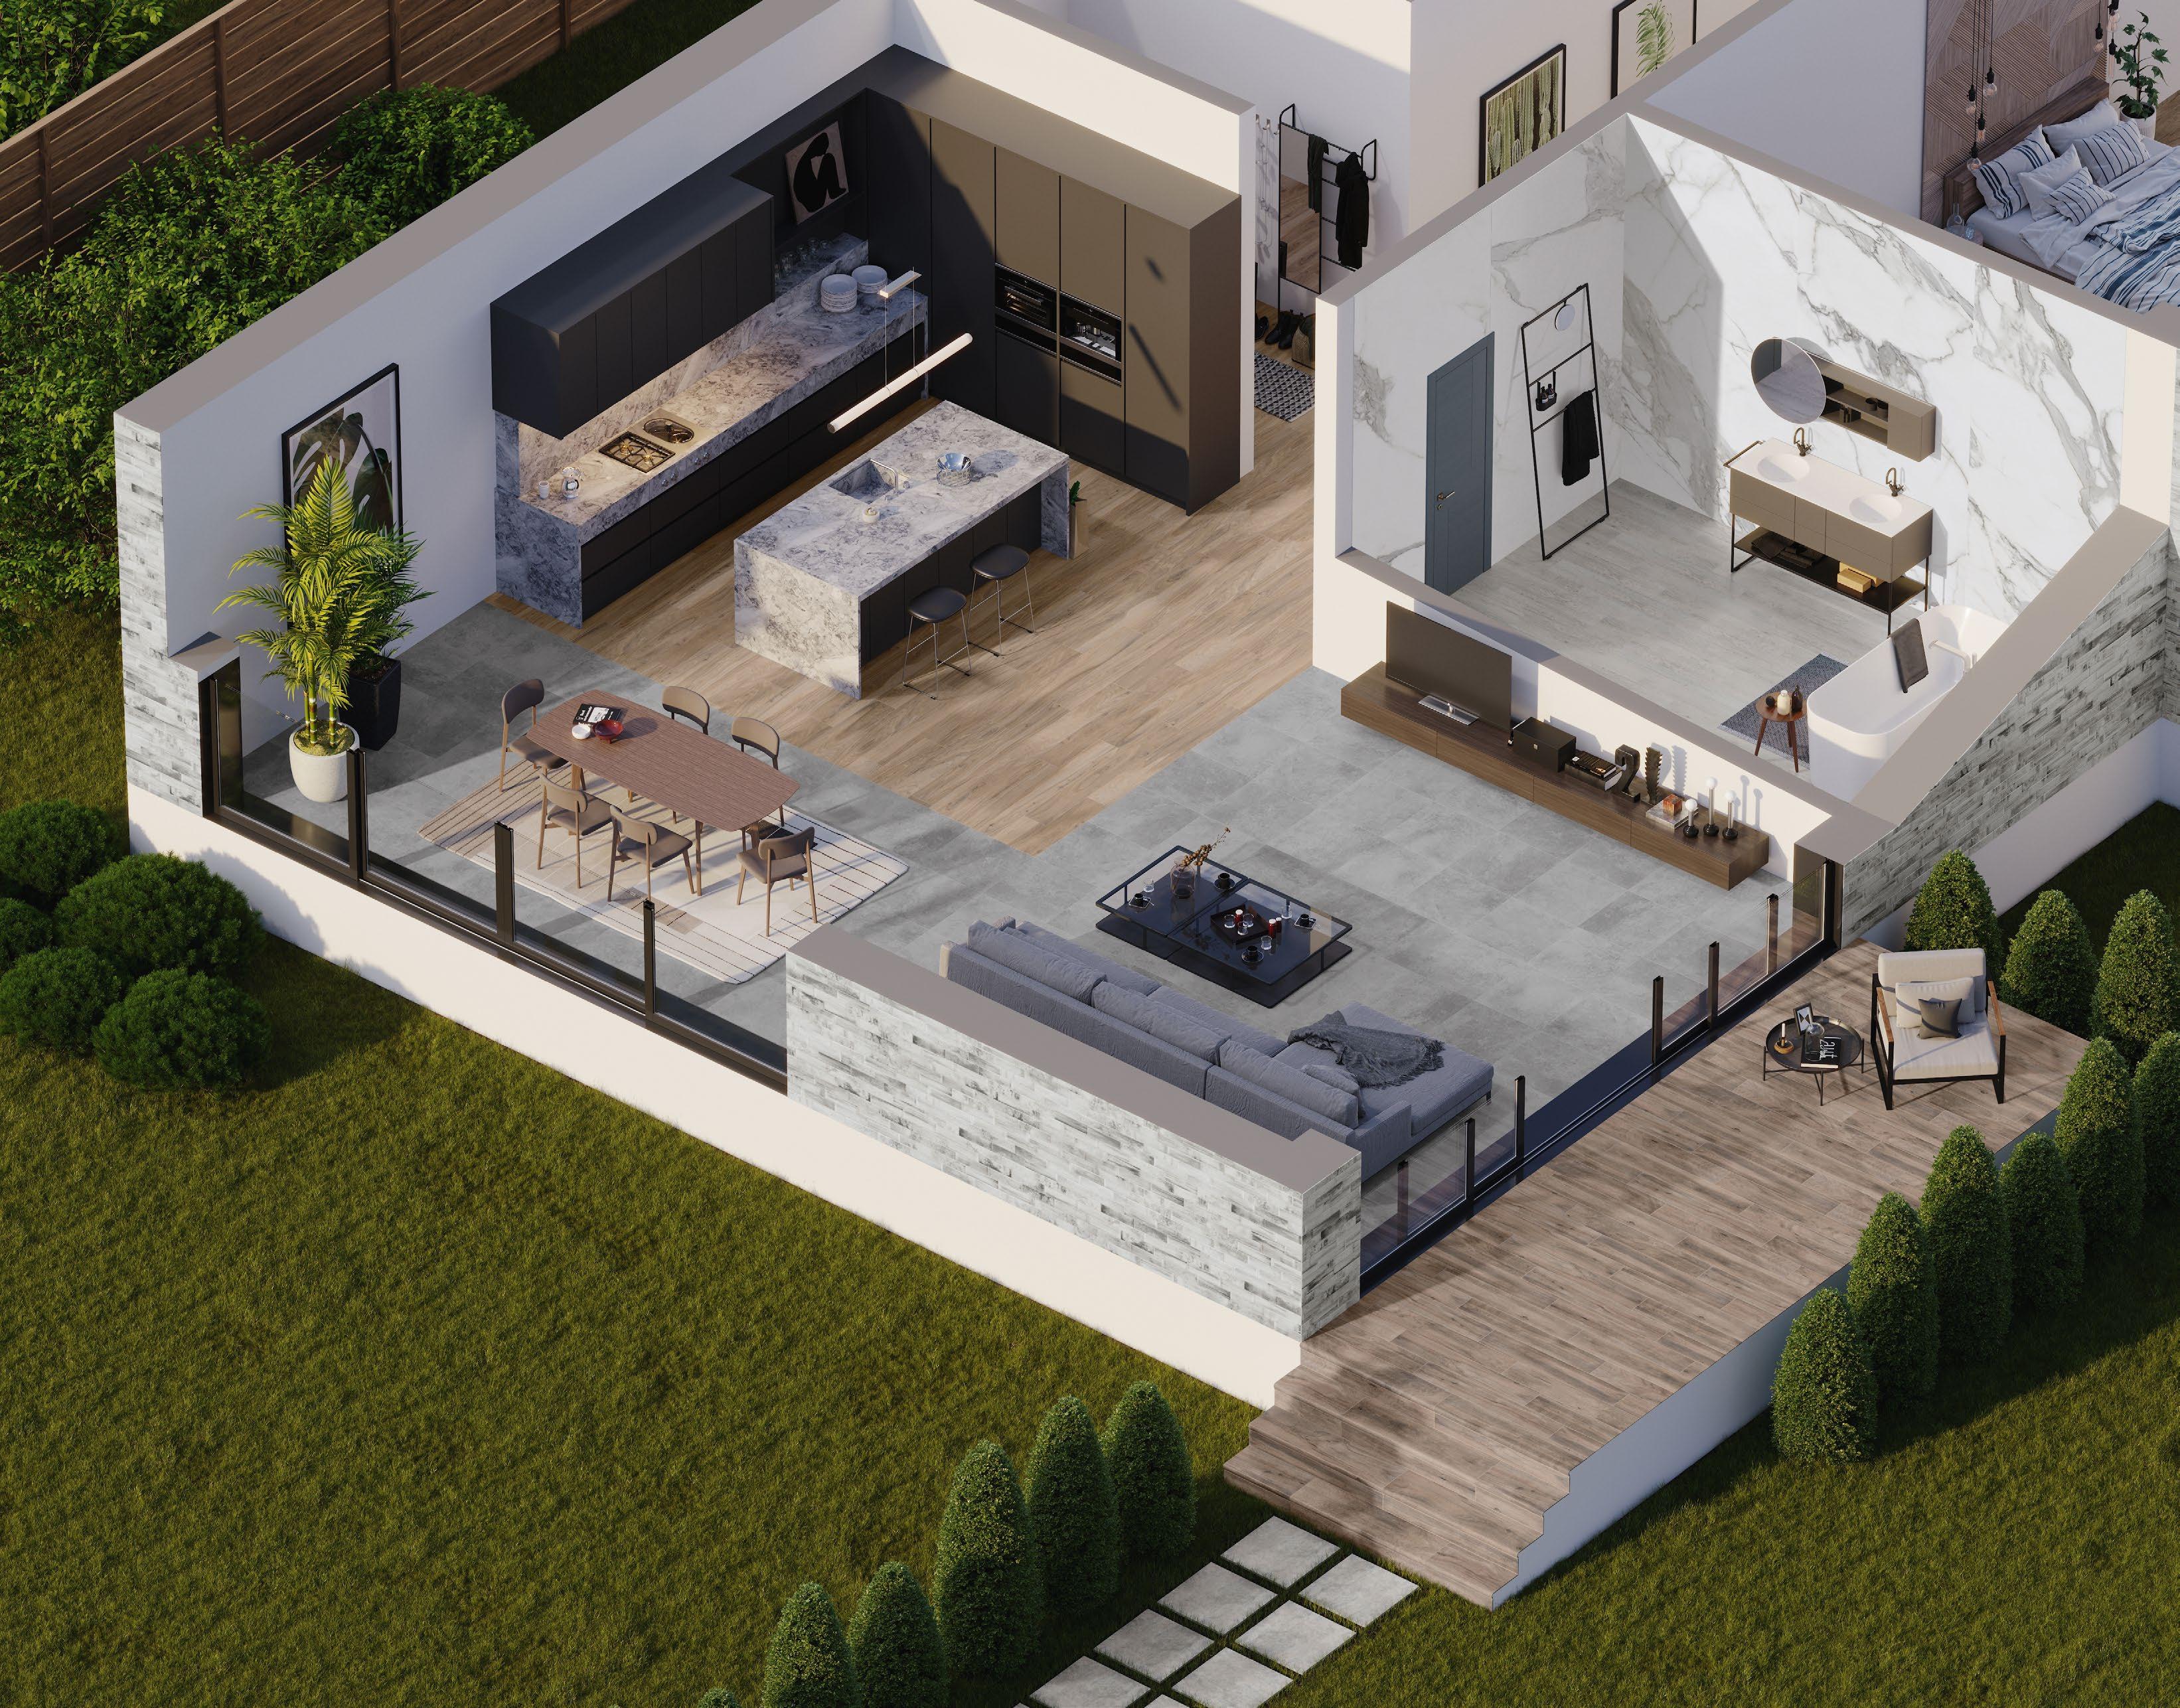
Monumental character of the tile will minimize amount of joints needed and will give you the impression of a flawless, uniform surface.
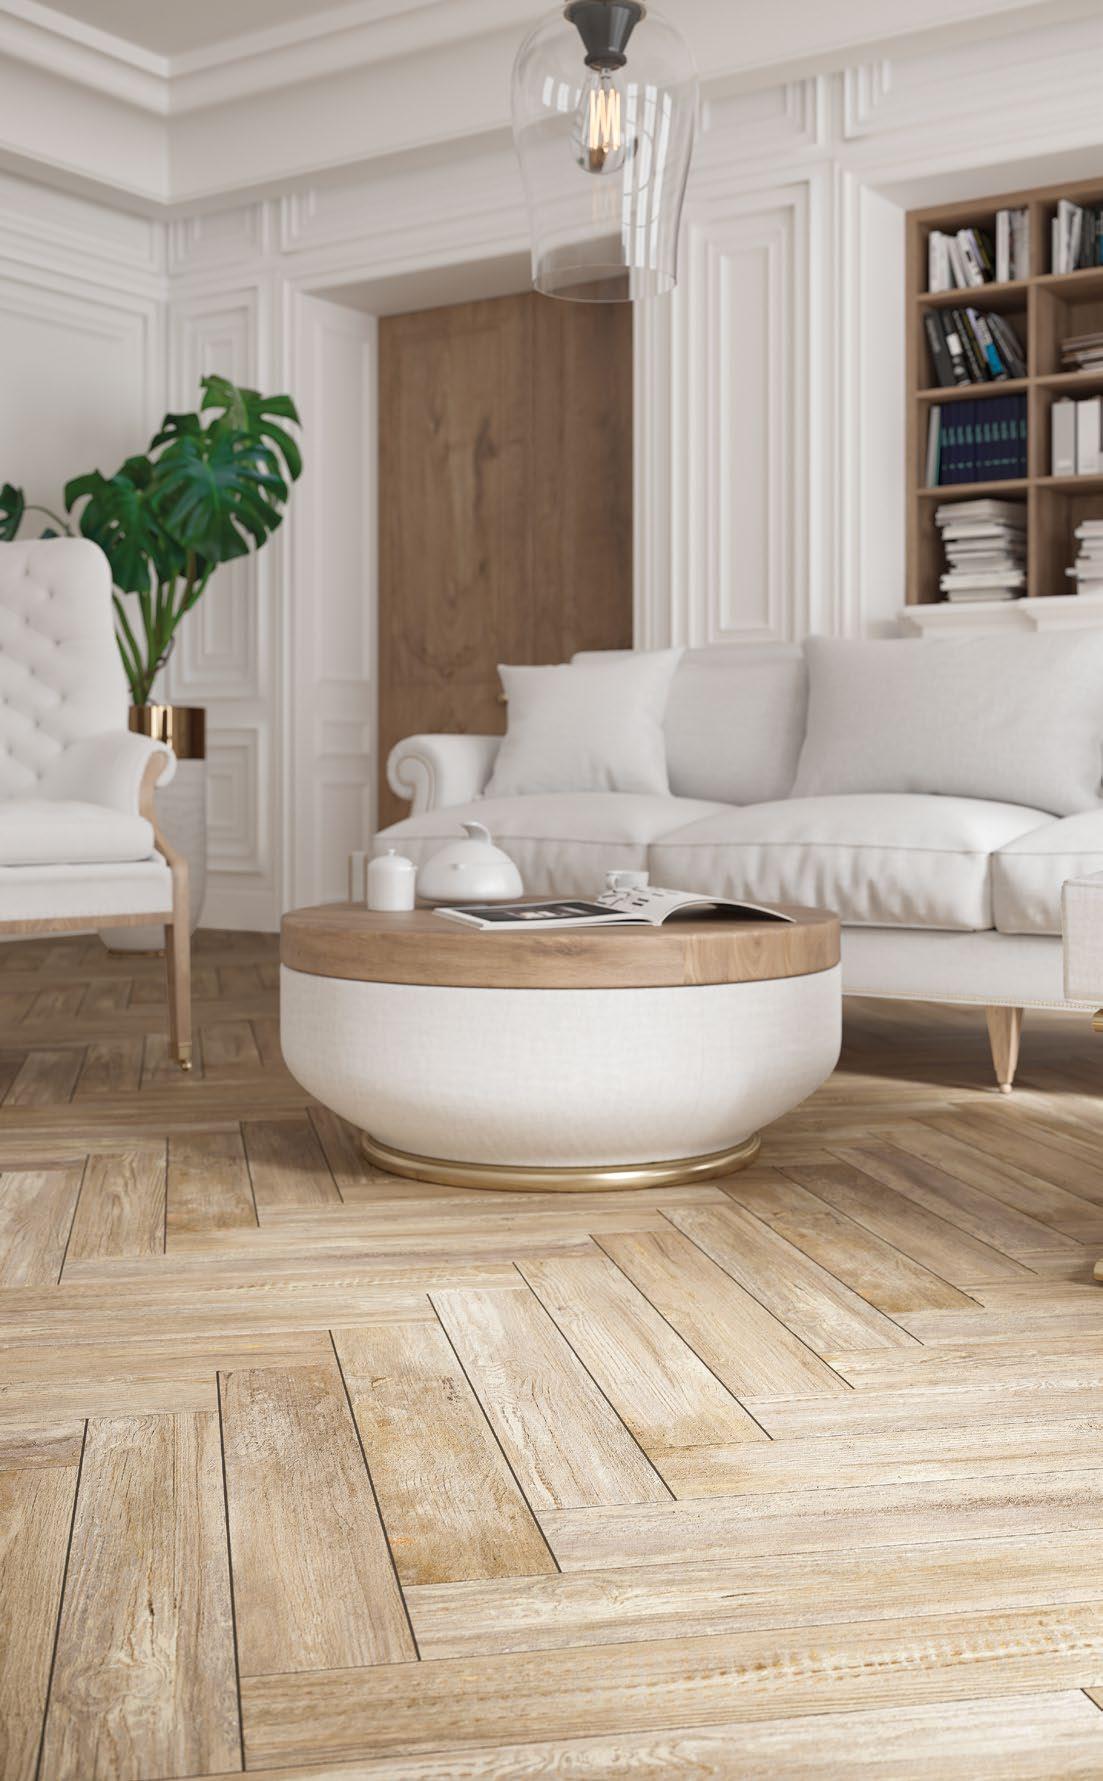
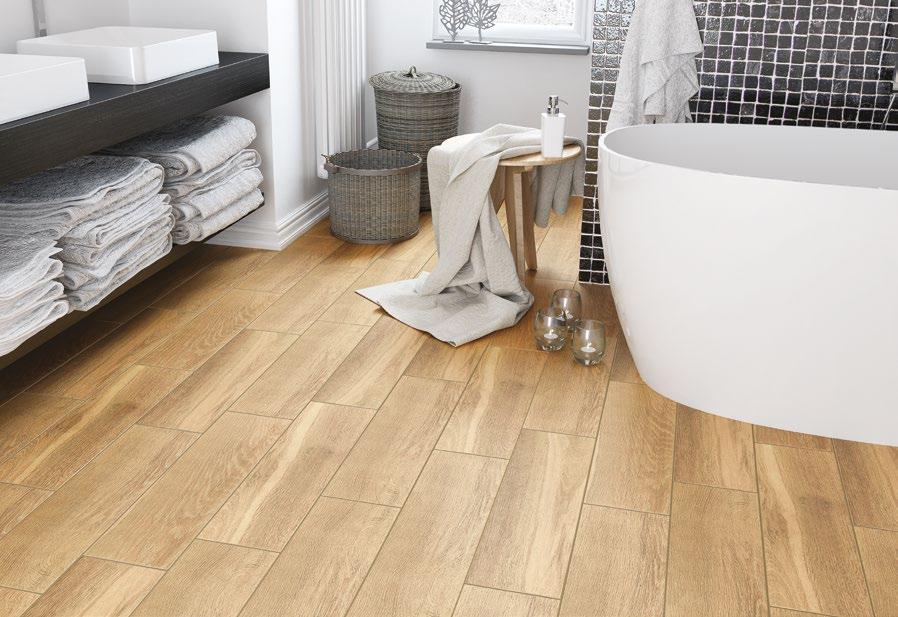
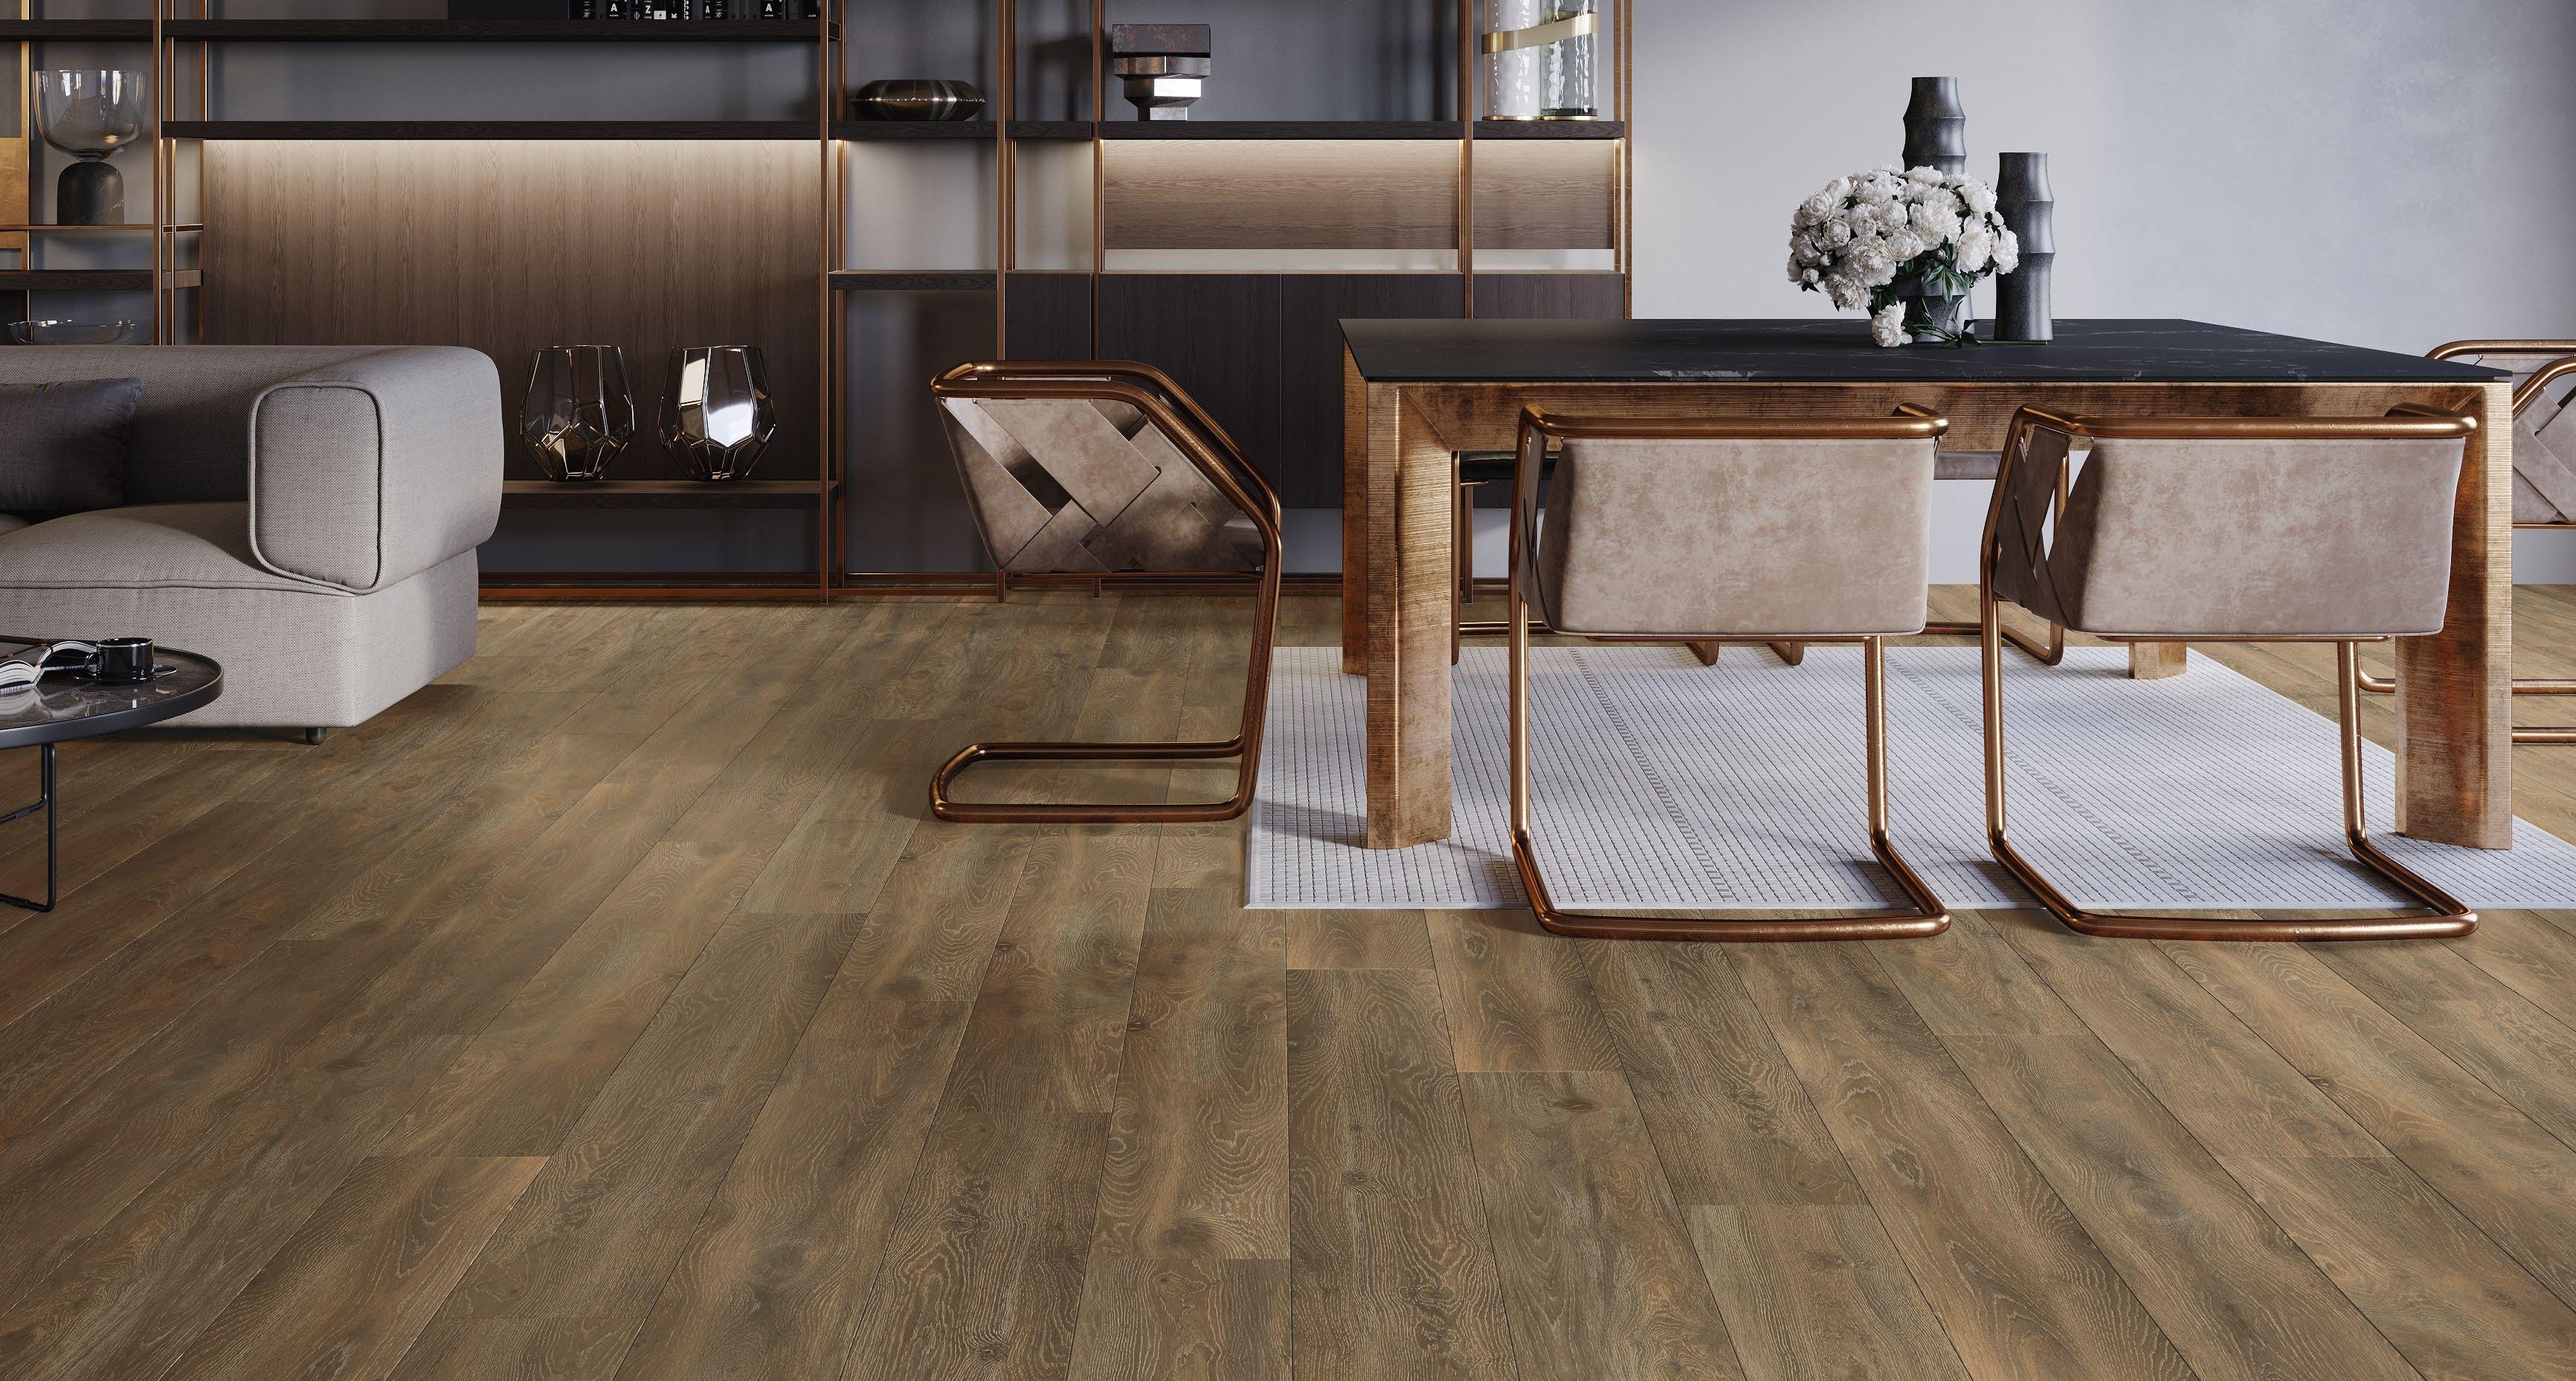
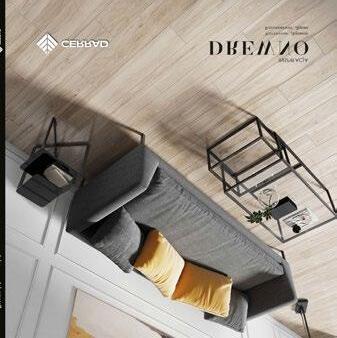
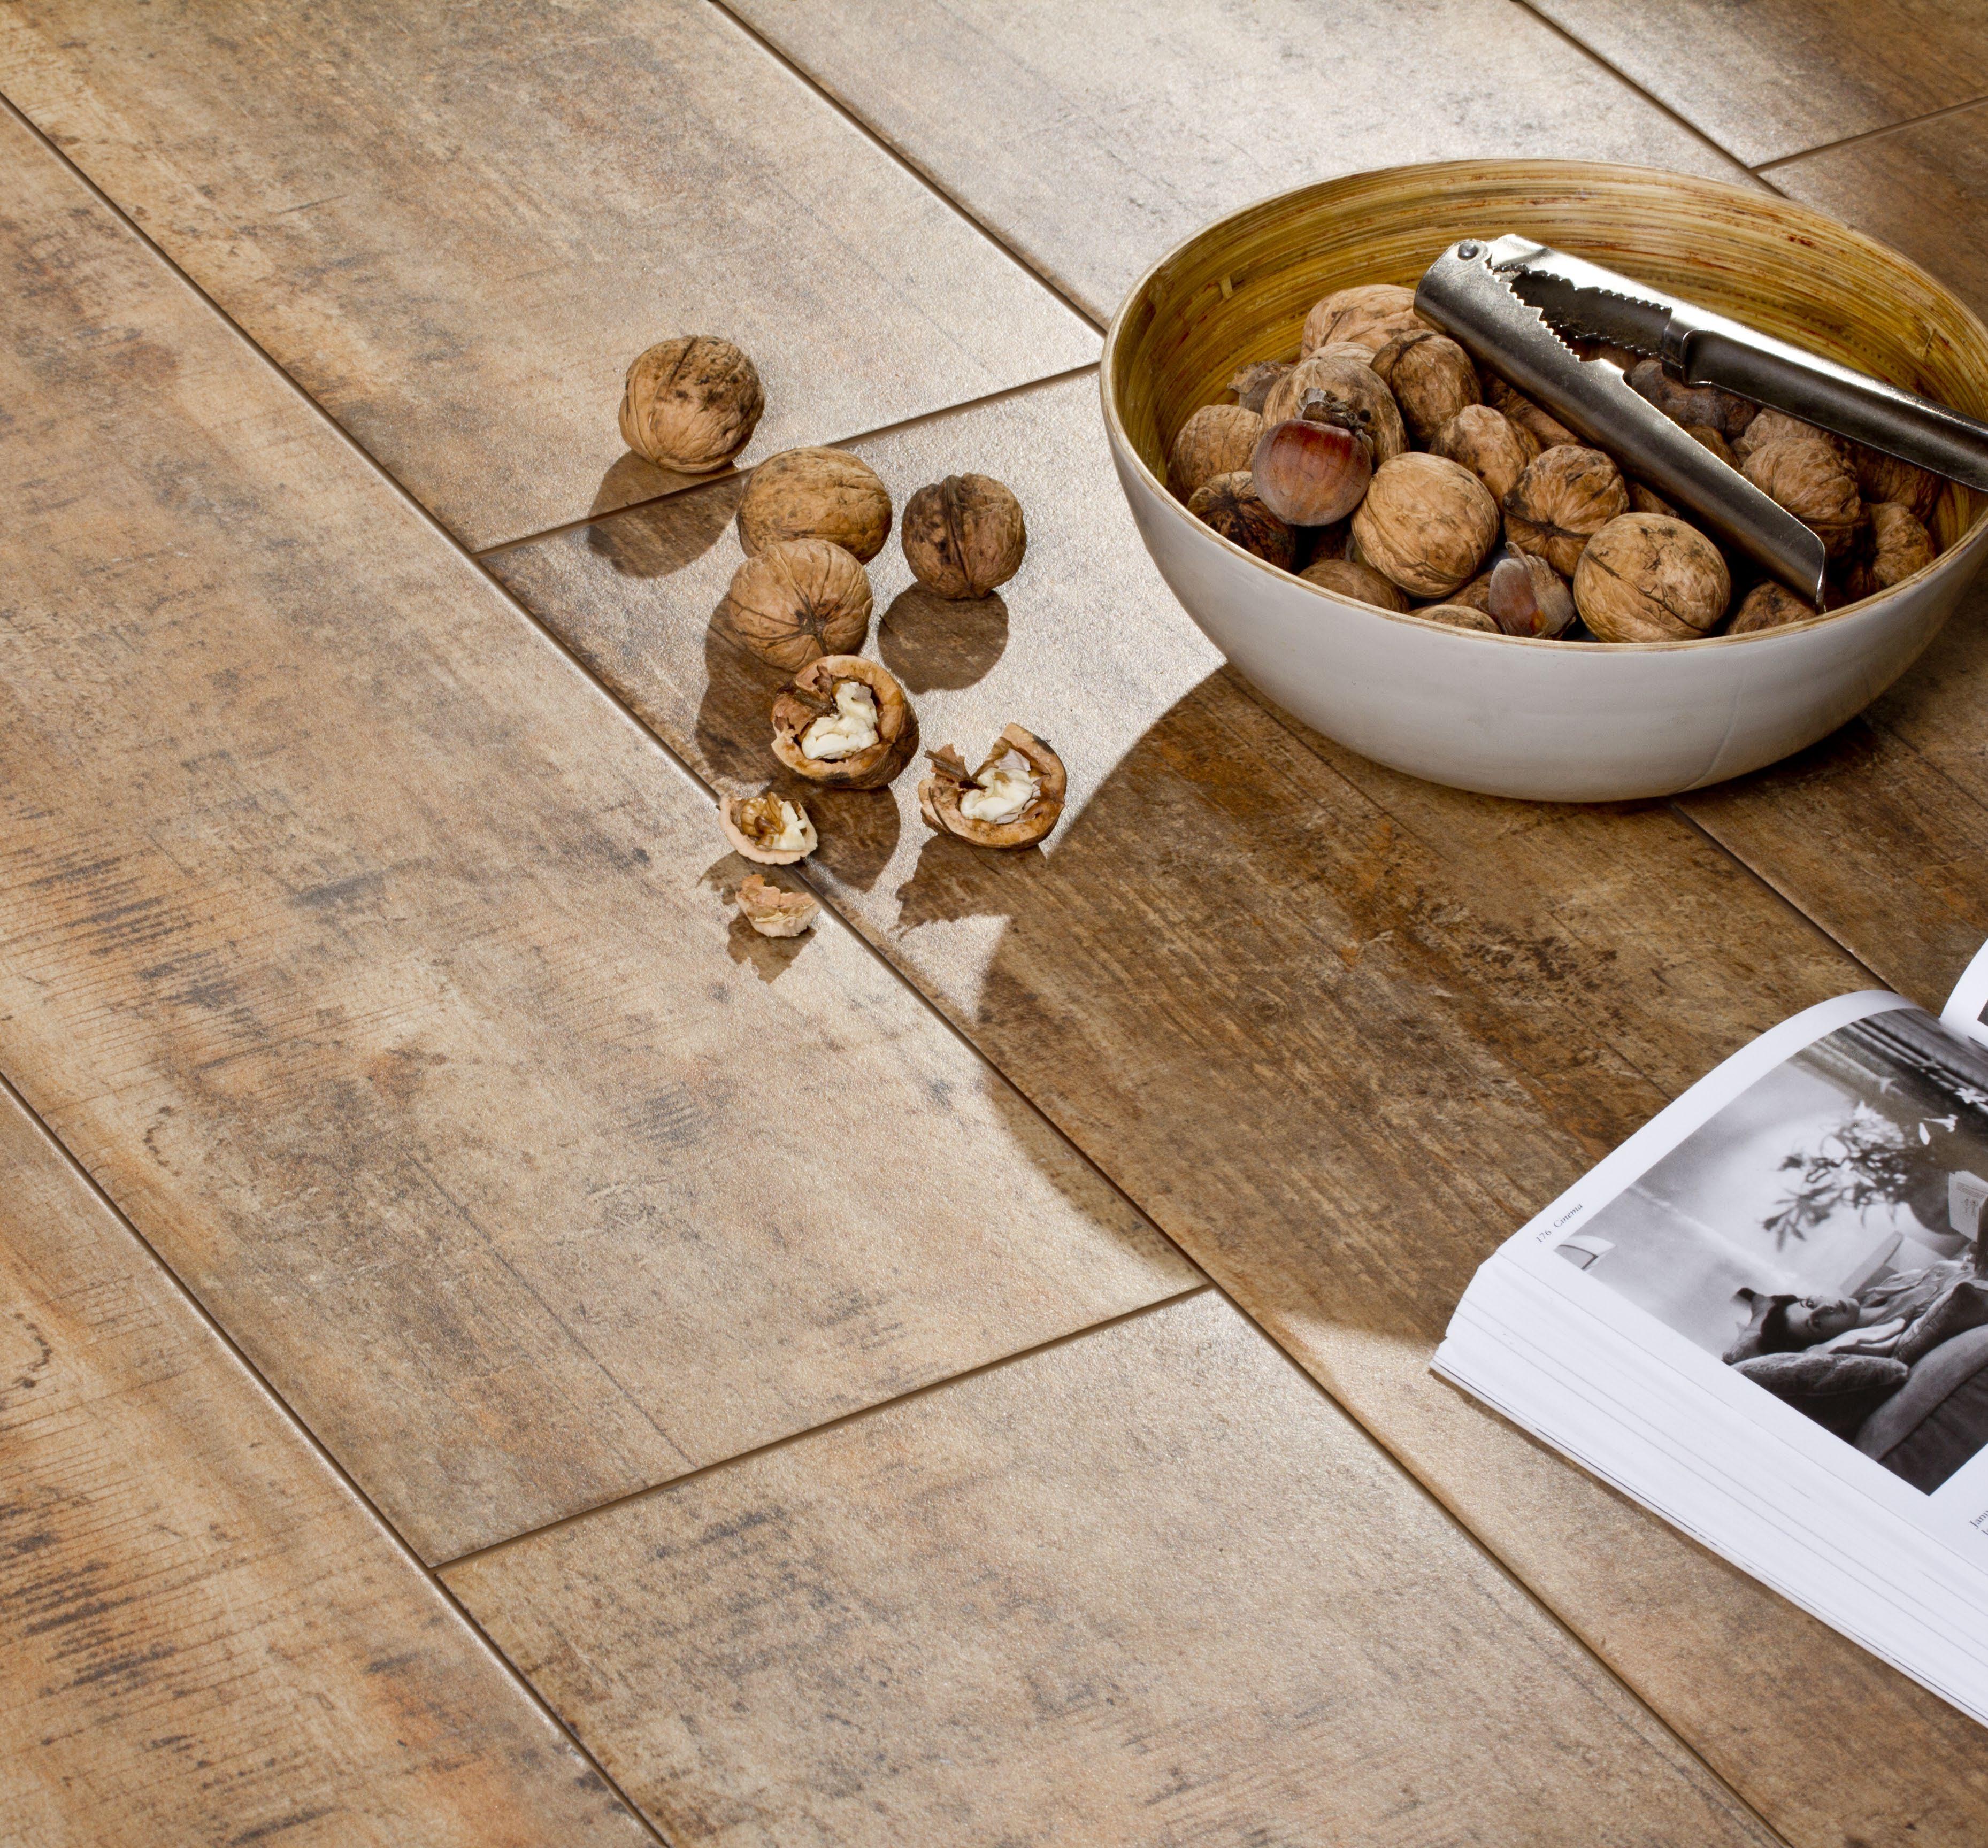
Tiles resembling a light coloured plank will blend in perfectly with the rest of interior and will work great in transferring warmth from floor heating.
Natural wood shades and high resistance to staining will not only give a kitchen warmth, but also desirable tile performance needed in this space.
Original appearance of the collection and its resistance to abrasion make it an excellent choice for a living room which is in direct contact with the outside.
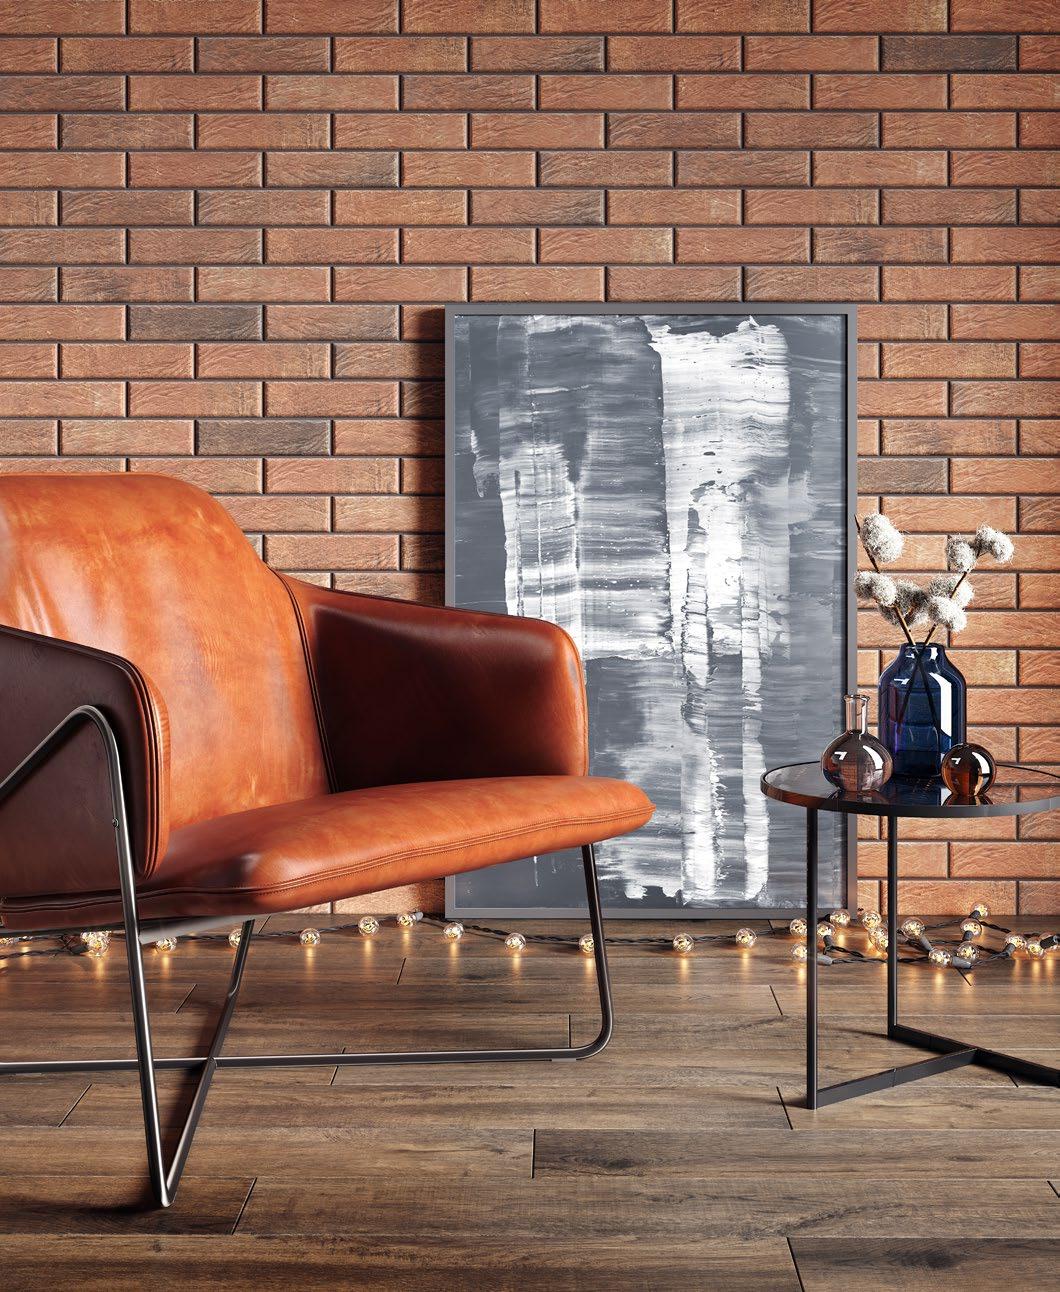
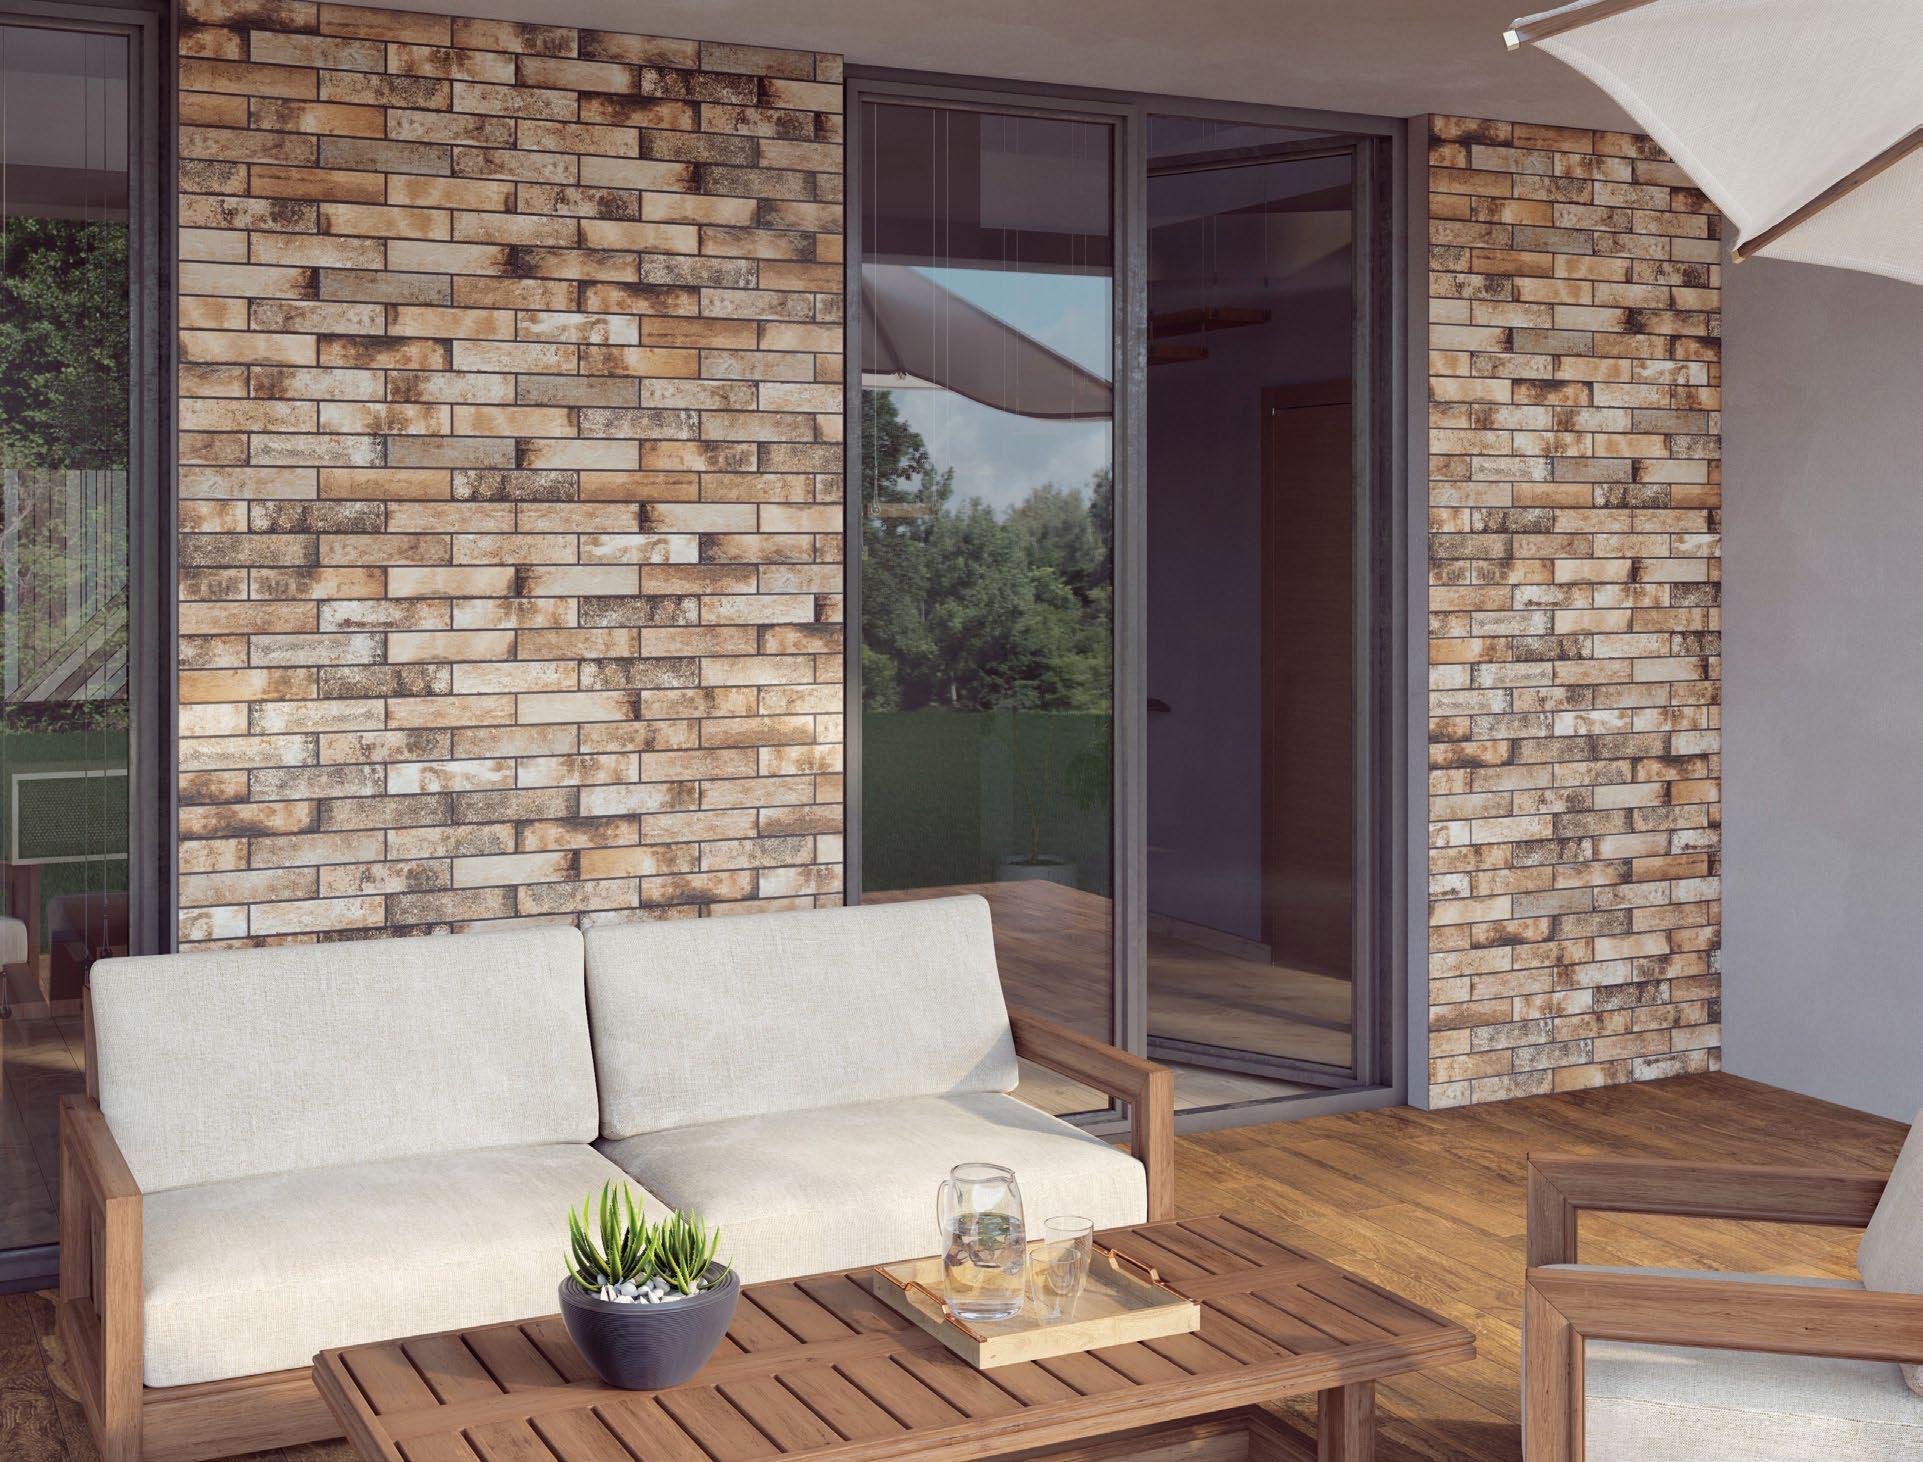
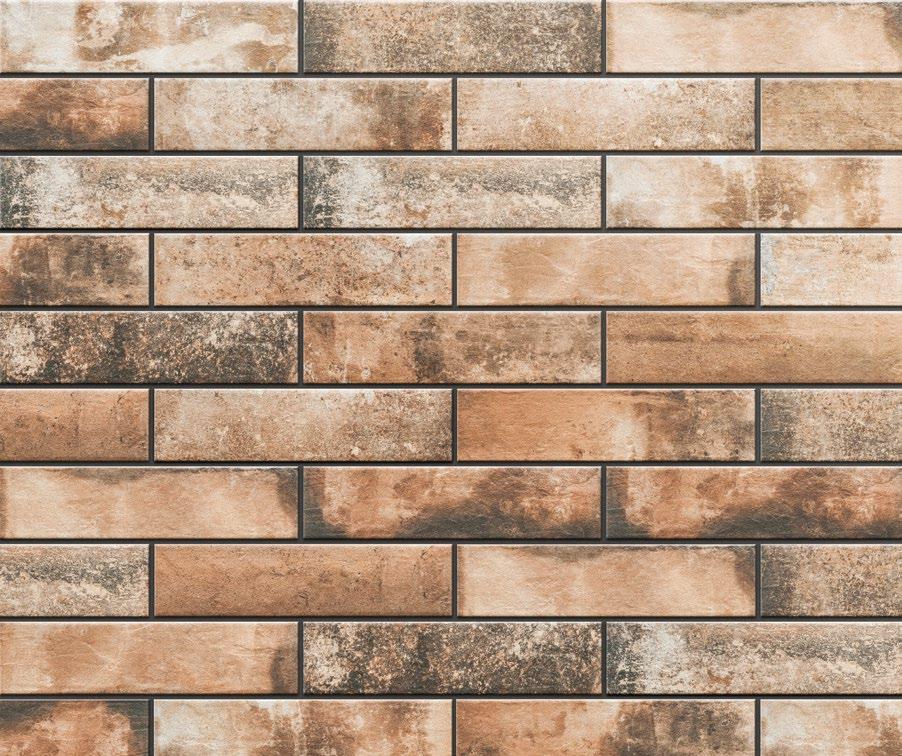
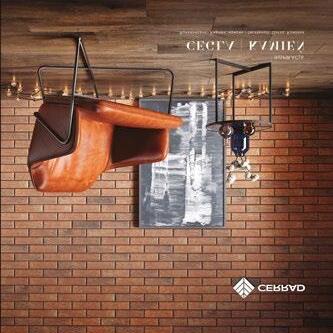
Clinker tiles modelled on Italian brick will distinguish a house from others – large number of different faces will effectively break up the repetition on any facade.
Increased slippery resistance properties of Mattina collection make it the ideal choice for outdoor use.
When combined with basic tiles of this collection, we will achieve a consistent, uniform look on every terrace.
Extremely high resistance to damage achieved by thickening of the tiles up to 20 mm makes them ideal for placement on gravel beddings, draining mortars, or raised, outdoor floor systems.
TACOMA
MATTINA
When deciding to buy tiles you should remember to not only take the aesthetic qualities into account, but also focus on their performance parameters.
In places with intensive use, where there is risk of bringing large amounts of abrasive material (sand for instance) from the outside, pay attention to appropriately high PEI parameter or choose unglazed products.
CUSTOMER SUPPORT
We offer customer support in many areas: we not only guarantee high quality technical advice, but we also adapt to market requirements by offering, among other things:
Electronic catalogs which can be downloaded from our website: www.cerrad.com

Polished tiles are not recommended in public buildings, entrances and passageways Why?
a) sand grains brought from the outside can lead to scratching of surface; b) polished tiles have lower slippery resistance properties.
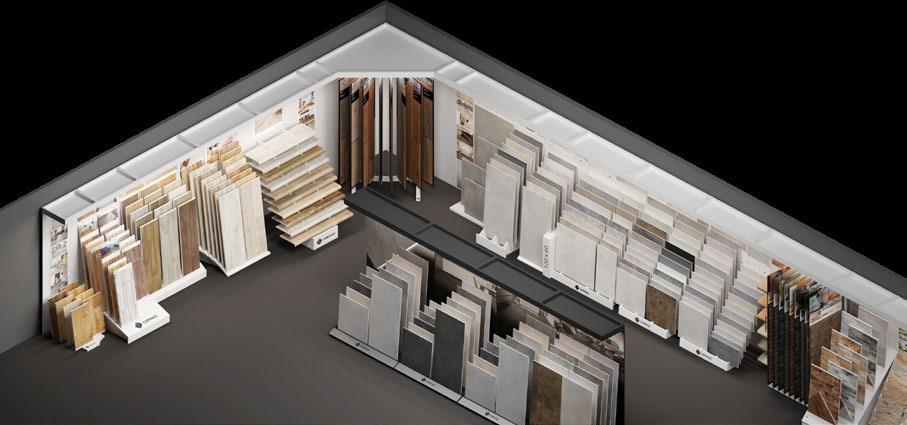
Ceramic tiles are not only a design choice but also a guarantee of durability for years. The surface of a tile (structure, type of finish) gives it specific properties, so we recommend an in-person verification of the product. Exhibition of our brands’ tiles can be found at our Business Partners showrooms.
As a manufacturer, we recommend purchasing 10-15% more tiles than actually needed. This way you will be protected in case of breakage or during future renovations.
We recommend that you document tile related information (label pictures for instance) in case you need to buy matching tiles in the future. Such documentation will provide information about the collection name, colour or production date.
Complaints can only be made with the proof of purchase received during the transaction.
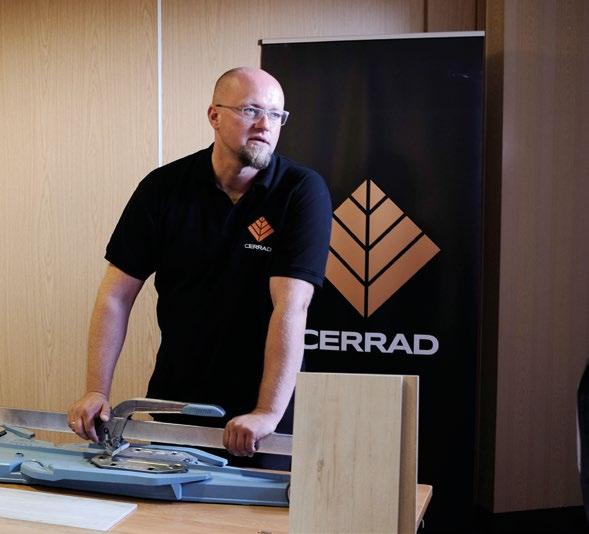
Training and technical advice for bussiness partners as part of cooperation
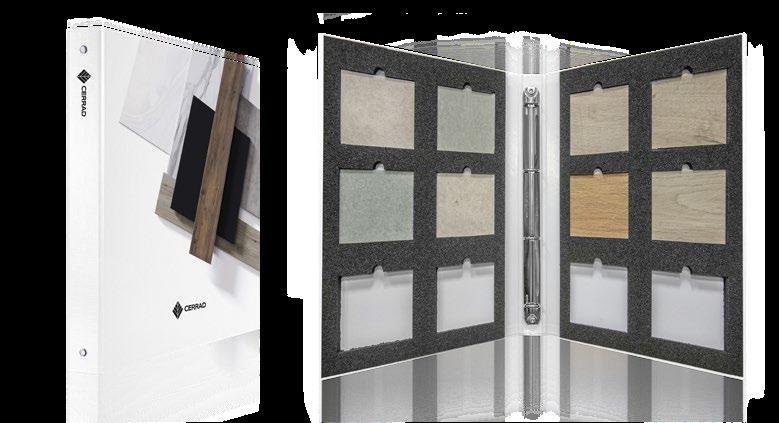
Ability of ordering tile samples
If
We
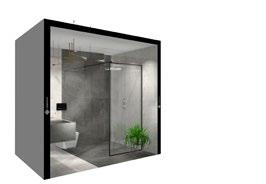
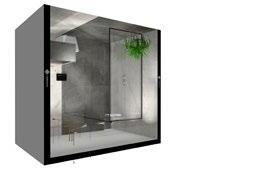
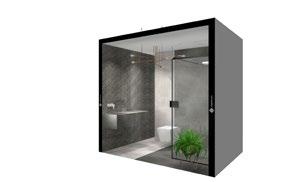
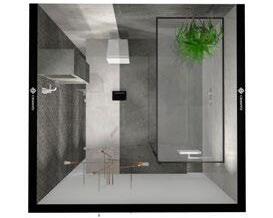
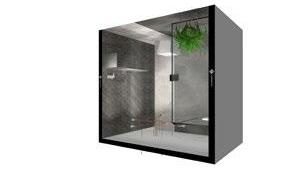
Designs of cubicles, displays and zones
Thanks

03 INSTALLATION
TILES INSTALLATION
Preparation of tiles prior to installation
humidity: at a level allowing to applicate primers and adhesives, without running them off or binding improperly;
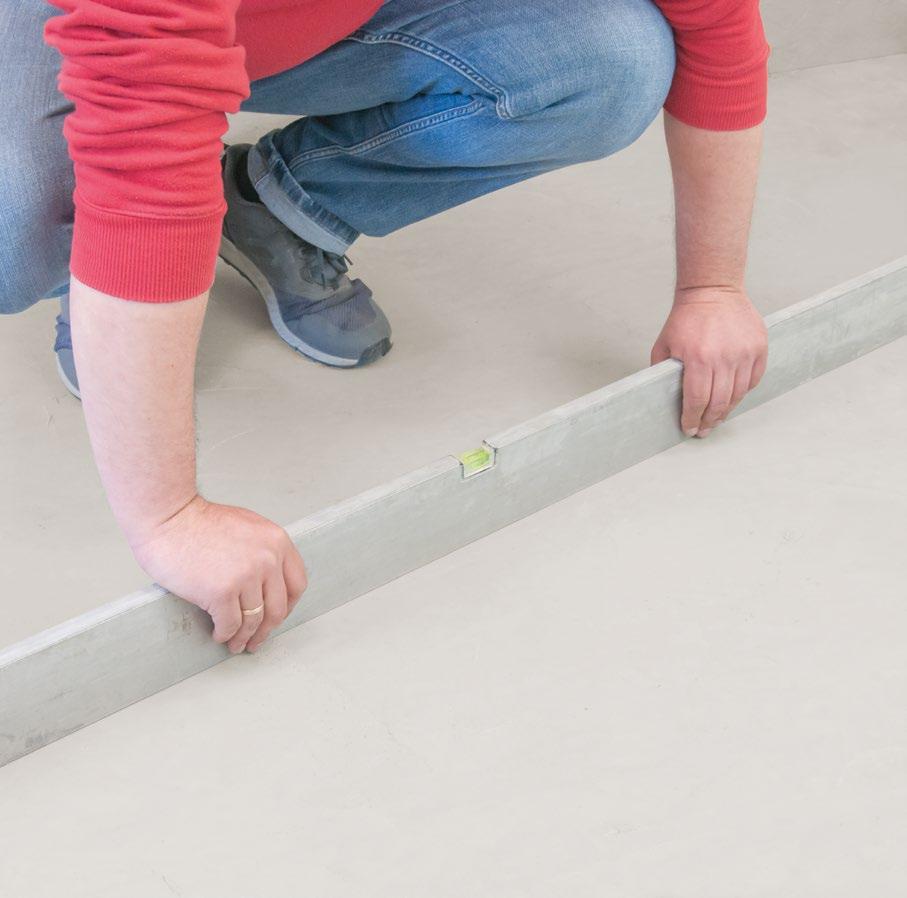
evenness: necessary for tile placement in a flat manner; do not use adhesives to correct the uneven surfaces – mortars, self-leveling screeds and leveling tools should be used instead.
While planning a tile installation project, one should start by designing a layout that takes into consideration the following factors: room size, tiles format, direction of tile placement and the design arrangement. These factors will help to determine both tiles quantity and areas where they are going to be cut or trimmed (also: in case of large spaces – locations of expansion joints).
Ceramic tiles – especially large porcelain tiles – should be stored in a space where they will be mounted, at least 24 hours prior to their installation. This will stabilize their temperature and make it easier to perform the necessary alterations on them.
Prior to unpacking, make sure that purchased product matches the collection name, product type and production batch. While inspecting the tiles, look for possible cracks, chipped areas and other flaws that may have occurred during transport or due to improper storage. If there is any doubt about the quality of the product, report it at the place of purchase yet before installation.
Exclamation-Circle
Defects resulting from visual differences in tile graphics are not a subject for returning, if they have already been permanently glued to the surface.
Preparation of surface prior to installation
01 02
Surface preparation is the first and the most important step in the installation process. Overlooking or neglecting of this step may result in an incorrect installation of tiles, leading to necessity of repeating the whole mounting process from the very beginning. Inspection of state and quality of surface where the tiles will be affixed can be done visually or with the use of proper tools. In case of doubts, consultation with an expert is recommended.
Correctly prepared surfaces should have the following qualities: proper adhesiveness capacity: meaning to be free of various debris and dirt, free of old adhesives layers that may be peeling off; these can greatly reduce the adhesion of glue to desired surface;
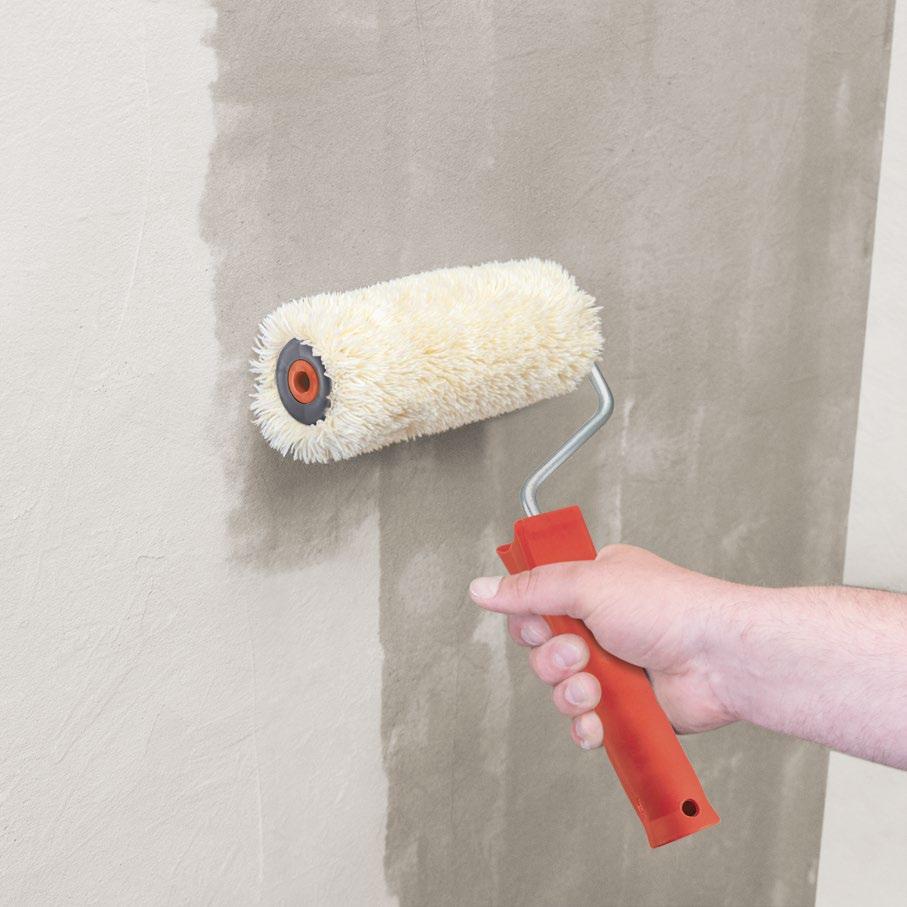
If the surface does not meet even one of the conditions above, it is necessary to prepare it using dedicated tile affixing products, including: screeds, mortars, leveling putty, binding and strengthening cements that also regulate absorbability, along with resins which include adhesive compounds. In cases when large format tiles are being installed, additional precautionary steps should be taken, such as the use of expansion joints, matts and adhesives with the highest possible flexibility.
Floor and wall heating
When deciding to use floor and wall heating, ceramic tiles are an excellent material for surface coverage. They have high thermal conductivity and great dimensional stability. All Cerrad Group tiles can be used with floor and wall heating installations. Prior to tile installation, it is important to conduct the heat treatment process to properly cure mortars that are being used with heating system components.
Remember to use surface and edge expansion joints that separate independent heating zones, which is important due to thermal expansion of mortars during temperature changes.
It is also important to use tools and mortar compounds that are appropriate for the installation type being completed.
Tiles installation on the surface
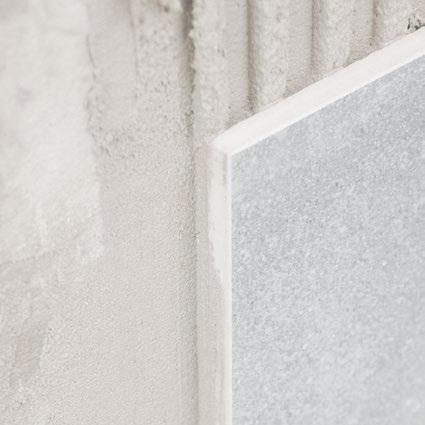
After the proper surface preparations have been completed, tiles can be installed. We affix the tiles to the chosen base with a glue dedicated specifically for the type of tiles being used. When choosing the glue, close attention should be paid to parameters such as: adhesive flow, time gap for setting, bonding strength and flexibility. When choosing the adhesive type, we should also take into consideration: project location (indoor or outdoor), tiles type (clinker or porcelain) and tiles format.
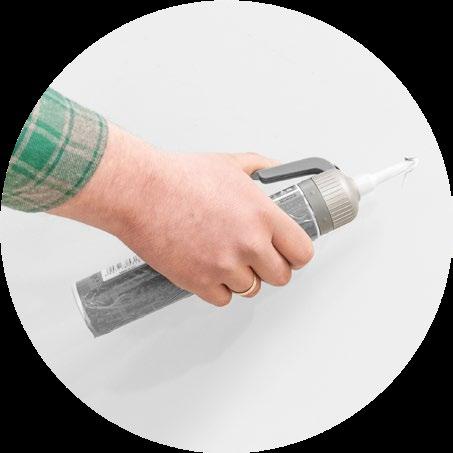
A crucial step in the installation process is the need to applicate adhesive on both adjacent surfaces – bottom side of the tile and the base of the wall / floor.
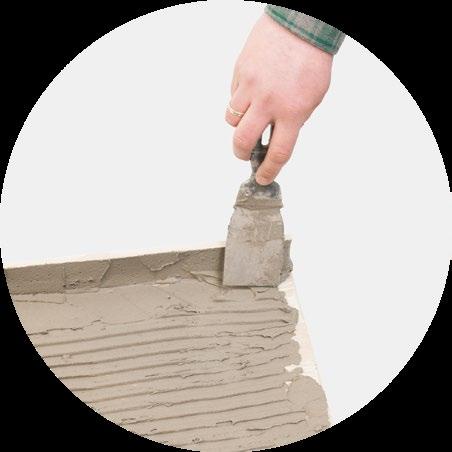
We begin by evenly spreading the glue on the wall / floor base using a notched trowel (Pic. c).
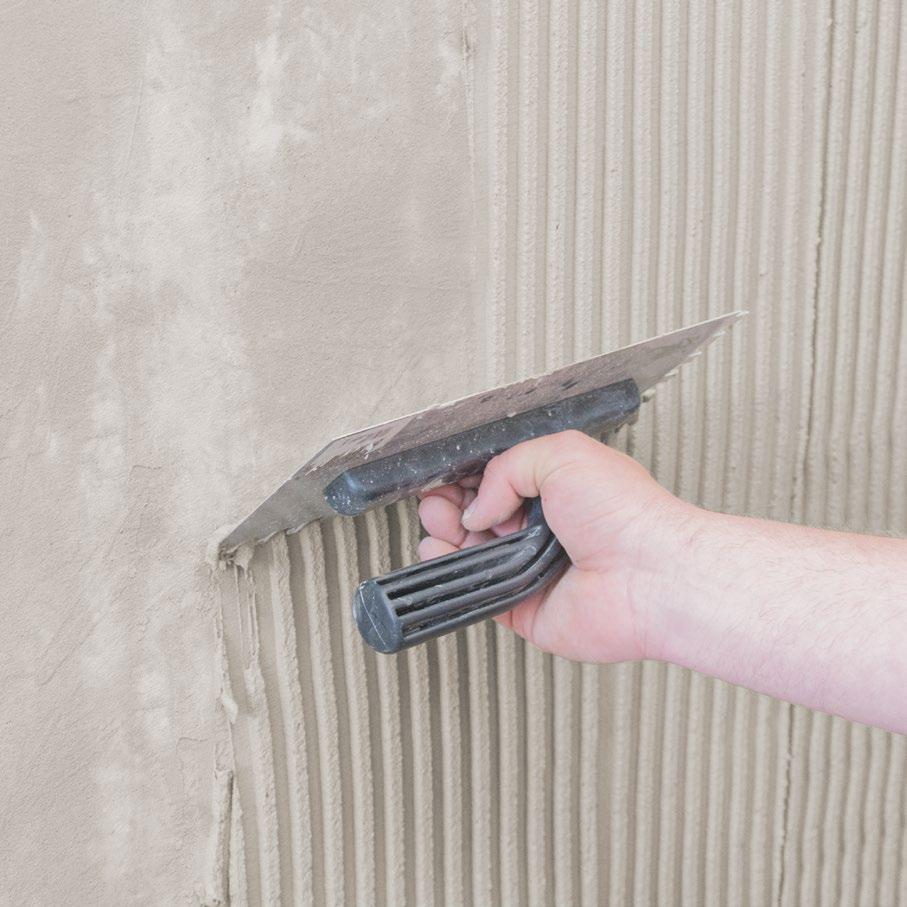
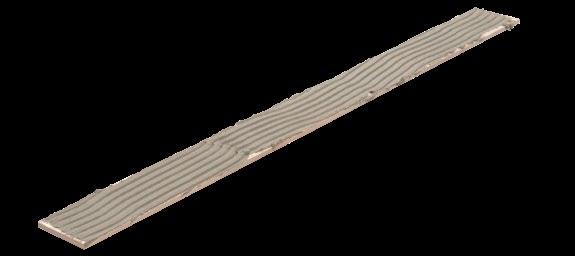
We then apply a thin layer of glue on the bottom side of the tile – the initial contact layer. This will then become the foundation for the application of another, final layer of glue, this time applied with the use of a notched trowel (Pic. d).
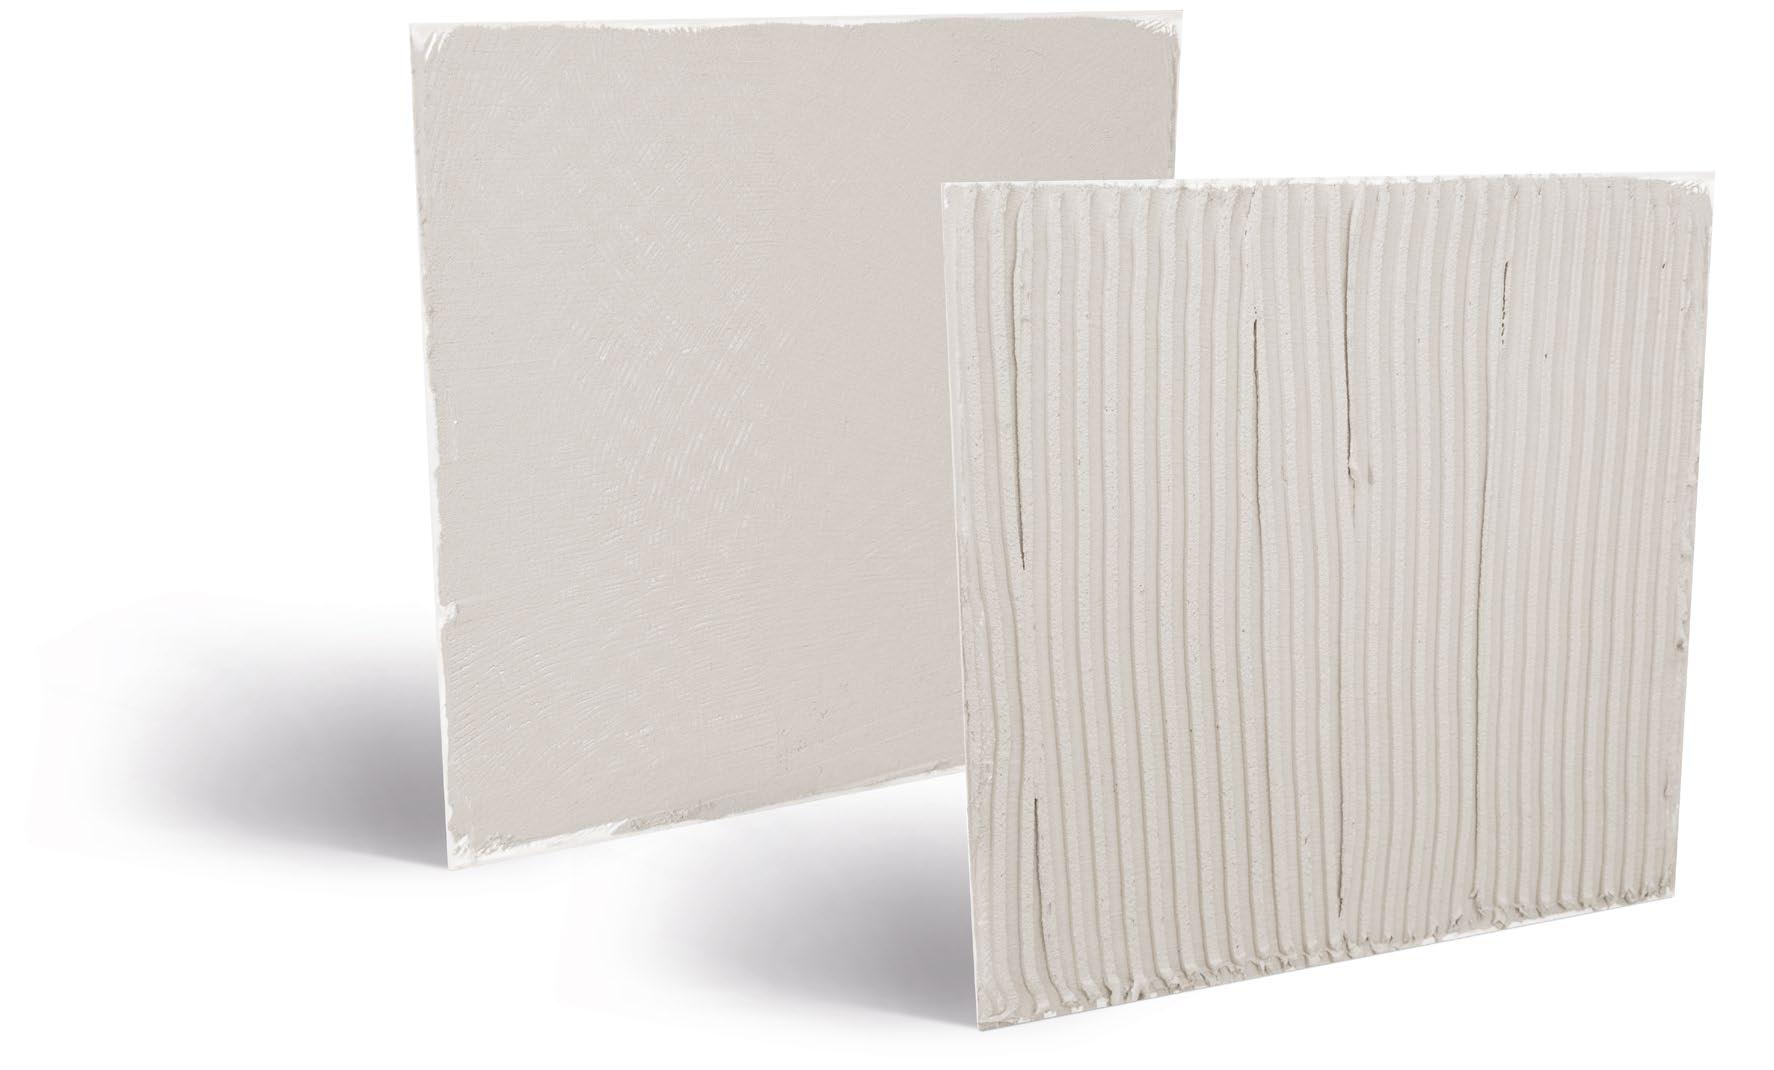
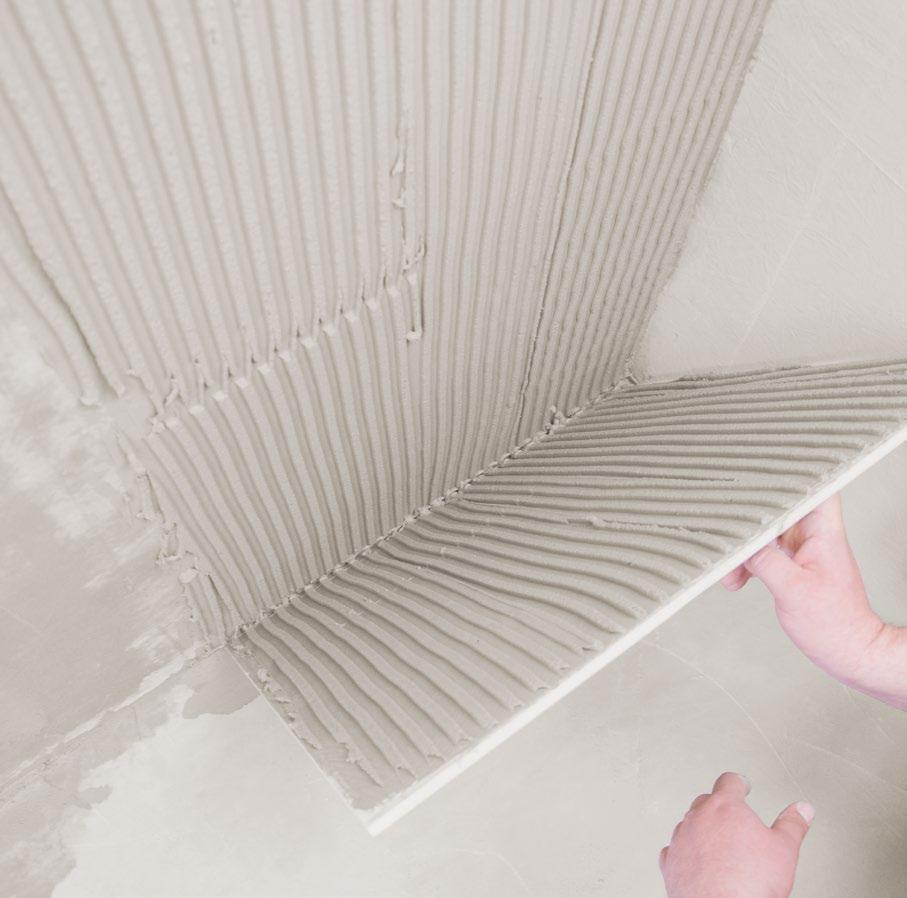
In order to assure proper placement and bonding, the grove direction from the notched trowel on both surfaces being affixed together should be parallel to one another (Pic. e).
Run the notched trowel on both surfaces parallel to the shorter side, which allows trapped air to be more easily pushed out. Thanks to this step, we eliminate the number of voids not filled with glue while pressing two surfaces together. Improper and uneven glue distribution can cause cracks and separation of the tile from the base during usage.
After the tile has been placed on desired base, we move it side to side in order to better connect the two layers (Pic. f).
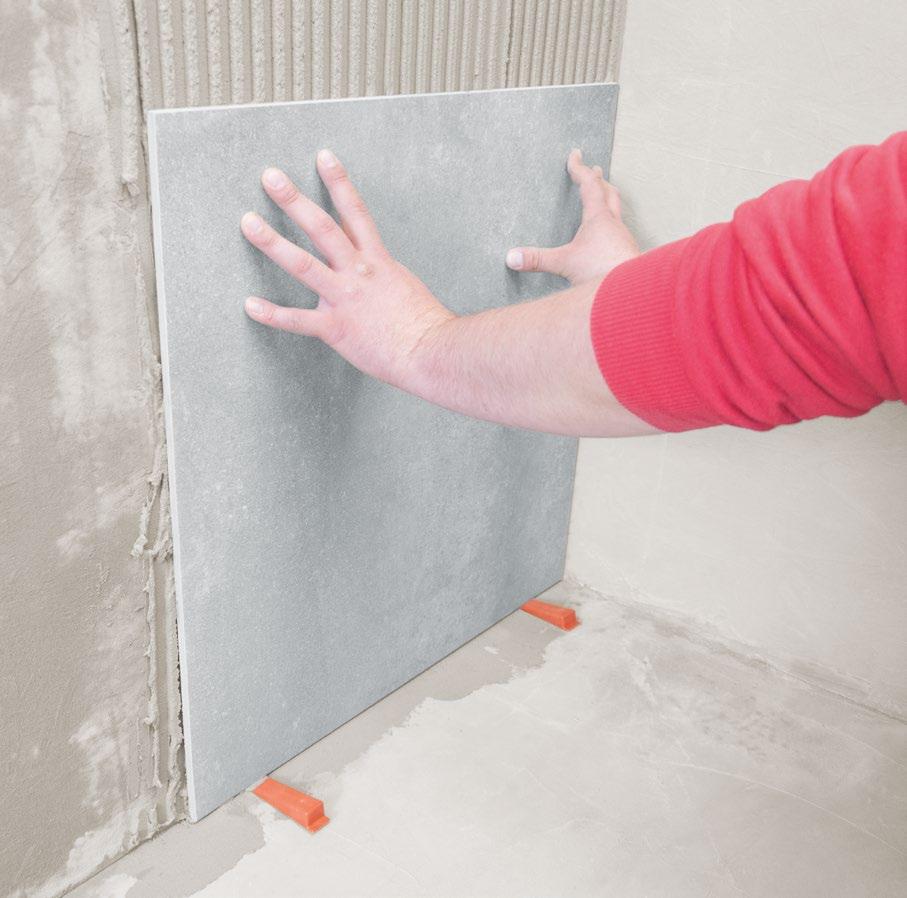
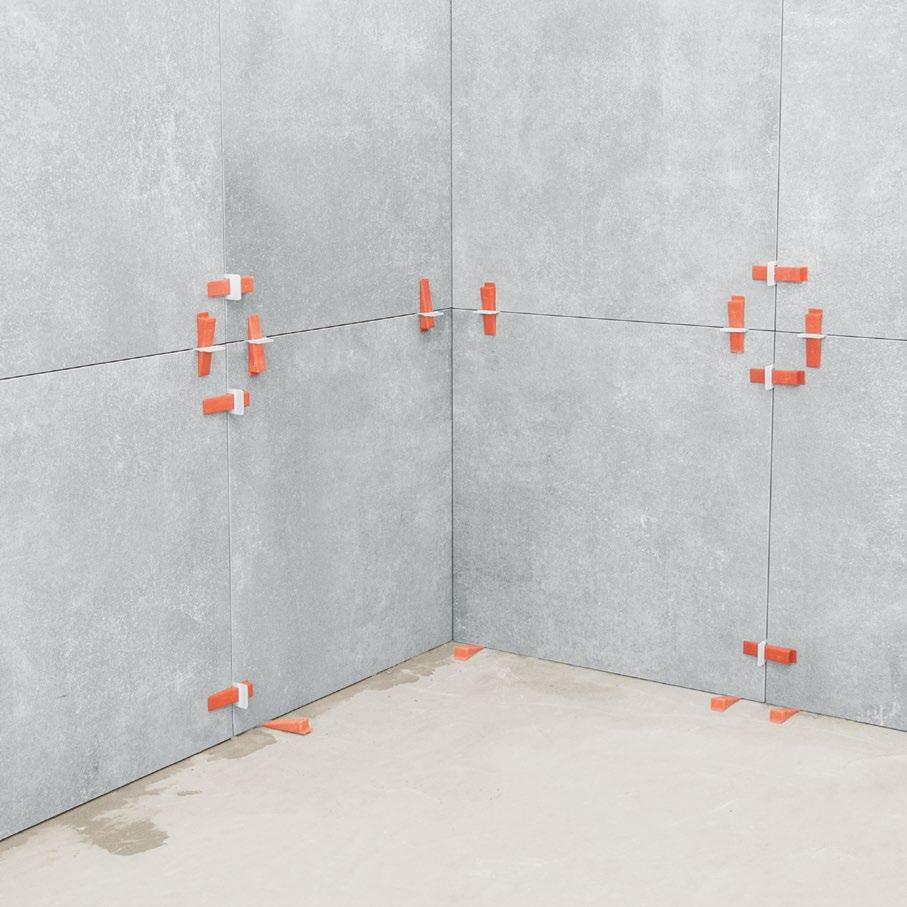
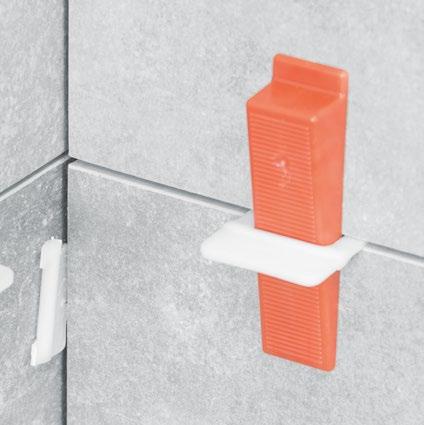
During the installation process and the placement of tiles on the wall or floor, it is recommended that tile wedges/ spacers be used in order keep them leveled and evenly spaced (Pic. g).
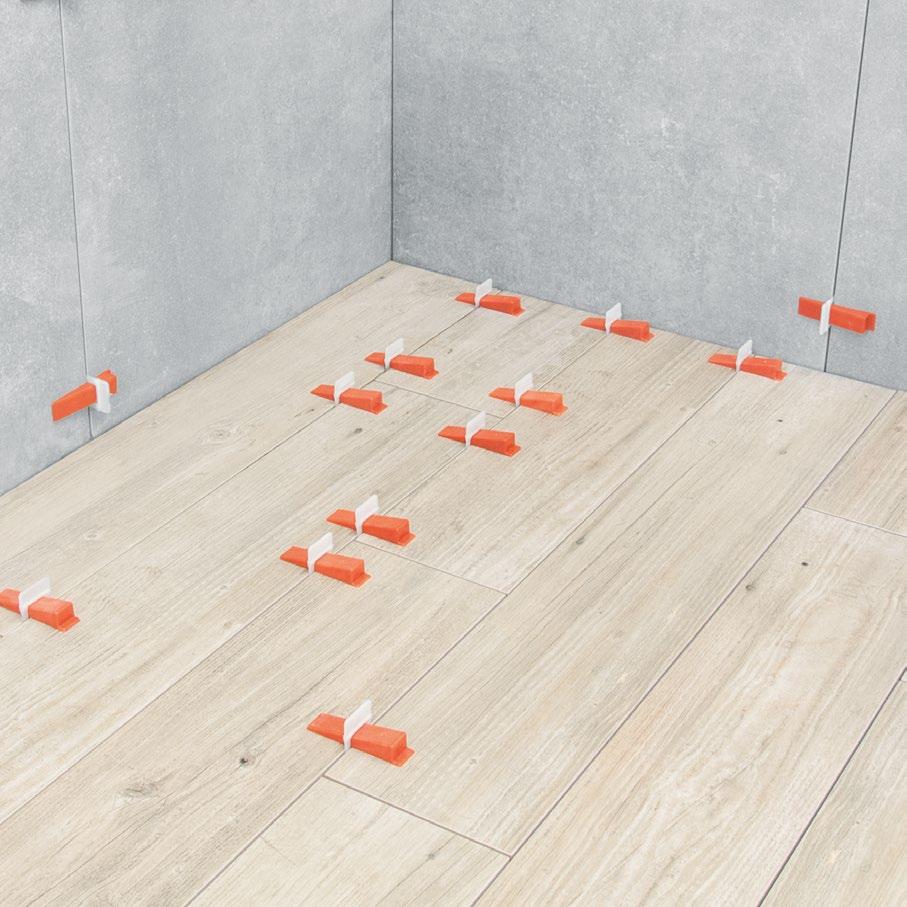
Especially when installing „board” format tiles, an offset of 1/3 relative to the length of board should be maintained (Pic. h).
Grouts and expansion joints
Grout is a type of compound (generally a mixture of water, cement and sand) used to fill the spaces between tiles. Its main purpose is to minimize movements and physical stresses transferred from the surface beneath tiles, and to protect them from pushing against one another. It also serves as a protective barrier against water and other types of liquids and debris from getting beneath tiles, minimizing the risk of separating them from the surface.
Just like with picking the proper adhesive, it is also important to choose the correct grout type. We recommend strictly following suggestions recommended by experts who manufacture these products.
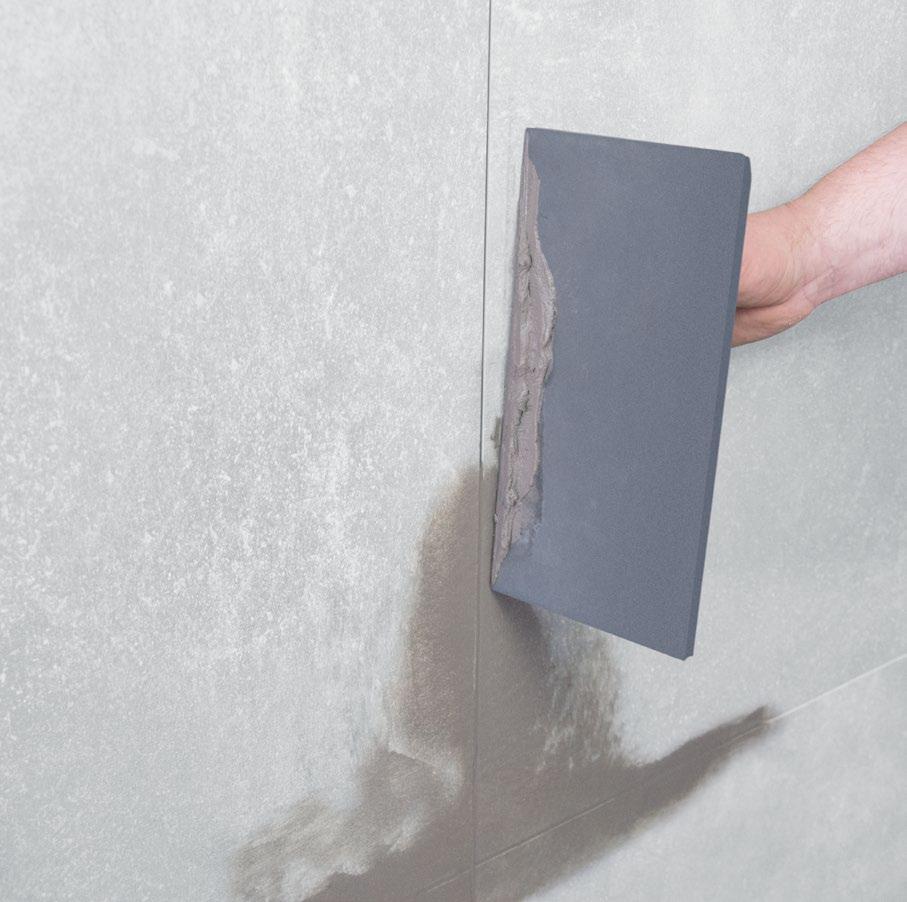
After choosing the proper grout, a test should be carried out in order to measure the ideal grout drying time (Pic. i). Tile surface type may influence grout setting time. Determining ideal grout clean-off time for tiles helps to avoid the need for harsh cleaning chemicals and tools. The grout can then simply be cleaned off using clean water, which will significantly reduce installation time as a whole.
Grout is applied with soft surface trowels, which prevent tiles from getting scratched (Pic. j).
For rectified tiles as a minimum, we recommend tile spacing of 2 mm indoors (3 mm with floor heating) and 5 mm for outdoor installations.
For calibrated tiles grout thickness should be accordingly wider due to dimensional differences in space of the caliber.
An expansion joint is a purposely created gap in order to compensate possible dimension changes in structural elements, which may change due to temperature differences of individual building components.
Lack of expansion joints can create high stresses in the floor tiles, which can then result in their damage.
Expansion joints play a very important role when heating is involved (e.g. underfloor heating). In order to maintain a satisfactory visual effect, the joints can be filled with resilient, flexible grouts and compound fillers.
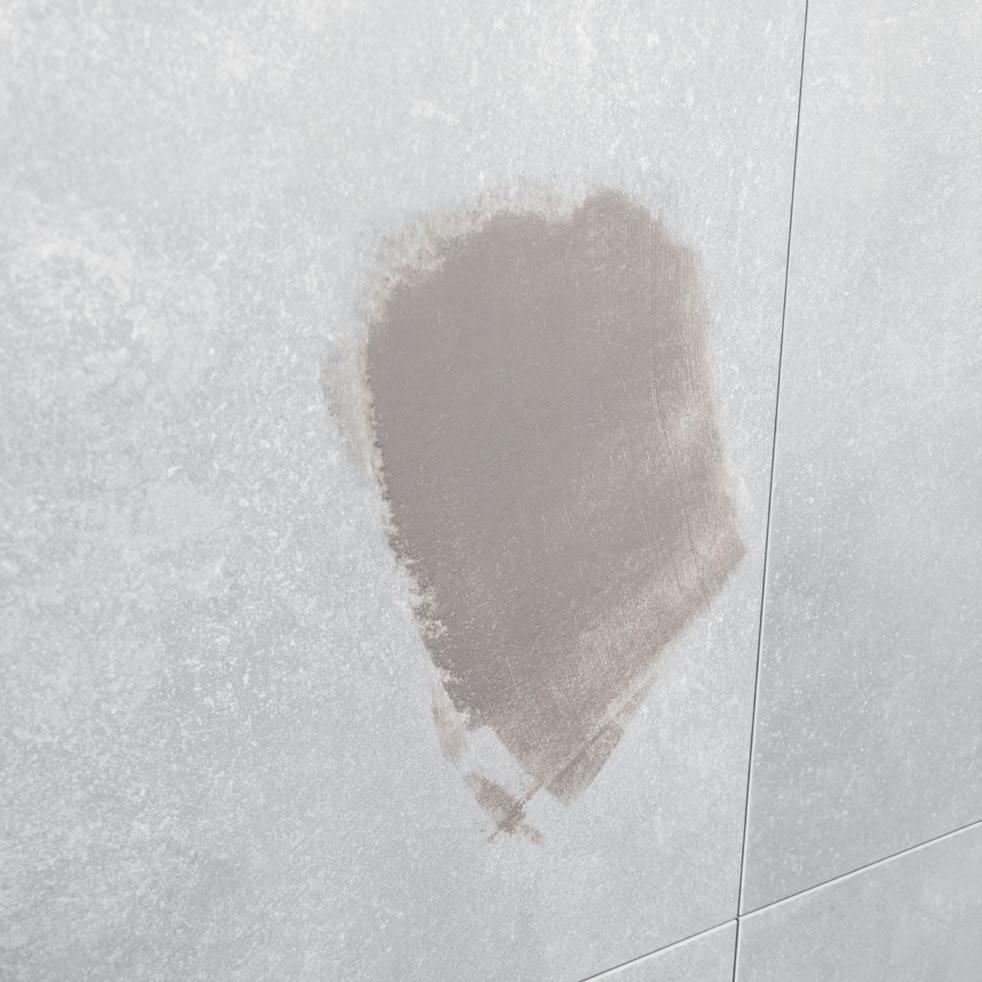
Impregnation
Impregnation is a method of protecting the surfaces of ceramic tiles against external factors. It also provides ceramic tiles with new surface properties. Most often, impregnation is done during installation process or right after it is finished, in order to protect the floor before it’s put into everyday use.
The main purpose of impregnation is to give a tile additional protection from staining.
It is recommended to impregnate unglazed polished tiles, according to instructions and recommendations of the manufacturer of impregnating agent, dedicated especially to polished surfaces. Impregnation should be carried out immediately after gluing of tiles, yet before grouting.
It is not recommended to impregnate glazed tiles.
In any case, before grouting of the entire cladding, make a trial grouting on a small piece of a tile and perform a cleaning check to determine the effect of the joint on the tiles.
Exclamation-Circle
Exclamation-Circle
Exclamation-Circle
Expansion joints
TILES PROCESSING
Depending on characteristics of the room, it will probably be necessary to process tiles in order to make them fit in shape and size of the space.
Cutting
Tiles should be cut after previously measuring them and drawing a cutting line. Manual tile cutters, angle grinders or motorized circular saws are used for this purpose. In case of porcelain tiles, it is necessary to use special diamond coated discs, which often require use of water. Such machines can also offer the possibility of cutting tiles at an angle, while simultaneously grinding the edge, which is not possible with handheld machines.
CUTTING
The arc formed during the drilling process protects the tile from cracking. This is a popular procedure used when installing a flushing mechanism into the tile.
The choice of cutting method should be dictated primarily by characteristics of the assortment. Let’s remember that both porcelain and clinker materials are high on the hardness scale and may have a structural surface finish – the use of a handheld cutters in this case is not always effective.
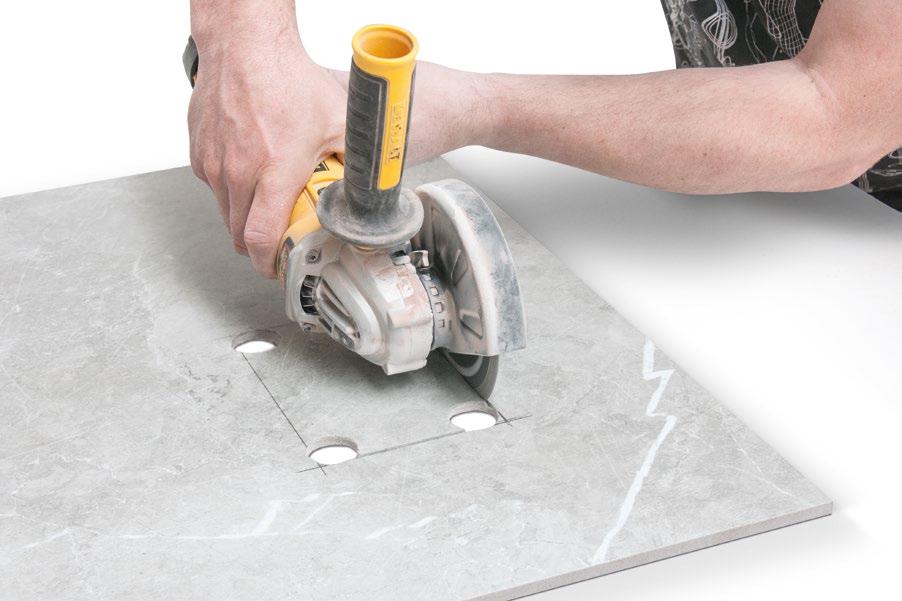
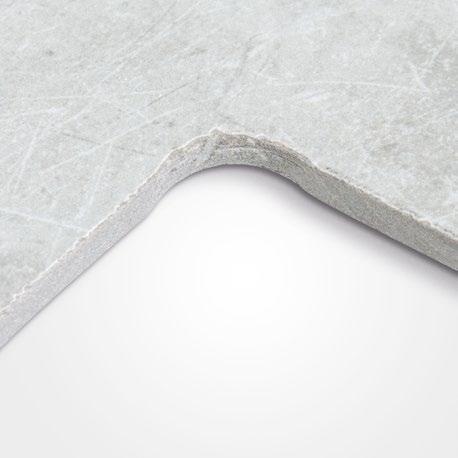
Holes drilling
Due to high linear stresses in clinker and porcelain material, there is a need to discharge the inner tension of a tile before any hole cutting can be done. This is done by drilling of holes. This task requires that a special holesaw is used – one with diamond or corundum coated bits. Take note which of them is intended for dry cutting and which requires the presence of water. This operation can be completed on already installed tiles, or prior to their mounting. The diameter of drilled holes is dictated by the size of the hole we want to cut.
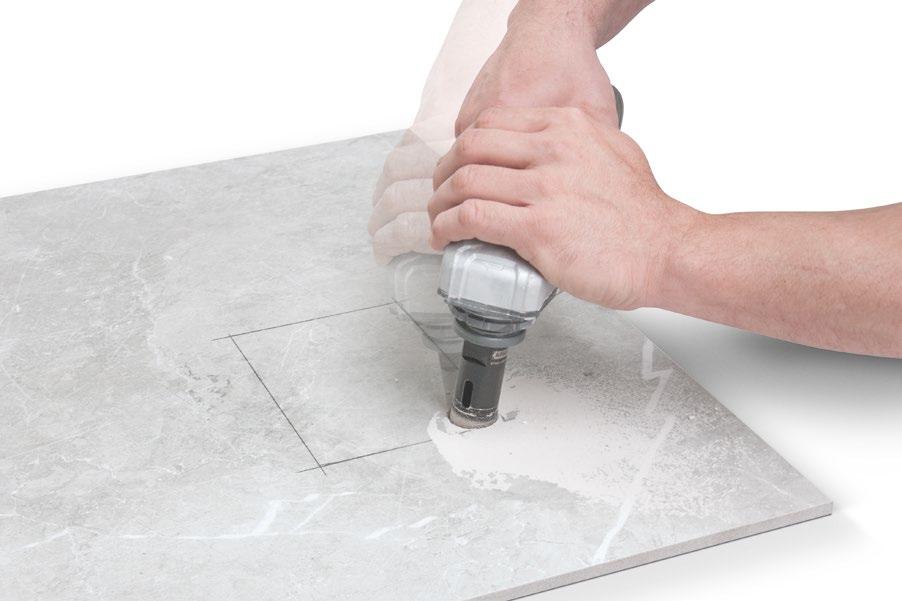
DRILLING
A hole is made by penetrating tile structure with a holesaw using moderate pressure with simultaneous circular movements.
The operation itself should be carried out in no hurry –most of the holesaws work effectively at relatively low rotations, so it is necessary to use those with adjustable speed settings.
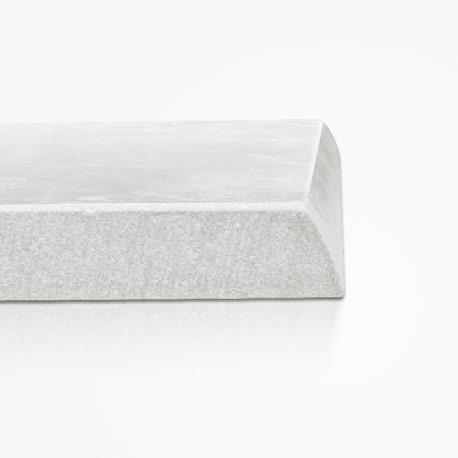
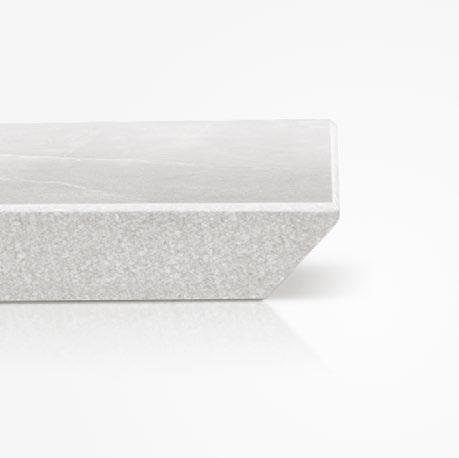
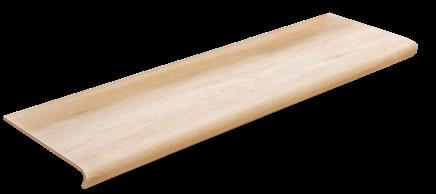
Edges beveling
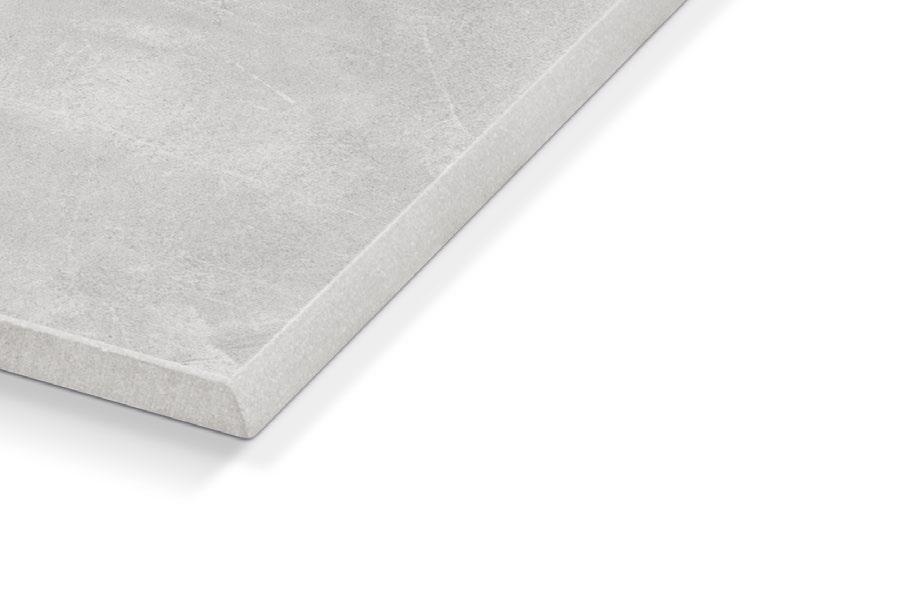
EXAMPLE
The curvature of the step tread edge prevents it from chipping and makes it safer during use.
EXAMPLE OF A TILE BEVELED AT 45 DEGREES
Sharp edges should be avoided when beveling tiles at an angle, that’s why the contact between the surface of tile and the beveled edge should be slightly rounded.
INSTALLATION OF SPECIAL ELEMENTS
The standard ceramic assortment and the way it is installed is well known, but with the expansion of the non-standard offers and the appearance of new products, special instructions had to be created.
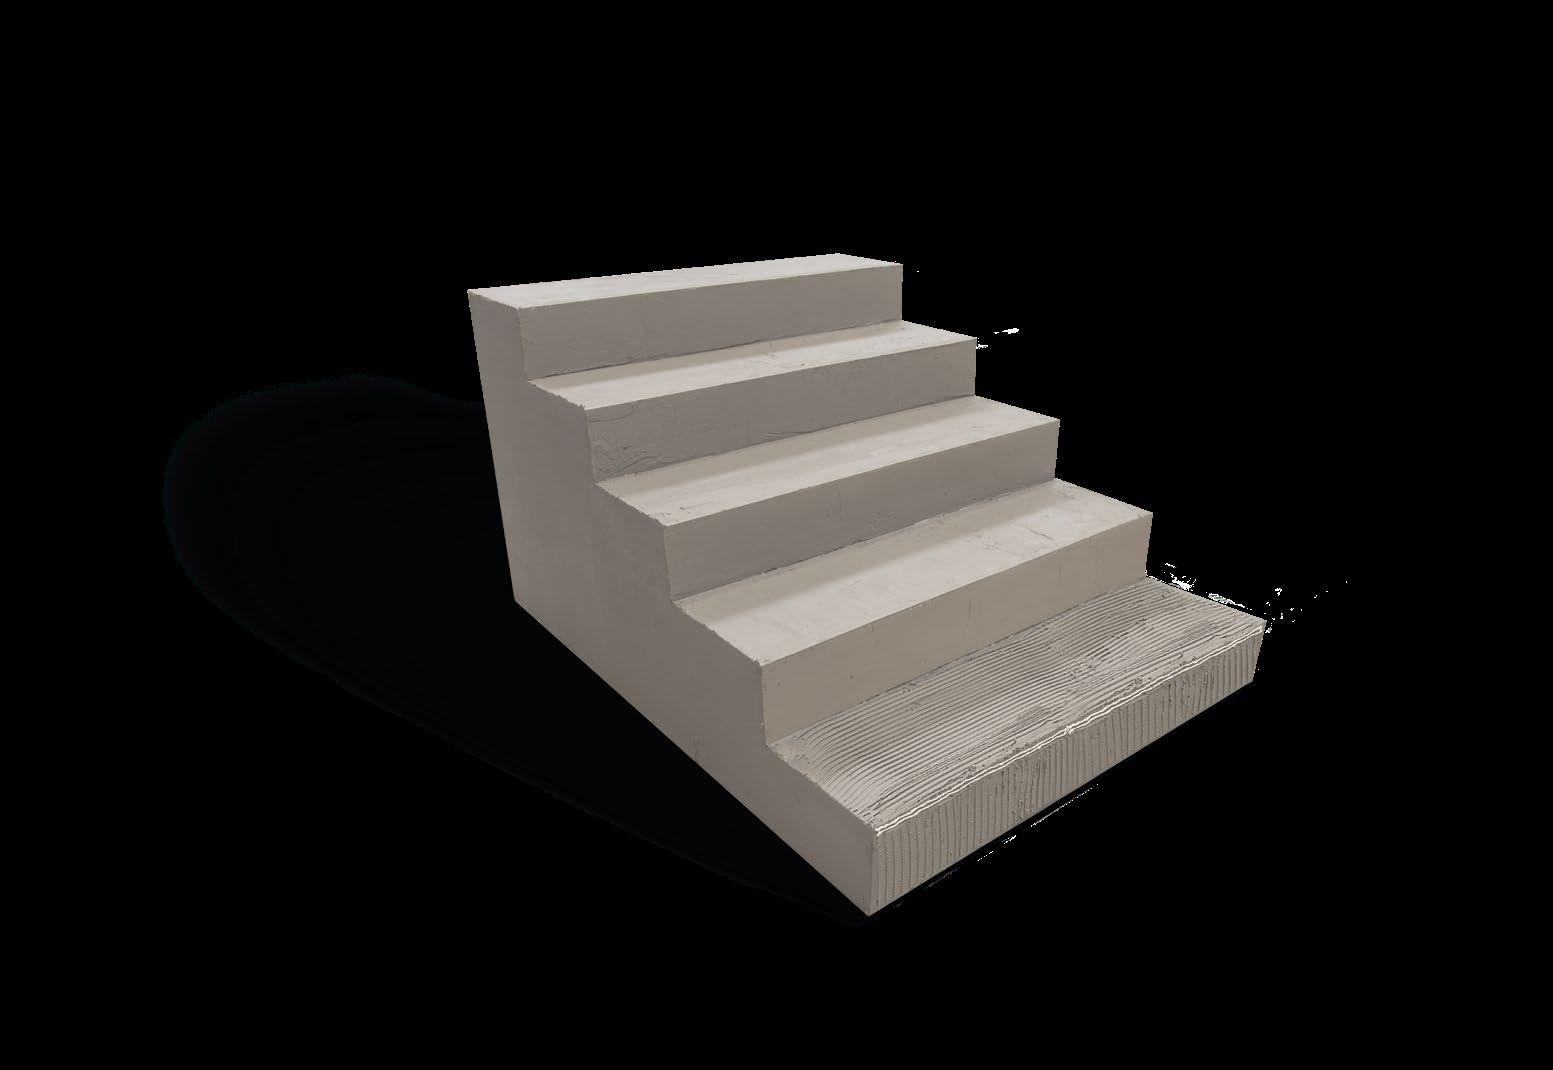
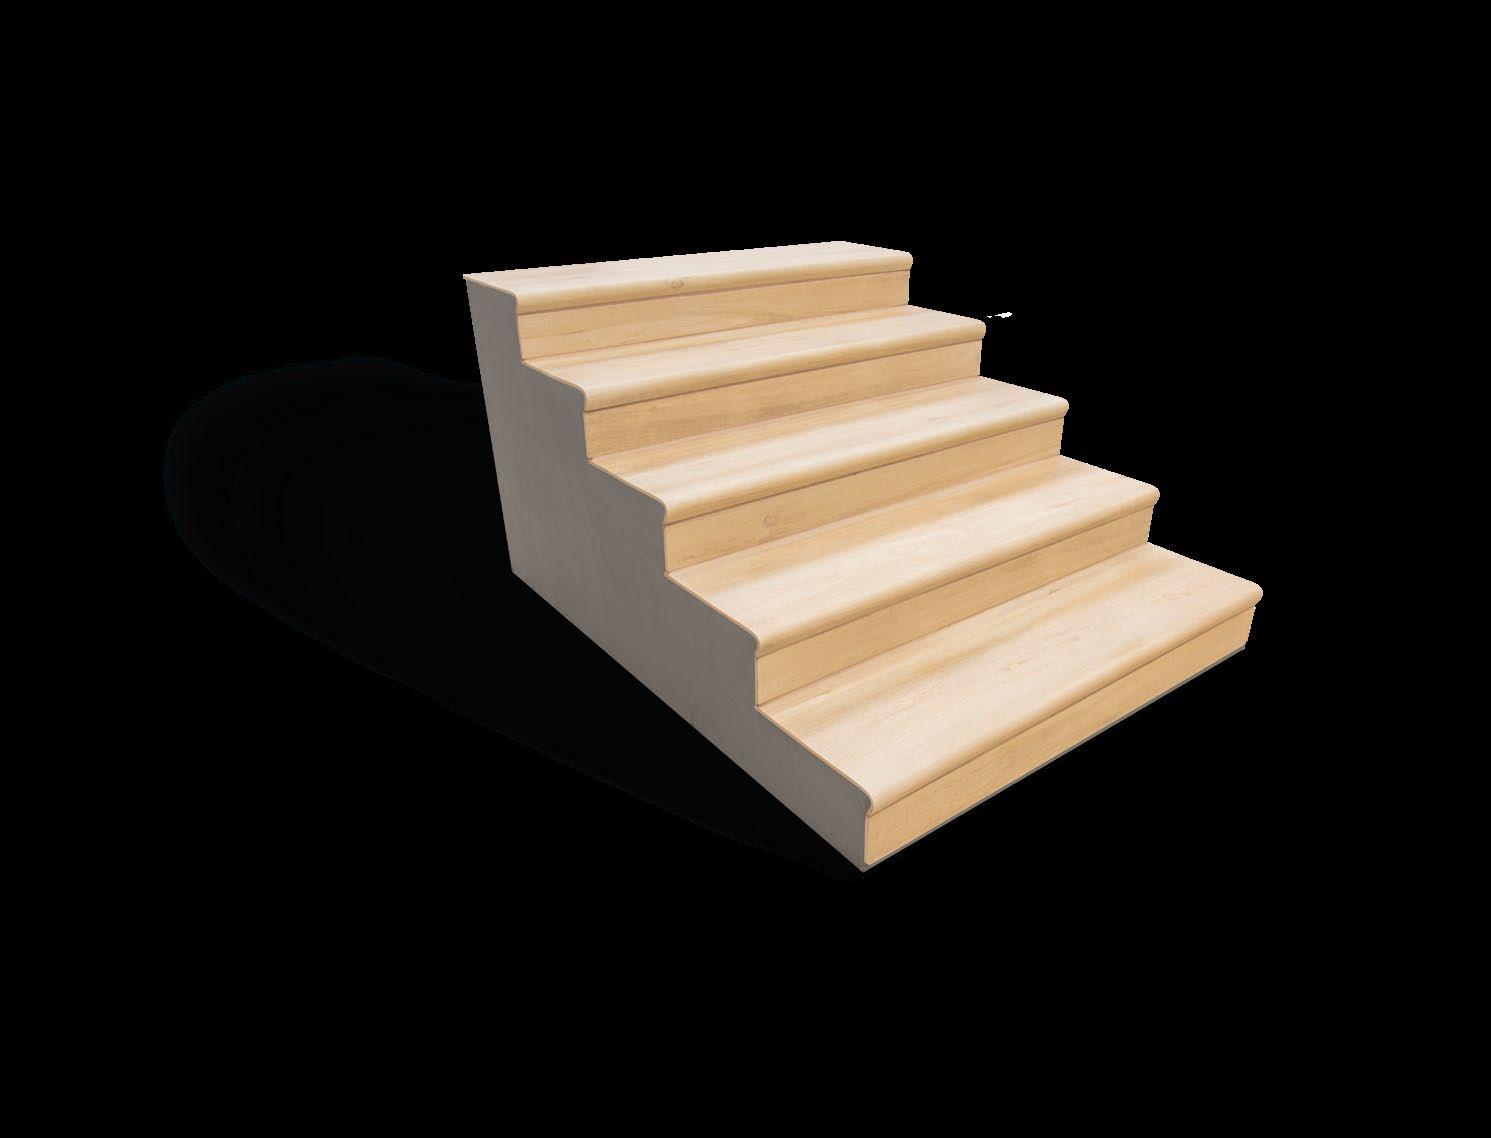
V-shaped treads
The original appearance and the possibility of covering a full step with only one element made the V-shape treads stand out in the group for this product type. The tile is made by a double firing process. The second firing is completed to strengthen the parameters of the tread and to give it its final shape (bent). Along with the special, unique technology in their production, which allows among other things to obtain a solid, 120 centimeter-long tread, a special assembly technique development was also needed.
Requirements – the base should be level, stable, dry, and free of dirt.
In order to improve adhesion it may be necessary to prime the base. This is especially important for absorbent surfaces. For outdoor applications, it is also important to create an effective moisture barrier. We recommend using one of the generally available tile adhesive systems.
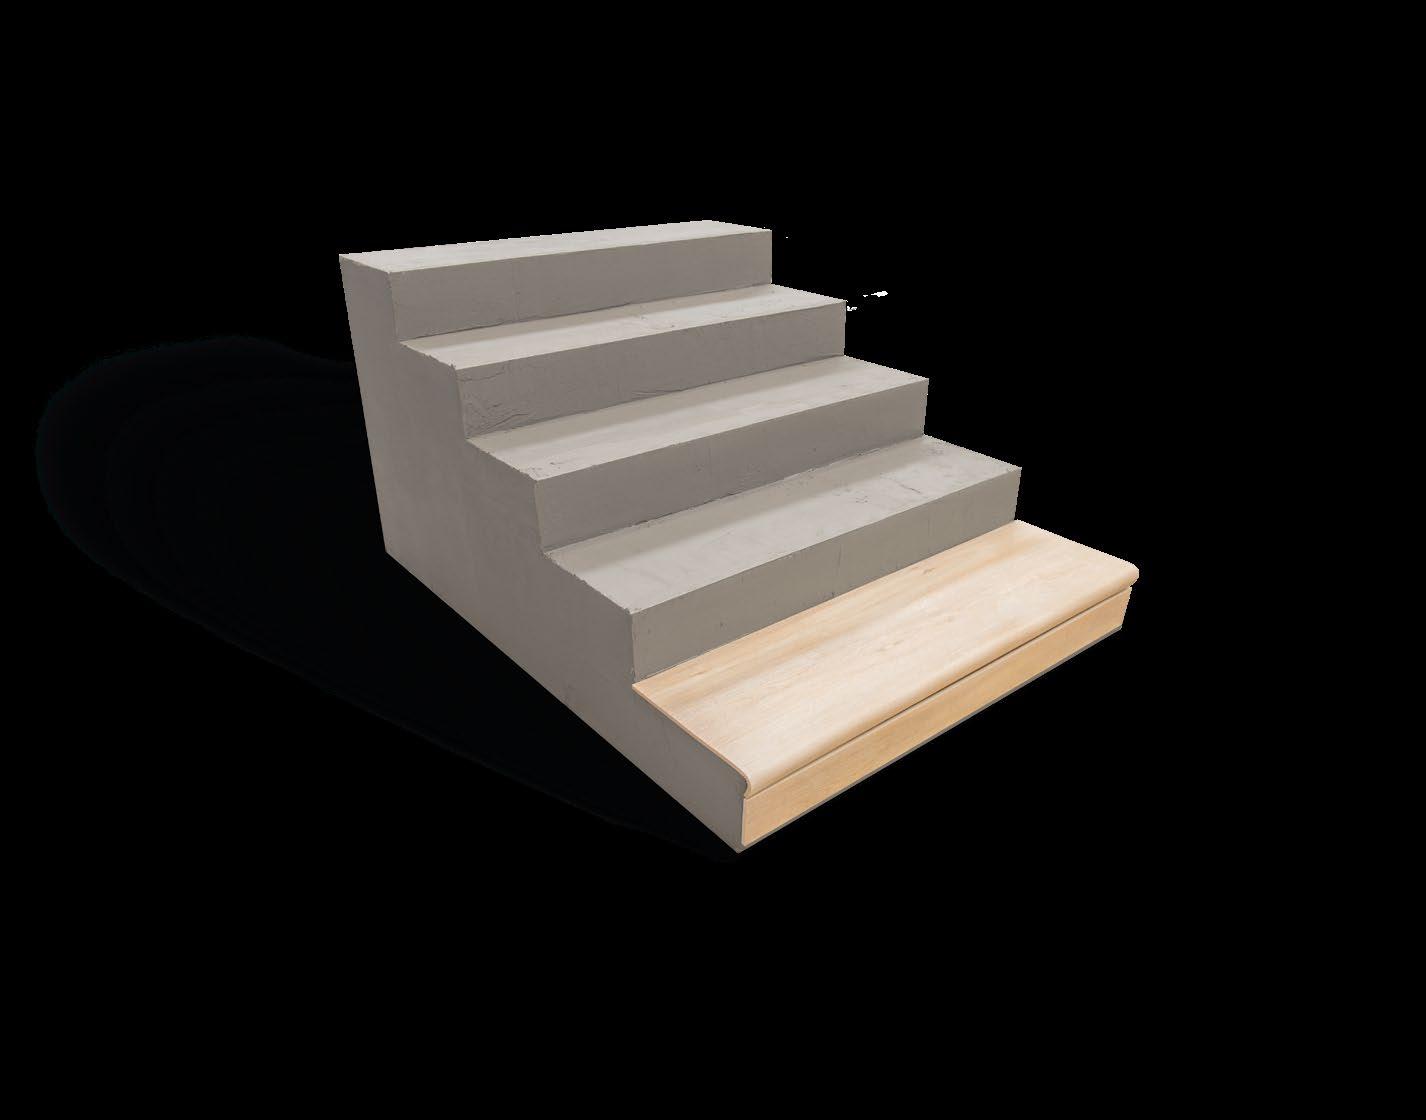
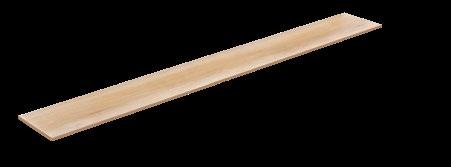
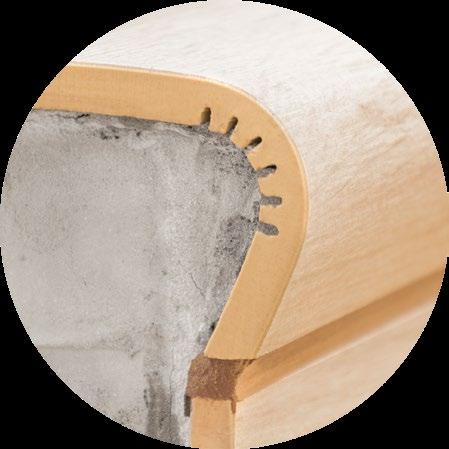
Prepare the stair tread tile and the riser, properly cutting the base tile to suit. At the stair tread bend (at the edge of the step), use a permanently elastic material of the same thickness (2–5 mm). See Figure 4.
PERMANENTLY PLASTIC MATERIALS
Permanently flexible materials, such as polyurethane mass used to fill the expansion joints, eliminate the potential forces and movements that result from the natural thermal expansion of the various building materials.
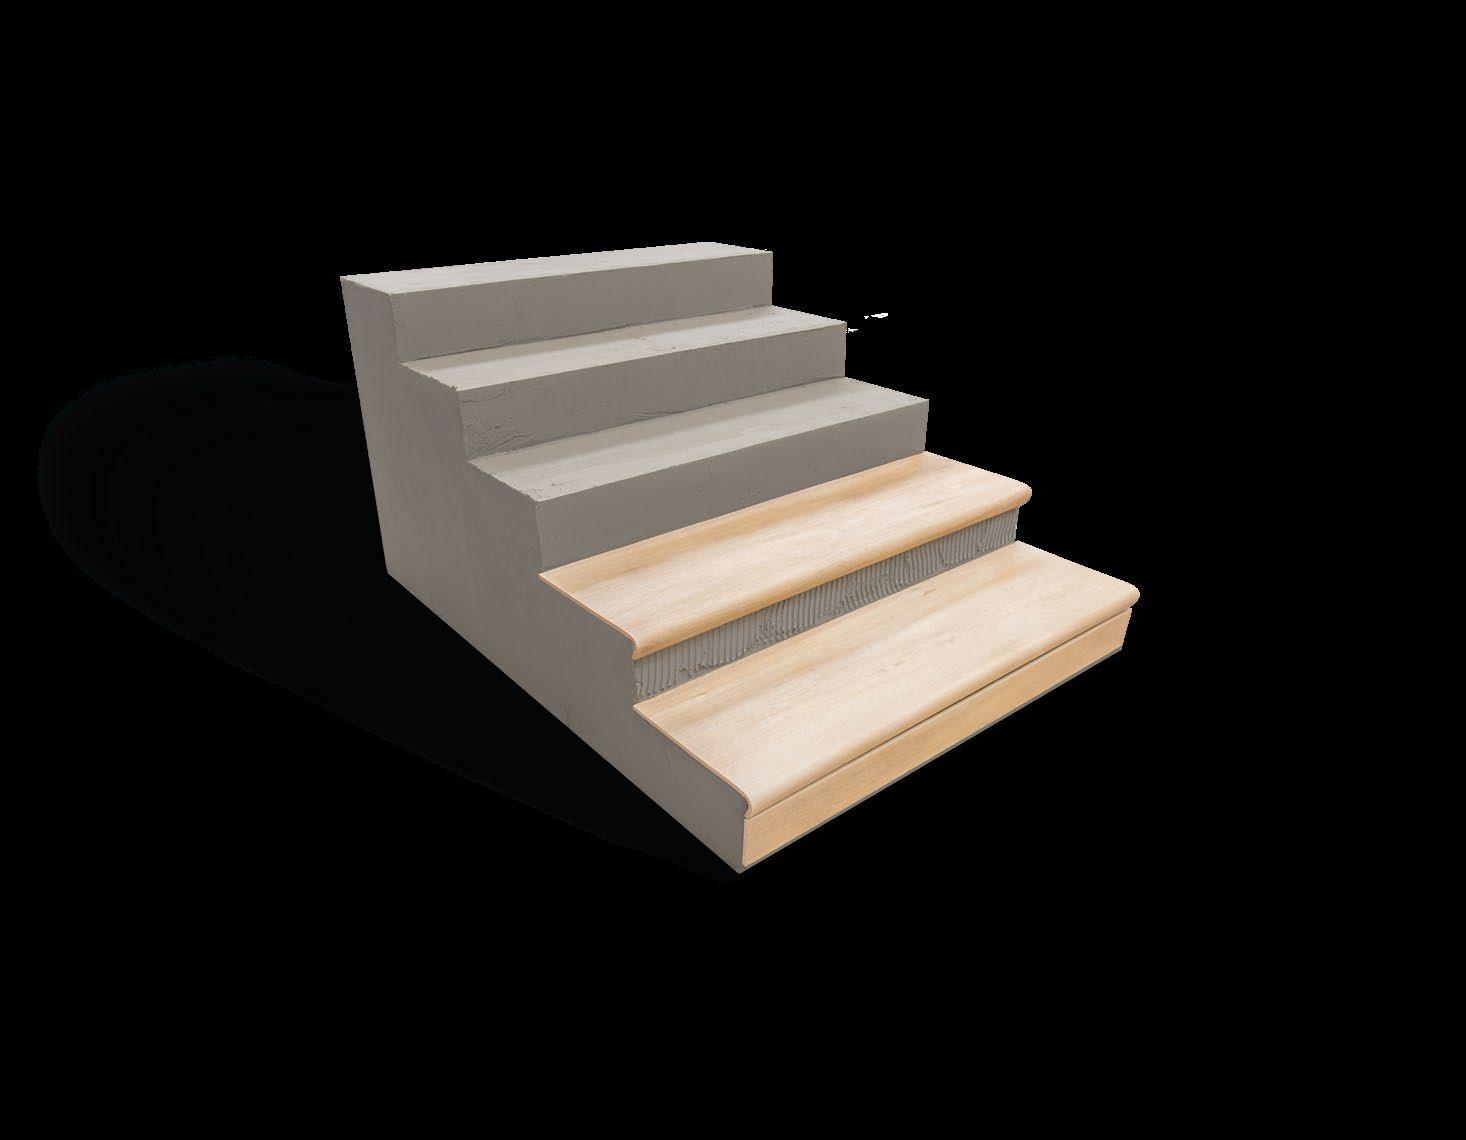

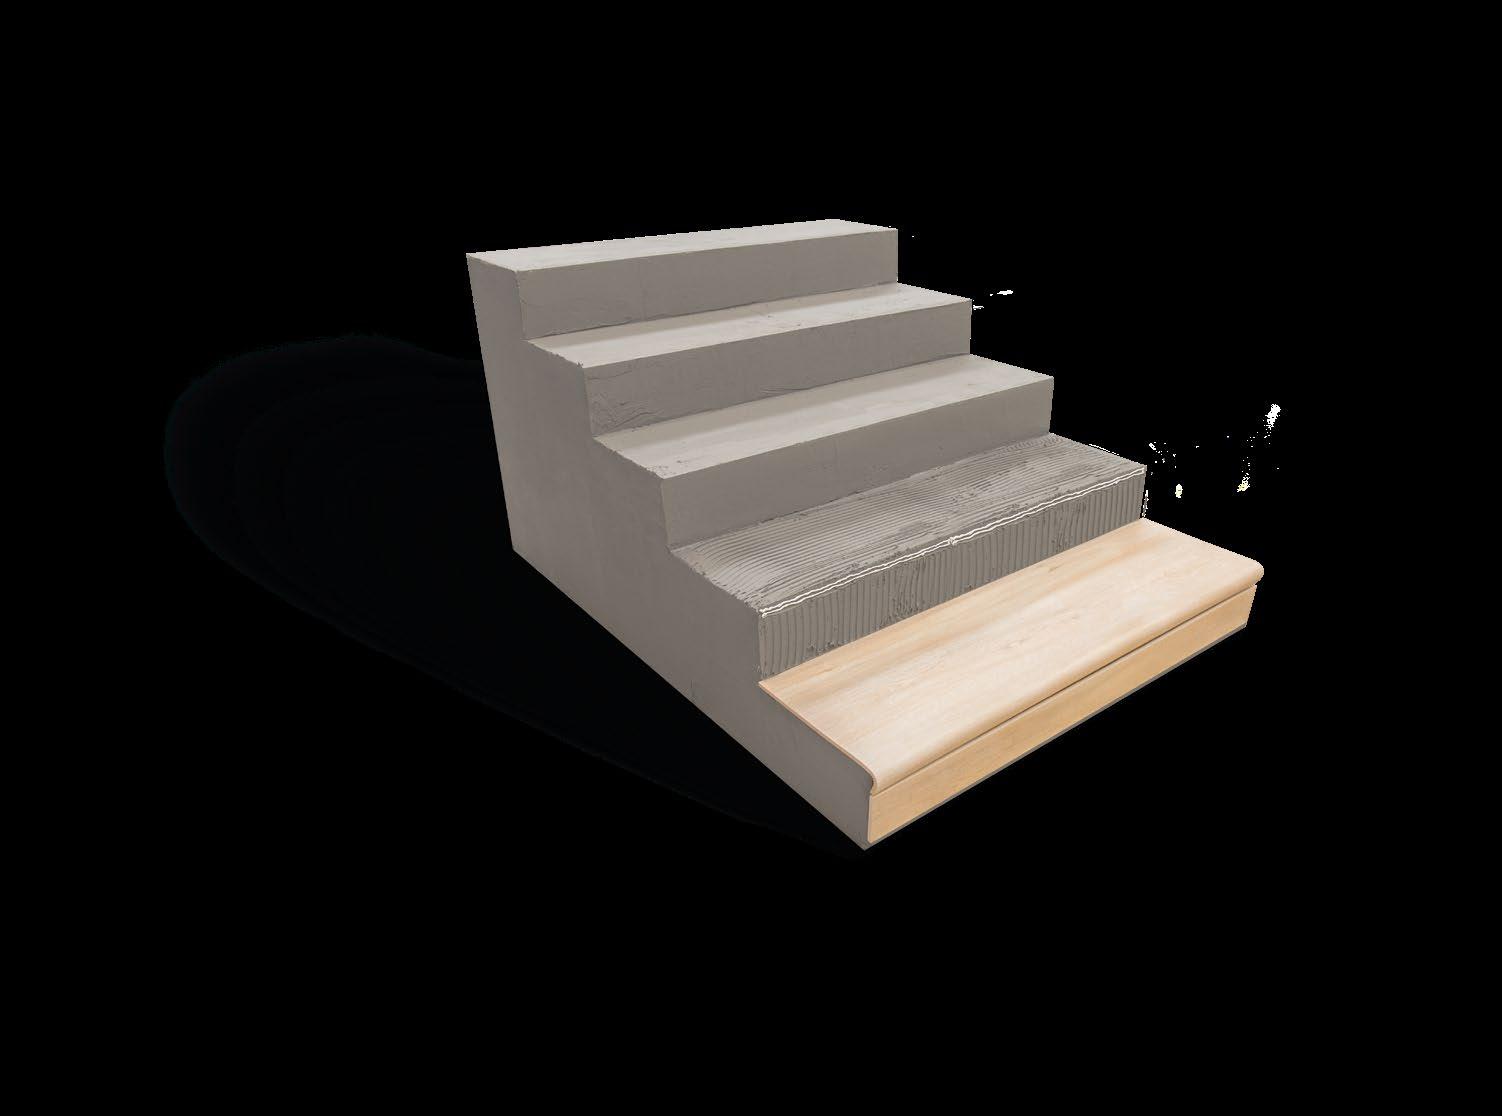
Apply the adhesive to the prepared base for the tile. We recommend that the type of adhesive must be of at least category C2, with improved adhesion and flexibility. Also remember to include at least a 2% gradient to allow water to drain off the tiles, which is especially important for outdoor applications. Apply the dry set adhesive mortar to cover the whole of the tile adhesive surface and the base.
ASSEMBLY RECOMMENDATIONS AND ORDER
Both the stair tread tile and the riser should be coated with the adhesive. It is also necessary to accurately fill the bend of the stair tread nose with adhesive, before bonding. The recommended sequence is first install the stair tread tile, followed by the riser tile.
GROUTING
Repeat the above steps while installing the remaining stair tread tiles.
Grout the tiles after the dry set adhesive mortar has fully set. The recommended flexible joint gap is min. 5 mm.
CUT AND MATCHED ELEMENTS
Additional reinforcement with composites
PROPER PREPARATION OF THE BASE
BONDING
Slabs
Large-format ceramic tiles were designed for large surfaces. Their handling requires appropriate skills and execution, as well as the use of special tools for carrying, cutting and final processing.
TRANSPORT CRATE
CUTTING ON A TABLE
01 02
03
To ensure that the cutting process runs in a controlled manner, the slab should be placed on a special table, which can be adjusted and leveled. Proper leveling of the slab minimizes the risk of cracking during the cutting process. The table top is completed as an aluminum grate, which allows for easy cutting and drilling, without damage to the table.
Slabs are delivered in transport crates or on A-frame pallets. The crates can be unloaded with a forklift. The forks should be perpendicular to the longer edge of crate, and their length should be appropriate to the crate size. The crates are additionally protected by foil (for outside storage).
Mark the cut line. Place the measuring guide and the cutter onto the slab. Remember to offset the edge of the guide from the marked cut line so that the cutting wheel is directly above the line.
It is recommended a special trolley be used when transporting large-format slabs, which will ensure a stable and safe transport. The trolley is also useful in subsequent stages, for example when applying glue to the mounting side of the slab.
LIFTING OUT / MOVING
To lift the slabs out of the crate, a special frame should be used, which will stabilize the slab during transport. The frames are equipped with suction cups or vacuum pumps (recommended) that guarantee a stable connection between the frame and the slab. The weight of one full sized slab (162x324 cm) is about 80 kg. Depending on the weight, an appropriate number of suction cups or vacuum pumps should be used.
Firstly, cut the slab starting at approx. 5 cm from its edge, directing the movement towards mentioned edge. Then, in a confident manner, without interrupting the cutting wheel movement and while using constant pressure, guide the cutting wheel along the defined cutting line.
At this point, the surface of the tile is cut, but the tile is not ready for breaking just yet.
TRANSPORT TROLLEY
a)
BREAKING
In order for the slab breaking process to proceed in the intended manner, it is necessary to use an appropriate tool such as a breaker. A screw breaker is preferred, as it guarantees precise control of the breaking force. The axis of the breaker should be placed directly above the cutting line.
b) The screw of the breaker should then be tightened slowly until you hear a characteristic sound of the slab breaking. Repeat this process on both edges of the slab. Move the tile so that the notched line is beyond the table edge, then with a decisive movement, and direct downward pressure break off a piece of the tile.
BEVELING AT 45 DEGREES / EDGE FINISHING
We use an angle grinder equipped with a disc designed for grinding porcelain material. To achieve the perfect polishing effect, we recommended polishing the tiles by hand with special sponges.
ADHESIVE APPLICATION
Due to the board format, an adhesive with a flexibility parameter of S1 should be used. In floors equipped with water heating systems use adhesives with S2 flexibility parameters. Firstly, the surface of the tile should be cleaned thoroughly. Apply a contact layer of adhesive first, then apply a combed layer of adhesive. Direction of the comb must run along the shorter edge of the tile. In order to obtain maximum adhesion of the tile, the combed layer must also be spread on the desired surface (wall or floor) and must be parallel to that on the mounting side of the tile. The combed layer cannot be applied in a criss-cross manner.
After previously marking the cutting line, drill a hole in each of its corners using a holesaw equipped with a diamond coated disc, with a diameter of minimum 25 mm. This process will remove linear stresses that occur in all porcelain tiles. The strength of stresses increases with the size of tile. This step will protect the tile from uncontrolled cracking during the cutting stage. Use an angle grinder to cut on the designated lines (using a disc designed for cutting porcelain). This will result in a hole with rounded corners, which eliminates the angle stresses.
MOUNTING
When mounting tiles that have been previously cut, frames equipped with vacuum pumps should be used for the safety of the person and the tile itself, as they will stabilize the entire surface of the tile.
CORRECTIONS
After mounting the tile onto the desired surface, we use a tapping trowel with the appropriate format and weight. This will help to remove any air that may be trapped underneath the tile and it will help to obtain an even tile placement. In order to achieve the intended joint width between tiles, we can use suction cups with a turnbuckle, which will allow movement of the slabs closer or further apart as needed. To obtain a uniform surface between two slabs, we use wedges.
CUTTING HOLES
Thickened tiles
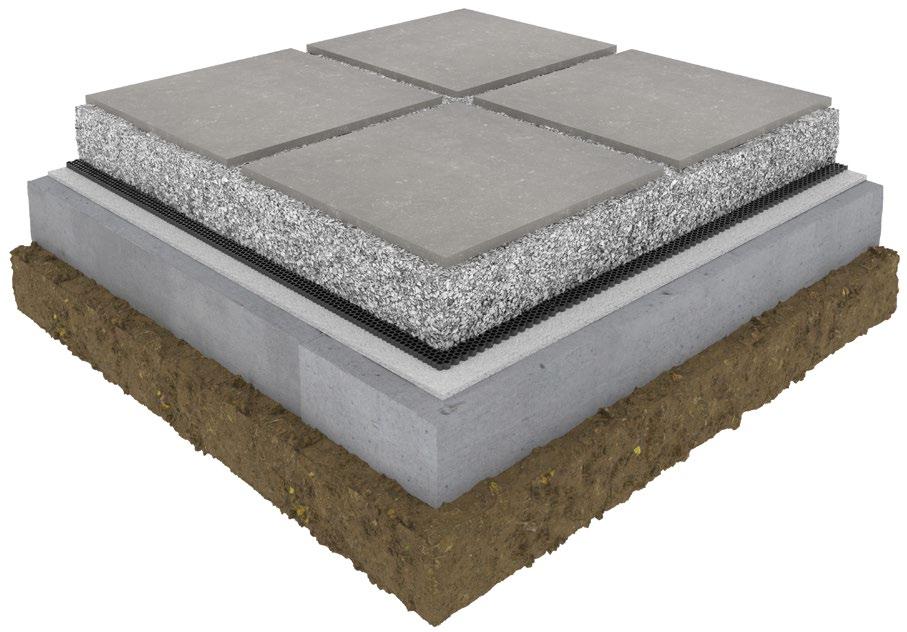
Thickness of these tiles reaches 20 mm, which makes them very resistant to heavier loads and allows them to be used in areas where a permanent installation is not required; but they can also be installed in a traditional way via adhesion. These thick tiles, along with their complex foundation and drainage solutions which are implemented during their installation, are often refer to as: ventilated tile systems.
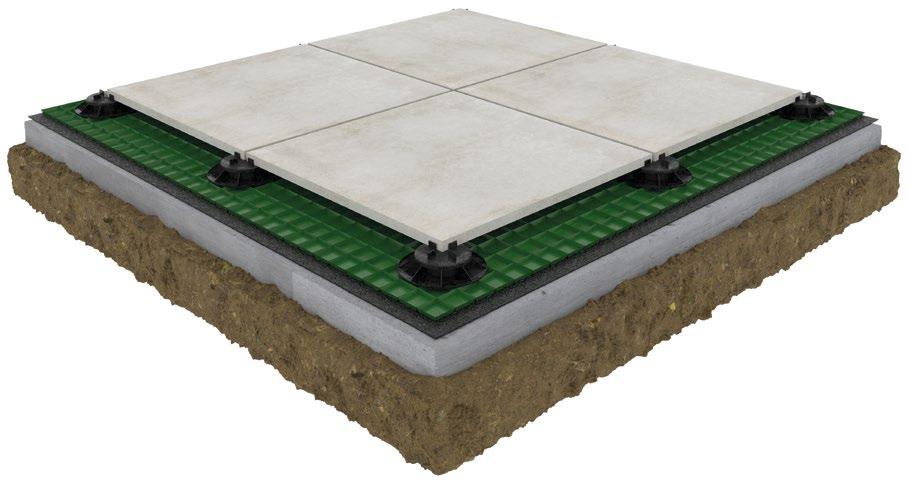
INSTALLATION ON A CONCRETE SCREED
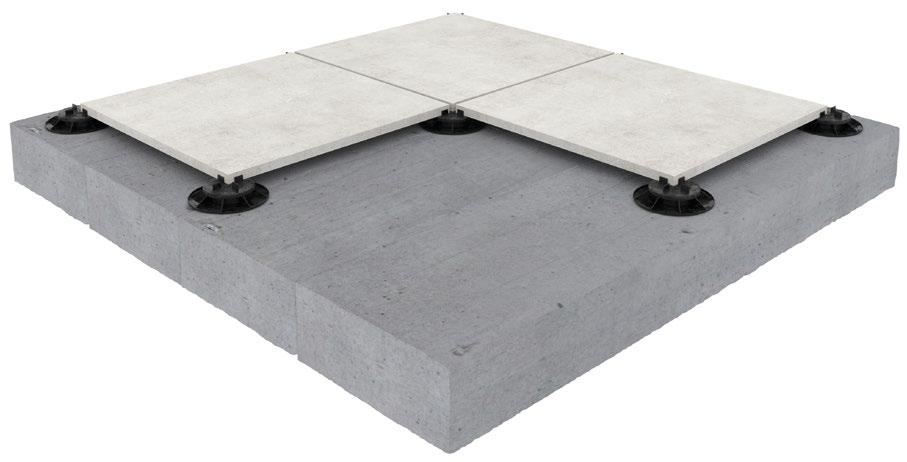
Thickened porcelain tiles are an ideal solution for existing, stable substrates such as concrete. For this type of installation, we can use various, plastic support pads to mount the tiles. They are adjustable in height, which improves the leveling and distancing of thickened tiles from the ground. Leaving space between the ground and tile is important for water flow and can be used to hide various water and electrical components.
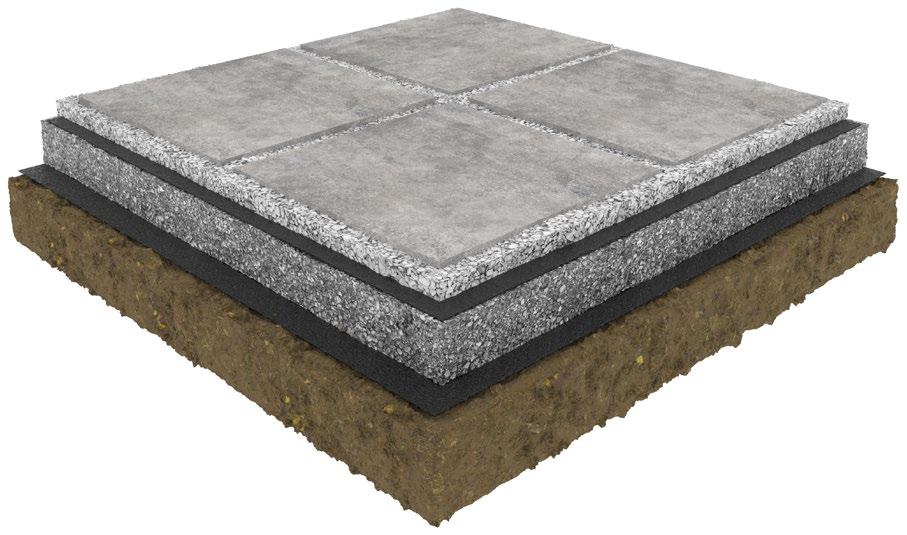
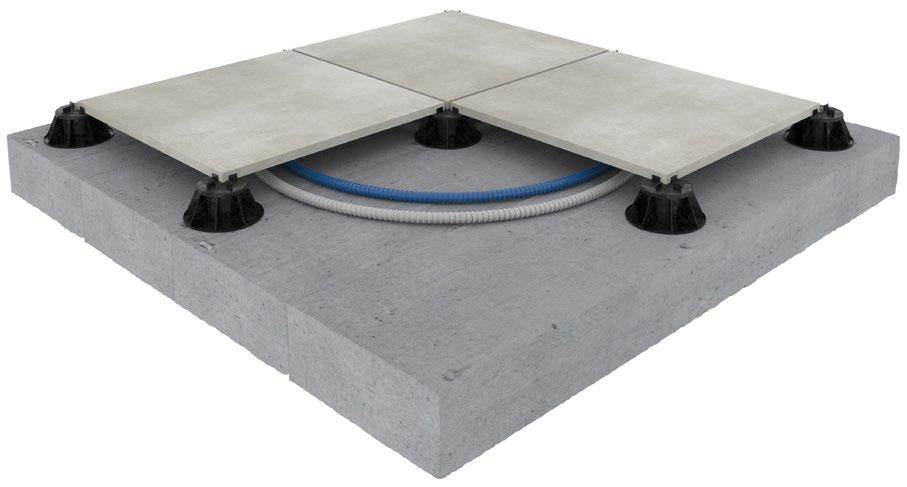
INSTALLATION ON A CONCRETE FOUNDATION IN CONNECTION WITH DRAINAGE SYSTEMS
Additional protection against water penetration into the concrete foundation includes the use of insulation and special drainage mats, which help to drain water outside terrace perimeters.
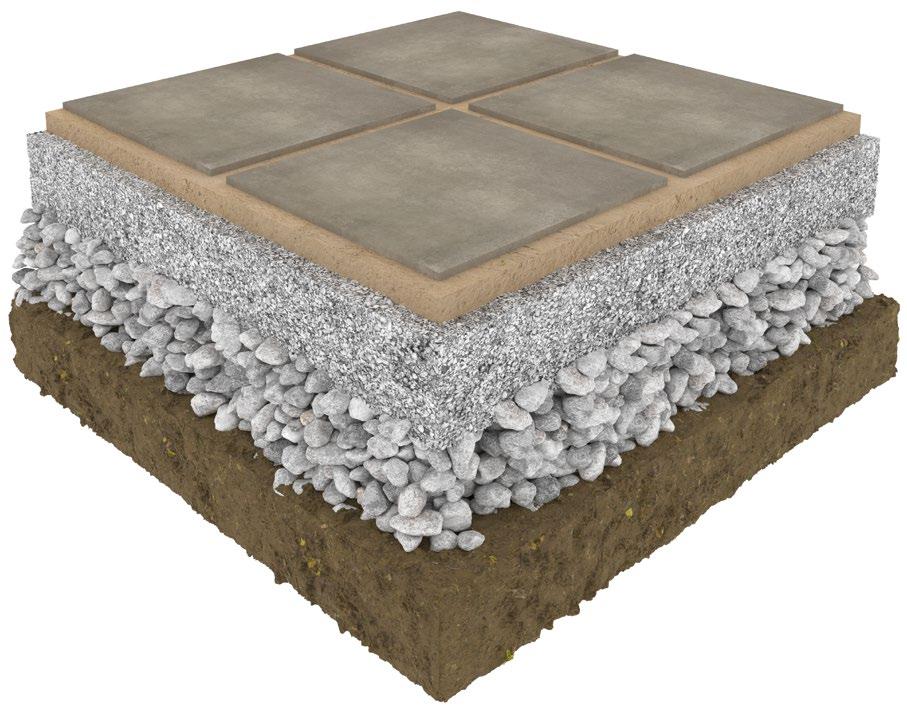
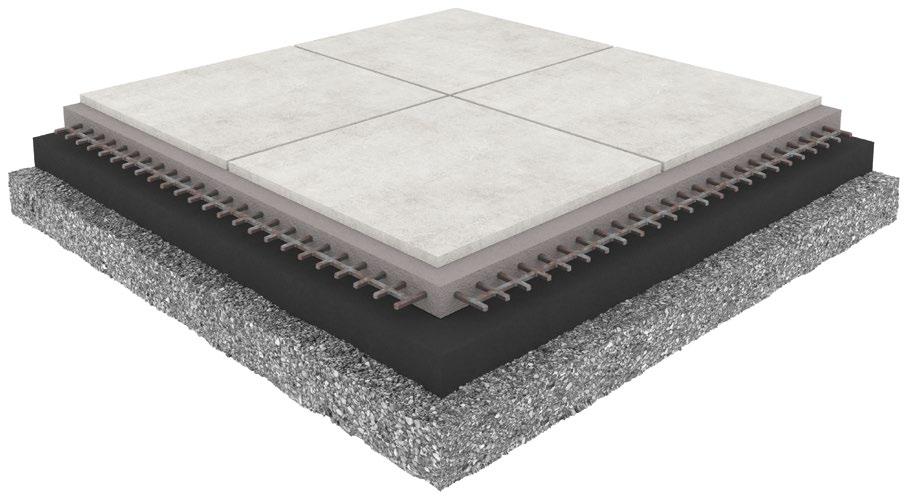
It is possible to install these tiles by gluing them down and filling the joints with grout. If gluing them to concrete, it’s worth to additionally reinforce the concrete with metal rods. Subsequent layers should be comprised of appropriate fractions in order to allow drainage of water.
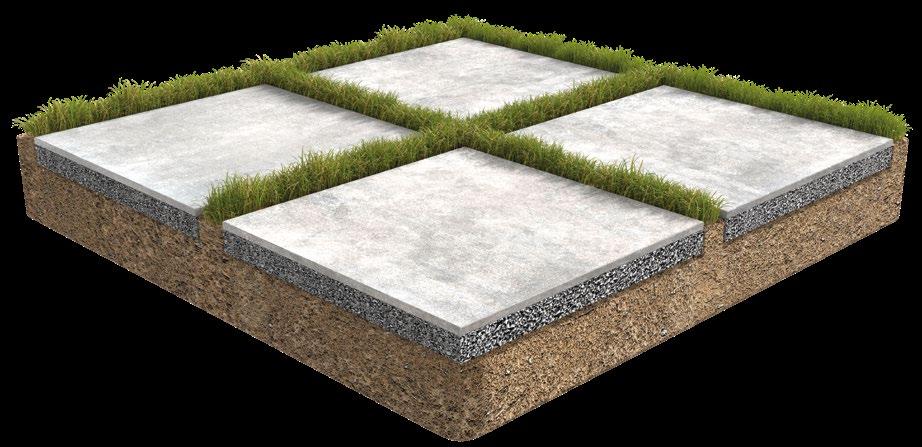
It is also possible to mount the tiles directly on sand. However, please remember to properly prepare the substrate beforehand. Before the sand layer is laid, layers containing various fractions of gravel should be placed below it, in order to maintain water flow into the ground.
If we want to lay tiles directly on the gravel bedding, it is worthwhile to install insulation between the layers in order to stabilize them.
When installing on the lawn, we must begin with removing the grass layer. Then, in order to prepare the substrate, we need to place a layer of properly fractioned gravel which will allow water drainage to the ground, without risking tile stability.
If the tiles will be exposed to heavy loads, like vehicles, a drainage system should be installed under the gravel fraction. The system should be installed on a previously prepared concrete foundation. The concrete layer directs water runoff.
We recommend to use the mechanical tools for cutting thickened tiles (tools equipped with diamond coated discs).
LAWN INSTALLATION
04 TILES USAGE
CERAMIC TILES CARE
Ceramic tiles are generally considered to be one of the easiest to keep clean. Easy removal of dirt and stains from the surface, possibility of cleaning under running water, as well as an extremely wide range of specialized cleaning agents available on the market, make them the best choice.
Daily care
We will encounter a lot of different dirt and grime in our domestic environments, some of which – such as liquids, dust or sand brought from the outside – can be easily cleaned up with a broom or mop. In other cases, it is necessary to use cleaning agents, which can be divided into two categories:
AGENTS WITH A BASIC pH – ideal for removing greasy or sticky stains;
AGENTS WITH AN ACIDIC pH – used where mineral stains need to be removed.
Special care
In cases where we have non-typical dirt situations, such as those resulting from tile installation work, or those caused by aggressive pigments, we recommend using products designed specifically for that purpose.
We recommend that you strictly follow the manufacturer’s instructions when using cleaning agents. Thus we can avoid, for instance: staining of grout or causing permanent change in tile’s surface appearance.
Most common situations that may require special cleaning include:
REMOVAL OF RESIDUAL ADHESIVE AND GROUT DEBRIS POST TILE INSTALLATION
– this type of dirt often sticks to the surface of tiles in form of visible or tactile lumps, but can also be present in form of white/grey deposits or dirty streaks. To remove them, we use acid-based solutions, which are capable of removing mineral residues.
REMOVAL OF SPOT STAINS
– made by juices, wine, inks and other contrasting liquids with very fine particles that penetrate into tile’s pores. Such stains are a problem mainly when left on the tile surface for a prolonged time. In these instances, we use agents made for the removal of stains or rust. Often, these agents will have similar chemical composition as those used for cleaning of fabrics and upholstery.
REMOVAL OF RINSE AIDS, WAXES AND IMPREGNATES
– usually, for each protective agent, there is a cleaning agent designed for its removal (especially in the case of impregnates). It’s necessary to match the cleaning agent to the previously used protective agent, and – in need of further advice – to contact the product manufacturer.
REMOVAL OF LUBRICATING OILS, PAINTS AND VARNISHES
– these are stains that usually occur in industrial conditions. Both, the maintenance as well as the cleaning of these surfaces is completed with the use of specialized equipment, which ensures the appropriate cleaning strength for a given surface, and allows for the use of chemical reagents in concentrated form.
COMPLAINTS
Complaints are evaluated in accordance with the Consumer Act of 30 May 2014 and in accordance with Article 561[5] of the Civil Code. The customer decides whether he wants to submit a claim under warranty. The registration of the complaint can be completed after a written complaint has been submitted by the customer in writing (by e-mail or letter).
In order to facilitate the complaint process for Contractors, we prepared a special complaint submittal Platform
The complaint should include:
• proof of purchase,
• customer data,
• place of purchase,
• the quantity of goods purchased,
• information on what assortment the complaint is about,
• description of the defect/damage,
• photographic documentation,
• basis and description of client’s claims.
Please note that only a correctly completed complaint will be considered.
If the complaint is justified, then the Complaint Specialist in consultation with the client-contractor carries out the appropriate analysis and develops a complaint settlement proposal.
In the absence of possibility of verification based on documentation mentioned above, the Complaint Verification Specialist inspects advertised product at the customer’s. A documentation containing a description of the facts is prepared with photographic or video evidence included. All inspection documentation is forwarded to the Complaint Department.
The documents are then subject to verification.
According to the information on the packaging, if the tiles were installed against the construction arts or manyfacturer’s recommendations, complaints will not be considered.
If the quality complaint is justified, the Customer-consumer is obliged to provide documents (evidence purchase) with the costs incurred for installing the tiles and the purchase of materials needed for installation.
A correctly completed warranty card is an indispensable document for making a warranty claim.
The card is available on our website www.cerrad.com
CERRAD Ltd.
Radomska Street 49 B
27-200 Starachowice, Poland
phone +48 800 237 723 office@cerrad.com www.cerrad.com