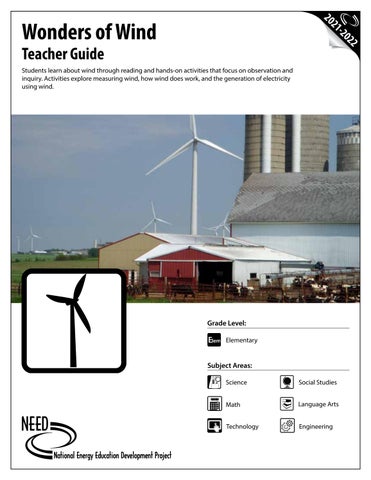
Students learn about wind through reading and hands-on activities that focus on observation and inquiry. Activities explore measuring wind, how wind does work, and the generation of electricity using wind.
Grade Level:
Elementary Elem
Subject Areas:
Science
Math
Technology
Social Studies
Language Arts
Engineering
Teacher Advisor y Board
Constance Beatty Kankakee, IL
La’Shree Branch Highland, IN
Jim M. Brown Saratoga Springs, NY
Mark Case Randleman, NC
Lisa Cephas Philadelphia, PA
Nina Corley Galveston, TX
Samantha Danielli Vienna, VA
Shannon Donovan Greene, RI
Michelle Garlick Long Grove, IL
Michelle Gay Daphne, AL
Nancy Gi ord Harwich, MA
Erin Gockel Farmington, NM
Robert Griegoliet Naperville, IL
DaNel Hogan Tucson, AZ
Greg Holman Paradise, CA
Barbara Lazar Albuquerque, NM
Robert Lazar Albuquerque, NM
Leslie Lively Porters Falls, WV
Melissa McDonald Gaithersburg, MD
Paula Miller Philadelphia, PA
Hallie Mills St. Peters, MO
Jennifer MitchellWinterbottom Pottstown, PA
Monette Mottenon Montgomery, AL
Mollie Mukhamedov Port St. Lucie, FL
Cori Nelson Win eld, IL
Don Pruett Jr. Puyallup, WA
Judy Reeves Lake Charles, LA
Libby Robertson Chicago, IL
Amy Schott Raleigh, NC
Tom Spencer Chesapeake, VA
Jennifer Trochez MacLean Los Angeles, CA
Wayne Yonkelowitz Fayetteville, WV
NEED Mission Statement
The mission of The NEED Project is to promote an energy conscious and educated society by creating effective networks of students, educators, business, government and community leaders to design and deliver objective, multisided energy education programs.
Permission to Copy
NEED curriculum is available for reproduction by classroom teachers only. NEED curriculum may only be reproduced for use outside the classroom setting when express written permission is obtained in advance from The NEED Project. Permission for use can be obtained by contacting info@need.org.
Teacher Advisory Board
In support of NEED, the national Teacher Advisory Board (TAB) is dedicated to developing and promoting standardsbased energy curriculum and training.
Energy Data Used in NEED Materials
NEED believes in providing teachers and students with the most recently reported, available, and accurate energy data. Most statistics and data contained within this guide are derived from the U.S. Energy Information Administration. Data is compiled and updated annually where available. Where annual updates are not available, the most current, complete data year available at the time of updates is accessed and printed in NEED materials. To further research energy data, visit the EIA website at www.eia.gov.
This guide effectively supports many Next Generation Science Standards. This material can satisfy performance expectations, science and engineering practices, disciplinary core ideas, and cross cutting concepts within your required curriculum. For more details on these correlations, please visit NEED’s curriculum correlations website.
Common Core State Standards
This guide has been correlated to the Common Core State Standards in both language arts and mathematics. These correlations are broken down by grade level and guide title, and can be downloaded as a spreadsheet from the NEED curriculum correlations website.
Individual State Science Standards
This guide has been correlated to each state’s individual science standards. These correlations are broken down by grade level and guide title, and can be downloaded as a spreadsheet from the NEED website.
Wonders of Wind Materials
ACTIVITY
Measuring Wind
Wind Can Do Work
Introduction to Blade Investigations
Blade Investigation
Blade Redesign Investigation
MATERIALS IN KIT
Pencils
Straight pins
Extra-long straws
Snow cone cups
Analog anemometer
Digital anemometer
Wind vane
Compass
Masking tape
Extra-long straws
Small straws
Straight pins
Binder clips
Masking tape
Trying the Other Tower
Wind Reflections
Weightlifter windmill (assembled)*
Wind turbine (assembled)*
Dowels
Hubs
Washers
Multimeter
Masking tape
Alligator clips
Buckets with string
Blade materials (corrugated plastic and cardboard)
Blade sets from previous activities
Weightlifter windmill (assembled)*
Wind turbine (assembled)*
Masking tape
*See pages 28-29 for windmill and turbine assembly instructions.
ADDITIONAL MATERIALS NEEDED
Hole punches
Watches with second hand or stopwatches
Markers
Rulers
Scissors
Foam cups
Scissors
Fans
Markers
Rulers
Hole punches
Paper clips
Thread or string
Alternative blade materials
Fans
Scissors
Poster board
Fans
Teacher Guide
Grade Level
Elementary, grades 3–5
Time
Approximately eleven 45-minute class periods to conduct all of the activities and evaluation
Language Arts Connection
Further integrate Wonders of Wind into your reading curriculum by checking out wind and energy related books, both fiction and nonfiction, from your library. Have these available for students to read during silent reading or when they are finished with work. Use the books as you instruct students on reading strategies, or give a more formal assignment of having students read a book and write a report about it.
A booklist of fiction and nonfiction energy related books can be found at www.NEED.org/booklist/.
Unit
Extension
Download NEED’s Wind for Schools unit for additional wind activities, including a siting and mapping activity geared for elementary students. Visit shop.NEED.org to download.
&Background
Wonders of Wind is an inquiry-based unit for elementary students. This unit includes nonfiction background information on wind energy, with activities that focus on observation and inquiry. The kit includes most of the materials to conduct the hands-on and inquiry-based activities, as well as a class set of Student Guides with space for recording observations, conclusions, and reflections.
Concepts
Wind is moving air. It comes from the uneven heating of the Earth’s surface by the sun.
Wind can do work.
Wind speed and direction can be measured.
Wind speed and direction vary by location and time of day.
A wind turbine changes wind energy into electricity.
2Preparation
Become familiar with the Teacher and Student Guides. It is suggested that the teacher conduct the hands-on activities before assigning them to students.
Gather the materials needed to conduct the activities. A list of materials by activity can be found on page 5 of the Teacher Guide.
Make copies of the student worksheets as needed.
@Science Notebooks
Throughout this curriculum, science notebooks are referenced. If you currently use science notebooks or journals, you may have your students continue using them. A rubric and checklist to guide assessment of student notebooks can be found on pages 18-19 in the Teacher Guide.
In addition to science notebooks, student worksheets have been included in the Student Guide. Depending on your students’ level of independence and familiarity with the scientific process, you may choose to use these instead of science notebooks. Or, as appropriate, you may want to make copies of worksheets and have your students glue or tape the copies into their notebooks.
Additional Resources
NEED has many other resources that can be used in the classroom to extend students’ learning about wind, and integrate the topic into other curriculum areas. Visit NEED’s Curriculum Resource section at www.NEED.org and search for the following by title:
Energy on Stage—Plays about energy including, Harry Spotter and the Chamber of Windy Myths
Energy Live!—Students write and perform songs about energy sources, including wind.
Energy Stories and More—This guide includes stories and supplemental activities about energy sources including two stories specific to wind, A Trip to the Farm and The Tale of Windy Wizard. Students may enjoy reading and illustrating these stories to share with younger students in their school or community.
Activity 1: Introduction to Wind
Objective
Students will be able to use observational skills to describe wind.
Materials
Windy day
Wind Pre/Post Assesment, Teacher Guide page 33
Observing The Wind worksheet, Student Guide page 15
New Learning About Wind and Energy, Student Guide page 16
Time
45 Minutes
Procedure
1. Have the students take the Wind Pre/Post Assesment. An answer key can be found on page 15 of the Teacher Guide.
2. Introduce today’s question, “What evidence is there that the wind is blowing?” Using your own Student Guide or science notebook, model for students the observation process of taking notes and drawing sketches from what you see outside.
3. Take the students outside for five to ten minutes with their worksheets or notebook, and have them answer the question, “What evidence is there that the wind is blowing?” They should draw sketches with labels and/or write notes.
4. After returning to class, have students share with a partner their evidence that the wind was blowing.
5. Show students the page titled New Learning About Wind and Energy worksheet. Instruct students that when they read, they should be on the lookout for information that is new to them. When they notice they have learned something new they should write it in one of the stars. Students will continue to use this page throughout the unit. If students happen to fill up the stars, they can keep track of new learning on sticky notes and post them on this page, or extra copies of this page can be provided.
6. Have students read What is Wind? on pages 6-8 in the Student Guide. As they read, they should write down any new learning on page 16 of the Student Guide.
7. After the class finishes, have students share at least one piece of new learning with a neighbor.
Activity 2: Measuring Wind
Objective
Students will be able to measure wind speed and direction using appropriate tools and units.
Materials FOR EACH PAIR
Pencil
1 Straight pin
2 Extra-long straws
5 Snow cone cups
Hole punch
Masking tape
Scissors
Watch with second hand or stopwatch
Marker
Ruler
Build an Anemometer worksheet, Teacher Guide page 24
Wind Speed Tables, Teacher Guide page 25
Materials FOR THE CLASS
Analog anemometer
Digital anemometer
Wind vane
Compass
Measuring Wind, Student Guide page 17
Time
60 Minutes
2 Preparation
Make copies of Wind Speed Tables. Cut out the tables so that each student has one table to place into his/her notes.
Procedure
1. Review the previous session's reading with the class. Highlight that scientists use tools such as anemometers and wind vanes to measure the wind. Show these tools to your students and explain how they work. An explanation is included on page 23 of the Teacher Guide on the digital anemometer.
2. Following the Build an Anemometer directions, pairs should make their own anemometers. Before going outside, each student should make a diagram of his/her anemometer in their notebook or on the worksheet. Give each student a Wind Speed Table and have them glue or tape the table into their notebook or on their worksheet as a reference.
3. When the class is ready, take everyone outside. First, set out the wind vane that came with the kit. Use the compass to orient it correctly. Have students record the direction the wind is blowing.
4. Have students test their anemometers. Students should record their location and how many times the anemometer rotates in ten seconds. Have students test at least three different locations around the school grounds and record the time of day for each measurement. (Try to choose locations where wind speed might vary—on a hill, an area partially shielded by a building, in an open field, etc.) Let groups try their own anemometers and see how their readings compare to the digital and analog anemometers.
5. After returning to class, discuss with the students the wind speed measurements they recorded. Were they surprised by the results? Why do they think there was variation in wind speed around the school grounds?
Activity 3: Introduction to Energy
Objective
Students will be able to list basic facts about energy and how it can be used.
Materials
My Energy Use, Student Guide page 18
Time
45 Minutes
Procedure
1. Ask students, “What do you think you know about energy?” Record their thinking on a class KWL chart or on the board.
2. Have students read pages 2-5 in the Student Guide, Introduction to Energy. Remind students to keep track of new learning in their Student Guides.
3. After reading, have students expand on what they understand about energy. What are the forms of energy? How do they use energy?
4. After talking about energy as a class, students should work independently to compare and contrast their energy use at home and at school using the My Energy Use worksheet. In the box they should list all of the ways they use energy similarly at home and school. On the T-chart, students should list differences in the ways they use energy at home and school.
5. Allow students to work for 5-10 minutes independently. Have students share with one or two partners.
Activity 4: Wind Can Do Work
Objective
Students will be able to explain how wind can do work.
! Caution
The straight pins are sharp. Review with students how to safely handle sharp objects. After the pin is in place, carefully wrap a small piece of tape around the sharp end.
Materials FOR EACH PAIR
1 Extra-long straw*
1 Small straw
Masking tape
2 Straight pins
1 Binder clip
50 cm Thread or string
Paper clips
Foam cup
Scissors
Marker
Time
60 Minutes
2 Preparation
Ruler
Hole punch
Wind Can Do Work worksheets, Teacher Guide page 26, Student Guide pages 19-20
Construct three blades using the basic Benchmark Blade Template. It is recommended that these blades are made from poster board.
Familiarize yourself with the multimeter using the information on page 31. Pre-test your blades before the demonstration to make sure you are able to generate a voltage reading.
Place students in small groups and assign them to initially investigate either the weightlifter windmill or the electricity generating wind turbine.
INSTRUCTIONAL NOTES:
Individual student needs can be met when you assign them to either the weightlifter windmill or the electricity generating wind turbine.
In either assignment, students will be investigating which blade design will produce the most work—either by generating more electricity or lifting more mass.
Blade Materials: Some corrugated plastic and cardboard sheets are included in your kit, but blades can be made out of almost anything. You may want to gather additional materials (paper plates, paper cups, foil pie pans, foamboard, etc.) or have students bring in materials they would like to use.
You may want to suggest that students use the fan speed you used when they test their designs in subsequent activities.
Procedure
1. Review the previous windmill investigation with the class. Ask them to describe what kind of work the windmill did. Ask them to describe how it did the work – what was required?
2. Have students read Electricity in the Student Guide, pages 9-12.
3. After reading, discuss with the class that energy is the ability to do work. The wind has energy of motion. That motion energy can do work on a pinwheel or turbine, and turn its blades. Electricity is also a form of energy. Just like when the pinwheel lifted the paper clips, wind can turn a turbine, which can turn a generator to make electricity. Wind can do work and make electricity!
4. Demonstrate how the weightlifter windmill and the wind turbine work with the benchmark blades. Students should record the results of your blades for each apparatus in their Student Guides on page 21. When students test their own blades, they can try to design blades that will produce more work than the standard blade design you have demonstrated.
NOTE: When demonstrating the electricity generating turbine, explain to students how the multimeter works and that they will be measuring voltage (volts). Voltage is a measure of electrical energy. Project the multimeter instructions, if desired.
5. Brainstorm as a class all of the variables that could be changed in the blade design (size, shape, blade material, angle of blade, mass of blade, etc.).
6. Give students their group assignments and, on page 21 of the Student Guide, have them write their focus question based on which tower (weightlifter or electric) they will be working with.
a. Weightlifter Windmill Question: What blade design will lift the most mass all of the way up to the spool?
b. Wind Turbine Question: What blade design will generate the most electricity?
7. Today students should brainstorm different blade design ideas individually using page 22 of the Student Guides If time allows, students should share their ideas with their teammates. Groups will have to choose one design with which to move forward.
NEED Wonders of Wind Kit
Activity 7: Blade Investigation
Objectives
Students will be able to explain how wind can do work.
Students will be able to list factors that can affect how turbines work.
Materials
Weightlifter windmill (assembled with bucket and string)
Set up two testing stations for students to test their designs. The weightlifter station should include the assembled weightlifter turbine, bucket, string, and washers. The electric station should include the assembled wind turbine, alligator clips, multimeter, and hubs. Both stations should have a fan. It is suggested students have the fan speed set on the same speed used in the introduction activity.
Procedure
1. Groups should discuss their ideas and decide on one blade design to use. Students should record the design on Student Guide page 23 and predict why this design will produce more work than the standard blade demonstrated by the teacher.
2. Working as a group, students should construct their blades.
3. Using their notebooks or page 24 of the Student Guide, students should re-write their focus question, and test their design. They should record the data from their investigation. Remind students that they should conduct three trials with their blade design and find the average of their trials. Assist students with the multimeter, if needed. Instructions can be found on page 31 of the Teacher Guide.
4. When groups are done they can watch the other groups, or they can move on to redesigning blades as described in Activity 8 and 9.
NOTE: Groups will have to wait their turn to test their blades. As they are waiting, have students observe how other blade designs are working. What is the same about their designs compared to other groups? What is different? What design elements might they want to include in a redesign of their blades later?
Extension
Create a class chart showing the results for both the weightlifter windmill and wind turbine. On the chart, create columns to show results from initial design (Activity 6 and 7), blade redesign (Activity 8), and trying the other tower (Activity 10). An example is shown below.
Blade Design 1
Blade Redesign
Trying the Other Tower
Group Name
Group Name
Group Name
Activity 8: Blade Redesign Investigation
Objectives
Students will be able to explain how wind can do work.
Students will be able to list factors that can affect how turbines work.
Materials
Weightlifter windmill (assembled with bucket and string)
Wind turbine (assembled)
Blade materials
Alternative blade materials
Dowels
Time
45-60 Minutes
2 Preparation
Washers
Multimeter
Masking tape
Alligator clips
Fans
Scissors
Hubs
Measuring Electricity, Teacher Guide page 31
Blade Redesign, Student Guide page 25
Set up two testing stations for students to test their designs. The weightlifter station should include the assembled weightlifter turbine, bucket, string, and washers. The electric station should include the assembled wind turbine, alligator clips, multimeter, and hubs. Both stations should have a fan. Utilize the same fan speed as in previous investigations.
Procedure
1. Groups should review their design and results from their first blade investigation. Using page 25 of the Student Guide, students should plan what changes they would make to their blades.
2. Groups should agree on a plan and construct their redesigned blades. When ready, they should conduct three trials to test the new blades on the same tower they used previously. They will record observations and data.
3. Students should find the average of their trials and add it to the class chart, if one was constructed.
NOTE: Students should save the redesigned blades for Activity 10—do not have them take them apart yet.
Activity 9: Blade Investigation Conclusion
Objectives
Students will be able to explain how wind can do work.
Students will be able to list factors that can affect how turbines work.
Time
30-45 Minutes
2 Preparation
This is a “Writing in Science Day.” Let students know that scientists have to take time to analyze their results and think about what they learned. They write conclusions so that other people can learn what they did, and what their results are. Other scientists may replicate their work to test it again, or make changes and continue testing.
Procedure
1. Have students look over their results. Did their results improve with the new blade design? Why or why not? Remind students that in a conclusion scientists use data to support the statements they make. Students should write a conclusion about their results on page 26 in their Student Guides or in their notebooks.
2. When students are done writing, have them switch with someone who used the opposite tower and read each other’s conclusions. Each person should summarize his or her partner’s conclusion out loud, then suggest what he or she might try next based on the results.
Activity 10: Trying the Other Tower
Objectives
Students will be able to explain how wind can do work.
Students will be able to list factors that can affect how turbines work.
Materials
Blade sets from Activity 8
Weightlifter windmill (assembled with bucket and string)
Wind turbine (assembled)
Blade materials
Alternative blade materials
Time
45 Minutes
2 Preparation
Dowels
Washers
Multimeter
Masking tape
Alligator clips
Fans
Scissors
Hubs
Measuring Electricity, Teacher Guide page 31
Trying The Other Tower, Student Guide page 27
Set up two testing stations for students to test their designs. The weightlifter station should include the assembled weightlifter turbine, bucket, string, and washers. The electric station should include the assembled wind turbine, alligator clips, multimeter, and hubs. Both stations should have a fan. Utilize the same fan speed as in previous investigations.
Procedure
1. Using their redesigned blades, students now have the opportunity to test their blades on the other tower that they have not yet used. Data should be recorded on the worksheet or in notebooks.
2. After they have tested their blades, students should write an observational conclusion. How are the towers the same and different? What were the results on the new tower? How do the results between the two machines compare?
3. Discuss with the class the similarities and differences between the two towers and how their results compared.
Extension
Have students who are interested explore other variables such as fan speed, fan height, dowel length, etc. Have them share/present to the class how these variables affected their optimal designs.
Activity 11: Wind Reflections
Objective
Students will be able to demonstrate their understanding of wind turbines and energy.
Materials
Masking tape
Student Guides
I Learned—You Learned, Teacher Guide page 32
Wind Pre/Post Assesment, Teacher Guide page 33
Wind Energy Bingo, page 34
Wind Reflections, Student Guide pages 28-29
New Questions About Wind and Energy, Student Guide page 30
Time
30-45 Minutes
2 Preparation
Make copies of the worksheets and assessment, as needed.
Procedure
1. Students begin by using the wind reflections page or their notebooks to reflect on what they learned about wind from their reading, wind observations, use of wind tools, and their blade investigations.
2. Pass out the I Learned You Learned sheet to each student.
3. Each student should write one thing they learned in one box.
4. Students then get up and move around the room and talk to each other. Student A shares what they learned and Student B adds Student A’s learning to their paper. Student B shares what they learned and Student A writes Student B’s learning on their paper. Students then switch partners and continue this process until their papers are full.
5. Have students complete New Questions about Wind and Energy.
6. As a fun, formative assessment, play Wind Energy Bingo with your students. Instructions are found on pages 16-17 of the Teacher Guide. Some of the clues may seem challenging for younger learners. Allow students to look up answers or provide substitute clues for easier vocabulary as needed.
7. Have students take the Wind Pre/Post Assessment.
Wind Pre/Post Assessment Answer Key
Evaluation
Evaluate the unit with your students using the Evaluation Form on page 35 and return to NEED using the information on the form.
BINGO Wind Energy
Wind Energy Bingo is a great icebreaker for a NEED workshop or conference. As a classroom activity, it also makes a great introduction to an energy unit.
2Preparation
5 minutes
Time
45 minutes
Bingos are available on several different topics. Check out these resources for more bingo options!
Download these titles for free in PDF format by visiting shop.NEED.org.
Biomass Bingo—Energy Stories and More
Change a Light Bingo—Energy Conservation Contract
Coal Bingo—Coal guides
Energy Bingo—Energy Games and Icebreakers
Energy Efficiency Bingo— School Energy Experts and School Energy Managers
Hydrogen Bingo—H2 Educate
Hydropower Bingo— Hydropower guides
Nuclear Energy Bingo— Nuclear guides
Oil and Natural Gas Bingo— Oil and Natural Gas guides
Science of Energy Bingo— Science of Energy guides
Solar Bingo—Solar guides
Transportation Bingo— Transportation guides
Instructions
Get Ready
Duplicate as many Wind Energy Bingo sheets (found on page 34) as needed for each person in your group. In addition, decide now if you want to give the winner of your game a prize and what the prize will be.
Get Set
Pass out one Wind Energy Bingo sheet to each member of the group.
Go
PART ONE: FILLING IN THE BINGO SHEETS
Give the group the following instructions to create bingo cards:
This bingo activity is very similar to regular bingo. However, there are a few things you’ll need to know to play this game. First, please take a minute to look at your bingo sheet and read the 16 statements at the top of the page. Shortly, you’ll be going around the room trying to find 16 people about whom the statements are true so you can write their names in one of the 16 boxes.
When I give you the signal, you’ll get up and ask a person if a statement at the top of your bingo sheet is true for them. If the person gives what you believe is a correct response, write the person’s name in the corresponding box on the lower part of the page. For example, if you ask a person question “D” and they gives you what you think is a correct response, then go ahead and write the person’s name in box D. A correct response is important because later on, if you get bingo, that person will be asked to answer the question correctly in front of the group. If they can’t answer the question correctly, then you lose bingo. So, if someone gives you an incorrect answer, ask someone else! Don’t use your name for one of the boxes or use the same person’s name twice.
Try to fill all 16 boxes in the next 20 minutes. This will increase your chances of winning. After the 20 minutes are up, please sit down and I will begin asking players to stand up and give their names. Are there any questions? You’ll now have 20 minutes. Go!
During the next 20 minutes, move around the room to assist the players. Every five minutes or so tell the players how many minutes are remaining in the game. Give the players a warning when just a minute or two remains. When the 20 minutes are up, stop the players and ask them to be seated.
PART TWO: PLAYING BINGO
Give the class the following instructions to play the game:
When I point to you, please stand up and in a LOUD and CLEAR voice give us your name. Now, if anyone has the name of the person I call on, put a big “X” in the box with that person’s name. When you get four names in a row—across, down, or diagonally—shout “Bingo!” Then I’ll ask you to come up front to verify your results.
Let’s start off with you (point to a player in the group). Please stand and give us your name. (Player gives name. Let’s say the player’s name was “Joe.”) Okay, players, if any of you have Joe’s name in one of your boxes, go ahead and put an “X” through that box.
When the first player shouts “Bingo,” ask them to come to the front of the room. Ask them to give their name. Then ask them to tell the group how their bingo run was made, e.g., down from A to M, across from E to H, and so on.
Now you need to verify the bingo winner’s results. Ask the bingo winner to call out the first person’s name on their bingo run. That player then stands and the bingo winner asks them the question which they previously answered during the 20-minute session. For example, if the statement was “can name two renewable sources of energy,” the player must now name two sources. If they can answer the question correctly, the bingo winner calls out the next person’s name on their bingo run. However, if they do not answer the question correctly, the bingo winner does not have bingo after all and must sit down with the rest of the players. You should continue to point to players until another person yells “Bingo.”
WIND ENERGY
A. Has used wind energy for transportation
BINGO ANSWERS
B. Knows the average cost per residential kilowatt-hour of electricity
E. Knows what an anemometer does F. Can name two forms of energy
I. Has seen a wind turbine J. Knows how wind speed is measured
M. Can name two uses of windmills N. Can name two myths many people believe about wind turbines
Sailboat Sailboard etc.
$0.13 (13 cents) national average for residential customers
C. Can name two renewable energy sources other than wind
G. Can name two factors to consider when siting a wind farm
K. Has experienced the wind tunnel effect
D. Can explain how wind is formed
H. Knows how electricity is generated by a wind turbine
L. Knows the energy efficiency of a wind turbine
O. Has been to a power plant P. Knows what a gear box does
biomass geothermal hydropower solar
The sun heats Earth’s land and water surfaces differently. Warm air rises, cool air moves in.
wind speed and consistency, environment (land and animals), public opinion, access to grid
Turbine spins a shaft, which spins a generator producing electricity
ask for location/description ask for details
Grind grain, pump water, generate electricity, etc.
meters per second, with anemometer
Noisy, unpredictable, expensive, kills birds, interferes with TV and communication signals, etc.
ask for location/description
The Betz Limit is 59% for wind, today’s wind turbines are about 25-45% efficient.
Connects low-speed shaft to high-speed shaft and increases the rotational speeds to produce electricity
Grading Rubric
Student Guide/Science Notebook Rubric
This is a sample rubric that can be used with investigations and science notebooks. You may choose to look at one activity specifically or the notebook as a whole. It is suggested that you share this rubric with students and discuss the different components ahead of time. GRADE
4 Student demonstrates thorough understanding of concepts through pictures, writing, and verbal communication.
3 Student demonstrates understanding of concepts through pictures, writing, and/or verbal communication.
2 Student demonstrates a beginning understanding of concepts, may have a couple of lingering misconceptions.
Student is able to follow all steps of the scientific process: predicting, observing/recording data, and drawing a more complex conclusion related to his/her data. Student shows higher level thinking by asking his/her own questions.
Student is able to predict, observe/ record data, and draw a basic conclusion.
Student is able to do two of the following: predict, observe/record data, draw conclusions.
Handwriting is legible. Pictures are realistic and include labels. All parts of the assignment are complete.
1 Student demonstrates confusion about concepts. Many misconceptions remain.
Student is able to do one or fewer of the following: predict, observe/record data, draw conclusions.
Handwriting is legible. Pictures are realistic and include most labels. All parts of the assignment are complete.
Words and/or pictures may be hard to decipher at times. Pictures are present but are missing labels. The notebook has some missing components.
Words and/or pictures are hard to decipher. They may not be connected to the investigation. The notebook has many missing components.
Science Skills Checklist
Designed to be a formative assessment tool, you may find this checklist useful as you work with students. Put all of your students names down the left hand side. When you look at a child's notebook or Student Guide and see a skill demonstrated, put a dot in the box. Decide how many times (typically 3-5) you want to see the student use the skill independently before checking off the box as a sign that the student has mastered this skill.
Student Name
Drawings
Picture is realistic (colors, shape, size)
Includes appropriate labels
Notes and Observations
Uses senses to record observations Observations are “big picture"
Observations focus on details
Graphs and Charts Data is accurate
Includes appropriate labels Clear presentation Communication Communicates verbally Communicates in writing Makes predictions Makes predictions with reasoning Uses evidence to support reasoning Compares and contrasts Communication is personal
1. The sun shines on land and water.
2. Land heats up faster than water.
3. Warm air over the land rises.
4. Cool air over the water moves in.
Inside a Wind Turbine
Wind Turbine Diagram
Nacelle
Transmission line carries electricity long distances on power towers
Distribution line carries electricity to house Transporting Wind Electricity
Transformer on pole steps down voltage before entering house
Neighborhood transformer steps down voltage
Transformer steps up voltage for transmission
Digital Anemometer
An anemometer measures the speed of moving air, most often wind speed. You will be using it to calculate the speed of air moving through a vent.
Operating Instructions
1. Turn the anemometer on by depressing and holding the “mode” button. The device should power up in a few seconds.
2. To change the units for measuring wind speed, depress and hold the “mode” button until the speed unit flashes.
3. Depress “set” to get the desired wind speed unit.
4. To change from ºC to ºF or vice -versa, remove the yellow cover from the device, turn it over, and use a push-pin or straightened paper clip to depress the “C/F” button on the back.
5. The device will also show the Beaufort Scale for the wind speed, as a series of pointed blocks stacking upon each other.
What is the Beaufort Scale?
In 1805, Sir Francis Beaufort of the Royal Navy developed the scale to help sailors estimate wind speed for settings sails based on visible effects of winds. The scale describes wind effects seen on land or at sea and assigns a value of 0 to 12 according to the force applied by the wind. The higher the number, the stronger (faster) the wind.
Portrait by Stephen Pearce of Sir Francis Beaufort; c. 1855-1856, oil painting
Materials
1 Pencil
5 Snow cone cups
2 Extra-long straws
Masking tape
Procedure
Build an Anemometer
Hole punch
Scissors
1 Straight pin
Marker
1. Take one cup and cut the tip off so it can slide onto a pencil. This is your base cup.
Watch with second hand or stopwatch
Ruler
2. Think of the circle end of the cup like a clock. Imagine where 12, 3, 6, and 9 would be located.
3. Use the hole punch to make two holes opposite each other very near the rim at 12 o’clock and 6 o’clock.
4. Punch two more holes opposite each other 1 1/2 cm from the rim at 3 o’clock and 9 o’clock.
5. Slide the first straw through the 12 o’clock and 6 o’clock holes. Slide the second straw through the 3 o’clock and 9 o’clock holes.
6. In the other cups, use the hole punch to make two holes opposite each other at 3 o’clock and 9 o’clock.
7. Color one cup a bright color or make lots of markings so that it is easy to see.
8. Slide one cup onto the end of each straw. Make sure the cups all face the same direction. Tape the cups to the straw.
9. Center the straws in the base cup.
10. Slide the base cup over the pencil as shown in the diagram.
11. Push a straight pin through the middle of each straw and into the pencil eraser. Lightly push the cups to make sure the straws spin smoothly.
12. Take your anemometer outside. Hold the anemometer so the colored cup is facing you.
13. Measure the speed of the wind by counting the number of revolutions in 10 seconds. Use the Wind Speed Table to find the speed in miles per hour.
Wind Speed Tables
Wind Can Do Work
? Question
What is the maximum load that can be lifted all of the way to the top of the windmill shaft?
Materials
4-Blade Windmill Template
1 Extra-long straw
1 Small straw
Masking tape
50 cm String or thread
Paper clips
Large foam cup
Procedure
1. Turn the cup upside down.
2-3 Straight pins
Binder clip
Fan
Ruler
Hole punch
Marker
Scissors
2. Cut the longer straw so that you have an 8 cm length. Share the other portion with another student or group, or discard it. Tape this straw horizontally to the bottom of the cup (which is now the top) so that there is an equal amount of straw on both ends. Set this aside.
3. Prepare the windmill blades using the 4-Blade Windmill Template.
4. Measure 1.0 cm from the end of the small straw and make a mark. Insert a pin through the small straw at this mark. This is the front of the straw.
5. Slide the small straw through the windmill blades until the back of the blades rest against the pin. Gently slide each blade over the end of the straw. Secure the blades to the straw using tape or another pin.
6. Insert the small straw into the larger straw on the cup.
7. Tape the string to the end of the small straw. Tie the other end of the string to a paper clip. Make sure you have 30 cm of string from the straw to the top of the paper clip.
8. On the very end of the small straw near where the string is attached, fasten a binder clip in place for balance and to keep the string winding around the straw.
9. Slide the small straw forward to bring the binder clip next to the larger straw. Place an extra straight pin through the small straw at the other end of the larger straw. This will keep the blades away from the cup while still allowing them to move and spin.
10. Place your windmill in front of the fan and observe. Record observations in your science notebooks.
11. Investigate: Keep adding paper clips one at a time to determine the maximum load that can be lifted all of the way to the top. Record your data.
Conclusions
Draw a diagram of the system. Label the energy transformations that occurred in order for work to take place.
Extensions
How could you change the design of your windmill to produce more work from the system?
What variables can you change in this investigation? Create a new investigation changing one variable at a time.
Procedure
4-Blade Windmill Template
1. Cut out the square.
2. Cut on the dotted, diagonal lines.
3. Punch out the four black holes along the side (being careful to not rip the edges) and the black hole in the center.
4. Follow the directions on the Wind Can Do Work worksheet to complete the windmill.
Turbine Assembly Instructions
For Each Tower You Will Need
3 Legs
1 Center hub
1 Locking disc
1 Wood tower
Nacelle (pre-assembled)
Gears
12 Hole crimping hub
Blades
Tower Assembly
1. Lock one leg onto the center hub.
2. Attach the two other legs in the same way.
3. Slide the locking disc onto the tower about 3 inches.
4. With the teeth of the locking disc pointing down, insert the tower into the center hub, locking the tower in place.
Turbine Nacelle Generating Electricity
1. The turbine nacelle will require assembly. The nacelle will then slide directly onto the tower. Use the assembly video for help, https://vimeo.com/114691934. The hub, gears, and motor can be removed and rearranged, depending on the investigation.
2. Electrical wire comes pre-connected to the motor. Tell students not to pull on the wires or they will detach from the motor. Make sure enough wire is exposed so that the alligator clips come in contact with enough of the wire. Strip off additional plastic coating as necessary.
3. Attach a hub as shown in the diagram, and explained on page 29.
2.
4.
Turbine Nacelle
Leg
Center Hub
Locking Disc Tower
Weightlifter Nacelle
1. One nacelle comes pre-assembled with a spool on one end of the shaft. Tie string through the bucket and attach it to the spool. There should be enough string so that the bucket can rest on the floor or table without any slack in the string.
2. Test the efficiency of the blades by adding mass to the bucket and seeing how much the wind turbine can lift.
Adding the Hub and Blades
1. The HEX shaped driveshaft allows you to connect the Hex-Lock to the driveshaft. If you mount your gears or a weightlifting spool on the back of the nacelle, it will not slip on the driveshaft.
2. Turn the knob on the front of the hub to loosen the two hub sides. Do not turn the knob too far or the hub will separate completely.
3. Place the blades into the slots. Tighten the hub to hold the blades in place.
Use the nuts to adjust the motor up and down so the gears mesh.
Weightlifter Nacelle
Measuring Electricity
Included in the kit is a tool to measure electricity—a multimeter. The multimeter allows you to measure current, resistance, and voltage, and displays the reading numerically.
When using a multimeter it should be noted that some measurements will never “stay still” at a single repeatable value. This is the nature of the variables being monitored in some circumstances. For example, if you were to measure the resistance between your two hands with the ohmmeter setting on the multimeter (megaohm range—millions of ohms), you would find that the values would continuously change. How tightly you squeeze the metal probes and how “wet” or “dry” your skin is can have a sizable effect on the reading that you obtain. In this situation you need a protocol or standardized method to allow you to record data.
We recommend that you discuss with your class the variability of measurement and let them come up with a standard for collecting data. They may decide to go with the lowest reading, the highest reading, or the reading that appears most frequently in a certain time period.
Digital Multimeter
(NOT USED)
Directions:
DC VOLTAGE
1. Connect RED lead to VΩmA jack and BLACK to COM.
2. Set ROTARY SWITCH to highest setting on DC VOLTAGE scale (1000).
3. Connect leads to the device to be tested using the alligator clips provided.
4. Adjust ROTARY SWITCH to lower settings until a satisfactory reading is obtained.
5. With the wind turbine, usually the 20 DCV setting provides the best reading.
DC CURRENT (NOT USED IN THIS ACTIVITY)
1. Connect RED lead to VΩmA jack and BLACK to COM.
2. Set ROTARY SWITCH to 10 ADC setting.
3. Connect leads to the device to be tested using the alligator clips provided.
Note: The reading indicates DC AMPS; a reading of 0.25 amps equals 250 mA (milliamps).
YOUR MULTIMETER MIGHT BE SLIGHTLY DIFFERENT FROM THE ONE SHOWN. BEFORE USING THE MULTIMETER, READ THE OPERATOR’S INSTRUCTION MANUAL INCLUDED IN THE BOX FOR SAFETY INFORMATION AND COMPLETE OPERATING INSTRUCTIONS.
I Learned–You Learned
Directions
1. In the first box write down one new piece of information you learned about wind or energy.
2. Find a partner. Share what you learned with your partner. Your partner will write down your learning in one of his/her empty boxes.
3. Listen to what your partner learned. Write down his/her new learning in one of your empty boxes.
4. Switch partners. Continue finding new people to talk to until all of the boxes on your paper are full.
Wind Pre/Post Assessment
1. The ability to do work is called_______. a. energy b. electricity c. a job
2. Wind is_______. a. moving clouds b. moving trees c. moving air
3. The energy in wind comes from the_______. a. Earth b. sun c. ocean
4. Wind is made by the uneven heating of the_______. a. Earth’s surface b. sun c. ocean
5. Wind moves best_______. a. in the forest b. over flat land c. in the city
6. A tool that measures the speed of the wind is a(n)_______. a. anemometer b. thermometer c. wind vane
7. A tool that shows the direction from which the wind is blowing is a(n)_______. a. anemometer b. thermometer c. wind vane
8. A wind turbine uses wind energy to make_______. a. electricity b. heat c. motion
9. What part of a wind turbine captures the wind?
a. tower b. gear box
c. blades
10. Deciding where to build many wind turbines is called_______. a. picking a windy place b. siting a wind farm c. choosing a windy spot
11. Give two examples of work that wind can do.
12. Give two reasons why wind is a good energy resource.
WIND ENERGY
A. Has used wind energy for transportation
E. Knows what an anemometer does
I. Has seen a wind turbine
M. Can name two uses of windmills
B. Knows the average cost per residential kilowatt-hour of electricity
F. Can name two forms of energy
J. Knows how wind speed is measured
N. Can name two myths many people believe about wind turbines
BINGO
C. Can name two renewable energy sources other than wind
G. Can name two factors to consider when siting a wind farm
K. Has experienced the wind tunnel effect
O. Has been to a power plant
D. Can explain how wind is formed
H. Knows how electricity is generated by a wind turbine
L. Knows the energy efficiency of a wind turbine
P. Knows what a gear box does
Wonders of Wind Evaluation Form
1. Did you conduct the entire unit?
2. Were the instructions clear and easy to follow?
3. Did the activities meet your academic objectives?
4. Were the activities age appropriate?
5. Were the allotted times sufficient to conduct the activities?
6. Were the activities easy to use?
Yes
Yes
Yes
Yes
No
No
No
No
7. Was the preparation required acceptable for the activities? Yes
8. Were the students interested and motivated?
9. Was the energy knowledge content age appropriate?
10. Would you teach this unit again?
Yes
Yes
Yes
No
No
No
No
No Please explain any ‘no’ statement below. How would you rate the unit
How would your students rate the unit
What would make the unit more useful to you?
Other Comments:
Adapt2 Solutions
Alaska Electric Light & Power Company
American Electric Power Foundation
American Fuel & Petrochemical Manufacturers
Arizona Sustainability Alliance
Armstrong Energy Corporation
Robert L. Bayless, Producer, LLC
Baltimore Gas & Electric
Berkshire Gas - Avangrid
BG Group/Shell
BP America Inc.
Blue Grass Energy
Bob Moran Charitable Giving Fund
Boys and Girls Club of Carson (CA)
Buckeye Supplies
Cape Light Compact–Massachusetts
Central Alabama Electric Cooperative CLEAResult
Clover Park School District
Clovis Uni ed School District
Colonial Pipeline
ComEd
Con uence
ConocoPhillips
Constellation
Delmarva Power
Dominion Energy, Inc.
Dominion Energy Charitable Foundation
DonorsChoose
Duke Energy
Duke Energy Foundation
East Baton Rouge Parish Schools
East Kentucky Power
EcoCentricNow
EDP Renewables
EduCon Educational Consulting
Enel Green Power North America
Eugene Water and Electric Board
Eversource
Exelon
Exelon Foundation
Exelon Generation
Foundation for Environmental Education
FPL
The Franklin Institute
George Mason University – Environmental Science and Policy
Georgia Power
Gerald Harrington, Geologist
Government of Thailand–Energy Ministry
Green Power EMC
Greenwired, Inc.
National Sponsors and Partners
Guilford County Schools–North Carolina
Honeywell
Houston LULAC National Education Service Centers
Iowa Governor’s STEM Advisory Council -
Scale Up
Illinois Clean Energy Community Foundation
Illinois International Brotherhood of Electrical
Workers Renewable Energy Fund
Illinois Institute of Technology
Independent Petroleum Association of New Mexico
Jackson Energy
James Madison University
Kansas Corporation Energy Commission
Kansas Energy Program – K-State Engineering
Extension
Kentucky O ce of Energy Policy
Kentucky Environmental Education Council
Kentucky Power–An AEP Company
League of United Latin American Citizens –
National Educational Service Centers
Leidos
LES – Lincoln Electric System
Liberty Utilities
Linn County Rural Electric Cooperative
Llano Land and Exploration
Louisiana State Energy O ce
Louisiana State University – Agricultural Center
Mercedes-Benz USA
Minneapolis Public Schools
Mississippi Development Authority–Energy Division
Motus Experiential
National Fuel
National Grid
National Hydropower Association
National Ocean Industries Association
National Renewable Energy Laboratory
NC Green Power
Nebraskans for Solar
NextEra Energy Resources
Nicor Gas
NCi – Northeast Construction
North Shore Gas
O shore Technology Conference
Ohio Energy Project
Oklahoma Gas and Electric Energy Corporation
Omaha Public Power District
Paci c Gas and Electric Company
PECO
Peoples Gas
Pepco
Performance Services, Inc.
Permian Basin Petroleum Museum
Phillips 66
PNM
PowerSouth Energy Cooperative
Providence Public Schools
Quarto Publishing Group
Prince George’s County O ce of Sustainable Energy (MD)
Renewable Energy Alaska Project
Rhoades Energy
Rhode Island O ce of Energy Resources
Rhode Island Energy E ciency and Resource
Management Council
Salal Foundation/Salal Credit Union
Salt River Project
Salt River Rural Electric Cooperative
C.T. Seaver Trust
Secure Futures, LLC
Shell
Shell Carson
Shell Chemical
Shell Deer Park
Singapore Ministry of Education
SMECO
SMUD
Society of Petroleum Engineers
South Carolina Energy O ce
SunTribe Solar
Tri-State Generation and Transmission
TXU Energy
United Way of Greater Philadelphia and Southern New Jersey Unitil