


Hi Friends!
We made it! Spring is finally here! This is my favorite season because we are rewarded for our patience throughout the winter months. Only after taking it slow and recharging on those colder days can we appreciate when flowers begin to bloom again, trees come alive with color, and there is a touch of warmth in the breeze. I find that, like most people, the promise of sunny days ahead naturally brings a lightness to my mood and I am filled with energy and motivation to make positive changes in my daily habits. For me, the months of March and April are the most invigorating and motivating, almost like my own personal version of New Year’s, just a few months late!
I’m excited to share with you the ways I’ll be refreshing my life this spring, from recipes and Easter projects to gardening tips and fashion advice. In this issue of our magazine, you’ll find everything you need to embrace the season of renewal. Let’s celebrate the fact that we made it through winter and look forward to the sunny days ahead!
Hillary
KITCHEN

I wanted to share some recipes that have always been popular for my family around this time of year, including a few cakes that are perfect for any Easter celebration. For some reason, I am always drawn to baking in the spring, which you might notice from my featured recipes!
01. Cinnamon Sugar Brioche French Toast
02. Jewish Coffee Cake
03. Banana Bread
04. Herb-Crusted Pork Tenderloin
05. Southwest Brunch Sheet Pan
06. Boursin Pasta
07. Carrot Cake
08. Coconut Cake
09. Strawberry Lemonade Buttercream

CHAPTER ONE
CINNAMON SUGAR BRIOCHE FRENCH TOAST
Ingredients
1 & 1/2 cups milk
6 eggs
1 tbs cinnamon sugar
1 tsp vanilla
1 loaf brioche
Directions
1. Blend all ingredients except bread in a blender for 30 seconds.
2. Pour mixture into a 9x13 pan. Place brioche slices in the mixture, let sit for 1 minute. Flip and let sit for 1 more minute.
3. Meanwhile, heat a griddle on medium heat and add a tablespoon of butter. Fry each slice of bread for 3 mins on each side.
4. Sprinkle each slice with cinnamon sugar and leave in a warm oven as you continue through the rest of the loaf.


JEWISH COFFEE CAKE
Ingredients
2 sticks butter
1 cup sugar
2 eggs
1 cup sour cream
2 cups sifted flour
1 tsp baking soda
1.5 tsp baking powder
Filling
1/2 cup chopped walnuts
4 tbs sugar
2 tsp cinnamon
Directions
1. Preheat your oven to 350F.
2. Mix sugar and butter with an electric mixer until creamed. Add eggs and sour cream and mix until combined. Add flour, baking soda and baking powder and mix again.
3. Mix chopped walnuts, sugar, and cinnamon in a bowl. This is your filling.
3. Grease and sugar a bundt pan. Add half the batter, layer with half the filling mixture then add rest of batter remaining filling.
4. Bake for 40-45 mins or until a toothpick comes out clean.

BANANA BREAD
Ingredients
4 over-ripe bananas
1 cup sugar
2 tbs brown sugar
1/2 cup unsalted butter, melted
2 eggs
1 tsp vanilla extract
4 tbs Greek yogurt
4 tbs water
1 & 2/3 cup flour
1 & 1/4 tsp baking soda
1/4 tsp salt
Directions
1. Preheat your oven to 350° F.
2. In a large bowl, combine melted butter and sugar. Add eggs, vanilla, water, and Greek yogurt and combine.
3. Once your wet mixture is combined, mix in dry ingredients.

4. Use an electric mixer to whip your over-ripe bananas. Fold bananas into your batter until mixed.
5. Coat loaf pan in oil and sprinkle with sugar. Pour your batter into the pan.
6. Bake for 45-50 mins. Let cool before serving.
HERB-CRUSTED PORK
TENDERLOIN
Ingredients
Brine
2 pork tenderloins, 1.5 lbs each
4 garlic cloves, smashed
1 tbs salt
1 dash herb rub
1/4 cup EVOO
1 small spring of rosemary
3 tbs fresh parsley
6 cloves of garlic
1/2 tsp dried oregano
1 tsp dried thyme
Sauce
2 tbs butter
1/2 cup white wine
1 tbs reserved herb marinade
Directions
1. In the morning before cooking, cover tenderloins in a bowl of water with 1 tablespoon of salt and garlic cloves. Allow meat to sit in brine until ready to cook. When ready, empty water out and thoroughly rinse tenderloins, patting dry.
2. Season tenderloins with a pinch of salt and pepper on each side.
3. Preheat your oven to 400° F.
4. Put all rub ingredients in a food processor, blend until a thick paste forms. Rub over pork tenderloins on both sides (reserve 1 tbs for sauce), and place tenderloins in a hot cast iron skillet. Sear each side on high for 2 minutes.
5. Place skillet of tenderloins in the oven and cook for 30 mins until they reach 155° F. Take out of the oven and place on a cutting board to rest for 10 mins.
6. Meanwhile, pour wine and reserved herb rub into the skillet and sauté for 7 mins. Add butter before serving. Pour over sliced meat.
SOUTHWEST BRUNCH SHEET PAN
Ingredients
1 lb ground pork sausage
1/2 green pepper, diced
1/2 red pepper, diced
1/2 yellow onion, diced
3/4 bag frozen hash browns
1 teaspoon parsley
1.5 teaspoons creole seasoning
S & P to taste
1/3 cup Colby Jack cheese
12 large eggs
Directions
1. Preheat oven to 425° F.
2. Spray a baking sheet with cooking oil, add hash browns in a thin layer, sprinkle spices and toss.
3. Bake for 20-25 minutes, flipping halfway through.
4. Meanwhile, brown sausage in a castiron skillet with peppers and onions.
5. When hash browns are lightly browned, take out of the oven and pour sausage mixture over top. Add eggs and cheese and place back in oven at 350° F for 14 minutes or until egg whites are cooked through.

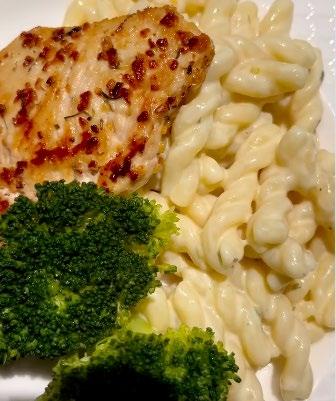
BOURSIN PASTA
Ingredients
3/4 pound pasta (I use gemelli)
4 tbs butter
6 cloves garlic, minced
1 cup milk
1/2 cup half and half
1 cup reserved pasta water
1.5 tsp chicken buillion
1 block Boursin cheese
Directions
1. Boil pasta until al dente. Drain, reserving water, and set aside.
2. In a pan, melt butter then sauté garlic. Add milk, half and half, reserved pasta water and buillion, let simmer for 10 mins. Add cheese and whisk until melted. Add pasta, heat through then let stand for 5-10 mins before serving to thicken, stirring often. S&P to taste.
3. If needed, add a little more reserved pasta water to make creamy.

CARROT CAKE
Ingredients
1 & 2/3 cup baking oil
1 cup sugar
1 cup brown sugar
6 eggs
1 tablespoon vanilla extract
3 & 1/4 cups all-purpose flour
1 tablespoon ground cinnamon
2 teaspoons baking soda
1.5 teaspoons salt
1 teaspoon baking powder
1/2 teaspoon ground nutmeg
1/4 teaspoon ground cloves
4 cups grated carrots
Frosting
3 80z. blocks cream cheese, room temperature
1 cup butter, room temperature
2 tsp vanilla extract
6 cups powdered sugar
Directions
1. Preheat oven to 350° F.
2. Mix together oil and sugars. Add eggs and vanilla, combine.
3. Combine flour, salt, baking soda, baking powder and spices in a bowl then mix into wet ingredients.
4. Spray two 8in cake pans with non-stick spray and pour batter in.
5. Bake for 25-30 minutes or until a toothpick comes out clean. Cool before icing.
6. For frosting, combine butter and cream cheese with an electric mixer until smooth. Add vanilla extract and stir.
7. Use mixer to gradually add powdered sugar to your mixture until combined.

COCONUT CAKE
Ingredients
5 eggs, yolk and white separated
2 cups sugar
1/2 cup butter, softened
1/2 cup canola oil
1.5 tsp coconut extract
1/2 tsp vanilla extract
1/4 tsp almond extract
2 & 1/4 cups cake flour
1 tsp baking powder
1/2 tsp baking soda
1/4 tsp salt
1 cup buttermilk
1/4 tsp cream of tartar
Icing
4.5 cups powdered sugar
3 sticks butter, softened
1 tsp coconut extract
1-2 tbs cream or milk
1 cup shredded coconut
Directions
1. Preheat oven to 325° F.
2. Beat sugar, butter and oil until light and fluffy. Add egg yolks one at a time then add extracts. Mix well.
3. Combine flour, baking powder, baking soda and salt. Add to creamed mixture, alternating with buttermilk.
4. Add cream of tartar to egg whites, whisk until stiff peaks form. Gently fold into batter.
5. Transfer to three greased, parchment lined, 9 inch cake pans. Bake for 25 to 30 minutes or until a toothpick comes out clean.
6. Meanwhile, combine powdered sugar, butter, coconut extract and milk in a stand mixer with the whisk attachment. Mix until fluffy and leave at room temperature until ready to ice.
7. Ice cake once completely cooled, adding icing in between layers and skim coating the outside. Sprinkle coconut on top. Serve chilled.

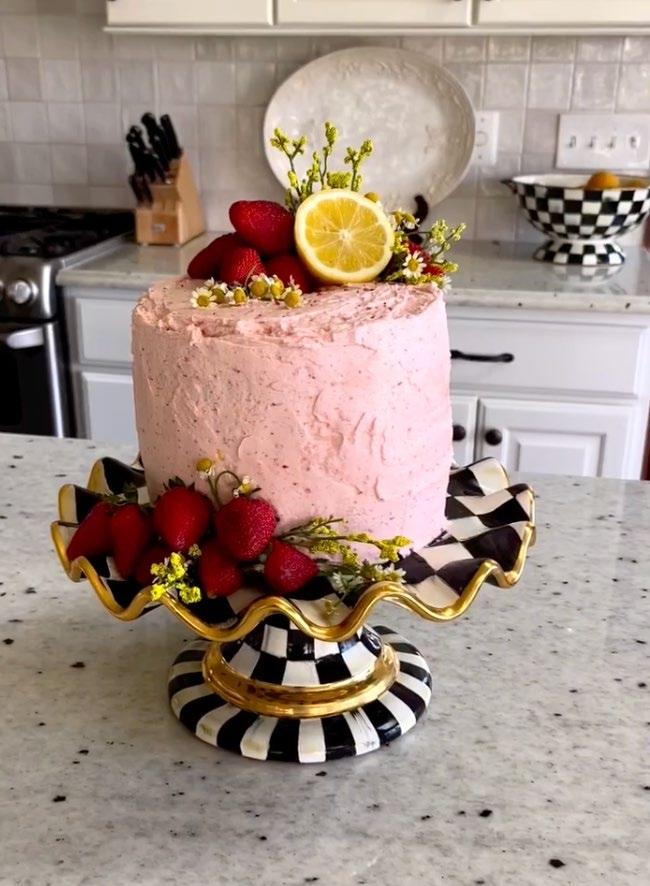
STRAWBERRY LEMONADE BUTTERCREAM
Ingredients
7 cups powdered sugar
3 sticks unsalted butter
4 tbs lemon juice
2-3 tbs milk
1 cup freeze dried strawberries, blended in a food processor
Directions
*I use a store bought cake and add my own icing. My favorite is the 7up cake from Aldi.
1. Whip butter and sugar, slowly adding in lemon juice and milk until light and fluffy. Be sure to scrape down sides.
2.Pour strawberry dust in and blend again.
3. Place in the refrigerator to chill before icing your cake.

HOME & ENTERTAINING
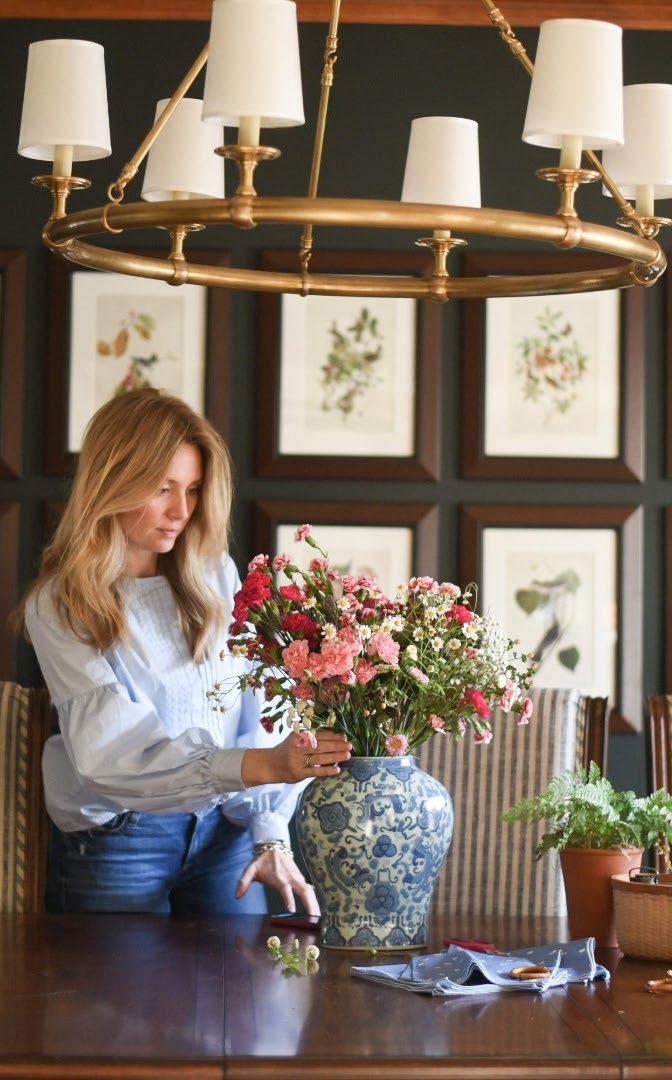
Easter is, of course, my main focus when it comes to hosting in the springtime. To help you with hosting, I created printable interactive place cards and trivia for you to have at the dinner table with friends and family! In this section, you will also find one of my favorite activities to do with the kids around this time of year, an Easter Egg Tree!
01. Printable Place cards for Easter Dinner
02. Easter Tree DIY
CHAPTER TWO
Hillary Write your guest’s name on the front and a question on the back Download Printable Here PRINTABLE PLACE CARDS & TRIVIA
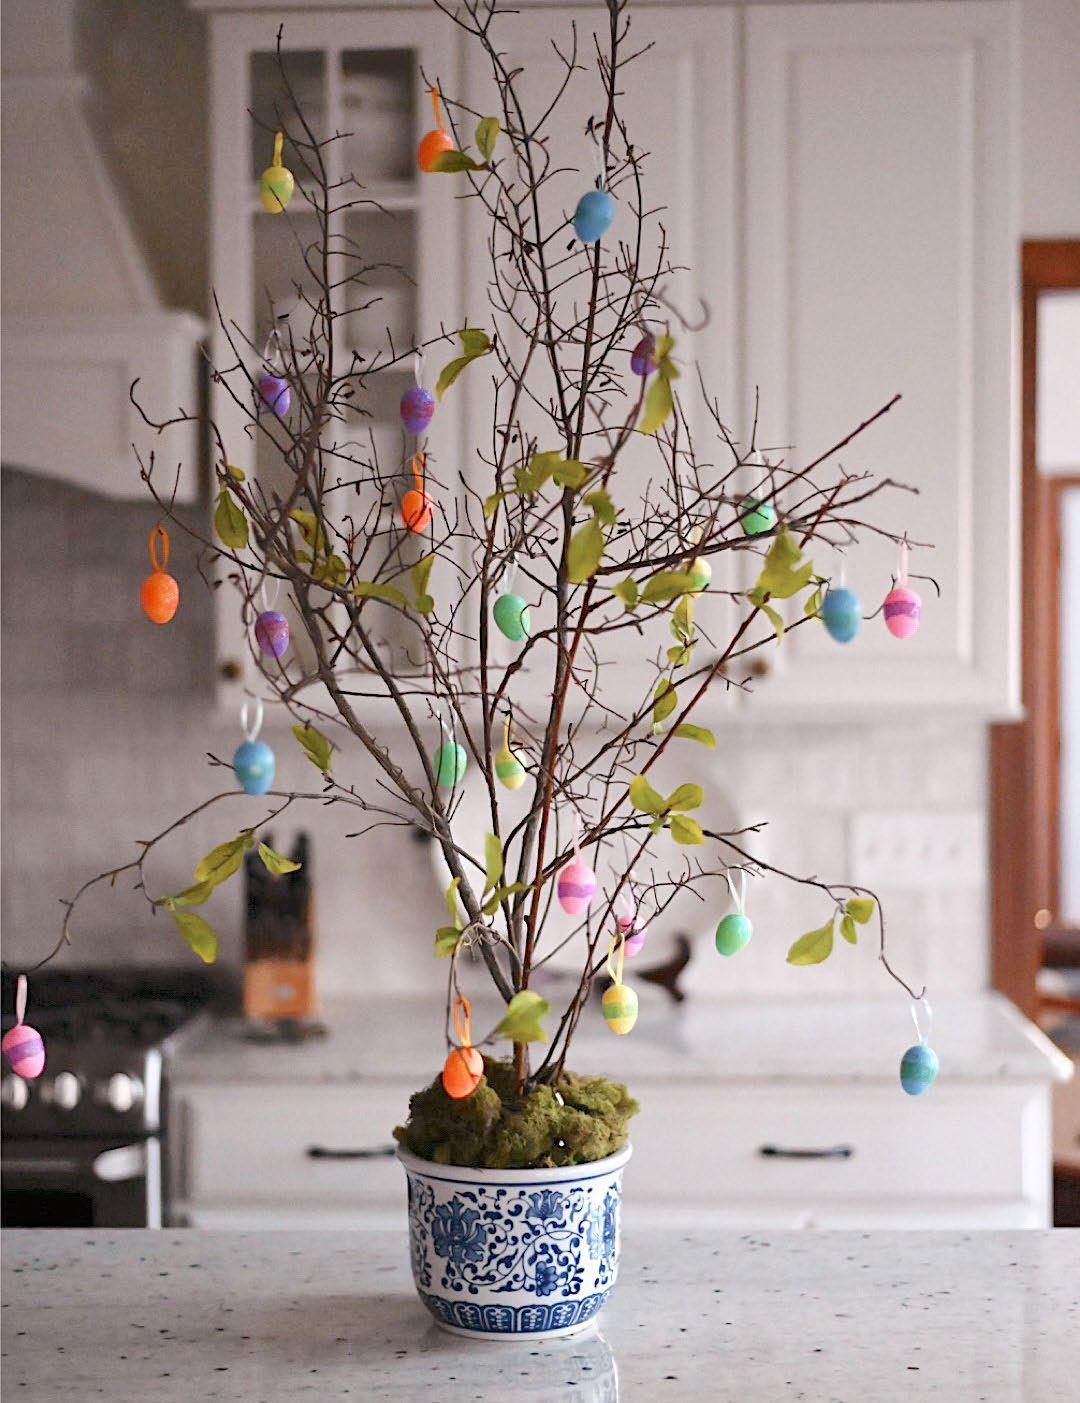
DIY: EASTER EGG TREE
This is one of my favorite crafts to do with the kids around Easter time. We have always participated in the egg-dying tradition, but after the fact I never knew what to do with the eggs so they usually just went in the trash. I hated getting rid of the kids’ colorful creations so soon so I found this DIY to keep their artwork on display for the entire season and it is oh-so cute! You can shop all of the supplies I used with the link below.
Instructions:
1. Fill a bowl or vase of your choice with pebbles.
2. Use a store bought mini tree or a large branch from outside and place in your bowl so that the stones hold it up.
3. Cover the base of your tree with moss until no stones are visible.
4. Paint mini foam or plastic eggs. Get creative with this!
5. Hang from your Easter egg tree and enjoy for the entire season!
Shop Supplies Here
GARDEN
Spring is the time of year that I start thinking about and tending to my garden. In this section, I included some very important questions to ask yourself before starting your own garden, something I wish I had done years ago. And, we have an amazing article written by one of my good friends and professional gardeners, Bailey Van Tassel - such a treat!
01. Questions to Ask Yourself Before Starting a Garden
02. The Secrets to a Beautiful and Bountiful Kitchen
Garden by BaileyVan Tassel
CHAPTER THREE
QUESTIONS TO ASK YOURSELF
BEFORE SPRING GARDEN SEASON:
1. What is your local hardiness zone, and which plants thrive in that zone?
2. How much sunlight does your garden receive each day?
3. What type of soil do you have, and does it need amendments for specific plants?
4. Have you considered the water requirements of the chosen plants and established a watering schedule?
5. What are you hoping to get out of your garden?
6. How much time and effort are you willing to commit? Be honest with yourself about how much time you can realistically dedicate to watering, weeding, and other tasks.
7. How much space do you have available? Be realistic about the size of your garden and choose plants that will fit well in it.
8. Are you a beginner gardener?
9. Do you have any pets or children? Choose plants that are safe for them if they’ll be spending time in the garden.
10. What is your budget?
Factor in the cost of seeds, seedlings, soil amendments, tools, and other supplies.
10. Do you prefer organic gardening methods? This will influence your choices of fertilizers, pest control, and other practices.

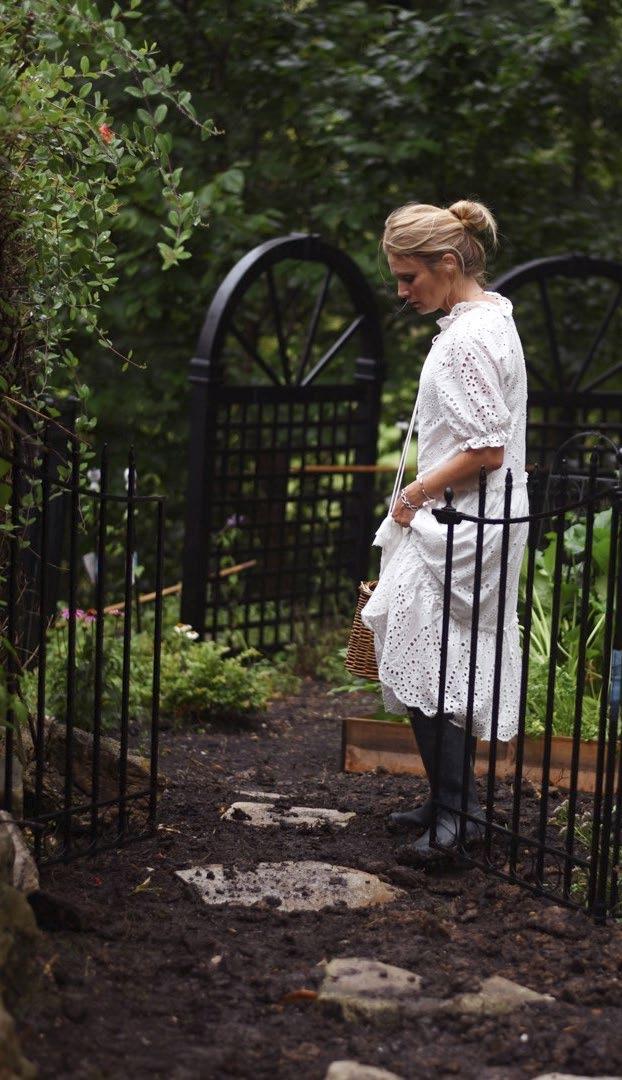
THE SECRETS TO A BEAUTIFUL AND BOUNTIFUL KITCHEN GARDEN
 By Bailey Van Tassel
Bailey Van Tassel is an author, podcaster, and founder of the national gardening club, The Kitchen Garden Society. Her goal is to get more people gardening, especially in suburban and small spaces, while making it a bigger part of our innate American culture. Bailey hosts The Garden Culture Podcast weekly and has her first published book coming out this year. She hopes to have families raise their children with a reverence for nature and an instinct for growing their own food and flowers while folding it into everyday life. You can get more information on Bailey at www.baileyvantassel.com or on Instagram @baileyvantassel
There is nothing quite like the anticipation of spring in the garden, knowing you’re just weeks away from budding flowers and ripe tomatoes. Though we are dazzled by the chance to get our hands dirty, it is also a time of mad dashery as we flit around trying to get all the tasks tasked in just the right amount of time so that our frost date isn’t pushing us around. The secret to a beautiful and bountiful kitchen garden lies in a few key details that if
well-planned out in advance, leave you feeling both parts fulfilled and joyful come summer.
Though gardens can be very practical matters, they are a place of beauty as well. They are an extension of our homes, and when treated as a complement to them, become their own rooms from which to do, or simply ponder life. Above all else, like a beautiful and well-curated home, the garden has a few foundational elements that should be put in order to create visual interest and maximize the space.
1. STRUCTURE
Whether you plant in-ground or in raised beds, creating structure in the garden will guide you through it, as opposed to leaving you with a big plot of mish mash. Even with in-ground gardening you can still add edging with some stones, willow woven wattle, or even wood or steel edging. If you’re working with raised beds, those create some height that can define a space. This also helps with planning and mapping out the garden. Distinct beds will help you create additional form with your plants.
Second to your beds, trellises are the

next way to add some gorgeous height and interest to the garden. You can choose your materials to match, or mix them up. Choosing some trellises to match the plants you anticipate growing will be crucial. An arched trellis makes a wonderful focal point alongside some obelisks, or even some larger a-frame trellises for things like cucumbers or tomatoes. I urge you to avoid the tomato cage of our parent’s gardens - there are much more creative and effective ways to help a tomato. Trellises offer visual impact, but also give climbing plants something to help them grow properly, or create airflow for bushy plants, which need their stems and leaves to spread and avoid disease.
2. SOIL HEALTH
Excellent soil is paramount and will be the next point to tackle in the kitchen garden. A bountiful garden is only possible with good soil. The keys to well-balanced growing conditions lies in high quality compost and some good amendments. I’ve found that almost all gardens can benefit from kelp meal, either wool pellets or coconut coir, worm castings, and some form of calcium like crushed oyster shells or bone meal. These amendments help infuse nitrogen, make micronutrients easy to absorb by the plants, prevent some pests and blossom end rot, as well as make the growing environment more porous for microorganisms and water retention.

3. CHOOSING PLANTS
The secret to a kitchen garden that is booming with both healthy veggies and beautiful ones are all in the varieties that you choose. To start out, find your US hardiness zone and get to know which varieties grow best in your area (you’ll also use this to guide your planting date, which is based on your last frost date). Some plants are better suited for cold climates or warm ones, but also can be adapted to your zone. Alongside well-suited plants are unique varieties that only home gardeners can get. You’ll be hard-pressed to find purple cauliflower, cucamelons, long-stemmed marigolds, and jimmy nardello peppers in the market. A
variety of plants makes for a variety of nutrients and such a fun treasure hunt come harvest time.
As you continue to choose plants, keep in mind that pollinators are of vital importance, leading us to grow flowers in every single bed. Edible flowers make so much sense in the kitchen garden because they’re useful, pretty, medicinal, and bring in good pollinators. They can also act as great companions and trap plants that either gather up bad pests, or repel them. Nasturtium, calendula, and borage do a great job of this. We love multi-purpose plants that control pests and have amazing benefits to us as well.
4. PLACING PLANTS
Where you place your plants is the second half of designing the garden. You’ll want to think about how the plants perform together and create biodiversity as well as how they’ll physically grow and create an emerging aesthetic. This is all an act of careful layering. It can be totally haphazard if you like, giving a more cottage garden feel - that is all well and good as long as you still keep a good mix of plants together to achieve the diverse planting scheme. Biodiversity is helpful in keeping harmful pests away because it’s confusing to them. Traditional row gardening makes things easy; a row of cabbages is easy access for the white cabbage butterflies to get in and
lay eggs, ruining a crop with their eventual tiny green looper caterpillars. To combat this, we plant in bunches or mixed rows. Instead of a bed that has a row of cabbages, a row of onions, and a row of radish, instead place your cabbages spread out staggered through the bed, with the onions on the inner side (they’ll get tall) and radish mixed in staggered between the onions and cabbage. This creates texture and mixes things up. You’ll also have room for some herbs and flowers to be snuck in, so that you now have a bed with some color, too. Add trailing flowers to the edge, like nasturtium, and some mixed in throughout, like calendula which will hopefully grab some of those loopers before they get to the cabbages.
When thinking about layering in a decorative sense, there is a rule of


thumb for potted arrangements that carries over to the kitchen garden. You always want a thriller, filler, and spiller. Something tall and big is the thrillerthink swiss chard, amaranth, or a trellis full of snap peas. These do best at the center or back part of a garden or bed. The filler is a bushier category of plants that really fill out a space. These are our cabbages, broccoli, lettuce, and carrots. Those complement the thriller well and are mixed below them. Then you have the spiller which is something that drapes over the edge. If you have raised beds, this creates lovely movement. There are trailing thyme and rosemary varieties, some smaller cucumbers and pumpkins do this really well. If you don’t have many things to spill over, color will do the trick in making things evened out aesthetically. A beautiful pop of red sorrel, some colorful thumbelina zinnias, or some dianthus (a lesserknown edible flower) can really add that lower layer to the visual appeal of your garden beds.
5. TENDING
The final stage in setting up your bountiful kitchen garden rests in the eventual tending. Make a plan now to note when your plants need more airflow, shade, or water. These are the things we want to really look out for and will help keep pests and disease at bay. If airflow is needed, consider pruning things like squash, tomatoes, cucumbers, or peas that tend to get
crowded by their own leaves. Staking plants can be a great idea as well. I always keep some redwood stakes on hand for just this purpose. Bushy plants like fava beans, bush beans, eggplant, and chilies often need something to hug as their fruit gets heavy. I also recommend having some shade options on hand as summer nears. You can buy hoops and shade cloth, or even use umbrellas staked into the garden. Of course, planting things that need shade next to the trellises in the garden is a great idea, as those will give a reprieve from the sun to things like spinach and basil. Finally, when it comes to water there is a trick to know if your beds have enough moisture. If you stick your pointer finger into the soil, then pull it back up and it’s dry, the beds need water. If soil sticks to your fingers with some dampness, you’re good.
While setting the kitchen garden up to be both bountiful and beautiful requires a bit more planning, it’s worth it. Nothing settles our busy hearts quite like the pace of nature. Taking the time to make the garden really sing with subtle layers and colors is both soothing and meaningful! You’ll never regret taking the time both enjoying the space and being in it doing the work of your own hands.
FASHION

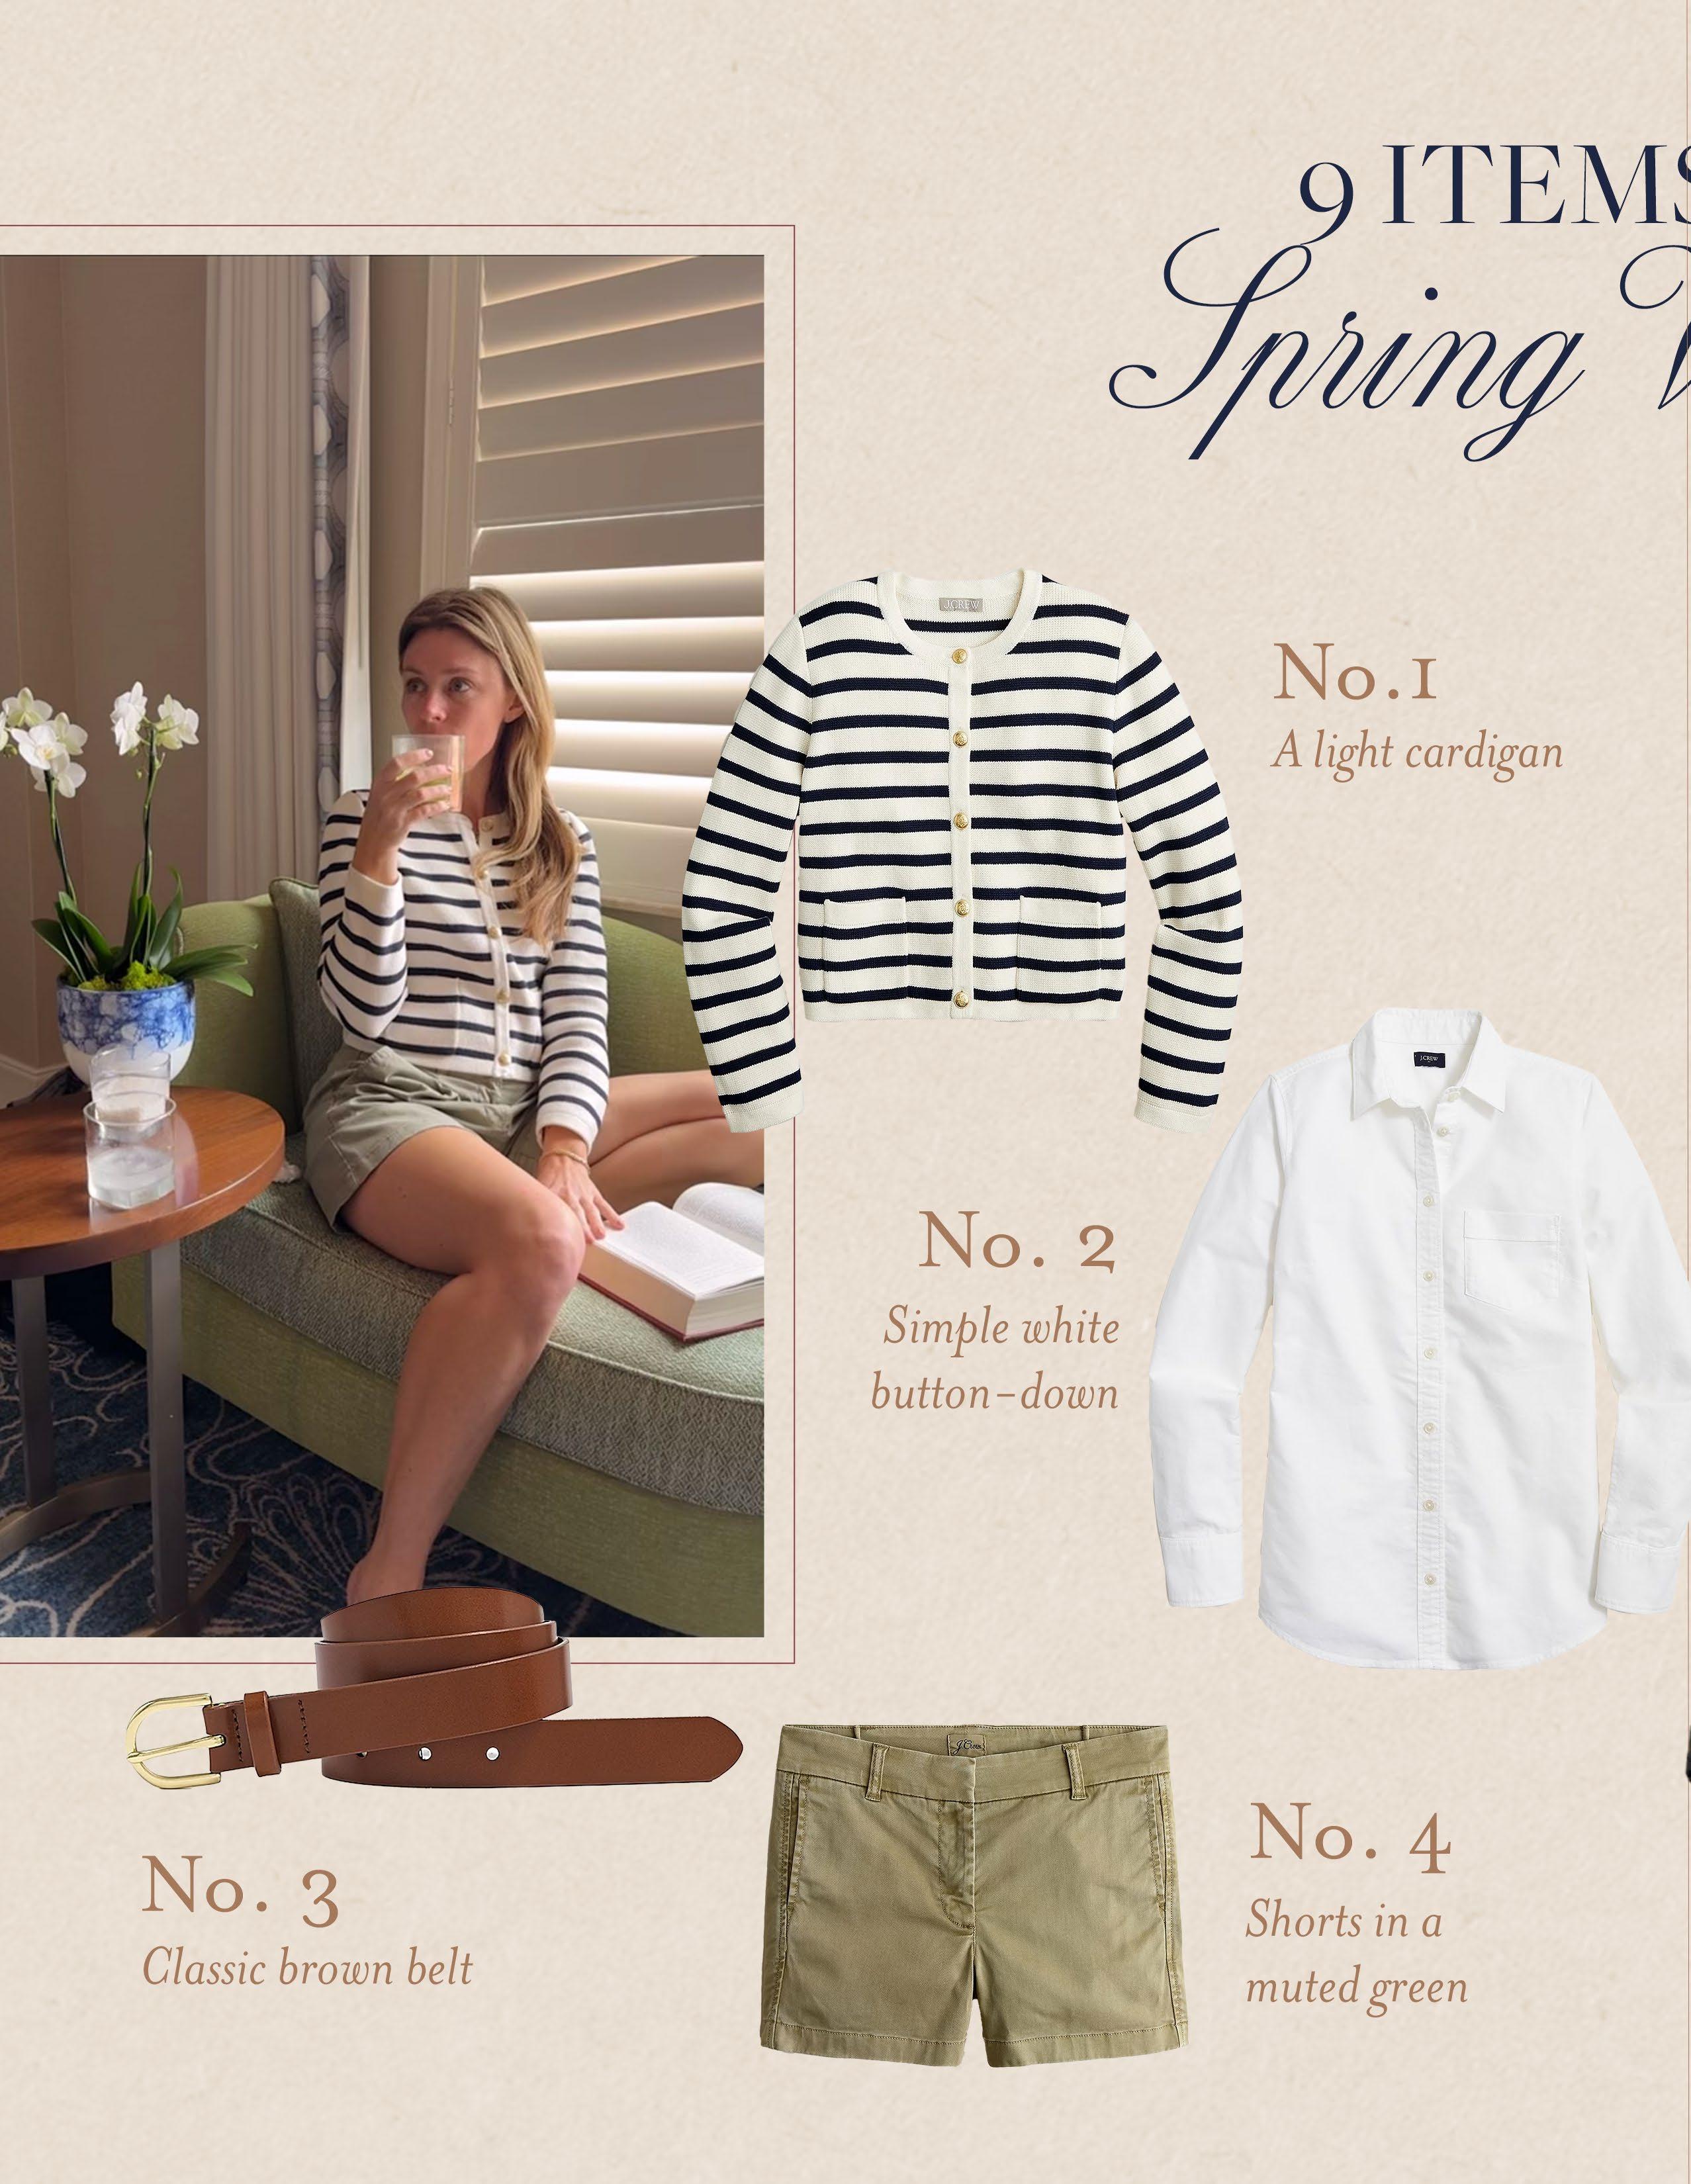
I love spring fashion but I am mindful of making it work for my personal style. A lot of spring pieces can be a bit too frilly and bright for me so I have to actively seek out brands and collections that cater to what I am looking for, and if you feel the same way you will love the picks I have below!
01. Easter Dresses
02. Spring 2024: What to Add to Your Closet by
Paula Dhier
03. Key Items to Buy for Spring
CHAPTER FOUR


you for reading!
Thank
