SoCaHi Communications Training Guide


SoCaHi Communications Training Guide

1. Log into the team Canva account using the following credentials:
• Username: vsaynorath@swinerton.com
• Password: Swinerton1!
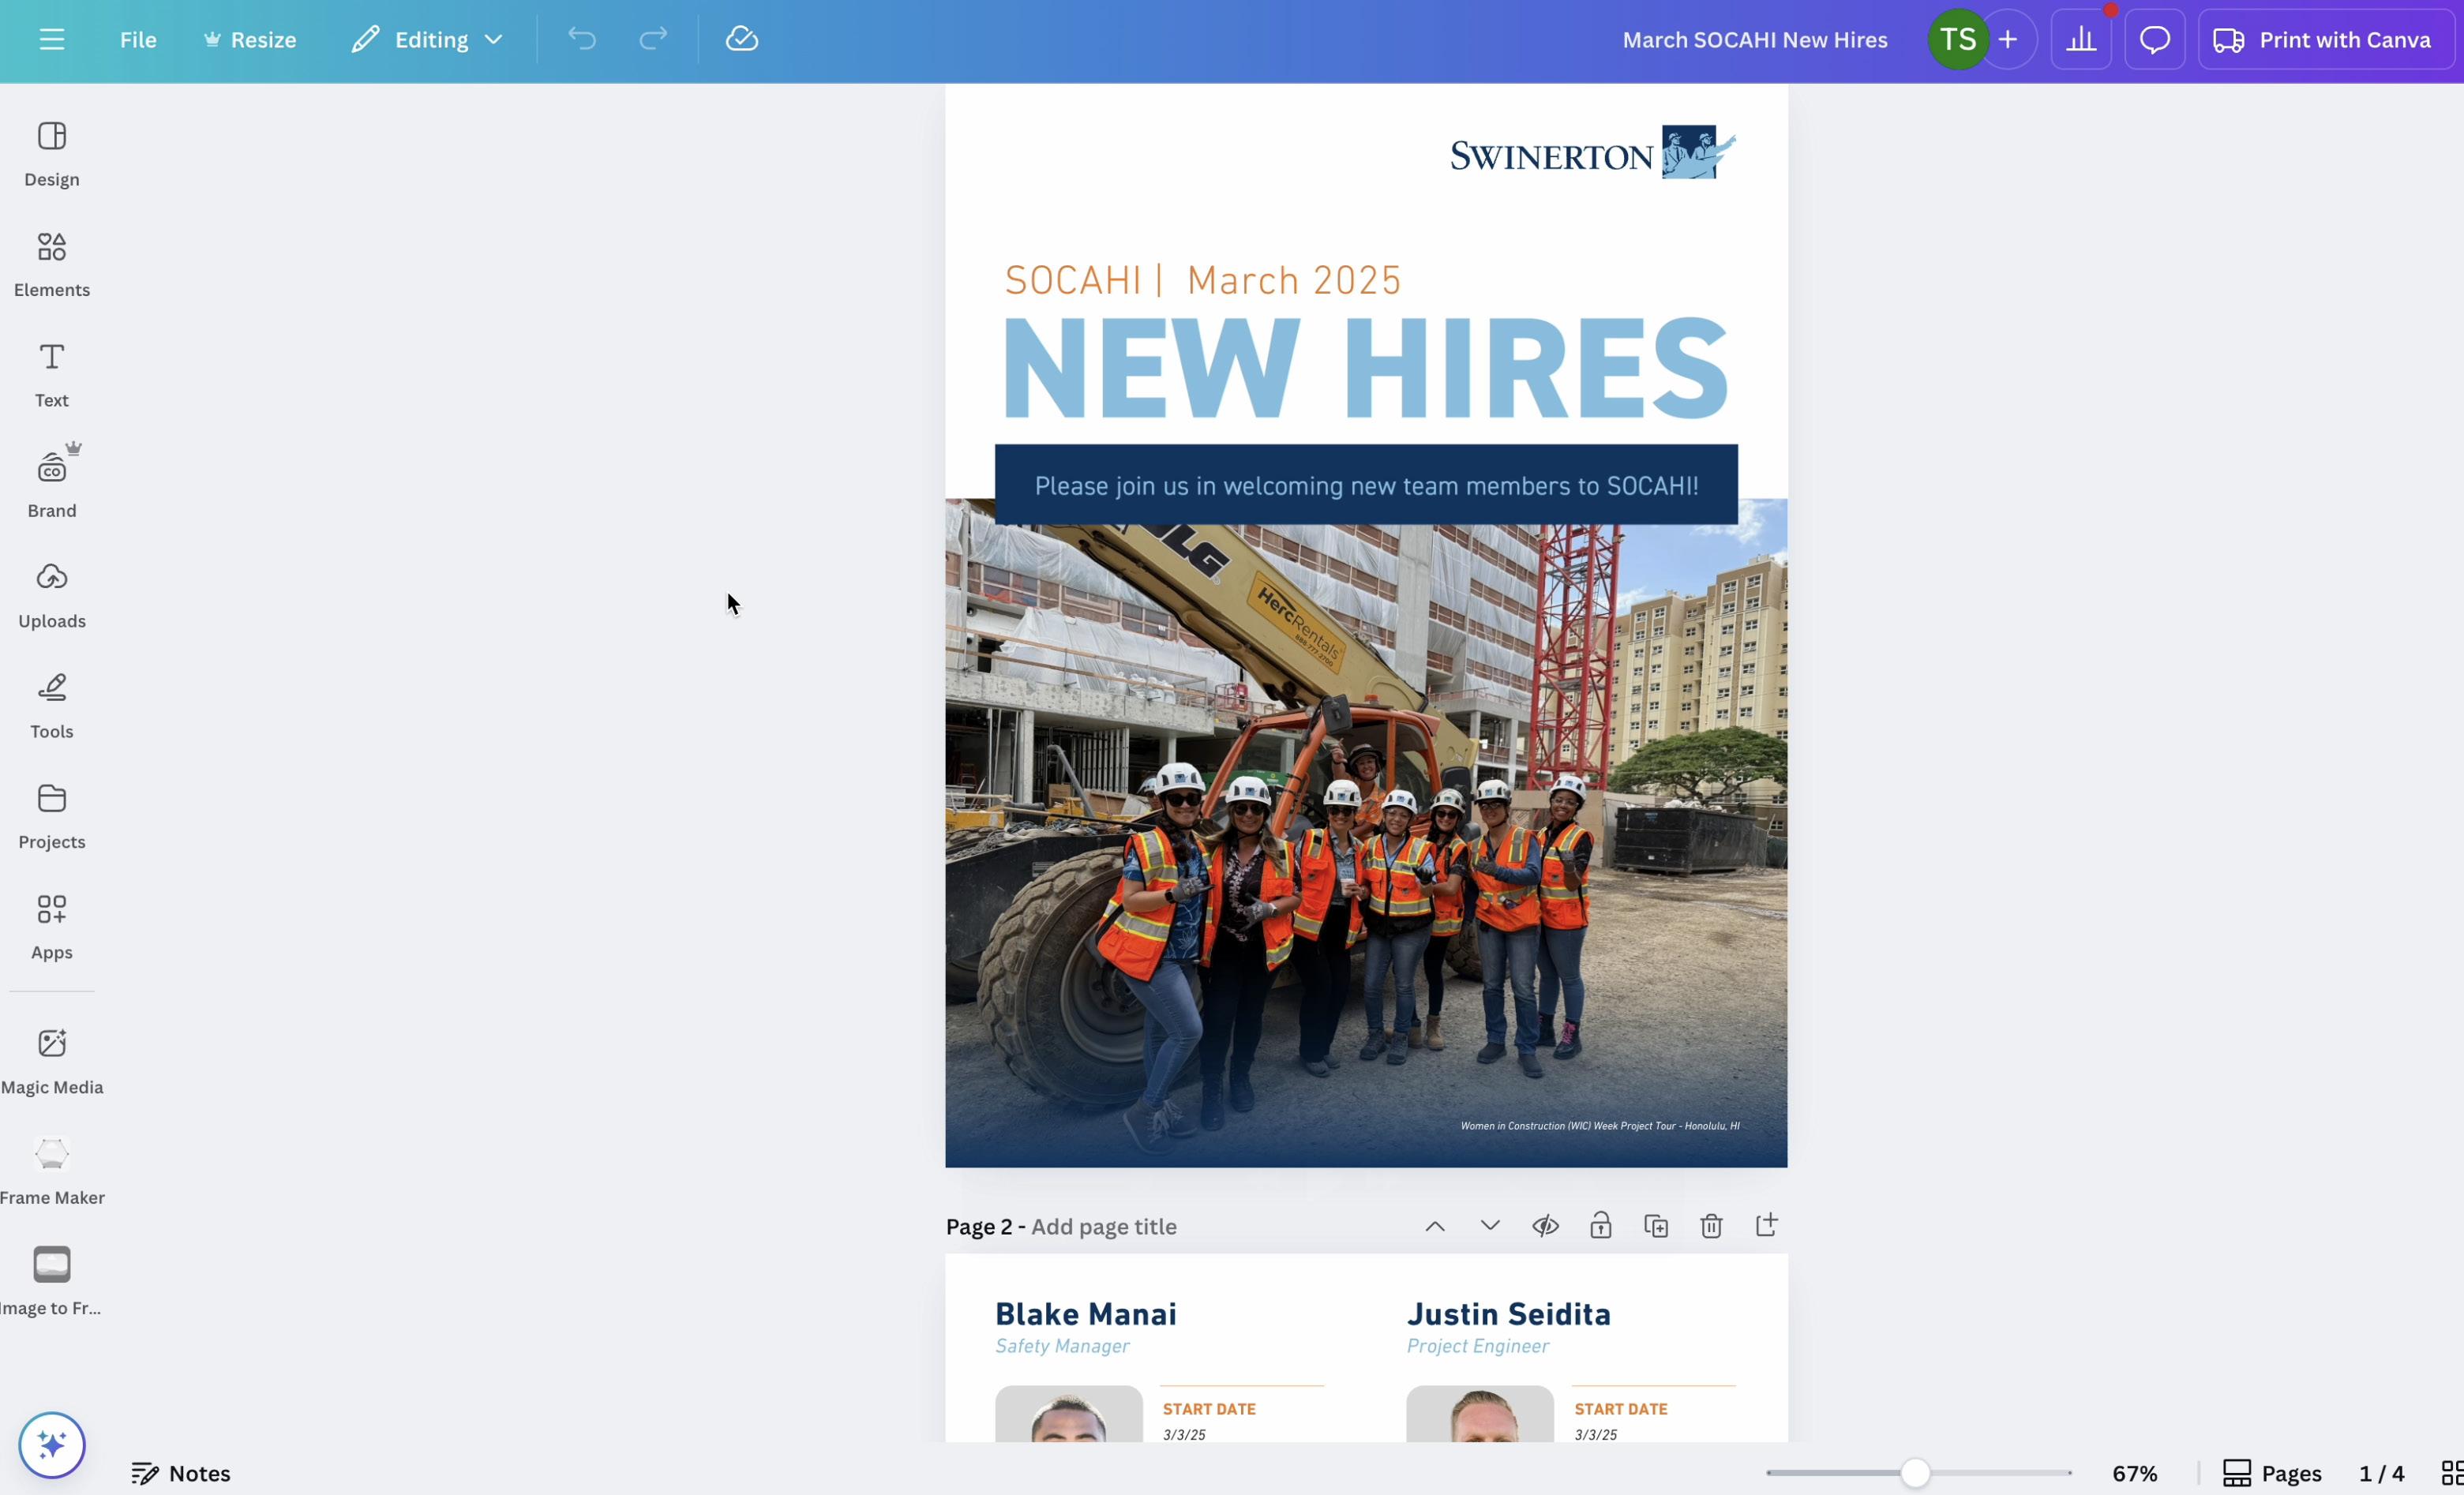
2. Export the first three (3) pages from the New Hires layout.
• Be sure to check the box labeled “Transparent background.”
3. From the main Canva dashboard, go to the “Template” folder.
4. Open the “New Hires Header” template to begin updating the graphic.
5. Upload the exported PNG images.
6. Click and drag each image into the appropriate placeholder.
7. Adjust and align the images as needed.
8. Click the video below to view a live, step-by-step walkthrough.

1. Log into the team ISSUU account using the following credentials:
• Username: swinerton411@gmail.com
• Password: ChocolateBunny1!
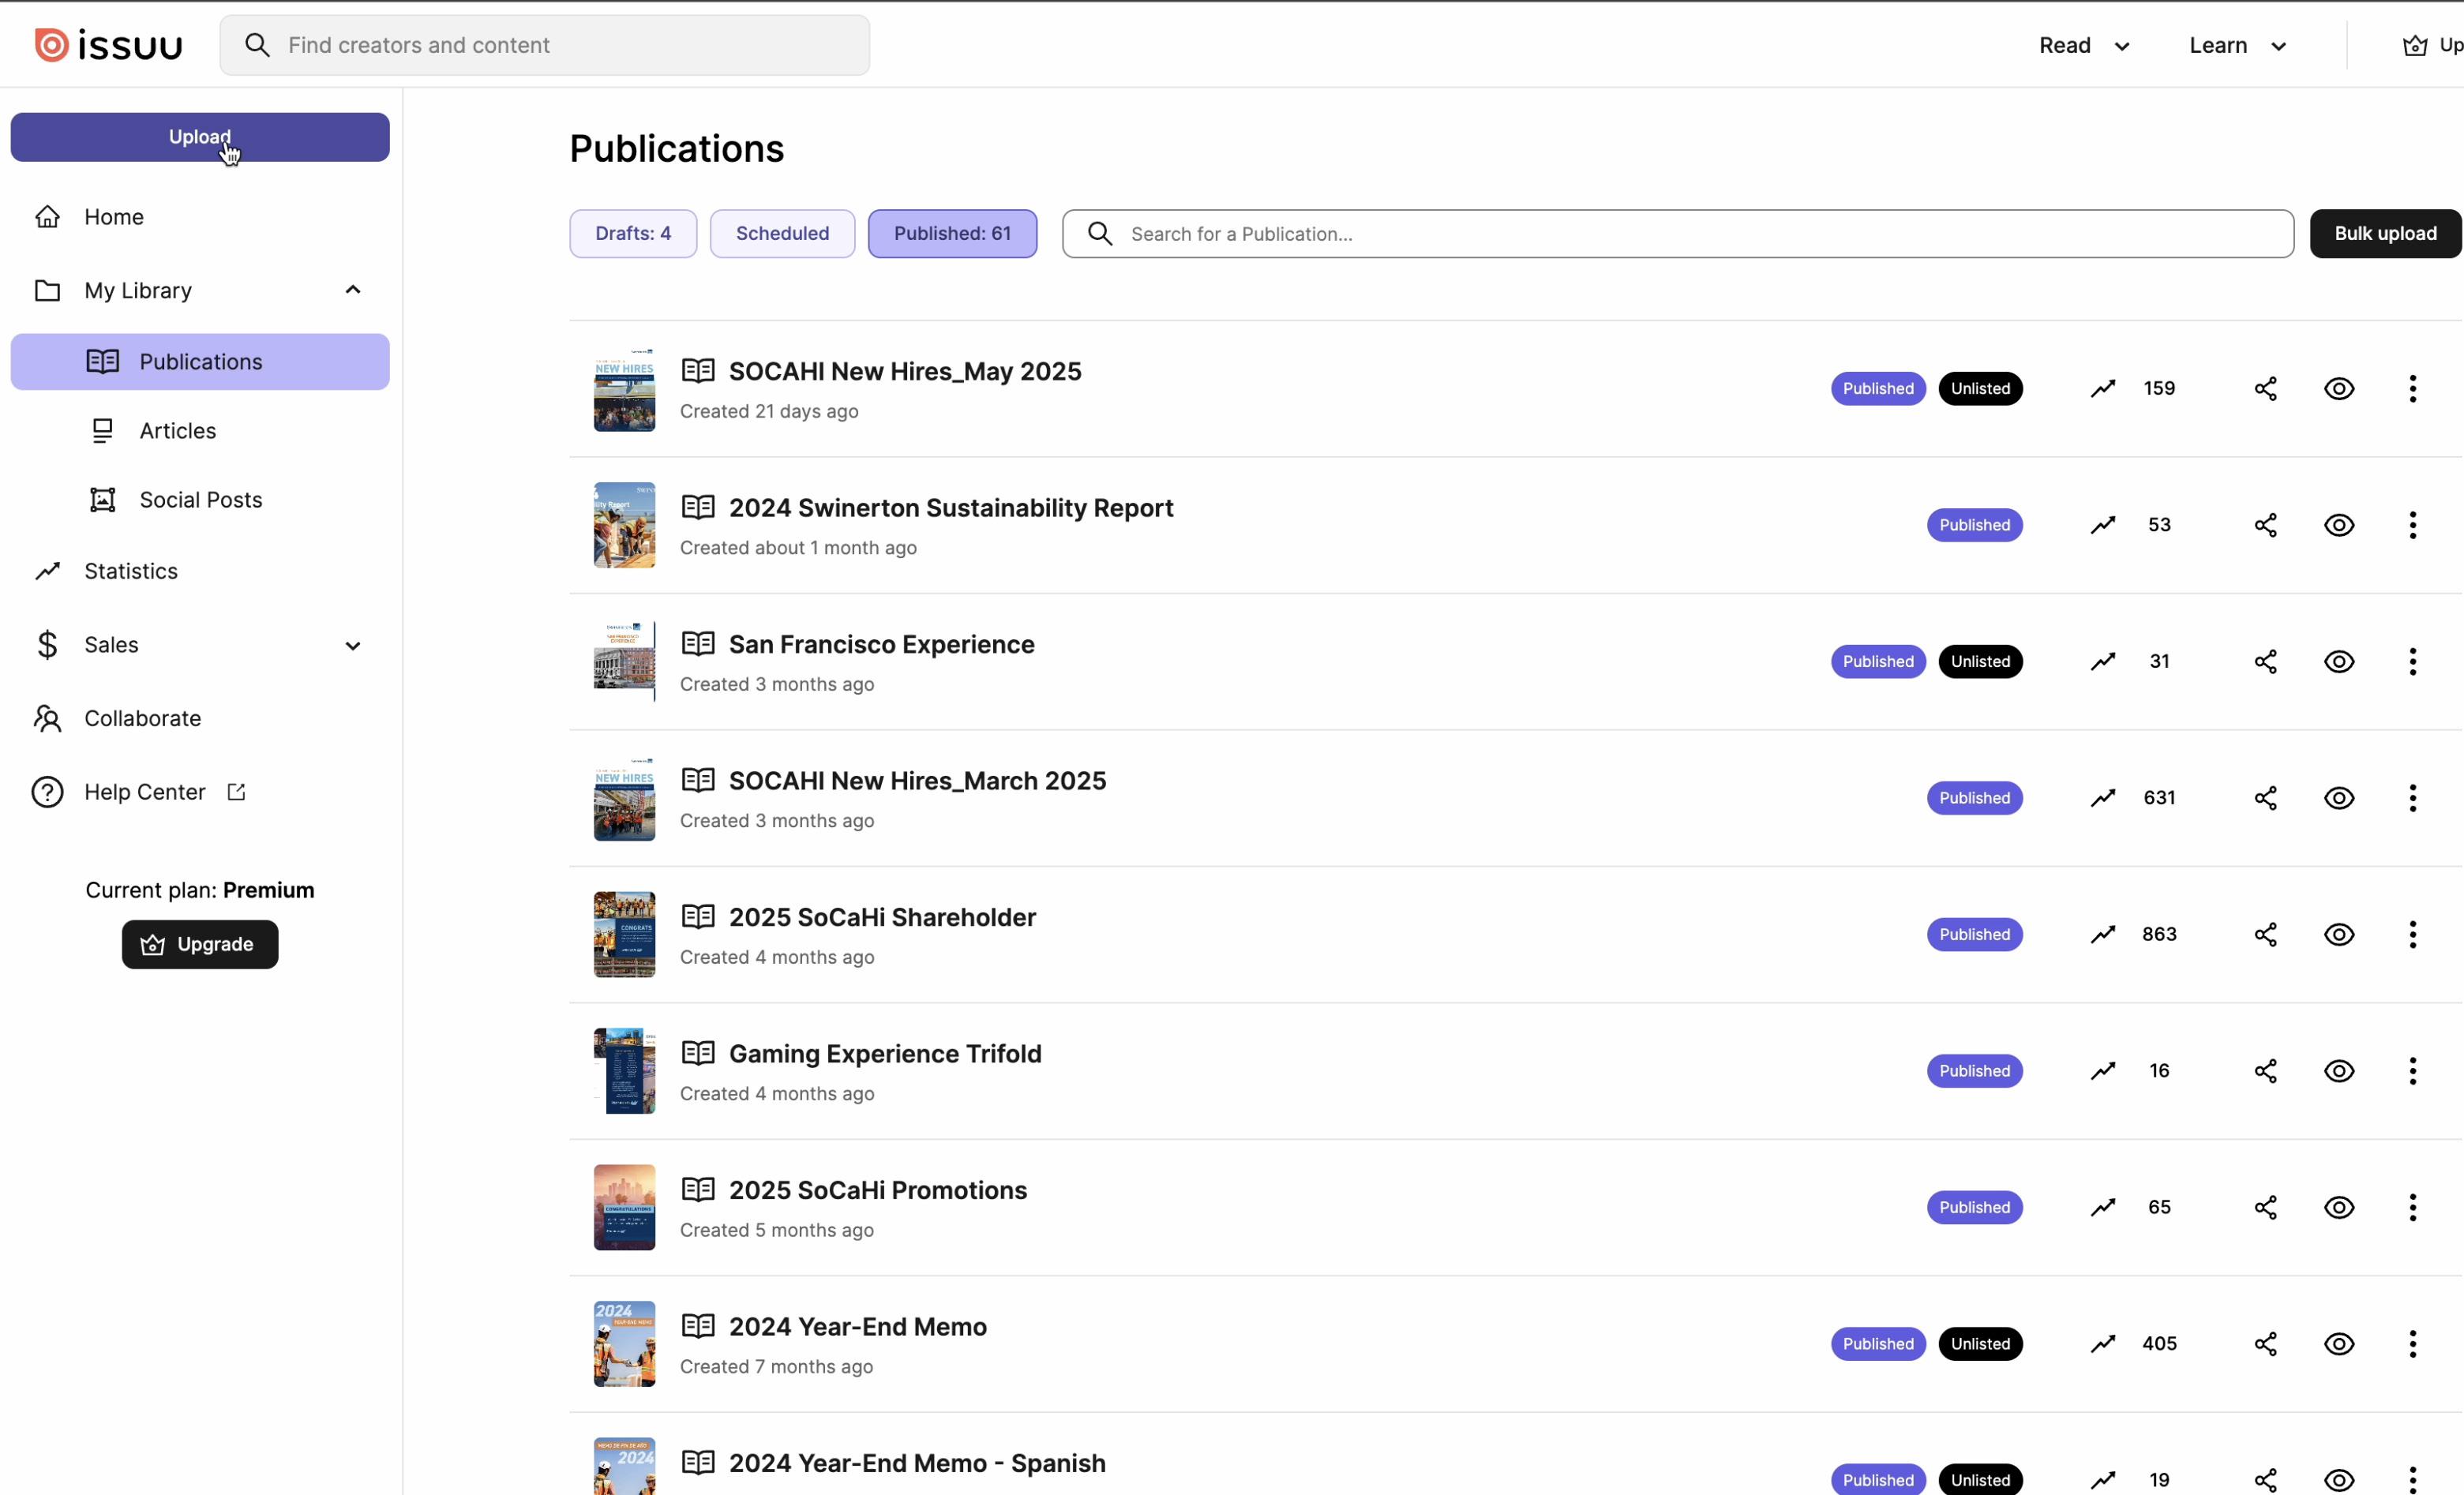
2. Click the “Upload” button in the top left corner.
3. Locate the New Hires PDF document from the designated folder and click “Upload.”
4. Wait 1–2 minutes for ISSUU to fully process the upload.
5. Once uploaded, flip through the pages to ensure everything displays correctly.
6. Verify that the Title and Description fields are properly filled out.
7. If everything looks good, click the “Publish” button in the top right corner.
8. After publishing, click the “Get Full Screen Link” button and copy the link.
9. Click the video below to view a live, step-by-step walkthrough.

1. Log into the Mailchimp account using your personal email and password.
• You should have received a personal user or collaborator account from Mailchimp.
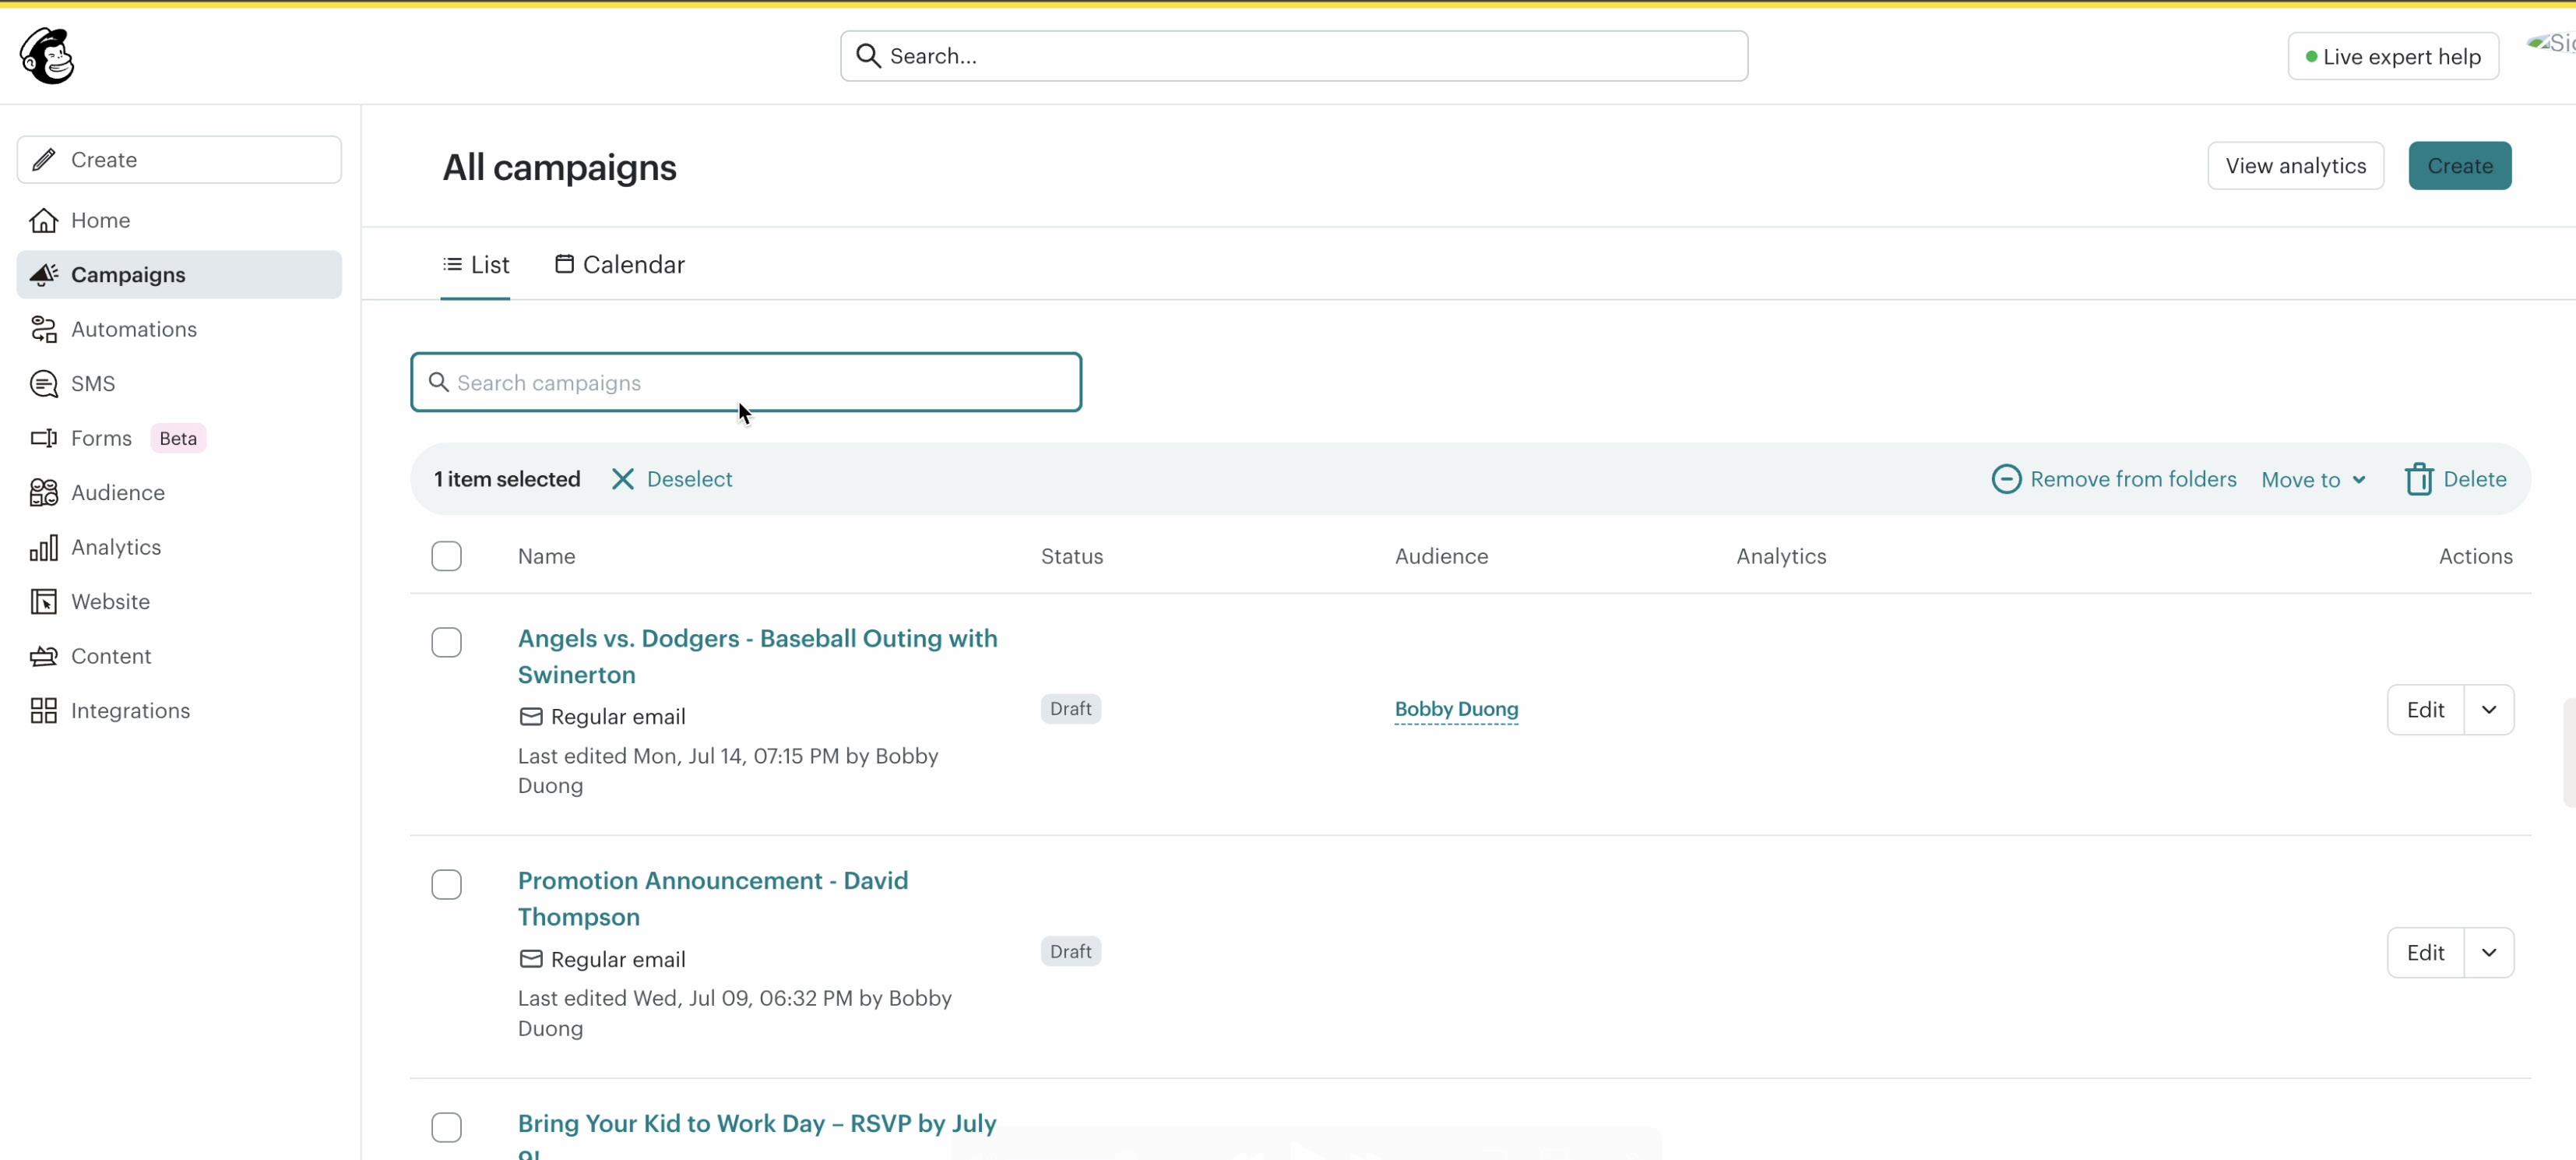
2. Once logged in, click on the “Campaigns” tab in the left sidebar.
3. In the search bar, type “New Hires” to find all the templates available for duplication.
4. Duplicate the appropriate template and update the campaign name and subject line to reflect the current month.
5. Click on the “Edit Design” button (near the bottom) to update the content and images for the new email announcement.
6. Click on the header image, then select “Replace” to upload the new graphic.
7. To update the ISSUU link:
• Click on the header image again, then click “Link.”
• Paste the new ISSUU URL into the web address field.
8. Update the body text to reflect the current month’s content.
9. Click on the orange “Click Here to View” button and update the link to the new ISSUU URL.
10. When you’re done editing, click “Preview” from the dropdown menu in the top right corner to review your design.
11. If everything looks good, click “Send a Test Email” to send it to the team for final approval.
12. Click the video below to watch a live, step-by-step walkthrough.
