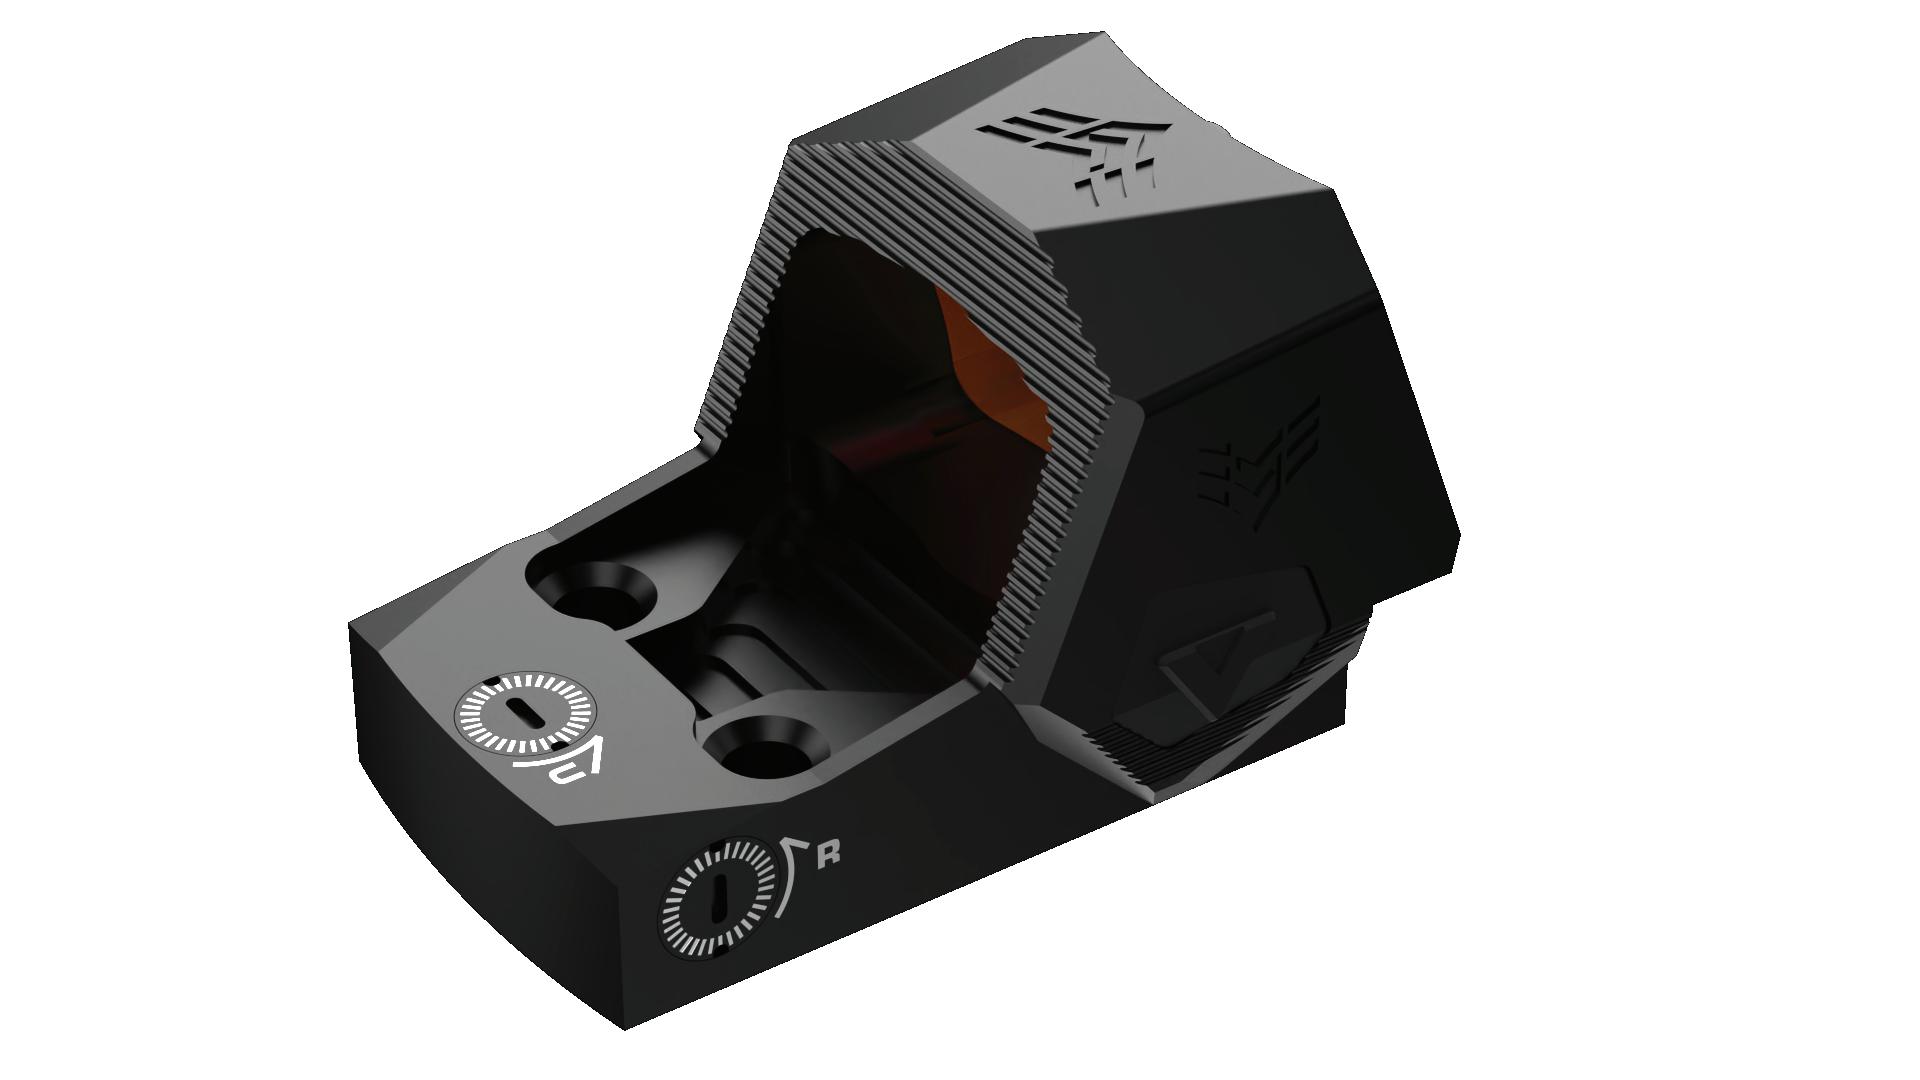

SENTINEL II
Sentinel II is a compact, ultra-tough micro reflex dot sight with next level features, optimized for every day carry use on slimline micro pistols. Sentinel II’s uncompromising construction makes it ideal for those who need to be ready.

Features include:
Shake N’ Wake
Detachable rear sight guide
3 MOA dot
7075-T6 aluminum construction
Anti-glare hood serrations
20mm window
BATTERY & POWER ON
Sentinel II uses a CR2032 battery, included in the box but not pre-inserted into the optic.
1. Insert the CR2032 battery from underneath, with the (+) side facing down and the (-) side facing up

2. Confirm that the optic powers on by pressing the brightness UP button.
POWER & BRIGHTNESS
Sentinel II-M: Manual On/Off:
1. Press the brightness UP button to turn on the optic.
2. Hold the brightness DOWN button for 3 seconds to manually turn off the optic.
When the optic is powered back on, it will automatically return to the previous brightness level.

 1
1
BRIGHTNESS
Sentinel II-M has 10 brightness settings that can be adjusted using the up and down arrow buttons on the side of the unit. Ensure adequate reticle contrast against the target when using low brightness settings, while medium brightness settings are suitable for indoor ranges and home defense. The top two brightness settings are daylight bright and should be used only in very bright conditions to avoid unwanted glare, reticle bloom, and eye fatigue.
SHAKE N’ WAKE
Sentinel II-M features Shake N’ Wake, a power-saving function that automatically turns off the illumination after about four minutes without movement. The optic immediately "wakes up” as soon as movement is detected, without requiring the user to press any button. This feature is seamlessly integrated into the optic’s function and cannot be activated or deactivated as a separate mode.

DETACHABLE REAR SIGHT GUIDE
Sentinel II's rear sight guide is installed in front of the optic window, providing a solution for micro pistols that do not have a rear dovetail for iron sights with an optimized sight picture. The rear sight guide can be easily removed with the included hex wrench, and then re-mounted by placing it on the optic with the serrated face towards the glass and tightening the screws until hand tight. It is highly recommended to use blue threadlocker upon installation.

NOTE: Our rear sight guide comes standard with your Sentinel II and is intended to be a general guidance tool in case of a failure with the dot. They are not intended to perfectly align with your firearm’s front sight for precise POA.
MOUNTING
Sentinel II comes with four sets of screws in the most common thread size, in case they are needed:
• M3 x 0.5 with 12mm effective length (SIG P365)
• #6-32 x 0.472 with 12mm effective length (M&P Shield)
• M4 x 0.7 with 11mm effective length (Springfield Hellcat / Glock 43X / Glock 48 MOS)
• M4 X 0.7 with 12mm effective length (Canik)
NOTE: Follow the slide manufacturer’s torque recommendation. If none are specified, use blue thread-locker on the screw threats and torque to no more than 15 inch-pounds.
MOUNTING
Before Installation, confirm the firearm is unloaded.
1. With the battery installed, place the included waterproof plate underneath Sentinel II.
2. Place the optic in the footprint, making sure the screw holes align.
3. Once properly mounted, take the proper screws and begin threading with even pressure through the optic into the slide.

PARALLAX
Sentinel II is parallax-free at 33 yards, and at closer ranges, the error is minimal and won't affect the point of impact. However, some parallax will be noticeable beyond 100 yards. The window of Sentinel II is available for aiming at very close ranges, and if you can see the reticle anywhere in the window, it can be used as a point of aim. For consistent hits at longer ranges, it's best to keep the reticle centered in the window.
ELEVATION AND WINDAGE ADJUSTMENTS
Sentinel II windage and elevation use 1 MOA per click adjustment increments.
• To adjust windage, rotate the dial clockwise to move the dot right and counterclockwise to move the dot left.
• To adjust elevation, rotate the dial clockwise to move the dot up and counterclockwise to move the dot down.
Elevation adjustment

ELEVATION AND WINDAGE ADJUSTMENTS
Example: You are shooting at 25 yards and aiming at the center of the target but impacting 2 inches low and 6 inches to the right. You would need to adjust the elevation dial 8 clicks counterclockwise and the windage dial 24 clicks clockwise to compensate for the offset.


Elevation: 8 clicks counterclockwise
Windage: 24 clicks clockwise
CLEANING
Before cleaning your optic lens, make sure to blow away all dust or grit on the lens to prevent the lens from being scratched while cleaning. Always use a soft cloth when cleaning your lens.
WARRANTY
Your Swampfox product is protected under warranty from any manufacturing or material-based defects. If the product suffers any damage that compromises the performance, we will repair or replace it. This does not include intentional or cosmetic damage to the optic as well as lost or stolen optics.
See https://www.swampfoxoptics.com for more info.
