INTRODUCTION
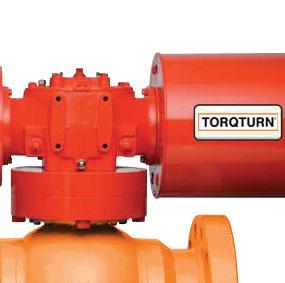
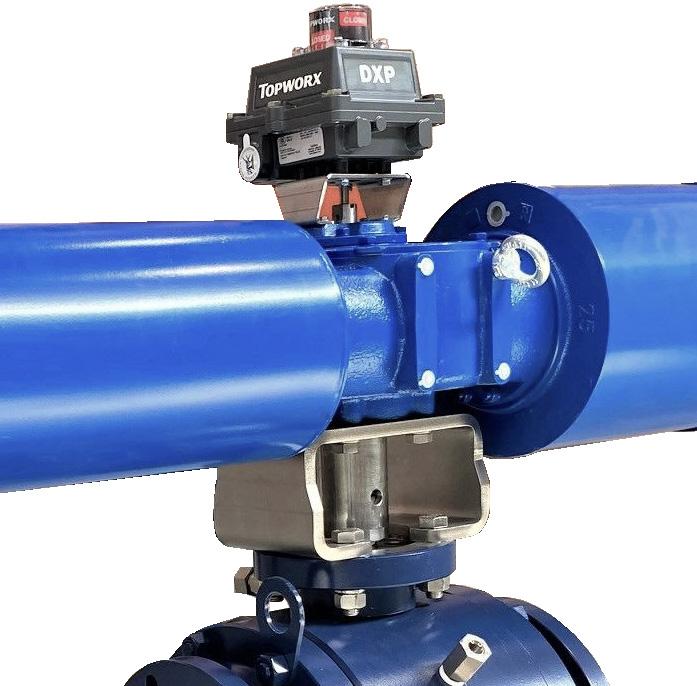
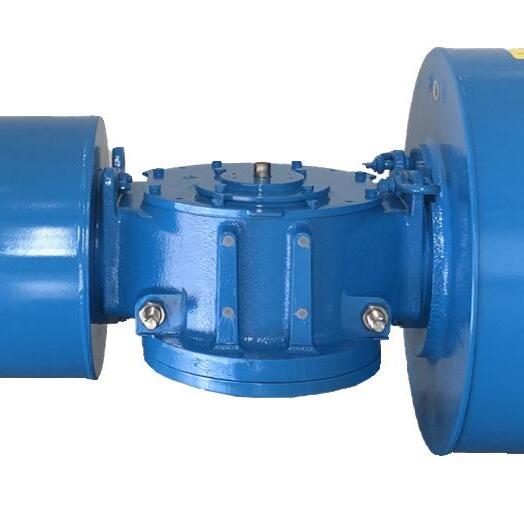
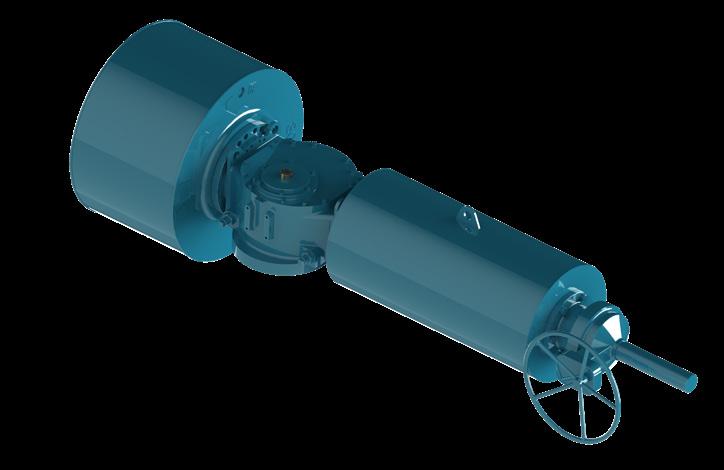
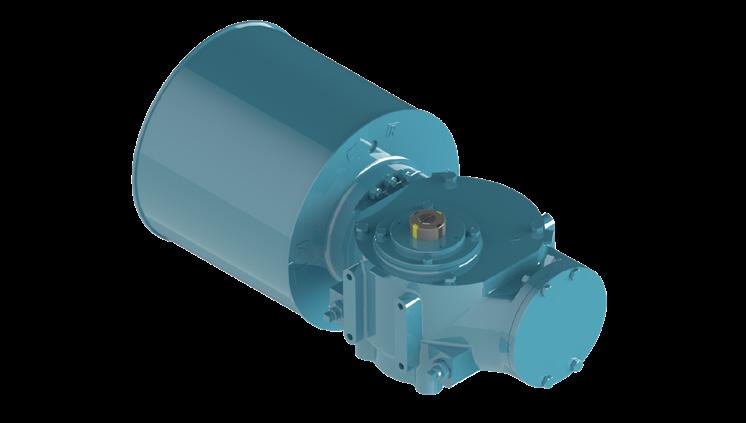
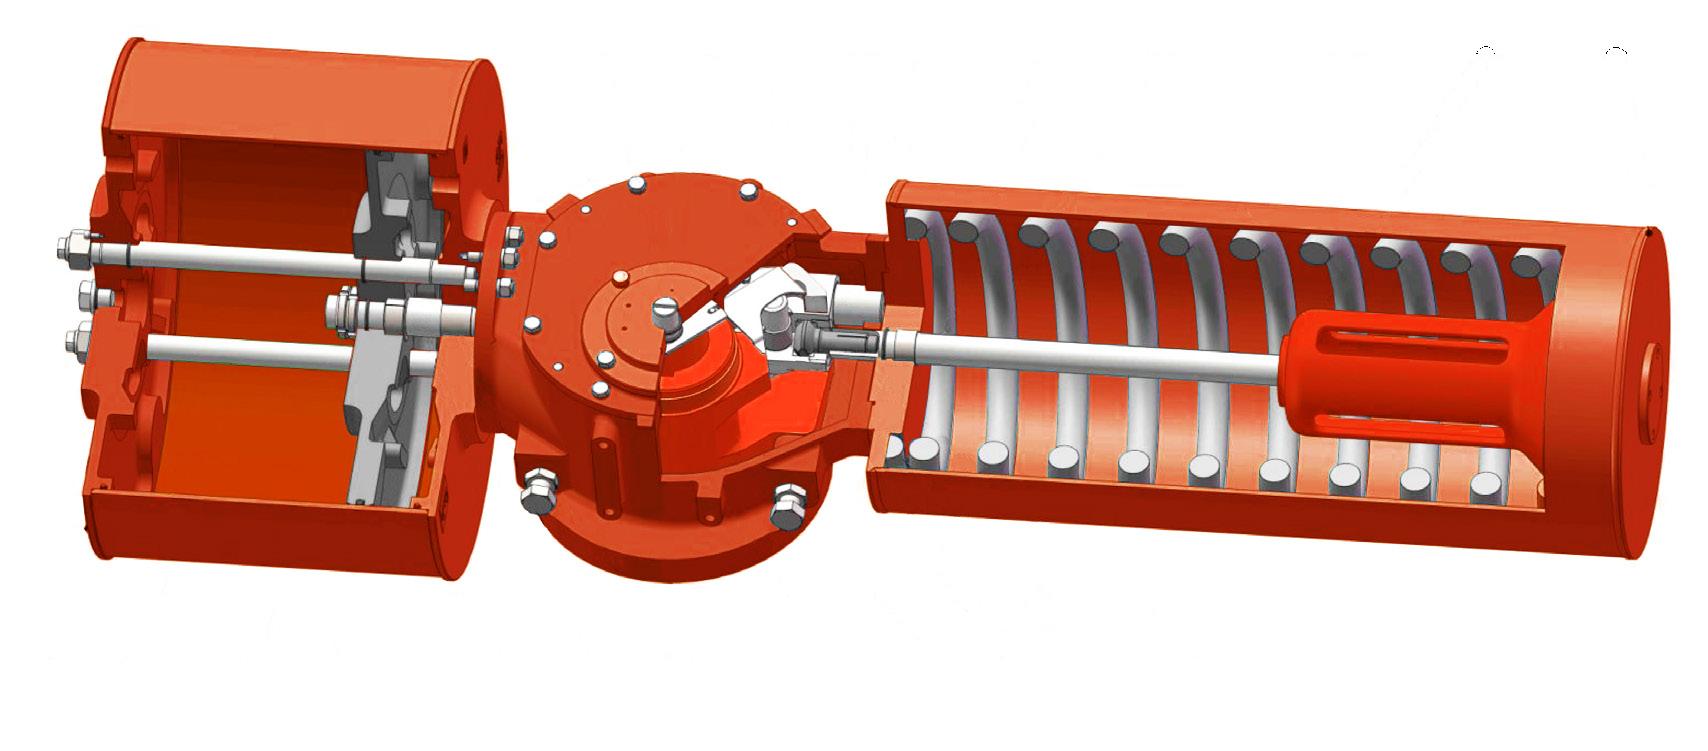
AGP Scotch Heavy Duty Yoke actuators are available in hydraulic and pneumatic and provide a large torque range compact body design. AGP Range actuators are an improvement on the basic competitors scotch yoke concept and feature an improved reaction bar in addition to adding replaceable bearings, a highly efficient wear and corrosion resistant coating system and a tension rod compressed spring. This enhanced design greatly improves efficiency, reduces wear and extends the actuator’s life. The combining of these technologies, enhancements, and superior quality control techniques ensures a high quality assembly which forms the heart of our extended service actuators.
ADVANTAGES
Corrosion Protected
O-Rings are fitted on body caps and all joints. This ensures an effective seal to prevent ingress of water. With one way vent checks, total O-Ring sealing, the orange design prevents water ingress and seals out the environment.
Also the Air/Hydraulic cylinder is XYLAN/PTFE lined. Tie-bars on the AGP power module are corrosion resistant, and internal and external surfaces are coated to protect in harsh environments. The AGP Series has no external side bars.
ISO Valve Mounting
The AGP Actuators interface meets ISO 5011 standard, and meets the dimensional requirements of ISO defined for each torque range.
Standardised Interface
The shaft driven accessory interface conforms to NAMUR and are identical on all AGP models, allowing standardisation of accessory mounting hardware and installation practices.
Wear Resistant
The guide rod and piston rod have an advanced surface treatment, which combined with self-lubricating bearings, provides superior wear resistance and extends the life of all sliding components.
High Efficiency
The piston rod and guide block connection have superior surface finishes and self-lubricating bearings to maximise input energy transfer directly to the valve
stem. Efficiency is further enhanced by the tensionloaded spring, minimising radial loads on the piston rod.
Bidirectional Travel Stops
Integral bidirectional travel stops, adjustable from 80°to 100° of total valve travel prevents excessive valve seat wear.
Long Service Life
The AGP actuators incorporate four stages of internal and external coatings to resist severe weather, chemical and petroleum environments. The inner surface of the air cylinder is coated with PTFE/XYLAN providing enhanced corrosion resistance and selflubrication.
Modular Design
AGP actuators design provides field serviceable drive, power, spring and over-ride modules. The modules are removable, serviceable and inter-changeable without the need to remove the actuator from the valve. Modules are available for separate purchase to reduce spare parts inventory.
Spring Module
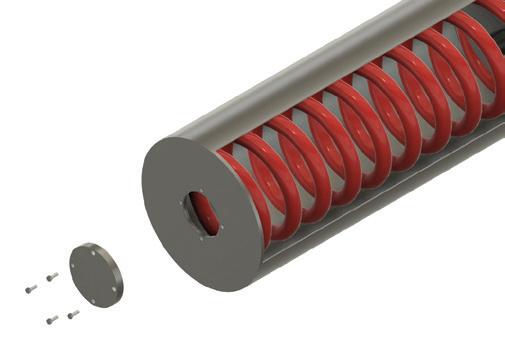
To ensure the safety of personnel during installation and maintenance, the spring module has been designed so that it can only be removed from the power module with the spring in the fully extended position. This prevents accidental release of the spring force, protecting personnel from injury and the actuator from accidental damage.
Pneumatic Model AGP Spring Return
Pneumatic Model AGP Double Acting
OVERVIEW
This instruction manual is for AGP Range double acting and spring return scotch yoke pneumatic actuators.
Temperature range: -
Standard temperature: -20°C to 80°C
Low temperature: -40°C to 80°C
High temperature: -20°C to 120°C
Operating Pressure: -
Pneumatic actuator: 3~7 Bar
Hydraulic actuator: 60~150 Bar
Operating Media: -
Pneumatic actuator: dry and clean compressed air
Hydraulic actuator: hydraulic oil with viscosity within 40CST, or lower temperature hydraulic oil for low temperature applications.
Output Torque:
Double acting: 830~226, 400 Nm
Spring Return end torques: 307~71753 Nm
APV-Torqturn actuators are extremely strong, compact and can be specified for services with a wide range of pressures, temperatures and environments, for use in various valve sizes and types. AGP actuators are a heavy duty, rugged, reliable, long life actuator, capable of meeting the rigorous demands required for the critical quarter turn application to operate low and high pressure ball, butterfly and plug valves. The AGP construction and design is a superior specification suitable for the demanding requirements of oil & gas transmission, offshore platforms, chemical, petrochemical, power and other industries.
The majority of this information is common knowledge to experienced valve & actuator users. When properly installed in applications for which they were designed, Australian Pipeline Valve (APV)Torqturn actuators will give long reliable service. This instruction is only a guide for installation and operation on standard service and covers general maintenance and minor repairs. A professional APV approved actuator engineering facility should be utilised for reconditioning or major repairs.
DESIGN
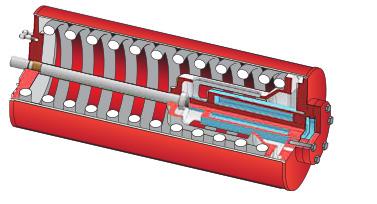
Self-lubricating bearings are used on piston rod, guide bar and other moving parts, which reduces resistance and extends the life of all moving parts.
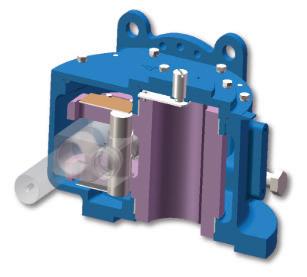
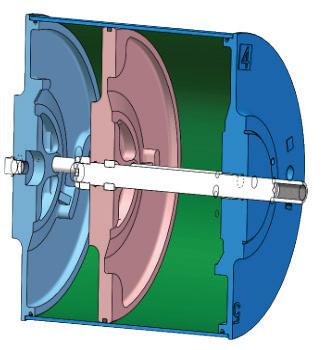
BODY PARTS INTERNAL
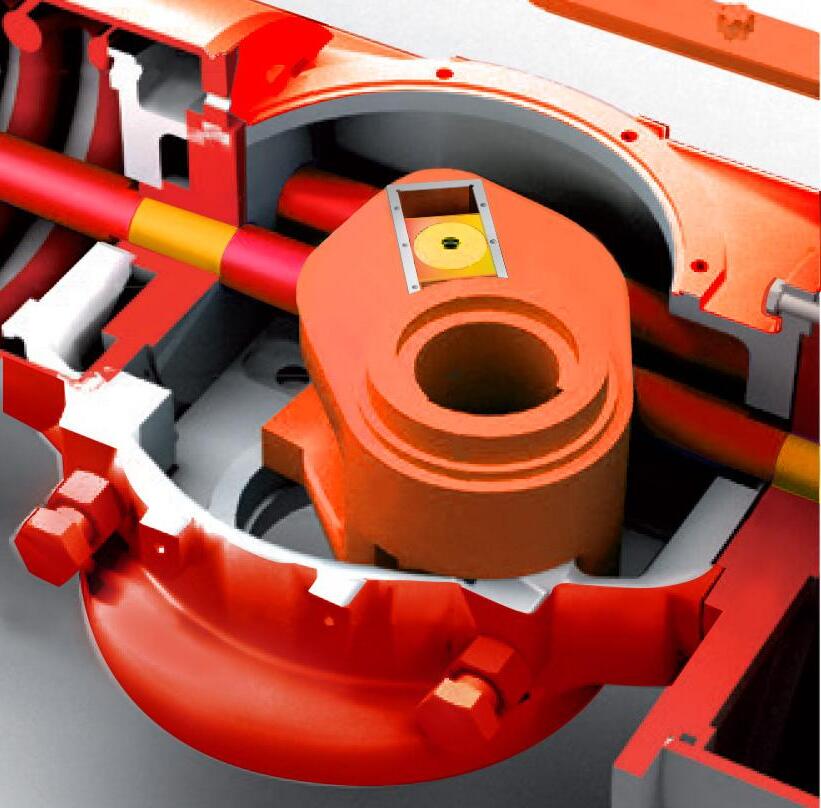
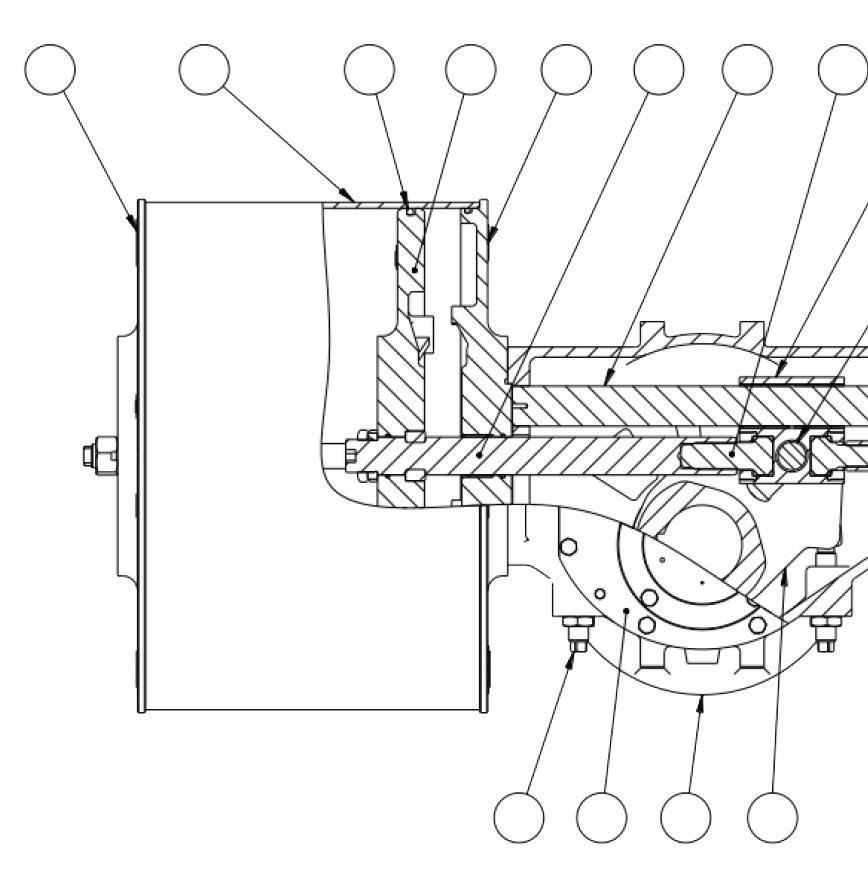
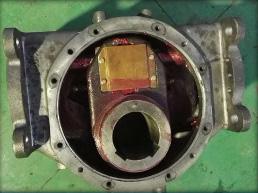
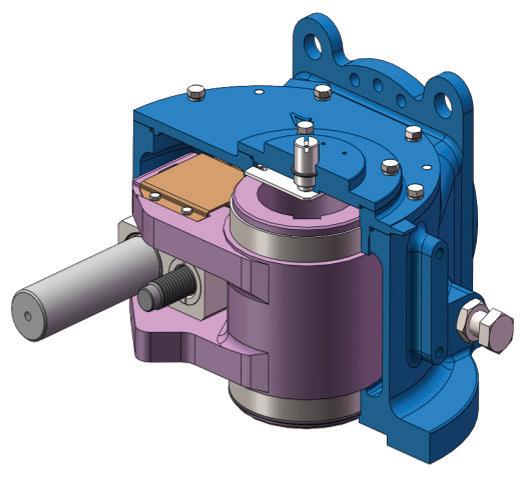
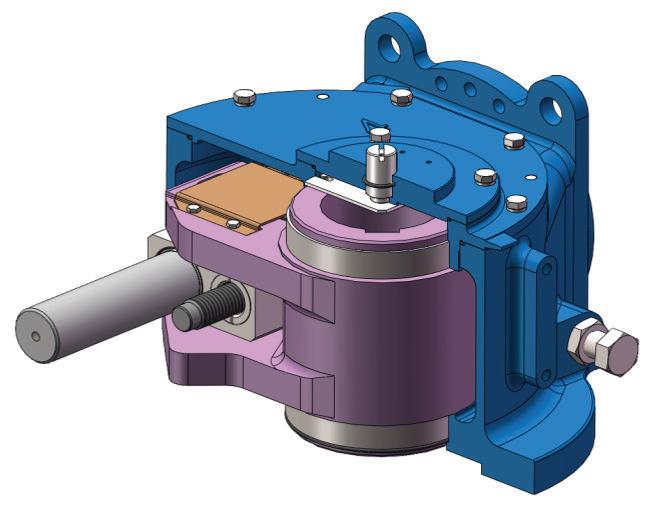
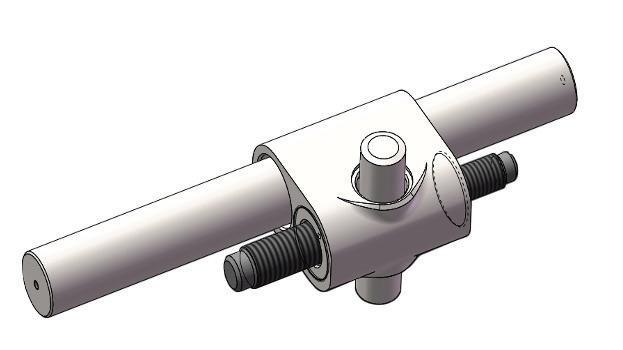
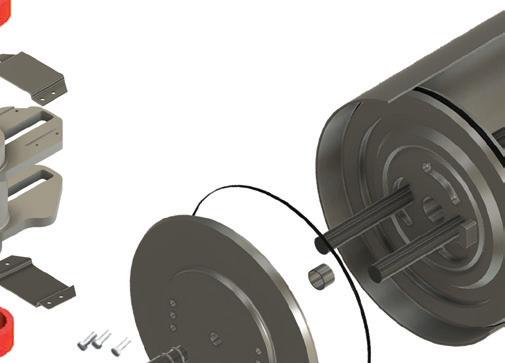
1 THRUST (GUIDE) BAR (hard chrome alloy steel) and guide block prevents any yoke pin axial movement, simply transferring axial loads directly to the drive module case, compensating for angular and lateral deflection.
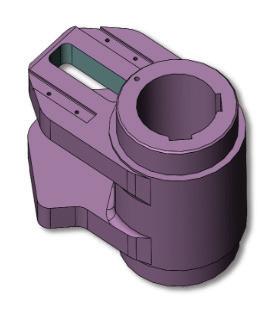
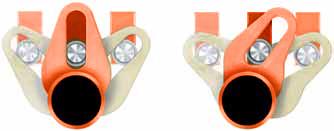
2 PARA ARM YOKE design connects piston rod with the guide block. This compensates for side load deflection and there by reduces wear on rod, bearings and seals. The fully integral yoke is high frequency quench hardened to HRC 50.
3 BEARINGS throughout provide protection for sliding and rotating components, suitable in both dry and lubricated working conditions.
4 YOKE ROLLER The high tensile alloy steel hard chromed roller rotates inside two PTFE coated bronze DU bearings to reduce friction and minimise wear. Furthermore the top and bottom of the roller pin is encapsulated under semi flexible anti-friction PTFE coated bronze retainer/cover plates which retains grease and prevents debris ingress. PTFE coated bronze slider cover plate encapsulates the roller pin ensuring smooth running and long life.
BODY
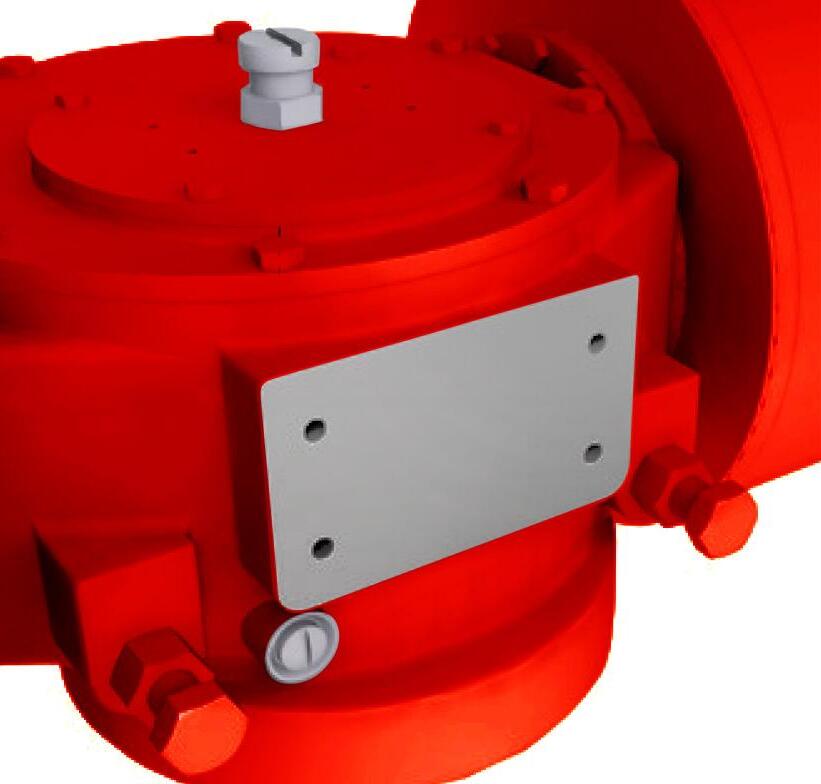
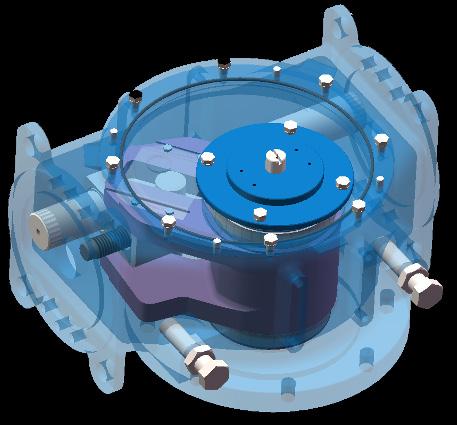
5 INTERNAL O-RINGS Maximum water and corrosive elements protection.
6 NAMUR mounting configuration for use with a wide range and sizes of shaft driven accessories.
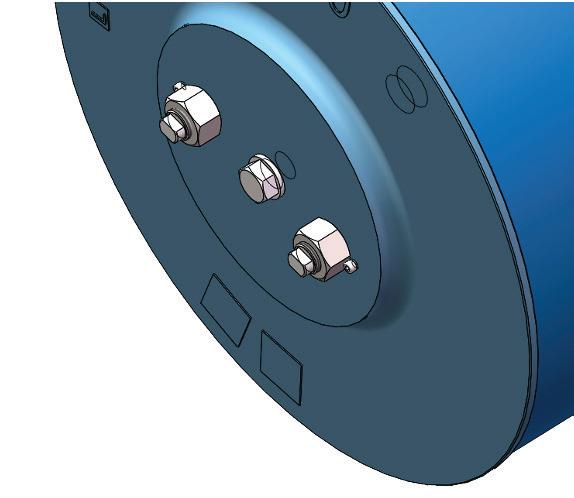
7 THREADED CONNECTIONS in front and the back side of the body enables attachment of control panels.
8 RELEASES OVERPRESSURE Integral vent check valve releases overpressure in the actuator main housing isolating the chamber from corrosive vapours and water.
SPRING MODULE
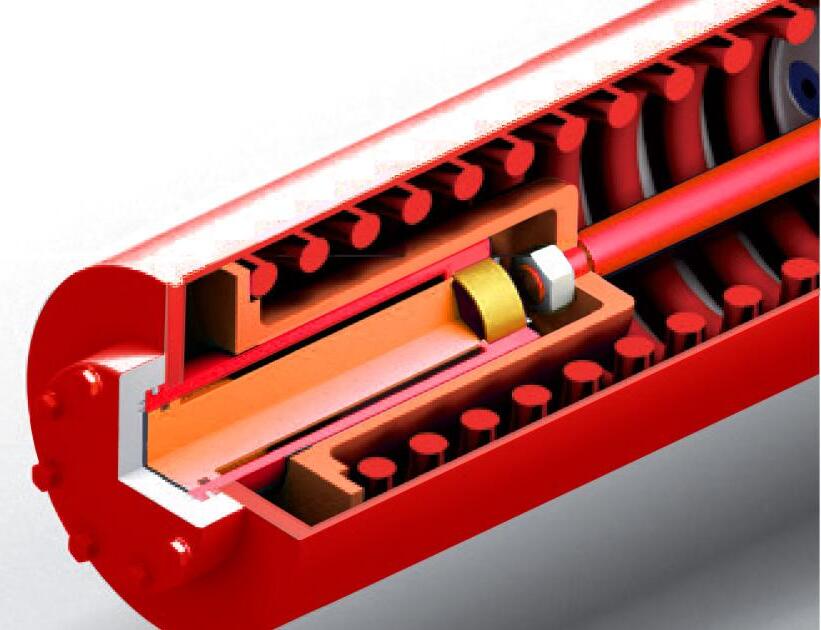
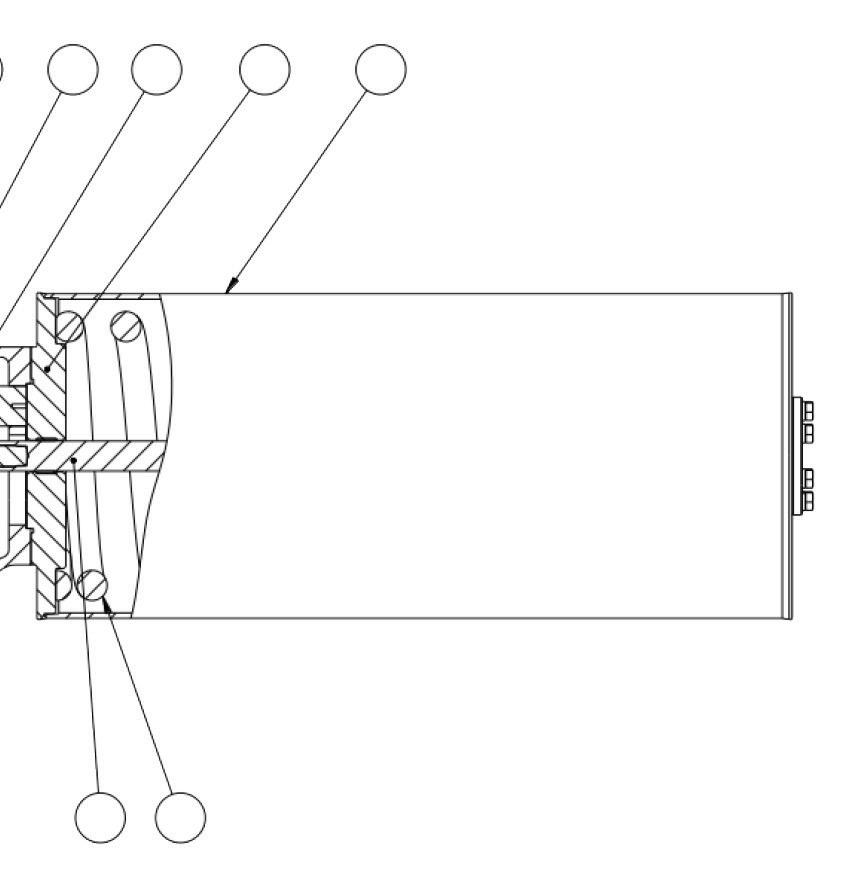
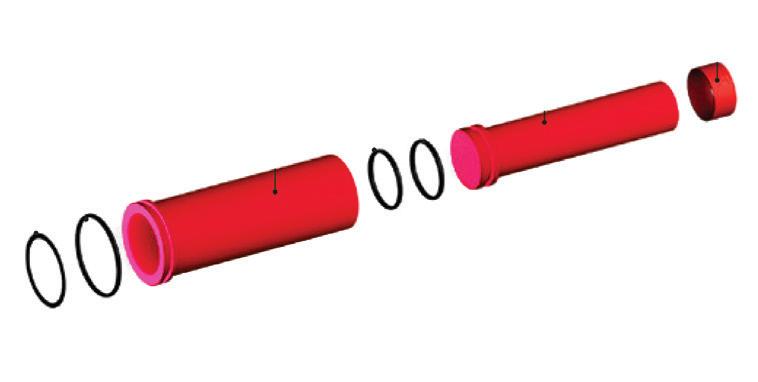
9 INTERNAL HYDRAULIC CYLINDER (Optional) for manual hand pump override. Internal hydraulic over-ride cylinder module for springreturn models doesn’t increase actuator length.
10 SAFE SPRING LOCK positively locks the spring module in place under load. Prevents spring module detachment from the drive module.
PNEUMATIC CYLINDER
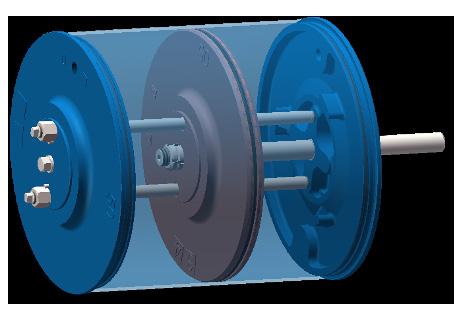
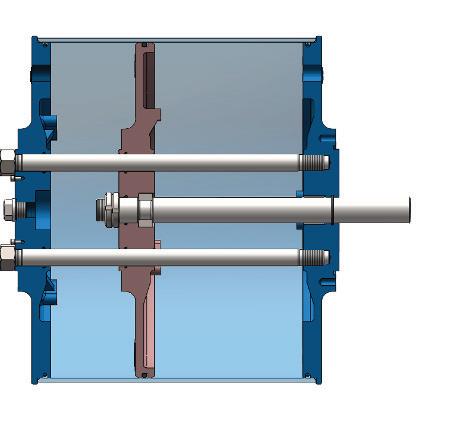
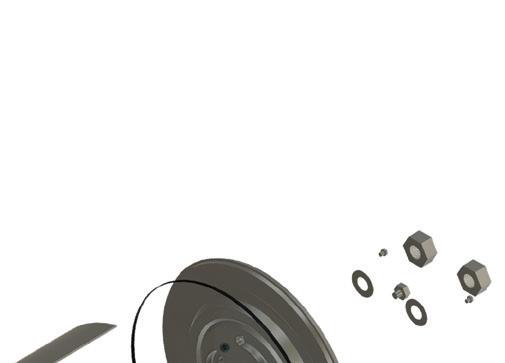
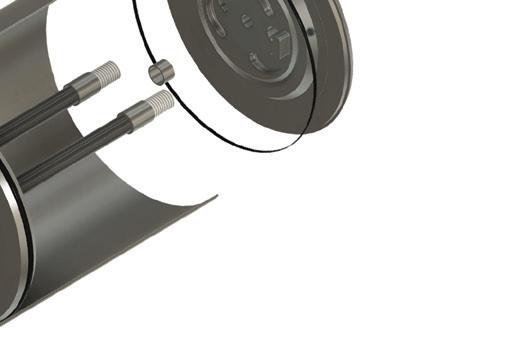
11 PISTONS DESIGN The AGP has no external tie bars which ensures a high level of corrosion resistance. The dual internal centralising hard chrome alloy steel guide and tie bars ensures a much smoother centralised motion and long life without axial wear loading on piston seal, bearings and yoke components. The steel air cylinder case is fully o-ring sealed.
12 LINED CYLINDER The Air Cylinder is PTFE/XYLAN lined ensuring smooth low torque operation over the life of the actuator and also prevent corrosion.
Note
We recommend that this entire document be read prior to proceeding with any installation. Do not attempt to repair this actuator, send it to APV or an APV approved repair facility. Australian Pipeline Valve and it’s parent company take no responsibility for damage or injury to people, property or equipment. It is the sole responsibility of the user to ensure only specially trained actuator repair experts perform repairs under the supervision of a qualified supervisor.
RESPONSIBILITY FOR VALVE & ACTUATOR APPLICATION
The User is responsible for ordering the correct valves & actuators. The user is responsible for ensuring APV Valves & Actuators are selected and installed in conformance with the current pressure rating and design temperature requirements. Prior to installation, the nameplates and drawings should be checked for proper identification to ensure the valve & actuator is of the proper type, material and is of a suitable pressure class and temperature rating to satisfy the requirements of the service application.
Do not use valves & actuators in applications where either the pressure or temperature is higher than the allowable working values. Also, actuators should not be used in service media if not compatible with the material of construction, as this will cause chemical attacks, leakage and failure.
RECEIVING INSPECTION AND HANDLING
Valves & Actuators should be inspected upon receipt to ensure:
- Conformance with all purchase order requirements.
- Correct type, rating, size, body and materials and end connections.
- Any damage caused during shipping.
The User is advised that specifying an incorrect valve or actuator for the application may result in injuries or property damage. Selecting the correct valve and actuator type, rating, material and connections, in conformance with the required performance requirements is important for proper application and is the sole responsibility of the user.
SAFETY INFORMATION
The following general safety information should be taken in account in addition to the specific warnings and cautions specified in this manual. They are recommended precautions that must be understood and applied during operation and maintenance of the equipment covered in this I.O.M.
To avoid injury, never attempt disassembly while there are pressures either upstream or downstream. Furthermore, actuators with spring packs can rapidly close or open the valve on failure of air supply with extreme force. Also, entrapped dangerous fluids can be rapidly expelled, this can still happen when working on the actuated valve once it is removed from the line.
Spring packs are factory sealed and can be dangerous. Do not attempt to disassemble spring pack, send to an APV approved repairer.
This manual provides instructions for storing, general servicing, installation and removal of actuators. APV and it’s re sellers refuses any liability for damage to people, property or plant as well as loss of production and loss of income under any circumstances but especially if caused by: Incorrect installation or utilisation of the actuator or if the actuator installed is not fit for intended purpose. It is the sole responsibility of the user to ensure the valve type and materials are correctly specified.
1.0 STORAGE & HANDLING
To ensure the seals remain flexible, and the actuator itself free moving during times of storage or intermediate services, air or nitrogen pressure should be cycled through the actuator at a minimum of three (3) times a month. Indoor storage is recommended for actuators in an environment where resilient seals can be preserved. To help keep out foreign particles and moisture; cylinder ports, control valve parts and body parts should be kept sealed.
2.0 INSTALLATION NOTES
Remove any existing manual gearing from the valve and move into the same position as the actuator (either both open or both closed). Inspect the stem adapter, valve stem, valve and actuator mounting surfaces for proper direction and any inconsistencies. In cases where the valve includes a lubricator fitting, this should be removed and a lubricator extension nipple installed. Refit the lubricator fitting into the extension nipple. If furnished loose, install the bushing for the stem adaptor over the valve stem, correctly position the set screw and mount actuator over bushing (parallel to the pipe). All nuts and bolts should be fastened evenly, ensuring the actuator is centred on the valve stem. Note: whilst the mounting bolts are loose the actuator can be cycled to help centre itself.
There are many actuator and valve variations, therefore it’s not practical to list instructions for all kinds. The design of the mountings are kept simple for ease of installation. Actuators are factory shipped with
the travel stops regulated for 90° revolution. However once the actuator is installed on the valve it will still require further stop adjustments. Reference should be made back to the valve manufacturer’s recommendations for particular requirements. For valves that contain internal stops, the actuator must be adjusted at the same points. The “stopping” should be performed by the actuator itself. For valve without internal stops, adjust the actuator to the full open setting. Using this as a reference point, position the valve closed and adjust to the specifications recommended by the valve manufacturer for total rotation. High strength grades of steel like 410, F6, F51, 303, S31803, XM-19, 4140 and 17-4 PH are preferred for stem adaptors.
2.1 INSTALLATION, TUBE & FITTINGS
Avoid high temperature, low temperature, high moisture and corrosive applications unless the actuator has been designed for the application
a. Use brass or 316 stainless steel tubing, try to avoid vibration, secure piping to avoid leakage. In case of any vibration or impact during transportation, check tubing and fittings for leakage.
b. Different pneumatic actuators have different air inlet sizes from 3/8” to 2” NPT. Using a smaller size piping (or reduce orifice valves, solenoids, etc.) will reduce opening speeds. Refer to Table 1 below for air inlet sizes -
c. To ensure quick operation of the actuator, do not use a smaller tube or fitting size than the inlet size provided. Also valves with reduced orifices will reduce air flow.
d. Operating media is filtered dry air, if dew point is over -15°C use a dryer.
e. Pneumatic (air) supply inlet positions are as per Figures 1 & 2 below.
exhaust air
Table 1 - Air Inlet sizes
Figure 1 - Spring Return AGP Pneumatic Actuator
inlet
Figure 2 - Double Acting AGP Pneumatic Actuator
f. Dimensions and mounting positions of accessories refer Figure 3 & 4 below:
Switchbox, E/P positioner
Figure 3
Solenoid valve, air-valve, relief valve installation position
2.2 MOUNTING
2.2.1 Installation of the actuator
2.2.2 Actuator lifting
Figure 4
Solenoid valve, air-valve, relief valve installation position Switchbox,E/P positioner
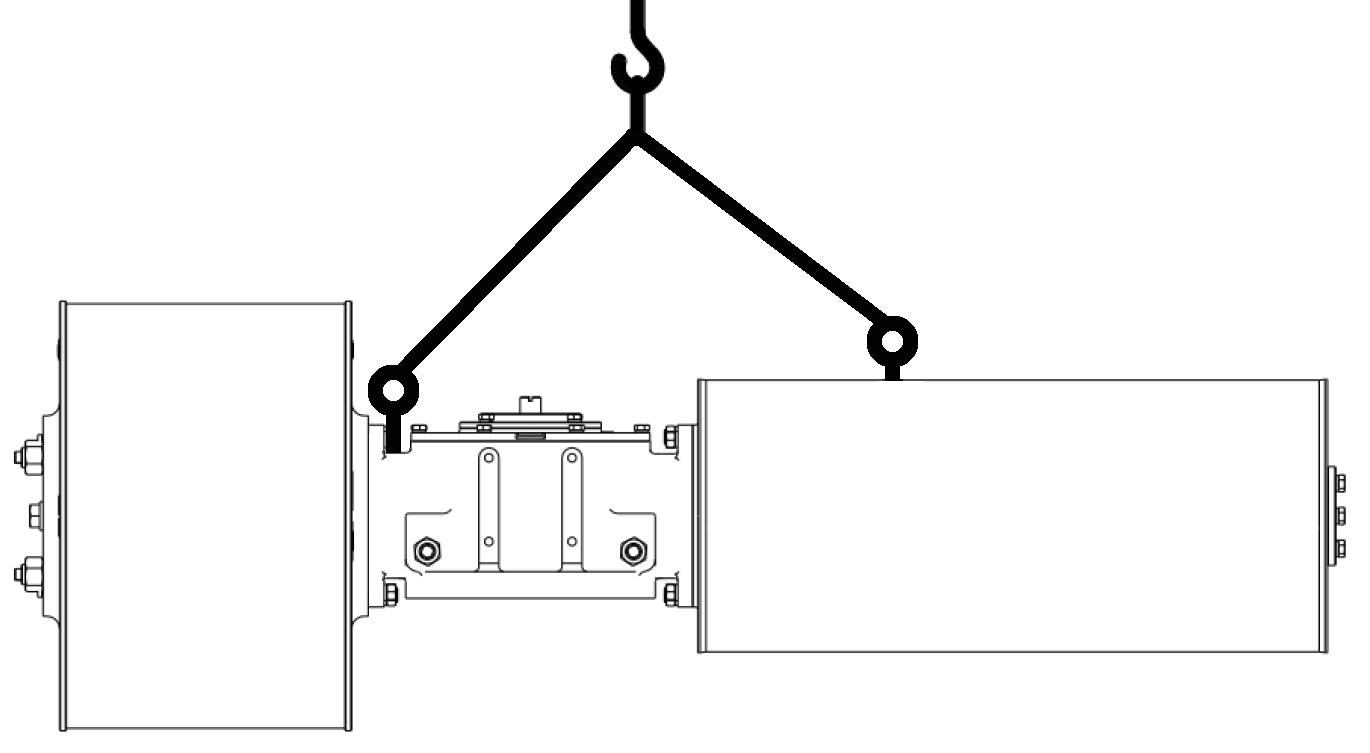
Please lift the actuator according to the schematic diagram in Figure 6 during which it is necessary to maintain a constant speed without impact and at the same time, the lifting chain should not be slack until the actuator is fixed.
In order to ensure the safety, please select the appropriate rated chain according to the weight of the actuator. Details are shown in Table 1 & 2.
Note
5
There are up to 3 lifting eyelets fitted to all actuators, refer to as-built drawing.
Figure
Table 2 - Weights [excludes manual devices] Model
AGP1-VTS1-200-SR 120
AGP1-VTS1-250-SR 130
AGP1-VTS1-300-SR 138
AGP1-VTS1-350-SR 146
AGP2-VTS2-300-SR 174
AGP2-VTS2-350-SR 182
AGP2-VTS2-400-SR 205
AGP3-VTS3-350-SR 251
AGP3-VTS3-400-SR 274
AGP3-VTS3-500-SR 322
AGP4-VTS4-400-SR 450
AGP4-VTS4-500-SR 482
AGP4-VTS4-600-SR 550
AGP5-VTS5-500-SR 776
AGP5-VTS5-600-SR 845
AGP5-VTS5-700-SR 1025
AGP7-VTS6-700-SR 1790
AGP7-VTS6-800-SR 1902
AGP7-VTS6-900-SR 2058
AGP8-VTS7-800-SR 2470
AGP8-VTS7-900-SR 2610
AGP8-VTS7-1000-SR 2758
2.2.3
Mounting to valve
Connect the mounting surface of the actuator to the valve body (see the mounting flange in Figure 6). Refer to as-built drawing for mount pad drawing. Make sure the bolts used are not below grade 8.8 of the steel. Refer to Table 3 for torques of bolting.
Table 3 - Bolting torques valve to actuator
Figure 6 - Spring Return AGP Actuator
3.0 OPERATION
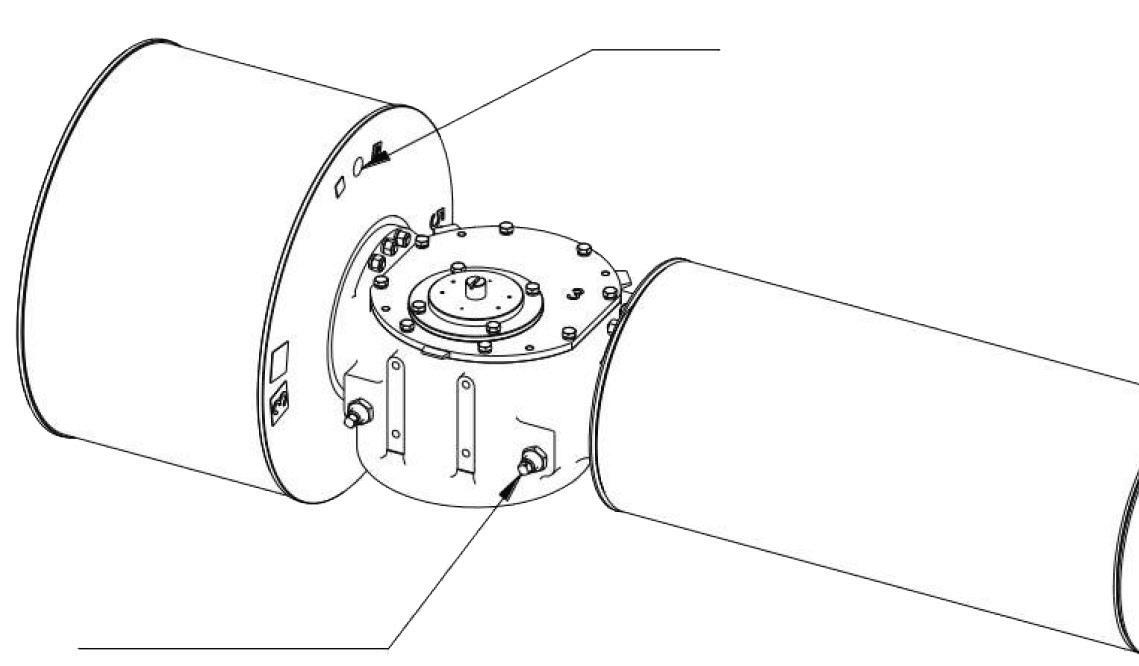
After the actuator is installed, Air Intake A (see Figure 3) activates the actuator, and then the position of the valve will be adjusted by rotating the limit screw (see Figure 3).
1. In the operation of the actuator, it is necessary to keep the Hole B (see Figure 3) clear.
Note
2. The actuator must not exceed the maximum allowable value in pressure (see the name plate).
3. If the actuator has a manual over-ride mechanism, make sure it is not energised.
3.1 AUTO-OPERATION ON/OFF
On/off operation for pneumatic & hydraulic actuated valve:
A) The valve is open when solenoid valve is energised (fail close type)
B) The valve is close when solenoid valve is de-energised (fail close type)
C) The valve is close when solenoid valve is energised (fail open type)
D) The valve is open when solenoid valve is de-energised (fail open type)
3.1.1
Modulating-Control Operation
Modulating control pneumatic & hydraulic actuated control valve:
a) Input 4~20mA electric signals to the electro-pneumatic positioner, valve’s open degree is proportionally regulated in 0°~90° stroke through different current size the positioner achieves.
b) Input 0.02~0.1MPa air signals to the pneumatic-pneumatic positioner, valve’s open degree is proportionally regulated on 0‚~90° stroke through different air pressures the positioner supplies.
3.1.2
Torque output
The cylinder module is moved to one side by the air from Hole A (see Figure 15), which moves the drive yoke module system at the same time as rotation. The spring is compressed in the other side spring module, so that the actuator outputs torque.
3.1.3
Spring reset
After the Inlet A looses the air, the spring is re-opened, making the fork in the driving module rotate to the initial position.
3.1.4
Travel limit
By rotating the limit screw (see Figure 3), the start and end positions of the drive module can be adjusted when rotating, as to adjust travel by +/- 100. (This is factory set once installed on a valve. Do not adjust). Details shown in Section 3.3.
3.1.5 Adjustable opening
If a higher degree of adjustment is required this will restrict the 90 degree travel range of the actuator but can be optionally pre-set in the factory.
3.1.6 Manual operation
If an actuator is equipped with a manual over-ride device, it will work normally by operating the manual mechanism in an air-failed state. (In the case of spring return style). Details shown in Sections 3.2 & 5.2.
3.2 MANUAL OVER-RIDE OPERATION
3.2.1 Manual Over-ride for Pneumatic Actuators
The following manual types of over-rides are available for pneumatic & hydraulic actuators depending on the model/size.
a. Declutchable Worm Gear Manual Over-ride - DA Actuators
Double acting actuators up to AGP4 are optionally available with a declutchable worm gear manual over-ride (refer Figure 7 & 8).
Override
Figure 7
Manual operating steps: firstly open the equalising valve on the pneumatic actuator, draw out the pull pin of the gear operator with one hand, simultaneously, use another hand to turn the clutch lever counter clockwise, until the worm and the worm gear engages, then release the pull pin. After the pin has returned into the eccentric sleeve, you can then operate the valve manually. Turn the handwheel clockwise to close the valve, turn the handwheel counter clockwise to open the valve. To return to automatic mode, first draw out the pull pin in the gear operator with one hand, simultaneously use another hand to turn the clutch lever clockwise until the worm and worm gear engages, then release the pull pin. After the pin has returned into the eccentric sleeve, close the equalising valve.
b. Hydraulic Manual Over-ride - DA Actuators
Figure 8
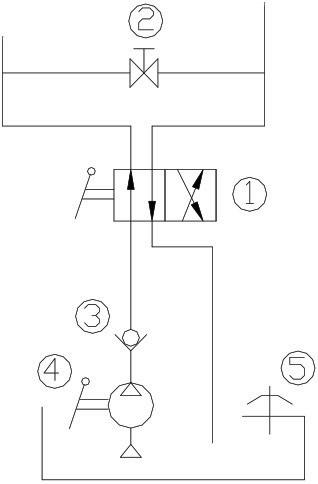
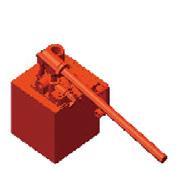
The hydraulic manual over-ride is optionally available for models AGP3 ~ AGP9 double acting pneumatic & hydraulic actuators (refer Figure 9 & 9A) the manual operating device is a hydraulic over-ride with a hand pump. When manual operating is required, firstly open the equalising valve (2) mounted on the pneumatic actuator, close ball valve (2) by operating the hand pilot valve to control the hydraulic cylinder’s oil supply/exhaust, and operate the hand pump to energise opening or closing the valve manually. To return to automatic operation, set the handle of the 4 port 3 position manual direction valve (1) to the middle position and open ball valve (2), Manual over-ride is then disengaged. Refer to section 3.2.1-e for operation of hydraulic manual over-ride.
Pneumatic Actuator
Lock Pin
Clutch Lever
Cylinder Manual Hydraulic Cylinder
(1) 4 port 3 position manual directional valve
(2) Stop valve
(3) Check valve
(4) Manual pump
(5) Breather valve
9
c. Jackscrew Operator Manual Over-ride - SR Actuators
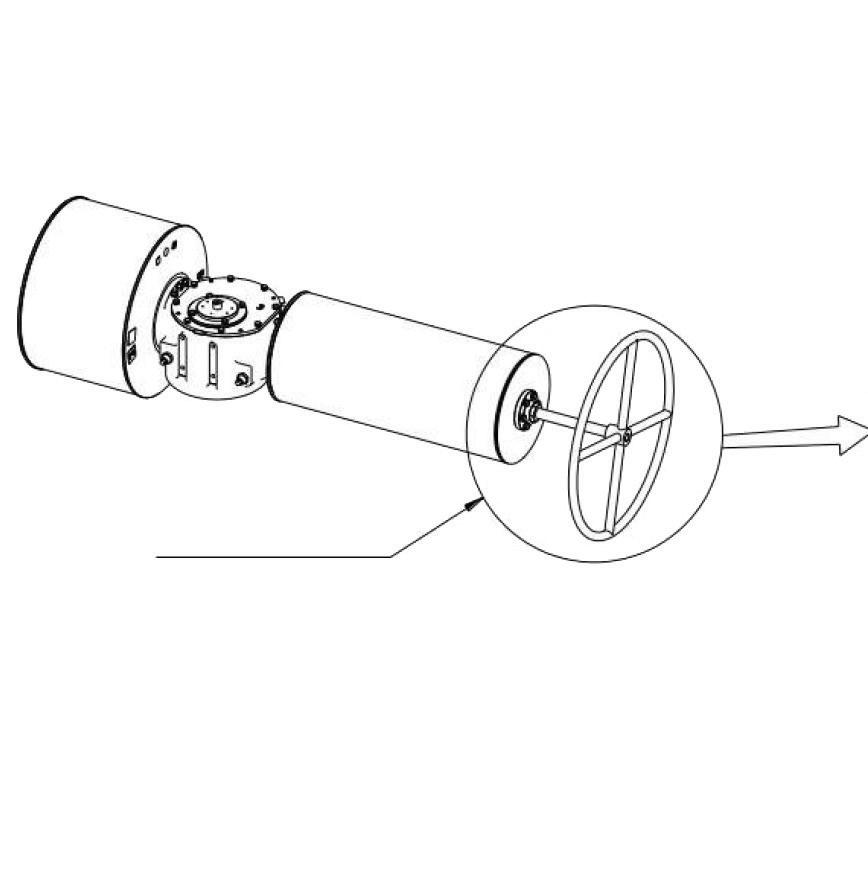
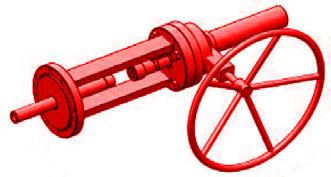
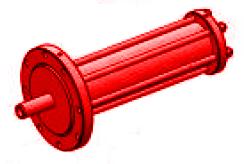
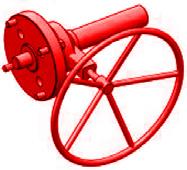
The jackscrew operator (Figure 10) is only available to suit models AGP single acting (spring return) pneumatic or hydraulic actuators. The jackscrew operator (Figure 10) is a side mounted operator. Turning the handwheel, controls the valve position by screwing the trapezoid screw into and out of the spring case (by compressing & decompressing the spring). To turn the valve, turn the jackscrew handwheel clockwise to compress the spring and move the valve one direction, counterclockwise to decompress the spring and the valve will move in the other direction. If the actuator is set ‘fail close’ then
Trapezoid Screw
Handwheel
Figure 10 compressing the spring will open the valve.
After manual operation, screw out the trapezoid screw until the spring is disengaged toward the actuator to return to auto-operation, check to ensure the spring can open fully and the spring is totally disengaged from the jackscrew. Avoid fully screwing out integral the trapezoid screw, as the screws also act as a position stop to ensure the valve is correctly returned to the full open or close position.
Figure
Figure 9A
Ball valve (2) Hand pilot valve
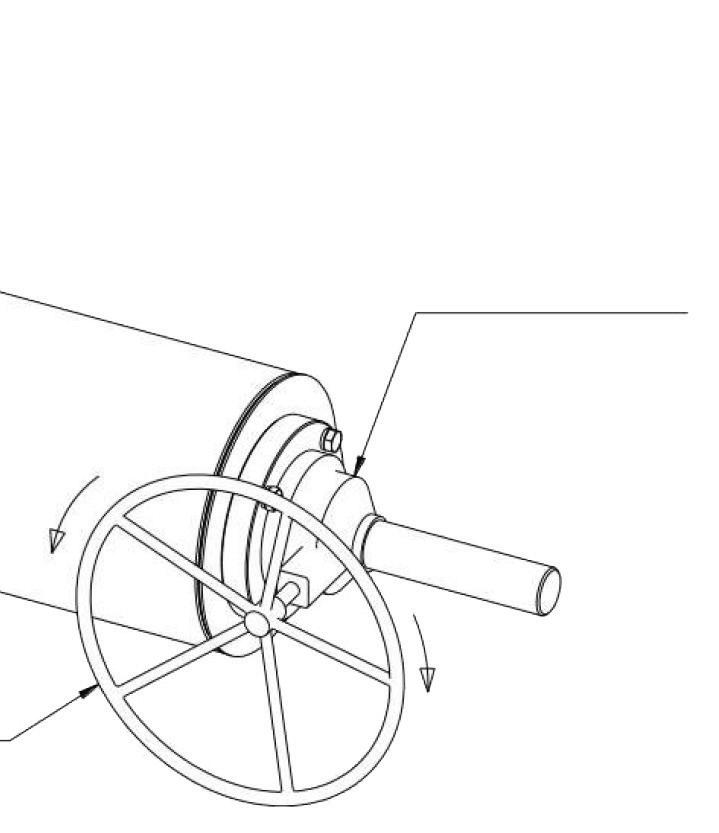
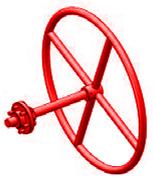
See Figure 11 for the operation of manual screw. Please follow the steps carefully:
Figure 11 - Manual handwheel over-ride
Please ensure that the gas/air supply has been cut off before operation!
1) Loosen the lock nut
2) Turn the hand wheel to operate the manual screw. Please note: turn the hand wheel clockwise and the output shaft of the actuator moves clockwise, turn the hand wheel counterclockwise, and the output shaft of the actuator moves counterclockwise.
3) Re-tighten the lock nut when the desired opening is obtained by the manual mechanism.
To switch back to pneumatic operation, the over-ride must be manually deenergised, see Table 4.
Note
Table 4
d. Hydraulic Manual Over-ride - SR Actuators
The hydraulic manual over-ride is available for AGP2 ~ AGP9 hydraulic and pneumatic spring return actuators. The hydraulic manual over-ride is a system which consists of manual pump, tank, globe valve, check valve and other parts, and is easy to operate and maintain (see Figures 11, 12 & 13).
e. Operation of Hydraulic Manual Over-ride System
1) Close globe valve (1), open globe valve (2);
2) Inject oil to the oil cylinder by operating manual pump with lever handle (which will then activate the hydraulic cylinder which will in turn compress the spring in the case of spring return - fail close actuator) to open the valve (assuming the actuator is set ‘fail closed’).
3) To deactivate, close globe valve (2).
4) Once the valve is closed, open the globe valve (1) to revert to normal operation with no over-ride.
Globe Valve (2)
13
f. Operation of Direct Gear Over-ride
Manual Pump
Globe Valve (1)
Hydraulic System Schematic (Also refer Figure 9) To Oil Cylinder
14
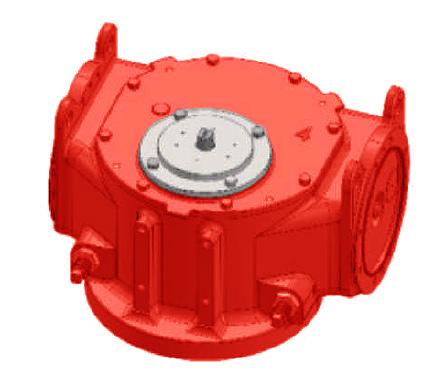
The type of the manual bevel gear is shown in Figure 14.
Turn the hand wheel to operate the manual bevel gear. The relationship between the direction of rotation of the hand wheel and that of the output shaft of the actuator is shown in Table 5.
Please ensure that the air supply has been cut off before operation!
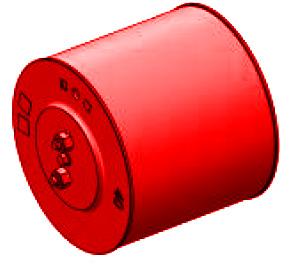
Hydraulic manual over-ride cylinder
Figure 12
Figure
Figure
Note
Figure 14 - Manual bevel gear
Table 5 - Operation direction of hand wheel of the bevel gear
Type of the actuator
Rotation direction of the hand wheel
Rotation direction of the output shaft of the actuator
Turn off the spring return of the actuator (FC) Clockwise Clockwise Counterclockwise Counterclockwise
Turn on the spring return of the actuator (FO) Clockwise Clockwise Counterclockwise Counterclockwise
To switch back to pneumatic operation, the screw must be manually de-energised, see Table 6.
Table 6
Type of spring return actuator Way of manual exit
Over-ride spring return actuator (FC) Turn the hand wheel clockwise
Over-ride spring return actuator (FO)
3.3 STROKE ADJUSTMENTS
The stroke adjustment (travel stop adjustment) can be made for hydraulic and pneumatic double acting and spring return actuators from 80° to 100° as follows:
Loosen the stroke nut then:
a. Screw out the open position stroke bolt to increase the open position, screw in the open direction to decrease the open position.
b. Screw out the close position stroke bolt to increase the closed position, screw in the close direction to decrease the closed position.
Tighten the lock nut after adjusting the appropriate on/off position.
15
Note
3.4 ACTUATOR SIZING
All factors shown in section 2.5.1 to 2.5.3 are only estimating guides and are based more on common smaller sizes valves. It is impossible to accurately estimate the effect on torque all the below factors will have. However, section 2.5.1 to 2.5.3 provide a rough guide and serve as a warning to ensure users are aware of the dramatic affect all the below factors can have on torque.
3.4.1 General Sizing Rules for Soft Seated Ball Valves
Valve and actuator torque values published are theoretical, however where required APV will perform a torque test prior to despatch. The real valve torque value can be higher depending upon the following listed factors as these factors can drastically increase (or decrease) the torque of soft seated ball valves. These factors will have a similar effect on soft seated butterfly valves. Metal to metal seated ball, butterfly and plug valves will also be effected but the torque implications will vary.
1) Fluid carrying dust, powder, abrasive particles (+50% to 125%). In extreme cases can be higher. i.e. Up to 200%.
1a) Slurry, pulp, resins, paste (+50%) can be much higher in some cases.
2) Dry service (Dry Gas) (+30%).
3) High or low temperature (consult us).
4) Infrequent use (+30-50%) *1 - *2.
5) If a higher minimum air supply than used in the calculation is available more torque will be produced in the air operation phase, (do not exceed maximum air capacity of the actuator).
6) Torque is based on a maximum Delta P for class. If your actual working pressure is lower please advise as a smaller actuator may be possible.
7) Lubricated service (clean oil or other high lubricity fluid) (+15%).
*1 PTFE/RPTFE seats can require more torque to unseat after a period of time due to it’s fluidity & ‘memory’. For Devlon/Nylon Seat the valve torque is higher and PEEK® is even higher (of course this should be factored into torque of valve where applicable), however as these are harder materials (especially PEEK®) infrequent use has a lesser effect on the increase in torque.
*2 Where set fail closed, additional infrequent use safety factor only needs to be applied to spring stroke torques. Allow additional 50% safety factor if valve is being operated less than once per month.
3.4.2 Actuator Sizing for Ball Valves
Use the following ‘ready reckoner’ rough estimating guide* to calculate the torque values required to turn a ball valve through it’s 90° travel. Consider torque requirements at these five basic positions:
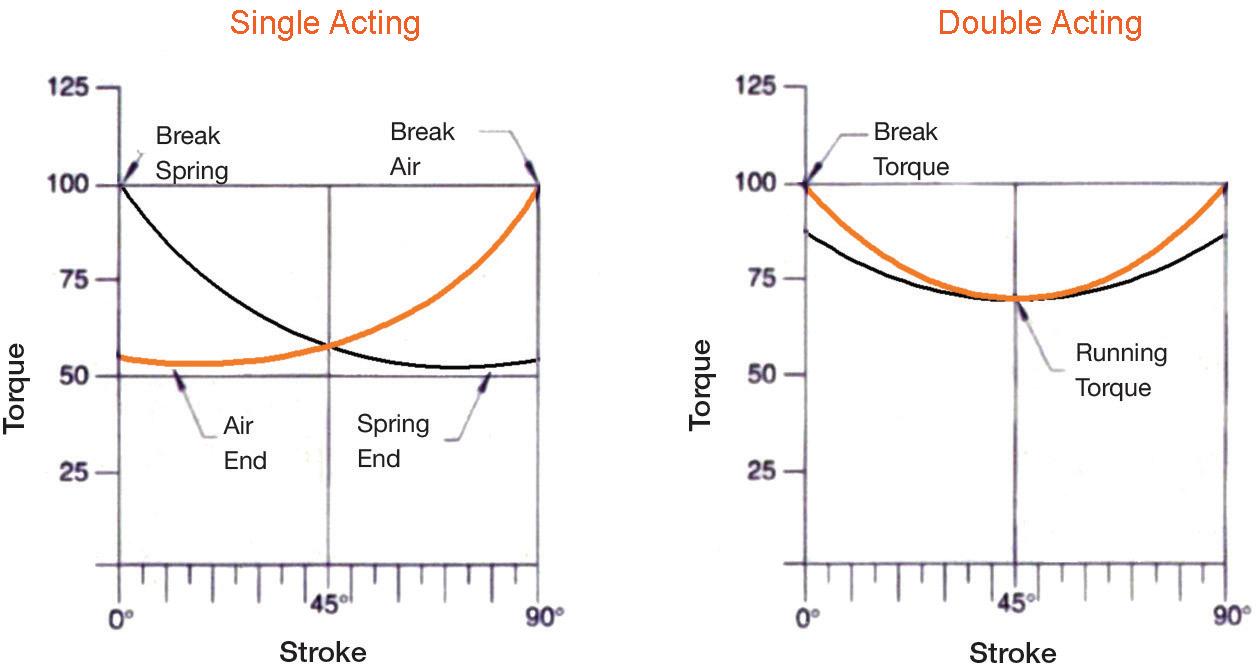
BTO - Break open torque: the torque required to unseat the closed valve. 100% of the stated torque.
RTO - Opening torque: the torque needed to move the valve to the fully open position. Average 70% of stated BTO torque*.
ETO - Open breakout torque: the torque required to move the valve from the fully open position. 70% of stated BTO torque*.
ETC - Closing torque: the torque required to reseat a closing valve. 85% of stated BTO torque*.
RTC - Running torque: the torque needed to keep the ball moving through it’s travel. 50% of stated BTO torque*.
MAST- Maximum stem torque - refer to manufacturer.
*Average guide based on floating ball and smaller size trunnion ball valves. Large trunnion ball valves have slightly different ratios. Butterfly and plug valves have totally different ratios.
3.4.3 Elements that Effect Soft Seated Ball Valve Operating Torque
The below factors are only for use as a rough estimating guide only and apply to smaller diameter ball valves. Furthermore, the effects the following factors have will vary for trunnion ball valves, even in smaller sizes. For trunnion ball valves it is impossible to provide accurate multipliers, however the below factors will effect all types of soft seated valves in all sizes to a certain degree and should be taken into account when specifying safety factors.
For a particular size and differential pressure, the torque of soft seated ball valves depend on many factors. Use the torque multipliers stated below with the selected valve’s stated ‘break’, ‘end to close’ and ‘end to open’ torques as needed for your application.
Seat Material: The friction force or degree of holding force depends on the seat material type.
- For floating ball valves up to 175 NM. For larger valves consult us.
Fluid Type: Torque values depend on media type. Torque will become higher with dry, gasses or liquids with solids and lower with oils. Torque multipliers are shown in the table (based on normal temperatures).
- Can be
Frequency of Operation: When a valve remains in closed position for extended periods of time, the breakout torque increases.
Temperature Effect: For operating temperature from 100°C to 218°C, use the torque multiplier given. For 0°C to 99°C no temperature multiplier is required. For operating temperatures less then 0°C and above 218°C consult Australian Pipeline Valve.
Temperature Multiplier = Temp ºC ÷ 100
The above is an approximate guide only, for estimating purposes.
4.0 COMMISSIONING
If the unit has been left in the same position for long periods, the packings and seals may have set. This means that when the actuator is again operated, possible leakage may come from the piston seals or rod packings. Cycling the unit several times will activate the packings and seals to work efficiently.
Many factors will effect the rate of operation:
a) how far away it is from the source of pressure
b) the diameter and pressure of the supply line
c) the size of the airline supply valve orifice
d) the torque requirements of the valve
e) the actuator size
f) impurities in the valve stem seat
g) temperature and viscosity of media
As any one of these factors effects the other, a typical operating time is difficult to forecast. However, operating time can be decreased as follows:
a) larger diameter and higher pressure of the supply line
b) larger airline control valve orifice size
c) high speed exhaust valves
Flow control valves may be used to indicate the flow of exhaust however this will reduce running time. We do not recommend measuring the incoming source or exhaust flow to great lengths as this may cause inconsistent operation.
5.0 MAINTENANCE INSTRUCTIONS
Once the APV-Torqturn actuator has been correctly assembled and installed it is ready for operation. Lubricants used at the time of adjustment along with the durable design of the actuator mean routine maintenance is not usually required. Modification or major overhaul can only be performed by an experienced APV approved actuator service facility.
To ensure long service life, trouble free operation and minimal maintenance, components of actuators
both pneumatic & hydraulic are lubricated. These include the gearing surfaces and bearings which are commonly covered with a teflon dry-film lubricant and corrosion inhibitor. Major internal components such as piston rods and tie bars are usually coated in electroless nickel or are stainless steel. All threaded fasteners, rollers, tracks, yoke bores, pins, gaskets and seals are coated with petroleum grease.
In addition to lubricants, correct instrument practices are also important. Foreign particles and debris can damage components such as seals, the solenoid and control valves, etc. Clean, dry air, gas or hydraulic fluid should be of high priority for acceptable operation and longevity. To assist with unit protection an in-line filter may be fitted to help prevent particles penetrating the cylinders of the actuator.
Only a trained actuator specialist should attempt any disassembly or conversion. Actuators can be under high spring loads and are dangerous devices. Valves can be rapidly slammed shut, possible safety threat. Entrapped dangerous fluid can be rapidly expelled.
5.1 REPAIR
Only a specialist actuator repairer should attempt repairs, if doing so take note of the following:
a- The actuator’s internal parts and external fitments shall be handled with care avoiding scratches or surface damage.
b- All tools and equipment for handling the internal parts shall be soft coated.
c- Actuators can be fitted with gaskets or seals in PTFE, Buna, Viton, etc., hence high or low temperatures will damage sealing components.
For all operations make reference to position number on part list of the applicable drawing listed.
5.2 ASSEMBLY OF OPTIONAL OVER-RIDE
5.2.1 To Assemble The Jackscrew On The Spring Module
1) Loosen the bolt on the spring end cap and take the spring end cap 42.
2) Assemble the jackscrew on the side of spring cylinder.
Figure 16
3) Screw and tighten the bolt connecting the jackscrew and spring cylinder.
4) Rotate the handwheel on the jackscrew and open/close the valve for 2~3 times to check if the manual over-ride works smoothly.
5.2.2 To Assemble The Hydraulic Manual Override Mechanism Onto The Spring Module
1) Loosen the bolt on the spring end cap and remove the spring end cap 42.
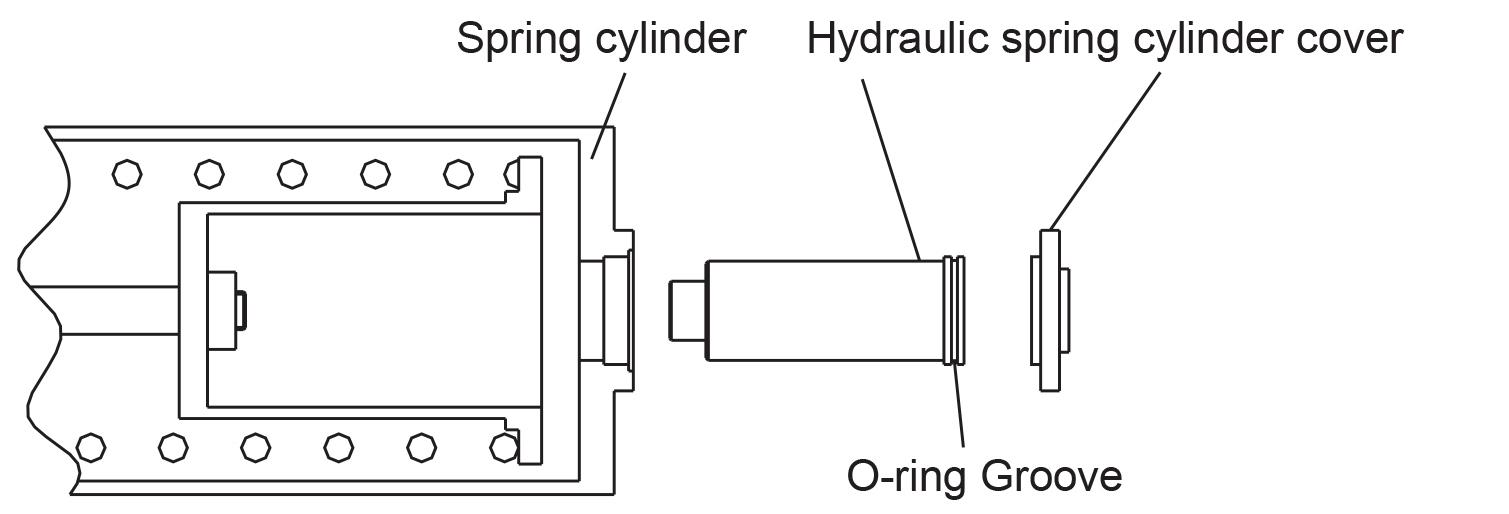
2) Fit the O-ring and stop collar to the O-ring of the hydraulic cylinder.
3) Assemble the hydraulic cylinder into the spring cylinder.
4) Fit the O-ring into the spigot of the spring cylinder side.
5) Assemble the spring cylinder cover on the spring cylinder.
6) Screw and tighten the bolt connecting the spring cylinder cover and the spring cylinder.
7) Refer to Figure 9 and section 3.2.1-b to assemble the manual pump onto the body cap, then screw and tighten the bolt.
17
8) Connect the stainless tube, high pressure fittings and the hydraulic cylinder.
9) Add some hydraulic oil into the tank of the manual pump, then power oil to the hydraulic cylinder by operating the lever on the manual pump. Activate the actuator, allowing it to run to the full open position, and check if there is leakage and if the manual over-ride works well.
6.0 OPERATION NOTES
Typical operation of the actuator involves applying pressure to the appropriate pressure inlet(s) of a double acting or spring return cylinder by means of a suitable control valve (refer to Appendix C).
APV-Torqturn actuators are sized to ensure the required valve torque is produced at the supply pressure selected by the customer.
All APV-Torqturn actuators feature a fully enclosed body cavity which ensures protection for all moving parts and eliminates the possibility of injury to operating personnel. If required, this enclosure may also be used as an optional oil bath. During usual circumstances APV-Torqturn pneumatic actuators do not require additional lubricants, however an air-line lubricator may be installed. Lubricated air improves performance of most control valves and solenoids (with the exception of positioners). Only lubricants compatible with the seals in the actuator and control valves should be used. When using APV-Torqturn actuators manually, the supply pressure is required to be vented or equalised on either side of the power piston (with some provision for handling the minor difference in displacement of opposing sides of the cylinder position).
Figure
a) When operation is a ‘declutchable’ gearbox, move the lever until the mechanism is engaged. With this done, the gearbox then operates actuator and valve.
b) When manual operation is through a hydraulic over-ride, energise the hydraulic supply and then rotate the handwheel in the appropriate direction to operate actuator and valve.
c) When manual operation is through a hydraulic over-ride on a spring return actuator, fully close block/ by-pass valve and operate hand pump in order to over-ride actuator spring and operate actuator and valve.
d) When manual operation is through a jackscrew handwheel, simply turn appropriate jackscrew handwheel to operate actuator and valve.
Do not attempt to repair this actuator in a non APV approved facility, send to an authorised APV repair facility.
8.0 DESIGN FEATURES
1. Safe Spring Lock
Positively locks the spring module in place under load. Prevents spring module detachment from the drive module.
2. Reduce Wear
The design of connection between the hard chromed piston rod and the guide block compensates for the side load deflection and there by reduces wear on the rod, bearings and seals. Connecting rod swivels that connect the piston rod to the guide block compensate for the deflection side loads and reduce wear on seals, bearings and seats (AGP2 ~ AGP9)
3. Standardised Mounting
ISO 5011 base flange and NAMUR mounting configuration allows standardisation of mounting hardware for a wide range of shaft driven accessories.
4. Replaceable Bearings
Replaceable PTFE coated upper and lower torque shaft and yoke pin/ piston rod bearings protect sliding and rotating components, with suitability for either dry or lubricated working conditions.
5. Guide Bar
Hard alloy steel thrust bar and block prevents yoke pin axial movement, transferring axial loads directly to the drive module case.
6. Optional Over-ride
Internal hydraulic over-ride cylinder module for spring-return models doesn’t increase actuator length.
7. Ease of Lifting
All AGP models are equipped with multiple lifting eyes for safe actuator handling during shipping, installation and removal.
8. Housing Vent
The main actuator housing incorporates a stainless steel check valve in order to release overpressure.
9. 80°~100° Travel Adjustment
Bi-directional travel stops are integral to the actuator. The stops allow 80° ~ 100° total travel adjustment and area designed to prevent ingress of foreign matter and water.
10. Yoke Roller
A high tensile chrome-moly hard chromed roller rotating in (upper and lower) PTFE coated Du bearing. The top and bottom of the hard chrome allow steel roller pin is encapsulated in PTFE anti-friction coated bronze cover/retainer plates which reduces friction and minimises wear.
11. Guided Disc
The AGP Series has no external tie bars ensuring corrosion resistance. The dual internal hard chromed guide and tie bars centralise the disc throughout it’s travel ensuring no leakage or wear of the heavy ‘D’ NBR piston seal and ensuring the cylinder is not damaged by the piston whilst also reducing torque as well as ensuring ease of operation.
12. Air Cylinder
The seamless Air Cylinder is PTFE/XYLAN lined to ensure smooth low torque operation over the life of the actuator and also prevent corrosion.
13. Spring Module
The retaining nut system & cover positively locks and covers the spring module to allow it’s safe removal and installation, eliminating accidental release of the spring force. The fully sealed seamless steel case module is guided by self lubricated alignment bearings and is corrosion resistant being grease filled for life with internal and external multi-coat paint systems.
14. Drive Swivels
1000 MPa high tensile alloy steel hard chromed power drive swivels balances radial forces for smooth low wear/low resistance for long life.
15. Corrosion Resistant Spring Module
Guided by self-lubricating alignment bearings. Fully enclosed and incorporating safety lock feature. Corrosion resistant to harsh environments. Multi-coat painted and internal grease filled for life.
16. Internal Tie Bars
Hard chromed alloy steel oversize dual internal centralising guided tie bars are corrosion resistant and ensure smooth, long life operation of the piston and seal.
17. Modular Design
AGP Series actuators have field serviceable drive, power, spring and override modules. The modules are removable, serviceable and interchangeable while mounted on the valve.
15. Seamless Spring Cylinder
13. Enclosed Spring Module
Drive Swivel
16. Tie Bar
9.0 REPAIR INSTRUCTIONS
Only and APV approved repair facility should undergo dismantling & repair.
The spring is compressed in the cylinder & dangerous. Non APV approved repairers should not attempt to remove.
7 -Materials of main parts
Table 8 -Weight for reference
9.1 DISASSEMBLY OF THE CYLINDERS
Before disassembly, please follow the steps:
1. Since the module is heavy, please prepare the necessary lifting equipment in advance (refer to Table 8).
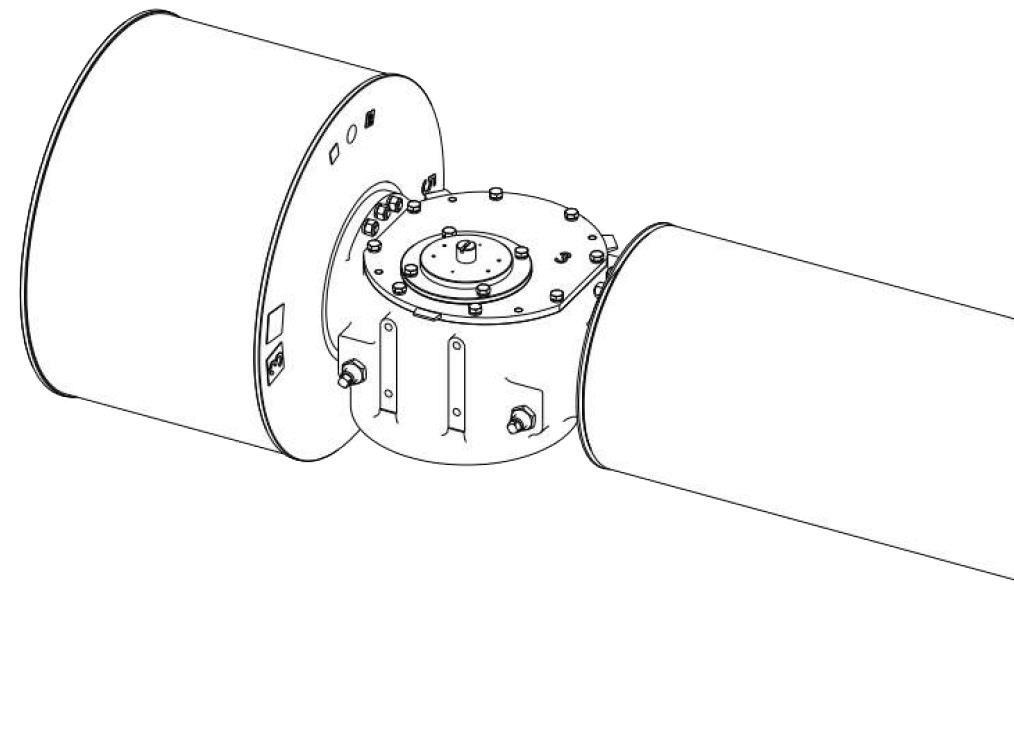
2. When removing the spring module or the cylinder module, it must be certain that the spring is fully open. See steps 1, 2, 3 & 4 in Section 9.1.1.
3. Take care when disassembling to note orientation & position to ensure re-assembly in the same position.
9.1.1 Disassembly of the Spring Cylinder
Please follow the steps below to complete the removal:
1. Allow venting from Air Inlet A to ensure the actuator is fully rotated so spring is not energised. Rotate the actuator.
2. Completely withdraw the limit screw (see Figure 19) near the side of the spring module.
3. Unscrew the fixing screws of the spring cover flange and open it.
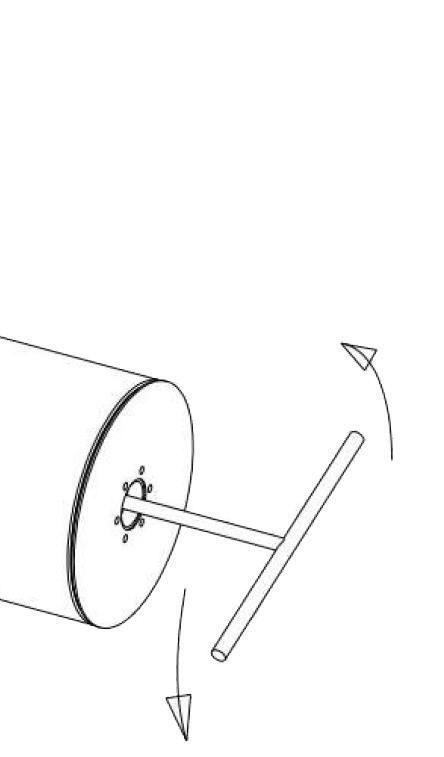
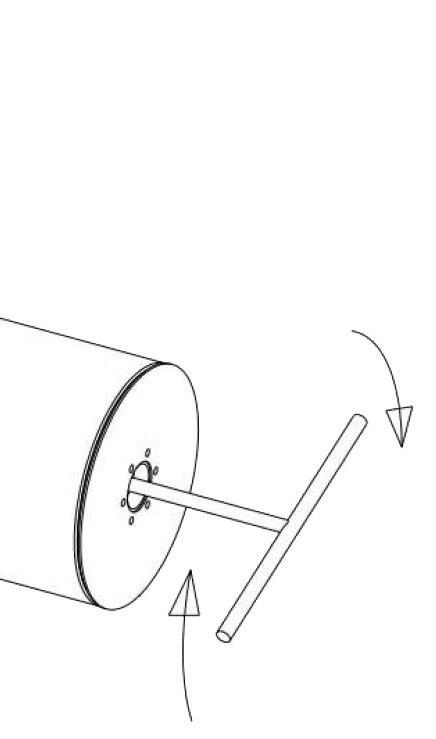
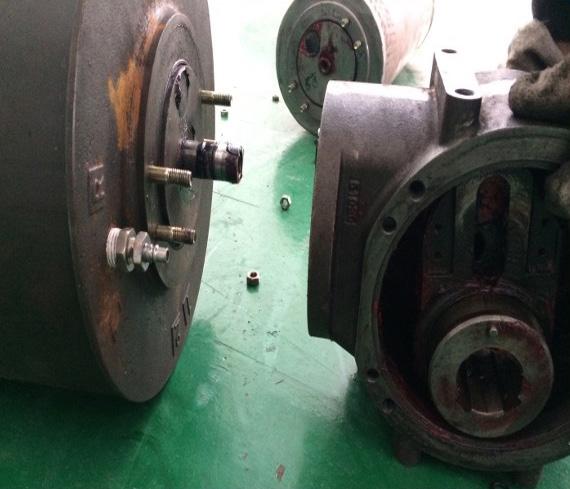
4. Use the special tools provided by the factory to extend into the spring module and insert into the end of the spring rod, see Figure 20.
5. Rotate the special tool counterclockwise in the direction shown in Figure 20 to completely disengage the spring rod from the transmission joint. Refer to Table 9 for the number of rotations.
Table 9 - Number of rotations of the spring rod
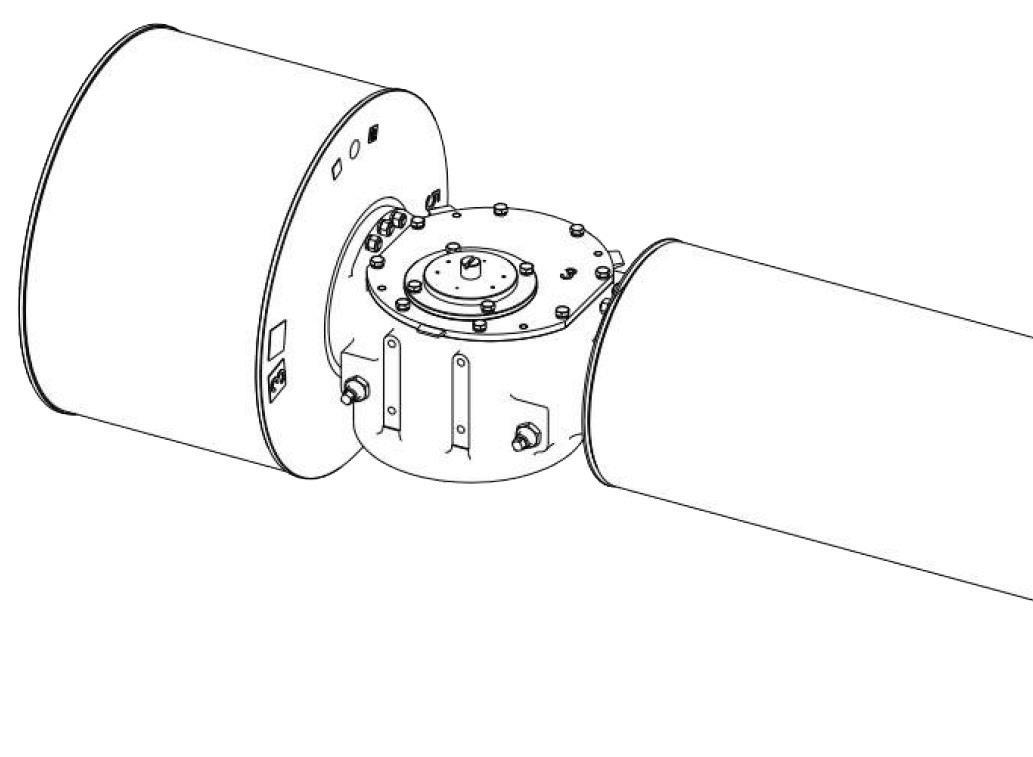
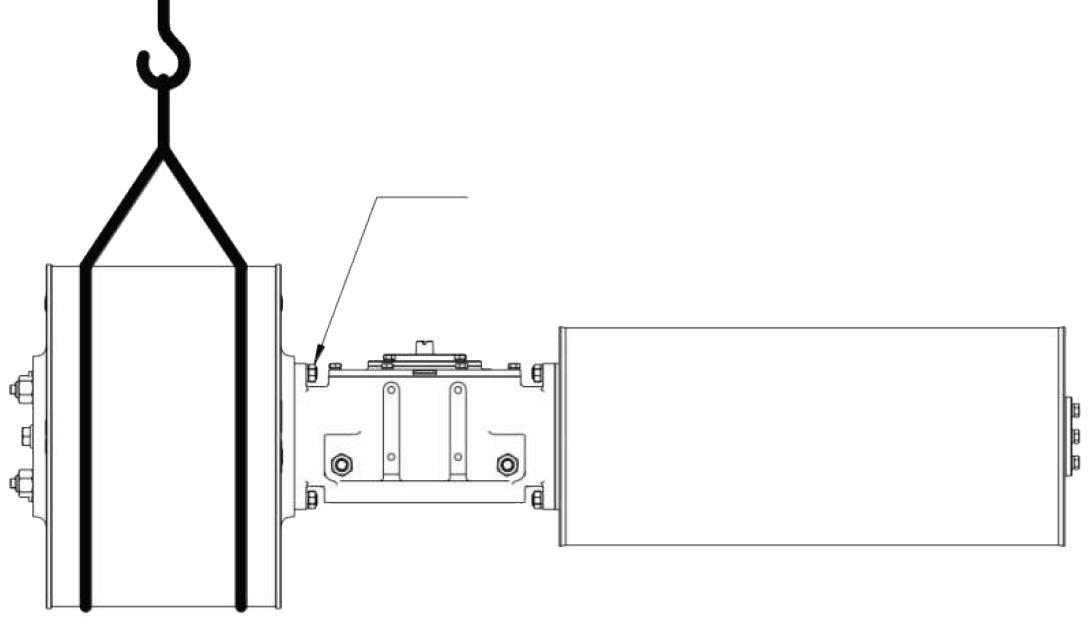
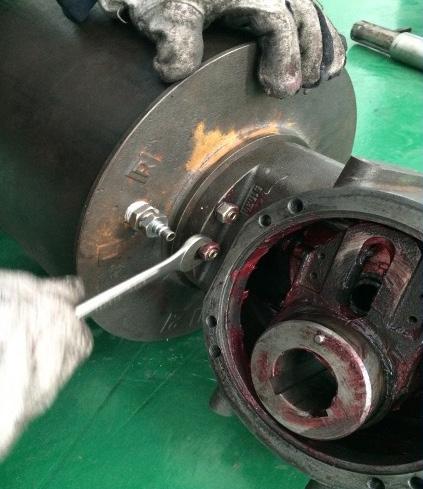
6.Take the necessary lifting measures for the spring module, refer to Figure 21. Unscrew the nut between the spring module and the drive module and remove the spring module. Note
Do not damage the seal o-ring between modules.
Figure 20
Figure 21
9.2 DISASSEMBLY OF THE AIR CYLINDER
If the spring module is not removed, you must first perform stems 1 & 2 in Section 9.1.1 to fully open the spring.
Note
1. Turn off the air supply.
2. Unscrew the screw plug on the cover of the outer cylinder (see Figure 22).
Do not damage the seal o-ring under the plug.
Note
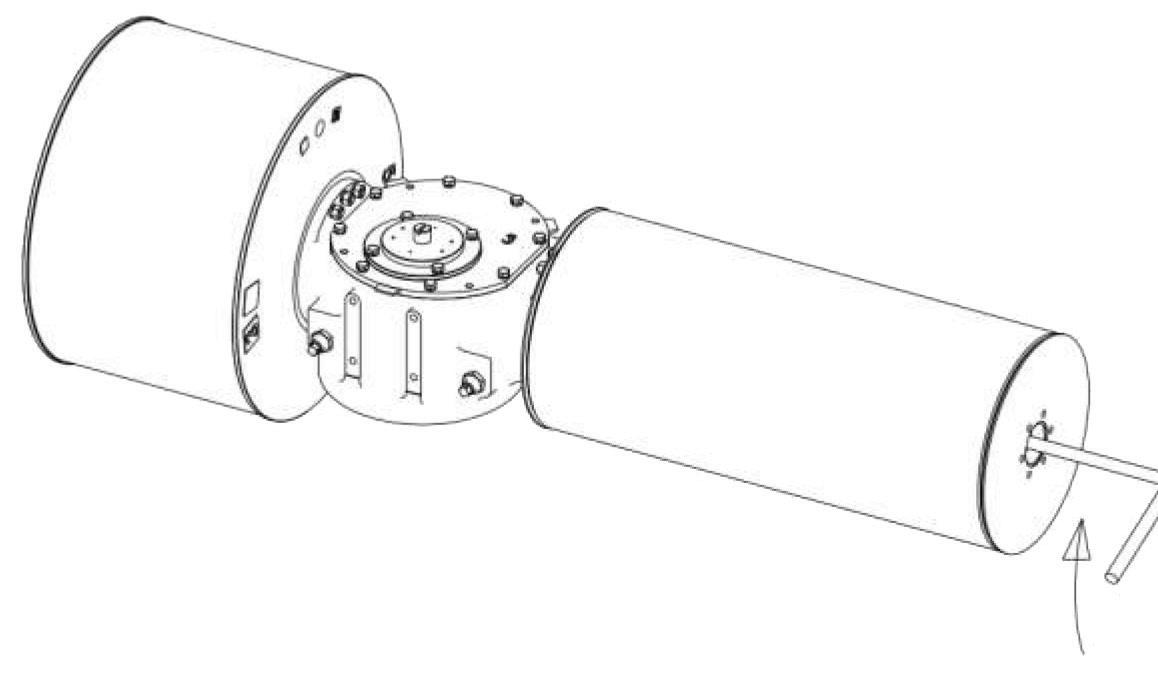
3. Use the special tools provided by the factory to extend into the cylinder module and insert into the end of the piston rod, as shown in Figure 23.
4. Rotate the special tool counterclockwise in the direction shown in Figure 23 to completely disengage the piston rod and the transmission joint. Refer to Table 10 for the number of rotations.
Table 10 - Number of rotations of the piston rod
Figure 22
Figure 23
4. At Inlet Hole A of the cylinder (see Figure 6), the air pressure is applied to move the piston to the outermost side;
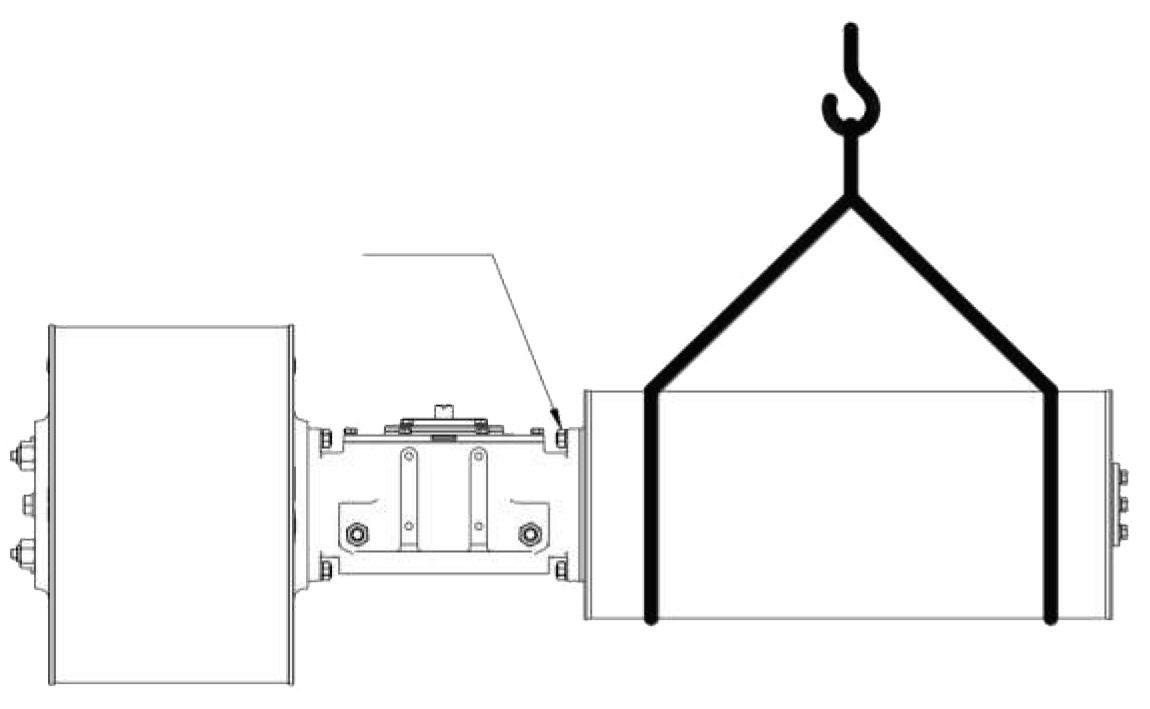
5. Perform the necessary lifting measures for the cylinder module, refer to Figure 24.
Unscrew the nut between the cylinder module and the drive module and remove the cylinder module.
Do not damage the seal o-ring of the plug.
9.3 INSTALLATION OF MODULE
Before installation, please note: Due to the heavy weight of the module, please prepare the necessary lifting equipment in advance (refer Table 8 for weights).
Note
9.3.1 Re-Installation of the spring
Follow the steps:
1. Lift the cylinder module (including the o-ring between the modules) to the mounting surface of the drive module (as shown in Figure 24), and tighten the nut;
Make sure the o-rings between the modules are properly installed.
Note
2. Slowly make the air into Hole B of the cylinder (see Figure 6) to move the air cylinder piston forward, so that the piston rod and the transmission joint are pre-fitted;
3. Unscrew the screw plug on the outer cylinder (see Figure 22).
Do not damage the seal o-ring of the plug.
Note
4. Insert the special tool provided by the factory into the cylinder module and insert it into the end of the piston rod, as shown in Figure 25.
Figure 24
6. Rotate the special tool clockwise in the direction shown in Figure 25 to combine the piston rod with the transmission joint. Refer to Table 11 for the torque;
Table 11 - Tightening torque of the piston rod
7. Re-install the screw plug and the o-ring onto the outer cylinder;
9.3.2 Re-Installation of the Air Cylinder
Note
Please make sure that the cylinder module is connected to the drive module, otherwise the installation will fail. Turn off the air supply of the air cylinder module.
Follow the steps:
1. Lift the spring module (including the o-ring between the modules) to the mounting surface the drive module (as shown in Figure 21), and tighten the nut;
Make sure the o-rings between the modules are properly installed.
Note
2. Unscrew the fixing screw of the cover of the spring and open it.
Do not loose or damage the seal o-ring of the cover.
Note
Figure 25
3. Insert the end of the spring rod with the special tool provided by the factory and push it forward to the bottom, then slowly ventilate Hole B of the cylinder (see Figure 6) to move the piston toward the side of the spring module until the special tool is extended to the outside and stop the ventilation.
4. Rotate the special tool clockwise in the direction show in Figure 26 to combine the spring rod with the transmission joint. Refer to Table 13 for the torque.
Table 12 - Tightening torque of the piston rod
5. Re-install the cover and the o-ring onto the spring module.
10.0
