

EMBRACE THE COLD
Unlock your potential. Break through mental barriers. Feel invigorated.
A Chill Tub will change your outlook on life and allow you to break through your own boundaries and make you feel you can take on the world.
Cold water therapy is a recovery technique used by athletes and individuals looking to reduce muscle soreness and inflammation after physical activity. Some potential benefits of taking a Chill Tub include:
Reducing muscle soreness
Cold water immersion can help reduce muscle soreness by constricting blood vessels and reducing inflammation.
Improving recovery time
By reducing muscle soreness, the Chill Tub may also help athletes recover faster and be ready for their next workout or competition.

Decreasing inflammation
Cold water immersion may help reduce inflammation in the body, which can be beneficial for individuals with chronic inflammation or inflammatory conditions such as arthritis.
Improving circulation
Cold water immersion can stimulate blood flow and improve circulation, which may help with recovery and reduce the risk of injury.
It’s important to note that the Chill Tub is not suitable for everyone and can be uncomfortable or even dangerous for some individuals. It’s always best to consult with a healthcare professional before starting any new recovery routine.
Start your cold journey with Chill Tubs.

QUICK SET UP
Before installing the Chill Tub, please ensure that there are no obstacles on the outside of the vents on the side of the chiller/fan.
If there are obstacles blocking the vents, it will cause the compressor to selfprotect and the Chill Tub water temperature cannot drop. Once your Chill Tub is in a position you are happy with please leave it laid flat for 24 hours for the refrigerant to settle in the compressor (Chill Tubs are the same as a fridge or freezers and the gas needs to settle before use).

The Chill Tub can then be filled with water but it should not be turned on for 24 hours. We do recommend that you read the full manual though in particular the safety information before you use.

1
Simply place a garden hose into it. The tub will be completely filled in approximately 15-30 minutes, depending on water pressure

3
Within a few hours you will be able to start enjoying your new Chill Tub cold water therapy

2
Plug in your tub to a 13 amp plug socket and set the desired temperature on the control panel

4
We strongly suggest you empty your water every 8 - 12 weeks and repeat these first three steps
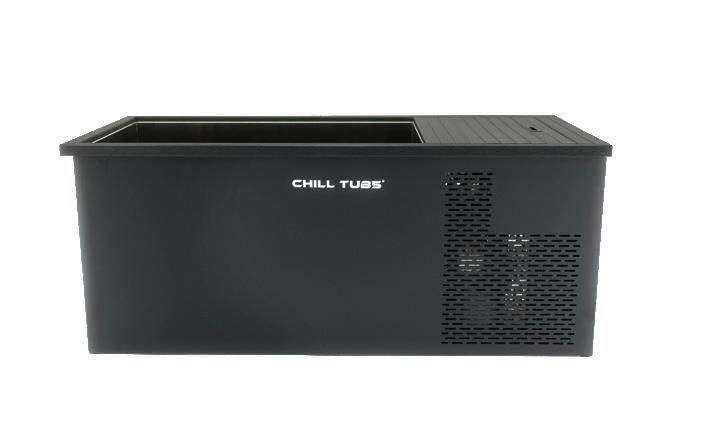
THE PURPOSE OF YOUR CHILL TUB
The purpose of the Chill Tub is to allow people to experience cold water safely and efficiently in their own setting at home or in a commercial setting.
The Chill Tub is designed to go down to as low as 3°C degrees, which is extremely cold and we advise you to read the safety instructions before getting in.
Who is it for?
The Chill Tub is designed for use by one person at a time and is suitable for adults only. If deliberate cold exposure is new to you please learn more about this first and
make sure it is for you. We also advise you to read this manual fully before you take the plunge.
We recommend you start gradually with the temperature set at 10°C degrees and shorter durations of up to a minute. This is to ensure you get used to it before you lower the temperature or increase your time.

Please note that children are not advised to use the Chill Tub.
Please note that in extreme warm climates during the summer, the Chill Tub will not chill to the lower temperatures that you may require.

TOP TIPS
DO build up slowly. Diving in at the deep end might not be the best ideacould start off by gradually introducing your body to the cold water - feet, then legs, then torso and so on. Don’t feel like you have to fully submerge on your first few attempts.
DO be mindful of your breathing. Learning to control your breath is a big part of being in cold water. How we breathe is often a very accurate indicator of how we are in our mind. So, if we’re breathing fast and rapidly, then that means we’re feeling quite frantic in our heads. If our breath is nice and slow and smooth and deep, we are maintaining an element of homoeostasis in our body, which keeps us calm.
DO take your experience into account when deciding what temperature to set your Chill Tub. For those who have never been exposed to any sort of cold water, you should start at around 10°C degrees Celsius. If you regularly take cold showers, then you could start a little lower at 6°C degrees Celsius.


OWNERS RESPONSIBILITY
Chill Tubs declines all liability for damages arising from failure to observe the following directions.
As the owner, it is your responsibility to:
0 Ensure the safety of those using the Chill Tub and read and observe the health and safety warnings and safety recommendations as set out in this manual
0 Maintain the materials of which the Chill Tub is made from by following the cleaning procedures in section 8 of this manual
0 Use the Chill Tub according to the recommendations in this manual
0 Only use our recommended engineers for service and repairs
0 Ensure that the cabling does not present a trip hazard
0 Live electrical components and equipment (except those powered at a very low voltage not exceeding 12V) must be out of reach of individuals using the appliance.
0 Parts containing electrical components must be positioned or fixed so that they cannot fall into the water
0 There will likely be times when water spills out of the Chill Tub, especially when getting in or out and we recommend taking a common-sense approach and making sure there is good drainage for water on the floor around your Chill Tub and a non-slip surface to step on to
CAUTION: Before carrying out any maintenance operations, disconnect the appliance from the power supply.
DO NOT switch the power on to the Chill Tub until it is filled to the required level.
Running the pump dry, without water, could cause immediate damage and void your warranty.
Avoid flooding. We would advise that the level to which you fill your Chill Tub with water falls at least 20cm below the top to avoid flooding.
This level is something that will be different for everybody and we recommend that you become comfortable with what level of water works for you and observe what happens to the water levels when you get in - you can always then adjust accordingly.
Top-up the water periodically as it lowers due to users entering/exiting to keep the water level high enough.
Do use your insulated cover. It is advisable not to leave the Chill Tub uncovered when not in use since the temperature of the water will rise.
Damage arising by not following the guide or warnings are not covered by the warranty.
If you have any questions concerning the operation of your Chill Tub or the information in this manual, please do contact us.
In extremely cold conditions, at temperatures of -10°C or below, it is essential to fully drain the Chill Tub to prevent the pipes from freezing. We advise you not to use the Chill Tub during this time until the temperature returns to -7°C degrees and above.

HEALTH & SAFETY WARNINGS FOR THE USER
Taking the plunge is a big step. Please read the safety warnings carefully before using the Chill Tub.
Chill Tubs declines all liability for damages arising for failure to observe the following directions.
If the supplied cord is damaged, it must be replaced by the manufacturer, its service agent or similarly qualified persons in order to avoid a hazard.
Health disclaimer: If you’re unsure about whether this is for you then please check with your doctor before using your Chill Tub.
Chill Tubs are suitable for most people, most of the time, however we recommend to take a cautious approach and we would advise that people with reduced mobility, sensory, and/or cognitive abilities only use the Chill Tub if supervised and only if they have the knowledge necessary to use the equipment safely, as well as to understand the dangers arising from improper use.
Tolerance to cold water varies from person to person and we recommend being mindful of gradually building up the duration of use with the Chill Tub and be cautious when using it alone.
New to this?
It is quite dangerous to suddenly jump into cold water that’s significantly cooler than what you’re used to as it can cause a shock to the body. Therefore, enter the water slowly and keep your face shoulders and hands clear until your breathing is under control.
The cold-water shock response decreases with cold exposure experience and being mentally prepared.
WARNING: When positioning the appliance, ensure the supply cord is not trapped or damaged.
WARNING: Do not locate multiple portable socket-outlets or portable power supplies at the rear of the Chill Tub.
A risk factor is hypothermia.
This occurs when you suffer a drop-in core body temperature and can eventually lead to loss of consciousness and heart failure. The amount of time you can spend in cold water without suffering from hypothermia is determined by the water temperature, your body size and shape, your level of cold adaptation and your experience, among other factors. Check with your doctor as relevant. Start with safe, short dips of 30 seconds to learn what your limits are. If you begin to feel uncomfortable or you start to shiver, listen to your body, get out and slowly warm up by walking around.
If you like, you can check the water temperature before entering the bath, to ensure that it is at temperature that is suitable for your experience in cold exposure. The temperature of the water is displayed as default on the control panel.
Children must be supervised near the Chill Tub to make sure they do not play with the equipment and do not carry out operations to be performed by adults (cleaning cycles/maintenance). Always attach the cover when not in use. Children are not advised to use the Chill Tub.
Please check with your doctor as relevant. Pregnant women should talk to a doctor first, low temperatures are not advised. Anybody under medical care, such as people with heart conditions, diabetes, high or low blood pressure or other health problems must not use the Chill Tub without first consulting their doctor. People with infectious diseases should not use the Chill Tub without first consulting their doctor.
The Chill Tub is not to be used by persons with reduced physical, sensory or mental capabilities, or lack of experience and knowledge, unless they have been given supervision or instruction.
Do not use the Chill Tub after drinking alcohol or taking recreational drugs.
The use of alcohol or drugs can greatly increase the risk of fatal hypothermia when using the Chill Tub.
Do not use your Chill Tub during extreme weather conditions (during storms or floods etc). It is also recommended to place the Chill Tub in an area that will not attract standing water. Good drainage is essential so that the services compartment does not become submerged with water. If it does, switch the unit off and let everything dry out.
Do not store explosive substances such as aerosol cans with a flammable propellant in the Chill Tub’s service compartment.
Be very careful when getting in and out of the Chill Tub. Surfaces may be slippery when wet.
In order to protect the pump from large pieces of debris - always do your best to keep the inlet (inside and right at the bottom of the unit) clean and clear.
DO NOT use other electrical appliances such as radios, hairdryers etc near the Chill Tub. It is important to maintain water cleanliness in accordance with Chill Tub’s instructions by following the correct cleaning procedure, see section 8.
The Chill Tub has an automated cleaning cycle which runs constantly. During this time the pump, filter and UV cleaner run simultaneously.DO NOT use any unapproved chemicals or detergents unless you plan to rinse the Chill Tub thoroughly to remove any remnants of cleaning products before refilling with the water you will bathe in. Chemicals such as ammonia, combustible substances, bromine, fluorine are not advised on the Chill Tub as they may risk passing on to users.
DO not use a pressure washer to clean the Chill Tub as this may result in damage to the electrics and services compartment unit.
It is very important to keep the cover secured and on the chill tub when the Chill Tub is not in use - this is to prevent injury to children or animals and to also prevent water ingress to the services compartment when raining, if the user is placed outside.
Any repairs required must be made by a Chill Tubs approved engineer. Chill Tubs cannot accept liability for any damage arising from alterations or repair made by non-approved engineers.
The appliance must be supplied through a residual current device (RCD) having a rated residual operating current not exceeding 30 mA.
It is the end user’s responsibility to ensure the power supply used is on an RCD protected circuit.
WARNING - This appliance contains a UV emitter. Do not stare at the light source.
Read the maintenance instruction before accessing the service compartment.
WARNING: Do not operate the UV-C emitter when it is removed from the appliance enclosure.

Unintended use of the appliance or damage to the housing may result in the escape of dangerous UV-C radiation. UV-C radiation may, even in little doses, cause harm to the eyes and skin.
Appliances that are obviously damaged must not be operated.
For all operations and maintenance of the Chill Tub please refer to this manual and if in doubt please contact Chill Tubs directly via email first – sales@chilltubs.com.au


Antifreeze Function
Prevents the formation of ice or frost
Insulated for reduced running costs Temperature Settings as low as 3° degrees or as high as 40° degrees


POSITION & OPERATION
Before installing the Chill Tub, please ensure that there are no obstacles on the outside of the vents on the side of the chiller/ fan. We recommend a 500mm space around the chiller for the best ventilation.
The chill tub needs to be on a level surface, capable of supporting a 750-800kg load. Location needs to be able to accommodate normal operational water spillage from entering and leaving the chill tub. Needs to have access to drain or drainage area to allow the disposal of water. Please ensure any socket outlets used for the power supply are installed in accordance with AS/ NZS 3000 the wiring rules and are RCD protected sockets.
If there are obstacles blocking the vents, it will cause the compressor to self-protect and the Chill Tub water temperature cannot drop. Once your Chill Tub is in a position you are happy with please leave it laid flat for 24 hours for the refrigerant to settle in the compressor (Chill Tubs are the same as a fridge or freezers and the gas needs to settle before use).
The Chill Tub can then be filled with water but it should not be turned on for 24 hours. We do recommend that you read the full manual though in particular the safety information before you use.
Clearance and Circulation:
Clearance:
Maintain a 500mm (50cm) clearance around the Chill Tub for optimal air circulation. Avoid placing the unit in enclosed spaces to ensure efficient heat dissipation this will also help prevent condensation.
Circulation and Fan Operation:
Ensure the unit is in a well-ventilated area.
Power connection
1. The Chill Tub must be plugged directly into an RCD protected circuit on a 10amp socket or box.
2. Do not use an extension cable to run the Chill Tub, this can be a fire hazard.
To fill the Chill Tub for the first time
1. Turn off the power to the Chill Tub before filling/draining and do not turn the power back on until the Chill Tub has been refilled.
2. Fill the Chill Tub to the desired level. It will take approximately 15-30 minutes to fill, Depending on water pressure
3. Open the air bleed screw to exhaust air from the filter and pump housing. See page 33 for more information
4. Switch the power on only when it has been filled. The monitor will flash green, wait for 3-5 minutes and it will enter the running state. The default temperature is 3°C degrees.
5. Allow the Chill Tub to get down to the temperature as set on your controller. As the Chill Tub is affected by the environment please turn the machine on 6-12 hours in advance.
If the chill tub is set to 3°C degrees, it will run the chiller until it reaches this temperature. Once the temperature then rises 4°C degrees, the compressor will reactivate bringing the temperature back down to 3°C degrees.
Where multiple users are using the Chill Tub frequently we recommend adding a Chill tabs. This is what we recommend as a proven, safe and powerful residual disinfection for Chill Tubs. We do not recommend chlorine products or other salts.
To drain and refill the Chill Tub:
1. Turn off the power to the Chill Tub.
2. Drain the water using the hose pipe attachment to connect a hose pipe and then open the ball valve to let the water out.
3. Wipe out the inside of the Chill Tub with a clean cloth to clean any residual dirt or grime. DO NOT use any chemicals such as bathroom cleaner or stainlesssteel cleaner - see section 8 for details.
4. When it is clean and rinsed, ensure the ball valve is closed. Re-fill using a hose pipe.
5. Switch the power back on to the Chill Tub and allow the water to get down to the temperature as set by on your controller.


IMPORTANT
We recommend that you replace the water in the Chill Tub every 8-12 weeks depending on user levels and visible water quality. Frequency of water replacement depends on frequency of usage and care taken in maintaining water quality. It will become evident that the water needs changing when the water doesn’t look clear. Drain and re-fill.
THE ORIGINAL CONTROL PANEL & SETTINGS
Chill Tub Original

Function Timer Up/Down On/Off
Components

Tub Outlet Ball Valve
Circulation Filter Pump
Chiller UV Switch Drain Ball Valve Control Panel
Tub Inlet Ball Valve
Chiller
Key Definition and Operation

On/Off Key
0 On the main interface, press this button to turn the Chill Tub on or off
0 In the parameter interface and parameter setting interface, press this key to return to the main interface
0 On the main interface, press and hold this button for 3 seconds to unlock or lock the screen.

Function Key
0 On the main interface of the power on, press the Function button to switch between working modes.


Up and Down Key
0 On the main interface, the two keys can be used to adjust the current set temperature.

Timer Key
0 Press and hold the timer button for 3 seconds to enter the real-time clock setting interface
0 When entering the real-time clock setting interface, the hour and minute positions will flash together
0 Press the timer button again, the hour position will flash and the minute position will remain on
0 Move the up and down keys to adjust the hour position
0 After adjusting the hour position, press the timer button again, the hour position will remain on and the minute position will flash. Move the up and down keys to adjust the minute position
0 After adjusting the minute position, press the timer button again to confirm and return to the main interface
0 Press the timer button to enter the timing setting interface. At this time, the timing group 1 flashes (you can select the timing group through the up and down keys)
0 When the current timing group is selected, the timing group flashes. At this time, press the timer button to enter the current timing group setting
0 Use the timer button to alter either the minute or the hour time. The order is as follows - the hour number for timing on, the minute number for timing on, the hour number for timing off, and the minute number for timing off.
0 After adjusting the time with the up and down keys, press the timer key again to return to the timer group 2 interface.
0 After repeating the above operation, return to the main interface. The current timer group flashes. At this time, press the timer key for a few seconds, and the ON/OFF button will light up, indicating that the current timer group is valid.
Reset
0 Pressing and holding the key and key together for 10 seconds can restore the default values of the parameters
Forced Defrosting
0 Press and hold + for 10 seconds to enter forced defrosting Status Query
0 Press and hold + for 5 seconds, collaborate with up and down keys to query running parameters.
Parameter Settings
0 In the shutdown state, press and hold the + for 10 seconds, combined with the up and down keys, to set various parameters.
Conversion between Celsius and Fahrenheit
0 Press and hold + together for 3 seconds to allow for the conversion between Fahrenheit and Celsius degrees, with Celsius degrees displayed by default.
System Protection
Water Flow Monitoring and Recovery System
0 Upon initiating the water pump for a duration of 10 seconds, the detection of a disconnected water flow switch for 2 consecutive seconds results in the identification of a water flow fault, prompting an immediate shutdown of the entire machine as a safety measure
0 In the event of a water flow fault, the system is designed for automatic recovery. Notably, this fault is not suppressed during defrosting periods. The recovery process involves the automatic cycling and activation of the water pump, continuously monitoring and awaiting closure of the water flow switch. This cycle repeats every 2 minutes and 30 seconds until the switch is successfully closed.
0 To indicate the occurrence of this fault, the remote control interface will display the code FFF, notifying users of the issue.
Water Flow Fault
0 After running the water pump for 10 seconds, if the water flow switch is detected to be disconnected for 2 consecutive seconds, it will be a water flow fault and the entire machine is shut down
0 After a water flow fault occurs, it can automatically recover. Please do not shield this fault during defrosting. After a water flow fault occurs, the water pump automatically cycles and starts, detecting the water flow switch until it is closed. Cycle every 2 minutes and 30 seconds
0 The remote control will display FFF
0 Winter Antifreeze Protection
0 Detect the inlet temperature TIN and ambient temperature TW in standby mode
0 When TIN < 15℃ and TW ≤ 0℃,enter the first level antifreeze state, and the unit will automatically start and operate the water pump mode; when TIN > 15℃ or TW ≥ 2℃, exit the antifreeze process
0 If TIN ≤ 2℃ and TW ≤ 0℃, enter the second level antifreeze state, and the unit will automatically start and operate in heating mode; until TIN > 15℃ or TW ≥ 2℃ exit the antifreeze process
0 If TW malfunctions, it is up to TIN to decide whether to prevent freezing. If TIN malfunctions, TW decides whether to prevent freezing (TIN malfunctions can only enter first level antifreeze). If both TIN and TW malfunctions, the antifreeze function will not be processed
0 The remote control will display AFP.
Water Inlet Temperature Sensor
Fault Detection
0 The detection of a short circuit or open circuit in the water inlet temperature sensor is identified as a fault in the sensor itself, specifically labeled as a water inlet temperature sensor fault. This triggers an automatic shutdown of the system as a protective measure
0 The remote control will promptly indicate this issue with the identifier PP 1.
Discharge Temperature Sensor
Fault Detection
0 Detection of a short circuit or open circuit in the discharge temperature sensor is recognised as a fault in the sensor, termed as a discharge temperature sensor fault. This initiates an immediate system shutdown as a safety precaution
0 The remote control will display the specific fault using the code PP 2 to notify users of this issue.
Coil Temperature Sensor Fault
0 Detection of a short circuit or open circuit in the coil temperature sensor is recognised as a fault in the sensor itself, referred to as a coil temperature sensor fault
0 In the event of this fault, the remote control will display the identifier PP 3 to indicate the specific issue.
Fault Detection:
Ambient Temperature Sensor
0 Detection of a short circuit or open circuit in the ambient temperature sensor is identified as a fault in the sensor itself. Consequently, the antifreeze conditions associated with it are canceled, allowing the system to resume normal operation
0 When this fault is detected, the remote control will indicate the issue with the code PP 5.
Low Pressure Protection
0 Following the system compressor’s initial five minutes of operation, if the system’s low-pressure switch is identified as disconnected for 10 consecutive seconds, it triggers the activation of low-pressure protection
0 Exiting the low-pressure protection mode occurs upon detecting the closure of the low-pressure switch. However, if this fault recurs three times within 30 minutes, restoration becomes contingent on a power-off reset
0 Notably, this fault is exempted during defrosting periods
0 The remote control interface will indicate the occurrence of this issue with the code EE 2.
High Discharge Temperature Protection
0 Once the compressor has been running for one minute, if the discharge temperature exceeds or equals 95°C (adjustable parameter P09), it signifies an overheating issue
0 As a safety measure, the machine will halt, indicating an EE5 error on display. If the discharge temperature drops to 80°C or 15°C degrees less than the peak, normal display resumes, and the high discharge temperature protection deactivates
0 The compressor includes a 3-minute shutdown safeguard
0 If this issue occurs three times within a span of 30 minutes, a power-off reset becomes necessary for restoration
0 The remote control will also display EE5 when this protection mechanism triggers.
Communication Failure
0 In the event that the motherboard fails to receive any communication signal from the remote controller within the first 20 seconds after initial power-up, it is regarded as disconnected from the remote controller. During this period, the system operates solely based on the mode switch signal without displaying any indication of disconnection
0 Alternatively, if the motherboard remains connected to a remote controller but fails to transmit its status signal for 10 consecutive seconds, it is identified as a communication fault
0 The occurrence of this communication fault is signaled by the remote control displaying EE 6.

MAINTENANCE & CLEANING
Maintaining your Chill Tub keeps it clean and hygienic, while also protecting it from damage.
If you want to keep it clean, you should combine both prevention and treatment to protect it. It has a built in UV and filter system for clear water.
How to change the filter


Filter clean and change
The filter should be replaced every three months. We recommend that you clean the filter every 1-2 weeks depending on usage. We recommend the Chill Tub filter.
Turn off the Chill Tub before cleaning or changing the filter.
Open the hatch on the top and you can change the filter and open/ close ball valves inside.
Outlet Valve
Inlet Valve
When replacing the filter element, please close the water inlet and outlet valves of the tub, loosen the filter exhaust valve by counter clockwise, then unscrew the filter cover, remove the filter element, and replace the filter element.
After replacing the filter element. Screw on the filter cover, open the ball valves. Then open the exhaust valve slightly to ensure there are no air locks. After this you can turn the Ice bath back on
Stainless Steel Maintenance
Cleaning Methods
If regular routines are adopted, the cleaning of stainless steel is relatively easy. Where however, the steel shows severe signs of surface discolouration (perhaps following periods of neglect, or misuse), the following cleaning methods should be applied.
Always attempt the mildest cleaning method first. Be patient and repeat it a fair number of times before resorting to more severe cleaning techniques.
Light Stains:
Light, superficial brown staining can be removed by routine cleaning as above, repeated as necessary.
Moderate Stains:
In case of moderate soiling, repeat the routine cleaning above or use a mild (nonscratch) household caustic cream-cleaner with a fine nylon scouring page.
Rub the surface as softly as possible using long even strokes in the direction of the polish lines. Avoid using a circular rubbing action. Rinse and follow by routine cleaning as above.
If this does not suffice, final resort may have to be made to the use of a coarser nylon scouring pad, but with the risk that the surface may become slightly affected.
Test for effect on a small area before proceeding with other areas.
Persistent Stains:
Persistent stains indicate an inherent or recurring problem, which if not addressed on a timely basis, could become progressively troublesome.
For example, a small rust spot with a halo around it indicates a fragment of carbon steel has been inadvertently embedded in the surface of the stainless steel.
Dab the spot with a cotton bud soaked in a 10% solution of nitric acid, keeping it moist for 20-30 minutes.
Repeat this treatment until the spot does not recur.
Severe rust stains may be removed by swabbing with a 10% solution of nitric acid for 15-20 minutes, repeating as necessary.
Very severe stains may require hard rubbing with a paste of fine household abrasive and 10% nitric acid, using a coarse nylon scouring pad.
All acid treatments however must be followed by a neutralising rinse with calcium bicarbonate solution.
Note: Nitric acid (HNO3) is friendly towards stainless steel and a 10% solution (1-part nitric acid added to 9 parts water) is usually used.
Caution: Concentrated nitric acid must be handled with care, 10% solutions are less hazardous nevertheless, it is advisable to wear rubber gloves and eye protection. If accidental skin contact occurs, wash well with lots of water. Keep it out of reach of children, etc.
Consult the Material Safety Data Sheet for details.
Scouring Pads
3M manufacture a range of nylon nonwoven, fine, multi-purpose and heavyduty scouring pads under the trade name Scotch-Brite.
Check product suitability for its intended use with your retailer.
Soft nylon scouring pads should be adequate for dealing with most deposits.
Cleaning Schedules
If care is taken during installation, cleaning before ‘hand-over’ should not present any problems.
More attention however may be required if the installation period has been prolonged or hand-over delayed.
Following hand-over, the frequency of cleaning is dependent on the applicationa simple rule is:
Clean the metal when it shows signs of staining to restore its original appearance.
KEEPING THE WATER CLEAN
Changing the water
We recommend that you replace the water in the Chill Tub every 8-12 weeks depending on user levels and visible water quality. Frequency of water replacement depends on frequency of usage and care taken in maintaining water quality. It will become evident that the water needs changing when the water doesn’t look clear. Drain and re-fill.
Cleaning the Chill Tub
It is important that you use the new Chill Tabs Sanitiser to chemically treat the water to ensure that it is safe to bathe in. Although the water is cold, bacteria can still be present. Cold temperatures cannot kill germs, but only slow down their growth. You should still chemically treat the water to ensure that it is safe to bathe in.
Recommended treatment:
0 We recommend dissolving the Chill Tabs sanitiser tablet in a jug of water before adding to the Chill Tub
0 Use 1 x Chill Tabs Sanitiser Tablet twice per week
0 This may need to be more frequent for heavily used Chill Tubs
0 Ensure you test the water regularly, including before use. Use quality test strips such as AquaSPArkle 4-way
The Chill Tabs sanitiser has been specifically formulated for cold water therapy as they have a fast rate of release with a low percentage of sanitiser.

IMPORTANT
The use of any hot tub/multi-functional tablets is prohibited and will invalidate your warranty, as this may cause problems with the stainless steel structure. We recommend you only use the Chill Tabs Sanitiser tablets.
SANITISER TABLETS COMPARISON
Suitable for Chill Tubs
Filter cleaning:
Check with manufacturer Check with manufacturer Check with manufacturer
The filter should be replaced every three months and cleaned every 1-2 weeks depending on usage. We recommend using a cartridge filter cleaner such as InSpire Cartridge Cleaner, following the product instructions for use.
NOTES

The water should be replaced every 8-12 weeks depending on use.
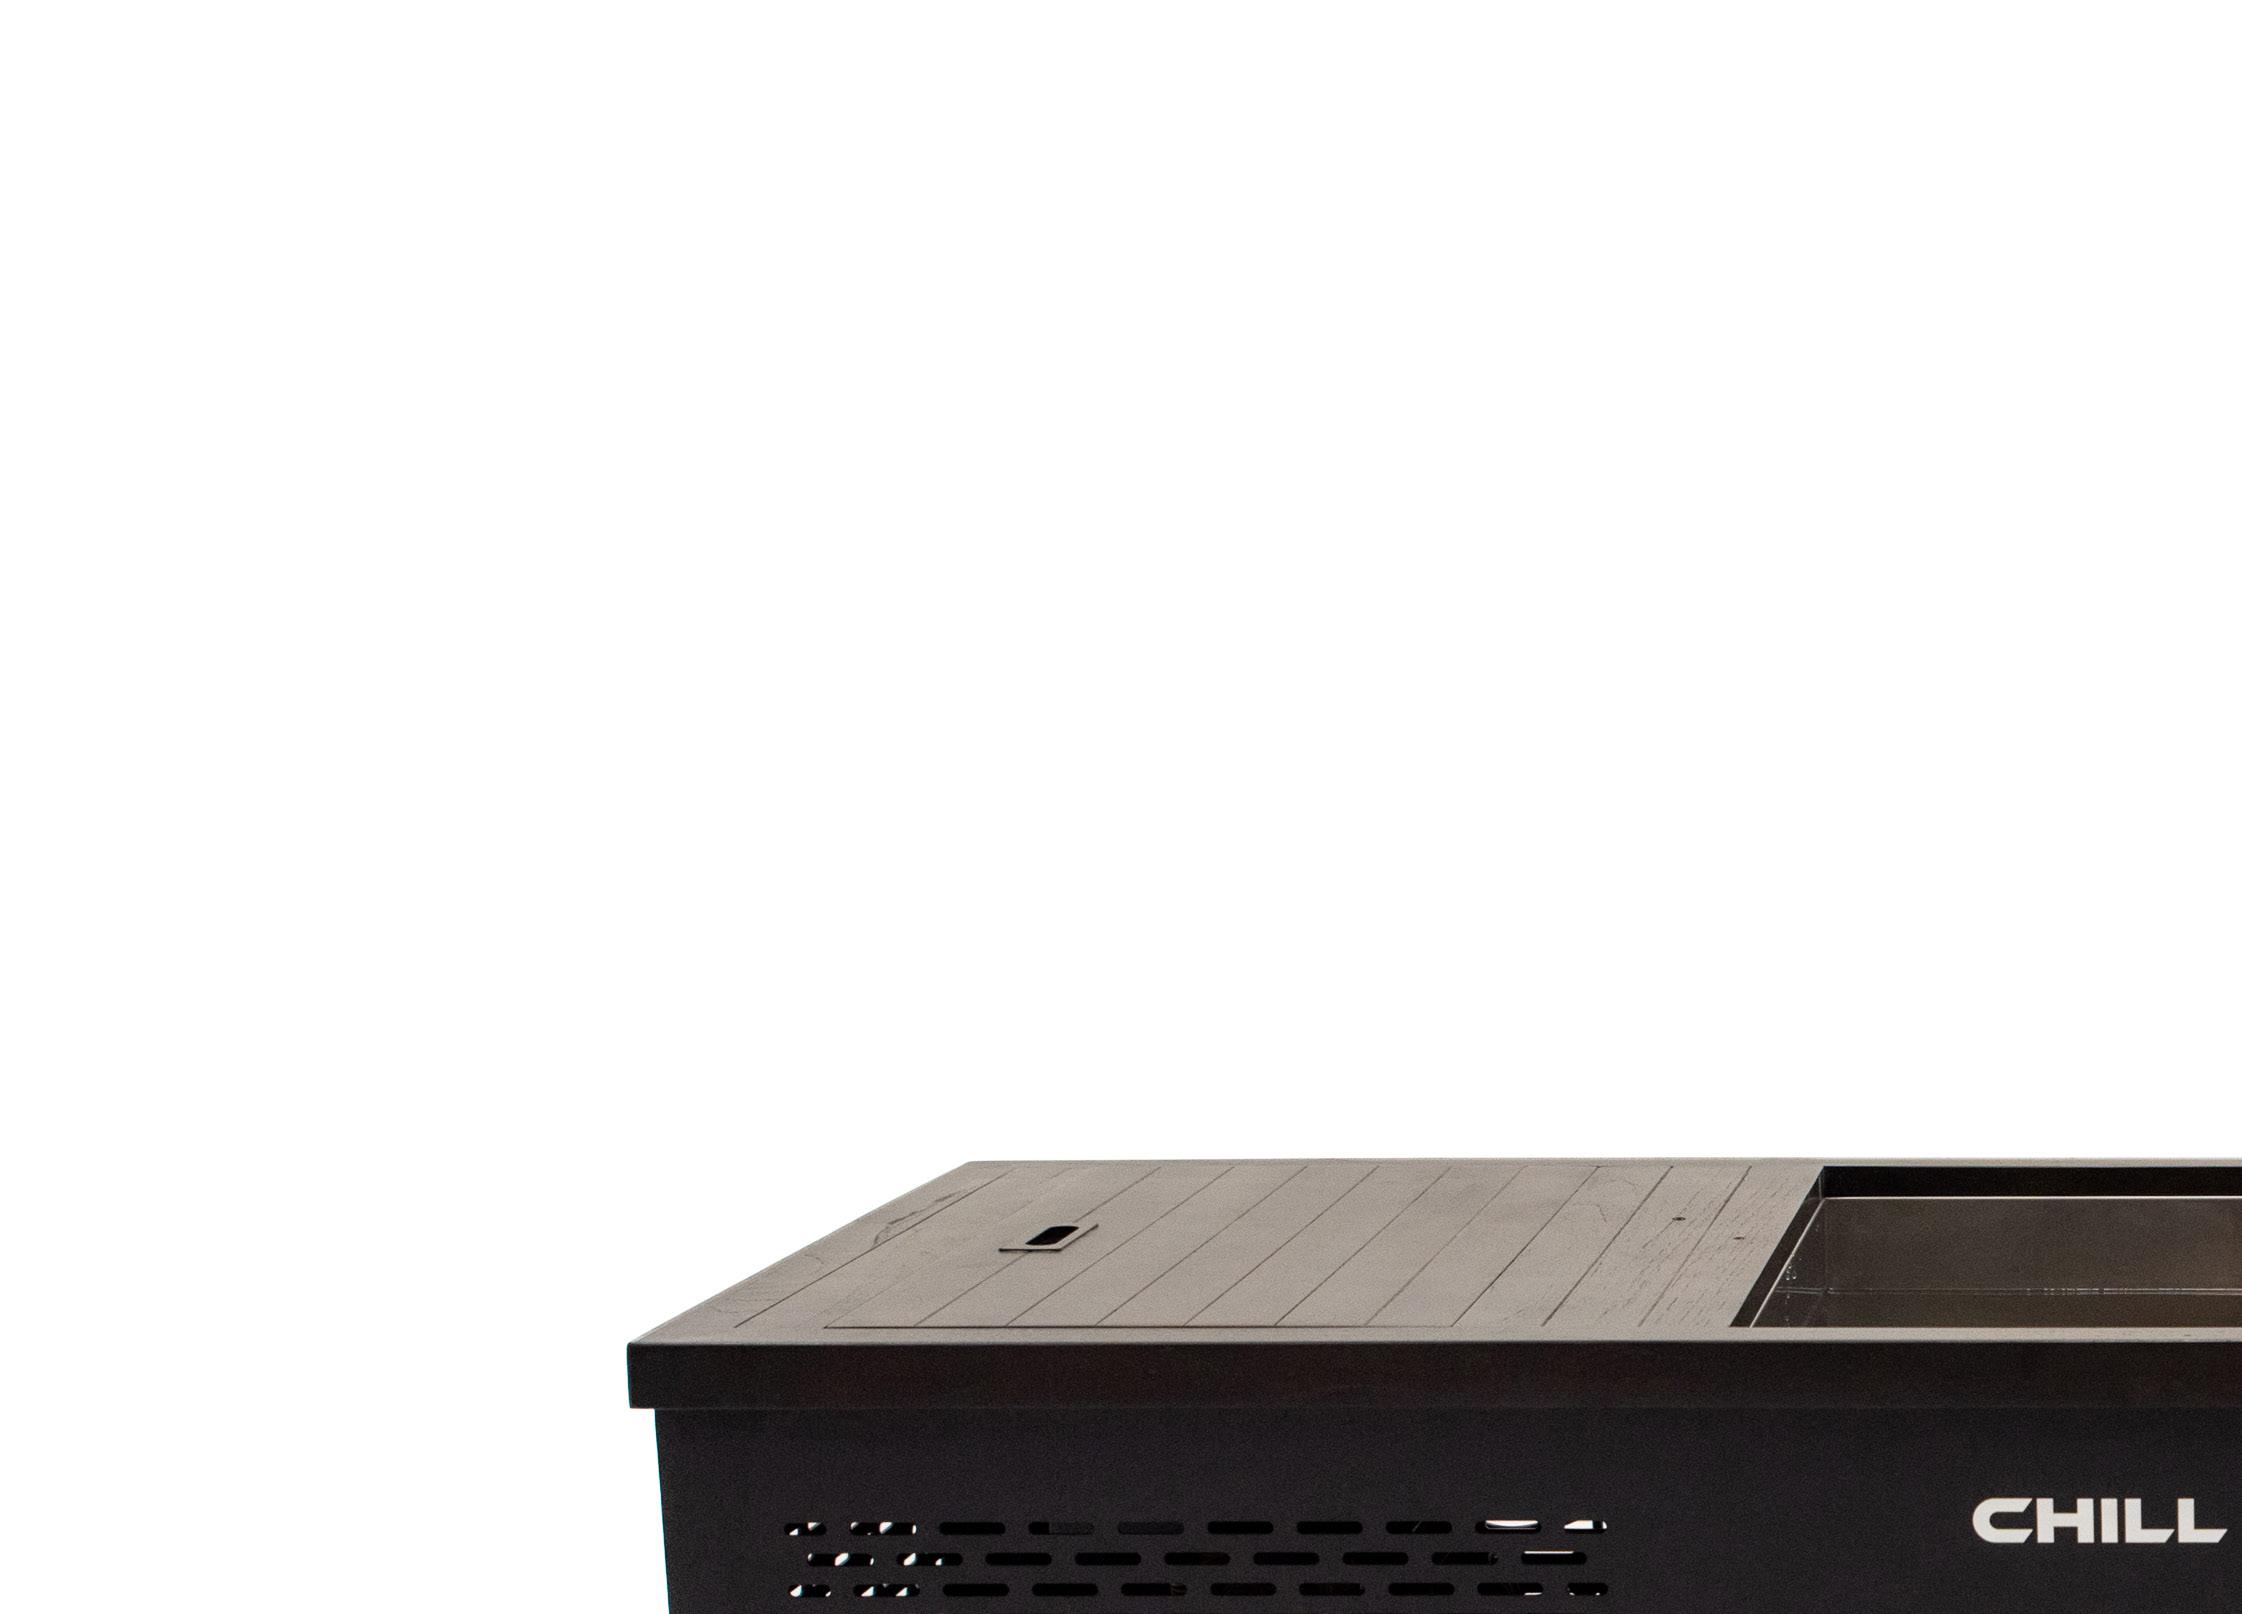
THE INSULATED COVER
The cover to your Chill Tub that has been supplied as an upholstered item and needs handling with care as it is easily damaged.
It comes with a 1 year warranty. Our covers, and any future replacements, can be ordered directly via Superior Wellness.
When not in use, the cover must be securely in place in accordance with local legislation.
The insulated cover is designed for three prime purposes:
0 To insulate the water from warmer air temperatures, especially warm sunshine
0 To stop debris from entering the water or the adjacent services area
0 A physical deterrent for small children and animals endangering themselves by entering the cold water

It will benefit from a hose down every month, including the underside.
If there is a problem considered to be a manufacturing defect, this will be covered by the warranty, please contact us as needed. If the problem is due to bad handling or mis-operation unfortunately this will not be considered as a warranty repair.
Chill Tub covers are not designed to be stood upon, crawled across, used as places to stand on to change exterior light bulbs etc.
TROUBLESHOOTING & ERROR MESSAGES
Problem Solution
The water is murky Ensure the filter is clean. The filter should be cleaned every 1-2 weeks depending on usage and the filter changed every 3 months. Change the water if it has become too dirty.
My Tub won’t get to temperature set
There is a bad smell coming from the Tub
The temperature is different to what my thermometer is showing
How do I drain my Tub?
Turn the appliance off for 2 minutes and turn back on, it will reset to 3°C degrees. Are both vents free of obstacles and walls, they require at least 500 mm (50cm) clearance around the Chill Tub for optimal air circulation. Avoid placing the unit in enclosed spaces to ensure efficient heat dissipation this will also help prevent condensation.
Check, is the compressor running, can you hear a fan, if not then please call us
If the water looks clean and clear there should be no adverse smells. Run a clean cycle several times. If the water looks murky, drain and change it.
The internal temperature probe is calibrated to within 0.3º +/-
There could be an issue with the temperature sensor or PCB board. Please contact Chill Tubs directly via email – sales@chilltubs.com.au
To drain your Chill Tub, please locate the rubber cap on the removable panel on the bottom right hand corner. Please remove the rubber cap and attach your hose pipe connection (you will receive this with your Chill Tub). When you remove the wooden hatch, you will see a small red valve at the bottom, turn 90°C degrees to open so the water may come out. Please remember to make sure your Chill Tub is turned off.
To fill, simply place your hose in the Chill Tub and leave until it has covered the vents. This time to fill will vary depending on your water pressure.
How do I remove the air locks?
I think the fuse may have tripped?
On top of your filter/pump you will have either a brass fitting or a grey hexagon shape cap. If you have a brass fitting with a small cap on, please unscrew the cap a little to release any air in the pump. If your Chill Tub has a grey hexagon shape cap, please loosen this a little to release the air until the water slowly comes out.
Please unplug your Chill Tub and check the fuse at the breaker box, if the problem persists get in touch with the supplier.
On the RCD box in the Chill Tub there are two plugs which are labelled pump and compressor. Please unplug the compressor by unscrewing it first, then unplug it and turn your Chill Tub on. If it stays on with just the pump running your compressor will need changing please call the After Sales team on 1300 887 236 and we will be happy to assist you.
FAULT CODE TABLE
System parameters
Parameter
P01
P03
P04
P12
P15 Steps of cooling electronic expansion valve under condition 0 (y0)
P16 Steps of cooling electronic expansion valve under condition 1 (y1)
P17 Steps of cooling electronic expansion valve under condition 2 (y2)
P18 Steps of cooling electronic expansion valve under condition 3 (y3)
P19
P20 Steps of cooling electronic expansion valve under condition 5 (y5)
P21 Steps of cooling electronic expansion valve under condition 6 (y6)
P22 Steps of cooling electronic expansion valve under condition 7 (y7)
P23 Steps of cooling electronic expansion valve under condition 8 (y8)
P24 Steps of electronic expansion valve when defrosting
System Status Query
A01 Inlet water temperature
A03 Coil temperature
A04 Ambient temperature
-
-
adjustable
adjustable
- 99℃ Measured value
- 99℃ Measured value
- 99℃ Measured value
- 99℃ Measured value
A05 Steps of electronic expansion valve 0 - 500 Measured value
System Malfunction
Protection/ Fault
Standby
temperature sensor fault
fault
3 Ambient temperature sensor fault
level antifreeze protection
second level antifreeze protection
WARRANTY AND REPAIRS
Our Chill Tubs warranty provides coverage for defects in workmanship and defects or malfunctions that arise during normal use conditions for a period of 2 years from the date of delivery.
This warranty applies to commercial and residential use of the Chill Tub and only to the original purchaser or original owner if the product was purchased as a gift. The use of any hot tub/multi-functional tablets is prohibited and will invalidate your warranty, as this may cause problems with the stainless steel structure. We recommend you only use the Chill Tabs Sanitiser tablets. The warranty does not cover damage resulting from the addition of chemicals to the water, (excluding our recommended Chill Tabs Sanitiser) neglected filter care and replacement, power outages, low water flow, restricted air flow, or any other form of neglect, misuse, or abuse. There may be other exclusions to this warranty, as described in the Limited Warranty. It is important to carefully read and understand the terms of the Limited Warranty in order to fully understand the coverage provided.
Warranty Limitations
0 The warranty period starts upon delivery of the Chill Tub

0 The warranty does not cover damage caused by misuse, lack of maintenance, or lime scale deposits. Chemical abuse or poor water chemistry. Chill Tubs Ltd reserves the right to replace the defective parts with factory or re-manufactured parts.
0 Chill Tubs Ltd is not responsible for any damage caused by alterations or modifications by the consumer.
0 The warranty of the Chill Tub does not cover defects, damage or failure caused by the common carrier, installer, user or other persons, pets or rodents, or resulting from, without limitation, any of the following: careless handling (lifting unit by plumbing, abrading finish, etc) including its own negligence; modification of any type for any reason) including modification to meet local codes); Improper installation (including installation not in accordance with instructions and specifications provided with the unit); connections supplied by the installer of the equipment; improper voltage supply or unauthorized electrical modification; misuse; incorrect operation, or lack of proper routine maintenance; operation of the unit without specified minimum amount of water or at inappropriate water temperature; use of abrasive or improper cleaners; or acts of God, such as lightening, floods, earthquakes etc.

0 In addition, Chill Tubs Ltd will not be responsible for incidental or consequential damages or losses arising from any cause (e.g. water damage to carpet, ceiling, tiles, marbles, loss of use etc.) including it’s own negligence; damages to, respecting or resulting from: chemicals/misuse are used in the unit or hard water conditions; optional equipment not manufactured by the company but supplied with the dealer, installer or Company; the units prior usage as an operational of display; or defects that should have been discovered before installation.
0 This warranty does not include labour, transportation, crane, or any other costs incurred in the removal and or re-installation of the original unit and/ or installation of a replacement unit; any costs relating to obtaining access for repair; or loss of use damage, including loss of sales, profit, or business under any circumstances. Chill Tub units are excluded of any warranty coverage if any addition, deletion, or modification of any kind whatsoever has been made to the unit (or to any component).
0 The warranty does not cover defects of damage due to normal wear and tear, improper installation, alterations without the manufacturer written consent, accident, misuse, abuse, commercial or industrial use, the use of an accessory not approved by the manufacturer, failure to follow the user manual, or repairs made or attempted by anyone other than an authorized representative of the manufacturer.
0 Chill Tubs Ltd will not provide compensation for delays in resolving warranty claims, or loss of use whilst the claim is in process.
Registering the product warranty
All products require registering using the product registration form within 7 days of installation. Failing to register may invalidate the warranty. Please fill in all information requested. To register your Chill Tub, please go to chilltubs.com/au/contact-us/
Extent of Warranty
This warranty extends only to the original consumer purchaser of the Chill Tub when invoiced and delivered. The warranty terminates upon any transfer of ownership prior to the expiration of the warranty period. Any modifications to the Chill Tub will void the warranty.
How to make a claim
If you are a Chill Tubs retailer making a claim on behalf of your customer, please log a claim using the warranty portal on the CRM.
If you are a Chill Tubs customer, please contact your Chill Tubs retailer who will make the claim on your behalf.

DISPOSING OF YOUR PRODUCT
Before disposing of your Chill Tub, please make sure it is switched off and safe.
Please note: the refrigeration system contains gases and refrigerants which require specialist waste disposal. The valuable materials contained in a refrigeration appliance can be recycled.
Contact your local waste disposal depot for proper disposal of your Chill Tub and contact your local authority, or you can speak to us directly if you have any questions.
FULL SET UP GUIDE
Please follow this step by step guide when setting up your Chill Tub by yourself.
1. Fill your Chill Tub to above the suction vents (this may take a while depending on your water pressure) or the advised water line.
2. Ensure the Chill Tub is plugged in and press the orange button to see the red light on the little trip switch.
3. You will see an orange light on the RCD box in the Chill Tub this will turn green after a few seconds.
4. Once it changes to a green light your Chill Tub is getting ready to work, you will notice a green flashing light on the control panel.
5. After a few minutes you’ll notice the fan kick in, a minute after the flashing light will stop flashing which means the compressor is on.

6. Your Chill Tub is now cooling to your desired temperature.
7. Once it has reached your set temperature it will shut off the compressor and the fan.
8. After the water temperature has risen a few degrees, the fan and compressor will turn on again to cool back down to temperature.
