Subscriptions and Distribution: Fatima Dramat fatimad@picasso.co.za
Online Editor: Stacey Visser
Printing: CTP Printers, Cape Town
MANAGEMENT
Management Accountant: Deidre Musha
Business Manager: Lodewyk van der Walt General Manager, Magazines: Jocelyne Bayer
REFRESH, RENEW AND REIMAGINE YOUR SPACE
There’s something about summer that inspires a fresh start – whether it’s reviving tired outdoor furniture, repainting your kitchen cabinets or giving your garden a planet-friendly glow-up. This issue of EasyDIY is all about helping you reimagine your home and embrace projects that add joy, colour and personality to every corner. From upcycled furniture ideas that turn old into art to designing for wellbeing, we’ve gathered simple, satisfying ways to transform your space without breaking the bank. And, with our festive gift edit for every kind of DIYer, there’s no better time to share the tools of creativity.
As we close the year, here’s to homes that tell stories, projects that make us proud and spaces that reflect who we truly are.
RainaJulies
Copyright: Picasso Headline. No part of this publication may be reproduced in any form without written permission from the publisher. The publisher is not responsible for unsolicited material. EasyDIY is published by Picasso Headline. The opinions expressed are not necessarily those of Picasso Headline. All advertisements/advertorials and promotions have been paid for and therefore do not carry any endorsement by the publisher.
BITS ‘N’ BOBS
3 FESTIVE FINDS
From first-time fixers to seasoned creators, our DIY gift guide has something for everyone. Make this December a hands-on celebration!
MAINTENANCE
7 OUTDOOR AND NEW, AGAIN
Your outdoor furniture is an extension of your home and deserves the same care as your interiors. With smart prep and the right paint system, you can weatherproof pieces, refresh their look and dramatically extend their life.
EXPERT ADVICE
8 DESIGNING FOR WELLBEING
For the longest time, interior design has mostly been about surface aesthetics. We designed mostly for the look. Not the feel. However, there’s a fantastic journey from look to feel happening within the design space.
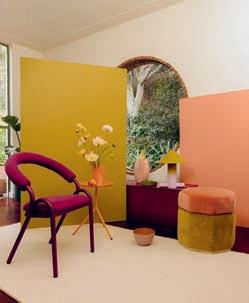
13 2026 IN COLOUR
Plascon’s 2026 colour forecast celebrates the human touch, offering handcrafted palettes that blend natural tones, bold accents and timeless style.
14 SIX EASY WAYS TO MAKE YOUR GARDEN A PLANET HERO
Transform your garden into a conservation hotspot with indigenous plants, water-wise tips, pollinator-friendly flowers and composting for a greener backyard.
16 HOW TO KEEP YOUR HOME WEATHERPROOFED
Severe weather can strike at any time, and the right preparation can protect both your home and your belongings.
DIY 101
18 REVAMP KITCHEN CABINETS ON A BUDGET
With fresh paint, new handles and a stylish backsplash, your kitchen can feel like new without a major renovation. Plus, these updates are easy to customise, so your space will reflect your style.
20 UPCYCLED FURNITURE MAKEOVER
A little sanding, paint and imagination and your old furniture can become charming, personalised pieces that bring joy – and style – to any room.
Festive FINDS
Gifts for the makers, the fi xers and the dreamers
rom rst time ers to seaso e creators, our i t ui e as somet i or e eryo e a e t is ecem er a a s o cele ratio
Ryobi Cordless Impact
Drill Kit 18V Li-ion
Best for: everyday home projects and small renovations.
Why it’s great: this cordless impact drill delivers impressive power and portability at an affordable price. It handles drilling into wood, metal and light masonry with ease. The battery life is reliable, and the ergonomics make it comfortable for longer use – a great entry point for first-time drill buyers.
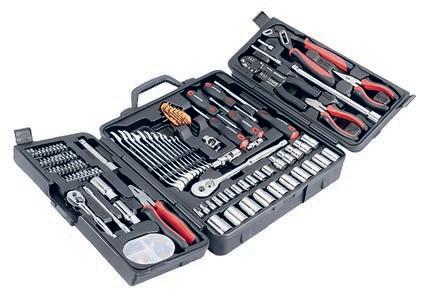
Mastercraft 147-piece Metric Tool Set
Best for: building your first complete toolkit.
Why it’s great: this set has everything – spanners, sockets, pliers, screwdrivers and more – all neatly organised in a sturdy case. It’s the ideal starter kit for tackling household fixes, assembling furniture or light mechanical work. The quality of the steel and the completeness of the kit make it a long-term investment.
Stanley Tylon Tape Measure
Best for: everyday measurements around the home.
Why it’s great: Stanley remains the gold standard in measuring tools. The Tylon tape’s smooth retracting mechanism and tough coating ensure long-lasting use. Clear markings make precision work simple –whether you’re hanging frames, cutting wood or marking floor plans.
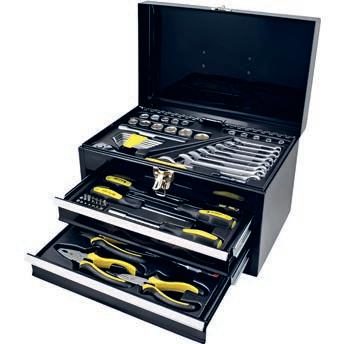
Workshop 67-piece Tool Kit in 2-drawer Chest
Best for: expanding your home workshop.
Why it’s great: this kit combines function and presentation – a neat two-drawer chest loaded with the most commonly used tools. Perfect for DIYers who enjoy the feeling of a “mini workshop”. The organisation system saves time and boosts efficiency during projects.
YOUR KITCHEN NEEDS THIS NOW!
Say goodbye to dull, inefficient refrigeration – the Miele K7000 Refresh range is here to transform your kitchen instantly. Advanced freshness technology keeps fruit and vegetables crisp up to five times longer with PerfectFresh Active, while DynaCool circulation delivers even temperatures on every shelf. Sleek stainless steel finishes and ambient LED lighting turn your fridge into a statement piece, and adjustable shelving makes organisation effortless. Stay in control from anywhere with Wi-Fi connectivity to adjust temperatures, activate special cooling modes or get alerts straight to your phone. Built to last for 20 years, energy-efficient and undeniably stylish, the K7000 Refresh range isn’t just a fridge – it’s a kitchen upgrade you’ll enjoy every single day.
Black & Decker 18V Hammer Drill
Best for: drilling into brick, concrete and tough materials. Why it’s great: this cordless hammer drill is powerful enough for masonry jobs yet versatile enough for lighter tasks. The hammer action adds extra impact force for drilling into hard surfaces, while the ergonomic grip ensures comfort during extended use. A strong step-up for those tackling structural or outdoor projects.
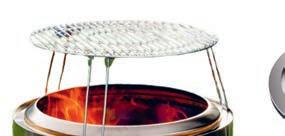
THE SEASON’S ULTIMATE GIFT
Looking for a gift that brings warmth, style and outdoor fun? The Helios Smokeless Fire Pit Kits are exactly what your backyard, patio or garden needs now. Designed for connection, comfort and cooking, these fire pits deliver the perfect campfire experience without smoke or lingering smells.
Best for: workshop precision
Expertly engineered for efficient airflow, Helios fire pits burn cleaner and hotter, creating a cosy glow, and are ideal for family braais, evenings under the stars or intimate garden gatherings. Crafted from durable stainless steel, they’re a striking centrepiece wherever they go.
Which kit is right for you?
• All-in kit: everything you need for full outdoor cooking and entertaining, ideal for braais and open-flame meals without the smoke.
• Deluxe kit: a balanced option with key features for effortless entertaining and cosy fires.
• Essential kit: sleek, portable and practical, perfect for smaller gatherings, picnics or weekends away.
• Cast iron kit: for serious outdoor cooks, featuring versatile cookware to take open-flame meals to the next level.
• Basic kit: entry-level favourite, offering Helios performance at great value, compact and portable for patios, balconies or camping.
Why it’s a great gift
Helios combines innovation, craftsmanship and practicality to create a sustainable, elegant and long-lasting fire experience. Perfect for cooking, gathering or relaxing, these kits bring people together all year round.
Availability: the full Helios Smokeless Fire Pit Kit range, including Silver and Black collections, is available online at www.heliosfire.com
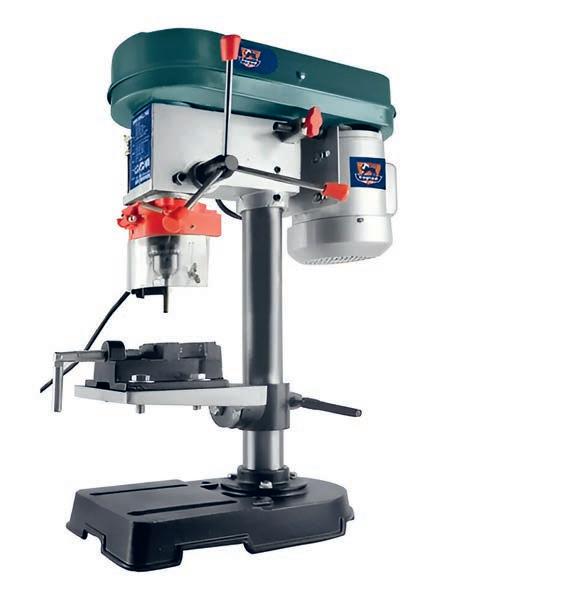
Fragram 350W Bench Drill Press
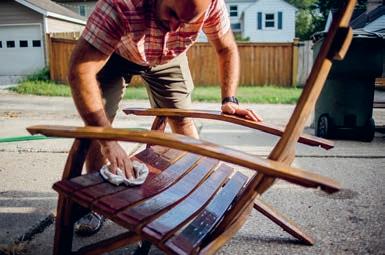
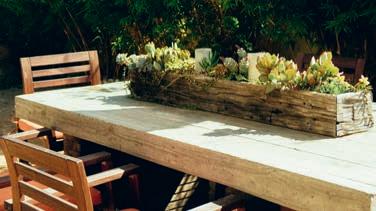
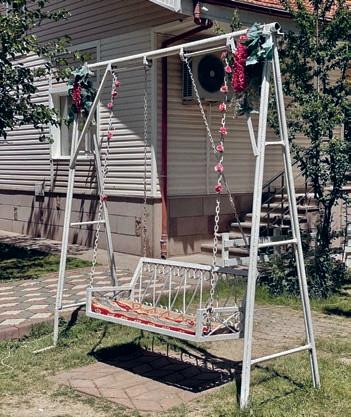
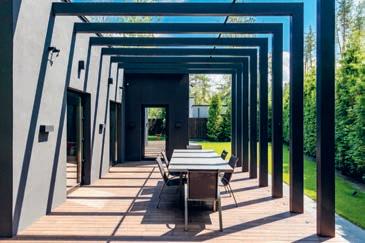
Outdoor AND NEW, AGAIN
Your outdoor furniture is an extension of your home, and it deserves the same care as your interiors. With smart prep and the right paint system, you can weatherproof pieces, refresh their look and dramatically extend their life
Here’s how, with a touch of the right paint and a few material-specific tips, you can preserve and elevate your outdoor furniture for years to come.
CLEAN AND PREP SURFACES
Before you begin painting, wash away dirt and dust. Wipe down all surfaces with a damp cloth and a mild detergent, paying special attention to crevices and hard-to-reach areas where grime often collects. Smooth rough areas by sanding; remove all dust before coating. A clean, dry, smooth surface helps paint and varnish adhere and last.
HOW TO PREPARE, PRIME AND PROTECT: WOOD AND METAL
If you’re working with wood, use a knotting agent to seal any knots and spot-prime nail heads with Dulux Rustshield or Dulux Steel Primer. Don’t skip the end grain - add a second coat after 10–20 minutes to keep moisture out. Prime with Dulux Wood Primer (two coats for absorbent wood) or use Dulux Supergrip, then follow with Dulux Universal Undercoat and your topcoat. For new wood, sand with 100–150 grit paper and wipe clean. Surfaces should be thoroughly dry with no more than 12% moisture content. If it’s been oiled or waxed, strip back to
bare wood. Clean with a lint-free cloth dampened with mineral turpentine. Multiple wipes may be required to remove surface oils and waxy residue. If varnished, clean with mineral turpentine before lightly sanding and finish with Dulux Woodgard Timbavarnish.
STYLE AND SIMPLE UPKEEP
Mix and match shades to create a co-ordinated look that seamlessly blends your furniture with your exterior walls and surroundings. Whether you prefer subtle neutrals, bold statement colours or warm grey shades that are thoughtfully designed to complement a variety of existing palettes, you have endless choices.
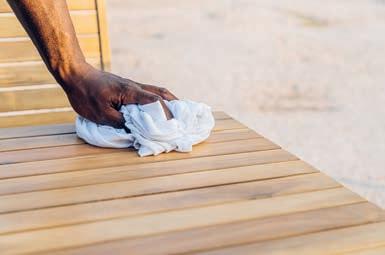
MAINTAIN YOUR OUTDOOR FURNITURE
Wipe down and clean outdoor furniture regularly to remove moisture and debris that can compromise appearance and durability. Inspect surfaces frequently and address chips or scratches immediately to reseal the coating and prevent moisture ingress. This simple routine prevents minor defects from escalating and extends service life, keeping pieces looking fresh year after year.
“Start with proper prep – clean thoroughly, prime correctly and finish with the right coating – and your outdoor furniture will reward you with lasting colour and reliable protection. Regular wipe-downs seal out moisture and stop small chips from becoming bigger problems, keeping wood and metal pieces looking fresh for years,” says Palesa Ramaisa, Dulux colour expert.
Start by cleaning metal surfaces with Dulux Galvanised Iron Cleaner until water runs off smoothly. If you spot any rust, treat it before applying your primer, undercoat and topcoat – remember to let each layer dry properly before moving on to the next.
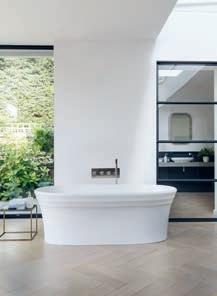
DESIGNING FOR wellbeing
For the longest time, interior design has mostly been about surface aesthetics. We designed mostly for the look. Not the feel. However, Nicole Russell, marketing manager at Italtile, says there’s a fantastic journey from look to feel happening within the design space
Today, the answers to “what do you want this room to be like?” include words like safe, peaceful, comforting, welcoming, warm ... not just descriptors like pretty, grand, impressive, opulent. Thanks to the greatest social disruptor of our time, interior design has moved from pure looks to embrace the feels. We have entered the healing era of the Emotional Care Movement.
Did you know that higher ceilings can help you breathe easier and feel more relaxed? Were you aware that light exposure affects our circadian rhythms? That sharp angles activate the amygdala (the part of the brain that lights up in the presence of threats), while soft curves are processed as safe and familiar? That overcluttering leads to overwhelm, while an aggressively sparse aesthetic can create feelings of isolation. Design for emotional care pays attention to all these factors.
Let’s take a look at the major elements of emotional care in design.
ENGAGING THE SENSES
Touch. Sight. Scent. Taste. Hearing. And, now, some say there is a further set of senses: proprioception (sense of body perception – knowing where our limbs are in space without having to look for them), interoception (sense of internal bodily state – hunger, thirst, pain) and vestibular sense (balance and spatial orientation, related to the sense of movement and balance). A mindful, layered environment that engages sight, sound, touch, smell and even taste, is what you’re going for here –sensory design.
SIGHT
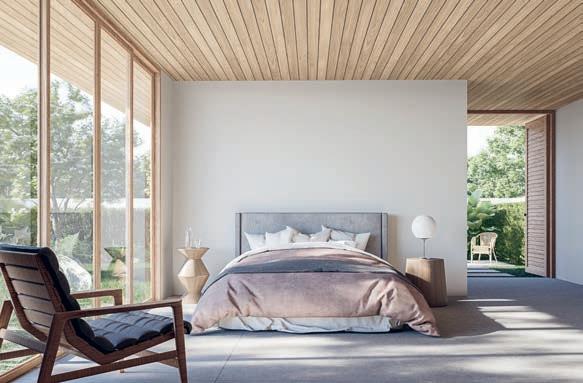
Start with varied lighting. Create a balance of warm LEDS (never cool-blue light) and natural lighting. Big windows are your friends here, as are glass sliding doors. Slatted blinds like plantation shutters will filter powerful afternoon sun and create fingers of light across a room. You want to feel kissed by the sun, not struck by lightning. These light sources are both the frames of and portals to your story.
TOUCHY-FEELY
Incorporate all the tactile elements your heart desires. Pay attention to natural materials and organic textures. Plush rugs. Richly grained wood. Kitten-soft wool, nubbly woven grasses and airy linens. Tactile stone. A grounding space that hands and bare feet love to touch. A considered mixture of shine and matt. What we call the Goldilocks effect: not too much, not too little, just the right amount. Balance. Harmony.
SCENTSPIRATION
Natural scents are your friends. If you can find it, natural cedarwood contains anti-anxiety aromatics. Curate a cluster of fresh herbs, such as basil and rosemary, in a sunny kitchen nook. Arrange fragrant fresh flowers in vases. Essential oil burners, linen sprays and room diffusers work a treat, puffing out their relaxing whispers. Balancing sage, comforting fresh cotton, earthy oud, invigorating bergamot, relaxing and restorative lavender ... depending on the mood you wish to evoke in each space. The shower space offers an everyday opportunity to enjoy the fragrant rituals that uplift our senses, as does a bath. Both activities will also disperse the fresh scent of your soap or body wash through the house.
EAR FOOD
Judiciously placed wind chimes will bring you hints of an outside breeze. Experiment with soundscaping (check out apps like Calm for inspiration). Arrange your space to optimise acoustics. Acoustic panels will shelter you from jarring noise. Soft furnishings, such as rugs and curtains, will dampen echo. Explore ASMR – Autonomous Sensory Meridian Response: you’ll find videos all over YouTube and TikTok, featuring deliciously engaging sounds, such as rustling, whispering, tapping, scratching, crinkling and page turning, all of which trigger relaxation through their repetition.
LET YOUR ROOM LAYOUT FLOW
Pay attention to the flow of your room layouts. You want an intuitive, ergonomic flow, rather than an uncomfortable sense of being a bumper car in your own home, particularly in the kitchen or bathroom. Ergonomics focuses on designing spaces that are comfortable, safe and efficient and encourage easy movement to meet the physical and psychological needs of the people using them. Furniture arrangement, lighting, storage, acoustics, room temperature and even the height at which you place your door handles – all these factors play their part as investments in health and wellbeing.
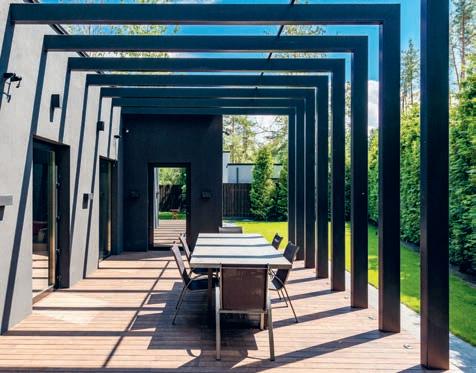
BE MORE BIOPHILIC
Biophilic design weaves nature into our indoor spaces to foster a deep connection to the natural world and positively impact our mental health and wellbeing. By incorporating elements like natural light, indoor plants, tones, colours and textures that bring the outdoors indoors, for example, wood looks, stone looks, the colours we encounter on a nature walk, from earthy to forest green and sea blue, we ground ourselves. Biophilic design counters stress, boosts mood and enhances focus. It’s an approach that can transform interiors into restorative, safe, nurturing, harmonious sanctuaries.
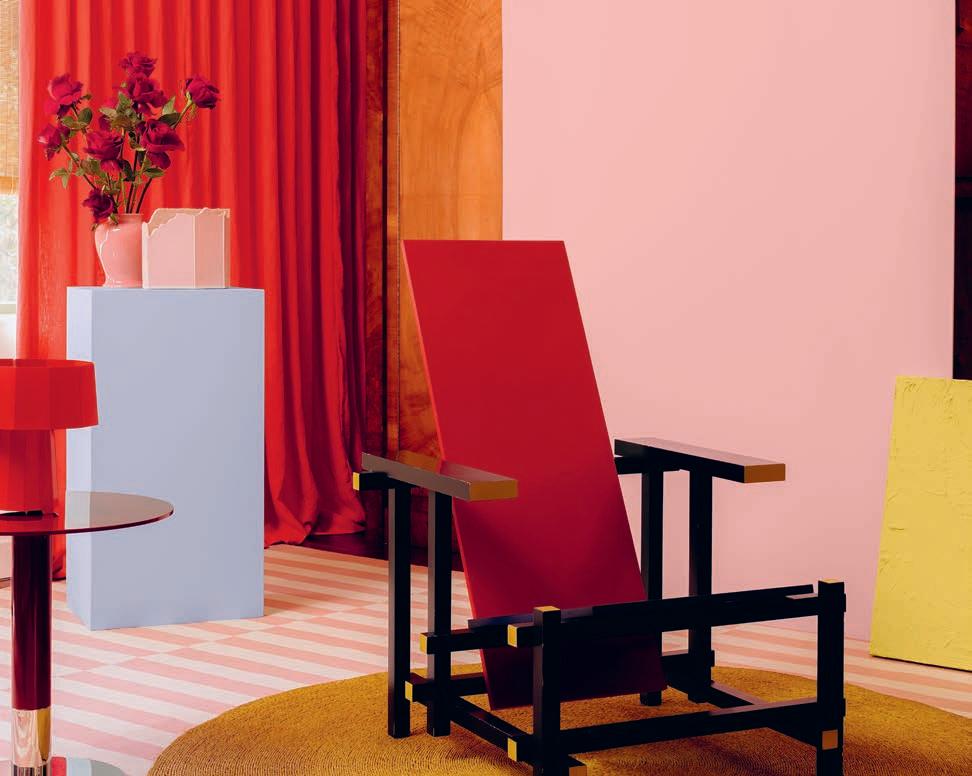
COLOUR PSYCHOLOGY
This is no longer seen as hocus-pocus. We know now that if you choose a colour scheme for looks and likes, you’ve chosen decoration over strategy. Think about how you want to feel in the space ... and take it from there. Blues evoke relaxation. Greens bring balance. Neutrals are soothing. Yellows are mood lifters. Reds raise cortisol. We bet you want to feel relaxed, rather than on high alert, agitated and aggressive. So, keep that red as an accent rather than a room drench!
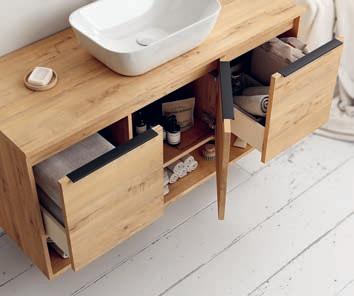
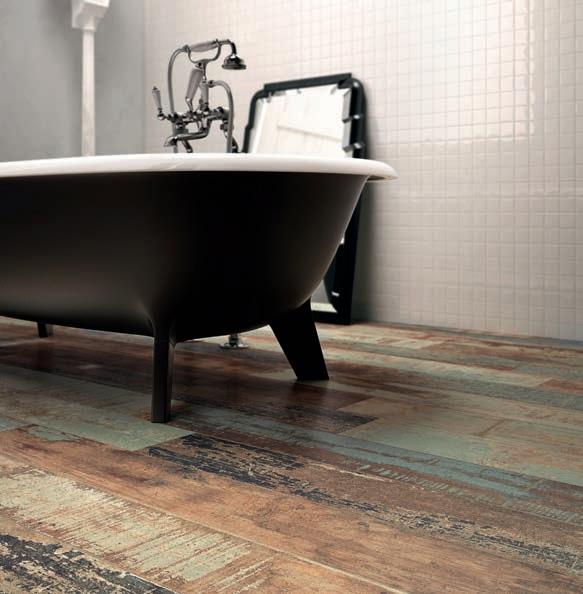
THINK TILES
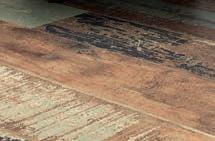
The Boost Mineral Tile Collection by Atlas Concorde
An authentic and tactile stone-effect experience that feels grounding with its expressive interpretation of metropolitan minimalism. Urban, yet warm and inviting. Exceptional graphic effects of smooth honed stone invite barefoot exploration.
Gloss versus matt
High gloss is great for light reflection. However, too much sparkle can create glare and “visual clutter”. Soften your space with the low stimulation of a matt surface here and there. Consider the low-reflection finish of soothing, velvety matt black products. Browse Everything Matt Black here.
A soft, calming colour palette offers emotional expression
Muted tones soothe the troubled soul, and no colour brings calm quite like a soft sage green. Browse Tetris Sage Luc Gloss Glazed Porcelain Tile 50x200, the versatile tone plays well with pretty much every look and feel. 100% Italian and 100% stress-busting.
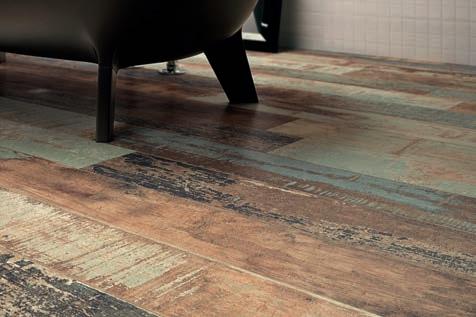
Take a walk through the woods
Without a doubt, wood looks rule the nature-inspired design kingdom, right next to stone. Ancient and eternal, they bring timeless, forever-on-trend elegance to every space, along with a connection to the natural world. Take a look at the Dorian Oak Wood Slat Rectified Matt Glazed Ceramic Wall Deco Tile 333x1000 collection
Choosing coated abrasives FOR EVERYDAY PROJECTS
Whether you are doing maintenance, painting, or busy with a restoration project at home, using coated abrasive products is almost always required to is t e o , writes GRINDING
TECHNIQUES
Sandpaper, available in various grits and configurations, is used for sanding wood, metal or plastic, while emery cloth is suitable for polishing and finishing surfaces.
The difference between paper-backed and emery-backed abrasives lies in their backing material. Paper-backed abrasives, such as water and cabinet paper sheets, use paper as a base, while emery-backed abrasives, such as cloth-backed sanding belts, use a cloth base. Emery-backed abrasives are more durable and tear-resistant than paper-backed ones. The cloth backing allows for more flexibility and can be cut or torn to a specific size, making them ideal for a wider range of sanding and finishing tasks, especially on metal. Due to a higher mechanical resistance, they offer a better option when working with power tools.
Paper-backed abrasives, such as sandpaper sheets, are more flexible, conforming better
to curved surfaces. As they are generally less expensive than emery cloth, they are more suited for general hand sanding on wood and plastics.
When it comes to surface finishing, thorough preparation is key. This can be done by hand or with the use of an orbital sander.
Wood, paint or lacquer is usually sanded by hand. However, for perfect intermediate sanding with a paper-backed abrasive, an orbital sander can be used. For projects like these, we offer a wide range of water and cabinet paper sheets that allow for easy and flexible operation on virtually any material.
Superflex waterpaper sheets are made of pure silicon carbide grain and are the perfect product for preparing surfaces on metal, wood, paint and lacquers. One of the special features of our waterpaper sheets is that they have a latex-covered backing, which makes them ideal for wet and dry sanding.
Superflex cabinet paper sheets with a
semi-open grain distribution on a slightly lighter paper backing are also available. The semi-open coating of the abrasive mineral on the backing prevents loading or clogging on the abrasive while still delivering an excellent surface finish.
When it comes to sanding and finishing with power tools, an angle grinder is probably one of the most commonly found items in your home tool collection.
Our range offers a comprehensive assortment of flap discs for use on an angle grinder, available in both Type 27 (with a depressed centre) and Type 29 (flat design).
Apart from these, we also stock a large assortment of Velcro-backed sanding discs that offer several advantages over other types of discs, including easy attachment and removal, reuse and cost-effectiveness. These discs mount to the sander with a hook-and-loop system, allowing them to be mounted quickly and securely.
Cloth-backed sanding belts are also very popular and an effective way of preparing and sanding larger flat surfaces like table tops. We can offer custom-made sanding belts for metal or wood processing in different sizes for mini belt grinders (power files), portable belt grinders and larger stationary belt grinders. Depending on the application, we have the ideal belt for an optimum result, whether you need longevity, maximum stock removal or a perfect surface finish. With their high stock removal rate, belts with embedded abrasive grain offer a quick and easy way to grind metal.
For more on our product range, or to secure a custom solution, contact us today : +27 11 271 6400 info@grindtech.com www.grindtech.com
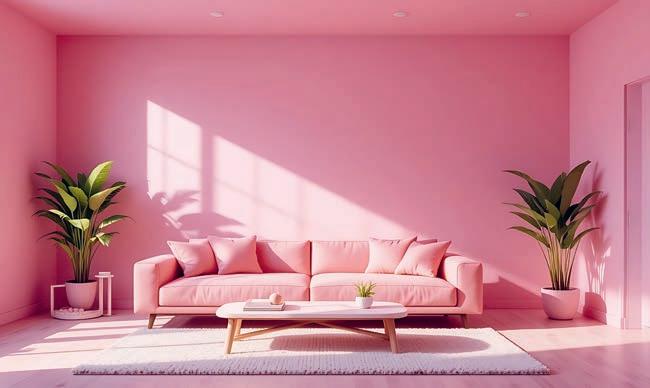
2026 IN Colour handmade inspiration
Plascon’s 2026 colour forecast celebrates the human touch, o eri a cra te palettes t at le atural to es, ol acce ts a timeless style
As our initial fascination with all things artificial intelligence begins to normalise, 2026 welcomes a refocus on all things human. In compiling its highly anticipated colour forecast for next year, Plascon has embraced a shift towards a ‘made by hand’ approach, foregrounding HAND, made as its overarching theme.
“At the heart of painting is the hand. It’s part of every step – choosing shades, testing swatches and finally bringing colour to the wall. Paint is not abstract or artificial; it’s tangible, textured and deeply human. The hand makes it real – authentic, unique and a mark of craft.
“Our new colour combinations reflect the same spirit of celebrating imperfection and individuality. They don’t just cover surfaces; they respond to daily life,” says Plascon’s head of marketing, Leslie Frank.
For inspiration, the Plascon team looked to aspects of our surroundings –horizons, waters, city streets and wild gardens. The captivating end result spans four distinct colour “worlds”, inspired by nature and daily life, and which celebrate imperfection and individuality.
Creating these four distinct colour groupings or “worlds” involved pairing earthy tones with daring brights and subtle neutrals with expressive accents. Each world celebrates contrast and harmony, offering curated colours that unite to form immersive palettes. These four worlds have been named Butter + Sky, Land + Sea, Fashion + Candy, and Orchard + Blooms
REFLECTING THE SPIRIT OF THE TIMES
The pre-existing Plascon colours comprising each world have been carefully curated to reflect the spirit of the times. The paint can be tinted in your choice of Plascon coating type at any leading retailer – ready for you to transform your home or premises.
“From swatch to wall, the process becomes a story told by the human hand and the transformative power of colour,” explains Leslie Frank, Plascon’s head of marketing. Visit https://plascon.co.za for more.
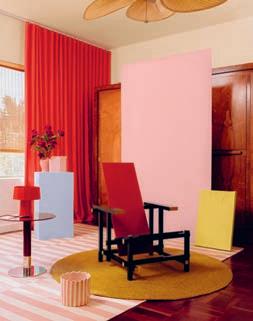
Butter + Sky
This palette is optimistic and inspired by blue skies and warm yellows. The colours include Chocolate Chunk (O2-D1-1), Blazing Sun (Y4-A1-4), Sapphire (B7-A1-1), Athena’s Dream (B4-A2-1), Cave Painting (O2-C1-1), Julia (Y3-A2-2) and Signal Red (G7).
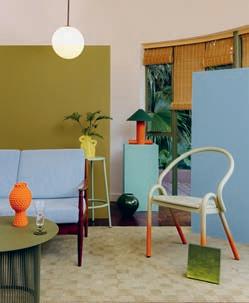
Land + Sea
Rooted in earth and water textures, this palette embraces natural materials and biophilic influences. The colours include African Mud (O2-E1-1), Olive (G2-E1-2), Frog Pond (Y6-D1-1), Bashful Blue (B3-C1-4), Sparkling Lemon Lime (Y6-A1-1), Daily Lily Dream (O2-A1-1) and Evening Stroll (G6-C2-1).
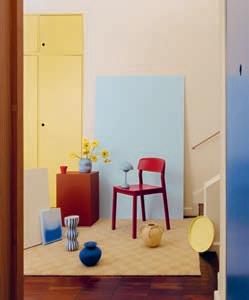
Fashion + Candy
Here, the colours are vibrant, eclectic and bold. Inspired by street style, nightlife and pop culture, this palette includes Eclair (R7-D1-1), Ruby Tuesday (R5-B2-2), Bellagio Blue (B6-B2-1), Hot-N-Spicy (R6-B1-1), White Maas (Y2-A2-2), Lemon Essence (Y5-A1-2) and Ginger Biscuit (O1-C1-1).
Orchard + Blooms
This lush and vibrant collection, inspired by fruit markets and garden centres, focuses on abundance and vitality. The colours include Chocolate Delight (R6-E1-1), Hudson (26), Spanish Brocade (O2-B1-3), Swazi (R2-C1-1), Wanda (Y4-C1-1), Good Day Sunshine (O6-A1-1) and Just Terracotta (R7-C1-1).
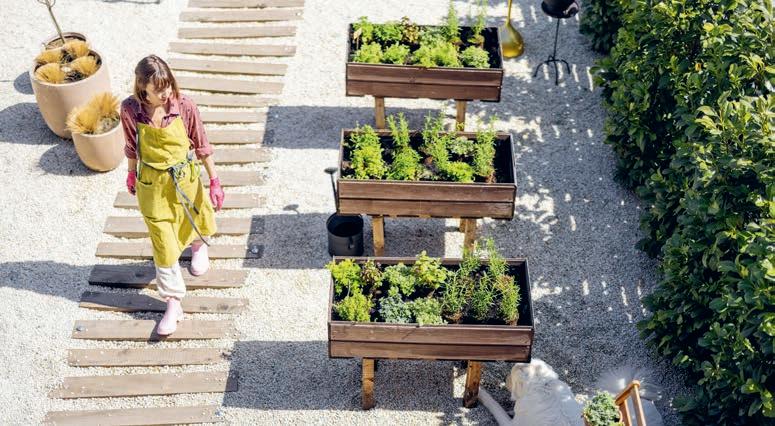
Six easy ways to make your garden A PLANET HERO
Transform your garden into a conservation hotspot with indigenous plants, water wise tips, polli ator rie ly flowers a composti or a ree er backyard. By Katherine Forsythe, Northern Cape/arid landscape manager at WWF South Africa
Whether you’re tending a large garden, a small balcony planter or a single pot on a windowsill, every green space can make a difference for the planet. From saving water to supporting pollinators, sustainable gardening at home is one of the easiest ways we can contribute to conservation without leaving our front gates.
Here’s how to turn your garden into a thriving ecosystem.
1.Plant like a patriot
Before reaching for exotic blooms, choose indigenous plants. They are adapted to our climate, naturally water-wise and low-maintenance. They also provide food and shelter for local bees, butterflies and birds. Visit a local indigenous nursery or use a plant identification app to discover species native to your corner of the country. 1 2 4 5 6 3
2.Create a buzz
A garden without pollinators is just decoration. Invite bees, butterflies and birds by planting flowers that bloom at different times of the year. Use blue, purple, yellow and white flowers with open blooms. Add a shallow dish of water with pebbles for pollinators to drink from, turning your garden into a five-star resort for essential pollinators.
3.Eat your garden
Grow your own food to reduce your carbon footprint. Herbs in a window box or a full vegetable patch cut down food miles and ensures fresh, pesticide-free produce. Start with easy options like lettuce, spinach and cherry tomatoes.
4.Don’t waste your waste
Compost kitchen scraps and garden trimmings to create nutrient-rich soil. Avoid meat, dairy, oils, pet waste and diseased plants. Composting diverts waste from landfills and fertilises your plants naturally.
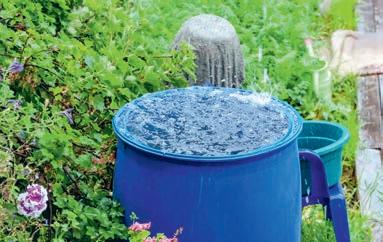
5.Be water-wise
Plant drought-tolerant indigenous species, mulch soil to retain moisture and install a rain barrel to capture every drop. Group plants with similar water needs together and water deeply but less frequently to encourage strong roots.
6.Ditch the chemicals
Skip synthetic pesticides and embrace natural solutions. Companion planting and simple soap-and-water sprays manage pests without harming beneficial insects, soil microbes or the ecosystem.
Remember, you don’t need to overhaul your garden overnight. Start with one indigenous plant, one compost bin or one chemical-free season. Small steps taken by many gardeners across the country create the wave of change our ecosystems desperately need.
HOW TO KEEP YOUR HOME weatherproofed
FIRE SAFETY
Severe weather can strike at any time, and the right preparation can protect both your home and your belongings. Ann Cloete, insurance expert at AON, explains t at weat erproo is a out more t a mai te a ce it s a out u ersta i risk, reinforcing your home and ensuring your insurance is up to date
CHECK YOUR INSURANCE COVER
Understanding your risk profile is the first step. Speak to your insurance broker about weather-related coverage, limits and deductibles. Some policies may exclude floods, hail, earthquakes, subsidence or landslip cover. If these perils are not included, ask whether they can be added and what the cost would be. Don’t overlook your contents cover either – furniture, appliances and valuables can be damaged or lost. Keeping an inventory of your possessions helps you make informed decisions.
STRENGTHEN YOUR HOME
While you can’t prevent natural disasters, you can take practical steps to reduce damage:
• Maintain your roof, gutters and flashings to prevent leaks.
• Keep drains, pipes and stormwater systems clear of debris.
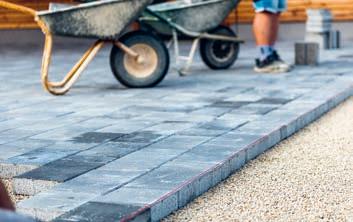
• Use paving around your home to direct water away from the building.
• Install lightning rods and surge-protected plugs in lightning-prone areas.
• Adhere to building regulations for any renovations or additions.
• Protect pumps, irrigation systems and pool equipment from water damage.
• Use fire-resistant materials and maintain defensible space in fire-prone areas.
• Subscribe to weather warning systems and forecasts to stay informed.
• Create a clear evacuation plan and make sure everyone in the household knows it.
ACT QUICKLY AFTER A DISASTER
Safety always comes first. Once you and your loved ones are secure, keep receipts for emergency repairs or temporary accommodation. Notify your broker immediately and begin the claims process. A good broker can help ensure settlements are fair and expedited so you can focus on getting back on your feet. The best defence is a combination of physical preparation and proactive insurance planning. By reinforcing your home and checking your coverage, you can face severe weather with confidence.
While fire protection in commercial and industrial sectors is highly regulated, domestic fire safety remains an area where risk is often underestimated. “Fire risk in residential properties is frequently overlooked, yet the potential consequences are no less severe than in industrial facilities,” comments Michael van Niekerk, CEO of ASP Fire. “The same principles of fire prevention, detection and suppression that are standard in industry should be applied, in a scaled manner, to the home environment.”
Key contributors to domestic fire incidents include:
• Compromised electrical installations.
• Overloaded distribution boards.
• Faulty appliances.
• Open-flame devices.
• Inadequate housekeeping.
Van Niekerk cautions that such risks, while often perceived as minor, create conditions where fire can ignite and spread rapidly. “The growth rate of a typical residential fire is exponential. Within three to five minutes, conditions can become untenable. Early detection and suppression are therefore critical.”
ASP Fire recommends a structured approach to residential fire risk, encompassing both engineering controls and behavioural practices. Measures include:
• Regular inspection and certification of electrical systems.
• Installation of smoke detection and alarm devices.
• Provision of portable fire extinguishers in high-risk areas.
• Development of clear evacuation procedures for occupants.
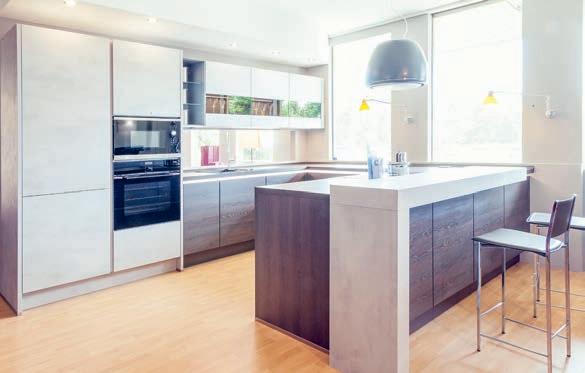
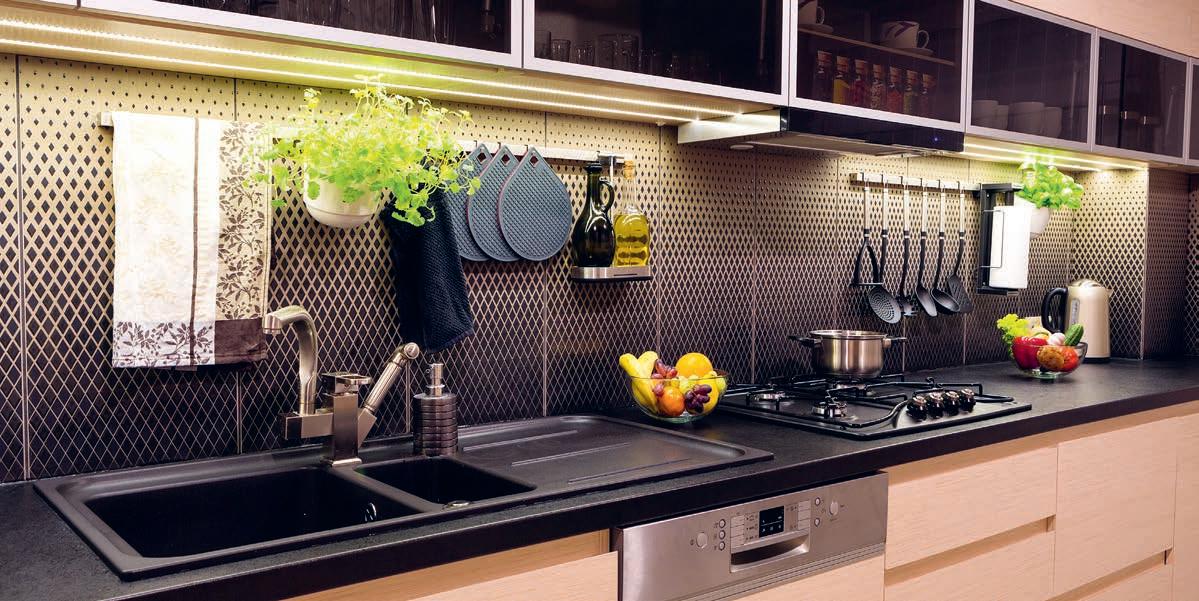
Revamp kitchen cabinets ON A BUDGET
With fresh paint, new handles and a stylish backsplash, your kitchen can feel like new without a major renovation. Plus, these updates are easy to customise, so your space will reflect your style
Old, tired cabinets can make even the most beautiful kitchen feel dated. The good news? You don’t need a full renovation to transform them. With a few simple steps – paint, hardware and accessories –you can create a modern, stylish space that feels brand new.
Step 1
Before applying paint or stain, proper preparation is key.
1. Empty your cabinets: remove all items and take off the doors, drawers and hardware.
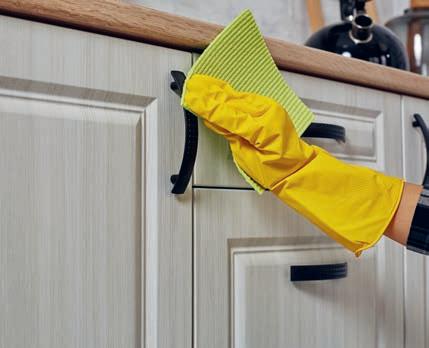
2. Clean thoroughly: use a degreasing cleaner to remove kitchen grime.
3. Sand lightly: smooth the surfaces using medium-grit sandpaper (120–150 grit). This helps paint adhere better.
4.Prime the surfaces: apply a good-quality primer designed for wood or laminate. This prevents peeling and ensures an even finish.
Use painter’s tape to protect walls, countertops and appliances.
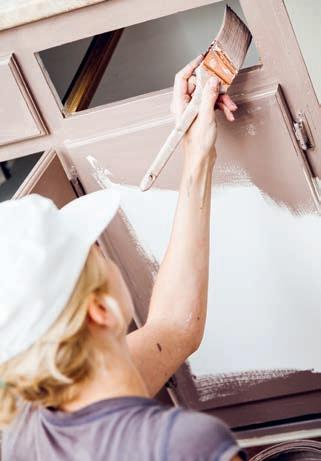
Step 2
Choose your finish
• Paint: choose a durable, water-resistant paint in a colour that complements your kitchen. Matt or satin finishes are perfect for a modern look.
• Stain: if you love the natural wood look, pick a stain that enhances the grain while giving a refreshed tone.
Apply two thin coats instead of one thick coat for smooth, professional-looking results.
Step 3
Upgrade hardware
1. Remove old hardware: keep screws handy in a labelled container.
2. Choose modern replacements: brushed metal, matt black or sleek minimalist designs instantly update cabinets.
3.Install new hardware: align carefully and drill pilot holes if necessary.
Extra touch Consider swapping a few solid door panels with glass inserts for a contemporary twist.
Step 4
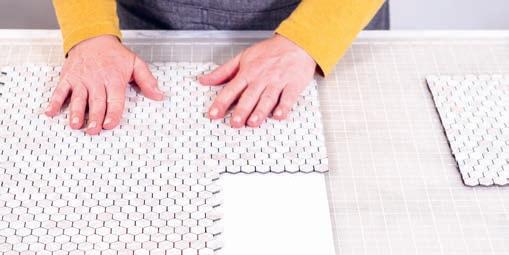
Add peel-and-stick backsplashes
No kitchen revamp is complete without a pop of personality.
• Peel-and-stick tiles are an affordable way to refresh your backsplash.
• Measure carefully, cut to size and apply from the centre outwards for a seamless look.
• Smooth with a scraper or spatula to remove air bubbles.
TIP
Choose tiles that complement your cabinet colour and overall kitchen theme – subtle patterns for a modern vibe or bold geometric prints for a statement feature.
Step 5
Finishing touches
• Let paint or stain cure completely before reattaching doors.
• Organise your cabinet interiors for a neat, functional finish.
• Consider adding undercabinet lighting or decorative shelf liners for an extra stylish touch.
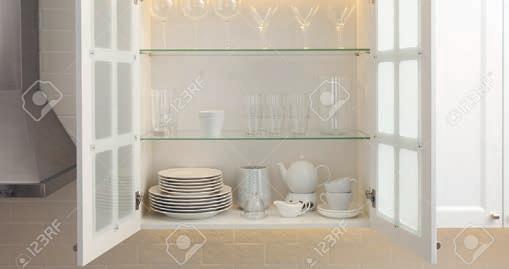
PANTRY REBOOT
Sonal Ratan, dietitian at FUTURELIFE,® shares a few simple steps to make your pantry functional and easy to keep tidy
Step 1:
plan strategically
Start by assessing your shelves to see what takes up the most room. Reclaim wasted space by transferring dry goods into repurposed containers, such as coffee and mayonnaise jars or ice cream tubs. These seal tightly, stack neatly and protect goods from pests and moisture, while making it easier to see when supplies are running low. Wash and dry the containers thoroughly and label them with the purchase and best before dates. Use shallow boxes or trays to group items on deep shelves so they can slide out easily – no pricey storage solutions needed.
Pro tip: use masking tape and a permanent marker for quick, removable labels.
Step 2:
check for expired items
You’ll likely find more expired items than you thought.
As a general guide:
•Canned goods: always check the expiry or best before date and toss any with rust, bulges or dents that may affect the seal.
•Sauces and condiments: once opened, these should be refrigerated and bottles should be tightly sealed. Check for changes in smell, colour or texture, especially separation or mould. If anything seems off, don’t take chances.
•Cereals and dry goods (flour, pasta, rice, beans, lentils): check the expiry or best before date and inspect any open packages for potential pests like weevils before sealing in airtight containers.
Step 3:
clean thoroughly
Once emptied, vacuum or wipe out crumb and dust build-up in the corners and crevices of each shelf. Use a nontoxic kitchen cleaner or a homemade disinfectant, such as one part vinegar to two parts water, for a safe, cost-effective solution. Allow all surfaces to dry completely.
Pro tip: shelf liners help guard against spills and make future cleanup a breeze – worth considering for long-term pantry upkeep.
Step 4:
sort, group and arrange Group items by category, such as baking supplies, cereals, grains, canned goods, snacks and condiments, and arrange them to better enable your everyday cooking. Keep frequently used items at eye-to-chest level, less-used items higher up and backstock above those. Adopt a first-in, first-out system by placing newer items behind older ones to cut down on waste.
UPCYCLED furniture makeover
A little sanding, paint and imagination and your old furniture can become charming, personalised pieces that bring joy – and style – to any room
Instead of throwing out worn furniture, transform it into a statement piece using a little creativity and some basic supplies. This project is perfect for both adults and kids – let your little helpers add patterns, stencils or decoupage designs for a personalised touch
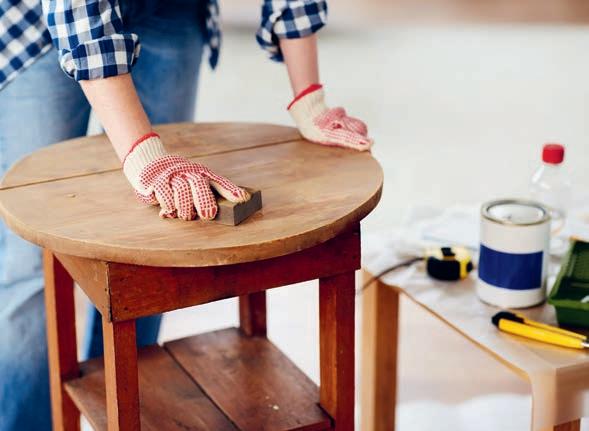
Prep your furniture
Good preparation ensures a smooth, long-lasting finish.
1. Clean thoroughly: wipe down the piece to remove dust, dirt or grease.
2. Sand the surface: use medium-grit sandpaper (120–150 grit) to remove old paint or varnish and smooth out imperfections.
3. Wipe clean: remove sanding dust with a damp cloth.
If your furniture has rough edges or cracks, use wood filler before sanding for a flawless surface.
SEAL AND PROTECT
To make your piece durable:
• Apply a clear, nontoxic topcoat or sealant suitable for the paint you used.
• Let it dry completely before use.
TIP
For items that will get heavy use, apply two coats of sealant for extra protection.
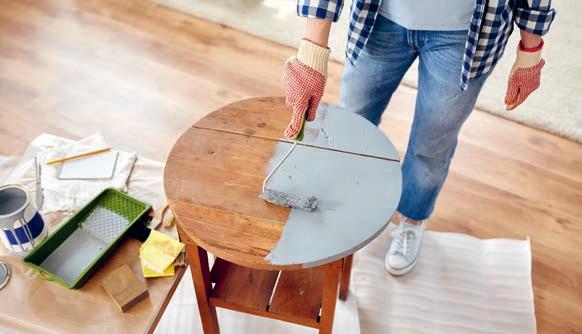
Choose your finish
Pick paint or stain that suits your style.
• Chalk paint: ideal for a matt, vintage look and doesn’t always need priming.
• Acrylic or latex paint: durable and comes in endless colours for a modern feel.
• Wood stain: enhances natural grain while refreshing the tone of wooden furniture.
TIP
For a playful twist, choose bright colours for kids’ rooms or bold accents for statement pieces.
Add patterns, stencils or decoupage
This is where the fun begins!
1.Stencils: position and secure with painter’s tape, then dab or brush paint over the design.
2.Decoupage: use safe decoupage glue to attach paper or fabric cutouts, then seal with a clear topcoat.
3. Freehand designs: let kids or adults add creative touches with brushes, sponges or stamps.
Start with simple geometric shapes for a modern look or whimsical patterns for a playful vibe.