
Winter Cookies Recipes Cookies of the Season

1

Table of Contents Allergy Tips...3 Nut Free Snowball Cookies... 9 Dairy Free Cookies... 10 Sugar Free Cinamon Cookies... 11 Decoration Winner... 13 Goody Winner... 15 Grinch Cookies... 18 Hazelnut Gelt Cookies... 19 Kwanzaa Cat Cookies... 20 2
9 Essential Tips For Holiday Parties With A Food Allergy Child

The holidays are a time of celebration, fun, and festivities. But when you manage a food allergy (or multiple food allergies), festivities can turn into a to-do list longer than Santa’s Good list! During a busy season like Christmas, this will make even the most prepared mama’s heart “two sizes too small”.
Side note: Because of all the extra work that social activities and food allergies bring, I’m often tempted to put social activities to the wayside. Going out to someone’s house and explaining how to safely manage food allergies can be exhausting, and going to a potluck or family event where the food and environment are unknown adds a whole new layer of stress. Sometimes I feel like it’s just easier to stay home. But after 12 years as a food allergy mom, I also know that loneliness is real and can be just as bad as the food allergies themselves. Which is why I intentionally work on going to more social events.
As I’ve become more intentional about attending social events, I’ve come up with a few things that help you to mentally and practically prepare for holiday events.
3
1. Let your host know of your child’s food allergies.
This isn’t telling them so that they will accommodate the allergies, but letting them know will help them understand why you and your family might not eat at the event or why you’re making certain accommodations. Basically, I don’t tell them about the allergy in expectation of them accommodating the allergies, because some people are just not comfortable or able to make accommodations.
Warning: Having an expectation that others will accommodate for food allergies can leave you disillusioned and the host feeling like we’re demanding.
That said, making the host aware allows them to think about food allergies in general terms and helps them understand your circumstances. It may even open the door in case they do want to make accommodations in the future, even though it isn’t the main intent.
2. Decide if you would rather bring safe allergy food or attend the event after food is served. Depending on the event, either of these can be a good alternative. It all depends on the event, how much time you have to prepare, how old your child is and what the event is. There is no wrong answer, just the answer that works
best for your family.
3. Bring your own main dish just for your food allergy child.
If you choose to bring safe food, keep it simple. Something that can be warmed up easily and something that your child likes.
If you make a meal your child likes during the week, pop an individual portion in the freezer to take out and warm at the party. You can also plan for this when you’re doing bulk cooks. Instead of placing the food into a family size container, store them in individual container sizes and pop them into the freezer. You’ll be set to grab and go meals for any holiday party!
4. Bring something to share that is safe for your child’s food allergies. Now that you have the main dish figured out, you may want to bring another item to share. By doing this, your child will be eating something safe that is the same as everyone else so they feel included.
Again, keep it simple to save your sanity!
We have so much to do when it comes to food already, so don’t make this too difficult. At our house, we tend to eat healthy for the most part, so when it comes to parties and social events, we’ll often opt for quick and easy treats. A couple of special top 8 allergenfree treats we fall back on are plain potato chips or a fruit tray. If you like to go fancier, feel free to make whatever you have the time and effort for!
5. Watch the RSVP list to watch for possible allergyfriendly goodies. This is optional if you have the time. If you’ve been invited online, there’s usually a list where people say what they’re bringing. Keep watch over it and check to see if there might be one or two safe things your child can enjoy. Once you spot them, check out safety of food before the event, (and not at the event). You can do this by asking the person bringing it, OR if it’s purchased from a store, you can call to see if it might be safe.

4
Side note: Because of all the extra work that social activities and food allergies bring, I’m often tempted to put social activities to the wayside. Going out to someone’s house and explaining how to safely manage food allergies can be exhausting, and going to a potluck or family event where the food and environment are unknown adds a whole new layer of stress.
Now, if your child is old enough, you can let them know if there are safe items or if they should avoid all foods brought by others. If you check for safety before the event, it avoids making the food allergy into a huge conversation at the party. I find large-crowd food allergy conversations are not usually the most productive and can be stressful.
6. Keep alcohol consumption down so you can spot an allergic reaction. Even if the event is walkable, my hubby and I try to have one adult that is not drinking so we are able to spot an allergic reaction quickly.
7. Teach your food allergy child what to do in public to keep themselves safe. Knowing that your child can take care of themselves is huge! It brings a feeling of control over our circumstances that we often feel helpless to change. Of course, this is age appropriate, but start early
because it will help your child become more independent as time goes on. For example, washing hands often and especially before eating is one, but there are others too.
8. Hire a responsible tween or teen who understands food allergies.
If you have a younger food allergy child, you might consider hiring a responsible tween to come to the event with you to be your child’s “playmate/helper”. The idea would be to have someone making sure your child doesn’t put things in their mouth and to wash/wipe your child’s hands frequently. By having this dedicated, extra set of eyes, you might be able to relax just a tad. Remember, if you don’ t know of a teen or tween that already understands food allergies, you can always teach them!

5
Photo by Summer Pahl
9. Always have two epinephrine injectors and your little’s food allergy emergency plan with you. This goes without saying but is SUPER important so I will say it. Always remember that having 2 working epinephrine injectors and your food allergy emergency plan WITH you may be life-saving and that you can depend on them if an allergic reaction occurred. Of course, we never want our little to actually have a severe food allergy reaction, but by having your epinephrine and emergency plans, you can feel confident that you will be able to help them quickly.
1. Let your host know of your child’s food allergies.
This isn’t telling them so that they will accommodate the allergies, but letting them know will help them understand why you and your family might not eat at the event or why you’re making certain accommodations. Basically, I don’t tell them about the allergy in expectation of them accommodating the allergies, because some people are just not comfortable or able to make accommodations.
Warning: Having an expectation that others will accommodate for food allergies can leave you disillusioned and the host feeling like we’re demanding.

That said, making the host aware allows them to think about food allergies in general terms and helps them understand your
circumstances. It may even open the door in case they do want to make accommodations in the future, even though it isn’t the main intent.
2. Decide if you would rather bring safe allergy food or attend the event after food is served.
Depending on the event, either of these can be a good alternative. It all depends on the event, how much time you have to prepare, how old your child is and what the event is. There is no wrong answer, just the answer that works best for your family.
3. Bring your own main dish just for your food allergy child.
If you choose to bring safe food, keep it simple. Something that can be warmed up easily and something that your child likes. If you make a meal your child
likes during the week, pop an individual portion in the freezer to take out and warm at the party. You can also plan for this when you’re doing bulk cooks. Instead of placing the food into a family size container, store them in individual container sizes and pop them into the freezer. You’ll be set to grab and go meals for any holiday party!
4. Bring something to share that is safe for your child’s food allergies.
Now that you have the main dish figured out, you may want to bring another item to share. By doing this, your child will be eating something safe that is the same as everyone else so they feel included.
Again, keep it simple to save your sanity!
We have so much to do when it comes to food already, so don’t
6
Keep watch over it and check to see if there might be one or two safe things your child can enjoy. Once you spot them, check out safety of food before the event, (and not at the event)
make this too difficult. At our house, we tend to eat healthy for the most part, so when it comes to parties and social events, we’ll often opt for quick and easy treats. A couple of special top 8 allergenfree treats we fall back on are plain potato chips or a fruit tray. If you like to go fancier, feel free to make whatever you have the time and effort for!
5. Watch the RSVP list to watch for possible allergyfriendly goodies. This is optional if you have the time. If you’ve been invited online, there’s usually a list where people say what they’re bringing. Keep watch over it and check to see if there might be one or two safe things your child can enjoy. Once you spot them, check out safety of food before the event, (and not at the event). You can do this by asking the person bringing it, OR if it’s purchased from a store, you can call to see if it might be safe.
Now, if your child is old enough, you can let them know if there are safe items or if they should avoid all foods brought by others. If you check for safety before the event, it avoids making the food allergy into a huge conversation at the party. I find large-crowd food allergy conversations are not usually the most productive and can be stressful.
6. Keep alcohol consumption down so you can spot an allergic reaction.
Even if the event is walkable, my hubby and I try to have one adult that is not drinking so we are able to spot an allergic reaction quickly.
7. Teach your food allergy child what to do in public to keep themselves safe.
Knowing that your child can take care of themselves is huge! It brings a feeling of control over our circumstances that we often feel helpless to change. Of course, this is age appropriate, but start early because it will help your child become more independent as time goes on. For example, washing hands often and especially before eating is one, but there are others too.
8. Hire a responsible tween or teen who understands food allergies.
If you have a younger food allergy child, you might consider hiring a responsible tween to come to the event with you to be your child’s “playmate/helper”. The idea would be to have someone making sure your child doesn’t put things in their mouth and to wash/wipe your child’s hands frequently. By having this dedicated, extra set of eyes, you might be able to relax just a tad. Remember, if you don’ t know of a teen or tween that already understands food allergies, you can always teach them!
7

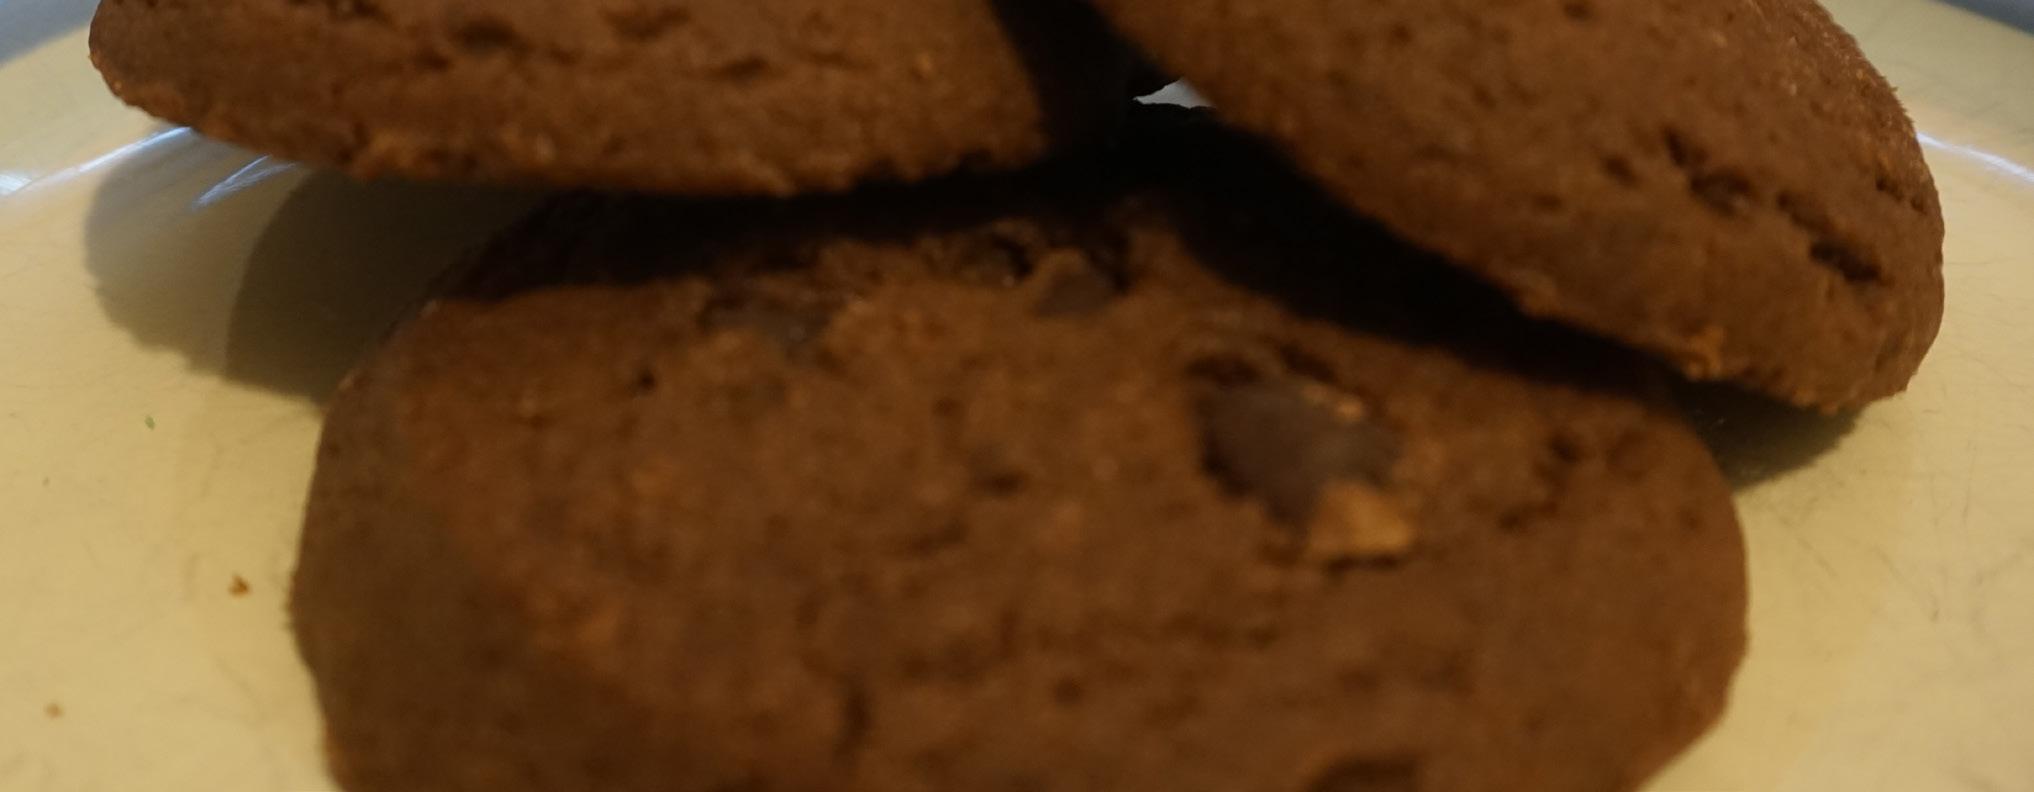
Nut Free Snowball Cookies
INGREDIENTS
1 cup (2 sticks) unsalted butter (or margarine for dairy free), softened
½ cup powdered sugar + 1/2 cup powdered sugar for coating
1 teaspoon vanilla extract
2 ¼ cups all purpose flour
Pinch of salt
INSTRUCTIONS
Preheat oven to 375°F.
Add butter to stand mixer and beat for 1-2 minutes until soft. Add ½ cup powdered sugar and vanilla and mix until incorporated.
Add flour and salt and mix until dough forms.
Roll dough into 1-inch balls and place about 1 inch apart on an ungreased cookie sheet (I like to line mine with parchment paper for easier clean up).

Bake for about 10 to 15 minutes, or until set (keep an eye on them!). Remove from cookie sheet and let cool for about 5 minutes on wire racks.
Place about ½ - ¾ cups of powdered sugar in a bowl and roll warm cookies in the powdered sugar. Then, let cool again and roll in powdered sugar again once completely cooled.
9
Photo by Summer Pahl
Dairy Free Cookies
INGREDIENTS
2 1/2 cups all purpose flour
1/2 cup powdered sugar ½ teaspoon baking powder ¼ teaspoon salt 1 cup butter-flavored shortening ¾ cup sugar 1 egg
1 1/2 teaspoon vanilla extract 1/2 teaspoon peppermint extract Green food coloring Yellow food coloring Red heart quins

INSTRUCTIONS
Preheat oven to 375F (180C), and line cookie sheets with parchment paper.
In a medium bowl, whisk together flour, powdered sugar, baking powder and salt – set aside.
In a large bowl with an electric mixer, cream the shortening and sugar until combined and fluffy – about 1 minute.
Add egg, vanilla and peppermint extracts. Beat until combined. Add flour mixture in ½ cup increments, mixing to combine and scraping sides when necessary.
Add food coloring until desired color is reached and mix until even. Using a small cookie scoop, scoop dough (do not smooth scoops) onto cookie sheet about an inch or so apart. Top each cookie with a heart.
Bake cookies for 10 – 12 minutes or until cookies have spread and dough is set. Remove from oven and allow the cookies to rest for several minutes before transferring them to a cooling rack
10
Photo by Summer Pahl
Sugar Free Cinnamon Cookies
INGREDIENTS
Almond flour.
Powdered sugar substitute. Egg whites. Cinnamon Ground coffee.
INSTRUCTIONS
Step 1: Start by beating the egg whites in a mixing bowl until they hold soft peaks. Slowly mix in the powdered sweetener until the mixture is stiff
Step 2: Add the almond flour and spices and stir until combined.
Step 3: Form a cookie dough ball and roll it out between 2 sheets of baking paper. Place in the freezer to chill.
Step 4: Remove from the freezer, lift the top baking paper sheet and use a cookie cutter to cut out shapes. Place on a baking tray lined with parchment paper.
Step 5: Bake in the oven until golden.
Step 6: Let cool completely, then ice with sugar free icing - ½ cup powdered sweetener mixed with 1 tablespoon water.
11
Photo by Summer Pahl
AD
Decoration Winner
Baking sugar cookies for Christmas? Let me help! Today I’m sharing 5 easy and approachable ways to decorate Christmas cookies. If you’re intimidated or nervous about making royal icing and creating adorably festive sugar cookies, this post is for you. Before we begin decorating, let’s review my favorite recipe for sugar cookies. This recipe, pictured below as adorable little hearts, have slightly crisp edges and a nice flat surface for decorating. They have a pronounced vanilla flavor, super soft center, and taste unbelievable on their own. A classic, go-to recipe that every baker should keep in their apron pocket– just like good recipes for pie crust, chocolate cake, and vanilla cupcakes (among many others!).
With so little ingredients, it’s

important that you use them all because each serves a very important purpose. Creamed butter + sugar makes the base of the cookie dough. This creates a buttery flavored foundation and incorporates air into the cookie dough, creating lighter textured cookies. Egg is the cookie’s structure. Vanilla adds flavor. I also like to add a bit of almond extract to make these sugar cookies taste extra special. It’s optional, but I suggest you try it! Flour is an obvious addition, baking powder adds lift, salt balances the sweet. So many *little ingredients* doing their *big jobs* to create a beautiful sugar cookie.
You can flavor with different extracts or spices, like cinnamon or pumpkin pie spice. I actually prefer a pinch of cinnamon in them.
The dough is nothing out of the ordinary, but my method is unique.
The Method
This sugar cookie dough needs time in the refrigerator to solidify the butter and to guarantee the cookies hold their shape in the oven. Instead of chilling it as one massive chunk of dough (see above picture in the bowl!), roll the dough out and THEN chill it in the refrigerator. The dough is
so much easier to roll out before it’s chilled. To make this even easier for you, divide the dough in 2 then roll it out. It’s much more manageable to work with in smaller portions. I like to roll the dough out on a silicone baking mat or parchment paper. Why? Since we will chill the rolled out dough in the fridge… are we going to just pick up this rolled out mass of dough? No! Roll out on a nonstick surface that you can literally pick up, put on a baking sheet, and place in the fridge. I created a separate post for my favorite royal icing. It’s my favorite because it’s easy to work with, tastes great, sets quickly, and doesn’t require raw egg whites. And, best of all, it doesn’t have a hard cement-like texture–it won’t break your teeth like other royal icings. If royal icing isn’t for you and you still want to bake festive sugar cookies this holiday season, try my stained glass window cookies or drop style Christmas sugar cookies. Here is the sugar cookie recipe written out for you. Below the recipe, you can see how to decorate each fun shape pictured today. Any of the piping tips and tools below would make for great gifts for the baker in your life (or yourself!). For more ideas, be sure to check out my Holiday.
13
Jessica Phral
INGREDIENTS
2 and 1/4 cups flour
1/2 teaspoon baking powder
1/4 teaspoon salt
3/4 cup unsalted butter
3/4 cup granulated sugar
1 large egg
2 tsp vanilla extract
royal icing
INSTRUCTIONS
Step 1: Whisk the flour, baking powder, and salt together in a medium bowl. Set aside.
Step 2: In a large bowl using a hand mixer or a stand mixer fitted with a paddle attachment, beat the butter and sugar together on high speed until completely smooth and creamy, about 2 minutes. Add the egg, vanilla and beat on high speed until combined, about 1 minute. Scrape down the sides and up the bottom of the bowl and beat again as needed to combine.
Step 3: Add the dry ingredients to the wet ingredients and mix on low until combined. If the dough seems too soft, you can add Tablespoon more flour until it is a better consistency for rolling.
Step 4:Divide the dough into 2
equal parts. Roll each portion out onto a piece of parchment paper or a lightly floured silicone baking mat

Step 5: Stack the pieces, with parchment paper between the two, onto a baking sheet and refrigerate for at least 1-2 hours and up to 2 days. If chilling for more than a couple hours, cover the top dough piece with a single piece of parchment paper.
Step 6: Once chilled, preheat oven to 350°F (177°C). Line 2 large baking sheets with parchment paper or silicone baking mats. Remove one of the dough pieces from the refrigerator and cut into shapes with cookie cutter(s). Re-roll the remaining dough and continue cutting until all is used.
I created a separate post for my favorite royal icing. It’s my favorite because it’s easy to work with, tastes great, sets quickly, and doesn’t require raw egg whites.
14
Photo by Summer Pahl
Goody Winner
before hitting the chewy center studded with melting chocolate chips. Rolling into balls and pressing the dough with a glass before baking allows the interior of the cookie to bake evenly, while the exterior bakes up crackly.

flour brings everything together. Last but not least, chocolate chips provide rich chocolate flavor to contrast the lighter hazelnut base. Are these cookies chewy or crispy?
Who knew a batch of cookies could be so easy? Nutella cookies are a five ingredient, no-mess way to whip up a quick chocolate dessert. This recipe is as decadent as double chocolate cookies, without the butter and cocoa powder. Instead, Nutella, a chocolate-hazelnut spread, provides the smooth, creamy base necessary for the perfect cookie dough. What ingredients are in Nutella cookies?
Just five pantry essentials! Nutella, brown sugar and eggs give moisture, while all-purpose flour brings everything together. Last but not least, chocolate chips provide rich chocolate flavor to contrast the lighter hazelnut base. Are these cookies chewy or crispy?
Both! The first bite of a Nutella cookies yields a crispy edge,
Is flaky sea salt important? Yes (but also no)! Sprinkling the freshly baked cookies with flaky sea salt is the final touch to elevate the bittersweet notes of these Nutella cookies and bring out their full potential. If flaky salt is nowhere to be found, add 1/2 teaspoon of salt to the dough before rolling and baking. Can Nutella cookies be frozen? Yes, these cookies keep well in the freezer for a quick defrosted treat.
Who knew a batch of cookies could be so easy? Nutella cookies are a five ingredient, no-mess way to whip up a quick chocolate dessert. This recipe is as decadent as double chocolate cookies, without the butter and cocoa powder. Instead, Nutella, a chocolate-hazelnut spread, provides the smooth, creamy base necessary for the perfect cookie dough.
What ingredients are in Nutella cookies?
Just five pantry essentials! Nutella, brown sugar and eggs give moisture, while all-purpose
Both! The first bite of a Nutella cookies yields a crispy edge, before hitting the chewy center studded with melting chocolate chips. Rolling into balls and pressing the dough with a glass before baking allows the interior of the cookie to bake evenly, while the exterior bakes up crackly.
The first bite of a Nutella cookies yields a crispy edge, before hitting the chewy center studded with melting chocolate chips. Rolling into balls and pressing the dough with a glass before baking allows the interior of the cookie to bake evenly, while the exterior bakes up crackly.
Is flaky sea salt important? Yes (but also no)! Sprinkling the freshly baked cookies with flaky sea salt is the final touch to elevate the bittersweet notes of these Nutella cookies and bring out their full potential. If flaky salt is nowhere to be found, add 1/2 teaspoon of salt to the dough before rolling and baking. Can Nutella cookies be frozen?
15
Amanda Stone
INGREDIENTS
1 1/2 c. Nutella
3 tbsp. brown sugar
1 egg + 1 egg yolk
3/4 c. all-purpose flour
3/4 c. chocolate chips
Flaky sea salt, for sprinkling
INSTRUCTIONS
Step 1: Preheat oven to 350˚.
Step 2:Combine the Nutella and brown sugar in a stand mixer on medium speed until glossy, about 2 minutes. Add the egg and yolk, beating well and scraping the sides of the bowl as needed. Add the flour and mix until incorporated. Make sure to scrape the bottom of the bowl to ensure there are no flour pockets. Fold in the chocolate chips, if using.
Step 3:Lay sheets of parchment paper on two cookie sheets. Roll dough into 1 1/2 tablespoon balls and press gently with the bottom of a glass. Bake for 8 to 10 minutes, until the edges of the cookies are set and no longer glossy. Sprinkle with flaky sea salt
and let sit for 3 minutes before transferring to a cooling rack.
Step 4:Combine the Nutella and brown sugar in a stand mixer on medium speed until glossy, about 2 minutes. Add the egg and yolk, beating well and scraping the sides of the bowl as needed. Add the flour and mix until incorporated. Make sure to scrape the bottom of the bowl to ensure there are no flour pockets. Fold in the chocolate chips, if using.
Step 5:Lay sheets of parchment paper on two cookie sheets. Roll dough into 1 1/2 tablespoon balls and press gently with the bottom of a glass. Bake for 8 to 10 minutes, until the edges of the cookies are set glossy.
Who knew a batch of cookies could be so easy?
Nutella cookies are a five ingredient, no-mess way to whip up a quick chocolate dessert.
 Photo by Summer Pahl
16
AD
Grinch Cookies
These Grinch-inspired sugar cookies are so easy to make and feel extremely festive. They can be done in about an hour and everyone will fall in love with the simple cookie because of that cute red heart. They’ll make even the biggest Grinch a holiday lover with one bite. We prefer gel food coloring over liquid as it will give you a more vibrant color without needing to drop half a bottle in there!
INGREDIENTS
2 1/4 c. all-purpose flour
1 tsp. baking soda
1/2 tsp. kosher salt 1 c. (2 sticks) butter, softened 1 c. granulated sugar
1 large egg
1 tsp. pure vanilla extract Green food coloring Red heart sprinkles
These Grinch-inspired sugar cookies are so easy to make and feel extremely festive. They can be done in about an hour and everyone will fall in love with the simple cookie because of that cute red heart. They’ll make even the biggest Grinch a holiday lover with one bite. We prefer gel food coloring over liquid as it will give you a more vibrant color without needing to drop half a bottle in there!
Step 1
Preheat oven to 350°. Line two baking sheets with parchment. In a large bowl, whisk together flour, baking soda, and salt.
Step 2
In another large bowl using a hand mixer, beat butter and sugar together until creamy. Add egg and vanilla and beat to combine. Add dry ingredients and mix until just combined. Add green food coloring until your desired color is reached.
These Grinch-inspired sugar cookies are so easy to make and feel extremely festive. They can be done in about an hour and everyone will fall in love with the simple cookie because of that cute red heart. They’ll make even the biggest Grinch a holiday lover with one bite. We prefer gel food coloring over liquid as it will give you a more vibrant color without needing to drop half a bottle in there!
Step 3
Using a medium cookie scoop (about 2 tablespoons), scoop dough 2” apart onto prepared baking sheets. Place a heart sprinkle in the middle of each cookie.
Step 4
Bake until edges are set and bottoms start to turn golden, 12 to 14 minutes. Let cool on baking sheets.
18
Hazelnut Gelt Cookies
Every year, I can’t wait for the holidays. When I was growing up (my mom is Jewish, my dad is Chinese), we celebrated Chrismukkah and threw dumpling-making parties. They were non-denominational and everyone was invited. On Christmas Day, we made latkes and donuts and gingerbread houses—and ate bagels and Chinese food. The way we saw it: Let’s celebrate everything. And eat everything in the process.
Nowadays, my holidays are pretty similar. They still revolve around food and we still celebrate everything. But with my blog, My Name Is Yeh, the celebrations happen months in advance. Like this year, in October, I worked on this Hanukkah cookie recipe and a stollen recipe. So the season gets drawn out, which isn’t a bad thing.
We have some new traditions, too. My friend always hosts a cookie swap and it’s so much fun. This year, I want to involve my daughter Bernie in some way—maybe have her help decorate cookies (though she’ll only be about eight months old). We usually host a Chrismukkah party at our house, with latkes and lefse, so my husband Nick’s side gets represented as well.
A few years ago, I made homemade gelt for the holidays. I shot a video with another baker, whose name is also Molly. It was her idea to make homemade gelt and I just thought it was the coolest thing ever. You form circles of melted chocolate on parchment—truly could not be easier— but there are so many ways you can go from there. You can top the chocolate with different nuts or seeds or dukkah or spice blends or sprinkles.
INGREDIENTS
3 1/2 cups all-purpose flour 1 1/3 cups ground hazelnuts
1 teaspoon baking powder 3/4 teaspoon kosher salt
1 cup unsalted soft butter
2/3 cup granulated sugar
2/3 cup powdered sugar
2 large eggs
1 teaspoon vanilla extract
Step 1
In a medium bowl, combine the flour, ground hazelnuts, baking powder, and salt, and set aside. In the bowl of your stand mixer fitted with the paddle attachment, cream the butter and the sugars until pale and fluffy, about 3 to 4 minutes.
Step 2
In another large bowl using a hand mixer, beat butter and sugar together until creamy. Add egg and vanilla and beat to combine. Add dry ingredients and mix until just combined. Add green food coloring until your desired color is reached.
Step 3
Using a medium cookie scoop (about 2 tablespoons), scoop dough 2” apart onto prepared baking sheets. Place a heart sprinkle in the middle of each cookie.
Step 4
Bake until edges are set and bottoms start to turn golden, 12 to 14 minutes. Let cool on baking sheets.
19
Kwanzaa Cat Cookies
American Maulana Karenga created Kwanzaa in 1966 during the aftermath of the Watts riots as a specifically African-American holiday.Karenga said his goal was to “give blacks an alternative to the existing holiday of Christmas and give blacks an opportunity to celebrate themselves and their history, rather than simply imitate the practice of the dominant society.” For Karenga, a major figure in the Black Power movement of the 1960s and 1970s, the creation of such holidays also underscored the essential premise that “you must have a cultural revolution before the violent revolution. The cultural revolution gives identity, purpose, and direction.”
According to Karenga, the name Kwanzaa derives from the Swahili phrase matunda ya kwanza, meaning “first fruits”. First fruits festivals exist in Southern Africa, celebrated in December/January with the southern solstice, and Karenga was partly inspired by an account he read of the Zulu festival Umkhosi Wokweshwama. It was decided to spell the holiday’s name with an additional “a” so that it would have a symbolic seven letters During the early years of Kwanzaa, Karenga said it was meant to be an alternative to Christmas. He believed Jesus was psychotic and Christianity was a “White” religion that Black people should shun. As Kwanzaa gained mainstream adherents, Karenga altered his position so practicing Christians would not be alienated, stating in the 1997 book Kwanzaa: A Celebration of Family, Community, and Culture that “Kwanzaa was not created to give people an alternative to their own religion or religious holiday.”
Many African Americans who celebrate Kwanzaa do so in addition to observing Christmas
INGREDIENTS
1pouch (17.5 oz) Betty Crocker™ Double Chocolate Chunk Cookie Mix 1egg (for cookie mix) 1/4 cup vegetable oil 2 tablespoons water
1 tub (16 oz) Betty Crocker™ Rich & Creamy Milk Chocolate Frosting 24chocolate Necco Red confetti sprinkles Chocolate Chips
Step 1
Preheat oven to 350° F. Prepare cookie mix according to package instructions.
Step 2
Drop cookie dough by teaspoonfuls on a cookie sheet. Bake at for 8-10 minutes.
Step 3
After removing cookies from the oven, let cool, but when still soft push the black non-pareils sprinkles into the top of the cookies for the eyes.
Step 4
Using the chocolate frosting, attach the chocolate Necco™ wafer to the middle of the cookie and the chocolate chips for the ears.
Step 5:
With a toothpick dipped in the chocolate frosting, attach the red confetti sprinkle to the middle of the Necco™ wafer for the nose.
20
Rules
Title Baskerville Bold Italic 31pt Title for Cookie Recipe Baskerville Bold 30pt
Subhead Baskerville Semibold 12pt
Body Text Baskerville Regular 11.5pt
When placing images make it so the pages are not so text heavy. Images also must go along with the text to show what the article is about.
INGREDIENTS
In Avenir typeface and different color then the recipe itself and will be in 12pt This is the only thing that will be written in a different typeface family
Ingredients Steps Bolded
Sidebars will be shown in this color box with white text 12 pt font and baskerville regular and white color font
Pull quotes will be in Baskerville Italic in 15 pt font and should be center alligned to make it stand out from the rest of the body text.
The directions in regular baskerville and in 12pt font Both things being in the grey color
Everthing must be written in three columns unless it is directions for a recipe.
goody
Winter Cookies Recipes
This will change based on season the magazine is being released. Location is placed where is seems best with image.
Logo always appears at the top of the cover
Slogan will always appear on the bottom of the cover.
Cookies of the Season

