The projects in the STEM Resource Book reinforce the following concepts using Kidversity Level 1 kit:
Preface
Education has always existed since the inception of the human race. However, it was informal in the beginning but took a more formal and structured shape later. The objective remained the same: to prepare the inquisitive learners of today for the challenges of tomorrow. Now, we are in the 21st century, where dynamic curriculum, engaging pedagogy, and performance-based assessments are the essential elements for an impactful education system, where integration of technology is indispensable and inseparable due to the extensive exposure of learners to media and information. These circumstances make the establishment of engaging and relevant education a true challenge for educators.
It is an open fact that the challenges of the 4th industrial revolution cannot be encountered through conventional educational approaches. Our STEM education model, based on STEM Resource books and makerspace, is developed according to the Science, Technology, Engineering, Mathematics (STEM) approach, inter-disciplinary and integrated learning that engages learners in learning, inculcates skills development and enhances problem-solving abilities.
STEM challenges in this book are developed by STEM-certified educators, based on Next Generation Science Standards, The National Curriculum of England and the Common Core for Mathematics. These challenges were then reviewed by international STEM experts & organizations, including STEM.org, an eminent research & accrediting body in the United States. These challenges and pedagogy were put to the test in a long & robust process of prototyping on students & their teachers for their feedback on learning attainment and experience.
Expert teachers appreciate and endorse the systematic initiative of STEM programs in schools, through which learners are challenged to solve problems of real-world situations and emerge as innovators and inventors. Apart from developing collaboration and communication skills, students choose their career paths and achieve their goals in life.
Understanding the Structure of the Lesson
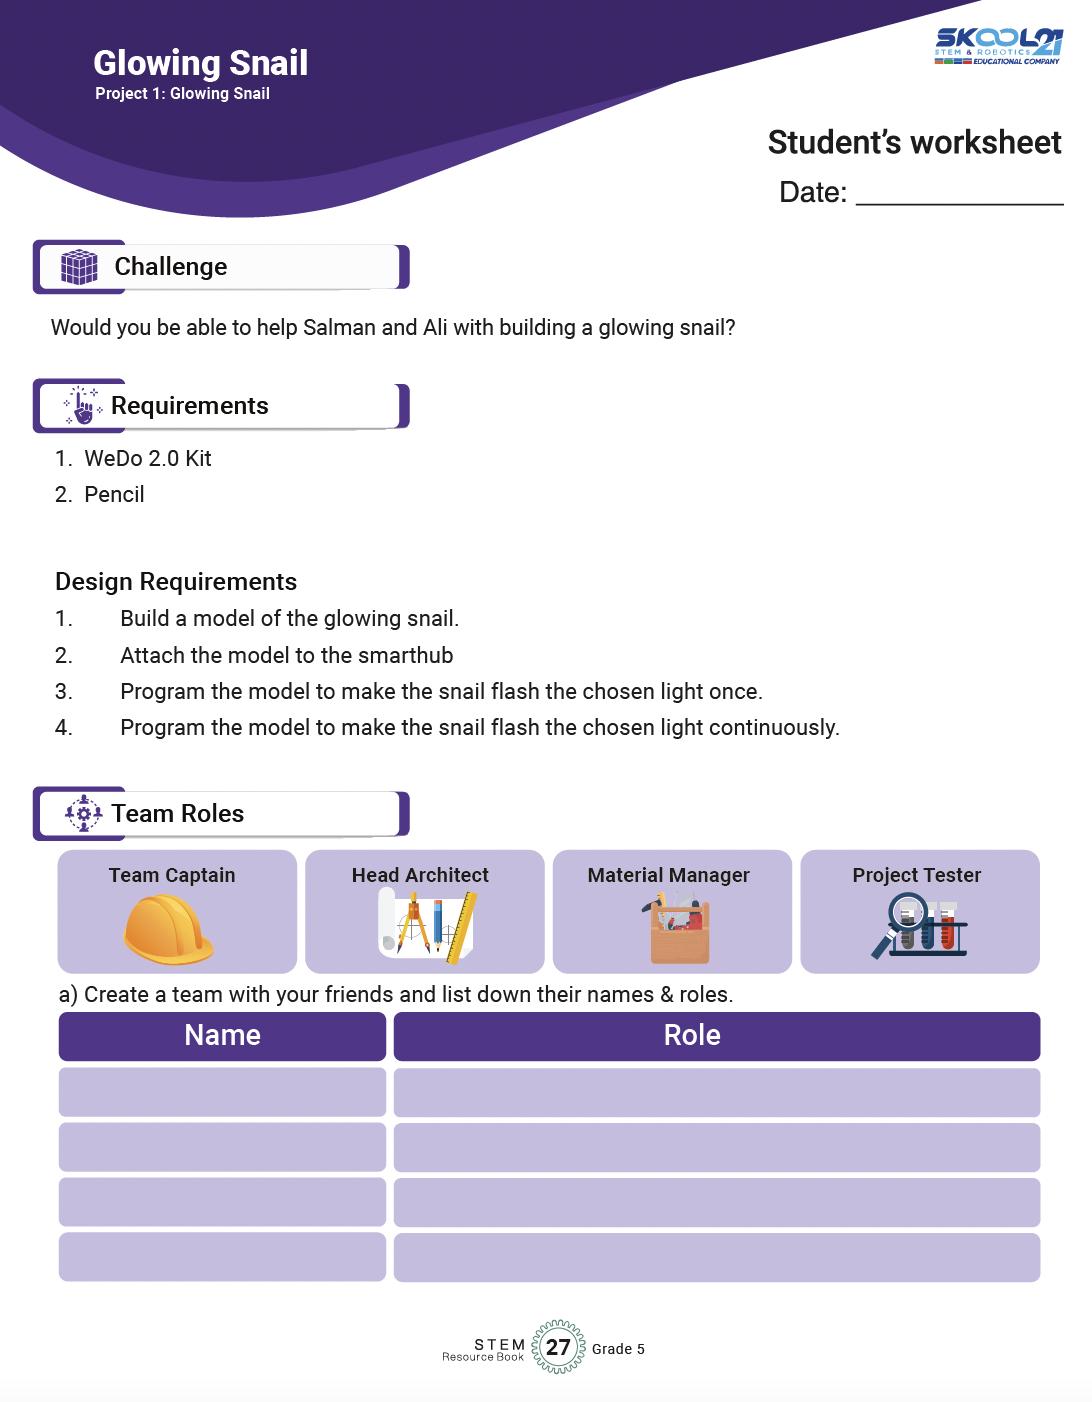
Requirements for the project
Team Roles in the Team
Alignment with the Sustainable Development Goals
NGSS Curriculum Linkage
Cambridge Science Curriculum Linkage
Technology Connection
Engineering Connection
Common Core for Mathematics Curriculum Linkage
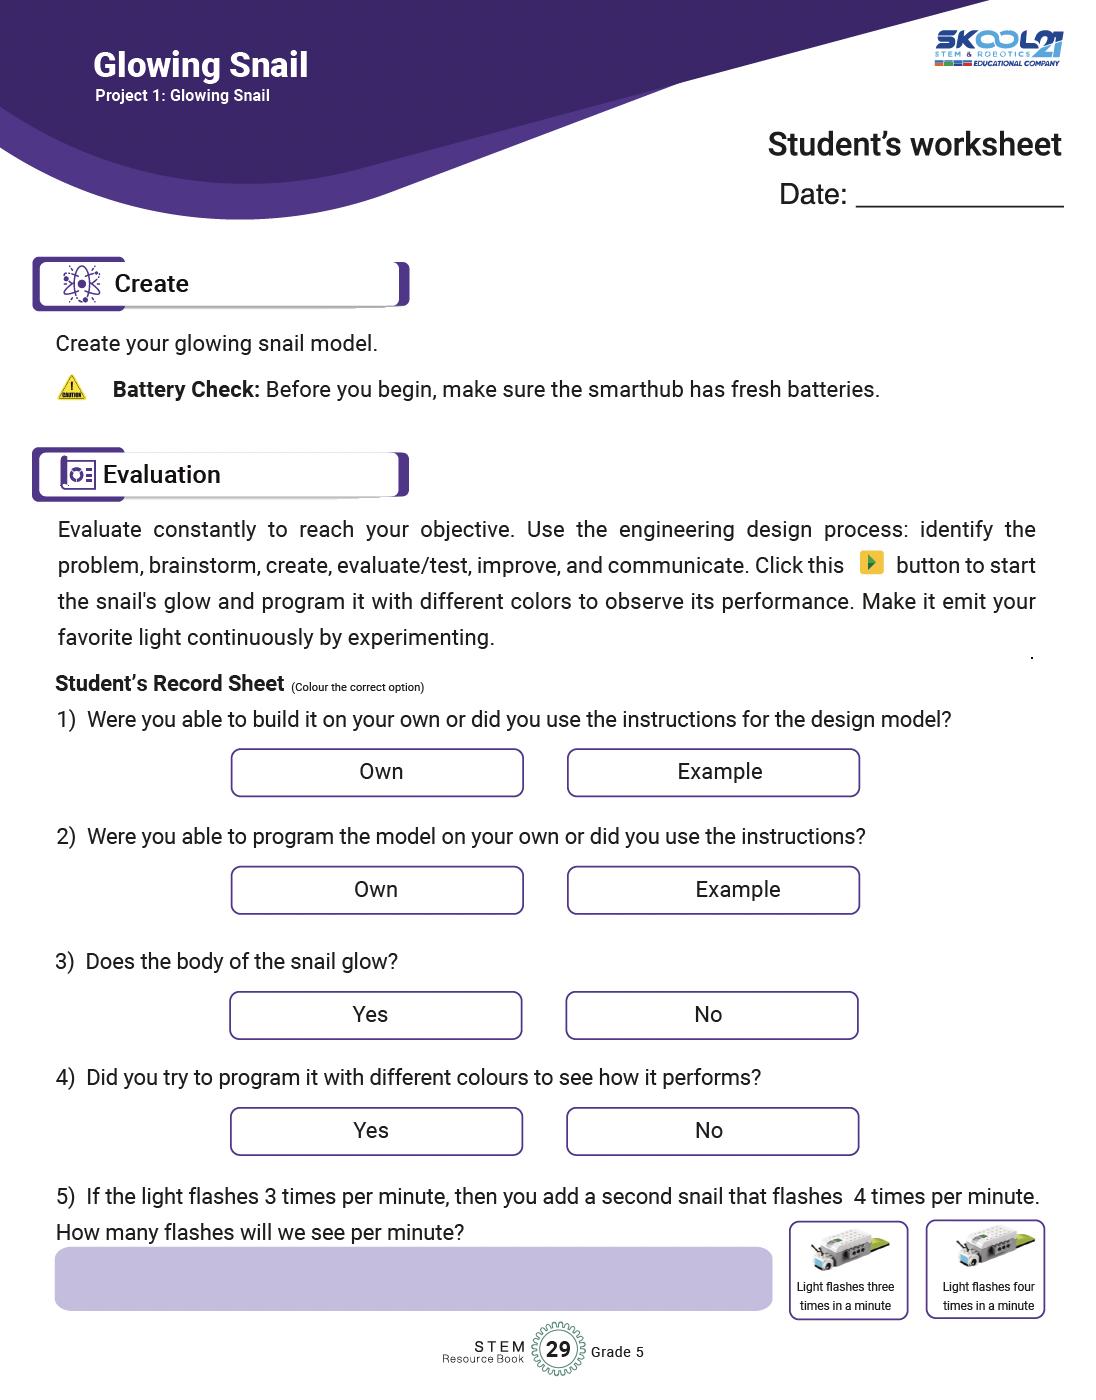
After brainstorming Learners create their model.
Evaluation is the phase where learners reflect on the performance of their model and link it to their classroom learning.
Learners write about the project they are building
Learners sketch their model and label as many parts for clarity in execution.
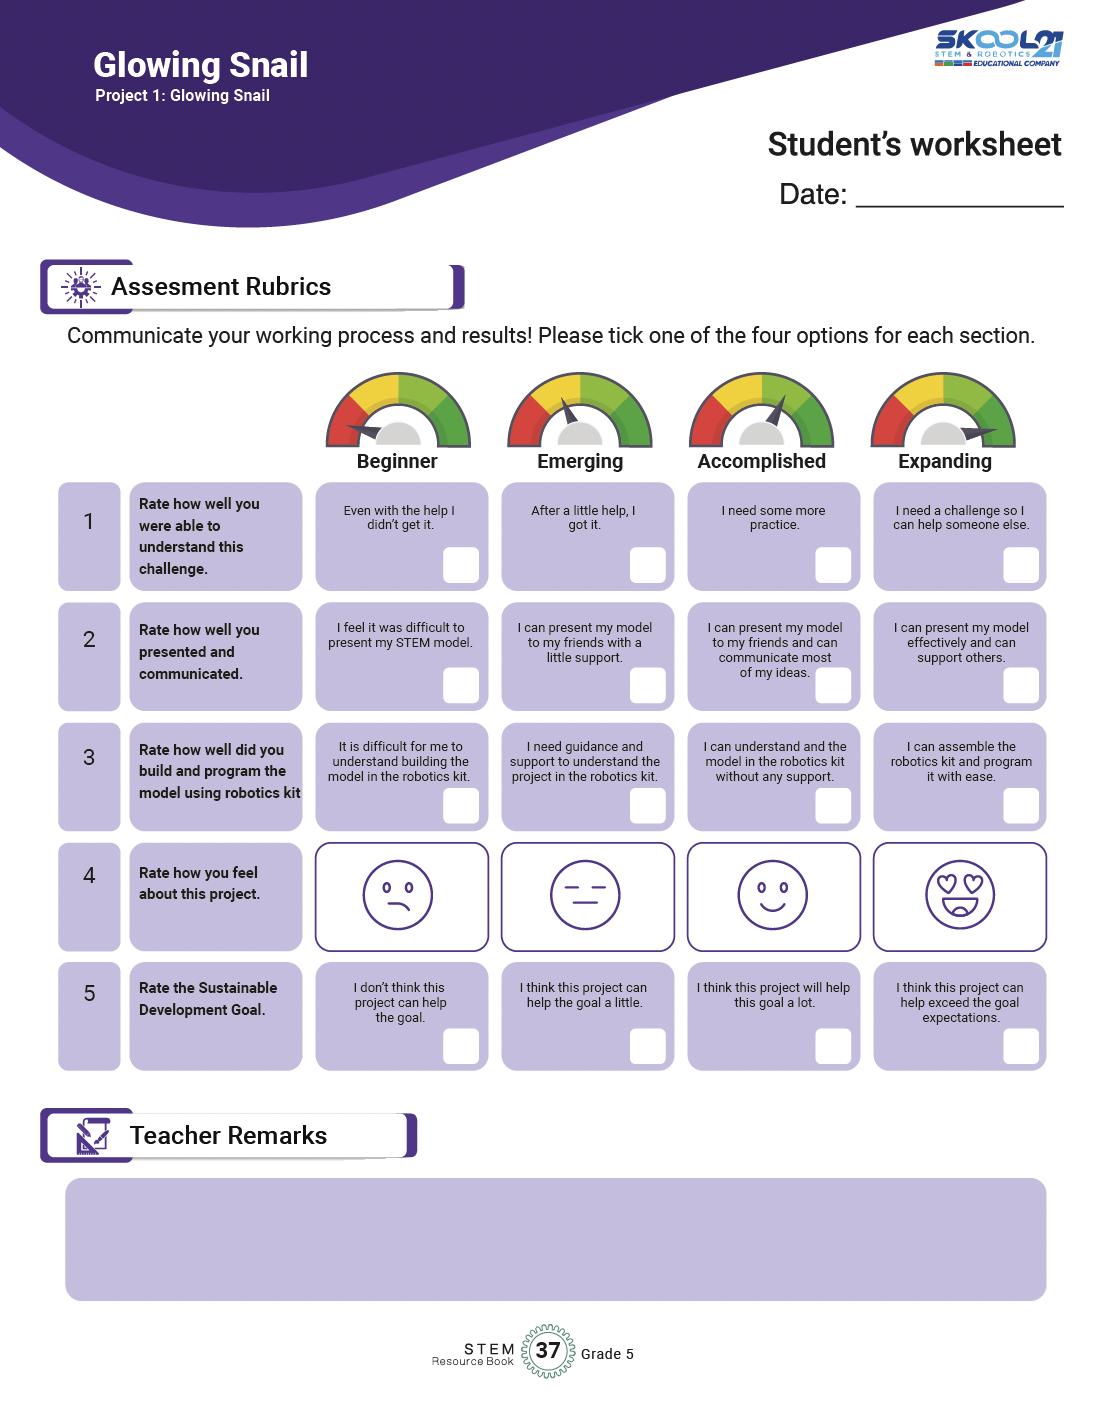
Assessment rubrics is a grid for teachers and learners to reflect on their progress in each of the project.
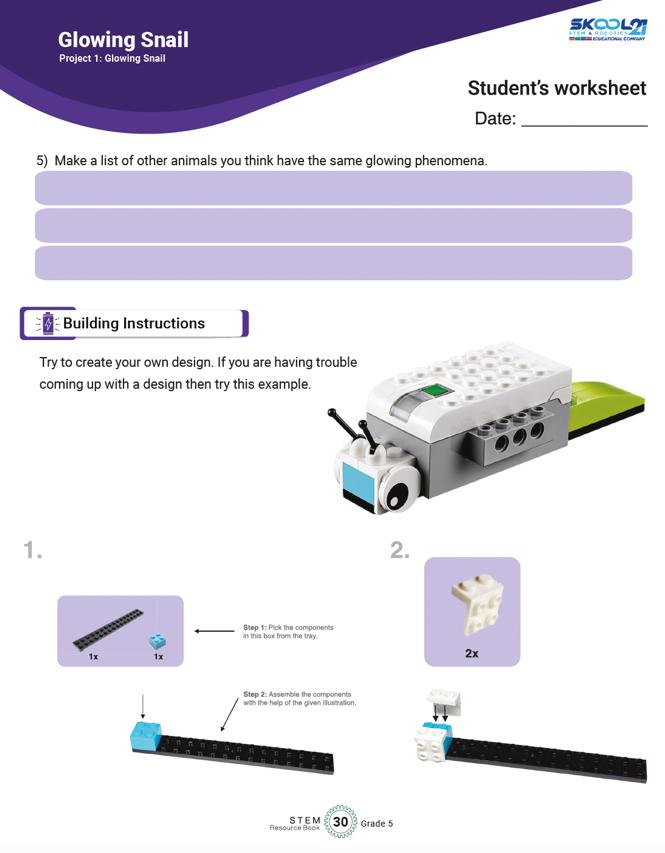
Building instructions are also provided to help learners get started, If they struggling in the first phase.
This space is for teachers to provide any remarks if needed on the participation of the learner in each of the project.
Alignment with the Sustainable Development Goals
Sustainable Development Goals (SDGs) are a set of 17 global goals adopted by all United Nations Member States in 2015 as part of the 2030 Agenda for Sustainable Development. eved by being for all at
Ensure inclusive and equitable quality education and promote lifelong learning opportunities for all. l women and
Ensure access to affordable, reliable, sustainable, and
Promote sustained, inclusive, and sustainable economic growth, full and productive employment, Build resilient infrastructure, promote inclusive and ndustrialization, and foster innovation.
Take urgent action to combat climate change and its stainable development.
Protect, restore, and promote sustainable use of terrestrial ecosystems, halt deforestation, and combat desertification and biodiversity loss.
inclusive societies for sustainable development, provide access to justice for all, and build effective, accountable, and inclusive institutions at all levels.
Partnerships for Strengthen the means of implementation and revitalize the Global Partnership for Sustainable Development.
Now, let's see how the students' projects can be linked to these SDGs:
When students design projects using STEM Resource Book and Wedo 2.0 Kit, they can focus on creating solutions that tackle real-world problems related to sustainable development. For example, they could create smart home systems that conserve energy (SDG 7Affordable and Clean Energy) or design a production (SDG 12
Linking their projects to specific SDGs requires critical thinking and understanding of the global challenges we face today. Students can also focus on projects that address local community needs and align them with relevant SDGs.
Encouraging students to consider the SDGs when designing their projects will help them understand the broader context of their work and how their technological and scientific skills can contribute to building a more sustainable and equitable world. This approach also empowers them to become responsible global citizens who actively engage with the challenges facing our planet.
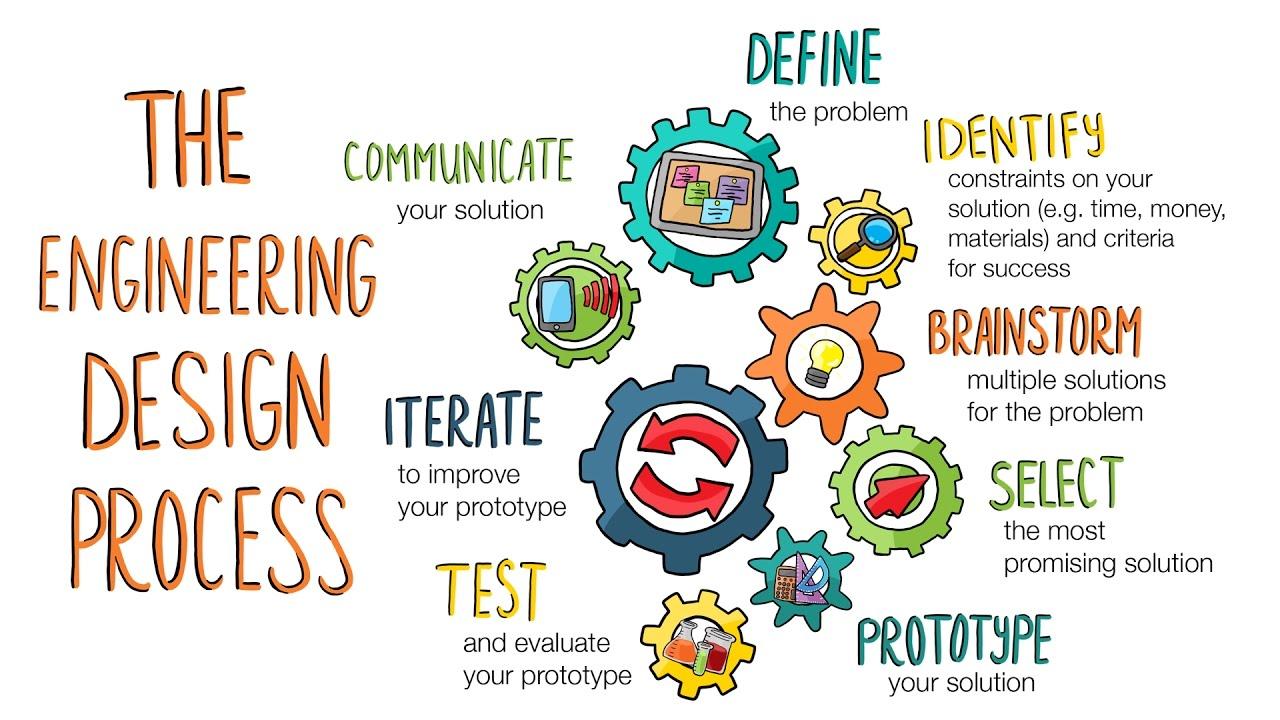
The Engineering Design Process
The Engineering Design Process is a systematic approach used by engineers and designers to solve problems and create innovative solutions. It provides a structured framework for developing new products, processes, or systems by following a series of well-defined steps. This process is not only applicable in engineering but is also widely used in various STEM disciplines to tackle challenges and develop creative solutions.
The typical steps of the Engineering Design Process are: Icons Phases
Define the Problem
Brainstorm Ideas
Design and Plan
Details
• Present the project's objectives and requirements to students, such as building a model, attaching it to the smarthub, and programming it.
• Encourage students to understand the purpose of the project, its context, and what they need to achieve.
• Engage students in brainstorming sessions where they envision and sketch possible solutions.
• Encourage creativity and diverse ideas, allowing students to explore various design options.
• Guide students to describe their chosen model's structure and function in detail.
• Help them plan how to use STEM Kit components effectively to build their models.
• Facilitate discussions on how they intend to program the model to perform specific
Build and Create
Test and Evaluate
Iterate and Improve
Communicate and Share
actions.
• Provide assistance as needed while students assemble their models.
• Encourage hands-on exploration, experimentation, and iteration as they build and refine their designs.
• Support students in testing their models and programming, providing guidance for troubleshooting.
• Ask questions to help them critically assess whether the model meets the specified requirements.
• Encourage students to identify areas for improvement based on testing outcomes.
• Guide them in making iterative changes to their designs to enhance performance and functionality.
• Organize opportunities for students to present their projects to peers or the class.
• Encourage them to explain their design choices, programming logic, and problemsolving strategies.
Fostering Social Skills
The STEM projects outlined in the "STEM Resource Book" provide opportunities for students to develop important social skills alongside their technical knowledge. These social skills are crucial for effective collaboration, communication, and engagement in real-world scenarios. Here's a brief introduction to some of the key social skills covered in these projects:
S# Social Skills
1 Collaboration
Details
Working together is a fundamental skill across all projects. Students learn to cooperate, share ideas, delegate tasks, and contribute collectively to achieve project goals. They experience the benefits of pooling strengths and perspectives to create more comprehensive and innovative solutions.
2 Communication Effective communication is vital in sharing ideas, presenting findings, and troubleshooting challenges. Through the projects, students practice articulating their thoughts clearly, listening actively to peers, and engaging in meaningful discussions that promote understanding.
3 ProblemSolving
4 Empathy and Respect
Engaging in the engineering design process exposes students to various challenges. They learn to approach problems analytically, brainstorm solutions, evaluate alternatives, and make decisions collaboratively. These skills are applicable beyond STEM and are valuable in everyday decision-making.
Encouraging students to appreciate different viewpoints, respect diverse ideas, and consider the feelings of their peers fosters a positive and inclusive learning environment. These skills promote effective teamwork and strengthen relationships within the group.
5 Critical Thinking
6 Time Management
As students work on designing, building, testing, and refining their projects, they enhance their critical thinking abilities. They learn to analyze situations, make informed judgments, and consider implications and consequences of their choices.
Working on projects requires efficient time management. Students develop skills in setting priorities, allocating time to tasks, meeting deadlines, and juggling multiple responsibilities –all of which are valuable in academic and professional contexts
7 Conflict Resolution Collaboration can sometimes lead to disagreements or conflicts. Through open discussions and respectful negotiations, students learn how to address conflicts, find common ground, and work towards mutually satisfactory solutions.
8 Presentation Skills
9 Reflection
Sharing their projects with peers and instructors hones students' presentation skills. They practice structuring their thoughts, speaking confidently, and using visuals effectively to convey complex information.
After completing each project, students reflect on their experiences, successes, challenges, and lessons learned. This practice encourages self-awareness, self-assessment, and the
ability to apply insights from one project to others.
By incorporating these social skills into STEM projects, educators prepare students not only for academic success but also for success in their future careers and personal lives. These skills empower students to collaborate effectively, contribute meaningfully to teams, and navigate the complexities of a rapidly changing world.
Makerspace
What is a Makerspace?
A makerspace is a collaborative workspace inside a school, library, or public/private facility for making, learning, exploring, and sharing. Here, students have the tools and resources to design, experiment, build, and invent. Makerspaces typically include a variety of materials and equipment, ranging from high-tech to no-tech, all aimed at fostering creativity, problem-solving, and critical thinking.
Features of an Ideal Makerspace
1. Space: The ideal makerspace should be spacious enough to accommodate groups of students working on projects. It should be well-lit and have areas for both individual and group work.
2. Furniture:
• Flexible Seating: Chairs and tables that are easily movable and can be reconfigured for different tasks.
• Storage Units: Shelves and drawers for organizing tools, materials, and student projects.
• Workbenches: Sturdy surfaces for hands-on activities.
• Display Boards: Walls or boards to showcase projects, ideas, or instructions.
3. Equipment Needed:
• Electronics STEM Kits: A core tool for the Grade 5 makerspace, these kits integrate hardware and software to produce a comprehensive learning tool.
• Computers or Tablets: For programming and accessing digital resources.
• General STEM Tools: Rulers, protractors, magnifying glasses, and basic lab equipment.
• Safety Equipment: Safety goggles, first aid kit, gloves, etc.
4. STEM Resource Book: This will guide students and educators in carrying out projects aligned with NGSS, the National Curriculum of England, and the Common Core State Standards for Mathematics.
Importance of a Makerspace in Schools
1. Enhanced Learning: Makerspaces enable hands-on learning, making complex concepts more accessible.
2. Fosters Creativity: Provides an environment where students can freely express and test out their ideas.
3. Teamwork: Students learn to collaborate, delegate tasks, and work towards a common goal.
4. Problem-solving: Tackling real-world challenges makes students more adept at thinking critically.
5. Prepares for the Future: Engaging with technology and tools prepares students for future job roles and challenges.
Executing STEM Activities in the Makerspace
1. Planning: Begin with the end in mind. Identify the learning outcomes you aim to achieve from the activity.
2. Group Formation: Divide students into small groups to encourage collaboration.
3. Introduction: Introduce the STEM Kit and how it can be used. Brief students on the activity using the STEM Resource Book.
4. Hands-on Activity: Allow students to build, experiment, and iterate using the kits. Ensure that they refer to the STEM Resource Book for guidance.
5. Reflection: Post-activity, allow students to discuss their findings, challenges faced, and what they learned.
6. Showcase: Encourage students to display their projects, explaining the science and math concepts they applied.
7. Safety: Always stress the importance of following safety guidelines, especially when using tools and equipment.
Standard Operating Procedure (SOP) for a Makerspace
1. Objective:
Provide a safe, organized, and productive environment for students to explore, invent, and learn using various tools and materials available in the makerspace.
2. Scope:
This SOP applies to all students, educators, and visitors within the makerspace area.
3. Responsibilities:
• Educators/Staff: Supervise activities, ensure the safety and proper use of tools/equipment, provide necessary training, and maintain equipment.
• Students: Comply with all guidelines, work safely, and respect all equipment and fellow makers.
4. Access:
• Makerspace access should be limited to authorized personnel and students during scheduled times.
• All users must sign in and out of the makerspace, noting their purpose of visit.
5. Safety:
• Before using any tool or equipment, students must receive proper training.
• Safety equipment like goggles, gloves, and aprons should be worn as required.
• No food or drink is allowed in the makerspace.
• First aid kits and fire extinguishers should be easily accessible.
6. Equipment Usage:
• All equipment should have clear, written instructions posted nearby.
• Users must report any damage or malfunction immediately.
• After use, equipment must be returned to its designated place and left in a clean and usable state for the next user.
7. Materials:
• All materials must be stored in their designated areas.
• Users must log materials used for inventory and restocking purposes.
• Waste should be disposed of properly in the provided bins.
8. Conduct:
• Respect fellow makers; do not interrupt or hinder someone else’s project.
• Clean up after completing a project or task.
• Notify staff of any issues, concerns, or suggestions.
• Always ask if unsure about equipment use or any makerspace procedure.
9. Training:
• Regular workshops should be held to train students on the use of new equipment or software.
• New users should undergo an orientation session before accessing the makerspace.
10. Maintenance:
• A routine check of all tools and equipment should be carried out to ensure they are in good working condition.
• Expired or worn-out materials should be discarded and replaced.
• Cleaning routines must be established to maintain the hygiene and tidiness of the makerspace.
11. Project Storage:
• Designate a space where students can store ongoing projects.
• All projects should be labeled with the student's name, class, and date.
12. Showcase:
• A dedicated space should be available for showcasing exemplary projects.
• Educators can rotate the showcased projects based on relevance, innovation, and educational value.
13. Continuous Improvement:
• Collect feedback regularly from users to understand what can be improved.
• Explore new tools, materials, and technologies to keep the makerspace updated.
14. Emergency Procedures:
• Clearly display emergency procedures, including evacuation routes.
• Train staff and students on how to respond to emergencies like fires, electrical failures, or injuries.
15. Periodic Review:
• This SOP should be reviewed at least annually to ensure its relevance and effectiveness.
In conclusion, a well-structured SOP ensures that the makerspace remains a hub of creativity while being safe and organized. Adhering to these procedures ensures that the makerspace is beneficial for all and remains a vital resource for students for years to come.
Project-wise Lesson Plan and Answer Key
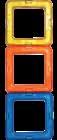
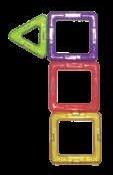
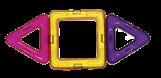
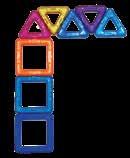
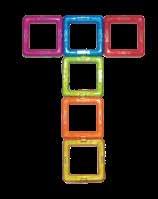
This project is about the letter A. Trace over the letter A below with your finger and then colour it.
Using the Kidversity Level 1 Kit, try to make the letter ‘A’ on your own.
Then, follow the model diagram below to make the letter ‘A’ .
Lesson Plan for Project 1.1: Making the Letter 'A'
Objective:
Students will be able to create the letter 'A' using the Kidversity Level 1 Kit. Students will practice identifying and using different shapes and colors. Students will develop fine motor skills.
Material Required:
Kidversity Level 1 Kit
Projector or whiteboard (for teacher's use)
STEM Resource Book Pre-K
1 Introduction 5 minutes
2 Activity 30 minutes
Duration: 45 minutes
• Show students the Kidversity Level 1 Kit and briefly explain the project's goal.
• Discuss the importance of following instructions and using the provided materials.
• Distribute the Kidversity Level 1 Kit to each student.
• Demonstrate building the letter 'A' using the sample model. Highlight the shapes and colors used.
• Let students work individually to build the letter 'A' using the provided shapes and colors.
3 Discussion and Comparison 5 minutes
• Bring the students together and discuss their creations.
• Compare their models with the sample model, emphasizing similarities and differences.
4 Letter Formation Practice 5 minutes • Tracing and writing the letter 'A'.
5 Cleanup and Conclusion 5 minutes • Have children clean up the materials.
Number of blocks used to make 'A'. 2 Number of red blocks used to make 'A'. 3 Circle the colors used.
4 Comparing similarities and differences between the models.
5 Preference based on personal choice.
6 The student traces and writes the letter 'A'.
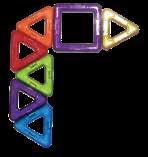
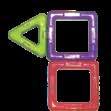
This project is about the letter a. Trace over the letter a below with your finger and then colour it.
Using the Kidversity Level 1 Kit, try to make the letter ‘a’ on your own.
Then, follow the model diagram below to make the letter ‘a’.
Lesson Plan for Project 1.2: Making the Letter 'a'
Objective:
Students will be able to create the lowercase letter 'a' using the Kidversity Level 1 Kit. Students will practice identifying and using triangles. Students will develop fine motor skills.
Material Required:
Kidversity Level 1 Kit
Projector or whiteboard (for teacher's use)
STEM Resource Book Pre-K
Duration: 45 minutes
S# Phase Duration Details
1 Introduction 5 minutes
2 Activity 30 minutes
3 Discussion and Comparison 5 minutes
4 Letter Formation Practice 5 minutes
5 Cleanup and Conclusion 5 minutes
• Introduce the project by explaining that students will be making the lowercase letter 'a' using the provided magnetic shapes.
• Distribute the Kidversity Level 1 Kit to each student.
• Demonstrate building the letter 'a' using the sample model. Highlight the triangles used.
• Let students work individually to build the letter 'a' using triangles from the kit.
• Bring the students together and discuss their models.
• Compare their creations with the sample model, discussing similarities and differences.
• Tracing and writing the letter 'a'.
• Have children clean up the materials.
Answer Key
Q# Answer Key / Guide for Evaluation Questions
1 Circling triangles as the shapes used.
2 Identifying the shape with three sides.
3 Number of blocks used for 'a'.
4 Comparing similarities and differences between the models.
5 Expressing a preference with a reason.
6 The student traces and writes the letter 'a'.
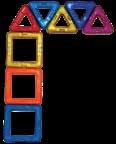
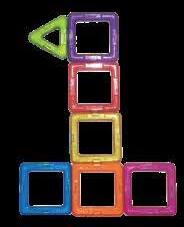
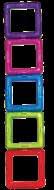
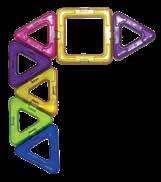
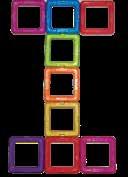
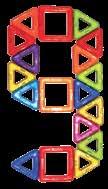
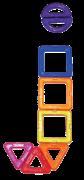
This project is about the number 1. Trace over the number 1 below with your finger and then colour it.
Using the Kidversity Level 1 Kit, try to make the number 1 on your own.
Then, follow the model diagram below to make the number ‘1’ .
Lesson Plan for Project 1.3: Making the Number '1'
Objective:
Students will be able to create the number '1' using the Kidversity Level 1 Kit. Students will practice identifying and using different colors. Students will develop fine motor skills.
Material Required:
Kidversity Level 1 Kit
Projector or whiteboard (for teacher's use)
STEM Resource Book Pre-K
Duration: 45 minutes
S# Phase Duration Details
1 Introduction 5 minutes
2 Activity 30 minutes
3 Discussion and Comparison 5 minutes
4 Number Formation Practice 5 minutes
5 Cleanup and Conclusion 5 minutes
• Explain to students that they will be creating the number '1' using the magnetic shapes from the kit.
• Distribute the Kidversity Level 1 Kit to each student.
• Demonstrate building the number '1' using the sample model. Highlight the colors used.
• Let students work individually to build the number '1' using the provided shapes.
• Bring the students together and discuss their models.
• Compare their creations with the sample model, discussing similarities and differences.
• Tracing and writing the number '1'.
• Have children clean up the materials.
Answer Key
Q# Answer Key / Guide for Evaluation Questions
1 Identifying the colors used.
2 Expressing whether making '1' was easier or harder than 'A'.
3 Number of blocks used for '1'.
4 Comparing similarities and differences between the models.
5 Expressing a preference with a reason.
6 The student traces and writes the number '1'.
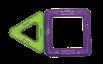
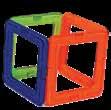
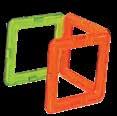
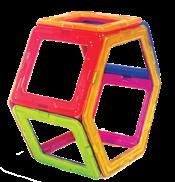
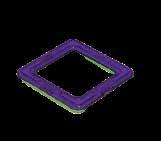
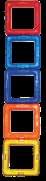
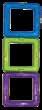
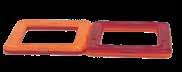
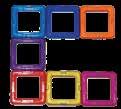
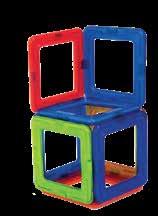
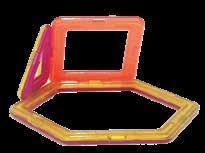
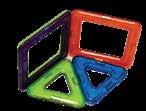
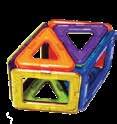
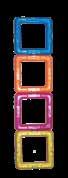
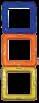
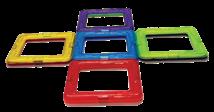
Trace over the shape below with your finger. This is a square.
Squares have 4 sides. All of the sides are equal.
Squares have 4 corners. A square is a 2D (flat) shape.
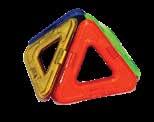
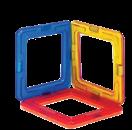
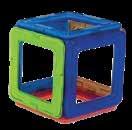
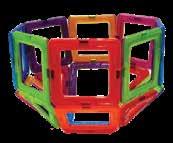
3D (solid) shape is called a cube. Make a “cube” with Kidversity Level 1 Kit.
Objective:
Lesson Plan for Project 1.4: Creating a Cube
Students will be able to create a 3D cube using the Kidversity Level 1 Kit. Students will practice identifying and using squares. Students will learn about 3D shapes and their attributes.
Material Required:
Kidversity Level 1 Kit
Projector or whiteboard (for teacher's use)
STEM Resource Book Pre-K
Duration: 45 minutes
S# Phase Duration Details
1 Introduction 5 minutes
2 Activity 30 minutes
3 Discussion and Exploration 5 minutes
4 Cleanup and Conclusion 5 minutes
• Introduce the concept of 3D shapes and cubes.
• Explain to students that they will be creating a 3D cube using the magnetic squares from the kit.
• Distribute the Kidversity Level 1 Kit to each student.
• Demonstrate building a 3D cube using the sample model. Highlight the concept of edges, faces, and corners.
• Let students work individually to build their own 3D cube using the provided squares.
• Gather students and discuss their cubes.
• Count the number of sides (faces), edges, and corners of the cubes.
• Have children clean up the materials.
Answer Key
Q# Answer Key / Guide for Evaluation Questions
1 Identifying squares as the shapes used.
2 Confirming that the cube can stand on its own.
3 Identifying the number of sides (faces) of a cube.
4 Identifying the number of edges of a cube.
5 Identifying the number of corners of a cube.
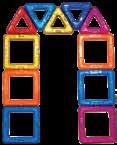
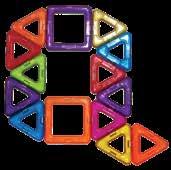
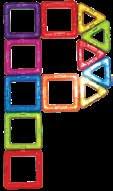
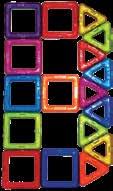
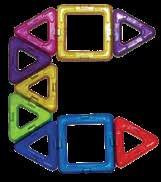
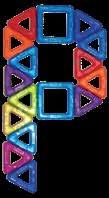
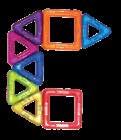
This project is about the letter B. Trace over the letter B below with your finger and then colour it.
Using the Kidversity Level 1 Kit, try to make the letter B on your own.
Then, follow the model diagram below to make the letter ‘B’ .
Lesson Plan for Project 2.1: Making the Letter 'B'
Objective:
Students will be able to create the letter 'B' using the Kidversity Level 1 Kit. Students will practice identifying and using different shapes. Students will develop fine motor skills.
Material Required:
Kidversity Level 1 Kit
Projector or whiteboard (for teacher's use)
STEM Resource Book Pre-K
Duration: 45 minutes
S# Phase Duration Details
1 Introduction 5 minutes
2 Activity 30 minutes
3 Discussion and Comparison 5 minutes
4 Letter Formation Practice 5 minutes
5 Cleanup and Conclusion 5 minutes
• Introduce the project by explaining that students will be making the letter 'B' using the provided magnetic shapes.
• Distribute the Kidversity Level 1 Kit to each student.
• Demonstrate building the letter 'B' using the sample model. Highlight the shapes used.
• Let students work individually to build the letter 'B' using the provided shapes.
• Gather students and discuss their models.
• Compare their creations with the sample model, discussing similarities and differences.
• Tracing and writing the letter 'B'.
• Have children clean up the materials.
Answer Key
Q# Answer Key / Guide for Evaluation Questions
1 Identifying shapes used for 'B'.
2 Determining if the design is 2D or 3D.
3 Number of blocks used for 'B'.
4 Considering the availability of green blocks for 'B'.
5 Expressing whether 'B' was easier or harder based on personal experience.
6 The student traces and writes the letter 'B'.
This project is about the letter b. Trace over the letter b below with your finger and then colour it.
Using the Kidversity Level 1 Kit, try to make the letter b on your own.
Then, follow the model diagram below to make the letter ‘b’ .
Lesson Plan for Project 2.2: Making the Letter 'b'
Objective:
Students will be able to create the lowercase letter 'b' using the Kidversity Level 1 Kit. Students will practice identifying and using triangles. Students will develop fine motor skills.
Material Required:
Kidversity Level 1 Kit
Projector or whiteboard (for teacher's use)
STEM Resource Book Pre-K
Duration: 45 minutes
S# Phase Duration Details
1 Introduction 5 minutes
2 Activity 30 minutes
3 Discussion and Comparison 5 minutes
4 Letter Formation Practice 5 minutes
5 Cleanup and Conclusion 5 minutes
• Introduce the project by explaining that students will be making the lowercase letter 'b' using the provided magnetic shapes.
• Distribute the Kidversity Level 1 Kit to each student.
• Demonstrate building the letter 'b' using the sample model. Highlight the triangles used.
• Let students work individually to build the letter 'b' using triangles from the kit.
• Gather students and discuss their models.
• Compare their creations with the sample model, discussing similarities and differences.
• Tracing and writing the letter 'b'.
• Have children clean up the materials.
Answer Key
Q# Answer Key / Guide for Evaluation Questions
1 Counting the number of triangles used for 'b'.
2 Identifying the color used most.
3 Identifying the color used least.
4 Comparing similarities and differences between the models.
5 Expressing a preference with a reason.
6 The student traces and writes the letter 'b'.
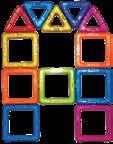
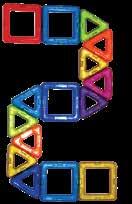
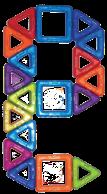
This project is about the number 2. Trace over the number 2 below with your finger and then colour it.
Using the Kidversity Level 1 Kit, try to make the number 2 on your own.
Then, follow the model diagram below to make the number ‘2’ .
Lesson Plan for Project 2.3: Creating the Number '2'
Objective:
Students will be able to create the number '2' using the Kidversity Level 1 Kit. Students will practice identifying and using different shapes. Students will develop fine motor skills.
Material Required:
Kidversity Level 1 Kit
Projector or whiteboard (for teacher's use)
STEM Resource Book Pre-K
Duration: 45 minutes
S# Phase Duration Details
1 Introduction 5 minutes
2 Activity 30 minutes
3 Discussion and Comparison 5 minutes
4 Number Formation Practice 5 minutes
5 Cleanup and Conclusion 5 minutes
• Explain to students that they will be creating the number '2' using the provided magnetic shapes.
• Distribute the Kidversity Level 1 Kit to each student.
• Demonstrate building the number '2' using the sample model. Highlight the shapes used.
• Let students work individually to build the number '2' using the provided shapes.
• Gather students and discuss their models.
• Compare their creations with the sample model, discussing similarities and differences.
• Tracing and writing the number '2'.
• Have children clean up the materials.
Answer Key
Q# Answer Key / Guide for Evaluation Questions
1 Identifying shapes used for '2'.
2 Circling the colors used for '2'.
3 Counting the number of blocks used for '2'.
4 Comparing similarities and differences between the models.
5 Expressing a preference with a reason.
6 The student traces and writes the number '2'.
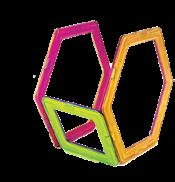
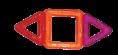
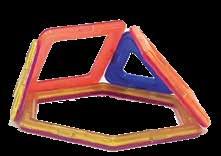
This shape is called a hexagon. Trace over the hexagon with your finger.
A hexagon has 6 sides and 6 corners.
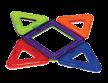
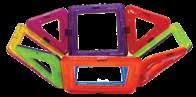
Make a “tyre” with Kidversity Level 1 Kit.
Lesson Plan for Project 2.4: Constructing a Tyre
Objective:
Students will be able to create a "tyre" using the Kidversity Level 1 Kit. Students will practice identifying and using different shapes. Students will develop spatial reasoning skills.
Material Required:
Kidversity Level 1 Kit
Projector or whiteboard (for teacher's use)
STEM Resource Book Pre-K
Duration: 45 minutes
S# Phase Duration Details
1 Introduction 5 minutes
2 Activity 30 minutes
3 Discussion and Exploration 5 minutes
4 Cleanup and Conclusion 5 minutes
• Introduce the project by explaining that students will be creating a "tyre" using the provided magnetic shapes.
• Distribute the Kidversity Level 1 Kit to each student.
• Demonstrate building a "tyre" using the sample model. Highlight the shapes used.
• Let students work individually to build a "tyre" using the provided shapes.
• Gather students and discuss their models.
• Compare their creations with the sample model, discussing similarities and differences.
• Have children clean up the materials.
Answer Key
Q# Answer Key / Guide for Evaluation Questions
1 Identifying circles as the shapes used for the "tyre".
2 Determining if the "tyre" is 2D or 3D.
3 Counting the number of blocks used for the "tyre".
4 Identifying whether there are more squares or hexagons.
5 Encouraging creativity by suggesting possible uses for the "tyre".
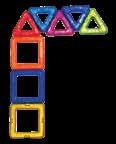
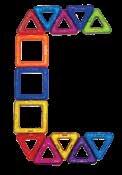
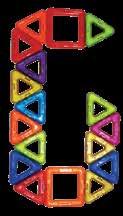
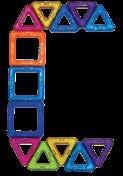
This project is about the letter C. Trace over the letter C below with your finger and then colour it.
Using the Kidversity Level 1 Kit, try to make the letter C on your own.
Then, follow the model diagram below to make the letter ‘C’ .
Lesson Plan for Project 3.1: Crafting the Letter 'C'
Objective:
Students will be able to create the letter 'C' using the Kidversity Level 1 Kit. Students will practice identifying and using different shapes. Students will develop fine motor skills.
Material Required:
Kidversity Level 1 Kit
Projector or whiteboard (for teacher's use)
STEM Resource Book Pre-K
Duration: 45 minutes
S# Phase Duration Details
1 Introduction 5 minutes
2 Activity 30 minutes
3 Discussion and Comparison 5 minutes
4 Letter Formation Practice 5 minutes
5 Cleanup and Conclusion 5 minutes
• Explain to students that they will be creating the letter 'C' using the provided magnetic shapes.
• Distribute the Kidversity Level 1 Kit to each student.
• Demonstrate building the letter 'C' using the sample model. Highlight the shapes used.
• Let students work individually to build the letter 'C' using the provided shapes.
• Gather students and discuss their models.
• Compare their creations with the sample model, discussing similarities and differences.
• Tracing and writing the letter 'C'.
• Have children clean up the materials.
Answer Key
Q# Answer Key / Guide for Evaluation Questions
1 Identifying shapes used for 'C'.
2 Counting the number of blocks used for 'C'.
3 Circling the colors used for 'C'.
4 Comparing similarities and differences between the models.
5 Expressing a preference with a reason.
6 The student traces and writes the letter 'C'.
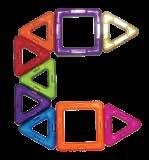
This project is about the letter c. Trace over the letter c below with your finger and then colour it.
Using the Kidversity Level 1 Kit, try to make the letter c on your own.
Then, follow the model diagram below to make the letter ‘c’ .
Lesson Plan for Project 3.2: Crafting the Letter 'c'
Objective:
Students will be able to create the lowercase letter 'c' using the Kidversity Level 1 Kit. Students will practice identifying and using triangles. Students will develop fine motor skills.
Material Required:
Kidversity Level 1 Kit
Projector or whiteboard (for teacher's use)
STEM Resource Book Pre-K
Duration: 45 minutes
S# Phase Duration Details
1 Introduction 5 minutes
2 Activity 30 minutes
3 Discussion and Comparison 5 minutes
4 Letter Formation Practice 5 minutes
5 Cleanup and Conclusion 5 minutes
• Introduce the project by explaining that students will be creating the lowercase letter 'c' using the provided magnetic shapes.
• Distribute the Kidversity Level 1 Kit to each student.
• Demonstrate building the letter 'c' using the sample model. Highlight the triangles used.
• Let students work individually to build the letter 'c' using triangles from the kit.
• Gather students and discuss their models.
• Compare their creations with the sample model, discussing similarities and differences.
• Tracing and writing the letter 'c'.
• Have children clean up the materials.
Answer Key
Q# Answer Key / Guide for Evaluation Questions
1 Counting the number of triangles used for 'c'.
2 Identifying the color used most.
3 Identifying the color used least.
4 Comparing similarities and differences between the models.
5 Expressing a preference with a reason.
6 The student traces and writes the letter 'c'.
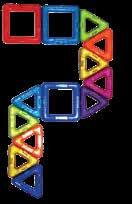
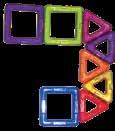
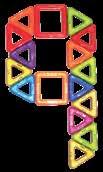
This project is about the number 3. Trace over the number 3 below with your finger and then colour it.
Using the Kidversity Level 1 Kit, try to make the number 3 on your own.
Then, follow the model diagram below to make the number ‘3’ .
Lesson Plan for Project 3.3: Creating the Number '3'
Objective:
Students will be able to create the number '3' using the Kidversity Level 1 Kit. Students will practice identifying and using different shapes. Students will develop fine motor skills.
Material Required:
Kidversity Level 1 Kit
Projector or whiteboard (for teacher's use)
STEM Resource Book Pre-K
Duration: 45 minutes
S# Phase Duration Details
1 Introduction 5 minutes
2 Activity 30 minutes
3 Discussion and Comparison 5 minutes
4 Number Formation Practice 5 minutes
5 Cleanup and Conclusion 5 minutes
• Explain to students that they will be creating the number '3' using the provided magnetic shapes.
• Distribute the Kidversity Level 1 Kit to each student.
• Demonstrate building the number '3' using the sample model. Highlight the shapes used.
• Let students work individually to build the number '3' using the provided shapes.
• Gather students and discuss their models.
• Compare their creations with the sample model, discussing similarities and differences.
• Tracing and writing the number '3'.
• Have children clean up the materials.
Answer Key
Q# Answer Key / Guide for Evaluation Questions
1 Identifying shapes used for '3'.
2 Counting the number of yellow tiles used for '3'.
3 Comparing the similarities and differences between '3' and the letter 'C'.
4 Comparing similarities and differences between the models.
5 Expressing a preference with a reason.
6 The student traces and writes the number '3'.
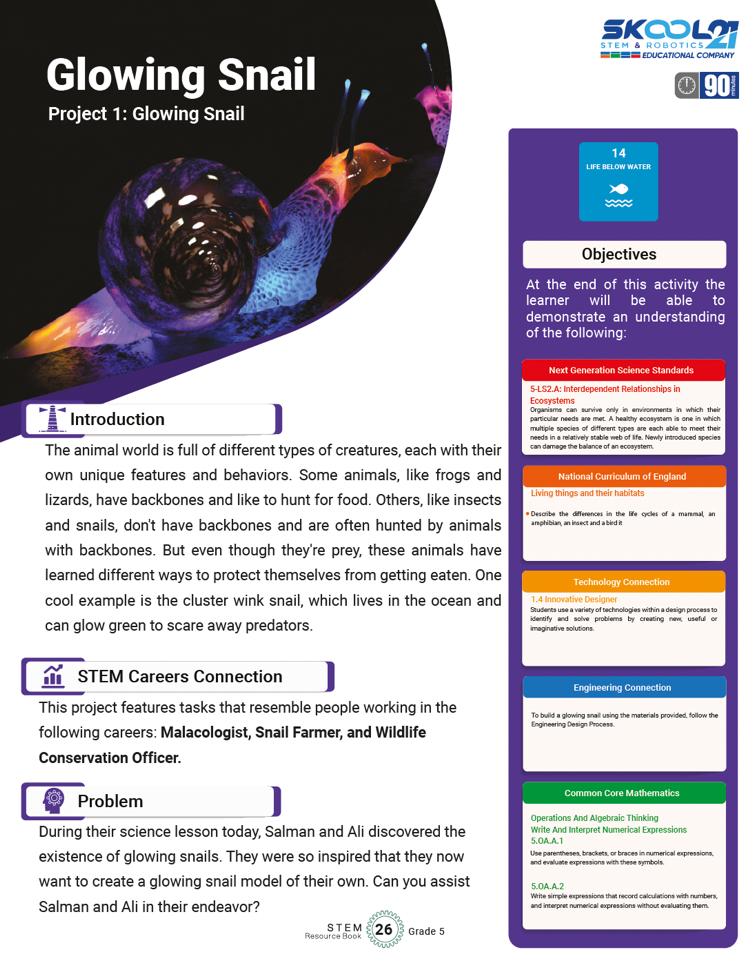
This is a flower. Point to the different parts of the flower. Can you name them?
Petals
Seeds
Make a “flower” with the Kidversity Level 1 Kit.
Lesson Plan for Project 3.4: Constructing a Flower
Objective:
Students will be able to create a "flower" using the Kidversity Level 1 Kit. Students will practice identifying and using different shapes. Students will develop spatial reasoning skills.
Material Required:
Kidversity Level 1 Kit
Projector or whiteboard (for teacher's use)
STEM Resource Book Pre-K
Duration: 45 minutes
S# Phase Duration Details
1 Introduction 5 minutes
2 Activity 30 minutes
3 Discussion and Exploration 5 minutes
4 Cleanup and Conclusion 5 minutes
• Introduce the project by explaining that students will be creating a "flower" using the provided magnetic shapes.
• Distribute the Kidversity Level 1 Kit to each student.
• Demonstrate building a "flower" using the sample model. Highlight the shapes used.
• Let students work individually to build a "flower" using the provided shapes.
• Gather students and discuss their models.
• Compare their creations with the sample model, discussing similarities and differences.
• Have children clean up the materials.
Answer Key
Q# Answer Key / Guide for Evaluation Questions
1 Identifying circles as the shapes used for the "tyre".
2 Identifying the shape used most in the "flower".
3 Counting the number of petals in the "flower" model.
4 Identifying the 2D and 3D parts of the "flower".
5 Encouraging creative exploration by considering different shapes for the "flower".
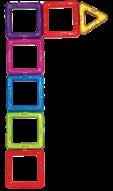
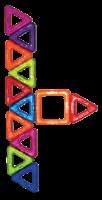
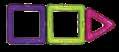
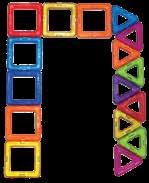
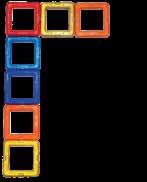
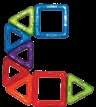
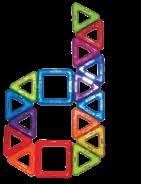
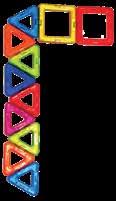
This project is about the letter D. Trace over the letter D below with your finger and then colour it.
Using the Kidversity Level 1 Kit, try to make the letter D on your own.
Then, follow the model diagram below to make the letter ‘D’. 1. 3. 2.
Lesson Plan for Project 4.1: Crafting the Letter 'D'
Objective:
Students will be able to create the letter 'D' using the Kidversity Level 1 Kit. Students will practice identifying and using different shapes. Students will develop fine motor skills.
Material Required:
Kidversity Level 1 Kit
Projector or whiteboard (for teacher's use)
STEM Resource Book Pre-K
Duration: 45 minutes
S# Phase Duration Details
1 Introduction 5 minutes
2 Activity 30 minutes
3 Discussion and Comparison 5 minutes
4 Letter Formation Practice 5 minutes
5 Cleanup and Conclusion 5 minutes
• Explain to students that they will be creating the letter 'D' using the provided magnetic shapes.
• Distribute the Kidversity Level 1 Kit to each student.
• Demonstrate building the letter 'D' using the sample model. Highlight the shapes used.
• Let students work individually to build the letter 'D' using the provided shapes.
• Gather students and discuss their models.
• Compare their creations with the sample model, discussing similarities and differences.
• Tracing and writing the letter 'D'.
• Have children clean up the materials.
Answer Key
Q# Answer Key / Guide for Evaluation Questions
1 Counting the number of blocks used for 'D'.
2 Counting the number of green blocks used for 'D'.
3 Circling the colors used for 'D'.
4 Comparing similarities and differences between the models.
5 Expressing a preference with a reason.
6 The student traces and writes the letter 'D'.
This project is about the letter d. Trace over the letter d below with your finger and then colour it.
Using the Kidversity Level 1 Kit, try to make the letter d on your own.
Then, follow the model diagram below to make the letter ‘d’.
Lesson Plan for Project 4.2: Crafting the Letter 'd'
Objective:
Students will be able to create the lowercase letter 'd' using the Kidversity Level 1 Kit. Students will practice identifying and using triangles. Students will develop fine motor skills.
Material Required:
Kidversity Level 1 Kit
Projector or whiteboard (for teacher's use)
STEM Resource Book Pre-K
Duration: 45 minutes
S# Phase Duration Details
1 Introduction 5 minutes
2 Activity 30 minutes
3 Discussion and Comparison 5 minutes
4 Letter Formation Practice 5 minutes
5 Cleanup and Conclusion 5 minutes
• Introduce the project by explaining that students will be creating the lowercase letter 'd' using the provided magnetic shapes.
• Distribute the Kidversity Level 1 Kit to each student.
• Demonstrate building the letter 'd' using the sample model. Highlight the triangles used.
• Let students work individually to build the letter 'd' using triangles from the kit.
• Gather students and discuss their models.
• Compare their creations with the sample model, discussing similarities and differences.
• Tracing and writing the letter 'd'.
• Have children clean up the materials.
Answer Key
Q# Answer Key / Guide for Evaluation Questions
1 Counting the number of triangles used for 'd'.
2 Identifying the color used most.
3 Identifying the color used least.
4 Comparing similarities and differences between the models.
5 Expressing a preference with a reason.
6 The student traces and writes the letter 'd'.
This project is about the number 4. Trace over the number 4 below with your finger and then colour it.
Using the Kidversity Level 1 Kit, try to make the number 4 on your own.
Then, follow the model diagram below to make the number 4.
Lesson Plan for Project 4.3: Creating the Number '4'
Objective:
Students will be able to create the number '4' using the Kidversity Level 1 Kit. Students will practice identifying and using different shapes. Students will develop fine motor skills.
Material Required:
Kidversity Level 1 Kit
Projector or whiteboard (for teacher's use)
STEM Resource Book Pre-K
Duration: 45 minutes
S# Phase Duration Details
1 Introduction 5 minutes
2 Activity 30 minutes
3 Discussion and Comparison 5 minutes
4 Number Formation Practice 5 minutes
5 Cleanup and Conclusion 5 minutes
• Explain to students that they will be creating the number '4' using the provided magnetic shapes.
• Distribute the Kidversity Level 1 Kit to each student.
• Demonstrate building the number '4' using the sample model. Highlight the shapes used.
• Let students work individually to build the number '4' using the provided shapes.
• Gather students and discuss their models.
• Compare their creations with the sample model, discussing similarities and differences.
• Tracing and writing the number '4'.
• Have children clean up the materials. Answer Key
Q# Answer Key / Guide for Evaluation Questions
1 Identifying shapes used for '4'.
2 Identifying colors used for '4'.
3 Comparing the difficulty of making '4' and the letter 'D'.
4 Comparing similarities and differences between the models.
5 Expressing a preference with a reason.
6 The student traces and writes the number '4'.
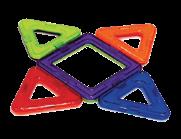
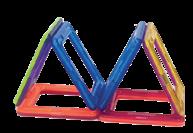
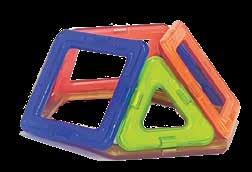
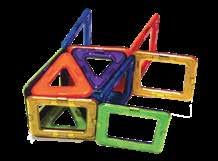
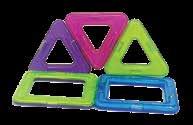
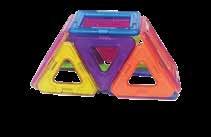
Trace over the shape below with your finger. This is a triangle.
Triangles have 3 sides and 3 corners. They are flat (2D) shapes.
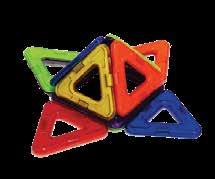
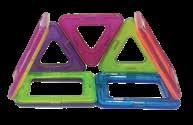
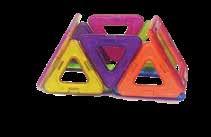
Make a “triangular tower” with Kidversity Level 1 Kit.
Lesson Plan for Project 4.4: Constructing a Triangular Tower
Objective:
Students will be able to create a Triangular tower using the Kidversity Level 1 Kit. Students will practice building vertically and understanding spatial relationships. Students will develop fine motor skills.
Material Required:
Kidversity Level 1 Kit
Projector or whiteboard (for teacher's use)
STEM Resource Book Pre-K
Duration: 45 minutes
S# Phase Duration Details
1 Introduction 5 minutes
2 Activity 30 minutes
3 Discussion and Exploration 5 minutes
4 Cleanup and Conclusion 5 minutes
• Introduce the project by explaining that students will be creating a Triangular tower using the provided magnetic shapes.
• Distribute the Kidversity Level 1 Kit to each student.
• Demonstrate building a Triangular tower using the sample model.
• Let students work individually to build a twostory tower using the provided shapes.
• Gather students and discuss their towers.
• Allow students to share their experiences while building and any challenges they encountered.
• Have children clean up the materials.
Answer Key Q# Answer Key / Guide for Evaluation Questions
1 Counting the number of shapes in the tower.
2 Counting the total number of blocks used for the tower.
3 Identifying and counting the triangle blocks.
4 Recognizing that a square provides a stable base for the tower.
5 Encouraging critical thinking about the structural feasibility of adding more pieces to the tower.
This project is about the letter E. Trace over the letter E below with your finger and then colour it.
Using the Kidversity Level 1 Kit, try to make the letter E on your own.
Then, follow the model diagram below to make the letter ‘E’.
Lesson Plan for Project 5.1: Constructing the Letter 'E'
Objective:
Students will be able to create the letter 'E' using the Kidversity Level 1 Kit. Students will practice identifying and using different shapes. Students will develop fine motor skills.
Material Required:
Kidversity Level 1 Kit
Projector or whiteboard (for teacher's use)
STEM Resource Book Pre-K
Duration: 45 minutes
S# Phase Duration Details
1 Introduction 5 minutes
2 Activity 30 minutes
3 Discussion and Comparison 5 minutes
4 Letter Formation Practice 5 minutes
5 Cleanup and Conclusion 5 minutes
• Explain to students that they will be creating the letter 'E' using the provided magnetic shapes.
• Distribute the Kidversity Level 1 Kit to each student.
• Demonstrate building the letter 'E' using the sample model. Highlight the shapes used.
• Let students work individually to build the letter 'E' using the provided shapes.
• Gather students and discuss their models.
• Compare their creations with the sample model, discussing similarities and differences.
• Tracing and writing the letter 'E'.
• Have children clean up the materials.
Answer Key
Q# Answer Key / Guide for Evaluation Questions
1 Circling the shapes used for 'E'.
2 Identifying the number of different shapes used.
3 Circling the colors used for 'E'.
4 Comparing similarities and differences between the models.
5 Expressing a preference with a reason.
6 The student traces and writes the letter 'E'.
This project is about the letter e. Trace over the letter e below with your finger and then colour it.
Using the Kidversity Level 1 Kit, try to make the letter e on your own.
Then, follow the model diagram below to make the letter ‘e’ .
Lesson Plan for Project 5.2: Crafting the Letter 'e'
Objective:
Students will be able to create the lowercase letter 'e' using the Kidversity Level 1 Kit. Students will practice identifying and using different shapes. Students will develop fine motor skills.
Material Required:
Kidversity Level 1 Kit
Projector or whiteboard (for teacher's use)
STEM Resource Book Pre-K
Duration: 45 minutes
S# Phase Duration Details
1 Introduction 5 minutes
2 Activity 30 minutes
3 Discussion and Comparison 5 minutes
4 Letter Formation Practice 5 minutes
5 Cleanup and Conclusion 5 minutes
• Introduce the project by explaining that students will be creating the lowercase letter 'e' using the provided magnetic shapes.
• Distribute the Kidversity Level 1 Kit to each student.
• Demonstrate building the letter 'e' using the sample model. Highlight the shapes used.
• Let students work individually to build the letter 'e' using the provided shapes.
• Gather students and discuss their models.
• Compare their creations with the sample model, discussing similarities and differences.
• Tracing and writing the letter 'e'.
• Have children clean up the materials.
Answer Key
Q# Answer Key / Guide for Evaluation Questions
1 Counting the number of blocks used for 'e'.
2 Identifying the color used most.
3 Identifying the color used least.
4 Comparing similarities and differences between the models.
5 Expressing a preference with a reason.
6 The student traces and writes the letter 'e'.
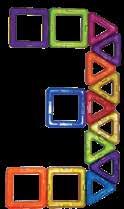
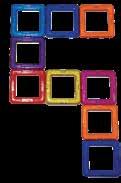
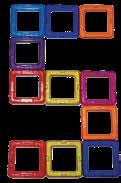
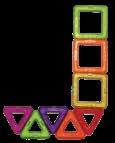
This project is about the number 5. Trace over the number 5 below with your finger and then colour it.
Using the Kidversity Level 1 Kit, try to make the number 5 on your own.
Then, follow the model diagram below to make the number 5.
Lesson Plan for Project 5.3: Creating the Number '5'
Objective:
Students will use the Kidversity Level 1 Kit to create the number 5. Students will practice identifying and using different shapes. Students will develop fine motor skills.
Material Required:
Kidversity Level 1 Kit
Projector or whiteboard (for teacher's use)
STEM Resource Book Pre-K
Duration: 45 minutes
S# Phase Duration Details
1 Introduction 5 minutes
2 Activity 30 minutes
3 Discussion and Comparison 5 minutes
4 Number Formation Practice 5 minutes
5 Cleanup and Conclusion 5 minutes
• Begin by introducing the project, explaining that students will create the number '5' using magnetic shapes.
• Discuss the importance of recognizing and forming numbers.
• Distribute the Kidversity Level 1 Kit to each student.
• Show the sample model of the number '5' using the magnetic shapes, highlighting the shapes used.
• Encourage students to work individually to recreate the number '5' using the provided shapes.
• Gather students and have them discuss their models.
• Compare their creations with the sample model, discussing similarities and differences.
• Ask students to identify the shapes and colors they used.
• Tracing and writing the number '5.'
• Guide students to trace and write the number '5' following the model.
• Instruct students to clean up the materials.
• Summarize the lesson by reinforcing the importance of practicing number formation.
Answer Key
Q# Answer Key / Guide for Evaluation Questions
1 Varies (e.g., squares)
2 Varies (e.g., 2 pink tiles)
3 Varies (e.g., they may notice differences in size or orientation)
4 Students' responses may vary but should include shape and color differences.
5 Students' preferences may vary, and reasons can include personal choice or creativity.
6 Evaluation should focus on correct number formation, including shape and direction.
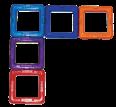
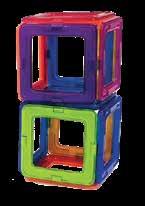
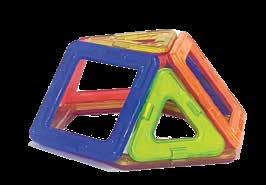
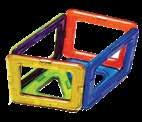
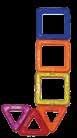
In Project 1, you made a cube. Look at the cube below. Can you identify which arrow points to the face, corner and edge
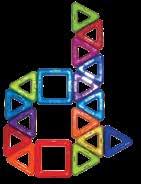
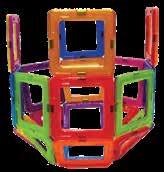
Today, you will be making a two-story tower using cubes. Follow the model diagram below to make the tower.
Lesson Plan for Project 5.4: Constructing a Two-Story Tower
Objective:
Students will be able to create a two-story tower using the Kidversity Level 1 Kit. Students will practice building vertically and understanding spatial relationships. Students will develop fine motor skills.
Material Required:
Kidversity Level 1 Kit
Projector or whiteboard (for teacher's use)
STEM Resource Book Pre-K
Duration: 45 minutes
S# Phase Duration Details
1 Introduction 5 minutes
2 Activity 30 minutes
3 Discussion and Exploration 5 minutes
4 Cleanup and Conclusion 5 minutes
• Introduce the project by explaining that students will be creating a two-story tower using the provided magnetic shapes.
• Distribute the Kidversity Level 1 Kit to each student.
• Demonstrate building a two-story tower using the sample model.
• Let students work individually to build a twostory tower using the provided shapes.
• Gather students and discuss their towers.
• Allow students to share their experiences while building and any challenges they encountered.
• Have children clean up the materials.
Answer Key
Q# Answer Key / Guide for Evaluation Questions
1 Counting the number of cubes in the tower.
2 Counting the total number of blocks used for the tower.
3 Identifying the color used most in the tower.
4 Recognizing that a cube provides a stable base for the tower.
5 Encouraging critical thinking about the structural feasibility of adding more stories to the tower.
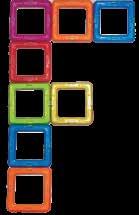
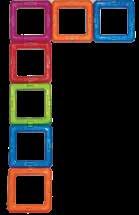
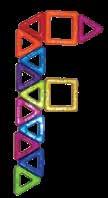
This project is about the letter F. Trace over the letter F below with your finger and then colour it.
Using the Kidversity Level 1 Kit, try to make the letter F on your own.
Then, follow the model diagram below to make the letter ‘F ’.
Lesson Plan for Project 6.1: Constructing the Letter ' F'
Objective:
Students will use the Kidversity Level 1 Kit to create the uppercase letter 'F.'
Students will practice identifying and using different shapes. Students will develop fine motor skills.
Material Required:
Kidversity Level 1 Kit
Projector or whiteboard (for teacher's use)
STEM Resource Book Pre-K
Duration: 45 minutes
S# Phase Duration Details
1 Introduction 5 minutes
2 Activity 30 minutes
3 Discussion and Comparison 5 minutes
4 Letter Formation Practice 5 minutes
5 Cleanup and Conclusion 5 minutes
• Begin by introducing the project, explaining that students will create the uppercase letter 'F' using magnetic shapes.
• Discuss the importance of recognizing and forming letters.
• Distribute the Kidversity Level 1 Kit to each student.
• Show the sample model of the uppercase letter 'F' using the magnetic shapes, highlighting the shapes used.
• Encourage students to work individually to recreate the letter 'F' using the provided shapes.
• Gather students and have them discuss their letter 'F.'
• Compare their creations with the sample model, discussing similarities and differences.
• Ask students to identify the shapes and colors they used.
• Tracing and writing the uppercase letter 'F.'
• Guide students to trace and write the letter 'F' following the model.
• Instruct students to clean up the materials.
• Summarize the lesson by reinforcing the importance of practicing letter formation.
Answer Key
Q# Answer Key / Guide for Evaluation Questions
1 Varies (e.g., 8 blocks)
2 Varies (e.g., 3 orange blocks)
3 Varies (e.g., D)
4 Students' responses may vary but should include shape and color differences.
5 Students' preferences may vary, and reasons can include personal choice or creativity.
6 Evaluation should focus on correct letter formation, including shape and direction.
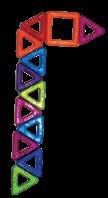
This project is about the letter f. Trace over the letter f below with your finger and then colour it.
Using the Kidversity Level 1 Kit, try to make the letter f on your own.
Then, follow the model diagram below to make the letter ‘f’ .
Lesson Plan for Project 6.2: Crafting the Letter 'f'
Objective:
Students will use the Kidversity Level 1 Kit to create the lowercase letter 'f.'
Students will practice identifying and using different shapes.
Students will develop fine motor skills.
Material Required:
Kidversity Level 1 Kit
Projector or whiteboard (for teacher's use)
STEM Resource Book Pre-K
Duration: 45 minutes
S# Phase Duration Details
1 Introduction 5 minutes
2 Activity 30 minutes
3 Discussion and Comparison 5 minutes
4 Letter Formation Practice 5 minutes
5 Cleanup and Conclusion 5 minutes
• Begin by introducing the project, explaining that students will create the lowercase letter 'f' using magnetic shapes.
• Discuss the importance of recognizing and forming letters.
• Distribute the Kidversity Level 1 Kit to each student.
• Show the sample model of the lowercase letter 'f' using the magnetic shapes, highlighting the shapes used.
• Encourage students to work individually to recreate the letter 'f' using the provided shapes.
• Gather students and have them discuss their letter 'f.'
• Compare their creations with the sample model, discussing similarities and differences.
• Ask students to identify the shapes and colors they used.
• Tracing and writing the lowercase letter 'f.'
• Guide students to trace and write the letter 'f' following the model.
• Instruct students to clean up the materials.
• Summarize the lesson by reinforcing the importance of practicing letter formation.
Answer Key
Q# Answer Key / Guide for Evaluation Questions
1 Varies (e.g., 2 shapes)
2 Varies (e.g., triangles)
3 Varies (e.g., red)
4 Students' responses may vary but should include shape and color differences.
5 Students can share their opinions, which may vary based on their experiences.
6 Evaluation should focus on correct letter formation, including shape and direction.
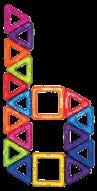
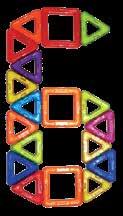
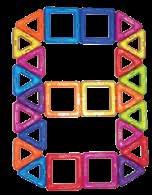
This project is about the number 6. Trace over the number 6 below with your finger and then colour it.
Using the Kidversity kit, try to make the number 6 on your own.
Then, follow the model diagram below to make the number 6.
Lesson Plan for Project 6.3: Creating the Number '6'
Objective:
Students will use the Kidversity Level 1 Kit to create the number '6.'
Students will practice identifying and using different shapes. Students will develop fine motor skills.
Material Required:
Kidversity Level 1 Kit
Projector or whiteboard (for teacher's use)
STEM Resource Book Pre-K
Duration: 45 minutes
S# Phase Duration Details
1 Introduction 5 minutes
2 Activity 30 minutes
3 Discussion and Comparison 5 minutes
4 Number Formation Practice 5 minutes
5 Cleanup and Conclusion 5 minutes
• Begin by introducing the project, explaining that students will create the number '6' using magnetic shapes.
• Discuss the importance of recognizing and forming numbers.
• Distribute the Kidversity Level 1 Kit to each student.
• Show the sample model of the number '6' using the magnetic shapes, highlighting the shapes used.
• Encourage students to work individually to recreate the number '6' using the provided shapes
• Gather students and have them discuss their number '6.'
• Compare their creations with the sample model, discussing similarities and differences.
• Ask students to identify the shapes and colors they used.
• Tracing and writing the number '6.'
• Guide students to trace and write the number '6' following the model.
• Instruct students to clean up the materials.
• Summarize the lesson by reinforcing the importance of practicing number formation.
Answer Key
Q# Answer Key / Guide for Evaluation Questions
1 Varies (e.g., 3 triangles)
2 Varies (e.g., 2 squares)
3 Varies (e.g., on top)
4 Students' responses may vary but should include shape and color differences.
5 Students can share their preferences, which may vary based on their experiences.
6 Evaluation should focus on correct number formation, including shape and direction.
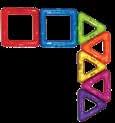
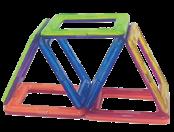
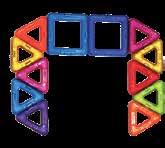
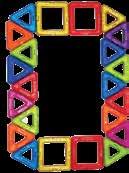
In Project 2, you learned about hexagons. Hexagons have six sides. Circle the hexagon below.
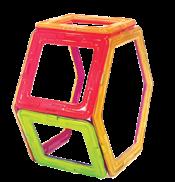
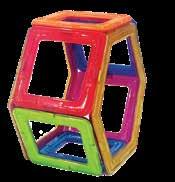
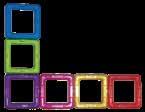
Today, you will be making a tomb using Kidversity Level 1 Kit. Follow the model diagram below to make a tomb.
Lesson Plan for Project 6.4: Constructing a Tomb
Objective:
Students will use the Kidversity Level 1 Kit to create a tomb structure. Students will practice identifying and using different shapes. Students will develop fine motor skills and spatial awareness.
Material Required:
Kidversity Level 1 Kit
Projector or whiteboard (for teacher's use)
STEM Resource Book Pre-K
Duration: 45 minutes
S# Phase Duration Details
1 Introduction 5 minutes
2 Activity 30 minutes
3 Discussion and Exploration 5 minutes
4 Adding Another Level 5 minutes
5 Cleanup and Conclusion 5 minutes
• Begin by introducing the project, explaining that students will be making a tomb structure using magnetic blocks.
• Discuss the importance of following a model and exploring 3D structures.
• Distribute the Kidversity Level 1 Kit to each student.
• Show the model diagram of the tomb structure using magnetic blocks.
• Encourage students to work individually to recreate the tomb structure following the provided diagram.
• Gather students and have them discuss their tomb structures.
• Compare their creations with the model diagram, discussing similarities and differences.
• Ask students to identify the shapes and colors they used.
• Challenge students by asking if they can add another level to the tomb structure.
• Encourage creativity in designing the additional level.
• Have children clean up the materials.
Answer Key
Q# Answer Key / Guide for Evaluation Questions
1 Varies (e.g., cubes, rectangles)
2 Varies (e.g., 12 blocks)
3 Varies (e.g., rectangle)
4 Varies (e.g., cube)
5 Encourage students to explain their reasoning. There's no specific answer.
6 This question encourages creativity. Students can draw patterns they see on their tomb structures.
This project is about the letter G. Trace over the letter G below with your finger and then colour it.
Using the Kidversity Level 1 Kit, try to make the letter G on your own.
Then, follow the model diagram below to make the letter ‘G ’.
Lesson Plan for Project 7.1: Constructing the Letter ' G'
Objective:
Students will use the Kidversity Level 1 Kit to create the letter 'G.' Students will practice identifying and using different shapes. Students will develop fine motor skills.
Material Required:
Kidversity Level 1 Kit
Projector or whiteboard (for teacher's use)
STEM Resource Book Pre-K
Duration: 45 minutes
S# Phase Duration Details
1 Introduction 5 minutes
2 Activity 30 minutes
3 Discussion and Comparison 5 minutes
4 Letter Formation Practice 5 minutes
5 Cleanup and Conclusion 5 minutes
• Begin by introducing the project, explaining that students will be making the letter 'G' using magnetic shapes.
• Discuss the importance of letter recognition and formation.
• Distribute the Kidversity Level 1 Kit to each student.
• Show the sample model of the letter 'G' using the magnetic shapes, highlighting the shapes used.
• Encourage students to work individually to recreate the letter 'G' using the provided shapes.
• Gather students and have them discuss their letter 'G.'
• Compare their creations with the sample model, discussing similarities and differences.
• Ask students to identify the shapes and colors they used.
• Tracing and writing the uppercase the letter 'G.'
• Guide students to trace and write the letter 'G' following the model.
• Instruct students to clean up the materials.
• Summarize the lesson by reinforcing the importance of practicing letter formation.
Answer Key
Q# Answer Key / Guide for Evaluation Questions
1 Varies (e.g., 5 to 10)
2 Varies (e.g., 3 purple blocks)
3 Varies (e.g., blue, yellow)
4 Students' responses may vary but should include shape and color differences.
5 Students can share their preferences, which may vary based on their experiences.
6 Evaluation should focus on correct letter formation, including shape and direction.
This project is about the letter g. Trace over the letter g below with your finger and then colour it.
Using the Kidversity Level 1 Kit, try to make the letter g on your own.
Then, follow the model diagram below to make the letter ‘g’ .
Lesson Plan for Project 7.2: Crafting the Letter 'g'
Objective:
Students will use the Kidversity Level 1 Kit to create the lowercase letter 'g.'
Students will practice identifying and using different shapes.
Students will develop fine motor skills.
Material Required:
Kidversity Level 1 Kit
Projector or whiteboard (for teacher's use)
STEM Resource Book Pre-K Duration: 45 minutes
S# Phase Duration Details
1 Introduction 5 minutes
2 Activity 30 minutes
3 Discussion and Comparison 5 minutes
4 Letter Formation Practice 5 minutes
5 Cleanup and Conclusion 5 minutes
• Begin by introducing the project, explaining that students will be making the lowercase letter 'g' using magnetic shapes.
• Discuss the importance of letter recognition and formation.
• Distribute the Kidversity Level 1 Kit to each student.
• Show the sample model of the lowercase letter 'g' using the magnetic shapes, highlighting the shapes used.
• Encourage students to work individually to recreate the letter 'g' using the provided shapes.
• Gather students and have them discuss their letter 'g.'
• Compare their creations with the sample model, discussing similarities and differences.
• Ask students to identify the shapes and colors they used.
• Tracing and writing the lowercase the letter 'g.'
• Guide students to trace and write the letter 'g' following the model.
• Instruct students to clean up the materials.
• Summarize the lesson by reinforcing the importance of practicing letter formation.
Answer Key
Q# Answer Key / Guide for Evaluation Questions
1 Varies (e.g., rectangle, triangle)
2 Varies (e.g., blue)
3 Varies (e.g., rectangle is at the bottom)
4 Students' responses may vary but should include shape and color differences.
5 Students can share their preferences and reasons for ease or difficulty.
Evaluation should focus on correct letter formation, including shape and direction.
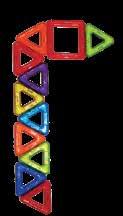
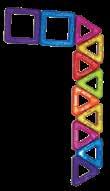
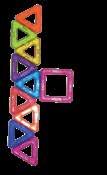
This project is about the number 7. Trace over the number 7 below with your finger and then colour it.
Using the Kidversity Level 1 Kit, try to make the number 7 on your own.
Then, follow the model diagram below to make the number 7.
Lesson Plan for Project 7.3: Creating the Number '7'
Objective:
Students will use the Kidversity Level 1 Kit to create the number '7.'
Students will practice identifying and using different shapes. Students will develop fine motor skills.
Material Required:
Kidversity Level 1 Kit
Projector or whiteboard (for teacher's use)
STEM Resource Book Pre-K
Duration: 45 minutes
S# Phase Duration Details
1 Introduction 5 minutes
2 Activity 30 minutes
3 Discussion and Comparison 5 minutes
4 Number Formation Practice 5 minutes
5 Cleanup and Conclusion 5 minutes
• Begin by introducing the project, explaining that students will be making the number '7' using magnetic shapes.
• Discuss the importance of number recognition and formation.
• Distribute the Kidversity Level 1 Kit to each student.
• Show the sample model of the number '7' using the magnetic shapes, highlighting the shapes used.
• Encourage students to work individually to recreate the number '7' using the provided shapes.
• Gather students and have them discuss their number '7.'
• Compare their creations with the sample model, discussing similarities and differences.
• Ask students to identify the shapes and colors they used.
• Tracing and writing the number '7.'
• Guide students to trace and write the number '7' following the model.
• Instruct students to clean up the materials.
• Summarize the lesson by reinforcing the importance of practicing number formation.
Answer Key
Q# Answer Key / Guide for Evaluation Questions
1 Varies (e.g., 3 triangles)
2 Varies (e.g., 2 squares)
3 Varies (e.g., squares are in between)
4 Students' responses may vary but should include shape and color differences.
5 Students can share their preferences and reasons for liking one model over the other.
6 Evaluation should focus on correct number formation, including shape and direction.
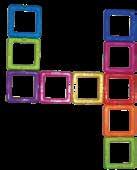
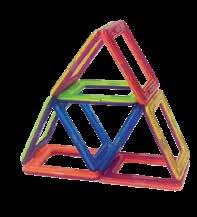
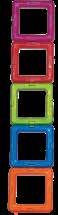
Lesson Plan for Project 7.4: Constructing a Watch Tower
Objective:
Students will use the Kidversity Level 1 Kit to create a watchtower. Students will practice identifying and using different shapes. Students will explore the concept of stability in design.
Material Required:
Kidversity Level 1 Kit
Projector or whiteboard (for teacher's use)
STEM Resource Book Pre-K
Duration: 45 minutes
S# Phase Duration Details
1 Introduction 5 minutes
2 Activity 30 minutes
3 Discussion and Exploration 5 minutes
4 Adding Another Level 5 minutes
5 Cleanup and Conclusion 5 minutes
• Begin by introducing the project, explaining that students will be making a watchtower using magnetic blocks.
• Discuss what a watchtower is and its purpose.
• Distribute the Kidversity Level 1 Kit to each student.
• Show the model diagram of the watchtower on a projector or whiteboard.
• Encourage students to work individually to recreate the watchtower using the provided shapes.
• Gather students and have them discuss their watchtowers.
• Ask students about the number of blocks used and the shapes they used.
• Discuss the stability of the watchtowers and why certain shapes may be better for building tall structures.
• Challenge students to think about whether they could add another level to their watchtowers.
• Discuss the factors that might make it possible or impossible to add another level.
• Have children clean up the materials.
Answer Key
Q# Answer Key / Guide for Evaluation Questions
Varies (e.g., 8 blocks)
Varies (e.g., triangle)
5 Students can explain whether they think it's possible based on stability and design.
6 This is a drawing activity, and there isn't a specific answer.
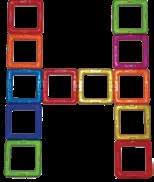
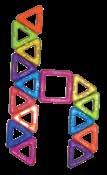
This project is about the letter H. Trace over the letter H below with your finger and then colour it.
Using the Kidversity Level 1 Kit, try to make the letter H on your own.
Then, follow the model diagram below to make the letter ‘H ’.
Lesson Plan for Project 8.1: Constructing the Letter ' H'
Objective:
Students will use the Kidversity Level 1 Kit to create the letter 'H.' Students will practice identifying and using different shapes. Students will learn to recognize the letter 'H.'
Material Required:
Kidversity Level 1 Kit
Projector or whiteboard (for teacher's use)
STEM Resource Book Pre-K
Duration: 45 minutes
S# Phase Duration Details
1 Introduction 5 minutes
2 Activity 30 minutes
3 Discussion and Comparison 5 minutes
4 Extension Activity 5 minutes
5 Cleanup and Conclusion 5 minutes
• Begin by introducing the project, explaining that students will be making the letter 'H' using magnetic blocks.
• Show the letter 'H' on a projector or whiteboard and ask if any students can recognize it.
• Distribute the Kidversity Level 1 Kit to each student.
• Show the model diagram of the letter 'H' on a projector or whiteboard.
• Encourage students to work individually to recreate the letter 'H' using the provided shapes.
• Gather students and discuss their letter 'H' creations.
• Ask students about the number of blocks used and the shapes they used.
• Discuss how the letter 'H' was formed using different shapes.
• Challenge students to think about how they could use the same shapes to create other letters or shapes.
• Discuss the concept of creating different symbols and designs using the same building blocks.
• Instruct students to clean up the materials.
• Summarize the lesson by reinforcing the importance of practicing letter formation.
3 Varies (e.g., Red, Blue)
4 Students can explain the similarities and differences between their letter 'H' and the sample
model.
5 Students can share their thoughts on the ease or difficulty of making both letters.
6 Trace the letter 'H.' Then, write your own letter 'H' below. This is a practical exercise, and there isn't a specific answer key.
This project is about the letter h. Trace over the letter h below with your finger and then colour it.
Using the Kidversity Level 1 Kit, try to make the letter h on your own.
Then, follow the model diagram below to make the letter ‘h’ .
Lesson Plan for Project 8.2: Crafting the Letter 'h'
Objective:
Students will use the Kidversity Level 1 Kit to create the lowercase letter 'h.'
Students will practice identifying and using different shapes.
Students will develop fine motor skills.
Material Required:
Kidversity Level 1 Kit
Projector or whiteboard (for teacher's use)
STEM Resource Book Pre-K
Duration: 45 minutes
S# Phase Duration Details
1 Introduction 5 minutes
2 Activity 30 minutes
3 Discussion and Comparison 5 minutes
4 Extension Activity 5 minutes
5 Cleanup and Conclusion 5 minutes
• Begin by introducing the project, explaining that students will be creating the lowercase letter 'h' using magnetic blocks.
• Show the letter 'h' on a projector or whiteboard and ask if any students can recognize it.
• Distribute the Kidversity Level 1 Kit to each student.
• Show the model diagram of the letter 'h' on a projector or whiteboard.
• Encourage students to work individually to recreate the letter 'h' using the provided shapes.
• Gather students and discuss their letter 'h' creations.
• Ask students about the number of blocks used and the shapes they used.
• Discuss how the letter 'h' was formed using different shapes.
• Challenge students to think about how they could use the same shapes to create other letters or shapes.
• Discuss the concept of creating different symbols and designs using the same building blocks.
• Instruct students to clean up the materials.
• Summarize the lesson by emphasizing the importance of recognizing letters and shapes while fostering creativity.
Answer Key
Q# Answer Key / Guide for Evaluation Questions
1 Varies (e.g., 2 shapes)
2 Varies (e.g., square)
3 Varies (e.g., Blue)
4 Students can explain the similarities and differences between their letter 'h' and the sample model.
5 Students can share their thoughts on the ease or difficulty of making both letters.
6 Trace the letter 'h.' Then, write your own letter 'h' below. This is a practical exercise, and there isn't a specific answer key.
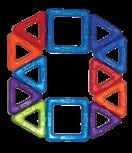
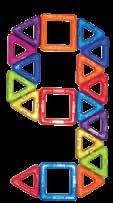
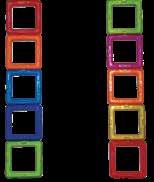
This project is about the number 8. Trace over the number 8 below with your finger and then colour it.
Using the Kidversity Level 1 Kit, try to make the number 8 on your own.
Then, follow the model diagram below to make the number 8.
Lesson Plan for Project 8.3: Creating the Number '8'
Objective:
Students will use the Kidversity Level 1 Kit to create the number '8.'
Students will practice identifying and using different shapes. Students will develop fine motor skills.
Material Required:
Kidversity Level 1 Kit
Projector or whiteboard (for teacher's use)
STEM Resource Book Pre-K
Duration: 45 minutes
S# Phase Duration Details
1 Introduction 5 minutes
2 Activity 30 minutes
3 Discussion and Exploration 5 minutes
4 Extension Activity 5 minutes
5 Cleanup and Conclusion 5 minutes
• Begin by introducing the project, explaining that students will be making the number '7' using magnetic shapes.
• Discuss the importance of number recognition and formation.
• Distribute the Kidversity Level 1 Kit to each student.
• Show the model diagram of the number '8' on a projector or whiteboard.
• Encourage students to work individually to recreate the number '8' using the provided shapes.
• Gather students and discuss their number '8' creations.
• Ask students about the number of blocks used and the shapes they used.
• Discuss how the number '8' was formed using different shapes.
• Challenge students to think about how they could use the same shapes to create other numbers or shapes.
• Discuss the concept of creating different symbols and designs using the same building blocks.
• Instruct students to clean up the materials.
• Summarize the lesson by reinforcing the importance of practicing number formation.
Answer Key
Q# Answer Key / Guide for Evaluation Questions 1
4 Students can explain the similarities and differences between their number '8' and the sample model.
5 Students can share their preferences and reasons.
6 Trace the number '8.' Then, write your own number '8' below. This is a practical exercise, and there isn't a specific answer key.
A rhombus is a 2D (flat) shape that looks like a square that has been pushed over. Trace the rhombus below with your finger.
A rhombus has 4 sides. All the sides are the SAME length.
Today, you will be making a fish using Kidversity Level 1 Kit. Follow the model diagram below to make a fish.
Lesson Plan for Project 8.4: Constructing a Fish
Objective:
Students will use the Kidversity Level 1 Kit to create a fish shape. Students will practice identifying and using different shapes. Students will develop fine motor skills.
Material Required:
Kidversity Level 1 Kit
Projector or whiteboard (for teacher's use)
STEM Resource Book Pre-K
Duration: 45 minutes
S# Phase Duration Details
1 Introduction 5 minutes
2 Activity 30 minutes
3 Discussion and Exploration 5 minutes
4 Adding Another Level 5 minutes
5 Cleanup and Conclusion 5 minutes
• Start by introducing the project. Explain that today, students will be using magnetic blocks to create a fish shape.
• Show an image or drawing of a fish and ask students to identify its shape and features.
• Distribute the Kidversity Level 1 Kit to each student.
• Display a model diagram of a fish shape on a projector or whiteboard.
• Encourage students to work individually to recreate the fish shape using the provided shapes.
• Gather students and discuss their fish creations.
• Ask students about the shapes they used to make the fish and any specific features they added.
• Discuss how they used the magnetic blocks to create the desired fish shape.
• Challenge students to think about what other underwater creatures or objects they can create using the same building blocks.
• Discuss the importance of creativity and imagination in building different designs.
• Instruct students to clean up the materials.
• Summarize the lesson by emphasizing the fun of creating shapes and objects using magnetic blocks.
4 Varies (students can describe similarities and differences)
5 Varies (students can provide their preferences and reasons)
6 Students trace the number '9' and then write their own number '9' below.
This shape is called a trapezoid. Trace over the trapezoid with your finger.
A trapezoid has 4 sides. The top side is shorter than the bottom side.
Today, you will be making a rocket using Kidversity Level 1 Kit. Follow the model diagram below to make a rocket.
Lesson Plan for Project 9.4: Constructing a Rocket
Objective:
Students will use the Kidversity Level 1 Kit to create a rocket. Students will practice identifying and using different shapes. Students will explore the concept of three-dimensional objects.
Material Required:
Kidversity Level 1 Kit
Projector or whiteboard (for teacher's use)
STEM Resource Book Pre-K
Duration: 45 minutes
S# Phase Duration Details
1 Introduction 5 minutes
2 Activity 30 minutes
3 Discussion and Exploration 5 minutes
4 Adding Another Level 5 minutes
5 Cleanup and Conclusion 5 minutes
• Begin by introducing the project. Explain that students will be using magnetic blocks to create a rocket.
• Display a model diagram of a rocket on a projector or whiteboard and ask students to identify it as a rocket.
• Distribute the Kidversity Level 1 Kit to each student.
• Show the model diagram of the rocket on the projector or whiteboard.
• Encourage students to work individually to recreate the rocket using the provided shapes, emphasizing that this is a 3D (solid) object.
• Gather students and discuss their rocket creations.
• Ask students to identify the shapes they used to make the rocket and how they arranged them.
• Discuss the concept of three-dimensional objects and their characteristics.
• Challenge students to create another 3D object using the magnetic blocks, such as a house or a pyramid.
• Discuss the differences between 2D and 3D shapes.
• Instruct students to clean up the materials.
• Summarize the lesson by emphasizing the importance of recognizing and creating 3D objects in the world around us.
5 Varies (students can explain if they can or cannot add another level)
6 Varies (Students can draw the pattern)
This project is about the letter J. Trace over the letter J below with your finger and then colour it.
Using the Kidversity Level 1 Kit, try to make the letter J on your own.
Then, follow the model diagram below to make the letter ‘J ’.
Lesson Plan for Project 10.1: Constructing the Letter ' J'
Objective:
Students will use the Kidversity Level 1 Kit to create the letter 'J.' Students will practice identifying and using different shapes. Students will explore color usage in their creations.
Material Required:
Kidversity Level 1 Kit
Projector or whiteboard (for teacher's use)
STEM Resource Book Pre-K
Duration: 45 minutes
S# Phase Duration Details
1 Introduction 5 minutes
2 Activity 30 minutes
3 Discussion and Exploration 5 minutes
4 Extension Activity 5 minutes
5 Cleanup and Conclusion 5 minutes
• Begin by introducing the project. Explain that students will be using magnetic blocks to create the letter 'J.'
• Display the model diagram of the letter 'J' on a projector or whiteboard.
• Distribute the Kidversity Level 1 Kit to each student.
• Show the model diagram of the letter 'J' on the projector or whiteboard.
• Encourage students to work individually to recreate the letter 'J' using the provided shapes.
• Gather students and discuss their 'J' creations.
• Ask students to identify the shapes and colors they used to make the letter 'J.'
• Discuss the placement of shapes in their 'J' creations and the importance of following the model diagram.
• Challenge students to create another letter from the alphabet using the magnetic blocks, such as 'A' or 'B.'
• Discuss the differences between uppercase and lowercase letters.
• Instruct students to clean up the materials.
• Summarize the lesson by highlighting the importance of recognizing and creating letters.
4 Varies (students can explain similarities and differences)
5 Varies (e.g., above the squares)
6 (Students trace the letter 'J' and write their own letter 'J' below)
This project is about the letter j. Trace over the letter j below with your finger and then colour it.
Using the Kidversity Level 1 Kit, try to make the letter j on your own.
Then, follow the model diagram below to make the letter ‘j’ .
Lesson Plan for Project 10.2: Crafting the Letter 'j'
Objective:
Students will use the Kidversity Level 1 Kit to create the letter 'j.' Students will practice identifying and using different shapes. Students will explore color usage in their creations.
Material Required:
Kidversity Level 1 Kit
Projector or whiteboard (for teacher's use)
STEM Resource Book Pre-K
Duration: 45 minutes
S# Phase Duration Details
1 Introduction 5 minutes
2 Activity 30 minutes
3 Discussion and Exploration 5 minutes
4 Extension Activity 5 minutes
5 Cleanup and Conclusion 5 minutes
• Begin by introducing the project. Explain that students will be using magnetic blocks to create the lowercase letter 'j.'
• Display the model diagram of the letter 'j' on a projector or whiteboard.
• Distribute the Kidversity Level 1 Kit to each student.
• Show the model diagram of the letter 'j' on the projector or whiteboard.
• Encourage students to work individually to recreate the letter 'j' using the provided shapes.
• Gather students and discuss their 'j' creations.
• Ask students to identify the shapes and colors they used to make the letter 'j.'
• Discuss the placement of shapes in their 'j' creations and the importance of following the model diagram.
• Challenge students to create another letter from the alphabet using the magnetic blocks, such as 'a' or 'b.'
• Discuss the differences between lowercase and uppercase letters.
• Instruct students to clean up the materials.
• Summarize the lesson by emphasizing the importance of recognizing and creating letters and shapes.
Answer Key
Q# Answer Key / Guide for Evaluation Questions
1 Varies (e.g., 3)
2 Varies (e.g., triangles)
3 Varies (e.g., blue, green)
4 Varies (students can explain similarities and differences)
5 Varies (students can provide their reasons)
6 (Students trace the letter 'j' and write their own letter 'j' below)
This project is about the number 0. Trace over the number 0 below with your finger and then colour it.
Using the Kidversity Level 1 Kit, try to make the number 0 on your own.
Then, follow the model diagram below to make the number 0.
Lesson Plan for Project 10.3: Creating the Number '0'
Objective:
Students will use the Kidversity Level 1 Kit to create the number '0.'
Students will practice identifying and using different shapes. Students will explore color usage in their creations.
Material Required:
Kidversity Level 1 Kit
Projector or whiteboard (for teacher's use)
STEM Resource Book Pre-K
Duration: 45 minutes
S# Phase Duration Details
1 Introduction 5 minutes
2 Activity 30 minutes
3 Discussion and Exploration 5 minutes
4 Extension Activity 5 minutes
5 Cleanup and Conclusion 5 minutes
• Begin by introducing the project. Explain that students will be using magnetic blocks to create the number '0.'
• Display the model diagram of the number '0' on a projector or whiteboard.
• Distribute the Kidversity Level 1 Kit to each student.
• Show the model diagram of the number '0' on the projector or whiteboard.
• Encourage students to work individually to recreate the number '0' using the provided shapes.
• Gather students and discuss their '0' creations.
• Ask students to identify the shapes and colors they used to make the number '0.'
• Discuss the placement of shapes in their '0' creations and the importance of following the model diagram.
• Challenge students to create another number from 1 to 9 using the magnetic blocks.
• Discuss the differences between the numbers they created and the importance of the shape and orientation of each number.
• Instruct students to clean up the materials.
• Summarize the lesson by emphasizing the importance of recognizing and creating numbers and shapes.
Answer Key
Q# Answer Key / Guide for Evaluation Questions
1 Varies (e.g., 7)
2 Varies (e.g., squares, triangles)
3 Varies (e.g., blue, yellow)
4 Varies (students can explain similarities and differences)
5 Varies (students can provide their reasons)
6 (Students trace the number '0' and write their own number '0' below)
A sphere is a 3D (solid) shape. It looks like a ball. Look at the sphere below.
A sphere is a curved shape. It has no corners or edges.
Today, you will be making a sphere using magnetic blocks. Follow the model diagram below to make the sphere.
Lesson Plan for Project 10.4: Constructing a Sphere
Objective:
Students will use the Kidversity Level 1 Kit to create a sphere. Students will practice identifying and using different shapes. Students will explore the concept of 3D (solid) shapes.
Material Required:
Kidversity Level 1 Kit
Projector or whiteboard (for teacher's use)
STEM Resource Book Pre-K
Duration: 45 minutes
S# Phase Duration Details
1 Introduction 5 minutes
2 Activity 30 minutes
3 Discussion and Exploration 5 minutes
4 Adding Another Level 5 minutes
5 Cleanup and Conclusion 5 minutes
• Begin by introducing the project. Explain that students will be using magnetic blocks to create a sphere, a 3D (solid) shape that is similar to a ball.
• Display the model diagram of the sphere on a projector or whiteboard.
• Distribute the Kidversity Level 1 Kit to each student.
• Show the model diagram of the sphere on the projector or whiteboard.
• Encourage students to work individually to recreate the sphere using the provided shapes.
• Gather students and discuss their sphere creations.
• Ask students to identify the shapes and colors they used to make the sphere.
• Discuss the concept of 3D (solid) shapes and how a sphere is similar to a ball in the real world.
• Challenge students to create other 3D (solid) shapes such as cubes, cylinders, or cones using the magnetic blocks.
• Discuss the differences between 2D (flat) shapes and 3D (solid) shapes.
• Instruct students to clean up the materials.
• Summarize the lesson by emphasizing the understanding of 3D (solid) shapes and their real-world counterparts. Answer Key Q# Answer Key / Guide for Evaluation Questions
1 Varies (e.g., squares, triangles)
2 Varies (e.g., 20)
3 Varies (e.g., triangle)
4 Varies (students can explain similarities and differences)
5 Answer: Varies (students can identify patterns they notice)