TEACHER GUIDE
1
The projects in the STEM Resource Book reinforce the following concepts using Gear Up kit:
Plants
Molecules to Organisms
Animals, including Humans
Water
Everyday Materials
Engineering Design
Waves and Their Applications
Working Scientifically
Light
Earth’s Place in the Universe
Preface
Education has always existed since the inception of the human race. However, it was informal in the beginning but took a more formal and structured shape later. The objective remained the same: to prepare the inquisitive learners of today for the challenges of tomorrow. Now, we are in the 21st century, where dynamic curriculum, engaging pedagogy, and performance-based assessments are the essential elements for an impactful education system, where integration of technology is indispensable and inseparable due to the extensive exposure of learners to media and information. These circumstances make the establishment of engaging and relevant education a true challenge for educators.
It is an open fact that the challenges of the 4th industrial revolution cannot be encountered through conventional educational approaches. Our STEM education model, based on STEM Resource books and makerspace, is developed according to the Science, Technology, Engineering, Mathematics (STEM) approach, inter-disciplinary and integrated learning that engages learners in learning, inculcates skills development and enhances problem-solving abilities.
STEM challenges in this book are developed by STEM-certified educators, based on Next Generation Science Standards, The National Curriculum of England and the Common Core for Mathematics. These challenges were then reviewed by international STEM experts & organizations, including STEM.org, an eminent research & accrediting body in the United States. These challenges and pedagogy were put to the test in a long & robust process of prototyping on students & their teachers for their feedback on learning attainment and experience.
Expert teachers appreciate and endorse the systematic initiative of STEM programs in schools, through which learners are challenged to solve problems of real-world situations and emerge as innovators and inventors. Apart from developing collaboration and communication skills, students choose their career paths and achieve their goals in life.


Understanding the Structure of the Lesson
Requirements for the project
Team Roles in the Team
Alignment with the Sustainable Development Goals

NGSS Curriculum Linkage
Cambridge Science Curriculum Linkage
Technology Connection
Engineering Connection
Common Core for Mathematics Curriculum Linkage


After brainstorming Learners create their model.

Evaluation is the phase where learners reflect on the performance of their model and link it to their classroom learning.

Learners write about the project they are building


Learners sketch their model and label as many parts for clarity in execution.
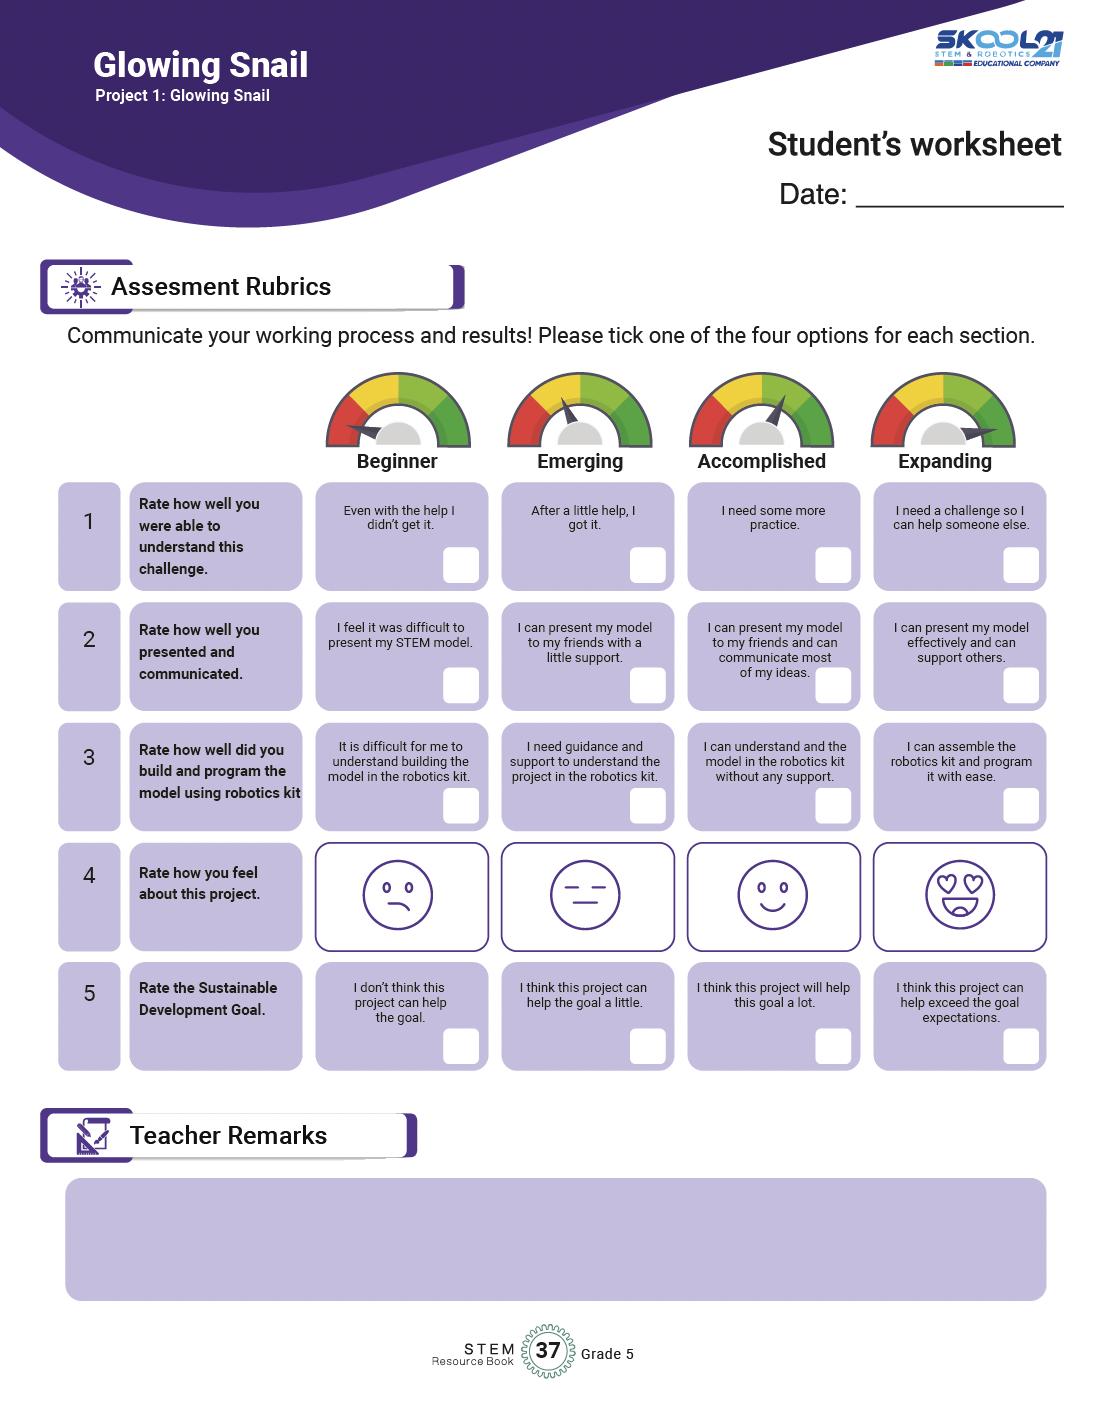
Assessment rubrics is a grid for teachers and learners to reflect on their progress in each of the project.

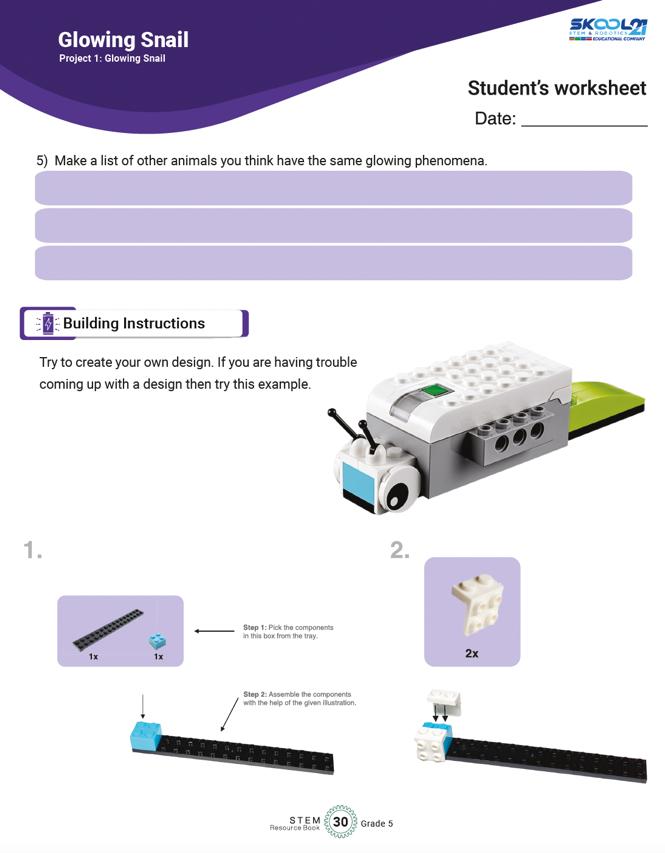
Building instructions are also provided to help learners get started, If they struggling in the first phase.
This space is for teachers to provide any remarks if needed on the participation of the learner in each of the project.
Alignment with the Sustainable Development Goals
Sustainable Development Goals (SDGs) are a set of 17 global goals adopted by all United 0 Agenda for Sustainable Development.
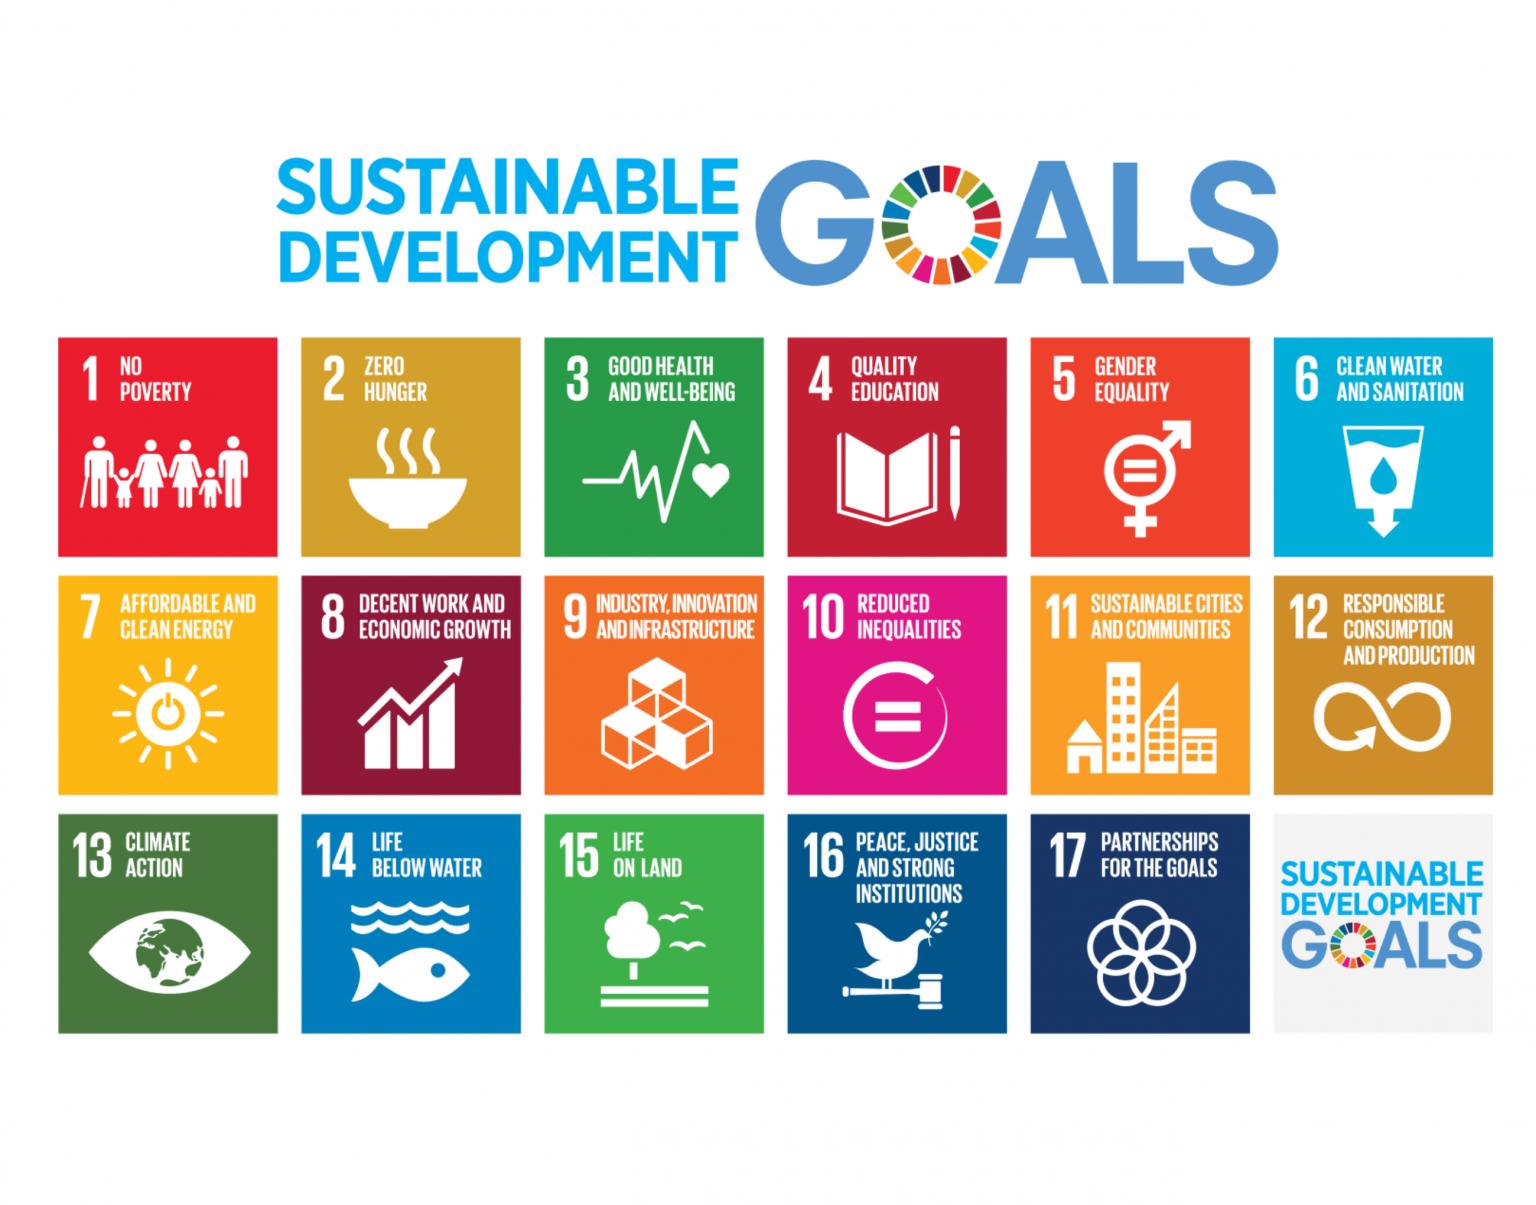
better and more sustainable future for all. Each goal has specific targets to be achieved by being for all at
Ensure inclusive and equitable quality education and promote lifelong learning opportunities for all.
Achieve gender equality and empower all women and
Ensure access to affordable, reliable, sustainable, and
sustained, inclusive, and sustainable economic growth, full and productive employment,
Build resilient infrastructure, promote inclusive and sustainable industrialization, and foster innovation.
Take urgent action to combat climate change and its marine resources for sustainable development.
Protect, restore, and promote sustainable use of terrestrial ecosystems, halt deforestation, and combat desertification and biodiversity loss.
Promote peaceful and inclusive societies for opment, provide access to justice for all, and build effective, accountable, and inclusive institutions at all levels.
Partnerships for Strengthen the means of implementation and revitalize the Global Partnership for Sustainable Development.
Now, let's see how the students' projects can be linked to these SDGs:
When students design projects using STEM Resource Book and Wedo 2.0 Kit, they can focus on creating solutions that tackle real-world problems related to sustainable development. For example, they could create smart home systems that conserve energy (SDG 7Affordable and Clean Energy) or design a production (SDG 12
Linking their projects to specific SDGs requires critical thinking and understanding of the global challenges we face today. Students can also focus on projects that address local community needs and align them with relevant SDGs.

Encouraging students to consider the SDGs when designing their projects will help them understand the broader context of their work and how their technological and scientific skills can contribute to building a more sustainable and equitable world. This approach also empowers them to become responsible global citizens who actively engage with the challenges facing our planet.
The Engineering Design Process
The Engineering Design Process is a systematic approach used by engineers and designers to solve problems and create innovative solutions. It provides a structured framework for developing new products, processes, or systems by following a series of well-defined steps. This process is not only applicable in engineering but is also widely used in various STEM disciplines to tackle challenges and develop creative solutions.
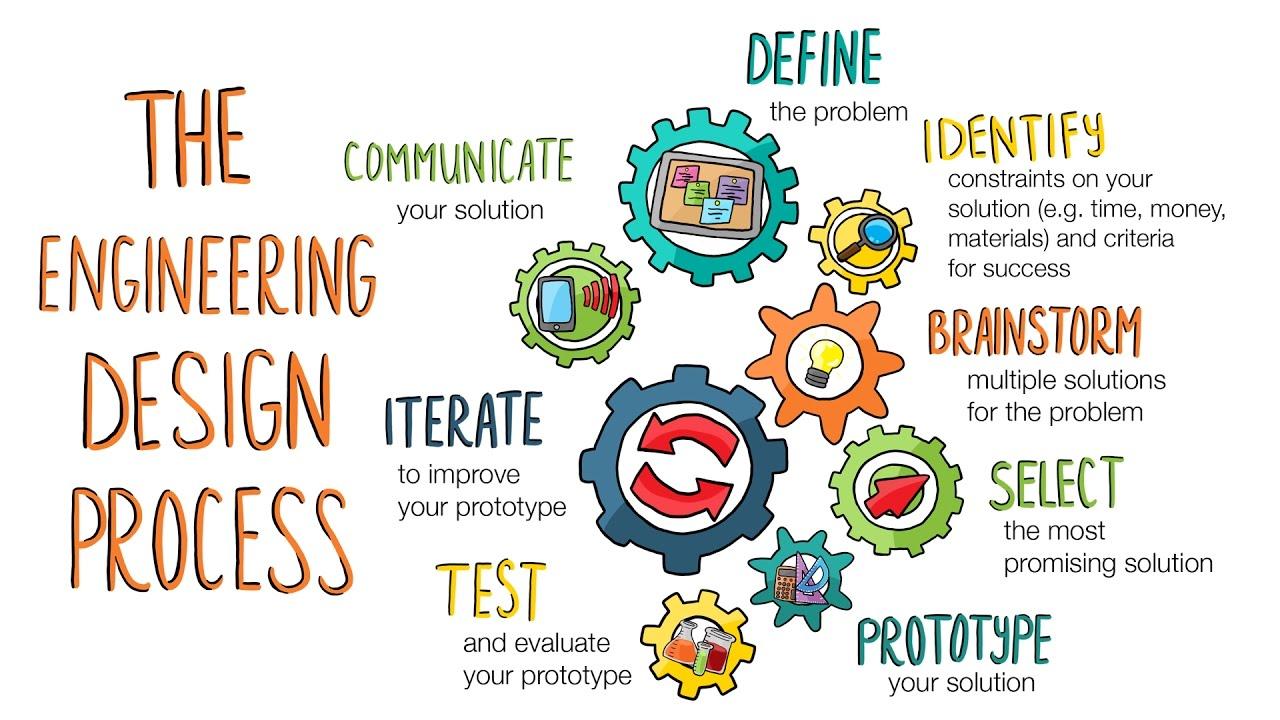
The typical steps of the Engineering Design Process are: Icons Phases
Define the Problem
Brainstorm Ideas
Design and Plan
Details
• Present the project's objectives and requirements to students, such as building a model, attaching it to the smarthub, and programming it.
• Encourage students to understand the purpose of the project, its context, and what they need to achieve.
• Engage students in brainstorming sessions where they envision and sketch possible solutions.
• Encourage creativity and diverse ideas, allowing students to explore various design options.
• Guide students to describe their chosen model's structure and function in detail.
• Help them plan how to use STEM Kit components effectively to build their models.
• Facilitate discussions on how they intend to program the model to perform specific

Build and Create
Test and Evaluate
Iterate and Improve
Communicate and Share
actions.
• Provide assistance as needed while students assemble their models.
• Encourage hands-on exploration, experimentation, and iteration as they build and refine their designs.
• Support students in testing their models and programming, providing guidance for troubleshooting.
• Ask questions to help them critically assess whether the model meets the specified requirements.
• Encourage students to identify areas for improvement based on testing outcomes.
• Guide them in making iterative changes to their designs to enhance performance and functionality.
• Organize opportunities for students to present their projects to peers or the class.
• Encourage them to explain their design choices, programming logic, and problemsolving strategies.
Fostering Social Skills
The STEM projects outlined in the "STEM Resource Book" provide opportunities for students to develop important social skills alongside their technical knowledge. These social skills are crucial for effective collaboration, communication, and engagement in real-world scenarios. Here's a brief introduction to some of the key social skills covered in these projects:
Details
1 Collaboration
Working together is a fundamental skill across all projects. Students learn to cooperate, share ideas, delegate tasks, and contribute collectively to achieve project goals. They experience the benefits of pooling strengths and perspectives to create more comprehensive and innovative solutions.
2 Communication Effective communication is vital in sharing ideas, presenting findings, and troubleshooting challenges. Through the projects, students practice articulating their thoughts clearly, listening actively to peers, and engaging in meaningful discussions that promote understanding.
3 ProblemSolving
4 Empathy and Respect
Engaging in the engineering design process exposes students to various challenges. They learn to approach problems analytically, brainstorm solutions, evaluate alternatives, and make decisions collaboratively. These skills are applicable beyond STEM and are valuable in everyday decision-making.
Encouraging students to appreciate different viewpoints, respect diverse ideas, and consider the feelings of their peers fosters a positive and inclusive learning environment. These skills promote effective teamwork and strengthen relationships within the group.
5 Critical Thinking
6 Time Management
As students work on designing, building, testing, and refining their projects, they enhance their critical thinking abilities. They learn to analyze situations, make informed judgments, and consider implications and consequences of their choices.
Working on projects requires efficient time management. Students develop skills in setting priorities, allocating time to tasks, meeting deadlines, and juggling multiple responsibilities –all of which are valuable in academic and professional contexts 7 Conflict Resolution Collaboration can sometimes lead to disagreements or conflicts. Through open discussions and respectful negotiations, students learn how to address conflicts, find common ground, and work towards mutually satisfactory solutions.
8
9 Reflection
Sharing their projects with peers and instructors hones students' presentation skills. They practice structuring their thoughts, speaking confidently, and using visuals effectively to convey complex information.
After completing each project, students reflect on their experiences, successes, challenges, and lessons learned. This practice encourages self-awareness, self-assessment, and the
ability to apply insights from one project to others.
By incorporating these social skills into STEM projects, educators prepare students not only for academic success but also for success in their future careers and personal lives. These skills empower students to collaborate effectively, contribute meaningfully to teams, and navigate the complexities of a rapidly changing world.
Makerspace
What is a Makerspace?
A makerspace is a collaborative workspace inside a school, library, or public/private facility for making, learning, exploring, and sharing. Here, students have the tools and resources to design, experiment, build, and invent. Makerspaces typically include a variety of materials and equipment, ranging from high-tech to no-tech, all aimed at fostering creativity, problem-solving, and critical thinking.
Features of an Ideal Makerspace
1. Space: The ideal makerspace should be spacious enough to accommodate groups of students working on projects. It should be well-lit and have areas for both individual and group work.
2. Furniture:
• Flexible Seating: Chairs and tables that are easily movable and can be reconfigured for different tasks.
• Storage Units: Shelves and drawers for organizing tools, materials, and student projects.
• Workbenches: Sturdy surfaces for hands-on activities.
• Display Boards: Walls or boards to showcase projects, ideas, or instructions.
3. Equipment Needed:
• Electronics STEM Kits: A core tool for the Grade 5 makerspace, these kits integrate hardware and software to produce a comprehensive learning tool.
• Computers or Tablets: For programming and accessing digital resources.
• General STEM Tools: Rulers, protractors, magnifying glasses, and basic lab equipment.
• Safety Equipment: Safety goggles, first aid kit, gloves, etc.
4. STEM Resource Book: This will guide students and educators in carrying out projects aligned with NGSS, the National Curriculum of England, and the Common Core State Standards for Mathematics.
Importance of a Makerspace in Schools
1. Enhanced Learning: Makerspaces enable hands-on learning, making complex concepts more accessible.
2. Fosters Creativity: Provides an environment where students can freely express and test out their ideas.
3. Teamwork: Students learn to collaborate, delegate tasks, and work towards a common goal.
4. Problem-solving: Tackling real-world challenges makes students more adept at thinking critically.
5. Prepares for the Future: Engaging with technology and tools prepares students for future job roles and challenges.
Executing STEM Activities in the Makerspace
1. Planning: Begin with the end in mind. Identify the learning outcomes you aim to achieve from the activity.
2. Group Formation: Divide students into small groups to encourage collaboration.
3. Introduction: Introduce the STEM Kit and how it can be used. Brief students on the activity using the STEM Resource Book.
4. Hands-on Activity: Allow students to build, experiment, and iterate using the kits. Ensure that they refer to the STEM Resource Book for guidance.
5. Reflection: Post-activity, allow students to discuss their findings, challenges faced, and what they learned.
6. Showcase: Encourage students to display their projects, explaining the science and math concepts they applied.
7. Safety: Always stress the importance of following safety guidelines, especially when using tools and equipment.
Standard Operating Procedure (SOP) for a Makerspace
1. Objective:
Provide a safe, organized, and productive environment for students to explore, invent, and learn using various tools and materials available in the makerspace.
2. Scope:
This SOP applies to all students, educators, and visitors within the makerspace area.
3. Responsibilities:
• Educators/Staff: Supervise activities, ensure the safety and proper use of tools/equipment, provide necessary training, and maintain equipment.
• Students: Comply with all guidelines, work safely, and respect all equipment and fellow makers.
4. Access:
• Makerspace access should be limited to authorized personnel and students during scheduled times.
• All users must sign in and out of the makerspace, noting their purpose of visit.
5. Safety:
• Before using any tool or equipment, students must receive proper training.
• Safety equipment like goggles, gloves, and aprons should be worn as required.
• No food or drink is allowed in the makerspace.
• First aid kits and fire extinguishers should be easily accessible.
6. Equipment Usage:
• All equipment should have clear, written instructions posted nearby.
• Users must report any damage or malfunction immediately.
• After use, equipment must be returned to its designated place and left in a clean and usable state for the next user.
7. Materials:
• All materials must be stored in their designated areas.
• Users must log materials used for inventory and restocking purposes.
• Waste should be disposed of properly in the provided bins.
8. Conduct:
• Respect fellow makers; do not interrupt or hinder someone else’s project.
• Clean up after completing a project or task.
• Notify staff of any issues, concerns, or suggestions.
• Always ask if unsure about equipment use or any makerspace procedure.
9. Training:
• Regular workshops should be held to train students on the use of new equipment or software.
• New users should undergo an orientation session before accessing the makerspace.
10. Maintenance:
• A routine check of all tools and equipment should be carried out to ensure they are in good working condition.
• Expired or worn-out materials should be discarded and replaced.
• Cleaning routines must be established to maintain the hygiene and tidiness of the makerspace.
11. Project Storage:
• Designate a space where students can store ongoing projects.
• All projects should be labeled with the student's name, class, and date.
12. Showcase:
• A dedicated space should be available for showcasing exemplary projects.
• Educators can rotate the showcased projects based on relevance, innovation, and educational value.
13. Continuous Improvement:
• Collect feedback regularly from users to understand what can be improved.
• Explore new tools, materials, and technologies to keep the makerspace updated.
14. Emergency Procedures:
• Clearly display emergency procedures, including evacuation routes.
• Train staff and students on how to respond to emergencies like fires, electrical failures, or injuries.
15. Periodic Review:
• This SOP should be reviewed at least annually to ensure its relevance and effectiveness.
In conclusion, a well-structured SOP ensures that the makerspace remains a hub of creativity while being safe and organized. Adhering to these procedures ensures that the makerspace is beneficial for all and remains a vital resource for students for years to come.
Week 1: Introduction to Building a Flower
Understand the purpose of the project. Learn about the parts of a flowering plant.
Week 2: Building and Evaluation of the
Complete the flower
Understand the functions of different parts of a flowering
Week 3: Reflection and Communication
Reflect on the project's learning outcomes. Communicate findings and ideas to the class.
STEM Resource Book – Grade 1
Model
Complete the reel model. Understand the concept of designing tools for specific tasks.
Week 3: Reflection and Communication Reflect on the project's learning outcomes. Communicate findings and ideas to the class.
Week 1: Introduction to Building a Lion project's purpose and structure of animals, particularly lions.
Week 2: Building and Evaluation of the Lion
Complete the lion concept of animal
Week 3: Reflection
Grade 1 – Kit
Digital Camera or Tablet
Printer Crayons
STEM
Resource Book – Grade 1
and ideas to the class.
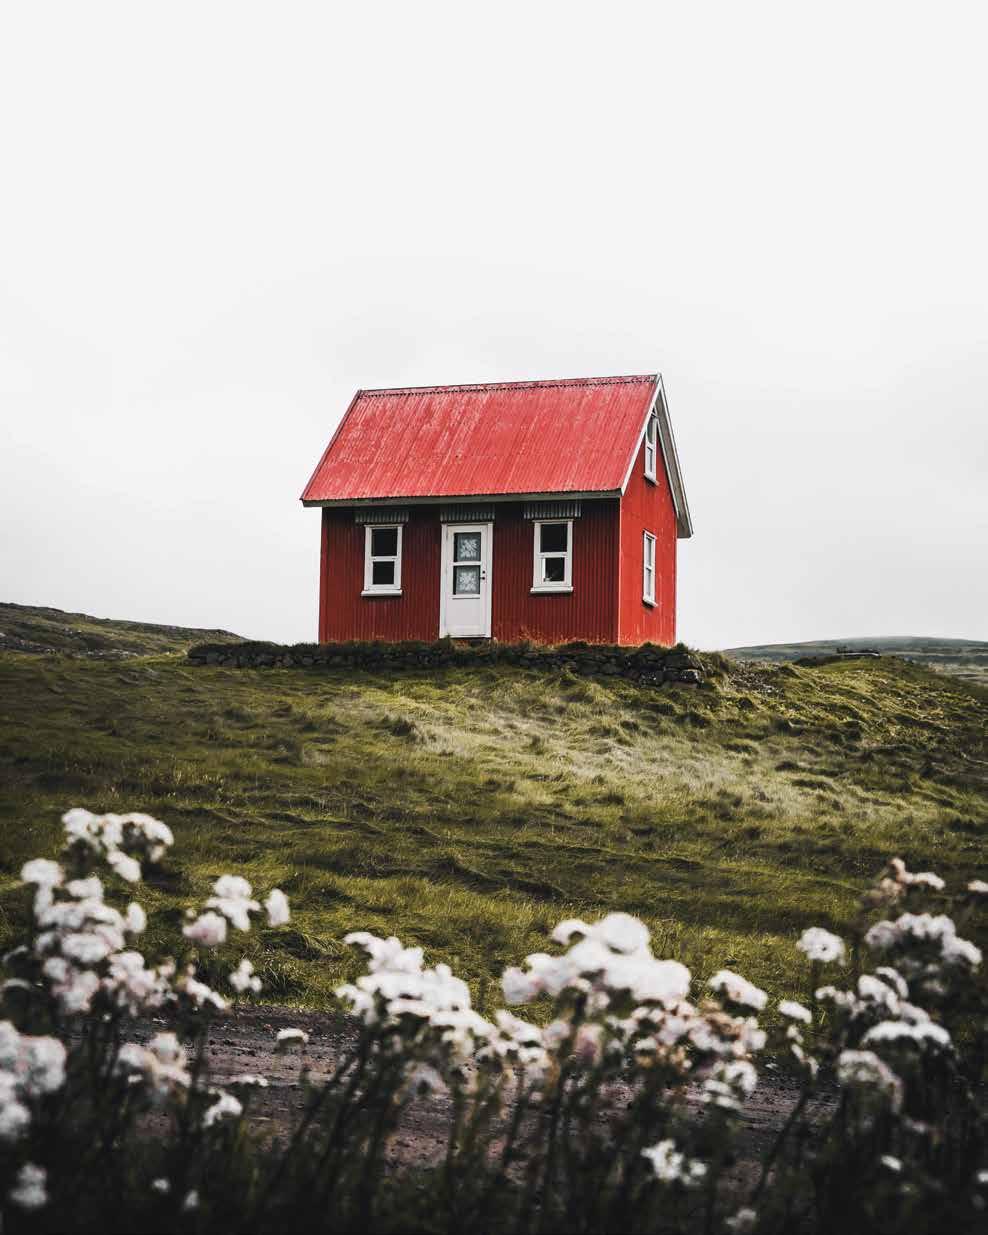
Week 1: Introduction to Building a House
Understand the project's purpose and objectives.
Learn about the materials used in building houses.
Week 2: Building and Evaluation of the House Model
Complete the house model.
Understand the concept of sustainable building materials.
Week 3: Reflection and Communication
Reflect on the project's learning outcomes. Communicate findings and ideas to the class.
Week 1: Introduction to Building a Stirring
Learn about the different states of
Crayons STEM Resource Book – Grade 1 matter.
Week 2: Building and Evaluation of the Ice Crusher Model
Complete the ice crusher model. Understand the concept of changing states of matter.
Week 3: Reflection and Communication
Reflect on the project's learning outcomes. Communicate findings and ideas to the class.
Week 1: Introduction
Understand the project's purpose and communication
Week 2: Building and Evaluation of the Telephone Model telephone model. concept of sound
Week 3: Reflection and Communication
Reflect on the project's learning outcomes. Communicate findings and ideas to the class.
Week 1: Introduction to Building a Flashlight
project's purpose and
Learn about light sources and their
eek 2: Building and Evaluation of the Flashlight Model flashlight model. concept of light emission and reflection.
Reflect on the project's learning outcomes. Communicate findings and ideas to the class Week 1: Introduction to Building the Earth project's purpose and
Earth's structure and features.
Week 2: Building and Evaluation of the
Complete the Earth
Understand the concept of landforms and water bodies.
Week 3: Reflection and Communication Reflect on the project's outcomes. Communicate findings and ideas to the class.
Week 1: Introduction
Understand the project's purpose and
Learn about the concept of pendulums
Week 2: Building and
Week 3: Reflection
and Communication
Reflect on the project's learning outcomes. Communicate findings and ideas to the class.
Project-wise Lesson Plan and Answer Key
Build A Flower
Project 1: A Flower
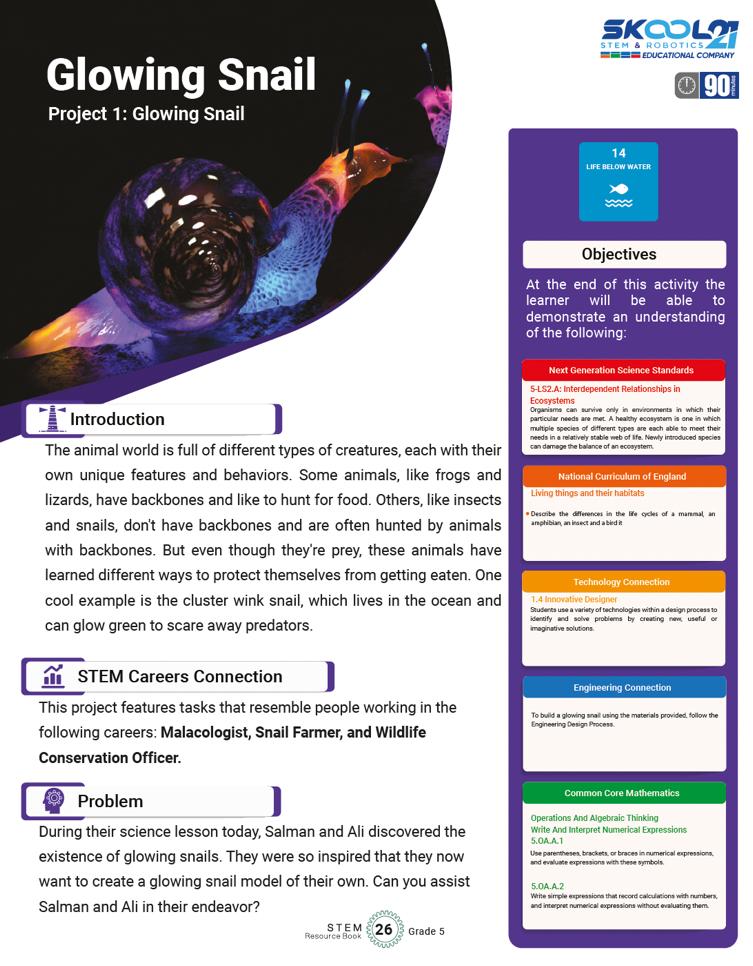
Introduction
Botany is the study of plants. Almost all living things depend on plants for many reasons. It is important to understand plants and how they are a part of our life on land.
STEM Careers Connection
This project features tasks that resemble people working in the following careers:
Agricultural Engineer, Farmer, Botanist
Problem
Alaya’s school class is learning about plants and how humans and animals interact with them. Alaya would like to build a model of a plant to be able to learn more about them.
Challenge
Can you build a flower that will help you identify and describe the functions of different parts of flowering plants: roots, stem/trunk, leaves, and flowers?
At the end of this activity the learner will be able to demonstrate an understanding of the following: Objectives
1-LS1-1 From Molecules to Organisms: Structures and Processes
National Curriculum of England
I
I
Objective:
Lesson Plan: Build A Flower (Project 1)
Week 1: Introduction to Building a Flower
Understand the purpose of the project. Learn about the parts of a flowering plant.
Duration: 45 minutes
S# Phase Duration Details
1 Introduction 5 minutes
2 Brainstorming 10 minutes
3 Discussion 15 minutes
4 Building the Flower 15 minutes
• Briefly explain the project and its objectives.
• Discuss the importance of plants and how they contribute to sustainable living.
• Ask students to think about the different parts of a flower (roots, stem/trunk, leaves, flowers).
• Have them draw how they imagine the flower will look after assembling the components in the kit.
• Review the drawings and discuss the various features of a flower.
• Explain the roles of each part of the plant in its growth and survival.
• Distribute the materials from the kit.
• Guide students in assembling the components to build their flower model.
Week 2: Building and Evaluation of the Flower
Objective:
Complete the flower model.
Understand the functions of different parts of a flowering plant.
Duration: 45 minutes S#
1 Recap 5 minutes
2 Building and Completing the Flower Model 20 minutes
3 Evaluation 15 minutes
• Quickly recap what was covered in the previous session.
• Allow students to finish assembling their flower models.
• Assist as needed.
• Have students individually evaluate their models.
• Use the provided evaluation questions to guide their assessment.
Week 3: Reflection and Communication
Objective:
Reflect on the project's learning outcomes. Communicate findings and ideas to the class.
Duration: 45 minutes
1 Reflection 15 minutes • Ask students to share their reflections on protecting plants for sustainable living.
• Encourage them to discuss ways to care for plants and their significance. 2 Communication 20 minutes
Have students present their flower models to the class.
• Collect feedback from peers and discuss possible improvements.
Table Completion 10 minutes
Guide students in completing the table based on feedback received.
• Discuss how positive and negative feedback can lead to improvements.
2 Leaf: Yes, Stem: Yes, Roots: Yes, Flower: Yes. 3 What is the height of your model? Answer will vary
Stem.
Guidance for Reflection Questions:
Students should reflect on practices like conserving water, reducing pollution, planting trees, and supporting sustainable farming methods. They could mention using less plastic, recycling, and participating in community gardening.
Build A Tree
Project 2: A Tree
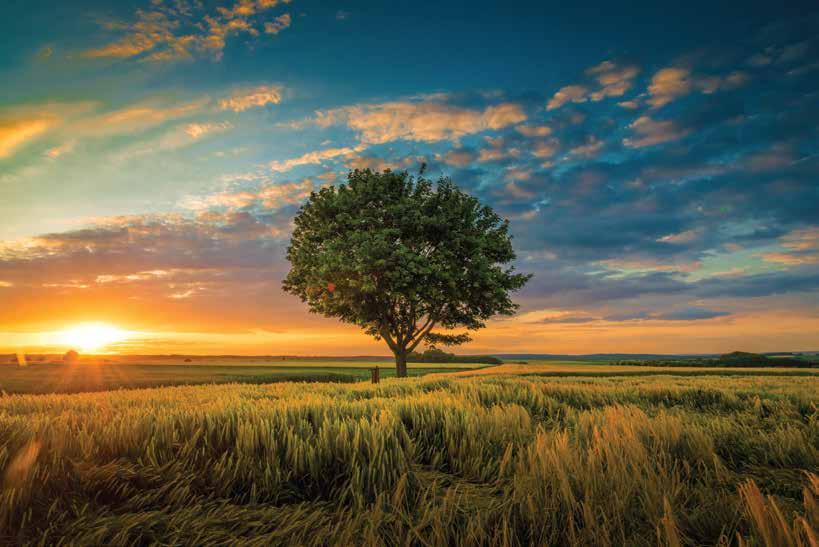
transported within plants.You will also explore the part that flowers play in the life cycle of flowering plants, including pollination, seed formation, and seed dispersal.
STEM Careers Connection
This project features tasks that resemble people working in the following careers: Food scientist, Agricultural Engineer, Botanist. Problem Yug’s grandfather is a farmer and has been talking to him about the environment and why it is important to care for it. Yug would like to learn more about how living things grow and change to help him understand about plants so he can help his grandfather on the farm.
Challenge
Can you build a tree?
the end of this
the learner will be able to demonstrate an understanding of the following:
Objective:
Lesson Plan: Build A Tree (Project 2)
Week 1: Introduction to Building a Tree
Understand the project's purpose and objectives. Learn about the life cycle of a plant, specifically a tree.
Duration: 45 minutes
S# Phase Duration Details
1 Introduction 5 minutes
2 Brainstorming 10 minutes
3 Discussion 15 minutes
4 Building the Tree Model 15 minutes
• Briefly explain the project and its objectives.
• Discuss the importance of trees in our environment.
• Prompt students to think about the different stages of a tree's life cycle.
• Have them draw how they imagine the tree model representing the life cycle.
• Review the drawings and discuss the different stages: pollination, seed formation, seed dispersal, and growth into a tree.
• Distribute the kit materials.
• Assist students in building their tree models, incorporating the life cycle stages.
Week 2: Building and Evaluation of the Tree Model
Objective:
Complete the tree model.
Understand the concept of the tree's life cycle.
Duration: 45 minutes
S# Phase Duration Details
1 Recap 5 minutes
2 Building and Completing the Tree Model 20 minutes
3 Evaluation 15 minutes
• Recap the previous session's content.
• Give students time to finish constructing their tree models.
• Provide guidance as needed.
• Have students assess their models individually.
• Use the evaluation questions to guide their self-assessment.
Week 3: Reflection and Communication
Objective:
Reflect on the project's learning outcomes. Communicate findings and ideas to the class.
Duration: 45 minutes
S# Phase Duration Details
1 Reflection 15 minutes
• Ask students to share their insights on ending hunger, considering the role of trees
2 Communication 20 minutes
3 Table Completion 10 minutes
in food production.
• Encourage discussions on sustainable agriculture and how trees contribute to it.
• Allow students to present their tree models and the life cycle stages to the class.
• Facilitate a feedback session for improvement.
• Guide students in completing the table based on feedback received.
• Discuss how feedback can lead to better designs and solutions.
Answer Key
Q# Answer
1 Yes.
2 Pollination: Yes, Seed Formation: Yes, Seed Dispersal: Yes, Tree: Yes.
3 Yes.
4 Stem.
5 Guidance for Reflection Questions:
Students might suggest sustainable farming practices, reducing food waste, and supporting local food sources.
Discuss the importance of diverse and nutritious diets for ending hunger.
Build A Reel
Project 3: A Reel
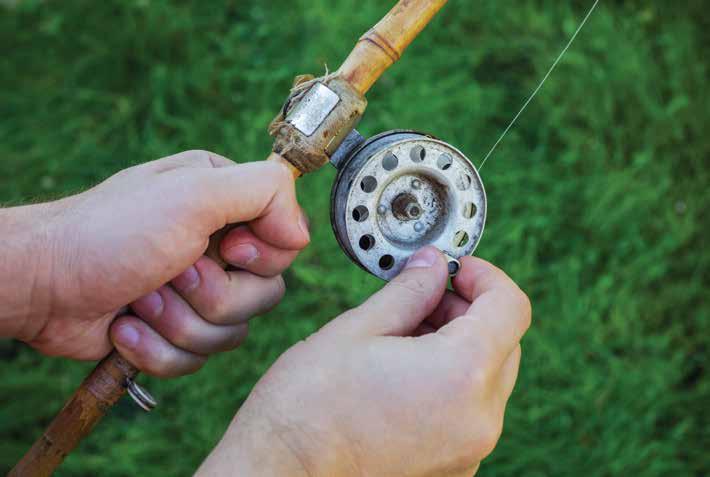
Introduction
Animals, including humans, need the right types and amounts of nutrition, and they cannot make their own food; they get nutrition from what they eat.
STEM Careers Connection
This project features tasks that resemble people working in the following careers:
Fisherman, Environmental Specialist, Research Biologist Problem
Aarna lives near a freshwater lake that is stocked with fish. Her friends are going to go fishing to catch some food for dinner. She is hungry and would like to go with them but has no way to catch a fish. What could Aarna do so that she can go with her friends and catch some fish to feed her family.
Challenge
Can you build a tool that would help Aarna catch some fish to help feed her family?
At the end of this activity the learner will be able to demonstrate an understanding of the following: Objectives
Animals, including humans
Objective:
Lesson Plan: Build A Reel (Project 3)
Week 1: Introduction to Building a Reel
Understand the purpose of the project. Learn about tools and machines used for specific tasks.
Duration: 45 minutes
S# Phase Duration Details
1 Introduction 5 minutes
2 Brainstorming 10 minutes
3 Discussion 15 minutes
4 Building the Reel Model 15 minutes
• Introduce the project and its goals.
• Discuss the importance of tools and machines in our lives.
• Encourage students to think about tools and machines used for fishing.
• Have them draw their initial ideas for building a tool to help Aarna catch fish.
• Review the drawings and discuss the various features and components of fishing tools and machines.
• Distribute the kit materials.
• Guide students in constructing their reel models for fishing.
Week 2: Building and Evaluation of the Reel Model
Objective:
Complete the reel model.
Understand the concept of designing tools for specific tasks.
Duration: 45 minutes
S# Phase Duration Details
1 Recap 5 minutes
2 Building and Completing the Reel Model 20 minutes
3 Evaluation 15 minutes
• Briefly review the previous session's content.
• Give students time to finish assembling their reel models.
• Provide assistance as needed.
• Have students evaluate their reel models individually.
• Use the evaluation questions to guide their self-assessment.
Week 3: Reflection and Communication
Objective:
Reflect on the project's learning outcomes. Communicate findings and ideas to the class.
Duration: 45 minutes
S# Phase Duration Details
1 Reflection 15 minutes
• Prompt students to reflect on ways humans
can conserve and sustain ocean resources.
• Discuss the importance of responsible fishing practices and marine conservation. 2 Communication 20 minutes
• Allow students to present their reel models and their ideas for helping Aarna catch fish sustainably.
• Facilitate a feedback session for further improvement.
• Guide students in completing the feedback table based on input from classmates.
• Discuss how feedback can lead to better designs and solutions.
Discuss sustainable fishing practices, protecting marine habitats, and reducing plastic waste to conserve marine life.
Emphasize the importance of maintaining healthy oceans for future generations.
Build A Lion
Project 4: A Lion
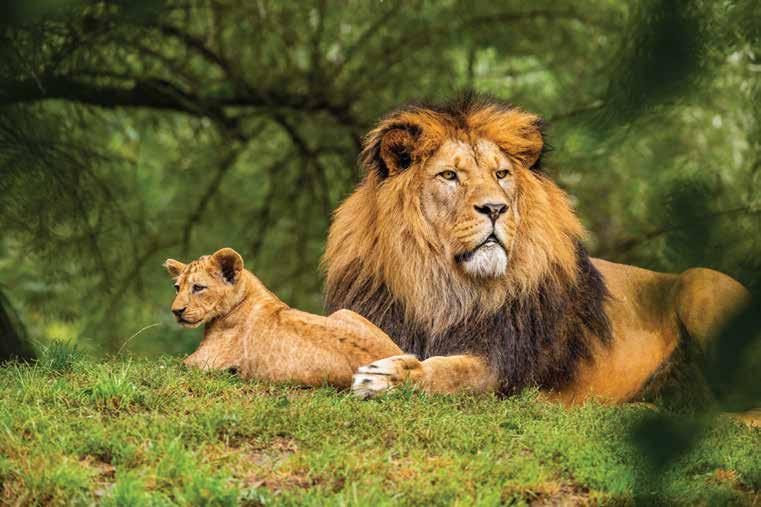
Humans and some other animals have skeletons and muscles for support, protection, and movement. Bones help to stand. Muscles help to move.
STEM Careers Connection
This project features tasks that resemble people working in the following careers: Zoologist, Wildlife Biologist, Zookeeper, Wildlife Educators
Problem
Milo has been learning that humans have bones and muscles in science class. He loves animals and his favorite one is a lion. Milo wanted to find out if lions have bones and muscles too. He asked his science teacher and she asked Milo to build a model of a Lion to see if he could find the answer himself.
Challenge
Can you build a model of a lion to see if you can help Milo figure out if it has bones and muscles just like humans?
At the end of this activity the learner will be able to demonstrate an understanding of the following: Objectives
Objective:
Lesson Plan: Build A Lion (Project 4)
Week 1: Introduction to Building a Lion
Understand the project's purpose and objectives. Learn about the structure of animals, particularly lions.
Duration: 45 minutes
S# Phase Duration Details
1 Introduction 5 minutes
2 Brainstorming 10 minutes
3 Discussion 15 minutes
4 Building the Lion Model 15 minutes
• Introduce the project and its objectives.
• Discuss the importance of understanding animal anatomy.
• Encourage students to think about the structure of a lion's body.
• Have them draw their initial ideas for building a lion model.
• Review the drawings and discuss the different body parts of a lion.
• Distribute the kit materials.
• Guide students in constructing their lion models.
Week 2: Building and Evaluation of the Lion Model
Objective:
Complete the lion model.
Understand the concept of animal anatomy.
Duration: 45 minutes
S# Phase Duration Details
1 Recap 5 minutes
2 Building and Completing the Lion Model 20 minutes
3 Evaluation 15 minutes
• Briefly recap the content of the previous session.
• Give students time to finish assembling their lion models.
• Provide assistance as needed.
• Have students evaluate their lion models individually.
• Use the evaluation questions to guide their self-assessment.
Week 3: Reflection and Communication
Objective:
Reflect on the project's learning outcomes. Communicate findings and ideas to the class.
Duration: 45 minutes
S# Phase Duration Details
1 Reflection 15 minutes
• Prompt students to reflect on the similarities and differences between animal
2 Communication 20 minutes
3 Table Completion 10 minutes
anatomy and human anatomy.
• Discuss the importance of studying animals for scientific understanding.
• Allow students to present their lion models and their insights on animal structures.
• Facilitate a feedback session for further improvement.
• Guide students in completing the table based on feedback received.
• Discuss how feedback can lead to better designs and solutions.
Answer Key
Q# Answer
1 Yes.
2 a. Muscles: Yes, b. Bones: Yes.
3 Bones.
4 Muscles.
5 Guidance for Reflection Questions:
Discuss the importance of biodiversity, conservation efforts for wild animals, and the interdependence of species in ecosystems. Emphasize the role of humans in protecting wildlife habitats and supporting conservation initiatives.

Build A Waterwheel
Project 5: A Waterwheel
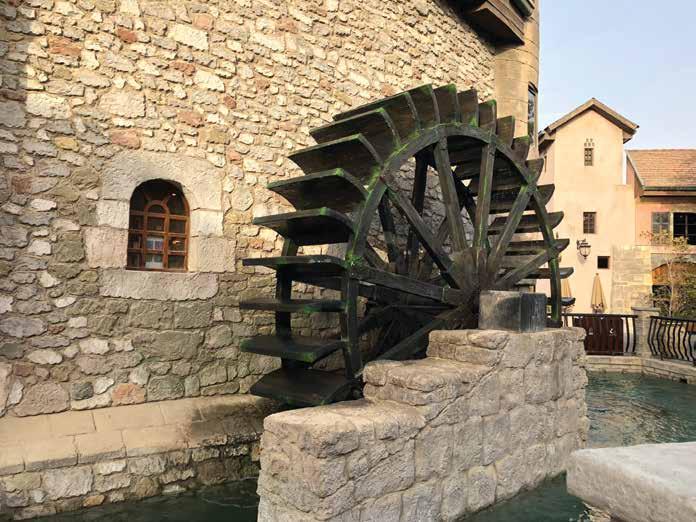
Introduction
Water is an important resource. Humans need water to survive. Water can also be a source of energy by using a waterwheel to create affordable and clean energy.
STEM Careers Connection
This project features tasks that resemble people working in the following careers: Hydropower Engineer, Hydropower Biologist, and Hydroelectric Engineers
Problem
Samaha lives in a rural part of England with an abundance of water. Her town has limited power in certain areas. Samaha learned about hydroelectric power in a book. She was wondering if her town built a waterwheel, they could generate electricity for their community.
Challenge
Can you build a waterwheel that would help Samaha generate energy for her town?
At the end of this activity the learner will be able to demonstrate an understanding of the following: Objectives
Objective:
Lesson Plan: Build A Waterwheel (Project 5)
Week 1: Introduction to Building a Waterwheel
Understand the project's purpose and objectives. Learn about energy conversion using waterwheels.
Duration: 45 minutes
S# Phase Duration Details
1 Introduction 5 minutes
2 Brainstorming 10 minutes
3 Discussion 15 minutes
4 Building the Waterwheel Model 15 minutes
Objective:
• Introduce the project and its goals.
• Discuss the concept of hydropower and its importance.
• Encourage students to think about how waterwheels work and generate energy.
• Have them draw their initial ideas for building a waterwheel model.
• Review the drawings and discuss the process of converting water energy into mechanical energy.
• Distribute the kit materials.
• Guide students in constructing their waterwheel models.
Week 2: Building and Evaluation of the Waterwheel Model
Complete the waterwheel model.
Understand the concept of energy conversion.
Duration: 45 minutes
S# Phase Duration Details
1 Recap 5 minutes
2 Building and Completing the Waterwheel Model 20 minutes
3 Evaluation 215 minutes
• Briefly review the content covered in the previous session.
• Give students time to finish assembling their waterwheel models.
• Provide assistance as needed.
• Have students evaluate their waterwheel models individually.
• Use the evaluation questions to guide their self-assessment.
Week 3: Reflection and Communication
Objective:
Reflect on the project's learning outcomes. Communicate findings and ideas to the class.
Duration: 45 minutes
S# Phase Duration Details
• Prompt students to reflect on the importance of renewable energy sources like hydropower.
• Discuss the advantages of using water as a clean energy source.
• Allow students to present their waterwheel models and explain how they work.
• Facilitate a feedback session for further improvement.
Guide students in completing the table based on feedback received.
• Discuss how feedback can lead to better designs and solutions.
Discuss the benefits of using renewable energy sources to reduce greenhouse gas emissions and combat climate change.
Encourage students to explore more about different types of renewable energy and their applications.
Build A House

Project 6: A House Introduction
Houses are made from many types of materials. It is the responsibility of the human race to consume and recycle as many materials to help maintain the sustainability of, the planet.
construction materials would be the best for the planet.
Challenge
Can you build a house and explain which parts of your house have been built with materials that help sustain the planet?
Lesson Plan: Build A House (Project 6)
Week 1: Introduction to Building a House Objective:
Understand the project's purpose and objectives. Learn about the materials used in building houses.
Duration: 45 minutes
S# Phase Duration Details
1 Introduction 5 minutes
2 Brainstorming 10 minutes
3 Discussion 15 minutes
4 Building the House Model 15 minutes
Week
Objective:
• Introduce the project and its goals.
• Discuss the importance of sustainable construction practices.
• Encourage students to think about the components of a house.
• Have them draw their initial ideas for building a house model.
• Review the drawings and discuss the different materials used in building houses.
• Distribute the kit materials.
• Guide students in constructing their house models.
2: Building and Evaluation of the House Model
Complete the house model.
Understand the concept of sustainable building materials.
Duration: 45 minutes
S# Phase Duration Details
1 Recap 5 minutes
2 Building and Completing the House Model 20 minutes
3 Evaluation 15 minutes
• Briefly recap the content covered in the previous session.
• Give students time to finish assembling their house models.
• Provide assistance as needed.
• Have students evaluate their house models individually.
• Use the evaluation questions to guide their self-assessment.
Week 3: Reflection and Communication
Objective:
Reflect on the project's learning outcomes. Communicate findings and ideas to the class.
Duration: 45 minutes
S# Phase Duration Details
1 Reflection 15 minutes
• Prompt students to reflect on the importance of sustainable construction and
2 Communication 20 minutes
3 Table Completion 10 minutes
design.
• Discuss the role of energy-efficient buildings in reducing environmental impact.
• Allow students to present their house models and discuss sustainable features.
• Facilitate a feedback session for further improvement.
• Guide students in completing the table based on feedback received.
• Discuss how feedback can lead to better designs and solutions.
Students' answers may
3 Guidance for Reflection Questions:
Discuss eco-friendly construction materials, energy-efficient designs, and waste reduction strategies in construction. Encourage students to think about their role in making cities and human settlements safe, resilient, and sustainable.

Build A Stirring Soil Machine
Project 7: A Soil Machine
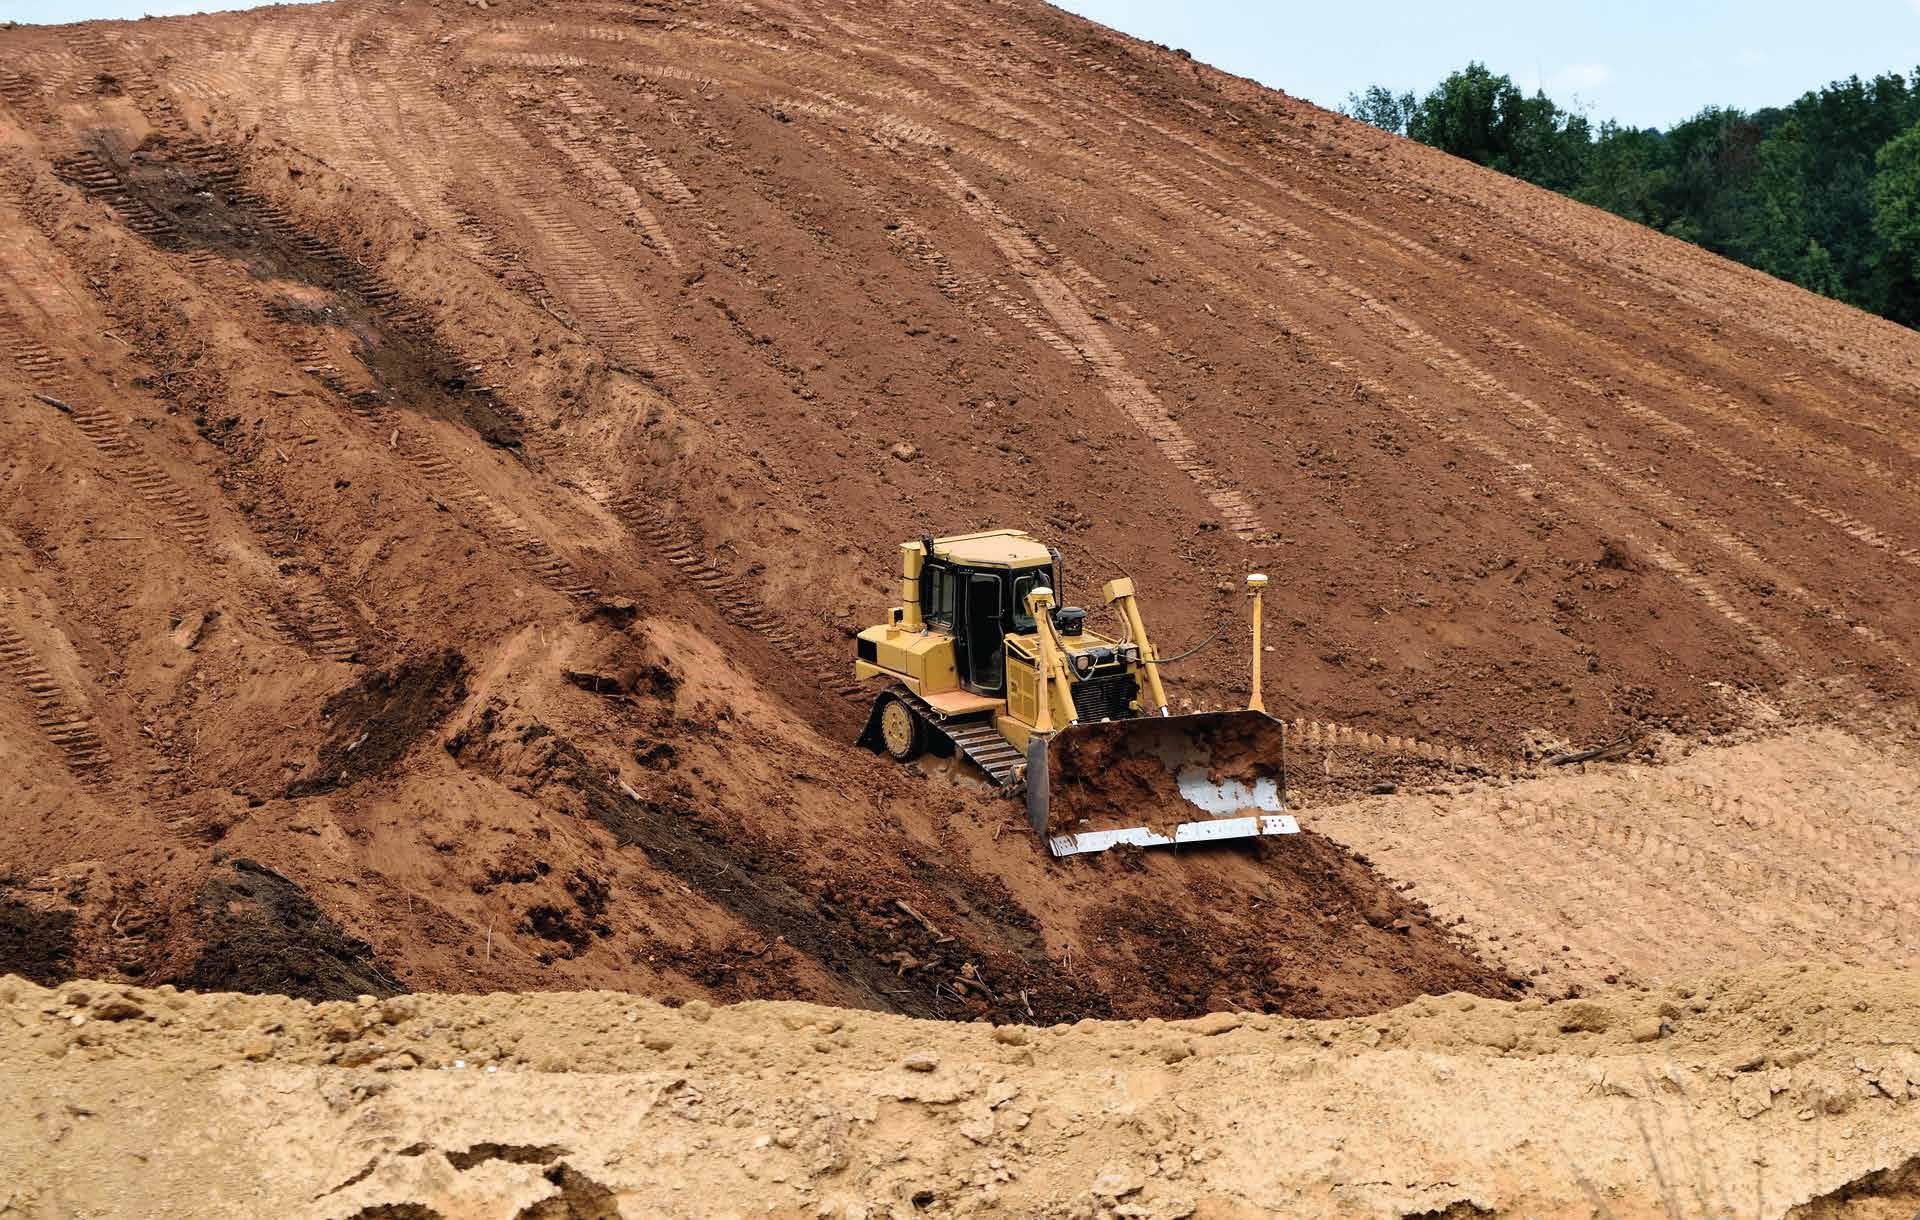
Introduction
When soil is stirred for planting, many different types of rocks and be found while the soil is being turned over. Comparing and grouping together different kinds of rocks on the basis of their appearance and simple physical properties can be helpful to farmers when they are trying to decide what crops to plant.
STEM Careers Connection
This project features tasks that resemble people working in the following careers:
Farmer, Horticulturalist, Soil Scientist, and Geologist
Problem
James is learning about how to grow his own food. He learned that when he stirs up the soil where he wants to plant his seeds he can find rocks. James needs a way to stir the soil so he can examine the types of rocks and soil to help him decide which plants will grow the best.
Challenge
Can you build a stirring soil machine to help James decide what types of crops he can plant in his yard?
Lesson Plan: Build A Stirring Soil Machine (Project 7)
Objective:
Week 1: Introduction to Building a Stirring Soil Machine
Understand the project's purpose and objectives. Learn about soil preparation for planting.
Duration: 45 minutes
S# Phase Duration Details
1 Introduction 5 minutes
2 Brainstorming 10 minutes
3 Discussion 15 minutes
4 Building the Stirring Soil Machine Model 15 minutes
Objective:
• Introduce the project and its goals.
• Discuss the importance of preparing soil for gardening.
• Encourage students to think about tools used for soil preparation.
• Have them draw their initial ideas for building a stirring soil machine.
• Review the drawings and discuss the different components of soil-preparation tools.
• Distribute the kit materials.
• Guide students in constructing their stirring soil machine models.
Week 2: Building and Evaluation of the Stirring Soil Machine Model
Complete the stirring soil machine model.
Understand the concept of soil preparation for gardening.
Duration: 45 minutes
S# Phase Duration Details
1 Recap 5 minutes
2 Building and Completing the Stirring Soil Machine Model 20 minutes
3 Evaluation 15 minutes
• Briefly recap the content covered in the previous session.
• Give students time to finish assembling their soil machine models.
• Provide assistance as needed.
• Have students evaluate their soil machine models individually.
• Use the evaluation questions to guide their self-assessment.
Week 3: Reflection and Communication
Objective:
Reflect on the project's learning outcomes. Communicate findings and ideas to the class.
Duration: 45 minutes
S# Phase Duration Details
Communication
15 minutes • Prompt students to reflect on the importance of soil health for plant growth.
• Discuss the role of soil preparation in sustainable farming practices.
Allow students to present their soil machine models and explain how they work.
• Facilitate a feedback session for further improvement.
Guide students in completing the table based on feedback received.
• Discuss how feedback can lead to better designs and solutions.
Discuss the importance of soil conservation, organic farming, and sustainable agriculture practices.
Encourage students to explore more about the role of soil in supporting food production and biodiversity.

Build An Ice Crusher
Project 8: An Ice Crusher
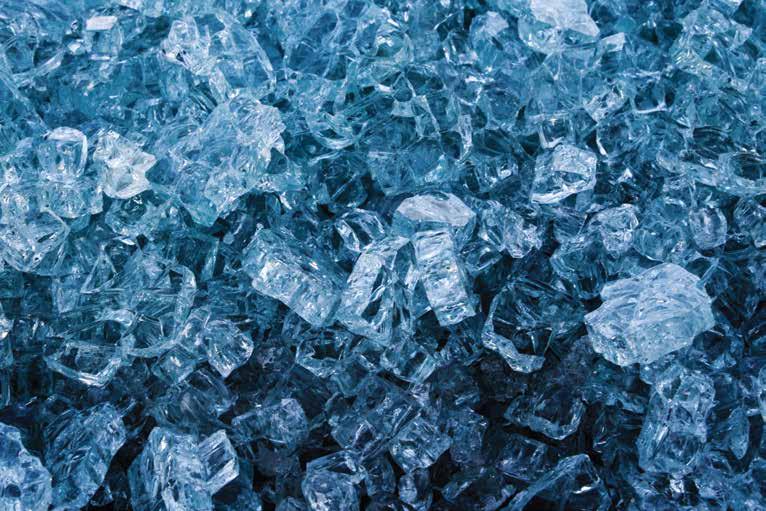
Introduction
Water is something that we see every day. We need water to survive. Water comes in many forms but the three most common categories are solid, liquid, and gas. These are called states of matter. In this lesson, we will be learning about the states of matter of water.
STEM Careers Connection
This project features tasks that resemble people working in the following careers:
Biologist,Geographer, Meteorologist, Oceanographer
Problem
Ellie has been learning about states of matter in school. Her teacher gave them the assignment to look around their home or town to see if they could come up with some examples of the three states of matter for water. On her way home from school she stepped in a puddle of rain.She knew that state of matter was liquid. When she got home, her grandmother was boiling water on the stove to make tea. When the water was boiling she saw steam coming from the kettle. She knew that state of matter was liquid. But she couldn’t find a solid state of matter for water until her mother put an ice cube in her water glass. She wants to prove that ice is a solid matter by building a machine to crush the ice into smaller pieces.
At
be
to demonstrate an understanding of the
Objective:
Lesson Plan: Build An Ice Crusher (Project 8)
Week 1: Introduction to Building an Ice Crusher
Understand the project's purpose and objectives. Learn about the different states of matter.
Duration: 45 minutes
S# Phase Duration Details
1 Introduction 5 minutes
2 Brainstorming 10 minutes
3 Discussion 15 minutes
4 Building the Ice Crusher Model 15 minutes
Objective:
• Introduce the project and its goals.
• Discuss the concept of states of matter and their changes.
• Encourage students to think about ice and its properties.
• Have them draw their initial ideas for building an ice crusher model.
• Review the drawings and discuss the different states of matter (solid, liquid, gas).
• Distribute the kit materials.
• Guide students in constructing their ice crusher models.
Week 2: Building and Evaluation of the Ice Crusher Model
Complete the ice crusher model.
Understand the concept of changing states of matter.
Duration: 45 minutes
S# Phase Duration Details
1 Recap 5 minutes
2 Building and Completing the Ice Crusher Model 20 minutes
3 Evaluation 15 minutes
• Briefly recap the content covered in the previous session.
• Give students time to finish assembling their ice crusher models.
• Provide assistance as needed.
• Have students evaluate their ice crusher models individually.
• Use the evaluation questions to guide their self-assessment.
Week 3: Reflection and Communication
Objective:
Reflect on the project's learning outcomes. Communicate findings and ideas to the class.
Duration: 45 minutes
S# Phase Duration Details
1 Reflection 15 minutes
• Prompt students to reflect on the properties
2 Communication 15 minutes
of water and its different states.
• Discuss the importance of water in our daily lives.
• Allow students to present their ice crusher models and explain the science behind them.
• Facilitate a feedback session for further improvement. 3 Table Completion 10 minutes
• Guide students in completing the table based on feedback received.
• Discuss how feedback can lead to better designs and solutions.
Discuss the water cycle, conservation of water resources, and the importance of clean water for ecosystems and human survival. Encourage students to explore more about water pollution, treatment, and sustainable water management.

Build A Telephone
Project 9: A Telephone

Introduction
Sound is caused by vibrations.These simple vibrations turn into waves that help communication over large distances. In the world today we need to significantly increase access to information and communications technology. That is why sound waves are so important.
STEM Careers Connection
This project features tasks that resemble people working in the following careers: Data Security Engineer, Cyber Security Engineer, Cell Tower Technician, and Communications Engineer Problem
Max is learning about sound waves in school. His teacher said that sound waves are also the basis of data signals that are sent through the air which provides internet and cell phone access. Max’s cousin lives in a village that does not have internet or cell phone access. He would like to find a way to communicate with his cousin by creating a telephone that would send sound waves long distances.
Challenge
Can you build a telephone to help Max communicate with his cousin?
At the end of this activity the learner will be able to demonstrate an understanding of the following:
Objective:
Lesson Plan: Build A Telephone (Project 9)
A Car Launcher
Understand the project's purpose and objectives. Learn about communication methods.
Duration: 45 minutes
S# Phase Duration Details
1 Introduction 5 minutes
2 Brainstorming 10 minutes
3 Discussion 15 minutes
4 Building the Telephone Model 15 minutes
Objective:
• Introduce the project and its goals.
• Discuss the history and importance of communication.
• Encourage students to think about different ways people communicate.
• Have them draw their initial ideas for building a telephone model.
• Review the drawings and discuss various communication methods.
• Distribute the kit materials.
• Guide students in constructing their telephone models
Week 2: Building and Evaluation of the Telephone Model
Complete the telephone model. Understand the concept of sound transmission.
Duration: 45 minutes
S# Phase Duration Details
1 Recap 5 minutes
2 Building and Completing the Telephone Model 20 minutes
Evaluation 15 minutes
Objective:
• Briefly recap the content covered in the previous session.
• Give students time to finish assembling their telephone models.
• Provide assistance as needed.
• Have students evaluate their telephone models individually.
• Use the evaluation questions to guide their self-assessment.
Week 3: Reflection and Communication
Reflect on the project's learning outcomes. Communicate findings and ideas to the class.
Duration: 45 minutes
S# Phase Duration Details
1 Reflection 5 minutes
• Prompt students to reflect on the evolution
2 Communication 20 minutes
3 Table Completion 10 minutes
of communication technology.
• Discuss the significance of effective communication in society.
• Allow students to present their telephone models and demonstrate their working.
• Facilitate a feedback session for further improvement.
• Guide students in completing the table based on feedback received.
• Discuss how feedback can lead to better designs and solutions. Answer Key
4 Guidance for Reflection Questions:
Discuss the impact of modern communication technologies on connecting people globally.
Encourage students to think about the role of effective communication in solving global challenges and promoting understanding.

Build A Flashlight (Torch)
Project 10: A Flashlight

Introduction
Dark is the absence of light. Light (illumination) is needed to see things that are hidden by darkness.
STEM Careers Connection
This project features tasks that resemble people working in the following careers: Police Officer, Military, Doctor, Heating and Cooling System Technician, and Mechanic
Problem
Rahmi’s family lives near a dense forest with open land for wild animals to roam. At night she can see the gazelles feeding off the land. She loves to watch and would like to be able to view them through the darkness but does not want to turn on the house lights because she will wake her little sister. How can Rahmi shine some light on the gazelles without disturbing her sister?
Challenge
Can you build a flashlight to help Rahmi be able to see the gazelles?
At the end of this activity the learner will be able to demonstrate an understanding of the following: Objectives
Lesson Plan: Build A Flashlight (Torch) (Project 10)
Week 1: Introduction to Building a Flashlight (Torch)
Objective:
Understand the project's purpose and objectives. Learn about light sources and their properties.
Duration: 45 minutes
S# Phase Duration Details
1 Introduction 5 minutes
2 Brainstorming 10 minutes
3 Discussion 15 minutes
4 Building the Flashlight Model 15 minutes
Objective:
• Introduce the project and its goals.
• Discuss the importance of light and its applications.
• Encourage students to think about different sources of light.
• Have them draw their initial ideas for building a flashlight (torch) model.
• Review the drawings and discuss various light sources.
• Distribute the kit materials.
• Guide students in constructing their flashlight (torch) models.
Week 2: Building and Evaluation of the Flashlight Model
Complete the flashlight model.
Understand the concept of light emission and reflection.
Duration: 45 minutes
S# Phase Duration Details
1 Recap 5 minutes
2 Building and Completing the Flashlight Model 20 minutes
3 Evaluation 15 minutes
• Briefly recap the content covered in the previous session.
• Give students time to finish assembling their flashlight models.
• Provide assistance as needed.
• Have students evaluate their flashlight models individually.
• Use the evaluation questions to guide their self-assessment.
Week 3: Reflection and Communication
Objective:
Reflect on the project's learning outcomes. Communicate findings and ideas to the class.
Duration: 45 minutes
S# Phase Duration Details
1 Reflection 15 minutes
• Prompt students to reflect on the importance of light in everyday life.
2 Communication 20 minutes
3 Table Completion 10 minutes
• Discuss the uses of light in various applications.
• Allow students to present their flashlight models and explain how they work.
• Facilitate a feedback session for further improvement.
• Guide students in completing the table based on feedback received.
• Discuss how feedback can lead to better designs and solutions. Answer Key
6 Guidance for Reflection Questions:
Discuss the importance of energy-efficient lighting, renewable energy sources, and reducing light pollution.
Encourage students to explore the concept of sustainable lighting practices and their impact on the environment.
Build An Aeroplane
Project 11: An Aeroplane

Introduction
Emissions from aviation are a significant contributor to climate change and air pollution.
STEM Careers Connection
This project features tasks that resemble people working in the following careers: Pilot, Airplane Mechanic, Conservationist, Climatologist, Renewable Energy Scientist, and Geoscientist
Problem
Raj has been learning about climate change and air pollution in school. He has a new baby brother and he is worried about the environment and how it will affect his brother. His teacher says that airplanes contribute to air pollution and climate change. Raj would like to create a new type of aeroplane that would make the air and climate safer for his brother.
Challenge
Can you build a type of aeroplane that would be safer for Raj’s brother and the environment? At the end of this activity the learner will be able to demonstrate an understanding of the following:
Objective:
Lesson Plan: Build An Aeroplane (Project 11)
Week 1: Introduction to Building an Aeroplane
Understand the project's purpose and objectives. Learn about different modes of transportation.
Duration: 45 minutes
S# Phase Duration Details
1 Introduction 5 minutes
2 Brainstorming 10 minutes
3 Discussion 15 minutes
4 Building the Aeroplane Model 15 minutes
Objective:
• Introduce the project and its goals.
• Discuss the importance of transportation and its various modes.
• Encourage students to think about different types of vehicles that can fly.
• Have them draw their initial ideas for building an aeroplane model.
• Review the drawings and discuss various modes of air travel.
• Distribute the kit materials.
• Guide students in constructing their aeroplane models.
Week 2: Building and Evaluation of the Aeroplane Model
Complete the aeroplane model. Understand the basic principles of flight.
Duration: 45 minutes
S# Phase Duration Details
1 Recap 5 minutes
2 Building and Completing the Aeroplane Model 20 minutes
3 Evaluation 15 minutes
• Briefly recap the content covered in the previous session.
• Give students time to finish assembling their aeroplane models.
• Provide assistance as needed.
• Have students evaluate their aeroplane models individually.
• Use the evaluation questions to guide their self-assessment.
Week 3: Reflection and Communication
Objective:
Reflect on the project's learning outcomes. Communicate findings and ideas to the class.
Duration: 45 minutes
S# Phase Duration Details
1 Reflection 15 minutes
• Prompt students to reflect on the principles
2 Communication 20 minutes
of flight and the mechanics of aeroplanes.
• Discuss the significance of aviation in modern society.
• Allow students to present their aeroplane models and explain the basic principles of flight.
• Facilitate a feedback session for further improvement. 3 Table Completion 10 minutes
• Guide students in completing the table based on feedback received.
• Discuss how feedback can lead to better designs and solutions.
Discuss the advancements in aviation technology, the environmental impact of air travel, and the future of sustainable aviation.
Encourage students to explore careers in aviation and aeronautics, as well as innovations in aviation for reducing emissions.

Build A Lawnmower
Project 12: A Lawnmower
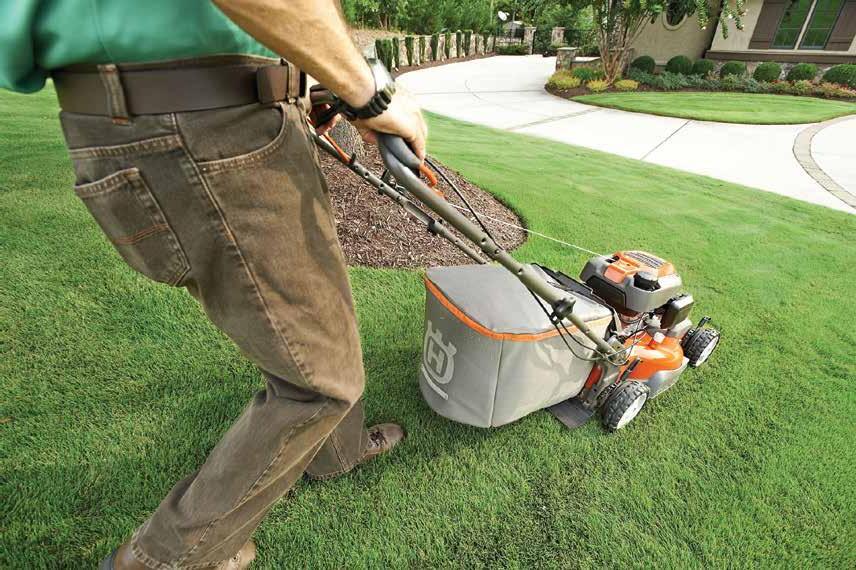
Introduction
Although most people don’t think they contribute to climate change, according to the United States Environmental Protection Agency (EPA), off-road gasoline-powered equipment, such as lawnmowers and leaf blowers, emit as many pollutants annually, just as much as cars and homes.
STEM Careers Connection
This project features tasks that resemble people working in the following careers: Landscaper, Conservationist, Climatologist, Renewable Energy Scientist, and Geoscientist
Problem
Vinay and his friend Joone want to go to the local Cricket match, but do not have enough money to purchase tickets.They decided to start a business where they mow lawns to make money. Joone’s father has an old gas-powered lawnmower he said they could use, but Vinay is concerned that those types of lawnmowers are bad for the environment. He would like to use a lawnmower that does not pollute the air and is environmentally friendly.
At the end of this activity the learner will be able to demonstrate an understanding of the following: Objectives
Objective:
Lesson Plan: Build A Lawnmower (Project 12)
Week 1: Introduction to Building a Lawnmower
Understand the project's purpose and objectives. Learn about different tools used for gardening.
Duration: 45 minutes
S# Phase Duration Details
1 Introduction 5 minutes
2 Brainstorming 10 minutes
3 Discussion 15 minutes
4 Building the Lawnmower Model 15 minutes
Objective:
• Introduce the project and its goals.
• Discuss the importance of gardening and maintaining outdoor spaces.
• Encourage students to think about different tools used in gardening.
• Have them draw their initial ideas for building a lawnmower model.
• Review the drawings and discuss the various tools used for lawn maintenance.
• Distribute the kit materials.
• Guide students in constructing their lawnmower models.
Week 2: Building and Evaluation of the Lawnmower Model
Complete the lawnmower model.
Understand the basic components of a lawnmower.
Duration: 45 minutes
S# Phase Duration Details
1 Recap 5 minutes
2 Building and Completing the Lawnmower Model 20 minutes
3 Evaluation 15 minutes
• Briefly recap the content covered in the previous session.
• Give students time to finish assembling their lawnmower models.
• Provide assistance as needed.
• Have students evaluate their lawnmower models individually.
• Use the evaluation questions to guide their self-assessment.
Week 3: Reflection and Communication
Objective:
Reflect on the project's learning outcomes. Communicate findings and ideas to the class.
Duration: 45 minutes
S# Phase Duration Details
Communication
15 minutes • Prompt students to reflect on the importance of maintaining green spaces and gardens.
• Discuss the benefits of gardening for the environment and well-being.
minutes • Allow students to present their lawnmower models and explain their functions.
• Facilitate a feedback session for further improvement.
Guide students in completing the table based on feedback received.
• Discuss how feedback can lead to better designs and solutions.
Discuss sustainable gardening practices, including organic gardening, water conservation, and natural pest control.
Encourage students to explore the benefits of urban green spaces and the role of community gardens in promoting environmental awareness.
Build the Earth

Project 13: The Earth

Introduction
The Earth and everything in our solar system are constantly moving. The sun, moon, planets, and stars make up the solar system. As the Earth orbits around the sun, seasons change in different parts of the world.
This project features tasks that resemble people working in the following careers: Astronomer, Meteorologist, Astronaut, and Planetary Scientist STEM Careers Connection
Problem
Maira is learning about the change of seasons in science class. She has been given the assignment to show the class how the seasons change as the earth orbits around the sun. She would like to build a model of the sun for her demonstration.
Challenge Can you build a model of the earth that Maira can use in her demonstration?
Objective:
Lesson Plan: Build the Earth (Project 13)
Week 1: Introduction to Building the Earth
Understand the project's purpose and objectives. Learn about the Earth's structure and features.
Duration: 45 minutes
S# Phase Duration Details
1 Introduction 5 minutes
2 Brainstorming 10 minutes
3 Discussion 15 minutes
4 Building the Earth Model 15 minutes
• Introduce the project and its goals.
• Discuss the importance of understanding Earth's structure.
• Encourage students to think about the Earth's features, such as continents, oceans, and more.
• Have them draw their initial ideas for building the Earth model.
• Review the drawings and discuss the different features of the Earth.
• Distribute the kit materials.
• Guide students in constructing their Earth models.
Week 2: Building and Evaluation of the Earth Model
Objective:
Complete the Earth model.
Understand the concept of landforms and water bodies.
Duration: 45 minutes
S# Phase Duration Details
1 Recap 5 minutes
2 Building and Completing the Earth Model 20 minutes
3 Evaluation 15 minutes
• Briefly recap the content covered in the previous session.
• Give students time to finish assembling their Earth models.
• Provide assistance as needed.
• Have students evaluate their Earth models individually.
• Use the evaluation questions to guide their self-assessment.
Week 3: Reflection and Communication
Objective:
Reflect on the project's learning outcomes. Communicate findings and ideas to the class.
Duration: 45 minutes
S# Phase Duration Details
• Prompt students to reflect on the Earth's features and their significance.
• Discuss the importance of protecting and conserving Earth's resources.
Allow students to present their Earth models and explain different features.
• Facilitate a feedback session for further improvement.
Guide students in completing the table based on feedback received.
• Discuss how feedback can lead to better designs and solutions.
Discuss the impact of human activities on the Earth's ecosystems and the need for sustainable resource management.
Encourage students to explore careers related to Earth sciences, environmental conservation, and geography.
Build A Pendulum
Project 14: A Pendulum

Introduction
How does a pendulum work? When the pendulum is raised and released, it will move freely back and forth due to the force of gravity on it.It continues moving back and forth without any extra outside help until friction (between the air and the arm and between the chains and the attachment points) slows it down and eventually stops it.
This project features tasks that resemble people working in the following careers: Clockmaker, Timekeeper STEM Careers Connection
Problem
Fayaz is visiting his relatives.They have a grandfather clock that Fayaz likes to observe and figure out how it works.He watches the pendulum swing and realized that it must be controlled by gravity friction as he learned in science class. As Fayaz watches the clock, he wonders if he added magnets to the pendulum and the sides of the clock if it would increase or decrease the speed of the pendulum and would the time still be accurate or would the magnets cause the time to be incorrect?
At the end of this activity the learner will be able to demonstrate an understanding of the following: Objectives
Objective:
Lesson Plan: Build A Pendulum (Project 14)
Week 1: Introduction to Building a Pendulum
Understand the project's purpose and objectives. Learn about the concept of pendulums and their uses.
Duration: 45 minutes
S# Phase Duration Details
1 Introduction 5 minutes
2 Brainstorming 10 minutes
3 Discussion 15 minutes
4 Building the Pendulum Model 15 minutes
Objective:
• Introduce the project and its goals.
• Discuss the concept of pendulums and their applications.
• Encourage students to think about where they have seen pendulums in real life.
• Have them draw their initial ideas for building a pendulum model.
• Review the drawings and discuss different types of pendulums and their uses.
• Distribute the kit materials.
• Guide students in constructing their pendulum models.
Week 2: Building and Evaluation of the Pendulum Model
Complete the pendulum model.
Understand the principles of pendulum motion.
Duration: 45 minutes
S# Phase Duration Details
1 Recap 5 minutes
2 Building and Completing the Pendulum Model 20 minutes
3 Evaluation 15 minutes
• Briefly recap the content covered in the previous session.
• Give students time to finish assembling their pendulum models.
• Provide assistance as needed.
• Have students evaluate their pendulum models individually.
• Use the evaluation questions to guide their self-assessment.
Week 3: Reflection and Communication
Objective:
Reflect on the project's learning outcomes. Communicate findings and ideas to the class.
Duration: 45 minutes
S# Phase Duration Details
• Prompt students to reflect on the principles of pendulum motion and its applications.
• Discuss how pendulums are used in timekeeping and scientific experiments.
Allow students to present their pendulum models and explain the science behind them.
• Facilitate a feedback session for further improvement.
Guide students in completing the table based on feedback received.
• Discuss how feedback can lead to better designs and solutions.
Discuss the significance of pendulums in timekeeping devices like grandfather clocks and pendulum clocks.
Encourage students to explore scientific experiments involving pendulum motion and its relation to concepts like gravity and periodic motion.
Build A Windmill

Project 15: A Windmill
Wind power is energy, such as electricity, that is generated directly from the wind.It is considered a renewable energy source because there is always wind on the Earth and we aren't "using up" the wind when we make energy from it. Wind power also does not cause pollution.
This project features tasks that resemble people working in the following careers: Farmer, Wind Turbine Technician, Wind Farm Project Developer, and Wind Energy Analyst STEM Careers Connection
Problem
William Kamkwamba is a 13 year old from Kasungu, Malawi Africa that is asked to leave his school because his family can no longer afford the cost. William loved learning and since he could not return to school he worked with the village librarian to remain engaged with his studies, especially science. One day while reading in the library, he came across a photo in a high school textbook, “Using Energy,” William reasoned out how to build an electricity-producing windmill from spare parts from his father’s bicycle and was able to use wind power to run some electrical appliances in his family's house.
At the end of this activity the learner will be able to demonstrate an understanding of the following: Objectives
Use place value understanding and properties of operations to add and subtract
Objective:
Lesson Plan: Build A Windmill (Project 15)
Week 1: Introduction to Building a Windmill
Understand the project's purpose and objectives. Learn about wind energy and its applications.
Duration: 45 minutes
S# Phase Duration Details
1 Introduction 5 minutes
2 Brainstorming 10 minutes
3 Discussion 15 minutes
4 Building the Windmill Model 15 minutes
Objective:
• Introduce the project and its goals.
• Discuss the concept of wind energy and its importance.
• Encourage students to think about where they have seen windmills and wind turbines.
• Have them draw their initial ideas for building a windmill model.
• Review the drawings and discuss the various uses of wind energy.
• Distribute the kit materials.
• Guide students in constructing their windmill models.
Week 2: Building and Evaluation of the Windmill Model
Complete the windmill model.
Understand the basic principles of wind energy conversion.
Duration: 45 minutes
S# Phase Duration Details
1 Recap 5 minutes
2 Building and Completing the Windmill Model 20 minutes
3 Evaluation 15 minutes
• Briefly recap the content covered in the previous session.
• Give students time to finish assembling their windmill models.
• Provide assistance as needed.
• Have students evaluate their windmill models individually.
• Use the evaluation questions to guide their self-assessment.
Week 3: Reflection and Communication
Objective:
Reflect on the project's learning outcomes. Communicate findings and ideas to the class.
Duration: 45 minutes
S# Phase Duration Details
1 Reflection 15 minutes
• Prompt students to reflect on the benefits
2 Communication 20 minutes
3 Table Completion 10 minutes
of wind energy as a renewable resource.
• Discuss how wind turbines are used to generate electricity.
• Allow students to present their windmill models and explain their functions.
• Facilitate a feedback session for further improvement.
• Guide students in completing the table based on feedback received.
• Discuss how feedback can lead to better designs and solutions.
Discuss the advantages of wind energy, such as reducing greenhouse gas emissions and decreasing dependence on fossil fuels.
Encourage students to explore careers related to renewable energy engineering and the design of wind turbines.
Cambridge Curriculum Alignment:
1
2
Project 1: Build A Flower
Project 2: Build A Tree
3 Project 3: Build A Reel
4
5
6
7
Project 4: Build A Lion
Project 5: Build A Waterwheel
Project 6: Build A House
Project 7: Build A Stirring Soil Machine
8
9
10
Project 8: Build An Ice Crusher
Project 9: Build A Telephone
Project 10: Build A Flashlight (Torch)
11 Project 11: Build An Aeroplane
12 Project 12: Build A Lawnmower
13
14
Project 13: Build the Earth
Project 14: Build A Pendulum
Plants:
Explore the structure and function of different parts of flowering plants.
Plants:
Explore the structure and function of trees and their importance in the environment.
Animals, Including Humans:
Explore the design and function of tools used by humans and their impact on the environment.
Animals, Including Humans:
Explore the structure and function of animal bodies, including bones and muscles.
Everyday Materials:
Explore materials used in the construction of a waterwheel and discuss energy generation and sustainability.
Everyday Materials:
Identify sustainable materials used in building a house and consider safety in settlements.
Everyday Materials:
Explore materials used in constructing a soil stirring machine and discuss soil preparation and food security.
Everyday Materials:
Explore materials used in constructing an ice crusher, discuss states of matter, and consider the importance of clean water.
Everyday Materials:
Explore materials used in building a telephone and discuss communication methods and innovation.
Everyday Materials:
Explore materials used in building a flashlight (torch) and discuss light sources and environmental protection.
Working Scientifically: Engage in hands-on activities to explore air travel and climate change action.
Working Scientifically: Engage in hands-on activities to explore sustainable practices and climate change action.
Seasonal Changes:
Explore the features of the Earth and discuss the importance of protecting life on land.
Working Scientifically:
Explore the motion of a pendulum and engage in discussions about innovation.
Project 15: Build A Windmill
Work Scientifically:
Explore energy sources and sustainability by building a windmill model.