Your warranty on this home is with JSM Builders, Inc., and each of the individual subcontractors. Page 4 of this packet is a general exhibit of the warranty that each subcontractor signed before their work was performed. With the completion and correction of defects observed during your Customer Orientation, and upon completion of your residence, we will become your contact on all future warranty work. Correspondence should be directed to JSM Builders, Inc. and we will work to correct problems promptly. In addition, we would like to remind you of policies, particularly warranty and service, as follows:
1. All correspondence concerning necessary service work should be submitted either in letter form, by email, or by calling JSM Builders, Inc. at 970.871.4899
For immediate service or emergencies please contact the following trades directly:
2. Within thirty (30) days after you occupy the home, we will request a punch list of appropriate items that we will review and complete according to the guidelines of this warranty packet and the original construction contract.
3. JSM Builders, Inc. will request a final service list within 10 days of the expiration of the one-year warranty period. We will review and complete the appropriate items according to the guidelines of this warranty packet and the original construction contract.
4. Throughout the one-year warranty period JSM Builders, Inc. will be available to supervise and ensure the completion of punch list items and warranty items as needed and according to the guidelines of this warranty packet.
5. All requests for service should be directed to:
JSM Builders, Inc.
1125 Lincoln Ave, Suite 400
Steamboat Springs, Colorado 80487
Office – 970.871.4899
warrantytheglen@jsmbuilders.com
Please include your name, address, email, phone numbers (both home and work), with a numbered list of the items needing correction.
We sincerely appreciate your business, and hope that you enjoy your new home!
Very truly yours,
Jeremy MacGray, President, JSM Builders, Inc.
Brian Heit, Vice President, JSM Builders, Inc.
Exhibit from Subcontractor Agreement
SECTION 19 Warranties
In addition to all warranties implied by law, Subcontractor warrants that the Subcontract Work, including all material, equipment, workmanship and design furnished by Subcontractor, shall be correct in every material respect, shall comply with all applicable requirements of the Plans and this Agreement, shall be completed in accordance with professional and good construction and engineering practice, and will be free from defects, including design defects to the extent Subcontractor has furnished any design, for a period of:
a. one (1) year after substantial completion of the project
b. one (1) year after correction of any defects in the Work pursuant to this Paragraph; and
c. the period(s) provided for by law;
Subcontractor guarantees that after receipt of notice from contractor it will promptly repair or replace, at Contractor’s option and at Subcontractor’s cost, any defective material, equipment, workmanship, or design, including all necessary work of removal, engineering, procurement, reinstallation, and cleanup.
If Subcontractor does not diligently commence to perform and complete the warranty work required under this Section, Contractor shall have the right to have such work performed, if after notice Subcontractor fails to cure or diligently undertake the completion of such warranted work within twenty-four (24) hours from receipt of such notification, and such Contractor’s work shall be at Subcontractor’s expense.
Homeowner Checklist
Homeowner Checklist
Set Up Utilities and Services
Electricity
Gas
Water
Trash & Recycling Collection
Internet Service
Cable or Streaming TV Services
Visit the local Post Office to obtain box assigment and keys if your neighborhood has a cluster box
Registering appliances allows you to claim warranties and receive product safety updates or recalls. Check the inside of the appliance door or the back for model & serial number.
• Look for a card inside the manual or visit brand’s product registration page
Warranty Information
WARRANTY INFORMATION
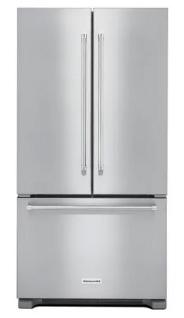
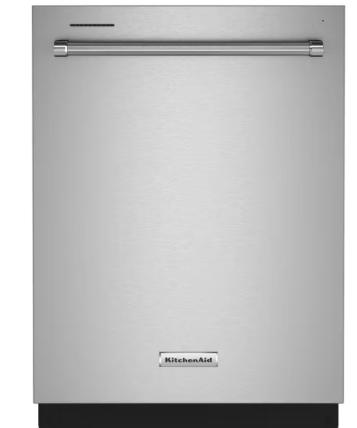
Appliances
WHAT MIGHT HAPPEN & WHAT’S COVERED
• Scratches, dents, or damage: Scratches, dents, missing parts, or damage on appliances must be reported during the orientation walk-through. We will arrange repairs for those issues. Damages will not be repaired after the home is occupied.
• Manufacturer warranties: Appliances like ranges, dishwashers, refrigerators, and garbage disposals come with a one-year warranty from their manufacturers. The Builder does not cover these warranties but will help coordinate needed repairs.
• Air filters: Homeowners should regularly replace air filters to keep systems running well.
The appliances warranties are the responsibility of each manufacturer, not the Builder. The Builder, however, can assist the Homeowner in facilitating the corrections necessary, if needed.
VIEW HOMEOWNER’S CHECKLIST FOR APPLIANCES YOU WILL NEED TO REGISTER FOR WARRANTY
Countertops and Cabinets
WHAT MIGHT HAPPEN & WHAT’S COVERED
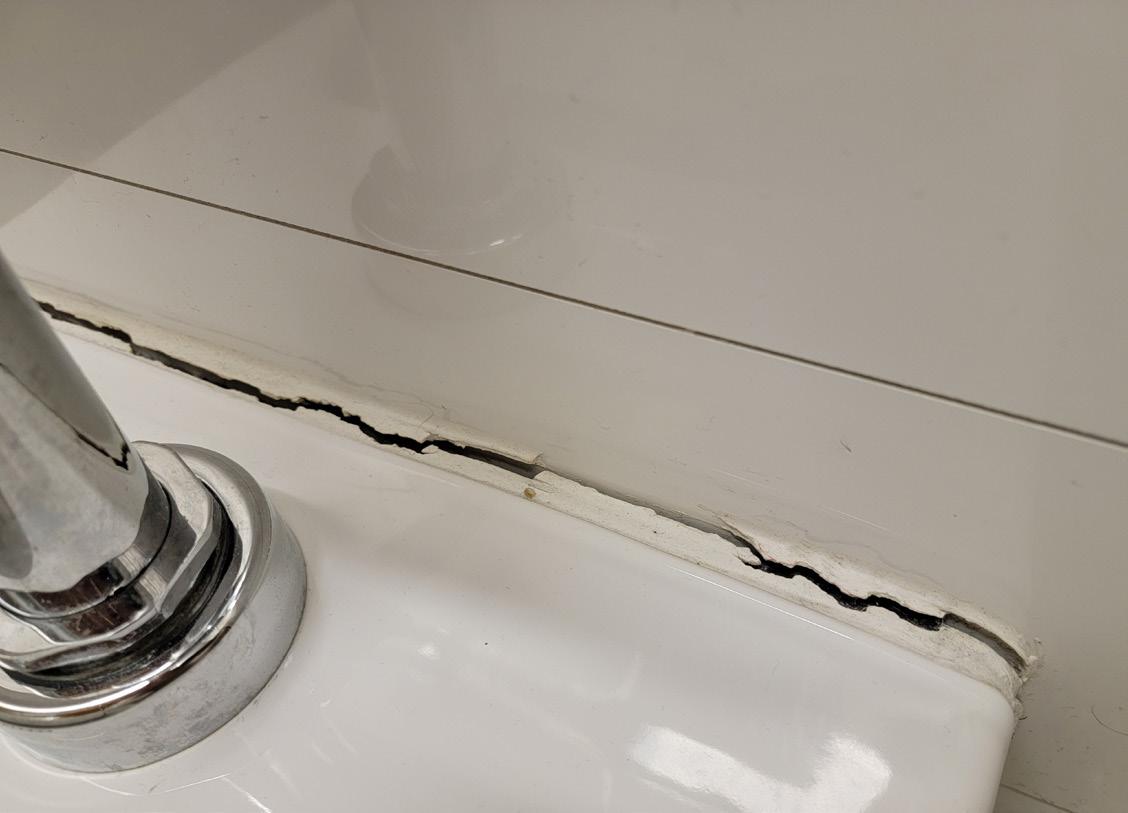
• Scratches or damage to countertops: We’ll fix chips, cracks, or scratches caused during construction if reported within 30 days. The manufacturer covers defects for 10-15 years and will repair or replace if needed.
• Kitchen cabinet issues: Doors, drawers, and hardware should work properly. We’ll repair or replace problems reported within 30 days. Please review the Limited Lifetime Warranty at www.showplacecabinetry.com/the-showplace-limited-lifetime-warranty/ for additional warranty information.
Doors and Windows
WHAT MIGHT HAPPEN & WHAT’S COVERED
• Sticky doors or windows: Sometimes doors or windows might stick or bind because of normal settling or moisture changes. We will adjust sticking doors or windows during the first year.
• Warped interior doors: Interior wood doors can bend or warp slightly. If a door warps more than 3/8 inch, we will repair or replace it during the first year.
• Garage door problems: If the garage door doesn’t open, close, or lock properly during the first year, we will repair it. To help prevent issues, it’s best to keep the garage door closed when not in use.
• Damaged parts like mullions: Mullions (the dividers in windows) that are damaged should be reported within 30 days after construction. We will repair them if noted.
• Scratched or chipped glass/windows: Minor scratches are normal. Major scratches or chips reported within 30 days will be repaired.
• Water leaks around doors/windows: If water seeps in during normal weather conditions, we will fix the cause during the first year.
• Sliding doors that stick, have scratched glass, or broken locks: We will adjust sliding doors so they open smoothly. Major scratches, chips, or broken locks reported within 30 days will be repaired or replaced.
Disclaimer: Items will not be covered if caused by Homeowner use of negligence.
WHAT MIGHT HAPPEN & WHAT’S COVERED
• Electrical problems: If switches, outlets, or light fixtures don’t work properly within the first year, we will repair or replace them. The Builder is not responsible for high electricity usage caused by defects.
Paint
WHAT MIGHT HAPPEN & WHAT’S COVERED
• Paint issues: Good quality interior paint is used throughout your home. If paint is missing or defective, please report it within 30 days and we will fix it. Note that there is no ongoing warranty for interior paint.
Plumbing
WHAT MIGHT HAPPEN & WHAT’S COVERED
• General info: Your plumbing meets all local codes and has been inspected. Sewer lines have clean-outs, and there’s a water shut-off valve near the water meter. Regular care is minimal, but if you add things like a water softener, make sure the connecting pipes aren’t smaller than the original pipes to avoid low water pressure.
• Garbage disposal not working: If the disposal stops working during the first year under normal use or is experiening defects, we will repair or replace it. If something like metal causes the problem, there may be a service charge. Try pressing the reset button on the disposal before calling for service.
• Chips or scratches on tubs or vanity tops: Chips or scratches reported within 30 days will be repaired (not replaced).
• Leaking fixtures: We will fix leaking or defective fixtures during the first year.
Plumbing System
WHAT MIGHT HAPPEN & WHAT’S COVERED
• Water heater & boiler: These are covered by the manufacturer’s warranty. Be sure to send in your warranty card. A built-in safety valve helps prevent overheating or pressure buildup - if it activates, it may look like a leak, but it’s working as intended.
• Heating issues (boiler or radiant flooring): If the heating system isn’t working, contact your plumbing contractor using the emergency list. The Builder will fix construction-related defects within the first year.
• Noisy water pipes: Some noise is normal, but if pipes are unusually loud, the Builder will inspect and fix anything outside normal construction standards.
Disclaimer: Items will not be covered if caused by Homeowner use of negligence.
WHAT MIGHT HAPPEN & WHAT’S COVERED
• General info: Drywall (gypsum wallboard) is the standard material for interior walls and ceilings. It’s durable and widely used, but minor cracks, nail pops, and faint lines may appear as the home settles during the first couple of years—this is normal.
• Minor surface defects: Small cracks, nail pops, or slight unevenness may result from normal settling. Minor framing marks showing through drywall are acceptable. If issues exceed normal standards and were noted during the orientation, or arise during the warranty period, the Builder will repair them.
Thermal and Moisture Protection
WHAT MIGHT HAPPEN & WHAT’S COVERED
• Weather-stripping issues: Weather-stripping should be lubricated with silicone to prevent sticking or tearing. Damage from lack of maintenance isn’t covered, but defective or poorly installed weather-stripping will be repaired or replaced within the warranty period.
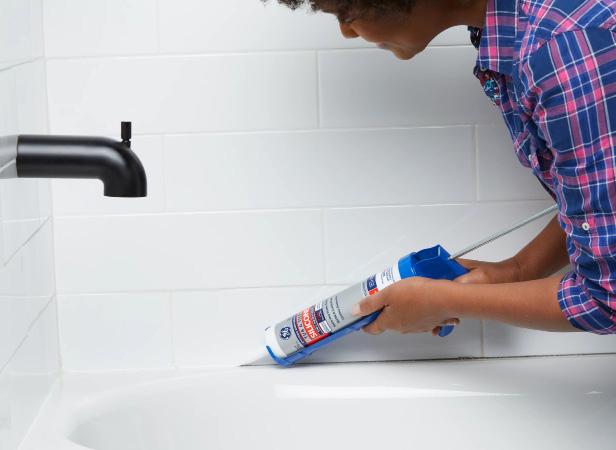
• Leaks from caulking: Caulking around exterior joints and openings helps keep water out. The Builder will repair or re-caulk failed areas during the warranty period. Ongoing caulk maintenance is the homeowner’s responsibility.
• Rain entering attic through vents: Attic vents or louvers are required for proper ventilation. In rare cases, strong wind-driven rain may get in through these openings. This is considered a natural occurrence and not covered by the warranty. However, the Builder will check to make sure the vents or louvers were installed correctly.
• Drafts around doors/windows: Some drafts are normal, especially in extreme weather. If caused by poor sealing or insulation, the Builder will address the issue during the warranty period.
• Damaged screens: Screens noted as damaged on the 30-day punch list will be repaired or replaced.
Disclaimer: Items will not be covered if caused by Homeowner use of negligence.
Warranty Calls
WHAT’S NOT COVERED
Your warranty covers defects in workmanship or materials, but it does not include seasonal maintenance, normal wear and tear, damage from misuse or accidents, or issues covered by manufacturer warranties. Below are common items not covered under the Builder’s warranty:
• Leaky faucets: Replacing worn washers is considered normal maintenance.
• Drywall nail pops and cracks: Minor settlement and shrinkage during the first year can cause these and are expected.
• Shrinkage in trim and doors: Some shrinkage in wood trim, doors, and millwork is normal. Only doors with extreme warping may be replaced.
• Sticking or warped doors: Seasonal changes or minor settling can cause doors to stick. No adjustments or replacements are made after move-in.
• Gaps in molding or baseboards: Normal wood shrinkage can cause slight separation, which is not covered.
• Grout separation: Gaps between tile and tubs or countertops from shrinkage are expected and not covered.
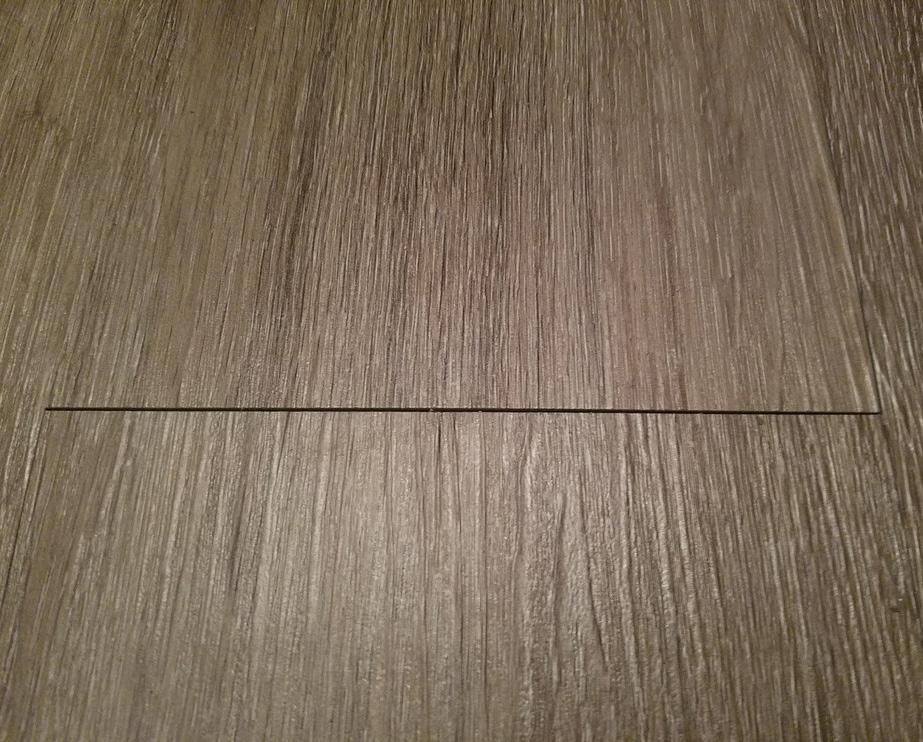
• Small gaps in flooring: Minor openings in vinyl, tile, rubber, or wood flooring are normal over time.
• Cracks in concrete or brick: Small cracks from settling, soil changes, weather, or material expansion/contraction are normal and not covered.
• Burned out light bulbs: Damage caused by overloaded circuits or faulty appliances is not covered. The Builder will not replace light bulbs.
• HVAC issues from dirty filters or modifications: Problems due to clogged filters or homeowner changes to the system are not covered.
• Clogged drains: Blockages from everyday use or foreign objects are the homeowner’s responsibility.
Disclaimer: Items will not be covered if caused by Homeowner use of negligence.
Energy Saving Tips
ENERGY SAVING TIPS
• In operating your garbage disposal, use cold water to solidify grease, thereby reducing hot water usage and eliminating maintenance problems.
• Keep your faucets maintained to prevent leakage.
• Keep the lint filter of your clothes dryer clean.
• Keep refrigerator coils and motor clean for maximum efficiency.
• Fill dishwasher completely before using.
• Try not to use the “high” position of your range elements for long periods of time.
• Maintain your heating and air conditioning systems in good working order.
• Keep all doors and windows closed when these systems are operating.
• If you have a fireplace, keep the flue closed when not in use.
• Use awnings, draperies, roll shades, blinds, and other means of adding insulation over glass areas of your residence.
• Keep drapes closed on the south and west side of your residence on summer days, but open on sunny winter days.
• If you have an attached or integral garage, remember to keep the overhead door closed to keep out excessive heat or cold.
General Information
GENERAL INFORMATION
Electrical
OUTLETS & CIRCUITS
Your home’s wiring meets all current safety codes. You can safely plug in small everyday items (like toasters, lamps, etc.) into outlets.
Avoid this: Plugging in large appliances (like big microwaves or freezers) or too many small appliances into one outlet. It may cause a breaker to “trip” (shut off power for safety).
If this keeps happening, call an electrician to check if you need more wiring.
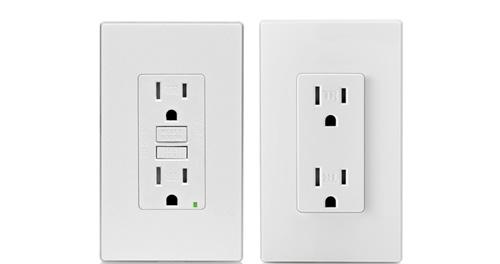
GFCI OUTLETS (GROUND FAULT CIRCUIT INTERRUPTERS)
Outlets in wet areas have built-in safety switches (GFCI). They turn off automatically if there’s a problem, like moisture or too much load.
Only use one small appliance at a time in these outlets. Don’t plug in anything heavy-duty (like heaters).
SERVICE PANEL & CIRCUIT BREAKERS
Every residence has a master circuit breaker located in the service panel box along with smaller circuit breakers. When the master breaker is tripped, the electricity in your residence is cut off. Circuit breakers may be reset by first switching the breaker to FULL OFF and then back to FULL ON.
GFCI Outlet Regular Outlet
Electrical Troubleshooting
TRY THIS BEFORE CALLING FOR HELP
Problem What To Check
Outlet Not Working
Lights Out
Garbage Disposal Not Working
Dishwasher Not Working
Oven Not Heating
Bathroom Fan Not Working
Breaker Keeps Tripping
Sparks From Outlet
Hot Switch Or Outlet
Check the breaker. Some outlets are controlled by a wall switch - make sure it’s ON.
Try the bulb in another socket. Check breakers and wall switches.
Press the reset button under the unit. Check breaker.
Make sure the switch (if it has one) is ON. Check breaker.
Double-check settings. Check breaker.
Check breaker and power.
Too many appliances? A faulty cord or motor could be the cause. If it keeps tripping, call an electrician.
Turn appliance OFF before plugging in. If sparking continues at multiple outlets, the appliance may be faulty. If only one outlet sparks, call an electrician.
Turn off the breaker immediately and call an electrician.
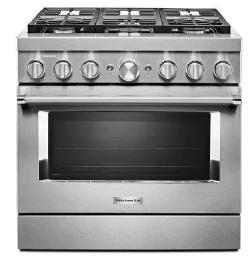
Appliances
• Always read and save appliance manuals.
• Send in warranty cards right away.
• For electrical issues, check plugs and breakers first.
• For gas appliances, check the pilot light. If you smell gas, turn off the main gas valve and call your gas provider immediately.
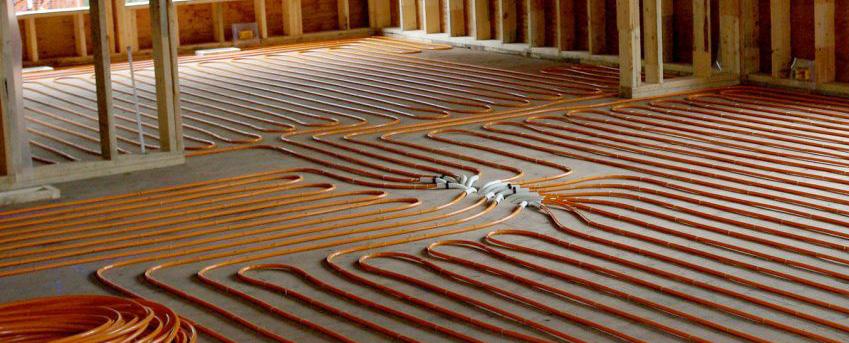
Radiant In-Floor Heatings
• Warm water flows through tubes under your floor to heat your home.
• It provides even, quiet heat, without blowing air.
• Keeps air cleaner and more humid in winter.
• You’ll feel warm at lower temperatures, saving on energy.
• Control with your thermostat like any heating system.
Air Conditioning
Your air conditioning system is designed to keep your home comfortable during the warmer months. Here’s how to make the most of it:
THERMOSTAT
The thermostat controls the temperature in your home.
• Heat is controlled by the thermostats installed on the wall. A/C, mounted on the wall, is controlled by remote controls. A comfortable setting is around 78°F for cooling and 72°F for heating, but you can adjust it to your preference.
• If your system includes both heating and cooling, you may need to switch between the two modes on the thermostat.
Note: Setting your thermostat much colder than necessary won’t cool your home faster - it will just increase your energy bill.
AIR FILTERS
Your system has an air filter that keeps dust and particles from circulating through your home.
• Check the filter monthly and clean or replace it as needed (usually once a month for standard filters).
• A dirty filter can reduce efficiency and even cause the system to malfunction.
Note: Refer to your HVAC manual for the exact filter location and replacement instructions.
CONDENSING UNIT
(OUTSIDE A/C UNIT)
The large metal box outside is your condensing unit.
• Once a year, turn off the power and hose off the coils to remove dirt and debris.
• Keeping it clean improves efficiency and prevents damage.
INSULATION & COOLING EFFICIENCY
Your home is insulated to meet climate standards, but poor cooling can often be caused by:
• Open windows or doors
• Blocked vents
• Clogged filters
• Open fireplace flues
Note: Check these first before assuming there’s an issue with the system.
REGULAR MAINTENANCE
Schedule a professional inspection once a year to keep your system in good shape. Follow the manual’s recommendations for service intervals and upkeep.
Your home’s plumbing system is professionally installed and built to last. With proper care, it should need only minimal maintenance over the years. Here’s what you need to know:
GENERAL TIPS
• Act quickly if you notice leaks or slow drains- small issues can become big (and expensive) problems if ignored.
• Avoid putting grease, food scraps, lint, hair, or wipes down drains or toilets. These cause clogs.
• All plumbing fixtures have drain traps (J-shaped pipes) that prevent sewer gases from entering your home. Run water in unused sinks or tubs occasionally to keep traps from drying out.
MAIN SHUT-OFF VALVE
Your home has a main water shut-off valve, usually located where the water line enters the house. You’ll be shown its location during your orientation.
• Use this valve to turn off all water to the home in case of an emergency (like a burst pipe).
SINK & TOILET VALVES
Each sink and toilet has a small shut-off valve underneath it - use these to stop water at a specific fixture.
• Turn faucets off gently
• If a faucet leaks, it’s often due to a worn washer or cartridge that may need replacing.
• Clean faucet aerators FAUCETS & FIXTURES
• If your dishwasher or washing machine overflows, first - sometimes a clog is the issue.
• If you can’t locate the problem, call a plumber to avoid damaging cabinets or flooring. LEAKS & OVERFLOWING APPLIANCES
• Pipe joints are designed to last, but if one loosens or leaks, it’s best to call a professional. PIPES & NOISE
• Noisy pipes can be caused by hot water creating steam. Try lowering your water heater temperature to fix this.
Drains
Your home’s drains are designed to handle everyday use, but like any system, they need proper care to avoid clogs and odors.
HOW DRAINS WORK
• If a drain isn’t used often, the water can evaporate. Run water occasionally to keep the trap sealed. Each sink, tub, and shower has a drain trap (a J-shaped pipe) that holds water to block sewer gases from entering your home.
PREVENTING CLOGS
To keep drains flowing smoothly:
• Never pour grease, food, or chemicals down drains.
• Use strainers in sinks and tubs to catch hair, lint, and debris.
• Avoid flushing items like wipes, diapers, or paper towels down the toilet.
CLEARING MINOR CLOGS
If a drain is slow or backed up:
• Use a plunger – cover the drain completely with water over the rubber cup and plunge 10–20 times in a row.
• Plug overflow holes or nearby drains when plunging to get better pressure.
• If plunging doesn’t work, try a plumber’s snake (available at hardware stores). Turn it the same way going in and out to avoid losing debris in the pipe.
Note: For partial clogs, pouring hot water (under 140°F for plastic pipes) down the drain may help.
AVOID USING HARSH CHEMICALS
• Chemical drain cleaners can damage pipes and are dangerous to use.
• If you use a drain cleaner, never plunge afterward - it could splash and cause injury.
• If a clog persists, it’s best to call a licensed plumber.
Note:
Because potash lye and caustic potash are highly corrosive, always pour them slowly into the drain to prevent splattering. Never pour water into the chemical. Wear old clothes, rubber gloves and goggles or safety glasses. Never use a plunger on a drain after chemicals have been added. The water may splash and cause personal injury or damage to nearby surfaces. If the stoppage is in the line past the trap, try using the snake at the clean-out plug nearest the blockage. These plugs are located on the drain lines throughout the house.
Drain Trap
Plumber’s Snake
Water Heater
Your water heater provides hot water for the entire home. It needs occasional maintenance to keep running safely and efficiently.
TEMPERATURE SETTING
• Ideal setting
• Electric: 125°F to 145°F
• Gas: Set to “Normal”
• Lower settings help prevent scalding, especially if you have children.
• Very hot water can cause noise (steam in pipes) or damage plumbing - turn the temperature down if you hear knocking or rattling.
PRESSURE RELIEF VALVE
• Your water heater includes a temperature & pressure relief valve for safety. Test it every 3-4 months to make sure it’s working.
• When it releases water, it may look like a leak, but it’s just releasing pressure.
DRAINING THE TANK
• Sediment can build up inside the tank over time. Once or twice a year, drain the tank to remove this buildup:
1. Turn off the electricity or gas.
2. Attach a hose to the drain valve near the bottom.
3. Let the water run into a drain or bucket until clear.
• If you have a water softener, it can reduce the need for frequent flushing
SAFETY TIPS
• Never store flammable items (paint, rags, gasoline, etc.) near your water heater. This is a fire hazard.
• Ensure airflow around the heater is not blocked
Bathtubs, Sinks, and Showers
Proper care keeps these fixtures looking great and working well:
CLEANING & MAINTENANCE
• The finish on tile, porcelain, and enamel surfaces can scratch or chip. Avoid dropping heavy items or using steel wool or harsh abrasives.
• Use non-abrasive cleaners like dish soap or baking soda for regular cleaning. Bon Ami Powder (not cleanser) is a good option.
• To clean shower doors, use a mild detergent or a mix of water and ammonia for hard water stains. Avoid abrasive pads on metal frames - they can damage the finish.
Note:
Be sure to read the caution note on the label before using ammonia. CLR Calcium, Lime and Rust Remover is a good alternative. Never use steel wool or scouring pads on the metal portoins of these elements. It will remove the protective finish applied by the manufacturer and cause unsightly scratches.
CAULKING
• Check the caulking around tubs, sinks, and showers. If it looks cracked or dried out, remove and replace it. This prevents moisture from getting behind walls and causing damage.
BRASS FIXTURES
• Clean with a soft, damp cloth. Never use scouring pads or abrasive cleaners - they’ll damage the finish.
HELPFUL TIPS
• Don’t use sinks or tubs to hold tools or paint supplies. They can scratch easily.
• Always use a bath mat to prevent scratches or damage from shoe soles or grit.
• Avoid using sinks or tubs to rinse harsh chemicals - they can stain the surface permanently.
• Don’t let food waste sit in the sink. Dispose of food waste through your disposal as it accumulates.
Toilets
Your toilets are designed for normal household use, but a few habits will help prevent issues:
USE & CARE
• Only flush toilet paper. Never flush wipes, diapers, grease, hair, lint, or trash. These will clog your pipes and the sewer line.
• If your toilet leaks from the tank, it may just be condensation, not an actual leak.
COMMON FIXES
• If water runs constantly into the bowl, check the float arm - bending it slightly downward can stop the overflow.
• If the tank won’t fill or is slow to refill, the flush valve or float may need adjusting or replacing.
• If the handle feels loose or the toilet won’t flush properly, check the chain or arm inside the tank to make sure it’s connected.
Note: Use only toilet-specific cleaners and follow directions. Never mix cleaners or use bleach in the tank, as it can damage internal parts.
Cabinets
• Clean wood cabinets as you would wood furniture, unless plastic-coated.
• Never use harsh abrasives - they can damage finishes.
• Keep doors and drawers closed when not in use to avoid warping or damage.
Countertops
• Your countertops are made from a solid surface material that resists most stains and scratches.
• For everyday cleaning, use soap and water or a mild household detergent with a soft cloth.
• For matte finishes:
• You can use an abrasive cleaner like Soft Scrub®.
• For tougher stains, gently scrub with a Scotch-Brite® #7447 green pad or similar non-scratch pad.
• Avoid placing hot items (over 175°F) directly on the surface - always use a hot pad or trivet.
• Never cut directly on the countertop - always use a cutting board to prevent scratches.
• If your countertop gets a burn or deep scratch, light sanding followed by buffing may restore the surface (for polished surfaces, a final buff is recommended).
Carpeting
• Vacuum at least once a week - especially for thick or dense carpets.
• Schedule professional deep cleaning once a year.
• Treat spills immediately - even 30 minutes later may be too late.
• For tough stains, consult a carpet cleaning expert.
Floor Tile
• Sweep or dust mop daily to remove loose dirt.
• Clean up spills right away to prevent staining or damage.
• If dried, use a damp sponge or mop to clean.
Paint
• Your home includes
• Sunlight may fade paint
• For cleaning, ask your local paint store for the right method based on your paint type.
Locks
• Owner’s keys will be left in the house after closing.
• Loose doorknobs or locks can often be fixed by
• For complex key locks (especially exterior), a locksmith may be required.
Windows
• Dual-pane windows improve insulation.
• Clean with commercial glass cleaner
• Use silicone spray
• Aluminum window frames may weather over time; clean with mild soap.
• Condensation on windows is normal
Most doors are low-maintenance and easy to care for. The most common issue is sticking, which usually results from moisture or settling:
• If swelling from damp weather is the cause, sand the edge lightly using sandpaper wrapped around a block.
• If due to misalignment (from settling), check and tighten hinge screws. If still sticking, sand or plane the binding edge.
• Always paint or varnish sanded areas to protect against future moisture damage.
SLIDING GLASS DOORS
• Keep tracks clean and free of dirt or debris.
• Apply a small amount of silicone lubricant to the tracks and locking mechanisms periodically for smooth operation.
BI-FOLD, BY-PASS, AND POCKET DOORS
• These doors operate on more delicate tracks:
• Don’t apply up/down pressure.
• For bi-fold doors, pull gently toward you and let them open themselves.
• For pocket doors, push gently in the direction they slide.
• Avoid nailing into the wall area where pocket doors slide.
• Adjustment screws are located on the back of doors if they become difficult to operate or misaligned.
• If you remove the doors, reinstall them in their original positions.
EXTERIOR DOORS
• Wood exterior doors should be painted or varnished whenever the house is painted.
• Aluminum doors do not need painting.
• Garage doors should be kept closed when not in use to prevent sagging.
• Lubricate moving parts every three months.
• Tighten all screws and bolts once a year.
Homeowner’s Maintenance Guidelines
HOMEOWNER’S MAINTENANCE GUIDELINES
Cleaning Window Glass
• Use a commercial glass cleaner or a solution of 1 cup of vinegar mixed with 1 gallon of warm water. Apply with a sponge or lint-free cloth. Dry and polish using paper towels or a rubber squeegee to help prevent streaks.
Aluminum Windows:
• Aluminum windows may stick or bind during abrupt weather changes. If this happens, apply a silicone spray to the window sash tracks. These frames have a baked enamel finish and can be cleaned using a mild detergent solution. Be aware that aluminum frames will naturally weather over time due to exposure.
Screens
• Window and patio door screens are made of high-quality nylon and do not require painting or preservatives. Clean screens gently with soap and water, then hose them off.
• Replacement nylon screen material is widely available at hardware stores if repairs are needed.
Window Condensation:
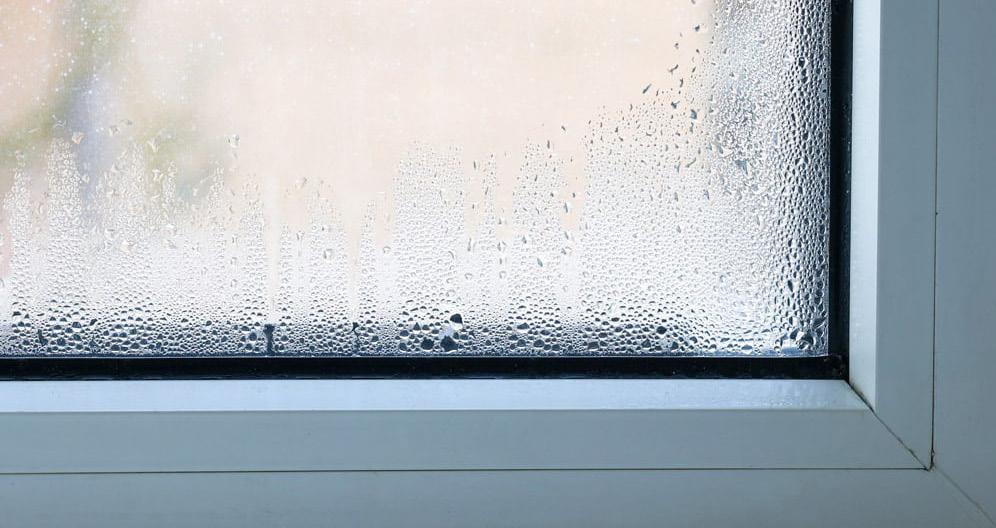
• Moisture forming on windows is usually caused by warm, moist indoor air hitting cold glass surfaces - this is called condensation and is not a sign of a window defect. Wipe away moisture quickly to avoid staining drywall, caulking, or the windowsill. View more information on the Humdity Levels Letter on the next page.
Window Condensation
HUMIDITY LEVELS LETTER
Here is the note from the Building Team regarding humidity in your new home:
You may experience some moisture on your windows due to the humidity levels in your house. Rest assured, this is a very normal event when a brand-new home is first built/occupied and is NOT a failure of your windows or a result of poor installation. It is due to three primary things:
1. New construction takes about a year or two to completely dry out.
2. The new energy codes we are required to follow result in a much tighter building envelope, which doesn’t ventilate like older homes. In the past, walls and windows naturally allowed more airflow due to less efficient construction methods.
3. Cold temperatures outside with our climate’s dry exterior air.
New homes have a naturally higher humidity because the components that were used to build your home are curing – concrete, wood, and paint all expel moisture, making it difficult to maintain a 35% humidity level. This will pass over time. The second year should see humidity levels that are easier to control and by the third or fourth year, much of the window condensation/high humidity levels will be gone if active living humidity is controlled. A new home will typically expel 500 to 600 gallons of water in the first year and a half, so it is difficult to reduce condensation during this time. Opening windows and doors periodically throughout the day and especially after activities that increase the humidity will help exchange the humid indoor air for drier outdoor air.
You may notice the most moisture in bedrooms, especially those that sleep two people and have shades drawn throughout the night. The breathing of two people creates a lot of humidity and the shades keep the air trapped against the colder glass all night. On cold nights, it helps to keep your shades open at the bottom of the window to allow some airflow.
Please go to this link to familiarize yourselves with the facts of condensation and what you need to do on a regular basis, especially the first year of occupancy: https://www.thermalwindows.com/condensation.php
Here are the recommended interior relative humidity levels to reduce condensation:
• -30°F or below — not over 15%
• -20°F to -10°F — not over 20%
• -10°F to 0°F — not over 25%
• 0°F to 10°F — not over 30%
• 10°F to 20°F — not over 35%
• 20°F to 40°F — not over 40% (Assumes 70°F indoor air temperature)
It will be important to control your humidity levels in order to manage the moisture build-up on your windows that will drain on to the sills and can cause damage to the paint or the wood if left to soak. We strongly suggest the use of a dehumidifier during the winter months to keep your humidity levels at or below the recommended levels to eliminate condensation. Here is a good option:
Let the team know if you have any other questions.
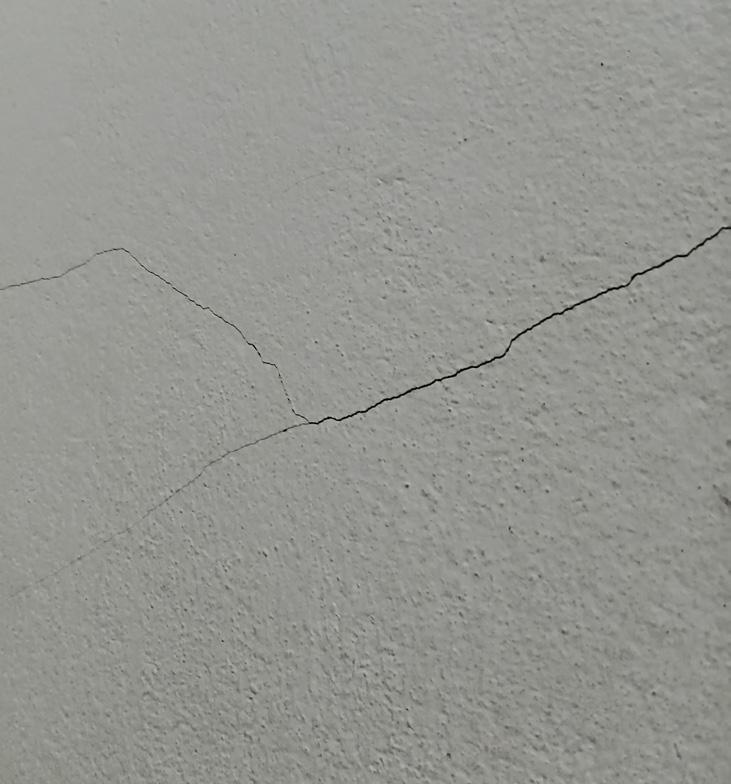
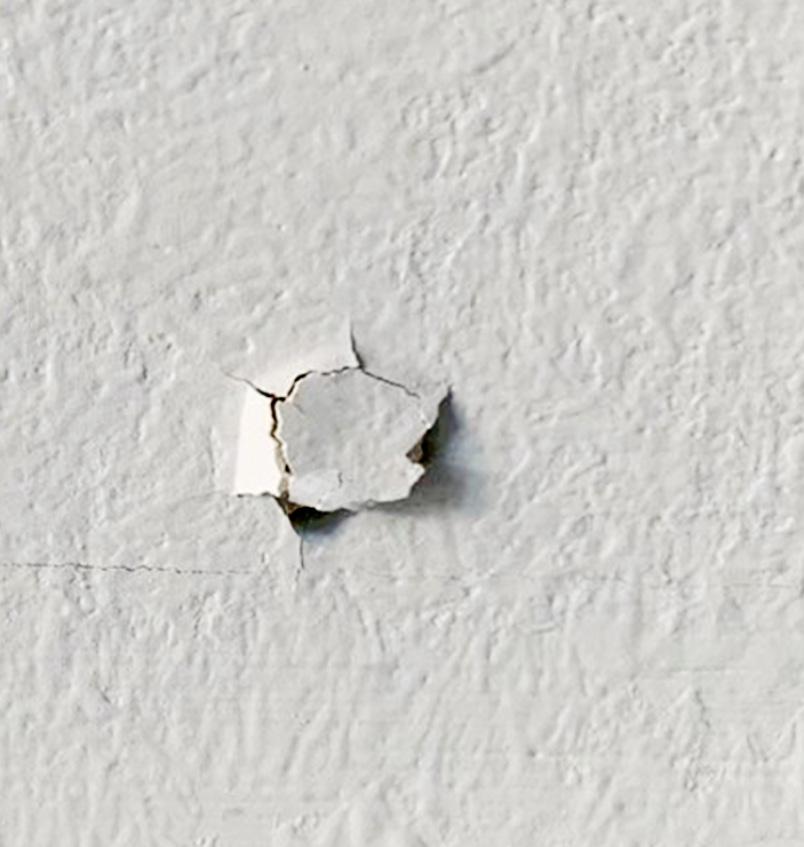
Walls & Ceilings - Interiors
Interior walls and ceilings are constructed of gypsum wallboard (drywall), designed to last with minimal maintenance. Normal settling may cause:
• Hairline cracks: Wait until you’re ready to repaint, then fill with spackling compound and sand smooth before painting.
• Nail pops: These occur as framing and drywall shrink slightly. Reset the nail, fill with spackling, sand smooth, and repaint when redecorating.
FOR SCUFFS OR DENTS
• Light marks can be removed with a damp sponge or cloth.
• Deeper indentations can be filled with joint compound applied in 2–3 thin layers, sanding between coats.
Note: Painted drywall should not be scrubbed aggressively - use a gentle cleaning approach to preserve the paint surface.
Exhaust Vents
Gas-powered appliances (e.g., water heaters, fireplaces, boilers) exhaust to the exterior of your home. These vents are installed per code and manufacturer instructions but may be placed in locations that are prone to snow accumulation or debris buildup. Homeowners are responsible for regular vent inspection and maintenance:
• Check vents regularly, especially after snowstorms.
• Clear away snow, ice, or debris to ensure proper airflow and function.
• Blocked vents can lead to appliance failure or safety issues, so ongoing maintenance is critical in Steamboat’s climate.
Nail Pop Exhaust Vent
Drywall Hairline Crack
Climate
• Steamboat Springs features a high-altitude alpine climate with four distinct seasons.
• The city sits at 6,795 ft elevation with surrounding peaks over 10,500 ft.
• Snowfall can range from 170 to 450 inches annually, depending on location in the valley.
• Average annual precipitation (rain + snow) is approximately 25 inches.
• Below are the average monthly temperatures:
Low
• With this environment comes a variety of local wildlife. You may encounter: