

They talk to each other, they see each other, they move in the same space with Ambiente.
Audio Modeling’s new room simulator is now available in all SWAM instruments. .


They talk to each other, they see each other, they move in the same space with Ambiente.
Audio Modeling’s new room simulator is now available in all SWAM instruments. .
Arthur C Clarke famously opined that “Any sufficiently advanced technology is indistinguishable from magic.” In my experience, though, the wow factor soon disappears, and we start to take incredible technological achievements for granted. When Clarke wrote his words in 1962, video calls were the stuff of science fiction. Today we FaceTime each other without a second thought. If we ever feel anything towards the technology, it’s not so much wonderment as frustration.
In the studio, meanwhile, it’s hard to recall the heady days of the early ’80s when sampling was a novel technology, and a Fairlight orchestral stab briefly sounded like something from another planet. Magic is terrifying as well as dazzling, and the awe that early samplers inspired was freighted with fear. Would this technology make real musicians and studios redundant? We soon realised that the answer was ‘no’, and learned to complain about lack of memory instead of sitting there open-mouthed when we heard an aerosol spray used as a hi-hat.
I suspect that the same process of disillusionment is going on with machine learning right now. What initially seemed miraculous is beginning to feel commonplace. When I used AI to transcribe the interview with Ken Scott that you can read in this issue, my reaction was not to gasp “How is this even possible?”, but to wonder
EDITORIAL
SOUND ON SOUND LTD (HEAD OFFICE)
ALLIA BUSINESS CENTRE
KING’S HEDGES ROAD
CAMBRIDGE, CB4 2HY, UK
T +44 (0)1223 851658
sos@soundonsound.com www.soundonsound.com


how it could possibly have misheard his first job at Trident Studios as mixing ‘Give Pizza Chance’.
But I think there is a value in reminding ourselves just how remarkable the tools available to us are. A studio local to me hosts birthday parties for young children. Without exception, the thing that most fascinates them is talkback. The fact that a person can press a button in the control room to talk to another person in the live room is still magic to the six-year-old mind.
So when we get frustrated because the high C in a violin patch is slightly out of tune, or the legato bassoon doesn’t speak in quite the way we wanted, it’s perhaps worth stepping back and thinking exactly how extraordinary it is that a generic laptop can produce these sounds at all. Sampling hasn’t put real musicians out of a job, as many once feared, but it has certainly made it hard to tell what’s sequenced and what’s live.
Clarke’s idea is sometimes understood to mean that technology appears magical only inasmuch as we can’t understand it, but I don’t think that has to be true. Anyone who reads Chris Korff’s eloquent explanation in this issue will understand very clearly how modern sampled instruments work — but won’t there always be something magical about pressing a key and hearing an entire symphony orchestra bursting from our speakers?
sos.feedback@soundonsound.com
Editorial Director Dave Lockwood
Executive Editor Paul White
Editor In Chief Sam Inglis
Technical Editor Hugh Robjohns
Reviews Editor David Glasper
Reviews Editor Matt Houghton
Reviews Editor Chris Korff
Production Editor Chris Korff
News Editor Luke Wood
SUBSCRIPTIONS
subscribe@soundonsound.com www.soundonsound.com/subscribe
Circulation Manager Luci Harper
Administrator Nathalie Balzano
PRODUCTION
graphics@soundonsound.com
Production Manager Michael Groves
Designer Mick Reilly
Designer Andy Baldwin
ADMINISTRATION
admin@soundonsound.com
Managing Director/Chairman Ian Gilby
Editorial Director Dave Lockwood
Marketing Director Paul Gilby
Finance Manager Keith Werthmann
ONLINE
support@soundonsound.com
Digital Media Director Paul Gilby
Design Andy Baldwin
Web Content Editor Callum Hall
Web Editor Adam Bull
Podcast Production Manager Atheen Spencer www.soundonsound.com twitter.com/soundonsoundmag facebook.com/soundonsoundmag instagram.com/soundonsoundmag
DISTRIBUTION
distribution@soundonsound.com
International Distribution
Magazine Heaven Direct www.magazineheavendirect.com
Sam Inglis Editor In Chief
“I think there is a value in reminding ourselves just how remarkable the tools available to us are.”

ADVERTISING
usadsales@soundonsound.com
North America Sales Manager Dan Brown
Regional Sales Manager David Carson
UK Media Sales Manager Guy Meredith
MARKETING
marketing@soundonsound.com
International Business Development Nick Humbert
“Best Flagship Synth 2023” - Alex Ball/Bo Beats
“Best Hardware Synth 2023” - Attack Magazine
“The 3rd Wave might be my favorite synth released in the last 10 years.”
- Sound on Sound

“Best New Synth 2023” - Gear News
“One of the most powerful synths you could imagine.”
- Music Radar


82 Modular
Cycle Instruments’ Josh Wilkinson talks about modules and reinventing the sequencer.
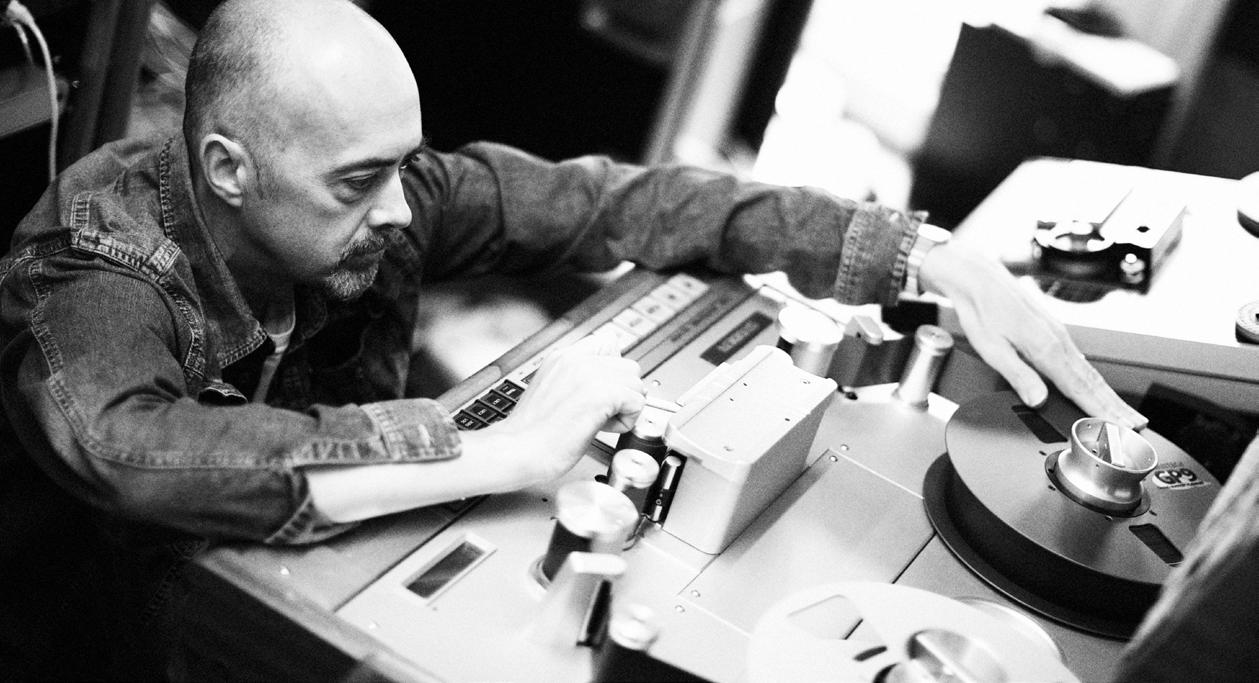
100 The Tape Mindset: An Analogue Approach To Our Digital World
Working with tape imposed a discipline on recording sessions that was hugely beneficial — and which our DAWs have made optional.
106 How Virtual Instruments Work
We cut through the jargon to explain how software instruments achieve their incredible realism.
112 The World Of Commercial Composition
Composing for adverts and music libraries can be rewarding, challenging and creative — and did we mention that you get paid?
130 Spotlight: Kick Drum Microphones
We’re spoilt for choice when it comes to dedicated kick drum mics. We check out some of the best.
134 Ziggy Stardust In Atmos
Ken Scott and Emre Ramazanoglu explain how they reinvented David Bowie’s classic album in three dimensions.
142 Inside Track: Julian Bunetta
Taking
and
Kor g MPS-10
Percussion & Sampler Pad
L auten LS-408 & LS-508
Microphones
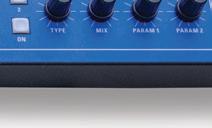
Make Believe Studios MixHead
APB Tape Tape Emulation Plug-in For APB
Moog Muse Polyphonic Synthesizer
Orchestral Tools
Wallfisch Strings
Or igin Effects Cali76 FET & Cali76 Bass
S ampleson Drumbada
Library
S onic Charge Synplant 2
Synthesizer
S oniccouture Pan Drums II Sample Library
S oundtheory Kraftur Multiband Saturation Plug-in
SPL Phonitor 3 Headphone Amplifier
S ynchro Arts VocAlign Pro
Plug-in
Teknosign Box Line Double Width Audio Processors
Toontrack The Jazz Sessions SDX
Drummer 3 Expansion 96 Universal Audio LA-6176
Channel Strip Plug-in 86 VSL MIR Pro 3D & Vienna Power House Immersive Audio Reverb Suite
Waldorf Iridium Core
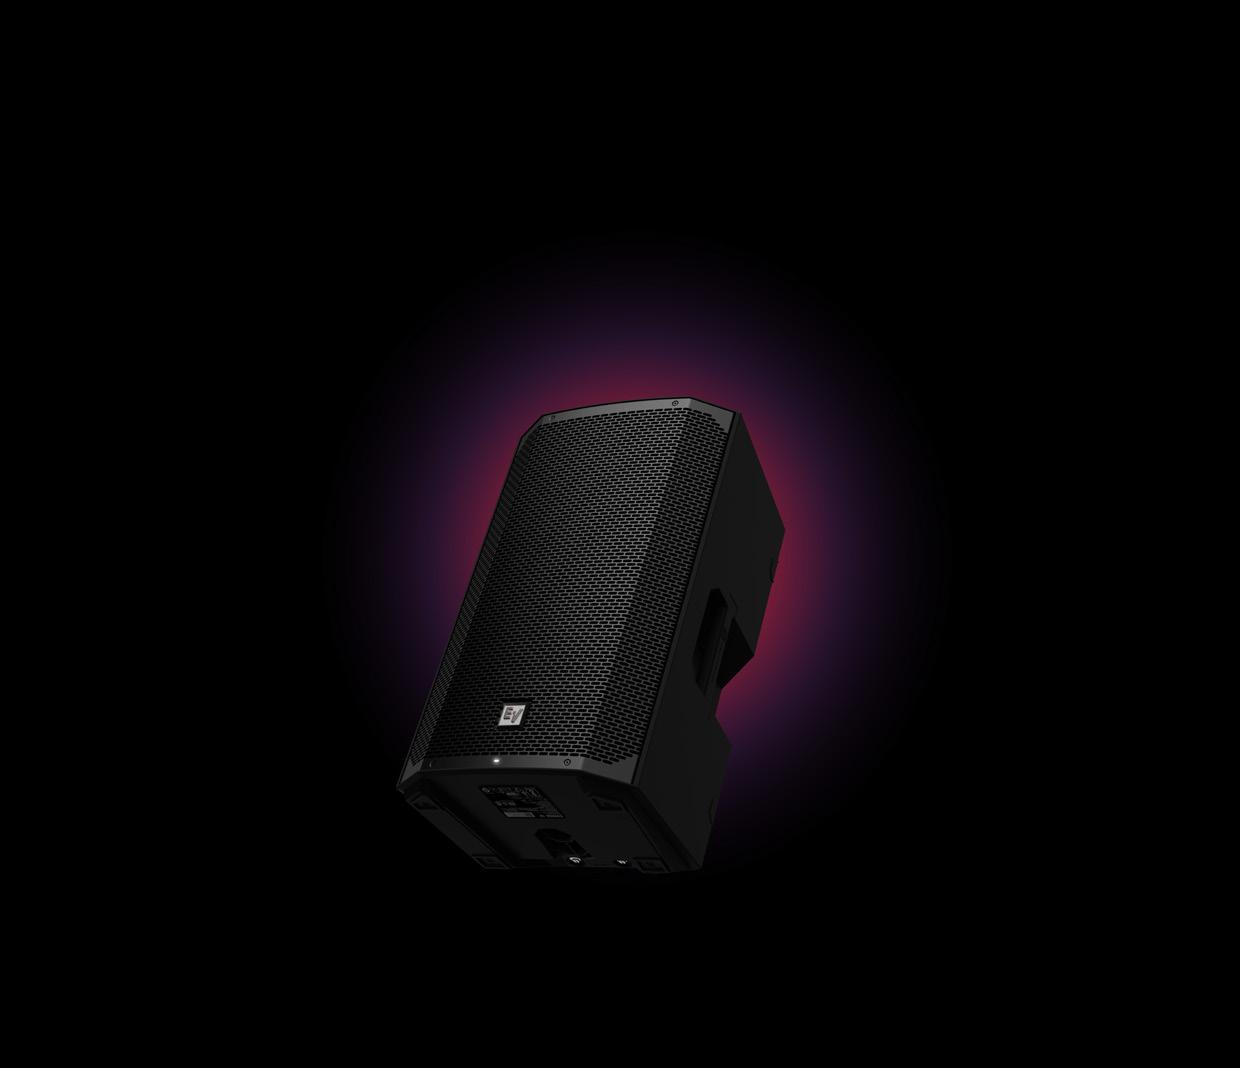
30 Zoom H4essential
Recorder
Zynaptic Morph3 Pro Audio Morphing Plug-in
Cubase
Studio One
Logic
Pro Tools
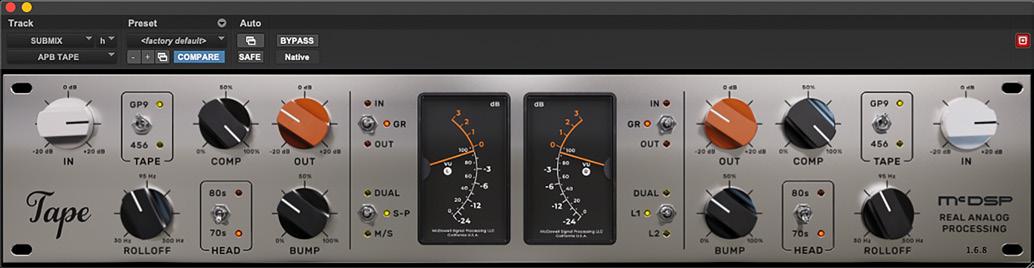
McDSP’s analogue plug-in platform can now replicate the complex dynamic behaviour of tape.
McDSP’s Analog Processing Box is perhaps the ultimate hybrid device. It processes audio in the analogue domain, but its processing is presented within your DAW in exactly the same way as conventional digital plug-ins are. The upshot is that you get true analogue processing with full recall, automation and the other ergonomic pluses of software.
Most of the APB’s capabilities centre on dynamics processing, and the initial suite of plug-ins included several compressors and limiters. Since launch McDSP have added such treats as a valve-style mixer, a multiband compressor, a mastering EQ and a dedicated saturation processor, all of which are free to APB owners. The latest addition to the range is a tape emulator.
thought-out control linking schema that help to make setting these up easier. There’s also a nice seleciton of presets categorised by instrument or application.
Some of the sonic artefacts of tape recording were undesirable, such as wow and flutter, high-end loss and hiss, but others are remembered more fondly. Most of these relate to the complex dynamic changes introduced by saturating the medium, and there have been many previous attempts to replicate these in the analogue domain as well as in digital plug-ins. However, if the tape emulation plug-ins in my folder are anything to go by, no-one can quite agree what the good qualities of tape actually were!
“If the tape emulation plug-ins in my folder are anything to go by, no-one can quite agree what the good qualities of tape actually were!”
APB Tape has a straightforward but comprehensive parameter set. The amount of saturation or dynamic processing is adjusted using input and output gain controls, plus a dial labelled Comp, which seems to act as a ratio setting. You can switch between two emulated tape formulations, and there are controls for mimicking the low-frequency ‘head bump’ and associated sub-bass roll-off that are characteristic of tape machines. When used in stereo, you also have the option of operating APB Tape in L-R or M-S modes, and there are two well
APB Tape adds another colour to the palette. It doesn’t introduce noise, pitch instability or other unwanted side-effects of tape recording, and unless pushed hard, it doesn’t drastically alter the timbre of the source. With the input gain backed off, in fact, it rivals Softube’s Tape in the “is it actually on?” levels of subtlety. As you raise the input level, though, you’ll encounter a wide range of variations on the ‘mix glue’ theme; and the hotter things get, the more the differences between the two emulated tape formulations become apparent. GP9 is, for want of a better word, quite ‘stiff’. As you pile on the signal, the upper midrange fills out nicely and
there’s a noticeable bite to the sound, but you have to really cane it before obvious compression occurs. The 456 formulation, by contrast, is a lot more spongy and soft. Either way, if you get the gain-reduction needle moving, the dynamic effect is very cool. It’s a little reminiscent of parallel compression, and is capable of bringing real excitement to drum-led mixes. Slate Digital’s VTM will do something of the sort when pushed, but APB Tape goes much further. I doubt you’d want to use the most extreme settings across an entire mix, but for something like a drum room mic or DI’ed funk guitar, they could be just the ticket. As you’d expect, the various elements of the processing are interactive, so whereas the ‘head bump’ sounds like a straightforward EQ curve at low gain levels, it responds to the dynamic changes at higher gain levels in quite a complex and interesting way.
I suspect that the sound of tape is a moving target, and I wouldn’t like to say whether APB Tape gets closer to it than other plug-ins. But it certainly stands out from the crowd, with an ability to inject energy into a mix and make everything ‘bounce’ that I haven’t heard in any purely digital tape emulation — or indeed in conventional compressor plug-ins. APB Tape further demonstrates the versatility and sonic potential of McDSP’s unique processing platform.
McDSP’s analogue tape emulation plug-in produces exciting and distinctive dynamic effects.
$ Free to APB owners. W www.mcdsp.com
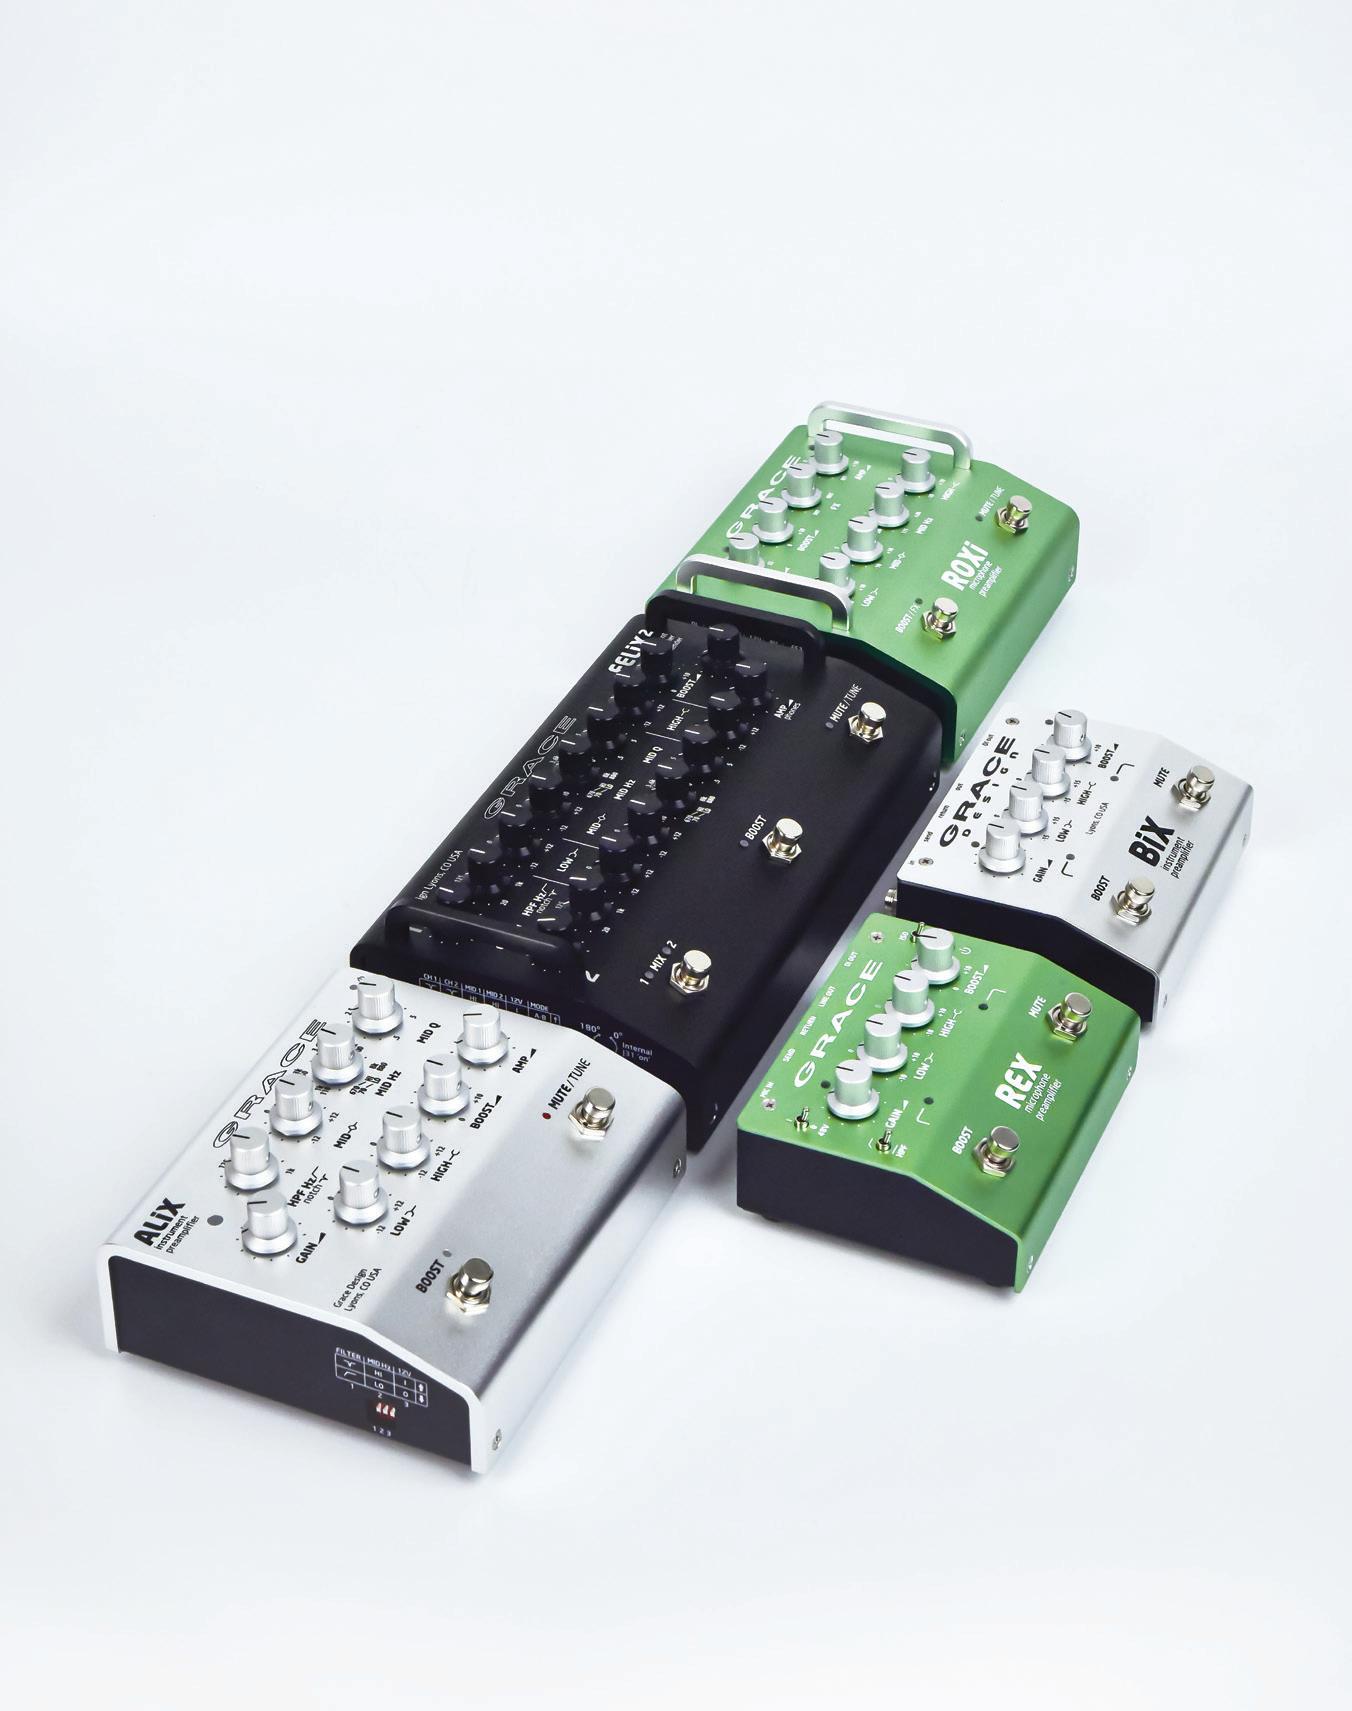
you pickers, pluckers, plinkers, strummers, shredders, stompers, yellers, thumpers, mashers, grassers, grinners, crooners, choppers, riffers, noodlers, pile-drivers, boom-chickers and song-slingers, y’all gotta plugin sometime. And that’s where we come in. Grace Design builds famously great sounding, reliable preamps for acoustic musicians of all stripes. You’ll
find them onstage just about everywhere, maybe even the one you’re standing on.

Could this clever, labour-saving plug-in change the way you mix drums?
MATT HOUGHTON
AIXDSP have been around for a few years now but when I first tried out their debut plug-ins, although I found them impressive, they didn’t feel quite finished, so I decided to await updates before reviewing them. Their offering has since matured considerably, and they now have a range of thoughtfully conceived EQ, dynamics and reverb plug-ins, including several that are aimed primarily (though not exclusively) at drum processing. These include a multiband gate, a multiband compressor and a dynamic EQ, but while each has some commendable features, by far their most impressive offering to me is DrumEQ, which is the focus of this review and is available separately and, along with Multiband Gate and Intuition Compressor, as part of their Drum Producer Pack.
At heart, there’s some fairly conventional technology behind DrumEQ and, technically, it’s possible to achieve pretty much anything you can with DrumEQ using conventional EQs and dynamics processors. But the way in which these technologies have been combined in this implementation makes DrumEQ a very different proposition to any other plug-in I’ve used. In addition to separate sweepable, fixed-slope high- and low-pass filters, there are 16 bands of fully parametric EQ here, each with gain, Q and frequency controls. But unlike in most EQs, these are organised in complementary pairs. You can see one pair at a time in the main part of the GUI, along with all the controls for both bands. The band on the left is described as an Octave Filter and the other, on the right, as a Resonant
Note Filter. Each band also has a dynamics section, with Threshold, Ratio, Attack, Hold and Release controls, and this can go from expansion to, effectively, limiting.
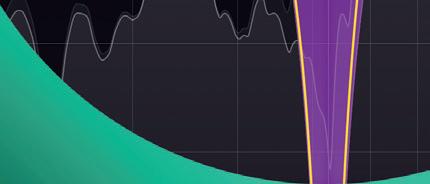
You get an overview of all the bands in a spectrum analyser in the upper pane, with Octave Filters represented as vertical blue lines, and the Resonant Note Filters as green ones. Here, you see the EQ curve along with the input spectrum, and can toggle the output spectrum on/off as an overlay so you can quickly see what you’re doing to the signal in real time. Click on any octave in the spectrum analyser, and that octave’s filter pair is selected in the lower pane.
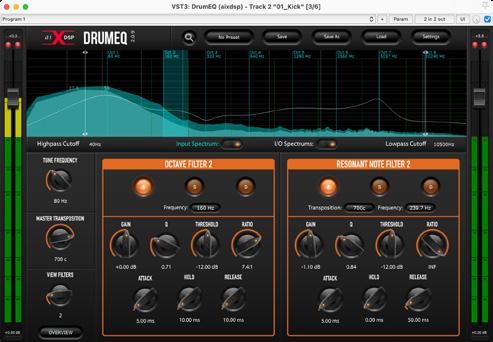
On the left of the GUI are three global control knobs: Tune Frequency, Master Transposition and View Filters. Turning Tune Frequency shifts the frequency of all the parametric bands simultaneously (ie. everything but the high-/low-pass filters), while turning Master Transposition shifts all of the Resonant Note Filters, effectively introducing an offset between these and the Octave Filters. Meanwhile, View Filters cycles the GUI view through the different filter pairs. There are also buttons to engage and solo each of the two visible EQ bands and to engage/bypass the dynamics processing, as well as the ability to load factory presets, or save/load your own.
If this all sounds conceptually simple, well it is... but that’s kinda the point here! Drums can be incredibly complex instruments, with multiple resonances and overtones contributing to each drum’s unique character. Processing them to your satisfaction can take time, and it’s easy to take the processing too far — such that it’s often as easy to zero everything and start again as it is to trace your steps and fix what you got wrong. With DrumEQ, it’s super easy to dial in just as much snap or girth from a drum as you want, while keeping nasty side-effects at bay.
The manual suggests what I agree is the best way to work: listen to your drum to hear where there’s a resonant peak that’s contributing something useful
or unwanted, and loop that section. Playing the loop, turn the global Tune Frequency knob until you sit a blue line (ie. an Octave Filter) on that resonance, and then start twisting the controls in that octave, pulling the resonance and its harmonics up or down as you please to emphasise the character. Then bring the Resonant Note filters into play to shape the resulting sound, perhaps cutting ugly resonances after a boost. Finally, you can fine tune the individual filters if required, and if you want to, bring the dynamics section into play.
In practice it’s an extremely intuitive and effective tool for tailoring your close drum mics. I’m normally one for using ears before eyes, but using the spectrum analyser for the initial filter placement works very well — you can get a long way very quickly, before fine-tuning by ear. My only note of caution is that those global filter positioning controls override anything you’ve set up differently in the individual bands, so you really do have to position those first, and if you make changes to the frequency of any individual bands, you might want to save a ‘safety preset’ for ease of recall.
The bottom line is that DrumEQ makes dialling in a huge and boomy or tight and snappy sound from your kick, snare and toms super easy and super fast. A great time-saver that will probably lead you to more satisfying results!
A novel and bloomin’ useful take on traditional EQ and dynamics processing, DrumEQ really could change the way you approach mixing multi-miked drums.
$ DrumEQ $59.99. Drum Producer Pack $149.99. W https://aixdsp.com
Along with various other improvements, version 6 of this labour-saving plug-in brings ARA2 support to Pro Tools users.
LUKE WOOD
Originally conceived for the AV post-production world, VocAlign soon became popular in music production because its ability to automatically align vocal and instrument takes could save hours of manual editing. In recent years, it’s been given more music-friendly features, derived from Synchro Arts’ flagship software Revoice Pro, including the ability to match the tuning of tracks as well as their timing. Sam Inglis’ review of the last major version (SOS February 2021: sosm.ag/synchro-arts-vocalign-ultra) details VocAlign’s core functionality, and rather than repeat that I’ll focus here on the new features.
With the release of version 6, VocAlign Project and Ultra are now known as Standard and Pro, respectively, but the key differences between them remain. The former, the entry-level version, is capable of automatically applying time-alignment across multiple audio tracks. The latter also offers pitch-matching, along with formant-shifting and transposition effects.
Both sport a newly designed ‘dark theme’ user interface, and the ARA2 version of the plug-in is now compatible with the latest version of Avid Pro Tools (2024.6). They’ve also both gained undo and redo buttons, and a convenient Arm Capture All function that makes it possible to capture all a session’s tracks with a single click. New features exclusive to Pro include Process Groups, that allow you to quickly apply identical settings to groups of tracks; SmartPitch, a tool that defines how the plug-in handles unison and non-unison parts; and some improvements to the accuracy of the Sync Points.
Shortly after VocAlign 6 was announced, an artist with whom I work regularly informed me they were recording a song that featured a piano and lead vocal, accompanied by a 21-track backing vocal ensemble. The
ensemble included a selection of doubles of the main vocal, octave-down parts, harmonies and an array of choral ‘ohhs’ and ‘ahhs’, so it was a perfect candidate to test out the plug-in’s new capabilities. And, as a Pro Tools user, I was particularly keen to check out the new ARA2 compatibility, so installed the latest Pro Tools update, loaded the multitracks, and then set about seeing what VocAlign 6 had to offer.
An ARA2 instance of VocAlign can be added to individual clips (using their right-click menu or Pro Tools’ Clip menu) or to an entire track (via the Elastic Audio/ARA menu, the File / Track menu, or the track’s right-click menu). Once loaded, VocAlign appears docked in Pro Tools’ Edit window. It can be opened and closed using a VocAlign 6 tab at the bottom of the screen, and it’s possible to undock it so that it can be freely moved and resized.
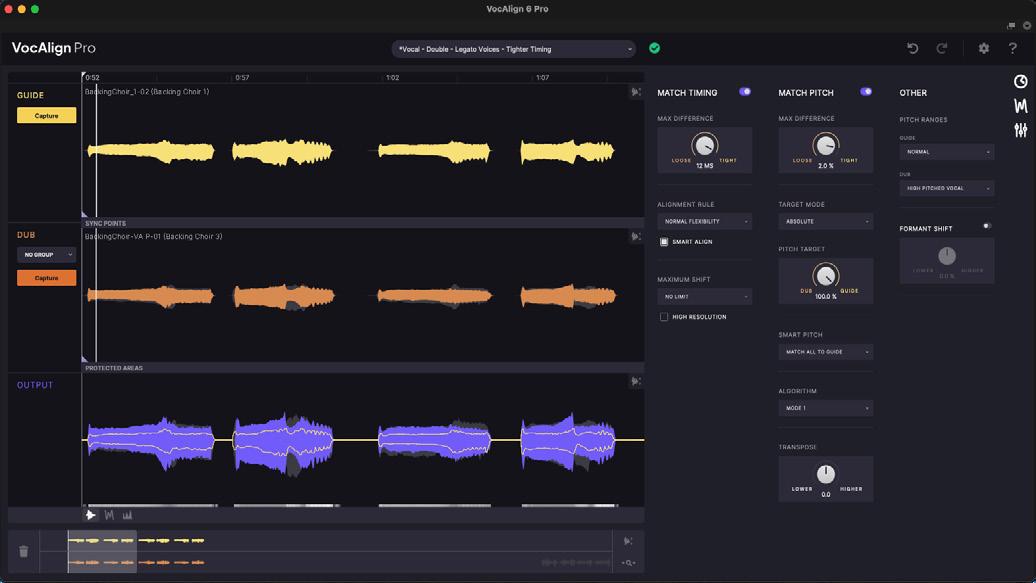
The general layout remains as in the previous version, with three lanes displaying the Guide, Dub and Output tracks, and the plug-in’s Match Timing, Match Pitch and Other control panels housed to the right. There are three new icons that allow these panels to be shown or hidden, which reduces visual clutter and saves screen
space when you’re not using them. Once happy with the settings, you right-click on your clip(s), select Render from the VocAlign menu, and the edited parts are committed to the timeline.
Thanks to ARA2, audio can be captured from the Pro Tools tracks to the Guide and Dub lanes instantly, and is routed directly back to the appropriate track. Not only does this make it possible to control playback of VocAlign using the DAW transport controls, but it also means that the mixer’s mute and solo controls can be used for detailed auditioning of the corrected parts. This was already possible in other ARA2-compatible DAWs, but for those working in Pro Tools, it’s a welcome addition that makes VocAlign feel much more integrated and intuitive.
Something that’s new for everyone is the Process Groups function, which has made its way over from Revoice Pro. A new option placed above the Capture button in the Dub lane allows multiple tracks to be added to a new group, so they can all be processed as a single operation. I put this to work on a section that had a chorus of nine ‘ohhs’ and ‘ahhs’, made up of three tripled-up parts that all shared timing but with a mixture of different harmonies. I was able to quickly line them all up by defining one part as the Guide and applying the same Match Time settings to all three groups, while using different Match Pitch settings for each. It’s worth keeping an eye on the mode that’s selected here, as well as the current Pitch Target and Target Mode settings. The more parts involved, the more you’ll appreciate it!
Another feature borrowed from Revoice Pro is SmartPitch, accessed in a new drop-down menu in VocAlign Pro’s Match Pitch panel. Three modes govern how the module applies its pitch processing. With the default setting (Match All To Guide), the pitch of all Dub parts will be aligned to that of the Guide. Match Unison Only aligns parts that are close to the Guide but ignores obviously different parts, such as harmonies. Finally, Match Unison & Tune Non-Unison aligns closely matching parts to the Guide, and applies nearest-note tuning correction to everything else. It’s worth keeping an eye on the mode you’ve selected here, as well as the Pitch Target setting that determines whether parts are tuned to the Guide or Dub; I had a bit of a shock when switching to editing a new part, hitting play and hearing the plug-in desperately trying to pull octave-down parts up to the pitch of the Guide!
The plug-in has been designed to carry out alignment work automatically,
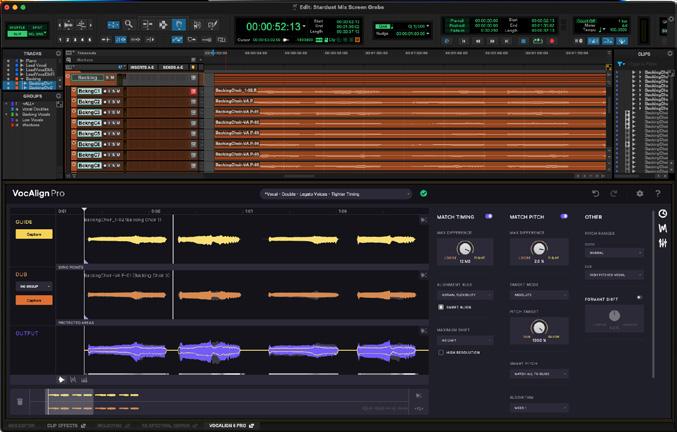
The ARA2 VocAlign Pro 6 plug-in allows more seamless integration with the latest version of Pro Tools, in which the GUI can be docked (as shown) or floating.
of course, but there are some scenarios where it might not get things 100 percent right first time, so Synchro Arts have also included a couple of tools that allow you to nudge its processing in the right direction. The first, Protected Areas, makes it possible to exclude areas of a track from alignment or tuning. This is ideal for parts that double only some words or phrases, or contain signals that throw off the automatic detection and cause undesired ‘corrections’. The second is Sync Points, which are user-defined alignment points in the Guide and Dub tracks. It’s important to appreciate that, while Sync Points resemble the direct, ‘warp’ style controls many of us have in our DAWs, they are actually used to influence the automatic alignment. So until you grow used to working with them, a bit of experimentation is required if you’re to achieve the desired results — they require a different approach than tools like Elastic Audio or Flex Time.
I have to say that VocAlign’s automatic detection was more than accurate enough for just about everything I loaded in. There were only a couple of instances where I felt the urge to create and move Sync Points, but when that need arose, they worked well. But it was good to know the new undo button was there, should I have needed to extract myself from any mess I created while learning the ropes!
All in all, Synchro Arts have taken an already very capable tool, and added some genuinely useful features that make it even quicker and easier to use.
The ARA2 integration will be all that’s needed to convince many Pro Tools users to invest, but there are plenty of noteworthy changes that should make upgrading worthwhile for others too. In particular, Process Groups and SmartPitch are both significant improvements that will make VocAlign 6 Pro very tempting for anyone working with complex vocal stacks. There’s also the more expensive Revoice Pro 5 (reviewed in SOS March 2024: sosm.ag/synchro-arts-revoice-pro-5) to consider. VocAlign Pro’s latest features definitely narrow the gap, but that remains the do-everything product in Synchro Arts’ range. The key distinction now lies in the pitch-correction: VocAlign is capable of matching tuning between tracks but provides no control over the tuning itself, other than how closely it’s matched to the Guide; Revoice Pro is equipped with a powerful set of pitch-correction tools, including the ability to adjust pitch modulations such as vibrato in detail. If that sort of thing is less important to you, then VocAlign Pro may now do everything that you need for a smaller outlay.
A worthwhile update to the best-in-class time-alignment plug-in, Pro Tool users in particular have reason to cheer now they have support for the ARA2 version.
$ VocAlign Standard $149. VocAlign Pro $349. Discounts apply for crossgrades and updates from previous versions.
E sales@synchroarts.com W www.synchroarts.com

The electric organ, the rotary, the presets and the MIDI – all rolled into one amazing expansion for EZkeys 2. If you’re a demanding songwriter, player or audio professional, have a look and a listen to the Session Organ EKX on our site today.
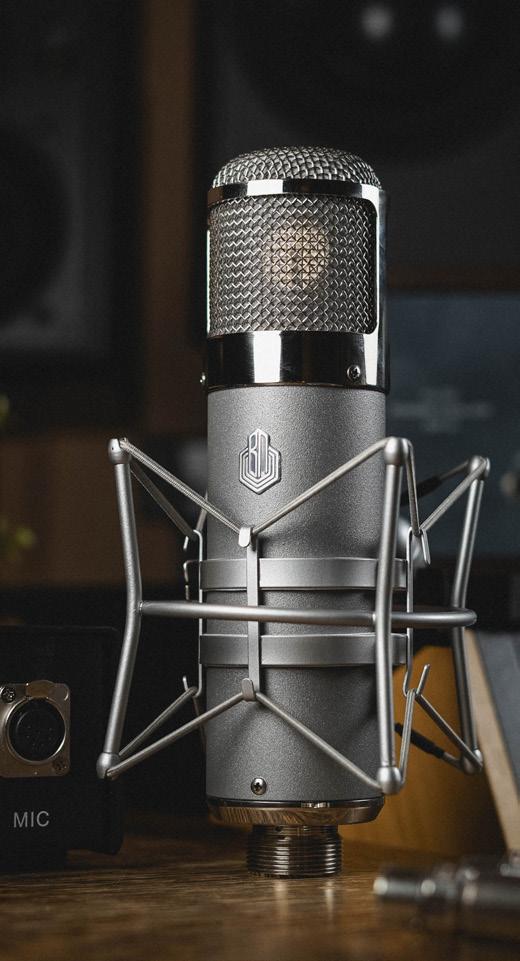
The Neumann U47 is legendary for a reason — as this homage makes clear.
Since starting production of their own mics back in 2002, Australian pro audio company
BeesNeez have built up an impressive catalogue. I reviewed the Lulu Tube from their budget-friendly Studio range (www.soundonsound. com/reviews/beesneez-lulu-tube) last month, and was impressed to find a high-quality valve SDC mic that would be affordable to a small studio owner like myself. For review this month we have another valve mic, but this time from their professionally priced Tribute range. The Tribute 1 is BeesNeez’s take on the classic Neumann U47.
There are already plenty of other options out there for engineers seeking a U47-inspired mic, so BeesNeez are keen to highlight the lengths they’ve gone to to reproduce key aspects of the original design and assembly, with the all-important capsule being a great example. The M7 capsule used in early
U47 and M49 microphones was, apparently, made from gun-barrel material, which is not readily available today. BeesNeez say that they have managed to track down a source of this material to use it in their M7 recreation. They have also designed and built a faithful replica of the original mic’s BV-08 transformer. Unsurprisingly, though, they haven’t managed to recreate its unique VF14 valve, so like many high-end U47 recreations, the Tribute 1 uses an EF12 as standard; BeesNeez can fit or supply an alternative option if required.
The powder-coated, matte grey finish to the Tribute 1 is very tasteful, and I like how minimal the mic itself looks — and how it doesn’t try to pass as a direct clone of its inspiration. Pattern switching is more versatile than on the original, running from omni to figure-8 in nine steps through a switch on the power supply. The build quality seems immaculate, and getting the mic up and running with the swivel-mount connector and cable felt effortless.
I’ve crossed paths with a few different U47-type mics in recent years, and when I come across a really good one, I’m always reminded how tricky it can be to describe the sonic magic they impart without reverting to pro audio cliché. Sometimes there’s no alternative, however! On my first vocal session using the Tribute 1, I was impressed with how the upper midrange of
a female vocalist, who I have recorded with for a few years, suddenly sounded more ‘present’ and ‘like a proper record’. And that’s U47s in a nutshell: there’s a reason these mics are so revered. They don’t suit every singer, but when they work, they can frame a voice in a way that is very familiar to our ears and helps it sit beautifully against the instrumentation. The Tribute 1 sounded superb in the all vocal sessions where I used it, whether capturing silky vocal tones or with the singer leaning into the capsule for more authoritative, low-end-heavy results. I also had great success using the mic on instruments, and when used above a drum kit or acoustic guitar in its omni pattern, it produced a lovely ‘open’ sound whilst adding a sense of depth — especially when in a good-sounding recording space.
I had high expectations for this mic, and they were comfortably met in all the sessions when I used it in my studio. As well as ticking the boxes I would want from an all-round large-diaphragm studio mic, I loved how this mic gently pushes forward the ‘presence’ frequencies of most voices I tried it on. This is not a cheap mic by any means, but the exchange rate in the UK at the time of writing pitches the Tribute 1 pretty squarely price-wise against at least two of the better-known U47-inspired mics currently available. With this in mind, If you’re in the market for a mic in this style, you should definitely put the Tribute 1 on your shortlist for auditioning.
A boutique, handmade reimagining of one of the most famous mics of all time, the Tribute 1 is both a faithful recreation and a beautiful mic in its own right.
$ $3961
E beesneez@icloud.com W www.beesneezproaudio.com


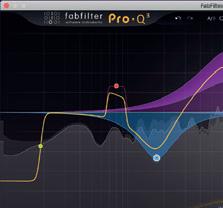
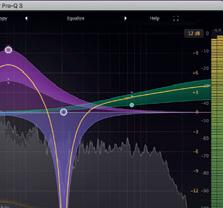
An equalizer is probably the tool you use most while mixing and mastering, so you need the best of the best! With FabFilter Pro-Q 3, you get the highest possible sound quality and a gorgeous, innovative interface with unrivalled ease of use.


Want to add power, energy and excitement to a source? Perhaps Kraftur can help...
PAUL WHITE
Soundtheory’s Kraftur is named for an Icelandic word for strength, and it’s a multiband saturation plug-in with some really nice touches. Used in the right way, multiband saturation — a technique whose potential I really began to discover back in the ’90s when using Drawmer’s Masterflow hardware — allows you to add a sense of power to a sound in a really focused way. For instance, you can put more energy and edge into the highs without increasing peak levels. Similarly, you can often add weight to the lows, without clouding the all-important midrange, or keep the lows clean while ‘inflating’ the mids. There’s another benefit to this multiband approach too, relative to conventional full-band saturation: while there’s obviously plenty of harmonic distortion going on, the process causes less intermodulation distortion, which means it often delivers more ‘natural’ or ‘effortless’ results.
Kraftur is authorised using an iLok account, and supports all the common plug-in formats for macOS and Windows hosts, including AAX. It can run at any sample rate up to 384kHz and oversampling (between 392 and 768 kHz) is used internally to minimise aliasing artefacts. A switchable Match function keeps the output at the same level as the input to make evaluating the effect easier.
Kraftur adds to the multiband saturation concept in a couple of useful ways. First, it offers control over the intensity of saturation in each band. Second, rather than a conventional wet/dry mix control, it provides a very practical, intuitive triangular blend pad, that allows the user to control the contribution of three different audio paths: the dry sound, full-band saturation and multiband saturation.
For the multiband path, Kraftur splits the signal into three separate bands, with user-adjustable crossover frequencies. You have control over each band’s individual distortion characteristics. To the left of the screen are controls that affect the saturation, and Drive determines the signal level that’s fed into both the single-band and multiband processors. While the sound is generally pleasing, I did find that if Drive was set too high it could introduce unwanted distortion, so you do need to listen carefully as you set that.
The shape of the transfer curve is affected by both Offset and Knee controls. The Knee does what you’d usually expect in a dynamics processor, while offset allows you to create a lower-reaching, gentler curve before the knee, for a smooth transition. The position of the curves for each band (low/mid/high) is controlled by three Shift sliders that can either be operated independently or, if you prefer, as one,
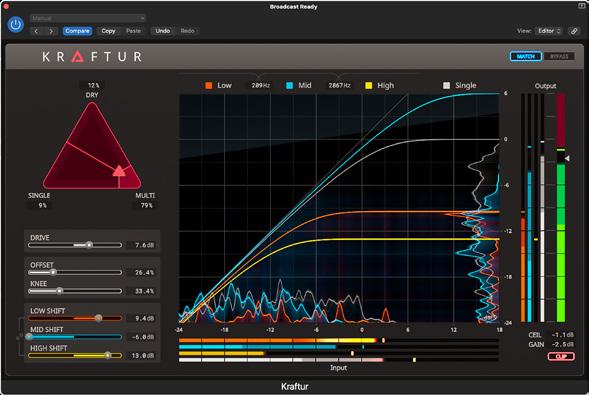
courtesy of a link control. Bands can also be soloed to help you fine-tune things when setting up each one, though obviously the result in the context of the recombined sound is all-important. Finally, a soft-clipping stage, with adjustable headroom, comes after the output gain control, the idea being that it can be engaged at the output to catch any ‘overs’ that result when the bands’ signals are recombined.
The level meters display both RMS and peak levels as dBFS (decibels relative to digital ‘full scale’). Peak shows whichever channel is highest and a peak hold line shows the peak values for two seconds, while RMS levels are averaged across all channels. That leaves the large central display, which shows both the split and full-band curves along with histograms showing peak levels. It makes excellent use of colour for clear visual feedback, with the colours becoming more saturated to reflect what’s happening to the audio. There’s also a choice of several alternative colour schemes if you don’t like the default.
Some might find it unusual that Kraftur doesn’t come with any presets, but it’s not an oversight — the results depend so much on both the level and dynamics of the incoming signal, along with its spectral content, that presets would be of little use. But even beginners shouldn’t let that put them off: Kraftur is really easy to operate.
What matters most, of course, is the sound. I have to say that Kraftur scores well
in this department generally. For processing overall mixes or submixes, I usually found that subtle settings worked best — it tended to be a case of using little or no processing on the mids, and then adding targeted enhancement to the highs and lows, depending on what I wanted to achieve. Things like drum busses and rhythmic loops can be treated more aggressively, though, to add punch or attitude, and fairly assertive settings can also help to make bass sounds seem more dense or more present in a busy mix. In fact, anywhere you might be tempted to use a conventional saturation plug-in, you can try Kraftur, and you’ll probably find that it affords you much more control over the results. There’s a free trial period so give it a shot.
A slick take on the concept of multiband saturation, Kraftur seems able to inject a sense of power or energy into almost any source, and is really easy to use.
$ $99 (discounted to $69 when going to press).
W www.soundtheory.com


Ever wanted to blend the characteristics of two different sounds? Morph Pro makes that easy.
MATT HOUGHTON
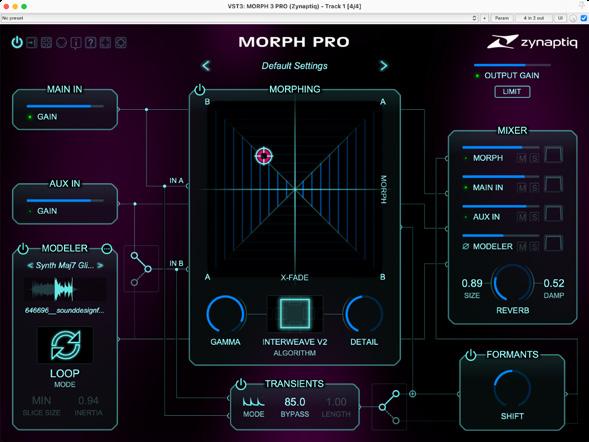
Available for the usual plug-in formats on Mac and Windows, Morph Pro takes two audio signals and computes a third signal, called the Morph, based on their characteristics. Add in some simple controls to manipulate the result, a few onboard effects and a mixer to blend the various signals, and what you have is a clever, powerful and unique sound-design tool.
The resizable (50-200%) GUI has input source controls on the left, the mixer and effects on the right and an X/Y pad to adjust the Morph in the middle. The track on which you insert Morph Pro is the Main In, and the side-chain input is the Aux In. New to v3 is the Modeller, which not only plays user or factory samples, as an alternative to the Aux In, but also offers a Style Transfer function — effectively a granular processor that attempts to reconstruct the Main input using granular slices of the Modeller. It has several modes (Loop, RMS, Peak, Spectral and a Custom option), a sampler-style pop-up interface, a multi-zone mapping editor and additional analysis features so there’s plenty of control here. Also worth noting is that you can adjust the loop’s start and end points during playback, which can create some interesting sounds and effects.
You can morph only the Aux or the Modeller with the Main signal, but all the input sources are available in the mixer, which has level sliders, mute/solo buttons and high-/low-pass filters, so you can create and shape a blend of any of the inputs and the Morph.
On one axis of the X/Y control matrix, the engine starts with the Main In signal at point A and blends in the character of the other signal as you move towards B. On the other, it’s the other way around, but as we’re not mixing audio here, but rather creating a new signal, the results on each axis could be broadly similar or wildly different, depending on the sounds you’re working with. You can also choose from 11 morphing algorithms. Six are new to v3, and both Fusion and Sonance are unique to the Pro version. There’s ‘method behind the madness’, but I can’t claim to truly understand what these do — yet they deliver different
results and I tended to just audition them and choose the best-sounding one. Either side of the algorithm selector are an algorithm-dependent knob and a Detail control; both help to finesse your Morph.
Finally, there’s a global output limiter and a handful of effects that apply only to the Morph: a transient processor, a ±2 octave formant shifter and a fairly basic (in terms of controls) but appealing and huge-sounding reverb.
I had a whale of a time feeding signals (sometimes very similar sounds, sometimes strikingly different) into Morph 3 Pro. Initially, the results ranged from woeful to wonderful, but after a morning’s experimentation I found I could consistently achieve interesting and engaging sounds. The results are always a bit unpredictable (it really is all about experimentation) but you soon get a feel for what sounds might work well and how to shape the result.
With similar sounds (two synth pads, say, or vocal oohs/ aahs and an evolving pad), you tend to be greeted with a wider range of musically useful results, and I found that the formant shifter was very
handy: blending a Morph I’d ‘deepened’ with the formant shifter with the Main signal often rewarded me with a dark, moody and interesting texture. Dragging the dot around the X/Y pad then generally gave me some useful control over the timbre.
With more contrast between the sources (eg. pads with percussion, voices with samples of engine noises, or drones with ambient chatter) the results were less predictable, the useable area in the X/Y pad usually smaller, and the sonic contribution of the secondary signal more obvious. But I found I could create some incredible soundscapes that way or, for example, liven up a repetitive drone or pad to sustain interest over time — some creations were vaguely reminiscent of the Orb’s Adventures Beyond The Ultraworld but that’s probably a story for another time! Used with subtlety, such combinations can be a great route to soundtrack-friendly moods and tension.
Hopefully, I’ve given a sense of what this uniquely creative plug-in is all about. There’s way more to it, but so much depends on the source sounds, so you’d be better off experimenting with the free 30-day demo than reading more of my words! Oh, and if the price is an obstacle, note that there’s a more afordable non-Pro version based on the same tech.
summary
This innovative sound-design tool offers a good dollop of creative inspiration and, after an initial learning curve, is really easy to use.
$ Full license $279. Upgrades from $69. W www.zynaptiq.com

Ditched your console but still have a thirst for analogue EQ? Maybe the Equate can quench it...
NEIL ROGERS
Well known for the highly respected Trident consoles of the ’70s and ’80s, Malcolm Toft is still designing gear, most recently releasing a range of niche products under his own name. I really enjoyed his 500-series Punishr analogue distortion (which I reviewed in SOS June 2023: https://sosm.ag/malcolm-toft-punishr) so was keen to check out his latest creation, which sees him return to territory for which he is perhaps best known: equalisation.
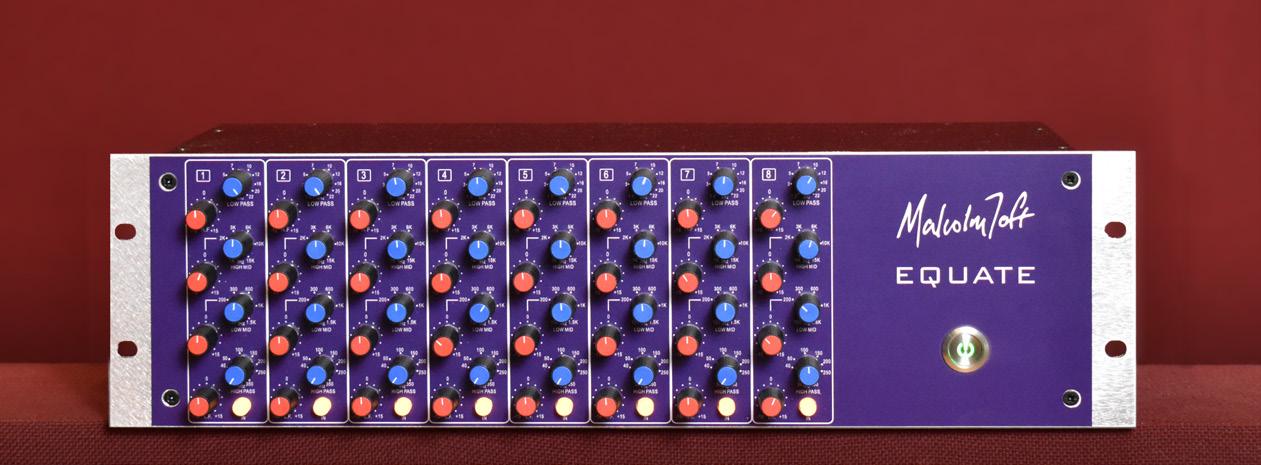
The Equate is a convenient solution for engineers who still like to use several channels of analogue EQ but don’t have or want a full console. A 3U rackmount device, it resembles a loaded 500-series rack but this is not a modular system. There are eight identical channels of EQ, along with an internal power supply and, conveniently, both TRS jack and DB25 D-Sub input and output connections.
Unsurprisingly, the Equate leans on the heritage of the Toft’s Trident 80B EQ design, each channel featuring two sweepable ‘peaking’ midrange bands as well as high- and low-frequency shelves. Unlike the 80B console EQ, the Equate sports sweepable high- and low-pass filters, to give us six bands in total.
I received the Equate during a busy period of tracking and mixing and, after a little rummaging around in my cable
boxes, patched it in to sit as inserts on the first eight channels of my Audient ASP8024 console. Given Malcolm’s background in large-format mixers, it wasn’t a surprise to find that it seemed completely at home in that setting!
In busy recording sessions, I’m largely looking for an easy-to-use EQ that can give me a helping hand in shaping sources on the way in, so that they’ll need less work come mixing time. The two midrange ‘peaking’ style bands on the Equate EQ are superb for this, and the low-mid band was probably the control I found myself using the most, especially to remove ugly low-midrange build-up or resonances. With its range extending from 100Hz up to 1.5kHz it was also handy for boosting audibility from 800Hz upwards on bass guitars or synths. The upper mid band also covers lots of ground (1-15 kHz) and, generally, I was impressed with how smooth and forgiving it sounded when boosting for presence and clarity. There’s no Q control with this style of EQ, but the bandwidth sharpens/relaxes according to the amount of cut or boost applied, so it’s pretty forgiving.
The low and high shelves of my console are often the most used section for gentle shaping while recording, and the equivalent options on the Equate performed the same role with aplomb. Centred at 80Hz, the low band can be used to dial in plenty of weight on bass guitars and kick drums, and it soon became a favourite technique to add a generous
amount of heft with the low shelf whilst using the high-pass filter to keep things contained. Centred around 8kHz, the high-shelf was similarly useful: great for easing off the top end of drum room mics or opening up the highs of an acoustic guitar or piano recording.
I’ve touched on how I liked to use the high-pass filter section, but it was great to have a variable low-pass filter here too. It allows you to ‘bracket’ a sound to tuck it into the mix, but rolling off the high end can also make things sound warmer (I think this is one of the things about tape emulation products that makes them so appealing!), or push them ‘back’ in the mix.
There are plenty of engineers who still like to record with multiple analogue EQs but who don’t necessarily need or have space for a console, and for anyone running such a ‘hybrid’ setup, the Equate could be a great option, perhaps sitting below a rack of 500-series preamps or one of the many multi-channel preamps now available. It might even prompt some who still mix on an analogue console to weigh up the pros and cons of keeping their desk. The bottom line is that the Equate is a great-sounding, all-round tracking EQ, with more than enough flexibility and creative options for most situations — and it’s better value for money than eight channels of 500-series EQ too.
The Equate features eight channels of great-sounding, flexible, console-style EQ in a convenient 500-series-sized rack.
$ $1999.
T Front End Audio +1 888 228 4530. E info@frontendaudio.com W www.frontendaudio.com W www.malcolmtoft.com
JOHN WALDEN
While Toontrack have certainly ventured into jazz drum sounds in the past, their latest expansion library for Superior Drummer 3, The Jazz Sessions, is undoubtedly their most ambitious project aimed at that genre. Recorded in collaboration with James Farber — whose recording credits read like a Who’s Who? of jazz greats from the last 40 years — the expansion features seven kits selected to span the history of jazz drum sounds and styles. These were recorded in four different rooms within New York’s Power Station, James’ studio of choice. A full range of performance articulations are provided, and the library includes options for sticks, brushes, rods, mallets and hands. The full library comes in at 161GB, but you can opt for a more compact install by forgoing some mic options (for example, the surround mics).
Once installed, SD3 divides the kits based upon the four rooms used for the recording. Each of these offers a distinct acoustic space, with the production team making kit selections for each room based upon the type of sound they were seeking. The kits themselves were chosen to span multiple eras, from the big band sounds of the 1920s to the jazz fusion sounds of the 1970s. That means that the available kits include both large and smaller kick drums, simple and more complex tom setups, and both darker and brighter cymbal choices.
For those more familiar with using SD3 for pop or rock drums, prepare yourself for some new mixing situations, as once these kits are triggered, there are some big kicks and splashy cymbals to manage. That’s in no way a criticism, though; the sounds are big, beautiful, detailed and totally in keeping with the genre. There are a huge range of sounds available across the seven kits and an impressive collection of presets created by both James Farber and the Toontrack team that ably show off the breadth and depth of the sounds. James comments on Toontrack’s website that the room mics are where he really starts when recording jazz drums, with the spot mics being used to simply reinforce elements as needed. It’s therefore interesting to solo the overhead mics in the presets as these present the kits beautifully within their respective acoustic spaces.
As ever, the SDX includes a dedicated MIDI grooves collection, all played by
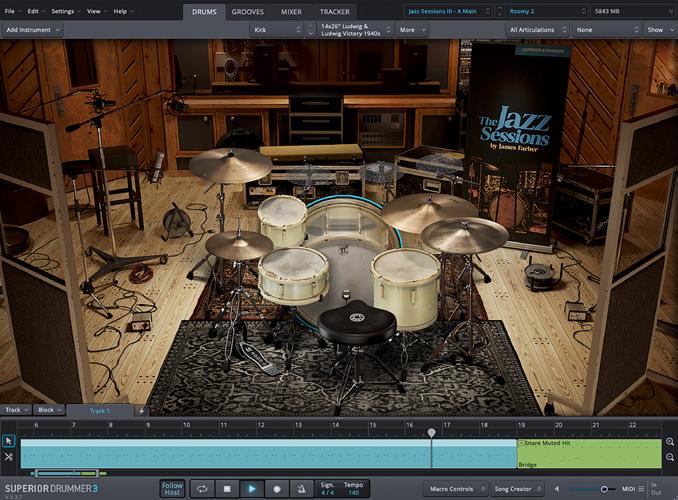
Toontracks’ SD3 Expansion has drum sounds suitable for almost any jazz project you can imagine.
Toontrack’s Norman Garschke. These cover all the main eras of jazz and provide straight and swung options in both 4/4 and 3/4 and across a range of tempos. They also include specific performances with the various tools including sticks, brushes (these sound very cool), mallets, rods and hands. I’d be surprised if additional drum MIDI packs aimed directly at The Jazz Sessions SDX were not on the horizon but, during testing, some of Toontrack’s older jazz-themed MIDI drum grooves also worked very well with these kits. If your own jazz drumming chops are still a work in progress, the supplied MIDI content is a valuable element within the overall package. If you happen to also be an EZkeys and EZbass (and perhaps the Upright EBX) user, SD3 and The Jazz Sessions is an ideal source of drum sounds to round out your virtual jazz trio. Indeed, writing this review took me way longer that it should have done because I got suitably distracted with this experiment myself.
It’s pretty amazing how quickly you can flesh out an idea when these three virtual musicians talk to each other via their respective Bandmate and Tracker options.
Hats off to James Farber and the Toontrack team — The Jazz Sessions SDX is a bit of a triumph. It offers an impressive range of jazz drum flavours and gives you a huge amount of control over how you craft the sounds into your mix. The detailed nature of the sounds makes them super convincing. If you need to drop some world-class drums into your next jazz composition, then look no further: The Jazz Sessions SDX is the perfect choice.
summary
The Jazz Sessions provides a top-class collection of jazz drum sounds that would grace any recording context.
$ $179 W www.toontrack.com
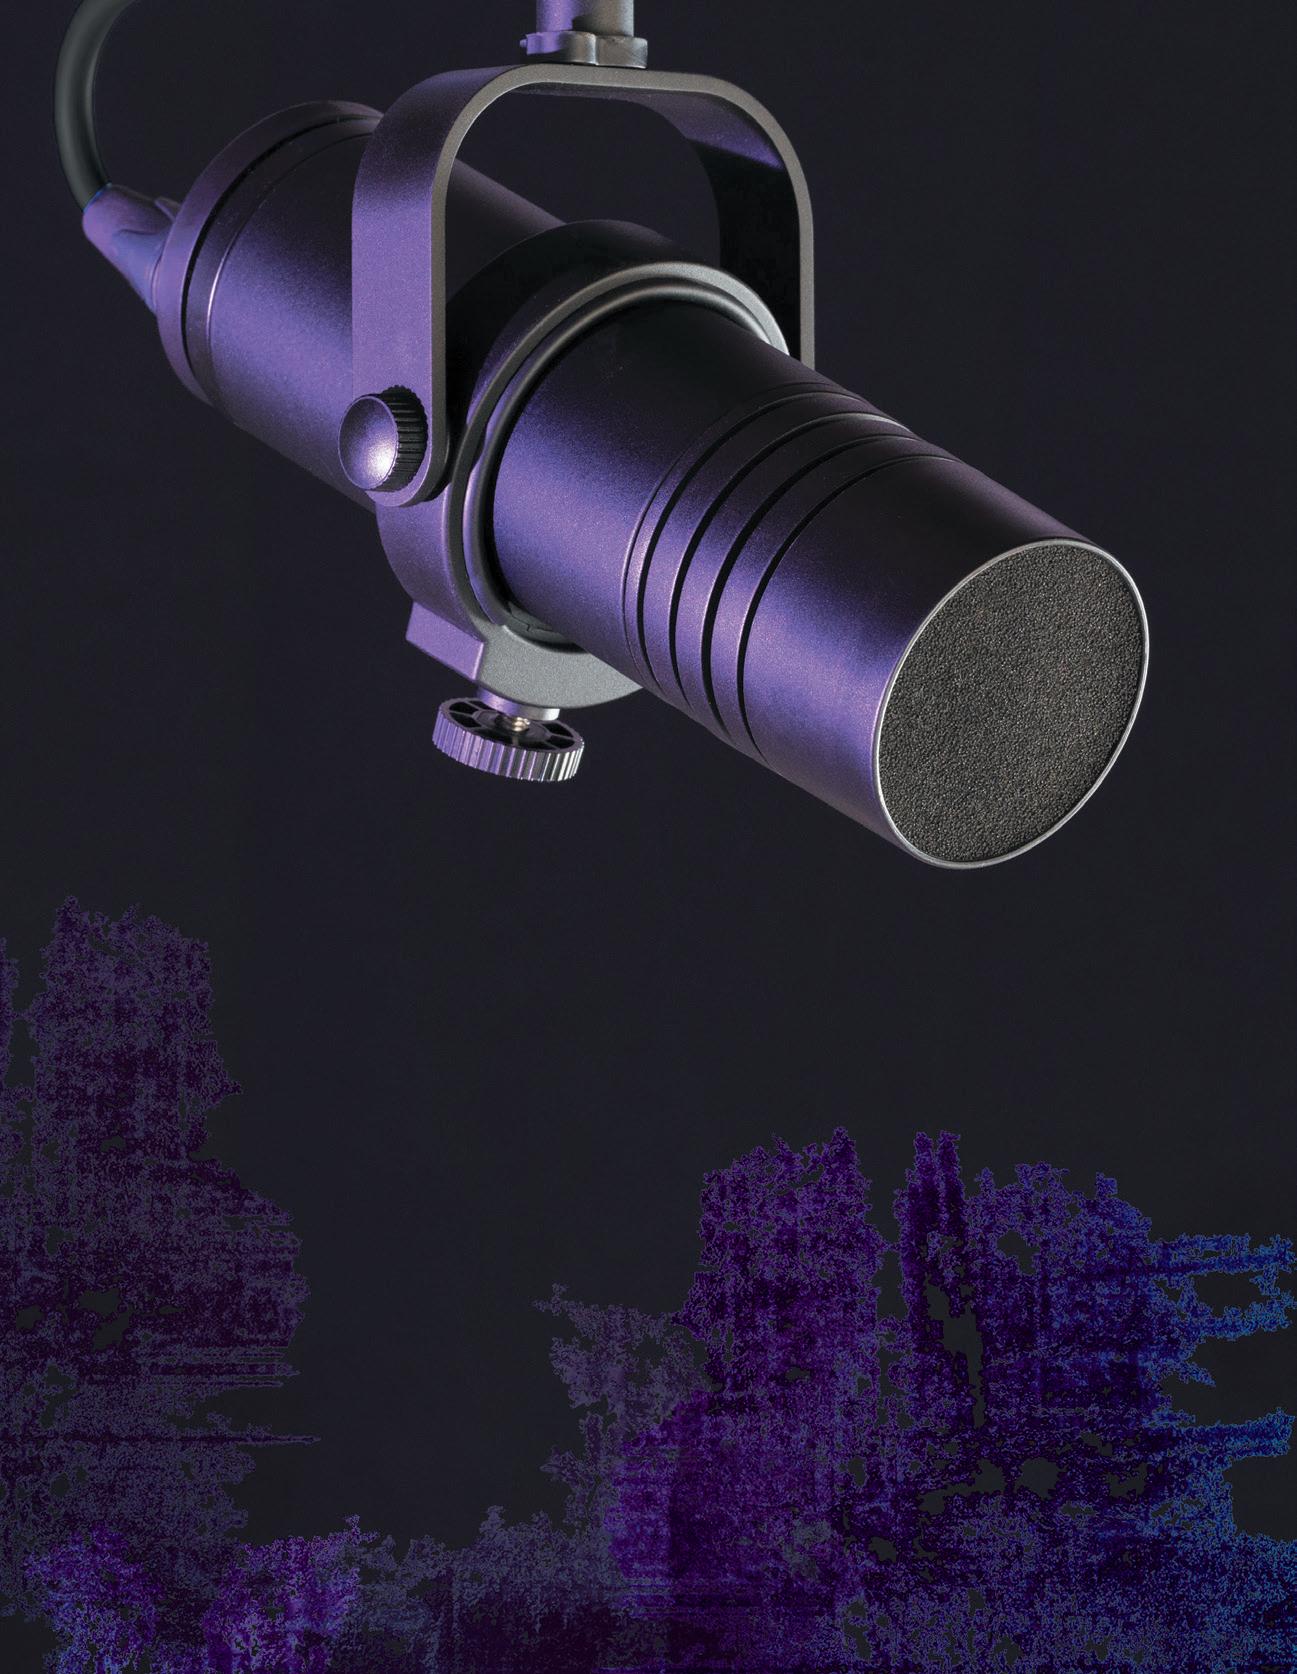
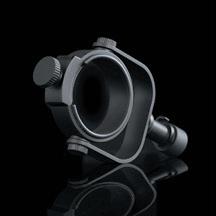
The new Stealth Broadcast bundle pairs the TEC Award-winning Aston Stealth mic with the fully-artculatng, custom-built Stealth Side Mount, to provide the ultmate set-up for professional broadcast and studio recording applicatons.
With its four world-class mic voicings and built-in Class A preamp, Stealth is already revered among audiophiles. Now Side Mount will take it (literally) to a new level.
Check out Stealth Broadcast and Stealth Side Mount (available as an accessory for existng Stealth owners) and fnd your nearest retailer at astonmics.com
There can’t be many products with a 15-year update cycle, but that’s how long fans of the original Synplant software synth have had to wait for v2. I have to admit, it was not a product I was familiar with, but the new release has caused a bit of a buzz amongst both users of the original and those with an interest in synth-based sound design. So, what exactly is Synplant and, 15 years after the original, what’s new in v2?
Under the hood, Synplant is essentially a twin-oscillator synth with FM and a flexible system for envelopes and modulation, a rather nice filter section, plus reverb, saturation, EQ and panning effects. The core elements of this engine have been brought up to date in v2 in order to improve the overall sound.
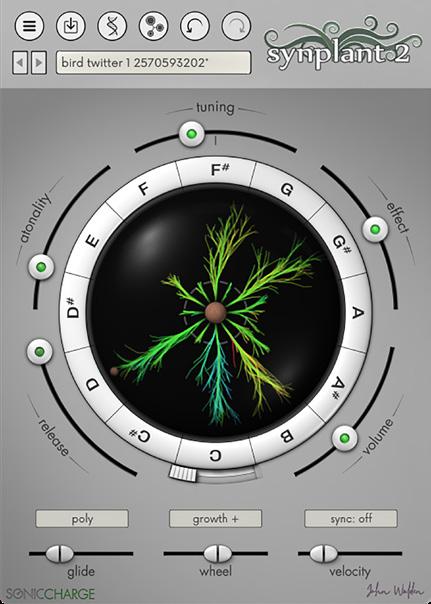
However, as with the original release, Synplant 2’s UI and sound-design controls are somewhat unconventional. With concepts such as planting seeds, growing branches, and DNA editing, designing sounds within Synplant might seem to
Synplant 2 takes a more horticultural approach to synthesis than you may be used to...
have more in common with a biological research lab than a synthesizer. The original’s Bulb and DNA Editor pages have been refined but, by deliberately sidestepping a more conventional graphical representation of the knobs, sliders and buttons found on a typical hardware synth, the UI was created to make experimental sound design accessible to any user.
Sonic Charge have not undermined that ethos in any way, but a more conventional graphical representation of the synth’s controls within the DNA Editor is now available if you want it. And, with the addition of the very intriguing Genopatch system, there is now a whole new (AI-fuelled) method of starting the sound-design process. So, if you have got your wellies on, and a suitable spade to dig with, let’s plant some (sonic) seeds...
Designing a new sound within Synplant requires you to plant a ‘seed’ at the centre of the Bulb display (for example, by simply holding Cmd/Ctrl and clicking on the seed icon). This triggers a randomisation process to provide some initial synth settings. By default, new branches then appear, growing outwards from that seed, each arranged upon one of the 12 notes laid out around the circumference of the surrounding circle. If you click and drag on one of these branches, it will ‘grow’ and, the further it grows from the centre, the more the sound changes relative to the original seed. You can also drag back towards the centre if you wish to reverse the process. The changing sound will audition as you drag, but you can also audition a branch by triggering the associated note from a MIDI keyboard. If you drag a second branch, its sound will ‘evolve’ in a different way, and you
can repeat this process to see which branch produces the most promising sonic evolution. Find something you like, and the main menu then lets you create a patch from the currently selected branch.
There are various other neat options available within the Bulb window. For example, by default, you can grow all the branches together by moving the mod wheel. If you like the way a particular branch has evolved, you can take that sound and ‘replant’ it as the main seed and then start evolving away from that. Equally, holding Alt and clicking the central seed will clone the sound of the selected branch to every other branch, essentially giving you the same playable sound mapped across the full MIDI note range.
The Bulb page now also includes four different bulb ‘modes’ to control how the branches respond to MIDI notes (this includes an impressive new option for layering sounds), as well as the main sliders for tuning, overall effect level, volume and release (which interacts with the amplitude envelope controls). When growing new sounds, the Atonality control influences whether you get more conventional playable sounds with an obvious pitch (at lower settings) or more abstract/ experimental sounds (at higher settings).
Once you have grown a suitable sonic starting point, switching to the DNA Editor page lets you dig a little deeper.
Sonic Charge Synplant 2 $149
PROS
• Fascinating sound-design workflow.
• Very capable synth in its own right.
CONS
• Perhaps not an obvious choice for bread and butter synth sounds.
SUMMARY
It was worth the 15-year wait. The new Genopatch sound cloning feature adds to the cool and quirky sound-design options but Synplant 2 is also an impressive sounding synth.
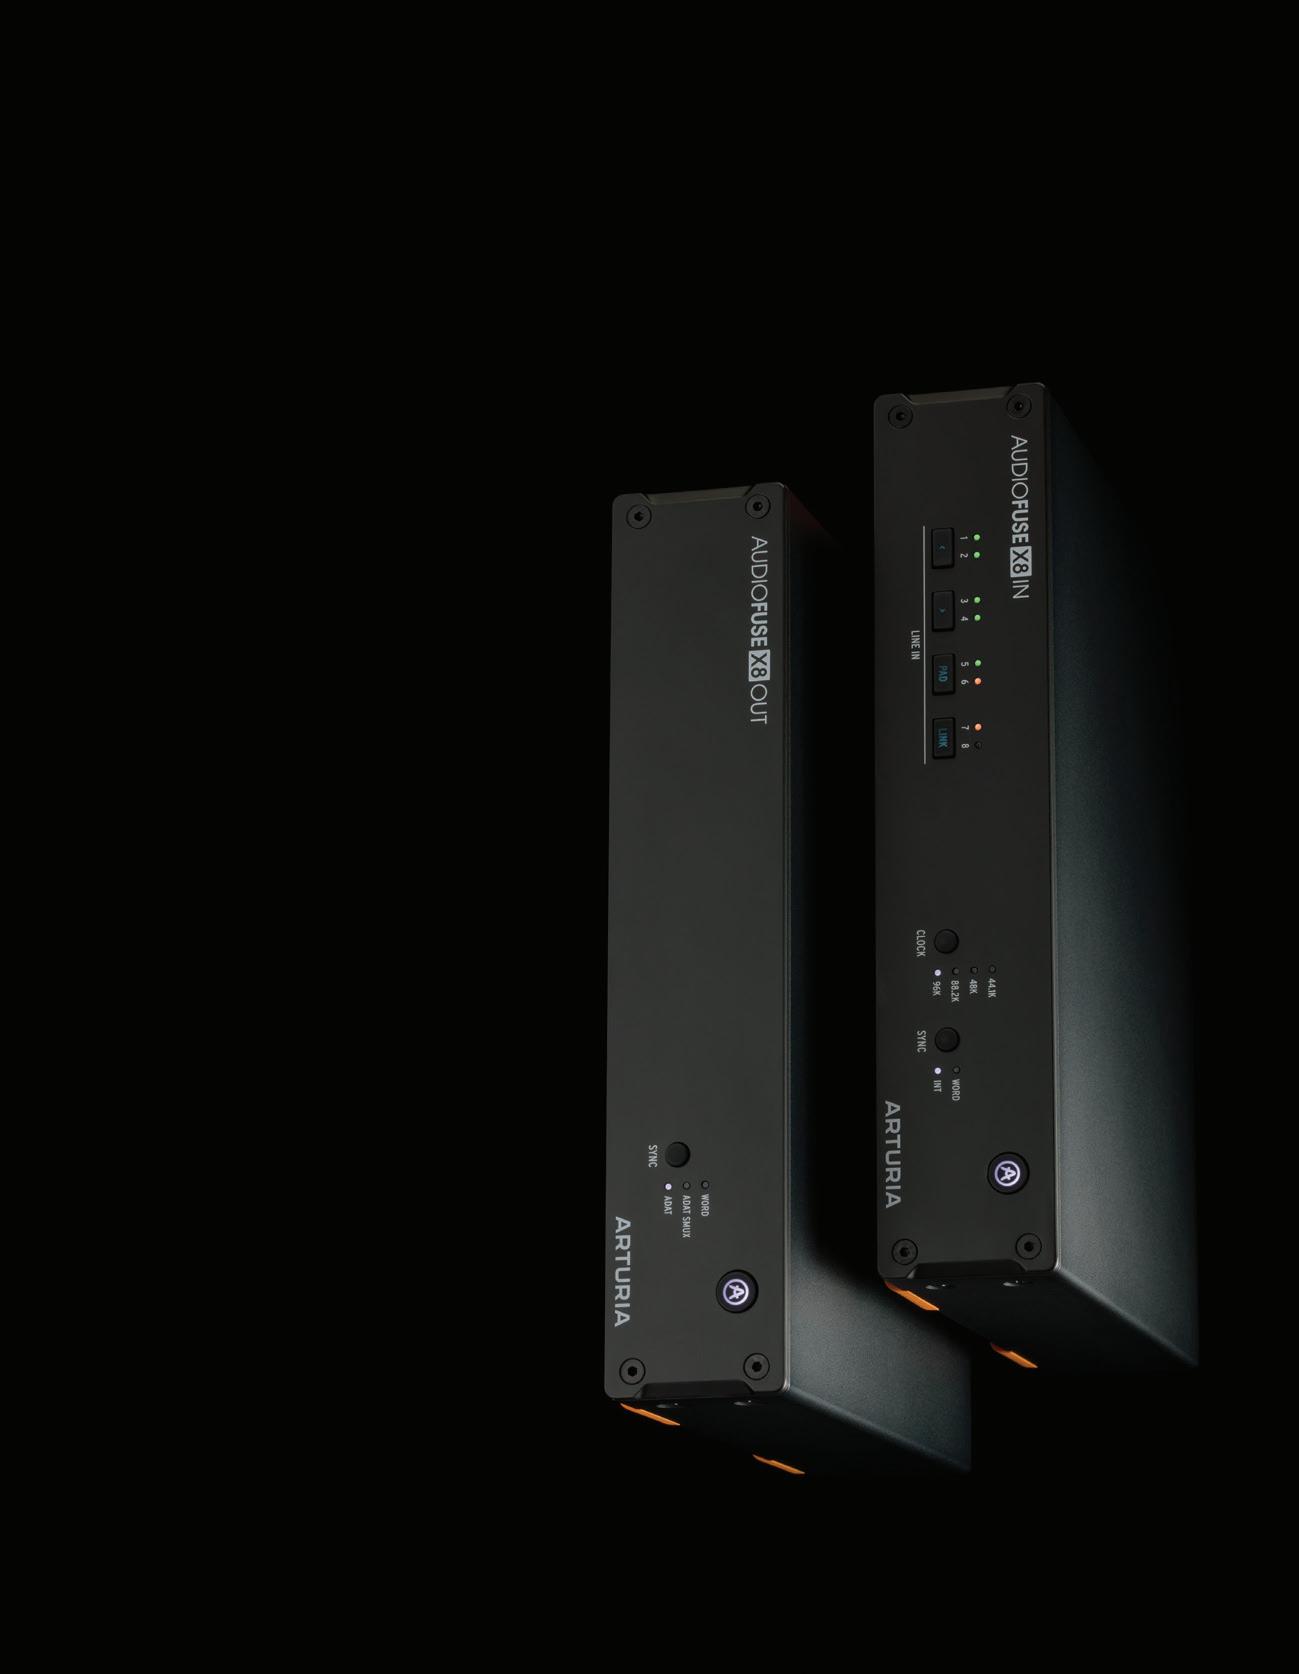
Have a fully-connected studio without the cost and complexity of a fully-featured interface.
AudioFuse X8 adds 8 channels of premium line-level connectivity to any ADAT-compatible interface - upscale your signal routing and have all your gear connected and ready to record.
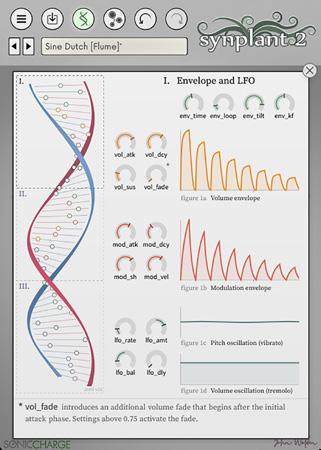
Alongside the DNA strand, the DNA Editor page now includes the option for conventional rotary controls for all the synth’s parameters.
This can be done via the rather beautiful — if somewhat abstract — DNA strand graphic, where each of the ‘genes’ (horizontal lines within the strand) acts as a synth parameter control. These are organised into three sections from top to bottom; envelope and LFO, oscillators, and filter and effects. However, new for Synplant 2, if you select one of these three sections, a full set of more conventional rotary controls for that section are then shown on the right side of the display. A very useful text description is shown at the base of the window as you hover over a specific control.
a combination of synth engine settings to match the sound of the audio sample. Once you trigger the process, the engine grows four different strands, each of which offers multiple versions of this sound matching process. Each possible match is represented by a small coloured dot within the display and clicking on any of these will audition the specific version of the synthesized sound. The toolbar’s Save button lets you save the currently selected sound match as a user patch, and you can also select the Plant Seed option from a drop-down menu; your matched sound then becomes a new seed for further evolution.
This is a fascinating process to watch unfold. Yes, it is unrealistic to load a two-second sample from one note (for example, from a guitar) and expect Synplant 2 to then generate a fully playable, totally realistic patch that both spans the full range of MIDI keys and offers the dynamic response of the original instrument. That
However, it’s probably the Genopatch sound cloning that most obviously grabs the attention. This is a really interesting concept. Surely other developers will soon bring their own take on this kind of process given just how quickly AI is finding its way into music technology software? An obvious next step might be to allow the user to import two or more samples at different pitches or dynamics levels and then let the AI create appropriate synth engine settings that interpolate between these multiple starting points. Hopefully, we won’t have to wait a further 15 years for Sonic Charge to offer that in Synplant. With AI moving at such a pace, my money would be on something closer to 15 months... Fingers crossed.
“Synplant 2 is a great-sounding synth that’s also a very accessible and downright fun to use sound-design tool.”
Whether or not you fully understand what’s going on within the nuts and bolts of the synth engine, the sound-design workflow is fascinating and intuitive. The results of this sound evolution process can be beautiful or bonkers, from playable sounds to weird sound effects. It’s both fun and inspiring to use.
Refinements and additions elsewhere aside, perhaps the headline new feature of Synplant 2 is the Genopatch process. This allows the user to import an audio sample of their choice and, based upon up to two seconds of that sample, Synplant 2 applies its in-built AI capabilities (and not an inconsiderable amount of your computer’s CPU grunt during this phase of the process) to attempt to find
said, in practice, while the results are very source-sample dependent, they can be both very good and very usable. That’s particularly the case if your starting point is a short sound such as a pluck or short bass tone, or perhaps a percussive sound such as a kick, snare, hi-hat or clap; it’s very impressive stuff. You can, of course, then do additional tweaking within the DNA Editor to finesse the ‘genetically cloned’ starting point that Genopatch has provided.
Space precludes a discussion of all the refinements and additions to be found, but v2 certainly moves the Synplant concept forwards with its improved sound engine, the conventional controls option within the DNA Editor and the new ‘sound cloning’ process offered by the Genopatch. The first two are impressive in their own right and would be enough for many long-standing users considering upgrading. For potential new users, Synplant 2 might not be an obvious choice as a ‘first serious virtual synth purchase’, but if you already own a few ‘standard’ synth emulations, this is a very cool curveball. Biological concepts within the UI aside, the sound can certainly get ‘organic’.
Synplant 2 is a great-sounding synth that’s also a very accessible and downright fun to use sound-design tool for folks that don’t usually spend their time doing sound design. OK, so the pricing might deter the more causal user, but the free three-week trial is well worth giving a spin. Is it perfect? No. Is it cool, quirky, interesting, inspiring, and capable of some great sounds? Yes. When it comes to a ‘grow your own’ approach to creating synth sounds, Synplant 2 can supply endless sonic seeds to get you started. Very interesting stuff.
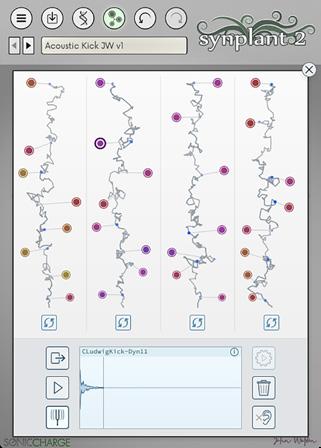
Via the new Genopatch feature, Synplant 2 will attempt to match the sound within an imported audio file as a starting point for your sound designing.
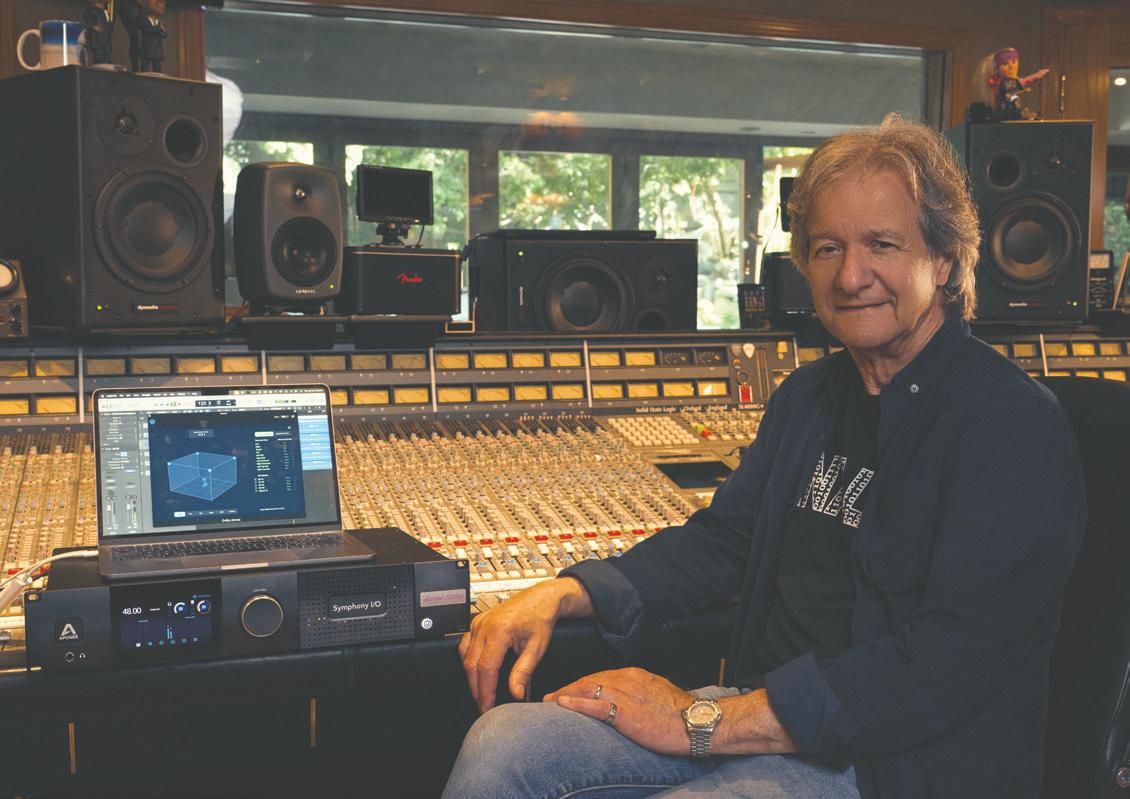

“Apogee’s Symphony MK II offers a direct pathway to the soul of the artists’ music. Its unmatched clarity and fidelity redefine studio excellence.”
- Bob Clearmountain
Dive deep into the art of mixing, as Bob shares his experiences and techniques with Rick Beato.
Clearmountain will be hosting intimate Immersive Audio Mixing Sessions. Sign up for information on these events.
“Just press record,” they say. Can it really be that easy?
CHRIS TIMSON
For the best part of 20 years, Zoom Corporation have been making themselves a force to be reckoned with in the field of portable audio recorders, and I have a couple of their devices: the H3-VR Ambisonic recorder and the F8n eight-track field recorder. Both are well implemented pieces of kit, and I believe the H3-VR remains unique. So it was with some interest that I accepted an invitation to review the Zoom H4e (‘e’ for essential) recorder. Superficially, it isn’t dissimilar to the Tascam Portacapture X6 I reviewed in SOS June 2023, so I wondered how they might differ. It turned out that they represent two very different design philosophies and I’ll go into more detail about that below — but first let’s consider the Zoom on its own merits.
The H4e is one of three recent arrivals in Zoom’s H-for-Handy range of recorders, all of which share the same design philosophy. The H1e is a basic handheld
stereo recorder, with two built-in mics in an X-Y arrangement. The H4e adds two XLR/TRS combo sockets for external mic/ line sources, and the ability to record four tracks simultaneously. Finally, the H6e adds another two XLR/TRS combo sockets, and can record six tracks at once.
All three appear to use the same built-in mics, so I’d expect them to sound pretty similar when recording through these in stereo. The big headline for all these recorders is the 32-bit floating-point recording format — in fact, they can record only in this format, and that’s a significant pointer to the intent of these machines, as I’ll explain in more detail below. The H6e is very similar in spec and use to the H4e apart from those two extra XLR/TRS inputs and the larger physical size necessary to accommodate them, so my conclusions will likely apply to both models. The H1e looks to be quite a different beast, though, with different controls and UI, so I won’t consider it further in this review.
The H4e is quite light in weight for its size, not least because it requires just two AA batteries, and while the case is plastic it still feels pretty sturdy so it’s quite practical as a handheld recorder. The shape is no surprise either, with mics at one end, a colour screen on top and
controls scattered around as required. This layout works, so why change it? The built-in mics function as an X-Y stereo pair by default but they can be configured for mono capture. The screen is quite small compared with some other recent recorders but it does suffice. Below
PROS
• Extraordinarily easy to use.
• Good built-in mics.
• 32-bit floating point recording.
• Fast boot time.
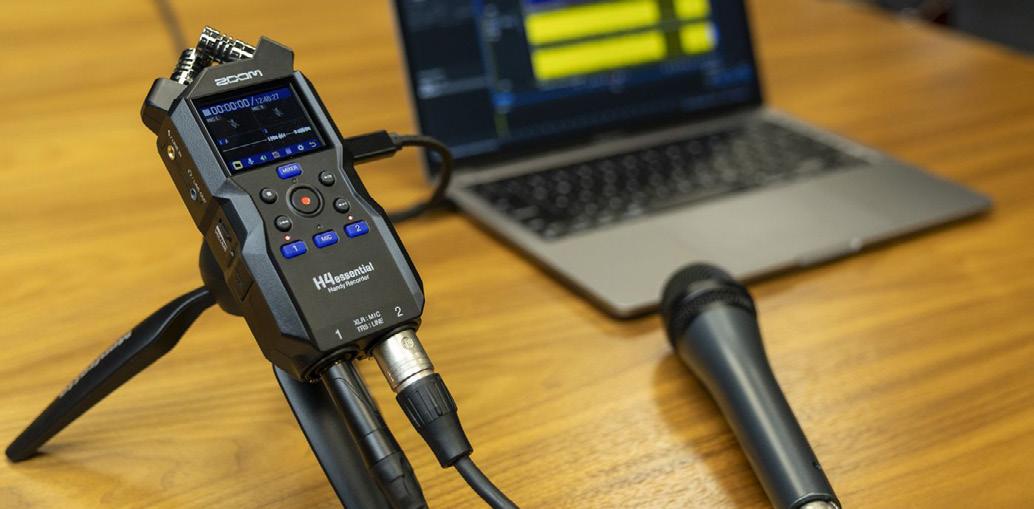
• Doubles up as an audio interface.
• Good battery life.
• Accessibility option may be seriously useful for the visually impaired.
CONS
• Some might prefer more user-adjustable settings.
• No PSU, SD card, batteries or physical documentation included.
SUMMARY
The H4essential takes advantage of 32-bit conversion to streamline the process of recording. You can’t tweak much, but it’s quick to power up and, if you point the onboard or external mics in the right direction and hit record, the resulting recording should be good.
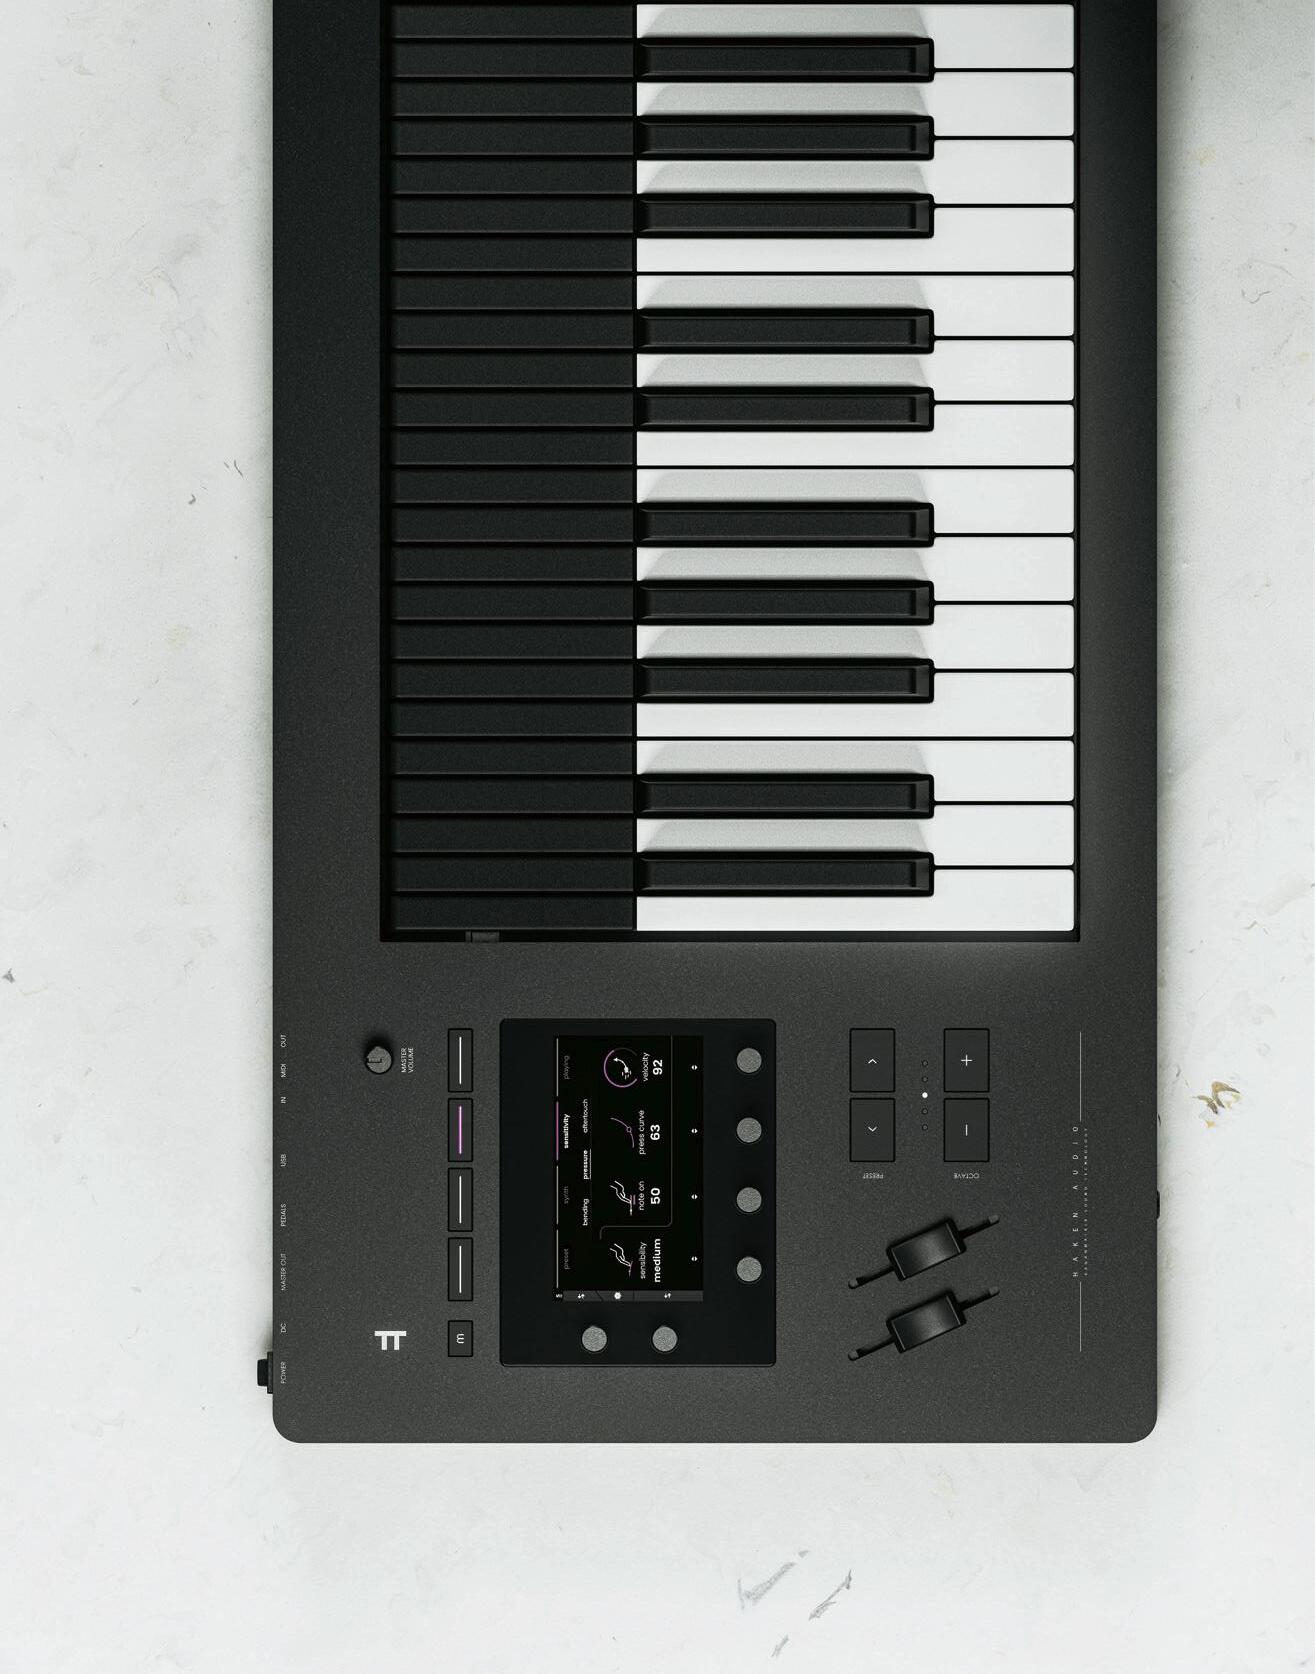
Next-gen standalone expressive synthesizer. Add emotion & movement to your music with a simple touch.
expressivee.com/osmose
the screen, you have a set of transport controls and a couple of odd bods such as Mixer and Mic.
Along the left-hand side is a line in socket that can also provide plug-in power for a suitable mic. Said mic will take precedence over the built-in mics if you use it. A line out socket doubles up as a headphone output that gives plenty of volume and quite a good sound for monitoring. Next to that there’s a volume control for the headphones and also for the in-built speaker that’s found on the back. As usual with portable recorders like this, to describe the sound quality of that speaker as ‘poor’ would be unusually kind, but of course that’s not it’s purpose — it’s really there for basic checking like, “Did I actually make a recording at all?” A plus point is that it’s quite loud. Next to the volume control is the microSD card slot (the H4e accepts microSDHC and microSDXC cards with capacities up to 1TB).
At the lower end are the two XLR/TRS combo sockets that can provide 48V phantom power if required, and can thus support the full range of professional mics. These don’t replace the in-built mics, which are always available, but can record to additional tracks, giving us the full four that are advertised.

On the right-hand side is an on/off/hold slider switch, and a slot for the optional BTA-1 Bluetooth adaptor. There’s a USB-C port that can be used to supply power and/or to support file transfer. You’ll have to provide your own PSU for external power, but most households will have such things coming out their ears, and for location work you can have the option of using an external USB power brick. Finally there’s a twiddly wheel and an Enter button. Both are key to the user interface, of which more anon.
On the bottom panel, a quarter-inch threaded insert enables mounting on a camera tripod but, if you’d prefer a mic stand, 1/4- to 3/8-inch adaptors are widely available.
The H4e recorder arrived in a neat little cardboard retail box accompanied by a few bits of paper concerning warranty and safety issues (it’s amazing how many safety issues it seems a device like this can have!), the Bluetooth adaptor (a cost option) and... nothing else: no batteries, no SD card, no PSU, no user manual and no quick start guide. I enquired to see if this was intentional and was told all was as it should be.
Apparently, Zoom wish to minimise waste and do their bit for the planet, the idea being that you download the PDF manuals from Zoom’s website. I do have some sympathy with that idea, but I didn’t notice the QR code on the box until quite a bit later, and do think that just a couple of sheets providing a getting started guide would be a Good Thing.
After I’d scrabbled around trying to find an unused microSD card (eventually
borrowing the one in my Zoom H3-VR) this gave me the perfect opportunity to try out my standard test with new kit: seeing how far I could get without a manual! The answer, once I’d worked out how the user interface worked, was a very long way. In fact, within about an hour, without any recourse to manuals, I had pretty much full control of the recorder — the user interface takes simplicity to a whole new level.
Having said that, when I first turned the H4e on I found myself vainly poking at the screen, thinking it might be touch-sensitive like the one on my Tascam Portacapture. Then I started prodding buttons randomly, but not understanding the results until I got onto the little twiddly wheel (officially named the Selection Dial) and the Enter button. When first turned on, the recorder takes you through a setup procedure for language, accessibility, data and time. I soon twigged that you use the twiddly wheel to move between fields on the screen. Once the field you want is highlighted, you press the Enter button and a list of options is displayed. You use the twiddly wheel to scroll to the desired option and press Enter again to choose it. Apart a few single-purpose buttons on the front, this is the whole and only way you interact the user interface. Once I’d got used to it, I found working with it reasonably straightforward, helped by the fact that the option lists are deliberately quite short. However, when I tried the remote Bluetooth app on an iPad I realised how much I missed the touch screen on my Portacapture.
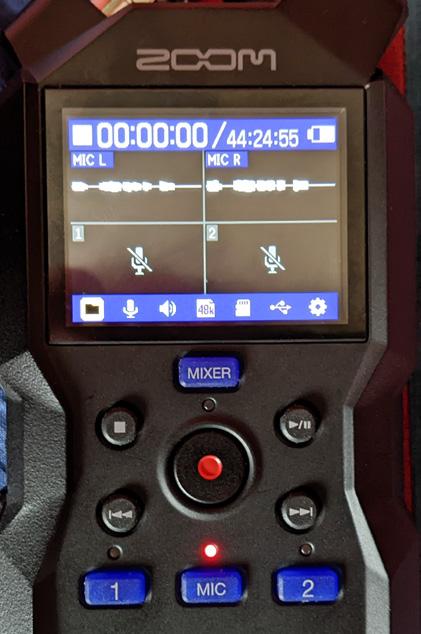
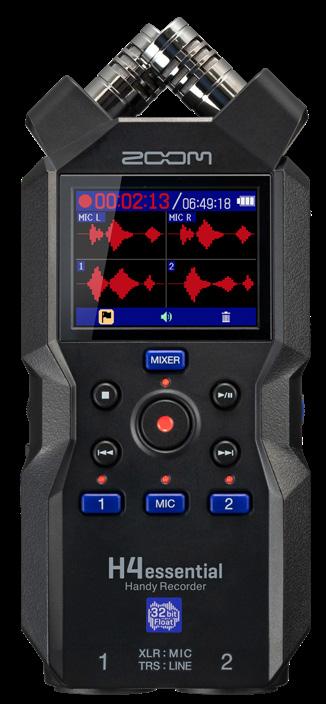
Once past the startup procedure, I arrived at the normal starting screen, at the top of which is displayed the elapsed recording time, the total amount of available recording time and an indication of the battery life. In the middle is a section for each microphone, and all are turned
SUPPORTED BY:

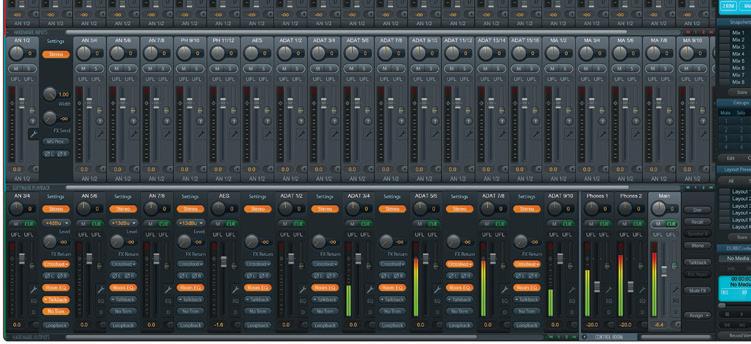
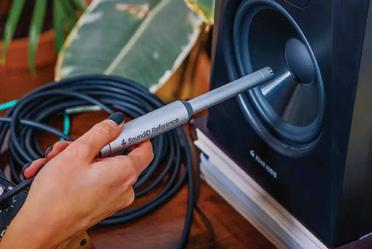
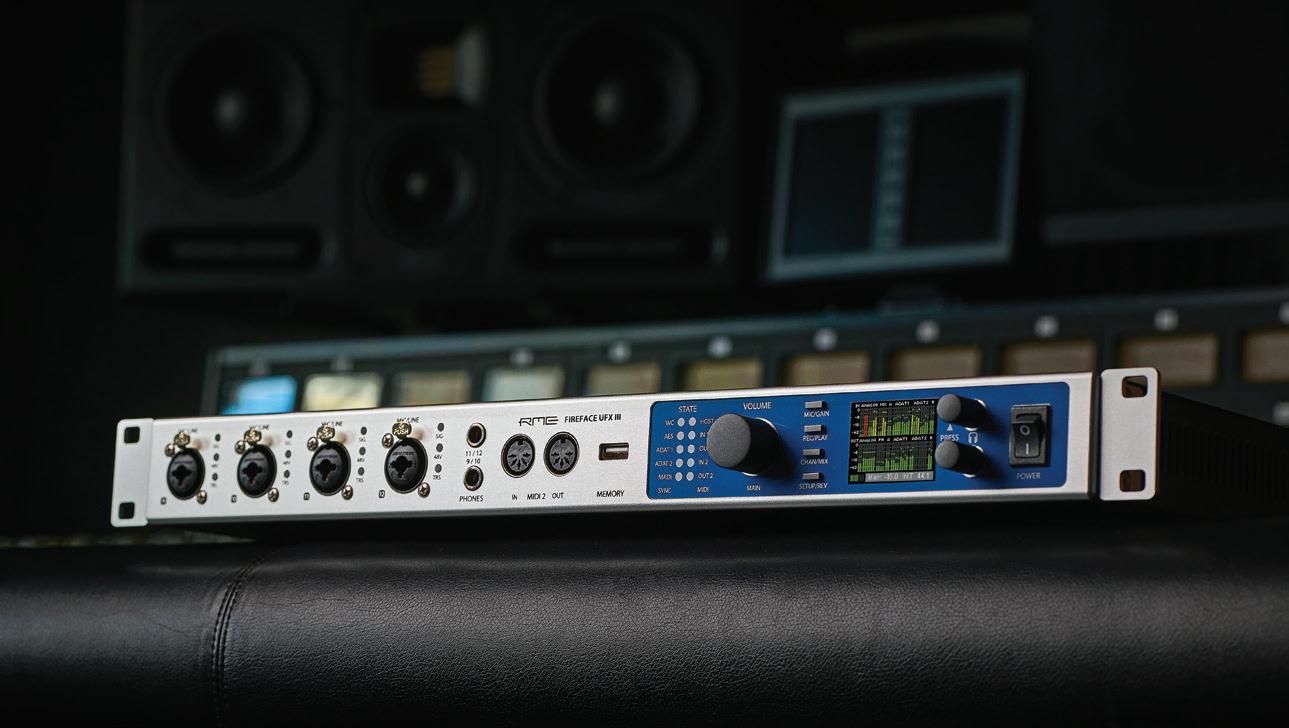
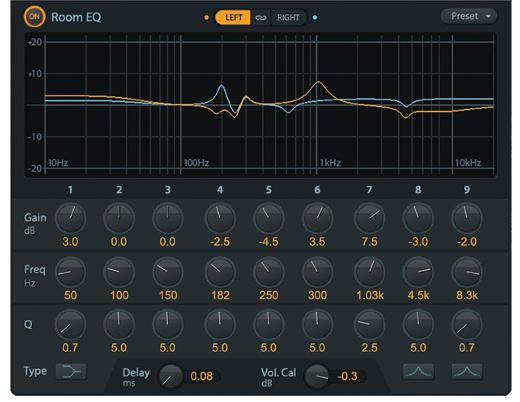
Calibrate your headphones and speakers. Apply the profle directly in TotalMix FX’s Room EQ.
For all RME Fireface flagship interfaces. rme-usa.com
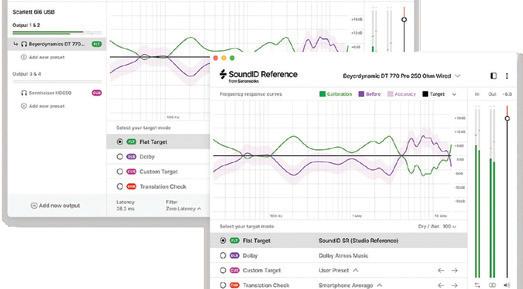
The zero-latency DSP solution for Speaker Correction. Optimized Headphone Sound Immersive Audio & Surround Setups - including Dolby ATMOS
Free update. Download now.
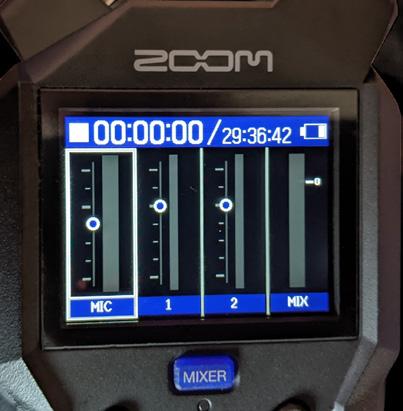
off. At the bottom are a series of icons that you select to set up various things.
First, there’s File List, and selecting this accesses a list of the recordings you’ve made and lets you play or delete them. This would be a good point at which to describe the H4e’s file system: in brief, it hasn’t got one! Well, under the bonnet it undoubtedly has, but the user has no control over things like file names or folders; it’s all decided for you. The file list is a list of recordings you’ve made, identified only by the date and time you made them. You can’t, for instance, supply a root name to be used to identify a set of recordings as you can on, say, the Portacaptures, or create a folder to group a set of recordings by theme. A typical recording name might look like 240615_122813, which would mean it was started on 15th June 2024 at 12:28 and 13 seconds.
Another icon, Input, accesses settings such as low-cut filtering, mono mix on/off for the built-in mics (by default the mics work in stereo, mono mix on makes them behave as a mono mic), plug-in power, phantom power and 1+2 Link for the external mics (provides stereo linking, but Mid-Sides is also an option for the external mics). While there is what amounts to a way of setting input levels if you want to, it isn’t here! An Output icon accesses a menu option to use or disable the volume control — I can’t see why you’d want to disable it, myself.
The Rec icon accesses a few recording parameters, including sample rate (44.1, 48 or 96 kHz) and metadata to the iXML standard. Notably ‘bit depth’ (digital
Although unable to set the mic gain (you don’t need to given the 32-bit recording) you can set the output levels and mix of the different mics, and the mix can both be auditioned and recorded alongside the mic channels.
word length) is missing and that’s because, as I mentioned, this machine always records files at 32-bit float. A significant parameter is Rec Source, which offers two options: Pre Mixer and Post Mixer. More about this below, where I discuss the output mixer. There’s also an SD Card icon — you can test or format the SD card here — and another called USB, for when you connect the H4e to a computer. You’re offered a choice of File Transfer or Audio Interface modes, and for the latter there are a few setup options, such as whether the H4e functions as a stereo or multi-channel interface. Apart from verifying that it did indeed show up on my Mac as a valid interface offering 32-bit floating point recording, I didn’t pursue this further.
Choosing File Transfer means it will show on your computer as a storage drive. You will see a list of folders, each with the ‘name’ of a recording made earlier, and in each folder is a set of files that actually hold the data. For instance, imagine the recording 240615_122813 we made earlier had the onboard mics set to on and each of the external inputs active as two mono mics. You’d see four files: ‘240615_122813_Tr1.WAV’ for the first of the external mics; ‘240615_122813_Tr2. WAV’ for the second; ‘240615_122813_ TrMic.WAV’ for the two onboard mics (whether stereo or mono); and ‘240615_122813_TrLR.WAV’, the output of the mixer section of the recorder.
Finally, we come to the System icon. This is for the settings not already covered above, with notable examples being Accessibility, Bluetooth and Help. Accessibility turns on what Zoom call Guide Sound: a female American voice speaks every heading when it’s highlighted, speaks every value you select and so on. It beeps whenever messages appear too. This is audible over the speaker except if headphones are plugged in. I’ve not seen this in a recorder before and I’m genuinely impressed, as it could make high-quality recording available to the visually
impaired. Nice one, Zoom! Bluetooth relates to the optional Bluetooth adaptor, the BTA-1, of which more later. The Help option brought a wry smile...
The transport controls on the front of the recorder do exactly what you’d expect, but what about the other four blue buttons? The Mic button turns on/ off the built-in mics for recording, 1 turns on the left-hand external mic and 2 the right-hand one. As each is selected, a red light shows above the button to indicate that the corresponding mic/array is armed for recording, and the display shows traces that correspond to the volume on each mic’s channel. It’s the sort of thing you might normally use to set your recording levels — but, of course, on this machine you don’t need to do that! The state of the Mic buttons is retained when the recorder is switched off, so if you left, say, the built-in mics armed when you switched off then when you next switch on they would still be armed and ready to record. It’s when you press the big red button in the middle that recording starts. Pressing the Mixer button brings up a new screen that, as you might expect, allows you to mix the output of the mics into stereo audio that can be listened to using the speaker or headphones. When
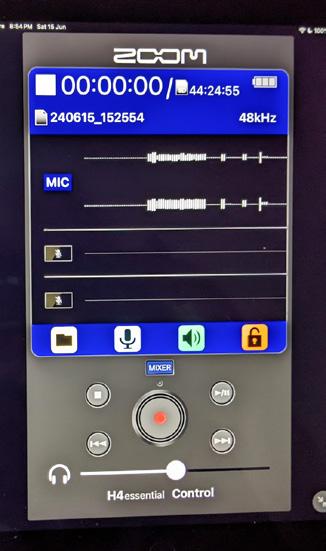
For those who like touchscreens, or want remote control, there’s an iOS app (though as yet there’s no sign of an Android equivalent).


you’re recording, this mix is also saved as a stereo file, as I mentioned in passing. I also mentioned the Rec Source option above and, in conjunction with this screen, this can have a big effect on the files you record. When set to Pre Mixer, each of the mic files will be at a default level, while the stereo mix file uses the levels set in the mixer. When set to Post Mixer, each of the mic files will use the levels set in the mixer, so, by a slightly circuitous route, you can set the gain levels for your recordings if you wish to.
You can also buy, separately, the optional BTA-1 Bluetooth adaptor, which works for the H4e and a number of other Zoom devices (it’s the same as the one for my H3-VR, for example). When plugged in, this provides a Bluetooth connection to compatible devices that are running the free control app. Currently, these seem only to be iThings, with no support for Android devices, which was a surprise — it’s a control app after all, not an audio one — so hopefully that will change in the future. Fortunately, I have an iPad, so I downloaded the H4essential Control app from Apple’s App Store, installed the BTA-1 in the H4e, started the app and established the connection.
As you can see from the screen, the app largely mirrors the H4e’s hardware UI, though you don’t have equivalents to the twiddly wheel and the Enter button. Instead, you just tap icons and lists in time-honoured tablet fashion. Frankly, it’s nicer than the twiddly wheel, but the main reason for using the app on an iPad or iPhone is to be able to control
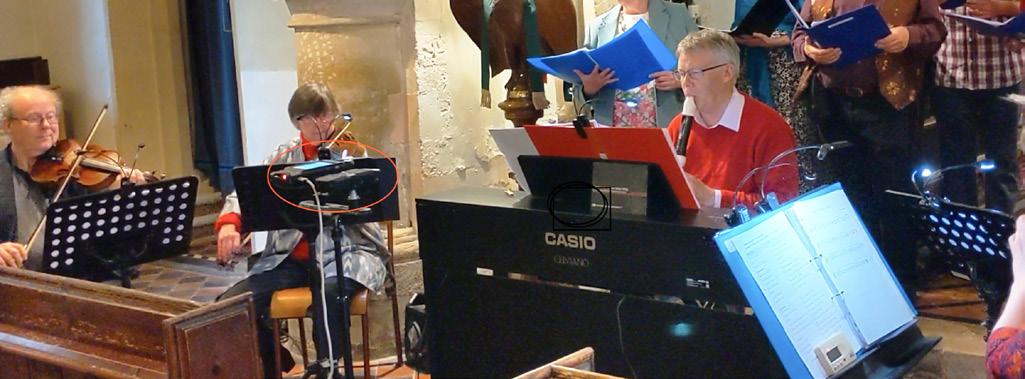
The test recording session, captured on both a Zoom H4essential and a Tascam Portacapture X8: the quality of results was very similar (and good in both cases!).
the recorder when you can’t be with it. For example, you might have it recording a band from the front while you’re back in the audience, or maybe you’re recording yourself playing guitar and don’t want to have to put down your instrument between takes. You can start and stop recording and perform similar tasks very easily. It’s not an essential add-on, but it’s a very useful option.
The H4e offers an interesting, simplified approach to recording, then, but what’s it like in use and how good are its recordings? On the evening of the day the H4e arrived, my wife’s band were playing in a charity concert at a local church. I’d already decided to record the concert using my Tascam Portacapture X8’s built-in mics, which I regard quite highly, but it was a no-brainer to take the H4e along and set it up next to the X8. I spent a little time setting up the X8 using its superb mobile-phone-inspired interface. For the H4e, I left Rec Source at its default Pre Mixer setting, and did little more than point it in the right direction and ensure its built-in mics were turned on. I set the X8 to record in 32-bit float, but with the H4e didn’t have to, since it’s the only option.
On the SOS website (https://sosm.ag/zoom-h4e) you’ll find a couple of recordings to accompany this review. Originally 48kHz/32-bit float WAV files, but converted to 48kHz/24-bit WAVs, these were captured using the onboard mics of two recorders, the Zoom H4e and my Tascam Portacapture X8, simultaneously. The originals were made at a concert on 31st May 2024, and the piece, ‘Lament For A Music Teacher’, was
Later, I loaded the recordings into Logic Pro, which can now use 32-bit float files natively. The Pre Mixer recordings of the H4e were startlingly quiet to my ears; obviously, the designers had taken advantage of the extremely low noise floor of 32-bit float to set a very conservative recording level that would not be overloaded under almost any circumstance. The X8 file was a good bit louder, but only because of my old habits when setting the gain; I could have set its recording levels as low as the H4e’s, or used the latter’s Post Mixer setting to bring its levels up, without affecting the quality of the result. To my ears both recordings were very good and I’d be happy to use either device.
Clearly, the H4e is capable of making excellent recordings, but so too are other recorders. What makes this recorder different is Zoom’s conscious drive towards simplifying its use. Rather than opt for a nice-to-use, very well-thought-out UI like the Portastudio X8’s, they’ve replaced many of the parameters normally found on recorders with fixed default values. For instance, and probably where this all started, removing the need to set recording levels by using only 32-bit float — because of that choice, I’d always leave Rec Source at its default setting
composed by Anne Gregson and performed by Fiery Dragon Company. The only processing on the files was gain, to make them approximately the same volume.
File recorded on the Zoom H4e: Music Teacher on Zoom.wav
File recorded on the Tascam Portacapture X8: Music Teacher on Tascam.wav
of Pre Mixer; who needs to be mucking about with gain all the time anyway? Then there’s the deliberately simple file system: why should you have to worry about what to call files? The date and time of the recording are there. What else do you need?
Although I’m now more used to touchscreens, I found the H4e’s simpler user interface OK to work with, and this was greatly helped by there being fewer decisions to make than with most other recorders. Were there the number of options offered by my X8, I think I’d have struggled and it might have proved quite clunky and awkward over time. But there aren’t, and once you’ve set up the few things you need to the first time, you probably won’t want to do much more. You will, as its makers suggest, “just press record”.
The lack of touchscreen no doubt contributes to the good battery life; the H4e requires only two AA batteries, compared with my Tascam Portacapture X8’s four, and they power it for at least as long (quite a long
time if not supplying phantom power for external mics). Finally, booting up is admirably quick (4-5 seconds).
As someone who’s been recording for quite a while, I do feel happier using a more controllable device. My X8 has, for instance, a manual mode that allows me to tweak lots of parameters, plus goodies like a built-in compressor and an elegant UI. So I won’t be trading it in for an H4e. But perhaps that says more about me than the devices themselves — do I really need those features? Arguably not. In fact, there will be plenty of people who actively wish to avoid that kind of messing about, and just want to guarantee they can be up and running quickly. For them, the H4e could be a revelation. Just press record. I suspect Zoom will sell these by the bucketload. They deserve to.
$ H4essential £199.99. H1essential $99. H6essential $299.99. BTA-1 Bluetooth adapter $39.99.
T Zoom North America + 1 631 542 5270. E info@zoom-na.com W www.zoom-na.com


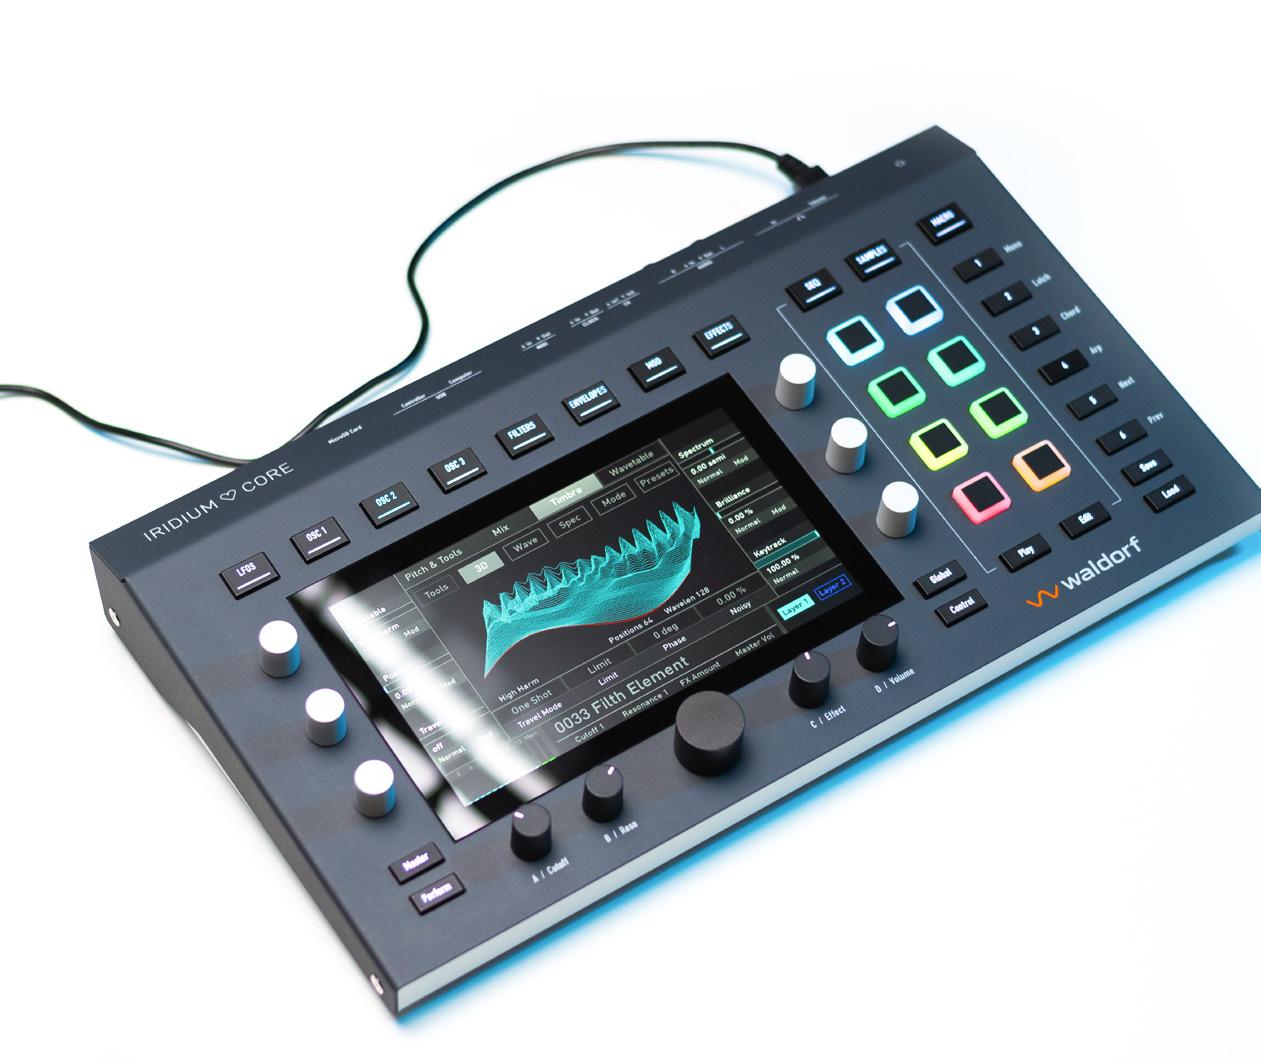
Waldorf’s all-encompassing Iridium engine is now available in its smallest form yet.
RORY DOW
As you may already know, the Iridium is not just any digital synthesizer. It’s Waldorf’s flagship. With a sprawling synthesis engine embracing virtual analogue, wavetable, frequency modulation, phase modulation, granular, multisampling and physical modelling, the Iridium is a true all-rounder. While being everything to everyone may seem impossible, the Iridium’s sheer scope is undeniably impressive.
The Core is the latest option in an expanding line-up and the smallest Iridium thus far. It measures 346 x 200 x 64mm and weighs 2.2kg, so it will fit comfortably on your desktop. It retains all of the features of its bigger siblings but with a reduced voice count of 12
(16 in the bigger models), a few changes to the inputs and outputs on the back, no keyboard, and fewer dedicated encoders.
Like the previous models, the Iridium Core revolves around a large 1024x600-pixel colour touchscreen. Most dedicated controls for synthesis parameters found on the larger keyboard and desktop models have been sacrificed for a smaller form factor, but you still get the top row of Section buttons for navigating, Macro buttons that can be freely assigned, the six contextual endless stepped encoders, eight rubberised pads for triggering notes and chords, and a selection of other encoders and buttons for quick access and navigation. One addition that helps with the reduction in dedicated controls is the four assignable Control knobs located underneath the screen. By default, they adjust filter cutoff, resonance, effects send and patch volume, but they can also be customised per patch,
giving you control over the most important parameters for any given preset.
Iridium’s synthesis capabilities remain identical to those of its older siblings. Patches between all the Iridium models can be shared and loaded on any other model, which is easy thanks to the microSD card slot. The Iridium Core has 2.6GB flash storage for samples, pre-loaded with a 2GB library of factory samples. There are over 1700 patches, with space to save several thousand more.
The synth engine uses two layers, which can be stacked, key-split and panned and assigned a custom number of voices per layer. Each layer uses a voice per note, so if you stack two polyphonic layers, you get a maximum of six voices. Layers can also be played bi-timbrally from different MIDI channels. Each layer is essentially a full synth patch, with three oscillators, three filters, six envelopes, six LFOs, a Komplex modulator and up to five effects. Layers are always saved together as a ‘Multi’ but can be loaded individually.
The power of the Iridium lies in its many and varied synthesis methods. These include classic wavetable synthesis that Waldorf are well known for, virtual analogue including eight-voice unison, multisample and granular (combined into what they call ‘Particle’ oscillators),
physical modelling, a speech synthesizer and even a highly customisable modular environment called Kernels, which allows you to combine amplitude modulation, frequency modulation, phase modulation, ring modulation and phase distortion in many different ways.
For filters, each layer has up to three multi-mode filters with different models that cover the full gamut of clean to filthy and can be routed in different ways. The filters are digital (unlike the analogue filters on the original Waldorf Quantum) and operate in stereo, which is great given that many of the oscillator types are stereo.
All this synthesis power is backed up by oodles of modulation: six LFOs (per layer), six envelopes with adjustable curves, and the aforementioned Komplex modulator, which combines two multi-stage waveforms to create a complex, looping, synchronised modulation source. Each layer has a 40-slot modulation matrix to help you make the most of all these sources.
In terms of effects, there are phaser, chorus, flanger, delay, reverb, EQ, overdrive and compressor. You can choose up to five per layer, and most parameters can be modulated. In addition, there is a global one-knob compressor and a bass boost option.
A 32-step sequencer and arpeggiator help keep things moving with advanced features like scale quantisation, rhythm patterns, swing and even MIDI output. The touch screen can be used as an X/Y pad modulation source too. In terms of MIDI, the Iridium engine supports poly aftertouch and MPE for whatever form of polyphonic expression you prefer. The Iridium Core has even kept its bigger siblings’ CV capabilities, albeit in a slightly reduced
Waldorf Iridium Core $2399
PROS
• It is the most affordable version of the Iridium yet with very few compromises.
CONS
• Reduced polyphony of 12.
• Mini-jacks for MIDI I/O should not be a thing at this price.
SUMMARY
form, with clock in and out and two CV inputs that can be used to play the synth monophonically or as modulation sources.
We’ve covered the finer details of the synthesis engine in previous reviews, so if you want the full breakdown of anything mentioned above, I refer you to our previous reviews of the Waldorf Quantum (Iridium’s digital/analogue predecessor) and the Iridium Keyboard in the April 2019 and September 2022 issues, respectively. I’ll summarise by saying that the Iridium engine is a powerful beast that encompasses many synthesis types and has the potential to keep you in new and exciting sounds for many years.
Waldorf are aiming to sell the Iridium Core to people who cannot afford a flagship synthesizer that costs thousands. And they’ve done an excellent job of making it compact and more affordable, although you still cannot describe it as cheap.
Have they made the right decisions on what to cut from the bigger flagships? Clearly, they did not want to compromise on the engine. Patches are identical to the bigger siblings, and that makes total sense. I assume that the Iridium Core is running on a slightly less powerful chip, hence the reduction in the number of voices from 16 to 12. But that is the only software downgrade.
The hardware is where the cuts have been made, most obviously by having fewer encoders and no keyboard. The side-effect of this is that the Iridium Core starts to feel a bit like a smart tablet with a few dedicated knobs and buttons attached. The lack of dedicated synthesis controls could impact your ability to use muscle memory to program the synth. I’m not sure that Waldorf could have avoided this, but it’s a fact nonetheless, and it’s worth bearing in mind that you can spend the exact same amount of money elsewhere and get a full hands-on synthesizer experience (just not the Iridium experience).
The Iridium Core has many of the same connections as its siblings: a 12V DC power socket and switch, headphone output, stereo audio inputs and outputs on unbalanced TS quarter-inch jacks, four CV connectors on 3.5mm jacks (reduced from eight on the Iridium Keyboard), MIDI in and out also on 3.5mm jacks, USB connectors for USB MIDI computer connection, and a USB host socket for class-compliant controllers or USB storage. Also, there’s a microSD card slot for file transfers, backups and OS updates. There are no pedal inputs, which makes sense as these can be supplied via a MIDI controller.
All this being said, the Iridium is still a flagship synthesizer. It is still an unbelievably powerful synth that could keep you busy for years. As a digital polysynth, it’s hard to think of an alternative that can do more, and you could spend a lifetime getting the best from it. The Core represents the most cost-efficient way to own an Iridium, and many people will prefer the smaller design and appreciate getting access to the ‘full’ synthesis engine.
The Iridium software is full of nice little touches that make sound design more effective. The favourites system for patches is a lifesaver when you have thousands of sounds to go through. My personal favourite is the ability to save oscillator settings as presets. This allows you to save your favourite oscillators, including samples, or the much more complex Kernels configurations, so that you can reuse them in other patches. I point these things out as examples of how mature the Iridium engine is now. It’s six years old, has had many updates, and it builds upon 35 years of digital synthesis expertise.
I was sceptical that the Iridium Core may have been hacked away at too much, but after spending time with it, I think it’s a great package. The build quality is excellent. You get all the power of the Iridium engine and the only real things missing are four voices and some knobs and buttons. Waldorf are doing a great job of offering the Iridium/ Quantum engine in as many different forms as possible, and it feels like there’s an option for everyone.
The Iridium contains 35 years of Waldorf’s expertise in digital synthesis, and the Iridium Core is the most affordable version yet. Despite a slightly reduced voice count, it retains all the synthesis capabilities of the bigger Keyboard and Desktop versions. $ $2399 W www.waldorfmusic.com
The price is higher than I expected, especially for a unit using mini-jacks for MIDI, and I’m not sure why Waldorf kept the rubberised pads. They don’t serve much purpose other than to trigger notes and chords, and they aren’t velocity or pressure sensitive, so they are just gated buttons. I’m sure the price could have been more competitive without them, or at least the MIDI in and out could have been upgraded to 5-pin DIN.
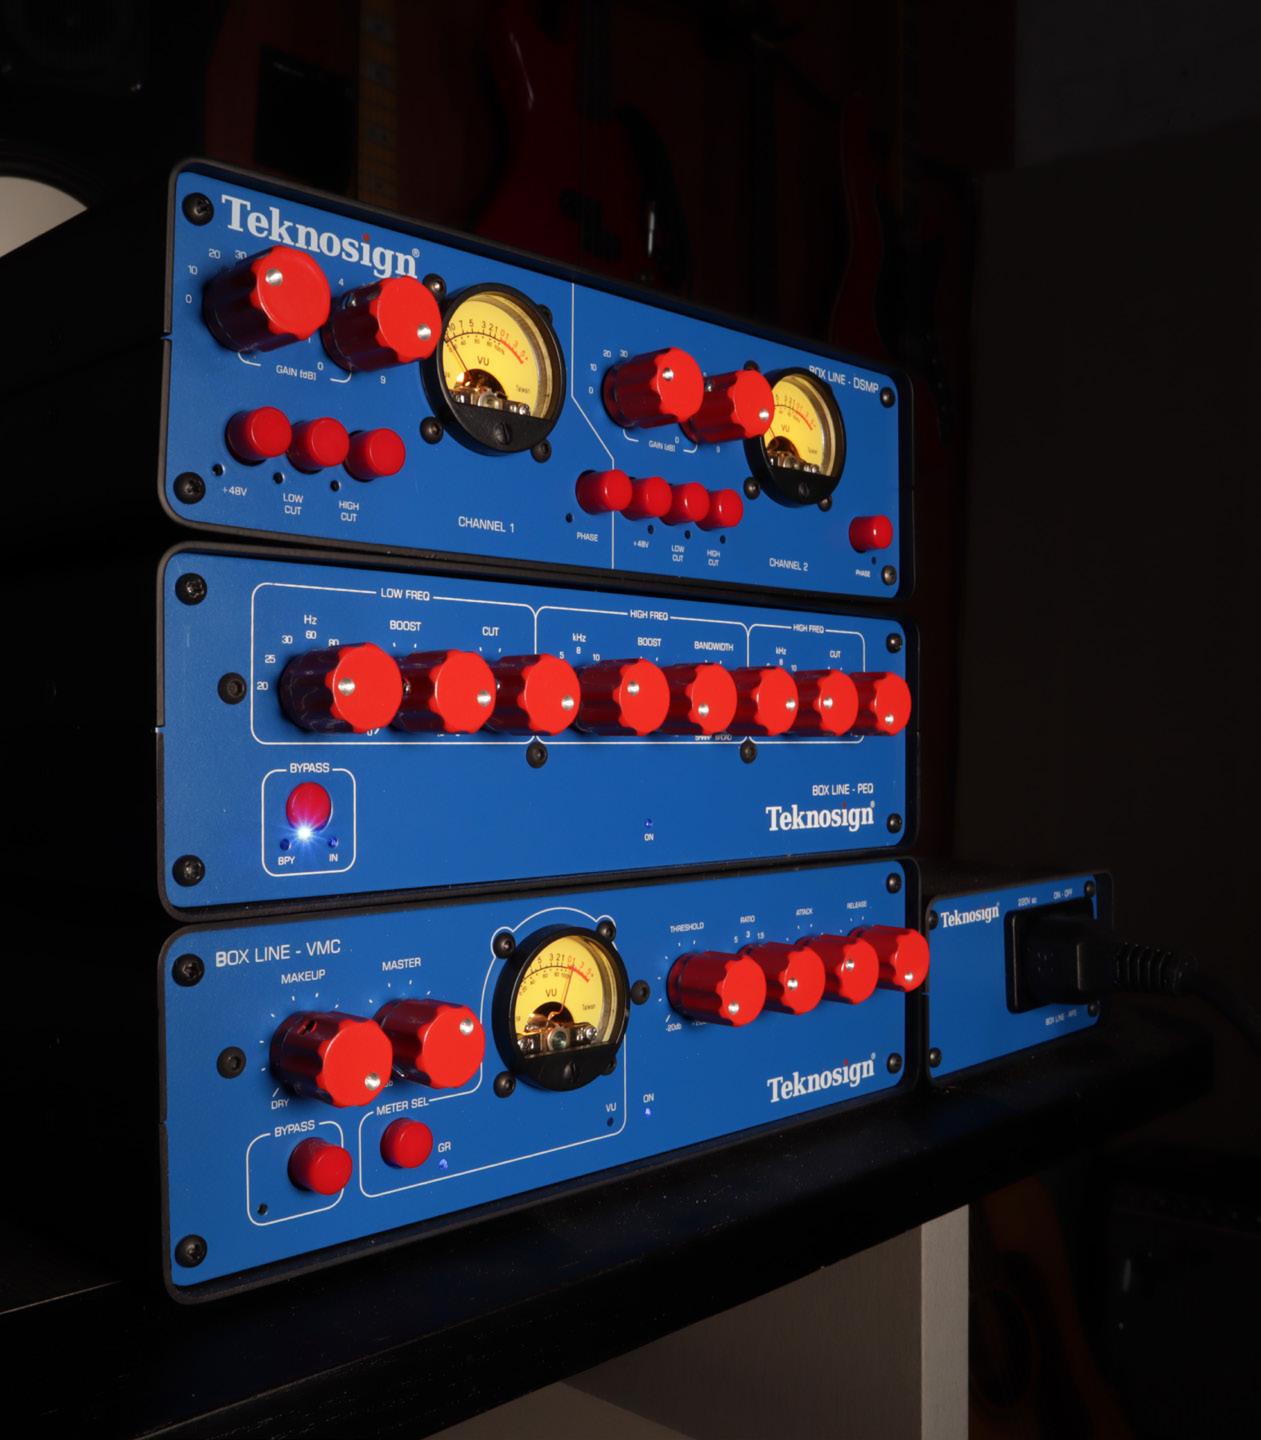
With bold looks, original designs and affordable pricing, Teknosign’s preamp, EQ and compressor offer an intriguing alternative to better-known names.
t’s amazing how things can fly under the radar, even in this age of information.
I mean, if there was someone out there offering a large range of high-quality analogue audio equipment, mostly based on original designs and built entirely in
Europe, you’d expect to know about it, right? Especially if that equipment was being offered at very competitive prices? Well, perhaps I’m just out of the loop, but I hadn’t heard of Teknosign until I ran across their booth at this year’s NAMM Show. And when I did, I was impressed.
Analogue outboard is now a choice rather than a necessity, and the market has changed as a result. There used to be numerous European and American manufacturers who specialised in developing affordable, functional, engineering-led designs, but quite a few have disappeared or changed their business models. The low end of the market is now dominated by Far Eastern manufacturing, and by copies of vintage outboard. A few companies successfully buck the trend — Drawmer, Radial Engineering, DAV and Lake People spring to mind — but increasingly it seems as though Western manufacturing and original designs are being squeezed out of the picture.
So it’s refreshing to encounter a European manufacturer who are doing things their own way. Based in Liguria, Italy, about halfway between Genoa and Pisa, Teknosign began producing audio equipment in 2011, building on the already extensive electronics manufacturing experience of company founders Riccardo Angeletti and Claudio Furno. Notably, Teknosign don’t just design equipment to be manufactured offshore: they build
• Good-sounding processors, with the features you’d expect from professional units.
• Pleasingly affordable, especially considering they are built entirely in the EU.
• Versatile, well thought-out semi-modular system allows up to eight units to be powered from one PSU.
CONS
• Loose controls on review units.
• Panel legends under the knobs are hard to read.
SUMMARY
Teknosign’s Box Line is an impressive range of European-made analogue outboard, containing a broad range of processors that are affordable to almost everyone, yet perfectly at home in professional recording studios.
everything in their own factory, and in fact their relatively affordable prices are made possible by their ability to make almost every component themselves. PCBs, cases, knobs, buttons, switches, transformers and more are all produced in-house, and the only items that have to be bought in are meters and audio connectors.
New items are being added to the Teknosign range all the time, with the launches at this year’s NAMM Show including lunchbox-type guitar and bass amplifiers. There’s a pretty extensive selection of utility products, such as patchbays and power conditioners, and a handful of 1U rackmount processors including two summing mixers. But most of the company’s studio tools are currently offered as part of what they call the Box Line. These processors occupy one of two form factors, which can be used as freestanding desktop units or housed in a 2U rack enclosure that is sold separately. A single 2U rack housing can accommodate four standard Box Line processors or two Double Width units.
At the time of writing, there are nine products in the basic Box Line. Many of these are utility devices — there’s an active and a passive DI, a passive stereo mic splitter, a headphone amp, a powered USB hub and a phantom power supply, for example — but the Box Line also includes the single-channel SSMP or Solid State Microphone Preamplifier, and what must be the world’s most compact 16:2 summing mixer. The Double Width range, meanwhile, comprises three products. The DSMP is a two-channel version of the SSMP, the PEQ is a solid-state equaliser inspired by the classic Pultec EQP-1A, and the VMC is a rather interesting compressor, of which more presently. For the purposes of this review, Teknosign sent me these three units along with the one basic Box Line device I haven’t yet mentioned.
That device is called the RPS, and its diminutive front panel is home only to a fused IEC inlet and an on/off switch. Turn it around, though, and you’ll find eight DC power sockets. All powered Box Line and Double Width processors run on 24V DC, so a single RPS can be used to power up to eight units, with patch cables of different lengths included. It’s no different really from powering a guitar pedalboard, except that you don’t have to worry about devices with non-standard requirements, and the front-panel on/off switch on the RPS means
The most obvious alternative I can think of for the DSMP, in terms of design and format, is DAV Electronics’ BG1. On the Pultec-style EQ front, both Warm Audio and Klark Teknik make keenly priced valve-based copies of the original EQP-1A. And if you’re looking for an affordable analogue compressor in a similar compact format, you could consider one of several options from Golden Age, though these are all vintage-inspired rather than original designs.
you don’t need to access the rear-panel on/ off buttons on the processors themselves.
With their contrasting blue front panels and red knobs, the Box Line products are eye-catching and very distinctive. I rather like the cosmetics, which come across as friendly and functional at the same time, and the only minor criticism I can level is that because the knobs protrude quite a long way from the cases, any legending underneath them is hard to see. The cases are made of aluminium, and seem robust. The settings of switched functions such as phantom power on the mic preamp or bypass on the compressor are clearly indicated using LEDs. Some of the controls on the review units were a little wobbly and I’d have liked a bit more resistance from the pots, but in general there’s nothing to suggest they wouldn’t survive intensive use over a long period.
Audio I/O on all three of the Double Width units is exclusively on rear-panel XLRs, and is limited to the basic ins and outs. There’s no external side-chain input or stereo link function on the compressor, for example (although a 1U stereo version is in the works), and no high-impedance input on the mic preamp. All are designed to operate at ‘professional’ levels, with the compressor and equaliser accepting inputs of up to +20dBu and the metering configured so that 0VU=+4dBu. All three come with 24V external power supplies, so the RPS is very much an optional convenience rather than a necessity.
Turning first to the mic preamp, this offers a 69dB gain range in 1dB steps, courtesy of coarse (10dB) and fine (1dB) rotary switches. Phantom power and polarity are individually switchable for each channel, as are not one but two filters. The high-pass filter has a 12dB/octave slope turning over at 80Hz, and there’s also the much more unusual option of a 6dB/octave low-pass
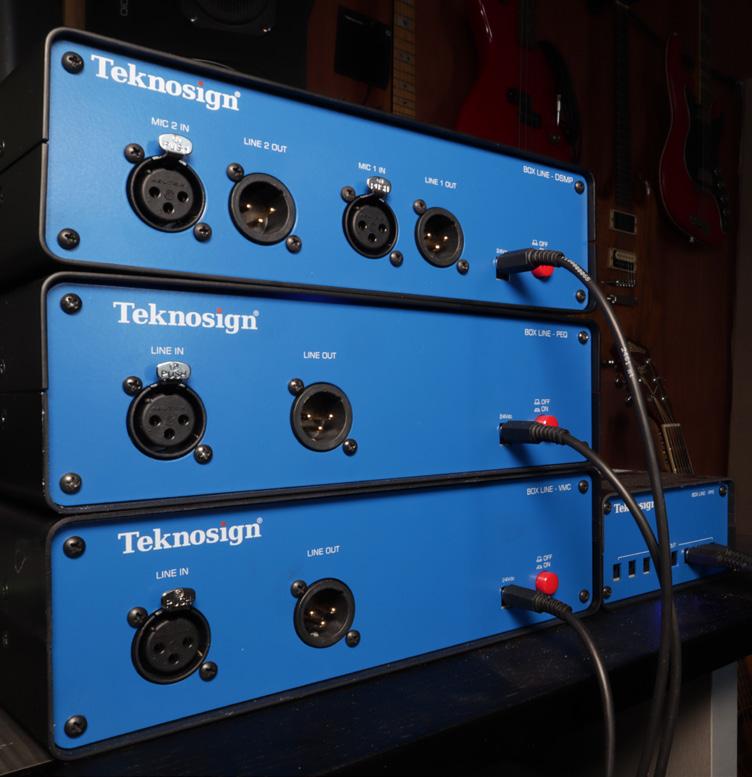
filter turning over at 10kHz. The circuit itself is a transformerless, solid-state design, and offers a huge frequency range of 15Hz to 300kHz. The most surprising specification, though, is the 600Ω input impedance.
Nowadays, most gear is designed to have comparatively high input impedances and low output impedances. The rule of thumb is that if the input impedance is at least 10 times the output impedance of the source device, loading effects will be minimal and the frequency content of the source will be preserved. Typically, therefore, modern mic preamps have an input impedance of at least 1.5kΩ and often much more, while mics are commonly specified with a 150Ω output impedance. The DSMP’s design could be seen as harking back to an earlier era when impedances were matched to maximise power transfer. Practically speaking, it’s likely to make little difference with electronically balanced mics, but could have a noticeable effect on the sound of transformer-balanced designs, especially vintage ribbon and dynamic models.
That was borne out to an extent in my testing. The DSMP is certainly a very capable general-purpose mic preamp, and when confronted with a modern capacitor mic, does exactly what you’d hope, amplifying the signal without adding tonal changes, distortion or noise. But it sounded particularly good on, for example, the Warm Audio WA-44 I reviewed in last month’s issue. As a sort of joint test I recorded an entire song using nothing but the WA-44 through the DSMP (and, on occasion, the PEQ), and the results really jumped out of the speakers in a way that recordings made with ribbon mics don’t always do.
The choice of VU meters gives the DSMP vintage appeal, but means that if you want your output to register at a healthy mark on an A-D converter calibrated to professional levels, you’ll have to get used to the sight of the needle being pinned against the end stops. Not a problem in itself, but it would be nice if there was also some visual indication of overloads. Put an attenuating device in the signal chain after the DSMP — the VMC will do nicely — and
you can overdrive it to good effect, though you need to be a little bit careful as the onset of saturation is quite sudden. Approached more conservatively, I’d be happy to use the DSMP for critical tasks such as stereo main pairs, and my measurements suggested that the two channels on the review unit were matched to within 0.1dB or so.
Of the three Double Width units in the Box Line range, the PEQ is the only one that’s obviously indebted to a vintage design. Its three EQ bands follow the template established by the classic Pultec EQP-1A, meaning that you can apply up to 15dB boost and/or cut in the low band, up to 15dB semi-parametric boost in the midrange and a separate high-frequency cut. The Pultec is a passive equaliser that uses a valve make-up gain stage, and hence is sometimes described as a valve EQ. Both the valve stage and the input and output transformers contribute to its distinctive thickness or colour, and engineers have been known to patch a Pultec in set flat, for these qualities alone. That’s not something you’d do with the PEQ, which is a transformerless device that uses solid-state circuitry in its active stages, but it’s still a pretty sweet-sounding EQ. With midrange boosts in particular, there’s an appealing ‘lightness’ to the sound that might be harder to extract from a full-fat Pultec, and of course you can still do the well-known trick of simultaneously boosting and cutting in the low band that is so characteristic of the Pultec design.
Compared with the original, Teknosign have added extra switched frequency options to the low band and the high-cut band. The latter are all at potentially useful frequencies, and although I had my doubts about the value of the 20Hz and 25Hz settings on the former, their effect can be audible well into the midrange — and when you do the simultaneous cut/boost thing, each setting does sound distinctly different. Selecting the 20Hz setting and turning both the Boost and Cut controls a long way up can do something very nice for bass instruments, and makes a surprising difference even on more midrange-y sources such as vocals.
And so to the compressor, which is perhaps the most unusual of the three
units. VMC stands for “variable-mu compressor”, a term that usually denotes the use of a valve as the gain-control device. But, like the other two Double Width units, the VMC is a defiantly solid-state affair. Little information is forthcoming about the actual operating principle, but unlike many actual valve compressors it has the full set of standard controls, with attack and release both running from 10ms to 500ms and six ratio settings including 1:1 at one end of the scale and infinity:1 (limiting) at the other. The VU meter can be set to display either gain reduction or input level, and there’s a hard bypass button as well as two further knobs. On the review unit, these were rather misleadingly labelled Makeup and Master; the Makeup control is actually a wet/dry mix balance knob, while the Master applies ±20dB make-up gain following this.
Despite the absence of valves and transformers, the VMC certainly isn’t a boring utility compressor, but neither is it a one-trick pony. With longish time constant settings, it does the sort of gentle smoothing-out that I associate with some old-school designs: not transparent, exactly, but instinctively sympathetic to the source, and seeming to maintain the natural dynamics of a voice or bass guitar even as it shaves 10dB off the louder bits. Turn the release control all the way anti-clockwise and it gets somewhat more ‘grabby’, and can be made to pump on percussive sources, though it’ll never be as fast as something like an 1176. Initially I wasn’t convinced that the wet/dry control was going to be all that useful, but discovered that blending a small amount of the dry signal back in can be a really nice alternative to backing off the threshold when you’ve gone just that bit too far. As is often the case, I got the best results when I set the controls by ear rather than by eye; this is much easier to do on hardware than it is with plug-ins, and led me to use settings I wouldn’t have thought to try otherwise. The forthcoming stereo version will make for a really tasty bus processor at, one hopes, a very competitive price.
All in all, I think there’s a lot to like about these cheerful and compact little boxes. The competitive pricing may be apparent in the feel of the controls, but it certainly isn’t reflected in either the sound or the capabilities of these processors. They lend themselves equally well to desktop or rackmount use, and the fact that each Double Width unit comes with its own power supply also means that they’re self-contained, so you can get started without the need for a 500-series chassis or similar. Then, once you have a couple of Teknosign processors in your collection, you can think about adding the RPS to help tidy everything up.
As I mentioned at the start of this review, using analogue outboard in this day and age is a matter of choice rather than necessity. Teknosign’s comprehensive range opens up that choice to many new people without compromising on audio quality.
$ DSMP $869; PEQ $599; VMC $685; RPS $295. T Teknosign +39 0187 559992
E info@teknosign.it
W www.teknosign.com
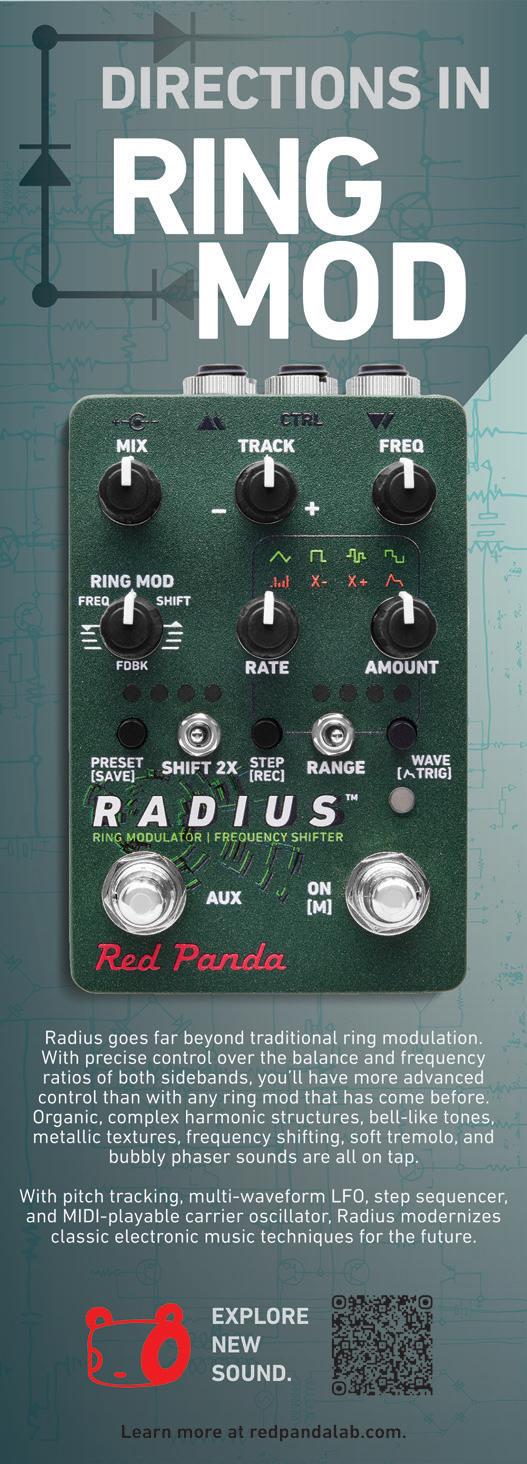
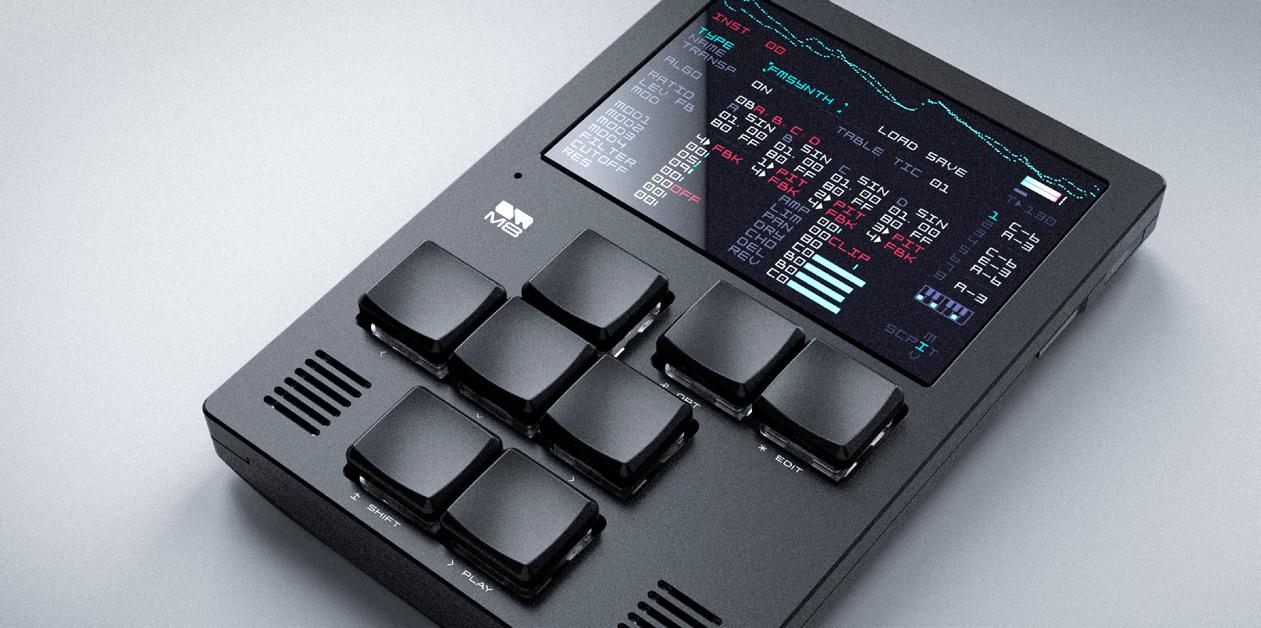
This powerhouse portable tracker might be your new best M8.
RORY DOW
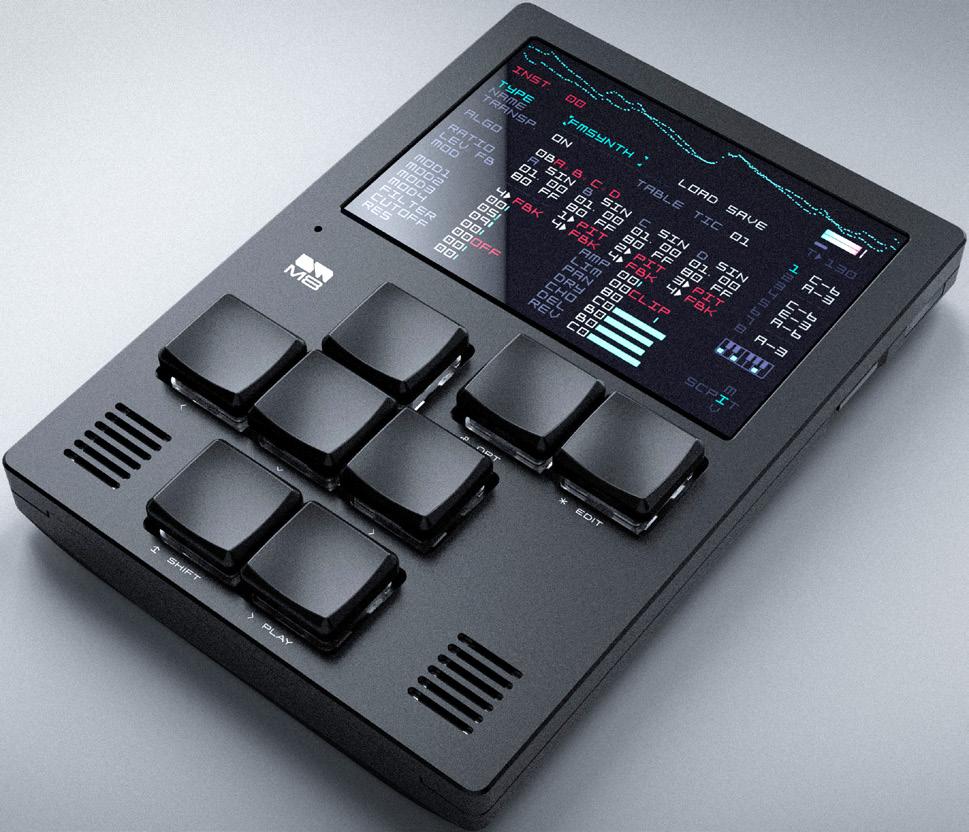
Portable tracking is a booming, albeit niche, industry. Dirtywave, the Los Angeles-based company behind the small but impressively powerful M8 tracker, have been quietly building a loyal following of M8 fans for about two and a half years. During that time, the M8 received many software updates, and despite having only one developer, it is currently on operating system version 3.3. And with a new Model:02 revision, it’s better than ever.
Timothy Lamb, the man behind Dirtywave, is a well-known figure in the tracking and chip-tune music scenes. Before moving into hardware production, he wrote a software tracker called Little Sound DJ, which ran on the Game Boy platform. It proved highly popular and serves as the basis for the M8 today. So, despite Dirtywave being a new name in town, the M8 software is mature and well-developed. The new Model:02 version improves on the first edition with a new aluminium enclosure, larger 3.5-inch display (from the original 2.8), improved battery life (up to 12
microphone, and USB-C instead of micro-USB. In all other aspects, the Model:01 and Model:02 are identical.
The M8 is surprisingly sleek and compact, measuring 96 x 133 x 20mm. It fits nicely in the palm and is operated like a smartphone — with two thumbs. The 3.5-inch IPS touch display is small but incredibly sharp. Data input happens through the eight mechanical key switches and, occasionally, the touch screen. I love the mechanical keys. They give the unit a classy feel. Stereo audio inputs and outputs, plus MIDI in and out, are on 3.5mm TRS jacks and sensibly placed at the top of the unit. At a push, you can use the onboard speakers instead of the line output (which doubles as a headphone output), but they are tiny, so keep your expectations low. On the sides are a recessed on/off button and a slot for a microSD card.
The battery provides about 12 hours of use. It charges through a USB-C port, which also functions as a stereo-in/
size, and loading and saving songs is almost instantaneous.
In many respects, the M8 is a classic tracker. Eight tracks of sample sequencing are arranged in rows of hexadecimal notes and ‘FX’ (more on these later). But the M8 has many features that take it beyond what you might find in a traditional tracker. Virtual synthesizers cover a range of synthesis types, including classic console chip emulation, FM, physical modelling and virtual analogue, and there are effects (reverb, delay and chorus), modulation, tables (a sort of pattern within a pattern), stem rendering, groove templates and scale quantising.
Trackers approach sequencing a bit differently from piano-roll-based DAWs and sequencers. Tracks are organised into rows, and notes flow from top to bottom. Each of the M8’s eight tracks can play one of 255 Chains. A Chain is a playlist of up to 16 smaller patterns called Phrases. Each Phrase can contain up to 16 steps. So, at the most, you’re working in 16-bar chunks. Each
step within a Phrase can play a different note on any instrument and apply up to three FX, which are instructions to transform the note somehow.
The eight tracks are monophonic. This standard limitation of trackers was originally there to keep CPU usage in check, and it has its downsides. You can’t sequence chords or polyphonic phrases without using multiple tracks, although the M8 does have some workarounds, which we’ll come to. However, the monophonic tracks have some creative benefits too, making them ideal for sample slicing, bass lines and leads. The ability to address a different sound on each step of a Phrase is also one of those features that, once you click with the tracker workflow, is sorely missed when moving back to more traditional sequencers. These inherent trackerisms helped shape music genres like chip-tune, jungle, and IDM back in the 1990s.
Using the M8 requires a certain amount of muscle memory. Almost everything is done with the eight mechanical keys on the front panel. There are up/down/left/right keys for navigation, a Shift key, an Option key, an Edit key and a Play button. With just these, one can navigate pages, make selections, edit values, copy, paste, etc. Some time spent learning shortcuts is necessary to become proficient, but once the muscle memory kicks in, it’s a surprisingly fast workflow.
The navigation of the M8’s pages is very logical. When you start a new song or load an existing one, you’ll begin at the Song page. If you press Shift and Up, you’ll move to other Song-related pages. Pressing Shift and Right will drill down into more detail, first editing the currently selected Chain, then with another press, the Phrase chosen within that Chain. A further right move will edit the Instrument assigned to whatever step you had selected in the Phrase. No matter which page you’re on, if you navigate up, you’ll get to pages relevant to the section you’re in, and if you navigate down, you’ll get to the Mixer and Effects pages. You can always see a small map showing you where you are in the system, although after a few days of regular use, you stop needing it. It’s an intuitive and fast way to move around the current project.
An M8 Song is composed of up to 256 rows. In each row, you can select one of 256 Chains to play for each of the eight tracks. To reiterate, a Chain is a playlist of up to 16 different Phrases, and a Phrase, in turn, is a pattern of up to 16 steps.
Instruments are the core of the M8, and you can have up to 128 Instruments defined per project. If you’ve used a tracker before, you’ll know that samples are the bread and butter of tracker music, so of course, the M8 has a powerful sampler on board. The sampler reads and writes directly to the SD card, so there is no limit on sample length. Each sampler Instrument can load or record a single sample from either the line inputs, USB inputs, or the built-in microphone. From there you can transpose, edit the start and end points, loop with different loop types, and assign up to 128 slices. Some offline edit operations are available, like normalising, cropping, fading in or out, downsampling and auto-slicing.
Every Instrument also has access to a multi-mode resonant filter, sample rate reduction, and a selection of waveshapers like soft-clipping, pre- and post-filter hard-clipping, swap, fold and sine functions. There are certainly plenty of options for pummelling your instruments into submission. Lastly, you can set the send amount to the reverb, delay and chorus effects.
Unlike many trackers, the M8 doesn’t stop at sample playback. There are four synths to choose from: Wavsynth, Macrosynth, FM Synth and Hypersynth. Wavsynth is an 8-bit wavetable synth with options to multiply, skew, warp and mirror the waveforms. It’s perfect for chip-tune sounds.
PROS
• Classic tracker mixed with modern features in a handheld package.
• Lightweight yet robust build using quality materials.
• Muscle-memory workflow that is fast and mostly intuitive.
• Surprisingly deep synthesis and sequencing.
• Surprisingly good sound quality.
CONS
• Tumbleweed...
SUMMARY
The M8 is an impressive little portable tracker that feels great to use, has a fast workflow, and sounds far better than it has any right to. It’s one of those products built by one person, and his passion and expertise show.
Macrosynth offers 44 different synthesis algorithms based on the Creative Commons-licensed Braids instruments created by Mutable Instruments. Synthesis methods include classic analogue, ring modulation, unison, hard-sync, vowel synthesis, FM, physical modelling, drum synthesis and more. Each model only offers a couple of editable parameters, but they cover a lot of sonic territory. Plus, you still get the filter, waveshaping, and modulation options common to every instrument.
FM Synth is a classic 4-operator FM synth with 12 algorithms, feedback per operator and different waveforms for each operator. It nails those early Yamaha FM-type sounds and is probably my favourite M8 synth.
Hypersynth aims to help with one of M8’s limitations: the lack of polyphony I mentioned before. Hypersynth has six sawtooth oscillators, which can be arranged as 16 user-definable chords. When sequencing Hypersynth, you can select different chord numbers and each chord is transposed by the note number.
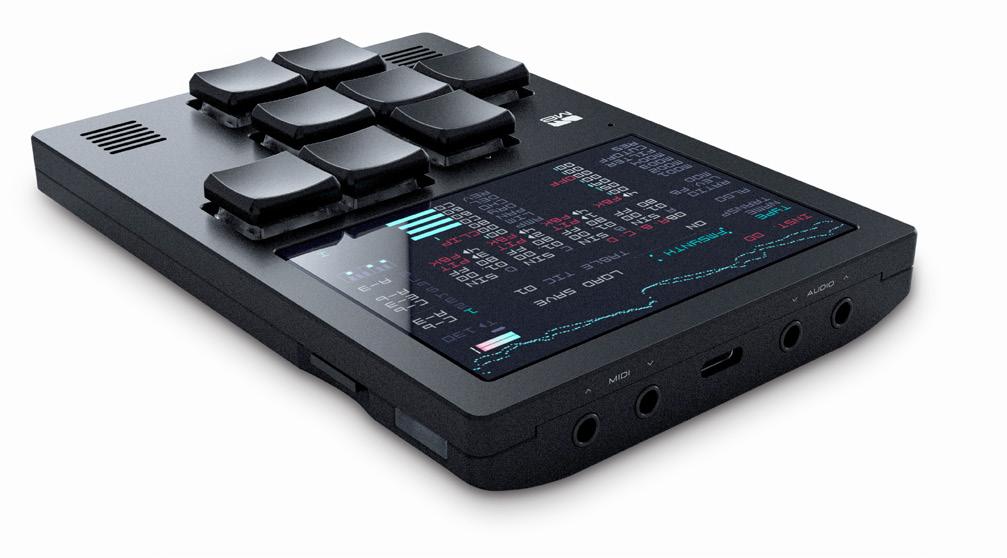
So Hypersynth allows chord progression using just a single M8 track. There isn’t much synthesis possible here, although you can detune the oscillators, spread them over the stereo field, and tilt the volume balance of the oscillators. Still, it’s a neat solution to the problem of polyphony.
Regardless of which Instrument you have loaded, you have four modulation slots into which you can load different assignable modulation sources. Choose from four different envelope types, including one that can be triggered by another track, allowing for some nice side-chaining effects. There’s also an LFO and a Tracking option for pitch-tracking modulation. Neighbouring modulation slots can even modulate each other. Four modulation slots might not seem like a lot, but it’s enough to get a sound moving and sounding organic, and I like that they are the same no matter which Instrument you have loaded.
There are a couple of final MIDI instrument options: a simple ‘MIDI Out’, which allows you to sequence from either the USB MIDI or 3.5mm MIDI port. You can assign channel, bank and Program Changes and up to 10 MIDI CC numbers.
The second MIDI option is ‘External Instrument’, where the instrument’s audio output is connected to the M8’s audio input. This allows the M8 to filter, waveshape, and apply effects to the external instrument’s audio. Sadly, external instruments cannot be rendered using the M8’s render functions, but you can record the audio using the sampler.
In all other aspects, rendering in the M8 is impressive. You can choose which tracks to include or exclude in the render and turn the effects on or off. You can choose to render stems or a stereo mix. Stem rendering is perfect for moving your song to a DAW for its final mix.
The magic of tracking is in its sequencing power, and the M8 doesn’t disappoint. Every step in a Phrase can trigger a note from any of the 128 Instruments and apply up to three FX. FX are an instruction to automate
Portable tracking is still a niche arena, but there are options. Firstly, the M8 is available as a ‘headless precompiled firmware’ that will run on a Teensy 4.1 development board. So, those with DIY skills can build their own M8 for a modest investment.
The other option is a Polyend Tracker Mini, which I reviewed in October 2023. Although quite similar to the M8, it feels quite different in use. It has a much bigger 5-inch screen, a better USB audio interface (more channels), and the recent firmware update has narrowed the gap in terms of synthesis, but the M8 is arguably more portable due to its smaller size.
something in the sequencing or synthesis engine. The M8 has over 90 different FX codes that can be applied, and they do a wide variety of things, from automating instrument parameters to sophisticated sequencing tricks.
Let me give you an example. You might use a Phrase to trigger slices in a drum loop. The three FX can be used to transform that slice in real time. You might use one to reverse the playback of some slices. You might use the second to place a conditional trigger so that the slice is only triggered every third loop of the pattern, and on the final column, you might increase the delay send for that step.
FX can be more complex than simple per-step automation. For example, the REP (Repeat) command will repeat the last command in the column for every subsequent step without copying and pasting the instruction on every step. The hexadecimal number applies an offset for each subsequent repeat, allowing you to automate filter sweeps, volume fades and pitch rolls with just a single FX command. Randomisation is another area where FX shine. You can randomise pitch, Instrument or FX for any given step. Combining this with the SED (Random Seed) command can create predictable randomness, which
is a great way to come up with alternative patterns, melodies and automation that you might never have programmed yourself.
Other FX allow you to jump around a Phrase, automate scale quantising, change mixer settings and synthesis parameters, program pitch-bends or portamento, apply vibrato, and much more. There are so many creative FX commands you’re unlikely to run out of inspiration. But the M8 has yet more tricks up its sleeve.
Tables are another form of instrument-based automation. A Table is another 16-step page similar to a Phrase except that it is instrument-specific and runs every time a note from that instrument is played. Think of it as a pattern within a note. It has a pitch offset, velocity, and three FX columns for each step. The Table runs faster than the main pattern (at a division of your choosing), allowing you to do ‘inter-step’ automation. A simple use of Tables might be to create arpeggio-style note trills or have some vibrato applied after a specific time. You might also use them to automate synth or mixer parameters like effects send or panning. The critical distinction is that these automations are within every note. And if one Table isn’t enough, you can even run a second one simultaneously.
Overall, I was mightily impressed with the synthesis and automation possibilities. There is a synergistic feeling throughout the M8 that all decisions about what features to include or exclude are well thought-out and, most importantly, true to tracking as an art form.
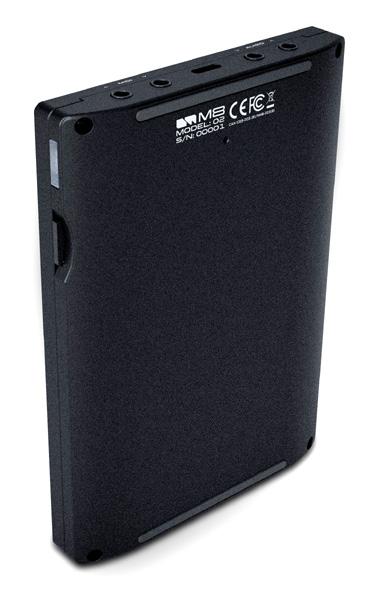
The M8 isn’t just for linear sequencing. There are some handy features for those who like to play live and improvise. In Song mode, you can quickly jump to different Song sections by cueing up any row to play next when the current row has finished. You can also create song sections by leaving blank rows. Whenever the sequencer reaches an empty row, it will loop back to the beginning of that section. This way, you can create ‘islands’ of sequences that loop until you hop to a new island. If you need even more freedom, you can engage ‘Live mode’ to trigger individual Phrases on different song rows, much like Ableton Live’s Session view.
Anyone playing live sets will also appreciate the ability to load a new Song and cue it without any stop in audio. This is possible because samples do not have to be loaded into RAM, so Song loading is effectively instantaneous. Also, if you’re
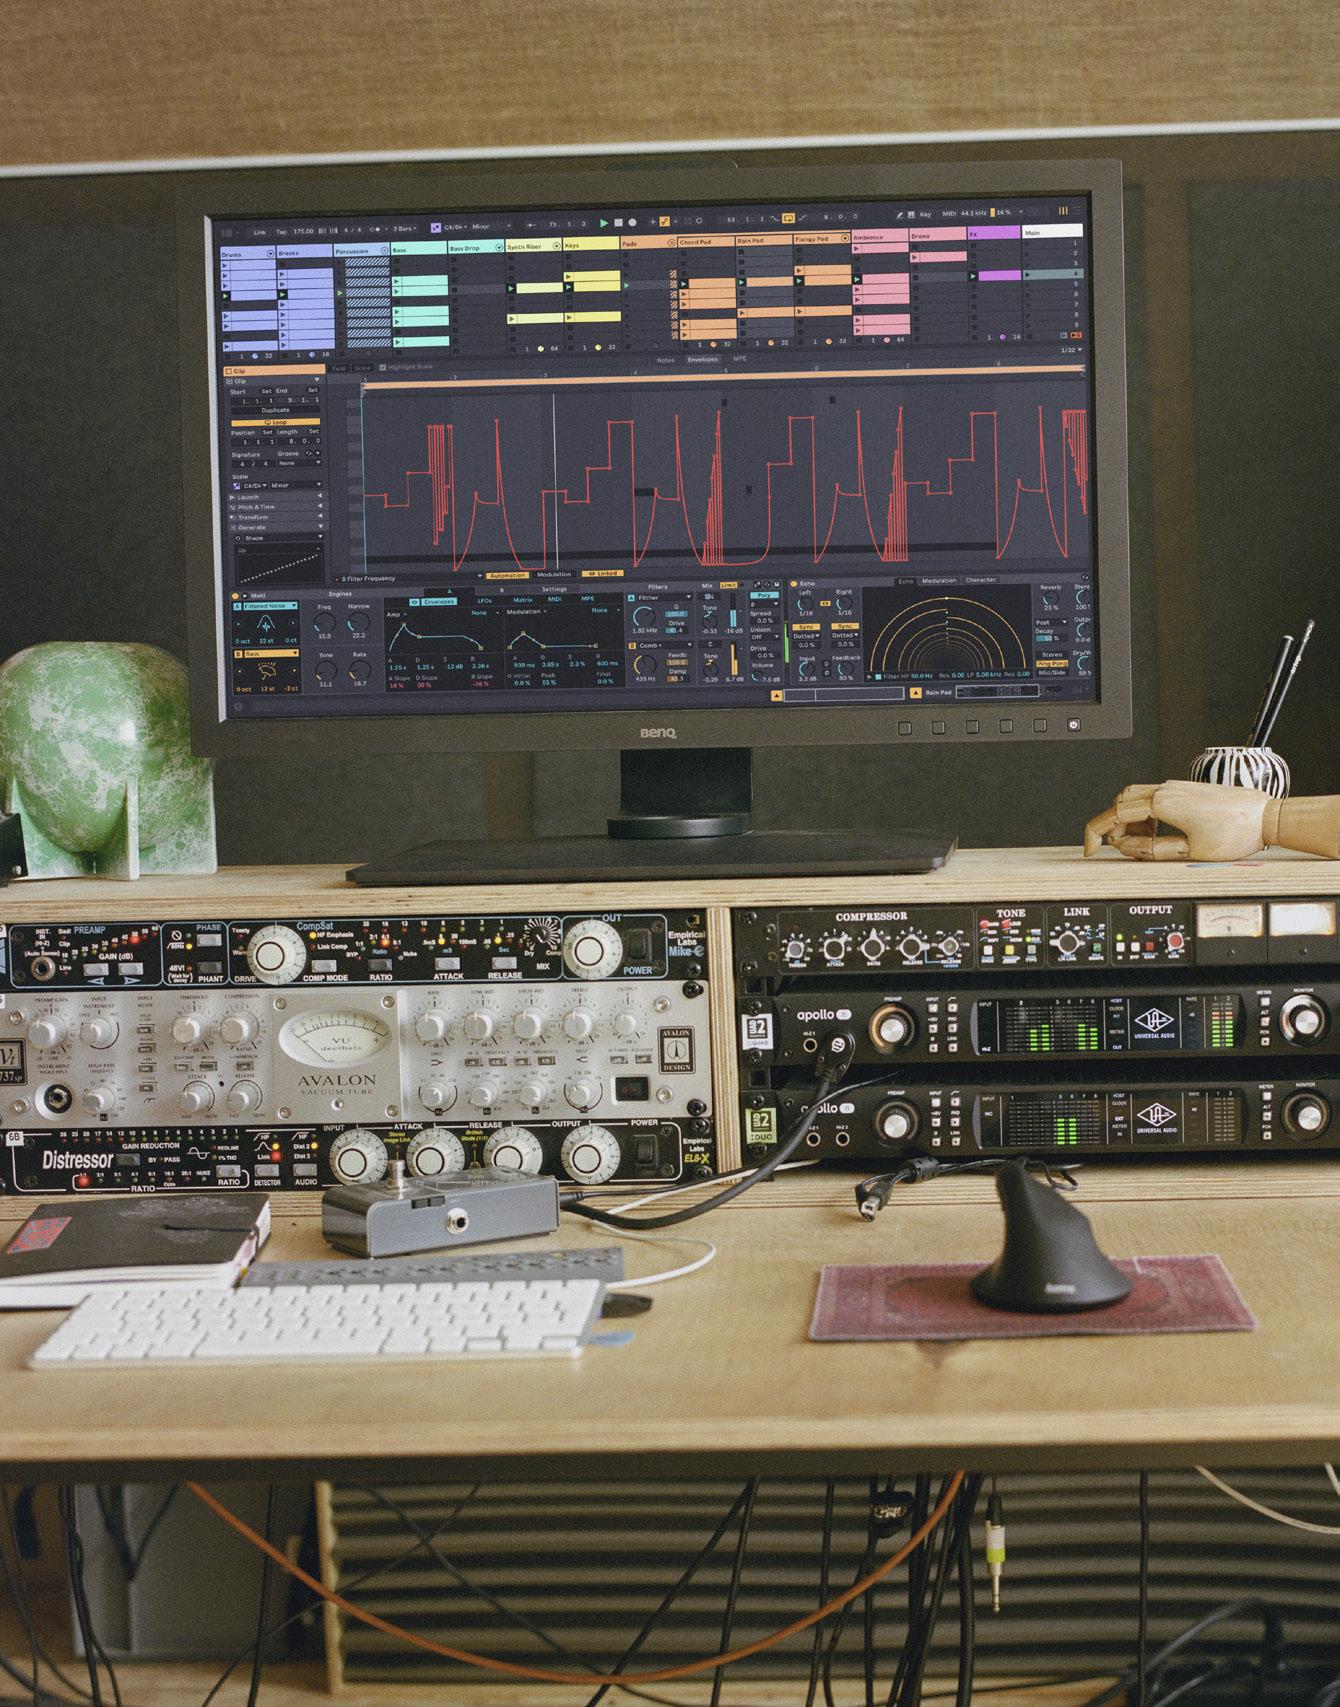
low on inputs and mixing options in your live setup, the M8’s inputs (USB or line) can be mixed with the internal mixer. There’s even a dual mono mode where you can use the left and right signals as two mono sources. These inputs have their own effect sends and volume controls and can be automated using FX commands.
What about integrating the M8 into a more extensive setup? The M8 does an excellent job of MIDI integration. As well as sending and receiving MIDI Clock sync and transport information, you can map up to 128 incoming MIDI control changes to just about any destination you can think of. This will please anyone playing live with the M8 as you can take a MIDI controller with you and have your controller pre-mapped, song-by-song, to any parameters you wish to automate.
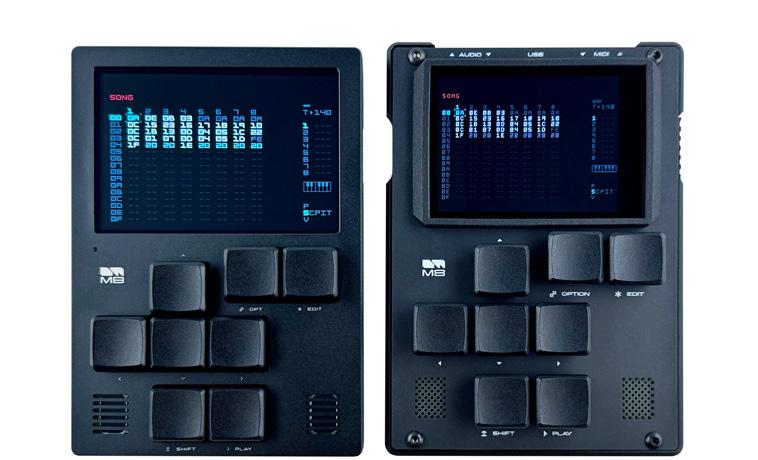
are all listed on the MIDI Mappings page, where you can edit the mapping’s range, source and destination.
Another potential input for automation is the touchscreen, which can be assigned to multiple destinations and used as an X/Y pad. These mappings
Such is the fast-paced development of the M8’s operating system that, just as we were preparing this issue for print, Dirtywave announced a major update. It’s currently in public beta, available from Dirtywave’s official Discord channel (discord.gg/WEavjFNYHh). It might even be fully released by the time you read this.
The 4.0 update will include support for controllers (just the Novation Launchpad Pro MkIII for now, more in the future); EQ for instruments, global effects, and master; a new instrument pool screen for easier instrument management; two new distortion types; 60 new wavetables added to the Wavsynth Instrument; two new zero delay feedback filter types; global tuning to diverge from A=440 standard pitch; and a generous number of new FX commands. I only had the briefest chance to play with the new features but I found the EQ extremely useful, and the new wavetables turn Wavsynth from a basic chip-tune synthesizer into a full-blown wavetable synth. The new FX commands unlock some powerful sound-design options too. A great update, free to all M8 owners, and compatible with both the original M8 and Model:02.
The M8 can even behave like a sound module, with each track having a separate MIDI channel. Suppose you assign multiple tracks to the same MIDI channel and activate Poly mode. In that case, the tracks will respond as a single polyphonic instrument, with as many voices as tracks assigned to that channel. So you can use the M8 as an 8-voice synthesizer, with the added coolness of each voice having a different sound.
Looking at the M8, you could easily dismiss it as a handheld toy. How much music can you write with eight buttons and a teeny screen? Well, if you go to Dirtywave’s official Discord server, you’ll find an active community growing daily, and the amount of music posted here is inspiring. What you’ll hear is not just Game Boy-inspired chip-tune (although there is plenty of that) but well-polished pop, electro, techno, IDM, ambient, jungle, drum & bass, synthwave, glitch, house, hardstyle, and modular-encompassing jams (did I mention the M8 can be mounted in a Eurorack case too?).
My own experience during the review period backs this up. I cannot think of another device I own or have reviewed in the last few years that I’ve been more productive with. The M8, once you click with its workflow, is incredibly fast to work with. I’ve finished around six songs in the two months I’ve used it and have started about a dozen more. When I say ‘finished’, I mean they’re full songs with different sections, fills, complex automation,
Spot the difference... The Model:02 (left) and the original M8.
well mixed, and not just 16-bar loop ideas. I will export these as stems and load them into the DAW for mixing, but consider them finished in all other aspects. The M8 cannot compete with a DAW for the final mix, but it’s an absolute blast for songwriting. In the 1990s, trackers were popular on the Commodore Amiga home computer. It was a fun way to write music. Many people progressed to the Atari ST, maybe with the addition of a sampler, a couple of synths, a mixer and some rackmount effects. The M8 reminds me of these times. It’s like having the Atari ST, an Akai S950 sampler (for sampling), a Yamaha DX100 (for FM sounds), a Moog prodigy (for analogue monosynth sounds), a Korg Z1 (for crazy physical modelling), a mixer, and some respectable effects all in a palm-sized unit. And that makes me happy.
If it’s not already obvious, I have fallen for the M8. It is clearly a passion project for Timothy Lamb, and the amount of thought he has put into its physical design, software and workflow is evident. The sequencer might be based on 30-year-old designs, but there are plenty of innovative new features you won’t find in another tracker.
And how does it sound? So often, with cheaper music devices, the general sound character can be disappointing, and no amount of clever features can compensate for that. I’m happy to say that is not true with the M8. It has depth and space, and I am constantly surprised by how well-produced M8 songs can sound. The synthesizers sound genuinely good, and so do the onboard effects.
If you’re looking for a hardware tracking device, you must check out the Dirtywave M8. In most senses, it’s a classic tracker. The hexadecimal spreadsheet sequencing will be instantly familiar, but the M8 adds so much: synthesis, performance options, FX, Tables, modulation, stem rendering, disk streaming and more. It’s fast to use, and it sounds great. In short, brilliant.
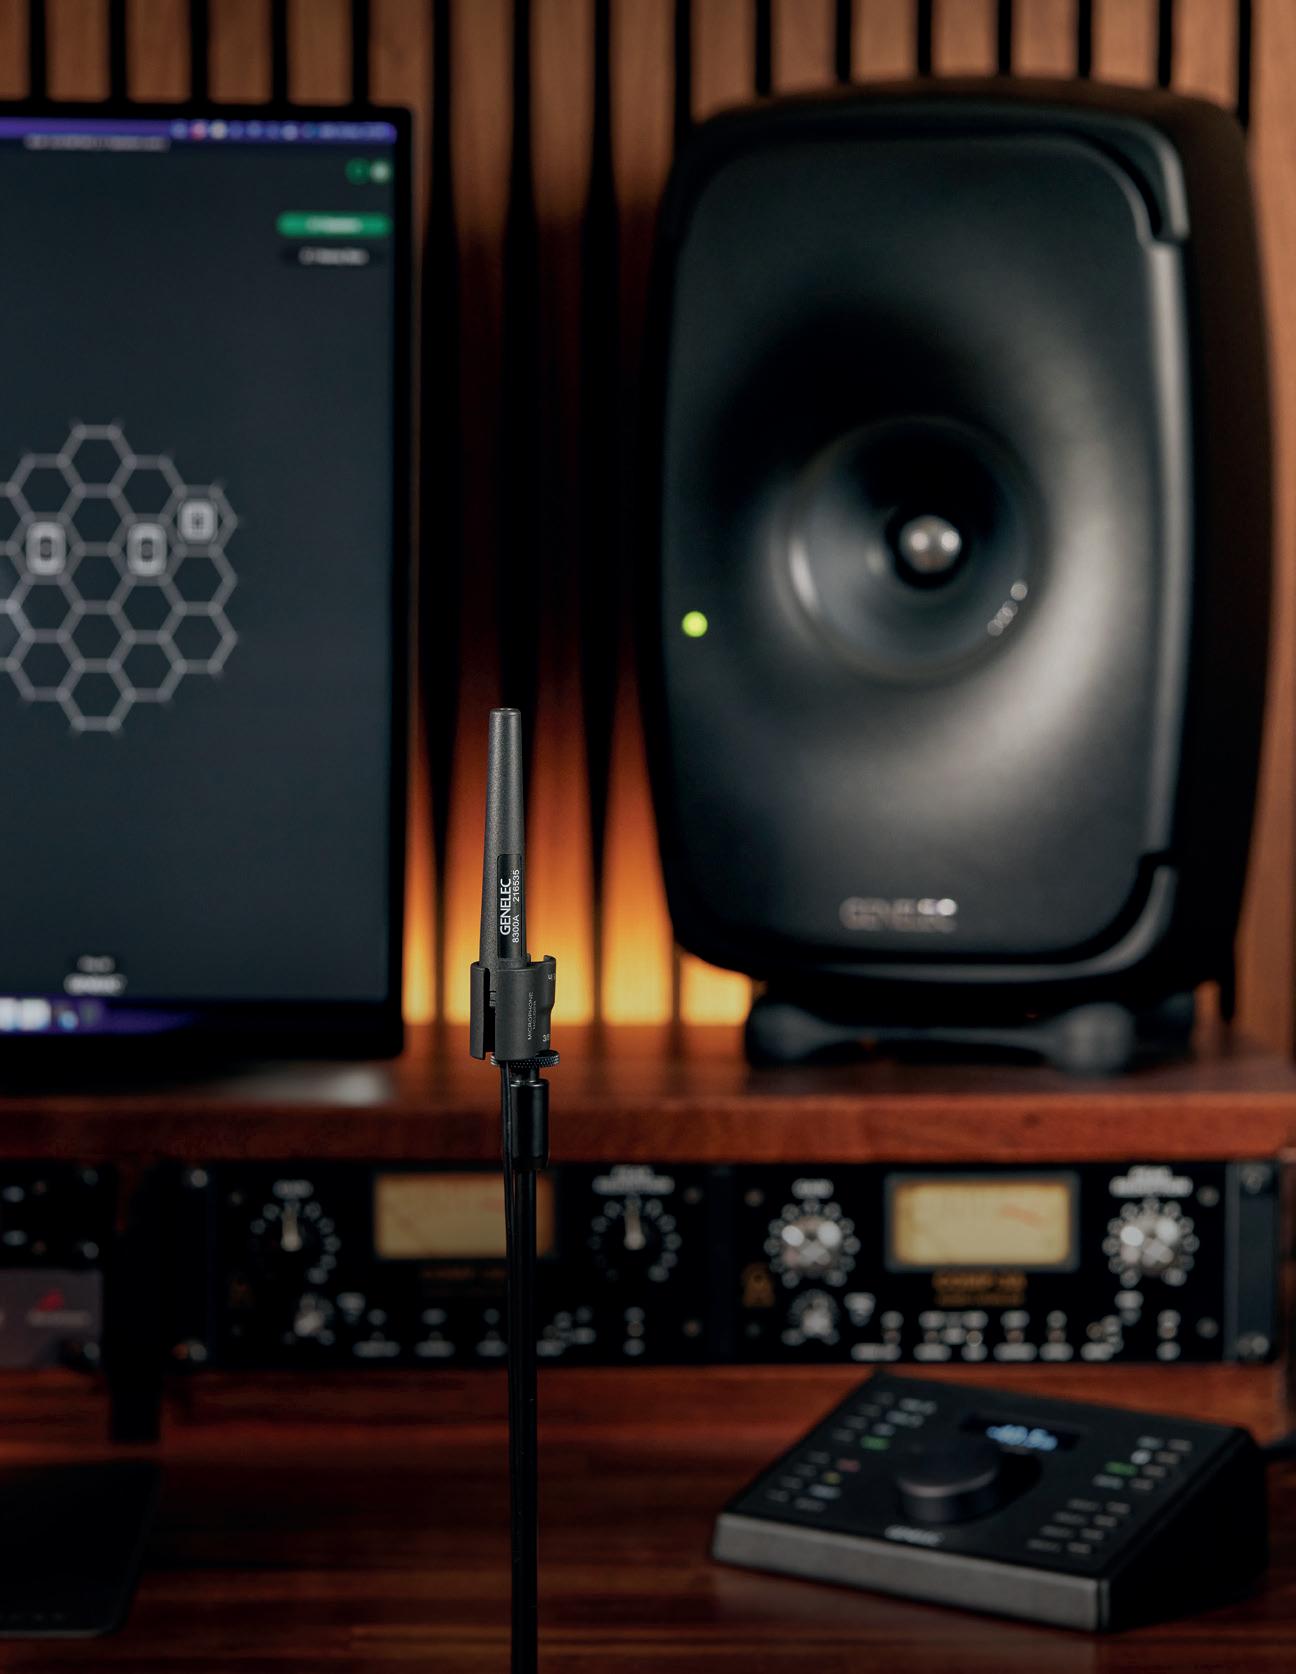
Reach the highest standards of audio production – even if you don’t have access to a professional studio.
Our Smart Active Monitors and Subwoofers (SAM™) work with Genelec Loudspeaker Manager (GLM™) software to offer the fnest room adaption available, so you can cut out the guesswork and move on with confdence.

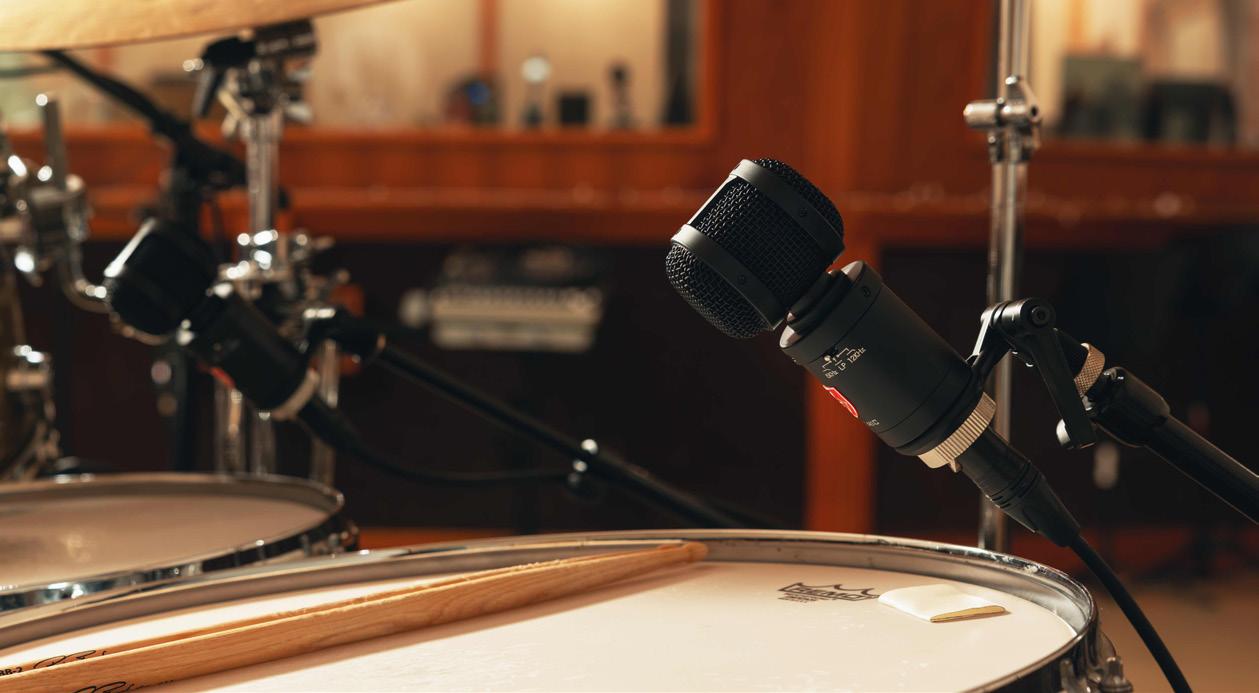
Lauten’s classy new capacitor microphones are purpose-made for toms and snare drums.
PAUL WHITE
We’re accustomed to using dynamic mics on the individual drums in a kit, but Lauten have taken a different approach with their LS-508 and LS-408 models, which are also dubbed simply the Tom Mic and Snare Mic. The Tom Mic (LS-508) uses a 32mm supercardioid capsule in a side-address configuration. Its FET circuitry is combined with integral analogue sound-shaping specifically designed to meet the challenges of tom miking, such as minimising cymbal bleed. As this is a capacitor microphone, 48V phantom powering is required. Lauten Audio use what they describe
Lauten LS-408 & LS-508
$398 each
PROS
• Sturdy.
• Voiced for their specific applications.
• Solid sound.
CONS
• Not cheap — but then these are very well-engineered mics.
SUMMARY
A well-built, great-sounding pair of drum mics specifically voiced for toms and snare drums.
as a bleed-blocking head design, and this, combined with their proprietary dual-bias circuitry, is said to offer up to 28dB of off-axis rejection. The capsule is shockmounted to minimise the effect of vibration if mounted on a rim clip, and the basket even includes a mildew-resistant dust filter to avoid problems caused by the decay of accumulated drum stick dust.
With a stubby, side-address profile, the mic comes with a swivel mount secured via a locking ring, and I’m pleased to see that it has a very strong locking mechanism so mic droop shouldn’t be a problem. The overall size of the mic is 127 x 60mm, or 131 x 106mm if you include the mount. Weight is 450g with the mount in place. A satin black finish is applied to the mic body, basket and mount, embellished with a red Lauten crest that denotes the front of the mic.
A pair of three-way toggle switches on the mic body engage high-pass and low-pass filtering, with two frequency options for each filter, plus a flat setting. This filtering isn’t as straightforward as it seems: the response curve has been shaped specifically for toms, and the same is true of the Snare Mic, the latter having a 1kHz dip combined with a small peak at around 3kHz.
With the low-pass filter set to its ‘flat’ position, the frequency response is not actually flat but rather unmodified. The mic’s ‘default’ frequency response exhibits a lift
from 1-2 kHz, dips sharply at 3kHz, then rises at around 5kHz to capture the stick attack. There’s also reduced sensitivity from 9kHz to 14kHz to minimise cymbal bleed.
Using the 12kHz low-pass filter tames bright tom strikes and further reduces cymbal bleed. The 5kHz setting attenuates cymbal bleed even more, while still preserving the general impact and tone of the tom.
With the high-pass filter switch in the flat position, low frequencies are not filtered out. Since smaller toms may not produce
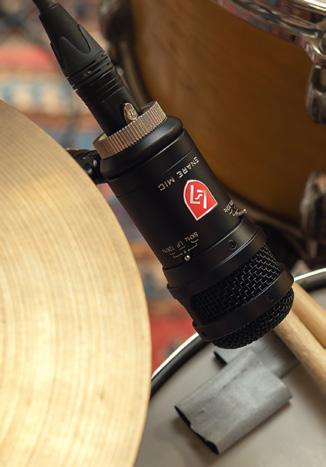
so much low end, there are 80Hz and 140Hz high-pass options for cleaning up the lows and reducing kick-drum spill. The frequency response of the mic (without filtering) is quoted as 20Hz-20kHz, though with no ‘dB down’ limits specified, those figures are not particularly informative. Dynamic range is specified as 135dB minimum and the self-noise a low 15dB A-weighted. Expressed as a signal-to-noise ratio, this works out at 79dB. While normal drum miking doesn’t require particularly low noise figures, it is good to know that this mic is quiet enough to use on alternative forms of percussion that may not be so loud. Both the Tom and Snare Mics have a deliberately lower sensitivity than for a typical general-purpose capacitor mic, as close-miked drums present a loud environment. The LS-508’s sensitivity is specified at 1.3mV/Pa.
The LS-408 Snare Mic is also a FET capacitor microphone, with a similarly stubby form factor body and the same mounting hardware, but this time configured as an end-fire mic. The capsule is also a 32mm design, but here with a cardioid pickup pattern rather than supercardioid, and it has a different response in the mids and highs. This model has an overall size of 109 x 50mm, or 112 x 71mm with the mount. There are the same body-mounted EQ switches, with the same options as for the Tom Mic. As before, the flat low-pass option delivers an unfiltered high-frequency response to capture the stick impact, maintaining an airy high end while the low end captures the punch of the fundamental frequency. As with the LS-508, the low-pass filtering options can be used to shape the high end or to reduce bleed from cymbals and hi-hats. Overall, the general specifications are very similar to those of the Tom Mic, but with a slightly different sensitivity of 0.5mV/Pa. Both mics are shipped in cardboard boxes and include the mount, a cleaning cloth with Lauten logo, and a padded zip-up storage bag.
While they’re not the cheapest options for recording toms and snares, given that these are FET capacitor mics they are not unduly costly either, especially taking into account the reputation of their manufacturer. The mounting hardware is excellent, and the short, stubby bodies make positioning easy. They are also
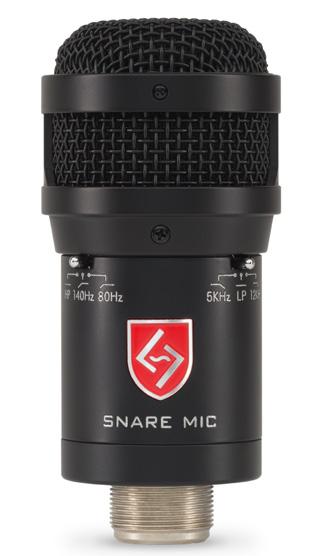
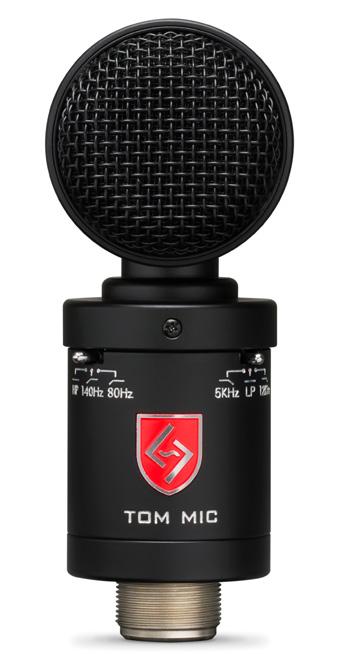
solidly engineered so the odd wayward drum stick shouldn’t upset them too much.
As with most drum mics, you have to know what to expect from a close-miked tom position, as some of the stick articulation invariably gets suppressed, and the proximity effect of the supercardioid capsule also beefs up the low end as you get closer. If that becomes too much, the built-in high-pass filters on both models are a very welcome addition. Once you add in your overhead mics, you get a really solid tom sound with just the right amount of stick impact. I also tried the Tom Mic on my set of three Rototoms; positioned maybe half a metre above the toms, the drums stayed pretty well balanced and I didn’t lose the ringiness and stick impact as you often do when putting a mic very close.
With both models, you will capture more stick attack by aiming the mic across the head, starting from the usual ‘just inside the rim’ position around 50mm above the head, which means that you can get a good position using a rim clip if that is your preference. Aiming the mic across the head in this way is Lauten’s recommendation.
The Snare Mic also demonstrates what most engineers already know about positioning. If you just mic the top head, you lose some of the snare sound but capture a good solid punch, so the overheads might bring back just
enough snare rattle for the drum mix to work. If not, you can mic the bottom of the snare (remembering to invert the polarity relative to the top mic, if using both). Used beneath the snare, the Snare Mic captures all the snare snap and rattle you could wish for, and you can filter out the lows using the onboard EQ to avoid too much kick-drum spill. Used on its own, the sound from an under-snare position becomes very snares-heavy, so balancing the top and bottom mics in the context of what the overheads are capturing is the key to a well-balanced snare sound. Another advantage of adding an under-snare mic is that you can use the filters on the top mic to suppress the spill from hi-hats and cymbals without losing high-frequency articulation, as the under-snare mic puts that back in. Having two different HF roll-off positions is a big help in that respect.
Both these mics are strong performers, and though they won’t compensate for poor mic technique, they do allow for more flexibility than most commonly used snare and tom mics when in the right hands. Their drum-specific voicings are invaluable, as are the flexible filter settings that are specifically tailored to the job in hand.
$ $398 each. T Lauten Audio +1 877 721 7018 E sales@lautenaudio.com W www.lautenaudio.com

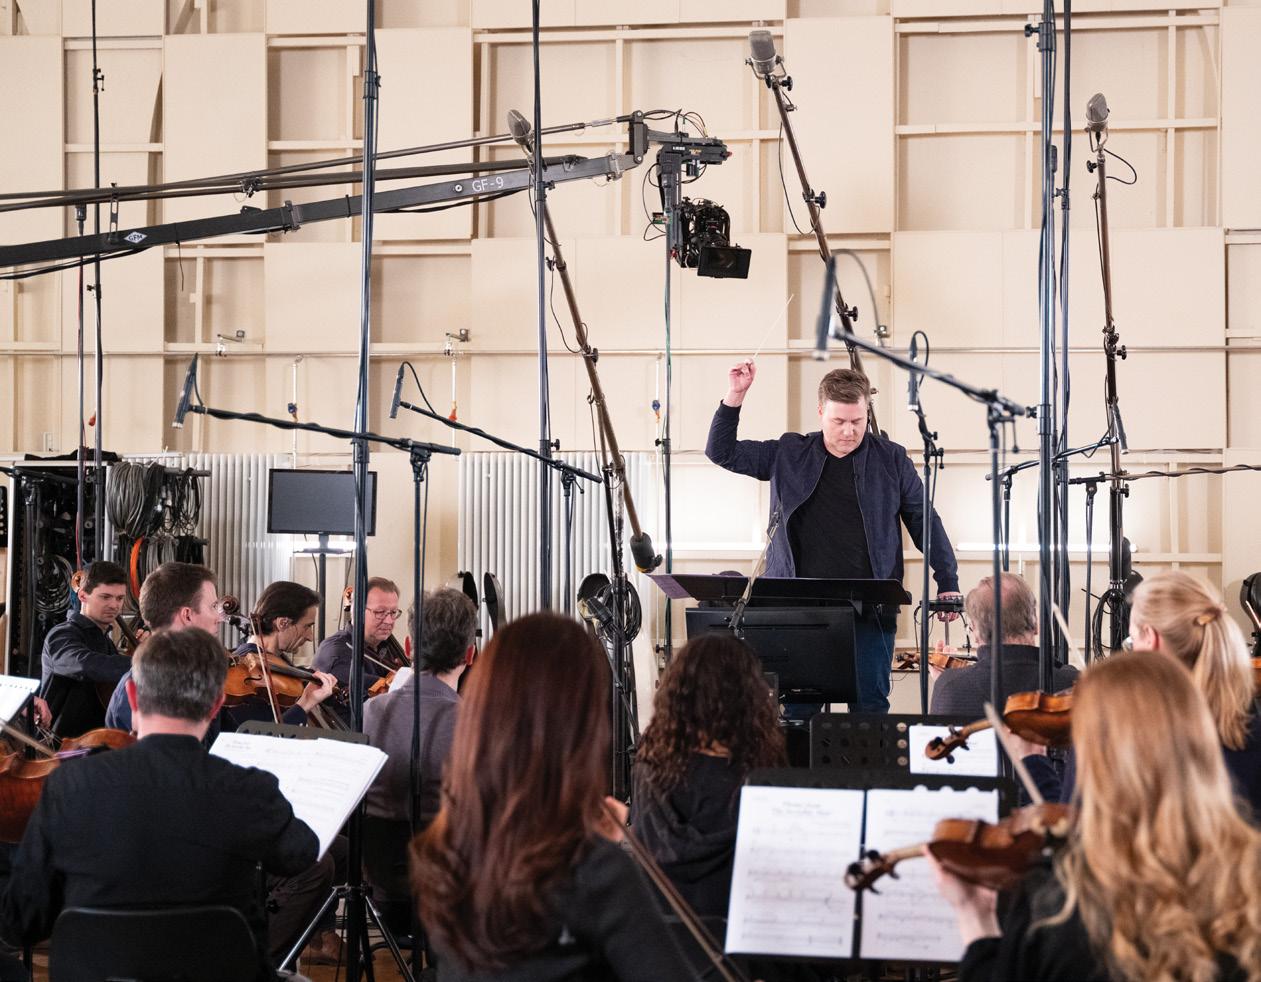
The Berlin samplemeisters link up with a Hollywood film composer to create two major string collections.
DAVE STEWART
Speaking in a video in November 2023, film composer Benjamin Wallfisch cheerfully observed: “I spend way too much of my time sitting here playing string orchestra samples. [Join the club, Ben.] We’re very lucky to have amazing libraries now of gorgeously recorded string orchestras from around the world, but I’ve always been slightly underwhelmed at the final result. Of all the sections of the orchestra, the strings have the biggest gap between what we’re able to do using samples and the finished final performance if we’re lucky enough to record with a live orchestra. And for years I’ve been thinking, why is that?”
Why indeed? Within weeks the question was addressed when Orchestral Tools announced the release of two standalone string collections, Benjamin Wallfisch
Strings (cinematic ensembles and divisi) and Stringscapes (orchestral string effects and textures). Created in close collaboration with the Hollywood composer and billed as OT’s largest sampling project to date, the project aims to give users (in Wallfisch’s words), “something that gets as close as possible to having a scoring session on your keyboard”.
The libraries feature identical line-ups of 14 first violins, 12 second violins (different players), 10 violas, 10 cellos and six double basses recorded on the main scoring stage at Berlin’s Teldex Studios. They are not small: Benjamin Wallfisch Strings (BWS for short) weighs in at a hard-drive challenging 501GB and Stringscapes eats up 129GB. Happily, you don’t have to download all of their numerous mic positions in one go; you can also hedge your bets by buying individual BWS and Stringscapes instruments for as little as €65 and €42 respectively.
Benjamin Wallfisch Strings and Stringscapes run exclusively on the latest version of Orchestral Tools’ Sine player, which works standalone and as a VST, VST3, AU and AAX plug-in. You’ll need least 8GB of RAM, and as with all large orchestral libraries, the makers strongly recommend SSD storage for best performance results.
It transpires that one of Mr Wallfisch’s complaints about today’s string libraries is the routine use of sample loops. While looped long notes can be sustained indefinitely, the composer feels that interrupting the players’ expressive performance mid-flow with a relatively short looped section has a de-humanising effect. Hence, BWS and Stringscapes are among the very few string libraries to offer loop-free sustains; instead, the players hold their long notes for 23-25 seconds, which should be enough for most musical situations.
BWS’s other deviations from the norm include true divisi sections, separate patches for upbows and downbows and five dynamic layers for all straight bowed artics and legatos. Another distinctive feature is a huge Atmos-ready microphone setup comprising Decca Tree L-R, Decca Tree centre, close, wide, A-B (an alternative wide position), outrigger, surround, immersive front and immersive mid mic positions. Each of these has a raw and processed version, the latter featuring Ben Wallfisch’s dedicated EQ and processing effects. Designed to give you “the Hollywood sound right out of the box”, these positions include an LFE mix for the basses.
Obviously having 18 versions of every sample hugely inflates the size of these libraries, but you can easily get by with just two or three positions: a mix of the default Decca Tree and close mics sound great, and if you want more room ambience you can add the distant outrigger or surround position. Personally I liked the subtle brightening effect of the processed versions, so they would be my starting point with these strings. If your project involves a large number of mic positions, you can use the Sine player’s mic merge feature to bounce them down into a single stereo mix.
Orchestral Tools’ long history of recording string orchestras at Teldex Studios has reached a zenith in BFS, one of the most sonically impressive string orchestras I’ve heard in recent years. The cello long notes are a thing of beauty: their hushed, breathy quiet deliveries, rich and vibrant mp range and majestic loud performances show off the library’s dynamics to great effect, and their generous C1-G5 span means you can use them as a sketching tool. Having used the cello sustains to create a chordal passage, I doubled the chords’ root notes with basses in the lower octave and was knocked out by their tremendous low-end presence — instant orchestral grandeur and gravitas. Another standout feature is the beautiful transparency of the high strings’ upper register. It’s unusual to find violins sampled beyond a top note of C7 (three octaves above Middle C) — these players go up to E7, maintaining pristine tone and perfect tuning all the way. Consequently, chords and melody lines sound fabulous across the violins’ entire register, with no weak spots.
BWS lacks the vibrato control of other OT string libraries: rather than providing an on-screen slider to switch between vibrato
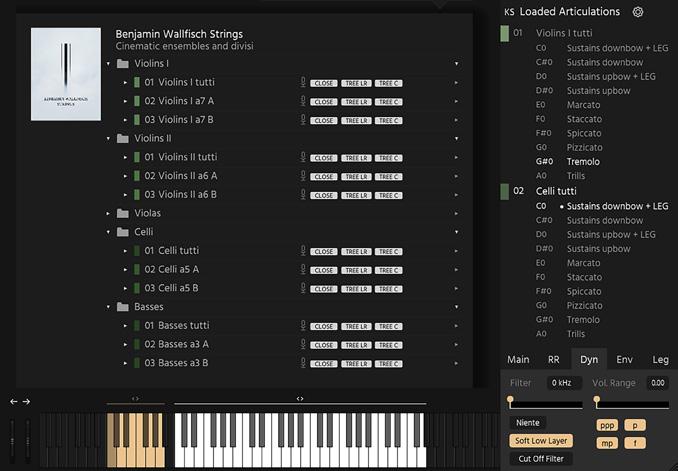
styles, it follows the example of Pēteris Vasks Strings by linking vibrato intensity to dynamics. The quieter layers use a light, restrained vibrato which becomes more pronounced in the mp dynamic and reaches full force in the loud deliveries, enabling you to program dramatic volume swells accompanied by emotive vibrato surges. This effect works particularly well with the violas, who step up with some impassioned loud sustains.
So, do upbow/downbow variants and unlooped sustains make a difference? I’d say definitely yes. To my ears, keyswitching between the two bowing styles at strategic moments sounds more natural and realistic than sticking with one or the other, and I felt that the somewhat gentler upbows are a better starting point for quiet romantic music. The loop-free samples are a revelation: each note in a chord develops naturally at its own pace without a loop butting in, resulting in a notably more organic sustained timbre.
Each of BWS’s five string sections was recorded with its full complement of players (referred to as the ‘tutti’ sections), then twice more with each section split into two half-size groups called Divisi A and Divisi B. Rather than dividing ‘at the desk’ in traditional style, the violins and cellos were split into front and back groups while the violas and basses divided left and right — this maintained a distinct physical separation between the divisi groups (good for panoramic mixes) while
enabling players to stay attuned to their desk partner’s performances (good for musical cohesion and intonation).
The advantages of divisi writing are well documented: you can boost orchestral realism by distributing the notes of a chord across separate divisi sections (thus adding voices without increasing the virtual player count), split cello parts
$870
PROS
• Both libraries sound fantastic and benefit from five dynamic layers, long unlooped sustains and admirable performance precision.
• BWS features half-size divisi sections and separate upbows and downbows.
• Soundscapes’ generous menu of played string effects and textures contains some startlingly original material.
CONS
• BWS is expensive.
SUMMARY
This collaboration with an award-winning UK composer represents the acme of Orchestral Tools’ string sampling achievements to date. Performed by 52 players and recorded via an Atmos mic setup, the project comprises two collections: Benjamin Wallfisch Strings is a classic strings multisample library suitable for traditional, contemporary film and pop work, while Soundscapes’ imaginative effects and textures span an emotional range from beauty to horror. Taken together, the two are a knockout combination.
The Stringscapes GUI.
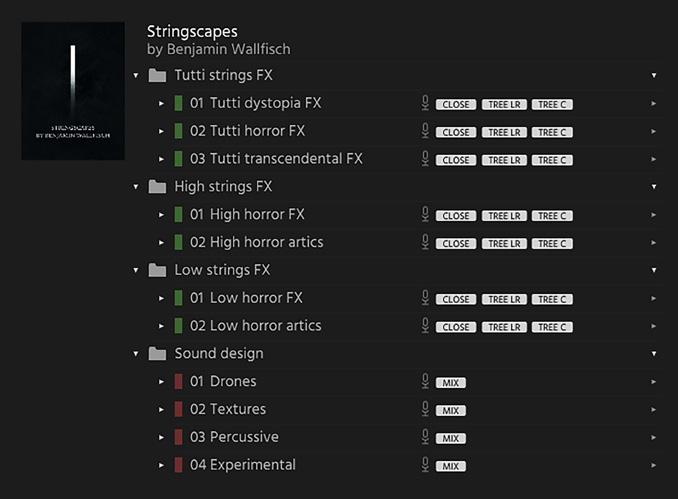
between melodies and bass lines, and achieve a more intimate chamber sound simply by using the excellent half-size sections. While this is not the first library to offer real divisi, it’s good to see it cropping up in a contemporary release.
Legato patches are supplied for all the tutti and divisi sections’ downbow and upbow sustains. Performed at five dynamics, the legato transitions maintain Orchestral Tools’ high musical standards and sound superbly expressive when you introduce dynamic movement with the mod wheel.
If you prefer, you can assign dynamics to key velocity — either way, it’s essential to overlap notes slightly to trigger the smooth inter-note transitions.
The remaining BWS articulations feature the standard trilogy of marcato, staccato and spiccato short notes along with pizzicato, tremolo (four dynamics each) and three-dynamic tone and semitone trills. The marcatos last just over a second and boast a scintillating loud layer; the staccatos are sufficiently short and tight to use for rhythmic ostinatos, while the ultra-short, briskly brushed spiccato bowing sounds
Born in London in 1979 to violinist mother Elizabeth and cellist Raphael Wallfisch, Benjamin Wallfisch’s paternal grandparents are concert pianist Peter Wallfisch and cellist Anita Lasker-Wallfisch, a remarkable woman who co-founded the English Chamber Orchestra after surviving the horrors of the Auschwitz concentration camp. Benjamin’s great-grandfather was Albert Coates, composer and conductor of the LSO from 1919 to 1922.
An infant prodigy who could play piano and compose by the time he was three, Wallfisch junior grew up in a house full of music. He recalls: “I think my first memories with music were hearing Bach played every morning by my dad, my mum playing the violin and my grandpa playing the piano... music was always synonymous with family, and I guess to this day it just kind of feels like home.”
Film music also made an impression: “Growing up in London in the ’80s and ’90s I was always very interested in movies... those incredible scores of John Williams, Jerry Goldsmith and all the rest of that extraordinary period in film music. When I saw ET I was immediately taken by something I didn’t know how to describe, but it just felt so powerful. As a kid I was also fascinated with the process of film-making, and with my passion for music it became a case of ‘I’m gonna find a way to bring those two things together.’”
The plan worked out. By 2005 Wallfisch had scored his first feature film, the crime drama Dear Wendy. The next 10 years saw a steady climb up the Hollywood ladder with scores for Hidden Figures (in collaboration
great on rapid-fire lines and arpeggios. Surprisingly, these artics are only played by the tutti ensembles — the divisi sections perform only sustains and legatos.
BWS’s companion library Stringscapes is an expansive set of string effects and textures inspired by the composer’s scores. The collection divides into live played effects written and orchestrated by Wallfisch and his team, and cinematic hybrid sounds created by Orchestral Tools’ sound designers using the raw material from these sessions.
The Tutti FX are musical events performed by the full string orchestra. Prosaic patch names belie their complex nature: the subtly menacing ‘Atmosphere’ combines gently accelerating minor third trills with a mournful lower semitone motif, while the unison of ‘Spreads’ disintegrates as low and high strings gracefully slide off in opposite directions in a series of tritone steps, only to see them slowly return to unison after hitting their outer pitch limits. In the same vein, major and minor chord glissandi slither up three octaves to a high triad before descending to their starting position. Another highlight here is ‘Trills’, a mini-composition which gradually builds trills of various pitches into a shimmering chordal latticework.
For pads, I can recommend the majestic ‘Chords’, and ‘Longs’, which weaves multi-octave unisons into lovely shifting soundscapes. I was also impressed
with Pharrell Williams and Hans Zimmer), It, Shazam!, Hellboy, The Invisible Man, Mortal Kombat, The Flash and Blade Runner 2049 (another Zimmer collaboration). To date he has over 75 film credits, has received Golden Globe, BAFTA, Grammy (twice) and Emmy nominations and was nominated for World Soundtrack Awards’ Film Composer of the Year in 2019 and 2020.
Following in his 19th Century ancestor’s footsteps, Wallfisch also continued a parallel career as orchestral conductor and composer, performing live in over 100 concerts worldwide. He has received over 50 concert, ballet and theatre music commissions and collaborated with luminaries such as Adele, Herbie Hancock, Lang Lang, Pharrell and Yuja Wang. Hard working, you might say.
If this sounds like the CV of some snobby classical composer, think again. Refreshingly unpretentious, our man also took a strong interest in the electronic music and rave scene of 1990s London, waxes lyrical about Vangelis’ Yamaha CS-80 sounds in the 1982 Blade Runner score and is well versed in analogue and soft synths, samples and sound design — all of which makes him an ideal collaborator for Orchestral Tools, and an inspirational role model for aspiring media composers.
Now based in LA, Ben Wallfisch works in his own composition facility The Scoring Lab, a state-of-the-art Atmos mixing studio and writing room. Though his great-grandfather might have found the technology bewildering, I’m sure Albert Coates would be proud of his descendant’s musical achievements.
150 KH 120 II KH 80 DSP
With Neumann MA 1, reference sound is at your fngertips.
Neumann speakers ofer exceptional linearity while MA 1 tackles the biggest remaining variable: your room.
Whether in a small studio with acoustical challenges or a grand immersive setup, MA 1 and KH speakers are fully scalable, delivering consistent sound you can rely on. KH 750 DSP
◆ Easy setup with expert results
◆ Exceptional sonic precision, bass extension down to 18 Hz with KH 750 DSP
◆ Set and forget: no plug-ins needed, no latency added
◆ Consistent sound that allows you to combine any KH speakers in immersive setups
DISCOVER REFERENCE SOUND
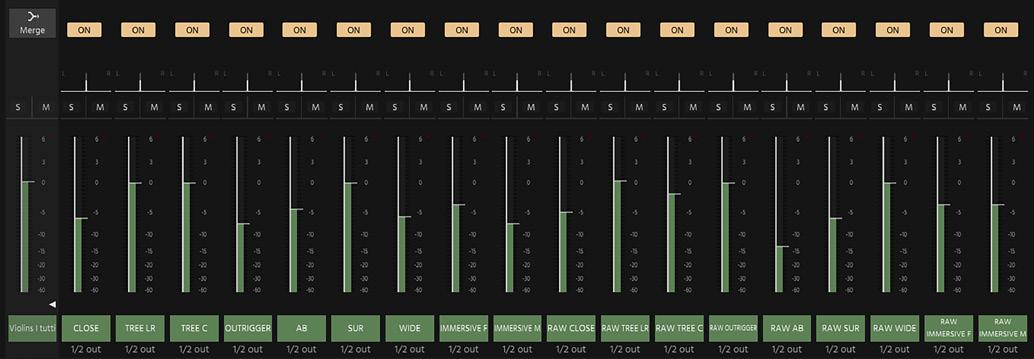
by the Tutti Horror FX’s nerve-jarring atonal material, which comprises some terrific risers, suspense textures and the alarming ‘Stabs’, a sforzando accent followed by a hurtling glissando reminiscent of falling down a lift shaft.
The spirit of Bernard Hermann’s iconic Psycho score lives on in Stringscapes’ high and low string effects. The high violins’ creepy ‘Aleatorica’ evokes the tormented workings of a fractured psyche, with the basses’ dark, grumbling version warning of something nasty lurking in the cellar. ‘Chatter Pads’ runs the gamut from high-pitched teeth-on-edge screechiness to psychotic low strings improvs, while ‘Spreads’ re-emerges in useful high and low formats. All great stuff, but in my book the standout here is the versatile ‘Glissandi FX’ category, which features some stunning atonal material.
Hermann fans will appreciate the high strings’ slashing staccato accents, which the low strings bring up to date with a tremendous array of visceral atonal stabs. These effects are augmented by straight col legno and Bartok pizzicato performances, which really should have been in the main library — the latter artic is played with mind-boggling force, and will easily hold its own in a rock mix.
User tip: all the above mentioned effects have a ‘Rev’ reverse playback option which is well worth exploring. Many of them start very quietly, fade in slowly and are very long, so keep holding down the key!
Though less startlingly original than the live effects, Orchestral Tools’ hybrid processed sounds contain some bangers. I’ll pick out some favourites... I liked the Hellish descending cacophony of ‘Aurora’ and the sinister supernatural ring of ‘Bloody Spring’ (which sounds like ring-modulated alien church bells). ‘Distorted Strings’ and ‘Space Port Atmos’ are similarly unsettling, respectively evoking the buzzing of a giant wasp and the fearsome hubbub of a crowded deep future Tokyo Metro station. To soothe the troubled soul, there’s ‘Infinity Strings’ (serenely symphonic crescendo-diminuendo major and minor chords) and ‘Ascending’, a blissed-out ultra-slow build to a high-pitched timbre suggestive of distant choral voices.
Sci-fi and horror are covered by the ominous ‘Lift to Hell’ spaceship lift-off noise and ‘Manic Riser’, which one can imagine to be the cries of a swarm of malevolent flying creatures. I also enjoyed the unhinged electronic pitched pulse of ‘Needles’ and chuckled at ‘Infrared Resonances’, which sounds like a clumsy replica of a Caribbean steel drum built by a race of dim-witted giants. Meanwhile,

‘The Transformation’ is a remarkably unpleasant category-defying racket spanning horror and comedy. All in all, a healthy collection of noises to disturb your listeners’ equilibrium.
This project arose from a mutual admiration society: Orchestral Tools CEO Hendrik Schwarzer is a fan of Wallfisch’s soundtrack work (in particular his powerful score for the 2017 film of Stephen King’s It), and the compliment was returned when the composer singled out Orchestral Tools as a potential collaborator. Both say they’re delighted with the end results, and a spokesman confirms that the composer is now using the strings to write with — no doubt the results will soon be booming from an immersive cinema sound system near you. Since Schwarzer and co already have several strings collections in their locker, the question “What makes this one special?” arises. Hopefully, my reviews of OT’s most directly comparable products Berlin Strings and Berlin Symphonic Strings (SOS August 2014 and April 2021 respectively) may help you decide. My personal view is that its combination of excellent performances, brilliant tone quality, loop-free long notes, switchable upbows and downbows, divisi sections and imaginative musical effects mark out this collaboration as a star attraction in Orchestral Tools’ sample catalogue.
$ Benjamin Wallfisch Strings: Full library €799 (about $870), single instruments from €65 ($70). Stringscapes by Benjamin Wallfisch: Full library €249 ($272), single instruments from €42 ($46). W www.orchestraltools.com
Unlock the full potential of your recordings with our two essential audio production tools: the Vintage Direct and the Replay Box. Designed with mastering-grade signal quality as the core mission, these boxes provide extraordinary signal isolation and noise rejection.
Tracks recorded with the Vintage Direct get added weight and heft from its custom, US-made 5078 large-core transformer, while capturing every nuance of your performance with unparalleled clarity and depth.
When it’s time to re-amp and enrich your sound, choose the Replay Box. This versatile tool boasts two distinct circuits: Harmonic and Transparent The Harmonic circuit adds color in the re-amp stage by engaging an alternate character transformer.

Switch to Transparent mode for pure, uncolored playback that maintains the integrity of your original signal.
Together, these boxes deliver a sublime DI recording and re-amping process with no added noise and zero tone-suck. If you want to maintain your sonic integrity from initial capture to fnal output, trust United.