CHOOSING A COMPUTER FOR AUDIO• AUDIO INTERFACES• MONITORING & ACOUSTIC TREATMENT• MIC TECHNIQUES• HOW DIGITAL AUDIO WORKS• UNDERSTANDING YOUR DAW SOFTWARE • PLUG-INS & SOFTWARE INSTRUMENTS• COMPRESSION & EQ• UPGRADING YOUR SYSTEM• USING AI IN MUSIC•
From the Classroom
For over 50 years, Solid State Logic has led the way in audio production, creating ground breaking tools that have transformed the way we make music and sound. Whether you’re a content creator, music producer, or an academic institution aiming to elevate your craft, SSL is here to support your journey. With exclusive pricing for students and institutions, access to expert-led courses, and unmatched industry expertise, we provide everything you need to succeed. From the classroom to the control room – get a solid start with SSL.
EDUCATORS
To the Control Room
Contents
Let’s Get Started!
There has never been a better time to get into music recording and production and Basics & Beyond is here to help you choose the right gear and acquire the essential skills to make the most of it.
Chapter 1:
What Gear Do You Really Need?
The vast majority of music recording and production is now carried out using a computer, but there are just a few other key components you’ll need.
Chapter 2: Choosing A Computer For Audio.
Mac or PC? Laptop or desktop? Or should it be a mobile device? We’ll help you make the right choices.
Chapter 3: What Does An Audio
Interface Do?
Your computer’s software looks after the recording and mixing, but the audio interface is what gets the sound in and out.
Chapter 4: Choosing And Using Microphones.
There has never been a better or wider choice of microphones available. You just need to know what to look for.
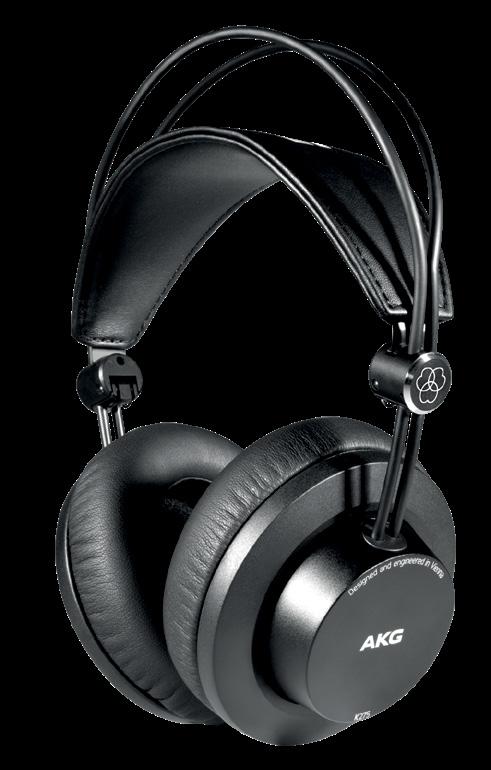
Chapter 5: Working With Headphones
Headphones really are an essential component of any home studio even if you are using speakers for monitoring.
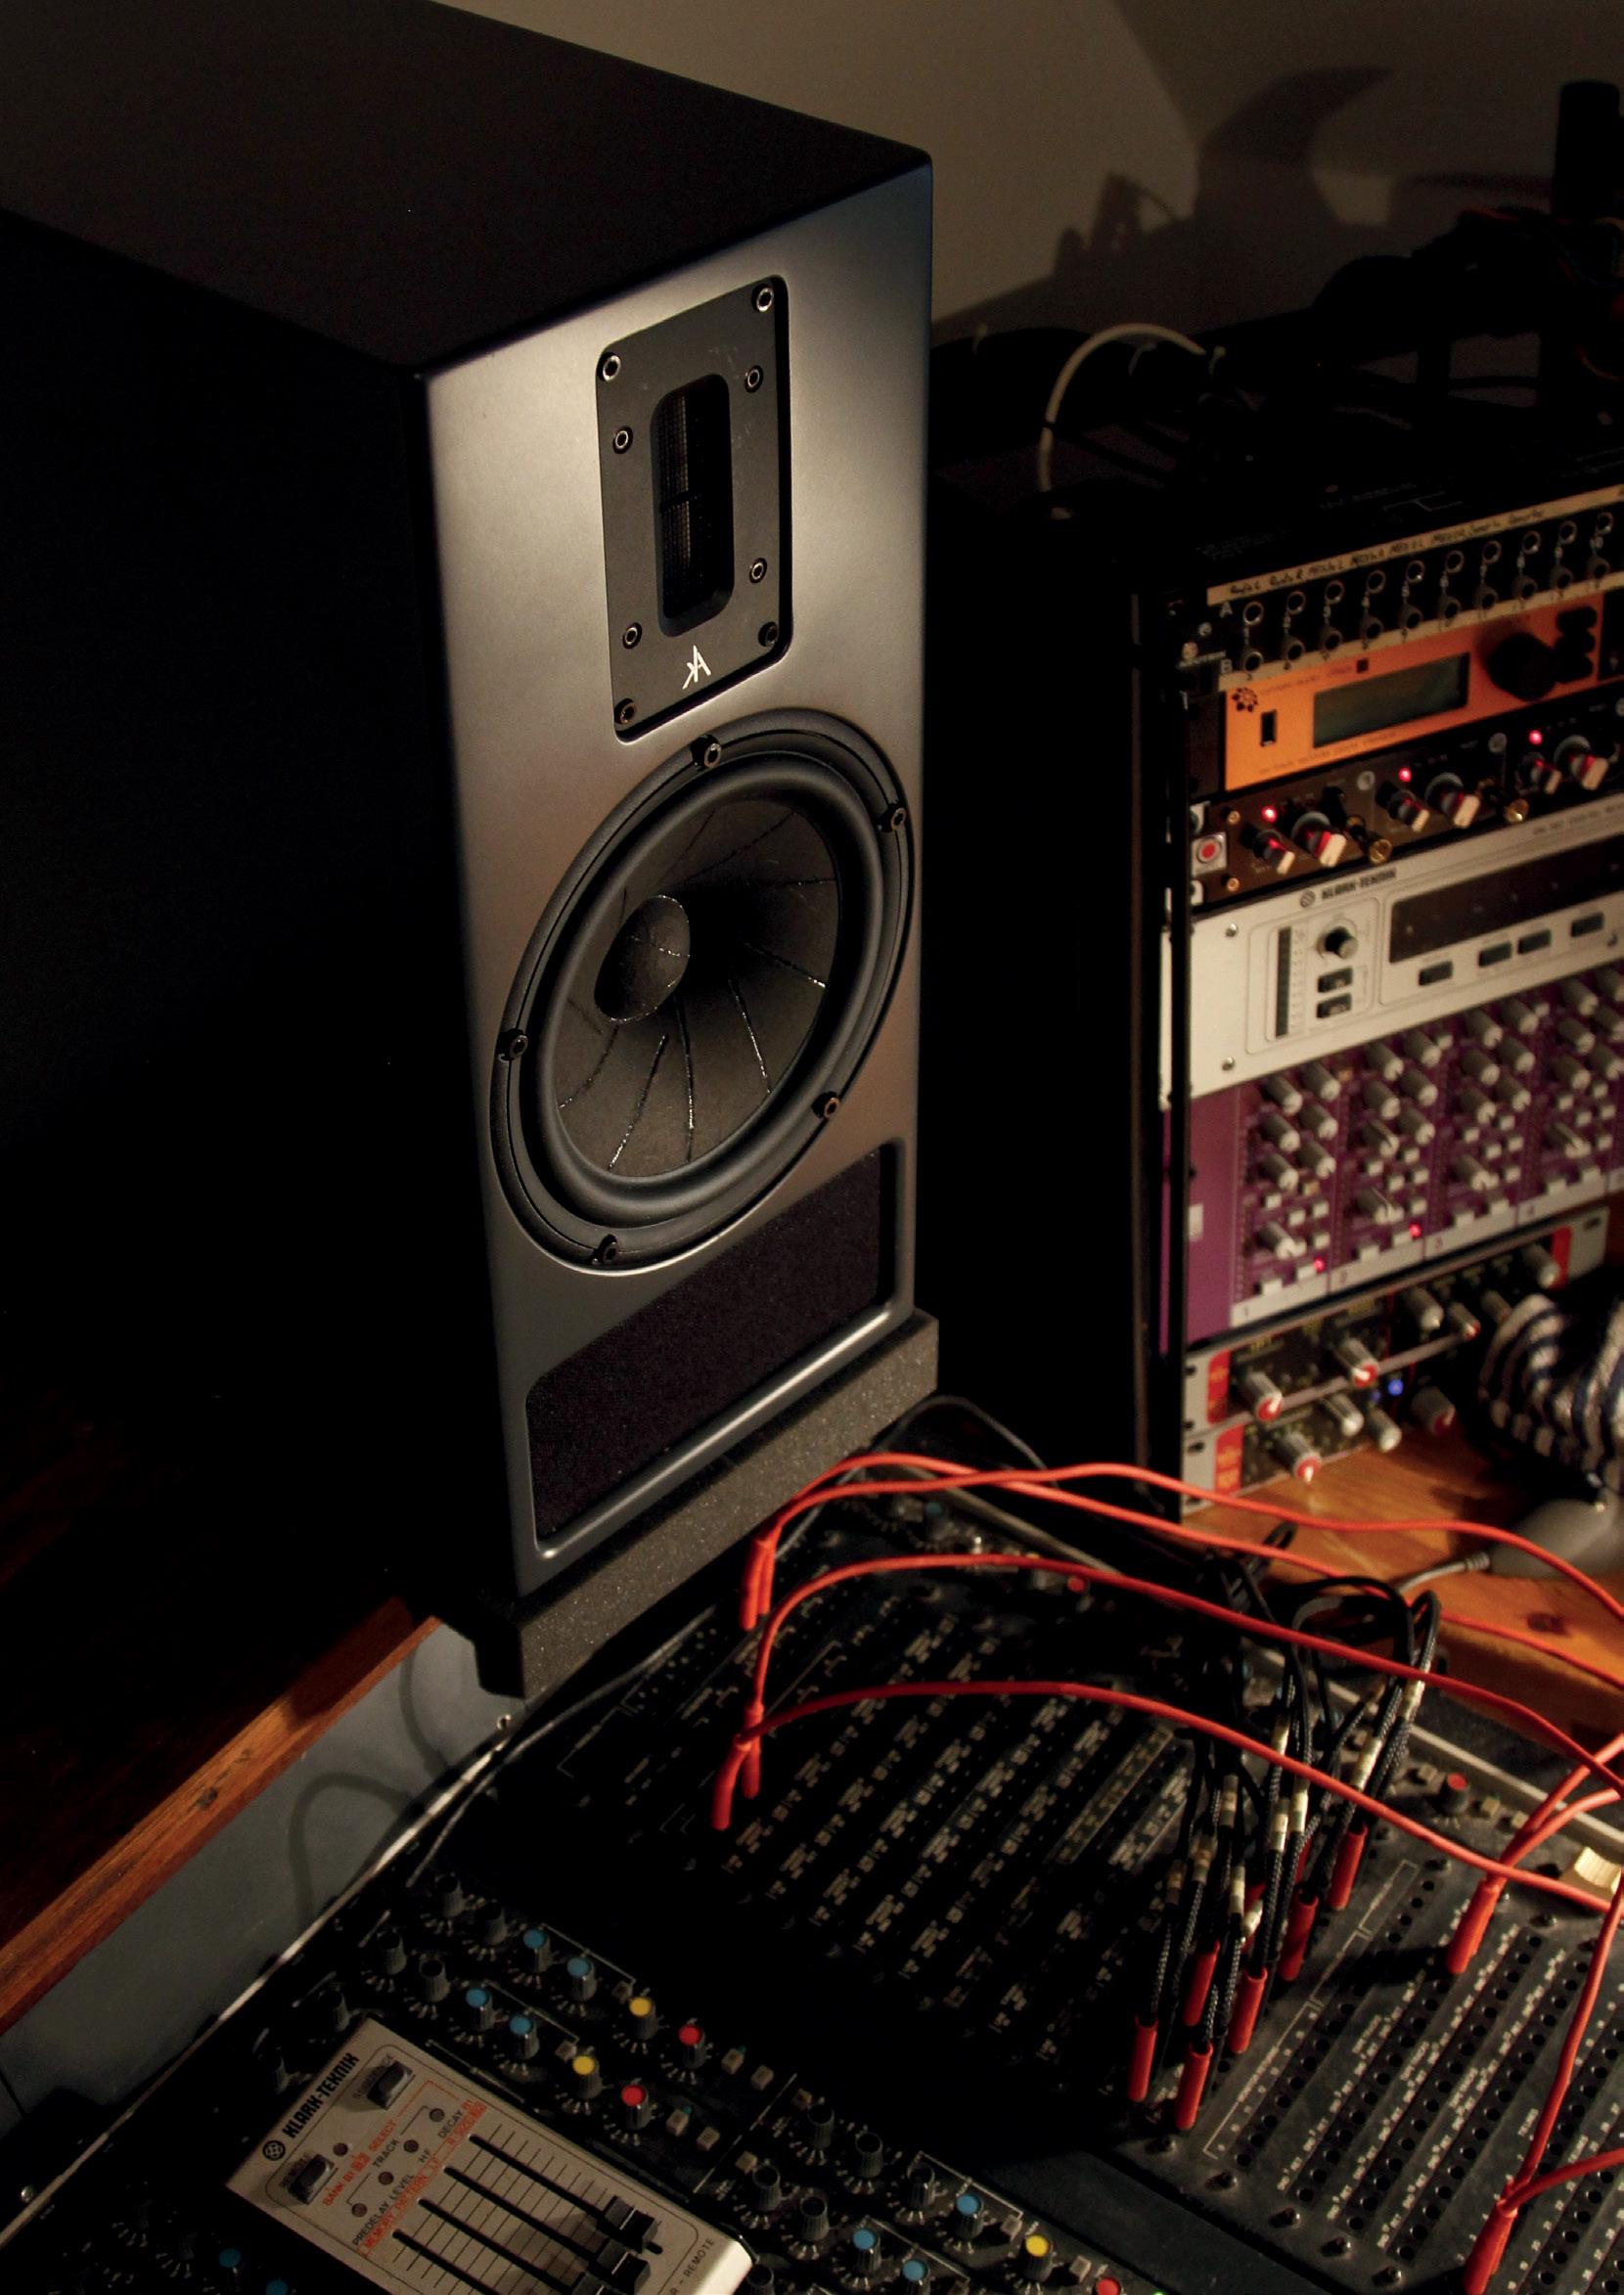
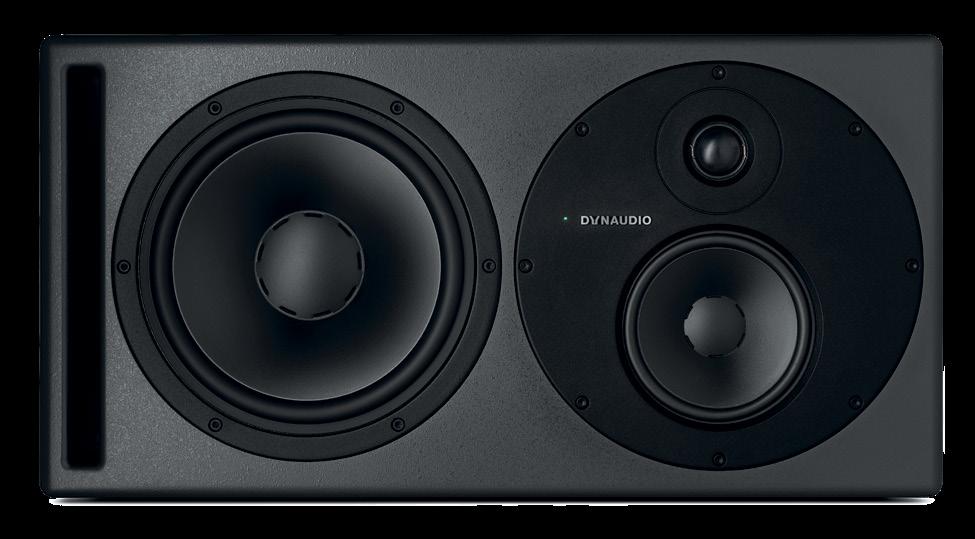
Chapter 6: Monitor
Speakers
Passive, active, ported or sealed? Precisely which model you chose
actually matters rather less than that you mount them properly and take the time to learn how they sound.
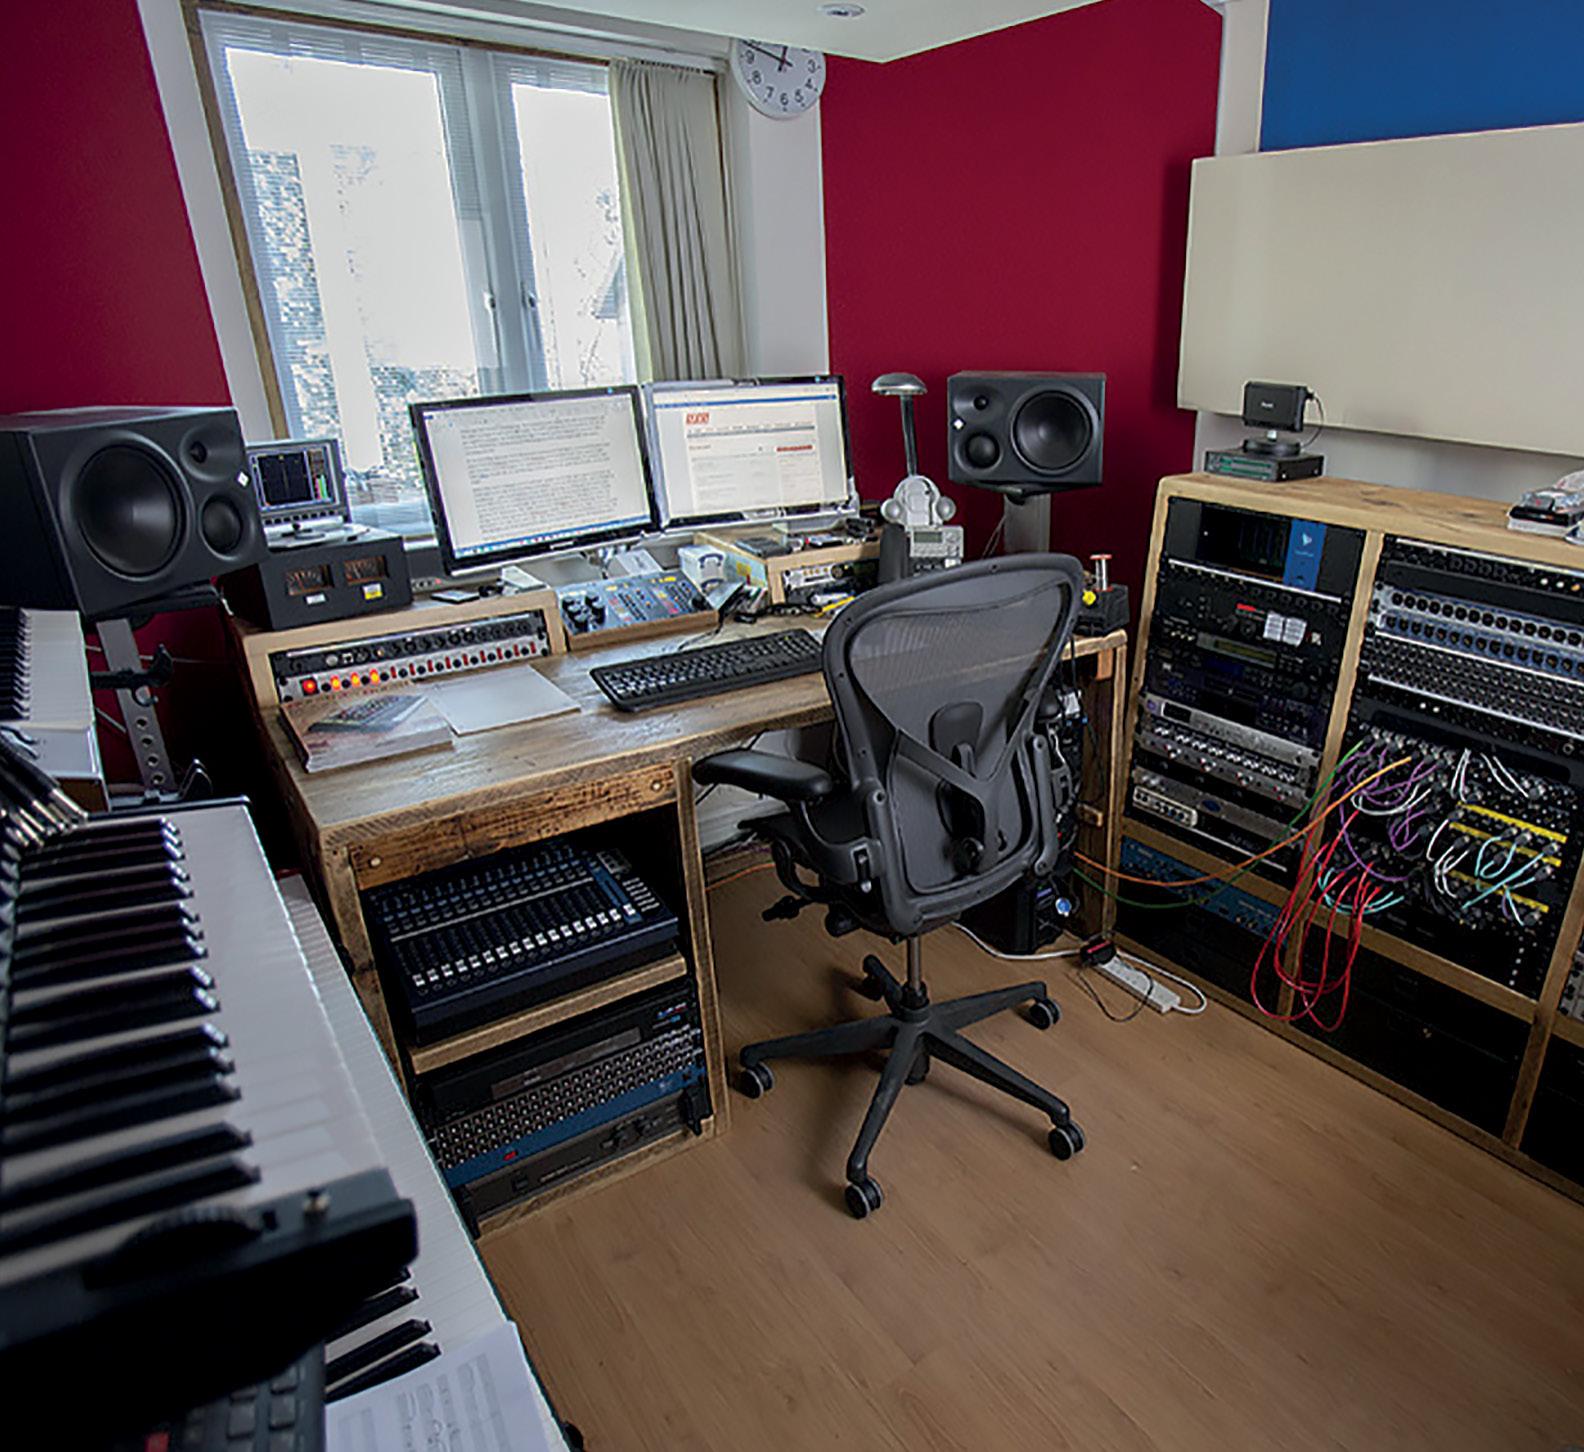
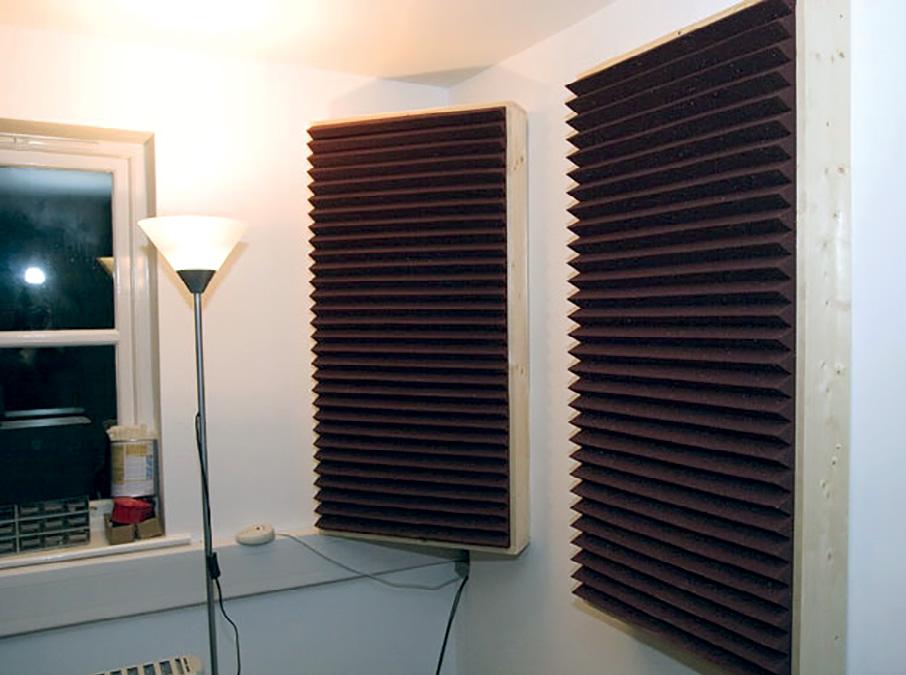
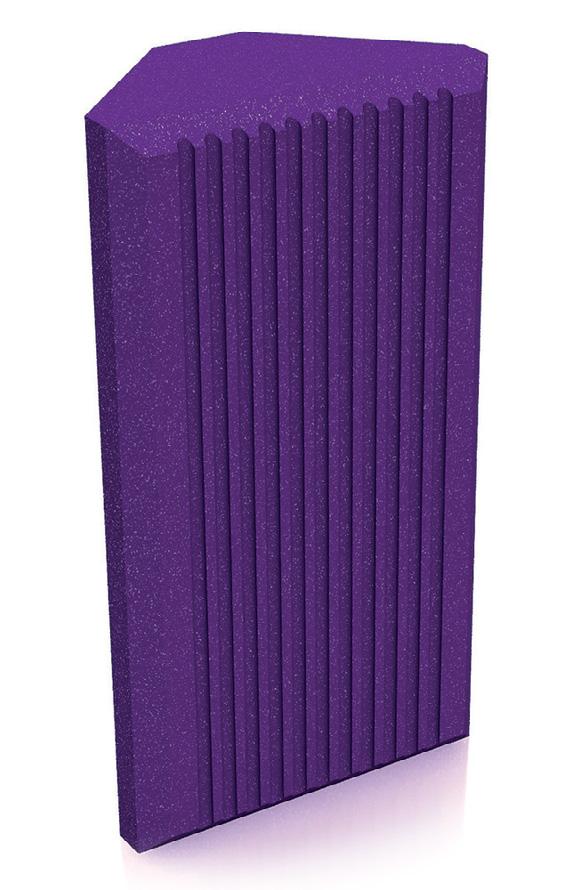
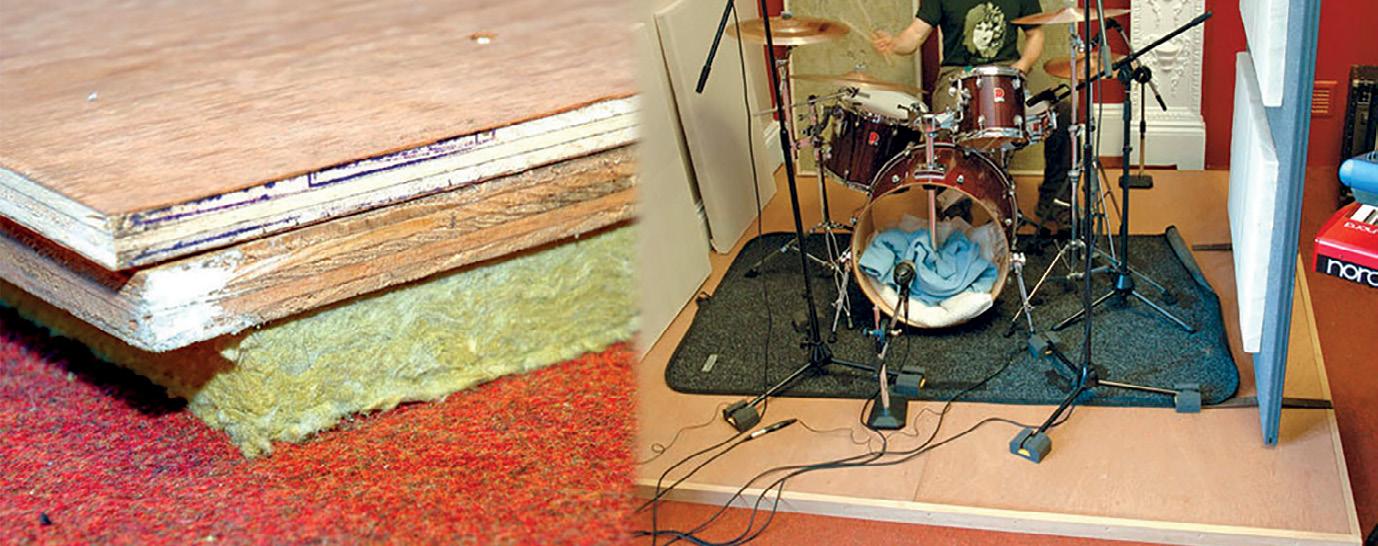
Chapter 7: Acoustic Treatment
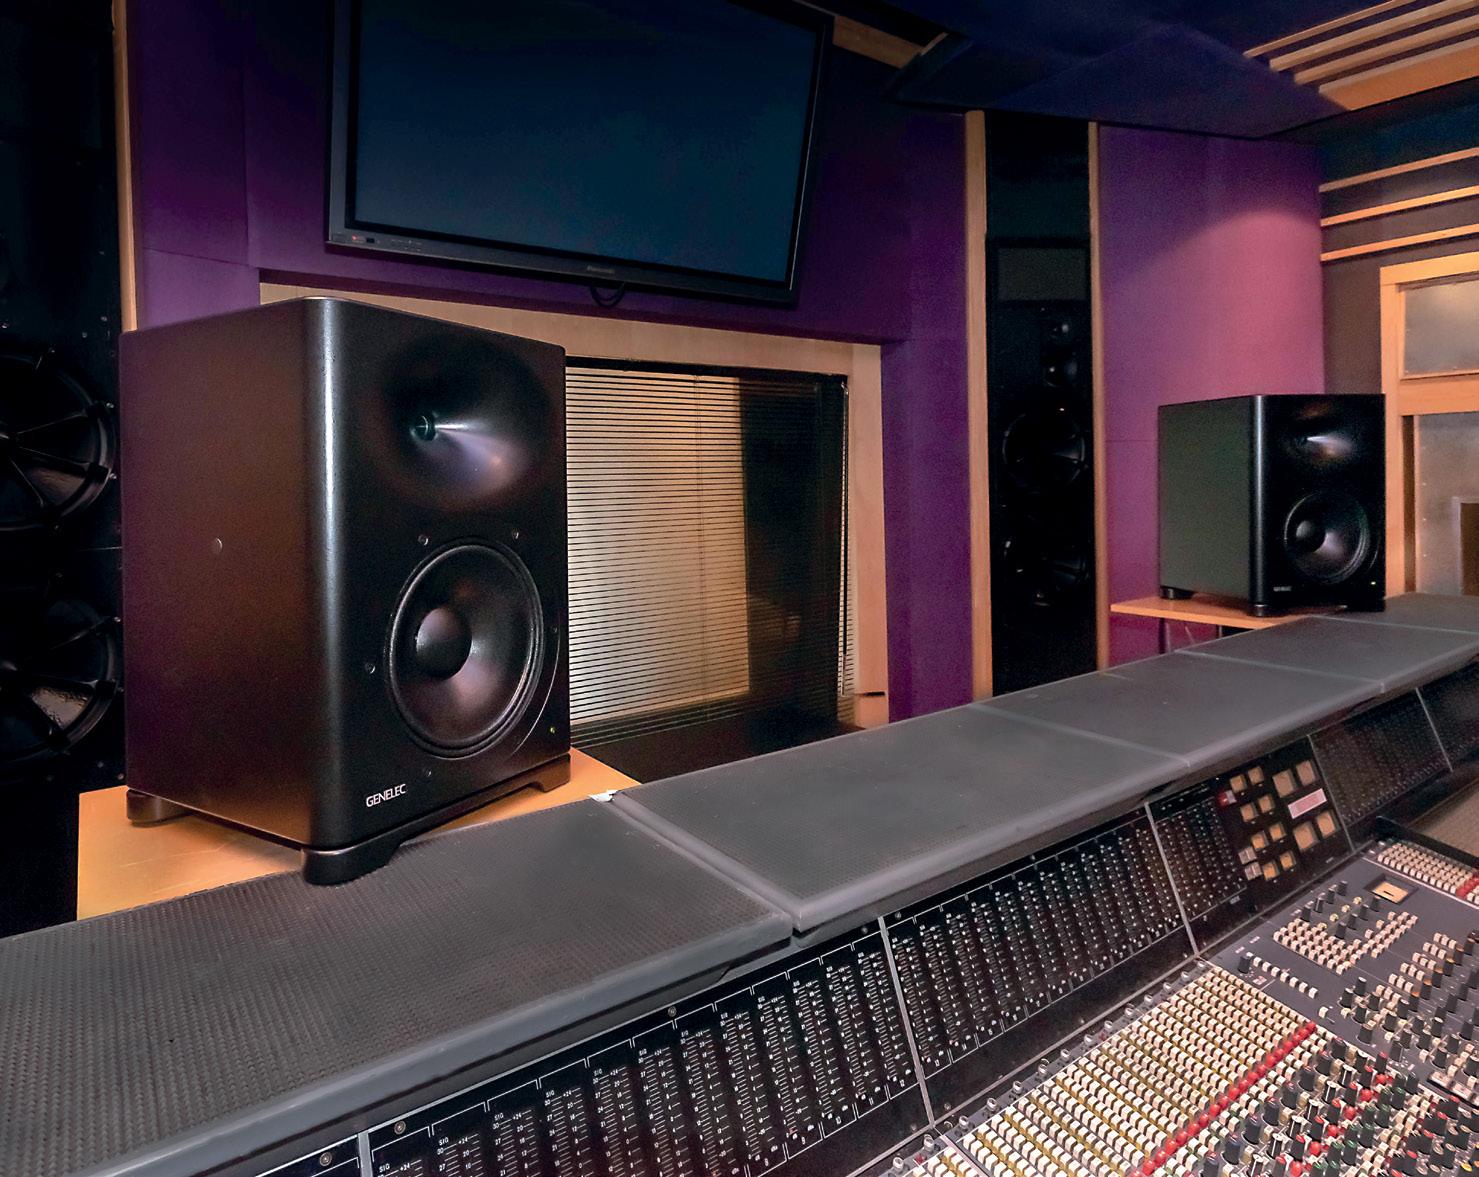
You are never listening just to your speakers, but always the speakers in combination with the room. We’ll help you make the most of whatever space your are working in.
Chapter 8: What Else Do I Need?
Welcome to the world of all the ‘extra bits’, like cables, adapters and stands. We’ll help you sort the essential from the ‘nice to have’.
Chapter 9: Understanding Digital Audio
You don’t really need to know how it all works in detail, but a basic understanding of the principles of digital audio will always be useful.
Chapter 10:
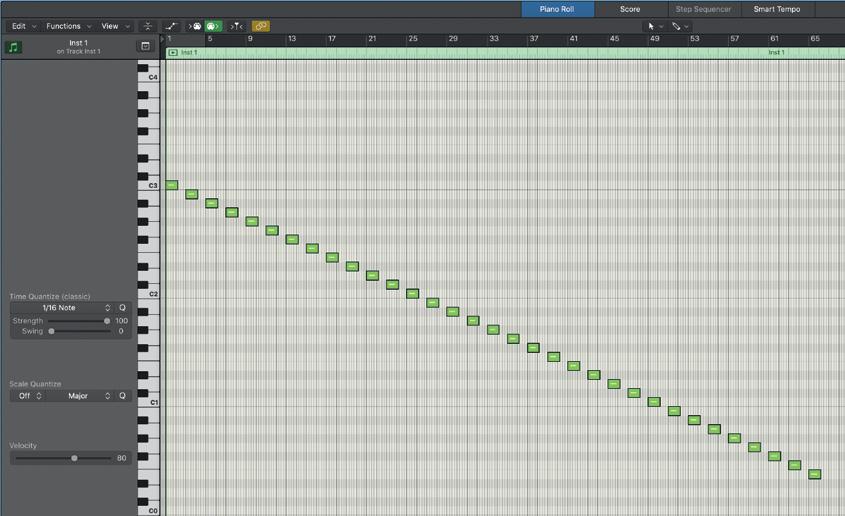
Making Sense Of MIDI
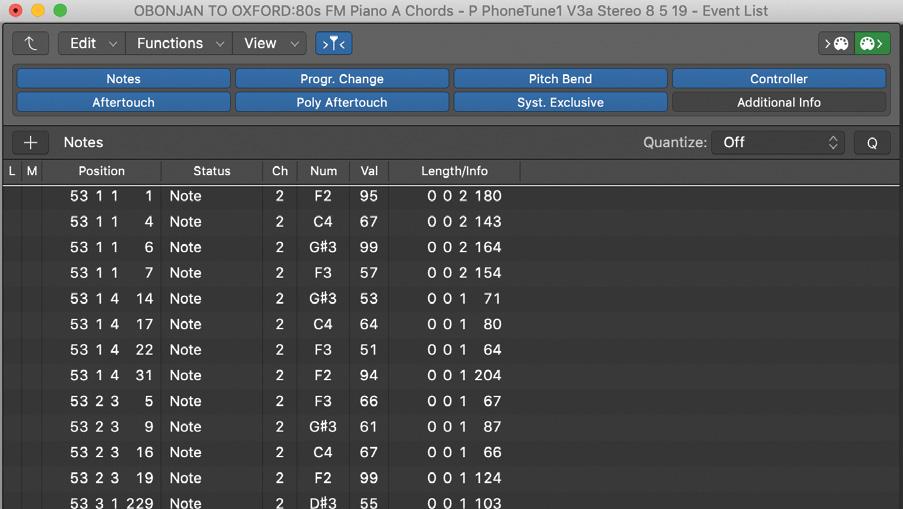
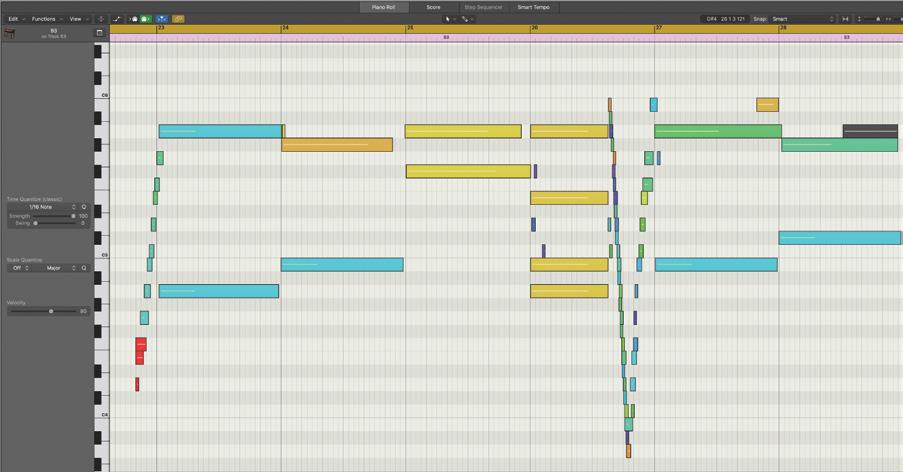
MIDI still manages to be slightly confusing to new users. The important thing to remember is that MIDI isn’t audio: it is a digital instruction set to tell MIDI-equipped instruments what to do.
Chapter 11: Getting To Know Your DAW Software
Today’s major DAW software packages may seem comlicated, but if you concentrate on just a few fundamentals to begin with, you’ll be recording, editing and mixing in no time.
Chapter 12: Recording Audio
Today’s powerful software allow us to ‘fix’ a lot of things that would previously have required re-recording. But the fact that you can, doesn’t always mean that you should!
Chapter
13:
Understanding Your DAW Mixer
How does an EQ work? What does a compressor actually do? What’s a plug-in? Software mixers are very flexible and powerful, but you don’t have to learn it all at once.
Chapter
14:
Getting Started With Mixing
To some, this is the most creative stage of music production. Start with all the faders open, or rhythm section first and build up from there? There are no rules, but we’ll guide you towards the techniques that might work best for you.
Chapter 15: Getting Deeper Into Production
Mixing drums, fine-tuning vocals, using powerful software processes for contemporary effects… Get creative. There’s not too much that can go wrong when you’ve got an Undo button!
Chapter 16:
Going Beyond!
Apart from adding more functionality to your studio, at some point you might also want to explore if you can improve the fundamental sound quality of your recordings, too.
Chapter 17: AI - The Future Is Already Here
AI and AI-like processes are now embedded within most music-production software, relieving us of some mundane tasks but also stimulating creativity with intelligent input into the process of music creation.
Chapter 18: Glossary
A comprehensive dictionary of recording and music-technology terms.
Photography Chris Korff, Dave Lockwood, Sam Inglis, Hugh Robjohns, Paul White
PRODUCTION
graphics@soundonsound.com
Design Mick Reilly
Production Michael Groves
admin@soundonsound.com
Managing Director/Chairman Ian Gilby
Editorial Director Dave Lockwood
Marketing Director Paul Gilby
Finance Manager Keith Werthmann
ONLINE
support@soundonsound.com
Digital Media Director Paul Gilby
ADVERTISING
adsales@soundonsound.com
marketing@soundonsound.com Business
Let’s get started!
Welcome to Basics & Beyond! There has never been a better time to get into music recording and production. Audio equipment capable of professional-sounding results is now available to more people than ever before, and is much simpler to use than it used to be — but it may not seem like that if you are a beginner facing what feels like a steep learning curve! At Sound On Sound we are here to help you with that. The aim of Basics & Beyond is to help you choose the right gear for you, and acquire the essential skills to make the most of it.
There are plenty of ‘everything you need to know’ books that will try to make you ‘an expert in no time’, but what you really need at the start is just a clear understanding of the basics: how the essential components of your system work, and which aspects of technique are really important. So, if you are just getting started, or have been at it for a while and yet still can’t seem to get the results you want, rest assured you’ve come to the right place. Your kit may be capable of recording to a very high standard from day one, but it can all too easily be compromised by a poor recording environment, inaccurate monitoring, inappropriate microphone placement, and many other factors that really just add up to a lack of experience.
We’ll have practical, low-cost advice on acoustic treatment and how to set up your room for both recording and mixing — problems sometimes start just with the placement of gear within
the room! We’ll equip you with an understanding of microphones that will help you buy the right ones and put them in all the right places. If you’re using a computer-based system built around a Mac or a Windows PC, we’ll make sure you know what your audio interface does and which bits of your recording software you really need to understand at the outset. If you prefer a mobile setup based around a tablet or a dedicated hardware recorder instead, fear not, as you will find much of the information will be equally applicable.
Once you’ve recorded some instruments and maybe a vocal, we’ll guide you through setting up a mix, using EQ, dynamics processing and all the other tools that go to make up a polished, professional-sounding track with front-to-back perspective as well as stereo width. You might be surprised by how simple and logical the whole business of recording and mixing can be once you have a good understanding of the basic principles involved.
Setting up a home recording system doesn’t have to cost a fortune these days. In fact it could be said that many people spend rather too much money on their gear and not enough time acquiring a skillset that allows them to use it all properly. Modern recording software now contains within it all the production power of a top-class professional studio, so the only real limitations are your understanding and your creativity. Let’s get started!
Dave Lockwood Editorial Director Sound On Sound
Chapter 1
Many DAWs have a version that will run on either a Mac or a Windows PC, but if want to use Logic Pro X as your DAW, you’ll need an Apple Mac.
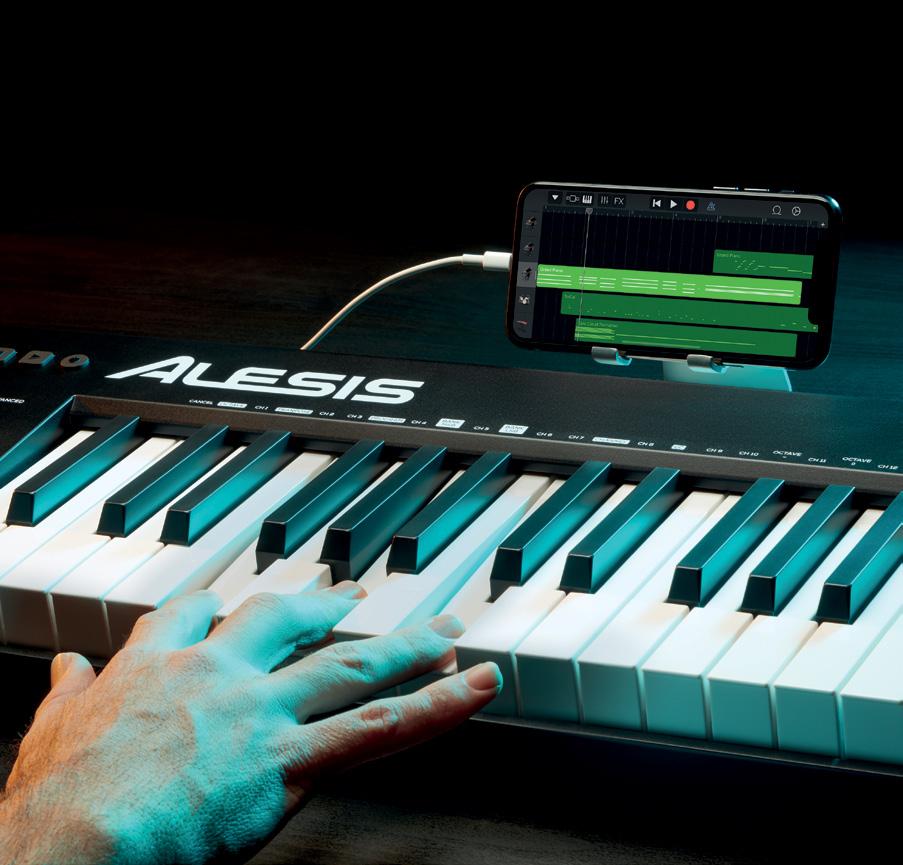
The vast majority of music recording and production, especially in home studios, is now carried out using a computer, and the fact that you’ve downloaded and are reading this rather suggests that you may already have one. Of course, you may be using a tablet or a phone, and these too can be used for music production, especially when you want a ‘go-anywhere’ system for making music on the move. But there are some compromises involved in using a mobile device as your sole means of recording and production, and whilst much of what we will be looking at applies equally to any software-hosting platform, we will be concentrating primarily on the use of a laptop or desktop computer as the heart of your system.
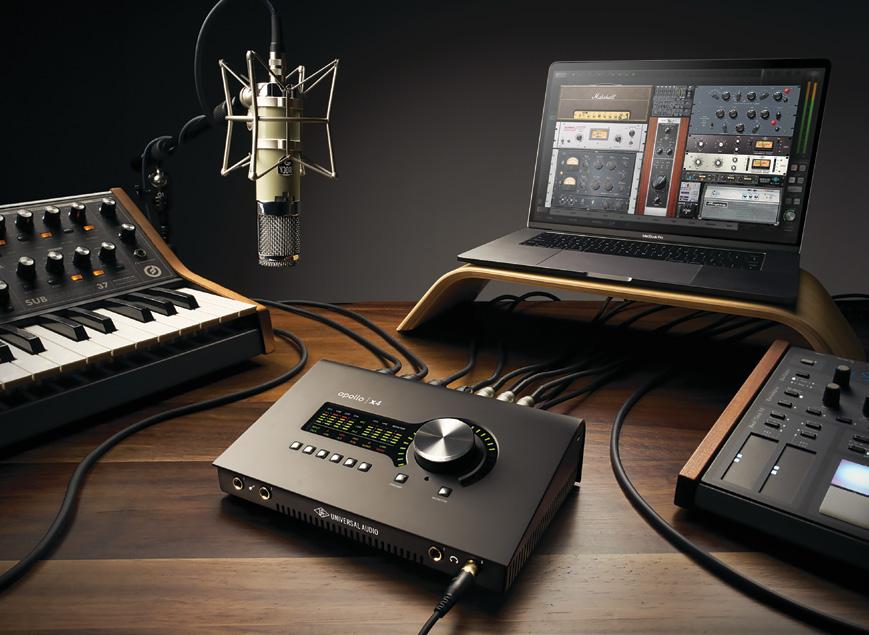
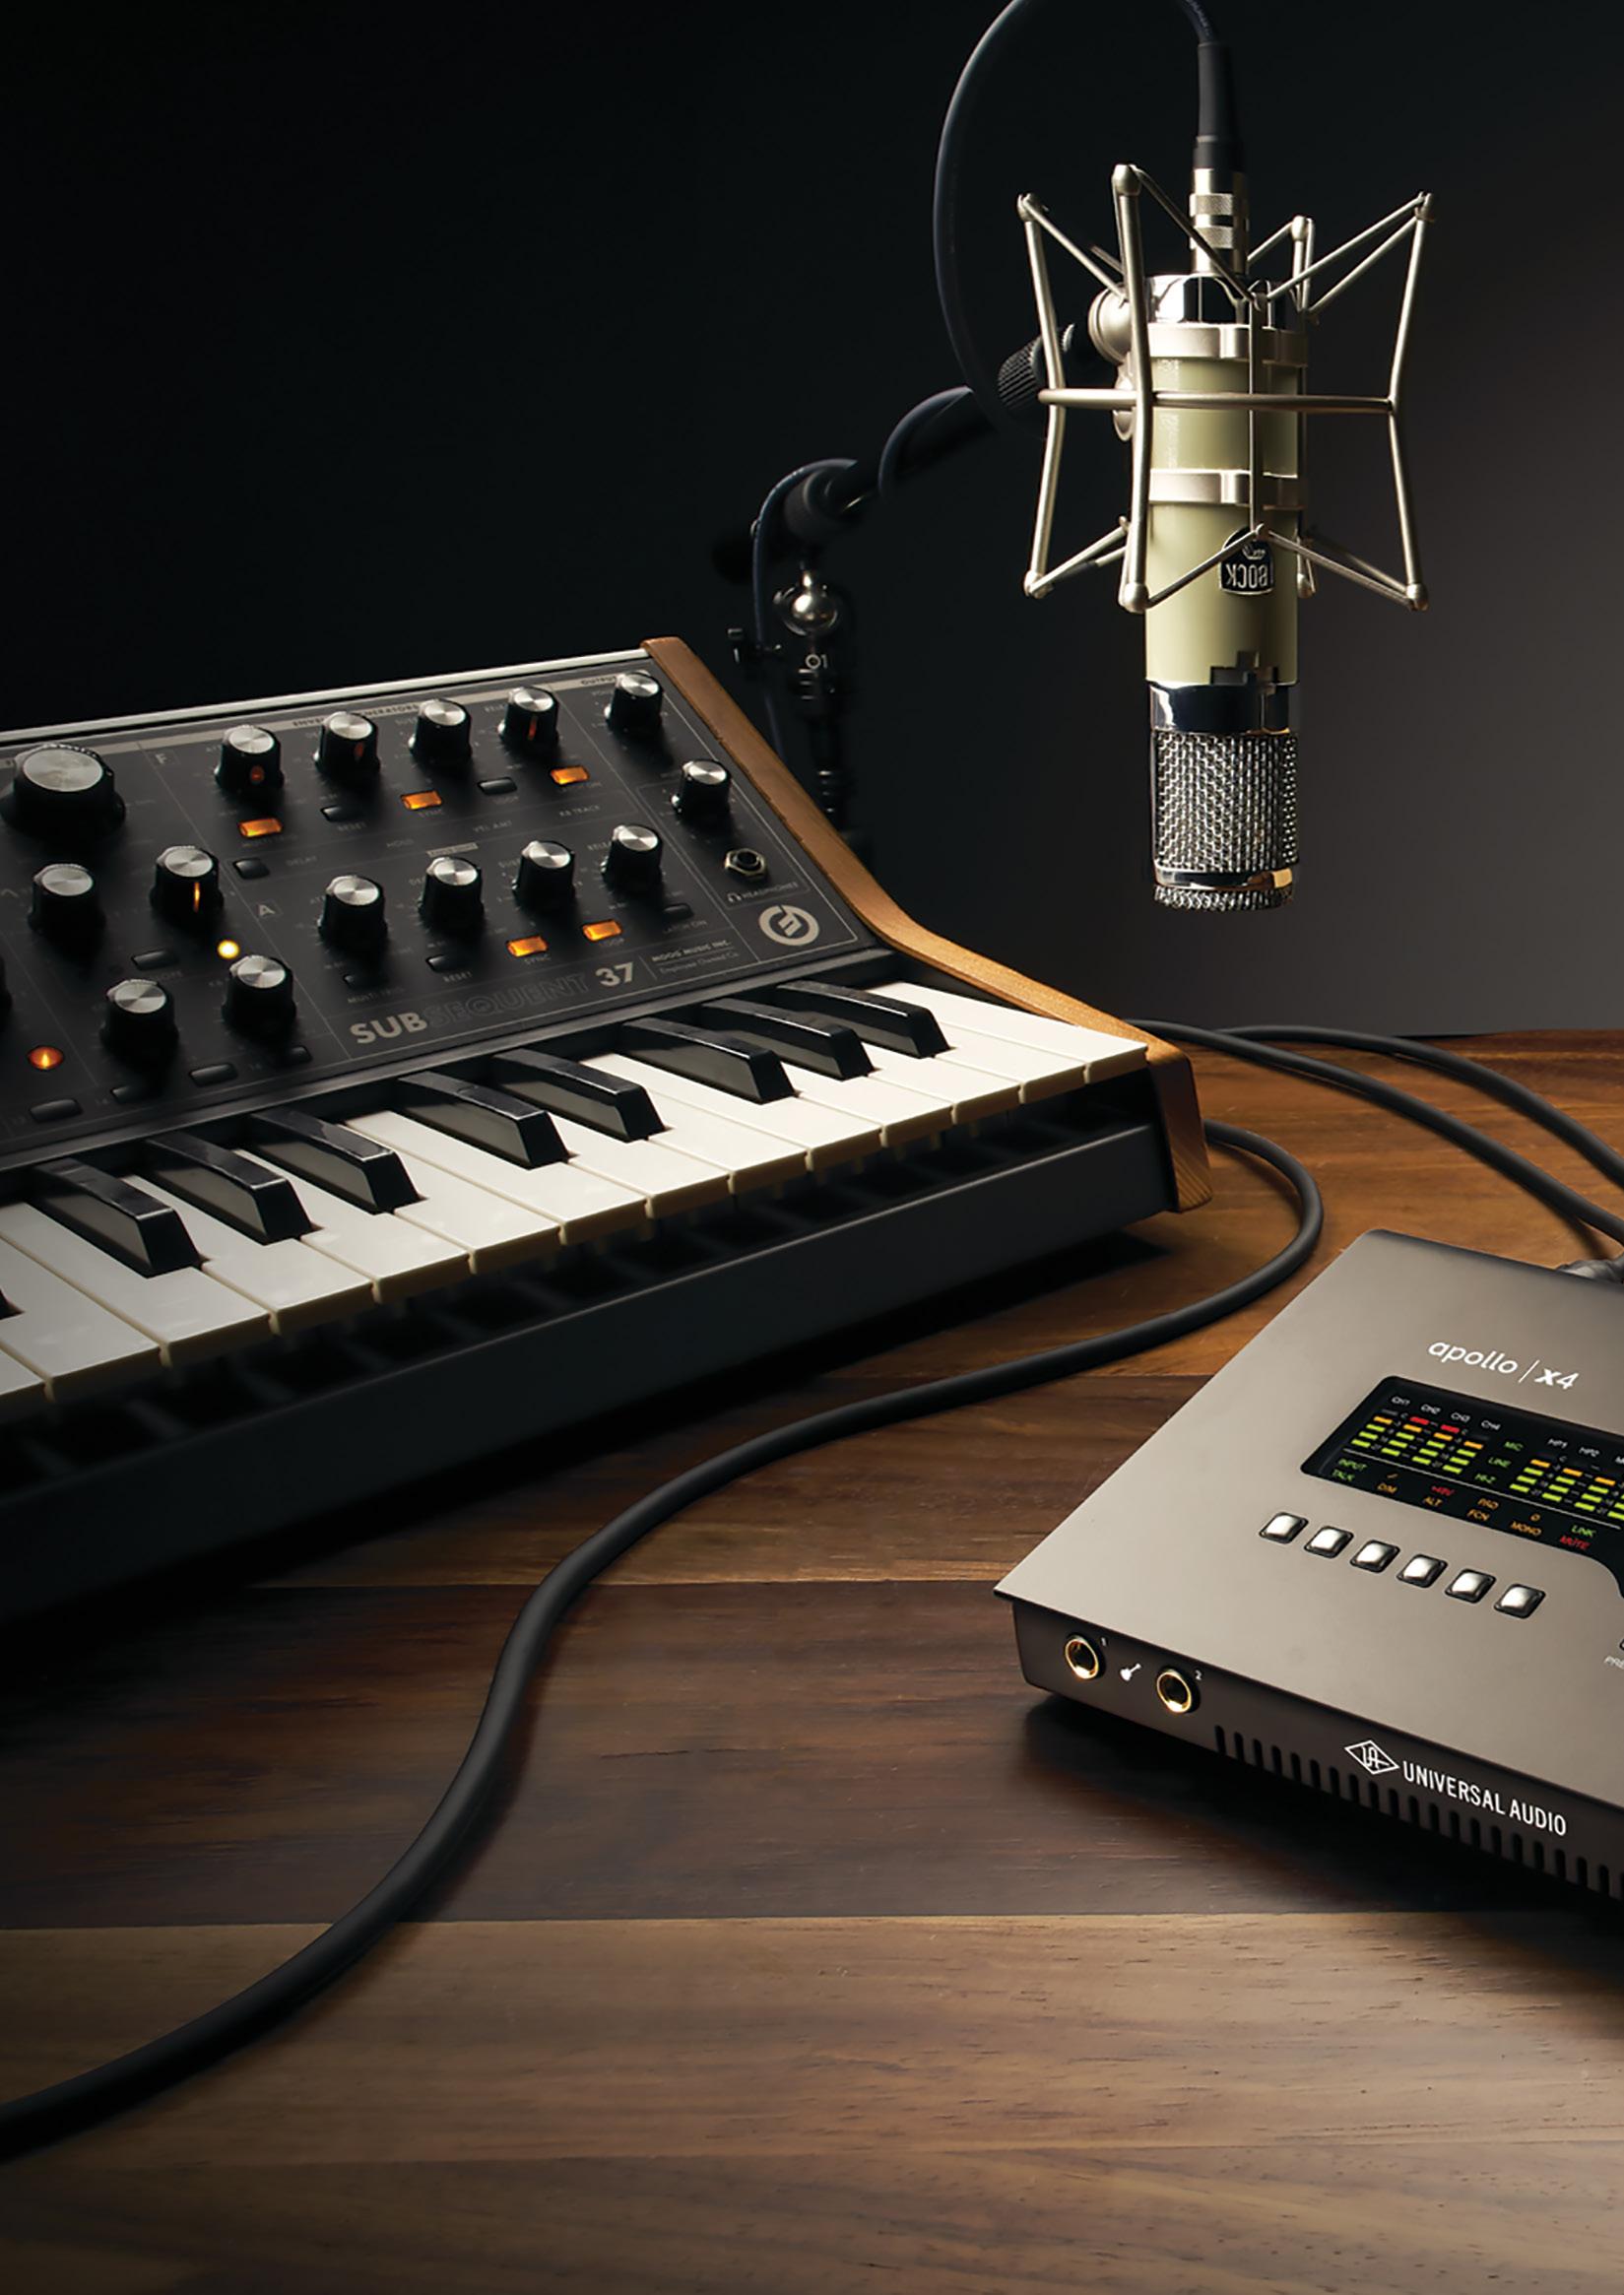
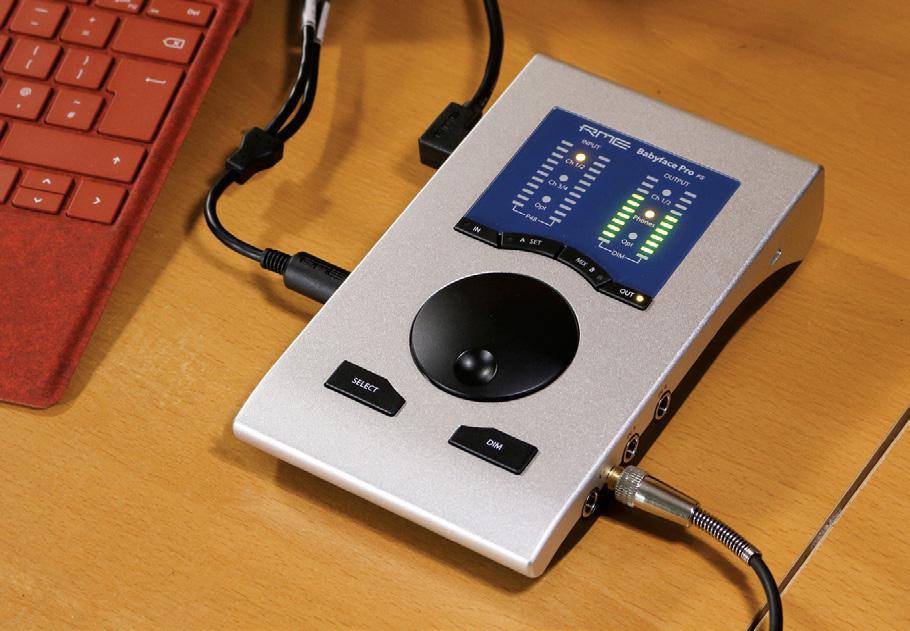
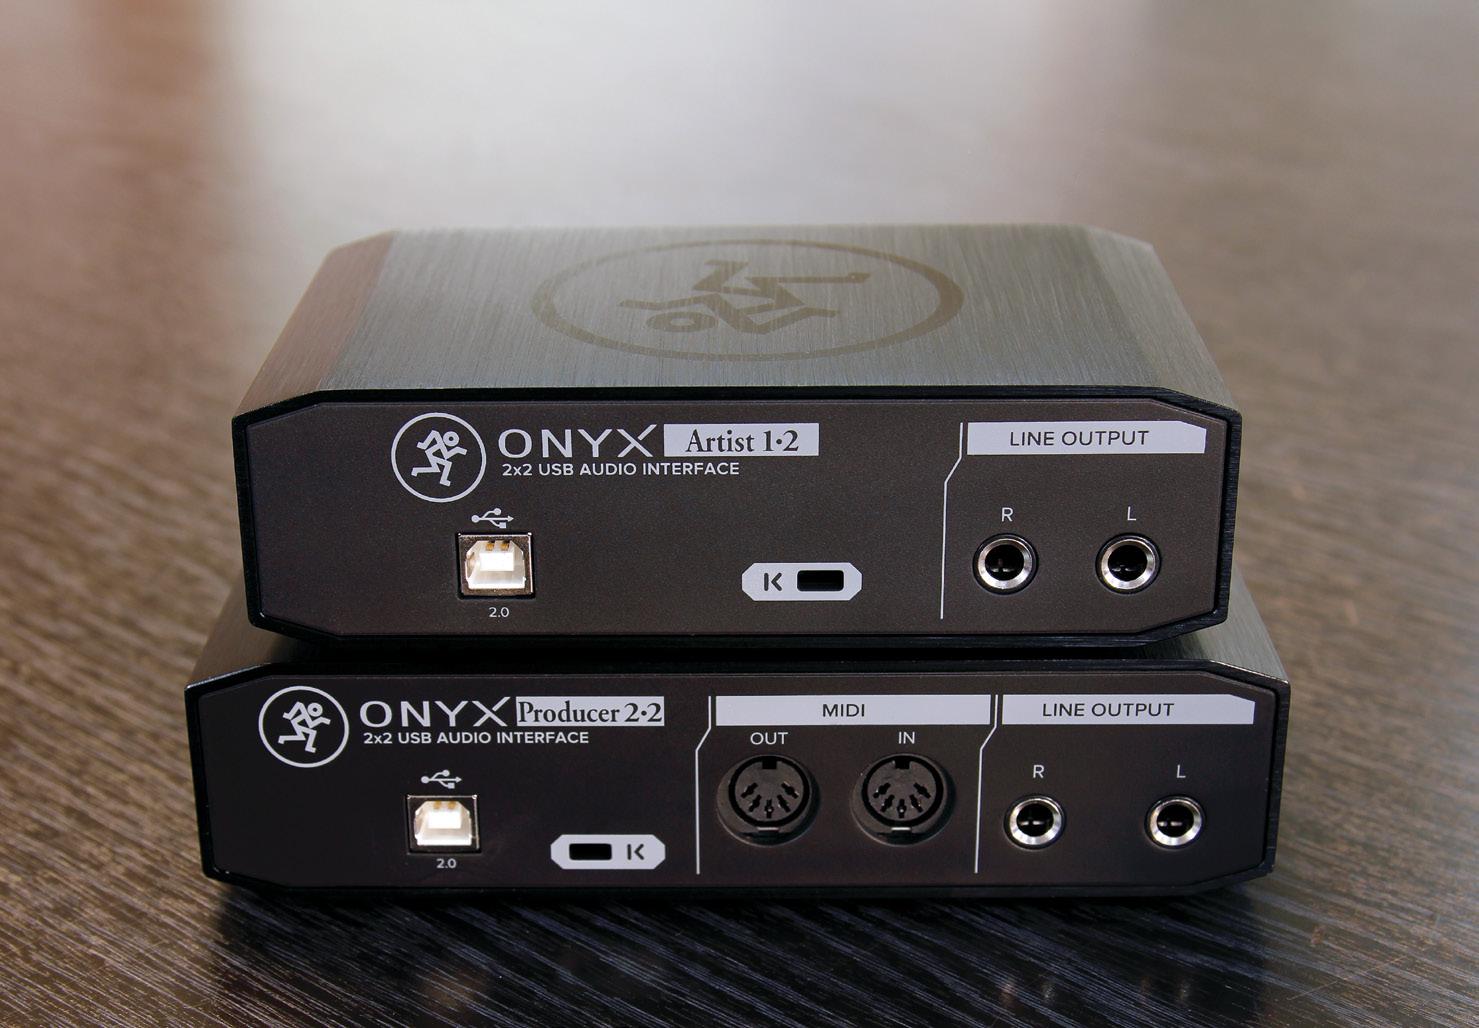
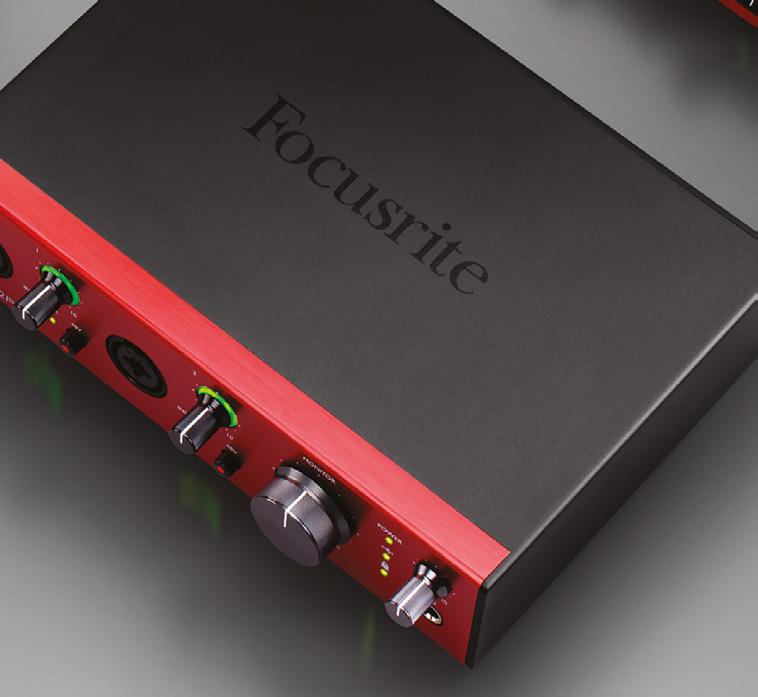
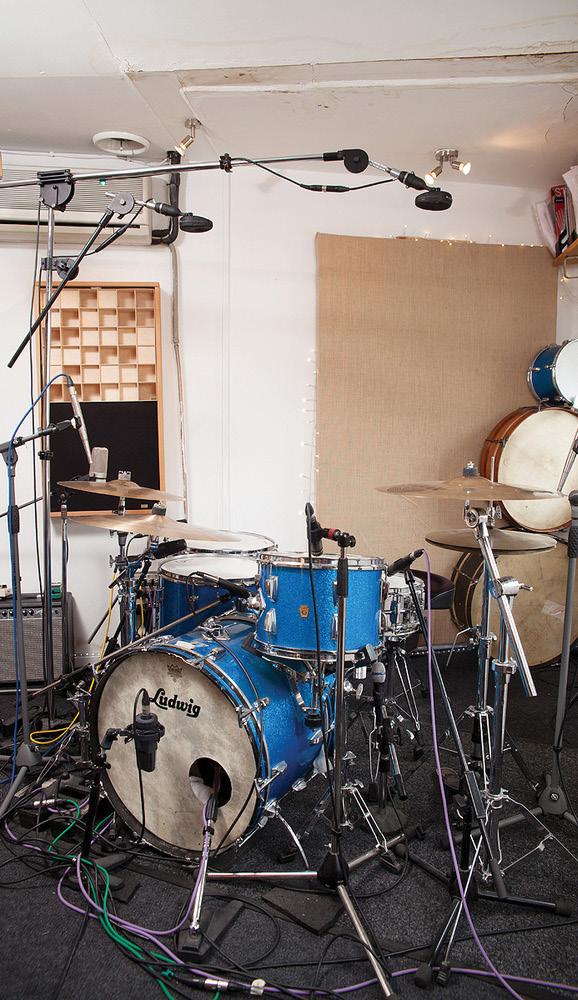
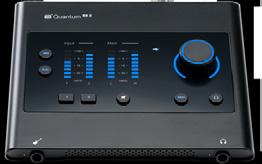
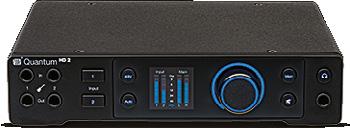
The audio interface is at the heart of a computer-based recording setup. The software looks after the recording, mixing and processing, but the audio interface is what gets the sound in and out. Compact audio interfaces come in a variety of forms, with size having no bearing on performance!
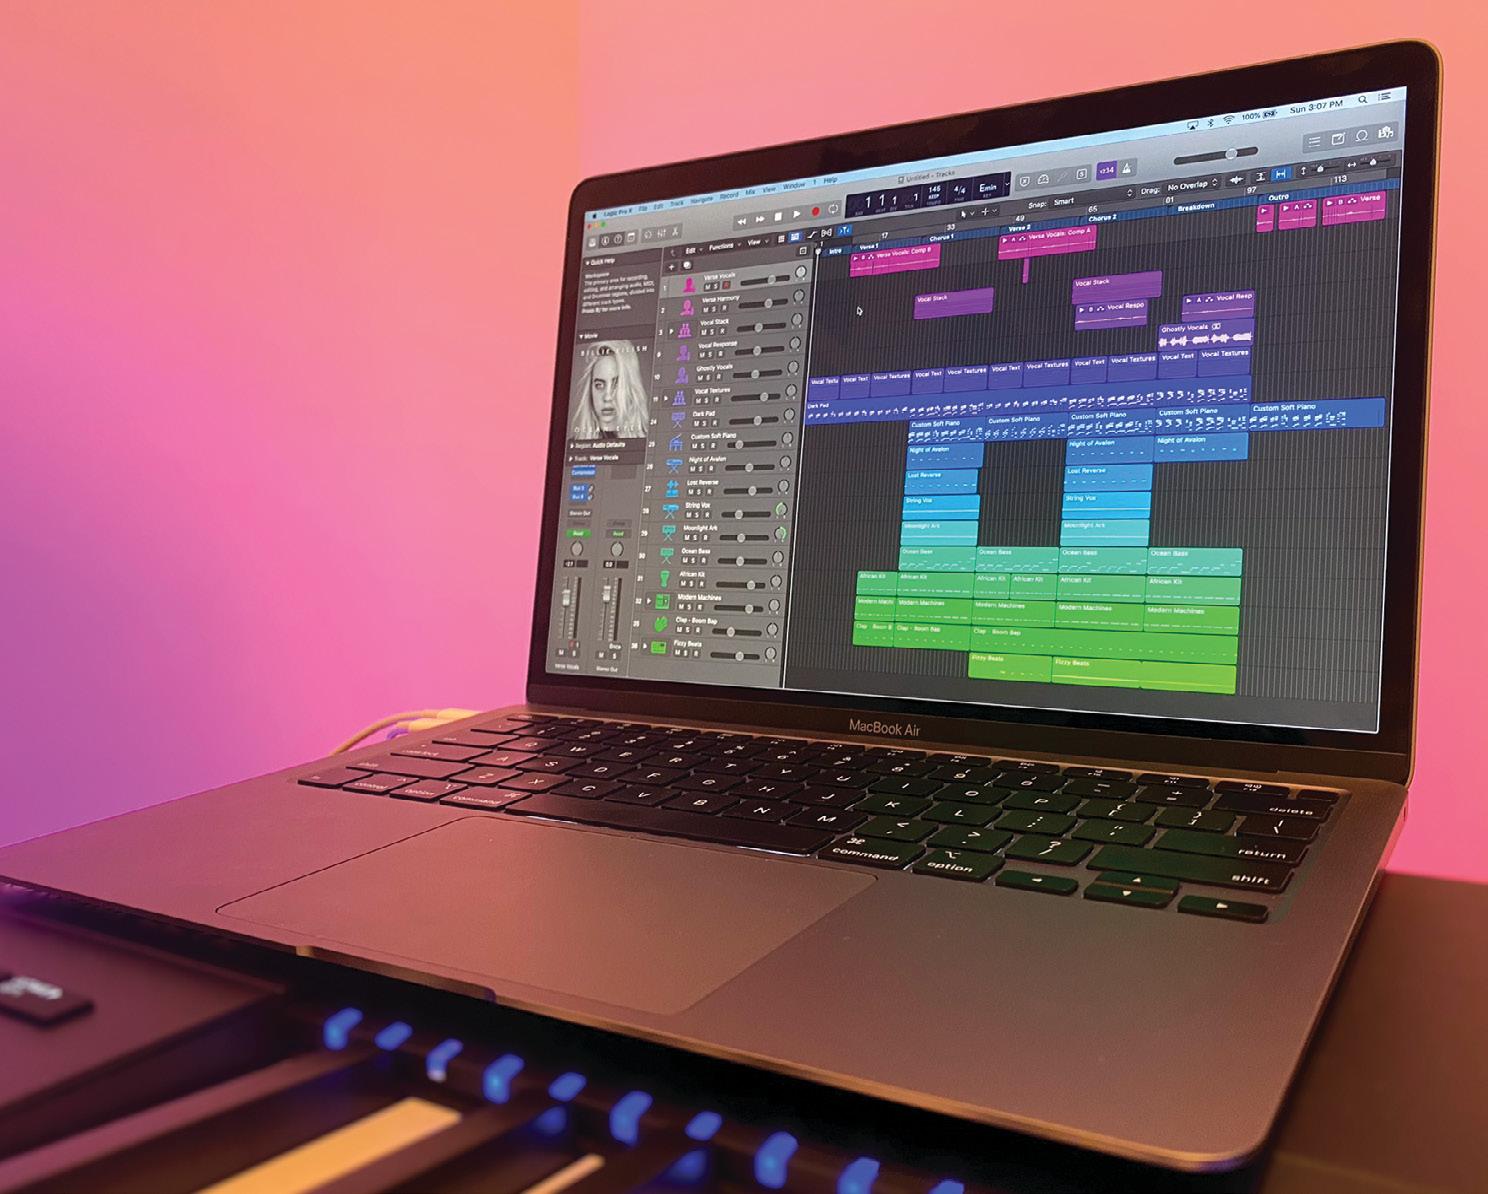
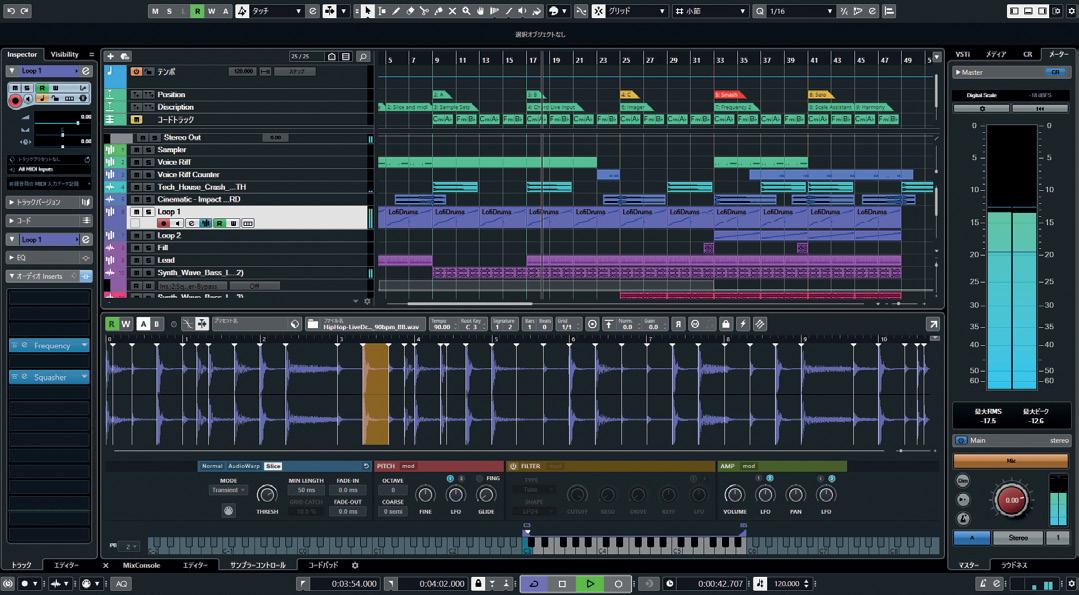
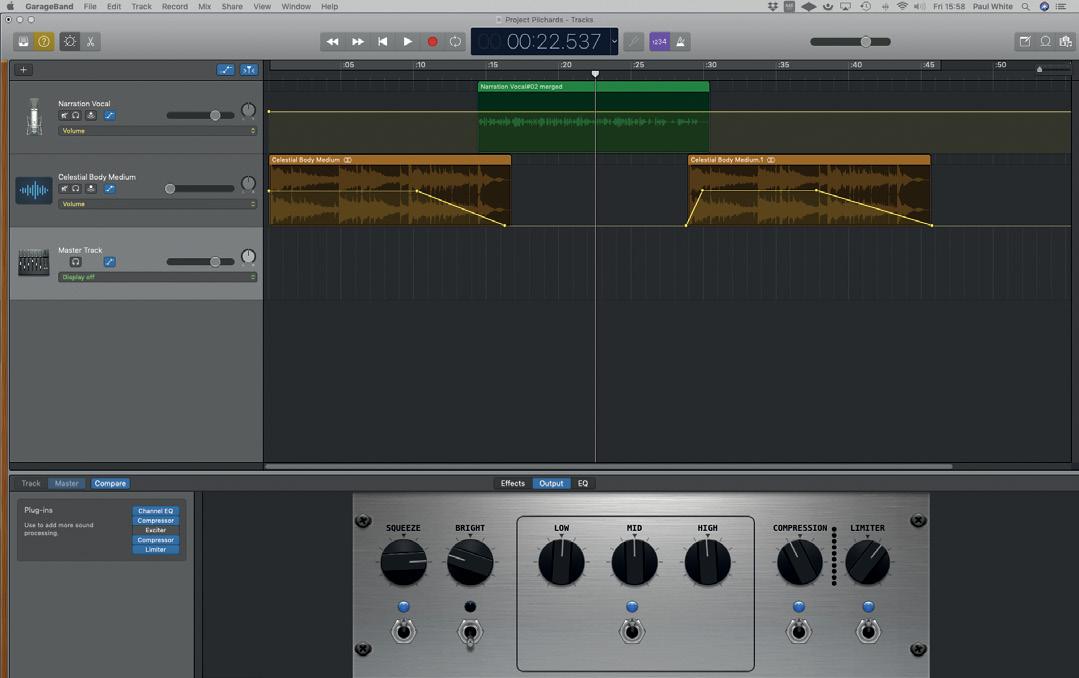
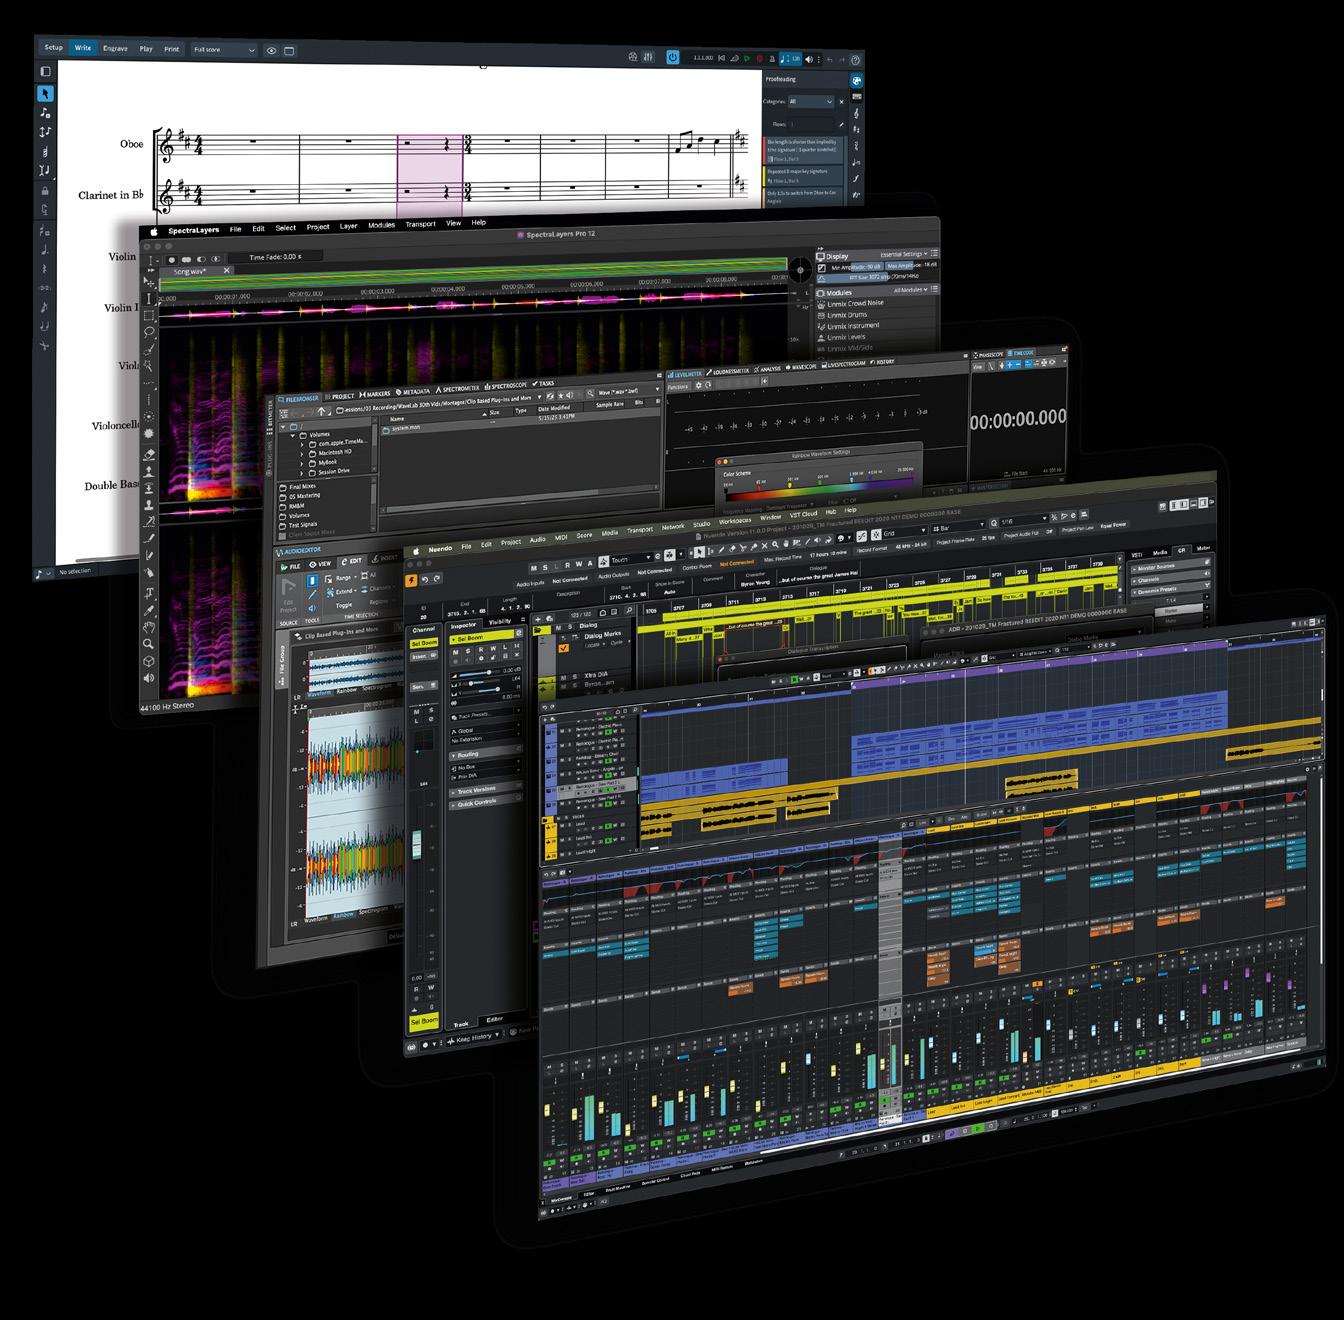
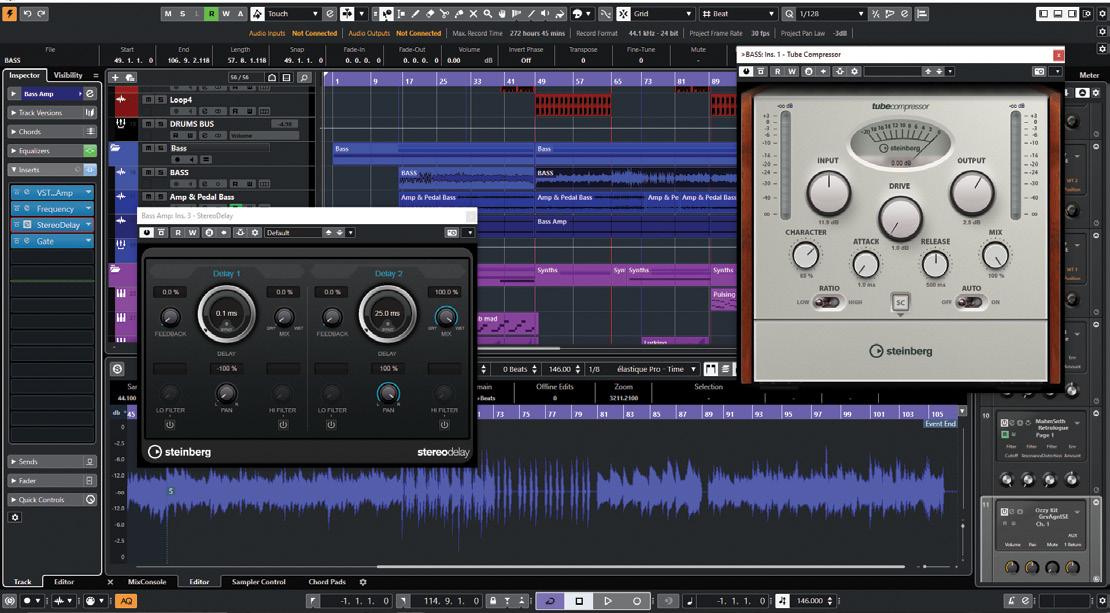
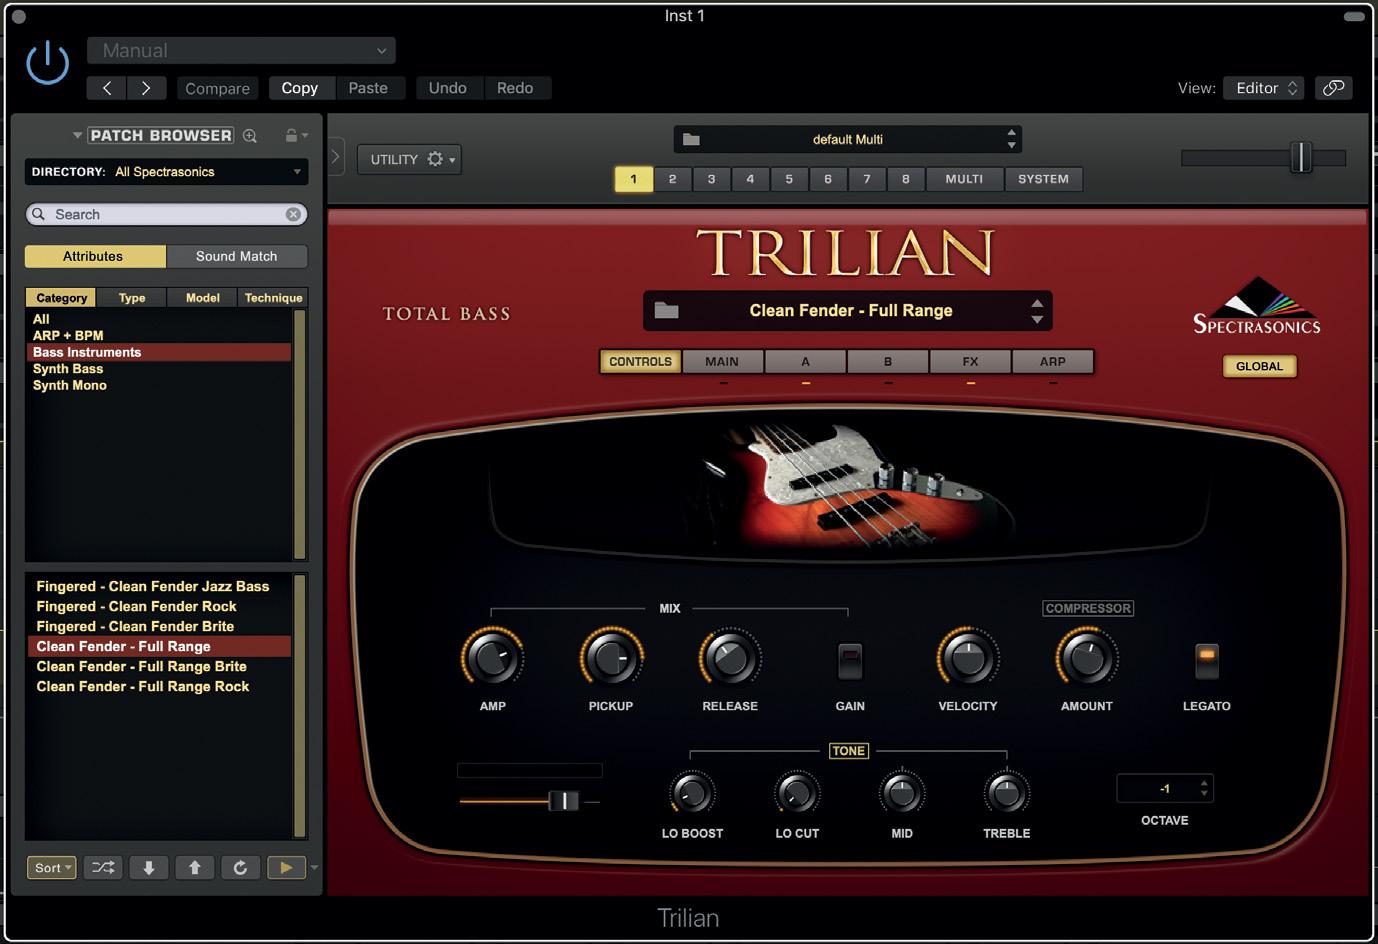
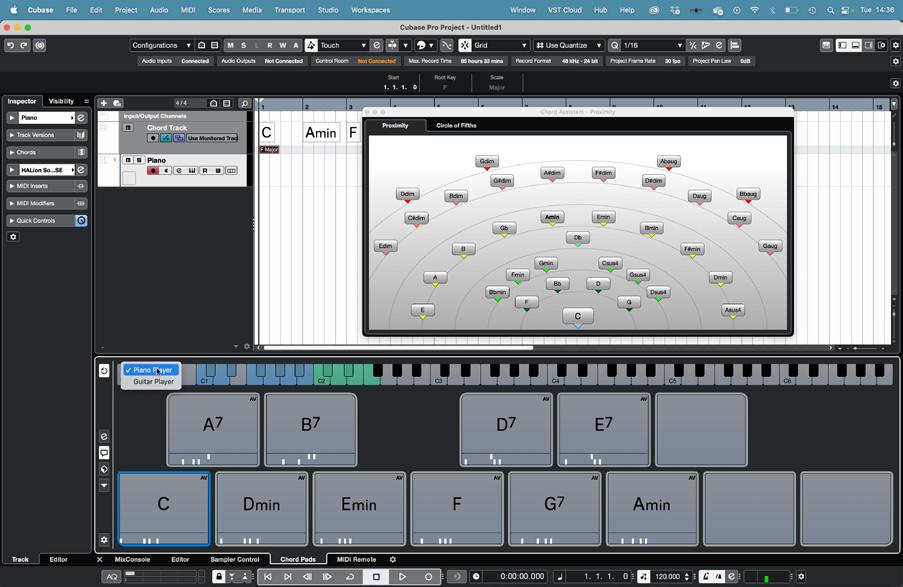
Steinberg’s Cubase DAW offers one of the most complete and powerful production environments, but most of the major DAWs now include an impressive suite of software plug-in processors and virtual instruments as standard, so there’s no ‘wrong’ choice to be made. Apple’s Garage Band, available for Mac OS and iOS may once have been a stripped down get-you-started DAW, but it is now a fully featured musicproduction app, closely resembling Logic Pro X.
Almost any reasonably modern Mac or Windows PC computer will be sufficient to get you started in recording, and there are just a few other key components you need. The first of these, an audio interface, is the essential box that sits between your audio sources and the computer, turning sound into something the computer can record and manipulate, and turning it back into something you can listen to on headphones or speakers. This is one of the most important things that you’ll be acquiring, so we’ll be devoting a whole chapter to helping you make the right choice.
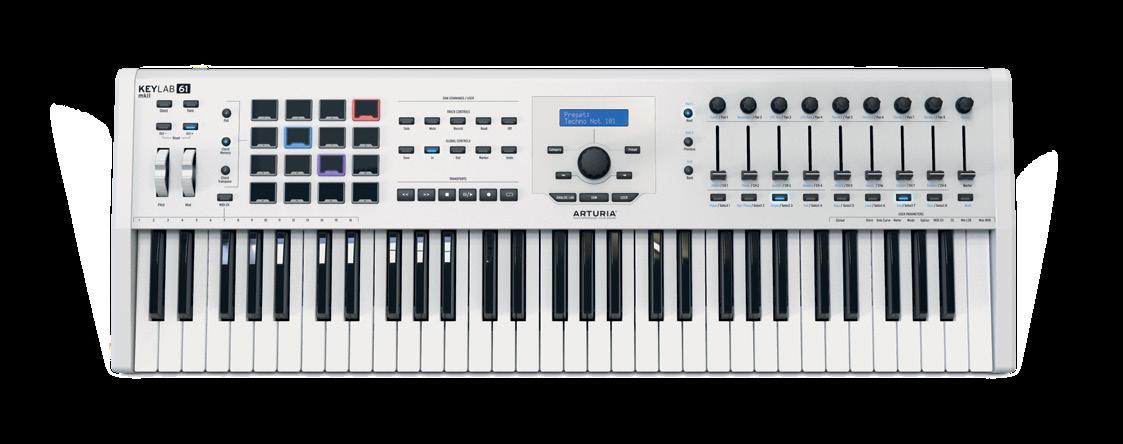
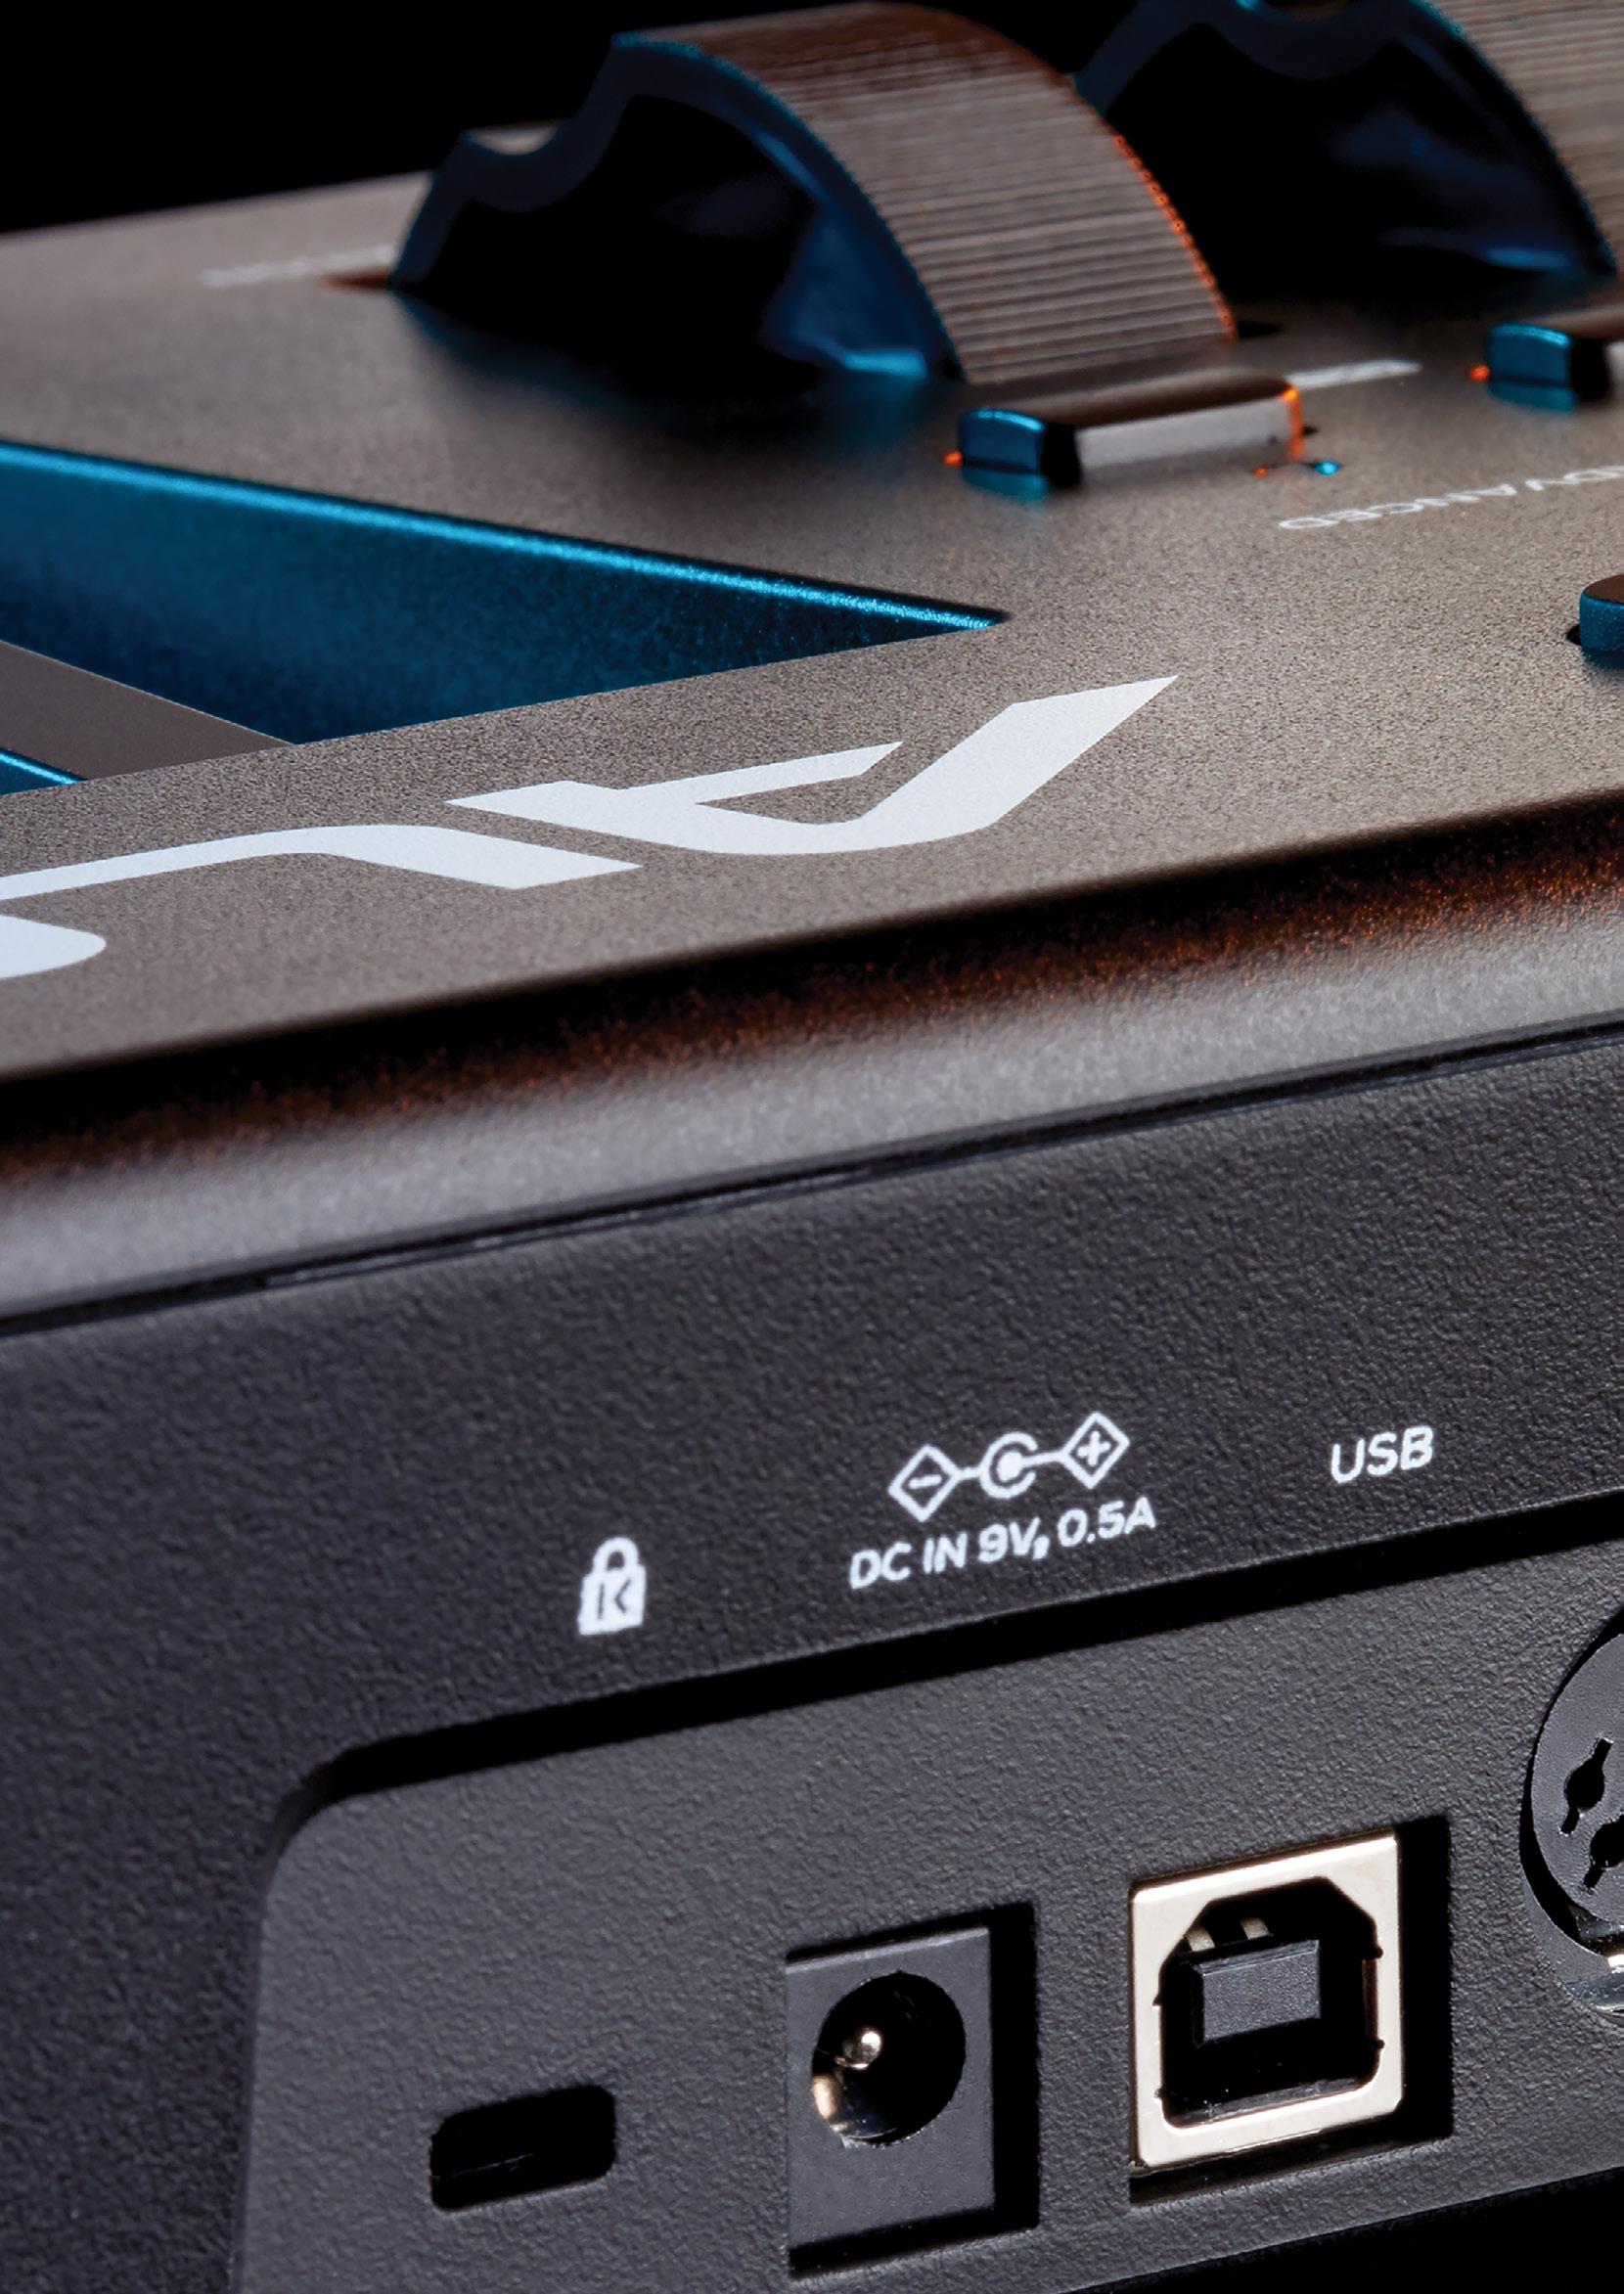
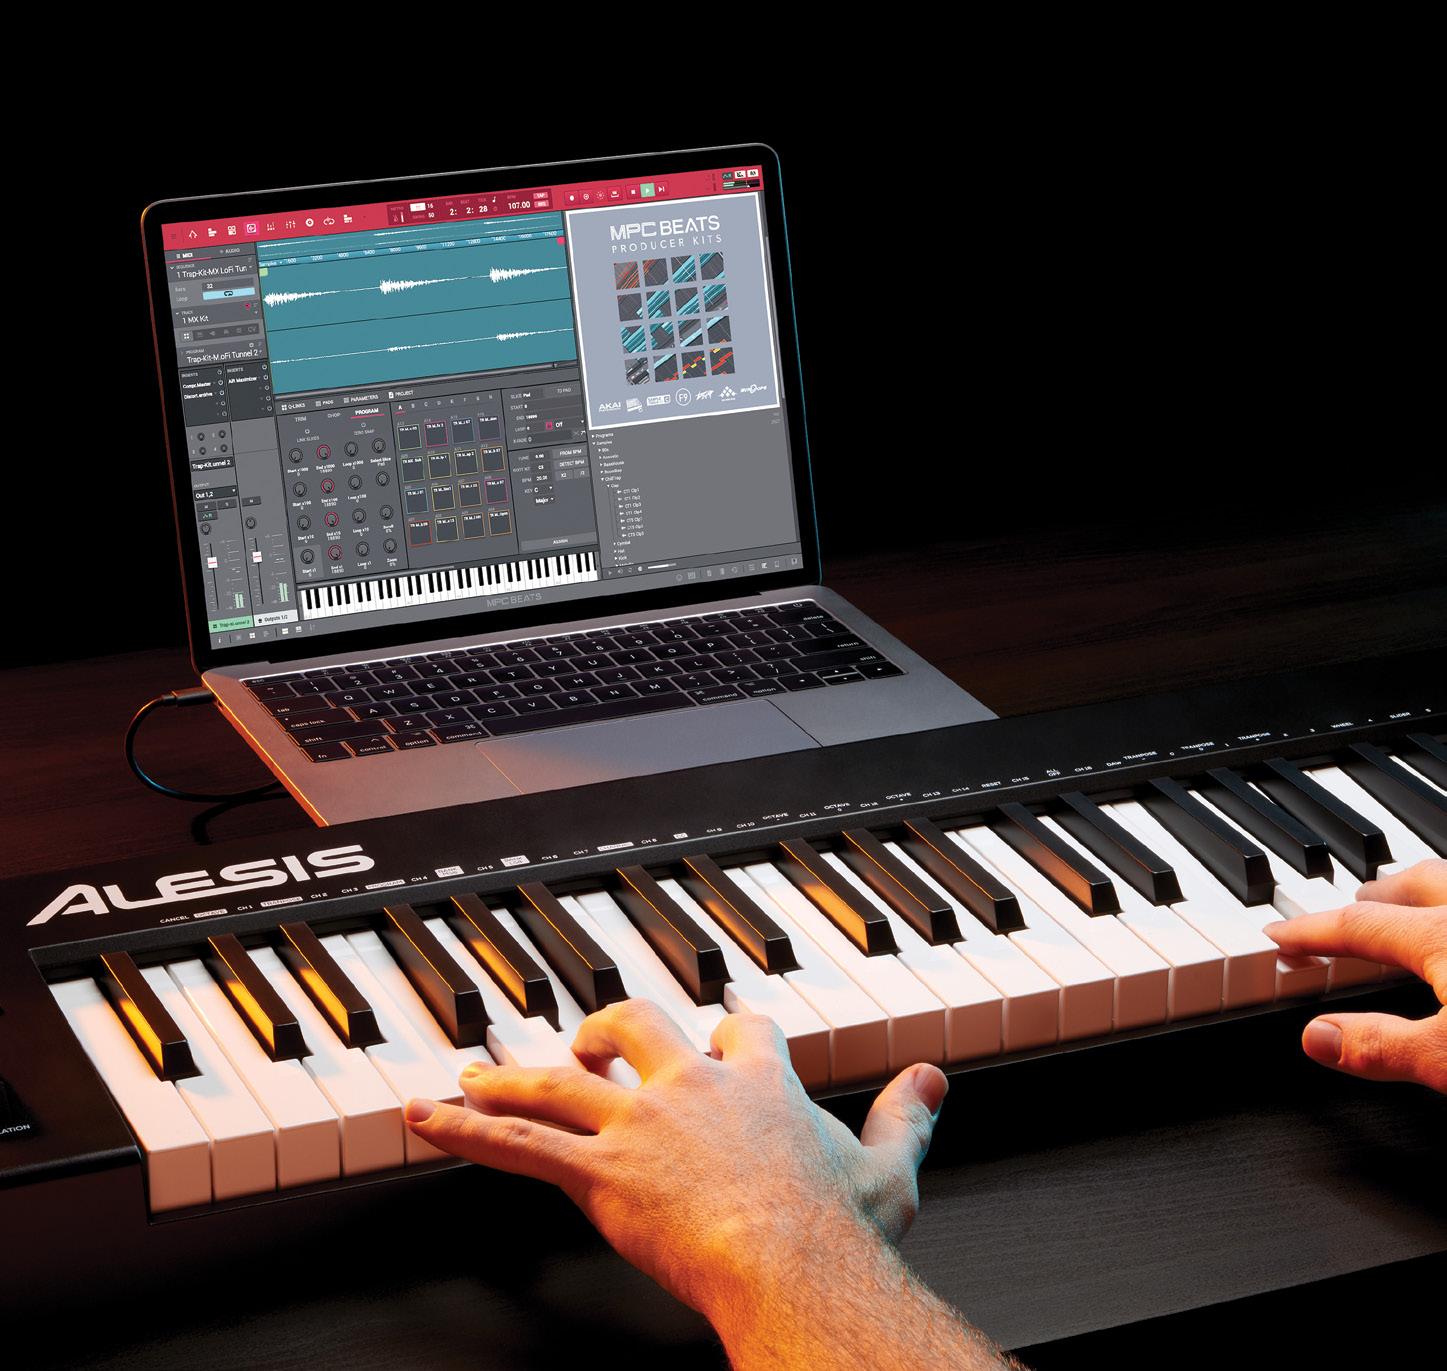
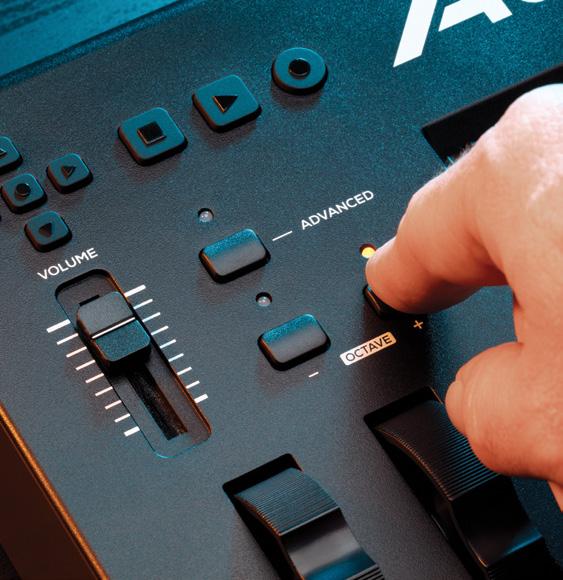
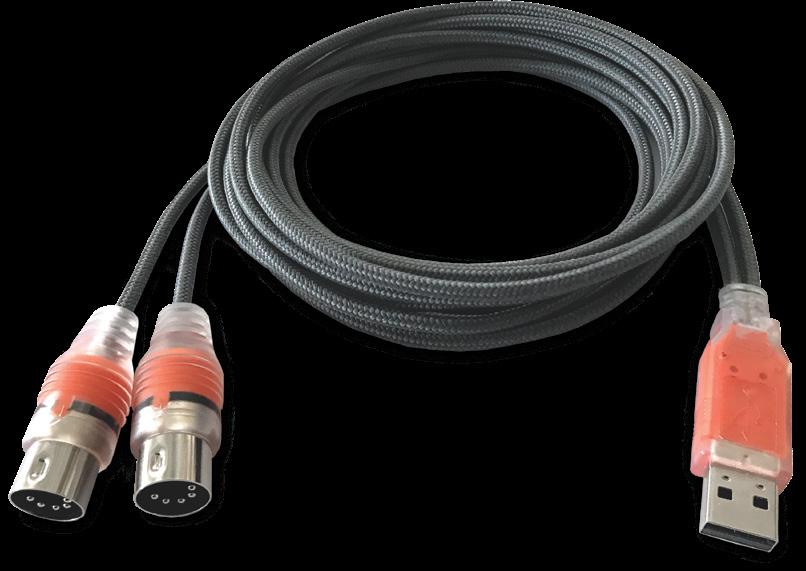
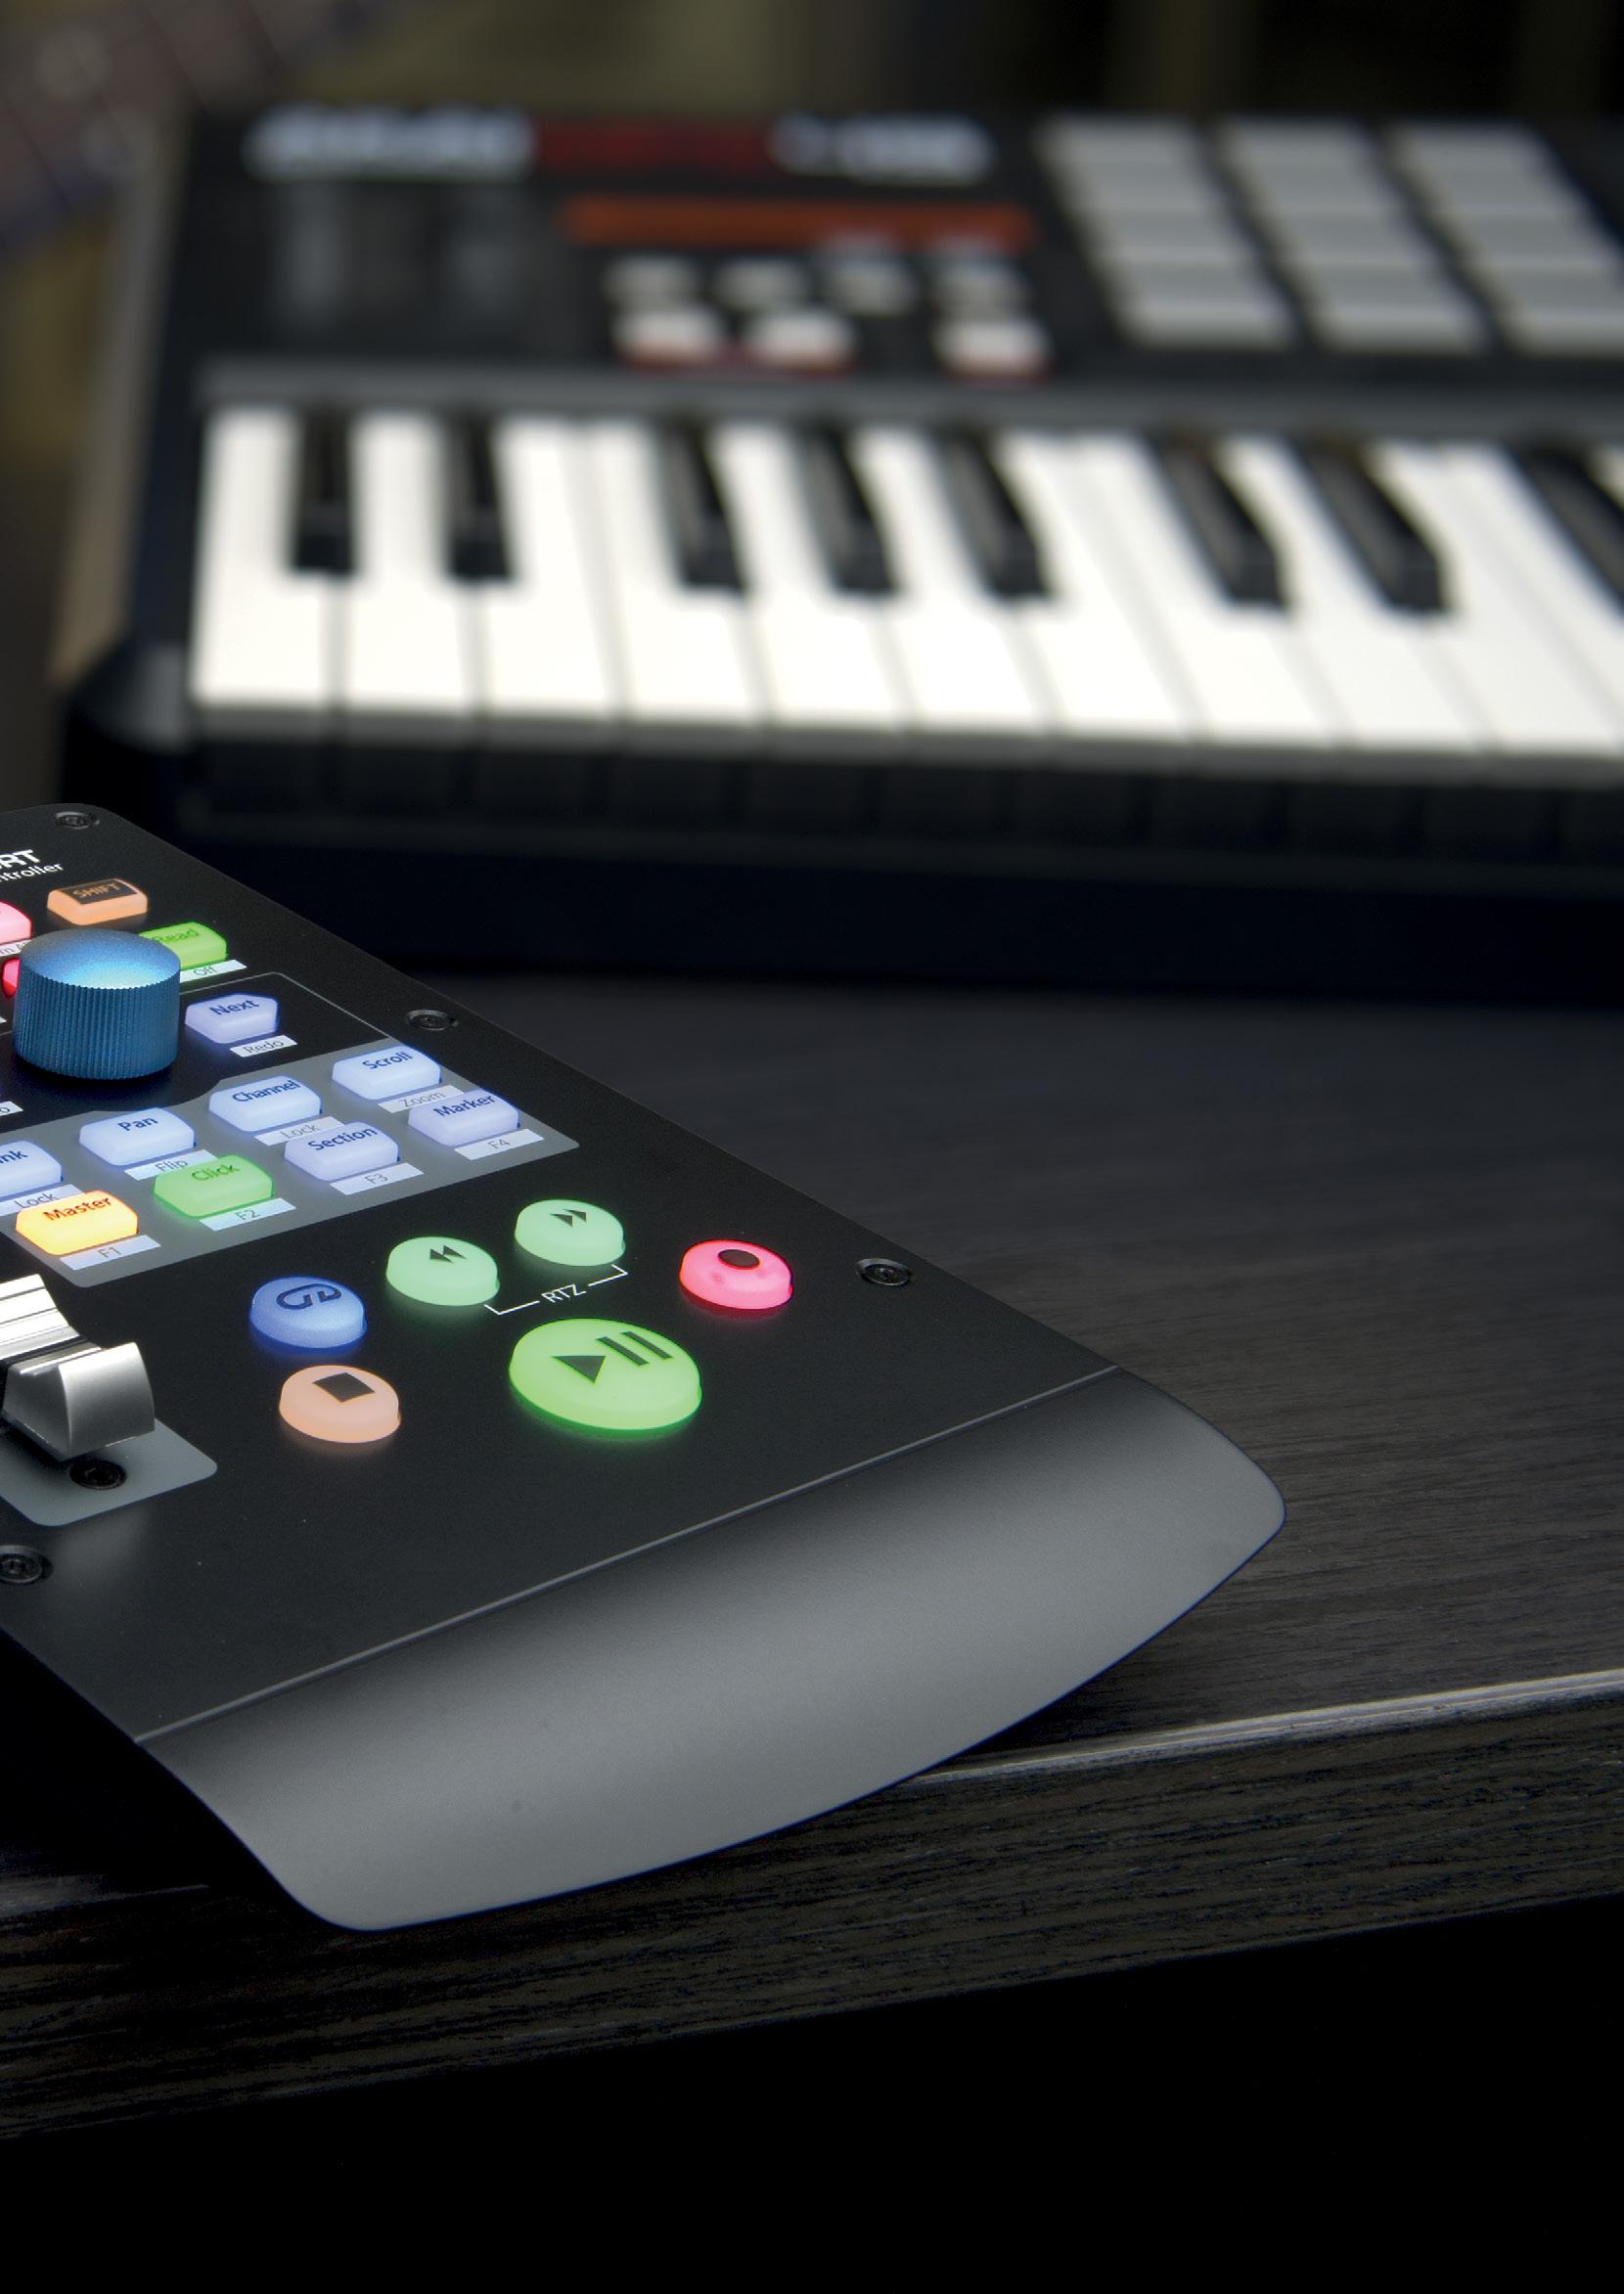
If you are starting from scratch and don’t yet have a computer, we’ll help you get that choice right, too. You’ll also need headphones, or speakers, or ideally both. Headphones alone, however, are quite sufficient to get you started, as you can always add speakers later. Finally, if you want to record vocals or any instrument that you can’t plug in directly, you’ll need a microphone. You just might want to include a keyboard, too, especially if you already have some keyboard-playing skills. A compact ‘controller keyboard’ with a USB output — one that just transmits MIDI data and makes no sound of its own
— is actually a useful thing to have around anyway, even if you don’t play keyboards at all.
Which software should I choose?
Your computer won’t be much use for recording without a program to tell it what to do. Recording programs are widely referred to as DAWs, which is short for ‘Digital Audio Workstation’. This is a slightly archaic term that was originally used to describe expensive dedicated hardware systems. These days it tends to mean any well-specified program or app that does audio recording, editing
and mixing. Many DAWs will run on either a Mac or a Windows PC, but some don’t, so if you already have the computer you intend to use for audio, your choices may be more limited. For example, Logic Pro X is developed by Apple and only runs on a Mac.
All of the ‘big-name’ DAWs are very capable and, with the exception of Ableton Live, tend to work in much the same way. All of them typically offer directly equivalent facilities, so there’s no ‘wrong’ choice in that area. The chances are that whichever one you choose, you’ll stick with it into the future, just because you’ve become so proficient through familiarity.
Headphones for monitoring are quite sufficient to get you started, as you can always add speakers later, and you’ll certainly need some if you want to record overdubs using a microphone.
One of the best ways of selecting which DAW to get started with is perhaps to choose the one used by any of your friends who are already quite proficient, as there is nothing better than simply being able to ask someone what to do when you get stuck. Ableton Live offers a different paradigm that is more suited to anyone working mainly with audio loops and samples. Several other DAWs now include similar functionality, which is something we’ll be exploring in a later chapter.
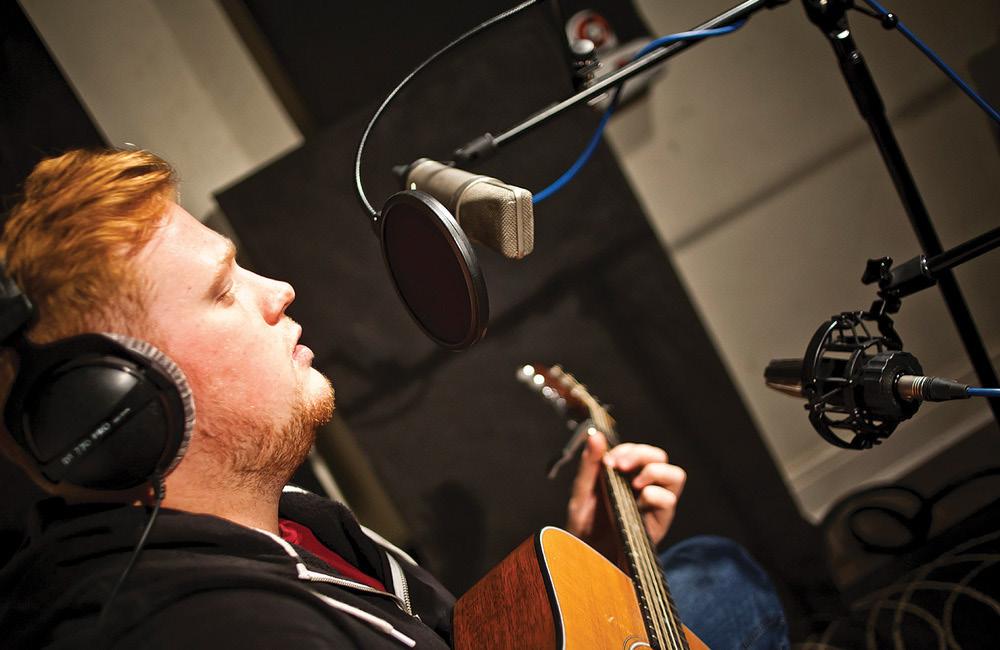
You are going to want some other bits of kit as you progress. If you make the move from headphones to speakers, you may well want to also add some acoustic treatment to control the sound of your room, and if you are using a mic to record vocals, you’ll need a mic stand, and probably some form of ‘pop’ filter to protect the mic from the air blasts of ‘p’s and ‘b’s. But even with just the absolute basics — a laptop, DAW software, an audio interface, a mic and some headphones — you are good to go, and start enjoying the fun and satisfaction of creating and manipulating recorded sound.
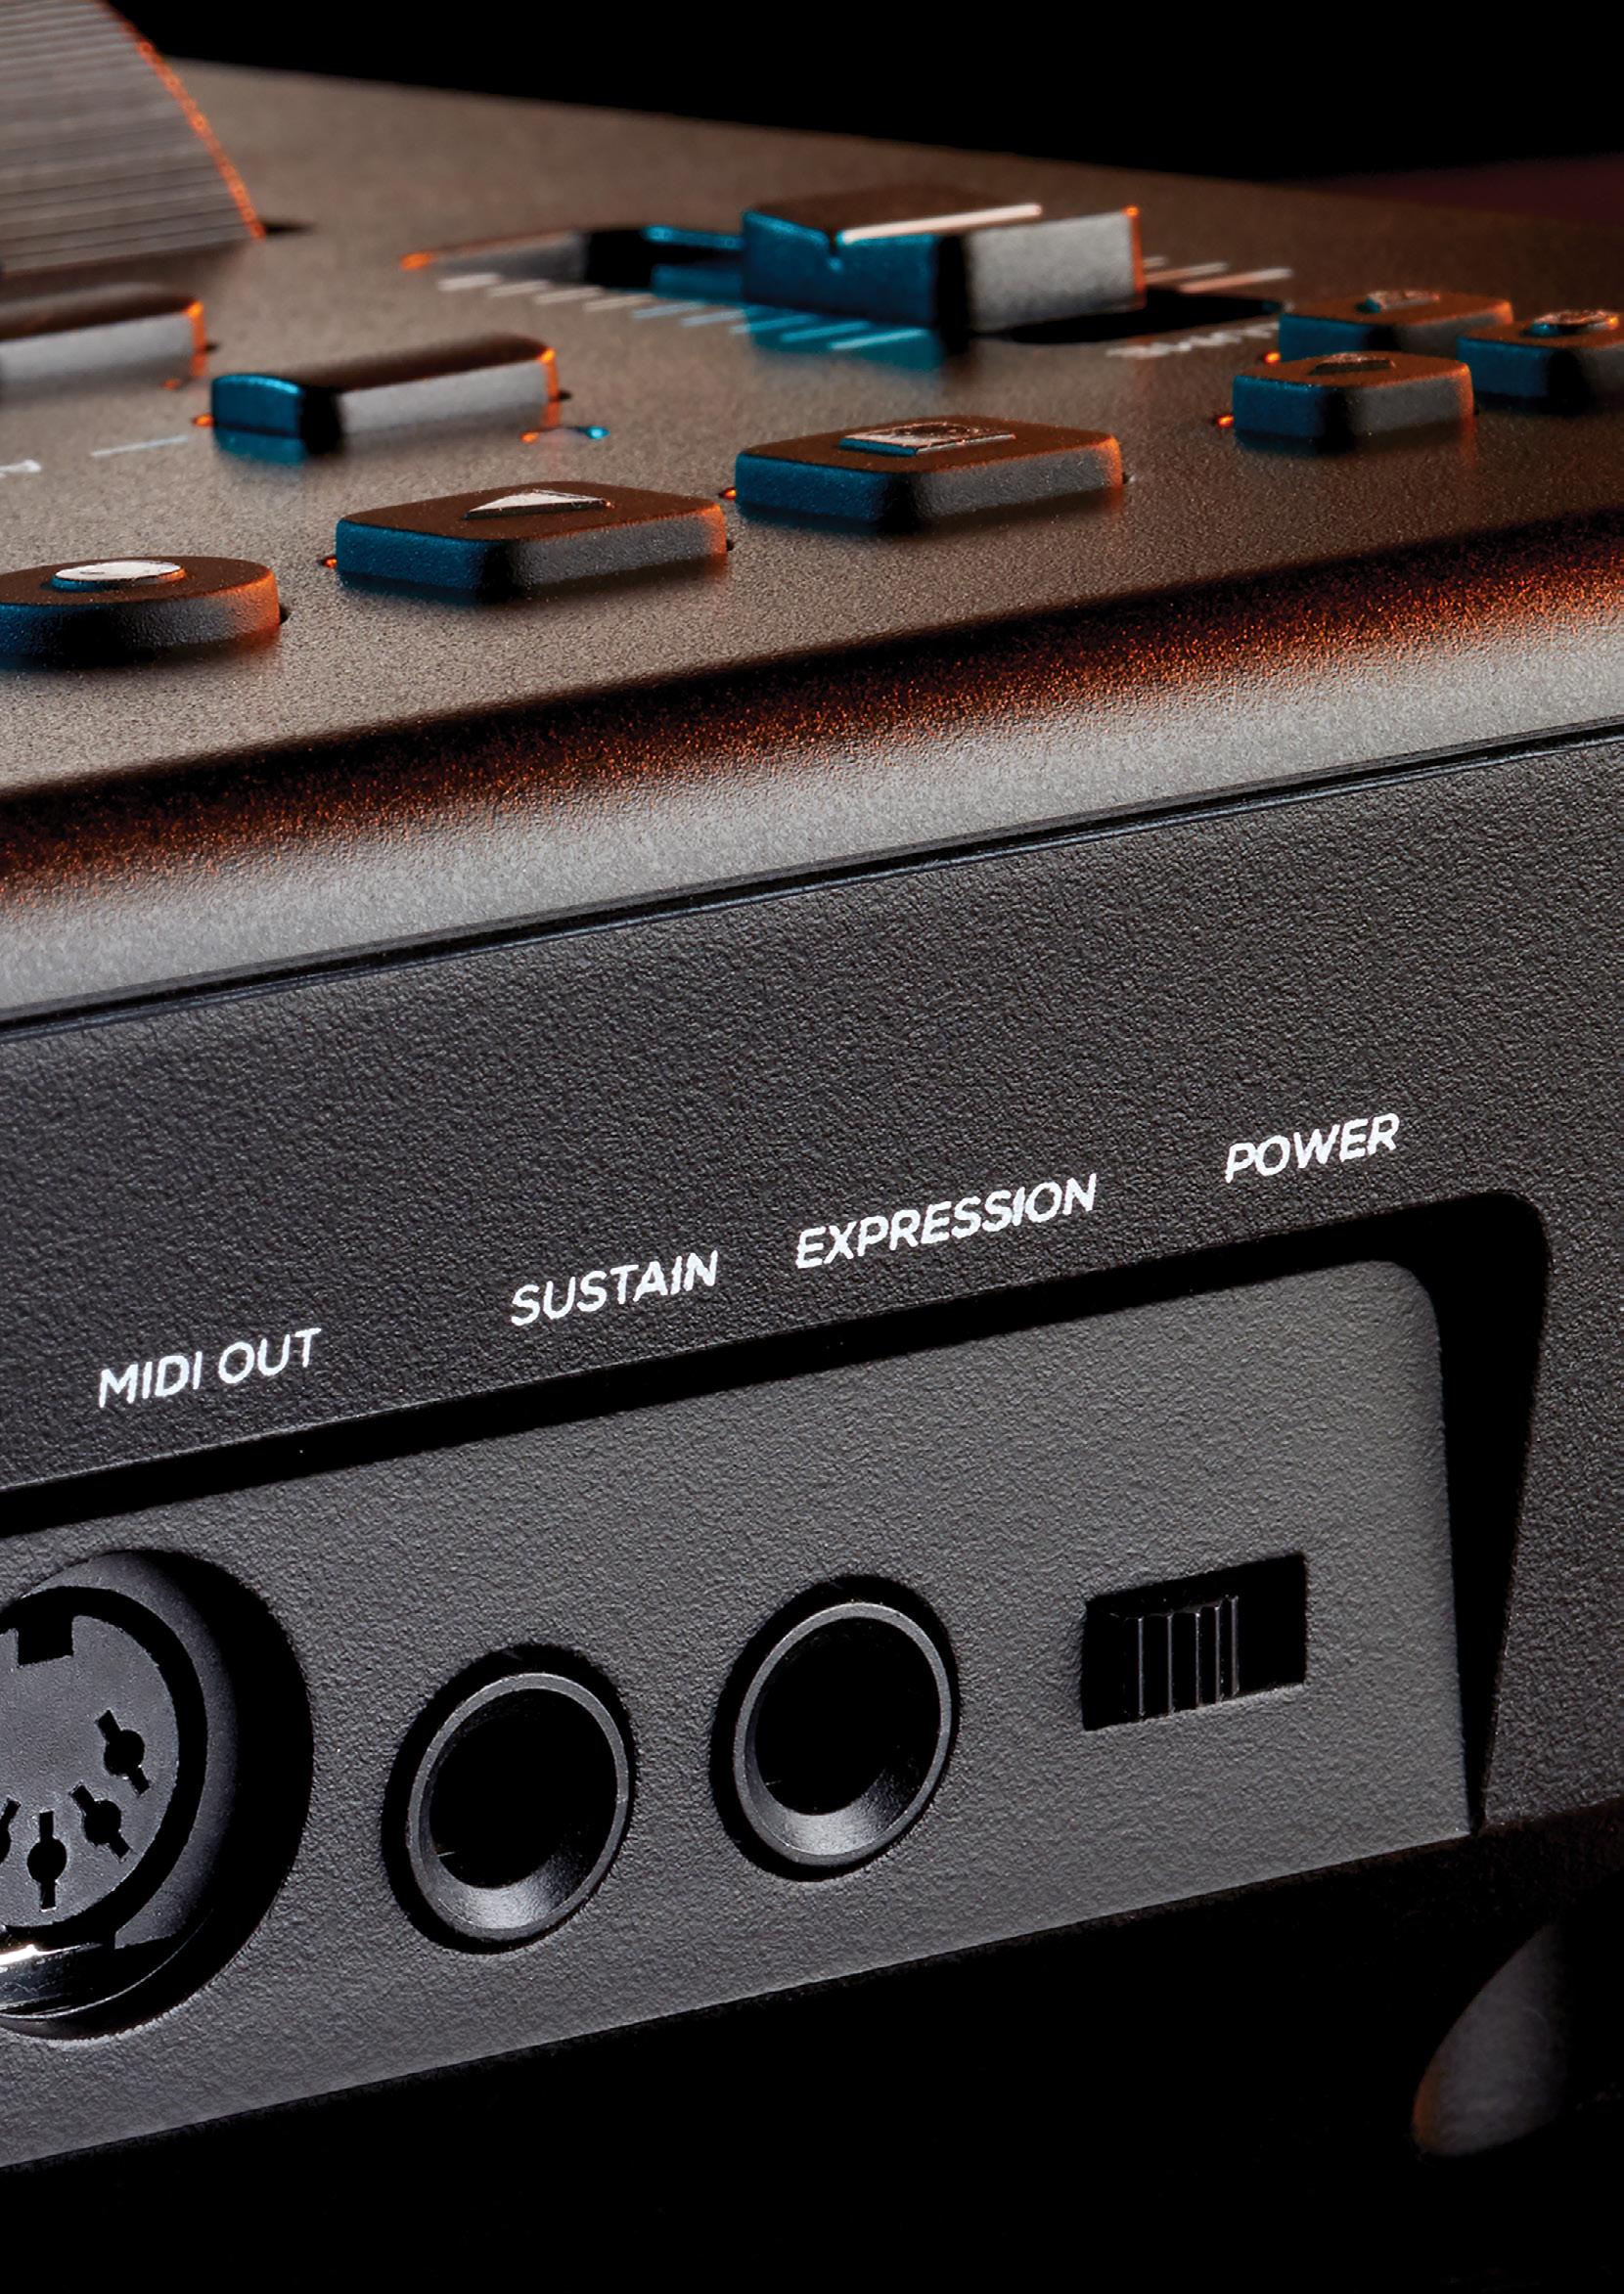
A compact ‘controller keyboard’ with a USB output — one that just transmits MIDI data and makes no sound of its own — is actually a useful thing to have in your studio even if you don’t play keyboards at all. You are almost certain to want to input some real-time control data at some point.
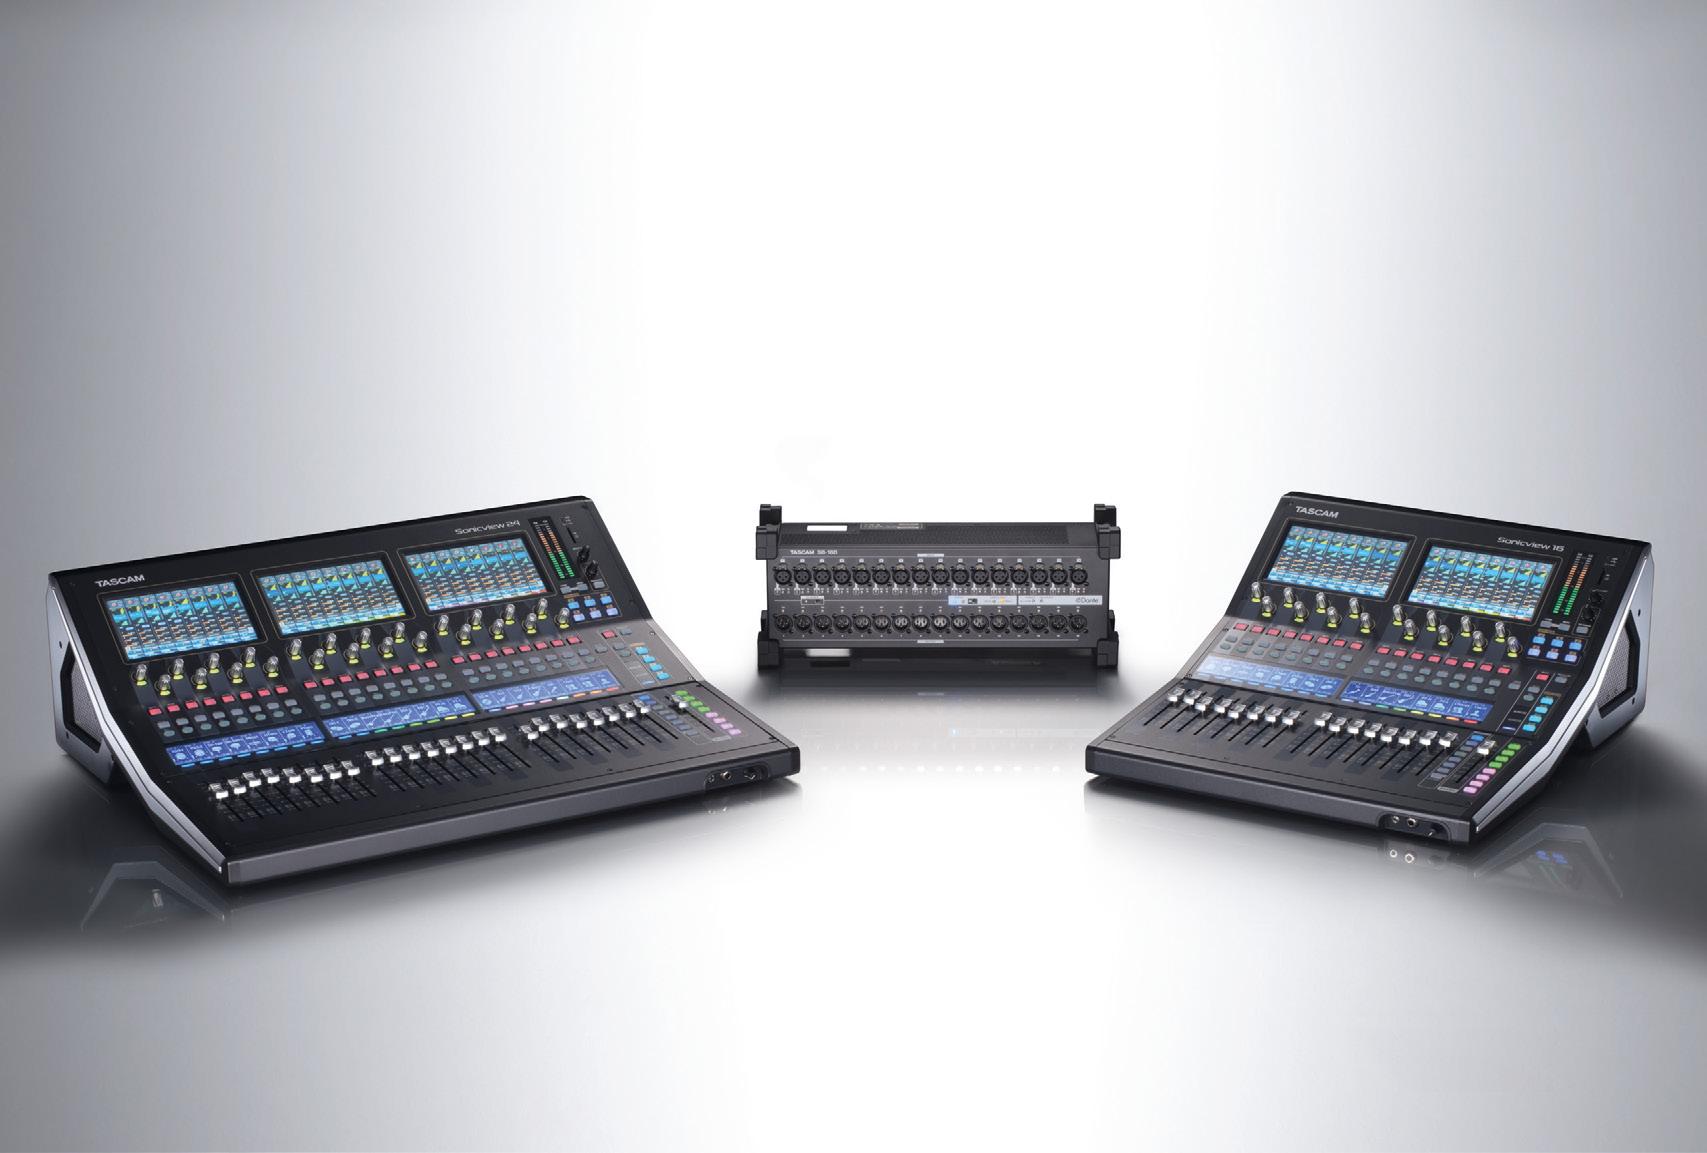
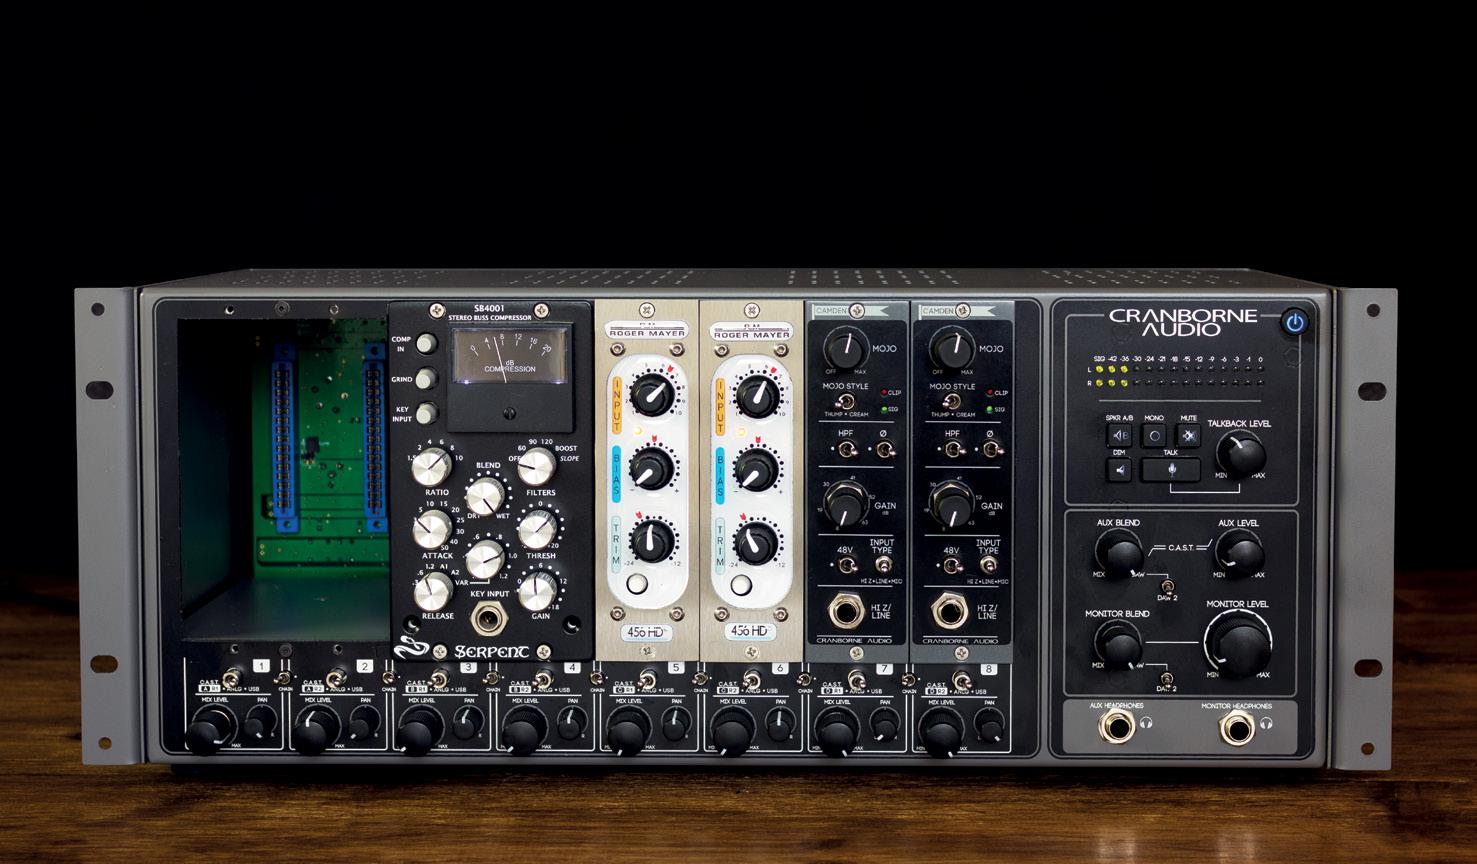
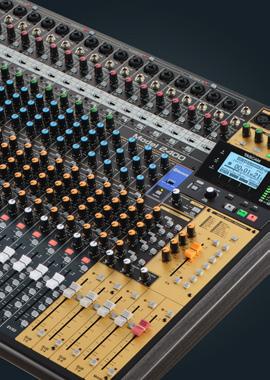
If you really don’t want to be dealing with the potential complexities of using a computer and software, an integrated hardware mixer and multitrack recorder is a good option, retaining some of the advantages of digital audio.
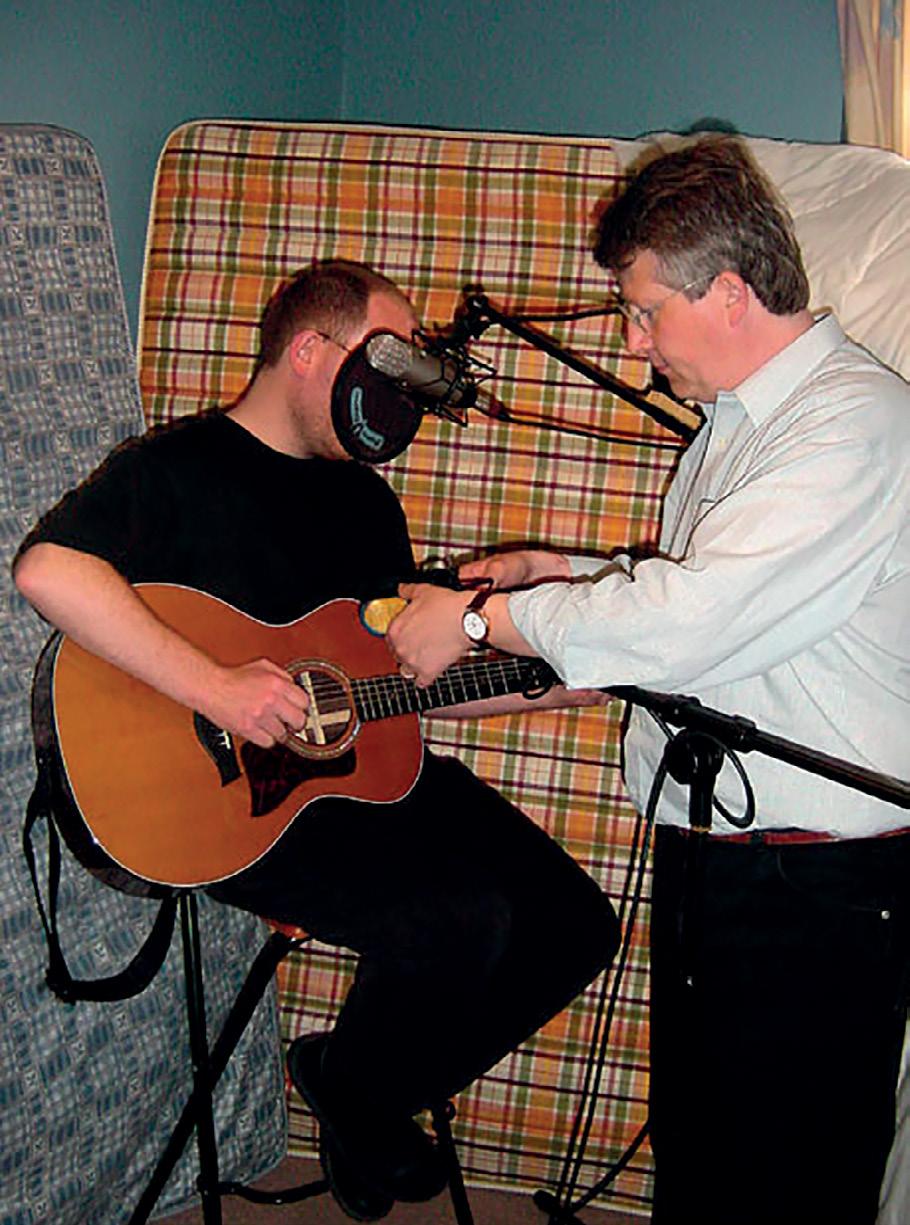
You’ll want at least one microphone, if you are planning to record acoustic instruments, and a pop shield, too, if you’ll be recording vocals.
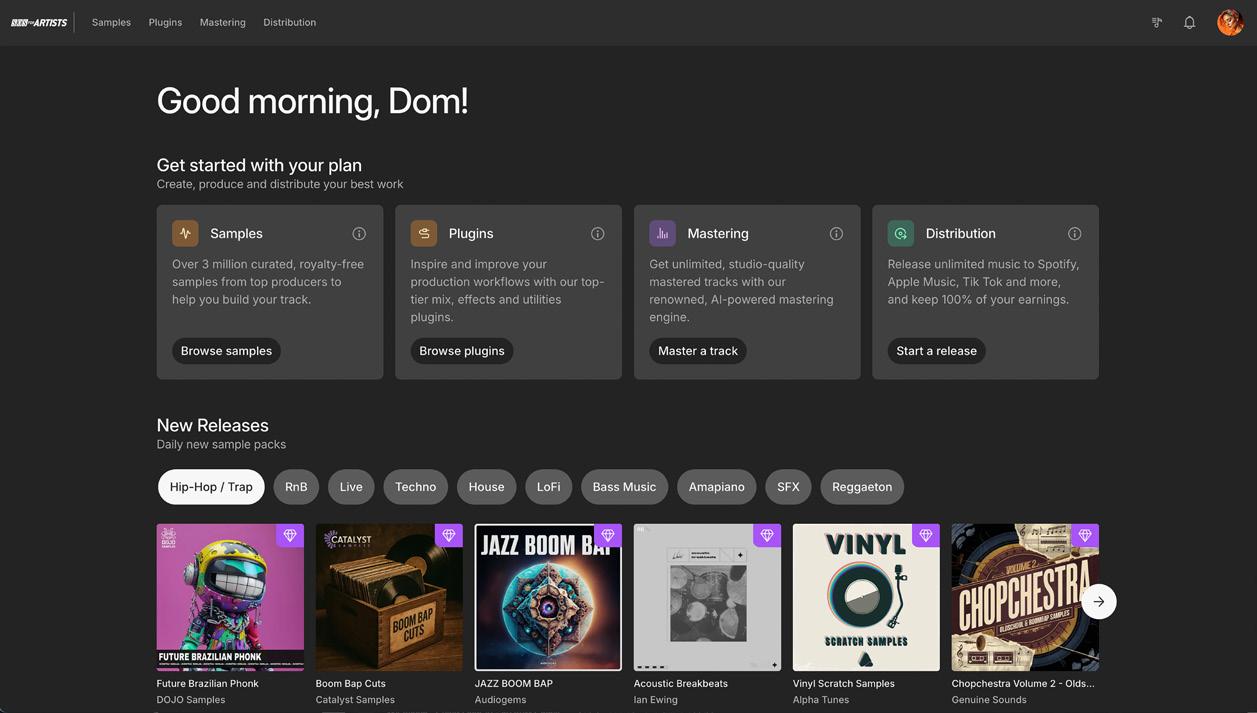
Discover SOS For Artists: A Complete Platform for Modern Music Creators
Designed to support independent artists, producers, and collaborators at every stage of the music-making journey, SOS For Artists is a new subscription service that brings together all the tools needed to take your music from idea to release.
1. Sample Selection Made Simple
Over 3 million royalty-free samples — with new packs added every week. Up to 2,400 samples per year included in your subscription plus an advanced preview tool that lets you tempo-match.
2. Instruments & Synths
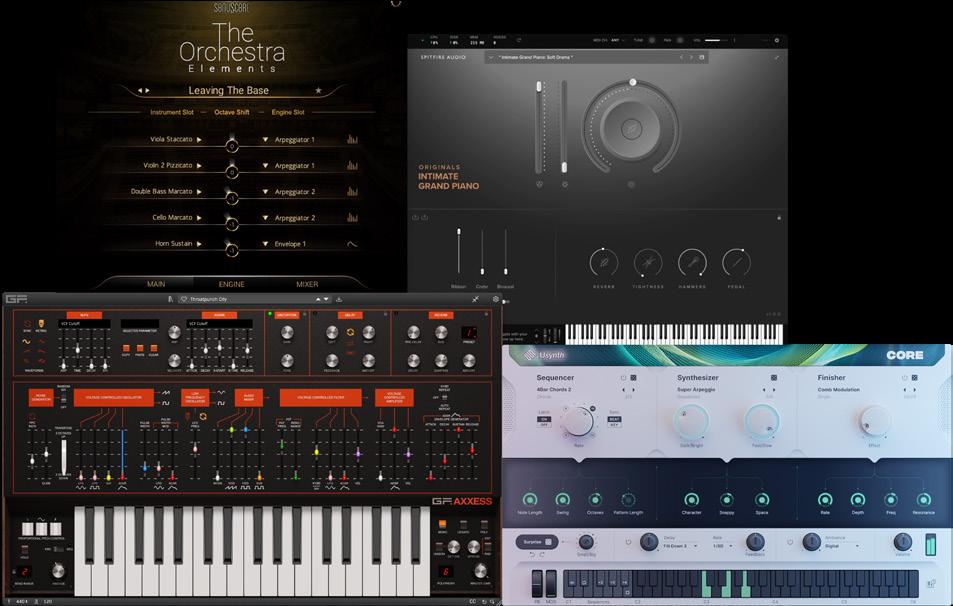
Included with SOS For Artists is a curated collection of high-quality plug-in instruments from respected brands like Spitfire, UJAM, Arturia, GForce, Sonuscore, and more.
4. Starter DAWs Included For newcomers, the subscription includes lite versions of Steinberg Cubase and Ableton Live. Your end-to-end music production suite
“Efficient, DAW-integrated tools to streamline sample selection and composition.”
3. Stem Extraction with AudioShake
An integrated stem-splitting plug-in allows you to isolate vocals, drums, bass, or instrumental parts from full mixes — right inside your DAW or via the web platform.
Sign up and explore the features
Upgrade at any time
Kickstart your creativity with 7,800 samples
Preview the Mastering tool
Preview the Distribution service
Produce
£99* per year
£199* per year ONLY ONLY
or £12.99** per month or £19.99** per month
£1,000 worth of Tools
inc 18 Plug-ins
1200 Sample Credits
Unlimited MP3 + up to 36 WAV masters per month
Unlimited Distribution
“Refined tools for mixing and mastering, suitable for both quick demos and professional releases.”
1. Mix & Effects Tools
The effects collection includes EQs, Compressors, Reverbs, Delays, Saturators, and creative FX from trusted names. Highlights include Eventide’s CrushStation, Arturia’s Rev PLATE-140, TAIP by Baby Audio, and MixBox SE from IK Multimedia, plus Synchro Arts’ powerful VocAlign and RePitch plug-ins.
Distribute
1. Global Digital Distribution
Distribute your music to over 150 platforms including Spotify, Apple Music, Tidal, Amazon, and Deezer. Just upload your tracks, artwork, and metadata, set a release date, and go live within 2–7 days. Migrating from another distributor? Bring your existing catalogue and retain play stats and followers.
2. Royalty Splits & Monetization
The Royalty Split feature allows you to divide earnings with collaborators. Just enter percentages. Payments are processed with low thresholds — starting at just $1 via PayPal — and you retain 100% of your royalties.
3. YouTube Integration
Link your official YouTube artist channel to keep distributed content and subscriber base in one place.
£2,000 worth of Tools inc 45 Plug-ins
2400 Sample Credits
Unlimited MP3, WAV + HD WAV masters
Unlimited Distribution
2. Mastering — Fast, Intelligent
SOS For Artists includes access to the advanced AI mastering engine from LANDR — available both online and as a plug-in. It analyses your track’s dynamics, frequency spectrum, tempo, and stereo image to deliver a tailored master.
4. Cover Song Licensing
Mechanical licenses for cover songs are handled automatically with a simple one-time fee. A direct link to the Harry Fox database helps you verify original composers and credit them properly.
5. Promotion & Reporting
Promotion tools include Linktree-style landing pages and content creation tips to help boost visibility. Detailed royalty reporting shows trends, top countries, and top-performing platforms.
“Release your music across 150 major platforms including Spotify, Apple Music, Tidal, Amazon and Deezer while maintaining catalogue integrity and metadata continuity.”
Choosing A Computer For Audio Chapter 2
Buying a computer specifically for audio production may seem complicated, with a lot of different factors to consider, but the cost of a suitable machine has never been lower. The more computer power you have at your disposal, the more complex the projects you can create, but almost any modern computer will be more than powerful enough for your needs at this stage. The first key decision is Mac or PC? If you want to be a Logic Pro X DAW user, you’ll need to have a Mac. For everyone else, there is a choice to be made.
There was a time when that decision was a clear trade-off between the Mac’s pretty much guaranteed trouble-free user-experience — in general, they just worked — versus the wider hardware choices, customisation options and lower price point of the PC, bringing with it greater potential for complication in setup and operation. That really isn’t the case so much any more, but a Mac will still cost you more than an equivalently specified Windows PC, and it is debatable whether it will offer more stable operation or a more elegant overall user experience. Will a laptop be good enough? Having decided your platform of choice, the next decision is laptop or desktop? Again, this used to be a clear choice between the convenience and portability
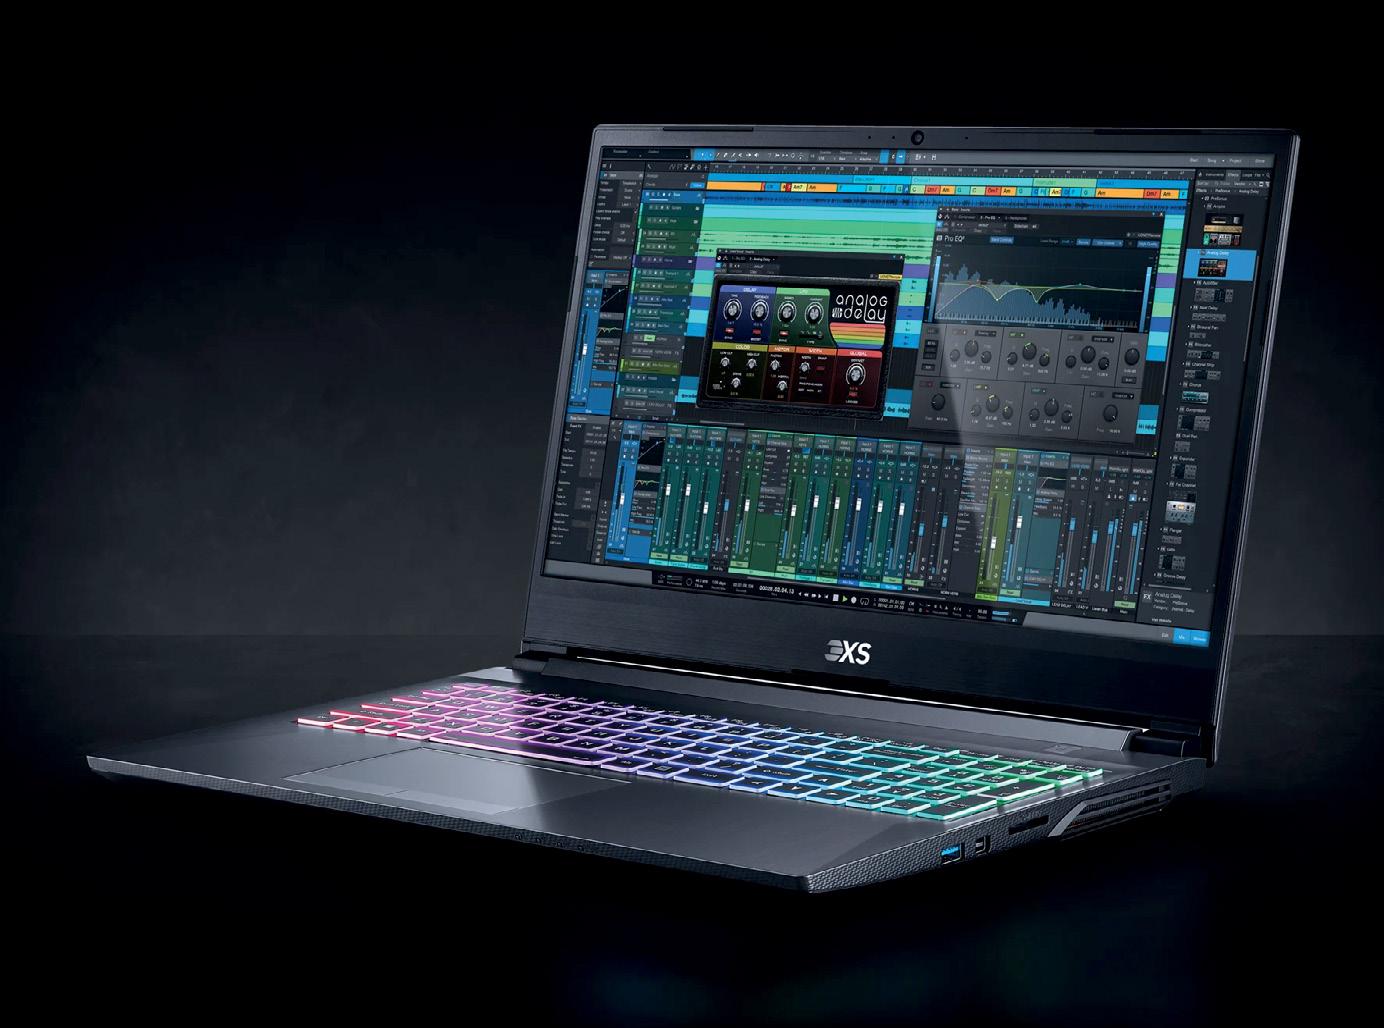
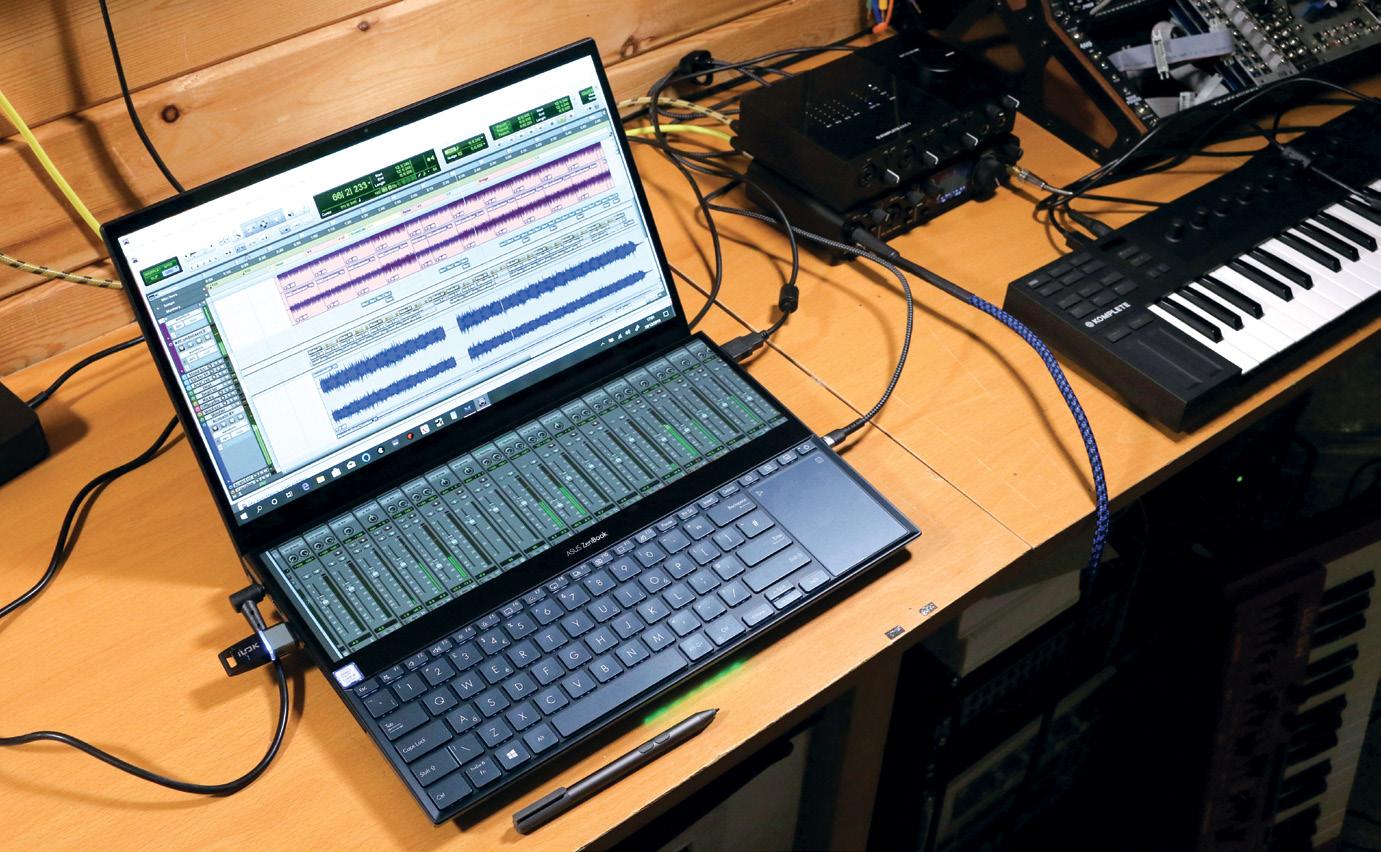
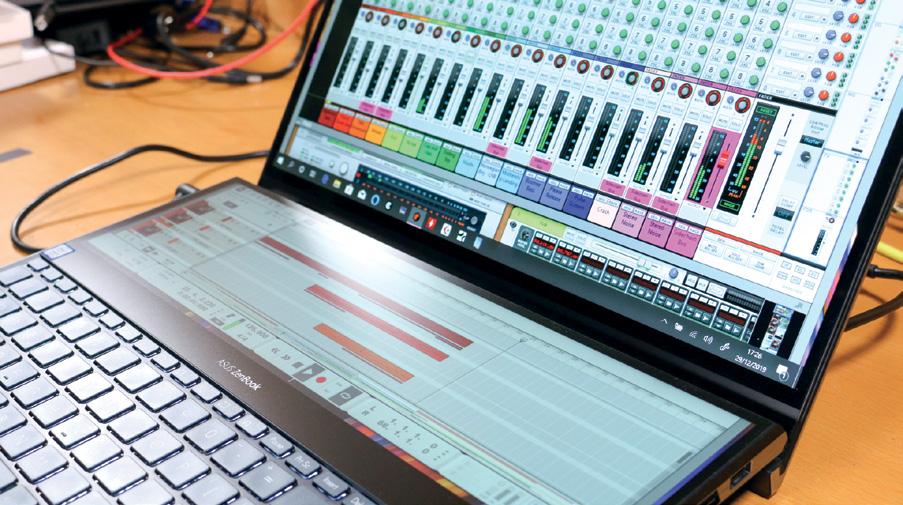
The convenience of a laptop might once have involved a trade-off against performance, but this, purpose-built Windows-based audio-production laptop loses nothing in comparison with tower-format machines.
of the laptop versus the greater power available in desktop machines, but modern laptops are now very well specified, and comfortably able to handle most music-production tasks. Choose the laptop format if portability is important to you — perhaps you intend to make recordings on location, or you want to use the laptop for other work as well — but maybe be prepared to acquire a larger screen for audio work later on. Otherwise, the desktop route offers a few advantages: more room for internal components, customisation with cards and drives, a larger power supply, better heat dissipation and so on.
The Mac mini and equivalent Windows machines represent an ‘inbetween’ option. They are, in effect, miniature desktop computers, and although they lack many of the traditional advantages of desktops, they can represent a good balance of power, compactness and value for money. You can get a lot of
You don’t always need the latest and best just to get started. This Mac laptop will still have more than enough horsepower to run all the audio tracks, plug-ins and virtual instruments you are likely to need for a good while.
Photo: 3XS audio-production
computing power for your money in this format, especially now that Apple have equipped the Mac mini with their latest M-series processor.
It would be almost impossible now to buy a new computer that didn’t have an adequate basic specification to use for music production, but there are still some choices to make, of which the most important are processor speed, memory and storage. The CPU (Central Processing Unit) speed will be quoted in GigaHertz and number of processing cores: ‘2.8GHz, quad core’, for example. A faster ‘clock speed’, as it is called, and more cores equals better performance, but even the base specification in most ranges will be acceptable for music production until you start getting up to very large track counts and lots of power-hungry software plug-ins.
You will normally have a choice as to the amount of RAM (Random Access Memory) that you want in the machine. RAM is measured in Gigabytes (GB) and 8GB is probably a working minimum these days, with 12 or 16GB preferable.
RAM is your computer’s short-term data storage system. In addition, it will need some long-term storage in the form of a hard-disk drive (HDD) or, more often these days, a solid-state drive (SSD). Solid-state drives are much faster than hard disks, and
having one as your ‘system drive’ — the one that hosts your computer’s operating system and applications — can make a big difference to how fast it operates. SSDs are more expensive, however, and you may have to trade off a smaller amount
A laptop can often be the best option, when work space is limited.
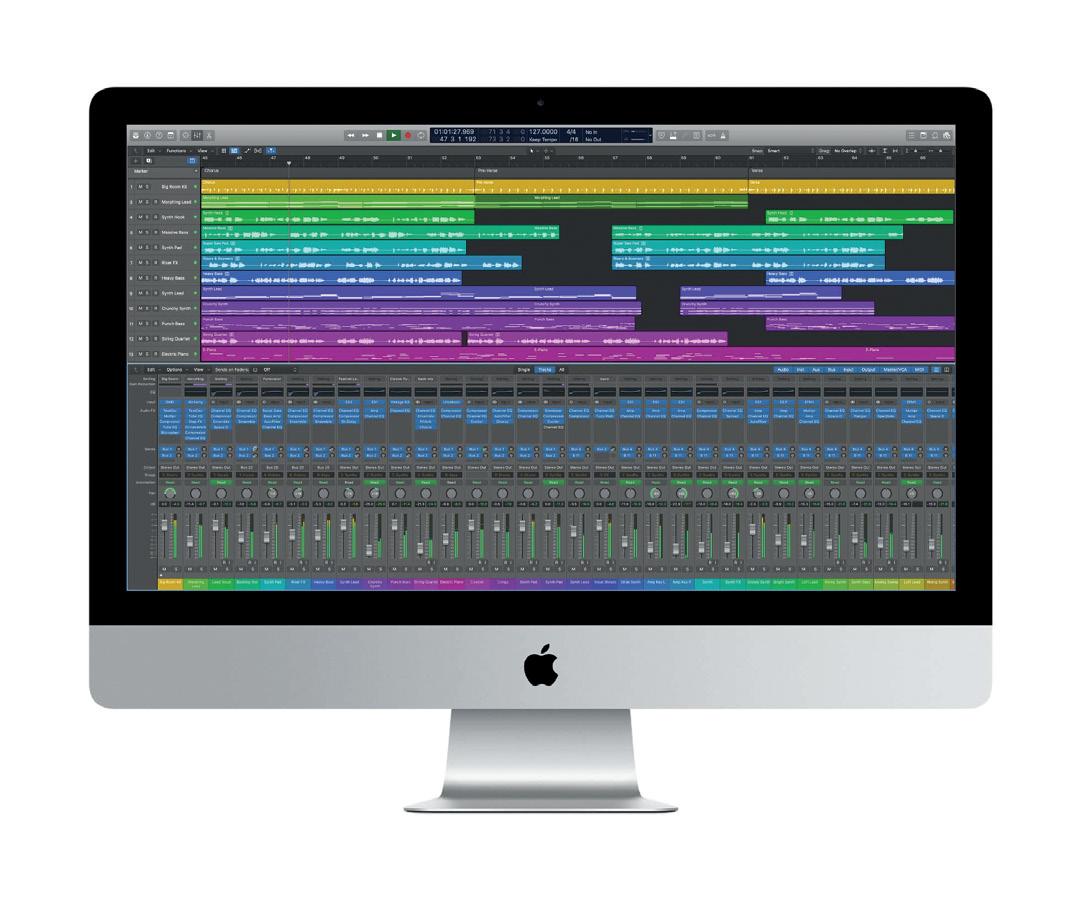
An older iMac can be a very affordable way to get started with music-production software.
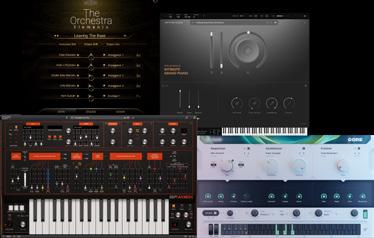
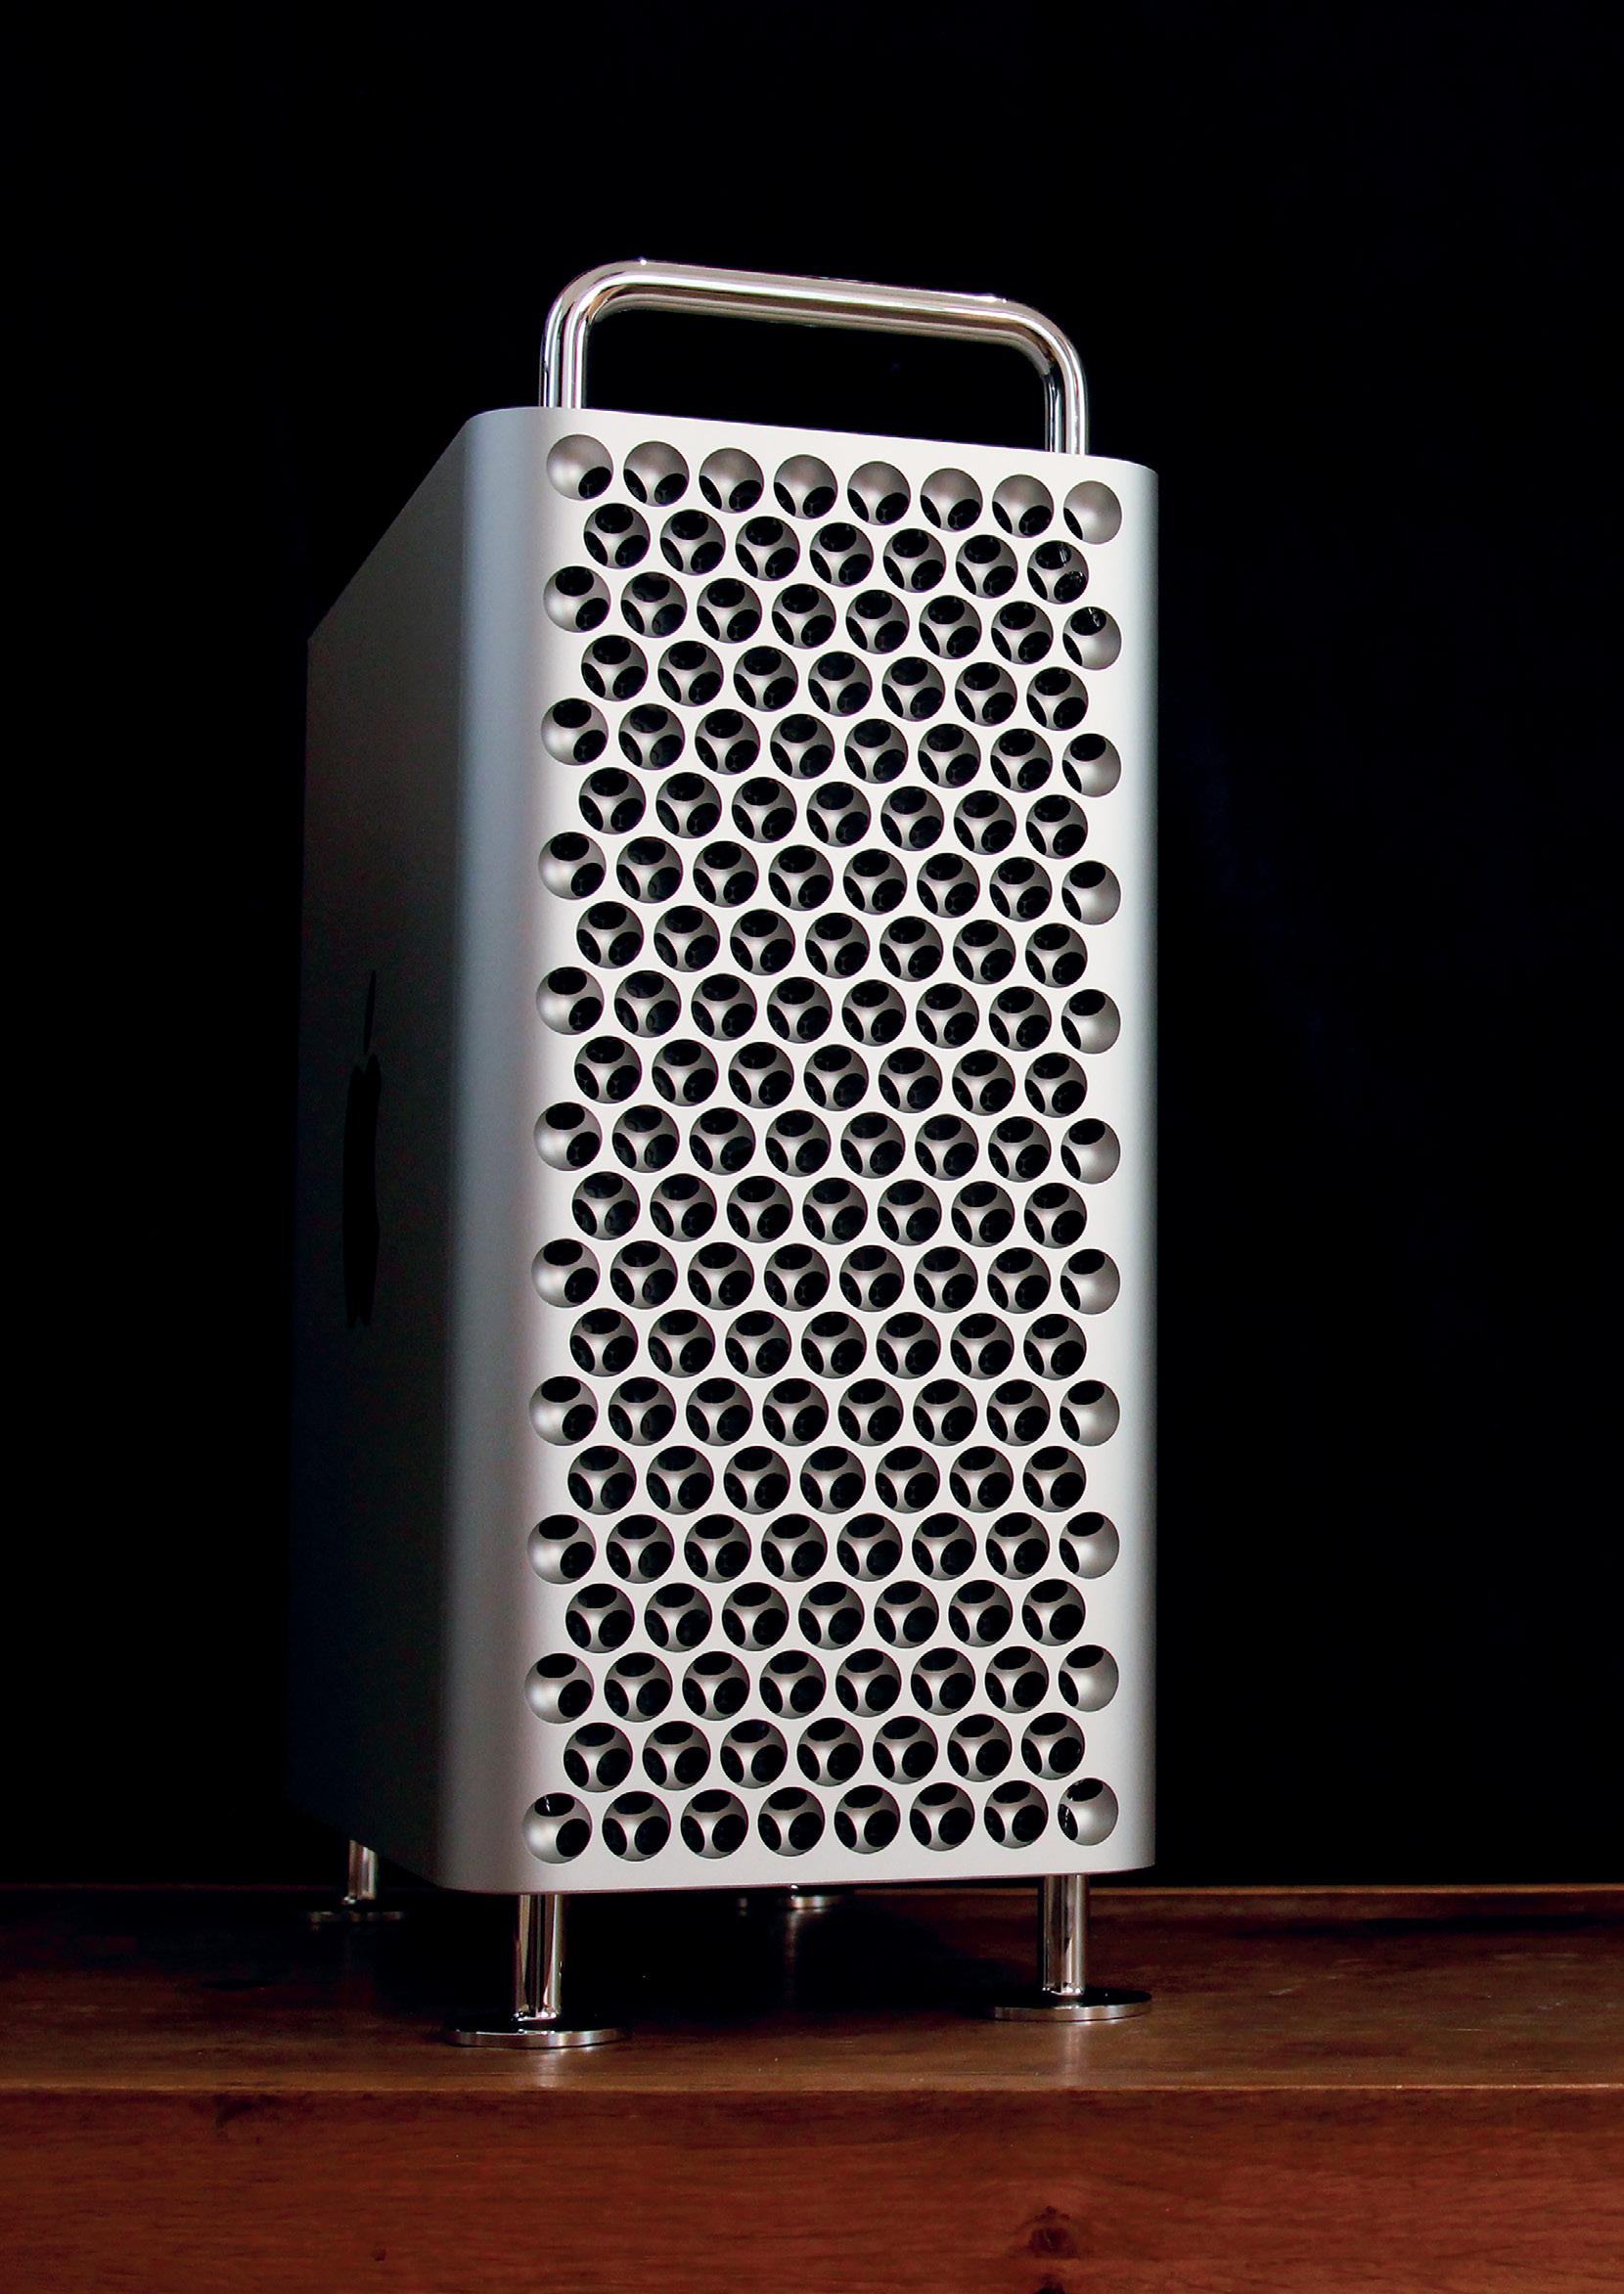
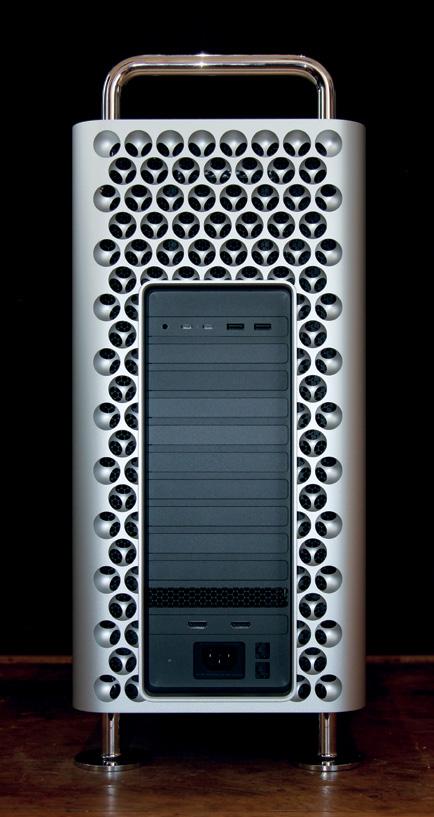
Choosing a tower-format computer allows you to house multiple disk drives, interfaces and co-processor boards neatly within the chassis. Pictured is a latest-generation Mac Pro that will handle any audio-production task you can think of, but it has a price tag to match.
of storage capacity against the additional speed.
Do I need an external drive for audio?
At one time you would need a separate, usually external, disk drive for sound recording, but that is no longer the case. You can record audio perfectly well to the system drive on most computers now, unless you are working with very large and complex projects. However, although the necessity may have gone away, it’s arguably still a good strategy to use an external drive for your audio projects. This takes some of the load off your system drive and saves you from filling it up with audio data.
You should also budget for acquiring a backup drive, and preferably one of the many ‘cloning’ apps that allow your data to be fully recovered in the event of a complete system failure. That is something that can happen in computer systems, hence the old adage that data
an
and transferring
shouldn’t be considered to exist unless it has been safely copied to at least one other drive!
Adding external drives will require knowledge of your computer’s connectivity, but that is a vital factor for your audio interface, too, so we’ll be dealing with that in-depth in the next chapter.
Finally, whatever platform you choose, it must have a 64-bit version
touchscreens on ASUS
PCs make them a uniquely intuitive Windowsbased music-production partner.
of the operating system, as that is a requirement for practically all serious music-production apps now. You couldn’t buy a new computer that didn’t have a 64-bit OS, but it is something to bear in mind if thinking of buying second-hand.
The
ZenBook
A modern smartphone is fundamentally just a computer with a small screen, and quite a powerful one, too. It just happens to make phone calls as well. You probably wouldn’t want to build
entire studio system round one, but they can be great for capturing ideas on the move
the files to a full-size DAW.
Chapter
The audio interface is at the heart of a computer-based recording setup — in fact, it can’t work without one. The software running on the computer looks after the recording, mixing and processing, but the audio interface is what gets the sound in and out.
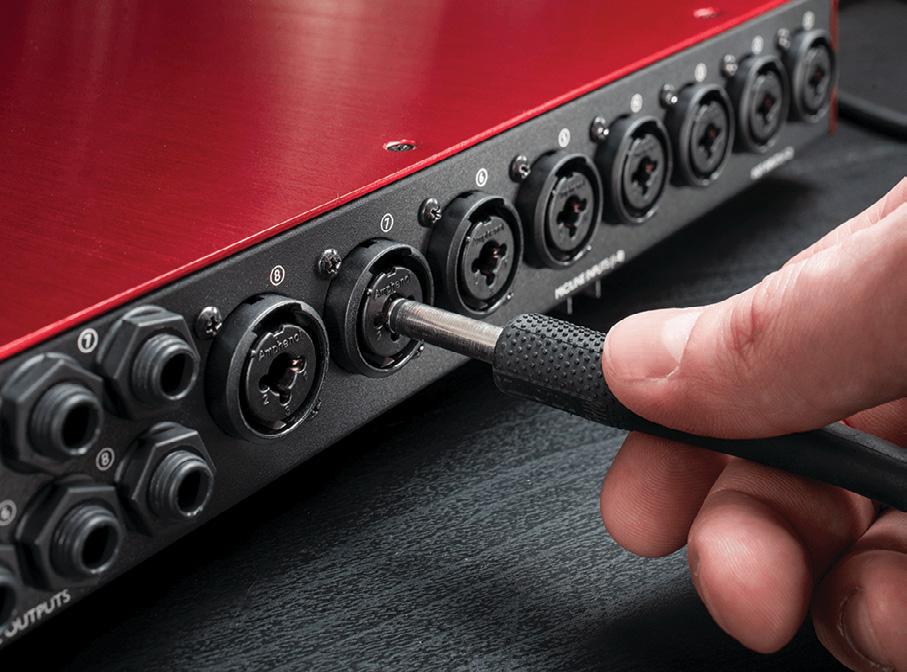
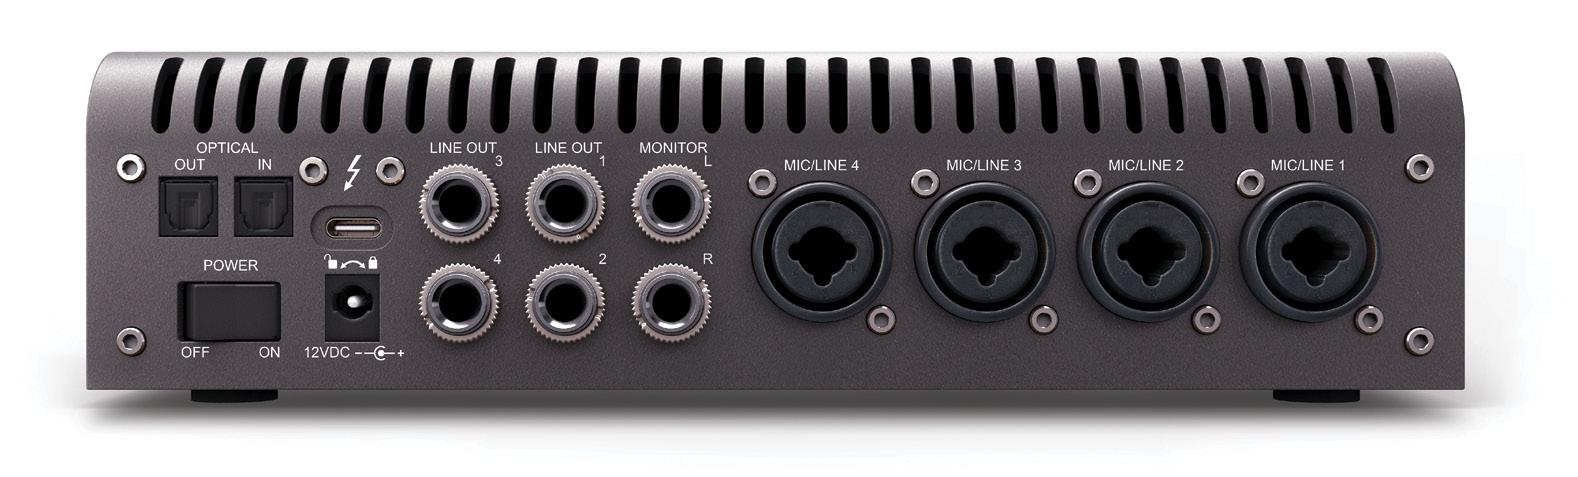
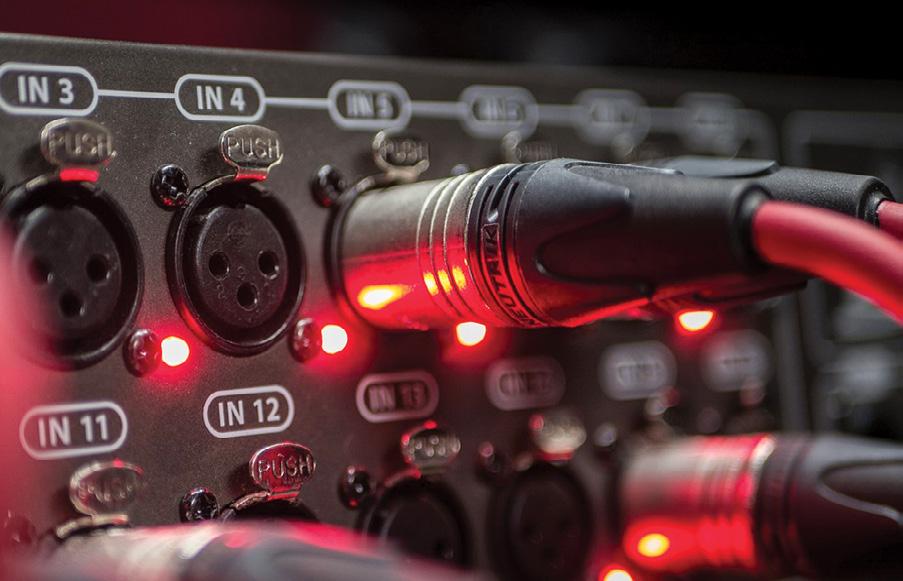
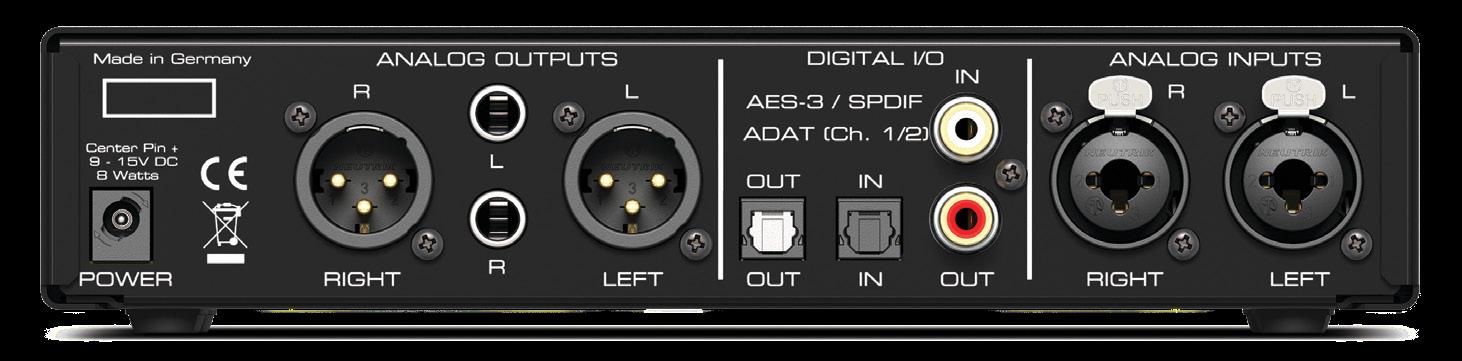
An interface will be designed to accept one or more ‘analogue signals’ — the latter being a small voltage from a microphone or electronic instrument — and convert it to a stream of digital numbers that the computer can work with. There will usually be three types of analogue input available: a ‘line-level’ input optimised for signals from electronic devices like mixers or synthesizers, ‘microphone’ and ‘instrument’ inputs designed to work with the smaller signal levels put out by mics and electric guitars, respectively. On smaller units, you’ll often find dual-purpose ‘combi’ sockets that combine both an XLR — the almost universal ‘standard’ connector for microphones — and a quarter-inch jack for a line or instrument input.
Key questions
The two key questions to be answered before choosing an interface are: what connection formats are compatible with my computer, and how many inputs and
outputs do I need? There are three connection protocols in widespread use in personal studios for connecting audio interfaces to Macs and PCs: USB, Thunderbolt and PCIe, with a fourth just beginning to become more popular. USB is by far the most commonly used, but it’s easy to be confused by the different variants and connectors: USB 2, USB 3, USB-C and so on. Fortunately, all of them are up to the job, and the more recent versions are fully backwards-compatible with the older ones, so as long as you have a cable with the right connector types, it’ll work. Smaller USB interfaces can usually be conveniently ‘bus powered’, which means you don’t need to connect a separate power supply to them, as they will be powered from the computer via the USB cable.
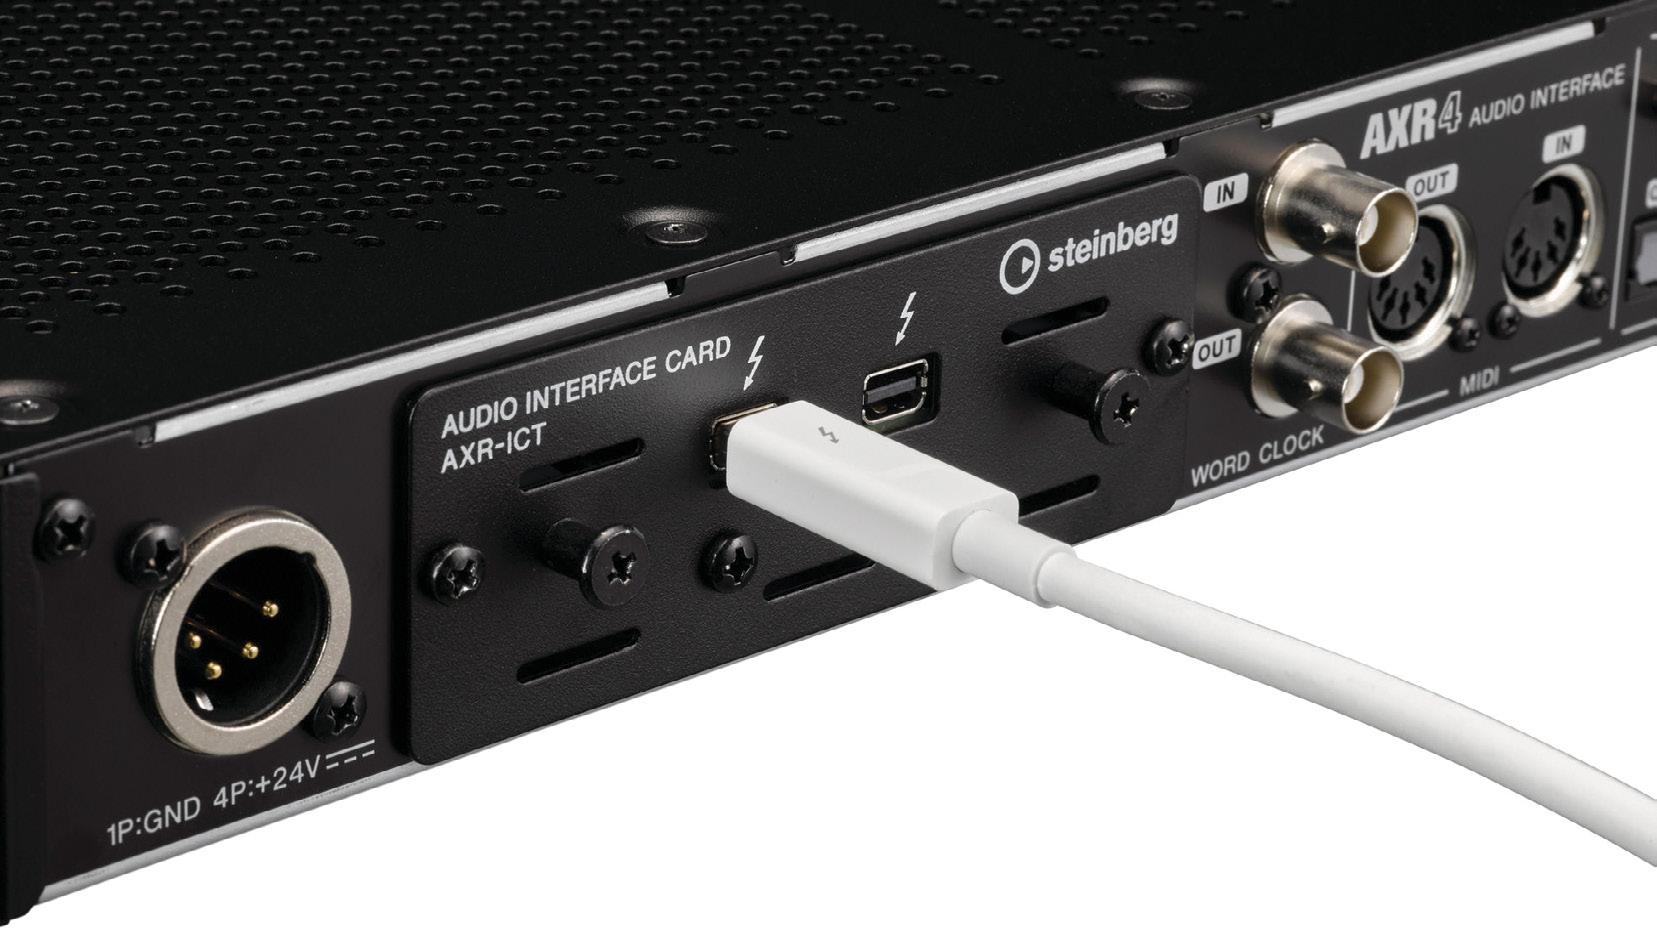
The Thunderbolt protocol, which also comes in two different flavours — Thunderbolt 2 and Thunderbolt 3 — can carry a lot more data, but more importantly for our needs, it also passes that data to the computer more quickly than USB 2 or 3. This can make a significant difference, as we’ll find out later in this chapter. Thunderbolt-based systems tend to be more costly, and the Thunderbolt protocol is not universally supported on Windows computers. Thunderbolt
Many interfaces use space-saving ‘combi’ input sockets that can accept either an XLR cable from a microphone, or a line input on quarter-inch jack.
interfaces can also be connected together to form bigger systems with more inputs and outputs, which isn’t generally the case with USB.
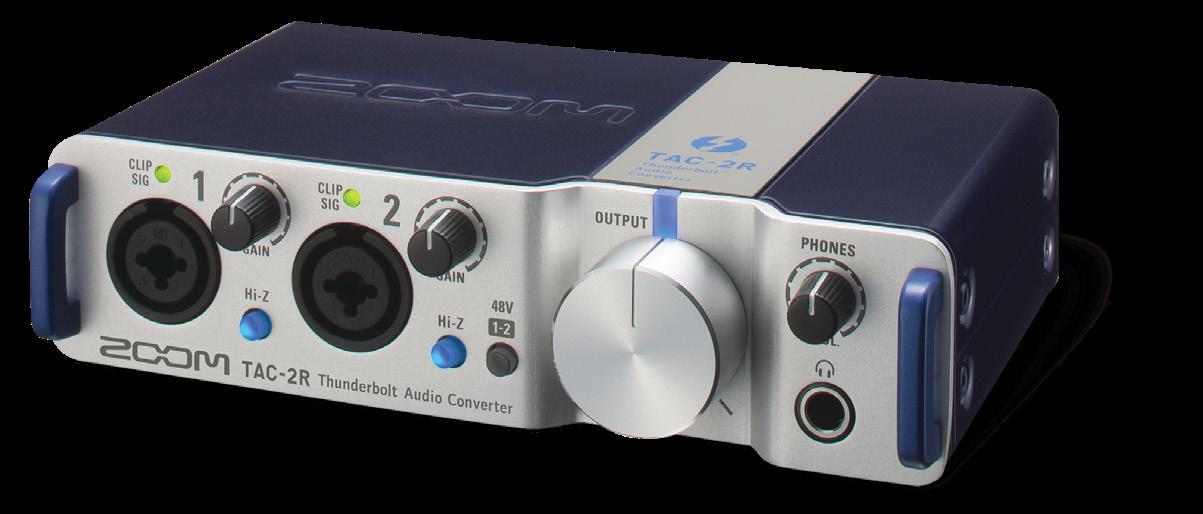
A few interfaces are designed to be installed inside the computer itself, and these use the PCIe protocol which connects directly to its internal processing, offering the fastest possible data handling. This is typically
This connector type is used for Thunderbolt 2; the newer Thunderbolt 3 uses the same Type C connectors as current USB sockets. Thunderbolt connections have low-level access to the computer’s PCIe bus, which is ideal for audio applications.
a high-end professional option, available only on desktop computers with expansion slots.
Finally, there are now also audio interfaces that connect via Ethernet using either a proprietary standard like Dante or Ravenna, or an open standard like AVB. These types of interface offer an advantage where very large numbers (many dozens)
of inputs are required, and where inputs and outputs are required in different locations, and they can pass audio data very quickly, but these are currently less relevant to small-scale systems for personal use.
Inputs and outputs
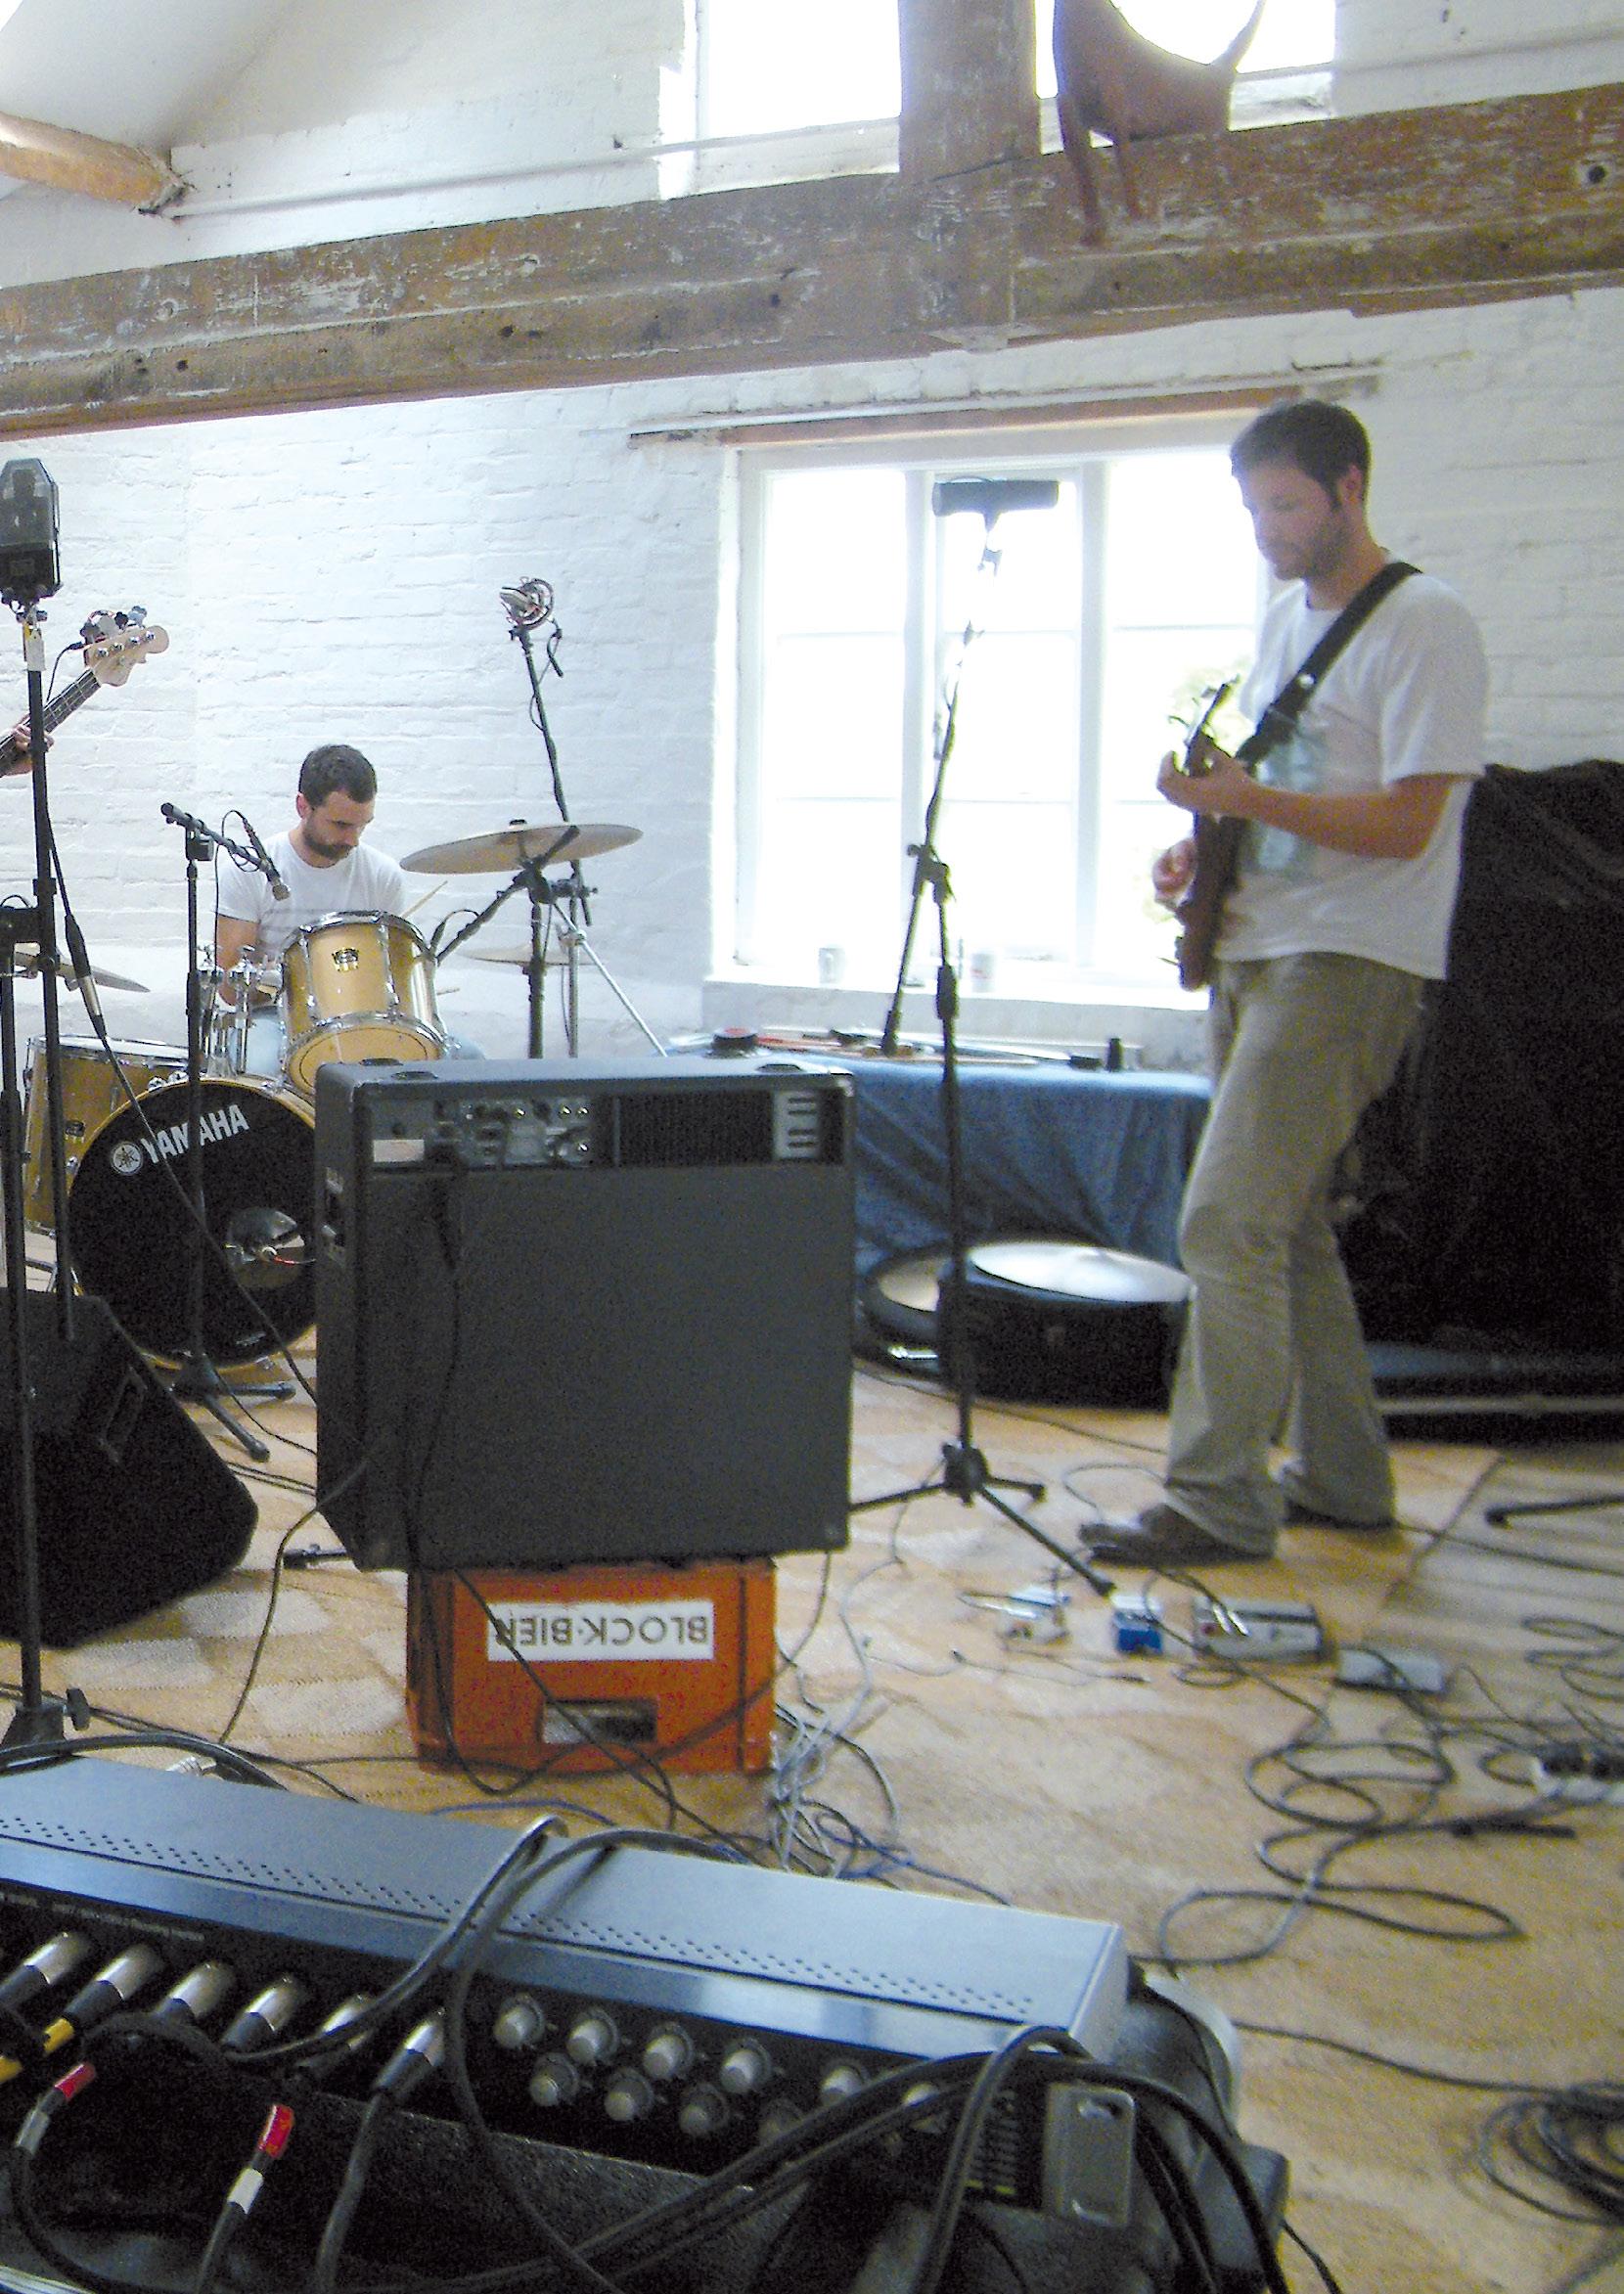
If you only plan on recording by yourself, you may only require one or two inputs. You can build up complex recordings with lots of parts by overdubbing, but they will be done one at time, using a single input, or two if you are recording your tracks in stereo or with multiple microphones. If, on the other hand, you want to be miking up a drum kit, or perhaps recording band all playing together, then obviously you will need as many inputs as sources you intend to record at once.
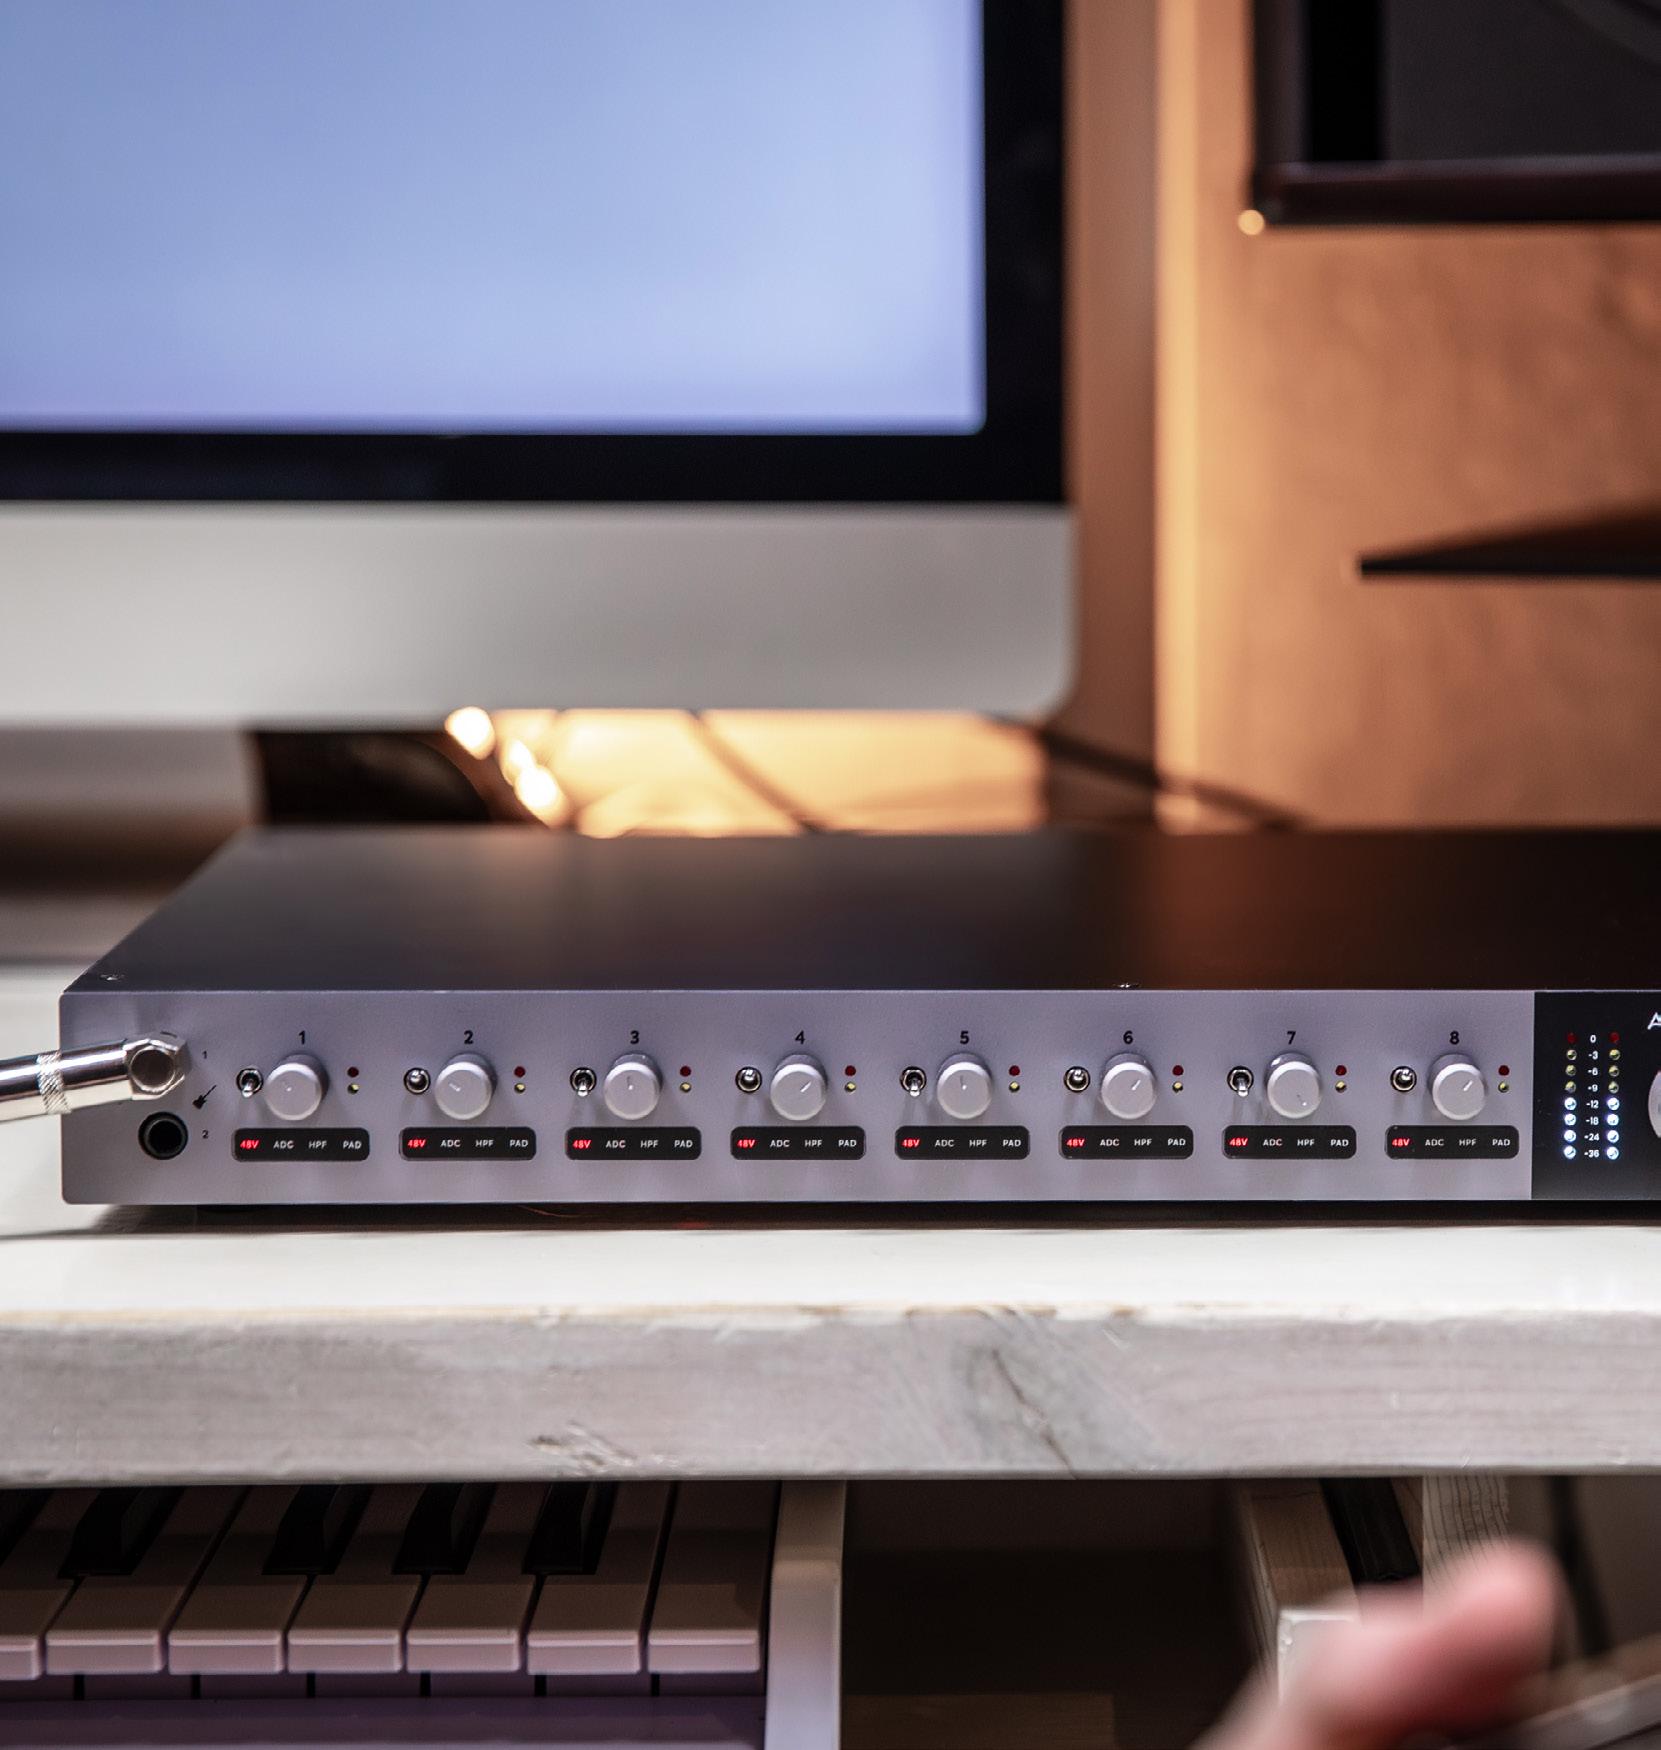
There are some interfaces that only have line-level inputs, and these are designed
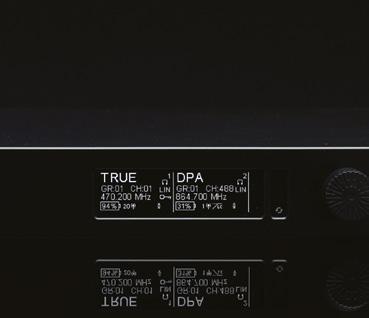
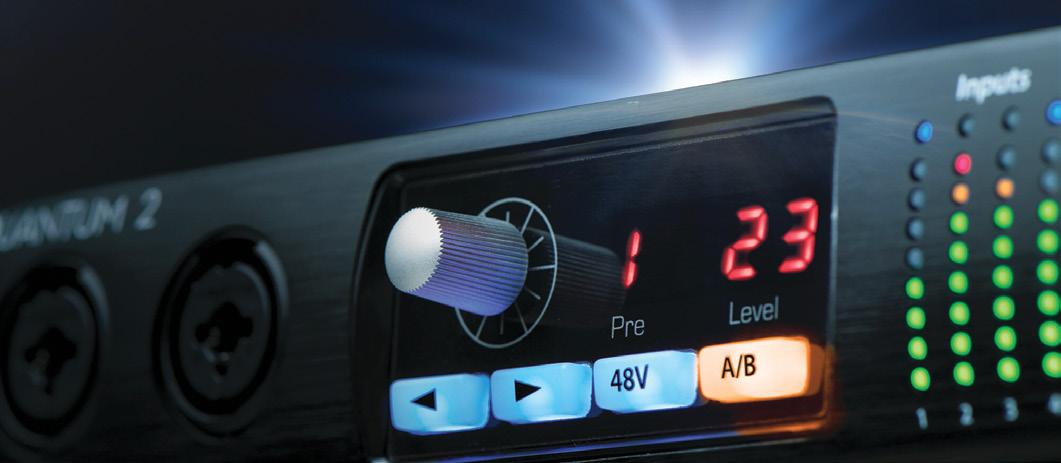
Preamp gain is most commonly adjusted using an analogue potentiometer, but some interfaces allow it to be controlled digitally, which offers increased precision as well as recallability.
to be used with a hardware mixer, which would provide the necessary connection and pre-amplification for microphones and then pass those on to the interface as line-level signals. Although it is more complicated than working with just an interface, there can be some advantages to such a setup, and that is something we will touch on later.
In addition to getting signals into the computer, audio interfaces perform a comparable job at the ‘back end’ of the system, taking digital data out of the computer and turning it into an analogue signal so that we can connect speakers or headphones to hear sound coming out of it. Nearly all
Which specs really make a difference?
The technical performance aspect of most new audio equipment these days is simply not something you need to worry about. The frequency response — the parameter that determines overall sound accuracy — will be wider than anything you can hear, with as near to the ideal ‘flat line’ response as makes no difference. Dynamic range, which is difference between the its background noise and the loudest sound it can handle without distorting, will usually be at least 110dB, which is far more than is needed to capture and reproduce any signal you are likely to encounter.
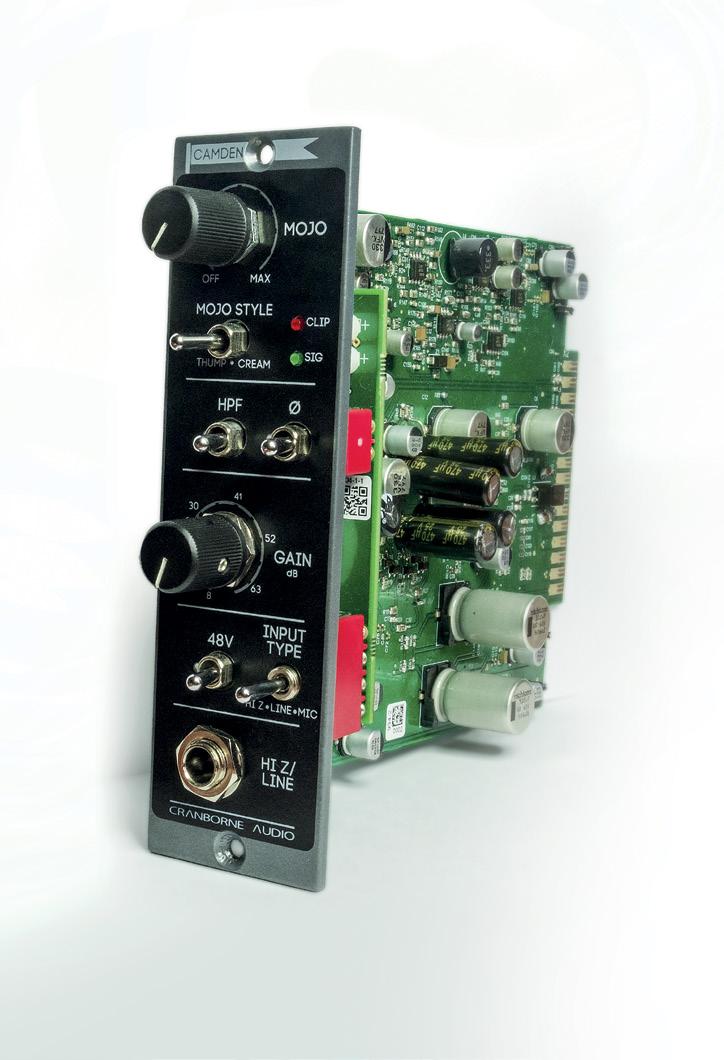
Specifications that do make a difference include the gain range and maximum input level of the mic preamps. A larger gain range makes it easier to cope with quiet sources and insensitive microphones — such as speech recorded with a dynamic mic — and it’s something that’s usually associated with a better quality of preamp, too. The maximum input level gives you a reference
point for that versatility. If this is high — say, +14dBu —you’ll know that you can safely record real drums and guitars with hot pickups without fear of clipping. There is quite a lot of variation between interfaces, so it’s worth thinking about what applications really matter to you. Gain range is sometimes defined using maximum and minimum values, in which case you can calculate the range by subtracting the minimum from the maximum. If, for example, the minimum gain is -5dB and the maximum is +55dB, the total gain range is 60dB. Most mic preamps provide around 60dB of gain range, but some offer as little as 40dB and others as much as 80dB.
All mic preamps introduce some electronic noise into the signal path, but some perform better than others and if you record quiet sources you want to be able to do so without adding unwanted noise. The key measurement here is Equivalent Input Noise or EIN. Look for the largest negative
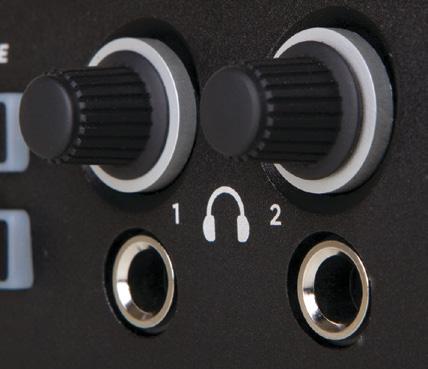
interfaces therefore feature at least one pair of line-level outputs and at least one stereo headphone socket. Again, the key question to answer is: how many outputs are you likely to need? Bear in mind that there are almost no audio interfaces with more than two headphone outputs. For
number and be aware that A-weighted figures look better than unweighted ones. The very best preamps manage about -129dBu unweighted, which equates to around -132dBu A-weighted, and it should ideally be at least -125dBu (unweighted).
The built-in headphone outputs on audio interfaces also vary, and some can drive headphones louder than others. Unfortunately, this is a specification that is often presented in different ways or not at all, making it quite hard to compare products. Another variable here is the headphones themselves, with higher impedance (ie. over about 150 Ohms) phones being harder to drive to loud levels than low-impedance (ie. below about 80 Ohms) phones. Audio interface manufacturers’ technical data often also omits important user-experience factors such as latency performance, simply because the number of potential variables within different computer systems is too great.
There may be newer alternatives now, but USB 2.0 remains a perfectly viable format for the majority of multitrack audio applications.
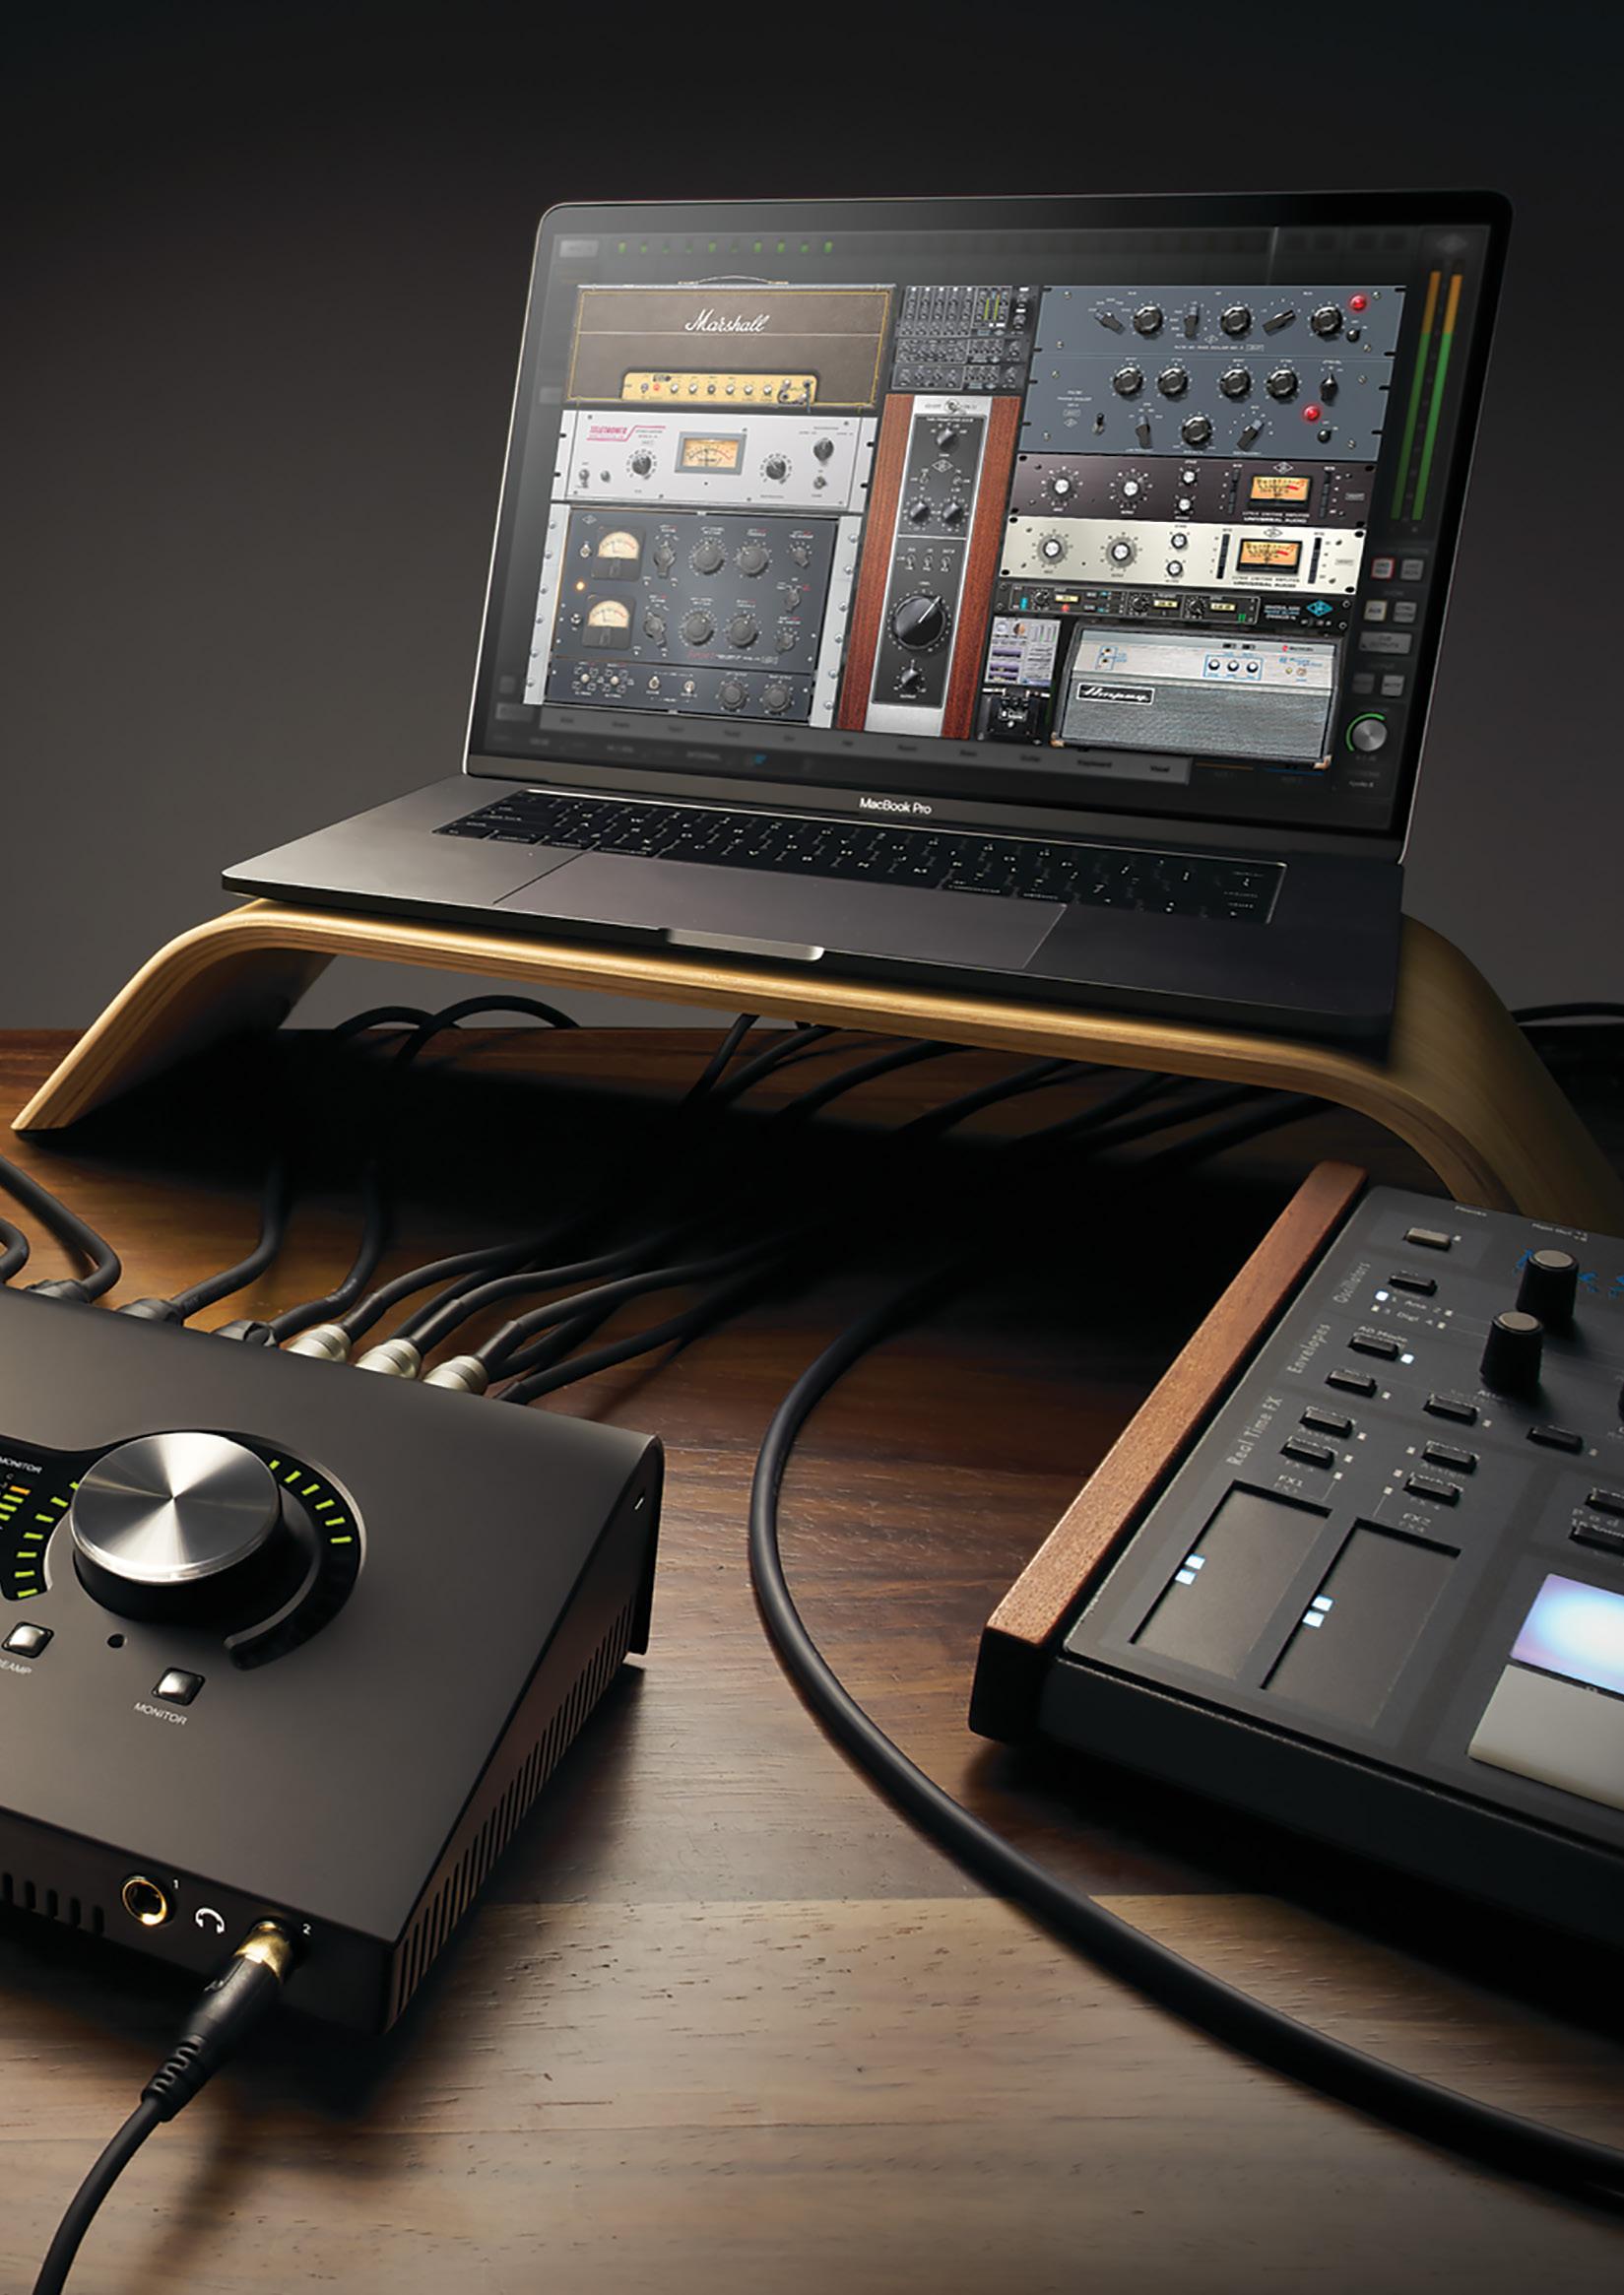
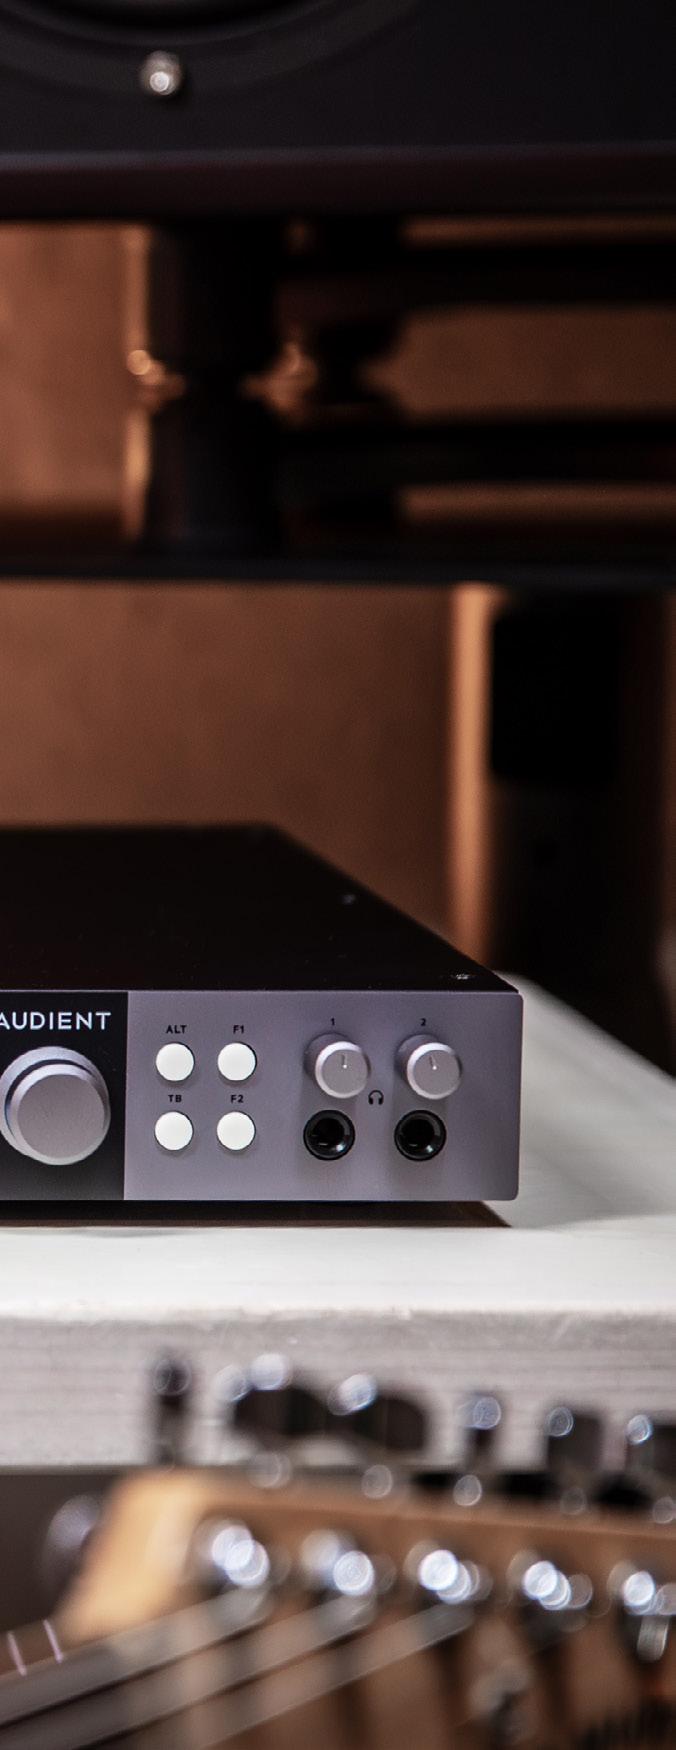
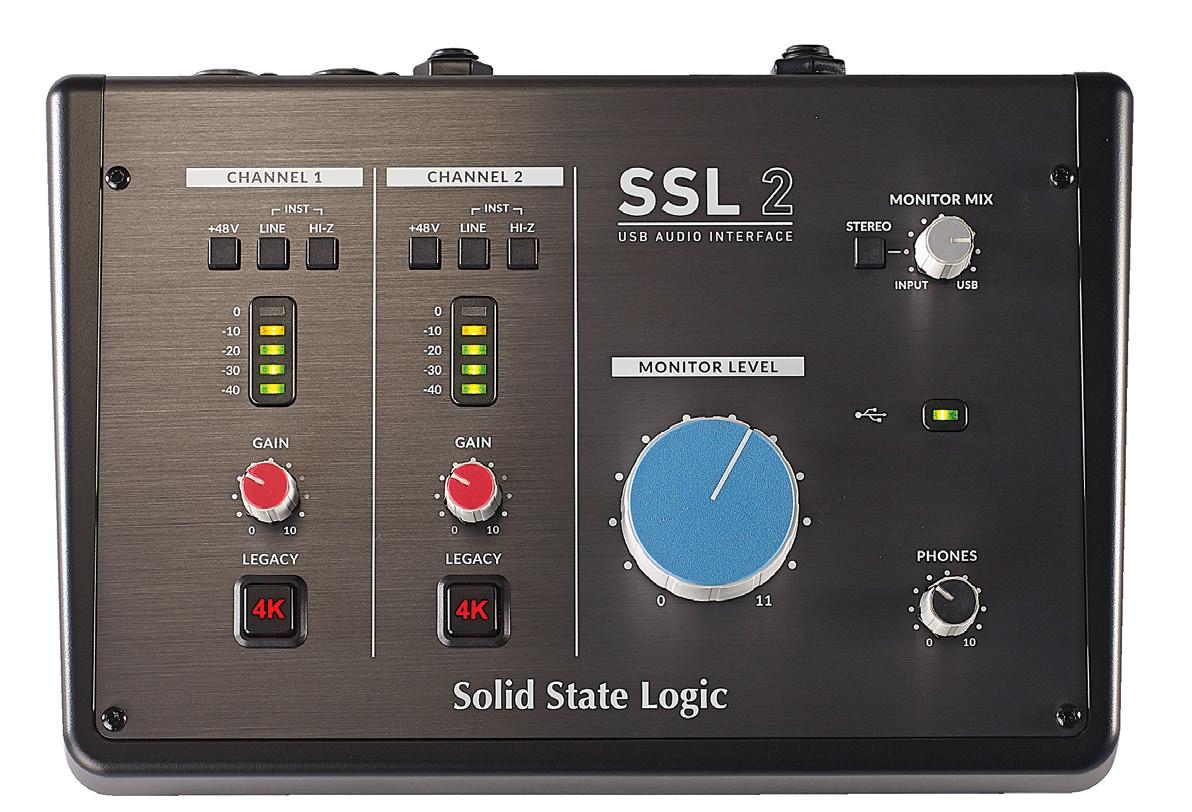
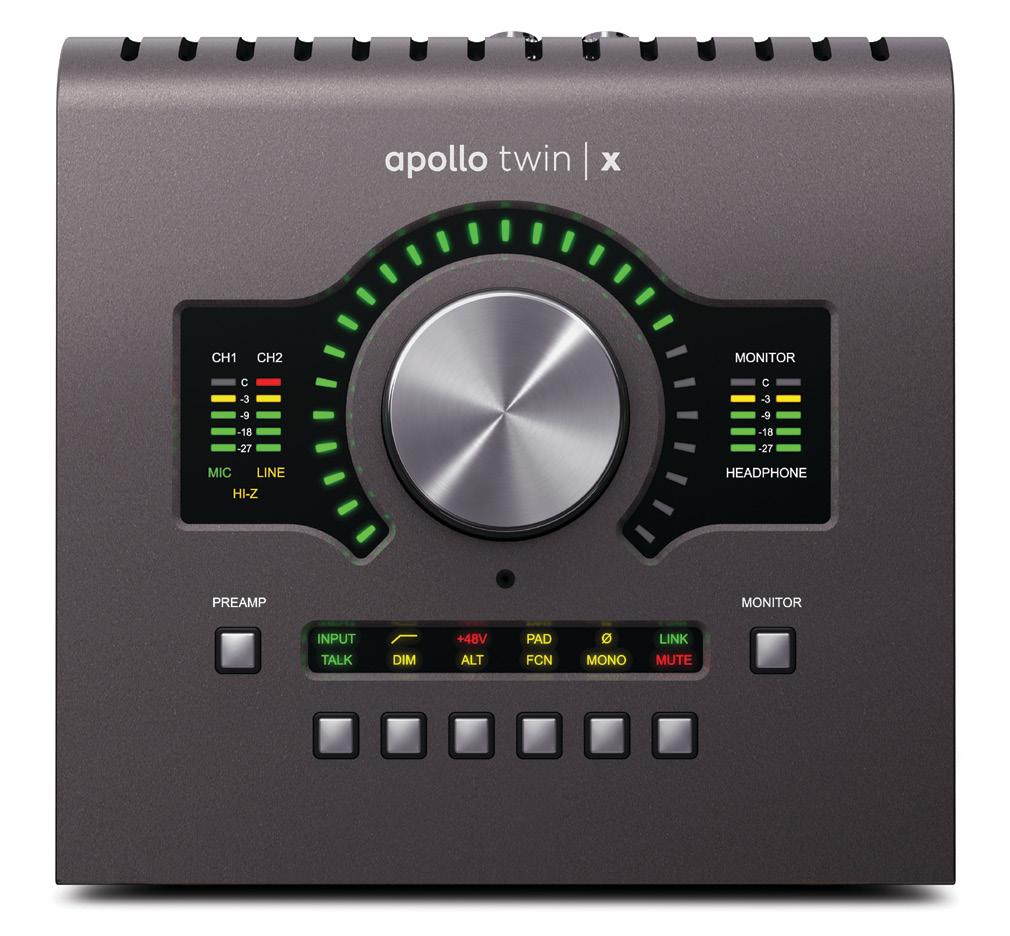
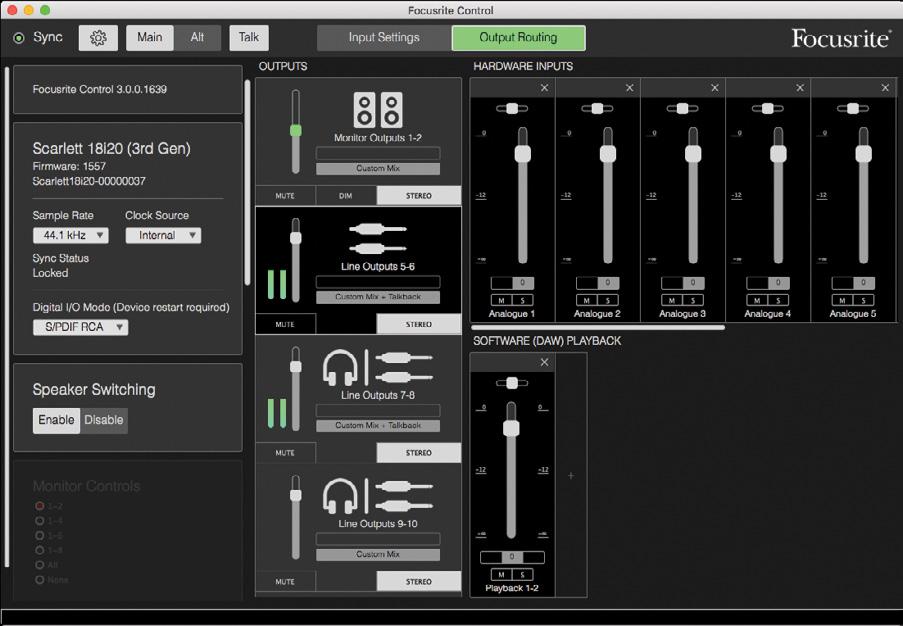
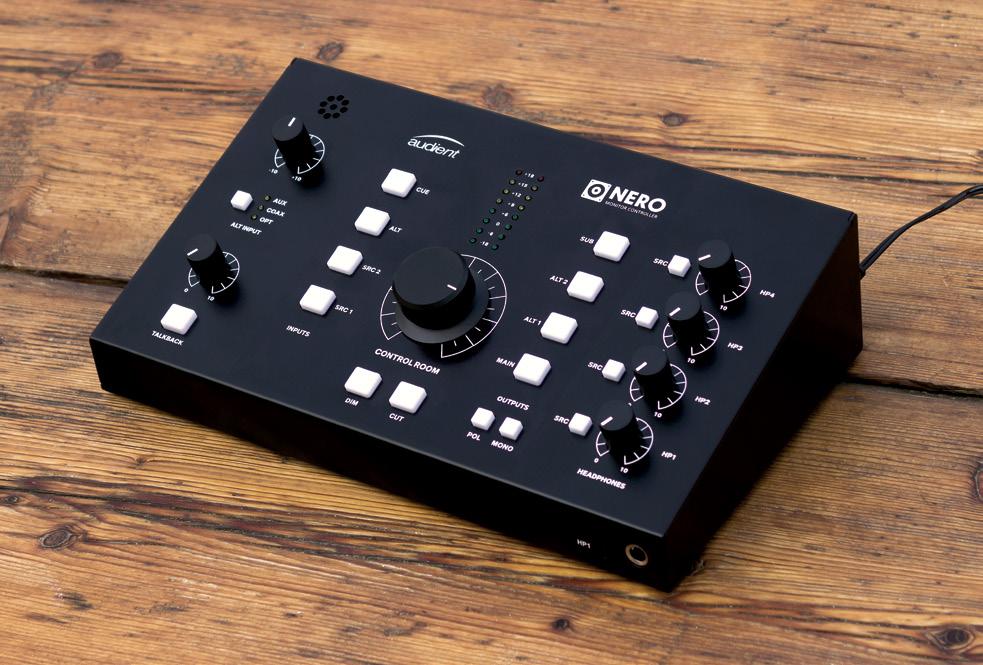
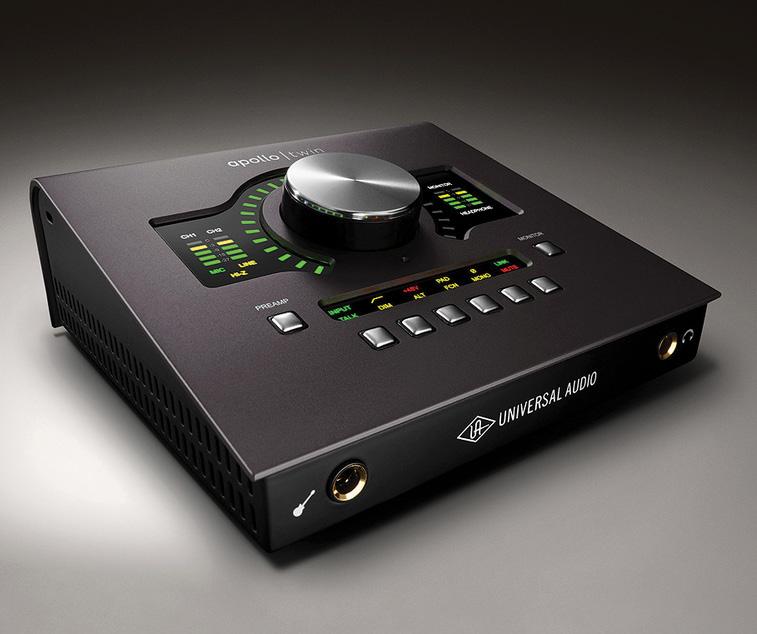
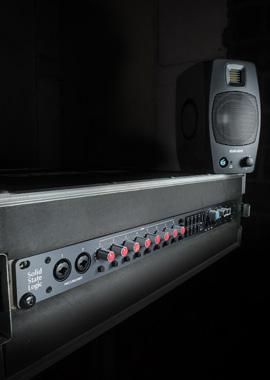
In this nice simple layout from Solid State Logic, the big monitor control is the setting the level of the speakers (if connected), while the Monitor Mix control sets the balance between the input signal and the DAW playback. The Headphone level control sets the listening level of the balance selected. The Universal Audio unit below takes a slightly different approach, with a big assignable control adjusting multiple parameters that are also available in software.
recording more than two musicians at once, you’ll thus need a dedicated multichannel headphone amp. This, in turn, will need to be fed from its own pair of line-level interface outputs. Bear in mind, too, that unless you have an outboard monitor controller with built-in speaker switching, you’ll also need a separate pair of line-level outputs for each pair of speakers you have.
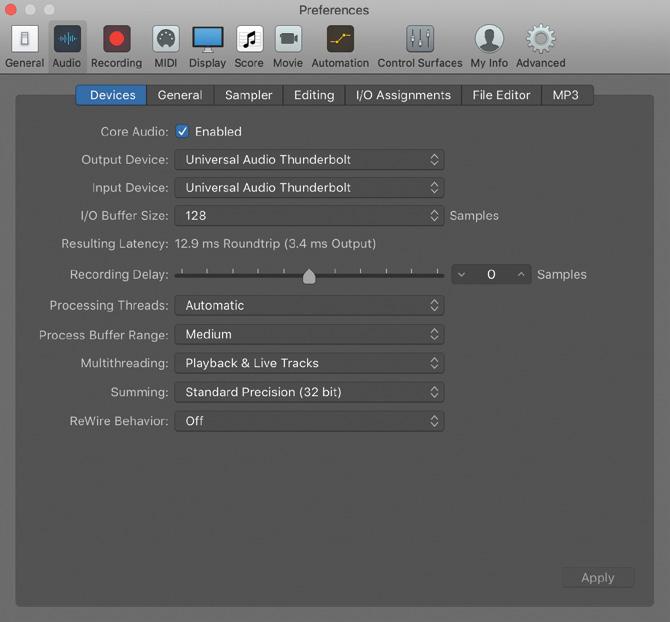
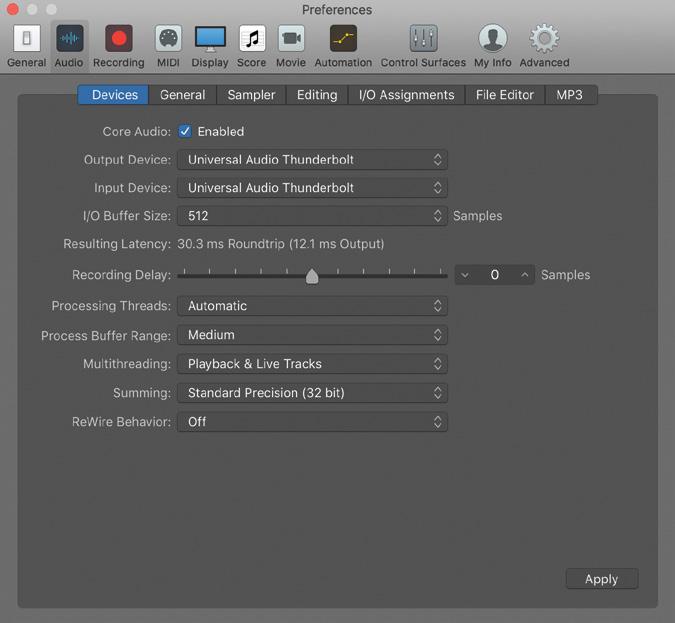
Latency and buffer size
When we record sound to a computer, that sound needs to be converted to a digital signal, captured by the recording software, and then finally turned back into an analogue signal that we can hear on our headphones or speakers. This process takes time, meaning that the input signal is always heard with a small delay, which is called ‘latency’. Ideally, it should be possible to make this delay short enough that it’s unnoticeable, but this isn’t always possible.
The total time taken for a signal to travel through a recording system, from source to monitor system, is known as the round-trip latency. Some people are more sensitive to latency than others, but once it gets much above 10 milliseconds, most will notice it. Interfaces are supposed to report their latency to the host computer, but many do not do so accurately. Latency is adjusted using a setting called buffer size: the lower the buffer size, the lower the latency, but the greater the demand on the computer’s CPU at the same time. For any given buffer
size, some interfaces will perform better than others, both in terms of the CPU load and of the actual latency they deliver. Thunderbolt and PCIe interfaces often outperform USB interfaces here, but another important factor is the driver software
that handles data transfer between interface and computer.
Many USB interfaces are ‘class compliant’, and can use the Apple driver built into the Mac OS operating system. This is good enough for most purposes, but interfaces that
You Can’t Unhear Quality
Award Winning Audio Interface Range | Class-A Audient Console Mic Preamps
Class Leading 32-Bit Converters | JFET Instrument Inputs | Headphone Outputs
Advanced Monitor Control | Audio Loop-back | 3 Year Limited Warranty
Free Plugins & Software Included
*Balanced Inserts feature on iD24, iD44 & iD48 only.
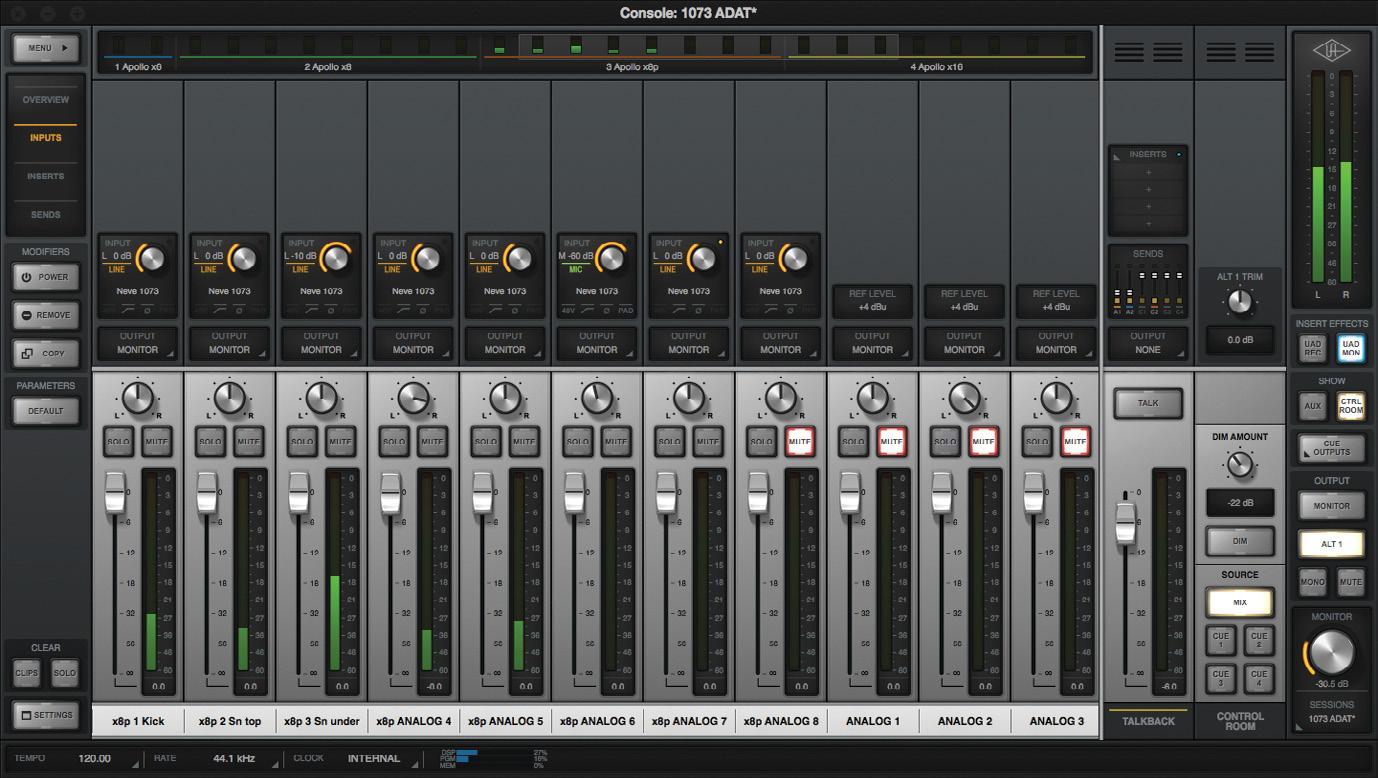
Some interfaces include a digital mixer controlled by software that runs alongside your DAW. These range from the most basic of direct monitoring facilities to sophisticated and powerful mixers with complex routing options and real-time plug-in processor options, like this Console app from Universal Audio.
employ custom driver software usually perform even better. This includes some USB interfaces, and all Thunderbolt and PCIe models.
On Windows, recording software typically uses the ASIO driver format developed by Steinberg. This isn’t part of Windows, so you’ll always need to install a driver, and the quality of these is quite variable. Many manufacturers of USB interfaces license third-party driver software, whilst other manufacturers create their own drivers. The latter usually offer better performance, but the situation is complex and it isn’t always easy to tell what driver a given interface uses. If you really want to get in-depth with measurements of low-latency performance on Windows computers, a visit to Vin Curigliano’s DAWbench. com website is essential.
Mixing it up
In general, low-latency performance is better today than 10 years ago. But even with the best drivers,
a round-trip latency of under 5ms can be hard to achieve, especially on USB interfaces. For this reason, many audio interfaces have a built-in mixer that allows us to hear input signals without waiting for them to pass through the computer and recording software — a feature usually called ‘Direct Monitoring’. On some small ‘desktop’ interfaces, this mixer is controlled using a simple knob that adjusts a balance between input signal and playback from your
recording software. Where more than a couple of inputs and outputs are concerned, though, manufacturers build in a digital mixer controlled from software.
Manufacturers take varied approaches to the design of digital mixers and the software that controls them. Some build in very powerful and complex mixers with endless routing options. Others concentrate on simplicity and ease of use, offering just enough functionality to cater for
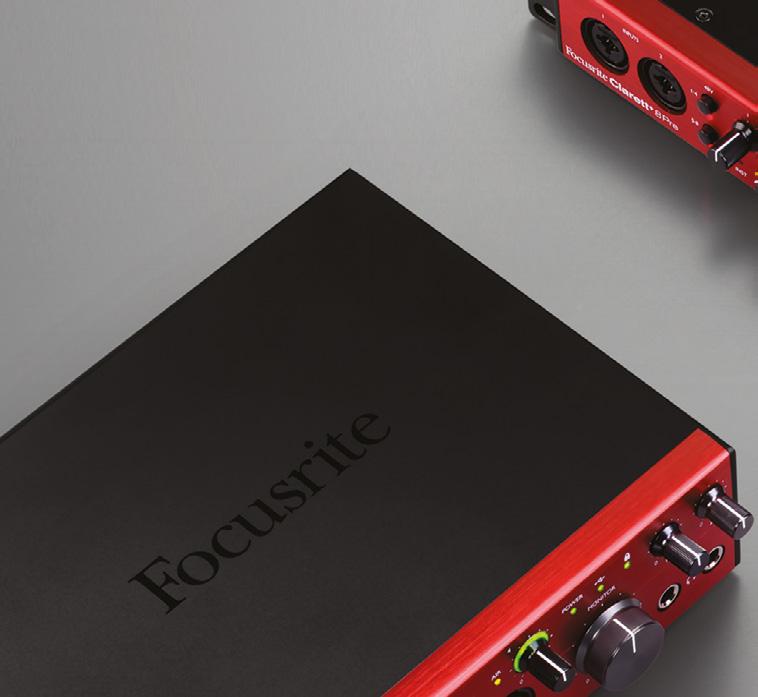
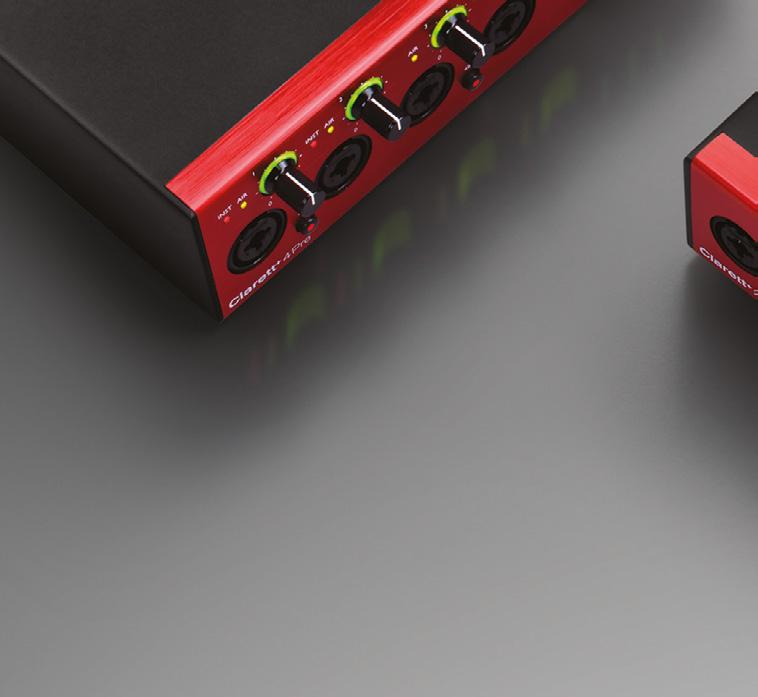
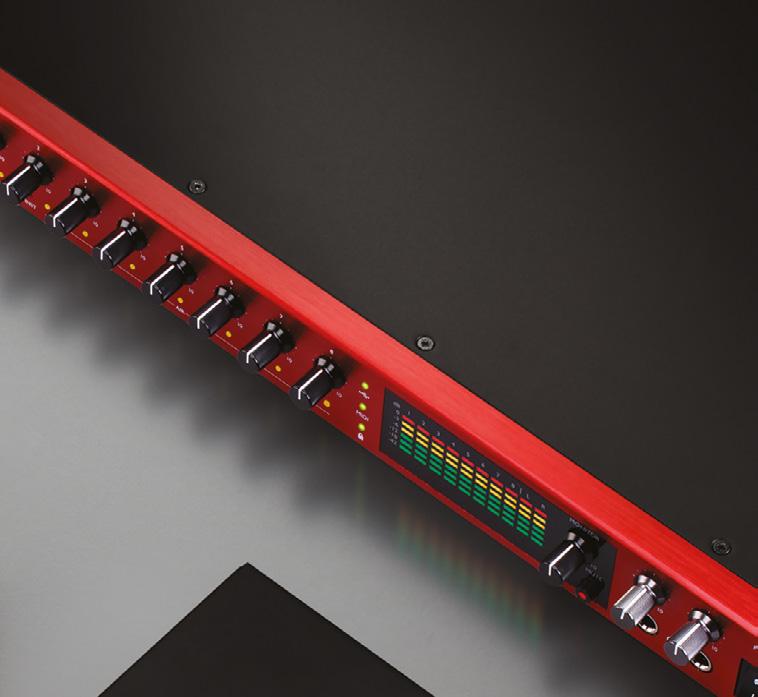
Clarity Redefined
Premium-quality USB audio interfaces designed for producers, engineers, and artists.
The ultimate recording preamp Clarett+ preamps have very high headroom, low distortion, and ultra-low noise, so you can capture exceptionally pure recordings and achieve a professional sound, whether miking guitars, recording vocals or tracking drums.
All-analogue Air
All-analogue Air with impedance switching and relay control brings clarity and presence, and makes vocals shine, by emulating the ISA 110 mic preamp from the classic Focusrite Studio Console.
Clear just got clearer
Improved, high dynamic range A-D and D-A conversion gets you closer to your music, with ultra-low distortion that provides clearer mixes and stunning detail at all levels.
Hear the truth
Improved headphone outputs and DAC performance provide powerful, transparent sound at all levels — on any headphones — so producers, engineers, and artists can make their best mix decisions and inspire amazing performances.
All the tools you need
A collection of software, including mixing plugins and virtual instruments, gives you the tools needed to master your craft.
typical use cases. Yet others build in not only mixing features but also plug-in equalisers (EQ) and other signal processors and effects.
Which of these approaches suits you is a matter of personal taste, but be aware that all of them can be implemented well or badly, and it pays to do some research. Read the in-depth reviews at www.soundonsound.com and check user forums online before parting with your cash. This is an aspect of interface design that’s easily overlooked, but it will affect your day-to-day experience with the product like nothing else.
Other factors
Considering only the basic specifications will probably leave you considering lots of interfaces with the same features. If so, it’s time to ask yourself some more detailed questions that will help you find the most suitable interface for your needs.
Most audio interfaces provide some monitor control functions, but the features on offer vary wildly. At its most basic, this might be a simple level control for one pair of speaker outputs. At its most sophisticated, you might have configurable control over multiple outputs, along with additional features such as talkback, monitor ‘dimming’, speaker switching, a button for checking your mixes in mono, and so on. Headphone outputs don’t
necessarily all appear as separate destinations in your recording software. Sometimes they duplicate what’s feeding one pair of line outputs, though you’ll often have some choice about which pair.
Small interfaces that are ‘bus powered’ through the USB or Thunderbolt cable are convenient and portable, but those restricted solely to bus power can sometimes be limited in performance, such as not being able drive headphones as loud as mains-powered units, or they might not be able to provide phantom power to microphones. Mains-powered interfaces, however, often employ an external power supply unit that might be lost or damaged, putting your studio out of action until it can be replaced.
Nearly all audio interfaces have at least one built-in headphone output, and many have two. Often these show up in your DAW software as separate outputs, but not always.
On some interfaces, mic preamp gain is adjusted digitally. This is more precise than using an analogue control and means that settings can be fully recalled and sometimes even stored with your DAW project. If you use capacitor microphones, you’ll need your interface to offer phantom power. Nearly all do so, but sometimes this is only switchable globally or in channel groups. This can be relevant if you want to connect things like ribbon mics, which ideally shouldn’t be allowed to encounter phantom power.
Larger, more upmarket interfaces almost always conform to the professional 19-inch rackmount format, whilst smaller ones come in a variety shapes and sizes, so ergonomic differences might also affect your decision — if you are going to use your interface in a rack, do you really want all the sockets on the back?
Finally, always remember that an audio interface requires committed support from the manufacturer, for instance by providing driver updates when computer operating systems change. Some manufacturers have a better track record than others when it comes to providing this support, especially for discontinued models. Choose well, and your interface should last you through many OS and computer upgrades!
Extra line outputs, in addition to the main stereo pair, can be useful for feeding supplementary headphone amps for more players, or hooking up to alternate monitor speakers.
Clear, comprehensive metering can be a big plus for some users, especially if you might be recording a lot of channels, such as when recording a whole band all playing at once.
Choosing And Using Microphones Chapter 4
If you are going to be starting out with just one microphone, you probably want to know which one is ‘best’. Inevitably, there is no simple answer to that! The sheer range of different models available might tell you that some models have been optimised for specific applications whilst others are all-rounders, but even just for something like vocal recording, it is difficult to identify the ‘best’. In any given price range some mics will just suit different voices more than others. And there are also factors beyond just the mic choice that will more strongly affect the outcome, such as mic placement and room acoustics. Microphones don’t pick up sound in anything like the same way as the human ear. The human hearing mechanism involves a lot of psychoacoustic filtering and processing from our brains. The complex shape of our outer ear imposes some quite radical, angle-related changes to the sound, but our brains know how to interpret this information and make sense of it in a way that microphones simply can’t. This is part of what enables us to choose to ignore or block out factors like background noise, whereas a microphone, with no ‘interpreting intelligence’ simply turns everything it ‘hears’ into an electrical signal.
Pickup patterns
Some microphones are equally sensitive to sound arriving from all directions, while others are designed to pick up sound only from certain directions. This is called the ‘pickup pattern’ or ‘polar pattern’ of
the microphone, and comes about as a function of the physics of its capsule and housing design. Most microphones that you’ll encounter will be directional models designed to pick up sound only from the front. These are usually referred to as unidirectional or ‘cardioid’ (so called because their nominal pickup pattern resembles an inverted heart shape). These mics are often favoured in recording applications because they capture more of the direct, ‘wanted’ sound from the source, and less reflected sound from elsewhere in the room.
In practice, however, the pickup pattern of most mics varies with frequency — most are a lot more directional in the high frequencies (the treble region) than they are at low frequencies. This means that sounds arriving from the side or rear won’t just be quieter than sounds arriving from the front, they’ll also have a different sonic character, with their high-frequency content being subdued.
This might seem irrelevant if what you’re recording is always directly in front of the microphone, such as vocals, but that would only be true if you were recording in an environment with no reflective surfaces (and/or no other sound sources nearby). In reality, some sound bounces back into the microphone from every possible angle, and this reflected sound is inevitably modified by the off-axis frequency response of the microphone. So it’s often important to minimise the amount of sounds reflecting around a room — something we’ll explore later on.
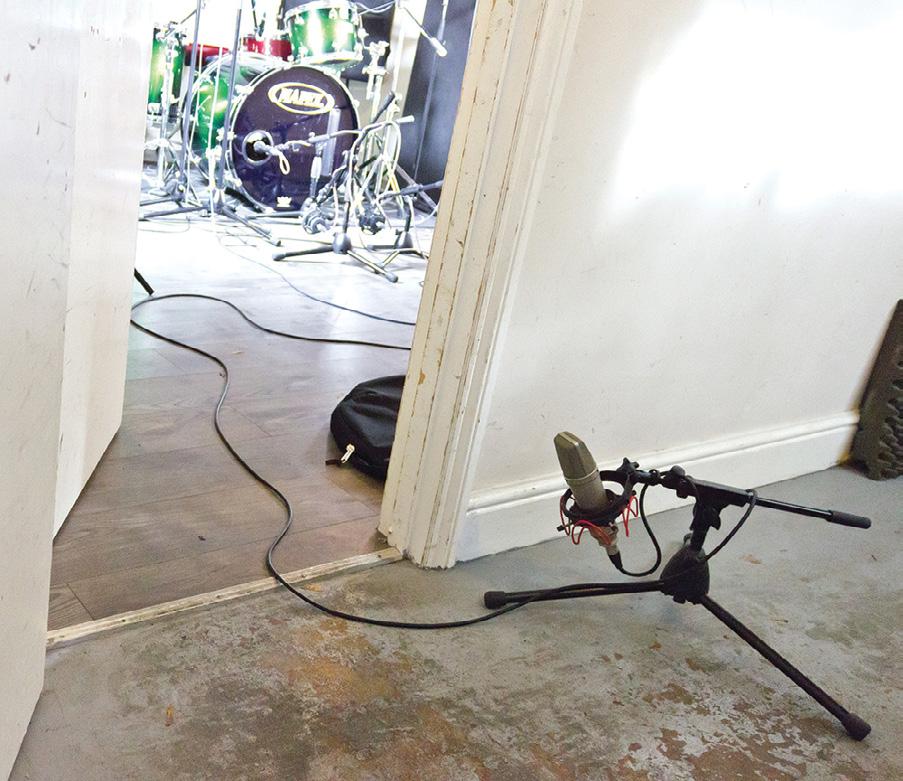
Miking the room or the source?
When you’re placing a mic in front of a singer or instrument, you can either try to set things up so that your mic will pick up as little reflected sound as possible, or you can choose to capture some sound from the room as well. Deliberately allowing the room to become an integral part of the sound — perhaps by opting to use omnidirectional mics and/or by increasing the mic’s distance from the source to balance the amount of direct and reflected sound — is generally more relevant to choral or orchestral recordings than to modern music production
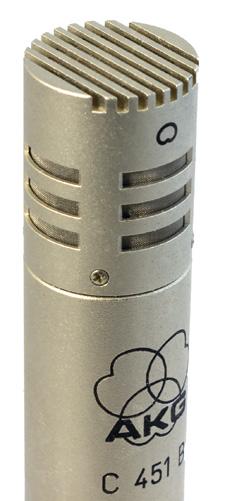
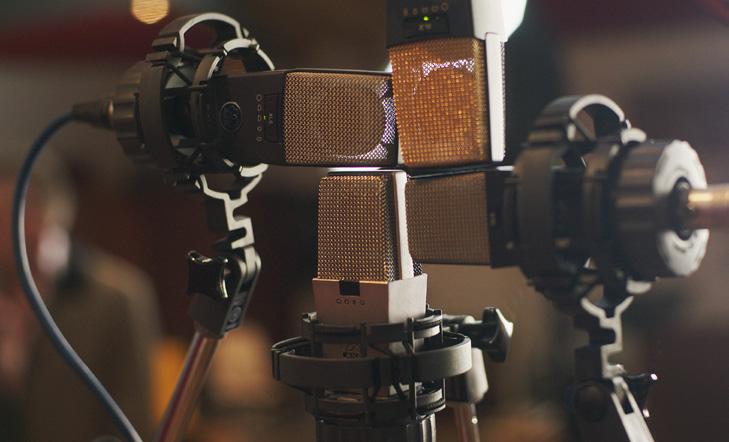
On this AKG C451 ‘end-address’ capacitor cardioid you can see vent slots in the housing.. These are the entrance to the acoustic labyrinth behind the diaphragm through which it achieves its directionality.
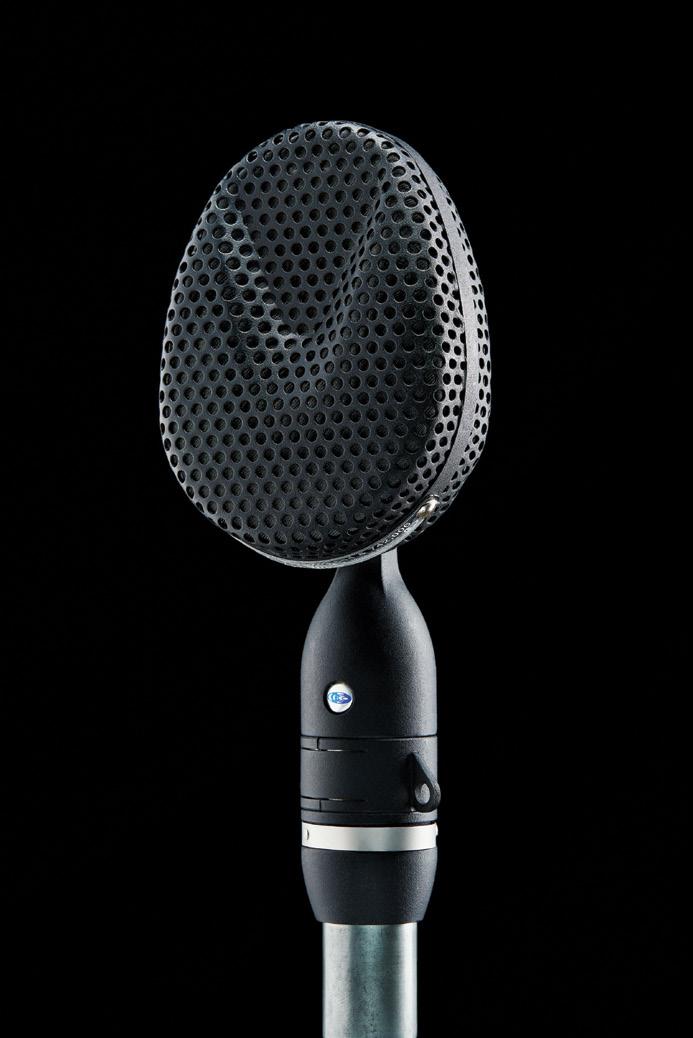
The basic ‘pickup pattern’ of a microphone comes about as a function of the physics of its capsule and housing design. Most microphones that you’ll encounter will be directional models, usually referred to as unidirectional or ‘cardioid’ — so called because their nominal pickup pattern resembles an inverted heart shape. This example is an Origin model from UK manufacturer Aston Audio, and like many ‘side-address’ mics, you know you’ve got it the right way round when the maker’s logo is facing you as you use it. The design of some models doesn’t make it immediately clear if they are side-address or end-address, like a handheld stage vocal mic. Whichever way is loudest gives you the answer, but note that figure-of-eight models will be the same from the back as the front — in which case, you’d usually work with the maker’s logo facing you.
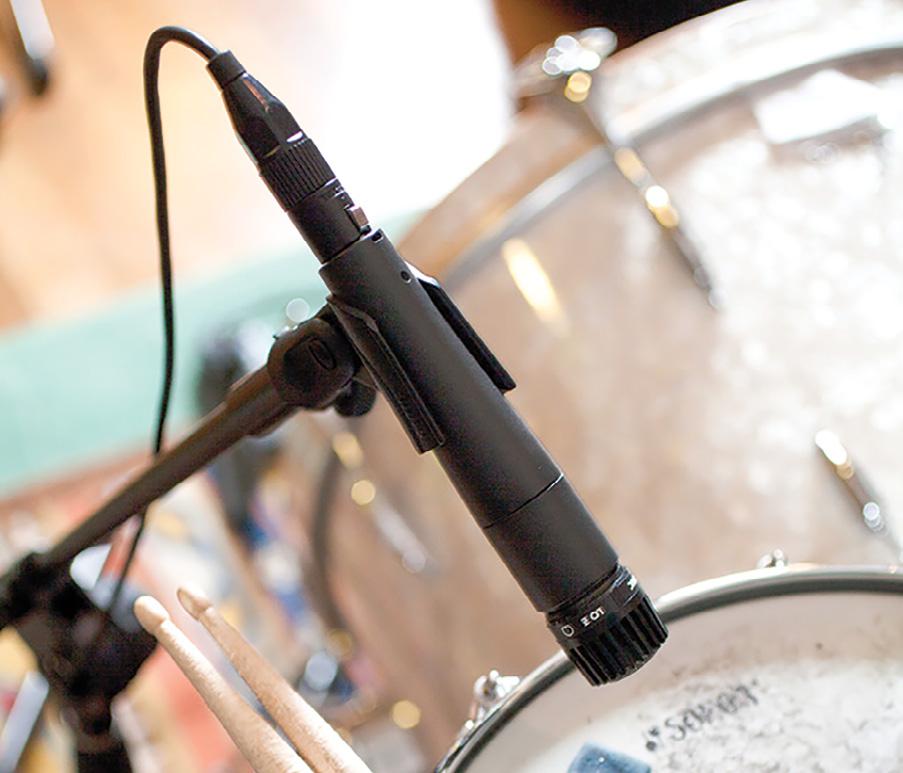
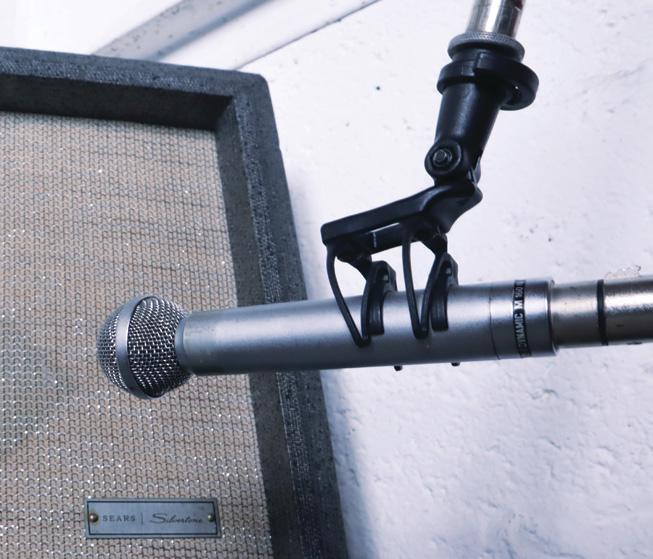
The venerable Shure SM57 remains a great ‘all-rounder’, equally at home on snare drum or a guitar speaker. It has a strong midrange without too much of a presence peak, making it useful for a wider range of sources than the vocal-optimised SM58. Try it on acoustic guitar for a more robust rhythm part than a capacitor mic would give you.
Omnidirectional mics ‘hear’ sounds more or less at the same level from all directions and will thus pick up a lot more room sound than a cardioid placed in the same position. Sometimes that may be exactly the sound you want, especially as the tonality of omnidirectional mics varies much less with the angle of arrival compared to cardioid mics, so the reflected room sound is more consistent. Using an omnidirectional mic very close to the source can actually reduce the room pickup to around the same level as it would be if you were using a cardioid mic at a greater distance and, because of the omni’s more consistent frequency response to sounds from different directions, the result can sometimes be more open and natural.
The alternative approach, more common in home studios where we’re often forced to use small rooms that sound quite boxy, is to employ a cardioid mic positioned fairly close to the singer or instrument as this technique dramatically reduces the amount of room sound being captured. It won’t eliminate it altogether, though: remember that cardioid mics still pick up a significant amount of sound from the sides and that room sound can often seem ‘coloured’ or unnatural compared to ‘omnis’.
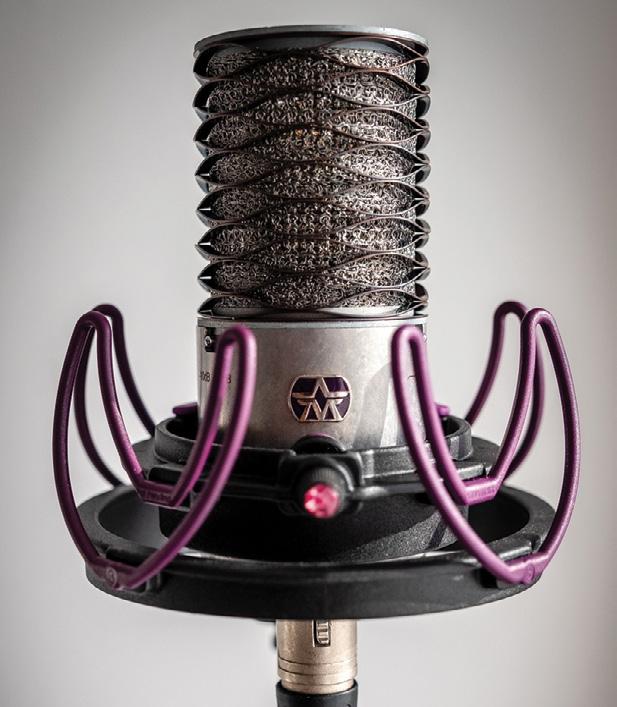
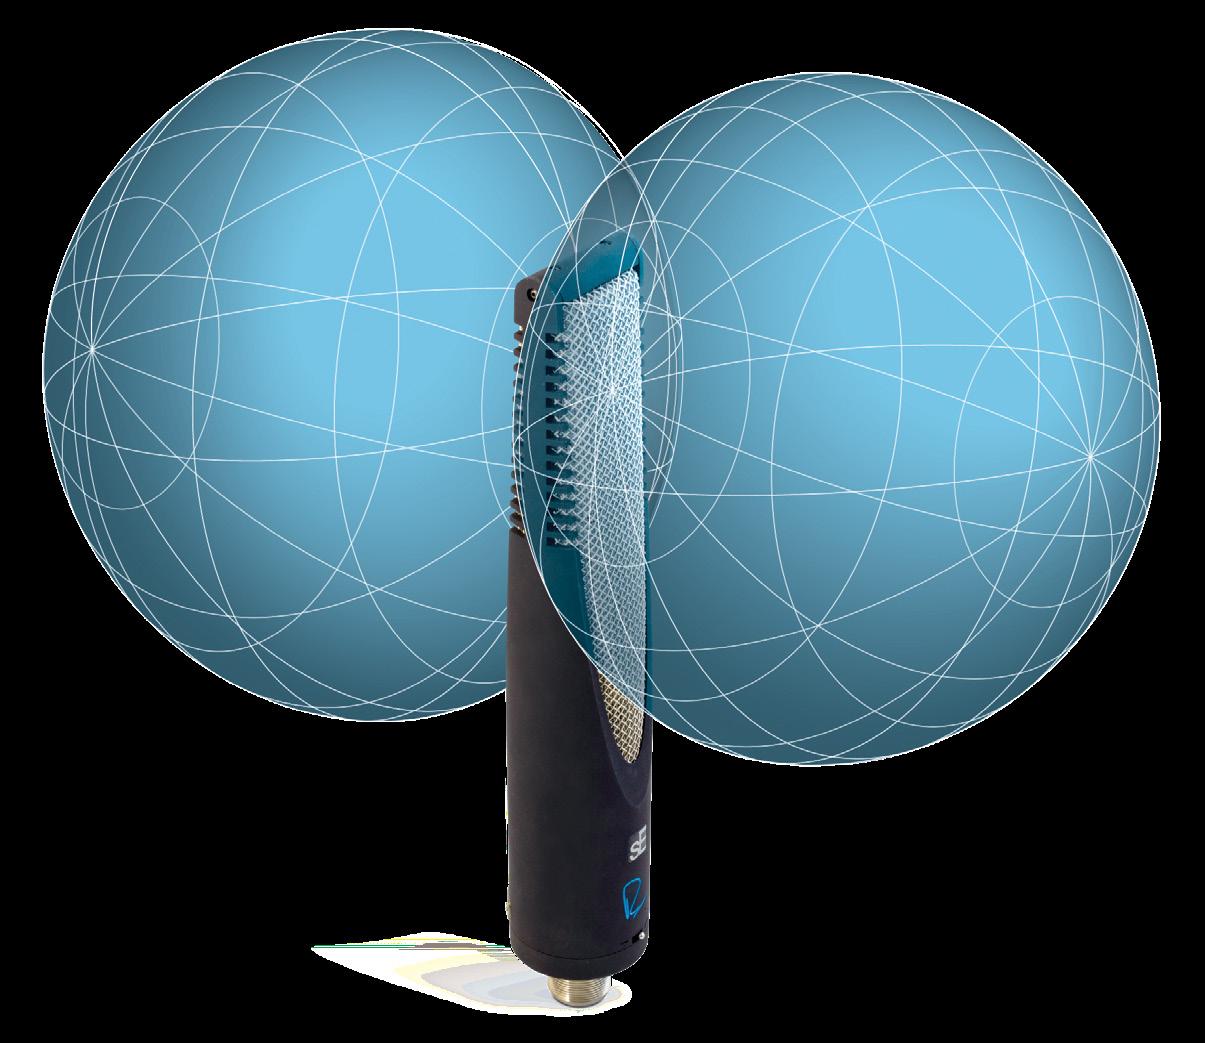
A figure-8 mic, such as this sE RNR-1 ribbon mic, is sensitive to sound at the front and rear but rejects sound that arrives from side-on (whether in the horizontal or vertical plane).
Something else to bear in mind is that omnidirectional mics don’t have any ‘proximity effect’ — a strong boosting of low frequencies when placed very close to a source — whereas cardioids very much do. Dedicated vocal mics, specifically designed to be used up close, often have a built-in low-frequency cut, rolling off gently below 200Hz or so to compensate for the proximity effect — just another reason why there are lots of different mic designs. Some mics have switchable low-cut filters, intended either to minimise stand-borne floor vibration (rumbles), or to mitigate proximity effect to some degree. Clearly, there are pros and cons for both omni and cardioid mics, and both are worth having, if possible, but there are also multi-pattern mics that allow you to switch between
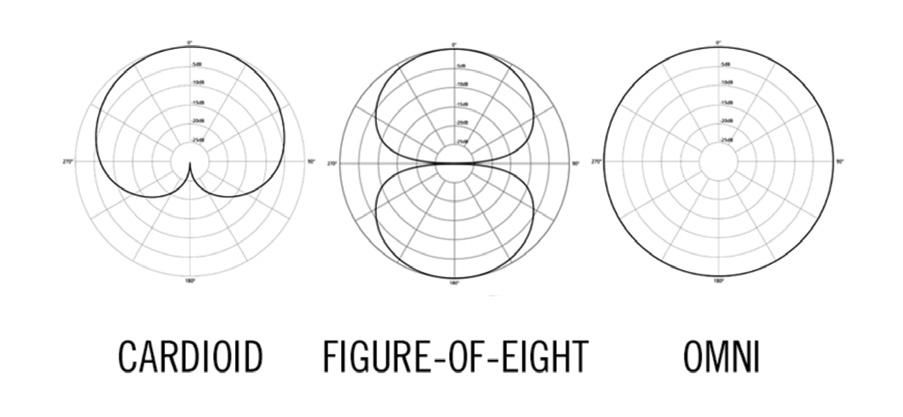
The three most commonly-used microphone ‘polar patterns’: the lobes of each figure show the sensitivity of the mic to sound arriving at the capsule from different angles. The cardioid pattern (left), which picks up primarily from directly in front while rejecting sound from behind, is the most frequently used pattern used in modern recording. The omnidirectional pattern (right) picks up equally well from all directions and is more common in mics used for acoustic music, where you are often content to include some of the natural ambience of the surroundings. The figure-of-eight polar pattern (centre) picks up sound equally from in front and behind while rejecting sound from the sides. Ribbon mics nearly all have this pickup pattern, but if you want to use one solely for its distinct tonality, perhaps something that needs its high end smoothing out a little, you can always put an absorbent screen behind the microphone to reduce room reflections. More complex polar diagrams will show extra traces for a number of different frequencies, indicating how the mic’s tonality varies with the direction of sound. Alternatively, you can take the pragmatic approach and try speaking into the mic whist listening on headphones, and noting how the sound changes as you turn it so you are speaking into the sides and rear. Does it get dull-sounding as you go around, or brighter and thinner? If it stays fairly consistent, you’ve got a mic with a pretty good ‘off-axis’ response.
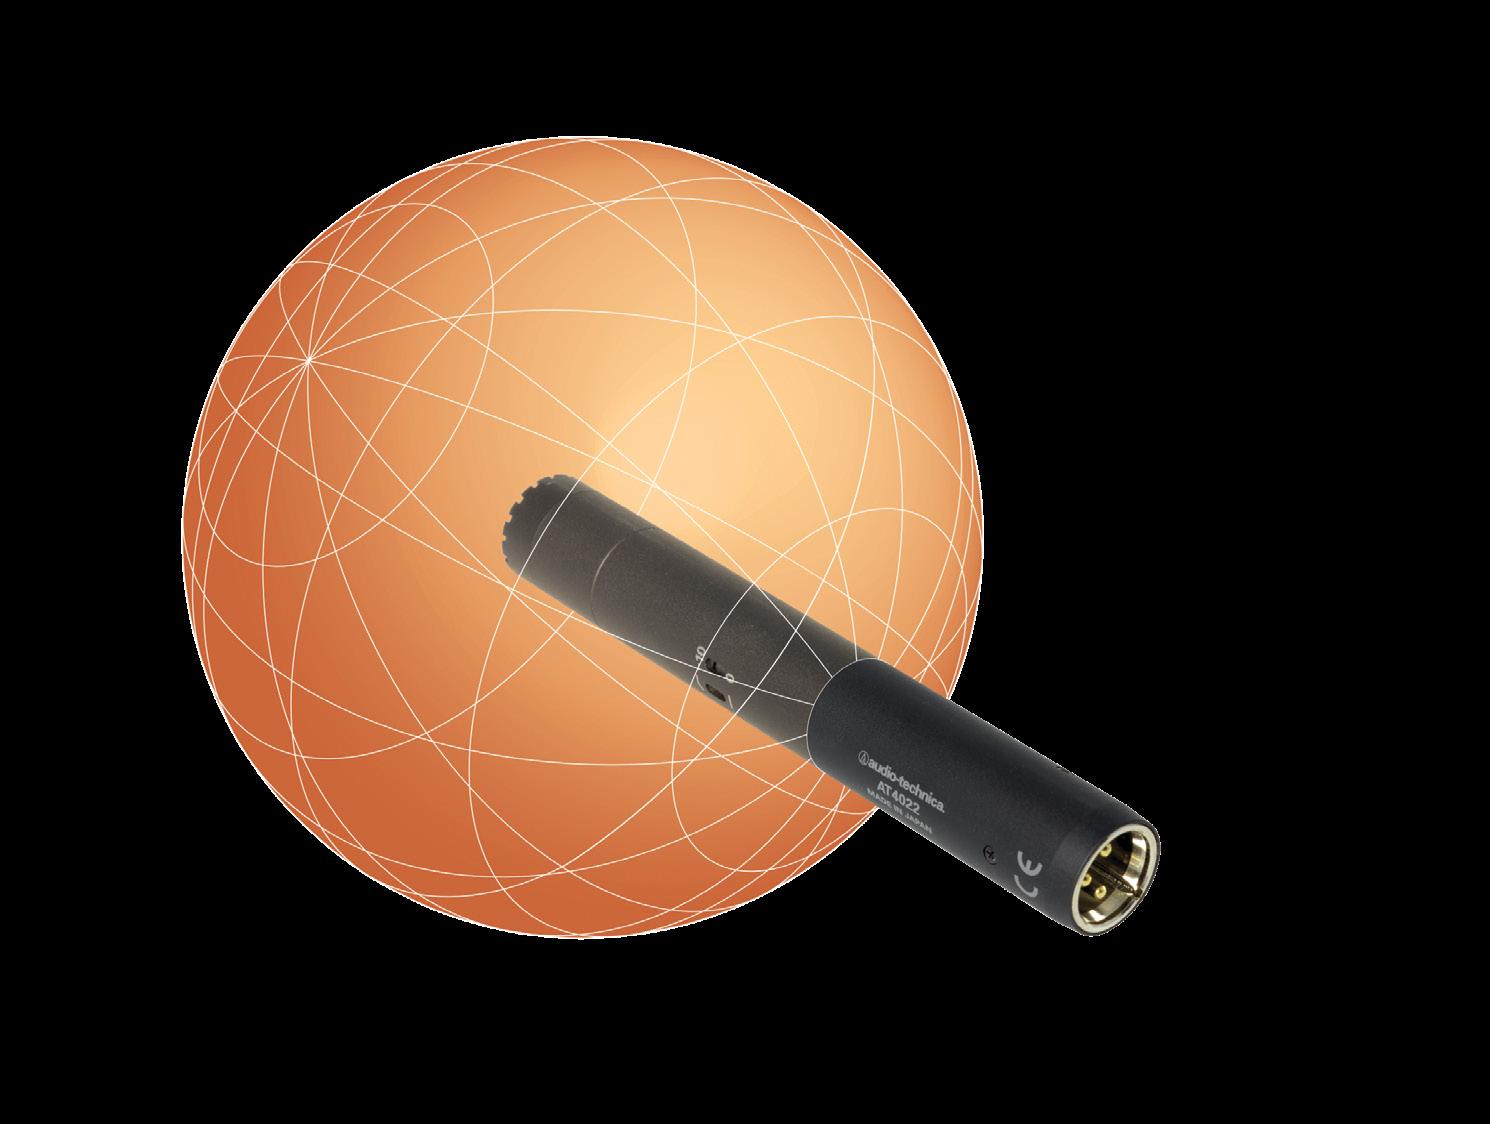
Omnidirectional mics, such as this Audio Technica AT-4022 small-diaphragm capacitor model, are equally sensitive to sounds arriving from any direction — hence the sphere centred on the capsule. Importantly, the off-axis sounds aren’t coloured any more than the on-axis sound.
Down-side up?
You’ll sometimes see pictures of famous artists in the studio singing into mics rigged upside down. Most side- address mics work just as well upside down as they do the ‘right’ way up — or sideways, for that matter! — and it can sometimes simply be more convenient to mount them upside down to keep the stand further away from the singer. It may also allow better sight of a lyric sheet on a stand, and encourage the vocalist to stand up tall and project their voice better.
polar patterns, and many of these are now quite affordable. Multi-pattern mics often include an additional pattern: figure-of-eight. The polar pattern is shaped like a figure 8, sensitive to sounds from both front and rear, but completely deaf to sounds from the sides (90 degrees off-axis and above/below).
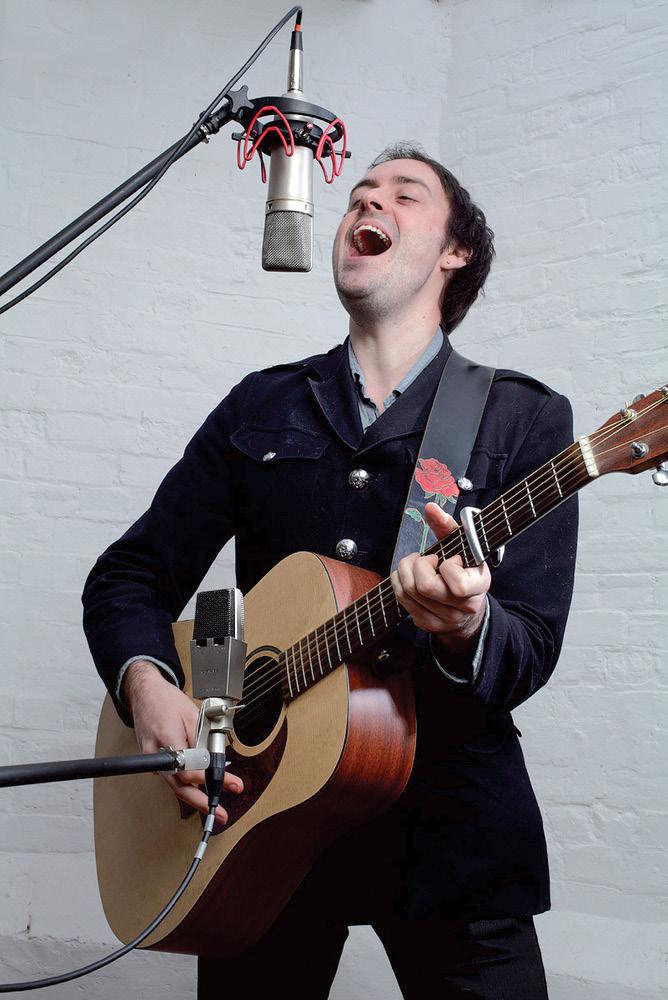
the other polar patterns, but it has some applications in stereo-miking configurations. Its unique property of being totally ‘deaf’ to sounds arriving from the sides can be ideal in situations where you need to try to separate sources that are in close physical proximity: you simply point the figure-of-eight mic’s ‘dead’ angle towards the sound you wish to exclude. A prime example might be to help separate an acoustic guitar and vocalist where both are to be recorded together. The exclusion of unwanted sound is never complete, because of room reflections, but a figure-of-eight in this situation should be a significant improvement over using a cardioid, since the front could be pointed at the mouth while the null is aimed at the guitar, and a second fig-8 mic could be used to pick up the guitar while the null faces the performer’s mouth. Of course, you still need to bear in mind that a figure-of-eight mic is just as sensitive at the rear as it is at the front, so it helps to put up some acoustic absorbers behind the mic if room reflections prove to be a problem.
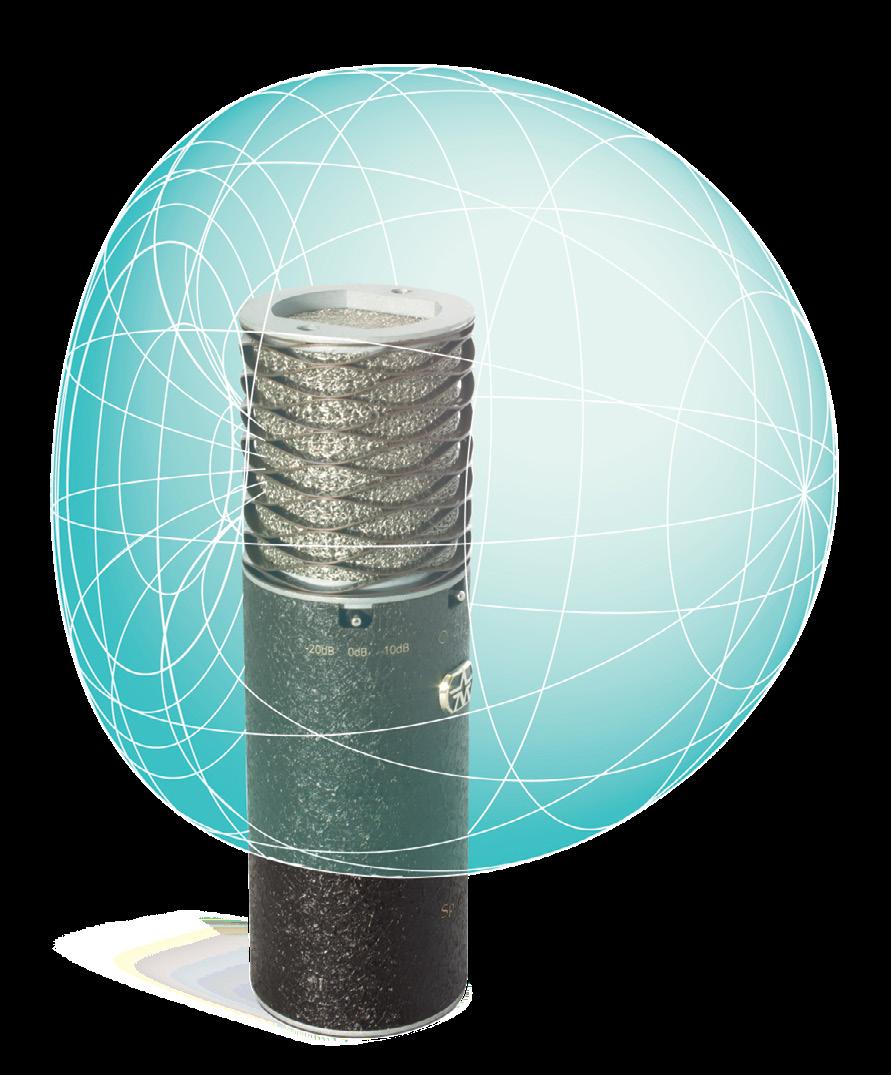
The cardioid pattern of this Aston Spirit capacitor mic is made up of a 50:50 blend of omni and figure-8: the omni pattern reinforces the figure-8 front lobe but cancels at the rear, to create a heart-shaped pickup pattern.
Microphone sound character
Most studio recording is carried out using ‘capacitor’ mics (sometimes also called condenser mics — condenser is
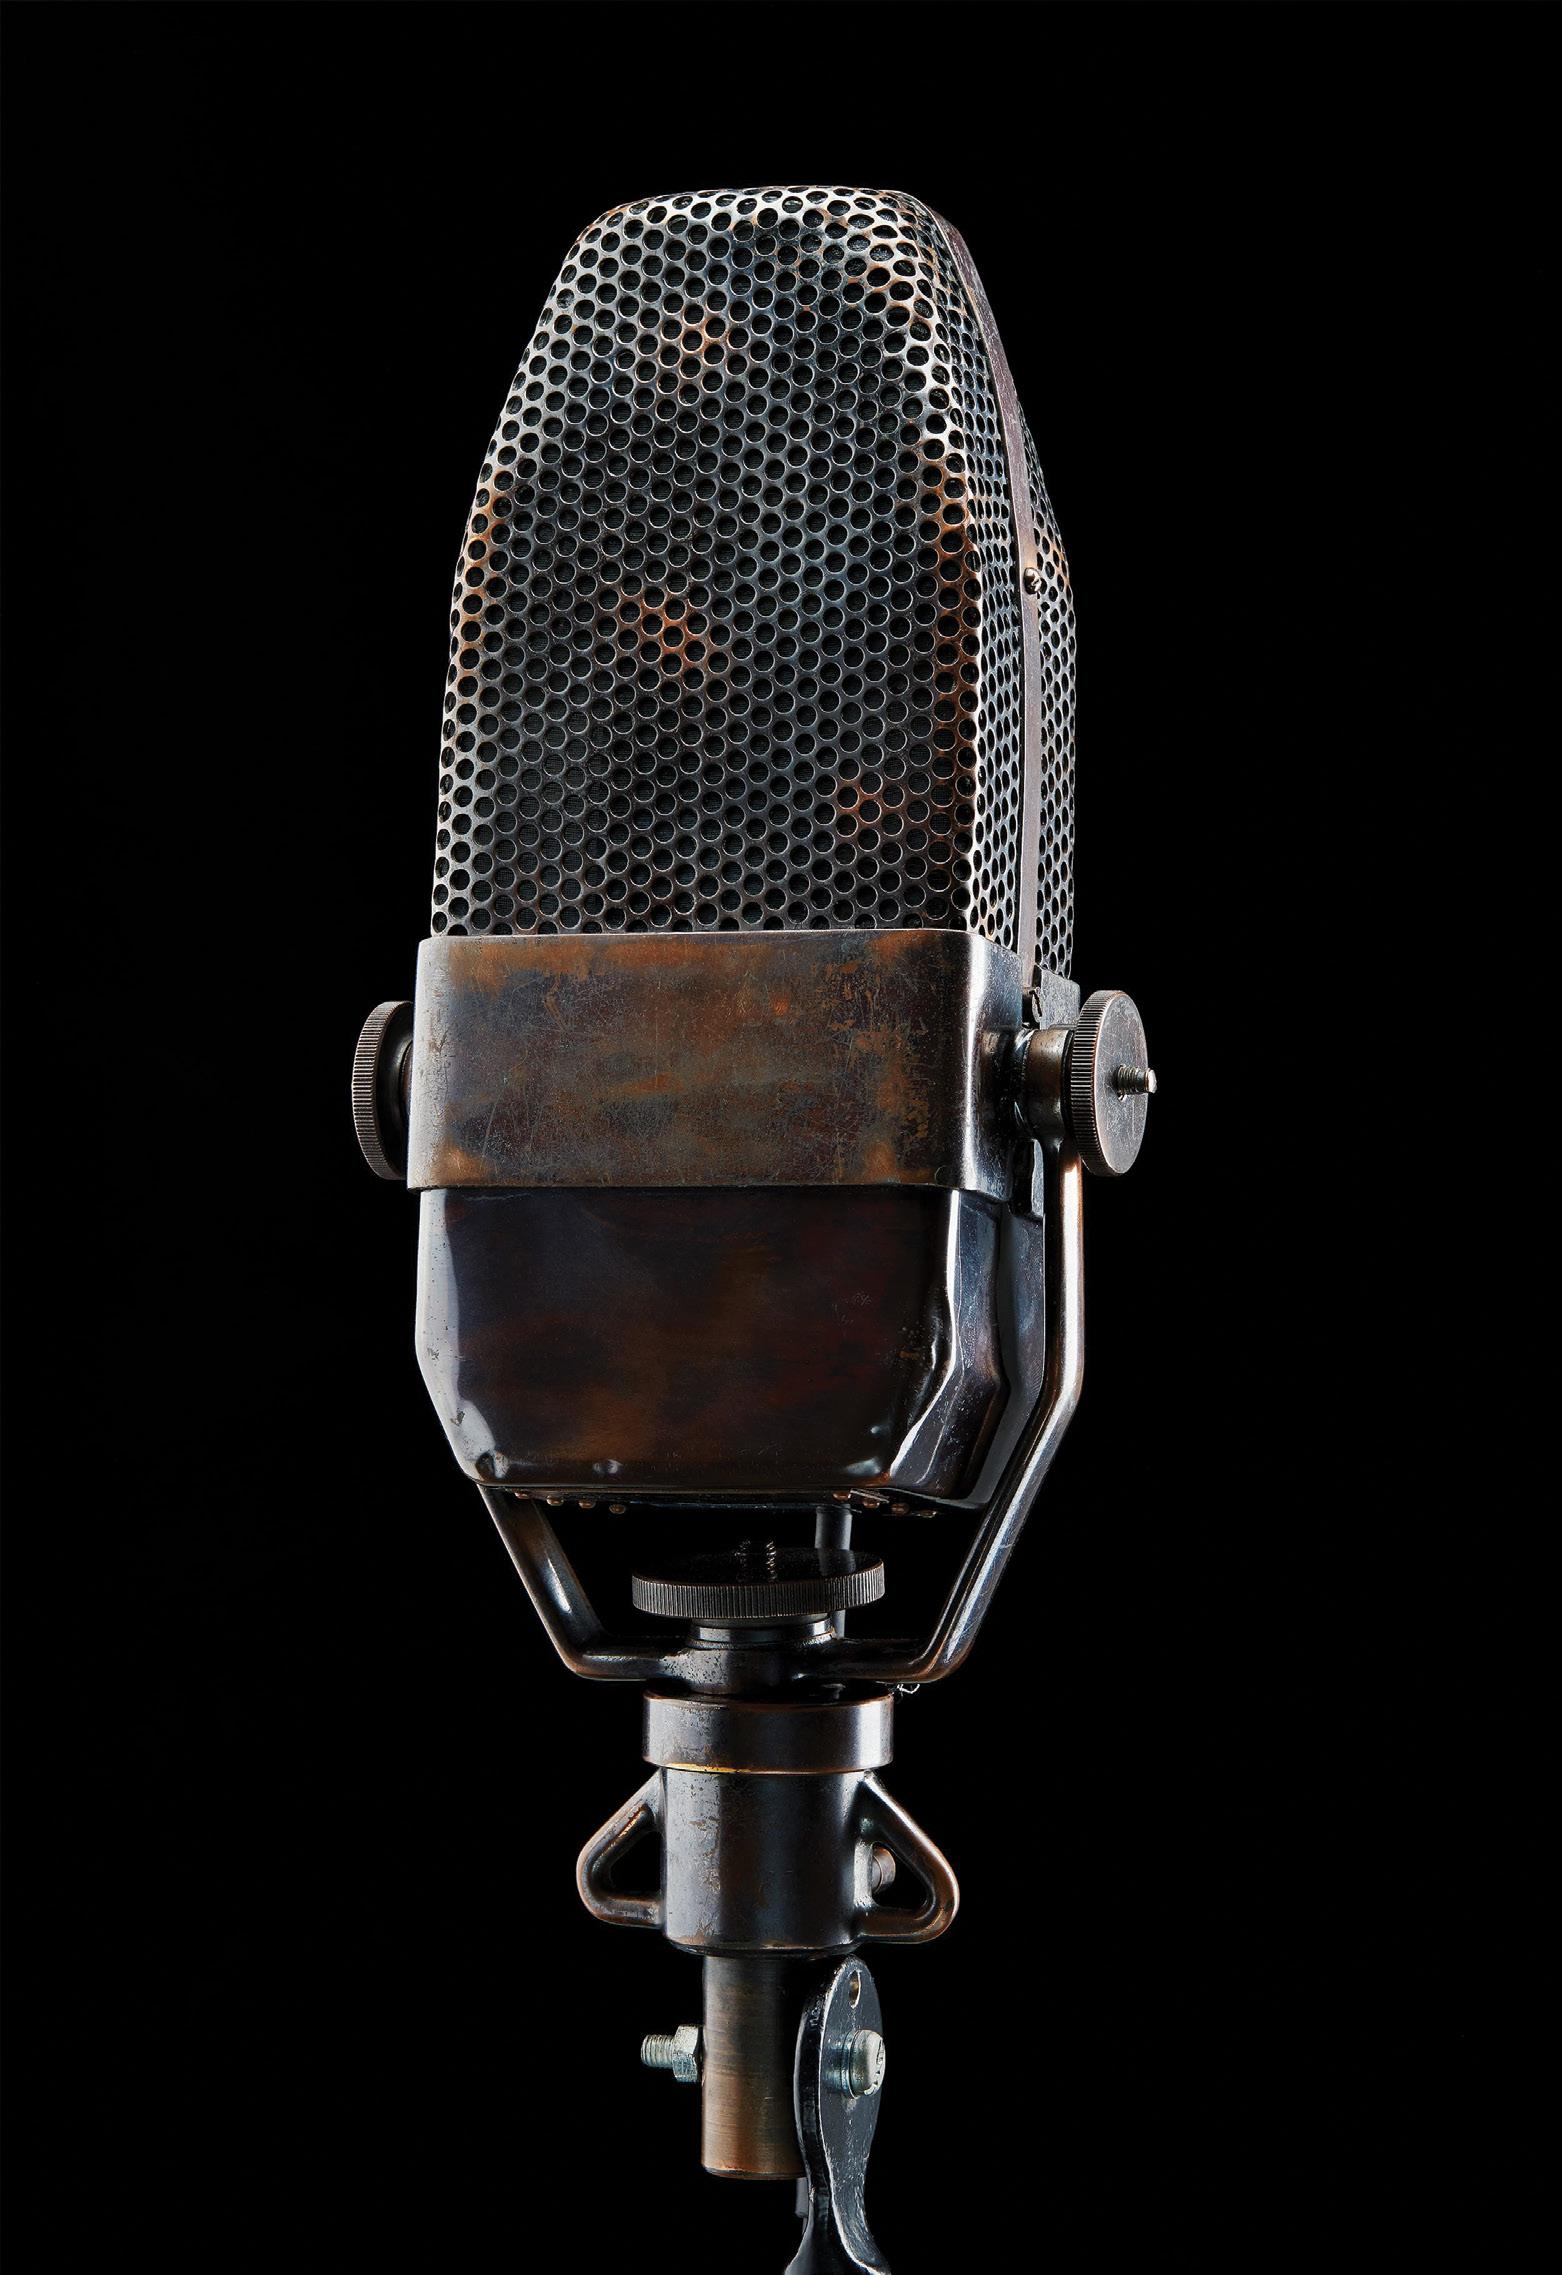
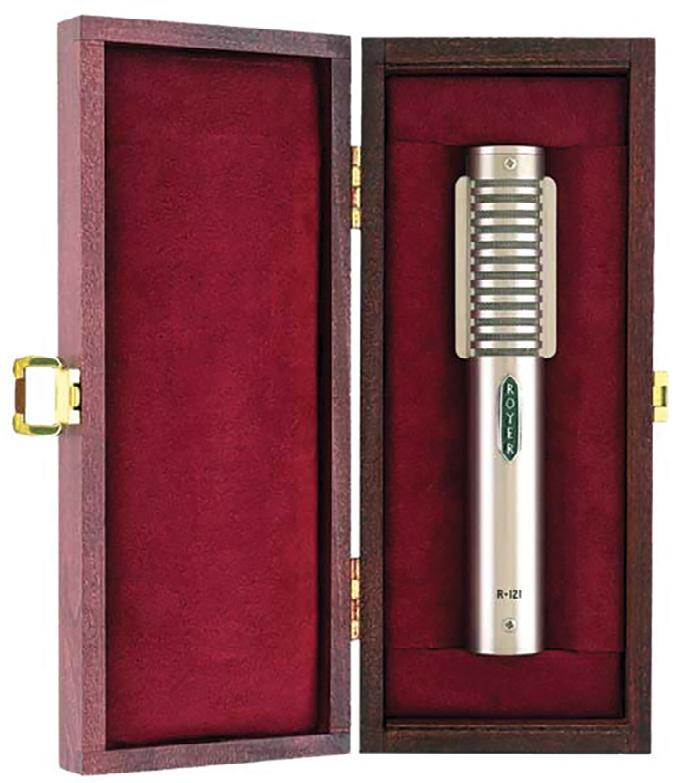
Ribbon microphones, like this Coles 4038 originally designed by the BBC in 1953, have an inherent figure-of-eight pickup pattern, enhance the low end when used up close, and have a subjectively smooth top end, arising from a frequency response that tails off around 15kHz, rather than the 20kHz of most modern capacitor mics. The thin, corrugated metal strip that forms the diaphragm is fairly delicate compared to the robust diaphragm of a moving-coil mic, especially in older designs. Modern ribbons, such as the Royer R-121 and Beyerdynamic M160 pictured, tend to be more robust, and are now a popular choice for miking electric guitar speakers. It is best practice to avoid sending phantom power to a ribbon mic, unless it is an ‘active’ ribbon design with an on-board preamp.
simply an older term for a capacitor). In these, the diaphragm — the part that moves in response to changing air pressure — is made from very light material and so is able to move very fast, which permits it to respond precisely to high frequencies and transients. Capacitor mics require some internal electronics to detect the diaphragm’s movement and generate the output signal, and that circuitry can sometimes be powered by a battery, or more often via ‘phantom power’ supplied by the microphone preamp. In comparison, the diaphragm of a moving-coil mic — often called
a ‘dynamic’ mic —is much more substantial as it supports a coil of wire that moves within a magnetic field, thereby directly generating the output signal without needing a power supply. The relatively heavy wire coil makes it harder for the diaphragm to move quickly, so dynamic mics tend to have a less accurate high-end response — they can sound duller and tend to ‘smooth out’ transients — but these characteristics can be used to advantage in some situations. Moving-coil mics also have a physical robustness that makes them very well suited to close-miking loud sources
such as drums and guitar cabinets. The inherent emphasis of midrange frequencies that many of them exhibit may sometimes simply suit a source better than the theoretically ‘more accurate’ capacitor mic. In mic choice, what sounds right is right: it’s as much art as science.
There has never been a better or wider choice of microphones available, and very few of them will disappoint if used correctly. Mics sound different to each other due to a number of factors, one of the most significant being the way in which the high-end response is modified to
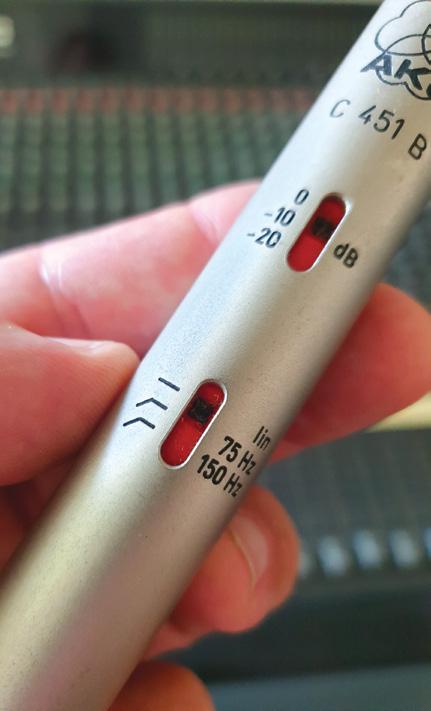
This cardioid, capacitor mic from AKG has a ‘pad’ switch and bass roll-off settings. The pad is used with especially loud sources to prevent the mic’s internal preamplifier from being overloaded. The bass roll-off is switchable between ‘Lin’, which means ‘linear response’ ie. ‘no bass roll-off’, 75Hz and 150Hz. Bass roll-off in the microphone itself can be used to counteract the bass boost of proximity effect, exhibited when cardioid mics are used very close to a source, or to avoid picking up unwanted noises when the source itself has no low frequencies you want to capure.
give the mic more or less ‘presence’. If the boosted frequencies are in the upper-midrange, around 2kHz, this can help some singers sound clearer, or give a guitar more ‘bite’, but those with edgier or more aggressive voices may find the same presence peak makes them sound too strident. A higher-frequency presence peak, perhaps around 6 to 8 kHz, will help add ‘airiness’ to a voice or acoustic guitar without making it sound harsh, but may not offer enough help to the singer who needs more clarity of diction, and it may also exacerbate ‘sibilance (the over-prominence of ‘ess’ sounds) in a recording.
There are also ‘warm-sounding’ mics, designed to pump up the low end slightly, often combining this with a smoothed-off high end. These mics can sound great with a singer with a harsh voice, or brittle sounding distorted guitar, but try to use one
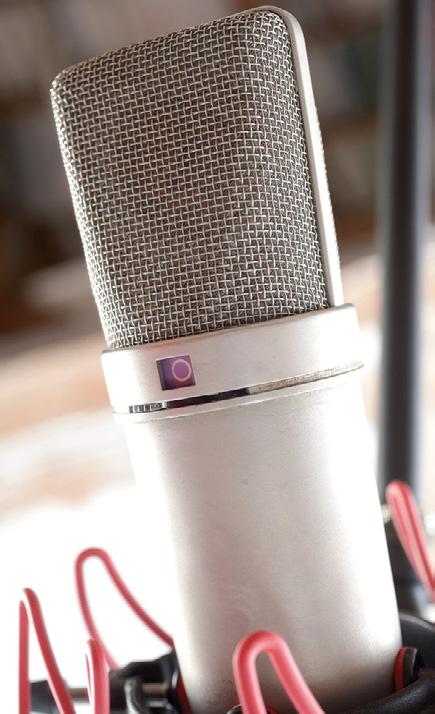
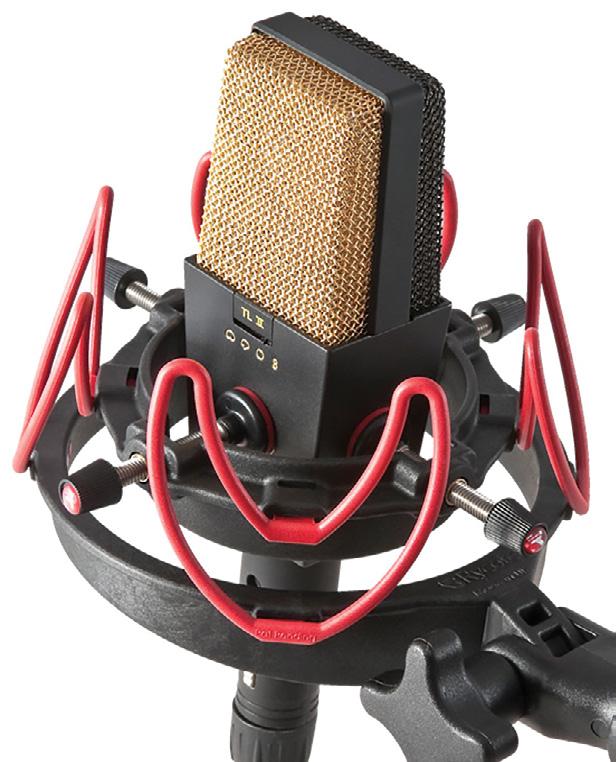
This Neumann U87 has front and rear diaphragms, and combining them in different configurations allows the microphone to operate with a cardioid, hypercardioid or omnidirectional pickup pattern. Changing the polar pattern not only affects the amount of room sound or spill from other sources, but also changes the tone of that spill, with the omnidirectional setting pictured here being the most tonally consistent.
Phantom power
Capacitor microphones (including professional electret mics) always incorporate electronics that require a source of power. Sometimes that power can come from an internal battery — a common feature of electret capacitor mics, for example — or from a dedicated external mains power supply which is typical of valve capacitor mics. However, the vast majority of capacitor mics require ‘phantom power’ which was introduced back in the 1970s.
Phantom power is passed to the microphone from the mic preamp over a standard balanced XLR cable, and it is a completely safe 48V DC supply. The positive side is applied to both (hot and cold) signal wires of the XLR cable, while the negative side is connected to the cable’s screen. This arrangement works well because only microphones designed to use it are ‘aware’ of its presence — hence its name of ‘phantom power’. A balanced moving-coil mic, for example, will completely ignore it and function perfectly normally whether phantom power is switched on or not.
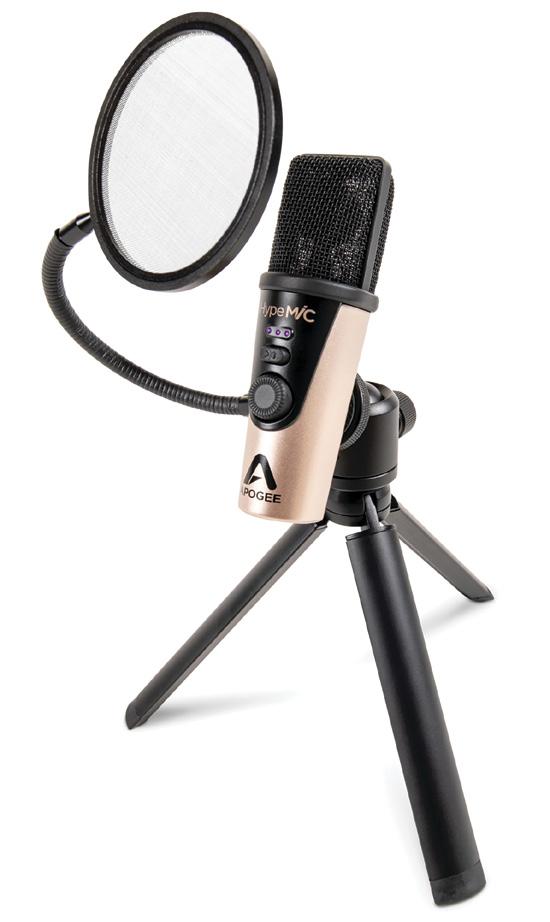
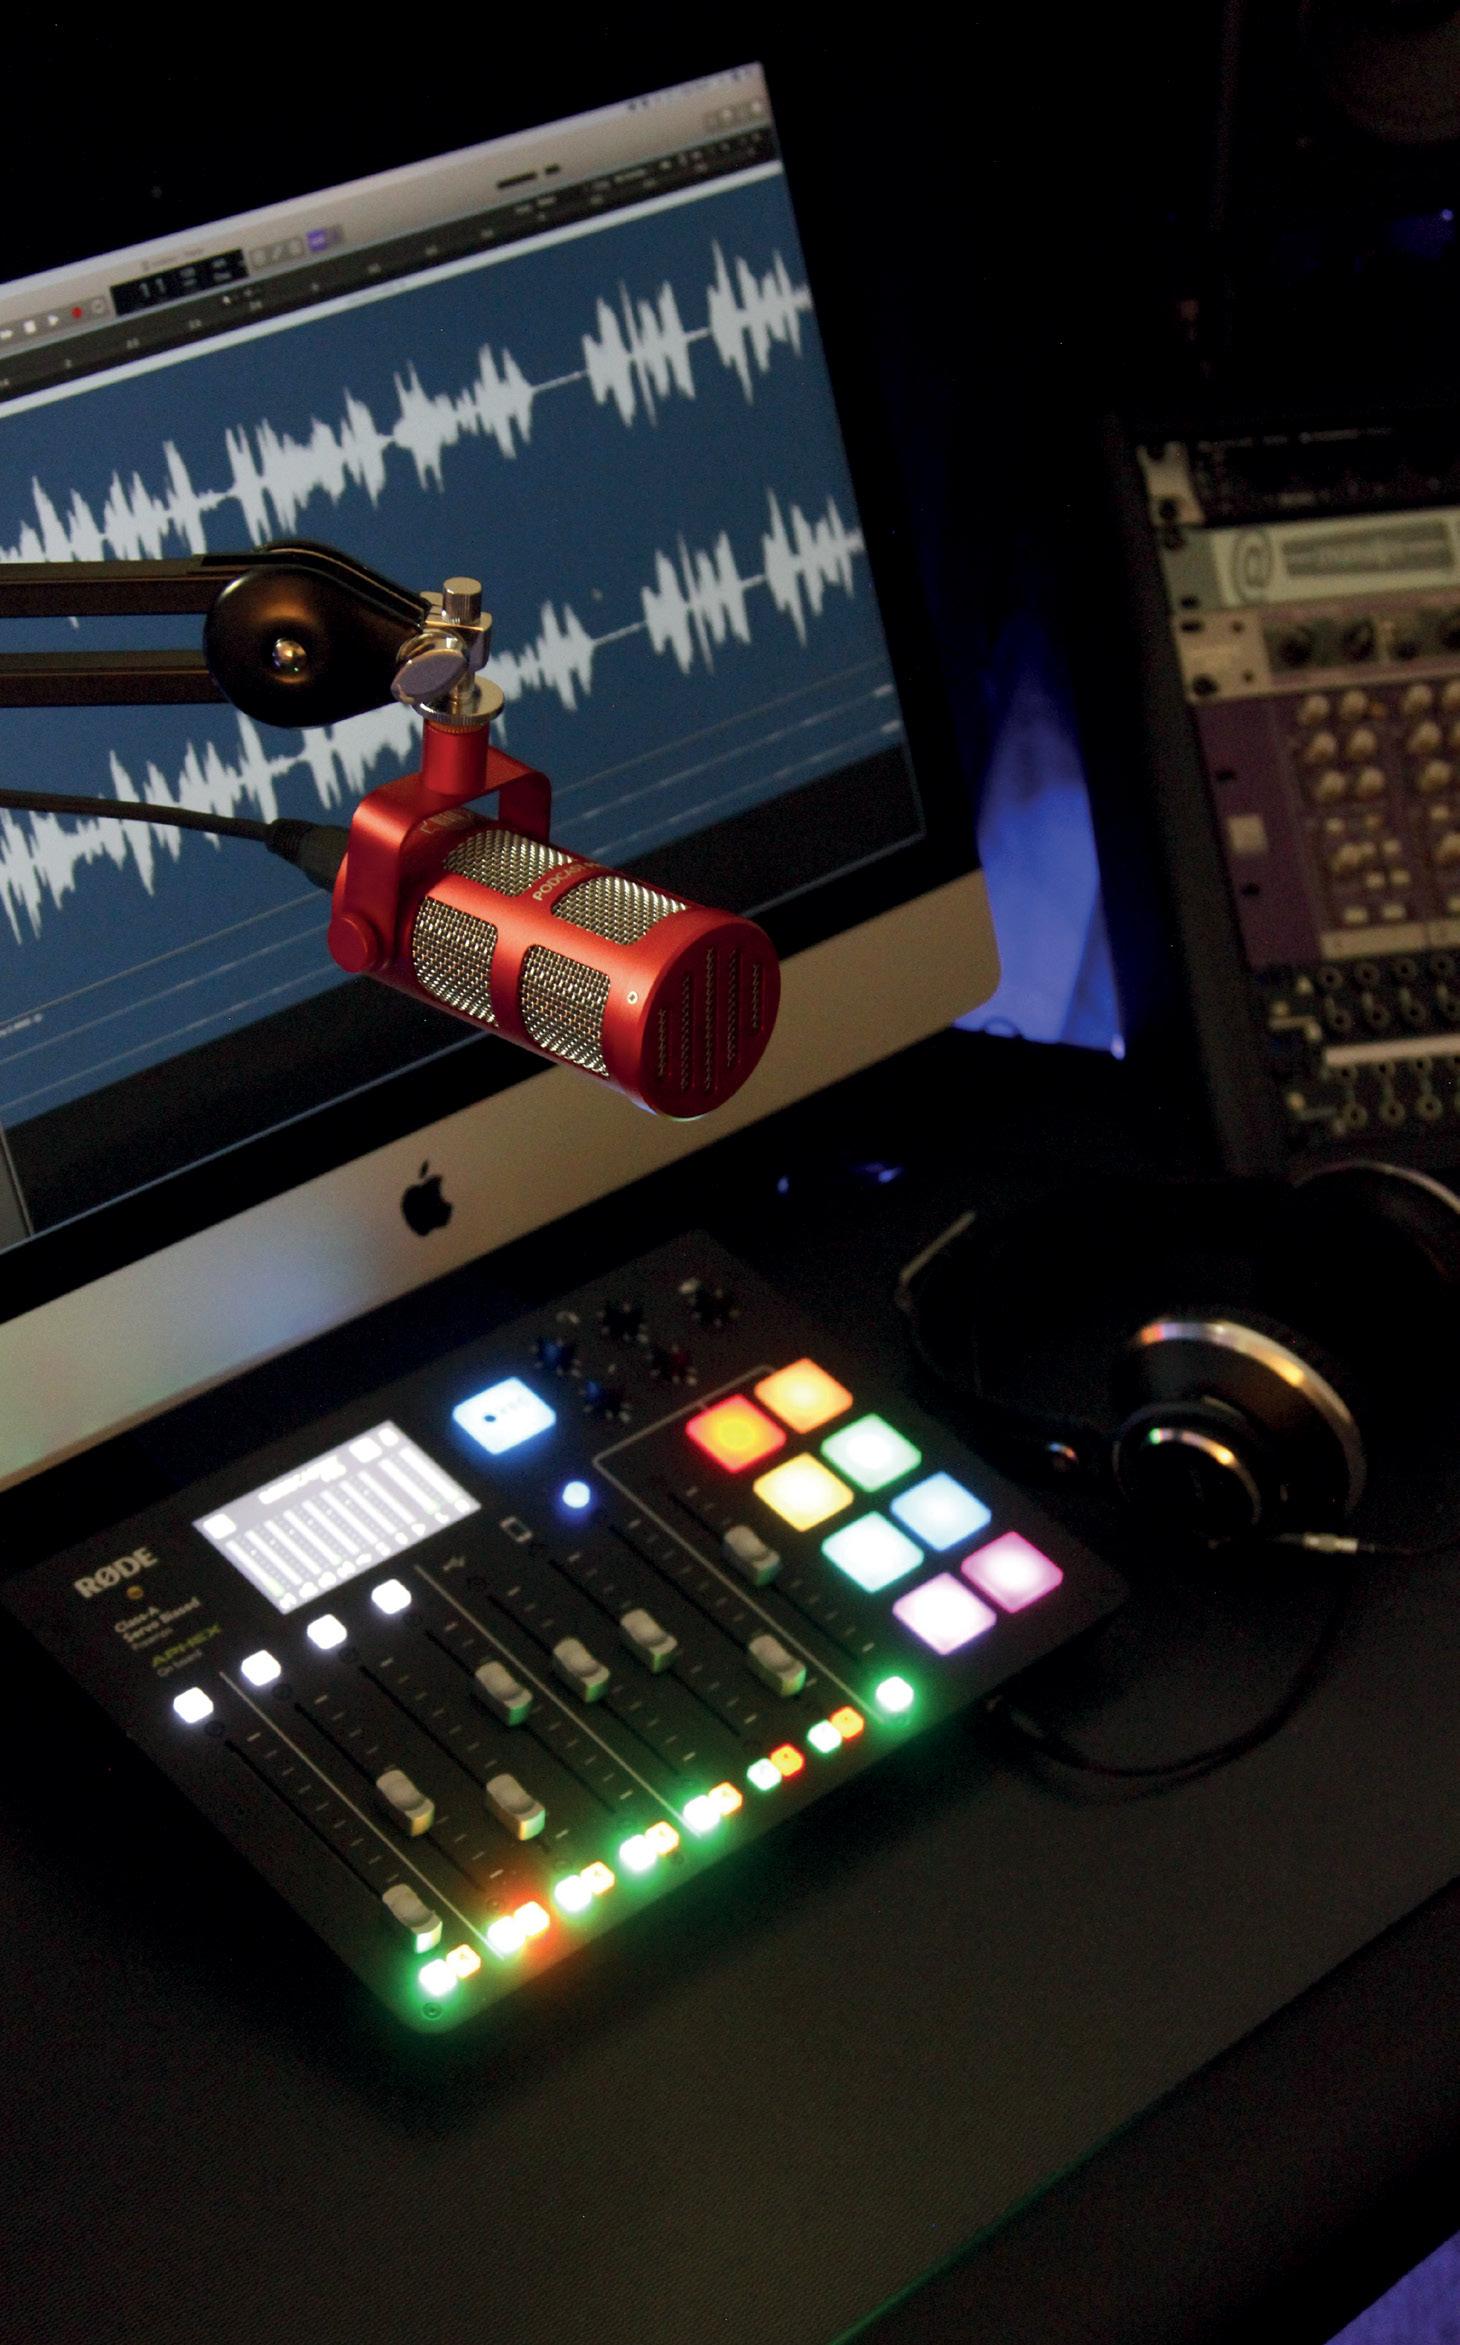
USB microphones can be connected directly to a computer, effectively acting as an audio interface as well, by providing a headphone output and a mix control to balance the mic signal against playback from an audio app. This Hype Mic model from Apogee benefits from an onboard analogue compressor, too. USB mics can be great for travelling light and recording on the move, but you probably shouldn’t think about building a home studio around one.
Phantom power is also sometimes used to power things other than capacitor microphones, such as DI boxes or special in-line mic preamplifiers, and a few ribbon and even moving-coil microphones now also incorporate buffer amplifiers that require phantom power, too.
Many consumer portable audio recorders, cameras, smart-phones and other similar devices often provide a different form of microphone power intended for use with low-cost electret microphones. This is called ‘Plug-in Power’ and it is only ever found on 3.5mm input sockets. It involves a 5V DC power supply and only works with unbalanced connections. Microphones intended for use with Plug-in Power will not work with phantom power and may be damaged by it, and microphones designed for phantom power cannot work with Plug-in Power. Special converters with active electronic circuitry are available to allow microphones to work with the alternate power source if really necessary, but simple passive adapters won’t work!
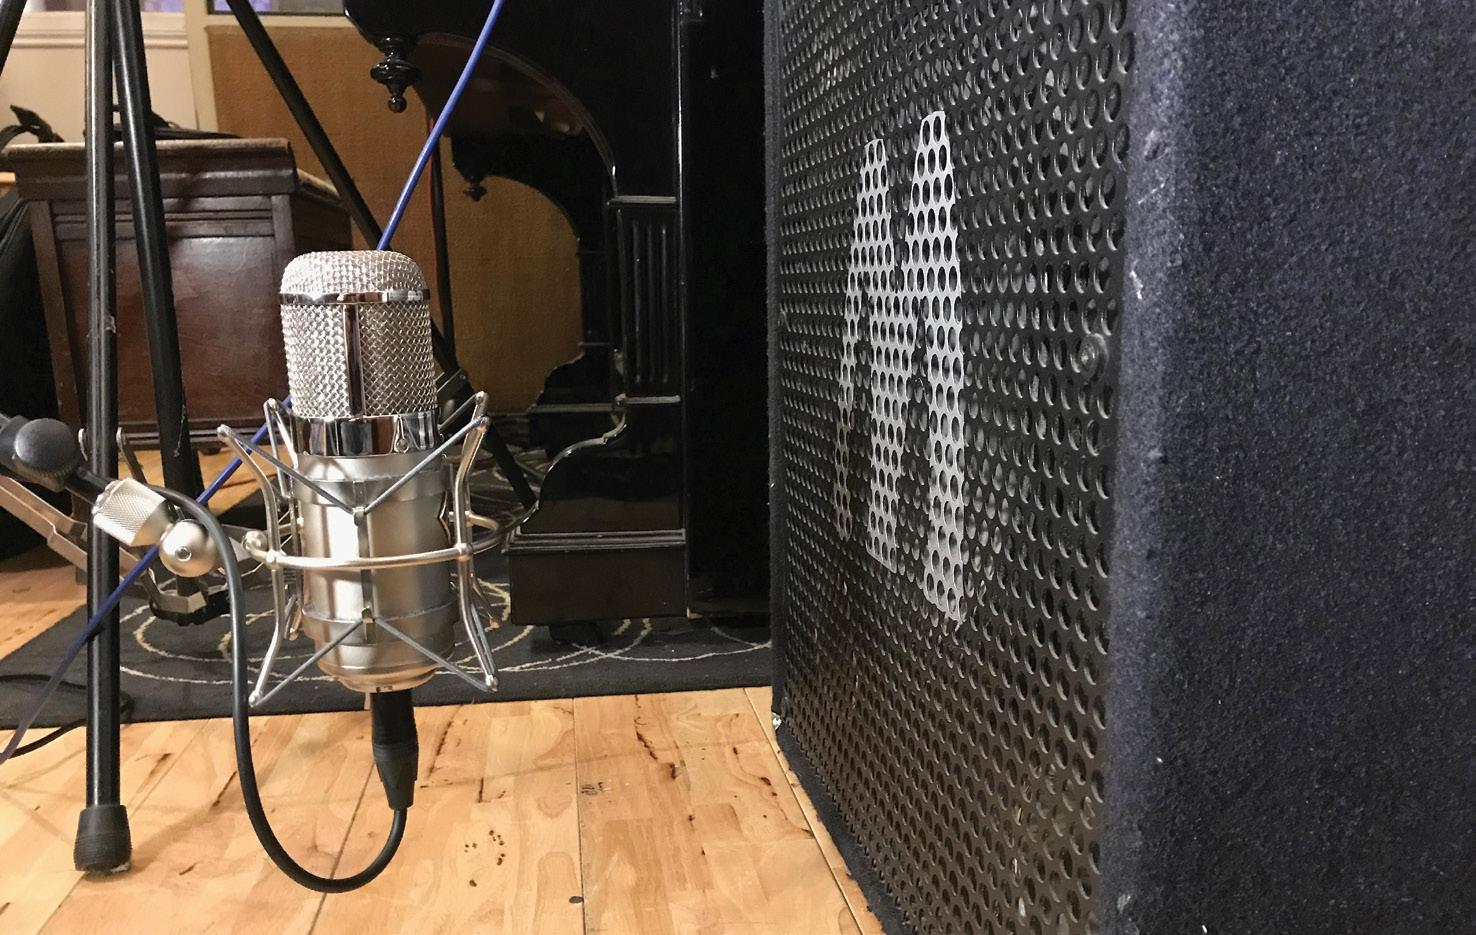
Don’t automatically place mics on speaker cabs right up against the cone. It often works for dynamic mics with some inherent bass roll-off, as the bass boost of proximity effect brings the bottom end back up, but a capacitor mic with no inherent roll-off will often have a ‘sweet spot’ where it sounds most balanced a few inches back from the speaker.
with a vocalist who already has a soft voice and it might sound as though they’re singing through a blanket!
Size matters… sometimes
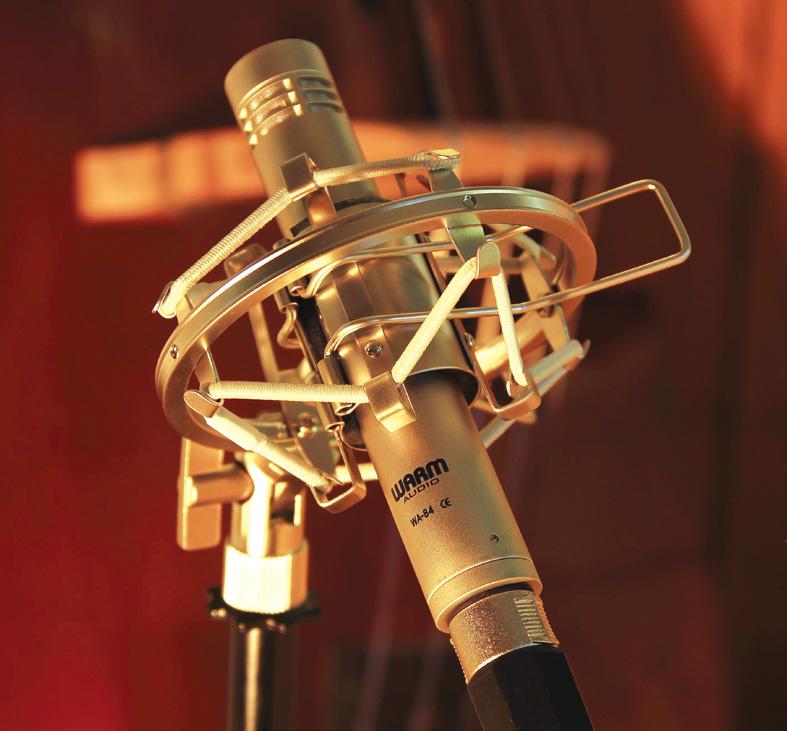
Have you ever wondered why some mics are much bigger than others, when they all perform more or less the same function? The difference results from the size of the diaphragm used. Small-diaphragm mics are generally more accurate, with an off-axis response that remains more consistent with frequency. Conversely, large-diaphragm models typically have a lower noise floor, but are often engineered to enhance the on-axis sound a little, while tending to ‘colour’ the off-axis sound.
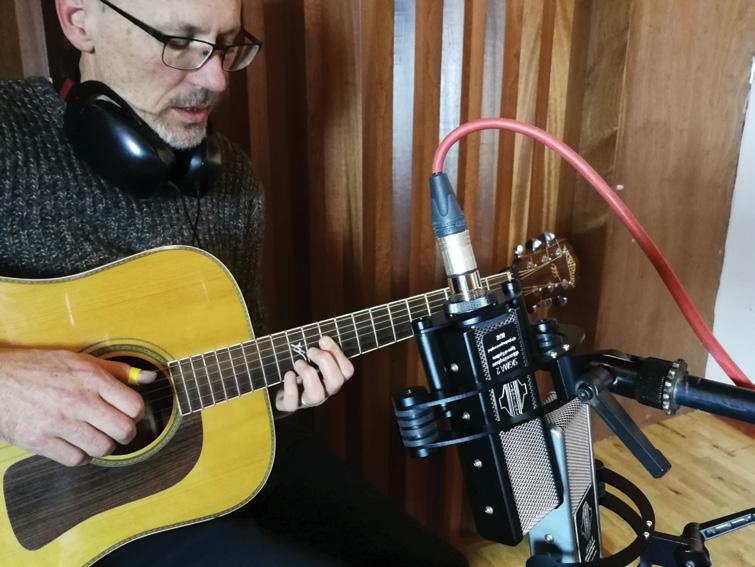
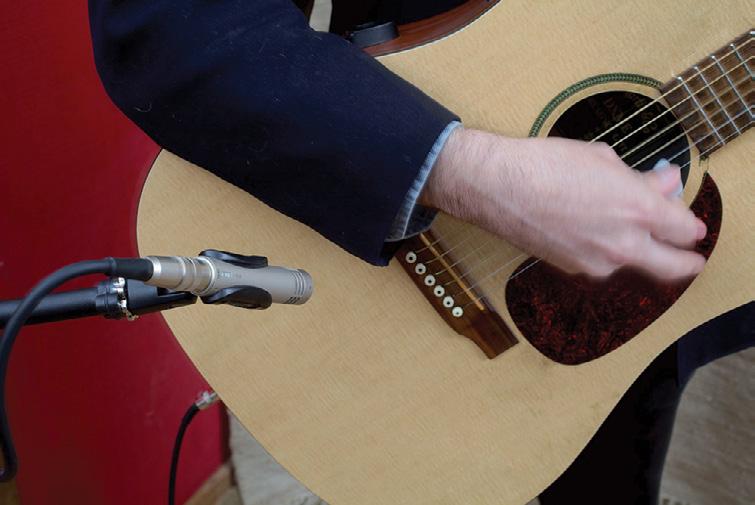
Large-diaphragm models are generally ‘side-address’, which means they pick up sound from the side of the microphone body, not the end, and they are the most popular choice for studio vocals. Small-diaphragm ‘pencil’ models are firm favourites for instrument recording, especially where an accurate sound is what’s needed, but either can be used in any situation with a high degree of success. If you only
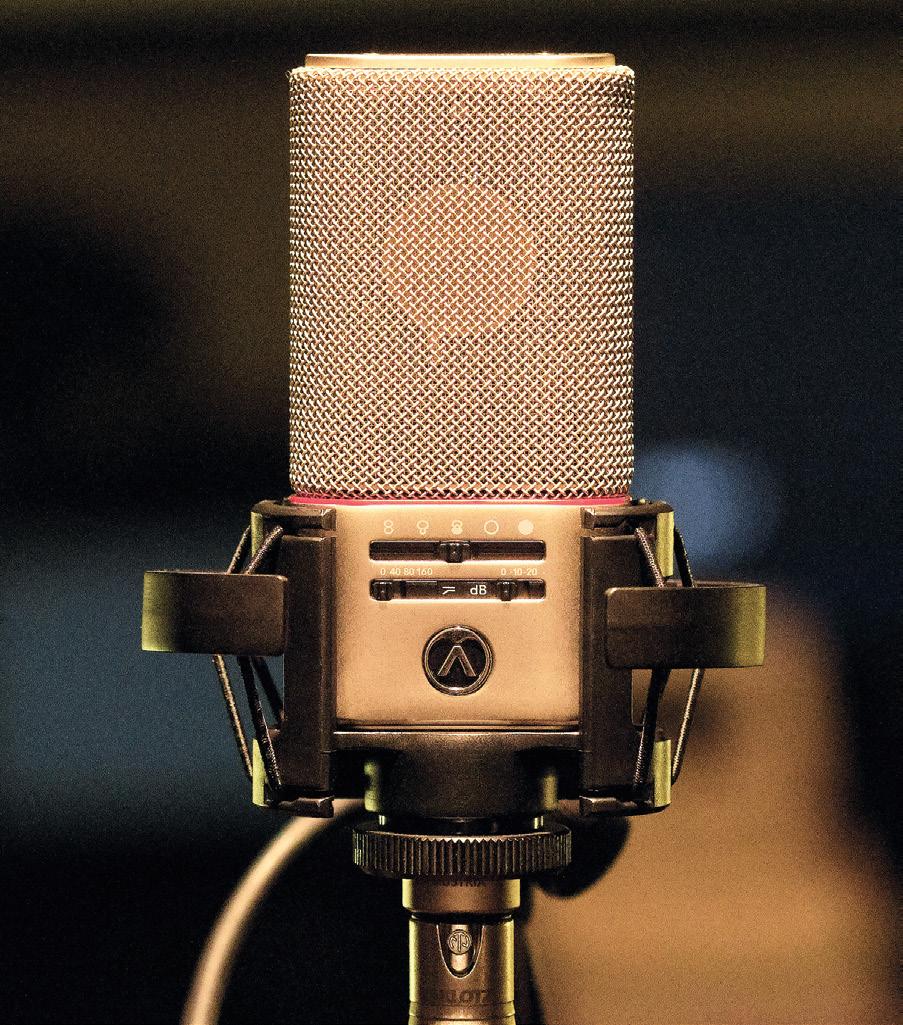
This sophisticated capacitor model from Austrian Audio offers five pickup patterns, plus pad options and four bass roll-off settings. It also features remote control of the pickup pattern and the ability to take separate outputs from the front and rear of the capsule. If these are recorded separately, they can be combined in different ways during mixing to generate the effect of different pickup patterns being used in the original recording.
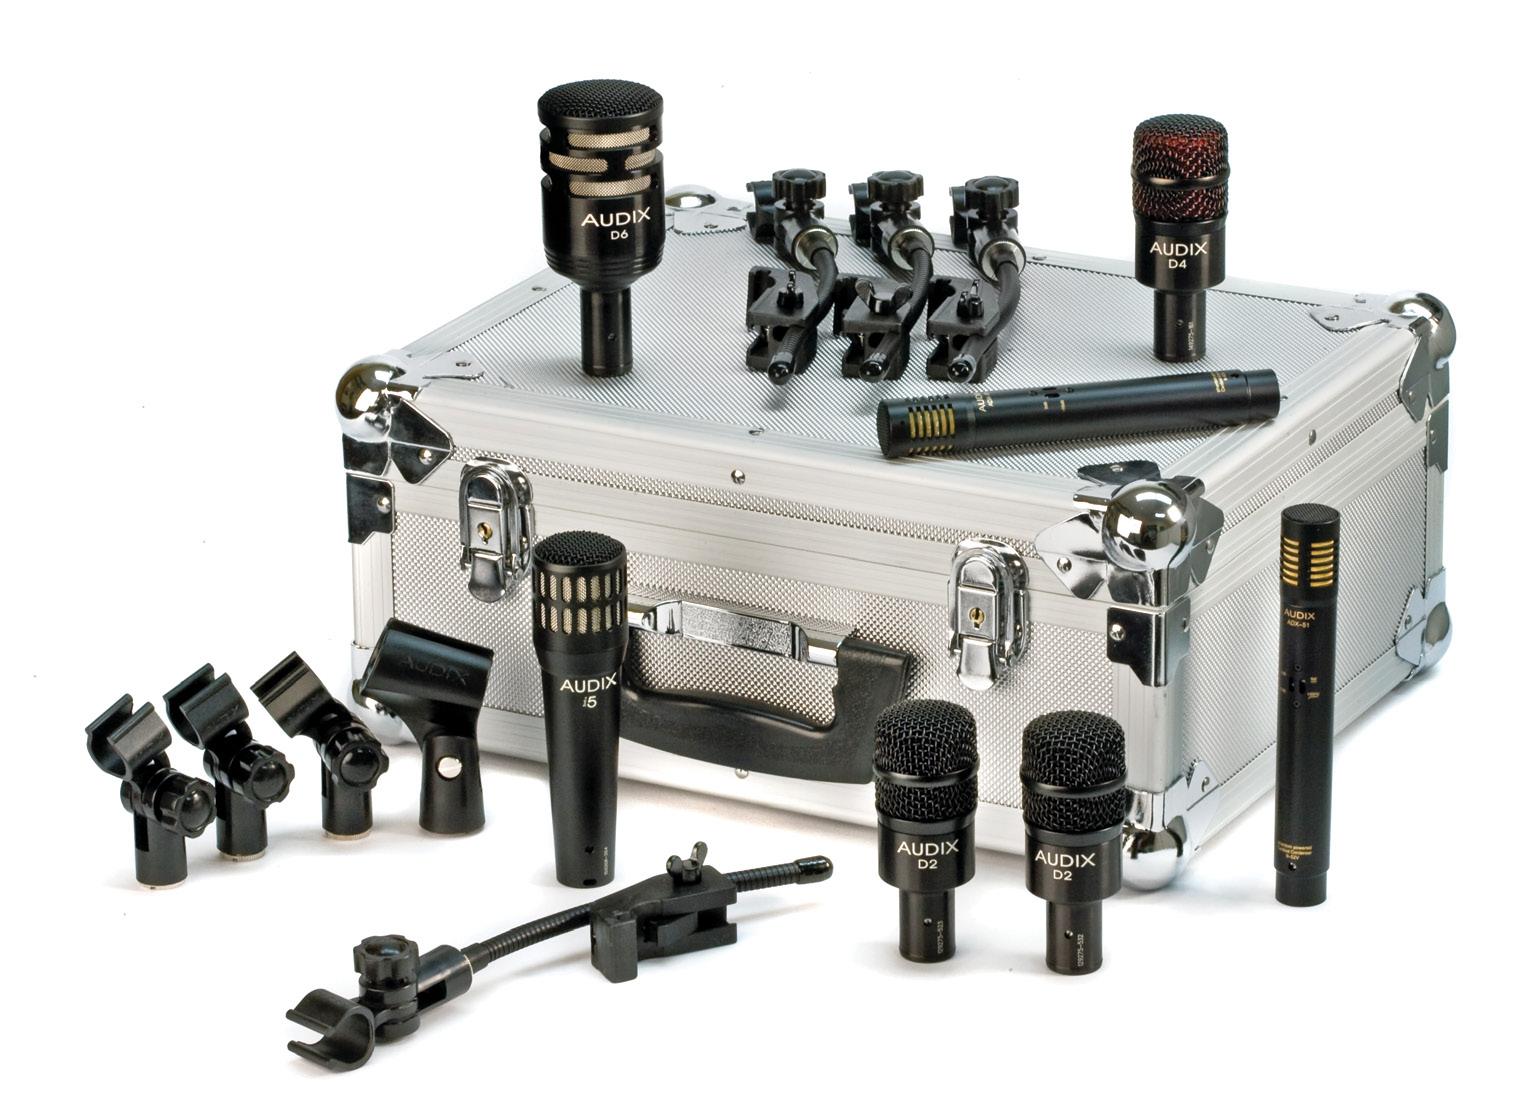
This drum-mic kit from Audix includes a specialized kick-drum mic, capacitor mics for an overhead pair, dynamic mics for snare and toms, as well as drum-rim mounting hardware to reduce the number of mic stands required.
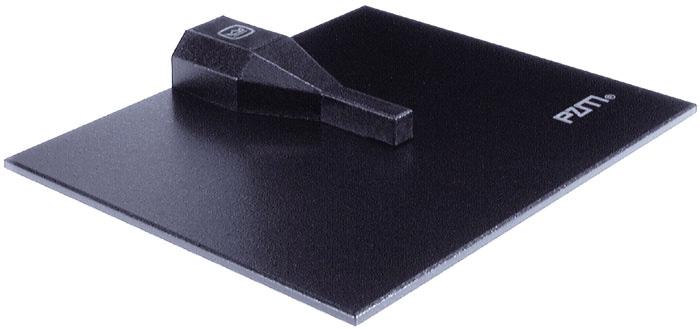
The ‘boundary mic’, sometimes known as a ‘pressure zone mic’ or PZM, offers something different to other microphone types. When an omnidirectional capsule is mounted flush with the surface of a wall, or placed a few millimetres above the surface and aimed towards it (it doesn’t have to be a wall: any large area of solid material will do), it can only pick up sound from one hemisphere. The capsule responds only to the air pressure changes that occur at the boundary, which means it can’t pick up any reflections from that boundary to cause phase cancellation.
have one mic, it probably makes most sense for that to be a large-diaphragm capacitor model, as it will sound equally at home on vocals or, say, acoustic guitar. A small-diaphragm model can still sound great on vocals, although it probably won’t sound as ‘hyped’ or flattering as a large-diaphragm model. You may also find that the large-diaphragm model has a built-in low-frequency roll-off to counter the proximity effect when close-miking vocals, whereas small-diaphragm instrument mics often feature a more extended bass response. If you’re going to close-mic vocals with a pencil
mic it helps to have a low-cut switch on your interface.
Even the most affordable microphones will now let you make decent quality recordings in your home studio, so long as you choose a suitable microphone position and pay some attention to the room acoustics. A more expensive mic may well sound better, but the difference between a budget model and an expensive one may be much less than you’d imagine. Too often we think better kit will automatically produce better results, but recording is not unlike photography: what’s actually
in front of the camera and how well the image is composed and lit has a far greater effect on how the picture looks than the quality of the camera, and it’s only once you know the basics that having top-quality hardware makes sense. So the quality of the instrument, the way it’s played, the acoustics of the recording environment, and where the mic is placed all make much more difference to the recorded sound than the microphone itself! Unlike software or other bits of studio gear, mics don’t go out of fashion or become obsolete — they’ll give good service for decades if you look after them. This being the case, the cost of ownership is fairly low when worked out on a monthly basis, so if you can afford something a little above the entry-level, it will stand you in good stead in the future.
Working With Headphones Chapter 5
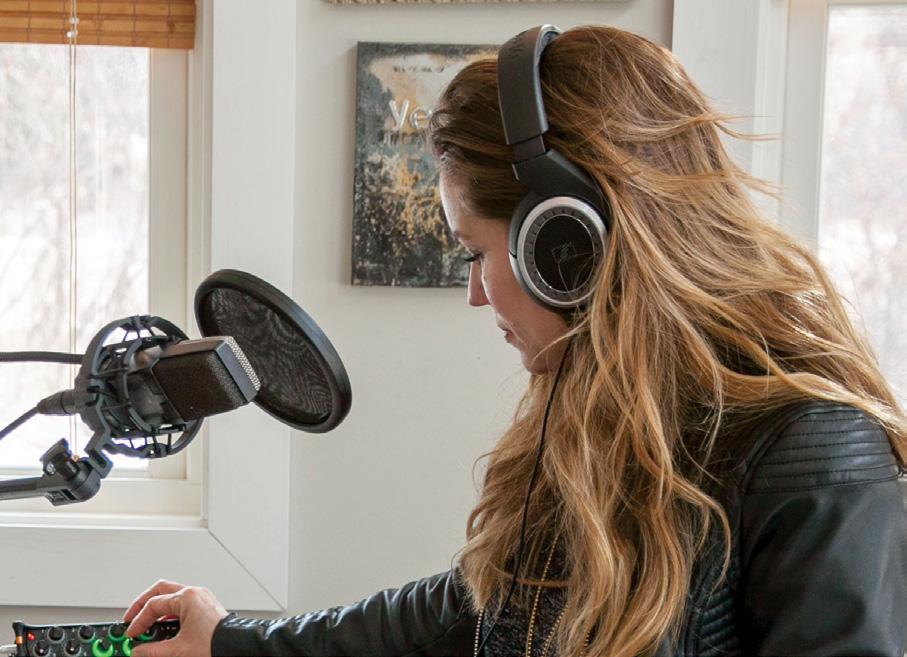
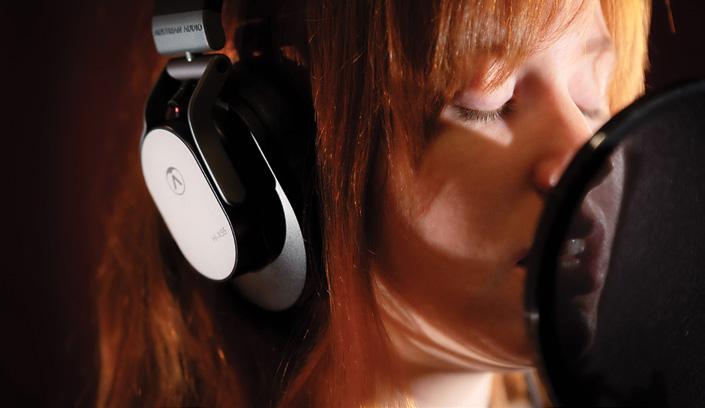
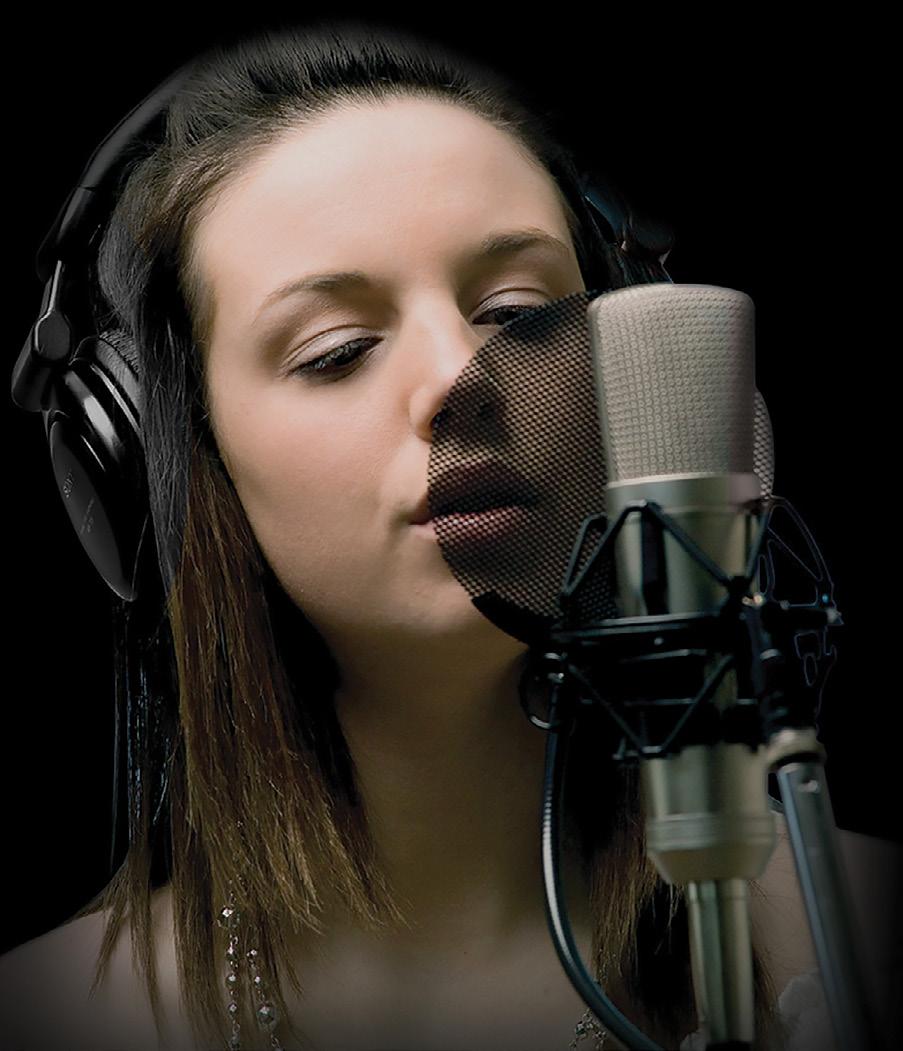
Headphones really are an essential component of any home studio. Of course, they may initially be your sole means of monitoring until you decide to invest in some speakers, but even if they aren’t, you’ll need headphones to monitor with if you want to hear tracks you’ve already recorded while recording through a microphone.
Headphone monitoring has its limitations, but it has its plus points too, as it allows you to work ‘silently’ without disturbing others or when the environment itself is noisy, and they are also great for forensically analysing audio, listening for unwanted noises that aren’t readily audible on speakers, and to hear low frequencies which small speakers and rooms could struggle to reproduce accurately.
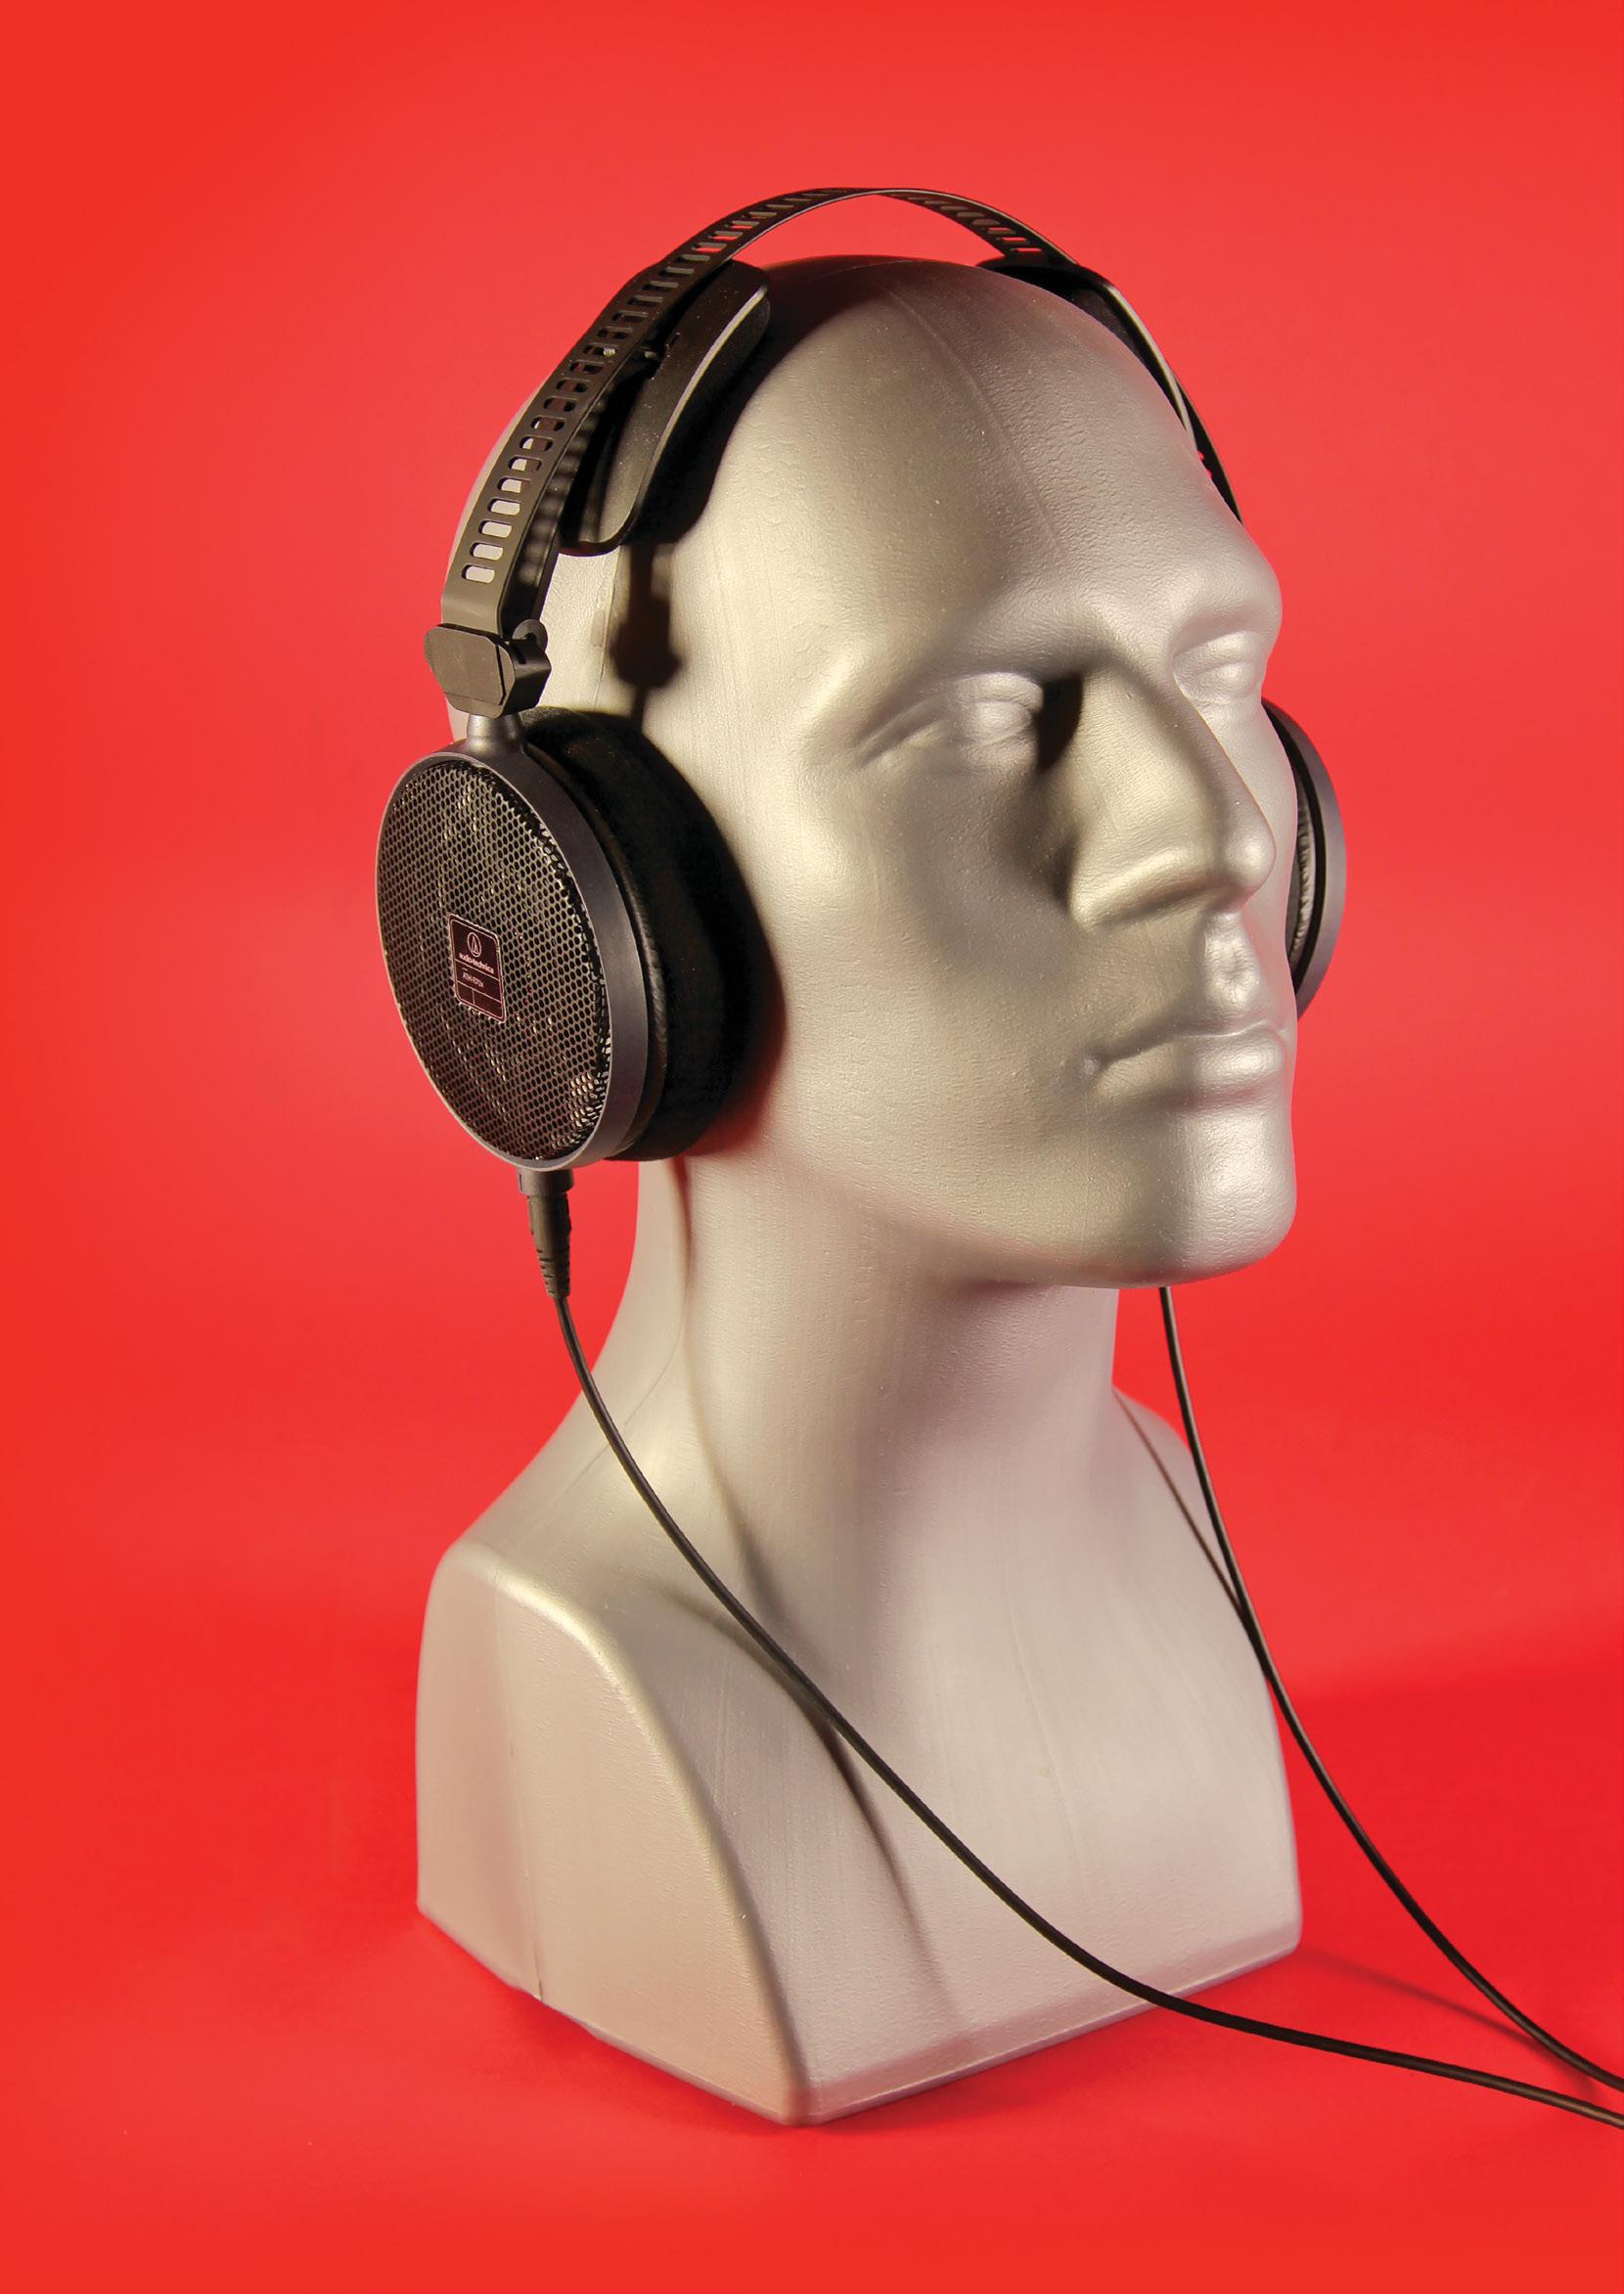
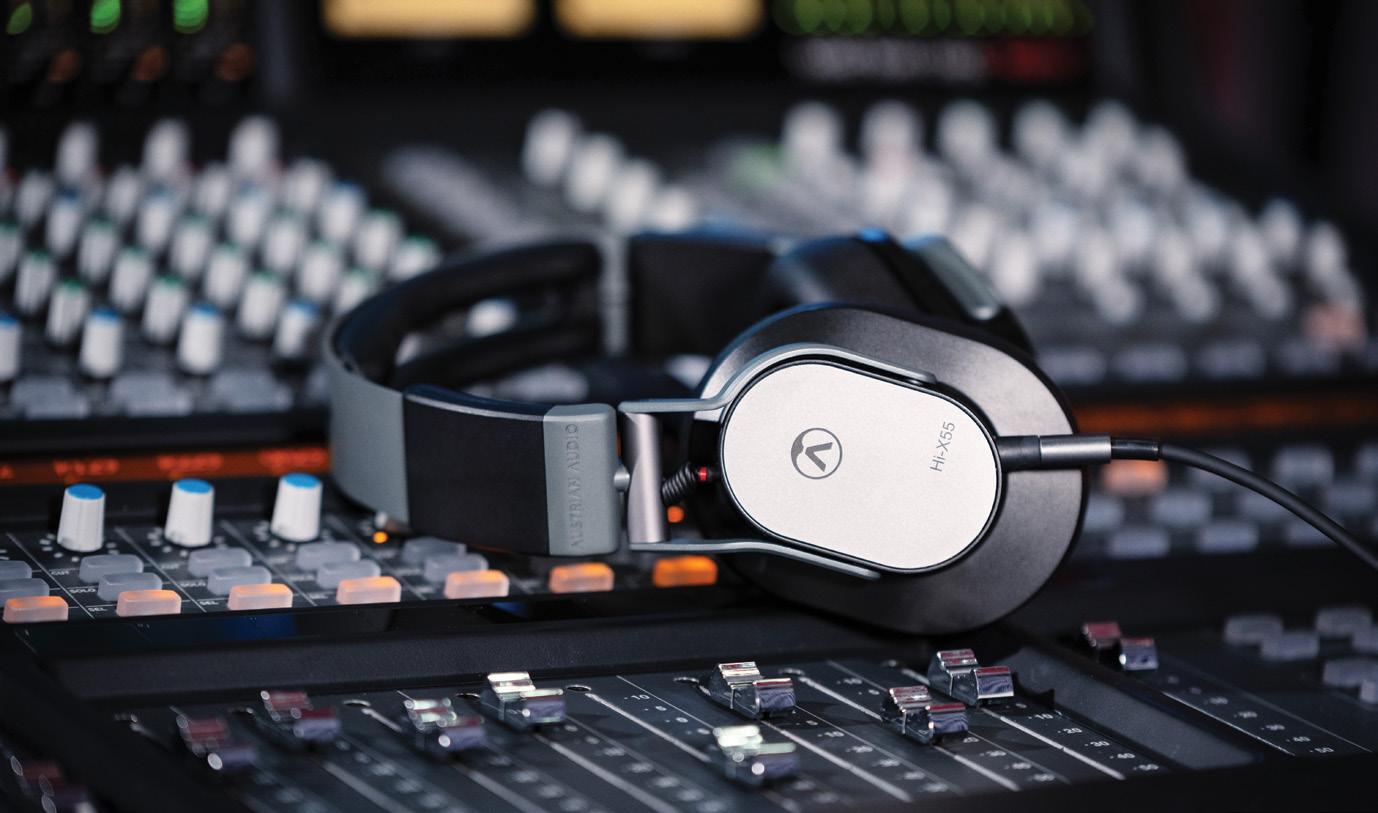
Headphones divide into two fundamental types — open-backed and closed-backed — but there is also a division between ‘circum-aural’ designs that cover the outer ear, and ‘supra-aural’ models that effectively just sit on top of the ears. Either type can be an open- or closed-back design. In-ear headphones (also known as earbuds, in-ear monitors, or IEMs’) are becoming increasingly popular too, and most are very good at excluding unwanted external sound.
Conventional wisdom suggests that open-backed phones are the more neutral and best for making accurate mixing decisions, and closed-back headphones are best for tracking, because they have far less leakage that can be picked up by mics, especially when recording vocals, when the mic and
and headphones will inevitably be physically close. That said, there are some great-sounding closed-back phones available, and if you can only afford one set to begin with it’s probably best to find a good closed-back pair.
Understanding the sound of your headphones
The absolutely key issue in working with headphones is to try to ‘learn’ their sonic characteristics. Listen to familiar recordings on them and try to note anything that stands out as being different to how you are perhaps used to hearing it on speakers. Often the low-end will be more extended and consistent, and the midrange might feel a little more recessed. The stereo imaging will also be quite different and is typically more exaggerated. Can you hear the vocals more or less clearly? Can you hear more hi-hat? Once you are doing mixes of your own, listen to how they compare when they are played on speakers and try to learn what compensations you need to apply.
The sound of headphones is affected by a number of factors such as the shape of your outer ear and your ear canal, and even how well the headphones fit your head, but once you know what to listen for — once you’ve ‘trained’, not so much your ears, but your auditory system as whole — it seems we can become remarkably good at adapting to whatever we have to work with. And, of course, there is one big advantage that headphones have over speakers, in that their performance is independent of the room — remember you are never listening to just speakers, but always the combination of the speakers and the room acoustics, whereas your headphones can be a consistent reference even if you are working in different rooms. Whilst it may once have been very much a secondary consideration for mix engineers, it’s now at least as important to make sure your mixes sound as good as possible on both proper headphones and lightweight earbuds as they do on loudspeakers. It is undoubtedly possible to
Headphones divide into two fundamental types — open-backed and closed-backed — but there is also a division between ‘circum-aural’ designs that cover the outer ear, and ‘supra-aural’ models that effectively just sit on top of the ears. Either type can be an open- or closed-back design. In general, open-backed phones are thought to be more neutral-sounding and best for mixing, while closed-back headphones are better for tracking, because they have far less leakage that can be picked up by mics when recording. There are some great-sounding closed-back phones, however, and if you can only afford one set to begin with it’s probably best to find a good closed-back pair.
successfully mix tracks entirely on headphones, but there’s no doubting that the outcome is considerably aided by being able to occasionally listen on speakers throughout the process, just as a reality check, especially for bass levels and stereo imaging.
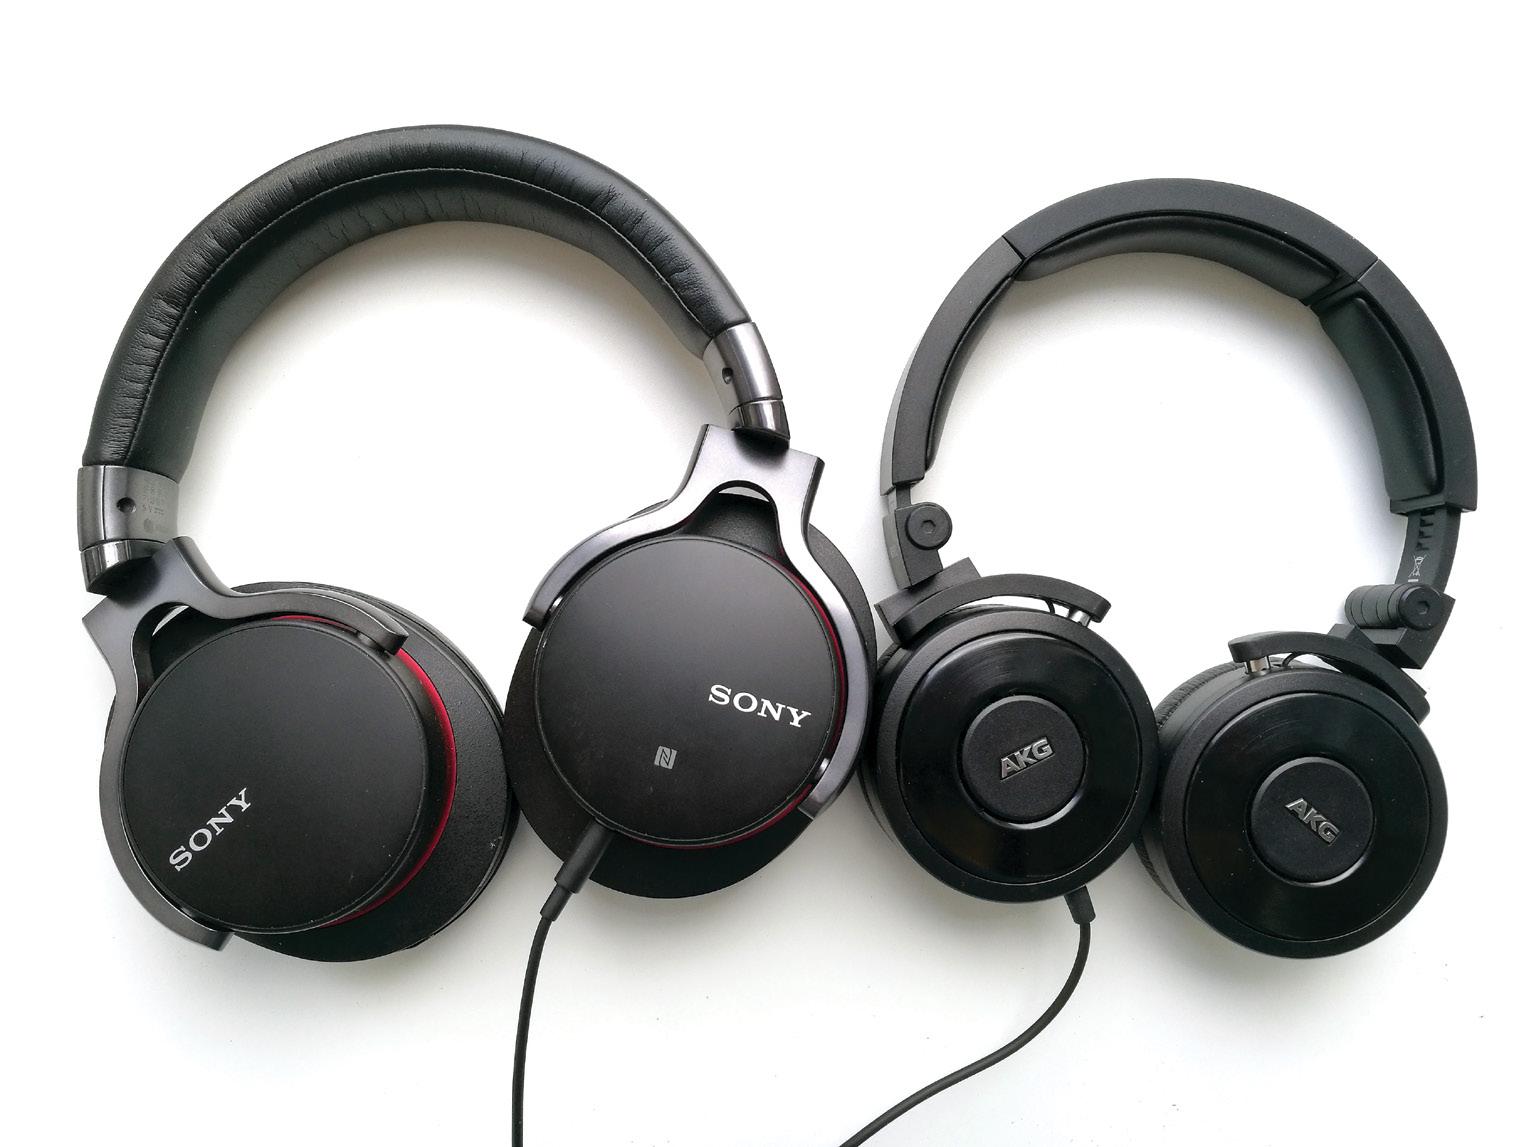
Different preferences
Just as with loudspeakers, different makes and models of headphone will sound subtly different, but almost all from reputable manufacturers will perform to a decent standard these
Headphone monitoring has its limitations — stereo imaging and bass perception, in particular — but it has its plus points too, as it allows you to work ‘silently’ without disturbing others or when the environment itself is noisy. Headphones are also great for forensically analysing audio, listening for unwanted noises that aren’t readily audible on speakers.
days. Given that we have a physical relationship with headphones — we wear them on our different-sized heads while they squirt sound into our different-shaped ear canals — it is no surprise that there is no absolute best, and that people end up with different preferences simply based on what works for them. Unlike monitor speaker manufacturers, headphone designers are often not striving for a ruler-flat frequency response: most headphones exhibit a rise in lower frequencies through into lower midrange, to compensate for the fact that you don’t ‘feel’ the bass frequencies through your body in the way that you do with loudspeakers. There may also be a gentle roll-off at higher frequencies to compensate for the fact that the drivers are right against your ear.
Earbuds that simply rest in the outer ear, such as those supplied with mobile phones and music players, don’t provide any isolation and have limited audio quality, but do make a good secondary listening reference, especially once you accept that they are often the primary music listening source for many people these days.
An image problem
One of the reasons why working with headphones is significantly
Singers sometimes find it easier to pitch accurately if they can hear themselves directly by pulling one side of their headphones away from their ear. The uncovered earpiece will generate a lot more spill from the backing track when they do this, and whilst that can be addressed through gating or mix automation in the space between phrases, it will still be heard as annoying coloration behind the wanted vocal. The best solution is to see if you can non-destructively disable one side of the headphones (some models have disconnectable earcups on each side), pan the backing track to one side, or make up a little in-line adaptor, consisting of two stereo sockets and a switch, to just disconnect the feed to one side.
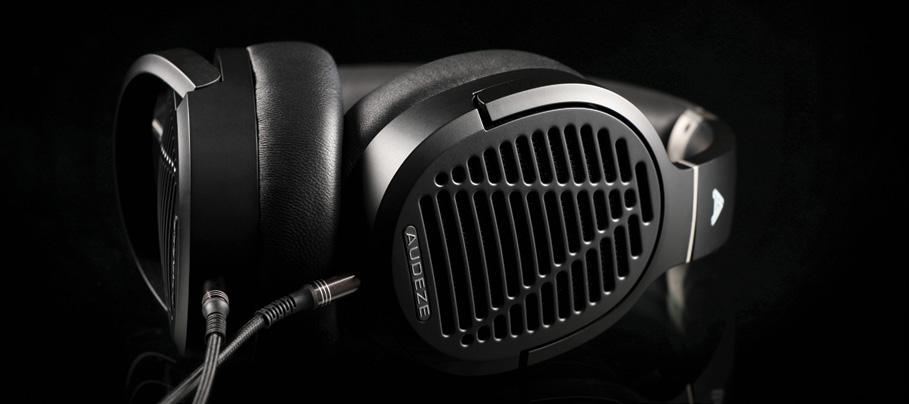
Most headphones use cone drivers, which are like very small loudspeakers, but there other technologies in use in headphone design. Planar Magnetic technology, for example, as used in these Audeze headphones, seeks to achieve lower distortion and deeper bass by driving the diaphragm across its whole surface rather than just from the centre.
different to listening on speakers is that each ear is receiving just its own channel of sound. With loudspeakers, by contrast, each ear hears both loudspeakers, so both sound channels, albeit with the farther one at a lower level and slightly delayed. This is caused both by the ‘shadowing’ effect of the head in between the ears and also reflections from walls, ceilings and floors, which is, of course, how we normally experience all the sounds around us. On headphones, any sounds panned fully left or right will be heard only in one ear, which feels very unnatural, and identical sounds in both channels that would be front and centre on loudspeakers may often sound like they are coming from inside your head!
Some dedicated headphone amps and monitor controller units have a ‘crossfeed’ feature that mixes a little of each channel into the opposite side (with some filtering and delay) to mimic to some extent what happens with normal loudspeaker listening. There are also software plug-ins that offer the same facility. The aim of the crossfeed effect is to make hard-panned sounds appear to come from similar points in space as they would on a pair of loudspeakers, and to a large extent, it works. If you don’t have a crossfeed facility, you can simply ‘play safe’ with your panning and limit any extreme placement to about 90 percent of the available setting. This keeps you out of the headphone ‘one-ear’ zone, whilst making no discernible difference to speaker playback.
Accurately judging low-frequency levels is another advantage when mixing on headphones because headphone bass response isn’t limited in the same way as loudspeakers by the size of the bass drivers, or by the room’s inherent acoustical issues. On the other hand, when we listen on speakers, we don’t just hear low bass in our ears, we also feel it in our bodies, and that effect is entirely absent from the headphone experience — although there are a few innovative products designed to give you a physical kick in some part of your anatomy based on the low-frequency information you are listening to!
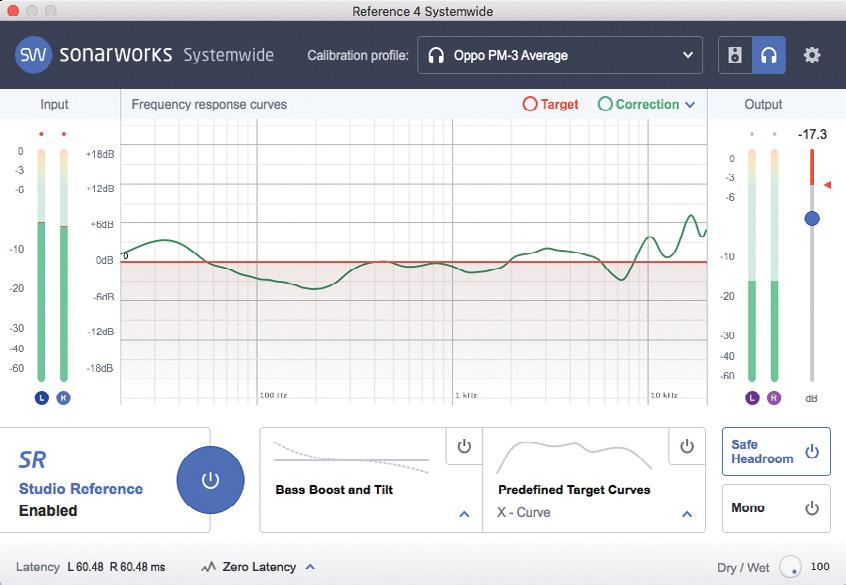
Digital headphone optimisation
The ideal monitoring system, whether it’s based on loudspeakers or headphones, will have a ‘flat’ or ‘neutral’ frequency response. In practice, this is hard to achieve, both because of technical challenges in the design of the system, and because of factors such as room acoustics and head shape. In recent years, a lot of work has been done on the idea of using digital equalisation to ‘correct’ the frequency response of a monitor system. There are several systems available that will ‘listen to’ your loudspeakers in your room and come up with an EQ curve to
flatten them out.
One of these systems, Sonarworks’ Reference, is unusual in that it also works on headphones. Measuring the frequency response of headphones is difficult, but Sonarworks have a proprietary test rig and a huge database of measurements, and their Reference software can equalise almost any pair of headphones to sound ‘neutral’. This is a great way of ensuring that your monitor system isn’t colouring what you hear in unwanted ways. Similar products are also available from dSONIQ and ToneBoosters.
You can find yourself wearing headphones for long periods of time in the studio, so it is important that they are comfortable. They also have to fit you quite well, too, or they won’t be delivering the sound that they are capable of.
Closed-back headphones are generally preferred for vocalists in order to minimise the amount of foldback signal leaking into the microphone. For singers who strongly prefer an open-backed pair you can try reducing the level of sounds that tend to be most annoying in ‘spill’ such as hi-hats and snare drums. Just make sure there are enough other instruments in the mix to still give the singer a good sense of time and rhythm, as well as pitch.
Some combinations of headphones and headphone amplifiers simply won’t work well together. The outcome depends on the relationship between the sensitivity of the phones, the power available from the amp and the impedance of the headphones. A headphone sensitivity specification will generally have a dB figure for a given amount of power input, such as -98dB @ 1mW. But you also need to know the impedance figure, too, as using higher impedance phones — 75Ω or more, for example — may limit the maximum volume obtainable with some devices, like a laptop, or even a bus-powered audio interface.
Ear buds are not a substitute for headphones in the home studio — they are not especially accurate and they don’t exclude much ambient noise. They can be useful as a temporary substitute, however, for reducing headphone fatigue when you are not required to do any critical listening. When mixing, it’s also good to check your work on ear buds as well as headphones and speakers, as that is how many people will end up listening to your tracks.
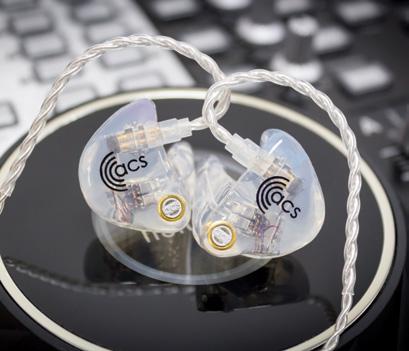
IEMs (In-Ear-Monitors), as used by many performers on stage, are not often used in the studio, but high-specification models, like this pair from ACS, are capable of very high quality audio performance, provided they are properly fitted to your ears. This is a custom-moulded set, which is also vented to reduce ear-fatigue and reduce the sense of isolation that fully sealed IEMs can have.
Regularly comparing your in-progress mix with commercial tracks of a similar genre always helps, but the bass end on some headphone models is often ‘shaped’ a little, and you can easily end up with too much low bass in your mix — 80Hz and below — because you just aren’t ‘feeling’ it, and too little in the next octave, between 80Hz and 160Hz, where the response of your headphones may be giving you too much that you then try to compensate for.
It will take some time to learn how much bass you need to be hearing over headphones for it to translate well to loudspeaker playback. Looking at a spectrum analyser plug-in on your mix bus will tell you if there is something very wrong at the low end, like inaudible traffic rumble in your recording, but you shouldn’t try to use that alone for balance decisions.
Details, details…
Monitoring with headphones allows you to hear a lot of low-level detail that might not be noticeable at all on speakers. This is great for spotting clicks, hiss and unwanted distortion, but it also means that each instrument may be more clearly audible, causing you to ‘under-mix’ it compared to where you’d set it for a speaker mix. Reverb, in particular, is so much more evident on headphones that you’ll invariably find you need more of it as soon as you hear your mix on speakers, where it becomes slightly masked by the additional factor of the room acoustic.
It’s perfectly possible to do the majority of your mixing on headphones, especially if you are able to have a ‘reality check’ now and again on speakers, but it is important to remember to give yourself frequent breaks, not just from the physical confinement and ear-warming effects of headphones, but also from potential ear fatigue, and ‘level creep’ – where you keep turning the listening level up subconsciously to compensate for the absence of feeling physical sound waves. Stopping just for a few minutes every hour to do something that doesn’t involve listening to music can be enough to give you a fresh perspective.
Monitor Speakers Chapter 6
To start with, you may feel very tempted to use whatever speakers you already have, but speakers for a monitoring system are different to hi-fi speakers that you might use for enjoying recorded music. Sonic accuracy matters so much more than just a pleasing sound, because you will be making decisions about relative signal levels and processing options based on what your monitor speakers are telling you. If your speakers lack low frequencies, for example, you may try to compensate in your recording or mix settings by boosting the low end to make what you are hearing sound ‘right’, but that would then result in a bass-heavy track when played on any speakers elsewhere with a more accurate frequency response.
Small loudspeakers that can be used up close, maybe within a metre of the listener, have the advantage of reducing the significance and influence of the room acoustics. These ‘nearfield’ monitors are often used in professional studios, as well as in home studios. Whilst you can’t expect to get very deep bass from small speakers, a well-designed nearfield speaker will reproduce bass instruments and kick drums accurately enough to make meaningful mixing decisions. In fact, an overly generous bass extension can be a disadvantage in a small room, unless the
In small rectangular rooms, it is usually preferable to have the speakers aimed down the long axis of the room; otherwise, the bass response may be uneven and will vary as you alter your listening position.
space has been acoustically designed and treated to handle it.
Project studio monitors
Most monitors designed for home studios are two‑way loudspeakers, meaning that they produce sound from two drivers: a low/mid frequency driver and a high frequency ‘tweeter’. Generally, they will have a bass driver of between five and eight inches in diameter, with larger bass drivers usually able to provide more low end at a higher playback level.
The designs and materials used when building speaker cabinets can have a profound effect on their sound. Many nearfield monitors feature air vents, known as ‘ports’ that make use of the resonance of the air inside the cabinet to take advantage of the sound coming off the rear of the loudspeaker cone, to supplement that coming from the front. Instead of being completely sealed, the cabinet has a hole in it through which the internal air can escape and contribute to the overall sound in the listening environment. But you don’t get something for nothing here: the bass output will be boosted around the resonant frequency of the port,
which can be used to extend the bass response downwards and increase the overall efficiency (maximum loudness), but the response will drop away faster below that point, compared to a sealed cabinet. Also, because this arrangement relies on a resonance effect, the bass energy is effectively stretched in time, and that can affect the way bass sounds start and stop.
Sealed cabinet designs without a port (sometimes called ‘infinite‑baffle’ designs) are slightly less common in small monitors, and will often appear to have slightly less bass than a similar sized ported cabinet, although what they do have
will be more accurate — in other words, there may be less of it, but what there is will be more even and free of resonances, and will start and stop more precisely. Very low frequencies, below the roll-off imposed by a ported design, will often be reproduced better by a sealed cabinet than a ported one.
Passive or active?
Passive speakers require external amplifiers to drive them, as in a traditional hi-fi setup, while active models have one or more amps built into them. The latter option is almost always the better choice for a small home studio these days. Not only do
ADAM Audio’s monitors employ a ‘folded ribbon’ tweeter design that gives them a high-frequency response up to an impressive 25kHz. The waveguide controls the HF dispersion with the aim of keeping the directivity as consistent as possible at the crossover point, providing a usefully wide monitoring ‘sweet spot’.
Focal’s Shape Twin monitor has a number features to optimise it for accurate, full-range performance in smaller rooms, with twin, side-mounted auxiliary bass radiators (ABRs) and a second bass/mid driver that extends up to 2.5kHz.
Acoustical loading from adjacent walls and other surfaces can reinforce a speaker’s low-frequency response. Most studio monitors therefore offer simple EQ facilities that allow you to adjust the LF response to suit the speaker placement.
If you need to stand your monitors on a shelf or desk, a well-designed decoupling system like this one from IsoAcoustics can be effective at preventing low-frequency vibrations being transmitted into the desk. In some instances, the improvement can be surprisingly noticeable. Foam decouplers, such as this Auralex MoPad, which act as both a spring and a damper, can also help to prevent some vibration from being transmitted from a speaker to your studio furniture.
you not have to find a power amp and suitable cabling, but you can also be sure that the amp(s) and speakers are optimally matched. Active monitors will also usually include some form of electronic protection to prevent the drivers from being damaged by overloads, and to shut down the amplifiers if they are overheating. Always make sure you understand the function of any control switches on the back panel of active monitors — they are often vital in optimising the response for the room characteristics, or compensating for the speakers’ positioning.
Although most active monitors have input sensitivity controls, these are not intended to be used as everyday volume controls and are often positioned on the rear panel where they are difficult to reach. If you are connecting active monitors to the monitor outputs of your interface, there will be a proper monitor level control that you can use to set the listening level of both speakers simultaneously. If you have a more complex setup, perhaps with a mixer involved, it may be advantageous to use a hardware monitor control box. Some monitor controllers may also
Although you’ll often see small monitors lying on their sides in studios, it is usually preferable to keep them in the orientation for which they were designed in order to maintain the intended dispersion and integration of the drivers. This high-quality Core 59 monitor from Dynaudio, however, has its mid and HF drivers mounted on a plate that can be rotated to facilitate optimum operation in horizontal or vertical configuration.
The primary function of a monitor controller is to give you convenient, independent control of your monitoring level, so you can set your listening level whilst leaving both your software and speakers’ own volume controls set for optimum gain structure. There will usually be a couple of headphone feeds too, and switching for other inputs or alternate speakers. This well-equipped Audient unit benefits from four headphone feeds — great for working with several performers at once — and usefully incorporates a talkback facility, too!
You need big monitors to achieve clean, loud monitoring in a big room, or you can use smaller speakers at a closer distance, but using big speakers with lots of bass extension in a small room may simply exaggerate any room problems at low frequencies.
include a headphone amplifier, and a means of switching between various input sources and output destinations.
Speaker placement
To work correctly, monitors must be set at the correct height and angle so their tweeters are aimed towards the listener’s ears. Ideally, they would also be symmetrically placed within the room, although that won’t always be possible in a home studio space. The distance between the speakers should be roughly the same as your distance from the speakers when you are mixing. Rigid, non-resonant floor-standing monitor stands are the best option, but not many home studios will have the necessary space to accommodate them. If you need to stand your monitors on a shelf or desk, one of the commercial decoupling systems can be effective at preventing
Subwoofers for use with powered speakers are usually configured to accept the left and right channel monitor feeds, which are summed to mono for the sub, but sent on to the main speakers in stereo via a crossover filter, sometimes with a choice of frequencies. A level control is essential for proper integration — generally you want to set up your system so you only really notice the sub by its absence if you switch it off!
PODCASTS
Three dedicated channels each with their own series of episodes to keep you entertained throughout the month.
RECORDING & MIXING
The Recording & Mixing channel takes the practical approach and will keep you inspired with expert hints and tips.
ELECTRONIC MUSIC
The Electronic Music channel is for everyone interested in synths, samplers and the world of electronic music.
PEOPLE & MUSIC INDUSTRY
The People & Music Industry channel features the great and good in engineering, production and manufacturing.
Follow our channels by subscribing to the shows on Apple Podcasts, Spotify, Amazon Music or wherever you get your podcasts.
Check out our website page for further details www.soundonsound.com/podcasts
low-frequency vibrations being transmitted into the desk. In some instances, the improvement can be surprisingly noticeable.
It is obviously important to avoid having objects such as your computer monitor screens blocking the direct path from the speakers to your ears, and if possible, try to avoid having too much flat desk space directly in front of the monitors too, as this will also reflect sound to the listening position. Ideally, there would be no reflective surfaces anywhere near your monitors, although this is all but impossible to achieve in anything but a purpose-built environment.
In small rectangular rooms, it is usually preferable to have the speakers aimed down the long axis of the room to minimise the variation in bass response as you alter your listening position. In most small rooms the speakers inevitably end up being quite close to a wall, but try to leave at least 200mm of free space behind them, if possible, especially if your monitors have bass ports at the rear. Definitely try to avoid having to sit exactly mid-way between the front and rear walls when mixing. Small square rooms present a real problem, as their dimensions result in a quite uneven bass end, meaning that some bass notes sound significantly louder whilst others are much quieter, regardless of how they were recorded or mixed. Furthermore, if your mixing position is close to the centre of the room, you may find that all the low end seems to disappear at this point. Cube-shaped rooms, where the height is the same dimension as the sides, are the absolute worst in this respect.
We are very fortunate at this time to be able to choose from a wide range of affordable monitors that all offer a fundamentally good performance. Precisely which one you chose actually matters rather less than that you locate and mount them properly and take the time to learn how they sound. All speaker and room combinations have their strengths and weaknesses — the key thing is to know what allowances to make to overcome any limitations you observe.
Genelec’s compact 8331A from their ‘The Ones’ series of professional monitor speakers, uses a coaxial driver array, where the midrange and tweeter drivers are integrated into a single unit. This creates a point-source design, which ensures that all frequencies originate from the same physical point, minimising phase and timing issues. Despite their diminutive size, they offer an impressive full-range frequency response (45Hz – 37kHz), whilst integrating well into smaller spaces.
Subwoofers
The deep bass response of smaller speaker systems can often be extended through the addition of a subwoofer. These dedicated low-frequency speakers can work well, when properly integrated, but can also make things a lot worse when set too loud or to operate at the wrong frequencies.
The ‘rule-of-thumb’ is that the sub should be set at a level where you are not really aware of it other than by its absence when you turn it off.
The position of the sub in the room has a big effect on how even the bass response will sound, but it should always be placed directly on the floor, not on a stand or shelf, and not in an enclosed space like under a desk, in a cupboard, or an alcove. One method for finding the best spot is to temporarily place the sub where you normally sit, then play back some music, preferably with busy bass parts and in different keys, while you crawl around the floor at the front of the room to try to identify the spot where the bass sounds most even. Once you find it, put the sub there — although practical considerations may often intrude on that placement
decision, in which case you have to settle for the best compromise.
Once the sub is sited appropriately you can fine tune the level, crossover frequency, and phase to achieve the best integration with the main speakers. If the sub has a filter control, start with it at its maximum frequency position, and play a low sine tone through the system (80Hz or E2). This should be reproduced by both the sub and main speakers, and you can then adjust the sub’s Phase control, if present, to maximise the apparent sound level. This makes sure that the sub and main speakers are in phase through the cross-over region. Next, adjust the level of the subwoofer so that the low bass is audible but balanced with the bass coming from the main speakers. As mentioned earlier, you shouldn’t really be aware of the sub working, but should notice the absence of its contribution when switched off! Finally, adjust the filter control for the smoothest transition of bass sounds between the main speakers and sub. Often the level and filter controls settings are mutually dependent, so if you adjust one you may then need to adjust the other.
Acoustic Treatment Chapter 7
In a professional studio, the acoustics of the recording area and the control room where the mixing is done are often different. The recording area will usually have a controlled acoustic but also some reflective ‘liveness’ to it to help make performers feel comfortable and keep the overall sound character similar to how we are generally used to hearing things. In the mixing area, however, you want as near to acoustic neutrality as you can get, so what you are hearing from the monitor loudspeakers is as accurate as possible, ensuring your mixes will translate well to other listening systems and environments.
Acoustic treatment in the home studio, where the same room is likely to be used for both mixing and recording, has to try to reconcile those two
aims. Obviously, addressing any large anomalies, like strong reflections from untreated walls, affects both activities equally but, by and large, for mixing the room acoustic issues will be midrange reflections and a lack of evenness in bass frequencies, and in recording you’ll be fighting a lack of brightness and ‘air’ in the sound.
Ideally, the room where we install our home studio gear would already have a fairly neutral, balanced reflection and reverberation characteristic — one in which all frequencies decay at a similar rate. But any room with a lot of hard materials, such as polished wood or glass, will allow high frequencies to bounce around between the surfaces. In contrast, a carpeted room with a lot of soft furnishings will absorb high
frequencies much faster than low frequencies. We might not be able to make really fundamental changes to a domestic room, but we can address simple decay-time imbalances like the above to some degree using fairly basic acoustic treatment.
Plasterboard walls, as well as windows and doors, will always allow some low-frequency energy to simply pass through them, rather than reflect it all back into the room, and that helps to improve the evenness of the low frequency reproduction from the monitor speakers. On the other hand, a room construction that keeps less bass inside will also be less effective at excluding low-frequency noise from outside and indeed keeping the sound of your monitor speakers from reaching others, too.
In this well-treated space you can see four wooden diffusors on the rear wall, bass-trapping panels hanging in the corners, and absorbers placed on the walls’ mirror points.
However, while solid brick or concrete walls will keep external sound out, they will also reflect most low frequency energy from the speakers back into the room, and those reflected sound waves will interact with the direct sound from the speakers to create audible interference peaks and dips in the bass level in different parts of the room, and at different frequencies or note pitches.
To resolve this problem, it is necessary to install ‘bass traps’ which absorb low frequencies and prevent the reflections that cause the uneven in-room bass response. Dedicated
Commercial foam bass traps can be expensive, but a DIY alternative is to build a timber frame that holds a standard 600 x 1200mm high Rockwool slab fixed at the front of the frame so as to leave an air gap behind. DIY mineral wool absorbers should always be covered, using acoustically porous cloth, as exposure to stray fibres can cause irritation to the lungs and skin. Alternatively, you can fix a sheet of acoustic foam to the outer side of the Rockwool, resulting in a broadband absorber that will provide some mid- and high-frequency absorption as well.
If the idea of hanging foam or DIY timber-frame absorbers on your walls doesn’t appeal, you may want to consider one of the fabric-covered absorption options from commercial manufacturers. The fabric covering makes them a more sympathetic addition to the look of most rooms, and they usually use mineral wool inside, rather than foam, making them effective over a wider frequency range.
Dedicated ‘bass traps’ can be purchased, usually designed to be mounted in the corners, where they are most effective, but really efficient bass traps need to be large, and most home studio rooms simply can’t afford to lose the space they would take up.
The boundary between the ceiling and the walls is just as much of a corner as the meeting of two walls, in acoustic terms. A foam bass trap intended for corner mounting can be mounted at ceiling height, if necessary, where it will be just as effective, without having to give up any floor space. You will need rather more than just this one, though!
‘bass traps’ can be purchased, and are usually designed to be mounted in the corners, where they are most effective. However, to be really efficient bass traps need to be large, and it can be a challenge to find the space for them in most home studio rooms. Nevertheless, installing any amount of bass trapping will make a worthwhile difference, even with DIY solutions.
Recording spaces
Optimising a room, or part of a room, for recording has a slightly different set of priorities. In contrast to mixing, you don’t want the acoustics to be too neutral and dead, especially at high frequencies, but neither do you want it to have a strong acoustic character that will impose itself on your recordings. If you are building up multiple layers of overdubs, any strong room coloration will become more and more evident with each one. Diffusion and scattering are your friends here, best achieved with the help of uneven reflective surfaces, such as loaded shelves, CD racks, spare equipment and so on. Irregular hard surfaces will lead to multiple reflections that combine randomly to create diffuse high-frequency energy that won’t exhibit any particularly strong characteristic in your recordings, but will allow the room to sound and feel more natural to you as you are playing or singing. Some rooms are just too small for diffusion and scattering to work effectively, however, leaving you with no option but to try to eliminate as much as possible of the room when recording. You won’t want to do this on a permanent basis, but hanging a blanket or duvet from a couple of extended boom mic stands can make a significant difference in a poor-sounding room. It might seem counter-intuitive, but this is usually best deployed behind whatever you are recording — after all, that is the direction the mic is pointing, and it’s the room reflections bouncing back into the front of the mic that we need to prevent. Hanging a duvet on either side as well makes a big difference as the sides of the cardioid polar pattern are still quite sensitive.
The porous absorber
The most common way of dealing with excess sound reflection is to employ a ‘porous absorber’ such as acoustic
Beware the Booth!
When constructed correctly a vocal booth can be a great asset, but simply creating a cupboard-sized enclosure with a door and then lining it with a couple of inches of acoustic foam invariably leads to very disappointing results — what you end up with is a sound that is dull and lifeless at the high end, but uncontrolled and boxy at the low end. The reason this happens is that the foam soaks up all the high frequencies very efficiently but does nothing at all for the low mid and low frequencies.
To create an effective vocal booth, the enclosure needs to be large enough to allow you to lose at least six inches — and ideally a foot or more — from each of the three ‘non-door’ walls, which will allow you to use a suitable depth of acoustic treatment to deal effectively with the low-end. Four-inch foam or Rockwool slab on two-inch spacers to keep it off the wall is reasonably effective, and you should also consider leaving some small areas untreated or putting the trapping behind perforated metal, plastic, or MDF sheeting to add a little high-end reflection back into the booth, otherwise it may still end up sounding too dull.
foam or mineral wool. The thicker a porous absorber is, the more effective it is at absorbing the energy from the air, and it will also extend the working range to a lower frequency. Porous absorbers are often stuck directly to walls, but their effectiveness can be increased by spacing them slightly off from the mounting surface — an absorber works by taking energy out of moving air, and there is no actual air movement at a boundary surface itself.
To be optimally effective, a porous absorber needs to be at least a quarter wavelength deep for the lowest frequency you are trying to absorb. However, a quarter of the wavelength of 50Hz is around 1.72m, or five feet eight inches, so in many home studio rooms absorbing low bass would require an absorber that occupied half the floor area! Clearly, simple porous absorbers are not a practical option at low frequencies, but they are nevertheless highly effective at mid and high frequencies, where a 50mm-thick panel of acoustic foam, spaced 50mm or so from a wall,
Diffusion and scattering are your friends here, best achieved with the help of uneven reflective surfaces, such as loaded shelves, CD racks, spare equipment and so on.
The irregular hard surfaces of this Vicoustic Multifuser create multiple reflections that combine randomly to create diffuse high-frequency energy that won’t exhibit any particularly strong characteristic in your recordings.
will offer useful absorption down to around 500Hz. The same panel fixed directly to the wall, by contrast, will only be useful down to 1.5kHz or so. Rigid mineral-wool slabs, of the type used for cavity wall insulation, make an inexpensive and effective alternative to acoustic foam. They can be mounted in a simple wooden frame, positioned flush with the front edge, but leaving an air gap behind, to maximize efficiency. DIY mineral wool absorbers should always be covered, using acoustically porous cloth, as exposure to stray fibres can cause irritation to the lungs and skin.
To find the optimum locations for wall-panel absorbers you need to identify the ‘mirror points’ which is achieved by sitting in your mixing position and getting someone to hold a mirror flat against a side wall, moving it until you can see a reflection of the speaker from where you are. That’s the first place where you need to put an absorber — and repeat for the other side, obviously! If you can safely mount it, it can also be helpful to hang another absorber panel — known as a ‘ceiling cloud’ — over the ceiling mirror point above the monitoring position.
There is no need to worry too much about floor reflections. You can’t really do much about them, anyway, and from a recording perspective, hard floors are actually beneficial to the sound of some instruments.
Bass traps
Any large soft furnishings, such as a sofa or bed, will be providing a degree of bass trapping already, but bass trapping is something you simply can’t have too much of in a small room. Triangular foam wedges, designed to be placed in corners, are available from suppliers of acoustic materials, with the size and thickness determining the lowest frequencies they will be able to affect — the bigger the better! These work because the main low-frequency room modes are ‘anchored’ in the corners, making the space across corners the most effective place to put bass trapping. You can use the wall-wall or wall-ceiling corners, or even the wall-floor corners — and best of all are the tri-corners of wall-wall-ceiling.
The most obvious sonic consequence of an inadequately
Some rooms are just too small for diffusion and scattering to work effectively, however, leaving you with no option but to try to eliminate as much as possible of the room when recording. You won’t want to do this on a permanent basis, but hanging a blanket or duvet from a couple of extended boom mic stands can make a significant difference. It might seem counter-intuitive, but this is usually best deployed behind whatever you are recording — after all, that is the direction the mic is pointing. Hanging a duvet on either side as well makes the biggest difference that you can achieve in a poor-sounding room.
What can you do if there’s a window exactly where one of your monitoring ‘mirror points’ turns out to be? If your monitors are already in the optimum position for the room and there are no other organisational options, you will have to treat the window in some way. While the usual approach is to place absorbing material at the mirror points — something like mineral wool or acoustic foam — most domestic settings will probably require that the window remain usable. A simple curtain will absorb some high frequencies, but absorption isn’t the only option. Slatted wooden blinds (wood is better than the plastic here), set to their half-open position, do a surprisingly good job at scattering and diffusing, reducing the effect of the first reflection interfering with the direct sound from the speakers. It would make sense to also use a scattering option on the other side as well, to retain acoustic symmetry.
bass-trapped room is that some bass notes will sound very loud whilst others tend to disappear. As you increase the amount of bass trapping, you should be able to notice that the bass notes in well-mixed music tracks start to sound much more consistent in level. Commercial foam bass traps can be expensive, and are often too small to be really effective, but a DIY alternative is to build a frame that holds a standard 600 x 1200mm high-density mineral wool slab, and fix several of these diagonally across the room corners. The triangular void behind the traps can then be filled with lower density mineral wool or standard loft insulation. As with the broadband porous absorbers, cover with a fabric to retain fibres and dust — just make sure you can blow air through the material to confirm it is actually porous.
Limp-mass absorbers
If you want to get really serious about DIY bass trapping, you could think about employing a ‘limp-mass absorber’ — a form of ‘membrane’ absorber often constructed from a flexible but very heavy, mineral-loaded material known as ‘barrier mat’ or ‘sheet rock’. A suspended barrier mat absorbs low frequencies through frictional losses as the sound energy attempts to force the heavy, self-damping sheet into motion. Like porous absorbers, limp-mass absorbers still need to be spaced away from the wall so that they are in the zone where air movement occurs. They also need to cover a large area so that they interact with as much of the low-frequency wavefront as possible.
Structure-borne sound, travelling through solid materials, is as likely to be a problem leaking out from your recording space as into it. In addition to sound, a drum kit makes a lot of impact noise that can easily travel through walls and ceilings. A simple but effective drum riser that prevents structure-borne vibration can be made by floating plywood (or similar sheet material) on mineral-wool slabs.
Make your own low-frequency test sequence
A simple way to identify and assess an uneven bass response caused by room modes is to record and play back a sequence of low notes from a sine-wave oscillator plugin in your DAW. You can then listen for which notes stand out as too loud or too soft. Even if your DAW doesn’t have a dedicated oscillator plug-in, it will almost certainly have a soft synth able to produce a sine wave, or a soft sampler that defaults to a sine wave until a sample is loaded Program a sequence of MIDI notes, all at the same velocity, to play a pure sine-wave tone over the bottom couple of octaves, starting at C4 (250Hz) and running in semitone steps down to about 41Hz (low E0). Each note in the sequence needs to be about two seconds in duration – long enough for any standing waves to have
time to build – but with gaps between notes so that you can hear any overhang when the note stops. To begin with, at the higher pitches, the levels of adjacent notes should sound very consistent, but as the sequence descends you may become aware of some notes being significantly louder and more resonant or boomy, and others being very weak or even missing completely. Be aware, though, that the overall level of bass notes is likely to fall off steadily due to the frequency response of the speakers themselves. If all the bass notes sound more or less even at the listening position you’re in luck, but if not, reposition the speakers by a few inches and try again. If there is nothing you can do to make the notes at least a bit more even, you probably need to install some bass trapping.
What Else Do I Need?
Photo: Antelope Audio
Acomputer‑based studio is a much less complex setup than one involving a multitrack tape machine, a big mixing console, and racks of outboard equipment, but you’ll still need to know how to connect everything together. The cable for the most fundamental connection of all, the link between your audio interface and the computer, should have been supplied along with the interface, although Thunderbolt cables are frequently not supplied with Thunderbolt interfaces and will therefore need to be acquired independently. All the cable types you’ll need for your studio will be readily available in a range of lengths. You might be tempted to choose lengths that most exactly match your current setup and room, but it is always worth having a little bit to spare. It is much better to put up with a bit of untidy excess cable than it is to find something vital will no longer reach its destination when you decide to reorganise your layout a little.
XLR cables
You’ll certainly need at least one three pin XLR F to XLR M cable, otherwise known as a balanced microphone lead. Standard XLR cables will work with any dynamic or capacitor mic but, perhaps surprisingly, most microphones are not supplied with a cable included. Valve/tube mics will include a dedicated cable with more conductors to connect to their specialised power supply, but you’ll still need an XLR cable to connect the output to your interface. There’s really no need to overspend here on something premium, but there are poor quality cables and connectors out there. Any mid price mic cable from a reputable supplier should work perfectly well for you for years to come.
Three pin XLR XLR cables are sometimes used for balanced line‑level connections, too, especially with professional equipment, but line‑level signals are more commonly carried using a three conductor jack plug referred to as ‘TRS’ (tip, ring, sleeve) jacks. Looking like a stereo headphone jack, you need these if you have equipment with balanced jack sockets on it, like an analogue mixer, or speakers, or a monitor controller with balanced connections. Conventional
You might not find mic cables sounding any different from one another at the sort of lengths used in a home studio, but you could certainly find a difference in durability if you buy really cheap ones. Check for good, name-branded XLR connectors and you shouldn’t go far wrong.
Pop shields successfully dissipate the air blasts that come from pronouncing ‘p’ and ‘b’ sounds when singing. You will almost certainly benefit from using one for recording vocals with a capacitor mic. Metal-mesh models may be slightly more transparent to high frequencies than nylon-mesh versions, but either is a good deal better than none.
There may not be much in the way of significant mechanical vibrations to worry about in a typical project-studio situation unless you are near heavy industry or a busy road. But even if you’ve got a decoupled or very solid floor that won’t convey much low-frequency vibration, singers have been known to tap their feet or even accidentally knock against the mic stand, so a shockmount can be useful if you are using a sensitive capacitor or tube mic.
‘unbalanced’ jack cables, which don’t have the additional ‘ring’ contact between the tip and sleeve, are used mainly to connect instruments, such as guitars and electronic keyboards to their stage amplifiers. Equipment with TRS balanced sockets will still work with an unbalanced jack cable, although and it is advisable to keep the cables short to avoid potential interference, and there is an increased risk of suffering ground-loop noises. So it’s always best to use balanced cables if the equipment has balanced inputs and outputs.
Good-quality recording equipment rarely uses the ‘RCA-phono’ connectors found on many consumer audio products, but the same physical connector type is often used to connect digital equipment using the co-axial S/PDIF protocol. Conventional RCA-phono cables intended for audio should never be used for a digital interconnect as they can cause corruption of the digital signal, so always buy either a dedicated S/PDIF digital
A good DI box really is an all round problem-solver in the studio. An active box will generally have a high input impedance, perhaps around 1MΩ, making it possible to achieve good performance from a directly connected electric guitar or bass with passive pickups. There should also be an earth-lift facility to break hum-loops, an attenuation ‘pad’, to accommodate very loud signals, and occasionally even a high- or low-pass filter. Active DI boxes can usually be battery or phantom powered, but there also passive DI boxes that require no power. Passive boxes can’t achieve the same high input impedance as an active box, but are fine for active instruments like keyboards or guitars connected via a preamp. They should still offer facilities like earth lifting or pad settings.
cable designed for the job, or a 75Ω video cable with RCA-phono connectors (they have the same technical specifications) if you need one.
Microphone stand
You will need at least one mic stand, and it makes sense to make it one with a boom arm, even if you think you’ll only ever be recording vocals. Using a conventional boom stand with three legs lets you get the base out from under your feet when you want to sing or play very close to the mic, but always
position one of the legs directly under the boom arm to ensure stability when there is the weight of a large-diaphragm capacitor mic on the end of the boom. This is one area where it is worth spending a little more to get a good quality stand, as the boom-arm friction mechanism often slips on cheaper stands, making it possible for the mic to droop. Ideally, the weight of the mic should be counter-balanced by the weight at the opposite end of the boom arm, to keep the centre of gravity over the stand’s vertical stem,
A lot of home studio equipment is now powered from an external power adaptor rather than a direct mains connection. It is well worth labelling adaptors with the name of the unit they supply, as you can easily find you have a few of them, all looking the same but supplying different voltages. Some units are protected against an over-voltage input, but by no means all. By the time you see smoke, it is usually too late!
The simplest and safest way to remedy an earth loop is to break the ground path through the audio connections with a transformer isolator. The audio signal passes between the electrically isolated primary (input) and secondary (output) windings of the transformer as an alternating magnetic flux, but the electrical isolation between the windings means that the signal ground of the destination equipment is no longer connected directly to the signal ground of the source equipment. Hence the ‘ground loop’ is broken and the problem is overcome. ART’s ‘DTI’ Dual Transformer Isolator is a very cost-effective stereo line isolator with some flexibility in connection formats. It doesn’t care whether the inputs or outputs are balanced or unbalanced: conversion is automatic and lossless.
It is actually good practice to feed all your recording gear from a single wall power outlet. Home studio recording equipment typically uses very little power, so connecting everything in a star arrangement across multiple distribution boards is not a problem and may even help avoid ground-loop problems.
reducing the strain on the friction clamp enormously. Sadly, few boom arm stands have a sufficiently massive counterbalance weight as standard, but larger ones are often available as accessories and are a wise investment. When attaching a shockmount or mic stand adaptor to a boom arm, just loosen the boom-arm locking screw and rotate the boom arm whilst holding the item still — much easier and less accident-prone than rotating the actual mic or shockmount.
Pop filter and shockmount
Some sort of pop shield really is mandatory for recording most singers, but different types vary in their usability and sound quality. Two- or threelayer nylon-mesh models are usually the least expensive, but metal-mesh types are arguably more transparent to high frequencies — although the perforations in some are too large and can let plosives through. Open-cell foam pop-shields supported in a frame of some kind are widely regarded as being the most effective, with the least effect on sound quality, and are the easiest to clean. It is easy to improvise a pop-shield, but they cost so little it is worth getting the proper thing, even if just for ease of mounting.
Shockmounts are every bit as important if you are going to be using a sensitive capacitor or tube mic. Even if you’ve got a decoupled or very solid floor that won’t convey any low-frequency traffic rumble, singers have been known to tap their feet or even accidentally knock the mic stand. Mic-specific shockmounts are
For most people, drum and percussion parts can be played far more intuitively and naturally from a drum pad interface using sticks or your hands, rather than with your fingers on a keyboard.
supplied as a standard accessory with many good studio mics now, and general-purpose ones are readily affordable anyway, so it just makes sense to use one as a matter of course. It’s also important to route your cable in such a way that it can’t transmit vibration to the mic, or it could cancel out some of the benefits of using a shockmount. Wrapping the cable around the stand a couple of times helps, as does leaving a small loop of loose cable behind or beneath the mic. Fastening the cable to the stand with a plastic clip (these are often supplied with stands) will help prevent your cable moving during recording.
Direct Injection
Many audio interfaces now incorporate one or more inputs that can be configured for direct connection of instruments. These will have a high input impedance, perhaps around 1MΩ, which makes it possible to achieve good performance from an
pickups. You might still find it useful to acquire a separate DI box, though. A good, ‘active’ DI box will have a number of useful facilities beyond just impedance matching. Active DI boxes can usually be battery or phantom powered, and may offer an
you need one now, sooner or later you’ll probably find yourself wishing that you had one.
Power distribution
You will want a few mains distribution boards, but standard ones will do the
Don’t remove a mains earth connection to stop earth-loop hum!
A ground loop occurs when there is more than one ground path between two items of equipment, allowing an unwanted noise current to circulate between the equipment. Usually, one path is the screen of an audio cable connecting the two pieces of equipment and the other path is via their chassis safety earths in the mains plugs, and through the building’s mains supply. Inside the equipment, the audio screen earth is often linked directly to the chassis earth, hence the possibility of a loop. If the two bits of equipment are plugged into the same mains socket, their chassis safety earths are effectively tied together at the same potential, and so there is unlikely to be any circulating ground current, despite the apparent ground loop. However, if one item is plugged into a different mains socket, its chassis safety earth might be grounded some distance away from the other equipment’s earth, and there can be a small difference in voltage between them — earth is not actually the same everywhere! The voltage difference between their two chassis earths can cause a small current to flow, and since the earth provides a reference
for the audio electronics, that flowing current causes the earth reference voltage point to vary slightly. This can be heard, usually as a low-level hum or buzz.
The ideal solution is to make sure that everything is earthed at one central point, so that they all share the same common earth reference point. The easiest way to do that is to plug everything into a star arrangement of plug boards fed from a single socket (assuming suitable power capacity). If that can’t be done, the safest solution is either to break the loop by isolating the audio cable screens at one the destination end, or to use a line-isolation transformer box – the transformer breaking the ground connection. The cable is still screened, but there is no longer any possibility of a loop, so the hum currents can’t flow around it. DI boxes also use transformers in the signal path to break the loop, as there is no electrical connection
between the primary and secondary windings. Serious problems arise if people decide to break the loop by removing the safety earth in the mains plug instead. This does break the loop, obviously, so any related hum will disappear, but it also means that the equipment is no longer earthed, and any fault that occurs in it is now potentially life-threatening!
Acquiring a multimeter, an assortment of screwdrivers, pliers and wire cutters, and above all, learning how to solder, will allow you to carry out a surprisingly useful degree of basic maintenance, especially making and repairing your own cables.
job just fine — no need to get special filtered or protected ones. Just get one more four-way board than you think you need — you’ll always use it in the end! Most direct mains power connections are now via the common IEC (C13) leads used to power many domestic appliances, but it seems that ever more equipment is now being powered from an external power adaptor, supplying either AC or DC current at the operating voltage of the unit. Even in a simple system, you can end up with a few of these, sometimes with similar connectors but different voltages so it is important to label them with the name of the specific unit they supply to avoid unfortunate accidents when replugging.
Where possible, it is actually a good idea to feed all your recording gear from a single wall power outlet. Home studio recording equipment typically uses very little power, so connecting everything in a star arrangement across multiple distribution boards is not a problem and may even help avoid ground-loop problems.
If you can hear a hum or buzz from your monitors (hum is a low-frequency sound, whilst buzz is higher), you may have a ‘ground-loop’ somewhere in your system caused by pieces of interconnected equipment being grounded by two or more different paths — perhaps a mains earth and a signal-lead screen. Equipment connected via balanced cables rarely suffers from this problem, but if you do find yourself with ground-loop noises, don’t feel tempted to simply remove the mains safety earth connection from anything. It may cure the hum, but it will leave the item, and possibly your system as a whole, in an electrically unsafe condition, relying on a signal lead for a safety earth connection — and lethal electric shocks are not conducive to happy music-making! There are safe ways to cure ground-loops, the easiest often being to connect the interface to the active monitor speakers via a ‘line-isolation box’ which uses transformers to pass the audio signal while keeping the equipment grounds separate.
Buzz is a very different sound to hum, and usually arises through having sensitive audio equipment too near to computer hardware or a lighting dimmer. The solution usually lies in simply moving the audio gear further away from the source of interference. In general, it is a good idea to try to keep signal cables separate from mains cables and power supplies, especially so with any unbalanced connections in your system.
Learning how to solder, and acquiring a basic toolkit comprising soldering iron, solder, pliers, wire cutters and an assortment of small screwdrivers can be highly beneficial and save you money. Knowing how to solder enables you to repair damaged cables rather than throw them away, and to make your own cables to exactly the right lengths and formats. You’ll find you can also often fix ground loops by modifying part of your audio wiring to disconnect the screen wire at the destination end of a three-conductor cable.
Discover SOS For Artists: A Complete Platform for Modern Music Creators
WITHSTARTA FREE PLAN
Sign up and explore the features
Upgrade at any time
Kickstart your creativity with 7,800 samples
Preview the Mastering tool
Preview the Distribution service
Your end-to-end music production suite
Designed to support independent artists, producers, and collaborators at every stage of the music-making journey, SOS For Artists is a new subscription service that brings together all the tools needed to take your music from idea to release.
Create
• Sample Selection Made Simple
• Instruments & Synths
• Stem Extraction with AudioShake
• Starter DAWs Included “Efficient, DAW-integrated tools to streamline sample selection and composition.”
Produce
• Mix & Effects Tools
• Mastering — Fast, Intelligent
“Refined tools for mixing and mastering, suitable for both quick demos and professional releases.”
Distribute
• Global Digital Distribution
• Royalty Splits & Monetization
• YouTube Integration
• Cover Song Licensing
• Promotion & Reporting
“Release your music across 150 major platforms including Spotify, Apple Music, Tidal, Amazon and Deezer.”
Chapter 9
Understanding Digital Audio
Analogue tape recorders work by varying the amount of magnetism stored on a band of plastic tape coated with metal oxide, but your DAW software represents sound digitally, as a series of numbers. You don’t really need to know how it all works in detail, but a basic understanding of the principles will always be useful.
Recorded sound almost always starts out as an analogue signal — a small AC (alternating-current) voltage generated by things like microphones or electric guitar pickups. That small analogue voltage will first need to pass through an analogue pre-amplifier, usually built into your audio interface, to increase its level to something a bit more robust that can be sent on to an analogue-to-digital (A-D) converter stage. The A-D converter changes the continuously varying analogue voltage into a stream of numbers that represent the exact shape of the sound wave in another form. The resulting digital audio file has one big advantage over an analogue tape recording: because the audio signal is represented simply as a stream of numbers, any
A sine wave audio waveform trace with 44.1kHz sampling points marked. If it doesn’t look like there’s enough of them, bear in mind that the underlying timeline grid is graduated in milliseconds — thousands of a second!
digital audio recording can be duplicated with no loss of quality simply by copying the numbers. The signal will not be degraded by copying, unlike analogue tape where sound quality is lost with every copy stage (or ‘generation’) and even by repeated playing. This means you can freely make backup or ‘safety’ copies when editing that are exactly the same as the original.
How does an A-D converter work?
At its simplest, the action of an A-D converter can thought of as taking a snapshot measurement of an analogue voltage thousands of times in succession and rendering each of those measurements as a number. The number of times that it does this in each second is called the ‘sampling rate’.
The sampling rate for audio has to be more than twice the highest frequency that you want to reconstruct, and as the upper range for human hearing is generally
In this comparison chart you can see exactly why 0dB on a digital scale is not remotely the same as 0dB in the analogue world!
To achieve the same amount of headroom in a digital system as working to 0dB on an analogue VU meter, you’d have to target around -20dBFS.
accepted as being 20kHz, that requires a sampling rate of at least 40kHz. Any frequencies higher than 20kHz (half the sampling frequency) have to be removed from the analogue audio signal before A-D conversion using filters, in order to avoid a type of distortion known as ‘aliasing’. To allow for the construction of practical filters, the rate is increased slightly above the theoretical necessity, resulting in the most commonly used sampling rates of 44,100 (44.1kHz) and 48,000 (48kHz).
That’s a lot of numbers, you might well be thinking, and, yes it is! And higher sampling rates — some people use 96kHz, 192kHz, or even higher rates — generate even bigger amounts of numbers to be processed and stored. Fortunately for us, handling large amounts of numbers is exactly what computers are designed to do.
Unless you’re working with very good equipment in a great-sounding studio with excellent sound isolation, there’s arguably little benefit in using ultra-high sample rates in a home studio. More disk space will be required for a given length of audio and more CPU power will be required to do any processing on the audio data, with negligible sonic benefit.
To play back the audio, that long list of numbers that we recorded is fed into a digital-to-analogue (D-A) converter, at exactly the same sample rate at which they were
Some DAWs allow you to customise your channel meters. Here, Cubase’s channel meters have been configured to show red at -10dBFS, yellow down from -10 to -18dBFS, and green below that. On this scale, aiming to just peak into the yellow area will give a good healthy signal while leaving sufficient headroom. It could be argued that manufacturers could do more to help ensure good headroom by changing the scaling of their metering. Contrast the standard Drawmer A2D2 meter display with the one they adapted for Sound On Sound Technical Editor Hugh Robjohns, where the green zone ends at -20dBFS!
generated, making it possible to reconstruct an accurate version of the original waveform as an analogue signal once again. With the signal back in the analogue world, we can send it to an amplifier and speakers or headphones and listen to it as audio again.
Of course, you can do a lot more than just play back a recorded digital audio file. Using complex mathematical processes, you can manipulate the numbers to create level variations, equalisation,
compression, delay, reverb and other effects, and, of course, the mixing of two or more streams of audio together.
Clocking
It is obviously vital that the digital audio data stream is fed into the digital-to-analogue converter at precisely the same rate at which it was recorded, otherwise it would be impossible to recreate the original signal. Digital systems therefore require a stable electronic clock that defines the exact points in time at
which the audio will be sampled. Your system’s clock resides in your audio interface, and unless you are setting up a complex array of multiple digital devices, you don’t need to worry about it. However, if you are recording from an external digital source the interface will need to use that external source’s clock instead of it’s own — something that normally happens automatically when you select a digital input, but it might need to be selected manually in some interfaces.
Bit depth
We’ve introduced the idea of measuring successive ‘slices’ of the audio signal thousands of time each second, but the other factor relating to how accurately the signal can be reconstructed by the D-A converter depends on how accurately we measure the amplitude of each slice in the first place.
We define the difference between the lowest level signal a system can reproduce and the highest level it can represent as its ‘dynamic range’. This is measured in decibels (dB).
As a rule of thumb, the dynamic range of a digital converter is roughly 6dB for every data-bit used. The CD format described each individual
The ‘stair stepping’ myth
Curiously, even after decades of widespread usage of digital audio, there remains a persistent myth that digital audio is in some way ‘cold’ or ‘harsh-sounding’ because it is ‘only’ sampled at discrete intervals resulting in waveforms that are ‘stepped’, with information lost in the intervals between samples. This is born of a lack of understanding of how digital audio really works — there really are no steps, no gaps, and nothing is ever lost! So long as the sample rate used is over twice the
Digital audio can be encoded electrically or optically, using pulses of light, and the most common optical connector is used for two different, incompatible types of digital audio data — one of which can also be sent over an electrical wire! That data type is S/PDIF (Sony/Philips Digital InterFace). Connecting an optical or electrical S/PDIF cable from the output of one device to the input of another will carry two channels of digital audio between them. However, the same cables that carry optical S/PDIF signals are also used for a multichannel format known as ADAT or Lightpipe. If you’re working at the standard 44.1 or 48 kHz sample rates, a single Lightpipe connection can carry eight channels of digital audio in one direction.
sample’s amplitude using 16 bits, which gave 65,536 discrete levels and a dynamic range of about 93dB (for comparison analogue tape would be around 55-60dB). However, most modern converters use 24 bit samples, with 16,777,216 discrete levels and a theoretical dynamic range of over 140dB. In practice, though, the best current converters actually achieve about 120dB because of the limitations of the analogue electronic circuitry — but that still matches the dynamic range of human hearing measured between the quietest sound we can detect and a sound so loud that it is painful to listen to!
Most digital equipment, and all DAWs, go even further internally,
maximum frequency of the audio signal entering the converter, and dithering is applied in the quantisation, every nuance of that signal is captured and recreated with a level of accuracy that far exceeds that of analogue tape. To put this into some kind of perspective, the amount of distortion added to a signal by analogue tape or circuitry may often be up to one per cent, whereas a digital audio system routinely offers distortion figures of less than one hundredth of that amount.
A heavily clipped audio waveform is instantly recognisable, with large flat-topped areas, but short-term clipping is much harder to detect visually.
The New Way of Mixing.
You asked for a digital mixing console for studio, touring, fixed installation and broadcast. You asked for the latest technology for superior sound quality and reliability, flexibility and intuitive, easy-to-use touchscreens and assignable buttons. You wanted Dante capability with a matching stagebox, as well as many connection and expansion options up to 32-track recording. We heard you. The new Sonicview from Tascam – mixing rethought.
though, using 32-bit (or even 64-bit) counting systems to give a virtually unlimited working dynamic range. That means that you can never lose your signals ‘in the noise’, or overload anything inside the DAW itself, although you might need to reign in any extremely loud signals before passing them to the 24-bit converters!
Why use 24-bit recording?
If 16-bit digital audio sounds perfectly fine, why should we bother to record at 24-bit resolution? Well, unlike analogue recordings, where higher signal levels become gradually more distorted as the tape or circuitry runs out of linear range, digital signals remain completely linear right up to their absolute upper limit. When you overload an A-D converter, the resulting data records the same maximum value for the duration of the overload, regardless of the actual shape of the original signal. When converted back to analogue, this would translate to an audio waveform with its loudest peaks ‘clipped’ flat. That’s a big problem because whilst analogue distortion can sometimes sound quite musical, digital clipping distortion sounds pretty unpleasant, even in very small doses! Analogue distortion usually introduces extra harmonics which are musically related to the signal, and so sound natural. In contrast, digital distortion introduces new
There are some sophisticated digital plug-ins that can sometimes achieve remarkable results in rescuing clipped digital audio. Always better not to need them, though!
signal components that are related to the sampling process rather than the signal, so sound unmusical and unnatural.
The 16-bit format of CDs works just fine because the signal level is known in advance and can be arranged to peak very close to the maximum possible level (digital Full Scale), ensuring the widest possible dynamic range — more than enough for domestic listening. However, when you’re making an original recording into a digital system, you have to leave a safety margin — headroom — to allow for unpredictable level changes or transient peaks, as you must never allow the input signal to exceed the maximum level the converter can measure.
on the console or tape machine’s meters, and sometimes people would push levels ‘into the red’ at the very top of the meter scale. But what the VU meter didn’t reveal was the equipment’s hidden ‘headroom’ — effectively a safety buffer specifically provided to cope with unexpectedly loud peaks.
In the analogue world it was usual to record signals around 0VU
In contrast, digital meters on DAWs and interfaces show the entire signal range right up to the clipping level. There is no hidden safety margin and, since we know that we should never allow the signal to reach digital full scale, we have to build in our own safety margin or headroom to avoid clipping if a louder than expected peak comes along. In practice, a headroom margin of 12dB to 20dB is a sensible precaution, but if we did that with a 16 bit system we’d reduce the practical dynamic range to about 70dB which isn’t much better than analogue tape. Thankfully, though, with a 24-bit system we can afford to work with that much headroom because the noise floor will still be more than 100dB below the average signal level, so we’re not compromising the recording at all, and we won’t need to worry about accidental overloads.
RME’s free DIGICheck software tool allows metering, testing, measuring and analysing of digital audio streams, including peak level, RMS level, ‘Over’ detection, correlation (phase), dynamic range and signal-to-noise ratios, and long-term peak detection.
Producing the best software for music and sound for over 40 years
Steinberg has been creating exceptional software for music and sound production for more than 40 years. What sets us apart is delivering the most innovative, powerful solutions tailored for everyone from the most advanced, experienced professionals through to those taking their very first steps.
Our products include Cubase and the Cubasis app for music composition and production, Nuendo for post-production and game audio, WaveLab for mastering and online content creation, Dorico for scoring, SpectraLayers for unmixing and audio restoration, plus an ever-evolving array of VST instruments, expansions and loop sets from both Steinberg and the world’s leading developers.
And with a vast, expanding collection of free tutorial videos to guide you, Steinberg has the best software solution for every audio creative.
Making Sense Of MIDI
With just a controller keyboard, a laptop and DAW software you can have a whole world of synthesized and sampled instruments at your fingertips.
MIDI, an acronym for Musical Instrument Digital Interface, has been with us for four decades now, but still manages to be slightly confusing to new users. The important thing to remember is that MIDI isn’t audio in any form: it is a digital instruction set devised initially for keyboard instruments. At its most basic, MIDI was designed to allow one keyboard instrument to play the sounds of another, using a simple, standardized one-cable connection. Two sounds could then be played simultaneously, or a different sound set accessed without having to physically play the other instrument’s keyboard.
MIDI recording devices were soon invented, initially in hardware and then increasingly as computer software applications that could record and play back MIDI information. MIDI ‘sequencers’ also allowed you
MIDI data can be edited graphically. Each graphic block represents an individual note, with its vertical position determining pitch, its length showing duration. Its position on the horizontal timeline tells you when it occurs in the recording. Recorded MIDI notes can be moved in time, lengthened or shortened, or be deleted. You can also change their velocity, which is a parameter derived from measuring how hard their key was pressed when they were recorded. Many of these notes are perfectly aligned with the grid, indicating that they have been ‘quantised’.
The green region is displaying a graphic representation of MIDI data, while the pink region above has a stereo waveform identifying it as an audio region.
Photo: InMusic
The Event list is another way of looking at recorded MIDI data. Taking the topmost F2 as an example, the numbers in the far left column are the position of the start of the note, beginning with a bar number, followed by three more sub-divisions, right down to the finest timing resolution that the sequencer offers. The note’s pitch (the ‘2’ just identifies which octave it is in) is flanked by its MIDI channel to the left and its velocity value to the right. The final four-column data field is the note’s length. You can edit these numbers directly, but most people find it more intuitive to work with the graphic editor.
Sampled drum hits are usually triggered to play out in their entirety regardless of how long their note is held, so drum part MIDI often ends up looking like this (top). Conversely, MIDI that looks graphically ‘messy’ isn’t always wrong. This is actually a glide up and down the keyboard in a Hammond organ part, so it’s important to listen when editing MIDI data and not just look! If it sounds right, it is right, but you can’t assume that it will still be OK if you change the instrument, as different synth voices will respond to data in audibly different ways.
Quantisation options have become ever more sophisticated over the years — you need a bit of musical knowledge to understand what some of these will be doing. If you are not sure, then straight 16th notes is a fairly safe place to start with most music, but always have a good look at the data in the graphical MIDI editor. Quantisation can move some notes further away from their intended position, and they will stand out when you are able to see them alongside all the others.
to edit the data, either to correct performance errors, or indeed to create performances entirely through entering data. MIDI messages tell a receiving device which notes to play, how long to hold them for, how ‘loud’ to play them and many more instructions to help create a musically satisfying performance. Alongside the invention of sound recording itself, the development of MIDI recording and editing was one the most significant events in the history of popular music production in the twentieth century.
Hardware to software
MIDI was originally transmitted and received via five-pin DIN connectors, but is now more commonly sent over USB. Likewise, hardware synthesizers have now often given way to software plug-in instruments, which are directly hosted within DAW software. The DAW integrates the recording and mixing
A good controller keyboard will let you send not just notes but also MIDI controller data to your DAW via hardware sliders and switches. Some, like this Alesis model, even incorporate ‘transport controls’ — Play, Stop, Record, Fast-forward etc — as well, allowing comprehensive control your DAW software’s functions without leaving the keyboard.
of both audio and MIDI, with the MIDI tracks providing a home for ‘virtual’ instruments within the application. You can still send MIDI data from a DAW out to an external hardware instrument, but for a lot of people, the virtual instruments included in their DAW cover all their needs, with the convenience of having everything able to be created and saved in one integrated project file.
In the hardware world, a MIDI connection can transmit up to 16 channels of MIDI data, allowing multiple destinations to be addressed via a single cable, with each keyboard or drum machine responding only to the data sent on its specific receiving channel. The software instruments in most DAWs, however, are set up by default to accept a MIDI input on any channel (or all channels: ‘omni mode’), converting or ‘rechannelising’ data to any MIDI channel as required. This means you don’t have to change your controller keyboard’s MIDI settings every time you want to
A small setup can always get by with a single MIDI-over-USB connection, but if you’ve got keyboards that don’t have a USB MIDI output, or a MIDI drum pad and maybe a MIDI guitar as well, you might want to incorporate a dedicated multi-port MIDI interface. This one has multiple inputs using the traditional MIDI five-pin DIN plug connector, but outputs MIDI as USB.
If you don’t have a lot of MIDI sources to connect, so it’s not worth acquiring a MIDI interface, adapter cables like this will allow a bi-directional hook up for a MIDI instrument that doesn’t itself have USB.
record a different MIDI track. In fact, you barely have to think about MIDI channels at all.
Some MIDI instruments, primarily in hardware and less frequently in software, are ‘multitimbral’, which means they can play different sounds at the same time, with each being accessed on a separate channel. There is little reason to engage with this complication at all within a DAW, when you can just select another
instance of a virtual instrument on a new track to use a different sound. If your studio keyboard is an instrument that makes sound itself as well as transmitting MIDI, you’ll want to delve into its MIDI functions and set it to Local Off mode, which effectively electronically disconnects the keyboard from its internal sound generators so that you aren’t hearing it whilst trying to play a virtual instrument sound in your DAW. Just turning the
If you really want to get ‘under the hood’ with MIDI, many DAWs will allow you to construct sophisticated real-time MIDI processing chains, or forensically examine the MIDI data stream when things aren’t quite doing what you expect.
instrument’s volume down may not work as doing so sometimes transmits a ‘volume down’ message via MIDI to the virtual instrument, thereby silencing it!
Editing MIDI
MIDI parts recorded in a DAW can be edited or replaced in a similar way to audio. Usually, you can choose whether data recorded on top of an existing part replaces that part, or is merged with it. The latter mode is useful for things like drums, where you might record the bass and snare drums first, then do hi‑hats on a second pass, with the tom fills played on a third pass. Alternatively, you can record the different parts of the kit onto different MIDI tracks that all address the same virtual drum instrument. It’s also possible to create MIDI parts simply by drawing in notes with your mouse.
Most DAWs offer a variety of dedicated editor windows designed specifically for different types of MIDI data editing: a ‘piano‑roll’ editor, a ‘score’ view for traditional music notation and sometimes one specifically designed for drums and percussion. Because MIDI data simply instructs instruments what to play, you can change pitch or tempo, or even the instrument sound itself after recording without any unwanted consequences.
A modern DAW can alter the pitch and timing of audio tracks, too, but not to the same extent, so it remains sensible working practice to establish basic commitments like key and tempo in a project using skeleton MIDI parts before recording a whole lot of audio.
Your DAW will include a variety of ‘quantise’ options, which will automatically put your recorded MIDI data into stricter alignment with the bars and beats of the timeline grid. Rigid quantisation doesn’t improve everything, as the musical ‘feel’ of a real performance can come from looser timing, and instruments with a slower onset of their sounds may need to be played slightly before the beat in order to sound in time. MIDI editing in software will also allow you to manipulate the key velocity data, which instructs the synthesizer how loud to play each note.
MIDI Continuous Controllers are a part of the MIDI protocol used to set parameters such as volume, damper pedal, modulation wheel, synth filter cut off frequency and resonance, patch memories, and much more besides — and these too can be recorded and edited just the same as notes. Controller data can be generated by moving dials in the plug‑in window directly, but it can also be recorded from a hardware controller, so if you think you’re going to be doing this
data can be processed in very powerful ways, making changes that would take forever if you had to do them manually.
a lot, consider choosing a master keyboard or separate control surface that also includes some assignable MIDI knobs and faders to make life easier. And it’s not only synths that can be controlled from such a device: MIDI faders can be assigned to mixer faders within your DAW, allowing you to balance the levels of multiple tracks when mixing.
MIDI
Getting To Know Your DAW Software Chapter 11
If you are completely new to both computers and audio, you will need to familiarise yourself with the basic operation of your Apple Mac or Windows PC before you start to think about getting your head around DAW software. You’ll need to know how to download and install new software and drivers, access menus, open, move and resize windows, and create, open and save files. It is also a very good idea to learn the common key commands that tend to be used across different software applications, such as copy, paste, delete, undo and redo. You’ll also want to know how to find the Preferences dialogue, as you may well need to make some changes there.
Even the simplest of today’s major DAW software packages is a very complete and capable audio production environment, encompassing everything you might need to produce professional-sounding music tracks. This can make them seem really quite complex at first glance, but the fact is, just because facilities are there doesn’t mean you have to use them. Many DAW users make great music accessing just a small fraction of what their software can do, so if you concentrate on just a few fundamentals to begin with, you’ll be recording, editing and mixing in no time. Nobody learns it all at once. You simply don’t need to.
Once you’ve installed and registered your software, and with your audio interface connected, open a new song/ project file. It is a good idea to now check the project settings to make sure you’re recording at an appropriate word-length and sample rate. For most users, this is probably 24-bit, 44.1kHz or 48kHz — there is no perceptible quality difference between the two sample rates, it’s just that the latter is preferable if combining audio with video.
Core Features
No two DAWs are exactly alike, but most now offer similar core features and have evolved towards a similar look and feel in terms of what types of windows are available and how data is displayed. In the most common configurations all have a ‘Main’ or ‘Arrange’ window, where you can see the various audio and MIDI tracks — usually as waveforms or blocks drawn along a ‘timeline’ — and a ‘mixer’ view, where your recordings are mixed and
The graphic representation of an audio recording on screen is just a means of telling the software which parts of the corresponding audio file to play. You can make edit cuts in the displayed region and mute parts of it, or move it to a different position in the timeline, all without altering the original file. This sort of non-destructive editing allows you to get creative, safe in the knowledge that you can always undo anything that goes wrong, and really is one of the primary benefits of digital recording in software.
processed. These will be supported by a ‘piano-roll’ MIDI editor and often by a separate audio waveform-editing view. Every DAW will have some kind of Audio Settings window that will allow you to select your connected audio interface as the input/output device and allocate the physical inputs and outputs to the DAW’s mixer, and you should also be able to set the audio buffer size here, too: a good compromise setting between overtaxing your computer and having unacceptably high latency is a setting of 128 or 256 samples. Some DAWs might also ask you to specify the project tempo, and how many audio or MIDI tracks you initially want, although you can always change this later.
You’ll probably spend most of your time in the Main/Arrange page of your DAW (it may have a different name, depending on the DAW you choose), as this is where you record and arrange your audio and MIDI parts. Recordings are represented by horizontal graphic strips, often containing a visual representation of the audio waveform or MIDI data they represent, with a time axis running from left to right. A cursor or ‘current time’ line moves along the tracks from left to right as you play or record. The usual convention is to have a timeline ‘ruler’ running along the top of the screen showing bars and beats, and it is possible to set up ‘cycle’ markers in the timeline that will loop playback or recording between the same two points.
This DAW window is displaying an overview of the relationship between regions used in the project arrangement and the underlying audio files they are taken from.
Most DAWs have an automatic audio transient-marking process that allows you to creatively process the timing of recorded audio. Sometimes you can even successfully quantise audio just like a MIDI part.
There’s also always the option to create multiple location markers to denote various points within a song so that you can jump to them quickly. Another common convention is that a section to the left of the screen is used to view and adjust parameters such as input sources, quantise settings and so on for one track at a time. This area is referred to as the ‘inspector’ in some programs. A typical
‘inspector’ view always relates to the currently selected or ‘active’ track and may include a fader or even a complete channel strip and associated settings. When you initiate a project, you may be asked to create some tracks, or there may be some created already by default, but somewhere in each of the audio tracks there will be an input source selector. By default this should be showing one of the physical inputs of your audio interface, or a pair if you have created a stereo track and your interface has more than one input. An interface with only two inputs will
only make two inputs available in the DAW, but if you have more available and you don’t see them you may have to visit one of your DAW’s audio setup windows again. On stereo tracks, inputs will always be numbered in adjacent pairs, such as 1-2, 3-4 and 5-6, while mono tracks will show individually numbered inputs. Any digital connections on your interface will also show up in this list, too, so if your interface has eight mic/line channels, plus a stereo S/PDIF digital input, the latter might show up as track pair 9-10. Software instrument tracks don’t need a physical audio input from the interface as the virtual instrument itself is the sound source, but they do need a MIDI input to control it. When you create a new virtual instrument track, it may initially be empty, or it may display a default instrument. Clicking
Steinberg’s Cubase DAW is a very mature program with a large user base, and is equally at home running on a PC or a Mac.
Some plug-ins, like these from UAD, feature beautifully rendered graphic depictions of the hardware processors whose sound they digitally replicate. For anyone familiar with the actual hardware this creates a familiar interface to go with the excellent sound quality, but for others, perhaps just a nice warm feeling of being able to work with a really rare and expensive piece of studio kit that they might never see in the real world!
the Instrument selection parameter in the channel is usually the way to access a menu of all the plug‑in instruments available within your DAW. When you select one, its graphical editing window will appear, allowing you to choose a preset sound or indeed create your own using the plug‑in’s on screen controls. In most cases, a plug‑in MIDI instrument will be playable straight away from a connected keyboard when its track is selected and made active. Transport controls’, such as Start, Stop, Play and Record, are usually grouped together at the top or bottom of the screen where they are easy to access, but there will also be key command equivalents of the transport keys, which make for more ergonomic operation.
Ready to record
You are now ready to record something. If it is going to be audio, you’ll want to check the recording level first. First click on an audio track’s individual Record button to ‘arm’ it. It should now display your input signal on the track’s level meter, and while playing or singing, you can adjust the input gain control on your interface to achieve a peak level of between half and two thirds of
the way up the meter scale. Typically, the average signal level should be hovering around 20 to 15dBFS on the meter, with occasional peaks up to between 10 and 6dBFS, and this approach leaves you plenty of safety margin or ‘headroom’ in case you get louder. Constantly worrying about whether you might overload the input is not conducive to a good performance, and the digital noise floor is so incredibly low that you never have to ‘record hot’ — headroom really is a friend!
When you’re happy with your input level you can hit the master Record button on the virtual transport control panel or the equivalent key command on your computer keyboard. The track will then start to record immediately, although you may find there is a default count in. If you are recording audio before you’ve created any MIDI instrument parts to serve as a timing reference, you might want to play to a metronome (click), which you can usually activate within the software. An on screen ‘cursor’ will usually be there to indicate which point in the song the DAW is recording and playing back at any given moment.
As you are recording, you should be able to see a graphical representation
of your new audio ‘region’ or ‘clip’ being generated in the selected track. When you’ve finished, dragging the cursor back to the start, or using the ‘return to start’ key, will allow you to play it back.
Simple editing
Once you have recorded a piece of audio onto a track, you will be able to adjust its start and end times — usually by dragging the boundaries of the graphic region. Obviously, while you can make a section of recorded audio shorter you can’t extend it beyond
Drum sounds can be enhanced by ‘layering’ audio and MIDI parts to make a composite sound. The audio snare hit in this example is being aligned with a sampled snare that gives it more depth.
Avid’s Pro Tools DAW differs slightly from the common working paradigm in that the main screen used for the arrangement of clips/regions is also the edit screen, as you can zoom in to sample level. Most other DAWs use a dedicated edit window for deep-level audio editing.
its original length, although you can duplicate it or copy and paste it elsewhere. You can also drag a recorded region or clip to a new position on the timeline — a typical default is that regions will ‘snap’ to the nearest beat, but if you want smaller subdivisions, or to be able to place the start point anywhere you like, you may have to drag while also holding down one or more of the computer’s modifier keys.
It is important to realise that you are not changing the original audio recording with these edits, just changing the computer’s instructions of which part to play, and when. If you have shortened a region by dragging one of its boundaries, pulling it back again will restore it to its original full length. And duplicating a region to another point on the timeline does not copy the actual audio file: it just plays back the same file again at a different time.
There will be a range of on-screen ‘tools’ available. All DAWs have a tool that is used to split regions in two. Once split, each part behaves like a separate region or clip that can have its start and end times adjusted, or be dragged to a new location on the same track, or even copied onto a different track altogether. Finding the best place to make cuts in audio for editing takes a little skill and experience. The smoothest-sounding edits are often the ones where you cut immediately before a new beat or note, or during
Most DAWs will have a go at rendering MIDI data as traditional music notation, but some are better than others. There’s a lot of sophisticated interpretation involved in creating something that’s actually readable and playable by a musician. Apple acquired their Logic DAW from German developer EMagic, who were perhaps the first to make MIDI-to-notation work to a useful degree in their Notator program for Atari computers back in the late 1980s.
a pause, both of which can be seen fairly easily in the waveform display, and edits can usually be smoothed out using fast crossfading — often simply by overlapping the end of one region with the start of another — and in most DAWs you will have the option to set this as the default behaviour.
The Audio Pool, Bin or Folder
As you record audio into the arrange window, every track, overdub and alternative take is recorded as a separate audio file. These remain stored, regardless of whether they are used in the current arrangement, unless you deliberately discard them. There will always be the option to view all audio files associated with a project via a dedicated window called something like ‘audio pool’, ‘audio bin’ or ‘region list’. It is worth learning how to delete unwanted audio files, as all those unused recording ‘takes’ waste a lot of space on your hard drive.
As well as recording audio, all DAWs also let you import existing audio files into a project. The word-length of the imported file doesn’t matter — 16-bit files can be dropped into a 24-bit or 32-bit floating-point project without any problems at all. The 0dBFS levels of all files are automatically aligned. However, some care may be necessary when it comes to sample rates and file formats. Ideally, the imported files should have the same sample rate as the project. Most DAWs will automatically sample-rate convert (SRC) mismatched files, but this may result in a slight loss of audio quality, depending on the algorithm used by the DAW. Many DAWs can also automatically import ‘lossy’ data-reduced files like MP3 or AAC and convert them so that they can be edited and manipulated just like the standard linear WAV or AIFF files used by all DAWs. However, it’s always best to work with raw WAV or AIFF files when possible, rather than ‘lossy’ data-reduced formats to maintain the best possible audio quality — especially if the final mix is likely to be converted to MP3 or AAC etc itself at some point.
MIDI regions have the option of more detailed editing at individual note level, usually carried out in a dedicated ‘piano roll’ edit window (different DAWs give this different names). Here, you can move, lengthen/shorten or
Every DAW will allow you to set up and save your preferred default parameters and display options in a Preferences file. Most will also allow you to define and edit key commands and favourite keyboard shortcuts.
delete notes, or even draw in some new ones using the ‘pencil’ tool, or equivalent. You can apply quantisation, conforming individual notes, or the whole MIDI region, to the underlying bars and beats grid that all DAWs have as their timing foundation. A typical value might be eighth or 16th notes, with options for triplets or ‘swing’ time, and sometimes more complex and subtle ‘grooves’ that incorporate musically satisfying deviations from
strict tempo. Used indiscriminately, quantisation can rob music of some of its ‘feel’, so many DAWs now include a percentage-quantise option to allow notes to be pushed closer to the grid but not all the way.
Advanced audio manipulation
Most DAWs now incorporate sophisticated functions that allow extensive manipulation of the timing and even the pitch of audio tracks,
Cockos’ Reaper DAW offers nearly all of the features and flexibility of other mainstream digital audio workstations like Pro Tools, Cubase or Logic, at a fraction of the cost. It is possibly the most user-customisable of them all, but the downside is that your do have to do that customisation before it becomes particularly user-friendly. It doesn’t come with a lot of extras, unlike all its rivals, so it is a very light download that will work on older computers and within limited memory space. It will also run on either a PC or a Mac.
usually under a descriptive name like Elastic Audio or Flex Time Processing. Activating one of these processes on a track will generate an analysis of the audio, after which you will be able to move individual elements of audio in time or pitch, either manually, to line them up with the grid or other audio, or indeed using quantisation, just like MIDI
What is a plug-in?
A plug-in is simply a software processor — a digital-code equivalent of a hardware compressor, reverb unit or any other sort of audio processing device that might once have been physically plugged into a mixing console. All DAWs now come with a comprehensive suite of plug-ins to perform all the basic functions needed for recording and mixing, but you can acquire additional ones from third-party suppliers.
There are a few different plug-in formats: AU (Audio Units) is part of MacOS X Core Audio system. Apple Logic Pro X DAW uses only AU-format plugins, but other DAWs such as Ableton Live and Presonus Studio One can also use them.
Steinberg’s VST (Virtual Studio Technology) platform is perhaps the most widely implemented and well-known format for effects and virtual instruments. VST3 is its latest evolution and includes a number of significant
data. These are extremely powerful software tools, so don’t expect to jump straight into using them extensively before you’ve mastered some of the more basic functions.
DAWs now often incorporate a selection of audio loops for you to import and use within your tracks. Loops were once just two or four-bar
segments, usually containing drum parts, that could be played repeatedly from a hardware sampler to form the basis of a rhythm track. Changing the tempo of a loop used to result in changing the pitch as well, which restricted their usefulness for melodic or chordal parts. Now, thanks to the power of modern computers and the availability of much greater storage capacity, loops are often up to eight or 16 bars long, and can automatically conform themselves to both the tempo and key of your project. Loop libraries
enhancements. The VST format is supported by almost every major DAW other than Logic.
AAX (Avid Audio eXtension) is the plug-in format of Avid’s Pro Tools DAW, from version 10 onwards — older versions used the RTAS (Real Time Audio Suite) format. You won’t need to think about this one, but there’s also the TDM (Time Division Multiplexing) format for Pro Tools systems that rely on dedicated DSP hardware to avoid having all processing done by the computer’s CPU.
Most plug-ins come in all the common formats, and the installer programme will sort out the right one for your platform. It’s not really as complicated as it may at first appear! Plug-in processors can be very simple and dedicated to a single function, or very sophisticated, with a photo-realistic graphical interface, and perhaps emulating the sound of an analogue ‘studio classic’ from the past.
Channel strips in your DAW mixer will have
slots where you can insert plug-ins, selected from a pop-up menu when you click on them. Virtual ‘signal flow’ is from top to bottom, so you can determine the order of processing by moving the plug-ins. The great thing about plug-ins, compared to real hardware, is that you can have as many instances of the same plug-in as you want — put a compressor and an EQ on every channel, if you want. The only limit is your computer’s ability to do all the processing in time, although most plug-ins don’t actually demand a ton of processor cycles. Ones that do, like high-quality reverbs, should be placed in dedicated effects channels and accessed by multiple channels via aux sends. There’s nothing to stop you putting reverb or delay plug-ins into individual channels, but it is wasteful of the computer’s resources, as they can’t be shared, and it makes it hard for you to make any sort of global wet/dry adjustment to your mix.
It is well worth taking the trouble to store Snapshots and fill in Notes fields as you are working. They can be invaluable if you want to revisit a project later.
now include whole chord sequences, melodic riffs and phrases on various instruments, allowing you to build entire compositions from them. There are still limitations, in practice, in how far your can re-pitch or alter the tempo of an audio loop before things start to sound obviously mangled, but there is now a great deal more flexibility and potential creativity than ever before.
Ableton’s ‘Live’ is a DAW specifically designed around the use of loops and samples. The user interface allows audio segments (Clips) to be cued up for looped playback in a specific order, or triggered ‘live’, as needed, with everything conforming to the project tempo. This makes for a far more spontaneous, almost instrument-like, interface, initially conceived to facilitate the more effective use of loops and samples in live performance. Live proved an ideal tool for DJs and producers working in the EDM genre, but has now added a more traditional linear recording view to its options, as well. At the same time, major ‘linear recording’ DAWs like Logic and Cubase have started incorporating ‘loop trigger’ working methods into their facilities, too.
You can make great sounding tracks just using your DAW’s loop library, and it can be a very satisfying way of getting started on a project, but if you are thinking of using one for a really prominent melodic part you should probably keep in mind that other people will be using those loops as well. Most DAW loop libraries will also incorporate MIDI loops. These can obviously be adjusted in pitch and tempo without audio consequences, and reassigning them to a different instrument from their default can be a great way of making them uniquely yours.
Changing the tempo of the audio in a loop is achieved in one of two ways. The first of these is Slicing mode, in which the audio is cut at all the transient points, effectively turning it into a set of individual regions that can be shuffled closer together or further apart. This tends to work very well for drums and percussion, as each piece of audio hasn’t actually been subject to any processing, just cutting and moving. The second method is more complex and involves omitting or duplicating individual samples to lengthen or shorten a piece of audio. Obviously, that is a little more invasive and will generate audible side-effects if used too extensively, but can otherwise retain remarkably good audio quality. This is the method used to automatically adapt melodic audio loops to your project tempo, and indeed change your project tempo after recording and have your audio regions follow the tempo and remain in time — a facility that would have been unimaginable just a few years ago.
A similar sample-level process is used to allow digital audio to be re-pitched. The deep technicalities of that are beyond the scope of this book, but digital pitch manipulation gives us automatic vocal tuning, harmony
Nearly every DAW now includes a selection of both MIDI and audio loops for you to import and use within your tracks. Both types will automatically conform themselves to the tempo and key of your project, but there are still limitations, in practice, in how far you can re-pitch or alter the tempo of an audio loop before things start to sound obviously glitchy and processed.
generation from a single line, the ability to transpose or fine-tune loops or recorded audio, and many more production processes that add to the creative options available today. It’s not ‘magic’, of course, and there are always limits beyond which the technology will start to generate serious side-effects, but there are no rules in modern music production and many a ‘side-effect’ has
SpaceBlender
An Imaginary Space Machine
Forget the rules of time and space! SpaceBlender is an experimental reverb that lets you create shapes, tones, and textures that don’t exist in the natural world. Inspired by the pioneers of ambient music, with their extensive use of layered tape loops and delays, SpaceBlender is designed to create massive waves of lush, organic, and evolving spatial effects.
“An incredible ‘missing link’ plug-in for adding tons of creative atmosphere.”
– Jason LaRocca
Grammy-nominated mixer and producer (Venom: The Last Dance, Alien: Romulus, God of War, CeeLo Green)
gone on to become a featured style, from distorted guitars to the familiar vocal warble of Antares Auto-Tune deliberately used outside its comfort zone.
Mixer and automation
Let’s assume now that you’ve recorded a few tracks of audio and maybe a MIDI part or two, and you want to mix them to create a finished song. The faders on your DAW’s mixer page will let you balance the various tracks, while the pan controls shift the sound towards the left or right speaker, as you’d expect. Keep an eye on the levels and try to ensure that the individual track meters and the master output meter are averaging between -10dBFS and -18dBFS to leave plenty of headroom. If your levels are too high, adjust the track input levels, either directly (on DAWS that have that feature) or by inserting a gain plugin until you’re back in the safe zone, rather than pulling down the master fader. If everything you recorded sounds exactly the way you wanted it to, you could just set a balance and let the track mix itself, but in reality you will probably want to at least adjust levels to even out discrepancies in the performance and to bring up instruments during any featured parts. To do this most effectively you will need to get to grips with your DAW’s in-built mix automation. There are two ways to approach this: you can either move
faders as your song plays back, and have your DAW record those moves; or you can simply use the mouse to ‘draw in’ the movements you want the fader levels to follow. Mix automation usually has a number of ‘modes’ of operation, such as Write (fader moves are recorded) and Read (fader moves are played back), which can be set individually for each track. There may also be other Write modes, such as Latch, which ‘latches’ at the last value created when you let go of the fader until you stop recording automation data, and Trim which allows you to fine-tune or modify existing automation data while it’s being played back. Once again, each DAW has its own variations. Automation capabilities of modern DAWs aren’t just limited to fader levels and you’ll find you can control and automate almost every parameter of the channel (pans, aux sends, etc), plug-in processes and virtual instruments, if you wish. By using the automation controls you can work very precisely on each track until the mix balance sounds exactly as you want it to, right the way through the song.
Further processing options
However well-recorded and balanced it is, a final mix of a track will usually benefit from a bit of refining and ‘polishing’ with EQ, dynamics processing (compression and limiting) and effects. Your DAW will provide EQ either as a standard feature within each channel
Ableton’s Live is the only DAW to have been specifically designed around working with loops and samples. Live proved an ideal tool for DJs and producers working in the EDM genre, with audio segments (Clips)being cued up for looped playback in a specific order, or triggered ‘live’, as needed, with everything automatically conformed to the project tempo. Live works with both MacOS and Windows.
or as a plug-in you can choose from a menu. Processors such as EQ and compressors are intended to affect the whole signal, as opposed to just adding something to it, and are best inserted directly into a track’s ‘insert’ points — if you don’t yet know what a compressor does and how it works, we’ll be looking at that in detail in Chapter 13 ‘Understanding Your DAW Mixer’. Effects that are likely to be shared across a number of tracks, such as reverb and delay, are best accessed using an ‘auxiliary send’. In most DAWs there will be a slot in the channel for you to add an aux or effects send (slightly different terminology may be used by some DAWs). In some DAWs, installing the aux send automatically creates a corresponding mixer channel, whilst in others the process may require you to create one yourself. Once you have an aux channel, you can insert the type of effect plugin you want, and that effect can then be added to any of the other tracks in various amounts by adding the same aux send to them as well. You can set up as many as your DAW will allow, which will usually be far more than you need.
You can also put plug-ins into the main stereo output, such as a gentle bus-compressor to work across all the tracks simultaneously. Once the mix sounds right with all your plug-ins and fader automation working correctly, you can ‘bounce’ the finished mix to create a new stereo audio file.
Of course, this is just scratching the surface of what your DAW can do, but once you are familiar with these key elements you can start making and mixing recordings. Everything else can be learned a piece at a time and at your own pace.
Recording Audio Chapter 12
Today’s powerful software processes allow us to do many things to recorded audio that didn’t seem possible just a few years ago. Within most DAWs it is now possible to change the pitch and timing of audio parts almost with the same flexibility as MIDI parts. This means there is a whole lot of things that you can now ‘fix’ that would previously have required re-recording. But the fact that you can, doesn’t always mean that you should! A lacklustre vocal performance is still a lacklustre performance even if it has been pitch-corrected and edited to pull it all perfectly in time. ‘The basics’ all very much still matter: if you are recording a guitar, make sure it is in tune, that it intonates properly, that the strings are in good condition, and so on. These things still make more difference to the perceived quality of a recording than any plug-in that you decide to dial up, or which microphone you used.
If the room acoustics are compromising your vocal sound, as is often the case when recording at home, it is worth spending some time to try to improve the situation before you start recording. Test out different positions for the mic within the room — and don’t rely on just hearing the difference in your headphones: make a short recording and listen to it compared to alternative positions. Be prepared to use improvised acoustic treatment using household items such as blankets and duvets, held up on mic stands between the performer and the walls — it really can make all the difference, especially when you start adding compression to your voice.
Keep the noise down!
Try to ensure any ambient noise being picked up by your mic is low enough in level not to be a problem, especially if you are recording multiple parts — it will build up with every track. This could be traffic noise from outside, or the sound of household appliances in the next room, or even the cooling fan and hard-drive noises from your computer. Keeping the mics well away from the noise sources, which should ideally be located in the ‘null’ axis of the mic — ie. directly behind a cardioid microphone. Using some sort of basic
If you think the room acoustics are compromising your recorded sound, as is often the case when recording at home, it is always worth spending a bit more time trying to improve the situation before you start, rather than hoping you can ‘fix it’ during mixing. Test out different positions both for the mics and the player within the room. And don’t rely on just hearing the difference in your headphones: make a short recording and listen to it compared to alternative positions
acoustic screening can really help, too. In a typical home studio, getting a signal-to-noise ratio (wanted sound versus background sounds) of 50dB can be considered a pretty good outcome, although a professional studio with proper sound isolation and silenced air conditioning will achieve a much better figure.
If you have your mic set up in the same room as your DAW and monitoring system, you will have to turn the speakers down and use headphones while recording, otherwise some of the sound from the speakers will find its way back into the microphone, and you may even end up getting acoustic feedback. Also, try to use ‘closed-back’ headphones when recording, as open-backed
types can leak a lot of sound that may be picked up by the microphone.
It’s always worth making sure your computer and DAW are ready to be used in an efficient way that doesn’t impede your creativity. Most DAWs will create a ‘project’ folder, to which they save the arrangement and all its settings, as well as all the relevant audio files. If your DAW doesn’t do this, it may ask you to set a ‘file path’ for your new song that tells it where to put the audio files, which could be on an external, dedicated audio drive. Once you have told it where to put the files, the song always knows where to look, unless you move them, of course, in which case you will be given the opportunity to reconnect the DAW arrangement with its files by
If you are using just one mic on an acoustic guitar, aiming it at the neck/body joint from about 12 inches away is a good starting point. If you want a more complete capture of the instrument and a fuller sound, adding a second mic aimed somewhere behind the bridge often works well.
pointing to a new path. That may sound complicated, but it is really just basic drive, file and folder management within your computer’s MacOS or Windows operating system. Sensible naming of projects and a little basic organisation should mean that you are never left wondering what’s happened to your precious audio!
Setting up a default project template in your DAW means that you won’t have to start from scratch every time you start a new song. Saving a template with perhaps eight audio tracks and eight virtual instrument tracks is a good starting point — you can always add more tracks as you need them. Set up the input sources for the audio tracks so you can instantly put them into Record mode, and place some of your most-used virtual instruments in the MIDI tracks. If there is anything that you find yourself using all the time, like a favourite reverb for your vocals, just add it to your template and save it, so you don’t have to instantiate it every time.
Most people will initially choose to use their DAW’s metronome when recording. This will generate a regular pulse or ‘click track’ that you listen to while playing your instrument, to make sure that what you have played will be in sync with the bars and beats of the underlying grid. You can choose to switch off the click and
In a carpeted room, simply adding a reflective wooden board under the player can enhance the sound of acoustic instruments. The first reflection, coming from the floor, often forms an integral part of the sound of instruments as we are used to hearing them.
A loudspeaker is really just like an acoustic instrument, in that the sound does actually vary at different points across its surface. It may be ‘traditional’ to mic speakers really close like this, but there is often a more complete, integrated sound to be had slightly further away, and aiming somewhere between the centre and edge of the cone.
work in free tempo, but editing will be more difficult, you won’t be able to use any of the timing quantisation functions and it will be difficult to use any pre-recorded loops, as they will automatically conform themselves to the project tempo setting rather than anything you have played. Many DAWs will now allow you to ‘tempo map’ a free-tempo recording, manually setting the bar divisions, but that’s probably something you won’t
Mic positioning basics
The closer a microphone is to the subject, the more direct sound you’ll pick up compared to the ambient room sound, so most of the time you’ll want to get the mic reasonably close to the performer, instrument or amp.
For a vocalist, you probably don’t want to get any closer than four or five inches, to minimise proximity effect bass-boosting — and use a windshield to prevent plosive blasts. Positioning for instruments is a little less obvious, because many of them produce sound from more than one place. If you put the mic too close, it will just favour one aspect of the sound to the exclusion of others, and if the player moves even a little, you can get a big change in tonality. A good ‘rule of thumb’ when you are not sure, is to make your initial mic distance about the same as the length of the part of the instrument that emits the majority of the sound. In the case of an acoustic guitar, that would be the length of the guitar body, while with a flute you’d use the entire length of the instrument as a distance guide.
want to be doing when you are just getting started.
A simple metronome click is not particularly inspiring to play to. If you’d rather have something with more ‘feel’, try importing a drum or percussion loop to use as a timing guide instead. Set your project tempo, import a drum loop file or select a loop from your DAW’s loop library, drag it onto the arrangement at the start of a bar, and then set it to loop
Clearly there will be exceptions: applying this very rough-and-ready rule to a concert grand piano, for example, you’d be placing your mic (more often two mics, for stereo) several feet away — and that is a common technique for a classical solo piece. However, a more intimate, detailed sound might be preferable for pop or jazz, which would typically be achieved with the mics set up only a few inches above the strings inside the piano. Other obvious exceptions are the pop/rock drum kit and the saxophone, where a tight, close-miked sound has become what is expected, despite it sounding nothing like the natural sound of an acoustic drum kit or a sax! A further consideration is close-miking to minimise the ‘spill’ from other instruments when recording an ensemble. Sometimes you may need to place microphones closer than you would prefer, simply to maintain sufficient separation between instruments to allow you the flexibility to create the balance you want when mixing.
Figure-of-eight mics offer much better rejection in their side lobes than cardioids and can help you achieve better separation of signals when recording a vocal and acoustic guitar performance at the same time.
so that it repeats for the duration of your song. Your DAW will have a default ‘pre-roll’ or count-in setting of one or two bars, which lets you know when to start playing or singing.
What am I hearing?
Organising the monitoring of new and already recorded tracks can seem a little complicated at first. Let’s assume that you are wearing headphones, plugged into the headphone output of your audio interface. The metronome and everything you’ve already recorded will emerge from your DAW through its ‘master’ bus, which is normally routed to the headphone (and speaker) outputs of the interface and available to listen to, controlled by the headphone volume control. When you hit the Play button in the DAW, you should hear your pre-programmed drum loop or click track.
On most smaller interfaces, you’ll see a control marked Mix, or Direct Monitoring, or something similar. This allows you to blend the live sound from your microphone or connected instrument directly into your headphones — rather than via the DAW — so you can balance it at a comfortable level with the playback
An unusual mic position, blended in with more conventional miking can give a familiar sound a unique extra quality. Record it to its own track so you can experiment with compression and EQ in the mix. If you haven’t got a big enough space to make ‘room’ mics work, placing one just outside can still work well to achieve the same effect. And if it is outside the room, it might as well be mono.
Integrating a mixer
Another way of achieving latency-free monitoring is to use a small mixer connected in between your input sources and your audio interface. You connect your mic or instrument to an appropriate input channel on the mixer, and connect an output from either a subgroup or an aux send to a line input on your interface. The stereo line output of your interface can be connected to another pair of input channels or an auxiliary return channel on the mixer for monitoring. The crucial thing here, though, is that whatever routing and connections you use, the mixer output feeding the interface must not contain the DAW mix coming back from your interface. If it does, you risk creating a howl-round loop which will be loud and unpleasant!
Now, you can use the mixer’s headphone monitoring facilities rather than the interface, and balance up the level of your input source(s) against the rest of the mix from the DAW. Incorporating a hardware mixer like this allows you to hook up effects that are just monitored without being recorded, like a reverb to make a vocalist feel more comfortable, and also makes it easy to use an analogue filter, EQ, or compressor on your signal before it is recorded. Of course, that means those processes will be ‘baked-in’ to the sound and you won’t be able to undo them, but sometimes that allows you to record something sounding exactly as you want it, so you won’t need to do anything to it in the mix.
Some classic mic preamps have a smoothly rising high-frequency response, replicated in switchable form here in this Focusrite interface. This type of response can be flattering to some sources, particularly when used with a fundamentally warm-sounding mic, but look out for mics that have a similar inherent rise in the HF response. The two together might be a bit much!
level from the DAW. This sort of direct monitoring of input signals is the simplest of all to use, and has the advantage of always being entirely latency-free. If you have forgotten what latency is, it is the short time delay involved in the round trip from the input, into your computer and back out again to your headphones and speakers. A large audio buffer setting in your DAW software — perhaps 512 samples — gives the computer more time to run lots of complicated plug-ins and instruments, but results in a significant delay in the output. The software keeps everything you record properly in
sync: it’s just not in sync with real time. So if you were to sing into your mic whilst listening to the output from the vocal track in the DAW, you would hear your voice with a short delay, which is very off-putting indeed!
More sophisticated interfaces will often have an associated control app to set up latency-free monitoring for specific inputs, and these will sometimes include the option to have some reverb in your ‘monitor mix’ to help make the signal in your headphones more performance friendly You can’t use direct monitoring when playing virtual instrument plug-ins, as there’s nothing
to monitor at source — the sound is created inside the computer.
The most important thing, though, is to make sure that you are not accidentally monitoring live audio inputs both through the DAW and via a direct monitoring path at the same time. You’ll know if this is happening because you will hear a strange doubling effect on the sound, or a very obvious colouration! In order to use direct monitoring without also hearing the input signal through your DAW, you may need to mute the output from the channel or track to which that input is assigned in the DAW. Many DAWs allow you to disable the automatic input monitoring of record-armed tracks, and this is the easiest option.
Setting levels
Before you hit record, you’ll want to set your input levels on your audio
interface by adjusting the front-panel gain knob while the track is in ‘record armed’ mode. Usually, a red Track Record button will light up dimly or flash when the track is in ‘record ready’ mode, and then it lights up brightly and continuously once you hit the master Record button on the transport bar.
The excitement of recording often means that musicians and singers get louder as soon as the actual recording starts, so it is best to set the gain on your interface to leave plenty of headroom as a safety margin, with the DAW level meters reading about halfway up the scale on the loud notes (somewhere between -10dBFS and -18dBFS). If the channel meter shows clipping when you start recording, do not ignore it: stop recording, lower the input gain, and start again. Clipping distortion sounds extremely nasty, and can’t be removed once it is embedded in the recording.
Once you are happy with what you’ve recorded on that track, you can de-select Record mode and move on to another one. You should only need to re-check the input gain setting if something has changed, like a different singer or new instrument, or if you have changed the microphone itself or its positioning.
It is generally best — at least as a novice — to make all your recordings ‘dry’, which means no effects or EQ being added before the signal is captured in your DAW. The reason is that you can’t take away effects that have been ‘baked in’ to the recording if you change your mind afterwards. In contrast, if you add these effects afterwards, to the dry recorded sounds, you can experiment until you settle on the perfect result. Another good reason for not processing while recording is that it makes patching up mistakes easier if you spot a problem later on. If you have used processing during recording, it can be quite difficult to recreate the exact settings in order to record a replacement word or phrase. The only exception to this advice is when recording electric guitar or bass, or synth sounds that rely on some form of processing for their character, such as distortion or amp simulation on a guitar. In this case the effect is really part of the instrument sound and should be captured as such.
Side-address mics work just as well upside down as they do the ‘right’ way up. Mounting them upside down can sometimes simply be more convenient, to keep the stand further away from the singer, allow better sight of a lyric sheet on a stand, or just to encourage the vocalist into a better posture for singing!
Back in the days of recording to analogue tape, fixing a mumbled word or botched guitar note involved manually ‘punching’ in and out of Record mode at exactly the right place in the track, while the performer sang or played the new part. If you got it wrong there was no Undo button, but fortunately, DAWs allow you to set automatic punch-in and punch-out points at the start and end of the problem section. However,
given the virtually unlimited number of tracks in a DAW, it is often simpler just to do another take of the problem section and then edit the two together afterwards.
Perhaps even better still would be to use the ‘comping’ feature available with most DAWs now. Comping (short for compiling) is a process routinely used to put together a final vocal or instrumental solo track from a number of separate takes. For example, you
Direct injection
Some musical instruments, such as electric guitars, bass guitars and many keyboards, need to be amplified to be heard properly. In a live performance, those instruments would be played through specialised stage amplifiers, or through a PA (‘public address’) system. The sound of an electric guitar is inextricably linked to the choice of amplifier, so in the studio you would often choose to record it by placing a mic in front of the amp. By contrast, the aim when recording keyboard instruments is often to capture the sound in the cleanest way possible. To do this, we often use what’s called ‘direct injection’ or DI, plugging a cable from the output of the instrument directly into our audio interface, and not using a microphone at all.
Most electronic keyboards and other electronic sources (like a DJ mixer, or electronic drumkit) can be plugged directly into an interface’s line-level input (or two inputs if the instrument is stereo). It’s also possible to DI electric guitars and basses, rather than mic an amp, but in this case, a standard line-level input won’t work well. Instead you need an input that can be set to ‘high impedance’ or ‘hi-Z’ mode, and many audio interfaces offer this facility. DI’ed electric bass is a common technique, but DI’d guitar is rarely used in its raw form— the sound character of an amplifier is usually applied to the recorded DI sound using ‘amp simulator’ plug-ins. It’s a good way of accessing a very wide range of guitar tones without having to own lots of expensive amps or upset your neighbours!
Many acoustic instruments are fitted with pickups or ‘bug’ mics, too, and these can also be recorded by direct injection, but the results are often harsh and unpleasant sounding — what works well on a crowded stage doesn’t necessarily suit a recording.
might get the singer to record the lead vocal line half a dozen times, then choose all the best phrases for your final version. DAWs with a dedicated comping mode allow you to record all the parts onto one audio track and view them displayed one under the other as alternate takes. You then use your mouse to select the bits you want to keep from each take, and when you’re happy you have the best possible version, the ‘comped’ vocal can be saved as a new audio file. If your DAW doesn’t have a dedicated comping
A quarter-inch jack input marked with a guitar symbol, such as this one on a UA Apollo Twin MkII, usually means that is has a high input impedance, around 1MΩ, which is about the same as most guitar amps. This ensures that it will work well with conventional passive electric guitar circuitry connected directly, either to achieve a clean DI sound, or to work with guitar-amp modelling software.
mode, you can still record a number of takes onto different tracks, slice them into phrases, then keep only the phrases from each that you need and merge them together to make a final track. It’s not cheating — everybody does it!
Most editing tasks in your DAW are of the ‘non-destructive’ type: they don’t affect the original audio recording files on your hard disk in any way, they simply tell your DAW which bits of the original audio files to play, at what level, and when. And it’s usually possible to edit with resolution right down to individual samples, if necessary
Some DAWs also include a ‘destructive’ editing function, often in a separate waveform editing window, where the content of an audio file can be permanently changed, so it would be wise to read up on the waveform editing features of your DAW before diving in on anything precious!
Recording drums
Drums present a different kind of challenge to most instruments in that the natural sound of the instrument
is rarely what’s actually wanted in a recording. The sound of the drums in most commercial records really bears almost no resemblance at all to the sound you would hear standing six feet in front of a drummer playing a drum kit, so a certain amount of artificiality, whether it’s close-miking, EQ, dynamics processing or reverb, is just an accepted part of getting them into the kind of shape required to fulfil the prominent role they have in much contemporary music.
Drum mics themselves don’t have to be specialised in any way, other than perhaps the kick-drum mic, but it can help from a practical point of view if the mics used for close miking are small and light, as this makes them easier to position out of the drummer’s way when playing, and where they are less likely to get hit with a stick. Some dedicated drum mics are designed to be mounted directly onto drum-shell rims, which can save you from having to find space for a lot of boom stands around the kit.
A kick-drum mic has to be able to tolerate very high sound levels and obviously must also have a good
low-end frequency response — most of the energy produced by a kick drum is below 150Hz, with a significant amount at around 60-90Hz. Close-miking a kick drum will never produce a particularly natural sound, so dedicated kick-drum mics often have a shaped frequency response so that they accentuate the low-frequency thump of the drum and also the beater impact in the 3kHz region. Frequencies from 200 to 500Hz may be lowered a little as well, resulting in a mic with two distinct peaks in its response. Used on any instruments other than possibly bass guitar, this might sound odd, but on a kick drum it helps produce a sound with both depth and definition.
Drums are loud, so drum mics don’t need to be particularly sensitive or have low self-noise figures, as they’re never going to be short of level and you won’t need to turn up the gain much on your preamps. Dynamic mics tend to be used most commonly on drums, partly because the inherent inertia of their moving-coil mechanism acts like a mechanical compressor, helping to reign in the loud and fast transient as the stick strikes the head, giving a naturally dense and solid sound character. A capacitor mic in the same situation retains the full transient detail, which gives a spikier, snappier, and somewhat thinner sound quality.
In a reasonably good-sounding room that’s not too bright and reflective, you can sometimes get a surprisingly balanced drum sound using just a single capacitor mic placed a metre or two in front of the kit, adjusting the mic height to get the best ratio of kick drum to the rest of the kit. For a little more flexibility, place a capacitor mic
Recording a drum kit in a small room is always a challenge. The key decision is whether to go for minimal miking, with perhaps just kick, snare, and one or pair of overheads, or to use an individual close mic on everything. The latter gives you a lot more flexibility when mixing, but also creates more issues with crosstalk and comb filtering, due to the same sounds arriving at different times across all the mics. If you are using a stereo pair of overheads, try to make them the exactly same distance from the snare drum, however wide they are, and also make sure you pan the toms with the same perspective as they will have in the overheads.
In this simple ‘comping’ example, the best phrases from two takes have been selected and automatically assembled into the ‘comped track’ lane above them, with the comping algorithm taking care of any crossfading as necessary. If your DAW doesn’t have automatic comping (most now do), you can achieve the same result by assembling the source takes together and cutting out the wanted phrases for assembly on another track.
above the kit in the centre and use another mic, preferably a dynamic model specifically designed for bass instrument use, on the kick drum. If the front head has a hole cut into it, try positioning the mic just inside the shell about 100mm from the shell wall, off to one side. A folded blanket inside the bottom of the shell will provide some damping, if necessary. If there’s no hole, just mic the front head, starting with a mic distance of half the drum’s diameter.
If you prefer to capture the kit in stereo, you’ll want two, preferably matched, mics for overheads — these are typically capacitor mics, but ribbon mics are commonly used too. For more flexibility when mixing, add a close mic on the snare. This can be a dynamic or a capacitor mic, placed around 50mm from the edge of the drum and about 30 to 50mm above the head, tilted to aim towards the centre of the drum head. Position the snare mic pointing away from the hi‑hat to minimise spill. Some people like to use an additional
mic on the underside of the snare to enable them to capture a bit more of the snare ‘rattle — be sure to invert the polarity of the bottom mic to prevent the signals from the two snare drum mics partially cancelling, resulting in a very thin sound. If your mic preamp doesn’t have a phase‑invert switch, you can record as normal but then use a phase‑inverting plug‑in in the DAW to invert the polarity of the signal after recording.
A full on kit miking setup for a modern music production might consist of a pair of small diaphragm capacitor mics for the overheads (usually cardioid pattern, unless the room is large and flattering, permitting the use of omnis), a kick drum mic, plus all the other drums individually spot miked. If the overhead mics and snare mic spill isn’t already giving enough hi‑hat, you might add another capacitor mic on the hi‑hat, pointed just above or below the cymbals so it doesn’t get hit by a blast of air every time the hi‑hat closes.
In a pro studio you’d also often find one or perhaps even two additional stereo pairs set up further from the kit. These ‘room mics’ can add a great depth and character to the sound, but only in a great‑sounding room, of course! In a home studio you may not have enough space to get the room mics far enough away to be really useful.
Retaining perspective
With so many powerful fix up processes available in software, it is easy to spend half an hour trying to improve the pitching and timing of a vocal phrase when it would just make more sense to go back to the mic and record the line again. So the two key things to remember are: don’t get drawn into thinking everything needs to be fixed — which is all too easy when you listen to things in isolation. What does it sound like in the track with everything else playing? And secondly, it’s usually quicker and easier to re record something that’s not quite right than to try to fix it with editing or plug ins ‘in the mix’ — and you usually get much better results that way too!
Unlike an analogue hardware mixer where you can see all the controls at once, a software mixer in a DAW often only shows you the components you are actually using. Each mixer channel still controls the sound of a single audio track or software instrument, but different software plug-in processes such as EQ and compression can be installed as plug-ins to some channels and omitted from others, as needed. There will also be facilities to enable channels to send a variable amount of their signal to effects channels elsewhere within the mixer, and to route the channel output to the main mixer output or a number of subgroup outputs.
Hardware mixers are designed to work within a particular range of signal levels, and whilst software mixers work in a different way, internally, , it is still good practice to keep your working levels within a defined ‘safe’ range, just as you would with an analogue hardware mixer. Although your DAW’s mixer can cope with a wide range of signal levels internally without becoming overloaded or getting lost in noise, it’s best not to allow levels to get high enough to trigger red warning
lights, as this can affect the operation of plug-in processors and it will overload the analogue outputs of the interface. In general, it’s best to set up instruments and plug-ins in such a way that you have comfortable levels with the faders at around the default 0dB (zero or unity) position.
This is where the faders have their most detailed visual resolution and are easiest to work with.
One big difference between a hardware mixer and the one in
This is the mixer in Presonus’ Studio One DAW, but most recording-software mixers now all look and operate in pretty similar ways.
Treat dynamics presets as a starting point — they’ll probably have sensible Attack and Release settings — but always be prepared to adjust Threshold and Ratio.
your DAW is that the functions of the mic preamp normally found at the top of every channel of a hardware mixer — the gain control, the input connector, phantom power switching and maybe a phase (polarity) switch — are now located in your audio interface hardware instead. However, once the audio interface has passed the signal from its mic preamp and
A-D converter into the DAW, the ‘signal flow’ thereafter is very similar to a hardware mixer, and runs from the virtual input, through any EQ and dynamics plug-ins installed in the ‘insert point’ slots, down to the channel fader and pan control, before being sent onto the stereo output or ‘mix bus’, where the signals from all the channels are combined. The channel ‘pan’ control determines how much of the signal is fed to the left output and how much to the right, and
Plug-ins that replicate classic hardware like this LA-2A from Universal Audio may often have unfamiliar control names and modes of operation for anyone more used to modern plug-ins. There’s no Ratio or Threshold that you might expect; instead, the Peak-Reduction control determines amount of gain reduction by controlling the gain of the side-chain circuit. The Gain control then sets the make-up gain, while the Limit/Compress switch selects one of two compression ratios.
thereby adjusts the perceived position of the sound in the stereo field.
Insert points for plug-in processors and effects are usually created as needed, so you may only see one or two to begin with, but multiple processes can be inserted into the same channel, with the signal passing through the plug-ins in order from top to bottom. DAW mixer channels will also have a ‘channel on’ or ‘mute’ switch and a ‘solo’ button that leaves the soloed channel operational, but temporarily mutes all the others.
Buses
In any sort of audio mixer, hardware or software, a ‘bus’ is simply a means
If you’ve been recording with a small buffer setting to minimise latency, you can switch to a much bigger buffer to ease CPU load and allow more plug-ins when mixing.
Entering mix-automation vector points manually can actually allow you to be more precise than using a fader or rotary control. Some level adjustments are almost always necessary during the mix, as the song evolves and builds, even if it is only riding vocal level changes and lifting instruments during solos.
by which a number of separate audio signals can be mixed together. By default, every track in your mix will initially be routed directly to your mixer’s main output, otherwise known as the stereo mix bus, but that isn’t always the easiest way to structure a complex mix with a large number of source tracks. Routing related groups of tracks to different buses, sometimes called ‘group buses’, that then feed on to the stereo mix allows you to control your mix more efficiently, and once you have it set up, you can often just use the bus faders to finalise the overall balance. For example, you might choose to send all your drum tracks to a bus, and then adjust the level of the
entire drum kit within the overall mix using just one fader without losing the relative balance between the individual drum source tracks.
DAW buses can usually be configured for mono, stereo and even
How does an EQ work?
The term ‘EQ’ is just an abbreviation of ‘equaliser’, so called because the first equalisers were designed to correct the frequency response of telephone lines by making all frequencies ‘equal’ in level. An EQ simply changes the level of a specific range of frequencies to make them louder or quieter, and most equalisers have multiple bands that can be used together, each affecting a different frequency area. EQ tends to be used either for gentle, creative, tonal shaping to alter the tonality of a sound, or for more precise ‘corrective’ purposes to remove some unwanted element of the sound spectrum.
There are several different forms of EQ in common use, described with names like high- and low-pass filters, high- and low-shelf, bell or parametric, and graphic, and the different types are employed for different purposes and applications.
A filter is the simplest form of equaliser, removing unwanted parts of the spectrum above or below a selected turnover frequency. For example, a low-cut filter removes low frequencies (unwanted rumbles, perhaps) while a high-cut filter removes high frequencies (typically hiss). Sometimes you may see these same filters referred to as high-pass or low-pass filters — these terms being the logical opposites, so since a low-cut filter inherently lets high frequencies through it can be called a high-pass filter (and vice versa).
It’s very difficult to make a filter pass one frequency but completely stop another –
there is usually a transition region through which the filter’s attenuation increases progressively. This is called the filter ‘slope’ and it is described in terms of decibels per octave (dB/Oct). For technical reasons filter slopes are typically 6, 12, 18 or even 24 dB per octave. What these numbers mean in practical terms, is that a 12dB/octave low-cut filter set to operate at 100Hz will attenuate a 50Hz signal (an octave below the turnover) by 12dB, while a 25Hz signal will be attenuated by a further 12dB lower, making it -24dB compared to a signal above 100Hz.
In contrast, a ‘shelving’ EQ can boost signals as well as reduce them, and all the affected frequencies are boosted or reduced by the same amount. A low shelf EQ boosts or reduces signals below its ‘turnover frequency’, so that the resulting frequency response graph looks a bit like there is a shelf at the low end (relative to the rest of the response). A high shelving EQ boosts or reduces all the frequencies above the turnover frequency. In some cases — such as simple bass and treble ‘tone controls’ — the turnover frequencies will be fixed (typically at something like 100Hz and 10kHz); in others the turnover frequencies may be adjustable. The slope is always fixed at 6dB/Octave.
Filters and shelf EQs are useful for manipulating the upper and lower extremes of the audio spectrum, but we often need to make adjustments to frequencies in the middle too, and this is why one or more mid-band or ‘bell’ EQs are often provided.
The ‘bell’ term is very descriptive of the shape of the equaliser’s frequency response which is bell-shaped. Like Shelving EQs, the bell can boost or attenuate signals either side of its ‘centre frequency’ which may be adjustable. Where more than one bell EQ is provided, their centre frequency ranges are usually arranged to overlap to ensure good coverage of the whole spectrum.
A simple mid-band or bell EQ will have a fixed bandwidth — the range of frequencies it affects — but a fully ‘parametric’ EQ allows the user to adjust the bandwidth as well. Sometimes the bandwidth is referred to as the ‘Q’ or ‘quality’ of the filter — it’s an engineering term — with a high-Q setting affecting a narrow bandwidth, and a low-Q working on a broad band of frequencies that could be several octaves wide.
In general, ‘high-Q’ boosting doesn’t sound very nice, but high-Q cuts are much less audible and can be very useful for notching out unwanted parts of a sound. In contrast, low-Q (wide bandwidth) boosts are far more sonically benign and are used in many of the best-sounding EQ designs. Graphic equalisers essentially comprise a large number of slightly overlapping high-Q, bell equalisers at fixed centre-frequency intervals, with the boost or cut of each one being controlled by a vertical fader. The name comes from the fact that the position of the faders ends up giving you an approximate representation of the overall frequency response they are creating.
Plug-ins that aren’t seeking to replicate hardware are able include additional displays and control options that can often be very useful in understanding how the signal is being processed.
Preset names may look very appealing as a quick fix, but the patch designers don’t know what material you are going to use them on. Even when you just use plug-in presets as a starting point, you still need to learn enough about how that particular plug-in works to be able to make further adjustments, according to the needs of the song. Dynamic plug-ins will almost always require you to adjust the threshold setting, while EQ is always best handled on a bespoke basis.
If you need to use a noise gate in a track that also has a compressor patched in, put the noise gate before the compressor to ensure it triggers reliably. If you put the gate after the compressor there will be less of a differential between the levels of the loud sounds and the quiet ones, so the gate will tend to mis-trigger more often.
multi-channel surround applications, and can be routed into other buses as well as the main stereo mix bus. As well as grouping your drum tracks, you might choose to put all supporting keyboard or guitar parts together, and all backing vocals in another bus. Lead vocals and solo instruments are usually single tracks, so they will generally go directly to the main stereo mix bus.
You can insert plug-ins on busses, just as you can into channels or into the main mix output. Doing so allows everything in the bus to be processed
together; for instance, you could add a little overall compression to a multi-layered backing vocal mix to help ‘glue’ it together, or perhaps some overall EQ to alter the general tonality of the sub-mixed parts. Working this way makes it easier to control the mix — one bus compressor to adjust instead of three or four separate channel compressors — and reduces the computer’s workload too.
Auxiliary sends
As well as having a main output, mixer channels can also have
auxiliary sends, usually abbreviated to just ‘aux’ or ‘effects’ sends. These provide additional paths by which the signal from those channels can be routed to other channels, busses or outputs. DAW mixers will always offer the choice of whether the ‘send’ is derived ‘pre-fade’ or ‘post-fade’. As the names suggest, a pre-fade(r) send picks up its signal before the main channel fader, so its level won’t change if you adjust the channel fader. Conversely, a post-fade(r) send’s signal is tapped off after the channel fader, so as you pull down the channel fader the amount of ‘send’ signal reduces correspondingly.
Pre-fade sends may be used to set up a headphone balance for a performer that remains independent of the (potentially changing) balance on the faders, but it is post-fade sends that we
The sound of a high-end reverb plug-in can make a real difference in a mix. And a very attractive graphic interface can certainly add something to the pleasure of using one, too.
are primarily interested in for mixing purposes. Here, they are usually employed to feed signals from several channels into effects processors such as reverb or delay plug-ins. Using a post-fade send means that when a source channel is faded out (or muted) it no longer contributes anything to any effects it is routed to. Your DAW’s post-fade sends could
be routed to physical outputs of your audio interface to feed any external hardware signal processors that you are especially keen on, so long as you’ve got an interface with a sufficient number of spare inputs and outputs, but most people will be content to use their DAW’s software plug-ins for effects. Any number of channels can feed the same ‘send’ bus, with
How do I use a compressor?
A compressor is an audio processor (hardware or software) that reduces its gain when it ‘sees’ the input signal rising above a ‘threshold level’, usually set by the user. If you set a threshold a few dB below the level of the loudest peak levels in a track, those peaks will be brought down in level, whereas the rest of the track will be unaffected. The precise amount that those peak levels will be reduced is determined by a ‘ratio’ control. For example, with a ratio of 4:1, peaks that previously rose 4dB above the threshold will now only rise 1dB above the threshold. However, the introduction and release of the required gain reduction takes time, and so on many compressors, you can also adjust how quickly the compressor responds to a signal once it has gone above the threshold value with the Attack control, and how fast the gain returns to normal once the signal has fallen back below the threshold again with a Release (or Recovery) control. The role of a compressor is to reduce the dynamic range of the signal to make the sound more even and predictable. Having done so we can often then increase its overall level, safe in the knowledge that the peaks will not exceed a chosen safe level. This raising of overall level is usually controlled by adjusting the ‘Make-up gain’. Some people struggle with the concept of making things louder using a compressor, but they are overlooking the factor of make-up gain. If you’ve pulled down the peaks by, say, 6dB
and then added 6dB of make-up gain to, the result is the same peak level, but everything below the threshold has been raised by 6dB, so the average level is now higher than before you applied the compressor.
There are many different ways in which compressors can be implemented. Some don’t have a user-adjustable threshold (you determine the amount of compression by varying the input level instead), some have fixed attack and release, whilst others have a release time that automatically adjusts to the audio content it is processing (auto-release mode). Most of the time, though, the aim will be control peak levels with as few side-effects as possible. One can set an attack time that lets some of the initial transient through, which can help to avoid an audible ‘squashing’ effect, and a slow release (or ‘recovery’ time) can make the compression process much less noticeable. If you are compressing for maximum loudness, however, you need a short release time — you want to get back to full gain as fast as possible. When you’re compressing anything with a regular pulse or beat in it, the best strategy is often to try to make sure the compressor has fully released by the time the next beat comes along.
Compression on individual signals, such as a solo voice or a bass guitar, can be relatively unnoticeable in context, as there is no reference point — the listener doesn’t know what the original dynamics would
Not all DAW automation displays look the same, but they will all work the same.
the contribution from each channel being independently set using the channel’s aux send control. The receiving aux bus is then set up to host the required effect plug-in(s), which need to be configured to 100 percent ‘wet’ with no ‘dry signal element. The output from this aux bus is usually routed back into the main stereo mix. Something extra to consider if using post-fade effects sends from individual channels which are themselves routed to a group bus, is that if you subsequently adjust the level of the submixed ‘dry’ signals at the group bus, the effect send levels derived from the individual channels won’t change, thus altering the
have been. Compression applied to a whole mix is far more evident, because if you are not careful with your settings, whatever is loudest in the mix can seem to audibly dip the levels of other instruments whenever it triggers gain reduction — and the loudest thing is often the kickdrum and/or bass guitar. For this reason, many compressors intended for mix-bus duties often incorporate a low-cut filter in the controlling circuitry, to make it less reactive to the low-frequency content of the mix.
The threshold setting is obviously crucial to compressor operation — set it too high and the compressor won’t be doing anything at all — but the ratio setting is also a major factor in determining how hard the compressor is working, and the two very much work in combination. If you just want to knock down a couple of peaks and leave the rest of your signal alone, a high threshold setting with a high ratio, like 4:1 or more, will get you there. If you want to tighten up the dynamics of the whole signal, however, you can use a very low ratio, like 1.5:1 set the threshold low, so the signal is above the threshold and therefore being compressed gently most of the time.
A very high ratio, like 10:1 or more, effectively fixes the output level at the threshold, which we tend to refer to as ‘limiting’. A limiter is generally only used to control brief, high-level transients; otherwise its action would be far too noticeable.
Celemony’s Melodyne program offers world-leading pitch and time manipulation, with very sophisticated processing going on beneath its cleverly intuitive and distinctive graphic interface.
intended effect balance. Returning the aux (effect) bus output to the same subgroup as the respective channels remedies this situation — but that is only the answer if no other channels are using the same effect. One of the great things about software
mixers, however, is that you can just insert another version of the same processor in a different bus for those other channels. Most modern computers have enough DSP power to allow you to run far more plug-ins than are good for your mix!
A DAW mixer will often give you a choice of ‘views’ so you can see just audio tracks, or software instruments, or buses, or everything at once, but there will always be a stereo master fader at the end. It
Routing every track directly to the stereo mix bus isn’t always the easiest way to structure a complex mix with a large number of sources. Creating logical groups of tracks to be sent to different buses, which then feed on to the mix bus, allows you to control your mix more efficiently using just use the bus faders for the overall balance.
may be tempting to use this to control your loudspeaker or headphone listening level, but you shouldn’t. Try to keep your master fader at the ‘unity’ position, which will be its default setting. This, in combination with setting your monitoring level loud enough at the outset, should help prevent you from building up excessive levels in your tracks and making the project hard to mix. If you find yourself wanting to pull back on the master fader, look at the source tracks to see if anything is excessively loud there, and if necessary, pull them all down a little. If your DAW allows it, try running with ‘pre-fader metering’ switched on. Then you’ll always be seeing the real levels your recorded tracks are running at, rather than the level after the faders have reduced it. If anything is seriously too loud, address it at source, and turn down the output of software instrument plug-ins and carry out a level-reduction process on audio channels — some DAWs have a parameter for adjusting the playback gain of individual regions, which will achieve the same goal without having to affect the original audio files.
FRASER T SMITH PRODUCING ‘ SET FIRE TO THE RAIN
‘Set Fire To The Rain’ was Adele’s third consecutive US number one, confirming her status as a superstar. In our exclusive video feature, Fraser T Smith tells us how he and Adele wrote the ultimate power ballad, breaks down his production and explains why a humble Yamaha upright piano was the best investment he ever made.
THE SECRETS OF PINK FLOYD’S QUADRAPHONIC PA
Pink Floyd pioneered live surround sound as long ago as the early ’70s. Chris Hewitt has tracked down the groundbreaking PA systems they used at Pompeii and on the Dark Side Of The Moon tour, and rebuilt the custom quad console operated by Alan Parsons. In our exclusive video feature, Chris explains how the Floyd created a fully immersive concert experience more than 50 years ago.
AKG C414 THE ULTIMATE COMPARISON
To celebrate AKG’s 75th birthday, we’re shining a light on perhaps their most iconic mic. The C414 has been in production for more than 50 years, and a lot of Internet mythology has grown up around the different variants. So we got together two of the most famous historic 414 models alongside the current XLS and XLII and headed to Half-Ton Studios in Cambridge to record the same song four times.
Getting Started With Mixing
Back in the days when all professional recording was done on magnetic tape, using analogue mixers and outboard hardware, ‘the mix’ was usually an entirely separate process that could only start when all recording was finished. If the studio was being used for another recording before the mix was due to be done, then the mixer and outboard settings would all have been changed from those used for recording, so the mix would effectively start from zero again.
A DAW project, however, saves every parameter of your session, so you get your session back exactly as you left it whenever you open the file again. It’s possible, therefore, to build up your mix as you record, making tweaks throughout the process until you regard the track as finished. There’s no need for a separate ‘mix stage’, because by the time you’ve recorded and processed the last part, the mix should already be sounding exactly how you want it to sound. There are positives and negatives here, though, as always. On the plus side, each new part that you add is heard in context of the whole mix, so you are less likely to create unnecessary tracks or parts that don’t really fit. On the other hand, there is a lot to be said for the fresh perspective that starting a mix from scratch can give you. Sometimes you like your current mix simply because that’s how you are used to hearing it as it has been built up, but it is possible that a different approach could make it even better.
Another good reason for starting a mix as a ‘blank canvas’ is that it tends to lead to a bit of cleaning up — examining the tracks one at a time, checking for stray noises or bits of unwanted playing or singing picked up before the wanted part starts or after it finishes. If you are super diligent, you may have cleaned all this up as you were tracking and overdubbing, but it is easy to get caught up in the creative moment and never get round to it.
The quick and reversible way to silence bits of unwanted audio is to make cuts in the on-screen regions/clips to define the bits you want to keep and then just mute or (non-destructively) delete everything
else. If you put a cut in the wrong place, just Undo it, or slide the edit cut to the right position. Such edits leave the underlying audio files entirely untouched. Fader and mute automation can do the same job, but is perhaps better used for the creative stage of the mix. If you are absolutely sure you want to get rid of something, it can be permanently silenced with a ‘destructive’ edit in the waveform editor.
It is a good idea at this stage to also check the audio levels of each individual track to make sure nothing was recorded at a too low or high level. Whilst this can be addressed at region/clip level, this is also something you can address in the original files. Every DAW will have a method of altering the file playback level, and getting them reasonably consistent will make mixing a much smoother, less potentially problematic experience. Assuming you are working in 24-bit mode, you’d want your individual tracks to be metering somewhere between -18dBFS and -10dBFS, with occasional peaks permitted slightly above that. This is deliberately well short of ‘digital maximum’ in order to leave plenty of ‘headroom’. The floating-point arithmetic used in DAW mixers makes them almost impossible to overload internally, but if your individual tracks are all in the red, you may have to pull down the output fader to avoid clipping the output D-A converter. Unlike analogue recording where you are striving to keep the signal above the noise floor, 24-bit digital recording has no such issues, so it pays to be slightly conservative with levels and maintain a reasonable headroom margin throughout the tracking and mixing processes. You can always add level to the later stages of a mix, or during a separate mastering process to match the typical loudness of commercial tracks.
An initial balance
There are two main approaches to getting an initial balance: one way is to start with just the rhythm section — bass, drums and a primary backing instrument or two — and
With a lot of sources, there’s nothing happening below 100Hz that you’d want to keep in the mix — it’ll just be eating up headroom to no audible effect, so you might as well clean it up with a high-pass filter. If you use a very gentle slope, you can even start the roll-off well up into the midrange, without making the sound audibly thinned out — in a lot of sources there is already too much lower-mid energy to combine well with others in a mix.
then build up the rest of the mix one track at a time; the other is to bring up all the faders at once and start to try to balance everything in context. A variation on the first option is to balance the rhythm section and the vocals first, as the two most important elements of the mix. Neither method is inherently better and different approaches suit different types of material and mindsets. If you are
new to mixing, try both on the same project and see which one feels more comfortable to you, or which seems to produce the best result.
During the initial stages of mixing it can be good to avoid any EQ, panning or effects and just get a feel for how all the parts work together. If the original parts are all decently recorded your rough mix shouldn’t sound too bad as it is. This is a good
opportunity to check that the actual musical arrangement of parts and instrumentation leaves adequate space for the vocal, both in terms of space between notes and phrases, and by leaving the vocal part of the frequency spectrum relatively uncluttered. This is also why it’s best to keep everything panned centrally to start with, to reveal if any instruments trample over each other in a way that might not be obvious if panned to opposite sides of the stereo image! Making space is an issue best tackled at the arrangement
It is helpful sometimes to carve a ‘dip’ in the middle of the spectrum of one sound to make room for another that occupies the same frequency area. You can apply some compensation with a little lift on either side of the dip, if necessary.
level if possible, but there are plenty of useful techniques that can help to keep a vocal on top of a busy arrangement, if necessary, as we’ll see below.
Once you have a workable initial balance you can scrutinise the various parts to see if anything would benefit from adjustment. If supporting parts, such as keyboard pads or acoustic guitars, are clouding the lower midrange, this can be remedied by thinning them out using a low-cut (high-pass) filter set at a slope of 12 or 18 dB/ octave. You might, in some instances, be able take the filter turnover frequency as high as 300 or 400 Hz, and although this will leave the instrument sounding very thin when heard in isolation, other parts will be providing the necessary low end in the track and so in context it will still sound fine, but you’ll now have plenty of spectrum space to work with for the rest of the mix. If you want a part to really sit back in the mix so that it doesn’t fight with the vocals and solo instruments you can also take off a little of the higher frequencies too, starting around 10kHz and working down until you achieve the desired effect. You’ll generally want to use a softer, 6dB/ octave filter slope for this.
Vocal balancing
Vocals will always fit more comfortably into a mix when they are compressed a little to level out the difference between the loudest and softest notes, and thus sit consistently above everything else. Compression
can also add some more density to the sound. However, if there is too much level difference within the raw vocal track, you will never be able to find a compressor setting that works without some parts sounding excessively ‘squashed’. The only answer in this situation is to level out the track by other means before applying compression. You can’t use fader automation for this job, as that works on the signal after any inserted compressor plug-ins. Since many DAWs have a parameter for adjusting the gain of individual regions, one simple way of pre-levelling a vocal is simply to isolate as many parts as need attention with editing cuts and then adjust their gain settings accordingly. You can then use
compression and/or subsequent level automation just to balance the vocal with the rest of the mix.
An alternative solution is to level the vocal with its channel-fader automation, but send the vocal track to a bus with the compressor inserted there, so the compressor ‘sees’ the already levelled-out signal. Alternatively, you could ‘bounce’ (render) a version of the automation-levelled vocal track, and use that bounced version with a compressor instead of the original.
Whether or not you are using compression, it is normal to automate the overall level of a vocal throughout a track to help it balance properly within the different parts of the song, perhaps pushing up in the choruses
Reducing the amount of the spectrum that one sound occupies by shaving off both frequency extremes can make other sounds more clearly audible without having to do anything much to them. The EQ’d sound might seem thin or dull in isolation, but you will invariably find that it helps everything to just sit better in the mix.
as things get busier, or towards the end where there is invariably greater energy and more happening in the arrangement.
When it comes to setting up a compressor for vocals, as a general rule you should adjust the threshold control to show about 6dB of gain reduction initially on the loudest notes, and then listen critically to see if the vocal sounds over-compressed. The sound character of a compressor depends partly on the attack and release parameters, the ratio and make-up gain and, most importantly of all, upon the relationship between the threshold control and the level and dynamics of the input signal. There’s nothing wrong with using the presets supplied with plug-in compressors so long as you adjust the threshold (or input level) control to achieve the desired amount of gain reduction for your specific track. If you don’t,
the plug-in almost certainly won’t be working as intended.
Most compressors will have a ‘make-up gain’ setting that can be used to restore the loudness lost in the compression process (as the peaks are attenuated). When setting this, it is a good idea to switch the compressor in and out to compare the bypass and processed loudness. In general, you want the compressed signal to be about the same or only slightly louder. Be careful with automatic make-up gain settings available in many plug-ins as they will often result in the signal being far louder than you want.
It is usually best to try to keep vocal EQ fairly subtle, avoiding any narrow-bandwidth (high-Q) boosting, as this will almost always sound unnatural. A good general principle of EQ-ing is always to first try cutting back any elements of the sound that
If there is something unpleasant in your recorded sound that you can’t quite put your finger on, you can locate it easily by setting up a fairly narrow-bandwidth (Q) EQ boost that you sweep across the frequency range of the track until the offending part of the sound really jumps out at you. Once located, you can apply a cut at that frequency to reduce the undesirable element. Narrow-bandwidth boost EQ invariably tends to sound unnatural and harsh, whereas narrow-band cutting is far less noticeable. You can always add a little compensating boost elsewhere to restore the right amount of prominence.
you don’t like rather than boosting those you want to stand out more. A little dip around 1kHz is often a good starting place to sweeten things up, and some gentle, shelving low-cut can help when the sound is a bit dull and undefined, before you think about doing anything to lift the top end. If a little more ‘air’ and breathiness is needed, it can usually be achieved without risking any harshness using a high-frequency shelving boost EQ above 8kHz or so.
Panning
Many of the tracks in a contemporary recording will be mono sources that are simply panned to the desired positions in the stereo mix to create the impression of a panoramic overall sound stage. When heard in stereo, pan positioning will aid separation between sounds, but it is good to remember that this will disappear when the track is heard in mono. Getting your mix to sound good in mono first will often force you to address any masking or frequency congestion issues. Then, when you start to pan things, it can be solely about position, rather than trying to achieve separation. Mix levels will invariably need to be tweaked a little after panning to compensate for the
slight level changes that naturally occur as part of the process. You can position things wherever you want, although the soundstage of a typical band mix usually approximates the way you might hear the musicians on stage, with
the bass drum, snare, bass guitar and lead vocal at the centre (so their energy is shared equally between the two speakers), and other sources arranged towards the sides. Individual drums are usually panned to sound the correct way around
Some people find it helpful to set a consistent monitor level that they always use when mixing. Others might gravitate towards that in the later stages of a mix, but prefer more flexibility in the early stages, where you might want to examine tracks forensically. Remember your hearing is a precious commodity, so choose sensible levels if you are going to be mixing for a long time, especially on headphones.
from the audience’s perspective (although some people actually prefer a ‘drummer’s perspective’), and for most musical genres it is important not to pan the elements of the kit too much, making the drums sound unnaturally wide. Where drums such as tom-toms are represented both on their own close mics and in the stereo overheads, the close mics should always be panned to match their drum positions as portrayed in the overheads to avoid generating confusing and conflicting stereo image information. Backing vocals and other instruments can be positioned wherever you want, although it makes sense to try to create a fairly even left-to right balance.
Mix perspective
Achieving a sense of front-to-back perspective is also helpful in giving your mix interest and scale, but there are no ‘front/back’ controls in a typical DAW mixer (unless it is configured for a surround mix), so we have to try to create the illusion of depth using other techniques. You don’t actually want everything to be fighting for a place at the front of the mix, as that just leads to a congested and often fatiguing sound, so the key thing is to make less important, supporting
If your EQ spectrum display looks anything like this, you’ve just made everything louder. Reset the EQ to flat, find the right level and start again with the EQ if necessary.
instruments sound as if they are placed a little further back.
A fundamental rule of acoustics is that the intensity of the reverberation is essentially similar throughout the room, whereas the level of the direct sound from a source diminishes as you move away from it (according to the ‘inverse square law’). That’s why sounds heard from further away within a large space seem to be more reverberant. So, in a real space the closer sound sources
tend to be heard with less reverb which arrives slightly later than the direct sound, and with a greater emphasis on strong early reflections from nearby hard surfaces. In contrast, sounds that are further away tend to comprise a larger percentage of reverberant sound that arrives at the same time as the direct sound, with the emphasis on the diffuse reverb tail.
Also, closer sound sources tend to be brighter, while more distant sounds are heard with less high-frequency energy due to air absorption, and you can exploit these effects to enhance the perspective effect – for example, sounds that you want to appear at the front of the mix can be kept drier and brighter
Your DAW’s master fader should never be down here (unless you are in the middle of a fade, of course). Keeping it anchored at the 0dB point will force you to keep the channel levels in check and preserve proper headroom throughout the mix.
than those set further back. You can go some way towards mimicking these natural characteristics by setting up a couple of aux sends feeding two different reverb settings, one of which is bright and weighted in favour of the early reflections with a reasonable pre-delay time (typically 50-100ms) to create a ‘forward’ sound, and a second that is warmer and more diffuse with no pre-delay to create the impression of distance. You can then add these in different proportions to individual tracks to help place them appropriately in the front-back axis. Using an ambience reverb based mainly on strong early reflections helps to reinforce the impression of closeness, while still adding desirable ‘ear candy’ to the vocal sound – if you listen to fairly ‘intimate’ sounding records you’ll often find that reverb has been used quite sparingly. Conversely, if you want to create a ‘stadium rock’ effect, where the band is supposed to be a fair distance away from the listener, you can use greater amounts of reverb, combined with long delay times, which has the effect of making the boundaries appear further away.
EQing for separation
You might imagine that if you recorded all your instruments to an
All good DAWs now include a pitch editing facility. The display here is showing the individual pitches identified, plus transitions between notes and vibrato within them, against a background of the waveform.
A stereo width plug-in can give the impression of sounds appearing to emanate from beyond the width of your speakers — a trick it achieves by feeding a little of each channel as an inverted-phase signal into the opposite side. It can be great on reverb returns or complex synth pad sounds, moving them out to the sides a little and leaving the centre of the stereo field more open for other sounds.
ideal standard, and your musical arrangement was perfect in every way, you could just balance up all the faders and have a perfect finished mix just like that. That does sometimes happen, especially with sparse line-ups, but in general you have to remember that a multitrack recording is an artificial construct: it is not the same as being at a live event, and indeed all the parts may very often have been recorded at different times. There are very few mixes that can’t be improved with a little EQ and dynamics processing.
Before reaching for the EQ, however, it pays to listen analytically to the arrangement to establish a hierarchy among the various parts, and even identifying if some of them aren’t contributing anything useful to the overall picture. Other parts may be able to be pushed further into the
Grouping the VCA way
background just by reducing their high-frequency content a little.
More dramatically, EQ can used to narrow down the frequency range occupied by an instrument, shaving off something at both frequency extremes to enclose and reduce the frequency range it occupies, a technique often referred to as ‘bracketing’. By reducing the amount of the spectrum that one sound occupies, you can sometimes make others more clearly audible without having to do anything much to them. Typically, big, impressive synth pad sounds are rich in lower midrange frequencies that conflict with the lower end of the male vocal range, while any bright highs may merge with the sound of the guitars or conflict with the vocals. You can often squeeze
In addition to bussing a number of channels together as audio, there is another way to control multiple of channels, in the form of fader or ‘VCA’ grouping (sometimes also referred to as ‘DCA’ in digital systems). VCA is short for ‘voltage controlled amplifier’ (or digitally controlled amplifier if a DCA) and this is a device that essentially replaces the manual fader to control the signal level through a mixer channel/group/master. The original fader now only sends a control signal to the VCA/DCA, but that control signal can now be shared and applied to other VCAs. In this way, channels can remain routed directly to the stereo mix bus or standard audio sub-groups, while their faders are linked as a ‘control group’, so they all move together each changing by the same proportional amount to retain the correct relative balance between them. The advantage in this method is that any post-fade send effects will continue to behave normally, changing in level along with the channel fader.
these into a narrower range, without affecting their role in the track, by using high- and low-pass filters (with 12 or 18dB/octave slopes), or shelving EQ cut at both the high and low ends. Although the EQ’d sound might then seem thin or dull in isolation, you will invariably find that it sits better in the mix. A further benefit of bracketing is that, as the mix becomes less congested, you may then be able to further lower the levels of some supporting sounds without them getting lost.
An alternative technique is to use a parametric EQ to carve a ‘dip’ in the middle of the spectrum of some sounds to make room for other sounds at a similar frequency. One example of this is to place a dip in a bass guitar sound to help keep it separate from the kick drum. You have to find the optimum frequency by ear, but in the case of kick and bass, it’s usually in the 100 to 250Hz range.
It is always a good idea to first try to fix a spectrum congestion problem using EQ cut, reducing the level of what you don’t want, rather than boosting the bit that you want to hear more of, especially if you want to achieve a natural sound. The human hearing mechanism seems to take far less notice of EQ cut than it does
It’s great to be able to have separate recording and mixing spaces, although it’s a luxury that few home studios can run to. Even in a well-optimised setup, however, if you’ve got a mixer in the monitoring sweet spot, there’s always a problem finding somewhere to put the DAW screen and keyboard. Placing it off to the side, as in this example, is often the only practical solution.
of boost, especially when the latter is concentrated in a narrow range. Where you do need to use boost EQ, working with a wide bandwidth (low Q) sounds more natural than boosting a narrow (high Q) region of the spectrum.
Where the sounds are not natural (such as synthesized sounds or electric guitars), more radical EQ solutions may sound perfectly fine, although sticking to the ‘cut first’ rule still usually produces the best-sounding results. Since these sources have no natural reference, the only rule is that if it sounds right, it is right!
Judging the balance
While some mixes do work with all the faders in static positions, some level adjustments to different sources are almost always necessary in most mixes as the song evolves and builds, even if it is only riding vocal level changes to keep the voice above the backing, lifting guitars slightly during solos, and so on. You can make these small fader movements manually, but mix automation allows greater precision and makes it very easy to fine tune the mix, of course, and on a DAW you can simplify the mix further by putting different sections onto separate tracks. As a rule, try to avoid changing the levels of the drums or bass guitar too much as these provide the backbone of the track against which level changes in the other parts take place.
When you have your basic mix sounding close to how you feel it should be, it is always worth taking a break to listen to a couple of commercial tracks in a similar style. Do bear in mind however that the commercial tracks will also have been
through a ‘mastering’ process, so your mix may sound less tight and punchy at this stage — you can get some idea of how your track might sound when mastered by inserting a compressor and limiter temporarily in the main mix output. Use a low compression ratio of, say, 1.2:1 and then set the compressor threshold to give you around 4dB of gain reduction so that the track’s entire dynamic range is squashed a little bit. Adjust the limiter so that it just catches the peaks giving 1 or 2dB of gain reduction, and if necessary adjust the output level control to match the level of your reference tracks. Remember to bypass these plug-ins when you resume mixing, as they are just for comparative listening at this stage.
With that frame of reference fresh in your mind you can then make any adjustments to your mix that you feel necessary. Double-check the mix by walking around and listening to it without looking at the computer screen, and do this at several different listening levels, from quiet background music to fairly loud. Also, listen to the mix from just outside the room, with door left open, as this often succeeds in highlighting any obvious balance issues that you have somehow missed when sat in front of the speakers.
Stereo mix bus processing
When all your mix parameters and automation moves are finalised and
everything is ready, you can use your stereo mix bus Bounce facility to create a stereo ‘master’. It is quite common to use a little overall ‘bus’ compression on a stereo mix. Some people think it acts as a sort of ‘glue’ that helps all the individual sources bind together better. Others just view it as a helpful tool in adding density, as controlling the peaks allows you to bring up the overall level of the mix a little. In most cases you should choose a ratio of about 2:1 on a master bus compressor, or perhaps up to 4:1 if you set the threshold higher so it is really just catching peaks, but in either instance you want to be seeing no more than a couple of dB of gain reduction. If you add a mix bus compressor after you have already achieved the balance you will probably find that it changes the perceived levels of some things, so there is an argument for adding the bus compressor right at the start of your mix and ‘mixing into it’. That way you hear the effect it is having and automatically compensate for it as you develop the mix. On the whole, though, it is probably better for less experienced operators to add a mix bus compressor near the end of the mix, as that way, you’ll immediately hear if it is generating any unwanted side-effects.
A similar dilemma arises over the subject of the target level for your final mix. There’s no technical reason
A multiband compressor can be useful on complex signals where you want to prevent one part of the spectrum from audibly dipping another, for example a kick drum triggering gain reduction that makes a hi-hat quieter. The spectrum is split and compression applied separately within each band. If you want to get creative, you can use a multiband as a dynamic EQ by setting one band to go into compression when it gets loud enough to exceed the threshold, while the other bands remain unaffected.
to strive for a high level in a 24-bit digital file, so you have the option of making your master at a very safe level with lots of headroom. You can then import the stereo mix file to a new project and do a bit of DIY ‘mastering’ using a limiter to tame the peaks followed by some make-up gain to try to get it as loud as a commercial recording. You can even try a little master EQ at this stage to correct any overall tonal imbalance that you perceive. Always leave a little headroom in your final bounce — at least 0.5dB —as some replay systems aren’t too comfortable with anything that reaches digital maximum, or 0dBFS (the ‘FS” stands for ‘full scale’). Music hosting and download sites now automatically turn down tracks that are assessed as being as ’too loud’ according to their site criteria. If you are looking to have your tracks hosted somewhere, it is well worth looking up their recommended level, which will be expressed as a LUFS number, meaning ‘Loudness Units Full Scale’. You then use a LUFS meter plug-in to try to hit the optimum level for your master mix and ensure that your track fits in well with others on the site. A good rule of thumb at the moment is to aim for -14LUFS, with peaks below -1dBTP (True Peak).
A ‘finished’ stereo master?
Given that you can revisit a DAW project file at any time to make alternate versions, there is no real reason why you can’t add some ‘mastering’ plug-ins to your stereo
bus before you render your mix as a finished stereo master. Much the same argument applies as for mix bus compression, in that you get to hear any effect it is having on the mix at the point at which you can make easy adjustments to compensate. However, there is no point in DIY mastering a file that you think you might want to send on to a real mastering engineer. You would just be pre-empting whatever they might be able to do for you, and with processes that can’t be undone. But for your own masters, though, it makes a certain amount of sense to have the mix created, finished and polished all in the one project file. Even if you only need lossy data-reduced versions of your masters, such as mp3 files, you should still create your stereo mix bounce as a 24-bit linear WAV or AIFF digital file to ensure there is a maximum quality master that you can make other versions from without having to open up the whole mix. Even if you’ve got all your files safely backed up, there is always the possibility that, over time, something in your project file won’t work any more. Older plug-ins can sometimes stop working when you’ve upgraded your computer operating system, for example.
Don’t be too worried if your first attempts at mixing are a bit disappointing. It is a skill that requires time and experience to fully develop. A mix is also only as good as the source tracks that you are mixing, and maybe your recording skills need some time to develop, too. It is also important to remember that there is never only one ‘right’ mix for a track, but always a range of possibilities and choices. And try to practise mixing on as many different genres of music as you can get your hands on — there are websites with freely downloadable multitrack files — as every new challenge will teach you something.
Start trying to listen analytically to commercial music, as opposed to just sitting back and absorbing it, and you’ll begin to be able to identify how the different components are balanced and arranged. Identify how loud the vocal or lead instrument is compared to everything else. How ambient is it? Where are the other instruments positioned, both with panning and tonally? Learn to really listen and you’ll soon find yourself able to use many of these techniques in your own mixes.
Getting Deeper Into Production Chapter 15
The vocals are usually the most important element in a typical contemporary, ‘commercial’ song, so once you have optimised the level using either compression, mix automation, or both, you’ll probably want to do some polishing and refining. That often means shaping the tone of the vocal with EQ and adding effects such as reverb or delay to make it sound more ‘finished’.
Don’t assume that EQ will be necessary — with the right voice and the right mic you may need little or none — but it’s certainly fair to say that most commercial mixes use at least some equalisation on the voice. With that in mind, here are some strategies that may help you focus your EQ efforts. Even if you’ve recorded your vocal using a good pop shield, some air disturbances or mechanical vibrations may still reach the microphone, so placing a steep low-cut (high-pass) filter at the start of your plug-in processing chain can improve things by removing unwanted sub-sonic ‘rubbish’ that you probably can’t hear, but which will gobble up the headroom and may be making your speaker cones flap about to no useful effect! If you have a plug-in spectrum analyser it will often reveal unwanted activity in the region below 50Hz, so a typical ‘safe’ low-cut turnover frequency to employ with a vocal can be as high as 80 to 100Hz, at 12 or 18dB/octave.
Cutting or boosting in the 2kHz to 5kHz range will allow you to fine-tune the amount of vocal ‘presence’, although adding any significant boost here can also cause a powerful vocal to sound harsh. An alternative strategy that avoids the risk of emphasising potentially aggressive presence frequencies is to apply a broad parametric boost at around 12kHz or a high-frequency shelving boost above 8kHz. This is often referred to as ‘air EQ’. Boxiness or any tendency to sound nasal can be improved by applying cut around 250Hz (boxy) and 1kHz (nasal), but there is always a risk of making the voice sound unnatural, so
be sure to use the EQ’s bypass button frequently to compare the processed and unprocessed sound.
Compression go before EQ or after?
Compression can be applied before or after EQ, but the results will be slightly different depending on the processing order. You get more control if the compressor comes before the equaliser as there is no interaction between the two processes, but putting the EQ first makes the compressor respond more strongly to areas in which you’ve used EQ boost and less strongly in areas where you’ve applied EQ cut. In
Virtual drummer instruments like Toontrack’s EZDrummer and Superior Drummer and Steinberg’s Groove Agent give you access to some wonderful grooves and high-quality sounds to use in your tracks. They are also a great learning facility for experimenting with different production choices, as there are always lots of options in tuning, miking and room pickup.
The integrated pitch editing now found in almost every DAW is a great tool for fixing a few misplaced notes in a vocal or monophonic instrument part, but you’ll always want a fundamentally good performance for it to be worth fixing!
effect, the compressor is trying to ‘level out’ any frequency-selective amplitude changes you’ve imposed with the EQ, although in some situations this is what gives the best subjective sound, so it’s usually worth trying both options and listening to the difference. However, we’d always advocate putting a low-cut filter before the compressor (or in its side-chain); otherwise there’s a risk that the compressor will react to unwanted energy from breath blasts and subsonic rumbles rather than to the actual vocal level.
Backing vocals can benefit from low-end thinning to stop them fighting for attention with the lead vocal, and you might choose not to add any ‘air’ EQ so that they sit back a little behind the lead vocal. Other than panning to create the desired stereo image there’s no particular special treatment required for backing vocals, although where there are several layers of the same vocal part it can really help to tighten up the sound to use your computer’s editing facilities to line up the timing of some of the phrases (unless of course the original timing was spot on), especially
where consonants (like ‘S’ and ‘T’) are involved. It often helps to make sure that any audible breaths occur at the same places, too.
When you record multiple backing vocal parts, it can sometimes be helpful to have the consonants at the starts and ends of words left out of all but one of these. If most of the parts are sung to deliberately de-emphasise consonants, you avoid the untidy effect of three or four ‘T’s
all turning up at slightly different times. You can fake this effect using level automation or editing to cut off the beginnings and ends of offending words in all but one or two of the backing vocal tracks.
Vocal reverbs
It’s often a good idea to set up a specific reverb just for your vocals. Convolution reverbs are brilliant for conjuring up the illusion of a real space, but you’ll often find that a good synthetic reverb or plate emulation gives the most flattering vocal effect.
Plug-in presets: good or bad?
Presets for effects such as reverb, delay, modulation and pitch changers are often very helpful, as you can usually find something that sounds good on a subjective level, and if you tweak the factory settings the results are immediately evident. Processing plug-ins, on the other hand, need to be handled with a little more care: problems can and do arise when you start relying on presets for EQ, compression, gating and other ‘processor’ tasks. For example, EQ presets are created with no knowledge of what your original recorded track sounds like, so the parameter settings are based on assumptions that
may be way off the mark. Furthermore, plug-ins relating to dynamic processing, such as compression or gating, have to make assumptions about the average and peak levels of the recorded track — and in many cases they’re completely unsuitable without proper adjustment. For example, you may call up a vocal compression preset, but if you’ve left plenty of headroom while recording, as we advised earlier, then the processor might not do anything at all as the signal level may never get high enough to reach the threshold setting included in that particular preset.
Bright reverb sounds are popular on vocals but can also tend to emphasise any sibilance, so you may need to choose a warmer reverb if you detect any problems. Alternatively, you can insert a plug-in called a de-esser into the reverb send. A de-esser is a special kind of compressor that’s set up to reduce the level of loud, bright noise bursts such as the letters ’S’ and ’T’. It can be applied to the entire vocal, and this is sometimes necessary, but tends to sound unnatural if you aren’t careful. However, de-essing just the reverb input signal is much less obvious than if you de-ess the dry sound. It’s also a good idea to roll off the low end on the reverb, either from the send or the reverb return, to avoid adding more low-mid congestion and clutter to the mix. Many modern vocal effects use a mix of delay (usually with some high-frequency cut to make the repeats less obvious) combined with a suitable reverb, with pre-delay of between 60 and 120ms.
Automatic tuning
In situations where the vocal performance is reasonably well pitched, but perhaps not quite spot-on,
Watch out for software-instrument presets that also install a collection of processing plug-ins, often ending with a reverb. It’s not often useful to have a lot of different reverb plug-ins within a mix, and the channel as a whole is usually designed to make the instrument stand out and sound impressive, which may not necessarily be what you want for the track!
an automatic pitch corrector such as Auto-Tune or one of its equivalents can add that final professional polish. So long as you don’t set the correction speed too high, there will probably be no audible side-effects. The best results are usually be obtained by setting the correction scale to match the notes being sung, rather than using the default chromatic mode, where it will try to correct every note. If the song contains a key change you can split the vocal onto different tracks and insert a different instance of the pitch-correction plug-in on each track set up with the correct scale notes for each section.
If you ‘pitch-correct’ a number of double- or multi-tracked vocal parts, the result can sound somewhat ‘phasy’ as the pitch of each part is now virtually identical. You can avoid this by backing off the pitch-correction speed to different degrees on some of the tracks, or you can apply pitch correction to some layers but not to others. For really serious ‘pitch surgery’
an off-line pitch-editing package such as Melodyne or Revoice Pro will provide more precise results. However, while these tools can be impressive, they are time-consuming to use and it’s usually better and faster to re-record a take with poor tuning than hope to fix it later.
Mixing drums
There are about as many different approaches to mixing drums as there are actual drums in a big modern kit! There’s no real right or wrong here, as always, what sounds right for the genre of music is right, regardless of how you get there. If you are using sampled or virtual-instrument drums, then pretty much all of the potential outcomes will be available to you through various artificial ambience settings and the balance of virtual miking options you choose. If you are mixing a real drummer playing a real drum kit, however, some of your mix decisions may already have been made for you by the room and the miking setup. Home studios are rarely able to
Antares’ Auto-Tune was the first really effective automatic pitch-correction processor and remains one of the most sophisticated. Its uses are not just restricted to vocal correction, however: a very convincing double-tracking effect can be created by duplicating a track, delaying the duplicate track by around 50 to 80ms, and processing it with automatic pitch correction whilst leaving the pitching of the original unaltered.
provide an ideal acoustic environment for recording drums, so one approach that can work well is to minimise the number of mics that you actually use in your mix. Regardless of how many recorded tracks of close mics you have, try starting your drum mix by raising just the stereo overheads, or even better, a single mono overhead, if you rigged one. Of course, there is unlikely to be enough kick drum at this stage, but listen to the balance of everything else. You can do this in isolation, but it is better done with a few other core instruments in the mix as well. What does the snare sound like? Do the toms have enough punch? Are cymbals too dominant, and can you hear the hi-hat well enough? Good drummers tend to naturally self-balance the elements of their kit and you may often find that just adding in the kick drum mic to the overhead(s) is a quick and reliable way to a decent drum sound, especially when you are just starting out at recording and mixing. You can then try blending in just a little of a spot mic or two, solely with a view to trying to correct any level or tonal imbalances, and finally, try adding a little overall compression to the whole drum mix, with no more than a couple of dB of gain reduction, if you find the drums need to sit in mix more consistently. If the compressor raises too much of the room sound, try an EQ instead set to dip the hard midrange area around 1kHz by a couple of dB with a bandwidth setting of about one octave (which equates to a Q of 1.4).
close mics, it is important to remember that none of the channels will sound the same in the mix as they do when they are soloed. Close-miked drums usually need at least some EQ to sound right, but any EQ decisions you make in isolation are probably going to change as soon as you open up the rest of the channels you intend to use. Isolating every hit with noise gating or editing can help clean up the comb filtering and colouration of multiple mics hearing the same sound at different points in time, and it might help to then re-purpose your overheads just as cymbal mics, by rolling off some of the low-end, but don’t be too hard on yourself if you can’t conjure up a nice tight, punchy modern drum sound this way. Every good recorded drum mix starts with a fine-sounding, well-tuned and miked kit, played well, in a sympathetic acoustic environment, and if even one of those isn’t right then trying to rescue the situation can be the least fun you’ll ever have mixing a track.
DAW doesn’t have a built-in process for this, you can use its pitch-to-MIDI conversion on each track and assign the resulting output of each track to a drum instrument. Pitch-to-MIDI on drum tracks usually requires only a little cleaning up of the MIDI output and can be very effective.
Ambience enhancement for drums is often based around room simulations — a convolution-based reverb available in most DAWs is usually best for this. You are not generally looking for the long decay time of an obvious reverb effect, but more a supportive lengthening of the natural decay time of the drums and sense of extra space around the overall sound. For a more obvious effect, try a simulated plate reverb on snare and toms for a big power-ballad sound, or a gated reverb effect preset for something really ear-catching.
If you want to take the alternative approach of building a mix using all the
If you really need the full flexibility of a separate channel for every drum, but things just aren’t sounding right, there’s always the option of drum replacement software that processes the original drum tracks and then uses samples to replace or layer the sounds. If your
Ideally, you’d always want the player to have followed the dynamics of the song, but it can be advantageous sometimes to use mix automation to lift a hi-hat or ride cymbal part when you want to drive the rhythm in a chorus or outro part. Likewise, there’s nothing wrong with using automation to really lift feature fills and details that might otherwise get a bit lost.
Drums are usually the backbone
If you want to split the output from an electric guitar to record both a clean and a processed track, a good-quality active DI box such as Radial’s J48, pictured, will do the job nicely. Plug the output of the guitar into the DI box and connect the balanced mic level output from the DI to a mic input channel on your interface. The ‘Link’ output can then be connected to the input of your amp, or amp-sim processor, with a mic or line output taken for recording at the same time. The clean recording can then be used to ‘re-amp’ the signal, if necessary at a later stage
of any modern music mix, so you won’t generally want to change their overall level too much during a song, but one thing to watch out for is their interaction with any overall mix compression you are using. A kick drum level that is just perfect for most of the song can be far too prominent in a quiet intro or breakdown passage where there isn’t enough going on to push the mix compressor into gain reduction. Dipping the kick drum using mix automation in those passages will take care of it.
Bass guitar
DI’ing a bass guitar will always produce a clean sound with lots of depth, but that sound can also tend to get lost when the rest of the faders come up. Purpose-designed bass-guitar-recording preamps, or their plug-in equivalents, often give better results because they add some of the coloration of a real amplifier and speaker cabinet, giving focus and
character to the sound. It is possible to get a good DI’d bass sound just by adding compression and EQ, but it does depend on the type of music you are producing as well: a clean DI’d bass may work perfectly well in a sparse arrangement, whereas bass-amp modelling might be needed for the bass to remain audible in a busy rock mix.
DI’d bass nearly always benefits from compression to firm it up a bit — an attack time of 20ms or so will help emphasise the transient attack at the start of each note, and the release time can be set anywhere from 50ms to 250ms, depending on the pace of
If you always make sure you record a clean DI track straight from the instrument whenever you are tracking guitars, you can experiment with different sounds without having to re-record the part, using re-amping: sending the DI signal to a different amp or processor and re-recording it. You can do this an unlimited number times, until you get the sound you want, or to create layered sounds, as if you had recorded with two or more amps at once.
the bass part and on how obvious you want the compression to be. A ratio of about 4:1 and a threshold setting to give a gain reduction of 4 to 6dB on peaks is a good starting point, but you’ll always need to fine-tune these parameters by ear, depending on how evenly the bass was played in the first place. The punch of a bass guitar sound within a mix comes as a combination of its low end and its mid-range — there’s very little useful signal content above about 4kHz other than finger noise. To increase or decrease the amount of bass, you need to cut or boost between 70 and 120Hz, but remember that boosting that end of the spectrum too much will reduce the amount of headroom you have, forcing you to turn the overall bass level down. In fact, a lot of the apparent punch and tonal character of the bass guitar comes in the 200 to 300Hz ‘harmonics’ range. A good way to prove this is to listen to your mix on small speakers with a weak response below 100Hz or so. If the bass seems to vanish from your mix, you probably have too much deep bass and not enough going on in the ‘harmonics’ region. Use a low-cut filter to reduce anything below 30Hz or so, as any energy down there will probably be unwanted very low-frequency ‘noise’ caused just by the un-played strings moving slightly above the pickups. Really good bass players are often excellent at damping un-played strings so you don’t hear them, but the act of damping still moves the strings slightly, generating a very low-frequency output.
Electric guitars
A typical electric guitar part covers mainly the 150Hz to 3kHz region of the spectrum — unless you use a clean DI, in which case it covers a slightly wider range. A low-pass filter at 12 or 18dB/ octave can help smooth out a gritty top end from a distorted guitar sound without making it sound dull. Boosting between 1kHz and 3kHz brings out the natural bite, but things can get very harsh very quickly in that area, so definitely don’t overdo it. Heavily distorted guitar parts often have absolutely no dynamics at all, and can
Digital modelling of guitar amps replicates not just the sound of an amp but also the speaker and microphone, giving you an easy-to-record, line-level signal that can be monitored ‘silently’ on headphones if necessary. In a home studio this can often be rather more ‘environmentally acceptable’ than miking up a 100 Watt tube amp and a cabinet! Convincingly tube-amp-sounding amp modellers are available now from brands like Universal Audio, Fractal Audio Systems, Line 6, Boss, Neural DSP, IK Multimedia and many more.
tend to trample all over everything else in the midrange. ‘Crunch’ power chord parts intended to sit behind a vocal will often benefit from having a chunk ‘carved out’ of them around 2kHz. A little compensating lift at 4kHz and 200Hz can keep them sounding big. Where there are two similar electric guitar parts you can try to use mix EQ to differentiate them, although this is always better done at the recording stage, by choosing different pickups, chord inversions, and amplifier settings. Panning them apart will also help, but a good mix sounds nicely organised and balanced in mono as well as in stereo. You can use ‘bracketing EQ’ to keep guitars out of the way of other instruments, but if you find yourself
needing to get too radical with it, the real solution may often be a different musical part.
For guitar ambience, a simulated spring or plate reverb often works best when you want an obvious reverb effect, but a hint of convolution reverb, with a room, chamber or studio setting, can be used just to eliminate some of the sterile dryness you often get with close-miked guitar sounds, whether they are real or simulated. It just adds a sense of the sound existing in a real space, without washing it out with obvious reverb. At the opposite end of the ambience spectrum, a single delay of around 500 to 700ms mixed in with a big-space reverb will give you instant ‘stadium rock’ guitar solo. Modulation
effects such as chorus, phasing/flanging and micro-shift pitch doubling can either be applied during the recorded performance, using pedals or rack effects, or added afterwards with plug-ins. The latter, of course, allows you to try different options and tweak the sound to perfection after recording, but guitar players sometimes need to be able to hear an effect whilst playing in order to perform with it most effectively.
‘Re-amping’ and load boxes
One way to preserve the option to change the effects or even the basic sound after recording is to record a clean DI track straight from the guitar at the same time as the ‘effected’
Software simulation of guitar amps and speaker has come a long way in the last few years, with even the ones integrated within popular DAWs like this Logic Pro X example sounding quite acceptable in a track. Some plug-ins go a lot deeper, however: Positive Grid’s Bias 2 plug-in allows you to design your own virtual amp, choosing tubes, tone stack and transformer settings, and a whole lot more.
version. If things aren’t working quite right in the mix, or you just change your mind, you can process this ‘clean track’ in software using an amp-modelling plug-in, or indeed fully ‘re-amp’ it, sending playback from the track to a guitar amp and recording the output again. Although you can feed a line output from an audio interface directly into an instrument amplifier, so long as you take care to reduce the line-level signal down to instrument level, a dedicated re-amping box will give better results, as it deals with both signal level reduction and impedance matching in a convenient way, sorts out any balanced-to-unbalanced conversion, and provides a ground lift to avoid ground loops.
If electric guitar is your main instrument and will feature prominently
in all your recordings, you may want to consider investing in a load-box/ speaker simulator, as an alternative to software or hardware guitar amp modelling. Not many of us have the luxury of being able to operate a tube amplifier at its optimum volume for recording, but a load box can safely absorb the output from an amp at any level, and then pass its signal through a digital model of a loudspeaker and microphone. This results in a line level
signal, audible only on your monitors or headphones, with your amp running at whatever volume makes it sound best. Truly a game-changer in electric guitar recording.
Acoustic guitars
Where the guitar is part of an acoustic-band performance or playing a solo piece, you’ll probably be looking to achieve a natural-sounding tonal balance in the recording. A gentle top
Toontrack’s EZBass plug-in can create interesting bass parts using the rhythmic and harmonic information from other parts of your song. The plug-in is based on a lot of contextual musical intelligence, and if you are not a bass player yourself, it can be quite inspiring to get some extra musical input to give your tracks a lift. If you prefer to play your bass parts yourself, Spectrasonics’ Trillian, shown on the next page, offers some of the most detailed sampling of bass instruments ever undertaken. If you get to know all its articulations, it’s hard to believe you are not listening to a bass track from a real live player.
or bottom cut or boost may be all you need to fine-tune the sound in the mix. If there is any honkiness or boxiness in your recorded sound, however, you can locate it easily by setting up a fairly narrow-bandwidth (high-Q) EQ boost that you sweep across the frequency range of the track until the offending part of the sound really jumps out at you. Once located, you can apply a cut at that frequency to reduce the undesirable element.
If your recording was made in a fairly dead room, a convolution-based ambience reverb can be used reintroduce a bit of natural-sounding ‘life’ to the sound without there being an audible reverb tail. In a pop mix, the low end of acoustic guitars — the body-resonance area — may conflict with other lower midrange sounds, so it’s a good idea to apply a low-cut filter or shelving EQ to thin out the bottom end. This keeps the sound of the guitar away from the vocal area and also stops it blurring into the low end of keyboards, electric guitars or the upper reaches
of the bass. Listen to almost any ‘contemporary country’ track to hear how perfectly acoustic guitars can be used as a rhythmic ‘virtual pad’ behind other instruments in a full electric band line-up.
Problem solving
Of course, there may well be timing and tuning errors, or incorrectly played notes, but a lot of the problems you’ll be trying to solve during mixing will be ‘technical’, such as spill, noise and distortion. One of the most prevalent technical problems, particularly in home-recording systems used to be tape ‘hiss’. Today, hiss is more likely to result from poor recording technique, or source noise generated by older synths, guitar amplifiers, effects pedals and so on. The simplest tool in the fight against recorded hiss is editing — just trim your audio regions exactly to the audio they contain — but if you don’t want to do that, perhaps because you have a lot of short regions on a track, you can
employ a noise-gate plug-in to do the job automatically.
Gate or expander?
A noise gate simply attenuates the signal when it falls below a certain threshold level. The amount of attenuation can range from a full mute to a more modest level reduction, depending on the gate’s design and control settings. Gating can be very effective, especially where you have a lot of tracks in your mix, so long as the ‘wanted’ sound is significantly louder than the noise you need to remove. When gating vocal tracks, it is better to set the gate’s attenuation (sometimes called range or depth) to between 6 and 12dB, rather than allowing it to completely silence the track. This is because we still need to hear the breath noises, albeit at a reduced level, otherwise the result can sound oddly unnatural. You’ll also need set suitable gate ‘hold’ and ‘release’ times to ensure you don’t snatch off the end of held notes and so that the noise isn’t cut off too abruptly, which can actually make it more noticeable.
Constant, broadband noise (hiss or other constant background sounds) can also be dealt with using dedicated de-noising software plug-ins. Some of these work by taking a noise ‘fingerprint’ of the
unwanted sound, so long as there is a section where it can be heard in isolation. Once the processor knows how to recognise the noise, it can then digitally extract that element from the wanted signal. Other de-noising processors usually involve a single-stage, multi-band filtering process. There will generally be a control that sets the amount of processing, allowing you to try to strike balance between reducing noise and generating unwanted artefacts, such as ‘ringing’ or ‘chirping’. If the noise is really bad, doing two or three gentle passes usually sounds much better than one heavy-processing pass. Note that systems relying on a noise ‘fingerprint’ to calibrate themselves are only effective where the level and frequency spectrum of the noise remain reasonably constant, and whilst some of the most sophisticated de-noise processes will track a changing noise profile and adapt accordingly, even they can be ‘fooled’ if the nature of the noise alters too abruptly.
Distortion
Distortion is often used as an effect, but you can, and probably will at some time, be faced with the problem of unintentional distortion. Distortion may sometimes be fairly mild and musically useful, as in a gentle analogue overdrive, or very hard and unpleasant as in the case of digital clipping. When it is not too severe, harmonic distortion can be mitigated with a very steep, high-cut filter to attenuate the unwanted upper harmonics. Of course, it is always better to fix distortion by re-recording the part to avoid having to try to solve the problem at all, but when you absolutely have to, using your DAW’s automation to apply filtering only when the distortion is actually present, allows you to avoid compromising the clean parts of the recording. Digital clipping is more problematic as it generates non-harmonically related distortion artefacts that crop up at frequencies both below and above the source frequencies, so they can’t be tackled by high-cut filtering.
Too many flavours?
The key to a good mix is often a bit like the key to good cooking: get good
ingredients, use appropriate amounts, and process them correctly. And, as with cooking, too many flavours can confuse and compromise the end product, so it pays to question each element of your musical arrangement to ensure that it is there for a purpose. The mixing process will be much less challenging if you have managed to keep spill between instruments to a minimum — if you record one instrument at a time, of course, that won’t be a problem – but sometimes a bit of spill from a good-sounding room actually helps to gel everything together, so it shouldn’t automatically be seen as a bad thing. Any significant instrument rattles, buzzes, humming or distortion (other than by intent, of course) that gets onto your original tracks will be very difficult, and sometimes impossible, to remove during the mix.
Do my tracks need mastering?
If you are just recording and mixing tracks for yourself and you are happy with the sound of your final mixes, you don’t really need to even think about a further mastering stage. But if those tracks are going to be hosted on a download site, or compiled into an album, you may find that there is some benefit in going through the processes involved in mastering. When vinyl records were the primary means of commercial distribution, mastering was the process by which audio was made suitable for the vinyl record production process. This often involved compromising on the amount of bass and sometimes limiting the overall level.
Mastering in today’s digital age is a more creative process, and might be better described as the stage at which the final polish is applied to your mixes. The great benefit of using a professional mastering facility is that their monitors will be better than yours, which means they will be able to hear and correct things that you haven’t been able to. They also tend to have a wealth of experience, and also benefit from the fresh perspective of not having already heard your mix over and over again while you were crafting it! They may also have expensive hardware tools and more sophisticated loudness optimisation processing than you, and the skill and
knowledge to use them to the best effect. If you are looking to exploit your tracks commercially in any way, then it is difficult to argue against using a professional mastering facility as a final check and polish stage.
If you are just getting started, however, there’s no reason not to have a go at a bit of DIY mastering — you already have all the basic tools you need as plug-ins in your DAW, so you don’t need to buy anything else. Just as with mixing, one of the key skills is learning to listen to music analytically. Compare your tracks to commercial releases in a similar genre and see if you can identify the tonal and dynamic points of difference, and then work towards making yours sound more similar. You are not trying to make it the same, as the content will be different, and your track will have its own optimum set of values, but you should be able to identify if there more bass, or more top end, or an overcrowded, stodgy midrange. If you have a spectrum analyser plug-in (these are often available within EQ plug-ins), you can use it to examine the spectrum of the reference track and your master. Significant deviations can often be easily identified visually, even if you are not hearing them over your monitoring system.
One of the greatest benefits of being your own mastering engineer is the extent to which it can inform your own mixing techniques. If there are significant overall tonal balance issues that you consistently find yourself addressing in mastering, then clearly that is something you can be aware of and correct when you are mixing. There’s nothing wrong, however, with using a little overall mastering EQ to smooth things out. It’s generally best to try to mainly use wide-band cuts in the areas where frequencies are excessively dominant, to see if that is enough to re-balance things, before deciding to use any boost EQ on weaker areas. It’s always worth applying a low-cut (high-pass) filter to remove anything below 25 to 30Hz, even if you think there is nothing going on down there. If you really do need to find some extra presence and brightness, choose a high shelving filter set to around 8 to 10 kHz, with just a couple of dB lift, to avoid making the upper midrange
sound harsh. Watch out for overdoing top-end — nearly everything sounds instantly better when you add it, and dull when you take it away again, so use the reference tracks as a point of comparison — it’s probably been mixed and mastered by people who know exactly how much top-end is enough!
Loudness
When applying compression to a stereo mix, the aim is usually to control peak levels so you can increase the average level of the sound through make-up gain. This is usually best done with fairly low compression ratios, somewhere between 1.2:1, and 2:1 is often enough, showing a gain reduction amount of 3 or 4dB just on the signal peaks. Of course, the content and dynamics of a song don’t usually stay the same all the way through, so it is best to activate a programme-dependent ‘auto’ release time if your compressor has one. Attack time should be somewhere around 10 to 20ms, depending on the tempo of the track.
It is common to insert a limiter after a mastering compressor, set
to restrict the peak output level to -1dBFS, or perhaps -0.5dBFS. The dB or so of headroom helps avoids distortion and other side-effects when subsequently converting the master to a data-compressed file format such as mp3. With a ceiling on the output level, you can then increase the limiter input gain a little, if you feel you need to raise the average level even more. Used sensibly, the combination of gentle compression and peak limiting can make your track sound louder and more engaging, without sounding too aggressive. Just don’t try pushing the process too far. Do trust your ears, as some tracks will start to display side-effects sooner than others.
Other mastering tasks
If you haven’t already cleaned up the start and finish of your track in the DAW project, you may need to trim the file to ensure there’s no unwanted sound before and after the track. In some instances, a gentle fade in or out is better than a hard cut, as there may well be a little residual noise, even when there is no music.
If you are compiling an album, you will also want to match the relative levels of the tracks. You really have to do this by listening: aiming to keep the lead vocal level consistent from track to track is a good guide to achieving a comfortable listening experience across a range of tracks that may have different instrumentation.
Even if your intended final format is to be a ‘lossy’ data-reduced file type, it is always worth making a 24-bit master. You never know if you are going to want to make copies in other formats later, and making them from a high-quality, linear WAV or AIFF file format ensures you get the most out of any format you may subsequently choose. Many DAWs allow you to make a copy of any file in your project, in a range of lossy file formats — just be sure to dig into your Preferences to check on the default format. The smaller the file size, the poorer the audio quality will be, so unless there is any compelling reason to go smaller, choose at least a 256kbps stereo format for your mp3s.
Spectrasonics’ bass software instrument.
Chapter 16
So long as your audio interface has enough inputs and outputs, most DAWs will allow the integration of external audio hardware, and the 500 Series format is a great way of having access to a number of different processes without having to accommodate a giant rack of 19-inch-format boxes. The 500 Series is based around a host rack that can hold multiple individual units, providing both power and dedicated signal interfacing. You can create recording chains comprising preamps, EQs, compressors or anything else that takes your fancy, and enjoy the immediacy and spontaneity of the knob-per-function world of hardware within a DAW ecosystem. Once you’ve got a host rack, some 500 Series modules will cost little more than a premium-grade plug-in. The unit pictured, from Cranborne Audio, uniquely expands on the concept even further, incorporating an audio interface and an analogue summing mixer into a 500 Series rack.
One of the great things about a modern computer-based studio is that it is made up of a number of individual components that can be upgraded when the current ones no longer fulfil your needs. The downside of anything computer-based, however, is that you will from time to time be faced with ‘the great upgrade dilemma’. DAW software, plug-in processors and computer operating systems all get new, ‘improved’ versions on a regular basis, but they don’t all get them at the same time, and the various parties involved won’t necessarily have managed to maintain compatibility, at least to begin with. However tempting it may be to jump on board with the latest and greatest, if your recording system is a priority over the many other uses you may have for your computer, it is often worth waiting a while for the bugs to all be ironed out. It can be tempting to ‘freeze’ a system that works well and resolve not to risk upgrading any part of it until you absolutely have to, but the trouble is, that day will come. You may have a failure of one of your major
components — your audio interface, perhaps — and then find that no manufacturer still makes one that is compatible with the operating system you are using and that your computer is too old to be upgraded to an OS that is supported.
Control surfaces
Of course, there are upgrades that simply add functionality to your system with the addition of a new component, such as a control surface. These are devices that offer physical controls such as faders and buttons that can be mapped directly to the on-screen controls in your DAW. More expensive ones often have motorised faders that will actually follow those on-screen controls, while controllers based on portable touchscreen technology such as an iPad can be very effective, too. For many users a control surface’s more tactile approach makes working with a DAW more intuitive.
One of the practical considerations of using a multi-fader control surface is exactly where to locate it. Its most obvious position, central in front
of the screen, is usually already occupied by a computer keyboard and mouse or trackpad, and maybe a music keyboard, as well. Placing it off to the side is OK if you are using headphones, but this would move you out of the monitor sweet spot if you are monitoring on speakers. For many, the more pragmatic option is to use a, simpler controller with just transport controls and a single motorised fader for the selected channel, or perhaps a USB MIDI keyboard with some limited DAW control functions built in.
A moving-fader control surface can make the software mixing process more intuitive for some people. A with a single motorised fader, like the Presonus unit pictured at the start of this chapter, can be a the same benefits without taking up too much workspace at the mix position. In a assigned to a main channel volume. A can be easily controlled from an eight-fader surface by assigning faders to subgroups, or switching in banks of eight across the channel faders. You can also address aux sends and create foldback mixes.
Hardware controllers are not limited to just mixing, of course, and some genres of music lend themselves perfectly to working with a of sample and loop triggering pads. Similarly, drum and percussion parts will often be played more intuitively and naturally using a than a
In addition to their analogue inputs, many interfaces also include some digital inputs, that can accept signals that have already been converted to digital data. If you decide that you need the option to record more simultaneous sources than you have available analogue inputs, these offer the necessary expansion route.
Digital audio can be encoded electrically or optically (using pulses of light). The most common electrical digital connections are S/PDIF (using RCA-phono connectors and a coaxial cable to convey a stereo signal in one direction) or AES3 (using either an XLR to carry a stereo signal, or a D-sub for eight channels). The most common optical connector — the ‘Toslink lightpipe’ — is used for two different, and completely incompatible types of digital audio data: one is S/PDIF again for a stereo signal, and the other is ADAT for an eight-channel signal (at base 44.1/48kHz sample rates).
In the project-studio world, the ADAT format is ideal for affordably expanding an audio interface, and there are lots of rack-mountable units on the market that offer eight channels of analogue-to-digital conversion, often complete with eight mic
Akai’s MPC product line started life in 1988 as a sampler, with pads and a sequencer, being used mainly as a drum machine and loop player. Modern MPCs now go way beyond this original concept, with built-in plug ins, CV outputs for controlling synths, clip launching and audio tracks. They can be treated as a great musical sketchpad within a DAW-based system, or indeed a powerful and spontaneous, fully-featured alternative production environment.
preamps, and ADAT connections. Optical connectors are usually switchable between ADAT and S/PDIF connection modes, but this is not always the case, so do check that the required optical interface format is supported if you need it.
In order to communicate successfully, digital devices need a common timing reference, so before you introduce any sort of digital connection into your studio, you’ll need to learn about clocking. When only two devices are involved, however, this is usually straightforward. The simple rule is that a digital system can have only one device acting as the master clock, and everything else has to follow that clock. So, for example, if you add an external eight-channel preamp to your interface, connected via an ADAT lightpipe, the preamp would be set up to run from its internal clock as the master device, and the interface would be set to follow that clock via its ADAT input. Other clocking configurations may be possible depending on the facilities of specific devices, so always read the equipment manuals to see what options may be available.
Better sounding?
Apart from adding more functionality to your studio, at some point you might want to explore if you can improve the fundamental sound quality of your recordings — a more upmarket audio interface may deliver incrementally better-quality A-D conversion and perhaps a better mic preamp stage. One of the simplest, and on occasions the biggest, improvement you can make, however, is to acquire a better microphone. Of course, ‘better’ is something of a subjective quality here, but some mics are designed to impart a particular sonic flavour and — particularly for vocalists, if you record mainly your own music — finding one that is just right for your own voice characteristics
Novation’s Launchpad controller hardware is an ideal partner for the loop and sample-based operation of Ableton Live, with 64 velocity- and pressure-sensitive RGB pads that mirror the software’s on-screen layout.
The best DAWs now all have an excellent array of virtual instruments included, but some third-party plug-ins can still bring an extra bit of magic to your music — none more so than Spectrasonics’ Omnisphere synth.
polish up to full-on crunch.
can help take your recorded performances to another level.
Good microphones have a working life of many decades if cared for, and buying a high-quality item is never something you’ll regret. Try to audition as many vocal mics as possible to see what suits your voice. Hire them, if necessary, borrow them or try them at a dealer, but make sure you find some way to hear them on your own voice before you settle on a high-end model.
The situation is slightly different if you are going to be recording other singers. Here, your main vocal
mic can’t be too characterful, as it is just as likely to be unflattering as it is to be the perfect choice for any particular singer. One good vocal mic with a fairly neutral character (in the hope that with the aid of a little EQ, it will work pretty well for anything), or buying two or more vocal mics with different characters (one ‘warm’ one, and one bright and airy one) would be a logical choice.
Any stereo recording can be represented either using left and right channels, or middle and sides. Mid-Sides recordings can be made at source using one cardioid microphone (the mid signal) and one bidirectional (figure-eight) microphone (the sides signal). The mid microphone signal alone offers a mono image, but adding the sides signal creates a stereo image, and the more sides signal you have, the wider the image is perceived to be. An L/R stereo source can be freely converted to M/S and vice versa, allowing you to process the elements separately in a mix. Lifting the volume of the sides signal can very subtly make a sound appear bigger without having to alter anything else, or you can EQ just the sides signal to make wider elements stand out more, or indeed less, if you want more focus on the centre. You can also apply compression selectively, perhaps compressing less at the sides, to prevent the high-energy signals in the centre from collapsing the stereo width whenever gain reduction is triggered.
If you think you might be doing a lot of instrument recording, you might consider adding some small-diaphragm capacitor mics. It also makes sense to have at least one stereo pair so that you can use them both individually and to make stereo recordings. Cardioid-pattern models are fine for most work, but if you can afford models with interchangeable heads to give you the choice of cardioid or omni working, that will give you more flexibility. Additionally, you’ll need some dynamic mics for drums and guitar amps, with a dedicated kick-drum mic to capture the deep low end. While you can buy low-cost drum-mic kits, you do tend to get what you pay for, so don’t expect them to sound as good as a better-specified set. If you must settle for an affordable drum mic set, this can be updated later by adding a good kick mic, and maybe some better capacitor mics for the overheads.
When you get to the stage where you can afford the odd luxury purchase, consider adding a ribbon
You can add harmonic flavour to the pristine sound of digital recording through plug-ins that authentically emulate tube circuitry and analogue tape recording. Izotope’s tape simulator offers everything from a smooth
mic for recording electric guitars, bowed strings and other sounds that would benefit from their smooth tonal character. Many of the newer models respond well to EQ, so you can use them anywhere that a smooth‑but‑warm sound is needed. Ribbon mics used to be expensive and fragile but, although it is still not a good idea to drop one, the modern models seem tougher than their ancestors and are also often much cheaper.
One word of warning about mic purchases, though: a better quality mic will not only capture the instrument or vocal sound with greater accuracy, it will also capture the room sound better too, so will tend to expose a bad sounding room even more! For that reason, it’s usually the case that the most obvious and significant improvement to the recorded sound quality comes from addressing the room acoustics first and foremost! It may not seem as exciting as buying a new microphone, but it is generally far more rewarding for the investment.
Plug‑ins
Your DAW may come with many different plug‑in types, but will you get a better sound if you buy third party plug ins? In our experience, the answer isn’t always a simple one, although we have found that the better third‑party equalisers and compressors can sound sweeter than the ones included with DAWs. You may also be able to buy a better reverb: while most DAWs include a very capable convolution reverb, some only come with a relatively low‑powered synthetic reverb, which could most definitely benefit from an upgrade. Fortunately, many plug‑ins are available as time‑limited demos, so you can try them for yourself before making up your mind. And while photo realistic graphics of vintage processors may delight the eyes, remember it’s your ears that
Computer-based recording systems aren’t just for music, of course. The same equipment can be used for any number of other audio applications, including podcasting. If you are really serious about the latter, though, you might want to take a look at a piece of dedicated hardware like the RodeCaster Pro from Australian manufacturer Rode Microphones.
THE WORLD’S BEST RECORDING TECHNOLOGY MAGAZINE
“I admire Sound On Sound as the survivor amongst the professional media. I knew the people that founded it, I read technical articles and have even lifted some of the articles and applied them to a few of my own designs! Long may you last!”
The Late, Great Rupert Neve Electrical engineer, founder of Rupert Neve Designs.
Not many home studios can accommodate tube amps turned up to their optimum volume level, which has had many recording guitarists turning to software simulations of miked amps and speakers as a solution. There is another option, however, in the form of a combined dummy-load box and speaker simulator, such as Universal Audio’s OX.
matter in deciding if a plug-in does what you need!
Monitoring
Without accurate monitors you can’t hope to make accurate mixes, so this is another obvious area in which upgrades can improve your recordings. Choose monitors to suit your room size, and pay attention to the stands or isolation pads you use to mount them, as these also affect the overall sound. Our online reviews at www.soundonsound.com will help you find something that fits your budget and your room — but please keep in mind our comments about the acoustic environment in which the speakers are used. If you simply stick good speakers in a rectangular room with bare plaster walls, they’re not going to sound good regardless of how much you paid for them. You don’t have to make permanent changes to a room to hang up a few acoustic panels: you can improve your room acoustics for a modest outlay and with minimal disruption, even in rented premises.
The last word
We hope this guide has served to show you that creating and recording your
Other high quality dummy-load box/speaker simulators include the Tube Amp Expander from Boss and Captor X from Two Notes. The dummy load accepts the output from the amplifier instead of a conventional speaker, with an impedance curve similar to that of a speaker so the amp behaves the same as normal. The amp’s output signal is then passed through a digital emulation of the response of a guitar speaker cabinet and microphone, to replicate the sound you would normally hear when miking a real speaker. Some devices use a dynamically modelled speaker simulation, whilst others employ impulse responses — essentially a very detailed snapshot of the frequency response of the speaker. The simulated speaker, microphone, effects and the acoustic environment can all be optimised within software apps, often with high-quality graphic representations to assist in your setup choices. The best units can give you a very good, easy-torecord version of the sound of your favourite tube amp, turned up as loud as you want, without making a sound in the room, so you can even record ‘silently’ on headphones if you want. All three of the units pictured will allow a volume-limited output to be sent on to a guitar speaker in the room, if you want.
own music has never been more affordable or accessible, and it doesn’t take a roomful of gear to make it possible any more. The complexity and sophistication of today’s recording systems may seem a little overwhelming at first, but you don’t need to ‘know it all’ at once. By introducing you to the essential components of a modern recording system and explaining the recording process in easy-to-follow steps, we hope to have demystified the subject, and equipped you with the skills and confidence to go ‘beyond the basics’ whenever you feel ready. It’s possible to achieve exceptional results with today’s software DAW recording systems, and for a relatively small financial outlay, enabling absolutely anyone to produce high-quality recordings in their own space, but we hope you will also have learned that it is not just about the gear. Optimising the acoustics of your workspace is a key element in achieving professional sounding results, too.
Unless your interests lie primarily in recording and mixing the performances of others, it is important not to neglect your own musical skills as you get into software recording. The creative possibilities are so vast and stimulating that it is easy to forget that music is a medium that connects and communicates, and that connection starts with a performance. The ‘first law of recording’ really should be to ‘have something worth recording’. Capture a great performance in a great acoustic space, and your mixing process becomes one of refining, enhancing and polishing, rather than fixing. Whether you are making music, podcasts or recording wildlife sounds, today’s readily available software recording tools really do have everything you need. With guides like Basics & Beyond to get you over the initial learning curve, the only limits really are your own creativity and imagination!
Artificial intelligence (AI) has the power to both enhance and disrupt many aspects of our lives, with the creative industries potentially among the most affected. In music production, AI is accelerating the changes already brought on by decades of advances in affordable audio technology, making the facilities of the professional recording studio now accessible to anyone with a computer and recording software. The inclusion of AI-assisted processes within music software undoubtedly has the capacity to further empower users, especially beginners, to bring their ideas to life with unprecedented ease. It might reasonably be viewed as a further democratization of access to the pleasure and satisfaction of music creation, and if your involvement in music and recording is primarily just recreational, does it even matter that you no longer need to learn how things actually work? This chapter is not intended as an AI tutorial, but rather to explore the role of AI and AI-adjacent algorithms in music production today, focusing on the ways in which they can assist especially those just starting out by simplifying and automating some aspects of music composition, recording and production.
What’s AI… And What’s Not
It has to be said that a lot of what appears to be AI in music production is not really AI at all. Often it is a mix of algorithmic programming accessing pre-defined patterns that can create a useful result. Beyond just composing and recording in a DAW, however, many genuinely AI-based processes can be found in things such as vocal generation in software for both singing and voiceover narration, voice replacement, stem separation, automatic composition, lyric writing and analysis, sound design and synthesis, education and interactive learning, content recognition and copyright, and probably a whole lot more. Some of that is perhaps a bit more ‘Beyond’ than ‘Basic’, so let’s start with something simpler. Many music-tech beginners without much of grounding in any kind of music theory struggle simply with generating melodies, harmonies, and basslines that work well together. For them, AI-like processes
in DAWs can now suggest chord progressions and generate melodies: Steinberg’s Cubase, for example, has a sophisticated Chord Assistant that helps with harmonization and chord progressions. This forces any MIDI part to the nearest pitches that match the chord or key and can do the same for audio using Cubase’s Variaudio engine — you can just drop a bass sample in and have it automatically conform to the project’s key. Whilst this feature might seem to perhaps involve some
degree of machine learning for an understanding of chords and keys, it’s really an example of an algorithmic, rule-based process based on music theory and pattern recognition. But, in music, at least, it’s only the end result that matters, and there is no denying that automatically generated melodies and chords can serve as a great starting points for anyone, whatever level you are working at.
Logic Pro, too, has integrated chord suggestions available based
Cubase’s Chord Assistant is able to suggest viable chord progressions using an algorithmic, rule-based process based on music theory and pattern recognition.
Toontrack’s EZkeys 2 provides an extensive library of pre-programmed chord progressions that will work as convincing piano parts in a track.
The Magenta Studio plug-in for Ableton uses machine learning based on millions of melodies and rhythms to be able to create new MIDI clips.
on common song sequences that make it easy to explore and experiment with different genres. Structuring a song as you are writing it is also frequently something of a challenge for newcomers to the craft of music production. AI-like tools can assist by suggesting basic song structures. Some DAWs even provide an arrangement assistant that automatically lays out the song structure with intros, verses, choruses, and bridge parts.
A Creative Helper
For something more generative, however, let’s look the Magenta Studio plug-in for Ableton Live, which uses large-data-set, machine learning based on millions of melodies and rhythms to be able to create its own MIDI clips. There are five processes to Magenta (a project of Google’s Magenta research lab, which requires Ableton Live 10.1 and Max for Live): they are Generate, Continue, Interpolate, Groove and Drumify.
The Generate module creates its own new MIDI content and allows the user to select the number of variations within a certain number of bars, while its Temperature parameter determines how ‘predictable’ the output will be. The training data set is music-based so the results are never fully random, unlike similar, genuinely ‘roll-the-dice’ processes. Continue, however, is a bit more ‘AI’ in that it can look at an existing clip and ‘intelligently’ add to it, offering up different variations to expand on the initial idea. Interpolate just allows you morph between two clips. Most of us will probably be already very familiar with ‘groove templates’ found within most DAWs, but Magenta’s Groove facility seeks to create ‘feel’ in clips in a more musically useful way based on the analysis of timing and hit-strength of a lot of real drummers. The related Drumify module similarly creates new drum and percussion parts based on the groove of other clips.
Magenta doesn’t really create an ‘AI composition’ as such because the user is still making choices — which variations to keep, how much
Logic Pro’s Drummer instrument gives you a lot of control, whilst still having the capacity to come up with something useful that you might not have thought of for yourself.
iZotope’s Master Rebalance plugin allows users to retrospectively tweak the level of vocals, bass, or drums within a mixed stereo track without needing the original multitrack files.
randomisation to use — so the experience can be more a sense of receiving context-sensitive suggestions from a virtual collaborator rather than just handing over control to an AI process.
The Intelligent Virtual Iinstrument
Many modern DAWs now offer a variety of virtual instruments that are able to automatically create plausible parts to add to your compositions, The Session Player tracks in Logic Pro X, are a good example, offering realistic simulations of organic, human performances with virtual instruments. These special track types provide an easy and adaptive way to integrate drums, bass, and keyboard elements into projects, simulating what would once have been a session player’s contribution to a recording. This is, of course, especially useful for musicians and producers who are just starting out, who may not have easy access to other players to work with, but they are equally useful for anyone wanting a quick, high-quality accompaniment part from an instrument that they can’t actually play themselves.
Logic Pro’s Session Player tracks are specialised software instrument tracks that generate contextually sensitive rhythmic accompaniment parts that will follow the arrangement’s tempo and
Plugin maker Sonible offers ‘smart’ versions of fundamental studio processes like compression, reverb, and EQ that can automatically adapt to incoming audio by optimising all the main parameters before giving the user a simplified set of controls for further tweaking.
time-signature. When you create a new Session Player or Drummer track, Logic provides a virtual performer with various instrument-specific personalities, each reflecting a particular style, genre, and intensity level. The tracks can call upon a catalogue of pre-programmed chordal parts, drum patterns and bass lines that fit a range of genres from rock and hip-hop to jazz and electronic music.
The Chord Track in Logic is the feature that helps to synchronize the harmonic structure of a composition
AI tools for automatic composition… as described by AI
I asked an AI process to give me a one-sentence summary of some of the better-known automatic composition tools. Obviously, there is text data readily available to be ‘scraped’ on the web as source material here, but what’s interesting is the variety it has managed to introduce into describing a whole lot of processes that are fundamentally quite similar — returning a few key phrases to Google I couldn’t find anything that was a direct lift from the original sources. The ability to create plausible text from a simple prompt has advanced massively in the last couple of years, and whilst the variables in music are almost infinitely greater, would any of us be willing to say with any degree of certainty that it wouldn’t be possible in the future for some AI compositions to be as aesthetically pleasing as any human creation? The audio content generated by a couple of these, below, I’d say is already at least at the ‘plausible’ stage.
OpenAI’s MuseNet can create multi-instrument compositions with the ability to mix genres and emulate specific composers. AIVA (Artificial Intelligence Virtual Artist) specializes in generating more ‘classical’-sounding music (although it can also compose across genres) and is used by game developers, filmmakers, and content creators to produce royalty-free music. Amper Music allows users to select a style, mood, and tempo, and it generates a music track. It’s often used by content creators and brands to quickly create background music that fits their needs. Dadabots is an AI ‘band’
across multiple tracks. This means that a specific chord progression, once defined on the Chord Track, will be followed by all compatible instrument tracks, such as the Session Keyboard Player or Bass Player, with the Chord Track acting as the ‘blueprint’ for the overall harmonic structure of the piece. The Session Player performance algorithm automatically adjusts the piano or bass part to match the chord progression specified in the Chord Track not just playing the correct
that continuously generates live music streams emulating specific genres and band styles. The music is streamed 24/7, with no human intervention. Google Magenta’s Lo-Fi Player is an interactive, AI-driven platform that helps users create lo-fi music by experimenting with beats, samples, and melodies. Riffusion is a sound design and sample-generation model that generates music by turning audio spectrograms into images: great for creating new, experimental sounds and samples. Stable Audio, founded in 2023 by Stability AI, the same company behind the popular image-generating model, Stable Diffusion, uses deep learning models to generate high-quality audio clips from text prompts, allowing users to specify characteristics like genre, mood, and duration for customized audio outputs. Suno’s music generation creates expressive audio clips, including multilingual songs and music, using advanced AI models that incorporate realistic vocals, tonal variation, and emotional nuances for rich, dynamic outputs. UDIO’s AI music generation leverages advanced AI technology to produce high-quality, royalty-free music tracks tailored to various moods, styles, and genres for creators and businesses. MusicFX uses AI-driven technology to create customized music tracks and soundscapes, enabling creators and brands to enhance user experiences with music tailored to specific moods, genres, and dynamic responses. Boomy’s AI technology can create songs from scratch in a range of genres: Boomy artists have so far created over 20 million original tracks!
extensive, royalty-free
notes but also adapting the specific voicing, timing, and intensity of each chord and fill notes to maintain a cohesive musical feel. If a different piano style is selected in the Session Keyboard Player, the chords will still be recognised, but now be played in a style that matches the new genre.
You can use the Chord Track to test different progressions and instantly hear how they sound, which can be really useful for experimenting with harmonic variations or creating new sections for a composition whilst also acting as a great teaching tool — you can learn what works by being able to instantly hear different outcomes
The LANDR mastering process is an AI-driven facility, available as a website or plugin, designed to enhance the overall sound quality of mixes, making them sound polished and professional. It uses algorithms trained on large sets of professionally mastered music to analyse and apply adjustments to uploaded audio files. LANDR addresses dynamic range; frequency balance; loudness matching (to meet industry standards); stereo imaging and genre-specific tuning. Users can select from different mastering ‘intensity’ levels—low, medium, and high—affecting how aggressively the mastering algorithms are applied.
based on new parameters. Within the Session Player interface, you can quickly customize the performance, adjusting the intensity, dynamics, and timing to specify whether you want a soft, laid-back part or a more energetic performance, ensuring that it fits the context of the track.
Logic’s Drummer was the Apple-owned DAW’s first adaptive virtual instrument and somewhat added to the idea of there being some real AI intelligence behind these sorts of instruments by giving each ‘player’ an apparent persona, with a personal name, and with each ‘personality’ only associating with specific genres, like Rock, Alternative, R&B, and Electronic. Once a Drummer-track pattern is chosen, it appears in the arrangement as a ‘Drummer region’ on the timeline, which can then be moved, duplicated, or cut like any other region, with all its real-time performance parameters remaining live. You can make very granular edits, by changing the performance settings for each region, even down to parts of a bar, and to edit
the pattern at an even deeper level you always have the option to convert the Drummer region to a MIDI region. This gives you full control over each individual note in the MIDI editor. Basic pattern and content choices are made within the Drummer editor window, allowing customization of which drums or instruments are included in the rhythm: you can mute different parts of the kit and adjust each instrument’s performance intensity individually, too, giving you a fairly deep measure of control of the outcome. It’s a very slick and intuitive interface that can sometimes give you a really nice surprise in what it comes up with: the sort of thing that feels like it ought to be AI, even if it isn’t.
Automatic Mixing And Mastering
As we’ve identified, many of the features identified with terms like ’intelligent’ or ‘smart’ are actually just using a limited range of template references rather than true AI, but one area where genuine AI is beginning to make its way into audio processing is in automatic mixing and mastering tools. iZotope’s Neutron and Ozone plugins use machine learning to analyse an audio track, then suggest EQ, compression and other settings to help the user achieve a balanced mix and polished master with minimal manual adjustment. The plugins ‘listen’ to the frequency spectrum and dynamics of the recorded track, and then apply adjustments based on patterns identified from a large dataset of thousands of professional mixes. The AI here is trained before release and doesn’t learn from new user data, but it is still machine-learning-based.
The new automatic Mastering process in Logic Pro, operates on
Key Characteristics of real AI-Based Processes
Automation of Decision-Making: AI systems analyse data to make decisions or predictions without human intervention. Learning from Data: Machine-learning models adapt and improve their performance based on data input, allowing them to learn patterns and make informed decisions.
Natural Language Processing (NLP): AI can understand, interpret, and generate human language, which is utilized in
applications like chatbots and virtual assistants that use NLP to engage in conversations with users.
Computer Vision: AI systems can interpret and process real-world visual information, used in areas like facial recognition and autonomous vehicles.
Predictive Analytics: a real AI process can use the analysis of historical data to forecast future outcomes, often employed in finance, healthcare, and marketing.
The Splice platform hosts an
sample library with millions of sounds across different genres and styles, as well as supporting a community with educational resources to enhance creativity.
Discover SOS For Artists: A Complete Platform for Modern Music Creators
WITHSTARTA FREE PLAN
Sign up and explore the features
Upgrade at any time
Kickstart your creativity with 7,800 samples
Preview the Mastering tool
Preview the Distribution service
Your end-to-end music production suite
Designed to support independent artists, producers, and collaborators at every stage of the music-making journey, SOS For Artists is a new subscription service that brings together all the tools needed to take your music from idea to release.
Create
• Sample Selection Made Simple
• Instruments & Synths
• Stem Extraction with AudioShake
• Starter DAWs Included “Efficient, DAW-integrated tools to streamline sample selection and composition.”
Produce
• Mix & Effects Tools
• Mastering — Fast, Intelligent
“Refined tools for mixing and mastering, suitable for both quick demos and professional releases.”
Distribute
• Global Digital Distribution
• Royalty Splits & Monetization
• YouTube Integration
• Cover Song Licensing
• Promotion & Reporting
“Release your music across 150 major platforms including Spotify, Apple Music, Tidal, Amazon and Deezer.”
LALAL.AI developed a custom neural network called the Rocknet algorithm, which is trained to recognise and separate different audio components within complex music tracks with high precision. The deep-learning framework is optimized to maintain the integrity of each stem, producing fewer audible artifacts, and also allows users to isolate more specific elements than other stem extractors. LALAL.AI has an intuitive web-based interface, making it easy for users at any skill level to access advanced audio separation without needing high-end hardware or software.
a similar basis, adapting your audio to an idealised target frequency and dynamic response. Sometimes these whole-mix processes produce a result that is ‘just right’ whilst at other times being spectacularly wide of the mark, in my experience, but the ability to vary the overall extent of their application and exclude or address specific parts of the spectrum is very useful in refining the initial result. Sometimes
You can use the ‘windowing’ EQ facility in zplane’s Peel Stems plugin to pre-focus on the bit of audio you want, before applying the stem-splitting process.
you can use the suggested ‘mastering’ EQ curve just to revisit aspects of your own mix and make worthwhile amendments at source.
Plugin specialists Waves offer a different approach to automatic mastering that takes advantage of their own vast collection of processors: they use machine learning to emulate the decision-making of real mastering engineers. Your track is analysed, as before, but the engine doesn’t process the audio. Instead, it creates a plug-in chain in your DAW, with the parameters set to mimic what the engineer would do with this material. This gives the user the ability to refine the result either using a limited set of macro controls, or by diving in and changing any parameter in the underlying plug-ins.
Intelligent audio restoration and noise reduction tools like those within iZotope’s RX Suite of plugins use
machine-learning models trained on large datasets of noise profiles and audio patterns to identify unwanted noises like hum, clicks, pops, and excessive reverb from recordings. The AI models distinguish between noise and the intended audio by analysing frequency and timing patterns, allowing for selective removal of the unwanted material whilst affecting the remaining audio as little as possible. Ambience removal processes are not adaptively intelligent though, and can’t always tell the difference between genuine room ambience and sympathetic resonances within an instrument, for example. Because of the nature of machine learning, real-time processing tools may often do a very good job of removing reverb from specific sources —plugins like Accentize’s DeRoom Pro and dxRevive, for example work exceptionally well on dialogue but they don’t work as well on anything other than voice. Waves, too, offer a similar tool, trained on sung vocals as well as dialogue.
Have you ever wondered how your sample library knows what genres all those thousands of samples and loops on sample platforms like Loopcloud and Splice belong to? Did somebody sit there and listen to every one before tagging it with some meta-data? No, certainly not. Searching, categorizing and auto-tagging a large number of audio files is an ideal machine-learning job, analysing tempo, key, mood, and genre based on learned audio patterns to assign tags, making it easier for everyone to find content that fits a particular style.
A similar level of automated genre and style recognition occurs in the automated LANDR and CloudBounce mastering processes in order to apply appropriate mixing or mastering presets. You can use the LANDR plugin version within your own DAW
AI Tools For Lyric Generation and Analysis
Models like the familiar ChatGPT app can assist in lyric-writing by generating words based on themes, styles, or rhyming patterns. AI-generated lyrics will often be best used as a foundation for modification and personalization, rather than treated as the complete artistic work, although I’m sure the latter has already been
done by someone! Google’s LyricAI is an experimental tool from Google designed to help writers brainstorm lyrics by providing suggestions based on keywords or themes. LyricFind uses AI to analyse lyrics and offer insights, recommendations, and rights-management services for songwriters and publishers.
RIPX ‘The AI DAW’
RIPX, by Hit’n’Mix, is an innovative DAW-like program that offers audio separation, deep editing, and a lot of intuitive creative manipulation by combining waveform-, pitch-, and time-based editing in a single interface. The integrated spectral editing means you can split stems from any audio and immediately begin to edit individual notes, even within chords. You can add or remove notes, or re-assign them to different stems if they’ve been mis-identified, and with a layer-based workflow, all changes can be reverted without having permanently altered the original audio. Level, panning, EQ and a range of special effects can be applied at track level or to individual notes, and you can extract MIDI from audio sources, too. New virtual instruments can be created using any single sound extracted from a loop, sample or audio file, or you can use the large built-in library of sounds and loops, replacing any instrument or vocal part with another instrument. RIPX automatically detects the key and tempo of imported tracks, so the bar lines are usually in all the right places and you can set notes to snap to the pitches that are part of any user-selectable scale as you drag them up and down.
The ’big AI’ element in RipX DAW, however, is that clicking on the green ‘brain’ icon takes you straight to a choice of links to AI based music-generation platforms. At the time of writing, the list consists of Stable Audio, Suno, Udio and MusicFX, but one might reasonably expect that list to expand and evolve as new players emerge in that field. All of them offer some degree of free operation, allowing you to generate a track from a text prompt or style menu that you might
or upload your final mix to a website, select a mastering style and loudness, and then download the mastered product at a significantly lower cost than using a professional mastering engineer. It may not always give you exactly what you wanted, but you couldn’t argue that the results of automated mastering are not all potentially valid choices. Musiio By Soundcloud’s algorithms are ‘trained’ with a kind of supervised learning to identify genre distinctions from a highly curated dataset of music samples and has become one of the leading exponents of automated tagging and cataloguing, with their exceptionally deep and detailed music analysis and reporting.
Stem Separation
Stem separation, or stem splitting, has become a valuable tool in modern audio production thanks to advancements in machine learning and artificial intelligence. Stem separation involves being able to isolate individual elements, such as vocals, drums, bass and other instrumental parts within a digital recording of a fully mixed track when you don’t have access to the original multitrack source. Once isolated in software, the streams can be rendered as individual audio files for further processing or analysis.
then choose to ‘rip’ and process within RIPX, or export as stems for working on in another DAW. RIPX stems, in isolation, are not the cleanest unless you spend a bit of time curating them, but within its own environment it is hard to beat it for spontaneous interaction, experimentation and creativity — ideal for DJ and remix work. Available for both Windows and MacOS.
W www.hitnmix.com
Some of the primary uses of stem separation in audio production today include using highly characteristic parts of a song, especially vocals or basslines, for remixes. Being able to work directly with properly isolated parts, rather than just the results of radical filtering results in better audio quality, and clean extractions also allow you to manipulate the elements, such as time-stretching or
effects processing, with much greater success. Stem separation allows for easy generation of instrumental or a capella versions of songs, ideal for karaoke and vocal practice, as well as the preparation of backing tracks to enhance live shows.
In mixing and mastering, some minor post-production adjustments — perhaps tweaking an effect level or EQ for just one element of a final mix — are still
Eleven Labs’ voice-generation technology focuses on creating natural-sounding, emotionally expressive, and context-aware voices, with a strong emphasis on capturing subtle human nuances, resulting in voice outputs that feel lifelike and convincingly human.
such as Fourier analysis (decomposing a signal into its individual frequency components) to help with frequency isolation, depending on the specific requirements of the task, the complexity of the audio, and the desired quality of the output. Machine learning might be used for initial separation with the output then refined using traditional filter techniques. For the end-user, stem splitters divide into three distinct types: the offline (non-real-time) processes included now in the latest versions of most DAWs; the ‘near-real-time’ process of something like zplane’s Peel Stems app; and the full-on, heavyweight, serious-computer-hosted, number-crunching process used by LALAL.AI, for example. Unsurprisingly, the more sophisticated the processing, the better the outcome, although some of the integral DAW-hosted splitters are capable of phenomenally good results with favourable source material. Although not as clean in its output, the zplane option still has its uses, however, because their app lets you hear the split audio stream as you make adjustments to its parameters, so you can tweak and optimise before you commit to a render. With the others, you have to wait for at least a preview file to complete before you know if the full render is likely to be successful or not. Like most AI processes in audio, stem-splitting will only get better and become even more useful over the coming years.
The Generation Game
possible in cases where there isn’t enough time to go back for a remix, or access to the original multitrack project isn’t possible. And stems can be a great musical practice aid, too, allowing you to play along with a track minus the instrument that you want to play. Finally, there is always a great deal
that can be learned just from dissecting recordings, studying the way individual parts work together to contribute to an arrangement.
While many stem-separation tools leverage AI for improved accuracy and quality, there also are some that will combine AI with DSP processes
True ‘Generative AI’ focusses specifically on the creation of new content, such as text, images, video, computer code or, in our case, audio. What sets it apart from other forms of AI is its ability to produce genuinely new data rather than just analysing existing data or making predictions based on it. Familiar generative AI models, like GPT for text or DALL-E or Midjourney for images, are trained to generate new and unique content based on a text prompt. The models can still learn patterns, structures, and styles from ‘training data’ and generate outcomes that resemble certain styles or techniques, without producing anything that is a direct copy of the reference material. In the music world we see examples of generative AI in
AIVA, Dadabots, Boomy AI, and SUNO all use AI to offer new tools for music production and composition. AIVA focuses on composition, Dadabots on genre experimentation, Boomy on accessible music creation, and SUNO on vocal synthesis.
automatic composition, AI-powered remixing and production, AI-based sound design and sample creation, lyric generation and assistance, and, perhaps most significantly of all, spoken- and singing-voice synthesis.
Generative AI can now synthesize both human-like speech and singing voices well enough to be able to be used to create entirely new virtual vocal performances. Voice synthesis models are trained on vast datasets of recordings of human speech and singing, and by analysing patterns of pitch, tone, and other vocal characteristics, the AI learns how to reproduce or mimic human voices. With user input for parameters such as pitch, style, and emotion, high-quality AI singing voices can be manipulated into producing complete songs in various genres with vocals that can sound remarkably lifelike. The same technology is now increasingly being used in podcasting and audiobook production where companies like Elevenlabs.IO, Loudly and Murf AI can convert written scripts into audio, offering various voice styles and accents to suit different subjects and audiences, allowing publishers to avoid the cost associated with hiring professional voice actors. In a program like Descript, you can edit recorded
Guitar-amp modelling in AI
In units like the Tonex amp modeller from IK Multimedia or Neural DSP’s Quad Cortex, deep learning models are used to analyse and replicate the tonal characteristics and dynamic response of guitar amps by feeding the model with audio samples from the actual gear during a profiling session. This allows them to learn how the equipment responds across various settings, not just the static tone of the amp but also its dynamic interaction with the guitar signal, including how it reacts to varying levels of input and picking intensity. An impulse response is then used to create the tonal characteristics of a speaker cabinet and microphone. It is certainly arguable whether this produces better results than detailed component-level digital modelling of analogue circuits, but this AI approach does have the benefit of allowing users to easily profile their own amps and share user-created libraries of tone models.
W https://www.ikmultimedia.com/products/ tonexpedal
dialogue using a word-processor-like document, not only deleting words, but also adding new ones that will be synthesised in the audio — great for correcting fluffed lines when you can’t do a retake. These facilities can offer a significant saving in production time, with no need to schedule recording sessions and wait for edits, allowing for faster project turnaround and the
Murf AI — https://murf.ai
Descript — www.descript.com
Respeecher — https://marketplace. respeecher.com
iSpeech — www.ispeech.org
Hitnmix — https://hitnmix.com
AIVA — www.aiva.ai
Amper Music — www.shutterstock.com/ discover/ampermusic
ability to adapt to last-minute changes. AI-generated vocals provide music producers with similar logistical benefits, but also a new level of creative flexibility, allowing experimentation with different vocal styles, tones, and keys that might be difficult to achieve with human performers. Generative AI voice tools have the capacity to make
vocal production more accessible to individuals and small teams who may not currently have the resources to hire professional singers for demos and development projects.
Voice Cloning And Replacement
Voice cloning involves creating a digital replica of a specific person’s voice. Tools like Descript’s Overdub, Respeecher, and iSpeech can clone voices by analysing even a relatively small sample of audio from the target
LALAL.AI’s Voice Changer allows you to transform any vocal track to sound like someone from their library of sound-alike famous singers. Use a source track that is in the right register for the target voice, and a high-quality recording, and it works remarkably well.
speaker. LALAL.AI utilizes neural networks to learn from the unique vocal traits of different speakers, allowing it not only to generate entirely new voice content but also modify existing spoken or sung audio clips to mimic the characteristics of specific voices, including well-known artists. This is more than just the novelty it might at first appear to be — songwriters writing with a specific artist
LALAL.AI — Stem splitting and more
Switzerland-based LALAL.AI is now one of the leading exponents of the use of artificial intelligence, machine learning, mathematical optimization and digital signal processing in audio. Their latest technology uses what they term their ‘direct synthesis method’ in which errors, side-effects and missing content created by the process of stem separation is simultaneously repaired, maintaining better audio quality throughout. Starting out with a simple two-stem splitter, the company has added ever more instrumental and vocal splits, now offering up to a ten-way split, including separating backing vocals from lead vocals — a major challenge to most other stem splitters. Other processes include Echo & Reverb
Remover and Voice Cleaner which can be used to remove background music, mic rumble, vocal plosives, and many other types of extraneous noises from recordings. Then there’s LALAL.AI’s Voice Changer, which allows you to transform any vocal track to sound like someone from their library of sound-alike famous singers, ranging from Taylor Swift to Frank Sinatra. Does it work? Well, yes it does, within a few obvious constraints, like using a source track that is in a plausible register for the target voice, and preferably a high sample-rate and bit-depth file. Multiple lyric languages are supported and at the time of writing the process is still in beta testing and free. Try it at www.lalal.ai
in mind can record a part in their own voice and then be able to hear what it might sound like with the intended performer: a single vocalist doing their own backing parts can change those into a different voice or voices to avoid the stacking of formant tones that builds up when the same voice is used layered parts.
As developments in this field continue, we can expect ever more sophisticated models that can capture even more of the subtleties of human speech and vocal delivery imbuing them with the ability to convey emotions more accurately. But for all the potential benefits of generative AI in vocal production, there are inevitably some ethical concerns, too. This is a technology that can clearly also be misused for malicious purposes, such as creating deepfake audio that impersonates individuals, leading to potential issues of misinformation, identity theft, and privacy violation. Both developers and users of voice generation or replacement software must navigate a landscape of ethical considerations, ensuring that the technology is
employed responsibly and with the necessary safeguards.
Voice cloning also raises important questions about copyright and intellectual property, too. If an AI can replicate a specific individual’s voice, who owns the rights to the generated content? There will have to be some clear guidelines and regulations in the future, but right now we seem to have a similar situation to sampling in the ‘80s and ‘90s, when nobody was really sure of how copyright issues might be enforced.
The Training-Data Question
In the music world, at least, AI’s reliance on being trained on huge data sets, means being trained on vast amounts of existing music, much of it owned and copyright controlled. It is no surprise, therefore, to see various legal actions having already begun on behalf of some of the large corporate copyright holders. But is it really as clear-cut as it might at first seem? The assertion that AI wouldn’t be able
to ‘create’ anything music-like at all without learning from existing human creations may be true, but it is equally true that human musicians have executed precisely the same process throughout history. How much music is made without its creator ever having heard any other music? As musicians and composers we all consume diverse influences from every type of music that we are exposed to, mash it all up and use that data to create something of our own, hopefully without creating an exact replica of anything we’ve been influenced by. Of course, there is a difference of scale — a human musician will only ever consume a fraction of everything that exists, whilst AI can learn from it all, but the principle is surely the same?
The Democratizing Power of AI in Music Production
Whilst AI clearly opens up incredible opportunities for beginners, striking a balance between AI assistance and creative autonomy remains essential.
Music production is an inherently personal and expressive art form, and it is surely best-practice to view AI as a tool for inspiration and learning, rather than a shortcut to finished songs? The role of the human creator should be seen as irreplaceable: the nuances of emotion, cultural influences, and personal experience that define truly great music cannot, for now at least, be fully replicated by algorithms and AI. As such, the latter should perhaps be best regarded as an enabler of further human creativity, rather than a replacement for it. AI in music production, as it continues to evolve, will be able to both simplify the execution of mundane technical tasks and also stimulate creativity in unexpected ways, whilst, for beginners, AI-powered software tools represent a gateway into the world of music, providing a platform where learning, experimentation, and creativity can converge, helping to make music production a truly accessible and inclusive art form.
GLOSSARY Chapter 18
See Chapter 17.
ADAT
An optical digital audio transfer format, ‘ADAT Lightpipe’ was developed by Alesis for the company’s digital eighttrack tape machines in the early ’90s (Alesis Digital Audio Tape).
ADAT transfers up to eight channels of 24-bit digital audio at base sample rates (44.1 or 48 kHz) via a single fibre-optic cable, physically identical to that used for the Toslink optical S/ PDIF stereo interface found on many digital consumer hi-fi devices. The interface incorporates embedded word and bit clocks, and padding zeros are introduced automatically if digital word lengths lower than 24 bits are being transmitted. Operation at higher sample rates reduces the number of audio channels that can be conveyed in proportion (so four channels at double rates and two channels at quad rates), and a format called S/MUX is employed to reconfigure the data across the channels.
Amp/Amplifier
An amplifier is an electrical device that increases the voltage or power of an electrical signal. The amount of amplification can be specified as a multiplication factor (eg. x10) or in decibels (eg. 20dB).
Analogue
(see also Digital)
The origin of the term is that the electrical audio signal inside a piece of equipment can be thought of as being ‘analogous’ to the original acoustic signal. Analogue circuitry uses a continually changing voltage or current to represent the audio signal.
Arming
(eg. for recording)
Arming a track or channel on a recording device places it in a condition where it is ready to record audio when the system is placed in record mode. Unarmed tracks won’t record audio even if the system is in record mode. When a track is armed, the system monitoring usually auditions the input signal throughout the recording, whereas unarmed tracks usually replay any previously recorded audio.
Audio Interface
A device which acts as the physical bridge between a computer’s audio software and the external recording environment. An audio interface usually connects to the computer via the USB or Thunderbolt protocol to pass audio (and sometimes MIDI) data to and from the computer. Audio interfaces are available with a wide variety of different facilities including microphone preamps, DI inputs, analogue line inputs, ADAT or S/PDIF digital inputs, analogue line and digital outputs, headphone outputs, and so on. The smallest audio interfaces provide just a single channel in and two out, while the largest may offer 30 or more each way.
Automation
(eg. of faders)
Automation refers to the ability of a system to store and reproduce a set of control parameters in real time. Fader automation is a system involving moving faders (virtual or physical) in which adjustments made by the user are recorded and can be reproduced in exactly the same way at a later time, or modified if necessary. Most modern DAW software allows all fader, mute, routing and plug-in parameters to be automated.
Auxiliary Send/Aux Send
A separate output signal derived from a mixer channel, usually with the option
to select a pre- or post-fader source and to adjust the level. Corresponding auxiliary sends from all channels are bussed together before being made available to feed an internal signal processor or external physical output. Auxiliary sends are often used either to feed effects such as reverb, or to create monitoring mixes for performers.
Balanced/Unbalanced Cables
Most audio gear operates internally with unbalanced signals sent via single-core screened cables. The signal voltage is passed on the inner core and a 0V (ground) reference is conveyed by the outer screen (an all-encompassing metal or conductive plastic braid). The screen ‘catches’ radio frequency interference (RFI) and prevents it from influencing the audio signal.
For greater protection from electromagnetic interference and freedom from earth references, a balanced interface is used. ‘Balanced’ refers to identical impedances to ground from each of two signalcarrying conductors, which are enclosed in an all-embracing grounded screen. The screen plays no part in passing the audio signal or providing a voltage reference. Instead, the two signal wires provide the reference voltage for each other.
Signals conveyed over the balanced interface may appear as equal halflevel voltages with opposite polarities on each signal wire. However, modern systems are increasingly using a single-sided approach, where one wire carries the entire signal voltage and the other a ground reference. An advantage of this is less complicated balanced driver stages. The connection to an unbalanced destination still provides the correct signal level, yet the interference-rejection properties are unaffected. For interface balancing to provide effective interference rejection,
both the sending and receiving devices must have balanced output and input stages respectively.
Bit Rate
The number of data bits replayed or transferred in a given period of time (normally one second), normally expressed in terms of kbps (kilobits per second) or Mbps (megabits per second). The bit rate of a standard CD is (2 channels x 16 bits per sample x 44.1 thousand samples per second) = 1411.2kbps. Popular MP3 file-format bit rates range from 128 to 320 kbps.
Buffer (computer memory & processing)
Essentially a short-term data-storage facility used to accommodate variable data read or write periods, temporarily storing data in sequence until it can be processed or transferred by or to some other part of the system.
Channel
A portion of an audio system dedicated to accommodating a single audio signal. Normally used in the context of an audio mixer, where each channel provides a range of facilities to process a single audio signal (gain, EQ, aux sends, fader etc). A hardware mixer might incorporate 6, 12, 32 or more channels, whereas software mixers are often limited in size only by computer power.
Click Track
A rhythmic audio signal, often comprising clicks or pops, intended as an audible cue to assist musicians in keeping accurate time during a performance.
Clipping
When an audio signal is allowed to overload the system conveying it, clipping is said to have occurred, and severe distortion results. The ‘clipping point’ is reached when the audio system can no longer accommodate the signal amplitude — either because an analogue signal voltage nears or exceeds the circuitry’s power supply voltage, or because a digital sample amplitude exceeds the quantiser’s number range. In both cases, the signal peaks are ‘clipped’ because the system can’t support the peak excursions. In an analogue system, clipping produces strong harmonic distortion artefacts at
frequencies above the fundamental. In a digital system those high-frequency harmonics cause aliasing, which results in anharmonic distortion where the distortion artefacts reproduce at frequencies both above and below the source fundamental. This is why digital clipping sounds so unlike analogue clipping, and is far more unpleasant and less musical.
Clocking
The process of controlling the sample rate of one digital device with an external clock signal derived from another device. In a conventional digital system there must be only one master clock device, with everything else ‘clocked’ or ‘following’ from that master.
Comping
The process of recording the same performance (eg. a lead vocal) several times on multiple tracks, and choosing the best sections to assemble a ‘compilation’ performance on a final track.
Compressor
A device (analogue or digital) that is designed to reduce the overall dynamic range of a complex varying audio signal by detecting when that signal exceeds a defined threshold level, and reducing the amplitude of that portion of signal according to a defined ratio. The speed of response and recovery can usually also be controlled.
Converter
A device that transcodes audio signals between the analogue and digital domains. An analogue-to-digital (A-D) converter accepts an analogue signal and converts it to a digital format, while a digital-to-analogue (D-A) converter does the reverse. The sample rate and word length of the digital format are often adjustable, as is the relative amplitude of analogue signal for a given digital level.
CPU
Central Processing Unit: the numbercrunching heart of a computer or other data processor. It may contain one or more processing cores.
Daisy Chain
An arrangement for sharing a common data signal between multiple devices.
A ‘daisy chain’ is created by connecting either an output or ‘thru’ port of one device to the input of the next. This configuration is often used for connecting multiple MIDI instruments together: the MIDI Out of the master device is connected to the MIDI In of a second device, then the MIDI Thru of that is connected to the MIDI In of a third device, and so on... A similar arrangement is often used to share a master wordclock sample-synchronising signal between digital devices.
DAW
Digital Audio Workstation: originally applied to any integrated digital production tool, including hardware, this term now more commonly refers only to elaborate software running on a bespoke or generic computer platform, which is designed to replicate the processes involved in recording, replaying, mixing and processing audio signals. Many modern DAWs incorporate MIDI sequencing facilities as well as audio manipulation and a range of effects and sound generation.
Delay
(1) The time between a sound or control signal being generated and it being auditioned or taking effect, measured in seconds or milliseconds. Often referred to as latency in the context of computer audio interfaces. (2) An echo effect, commonly used on vocals and instruments in mixing.
DI Box
Direct Injection Box: a device that accepts the signal input from a guitar, bass, or keyboard and conditions it to conform to the requirements of a microphone signal at the output. The output is balanced and with a low source impedance, capable of driving long mic cables. There is usually a facility to break the ground continuity between mic cable and source to avoid unwanted groundloop noises. Both active and passive versions are available, the former requiring power from internal batteries or phantom power via the mic cable. Active DI boxes usually have higher input impedances than passive types, and are generally considered to sound better.
Digital
(see also Analogue)
Digital audio circuitry uses discrete voltages or currents to represent the audio signal at specific moments in time (samples). A properly engineered digital system has infinite resolution, the same as an analogue system, but the audio bandwidth is restricted by the choice of sample rate, and the signal-to-noise ratio (or dynamic range) is restricted by the word length.
Editing
The process of changing a MIDI or audio performance after it has been recorded, for instance to correct timing problems. Once, audio recordings were edited by chopping up the magnetic tape on which they were recorded; nowadays, all DAWs provide ‘non-destructive’ editing tools for digital audio where the original audio recording is not actually changed, but instructions are created to control how it is replayed to achieve the desired edit.
Equaliser
(see also Filter)
A device which allows the user to equalise, balance or adjust the tonality of a sound source. Equalisers are available in the form of filters, shelf equalisers, parametric equalisers and graphic equalisers — or as a combination of these basic forms.
Filter
(see also Equaliser)
Filters remove unwanted parts of the spectrum above or below a turnover frequency, and the rate of attenuation versus frequency is called the filter’s slope. A high-pass (or low-cut) filter removes frequencies below the turnover frequency and usually has a slope of 6, 12 or 18 dB/octave.
Flash Drive
(see also Solid-state Drive)
A large-capacity solid-state memory configured to work like a conventional hard drive. Used in digital cameras and audio recorders in formats such as SD and CF2 cards, as well as in ‘pen drives’ or ‘USB memory sticks’. Many computers now use solid-state drives instead of internal hard drives.
General MIDI (GM)
A universally agreed subset of the MIDI standard, created to enable
manufacturers to build synthesizers, synth modules and plug-in instruments that exhibit an agreed minimum degree of compatibility.
Ground Loop & Ground-loop Hum
A condition created when two or more devices are interconnected in such a way that a loop is created in the ground circuit. This can result in audible hums or buzzes in analogue equipment, or unreliable or glitchy audio in digital equipment. Typically, a ground loop is created when two devices are connected together using one or more screened audio cables, and both units are also plugged into the mains supply using safety ground connections via the plug’s earth pin. The loop is from one mains plug, to the first device, through the audio cable screen to the second device, back to the mains supply via the second mains plug, and round to the first device via the building’s power wiring. If the two mains socket grounds happen to be at slightly different voltages (which is not unusual), a small current will flow around the ground loop. Although not dangerous, this can result in audible hums or buzzes in poorly designed equipment.
Ground loops can often be prevented by ensuring that the connected audio equipment is plugged into the same socket or mains distribution board, thus minimising the loop. In extreme cases it may be necessary to disconnect the screen connection at one end of the audio cables or use audio isolating transformers in the signal paths. The mains-plug earth connection must NEVER be disconnected to try to resolve a ground-loop problem, as this will render the equipment potentially LETHAL.
GUI
Graphical User Interface (GUI is often pronounced ‘Gooey’): a software designer’s way of creating an intuitive visual operating environment controlled by a mouse-driven pointer or similar.
Hard Disk Drive
(see also Solid-state Drive)
The conventional means of computer data storage, consisting of one or more metal disks (hard disks) hermetically sealed in an enclosure with integral
drive electronics and interfacing. The disks are coated in a magnetic material and spun at high speed (typically 7200rpm or more for audio applications). A series of movable arms carrying miniature magnetic heads is arranged to move closely over the surface of the discs to record (write) and replay (read) data.
Headroom
The available ‘safety margin’ in audio equipment required to accommodate unexpected loud audio transient signals. It is defined as the region between the nominal operating level (0VU) and the clipping point. High-quality analogue audio mixers or processors will have a nominal operating level of +4dBu and a clipping point of +24dBu, providing 20dB of headroom. Analogue meters don’t show the headroom margin at all; in contrast, digital systems normally do — hence the need to restrict signal levels to average -20dBFS when tracking and mixing with digital systems to maintain sensible headroom. Fully post-produced signals no longer require headroom as the peak signal level is known and controlled. For this reason it has become normal to create CDs with zero headroom.
Hub
Normally used in the context of the USB computer data interface. A hub is a device used to expand a single USB port into several, enabling the connection of multiple devices. Particularly useful where multiple software program-authorisation dongles must be connected to the computer.
Impedance
The ‘resistance’ or opposition of a medium to a change of state, often in the context of electrical connections or acoustic treatment. Signal sources have an output impedance and destinations have an input impedance. In analogue audio systems the usual arrangement is to source from a very low output impedance and feed a destination of a much higher (typically 10 times) input impedance. This is called a ‘voltage matching’ interface. In digital and video systems it is more normal to find ‘matched impedance’ interfacing where the source, destination and cable all have the same impedance (eg. 75Ω in the case of S/PDIF).
Microphones have a very low output impedance of 150Ω or so, while microphone preamps provide an input impedance of 1500Ω or more. Line inputs typically have an impedance of 10,000Ω and DI boxes may provide an input impedance of as much as 1,000,000Ω to suit the relatively high output impedance of typical guitar pickups.
Insert Point
The provision on a mixing console (hardware or software) of a facility to break into the signal path to insert an external processor. Budget devices generally use a single connection (usually a TRS jack socket) with unbalanced send and return signals on separate contacts, requiring a splitter or Y-cable to provide separate send (input to the external device) and return (output from external device) connections. High-end units tend to provide separate balanced send and return connections.
Latency
(see also Delay)
The time delay experienced between a sound or control signal being generated and it being auditioned or taking effect, measured in (milli)seconds.
Limiter
An automatic gain-control device used to restrict the dynamic range of an audio signal. A limiter is a form of compressor optimised to control brief, high-level transients with an effective ratio of more than 10:1.
Loop
A small section of audio that is played over and over again, usually from a digital sampler or within a DAW.
Loudspeaker (see also Monitor)
A device used to convert an electrical audio signal into an acoustic sound wave.
MIDI
Musical Instrument Digital Interface: a defined interface format that enables electronic musical instruments and computers to communicate instructional data and synchronise timing. MIDI sends musical information between compatible devices, including the pitch, volume and duration of individual notes,
along with many other aspects of the instruments that lend themselves to electronic control. It does not carry any actual audio. MIDI can also carry timing information in the form of MIDI Clock or MIDI Time Code for system synchronisation purposes.
Mixer
A device used to combine multiple audio signals together, usually under the control of an operator using faders to balance levels. Most mixers also incorporate facilities for equalisation, signal routing to multiple outputs, and monitoring facilities.
Modelling
A process of analysing a system and using a different technology to replicate its critical, desired characteristics. For example, a popular but rare vintage signal processor, such as an equaliser, can be analysed and its properties modelled by digital algorithms to allow its emulation within the digital domain.
Monitor
A device that provides information to an operator. Used equally commonly in the context of both a computer VDU (visual display unit) — such as an LCD screen — and a high-quality loudspeaker.
MTC
MIDI Time Code: a format used for transmitting synchronisation instructions between electronic devices within the MIDI protocol.
Multitimbrality
The ability of an electronic musical instrument to generate two or more different sounds simultaneously.
Overdubbing
Recording new material to separate tracks while auditioning and playing in synchronism with previously recorded material.
Patch
A specific configuration of sounds or other parameters stored in the memory of a synthesizer or signal processor, and accessed manually or via MIDI commands.
Phantom Power
A means of powering microphones such as capacitor, electrets or dynamics
with built-in active impedance converters. Phantom power normally provides 48V (DC) to the microphone as a common-mode signal (both signal wires carry 48V while the cable screen carries the return current). The audio signal from the microphone is carried as a differential signal and the mic preamp ignores common-mode signals so doesn’t ‘see’ the power supply — hence the ghostly name, phantom. This system only works with balanced three-pin mic cables.
Consumer recorders, such as MP3 recorders, are often equipped with a microphone powering system called ‘Plug-in Power’. This operates with a much lower voltage (typically 1.5V) and is not compatible with phantompowered mics at all.
Pitch Bend
A means of detuning a signal generator, either manually via a control wheel or under MIDI control. The electronic equivalent of pushing a guitar string sideways when playing.
Plug-in
A self-contained software signal processor, such as an equaliser or compressor, which can be ‘inserted’ into the notional signal path of a DAW. Plug-ins are available in a myriad of different forms and functions, and produced by the DAW manufacturers or third-party developers. Most plugins run natively on the computer’s processor, but some require bespoke DSP hardware. The VST format is the most common cross-platform plug-in format, although there are several others.
Polyphony
The ability of an instrument to play two or more notes of different pitches at the same time.
Pop Shield
A device placed between a sound source and a microphone to trap wind blasts, such as those created by a vocalist’s plosives (Bs, Ps and so on), which would otherwise cause loud popping noises as the microphone diaphragm is overdriven. Most are constructed from multiple layers of a fine wire or nylon mesh, although more modern designs tend to use open-cell foam.
Preamp
Short for ‘pre-amplification’: an active gain stage used to raise the signal level of a source to a nominal line level. For example, a microphone preamp.
Project Studio
A relatively small recording-studio facility, often with a combined recording space and control room.
Quantisation
(1) In the context of digitising an analogue signal, the process of describing or measuring the amplitude of the analogue signal captured in each sample.
(2) Automatically moving recorded MIDI notes onto a bars and beats grid to make them play perfectly in time.
Rackmount
A standard equipment-sizing format allowing products to be mounted between vertical rails in standardised equipment bays.
RAM
Random Access Memory: the default short-term data storage area in a computer, normally measured in gigabytes (GB).
Reverb
Short for ‘reverberation’: the dense collection of echoes that bounce off acoustically reflective surfaces in response to direct sound arriving from a signal source. Reverberation can also be created artificially using various analogue or, more commonly, digital techniques. Reverberation occurs a short while after the source signal because of the finite time taken for the sound to reach a reflective surface and return, the overall delay being representative of the size of the acoustic environment and the distance between the source and listener. The reverberation signal can be broadly defined as having two main components: a group of distinct ‘early reflections’ followed by a noise-like decaying tail of dense reflections.
Sample
(1) A defined short piece of audio that can be replayed under MIDI control (such as a Loop). (2) A single discrete
time element forming part of a digital audio signal.
Sample Rate
(see also Bit Rate)
The rate at which a digital audio signal is intended to operate, normally denoted either in terms of kilo-samples per second (kS/s) or kilo-Hertz (kHz). The audio bandwidth must be less than half the sample rate, which in high-quality audio systems operates at 44.1 or 48 kHz to provide an audio bandwidth of at least 20kHz.
Sampler
A device that captures and replays short audio excerpts under MIDI control.
Sequencer
A device that records and replays MIDI instructions. Original sequencers were hardware devices, but most are now software and are integrated into DAWs.
Shockmount
A device used to support a microphone in such a way that unwanted external mechanical vibrations are prevented from reaching the microphone, where they would otherwise generate unwanted lowfrequency noise and distortion.
SMPTE Time Code
A means of affording recordings with reliable positional information coded to resemble clock time, originally used to identify individual picture frames in video and film systems.
Solid-state Drive
(see also Hard Disk Drive)
A large-capacity solid-state memory configured to work like a conventional hard disk drive. Many computers are now available with solid-state drives instead of internal hard disk drives. Also used in digital cameras and audio recorders in formats such as SD and CF2 cards, as well as in ‘pen drives’ or ‘USB memory sticks’.
S/PDIF
Sony/Philips Digital Interface: can be pronounced either as ‘S-pee-dif’ or ‘Spudif’. A stereo or dual-channel selfclocking digital interfacing standard
employed by Sony and Philips in consumer digital hi-fi products. The S/ PDIF signal is essentially identical in data format to the professional AES3 interface, and is available as either an unbalanced electrical interface (using phono connectors and 75Ω coaxial cable), or as an optical interface called Toslink.
Synthesizer
A device used to create sounds electronically. The original synthesizers were hardware devices and used analogue signal generation and processing techniques, but digital techniques took over and most synthesizers are now software tools.
USB
Universal Serial Bus: a computer interface standard introduced in 1996 to replace the previous standard serial and parallel ports more commonly used. The original USB 1 interface operated at up to 12Mbps, but this was superseded in 2000 by USB 2, which operates at up to 480Mbps. Most USB interfaces can also provide a 5V power supply to connected devices. USB 3 launched in 2008 can operate at rates up to 5Gbps.
XLR
A connector design developed by US manufacturer, Cannon. The original X-series connector was improved with the addition of a latch (Cannon XL) and a more flexible rubber compound surrounding the contacts to improve reliability (Cannon XLR). The connector format is now available in numerous configurations, from many different manufacturers, and with several different pin configurations. Standard balanced audio interfaces — analogue and digital — use three-pin XLRs with the screen on pin 1, the ‘hot’ signal on pin 2 and the ‘cold’ signal on pin 3.
For more in-depth explanations of technical terms from the fields of Recording, Audio Production, Music Technology, MIDI, Music Software, Audio Plug-ins, Mac and PC Computing, Live Sound, Acoustics, Electronics and more, please visit Sound On Sound’s indispensible, regularly updated online glossary at www.soundonsound.com/glossary
Sound On Sound now
our Full Issue PDF. This complete digital replica of the Print magazine includes all articles and adverts published in that edition.
• Buy and download instantly - no shipping costs!
• Only £3.99 each edition (or FREE with all Digital subscriptions).
• PDF can be viewed on your desktop, smartphone or tablet.
• FI-PDFs remain in your MY ACCOUNT > DOWNLOADS library after purchase and can be redownloaded at any time in the future.