2DFAB Two Dimensional Fabrication
1
SEXTON
AMY
Tessellation
Activity - Create a tessellation
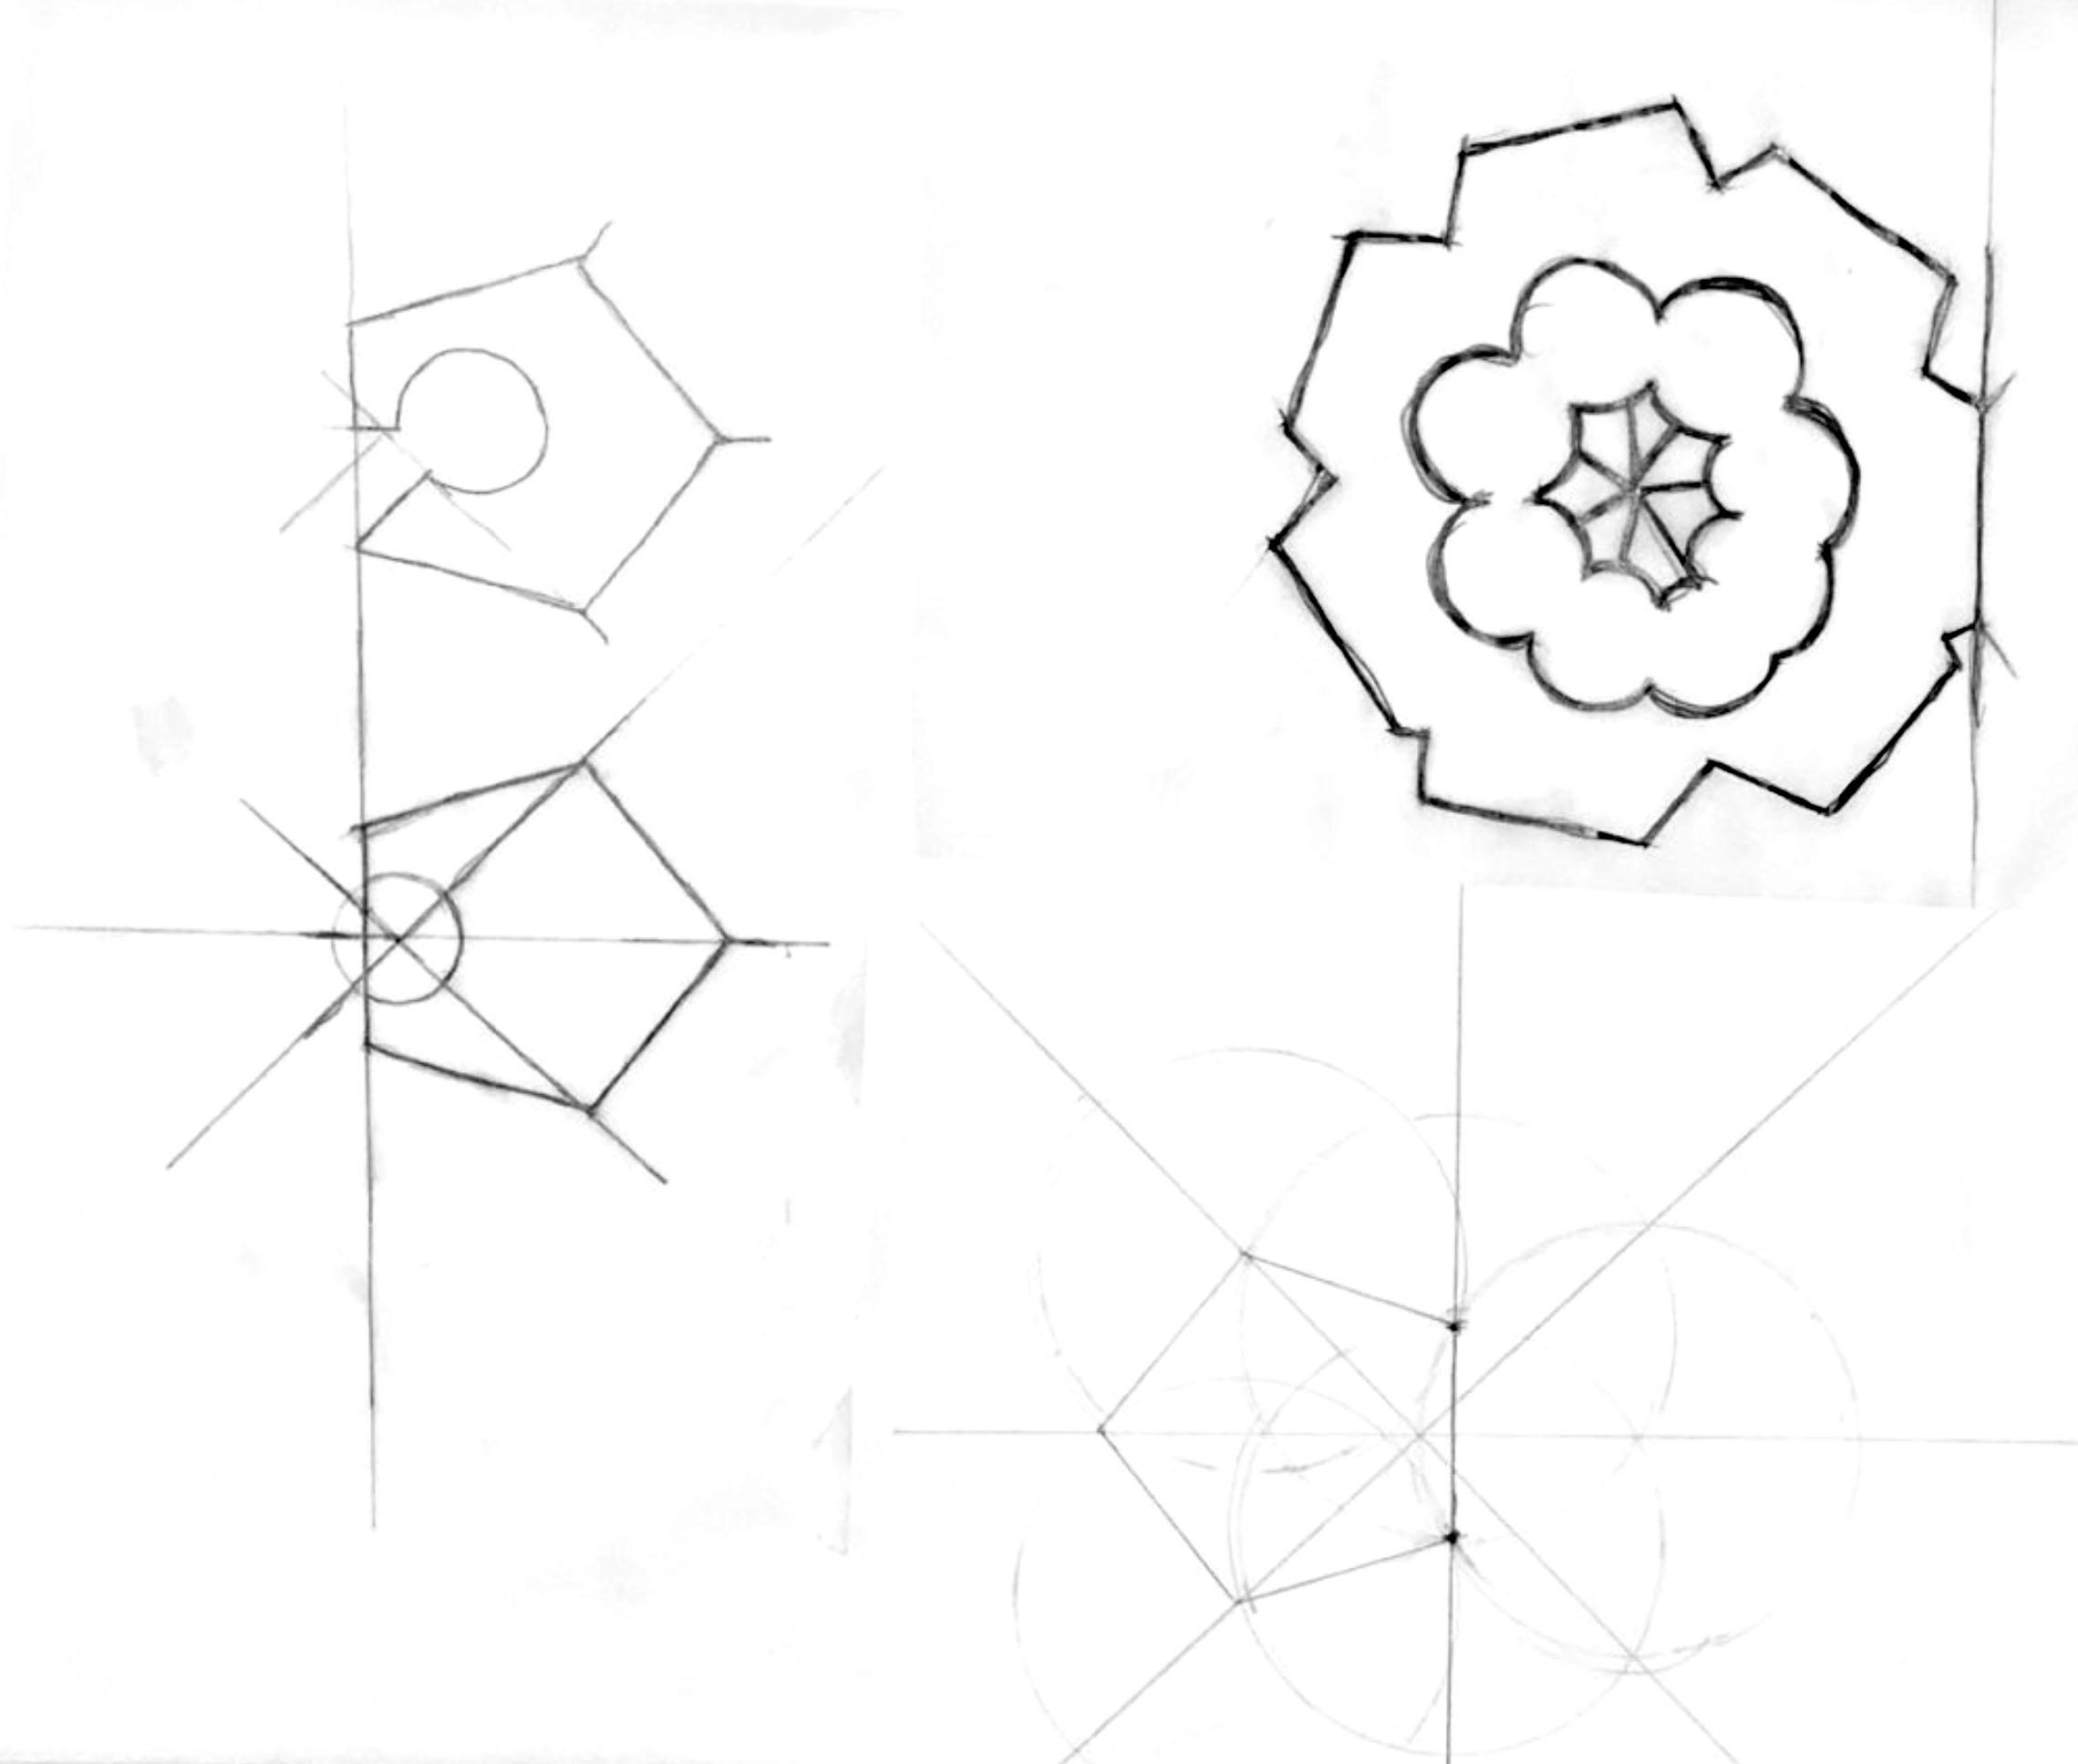
I wanted to try to make a tessellation based on a pentagon. I cut a shape out and attached it to another side.
I tried some iterations with this pentagon shape and arrived at one where I rotated it around a center point.
2 EARLY SHAPE DEVELOPMENT
01
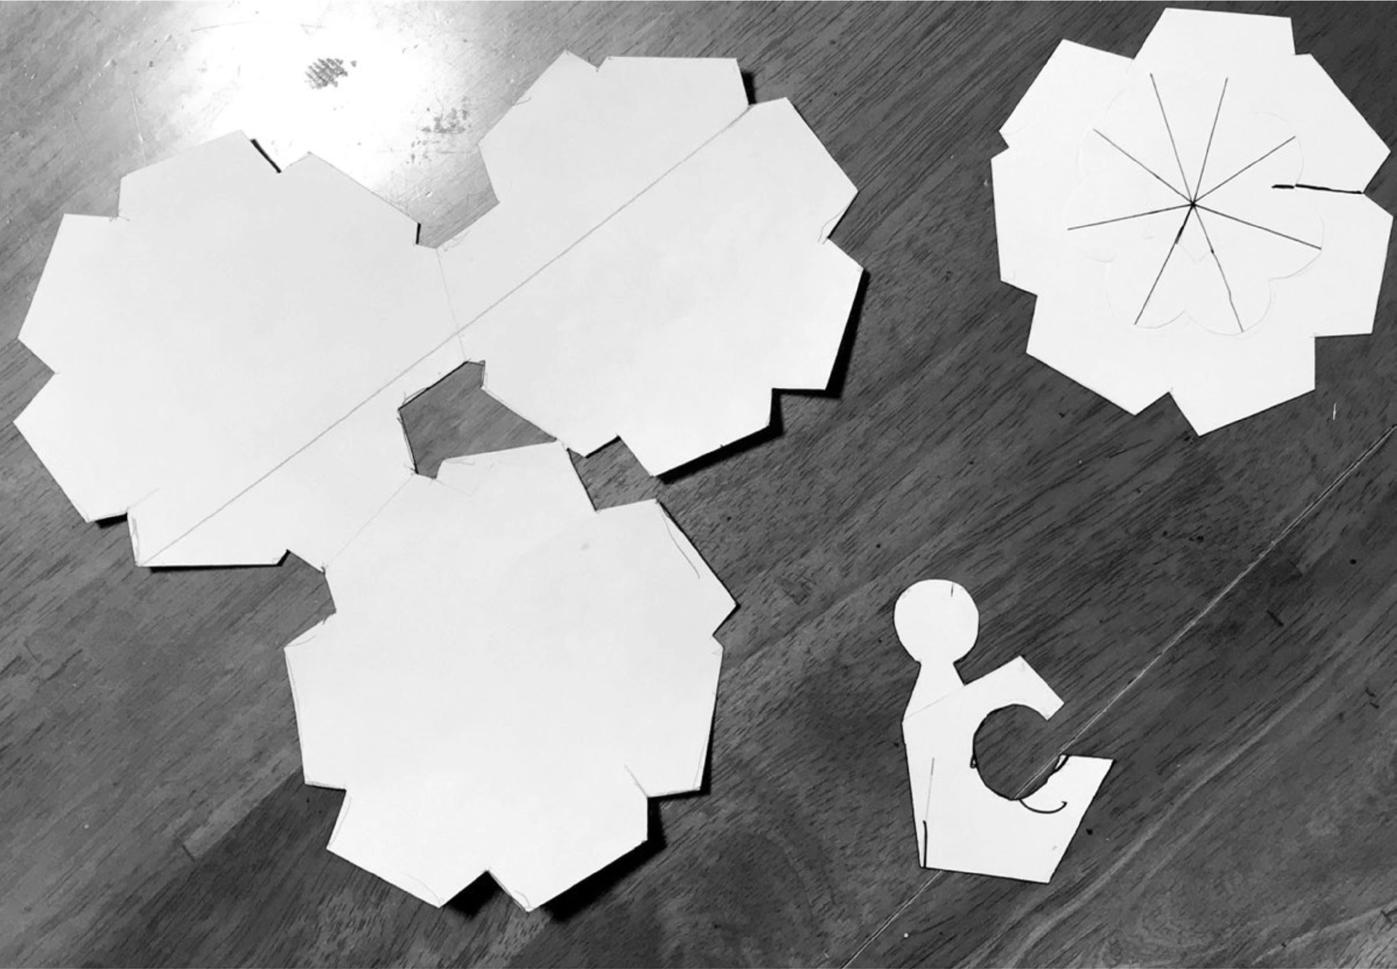
The flower shape was asymmetrical and finding a logical manner for a repeating pattern was a challenge.
KEY TAKEAWAYS
Shape looks like a flower Without the center part, the shape is less interesting Three together look good 3D shape is less effective Pentagons are challenging
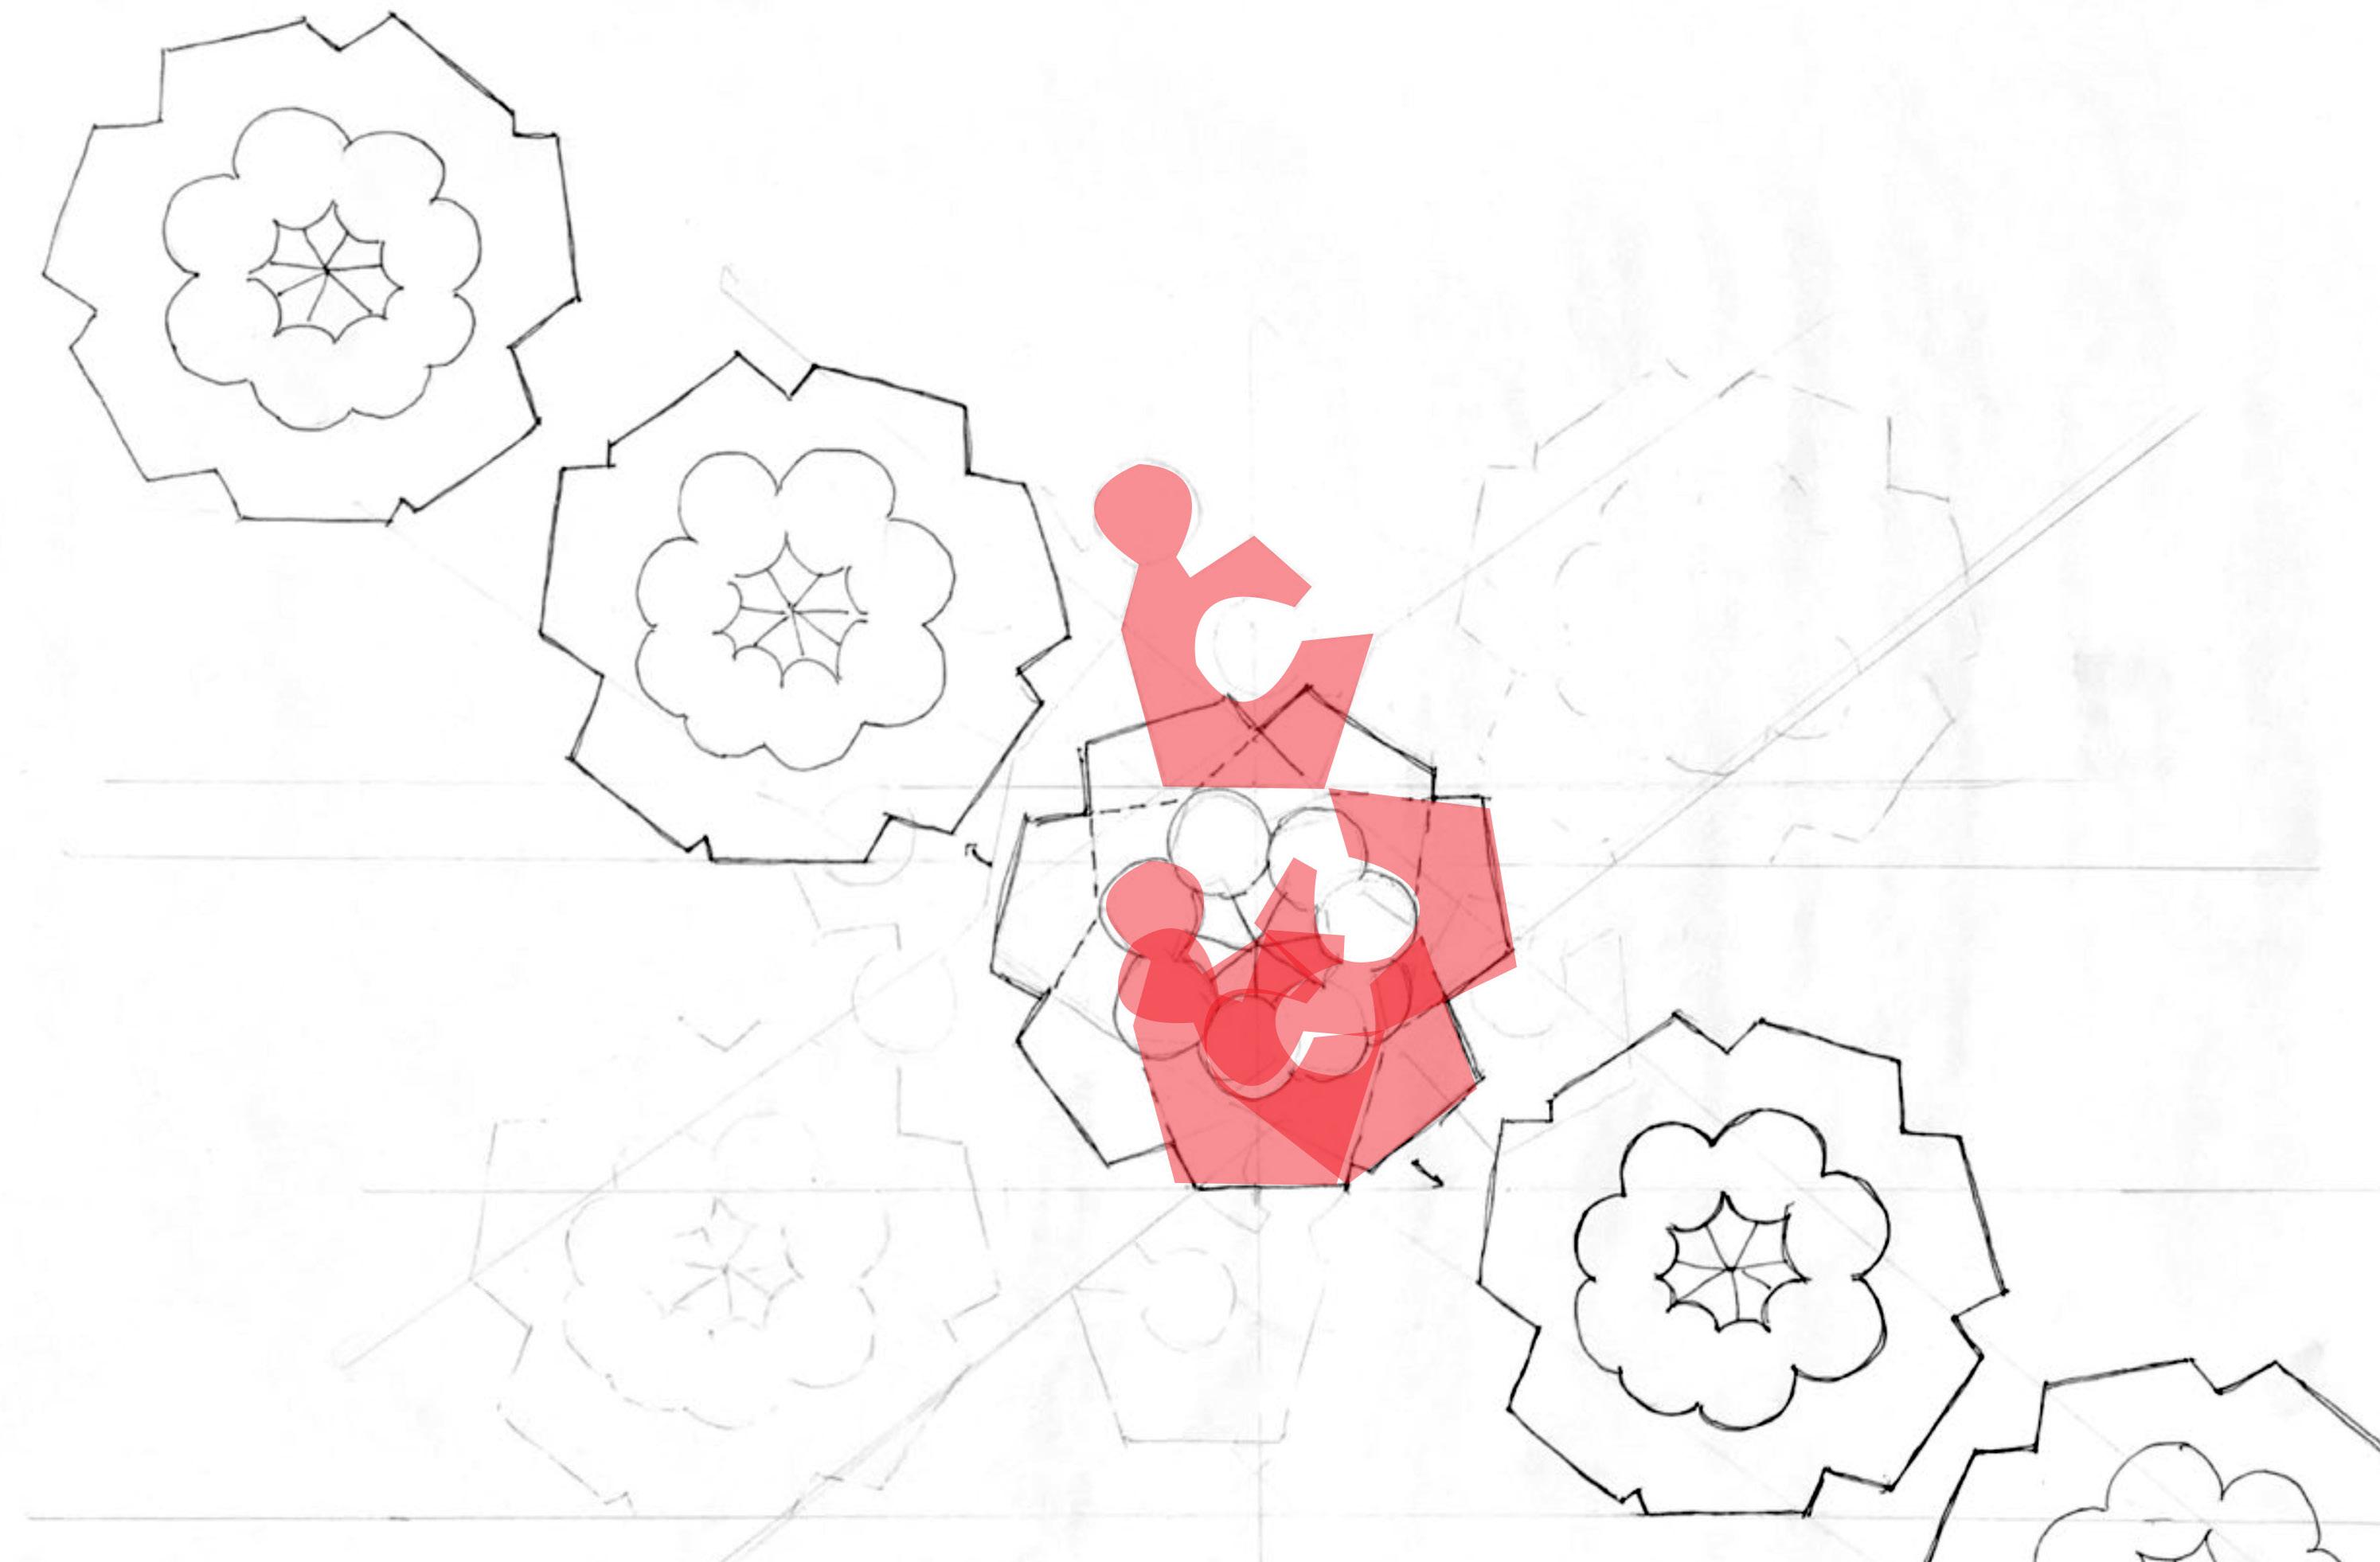

3 i FLOWER SHAPE REPEATING
PAPER STENCILS
FLOWER SHAPE IN 3D
Tessellation 02
Activity - Continue development of tessellation
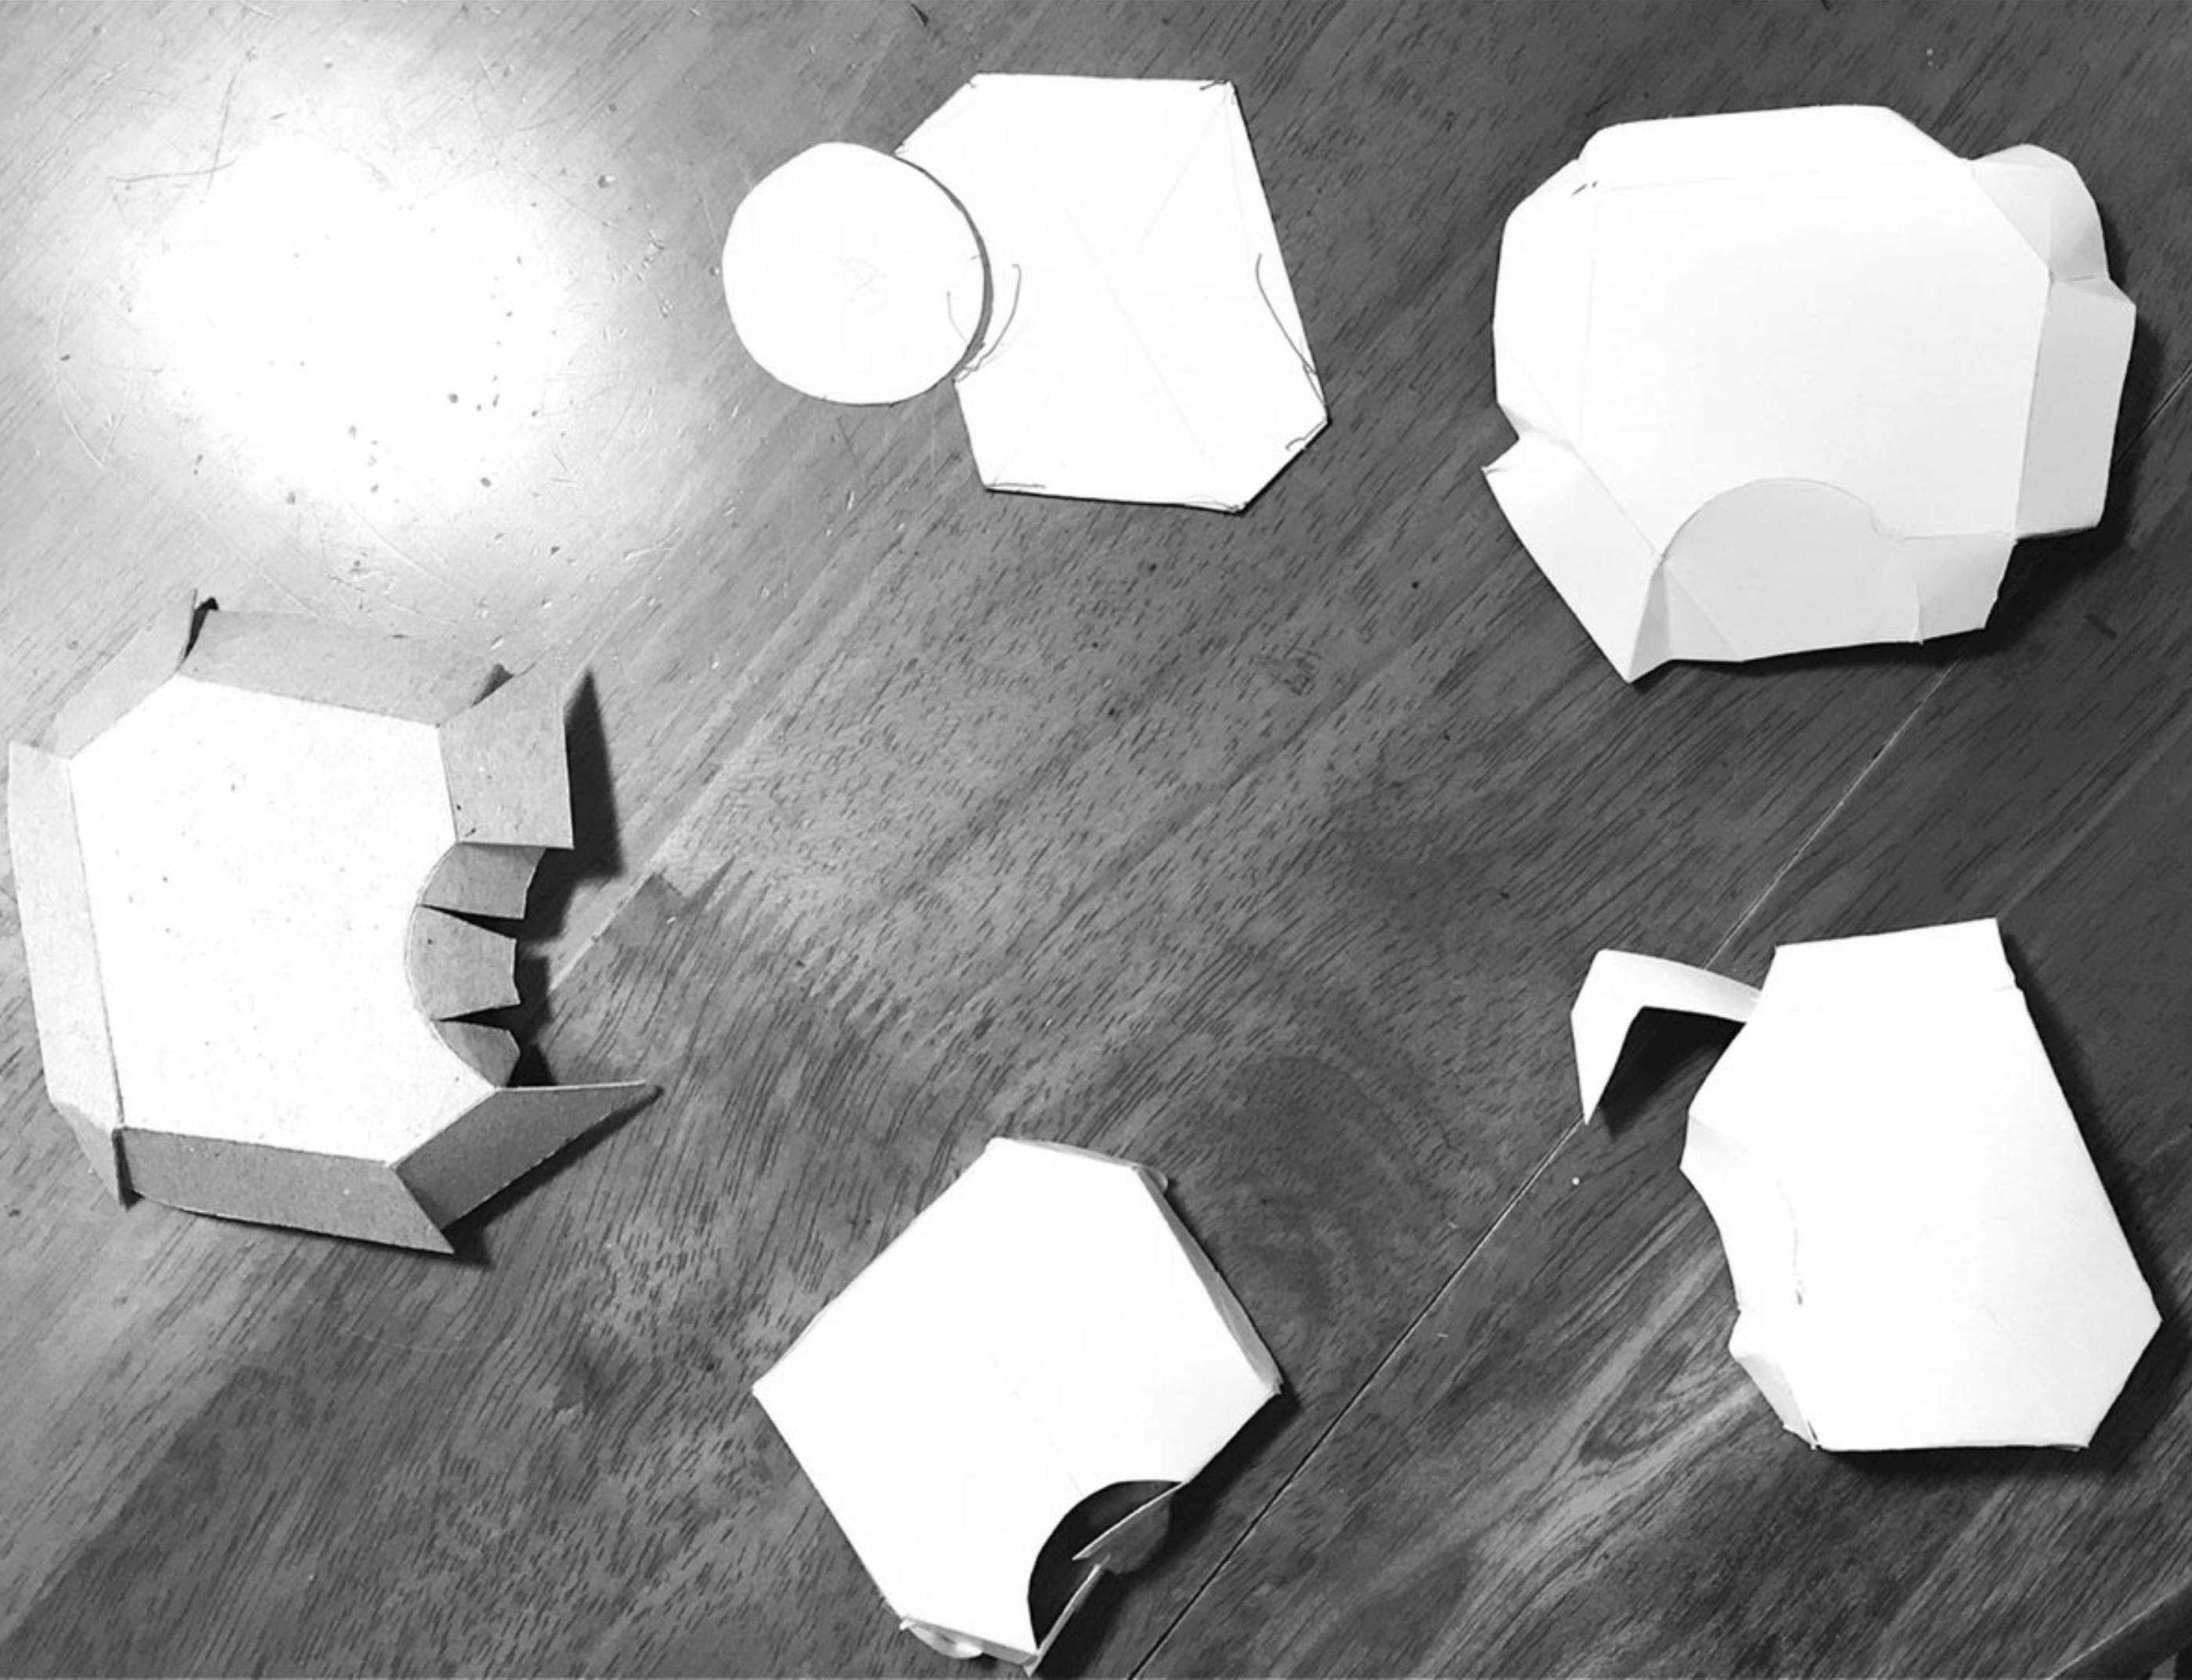
Initial flower shape abandoned for new direction.
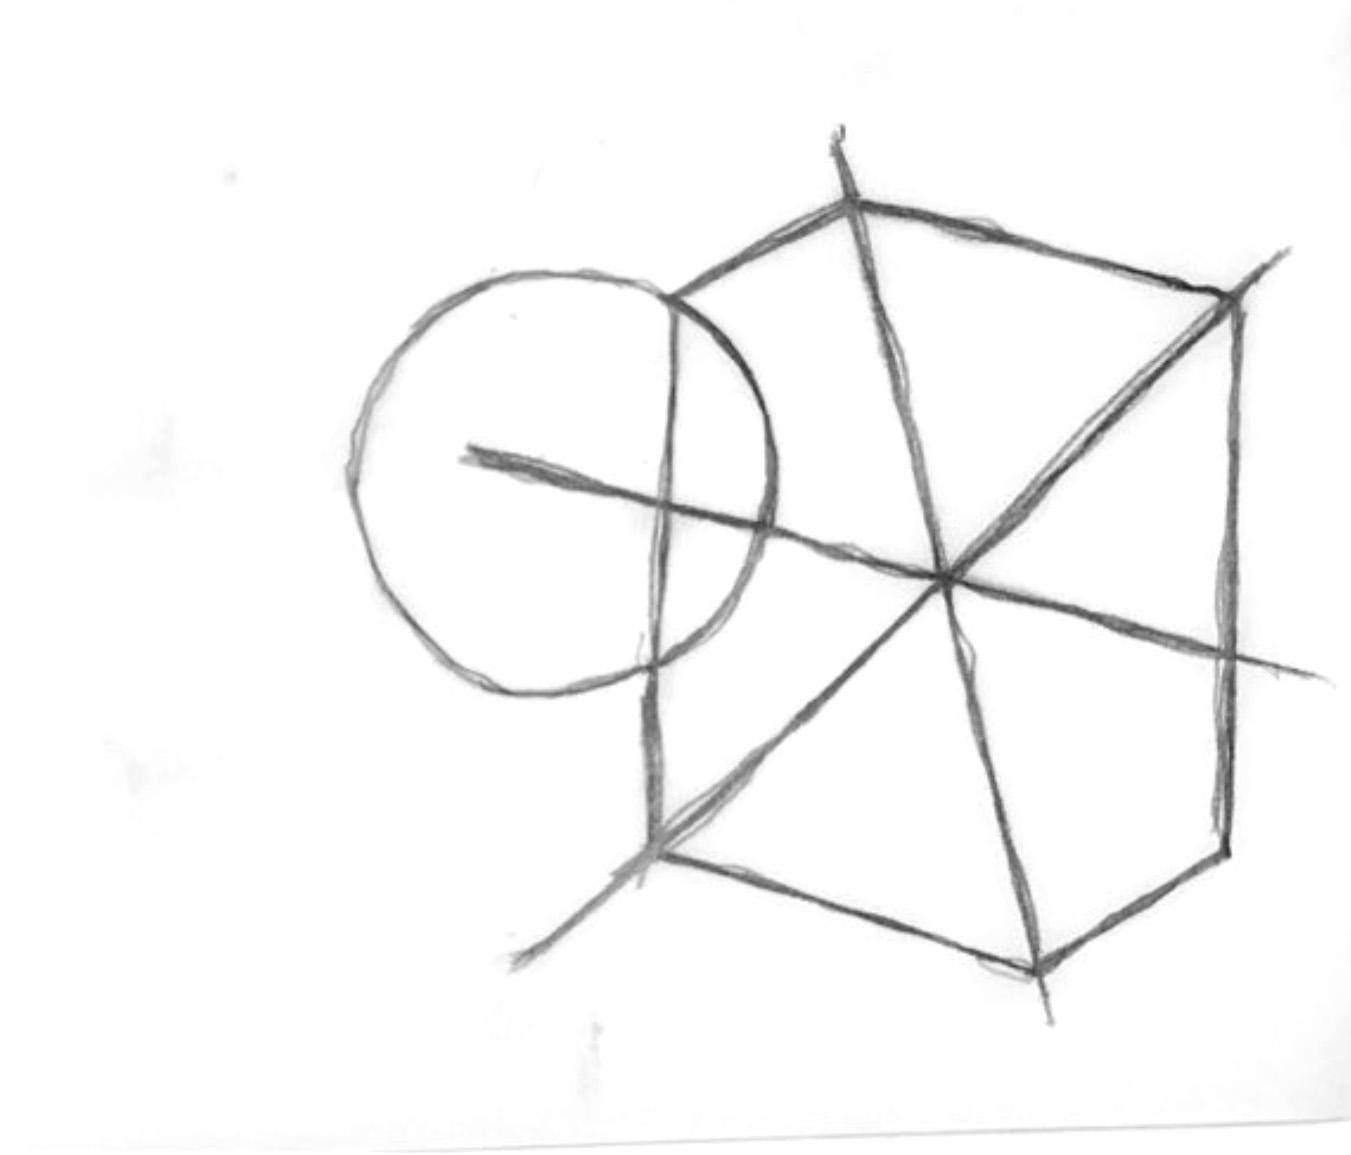
A shape based on a hexagon with a cut-out on one side. Various attempts at a 3D version did not yield success.
4
EARLY PAPER
PROTOTYPES
3D
KEY TAKEAWAYS
Hexagon based pattern still requires additional shapes
Circles and curves are challenging to fold with precision
Uneven hex shape is working
Round cut out is not working T2 REPEATING PATTERN
5
T2 BASE SKETCH
Tessellation 03
Activity -develop tessellation in 3D
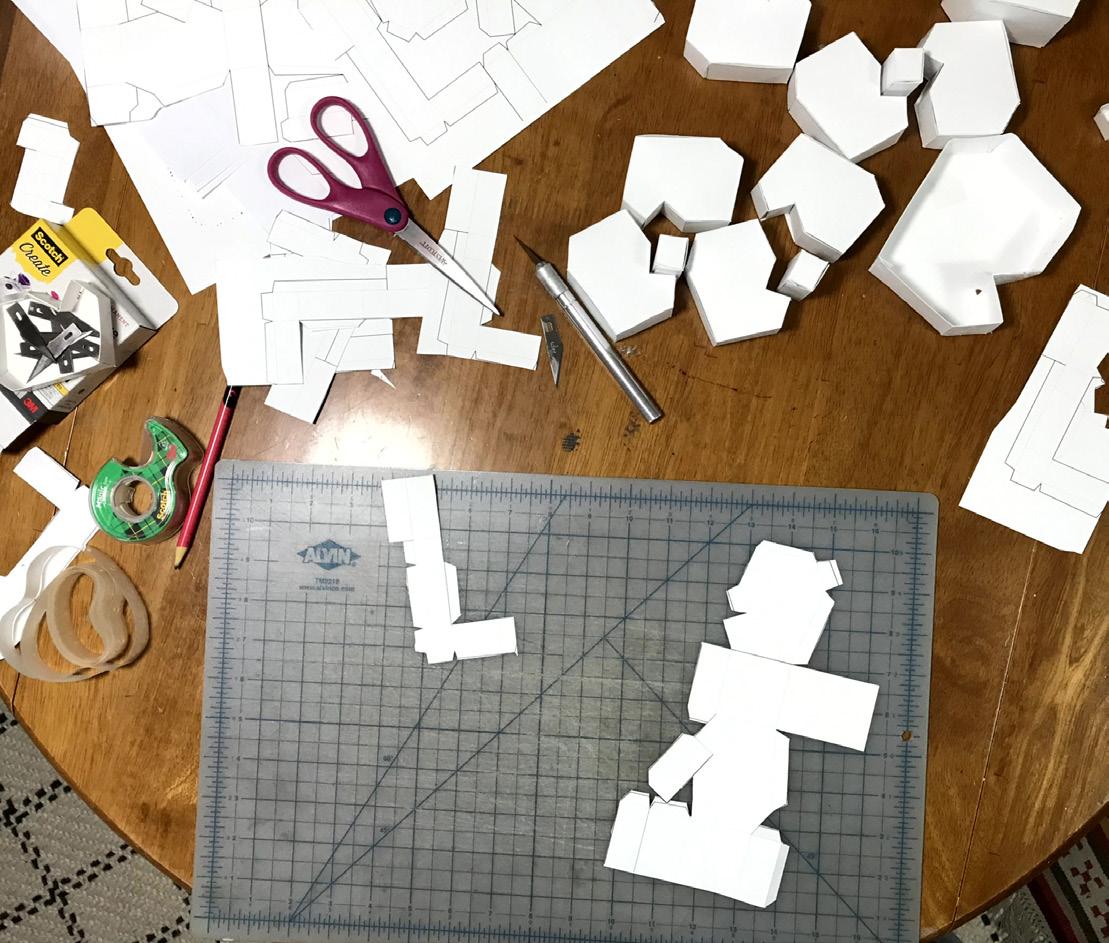
Created a template for scoring and folding to produce a 3D version of my shape. I included tabs to receive glue.
I made a standard version, a taller version of the standard, and a 1.5 scale version. Using tracing paper, I transferred the shape to cardstock and cut them out with an exacto. I enlisted my husband to help me assemble- he was so careful and he used a lot of glue.
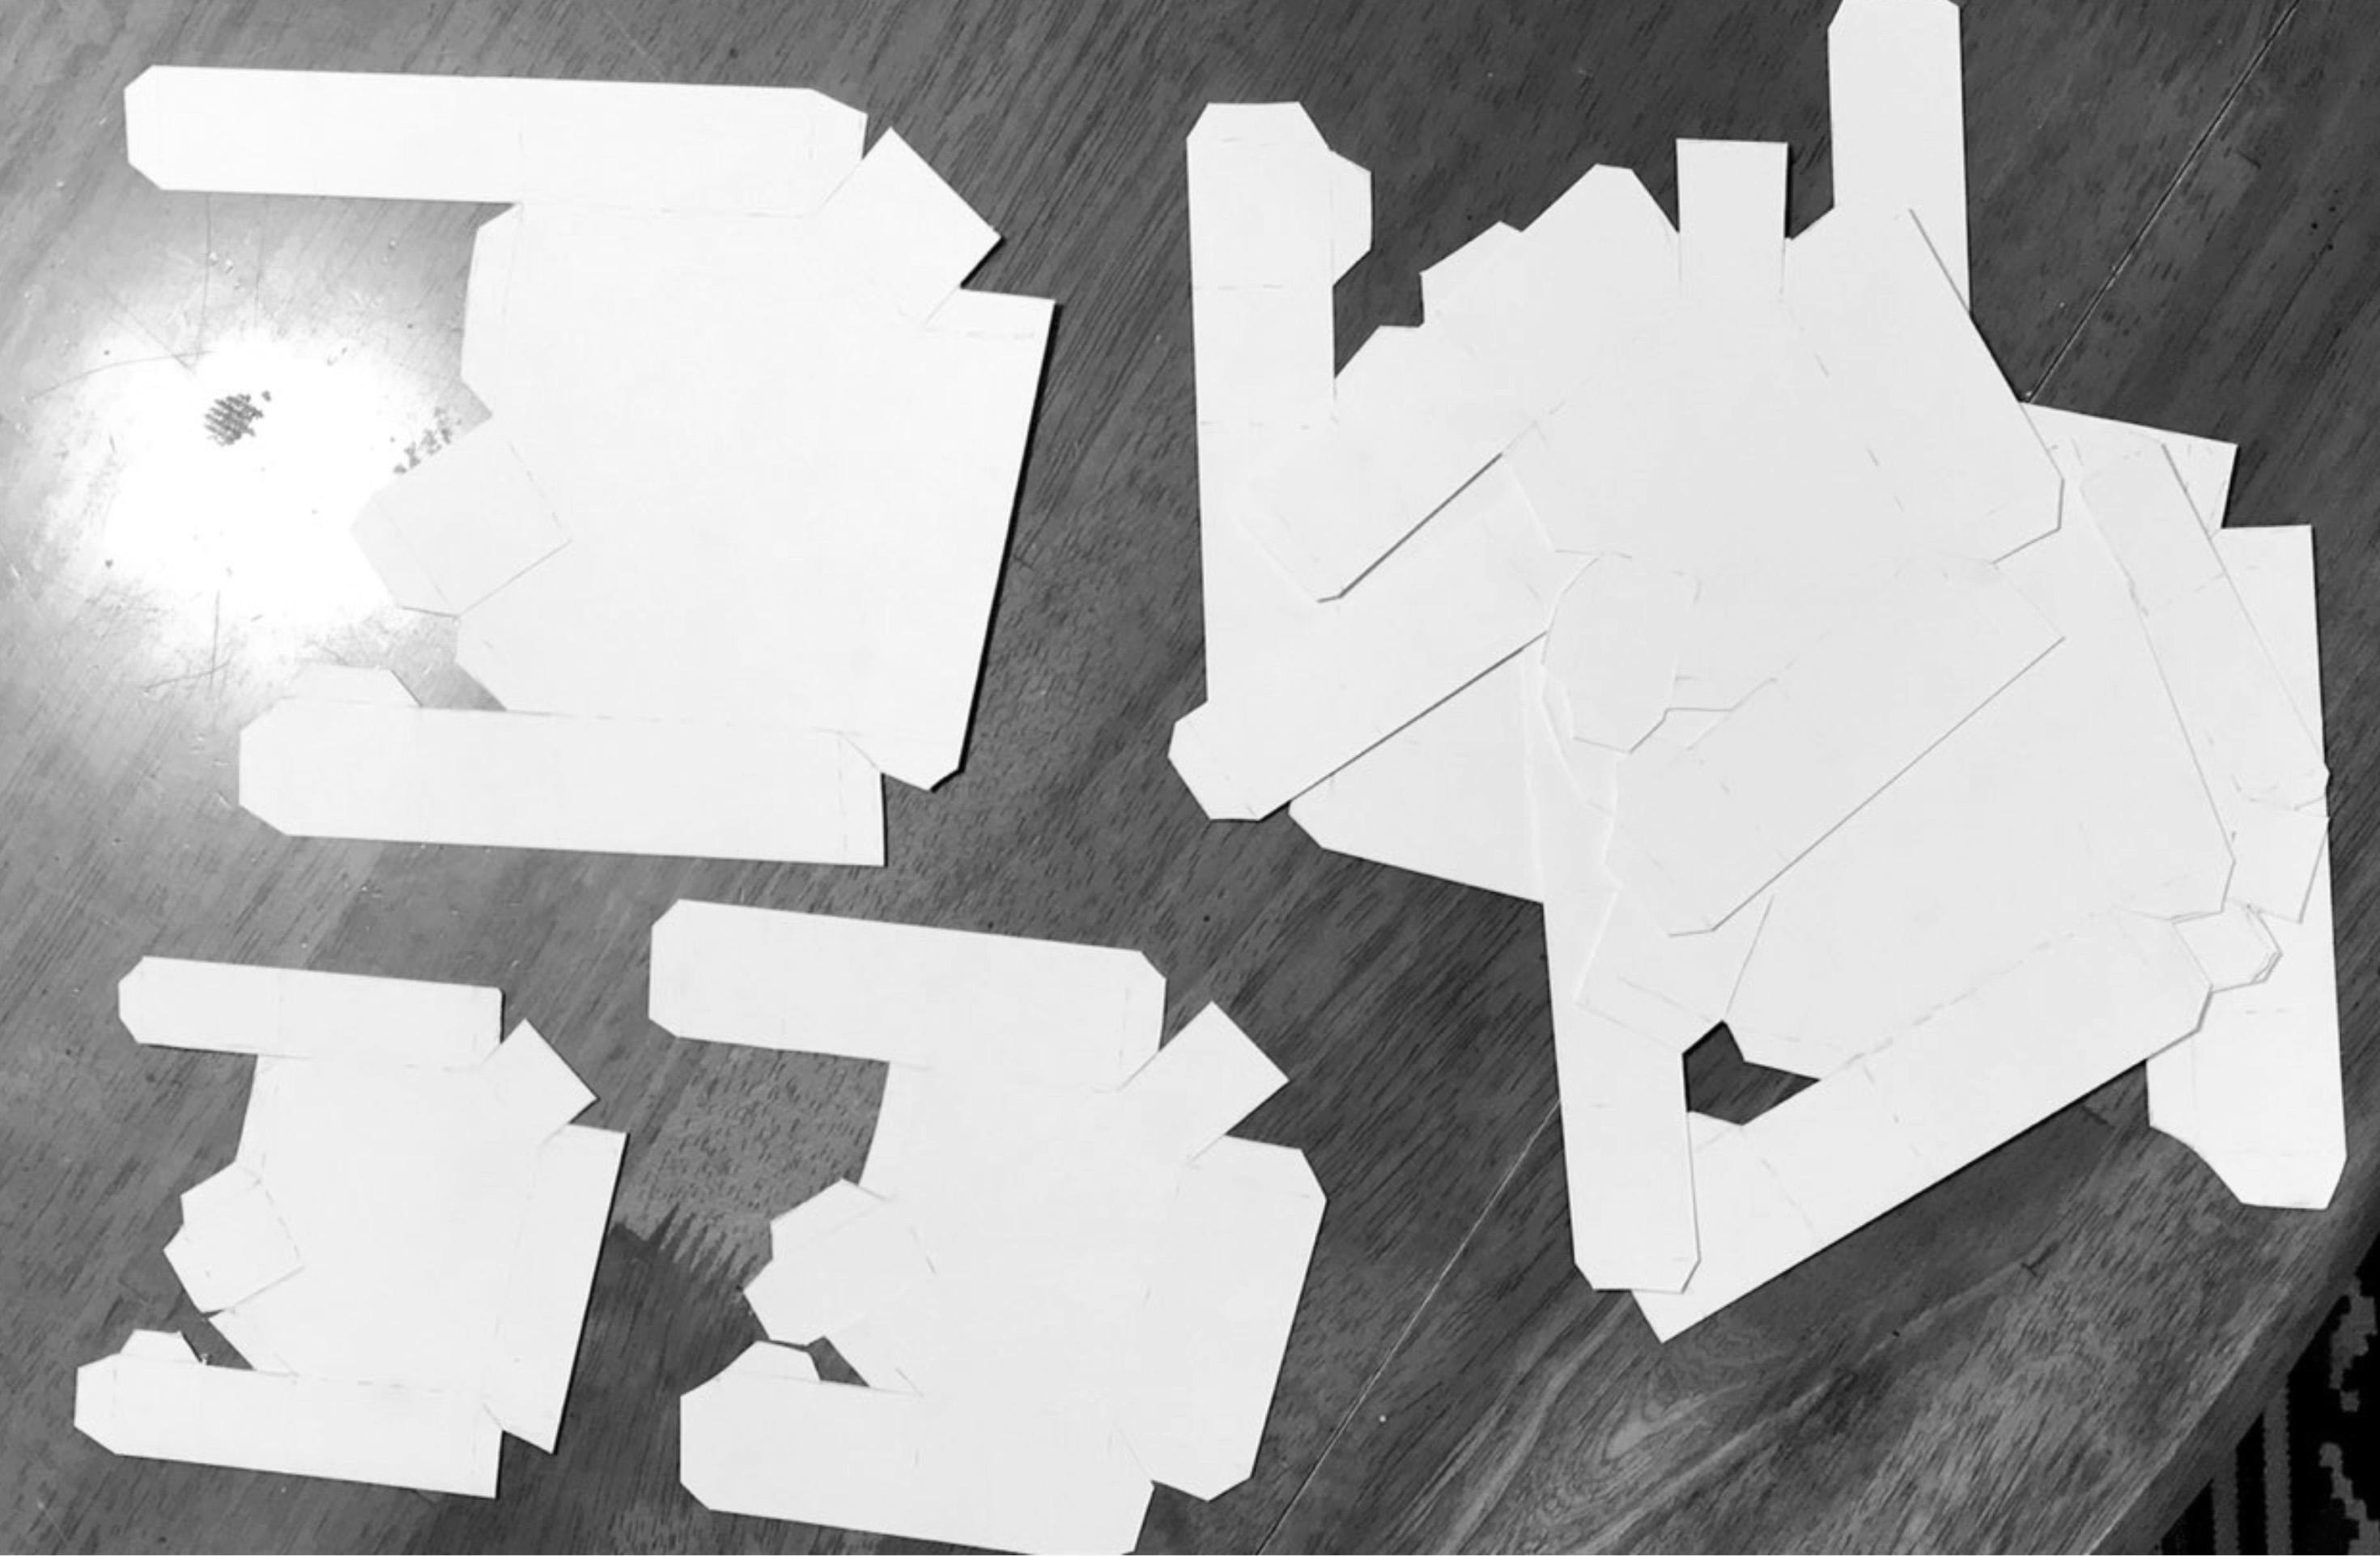
6 CUT PIECES READY FOR ASSEMBLY
T3 STANDARD
Variations
Activity -develop tessellation in 3D
KEY
TAKE AWAYS
Straight sides fold neatly
Tracing paper not precise enough
1.5 scale pieces disrupted the pattern
Add a bottom plane for stability
Make pieces as large as possible
Add square piece in between
“Box” folding method works
T3 THREE VARIATIONS
7 T3 SHAPES IN 3D
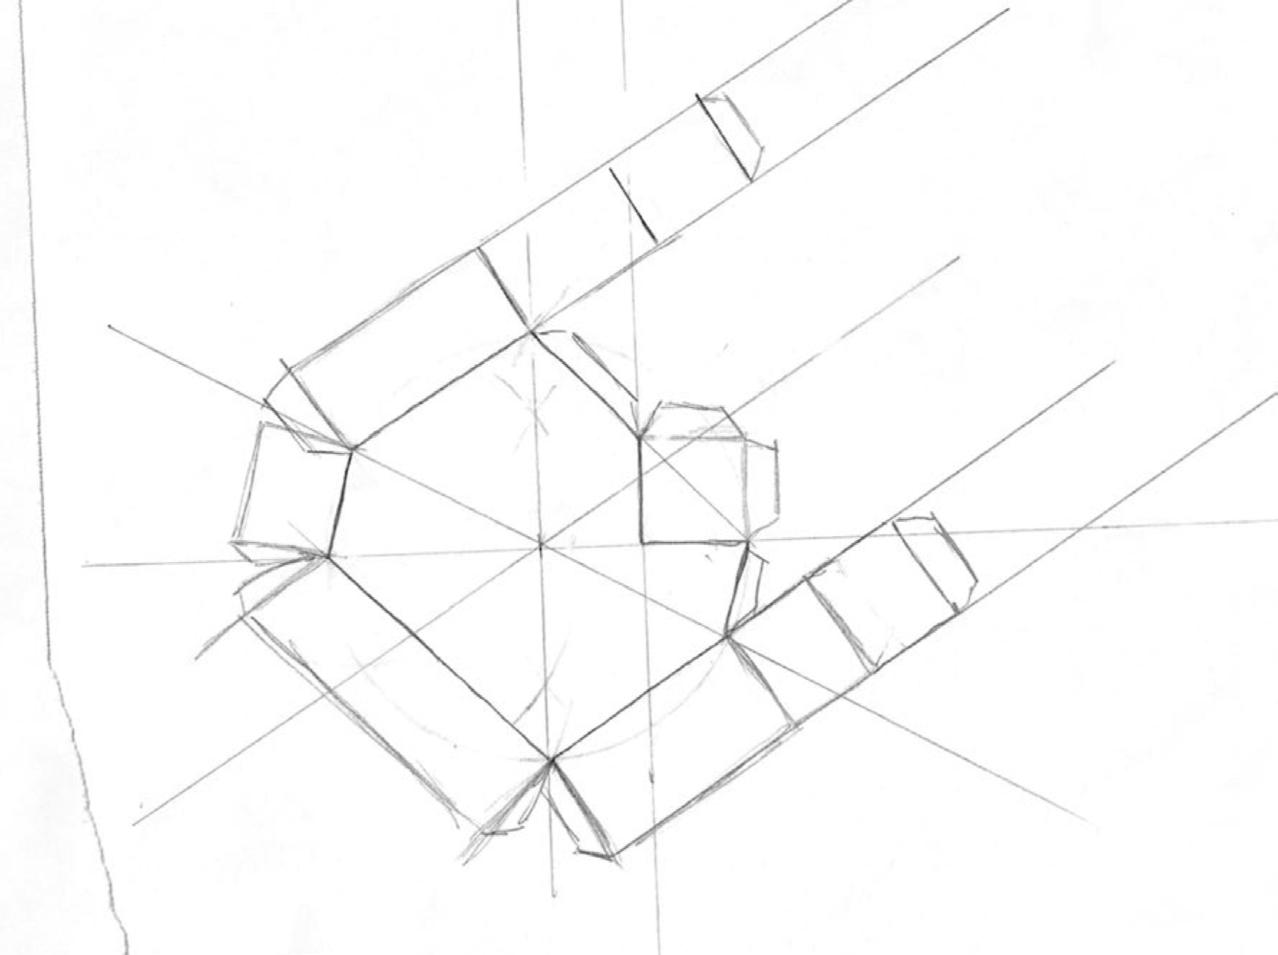
Tessellation 03
Activity - Refine tessalation in Rhino
Layout in Rhino provided more precision in the individual units. Assembly was more efficient with printed stencils and some adhesive dots I found in my craft supplies.

8 DETAIL
This was a more successful iteration. The combination of the 2 shapes is working and the height variations are enough to look intentional.
KEY TAKEAWAYS:
• Short squares need to be taller
• Bottom plane requires sequenced assembly
• Adhesive dots are handy
• Addition of squares is worthwhile
Unroll command in Rhino produced difficult shapes to fold up in paper
Expolded and reassembled in shapes similar to previous iteration

9 TOP VIEW WORKSPACE DURING PRODUCTION
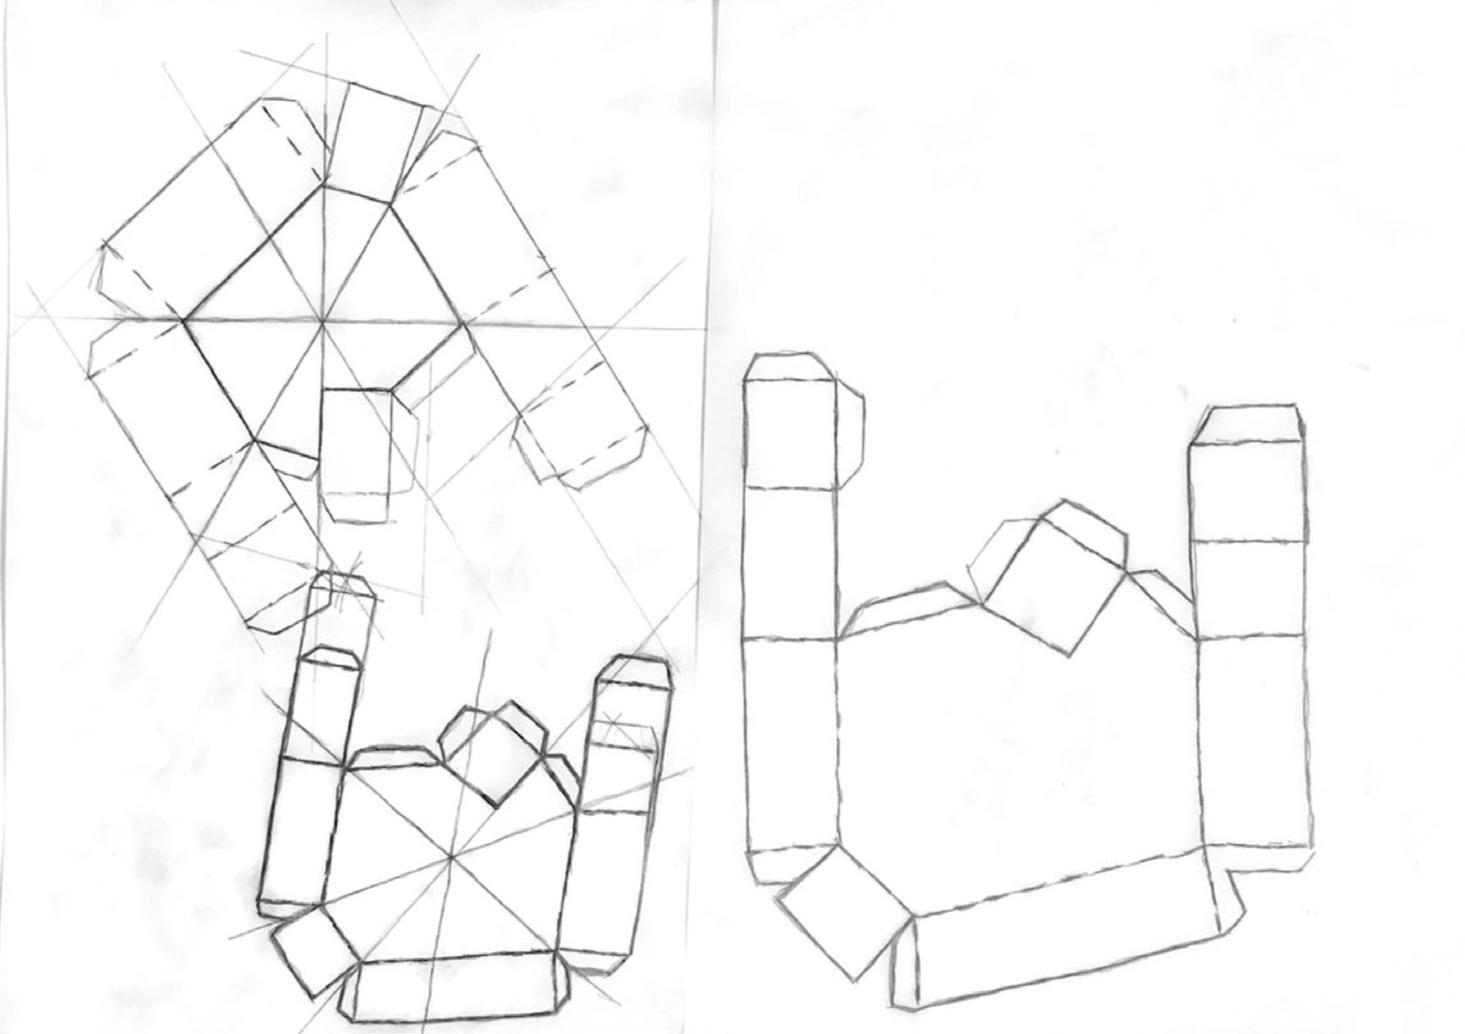
3D Model Development
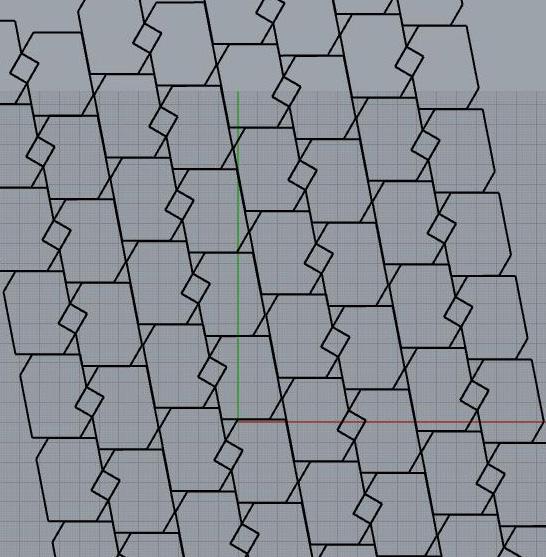
Activity - Refining the pattern in Rhino in preparation for laser cut
Further refine the tessellation in Rhino with greater precision in layout. Tile the design to observe the overall pattern.
Refine chosen variations. Unroll the solids used in the pattern and refine for constructibility. Export the Rhino file for editing in Illustrator. Edit line styles, add tabs for assembly and verify print size.
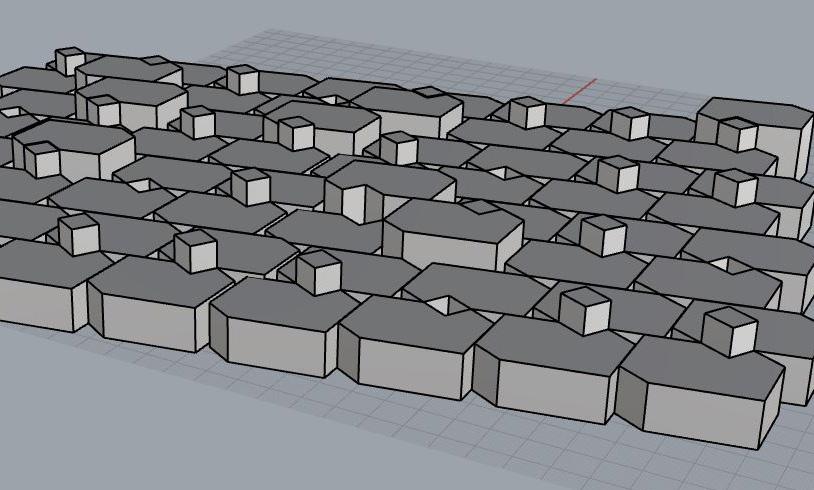
10
RHINO MODEL PERSPECTIVE VIEW
KEY TAKEAWAYS:
• Precision improved
• Height variations working
• Scale was so small, assembly was challenging
• Make as large as possible- split on 2 pages
Printer paper is too thin for models- print on thicker stock
11
RHINO MODEL TOP VIEW
RHINO OUTPUT ASSEMBLED
Architectural Wall Finish
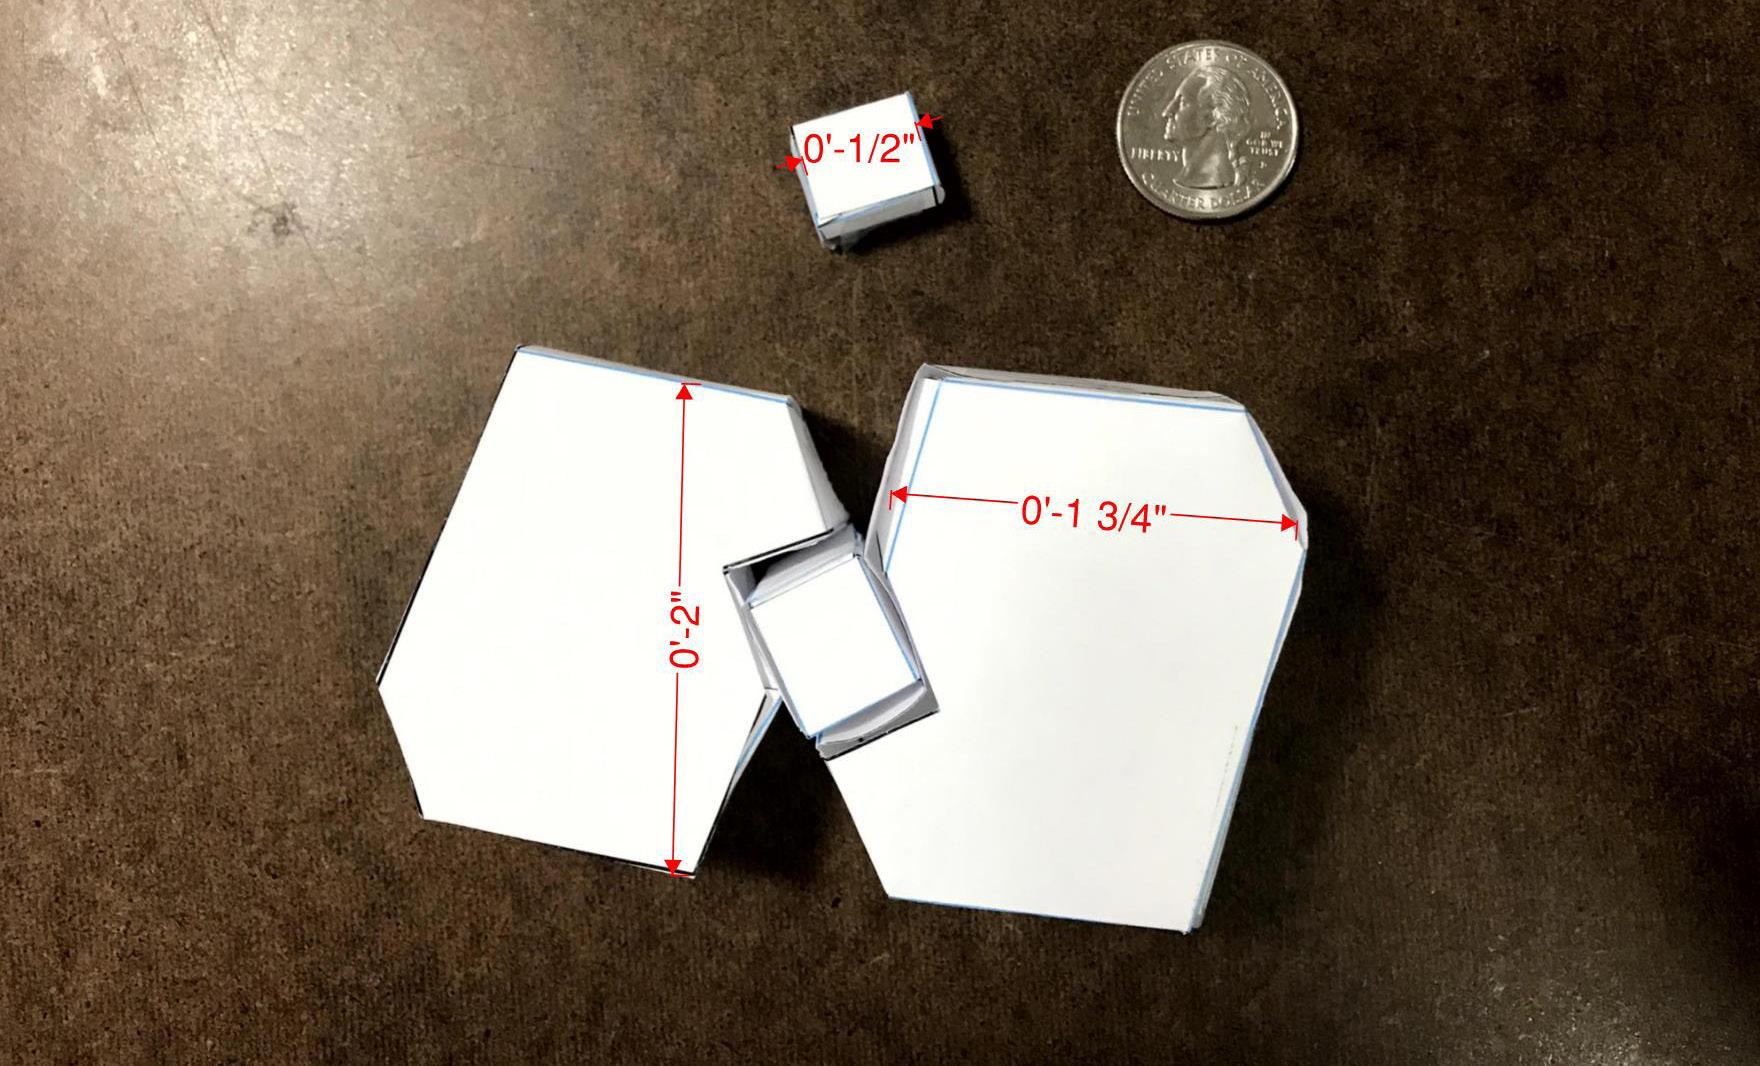
Activity - Further refine model, print and assemble
A slight increase in scale to fit on a legal sized sheet and heavier stock were the improvements that had the most impact.
A printed template copied on to cardstock on the copier at work facilitated multiple copies. Each sheet contained 2 hex shapes and 2 cube shapes.

12 CARDSTOCK MODEL DETAIL
Forms were hand cut and assembled using adhesive dots and tape. The random arrangement of high/low is imntentional to show variation.
KET TAKEAWAYS
Height variation works
Short cubes still too short?
Random arrangement not working
Shadows across the sides are interesting
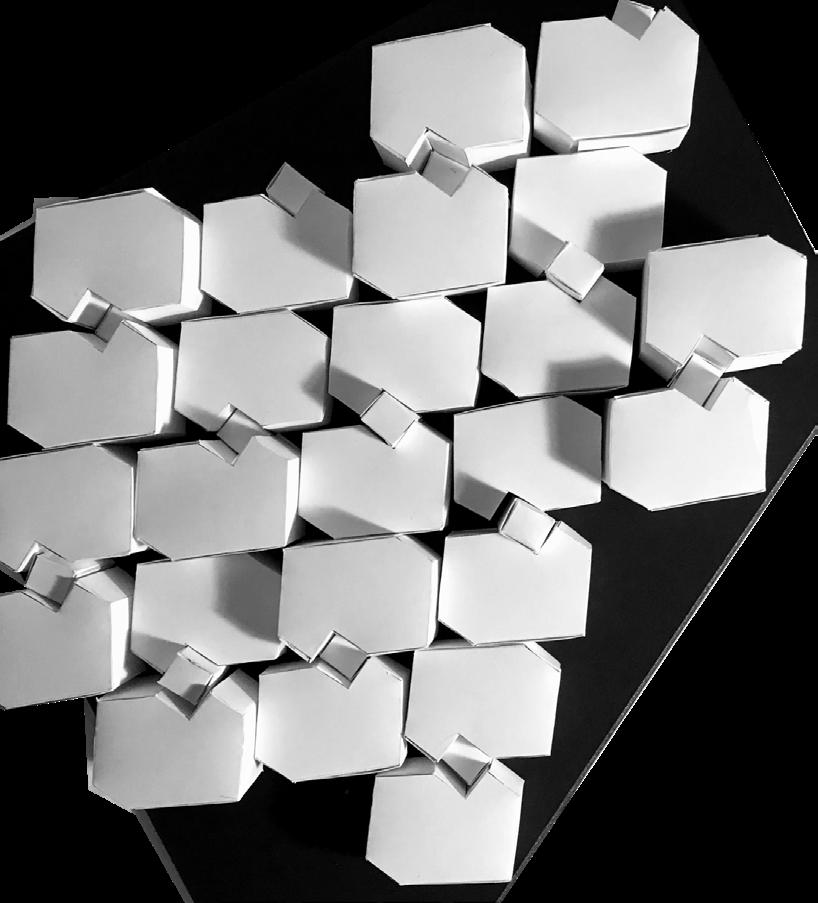
13 PERSPECTIVE + AERIAL VIEW
TOP VIEW
Laser Cut Preparation
Activity - Edit unrolled Rhino model in Illustrator for laser cutting
Export Rhino file for editing in Illustrator. Edit line styles using color to indicate cut and score locations. Red lines are cut lines and blue lines are score lines.
Print the edited file and assemble to test for constructibility. Add or omit tabs as needed to aid assembly.
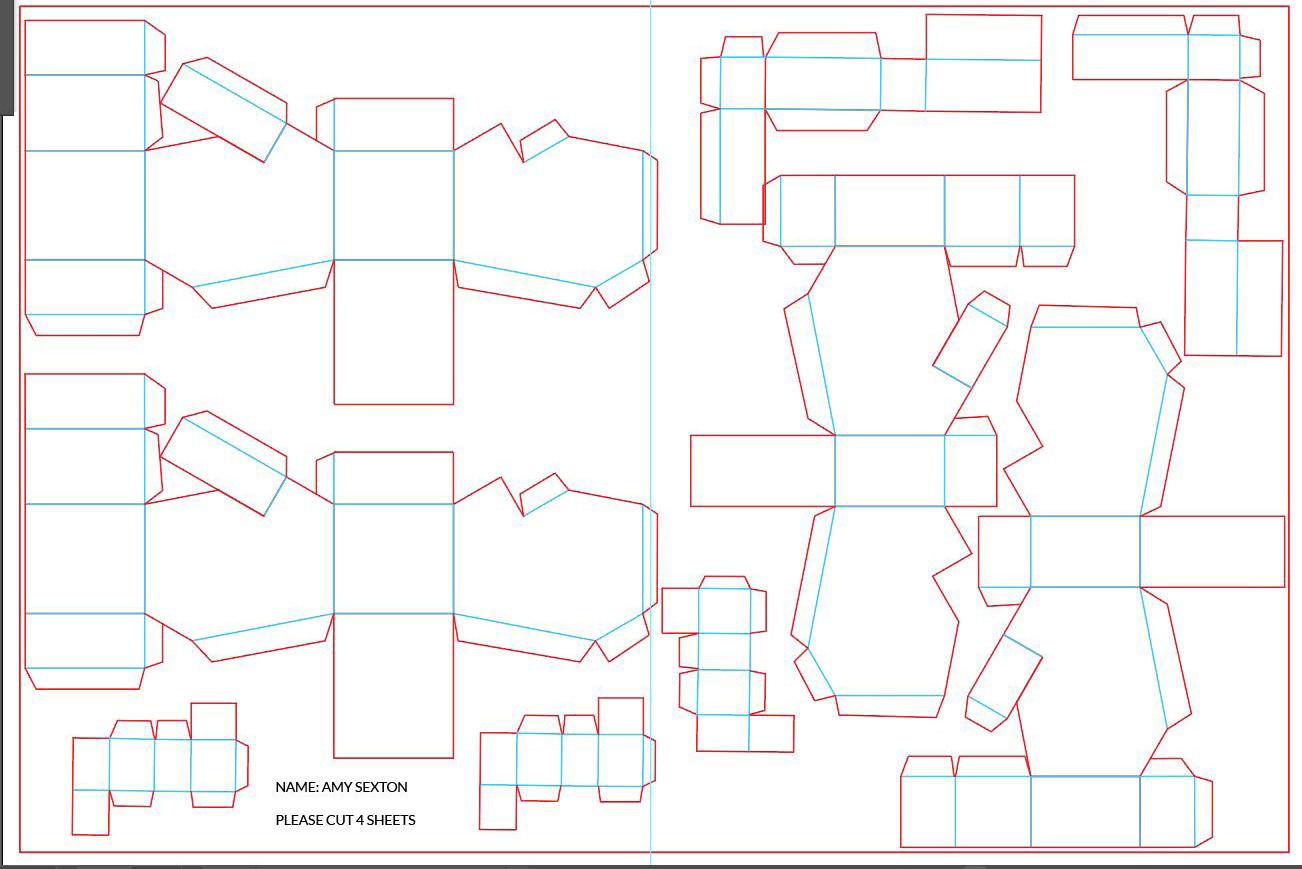
14 PRINTED LAYOUT FOR CUTTING + SCORING
KEY TAKEAWAYS
Plenty of tabs for assembly
Cannot fit many on sheet
1 cube for 2 shapes
Illustrator allowed control of line weights, colors
Needed to verify if lines are doubled
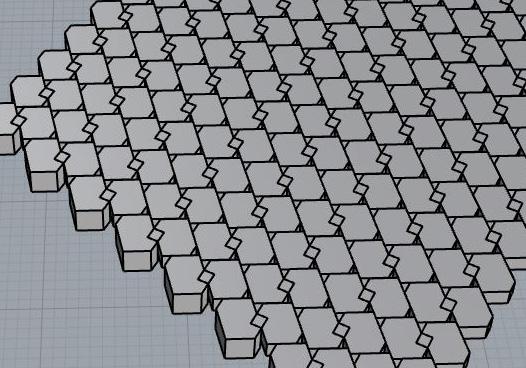
15 3D RHINO VIEW OF OVERALL PATTERN
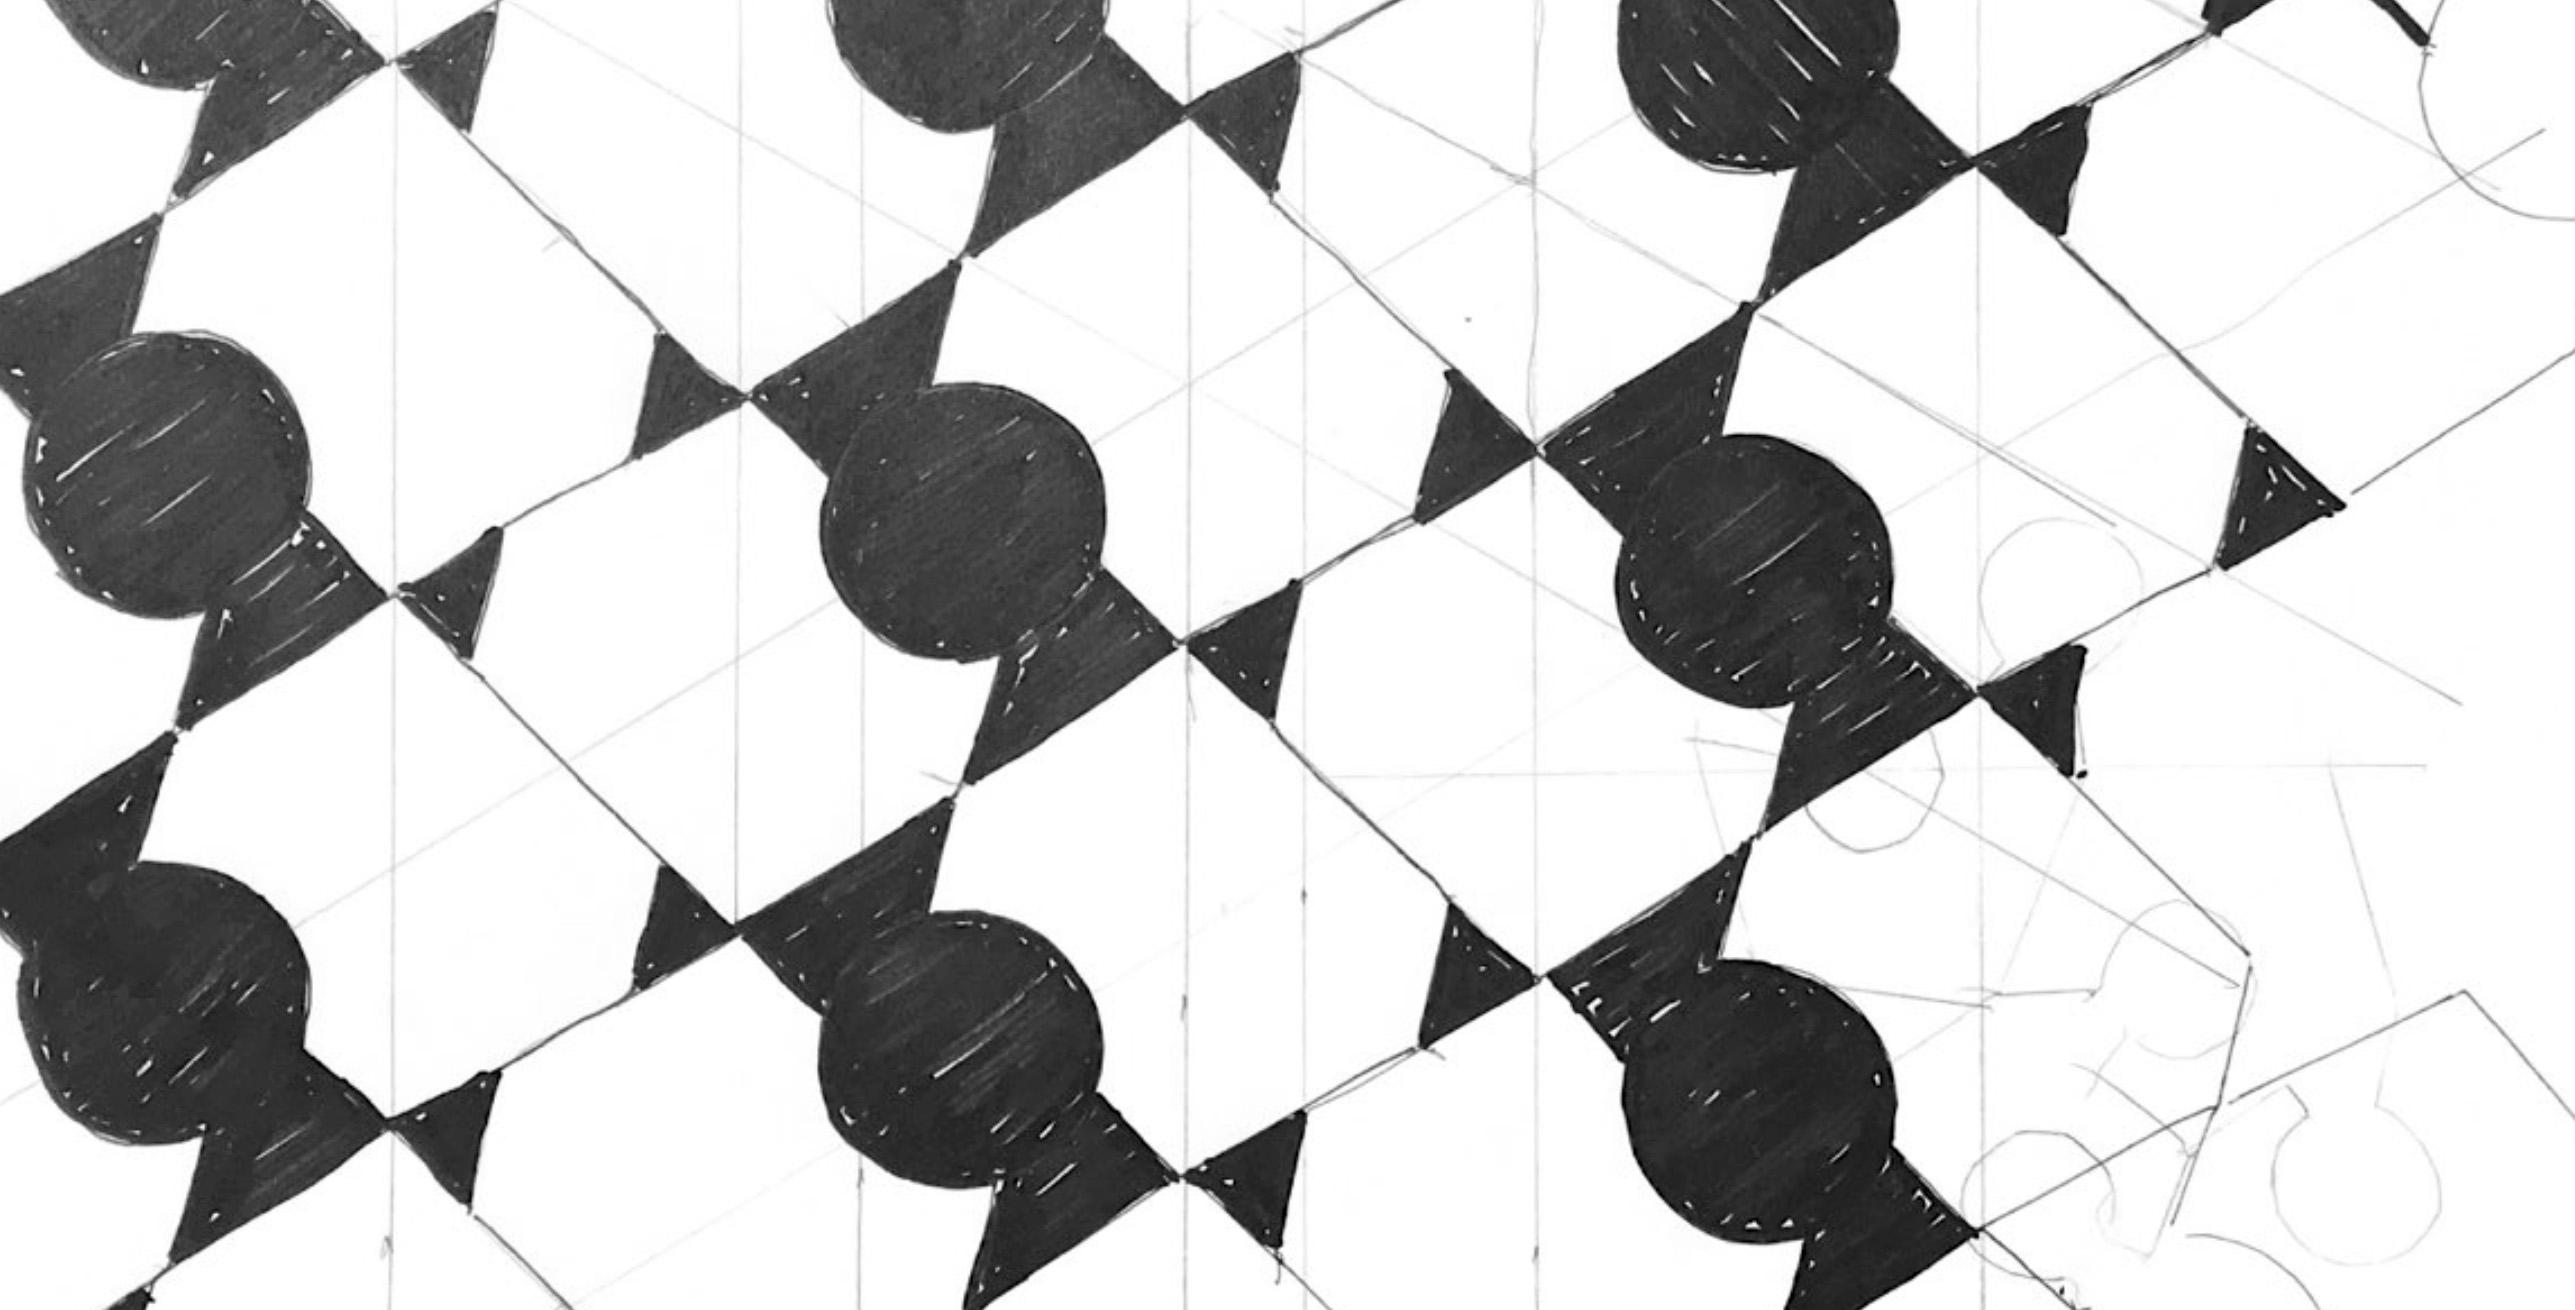
Exploded Tessellation 03.1
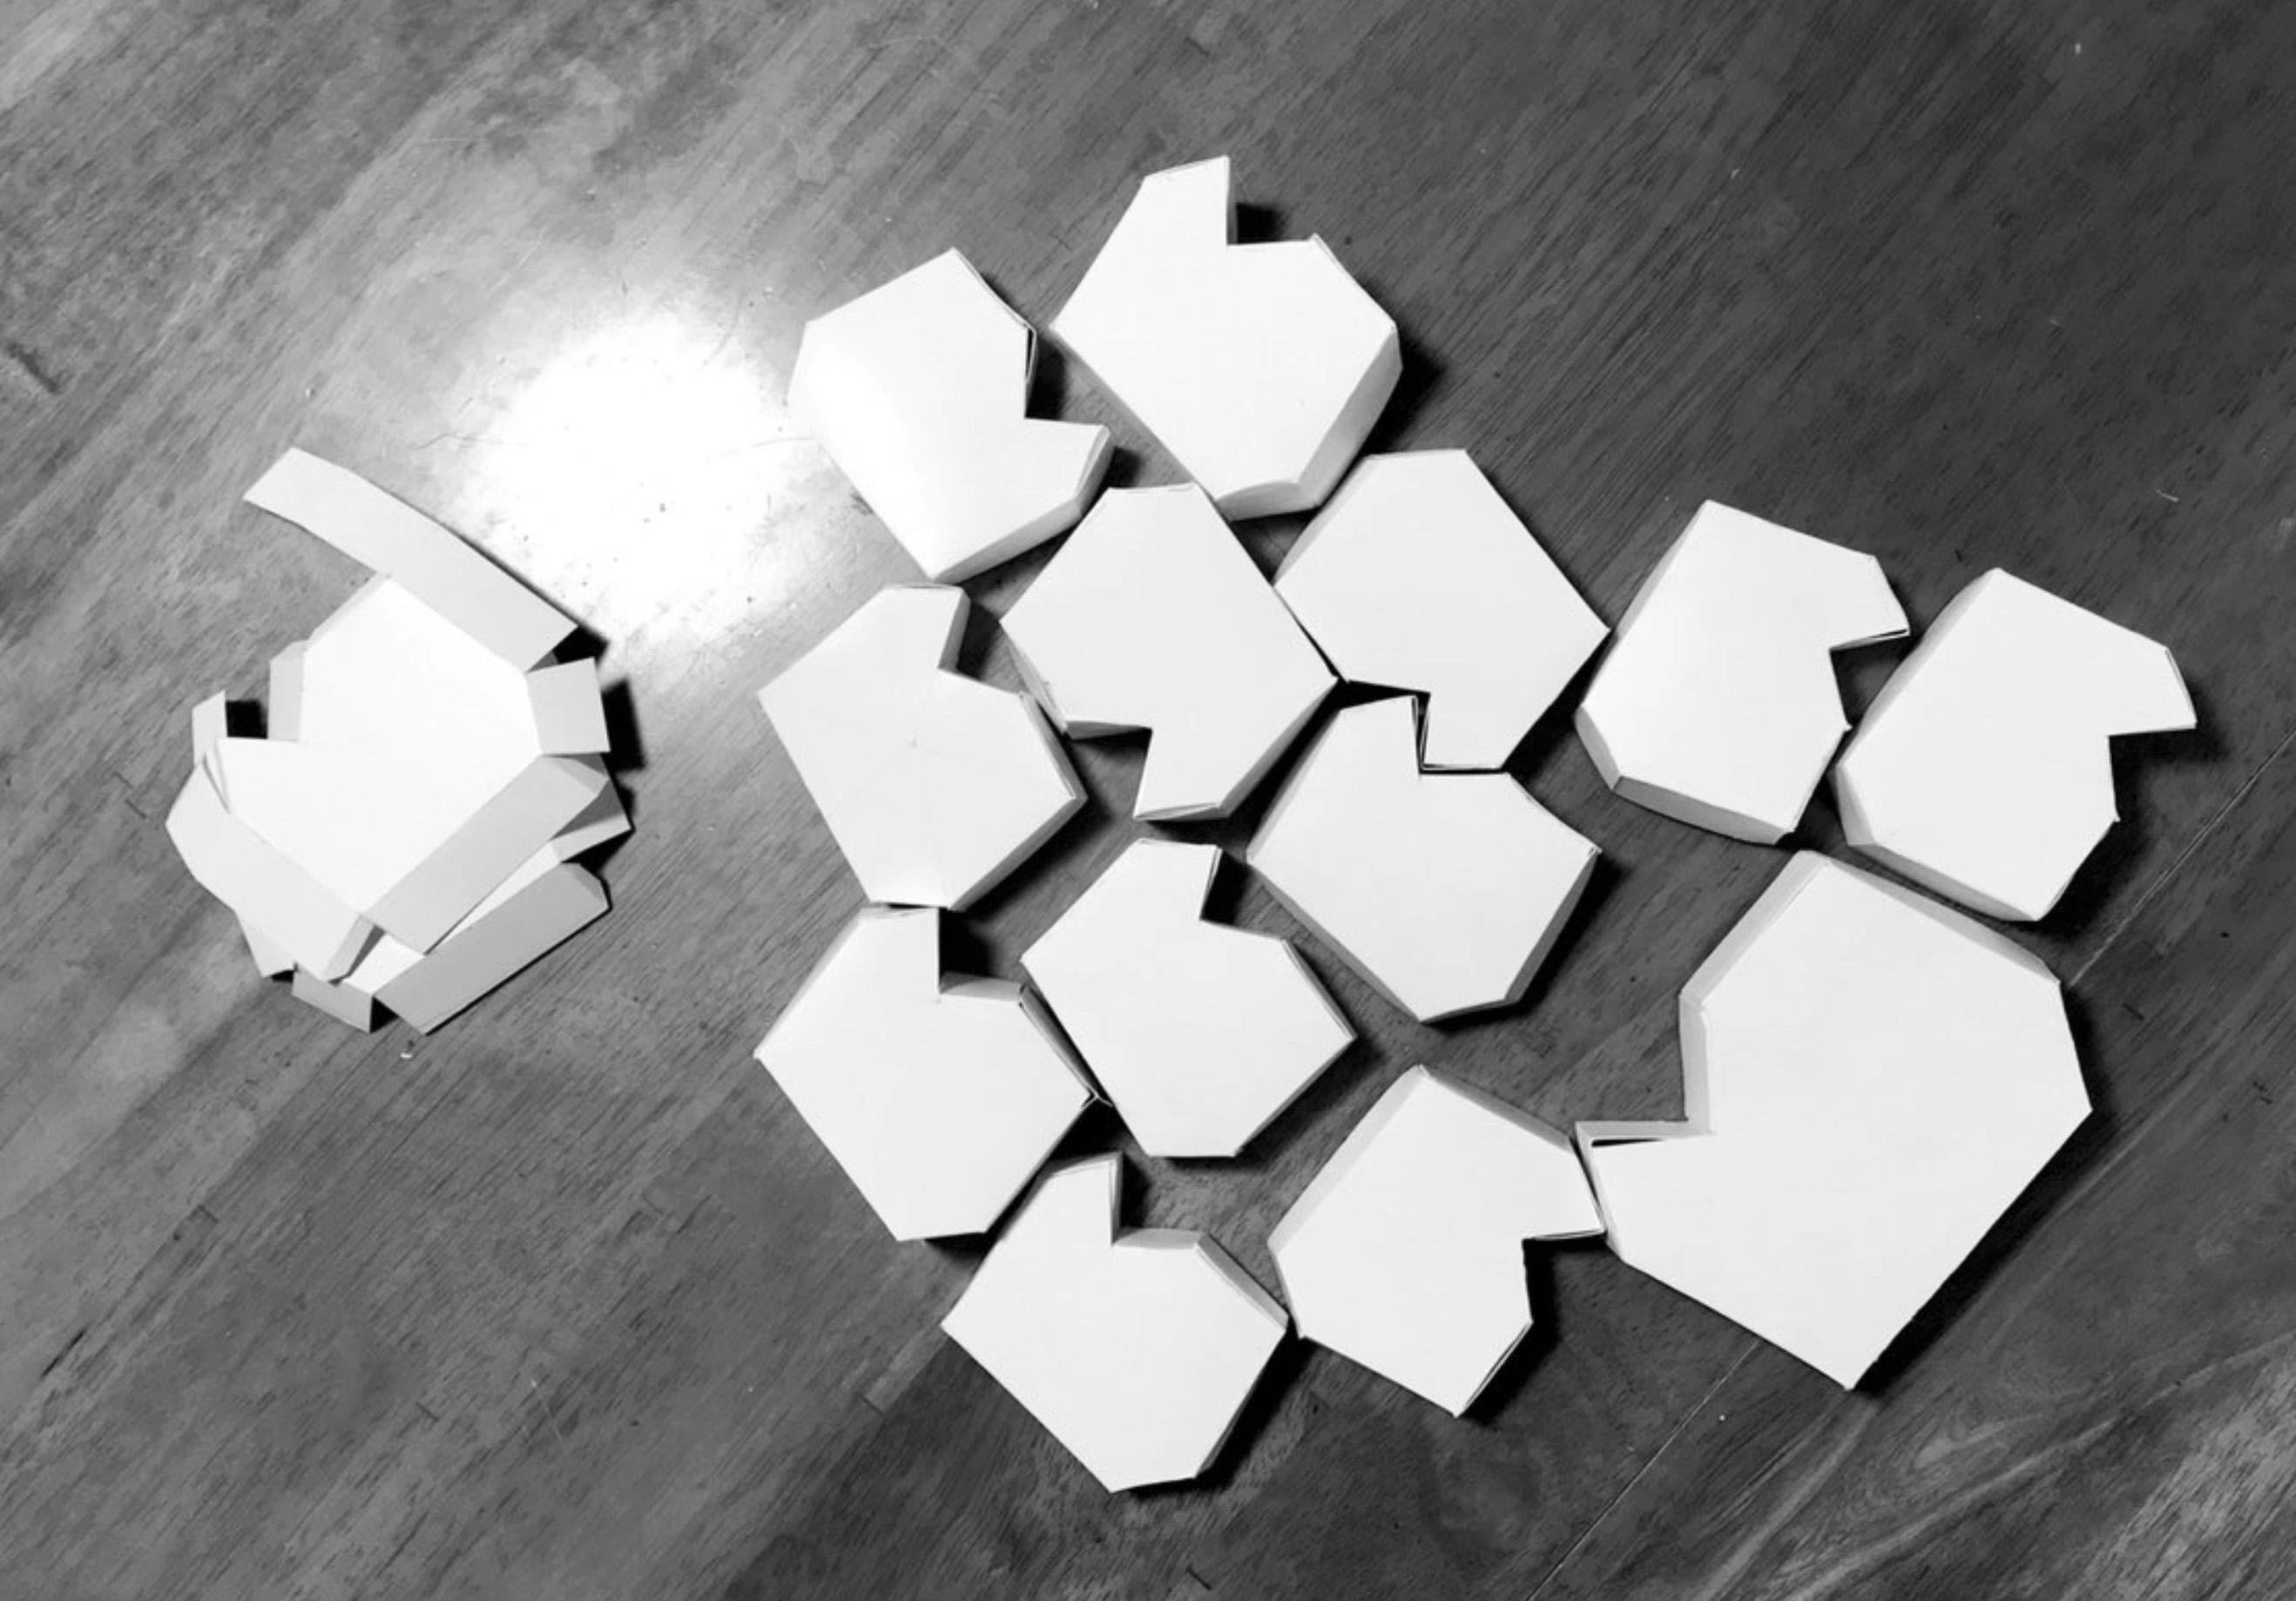
Activity - Assemble the laser-cut model pieces
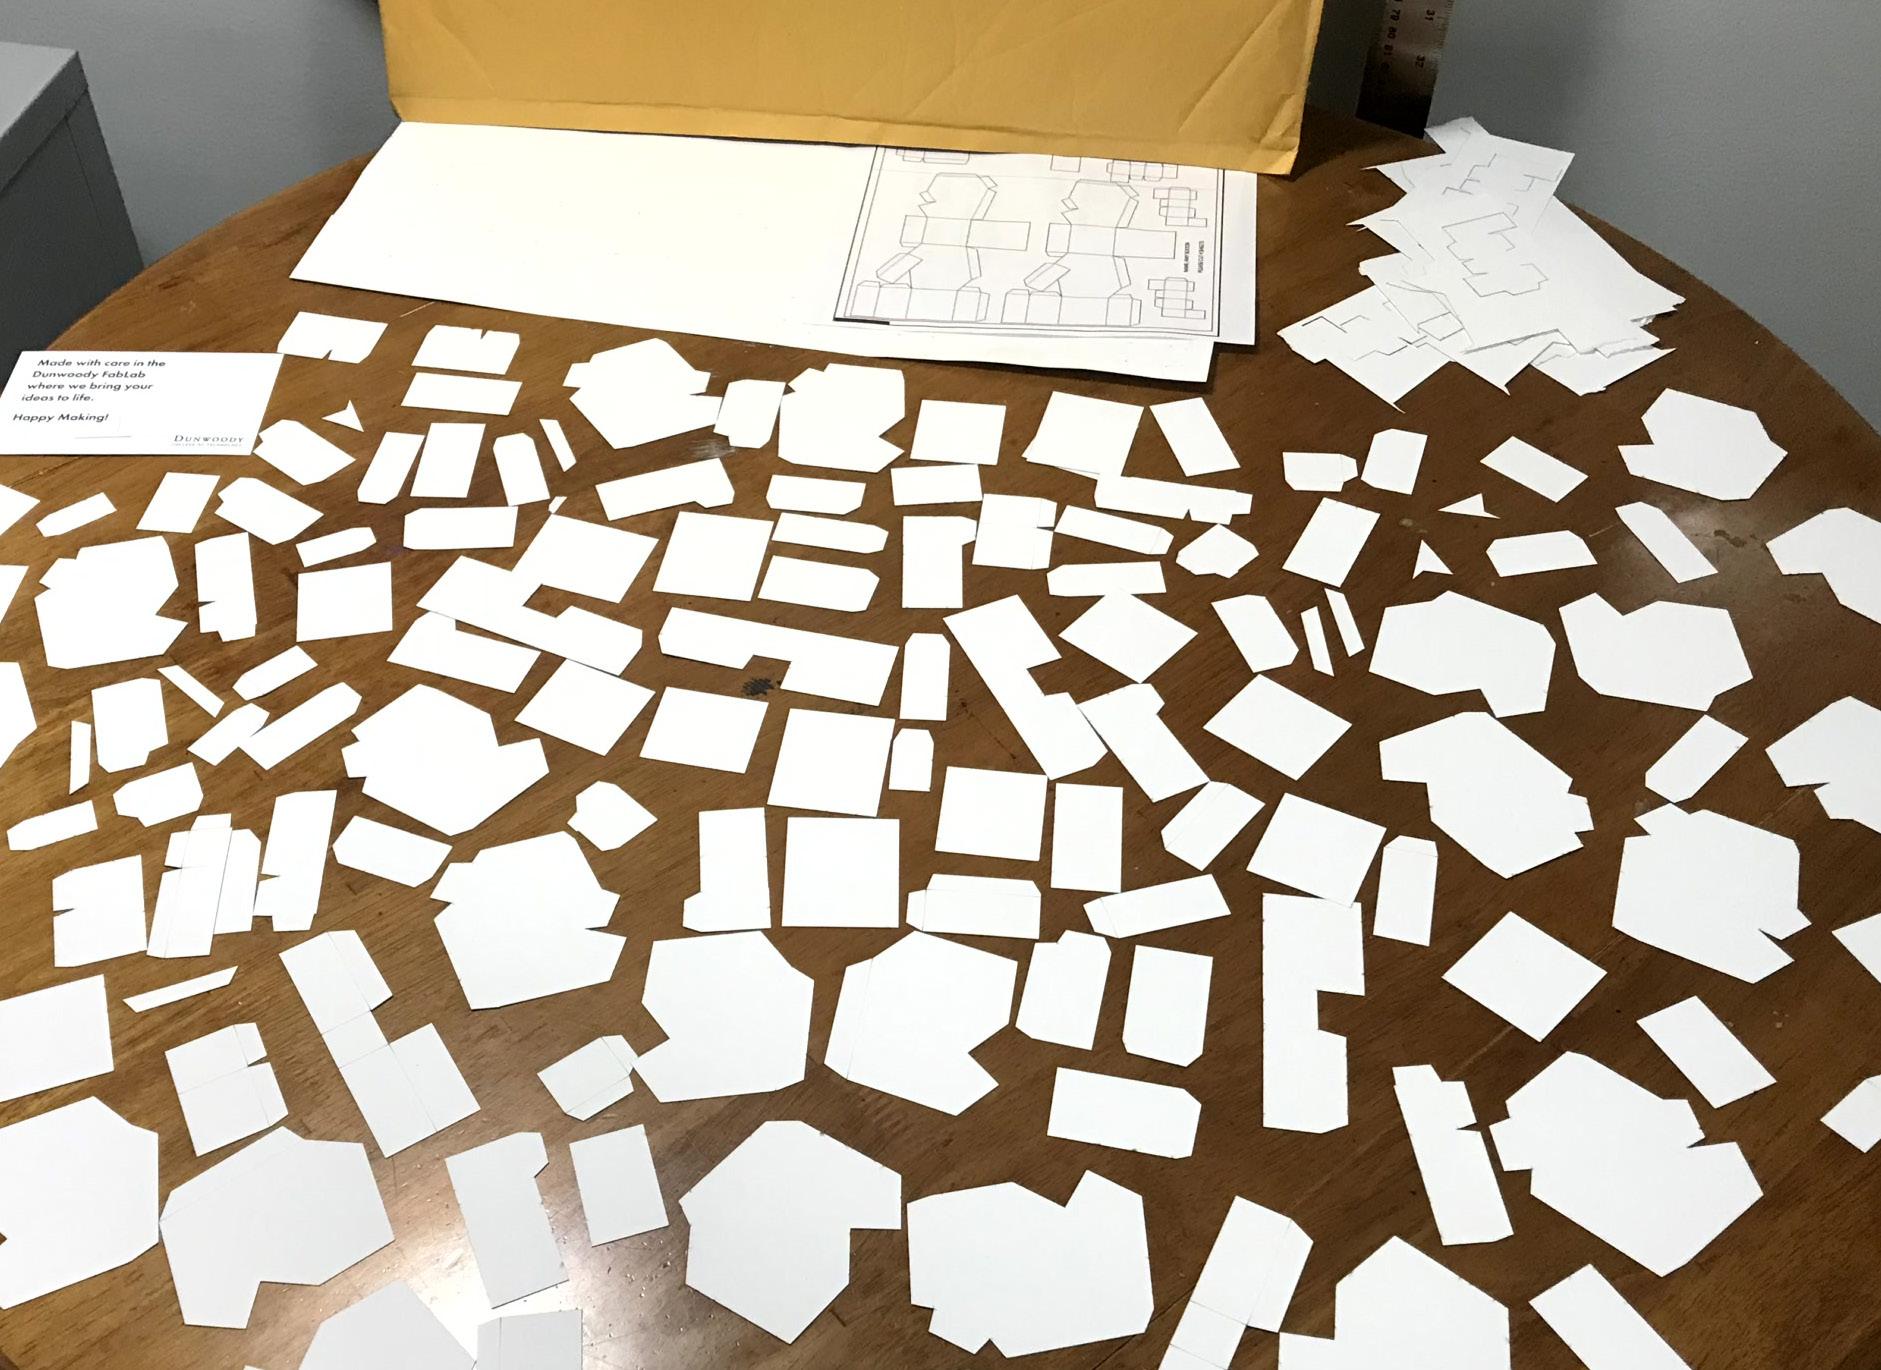
The envelope from the Dunwoody Fabrication lab contained pieces of the forms broken up into separate planes. Some pieces were less than 1/8” w.
In translating the physical model into Rhino and further into Illustrator, some lines were overlaid, resulting in cuts that should have been scores.
Tiny brown marks on the cut pieces suggest the laser going back and forth over certain spots and heating the paper.
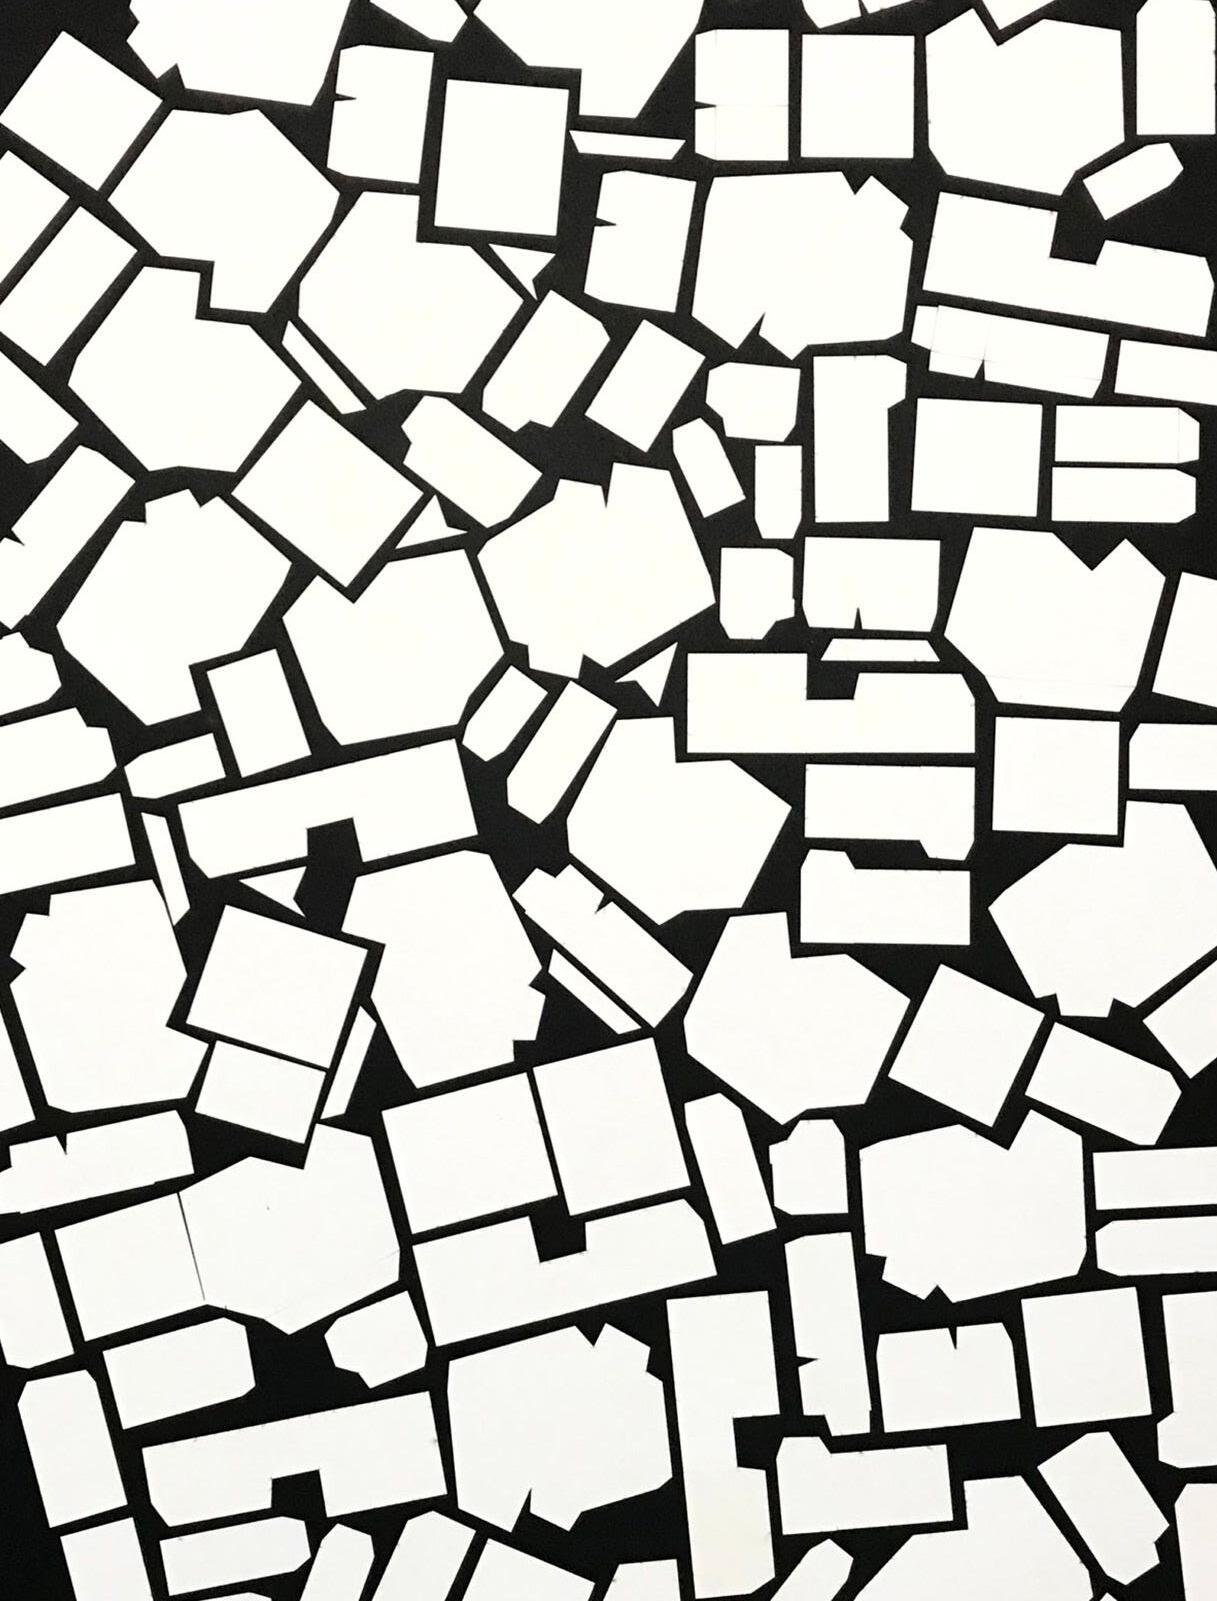
Image at right shows the pieces laid out on a black matboard to form a random pattern.
KEY TAKEAWAYS
Lines were doubled
Impossible to tell which pieces went together
Use pieces in 2D instead Arrange on black background to make an overall pattern
Tile pattern in Photoshop (for wallpaper image)
16
ENVELOPE CONTENTS
17 T2 REPEATING PATTERN
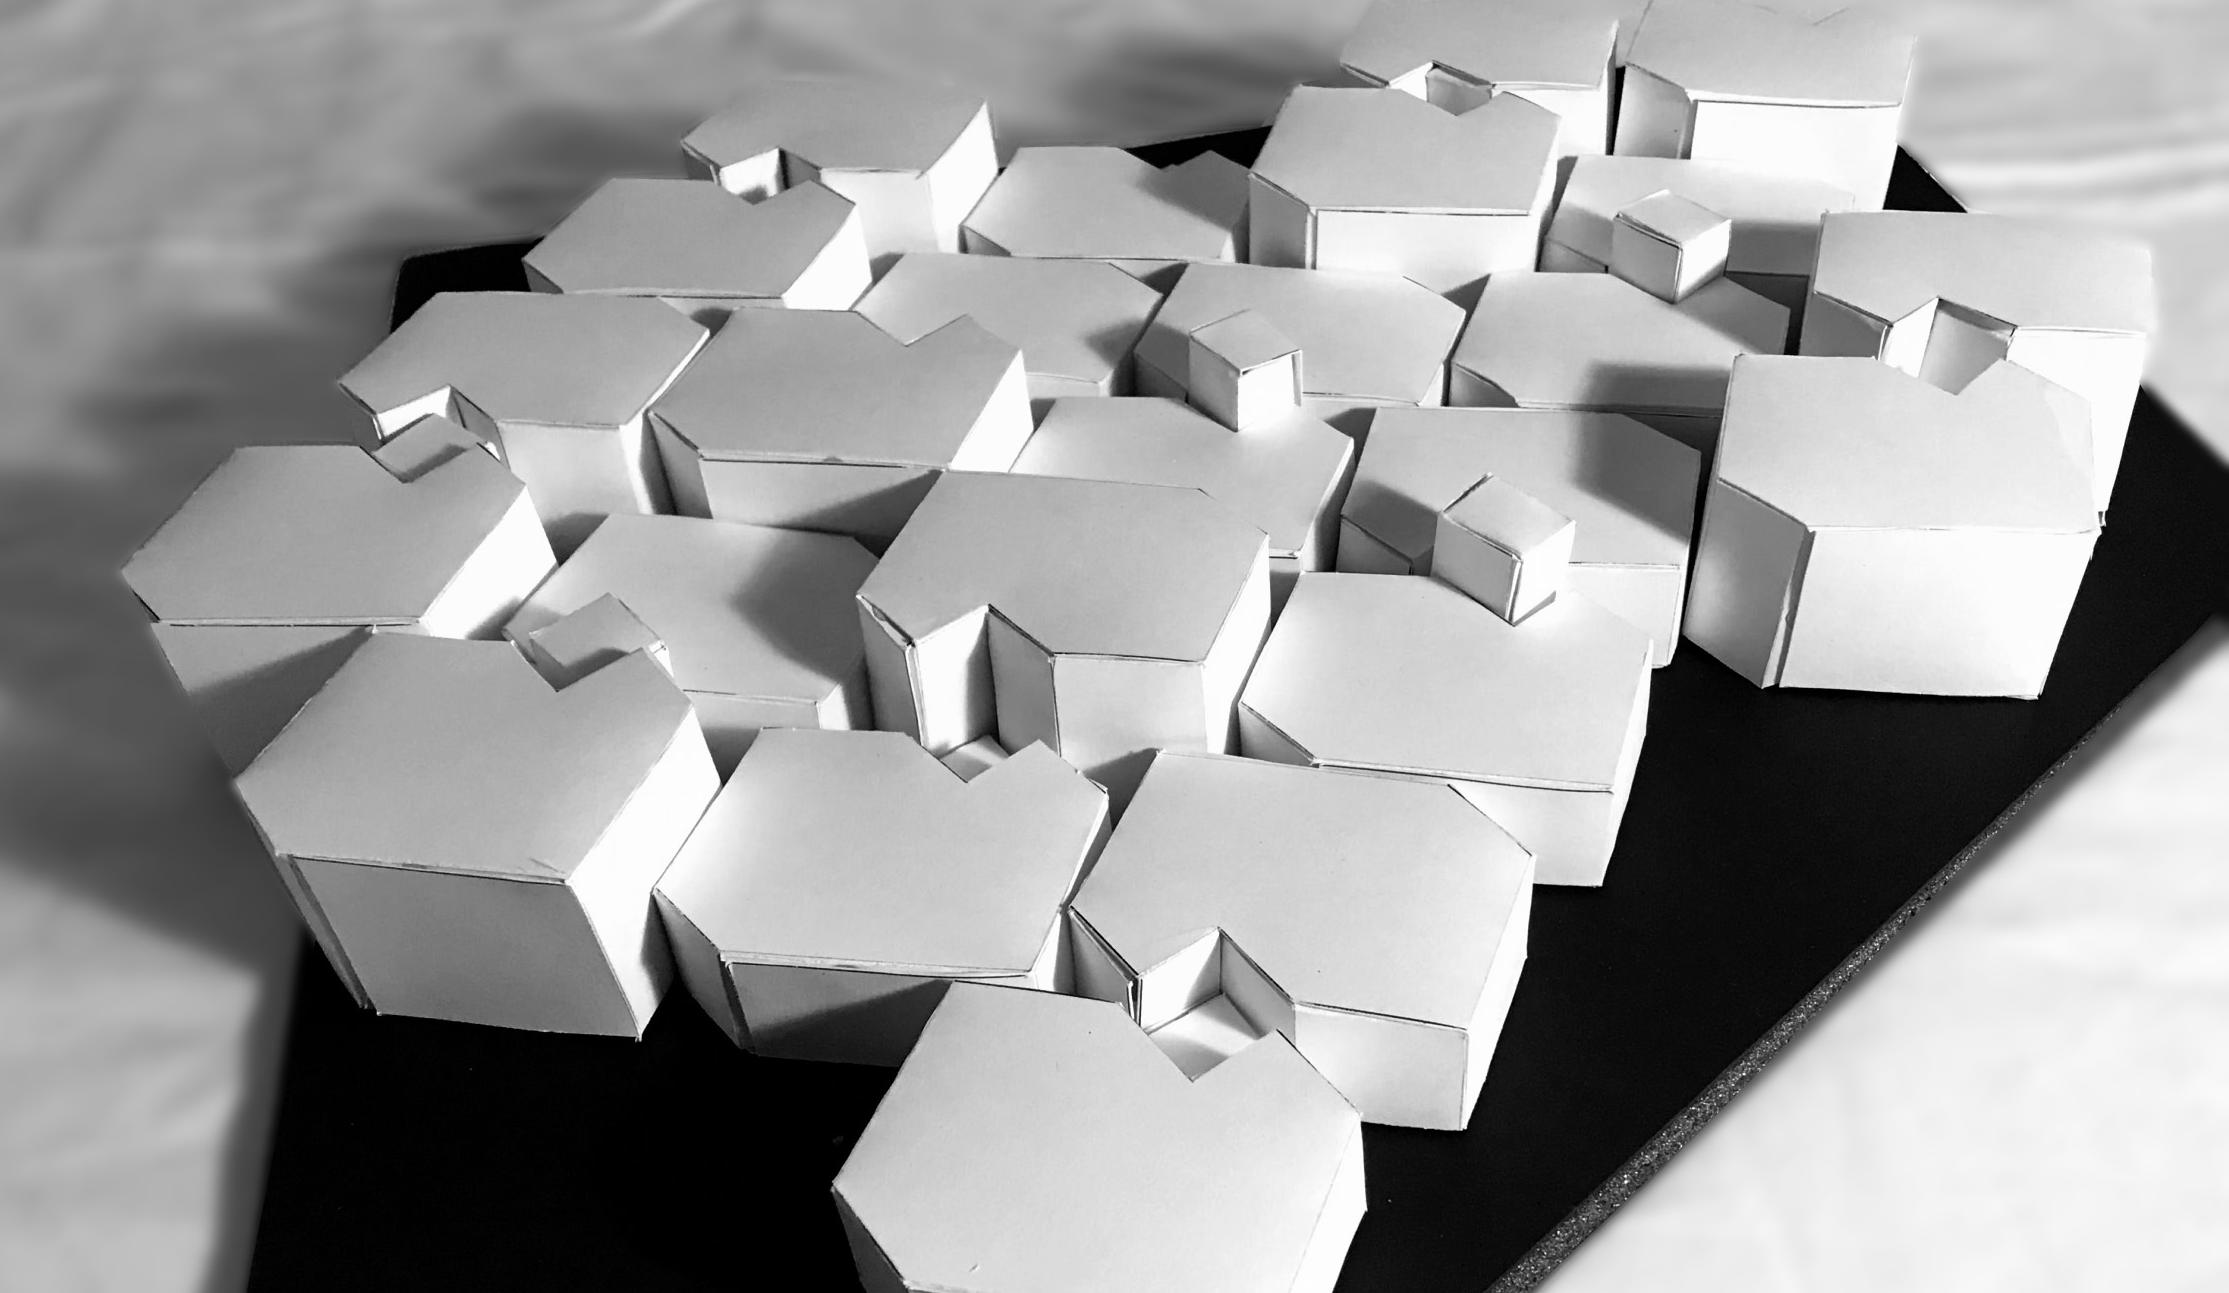
Final Products
Outcome - Two complementary finishes
The exercise using a tessillation as the inspiration for an architectural wall finish was successful.
Producing numerous iterations throughout the process kept improving and evolving the results.
18 DAPPLED SUNLIGHT
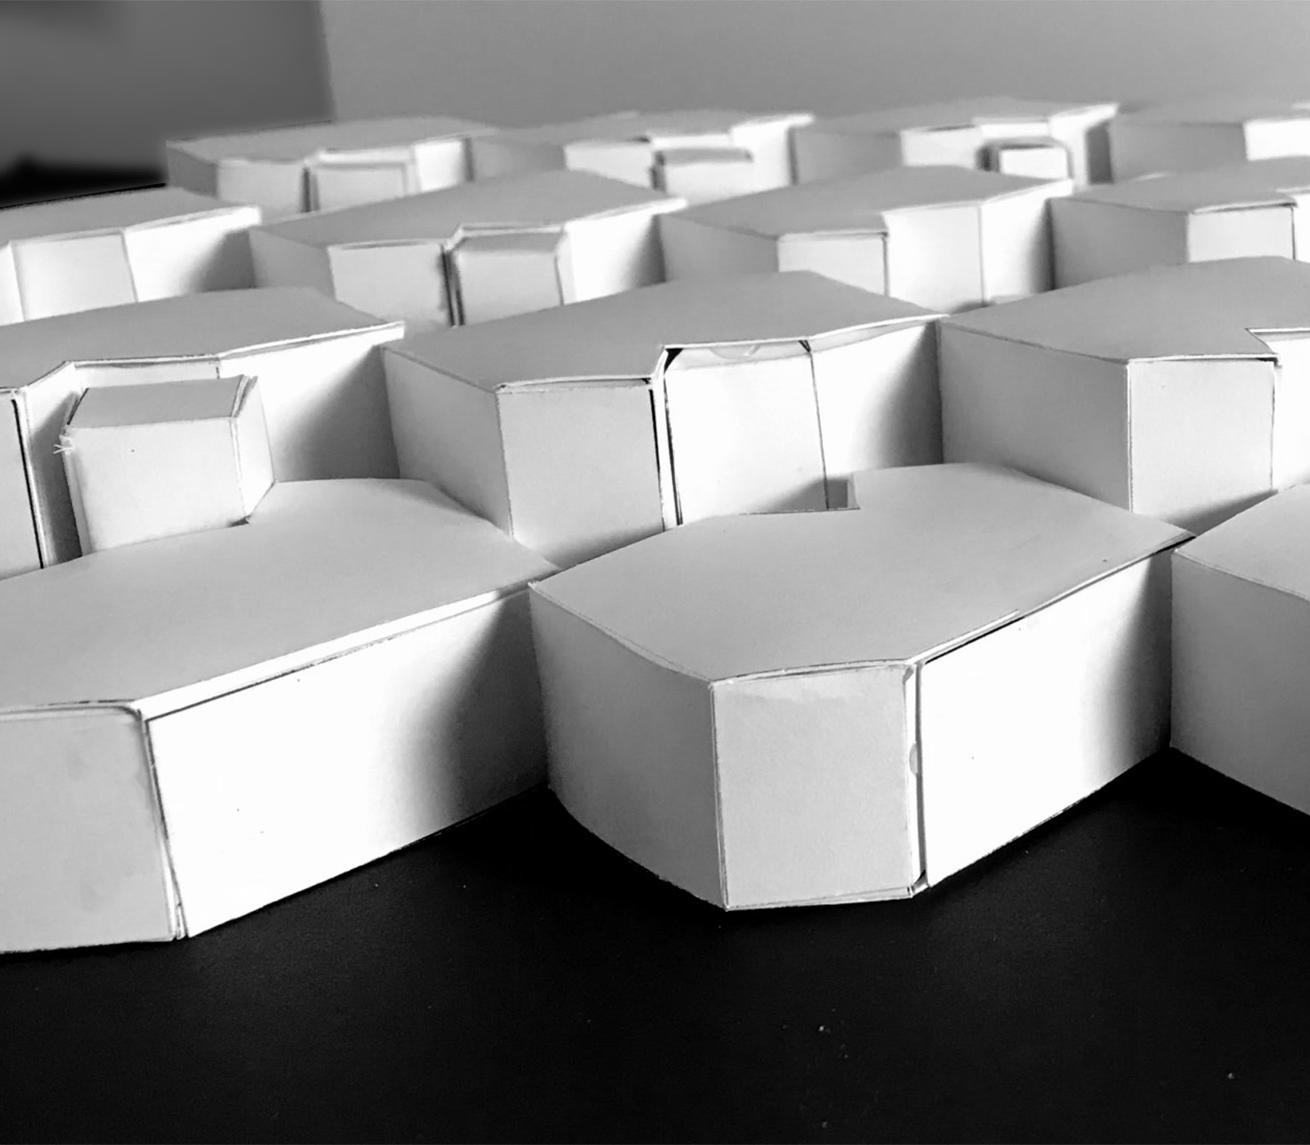
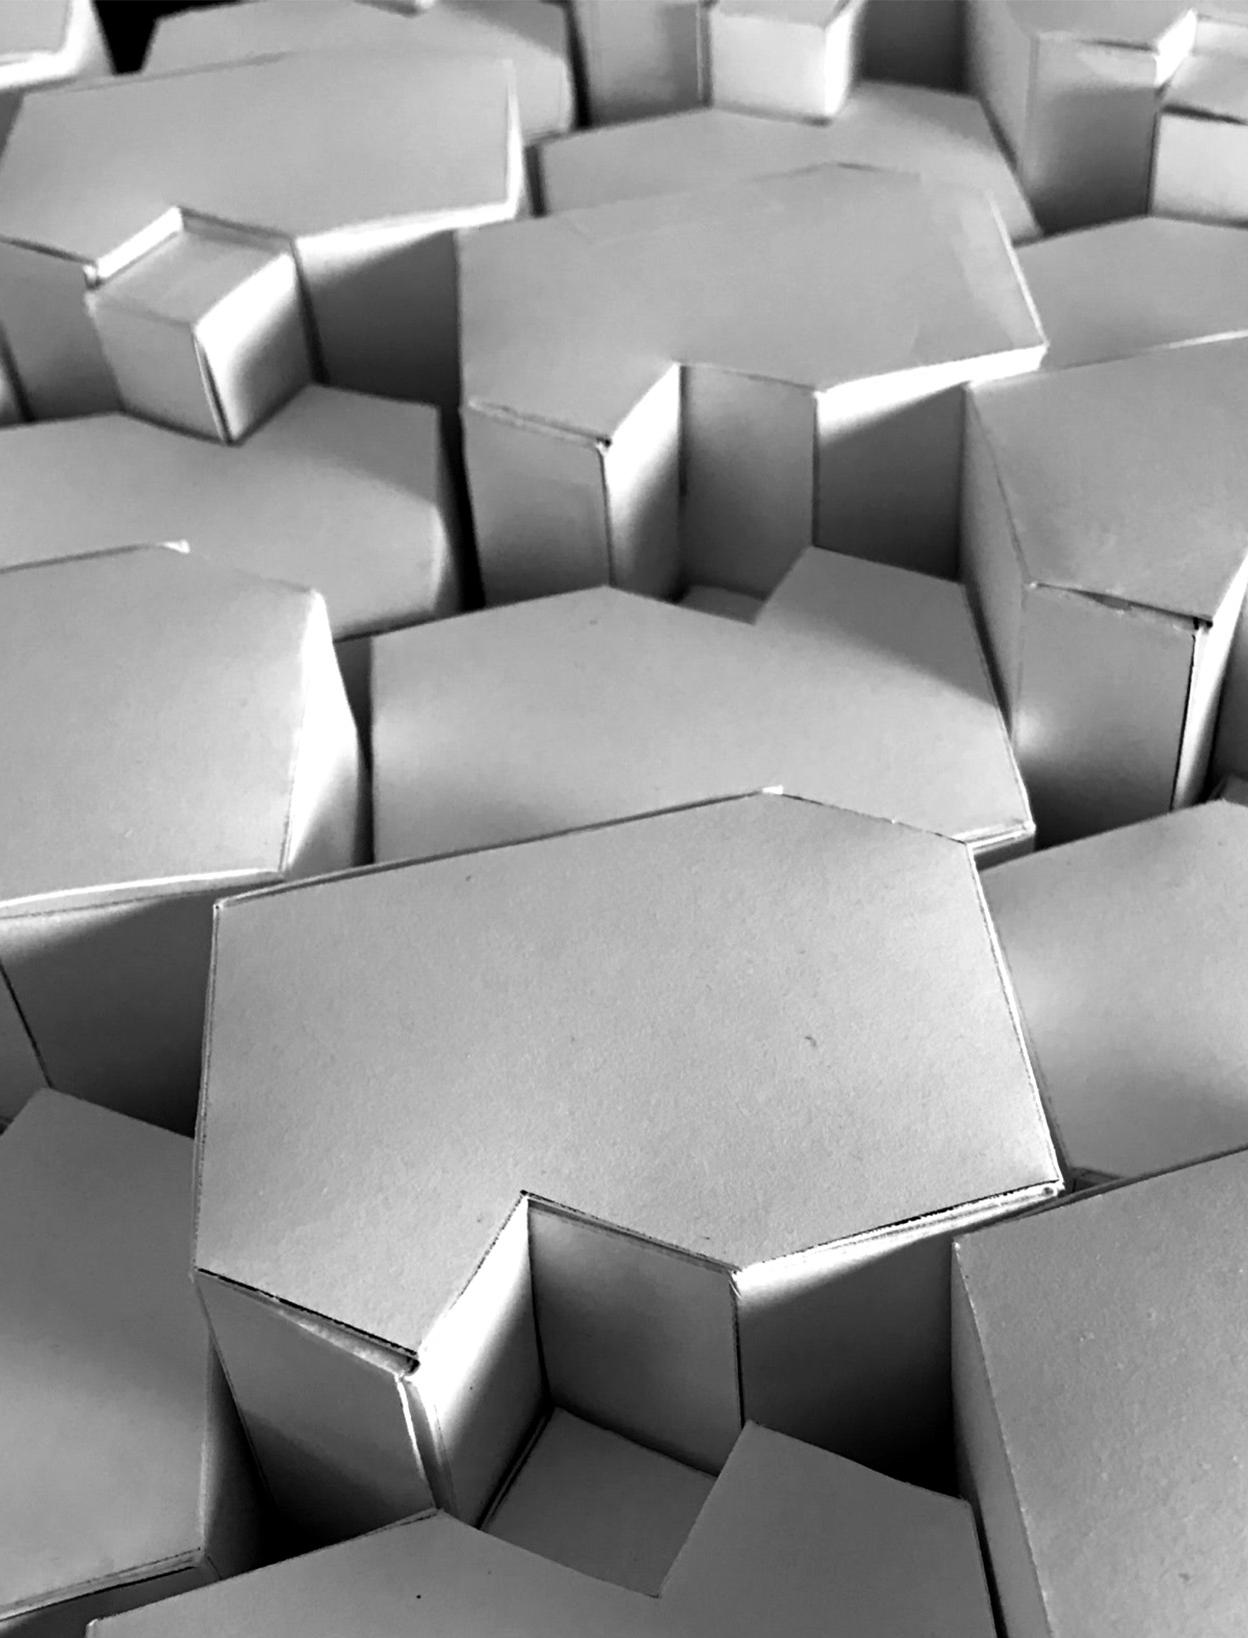
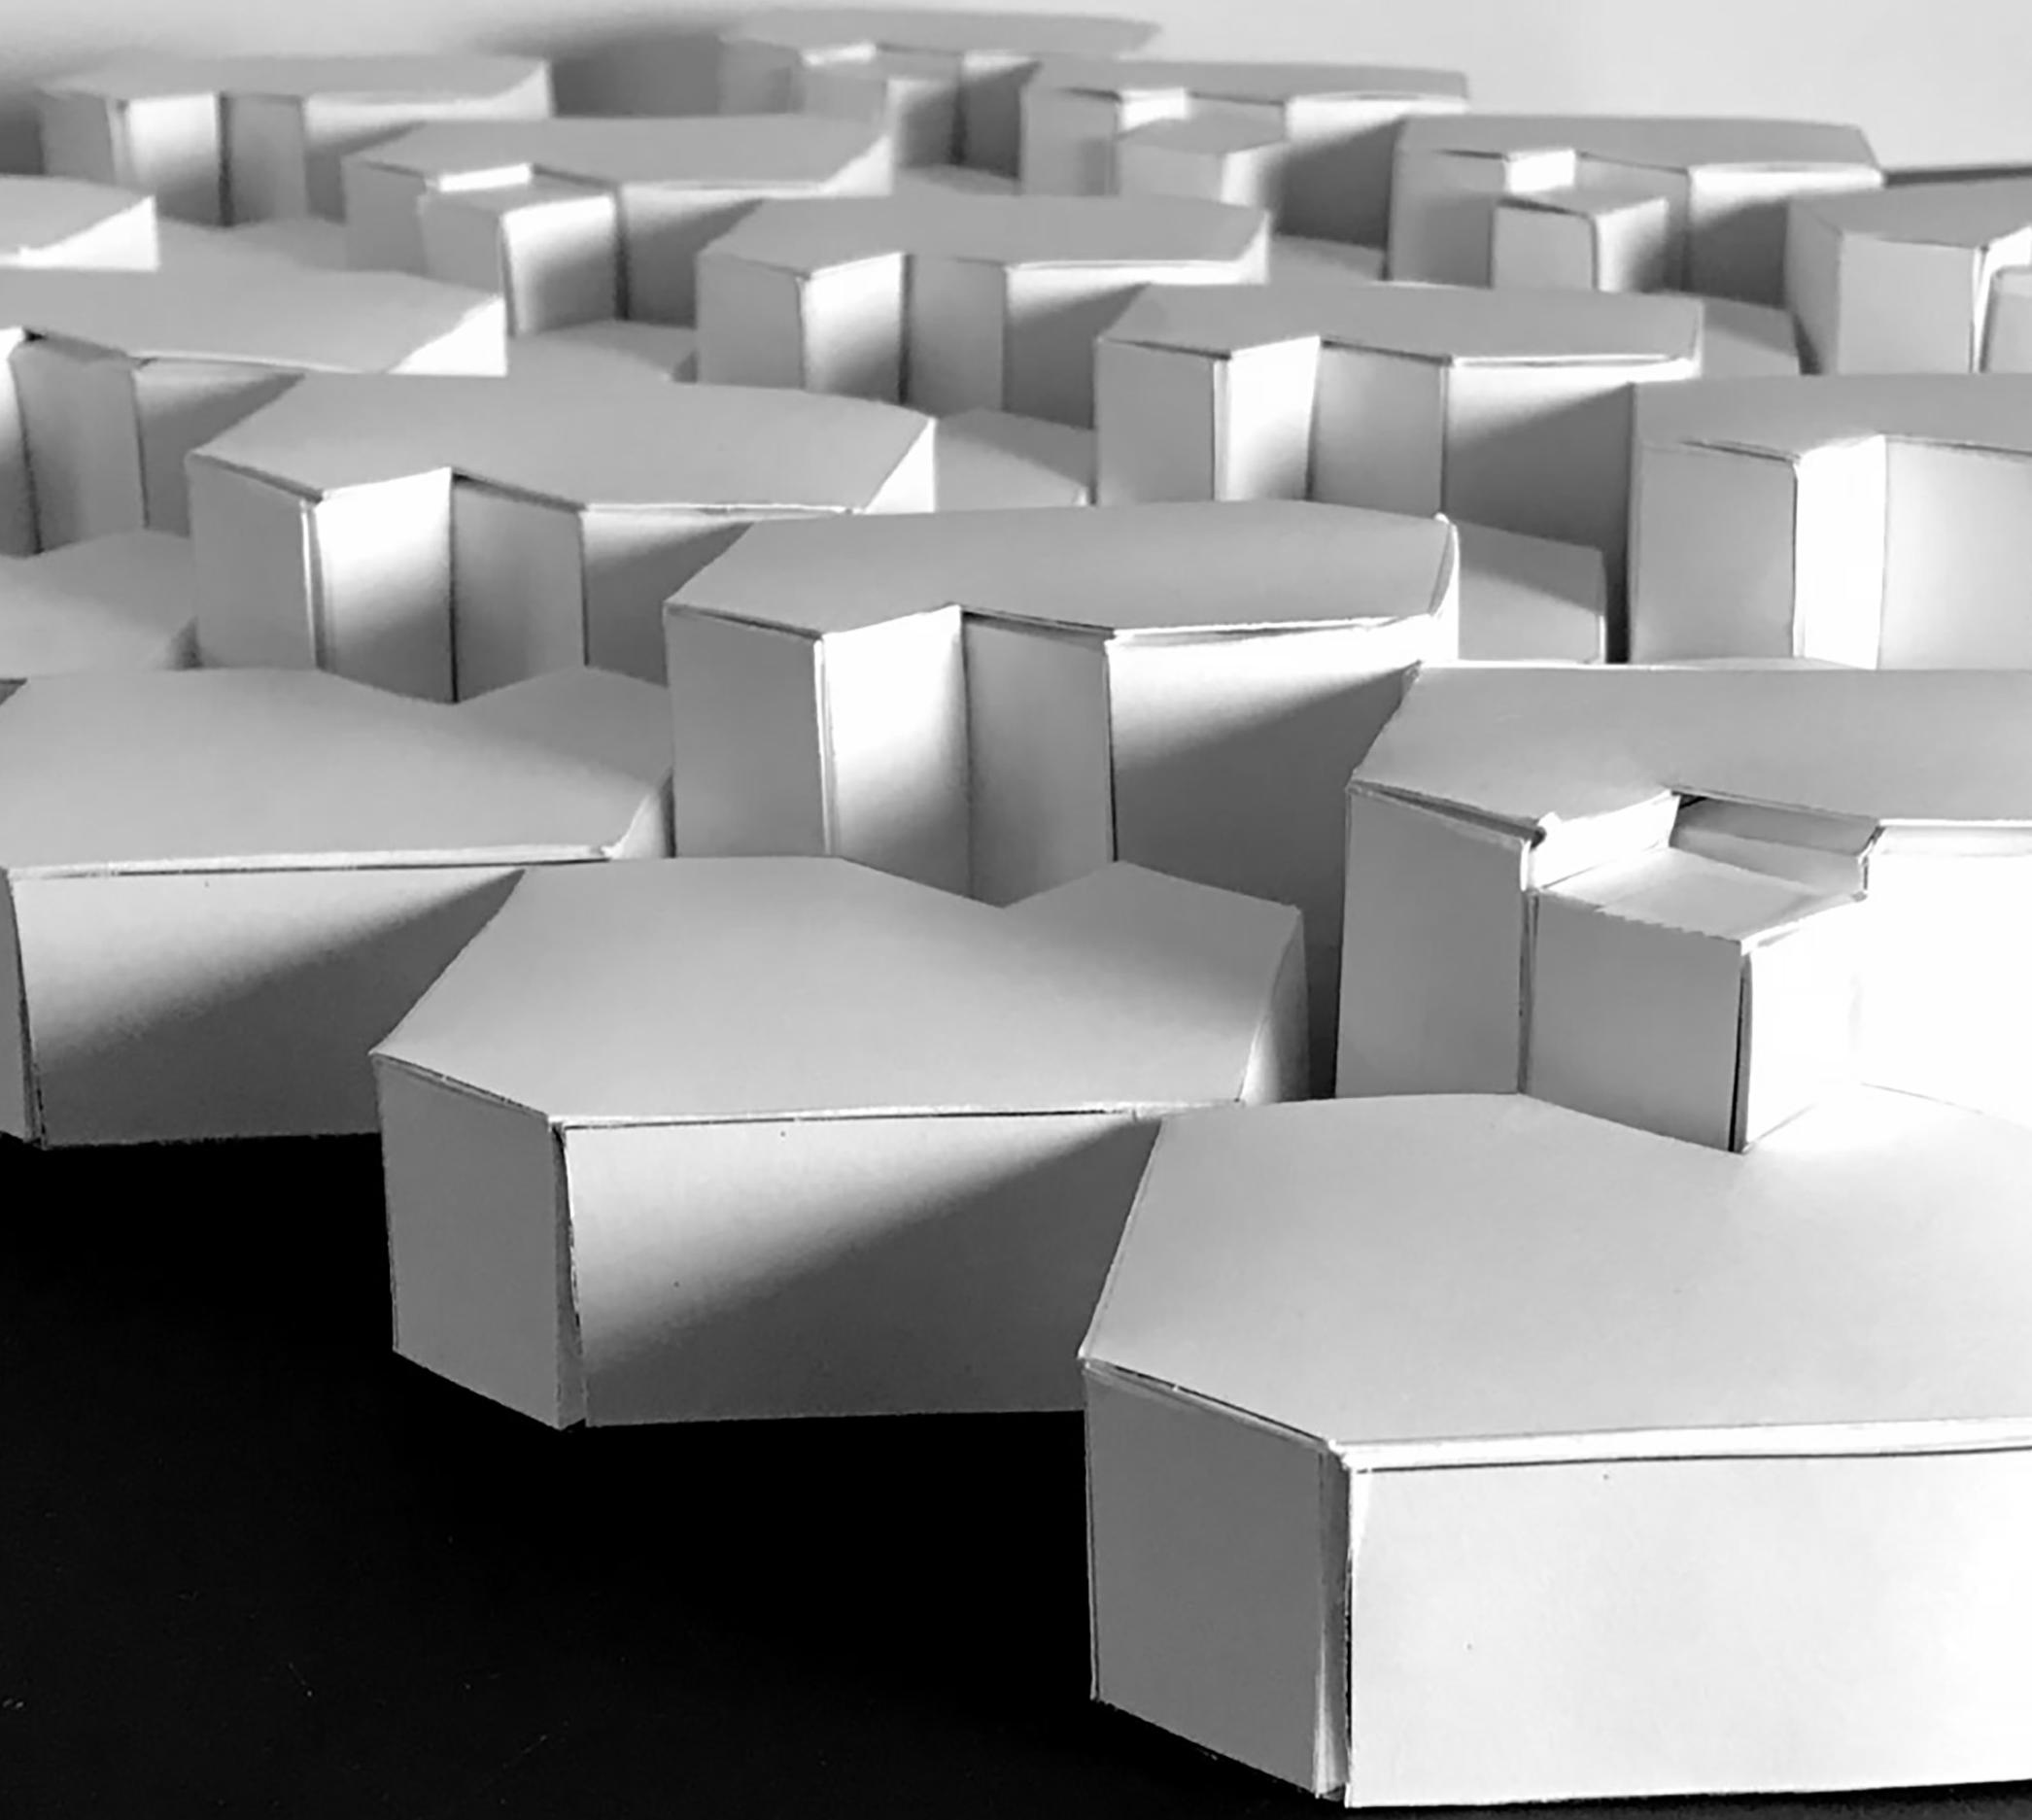
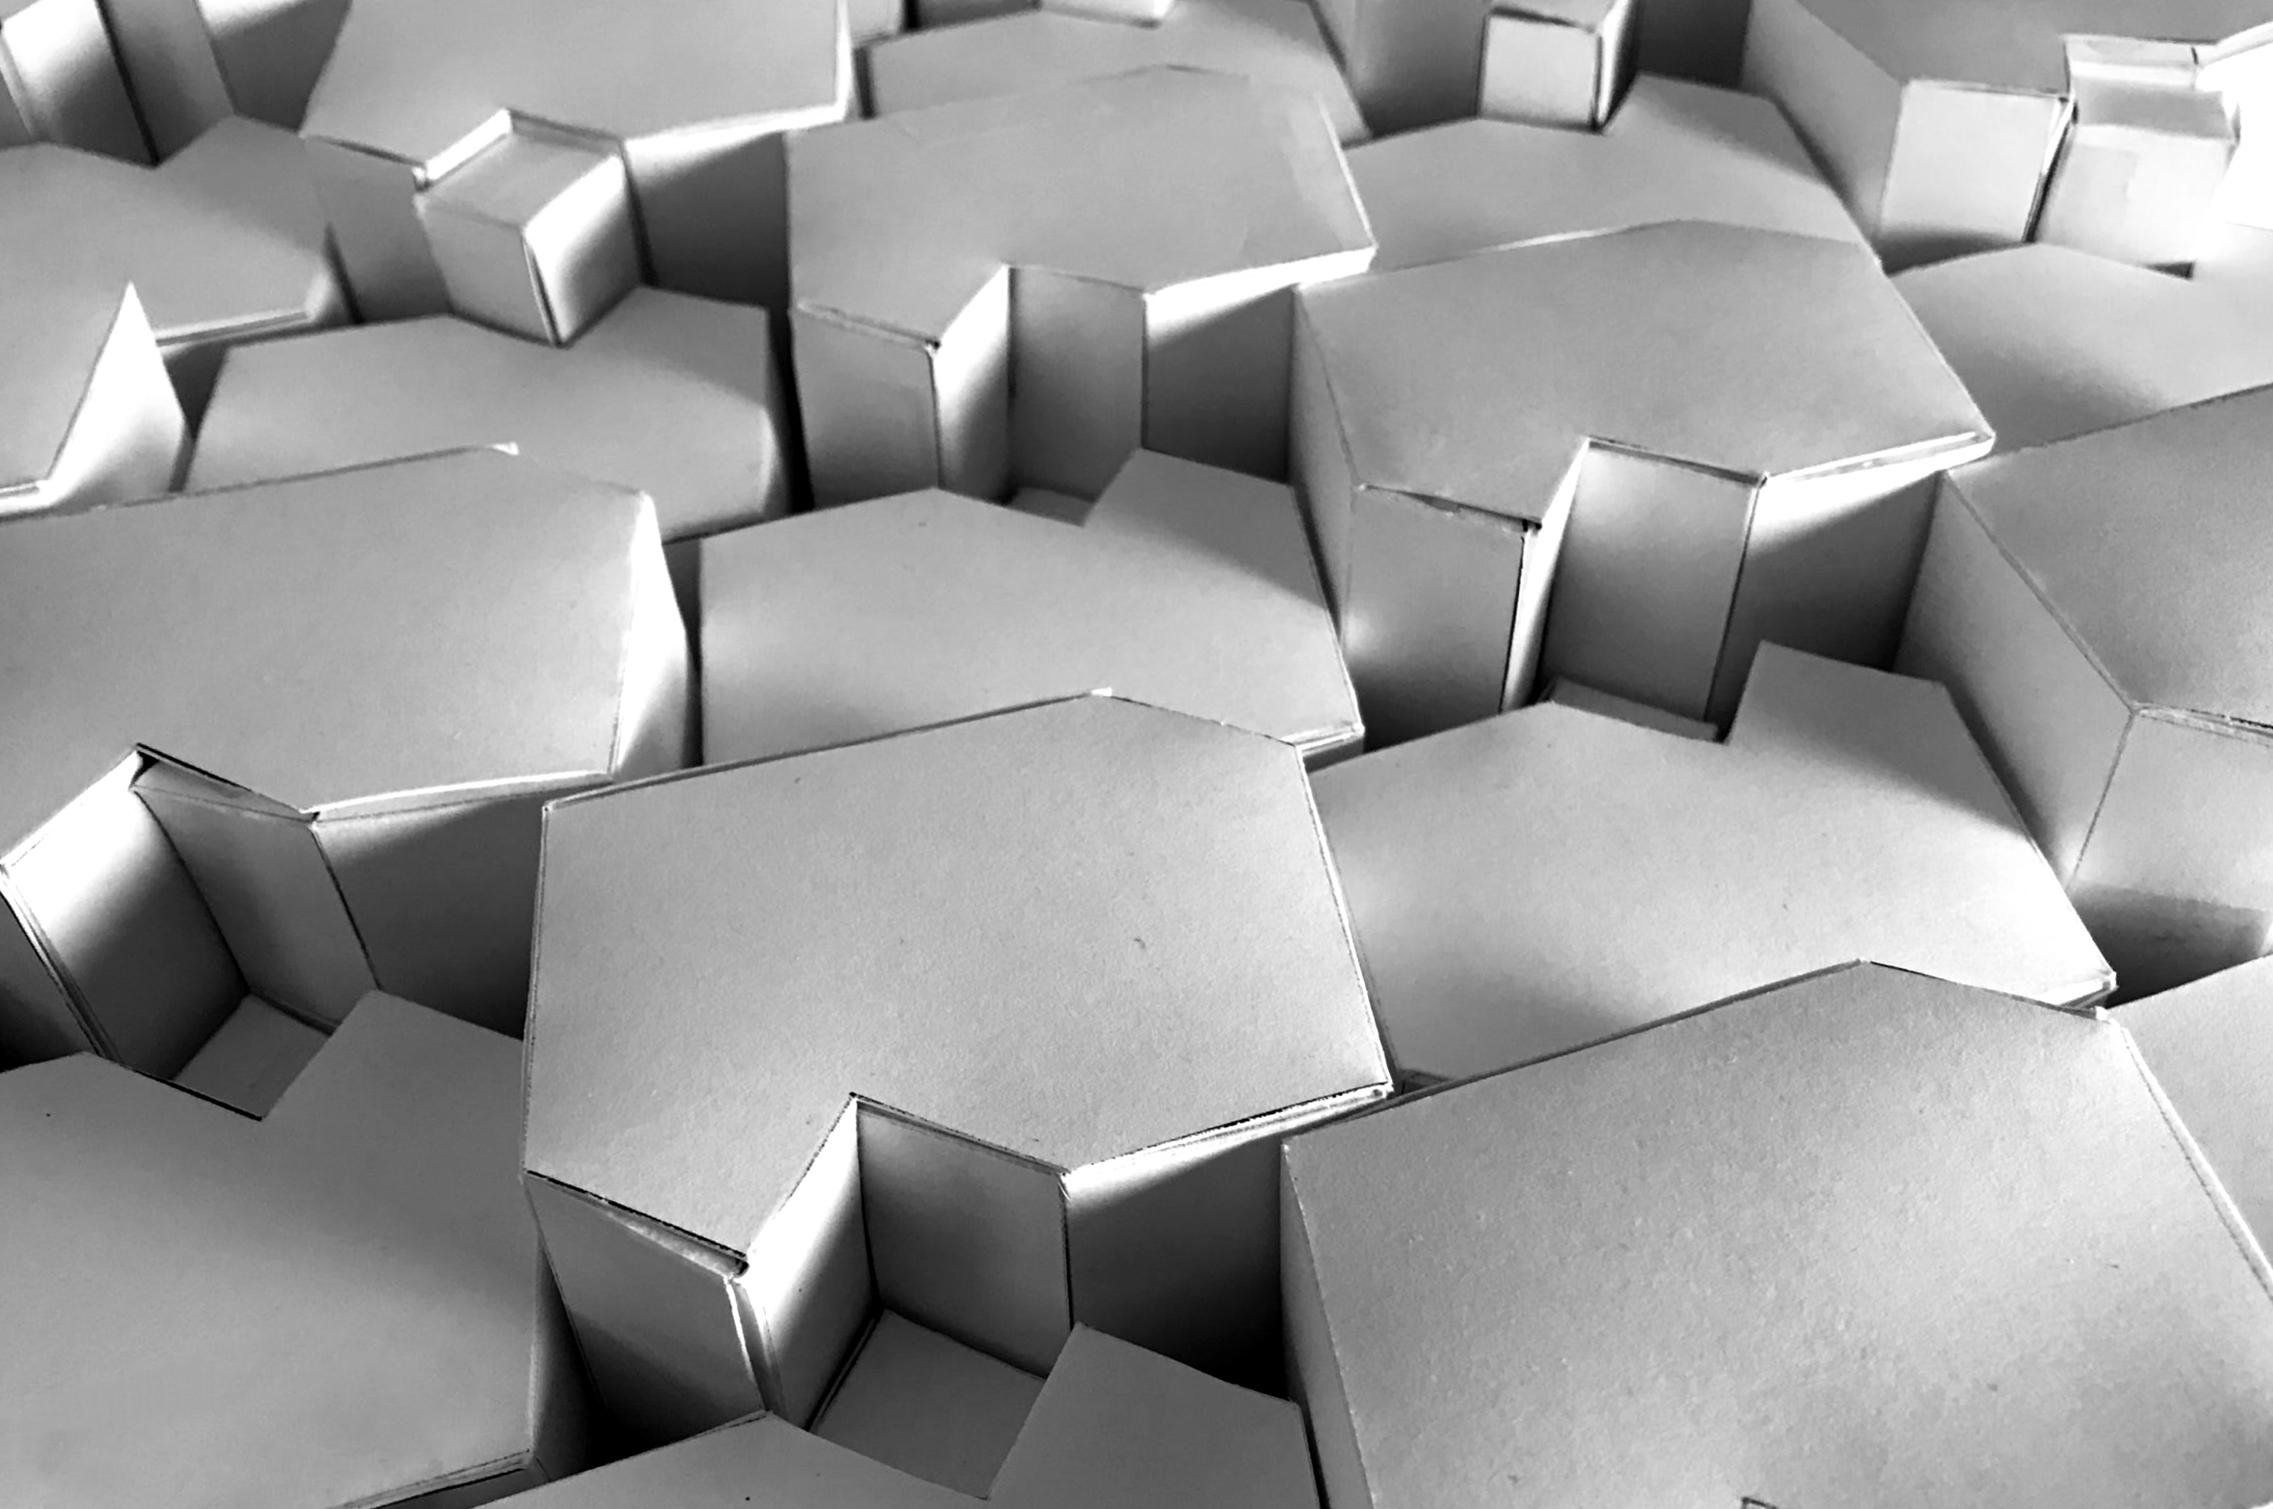
The 3 dimensional finish incorporates stylized hex shapes with cuboids that repeat with height variations. From certain views, the finish suggests repeating building facades.
The play of shadow and light off the various sides adds visual interest and texture.
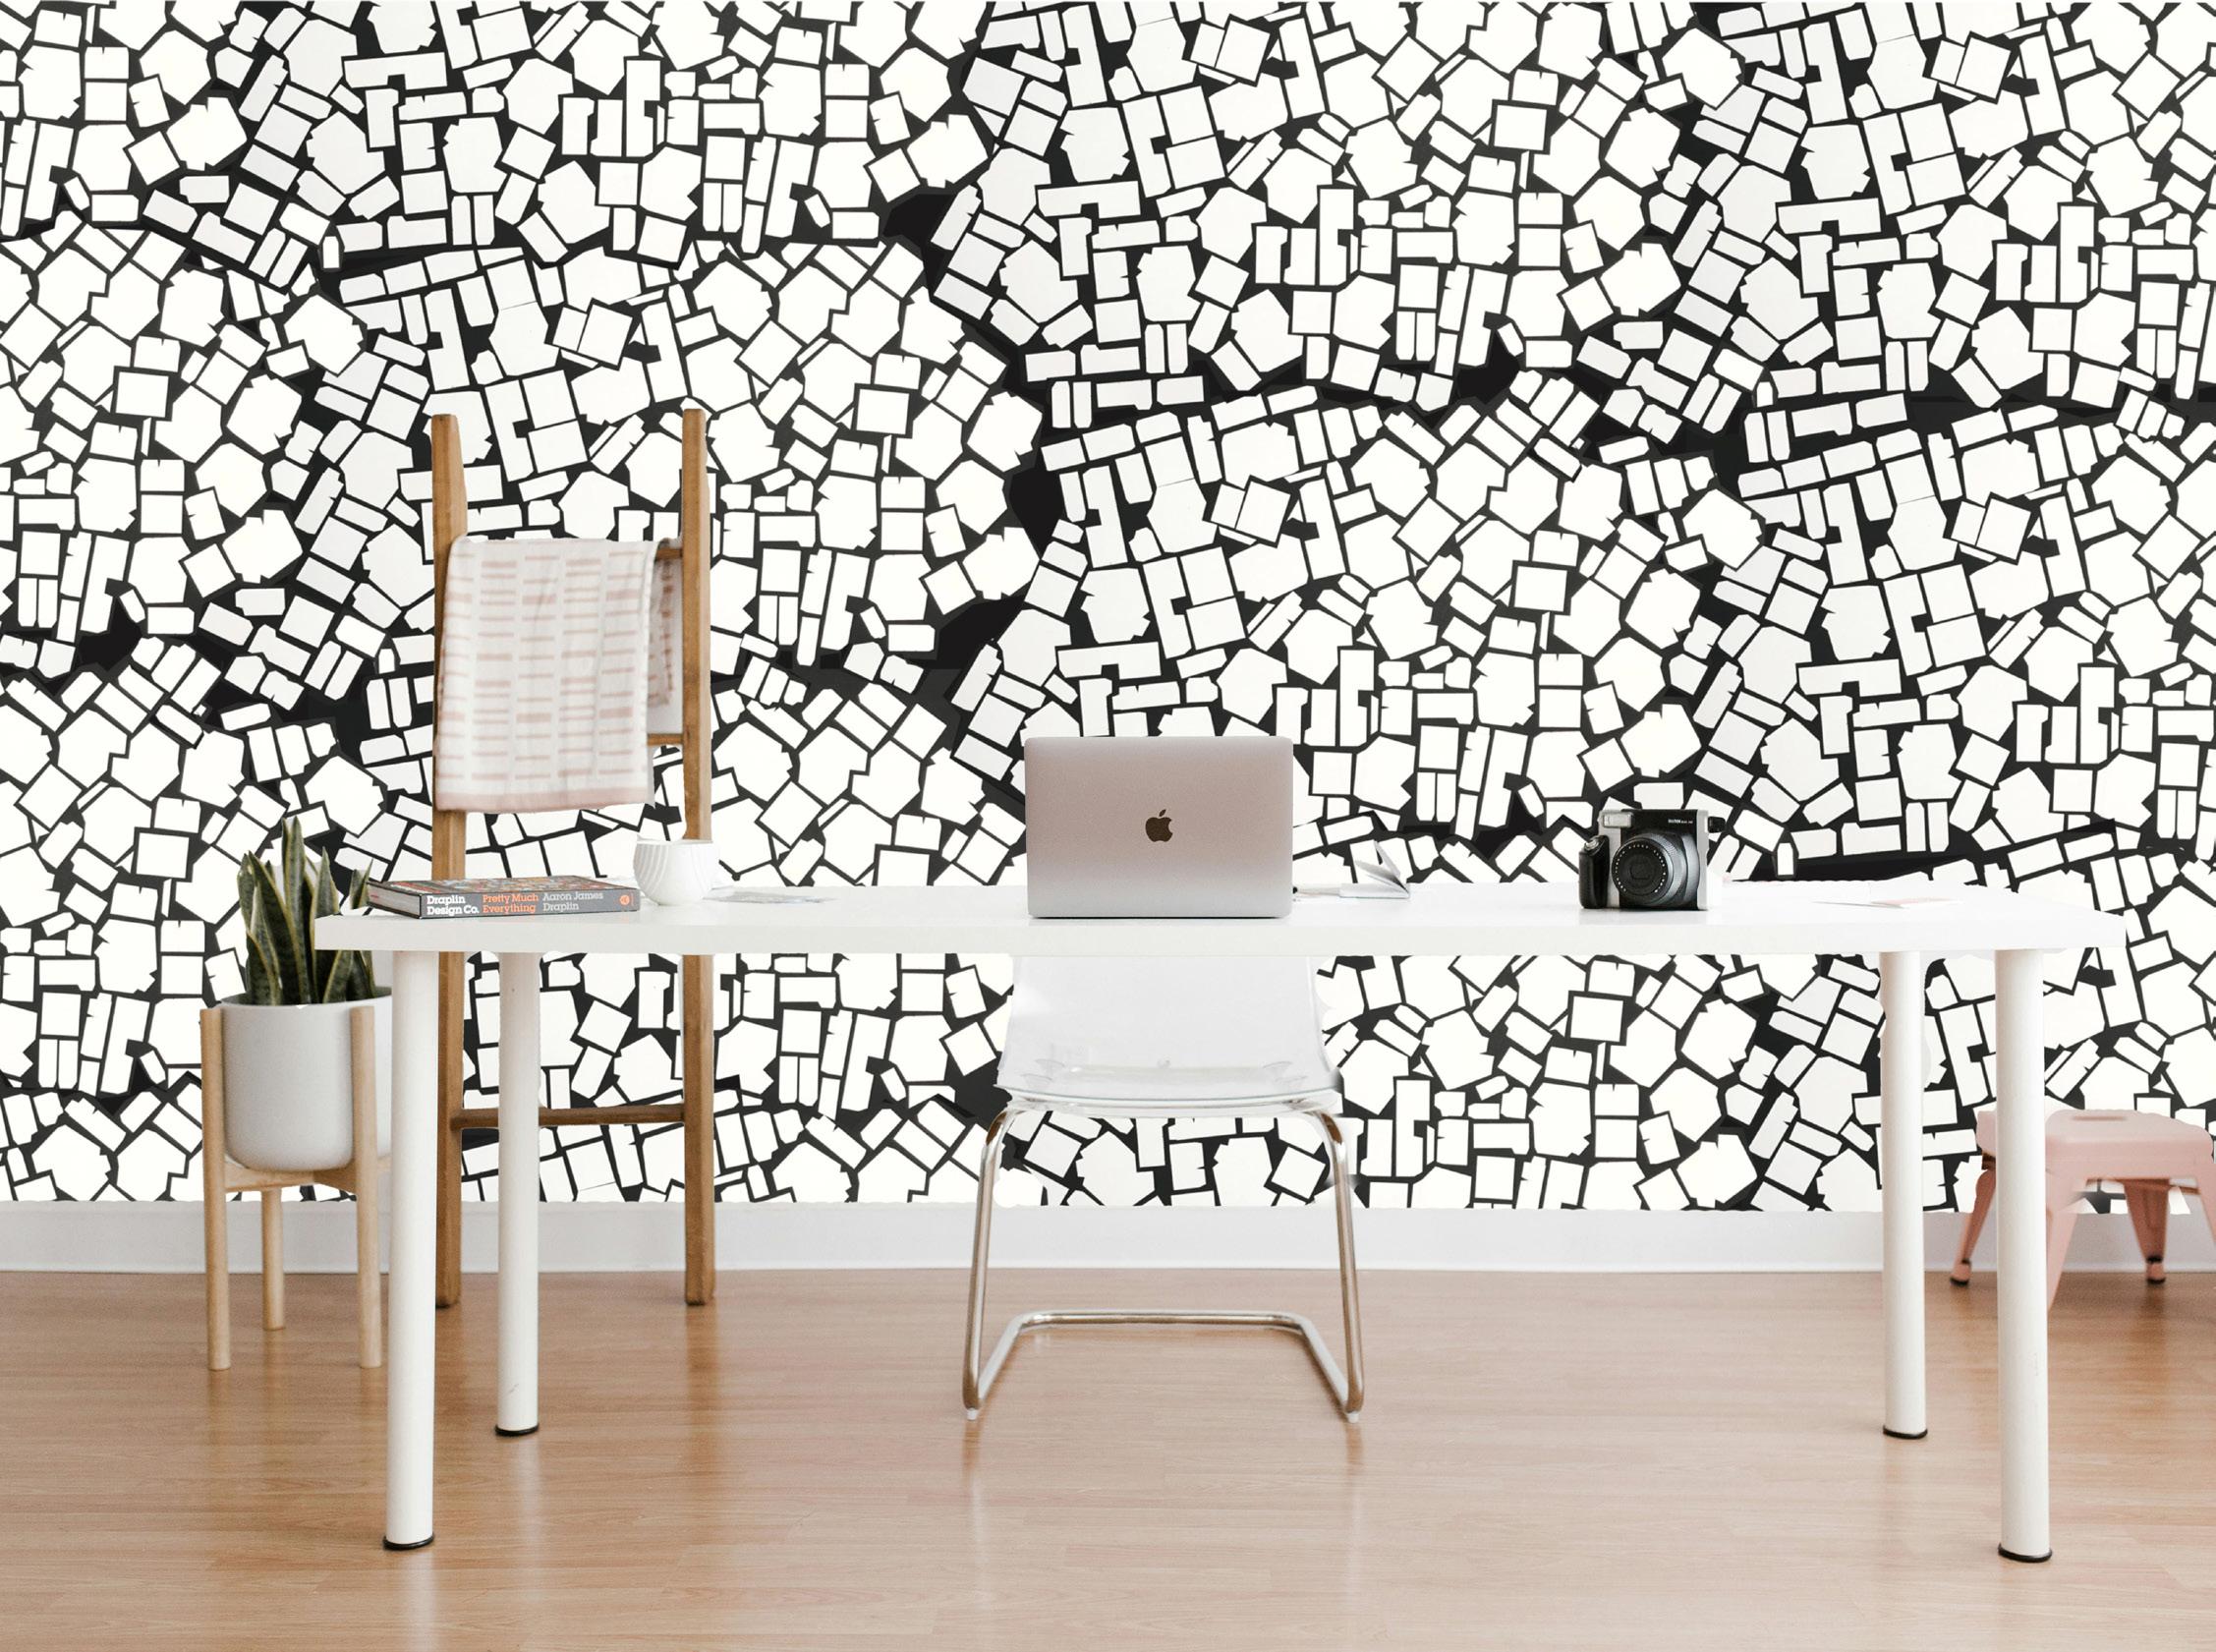
The 2 dimensional pattern design was an unexpected outcome. The various cut pieces from the laser cutter laid out on the table looked like terrazo - which lead to the development of the complementary wallpaper and textile pattern.
19 PARTIAL SUN PARTIAL CLOUDS
Below - Exploded Tessellation WallpaperAvailable soon