

Deep Cleaning for Pubs: Revitalizing Your Establishment for a Fresh Start

The Importance of Deep Cleaning in Pubs
Running a successful pub involves more than just serving great food and drinks. It also requires maintaining a clean and hygienic environment for your customers. Regular cleaning is important, but deep cleaning plays a crucial role in ensuring the overall cleanliness and safety of your pub. In this article, we will explore the importance of deep cleaning in pubs, the benefits it provides, and why it should be a priority for every pub owner.
Creating a Clean and Inviting Atmosphere
Deep cleaning goes beyond surface-level cleaning and addresses the hidden dirt, grime, and bacteria that can accumulate in a pub over time. Pubs are busy places where spills, food particles, and high foot traffic are common. Regular deep cleaning ensures that
these areas are thoroughly cleaned, removing dirt, stains, and odors. This creates a clean and inviting atmosphere for your customers, making them feel comfortable and increasing their overall satisfaction with their pub experience.

Enhancing Food Safety and Hygiene
Food safety is of utmost importance in pubs that serve meals or snacks. Deep cleaning the kitchen and food preparation areas is essential for maintaining high standards of hygiene. It involves thorough cleaning of equipment, countertops, cutting boards, and other surfaces to remove any traces of bacteria, dirt, or food residue. Deep cleaning not only ensures the safety of the food you serve but also helps prevent cross-contamination and the risk of foodborne illnesses.
Maintaining Health and Safety Standards
A clean and well-maintained pub is not only visually appealing but also promotes a healthy and safe environment for both customers and staff. Deep cleaning targets areas that are often overlooked during regular cleaning routines, such as hard-to-reach corners, hidden crevices, and high-touch surfaces. By eliminating dirt, dust, allergens,
and pathogens, deep cleaning helps reduce the risk of respiratory problems, allergies, and the spread of infections, creating a safer environment for everyone.
Preserving the Longevity of Fixtures and Equipment
Pubs often have various fixtures, furniture, and equipment that require proper care and maintenance. Deep cleaning helps preserve the longevity of these assets. Regular deep cleaning removes dirt, grime, and stains that can cause premature wear and tear, extending the lifespan of your fixtures and reducing the need for frequent replacements. This not only saves you money in the long run but also helps maintain the aesthetic appeal of your pub.
Boosting Reputation and Customer Satisfaction
A clean and well-maintained pub leaves a positive impression on customers. When patrons walk into a pub that is visibly clean and fresh, it creates a sense of trust and professionalism. Deep cleaning demonstrates your commitment to providing a high-quality experience and shows that you prioritize cleanliness and customer satisfaction. Word-of-mouth recommendations are often influenced by the cleanliness and ambiance of a pub, so investing in deep cleaning can contribute to a positive reputation and increased customer loyalty.

Assessing the Cleaning Needs of Your Pub

The size and layout of your pub will significantly impact the cleaning needs. Assess the square footage of your pub, including the dining areas, bar area, kitchen, restrooms, and any outdoor seating areas. Larger spaces may require more extensive cleaning and maintenance. Additionally, consider the layout and design elements that may require extra attention, such as intricate fixtures, high ceilings, or hard-to-reach areas. Understanding the dimensions and layout will help you allocate resources and determine the level of cleaning required for each area.
Identify High-Traffic Areas
Identifying high-traffic areas is crucial when assessing your pub's cleaning needs. These are the areas that experience the most foot traffic and are more prone to dirt, spills, and wear and tear. Common high-traffic areas in a pub include entranceways, bar counters, seating areas, and restrooms. These areas will require more frequent and thorough cleaning to ensure they remain clean and presentable throughout the day Paying extra
attention to high-traffic areas will help maintain a positive impression on your customers.
Consider the Type of Services Offered
The type of services offered in your pub will also influence the cleaning requirements. If your pub serves meals or snacks, you'll need to pay particular attention to the cleanliness of the kitchen and food preparation areas. Regular and thorough cleaning of kitchen equipment, countertops, and storage areas will ensure food safety and hygiene. Additionally, if your pub hosts live entertainment, such as bands or DJs, consider the cleaning needs associated with the stage area, sound equipment, and dance floor. Tailoring your cleaning plan to accommodate the specific services offered will help maintain a clean and well-managed pub environment.
Evaluate Cleaning Frequencies

Determining the appropriate cleaning frequencies is essential to keep your pub consistently clean and well-maintained. Assess the foot traffic in different areas of your pub and consider factors such as the time of day and day of the week when certain areas may require more attention. For example, restrooms and high-traffic areas may need more frequent cleaning during peak hours, while outdoor seating areas may require daily cleaning during warmer months. Evaluating the cleaning frequencies will help you establish a cleaning schedule that effectively addresses the needs of your pub.
Consider Professional Cleaning Services
While regular cleaning tasks can be handled in-house, some pub owners find it beneficial to hire professional cleaning services. Professional cleaners have the expertise, equipment, and resources to tackle deep cleaning tasks and ensure a consistently high standard of cleanliness. They can provide specialized services such as carpet cleaning, window cleaning, and floor maintenance, which may require specialized equipment and techniques. Considering professional cleaning services can save you time and effort, allowing you to focus on other aspects of running your pub while maintaining a clean and inviting environment.

Creating a Deep Cleaning Checklist
Maintaining a clean and hygienic environment is crucial for the success of any pub. Deep cleaning plays a vital role in keeping your establishment fresh, presentable, and safe for both customers and staff. To ensure a comprehensive deep cleaning process, it's helpful to create a checklist that covers all the important tasks specific to a pub setting. In this article, we will guide you through the process of creating a deep cleaning checklist for your pub, ensuring that no area is overlooked during the cleaning process.

Assess Your Pub
Before creating a deep cleaning checklist, take some time to assess your pub thoroughly Walk through each area and identify the specific cleaning challenges and areas that require deep cleaning attention. This assessment will help you understand the unique cleaning needs of your pub and ensure that your checklist covers all the necessary tasks.
Break Down the Areas
Divide your pub into different areas or zones to facilitate effective cleaning. This can include the bar area, dining areas, restrooms, kitchen, outdoor seating, and any other specific spaces within your establishment. By breaking down the areas, you can focus on one section at a time, ensuring that all areas receive the necessary deep cleaning attention.
Identify Deep Cleaning Tasks
Identify the deep cleaning tasks that need to be performed in each area of your pub. These tasks will go beyond the regular cleaning routines and target areas that may accumulate dirt, grime, or odors over time. Some common deep cleaning tasks for a pub include:

1. Bar Area:
● Thoroughly clean and sanitize the bar counter and surface.
● Clean and polish bar equipment, including taps, glassware, and utensils.
● Deep clean refrigeration units and remove any spills or residue.
● Clean and disinfect bar stools, footrests, and other seating areas.
2. Dining Areas:
● Vacuum and deep clean carpets or mop and polish hard floors.
● Clean and sanitize tables, chairs, and booth seating.
● Dust and clean light fixtures, ceiling fans, and decorative items.
● Spot clean or deep clean upholstery on chairs and booth seating.
3. Restrooms:
● Clean and sanitize toilets, urinals, sinks, and countertops.
● Wipe down mirrors and glass surfaces.
● Refill soap dispensers, hand dryers, and toilet paper holders.
● Clean and disinfect door handles, light switches, and other high-touch surfaces.
4. Kitchen:
● Deep clean and degrease cooking equipment, including ovens, grills, and fryers.
● Clean and sanitize food preparation areas, countertops, and cutting boards.
● Empty and clean out refrigerators, freezers, and storage areas.
● Scrub floors and drains to remove any buildup.
5. Outdoor Seating:
● Sweep and hose down outdoor seating areas.
● Clean and wipe down tables, chairs, and umbrellas.
● Remove any debris or trash from the outdoor space.
● Check and clean outdoor lighting fixtures.
Customize the Checklist
Once you have identified the deep cleaning tasks for each area, create a customized checklist that outlines them. Consider the frequency of each task, whether it's a daily, weekly, monthly, or quarterly task, and allocate sufficient time and resources accordingly Regularly review and update the checklist to ensure that it remains relevant and effective in meeting your pub's deep cleaning needs.
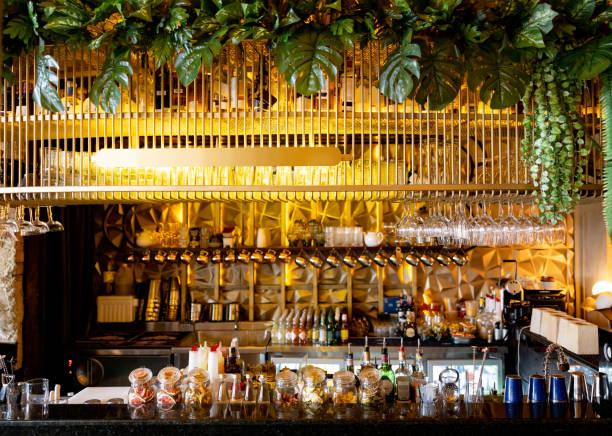
Deep Cleaning the Bar Area
The bar area is the heart of any pub, and keeping it clean and well-maintained is crucial for creating a pleasant and inviting atmosphere for your customers. Regular deep
cleaning of the bar area helps ensure that it remains hygienic, presentable, and in compliance with health and safety regulations. In this article, we will guide you through the process of deep cleaning the bar area, covering essential tasks and tips to achieve a thorough and effective cleaning routine.

1. Clear and Organize
Start by clearing the bar area of any clutter, empty bottles, or unnecessary items. Remove glassware, utensils, and bar tools from the counter and organize them in designated storage areas. This step allows for easy access to surfaces and ensures a clean and organized workspace for the deep cleaning process.
2. Clean and Sanitize the Bar Counter
Thoroughly clean and sanitize the bar counter using an appropriate cleaning solution. Remove any spilled drinks, sticky residue, or debris. Pay special attention to areas where glasses, bottles, or other items are placed frequently Use a microfiber cloth or a bar towel to wipe down the counter, ensuring all surfaces are clean and free of bacteria or germs.
3. Polish Glassware and Utensils
Clean and polish glassware, utensils, and bar tools to maintain their shine and hygiene. Wash glassware using hot soapy water or a dishwasher, following proper hygiene practices. Inspect each glass for any residue or spots, and polish them using a lint-free cloth or a glass polishing cloth. Similarly, clean and sanitize utensils and bar tools, ensuring they are free from any dirt or contaminants.
4. Deep Clean Bar Equipment
Take time to deep clean the various bar equipment, including taps, beer lines, coffee machines, and blender heads. Follow the manufacturer's instructions for cleaning each specific piece of equipment. Use appropriate cleaning solutions or sanitizers to remove any buildup, grime, or bacteria that may accumulate over time. Regular deep cleaning of bar equipment not only ensures their longevity but also helps maintain the quality and taste of the beverages served.
5. Clean and Sanitize Bar Stools and Seating

Wipe down and sanitize bar stools and seating areas regularly. Use a mild cleaning solution appropriate for the material of the stools, such as wood or metal. Pay attention to any stains or spills, and address them promptly. Disinfect the seating surfaces to maintain cleanliness and promote a hygienic environment for your customers.
6. Maintain a Clean Back Bar
The back bar area often houses a variety of bottles, glassware, and other bar essentials. Regularly clean and organize this area to maintain a neat and presentable appearance. Dust the shelves, wipe down bottles, and discard any expired or damaged items. Keeping the back bar clean and organized enhances the overall aesthetics of the bar area.
7. Pay Attention to Glassware Storage
Ensure that the storage area for glassware is clean and well-maintained. Clean the shelves or cabinets where glassware is stored, removing any dust, spills, or debris. Regularly inspect glassware for chips or cracks, and replace any damaged items. Proper storage of glassware helps prevent contamination and ensures the glasses are ready for use at any time.
Refreshing the Dining and Seating Areas
The dining and seating areas of your pub play a significant role in creating a comfortable and enjoyable experience for your customers. Regularly refreshing these areas helps maintain cleanliness, visual appeal, and a welcoming ambiance. In this article, we will guide you through the process of refreshing the dining and seating areas of your pub, covering essential tasks and tips to create an inviting atmosphere for your patrons.
1. Clear and Declutter
Start by clearing the dining and seating areas of any unnecessary items, such as empty glasses, plates, or napkins. Remove any clutter that may have accumulated on tables, such as condiments, menus, or promotional materials. Clearing the area provides a clean canvas for refreshing the space and allows for easy access to surfaces.
2. Wipe Down and Disinfect Surfaces

Thoroughly wipe down and disinfect all surfaces in the dining and seating areas. This includes tables, chairs, booth seats, bar tops, and any other furniture or fixtures. Use a suitable cleaning solution to remove dirt, stains, and bacteria. Pay attention to high-touch areas, such as table edges, chair arms, and seat backs. Regular disinfection helps maintain a hygienic environment for your customers.
3. Deep Clean Upholstery and Fabrics
If your pub has upholstery or fabric-covered seating, deep clean these areas regularly to keep them fresh and inviting. Vacuum the upholstery to remove loose dirt and debris. Treat any stains or spills promptly using appropriate cleaning products or methods recommended for the fabric type. Consider professional upholstery cleaning periodically to ensure a thorough and effective deep cleaning process.
4. Refresh Table Settings
Refresh the table settings by replacing tablecloths, napkins, and tableware as needed. Ensure that tablecloths are clean, wrinkle-free, and properly sized for each table. Fold napkins neatly or use napkin holders for a polished appearance. Check tableware, such

as cutlery and glassware, for cleanliness and replace any damaged or worn items. Well-presented table settings contribute to the overall aesthetic of the dining area.
5. Enhance Lighting and Ambiance
Evaluate the lighting in the dining and seating areas and make necessary adjustments to enhance the ambiance. Ensure that bulbs are working correctly and provide sufficient illumination without being too harsh or dim. Consider incorporating additional lighting elements, such as decorative lamps or candles, to create a warm and inviting atmosphere. Proper lighting sets the mood and adds to the overall dining experience.
6. Decorate and Personalize
Consider adding decorative elements or personal touches to the dining and seating areas to make them visually appealing and unique. This could include artwork, plants, or themed decor that aligns with your pub's style or seasonal themes. Personalizing the space adds character and creates a memorable experience for your customers.
7. Regular Maintenance

In addition to regular refreshing, ongoing maintenance is essential to keep the dining and seating areas in top condition. Conduct regular inspections for any repairs or maintenance needs, such as loose chair legs, wobbly tables, or damaged upholstery. Address these issues promptly to ensure a safe and comfortable environment for your customers.
Revitalizing Restrooms and Sanitary Facilities
Restrooms and sanitary facilities are essential areas of any establishment, including pubs, that require regular attention and maintenance. A clean and well-maintained restroom not only ensures the comfort and satisfaction of your patrons but also reflects the overall hygiene standards of your pub. In this article, we will explore effective strategies for revitalizing restrooms and sanitary facilities, providing a fresh and pleasant experience for your customers.

1. Deep Cleaning
Begin the revitalization process by conducting a thorough deep cleaning of the restroom. This includes scrubbing and disinfecting all surfaces, such as sinks, toilets, urinals, countertops, and floors. Pay special attention to high-touch areas, such as door handles, faucets, and dispensers. Use appropriate cleaning agents to remove stains, eliminate odors, and sanitize the space. Regular deep cleaning ensures a hygienic and inviting restroom environment.
2. Restocking Supplies
Check and restock restroom supplies regularly to ensure they are always available for your customers. This includes toilet paper, paper towels, hand soap, and hand sanitizer
Keep an eye on the supply levels and replenish them promptly to avoid any inconvenience for restroom users. Additionally, make sure that all dispensers are in good working condition and provide easy access to the supplies.
3. Fixtures and Hardware Maintenance
Inspect and maintain restroom fixtures and hardware regularly to ensure they are functioning properly. Repair or replace any malfunctioning toilets, faucets, soap dispensers, or hand dryers. Check for leaks, loose fittings, or any other issues that may affect the functionality and appearance of the restroom. Well-maintained fixtures contribute to a positive restroom experience for your customers.
4. Freshen Up the Atmosphere
Implement strategies to freshen up the restroom atmosphere and eliminate any unpleasant odors. Use air fresheners or odor-neutralizing products to keep the air smelling clean and pleasant. Consider using automatic air fresheners that release fragrance periodically to maintain a fresh scent throughout the day. Regular ventilation and proper airflow are also crucial in preventing stagnant air and promoting a more pleasant restroom environment.
5. Enhance the Visual Appeal
Enhance the visual appeal of the restroom by paying attention to the aesthetics. Ensure that the restroom is well-lit with adequate lighting that creates a bright and welcoming atmosphere. Keep the walls and ceilings clean, and consider adding decorative elements such as artwork or mirrors to add visual interest. Use coordinated colors and quality finishes to create a cohesive and appealing restroom design.
6. Regular Inspection and Maintenance
Establish a regular inspection and maintenance routine for your restrooms to address any issues promptly. Regularly check for plumbing problems, leaks, broken fixtures, or any other maintenance needs. This proactive approach helps prevent potential problems from escalating and ensures that your restrooms remain in optimal condition for your customers' comfort and satisfaction.
7. Communication and Feedback
Encourage open communication with your customers regarding the restroom facilities. Display signs or reminders that encourage proper hygiene practices, such as handwashing. Provide an easy way for customers to provide feedback or report any concerns about the restroom's cleanliness or functionality. Actively address customer feedback to continuously improve the restroom experience.
Tackling Kitchen Deep Cleaning
The kitchen is the heart of any establishment, including pubs, where food is prepared and served. Keeping the kitchen clean and hygienic is crucial to ensure food safety and maintain a healthy environment for both staff and customers. Deep cleaning the kitchen on a regular basis is essential to remove grease, grime, and food residues that can accumulate over time. In this article, we will explore effective strategies for tackling kitchen deep cleaning, providing a pristine and sanitary space for food preparation.

1. Clearing and Organizing
Before starting the deep cleaning process, clear and organize the kitchen area. Remove all items from countertops, shelves, and storage areas. Properly store or discard any expired or unused ingredients, utensils, or equipment. This step allows for better access to surfaces and ensures that the cleaning process is thorough and efficient.
2. Degreasing Surfaces
Grease buildup is a common issue in kitchens, especially near cooking equipment and exhaust hoods. Use a degreaser to tackle stubborn grease stains on surfaces, such as countertops, stovetops, range hoods, and walls. Follow the product instructions and use appropriate cleaning tools, such as scrub brushes or scouring pads, to effectively remove the grease. Pay special attention to areas that are prone to accumulation, including behind equipment and in corners.
3. Deep Cleaning Appliances
Appliances in the kitchen, such as ovens, grills, fryers, and refrigerators, require thorough cleaning to remove food residues and prevent bacterial growth. Follow manufacturer's instructions for cleaning each appliance and use suitable cleaning agents. Take apart removable parts, such as oven racks or refrigerator shelves, and clean them separately Pay attention to hard-to-reach areas and ensure that all surfaces are properly sanitized.
4. Sanitizing Food Preparation Surfaces

Food preparation surfaces, including cutting boards, countertops, and sinks, must be sanitized to maintain food safety standards. Start by removing any loose debris or food particles. Use a food-safe sanitizer to disinfect the surfaces, ensuring that all areas come into contact with the sanitizer. Rinse the surfaces thoroughly and allow them to air dry. Regular sanitization of food preparation areas prevents cross-contamination and ensures the safety of the food prepared in your kitchen.
5. Deep Cleaning Floors
Kitchen floors can accumulate dirt, grease, and spills, making them prone to slips and falls. Begin by sweeping or vacuuming the floor to remove loose debris. Use a suitable floor cleaner or degreaser to thoroughly clean the floor, paying attention to corners and edges. Scrub the floor using a mop or scrub brush to remove any stubborn stains or residues. Rinse the floor with clean water and allow it to dry completely Regular deep cleaning of kitchen floors improves safety and maintains cleanliness in the working environment.

6. Cleaning Ventilation Systems
Proper ventilation is crucial in commercial kitchens to maintain air quality and remove cooking odors and airborne contaminants. Clean and maintain the ventilation system, including range hoods, filters, and exhaust ducts. Remove and clean or replace filters as needed to ensure proper airflow and prevent the accumulation of grease and debris. Regular maintenance of ventilation systems promotes a healthier kitchen environment and reduces the risk of fire hazards.
7. Regular Maintenance and Inspection
Establish a regular maintenance and inspection routine to address any issues promptly and prevent potential problems. Check for leaks, loose fittings, or malfunctioning equipment. Inspect and clean the kitchen on a regular basis, ensuring that deep cleaning is scheduled at appropriate intervals. A proactive approach to maintenance and inspection helps to maintain the cleanliness and functionality of the kitchen.

Cleaning and Polishing Glassware and Utensils
Glassware and utensils play a vital role in the presentation and service of food and beverages in pubs. Clean and polished glassware enhances the overall dining experience and reflects the establishment's commitment to hygiene and quality In this article, we will explore effective techniques for cleaning and polishing glassware and utensils, ensuring they are sparkling clean and ready for use.
1. Preparing the Cleaning Area
Before starting the cleaning process, set up a designated area with the necessary supplies. This area should include a sink or basin, cleaning agents, brushes or sponges, and lint-free cloths for polishing. Ensure that the area is clean and free from any contaminants that may affect the cleanliness of the glassware and utensils.
2. Pre-Rinsing
Start by pre-rinsing the glassware and utensils to remove any loose debris or food particles. Use warm water and gently rinse each item individually This step helps to loosen any stubborn residue and prepares the items for the cleaning process.
3. Washing
Fill a sink or basin with warm water and add a mild dishwashing detergent. Avoid using harsh chemicals or abrasive cleaners that may damage the glassware or utensils. Submerge the items in the soapy water and use a soft brush or sponge to gently scrub the surfaces, paying attention to any stains or spots. Ensure thorough coverage of all areas, including the bottom and handles of the utensils.
4. Rinsing
After washing, rinse the glassware and utensils under warm running water to remove any soap residue. Make sure to rinse each item individually, ensuring that no soap is left behind. Proper rinsing helps to eliminate any potential residue that may affect the taste or appearance of the food or beverages served.
5. Drying
To prevent water spots and ensure a streak-free finish, it is crucial to dry the glassware and utensils properly. Use a lint-free cloth or towel to gently dry each item, paying
attention to any intricate designs or crevices. Avoid using fabric softeners or rough materials that may leave lint or scratches on the surfaces. Proper drying enhances the clarity and shine of the glassware and utensils.

6. Polishing
Polishing is the final step to achieve a flawless and sparkling finish. Use a clean, lint-free cloth specifically designed for glassware to polish each item. Apply gentle pressure and polish in a circular motion, focusing on the areas that require extra shine. For utensils with stainless steel components, use a separate cloth to polish the metal surfaces, ensuring they are free from fingerprints or smudges.
7. Inspection and Storage
After cleaning and polishing, inspect each glassware and utensil for any remaining spots or residues. Address any issues promptly, rewashing or polishing if necessary. Once fully inspected, store the glassware and utensils in a clean and dry area, away from any potential contaminants. Proper storage helps to maintain their cleanliness until they are ready for use.
Carpet and Upholstery Cleaning
Carpets and upholstery are key elements of interior design that add warmth, comfort, and style to any space. However, over time, they can accumulate dirt, stains, and odors, compromising their appearance and freshness. Regular carpet and upholstery cleaning are essential to maintain a clean and healthy environment. In this article, we will explore effective methods and tips for cleaning carpets and upholstery, ensuring they remain in pristine condition.
1. Vacuuming
The first step in carpet and upholstery cleaning is thorough vacuuming. Vacuuming removes loose dirt, dust, and debris from the surface, preventing them from embedding deeper into the fibers. Use a high-quality vacuum cleaner with strong suction power and attachments suitable for different surfaces. Pay special attention to high-traffic areas and areas prone to spills or stains.
2. Spot Treatment
For carpet and upholstery stains, it's crucial to address them promptly with spot treatment. Identify the type of stain and choose an appropriate cleaning solution. Always test the solution on a small, inconspicuous area first to ensure it doesn't cause any discoloration or damage. Gently blot the stained area with a clean cloth or sponge, working from the outside in to prevent spreading the stain further. Avoid rubbing, as it can push the stain deeper into the fibers.
3. Deep Cleaning
Deep cleaning carpets and upholstery is essential to remove embedded dirt, allergens, and odors. There are several methods for deep cleaning, including steam cleaning, shampooing, and dry cleaning. Steam cleaning involves using hot water extraction to remove dirt and debris. Shampooing uses a specialized carpet or upholstery shampoo and a brush or sponge to agitate the fibers and lift dirt. Dry cleaning utilizes a dry cleaning solution and a machine that absorbs dirt without using water. Consider the material and manufacturer's recommendations when choosing the appropriate method for your carpets and upholstery.
4. Professional Cleaning
While regular maintenance is important, it's recommended to schedule professional carpet and upholstery cleaning periodically. Professional cleaners have the expertise, equipment, and cleaning agents to tackle tough stains, deeply embedded dirt, and odors. They can also provide protective treatments to prevent future stains and prolong the life of your carpets and upholstery. Research and choose a reputable cleaning company with experience in carpet and upholstery cleaning.
5. Regular Maintenance
To keep carpets and upholstery looking their best, implement regular maintenance practices. Vacuum carpets at least once a week to remove surface dirt and prevent it from settling into the fibers. Attend to spills and stains immediately to prevent them from becoming permanent. Consider using protective treatments, such as fabric or carpet protectors, to make cleaning easier and repel stains. Regularly rotate furniture and rugs to prevent uneven wear and distribute traffic patterns.
6. Professional Advice

If you're unsure about the best cleaning methods or products for your specific carpets or upholstery, seek professional advice. Consult with a reputable carpet or upholstery manufacturer or a certified cleaning professional. They can provide guidance on suitable cleaning techniques, products, and any specific considerations for your particular materials
Floor Stripping, Waxing, and Polishing
Maintaining clean and polished floors is crucial for creating a welcoming and professional environment. Over time, floors can become dull, scuffed, and worn due to foot traffic, spills, and everyday wear and tear. Floor stripping, waxing, and polishing are essential processes that help restore the shine and protect the integrity of various types of flooring. In this article, we will explore the steps involved in floor stripping, waxing, and polishing, along with tips for achieving excellent results.
1. Floor Stripping
Floor stripping is the process of removing old wax, dirt, and other contaminants from the surface of the floor. This step is necessary before applying a new coat of wax. Here's how to effectively strip a floor:
● Clear the area: Remove furniture, rugs, and any obstacles from the floor to provide a clear working space.
● Dilute stripping solution: Follow the manufacturer's instructions to dilute the floor stripping solution with water Use protective gloves and eyewear when handling chemicals.
● Apply the solution: Use a mop or a scrubbing machine to apply the stripping solution evenly over the floor. Ensure that the solution covers the entire surface.
● Let it sit: Allow the stripping solution to sit on the floor for the recommended dwell time, usually around 10-15 minutes. This allows the solution to penetrate and break down the old wax.
● Scrub the floor: Use a scrubbing brush or a floor scrubbing machine to agitate the solution and loosen the dirt and old wax. Work in small sections to ensure thorough cleaning.
● Remove the solution: Use a wet vacuum or a mop to remove the solution and the loosened dirt from the floor. Rinse the mop or vacuum regularly to prevent spreading dirt.
● Rinse the floor: Mop the floor with clean water to remove any remaining residue from the stripping solution. Ensure all traces of the solution are thoroughly removed.
● Allow to dry: Give the floor sufficient time to dry completely before proceeding to the next step.
2. Floor Waxing
Floor waxing involves applying a fresh coat of wax to the stripped floor Waxing not only enhances the floor's appearance but also provides a protective layer that helps guard against scratches, stains, and wear. Here's how to wax a floor effectively:
● Choose the right wax: Select a high-quality floor wax suitable for your specific floor type. Consider factors such as the level of foot traffic and the desired level of shine.
● Apply a thin, even coat: Pour a small amount of wax onto the floor and use a clean mop or wax applicator to spread it evenly across the surface. Work in small sections, overlapping each stroke slightly
● Allow drying time: Follow the manufacturer's instructions for drying time. Typically, it takes about 20-30 minutes for the wax to dry to a haze.
● Apply additional coats: For optimal results, apply multiple thin coats of wax, allowing each coat to dry before applying the next. This builds up a durable protective layer and enhances the shine.
● Buff the floor: Once the final coat is dry, use a floor buffer or a high-speed polisher to buff the waxed floor. This step helps bring out the shine and creates a smooth, polished finish.
3. Floor Polishing
Floor polishing is the final step in the process, which further enhances the shine and luster of the floor. Here are some tips for effective floor polishing:
● Select the appropriate polishing product: Choose a floor polishing product suitable for your floor type. This could be a liquid polish, a spray polish, or a polishing powder.
● Apply the polish: Follow the product instructions to apply the polish evenly across the floor. Use a clean mop or a polishing machine to spread the polish and work it into the surface.
● Allow drying time: Give the polish sufficient time to dry and set, as per the manufacturer's recommendations.
● Buff the floor: Once the polish is dry, use a floor buffer or a high-speed polisher to buff the floor, bringing out the desired shine and creating a glossy appearance.
● Maintain the polished floor: Regularly dust and sweep the floor to prevent dirt and debris from scratching the polished surface. Use appropriate cleaning methods and products to maintain the polished look.
Deep Cleaning Outdoor Spaces and Smoking Areas
Outdoor spaces and smoking areas are important components of many establishments, providing a comfortable and inviting environment for customers and employees. However, these areas are exposed to various elements such as dirt, debris, and cigarette residue, which can accumulate over time and compromise their cleanliness and appearance. Deep cleaning outdoor spaces and smoking areas is crucial to maintain a pleasant atmosphere and ensure the well-being of everyone using these spaces. In this article, we will explore effective methods and tips for deep cleaning outdoor spaces and smoking areas.
 1. Clearing Debris
Before beginning the deep cleaning process, it is essential to clear the area of any debris, including fallen leaves, branches, trash, and discarded cigarette butts. Use a broom, rake, or leaf blower to gather and remove the debris, ensuring a clean and clear surface to work on.
2. Power Washing Surfaces
Power washing is an effective method to remove built-up dirt, stains, and grime from outdoor surfaces. It is particularly useful for concrete, stone, brick, and tile areas. Here's how to power wash outdoor spaces effectively:
● Prepare the power washer: Follow the manufacturer's instructions to set up and prepare the power washer. Ensure that you have the appropriate nozzle for the cleaning task.

● Wet the surface: Use the power washer to wet the surface evenly before applying any cleaning solution. This helps loosen dirt and makes the cleaning process more effective.
● Apply a cleaning solution: Depending on the surface and the level of dirtiness, choose an appropriate outdoor cleaning solution. Apply the solution to the surface, working in manageable sections.
● Power wash the surface: Starting from one end, use the power washer to clean the surface, moving in even and overlapping strokes. Maintain a consistent distance from the surface to ensure thorough cleaning without causing damage.
● Rinse the area: Once you have power washed the entire surface, thoroughly rinse it with clean water to remove any residual cleaning solution.
● Allow to dry: Give the area sufficient time to dry before proceeding to the next step.
3. Removing Stains and Odors
Outdoor spaces and smoking areas may develop stubborn stains and unpleasant odors over time. Here are some tips for effectively removing stains and eliminating odors:
● Stain removal: Use appropriate cleaning solutions or stain removers specific to the type of surface and the nature of the stain. Scrub the stained area with a brush or sponge, working the cleaning solution into the stain. Rinse thoroughly and repeat if necessary.
● Odor elimination: To eliminate odors, use odor-neutralizing sprays or deodorizers designed for outdoor use. Apply the product generously to the affected areas and allow it to dry completely Consider using air fresheners or strategically placing potted plants to enhance the overall freshness of the space.
4. Maintaining Landscaping
In addition to cleaning the surfaces, it is important to pay attention to the landscaping in outdoor spaces. Trim and prune bushes, trees, and hedges to maintain a tidy appearance. Remove weeds and unwanted vegetation regularly to keep the area clean and presentable.
5. Regular Maintenance
To ensure outdoor spaces and smoking areas remain clean and inviting, regular maintenance is essential. Here are some tips for ongoing upkeep:
● Daily cleaning: Assign staff to regularly monitor and clean the area, picking up trash, emptying ashtrays, and maintaining cleanliness throughout the day
● Scheduled deep cleaning: Establish a regular deep cleaning schedule to address more intensive cleaning needs, such as power washing and stain removal.
● Proper waste disposal: Provide designated bins for cigarette butts and ensure proper waste disposal to prevent litter and maintain cleanliness.
● Educate and inform: Display signage or communicate guidelines to encourage responsible behavior in the outdoor spaces and smoking areas, promoting cleanliness and respect for the environment.
Dealing with Ventilation Systems and Air Quality
Proper ventilation and good air quality are essential for any establishment, as they contribute to a healthy and comfortable environment for occupants. In commercial spaces, such as offices, restaurants, and retail stores, ventilation systems play a vital role in maintaining optimal air circulation and quality Regular maintenance and cleaning of ventilation systems are necessary to ensure their efficiency and prevent the buildup of contaminants that can compromise air quality. In this article, we will explore the importance of ventilation system cleaning and provide practical tips for maintaining good air quality.
1. Understanding the Importance of Ventilation System Cleaning

Ventilation systems are designed to circulate fresh air and remove stale air from indoor spaces. Over time, dust, allergens, pollutants, and even mold can accumulate within the system. This buildup not only affects the performance of the system but can also lead to poor indoor air quality, resulting in health issues for occupants. Regular cleaning of ventilation systems is essential to:
● Remove accumulated dust, debris, and allergens
● Prevent the growth of mold and mildew
● Improve the efficiency and lifespan of the system
● Enhance indoor air quality for a healthier environment
2. Hiring Professional Duct Cleaning Services
Cleaning ventilation systems is a specialized task that requires professional expertise and equipment. Hiring professional duct cleaning services is recommended to ensure
thorough and effective cleaning. Here are some key considerations when selecting a duct cleaning service:
● Experience and certifications: Look for a company with experience in commercial duct cleaning and relevant certifications in HVAC system cleaning.
● Reputation and reviews: Check online reviews and seek recommendations from trusted sources to gauge the reputation and reliability of the service provider
● Services offered: Inquire about the specific services offered, including duct cleaning, filter replacement, and system maintenance.
● Compliance with regulations: Ensure that the service provider follows industry standards and complies with local regulations regarding ventilation system cleaning.
3. Regular Filter Replacement and Maintenance
Filters play a crucial role in trapping dust, allergens, and other particles circulating in the air Over time, these filters can become clogged and less effective. Regular filter replacement and maintenance are essential to maintain good air quality Here are some tips for filter maintenance:
● Follow manufacturer guidelines: Refer to the manufacturer's recommendations for filter replacement intervals and follow them accordingly.
● Use high-quality filters: Invest in high-quality filters that are designed to effectively trap pollutants and allergens.
● Clean filters when necessary: If your system uses washable filters, clean them regularly as per the manufacturer's instructions.
● Monitor filter condition: Regularly inspect the condition of the filters to identify any signs of excessive dirt or damage that may require immediate attention.
4. Promoting Good Indoor Air Quality
Apart from maintaining ventilation systems, there are additional measures you can take to promote good indoor air quality:
● Regular cleaning routines: Implement regular cleaning routines for your establishment, including dusting, vacuuming, and mopping, to minimize the accumulation of dust and allergens.

● Proper ventilation: Ensure that windows and doors are properly sealed to prevent outdoor pollutants from entering the indoor space. Consider installing air purifiers or opening windows when weather conditions permit.
● Control humidity levels: High humidity can lead to mold growth, while low humidity can cause discomfort. Use humidifiers or dehumidifiers as needed to maintain optimal humidity levels.
● Educate occupants: Promote awareness among employees and occupants about the importance of maintaining good indoor air quality Encourage them to report any concerns regarding air quality promptly
Specialized Cleaning for Entertainment Areas (Pool tables, dartboards, etc.)
Entertainment areas, such as game rooms, pubs, and recreational facilities, often feature various attractions like pool tables, dartboards, arcade machines, and more. These elements contribute to the fun and enjoyment of patrons, but they also require regular cleaning and maintenance to ensure cleanliness, safety, and optimal performance. In this article, we will explore the importance of specialized cleaning for entertainment areas, focusing on pool tables and dartboards, and provide practical tips for keeping these attractions in top condition.
1. The Importance of Cleaning Entertainment Area Attractions
Regular cleaning of entertainment area attractions is essential for several reasons:

● Hygiene and cleanliness: Patrons expect a clean and hygienic environment when they visit an entertainment venue. Regular cleaning removes dust, dirt, and germs from surfaces, ensuring a pleasant and safe experience for guests.
● Performance and longevity: Proper maintenance and cleaning help preserve the performance and lifespan of entertainment attractions. Dust and debris buildup can affect the playing surfaces, moving parts, and electronic components, leading to subpar performance or even damage if left unaddressed.
● Safety and player satisfaction: Clean and well-maintained attractions contribute to the safety and satisfaction of players. Smooth playing surfaces, properly aligned equipment, and well-maintained components enhance the overall experience and minimize the risk of accidents.
2. Cleaning Pool Tables
Pool tables are popular attractions in entertainment areas, requiring specialized care and maintenance. Here are some key tips for cleaning pool tables:
● Brushing the playing surface: Use a pool table brush to remove dust, chalk residue, and other debris from the felt surface. Start from one end and brush in straight, overlapping strokes until the entire playing area is covered.
● Spot cleaning spills and stains: Immediately attend to spills or stains on the felt surface. Blot the affected area gently with a clean, damp cloth, and avoid rubbing to prevent spreading the stain. Consult a professional cleaning companyl if the stain persists or requires specialized treatment.
● Cleaning the rails and pockets: Wipe down the rails and pockets with a soft, damp cloth to remove dirt and grime. Pay attention to the corners and crevices where dust can accumulate.
● Regular maintenance: Periodically inspect the pool table for loose or damaged parts, such as rails, pockets, or leveling mechanisms. Tighten loose screws and seek professional cleaning and maintenance service for any significant repairs or adjustments.

3. Maintaining Dartboards
Dartboards are another popular attraction that requires regular cleaning and maintenance. Follow these guidelines for dartboard care:
● Dusting the surface: Use a soft, dry cloth or a specialized dartboard brush to remove dust from the dartboard's surface. Gently sweep the cloth or brush across the board, starting from the outer edge and moving toward the bullseye.
● Cleaning the segments: If the dartboard has removable segments, carefully detach them and wipe them clean with a slightly damp cloth. Avoid getting the board excessively wet, as it can affect the integrity of the material.
● Checking and replacing dartboard parts: Inspect the dartboard for any damaged segments, loose wires, or worn-out bullseye. Replace these components as needed to ensure accurate scoring and optimal gameplay
● Proper dart storage: Encourage players to use dart holders or cases to store their darts when not in use. This helps prevent damage to the dartboard surface and ensures that darts are kept in a safe and organized manner.
Paying Attention to High-Touch Surfaces and Points of Contact
In today's world, where hygiene and cleanliness are of utmost importance, it is crucial to pay close attention to high-touch surfaces and points of contact in various settings. High-touch surfaces are areas that come into frequent contact with multiple individuals, increasing the risk of germ transmission. By properly cleaning and disinfecting these surfaces, we can help prevent the spread of germs and create a safer environment for everyone. In this article, we will explore the significance of paying attention to high-touch surfaces and points of contact, along with practical tips for effective cleaning and disinfection.
1. Understanding High-Touch Surfaces and Points of Contact
High-touch surfaces and points of contact refer to areas that are frequently touched by multiple people throughout the day These surfaces can vary depending on the setting but often include:

● Door handles and knobs
● Light switches
● Handrails
● Countertops and tabletops
● Elevator buttons
● Keyboards and computer mice
● Touchscreens and control panels
● Faucets and restroom fixtures
● Cash registers and payment devices
2. Importance of Cleaning and Disinfecting High-Touch Surfaces
Proper cleaning and disinfection of high-touch surfaces are essential for several reasons:
● Preventing germ transmission: High-touch surfaces can harbor harmful bacteria and viruses, including those responsible for respiratory illnesses and gastrointestinal infections. Regular cleaning and disinfection help reduce the risk of transmission and promote a healthier environment.
● Enhancing hygiene practices: By prioritizing the cleaning of high-touch surfaces, we encourage individuals to adopt good hygiene practices, such as handwashing and sanitizing. This contributes to overall cleanliness and reduces the likelihood of cross-contamination.
● Mitigating the spread of illnesses: Effective cleaning and disinfection of high-touch surfaces can play a significant role in controlling the spread of infectious diseases, especially in high-traffic areas like offices, schools, and public spaces.
● Promoting peace of mind: Keeping high-touch surfaces clean and disinfected reassures individuals that their safety and well-being are a top priority This fosters confidence and peace of mind among employees, customers, and visitors.
3. Effective Cleaning and Disinfection Practices
To ensure proper cleaning and disinfection of high-touch surfaces, consider the following tips:
● Use appropriate cleaning products: Select cleaning solutions and disinfectants recommended by health authorities or regulatory agencies. Look for products that are effective against a broad range of germs and viruses.
● Follow manufacturer instructions: Read and follow the instructions provided on cleaning product labels, including proper usage, dilution ratios, and contact times for disinfectants.
● Clean before disinfecting: Start by removing any visible dirt or debris from surfaces using soap and water or a general-purpose cleaner. Once surfaces are clean, proceed with disinfection.
● Pay attention to contact time: Disinfectants require a specific contact time to be effective. Ensure that the disinfectant remains on the surface for the recommended duration before wiping it off or allowing it to air dry.
● Consider frequency: High-touch surfaces should be cleaned and disinfected frequently, especially in areas with heavy traffic. Develop a cleaning schedule that addresses the specific needs of your setting.
● Encourage individual responsibility: Educate employees, customers, and visitors about the importance of personal hygiene and encourage them to practice hand hygiene, use hand sanitizers, and be mindful of touching surfaces unnecessarily.

Implementing Regular Maintenance and Cleaning Schedules
Regular maintenance and cleaning schedules are essential for maintaining cleanliness, hygiene, and the overall functionality of various spaces, whether it's a residential home, commercial establishment, or public facility By establishing and adhering to a consistent schedule, you can effectively manage tasks, ensure timely cleaning and maintenance, and create a healthier and more organized environment. In this article, we will explore the importance of implementing regular maintenance and cleaning schedules, along with practical tips for establishing an effective schedule.
1. The Importance of Regular Maintenance and Cleaning
Regular maintenance and cleaning offer numerous benefits:
● Cleanliness and hygiene: Regular cleaning helps remove dirt, dust, allergens, and pathogens, promoting a clean and hygienic environment. It minimizes the risk of illness, allergies, and the spread of germs.

● Preventive maintenance: Regular maintenance allows for the timely detection of potential issues and the implementation of preventive measures. This helps avoid costly repairs and ensures the longevity of equipment, systems, and infrastructure.
● Safety: Maintaining a clean and well-maintained space contributes to safety. Regular inspections and maintenance help identify and address safety hazards, such as loose wires, slippery surfaces, or malfunctioning equipment.
● Efficiency and functionality: By regularly cleaning and maintaining equipment, systems, and facilities, you can ensure optimal functionality and efficiency This can enhance productivity, energy efficiency, and the overall performance of the space.
● Aesthetics and reputation: Regular cleaning and maintenance contribute to the aesthetic appeal of a space. A clean and well-maintained environment creates a positive impression on visitors, customers, and residents, enhancing your reputation.
2. Establishing an Effective Schedule
To implement an effective maintenance and cleaning schedule, consider the following tips:
● Identify cleaning and maintenance needs: Assess the specific cleaning and maintenance requirements of your space. Consider factors such as the type of facility, foot traffic, equipment, and any unique cleaning needs.
● Determine frequency: Establish the frequency at which various tasks should be performed. Some tasks may require daily attention, while others can be performed weekly, monthly, or quarterly. Consider factors such as the importance of the task, usage patterns, and regulatory requirements.
● Delegate responsibilities: Assign specific tasks to individuals or teams responsible for cleaning and maintenance. Clearly communicate expectations and provide necessary training to ensure that tasks are performed effectively
● Create a detailed checklist: Develop a comprehensive checklist that outlines all the cleaning and maintenance tasks to be completed and their respective frequencies. Include specific instructions and any safety precautions.
● Set reminders and schedules: Utilize digital calendars, task management apps, or physical planners to schedule and track cleaning and maintenance tasks. Set reminders to ensure timely completion and avoid missed or overdue tasks.
● Regularly evaluate and adjust: Periodically review your cleaning and maintenance schedule to assess its effectiveness. Consider feedback from employees, customers, or residents and make adjustments as needed to address any emerging needs or challenges.
3. Communication and Accountability
Effective communication and accountability are key to maintaining a successful cleaning and maintenance schedule:
● Clearly communicate expectations: Ensure that all individuals involved understand their roles and responsibilities. Provide clear instructions and guidelines to maintain consistency and quality.
● Foster a culture of cleanliness: Encourage a sense of ownership and responsibility among employees, residents, or facility users. Educate them on the importance of cleanliness, hygiene, and their role in maintaining a clean and safe environment.

● Provide necessary resources: Ensure that individuals responsible for cleaning and maintenance have access to the necessary cleaning supplies, equipment, and personal protective equipment (PPE).
● Monitor and evaluate performance: Regularly assess the performance and adherence to the cleaning and maintenance schedule. Provide feedback, recognize achievements, and address any issues or areas that require improvement.