


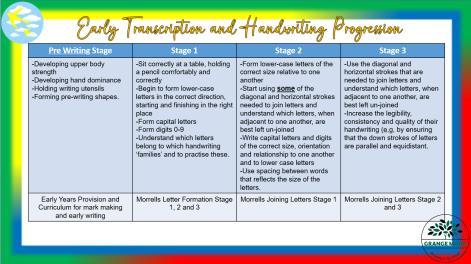
Early Transcription and Handwriting Progression


Birdsedge and Grange Moor Partnership


At Grange Moor and Birdsedge we know the importance of supporting children with their transcription skills right from the start. Establishing strong foundational skills needed for handwriting is key and begins in our Early Years.

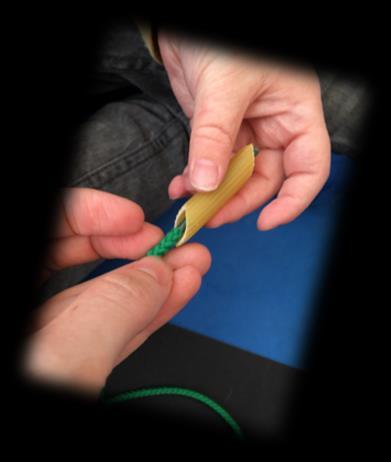
Threaded through our Early Years Curriculum and Provision are broad opportunities for building and strengthening the pre-writing skills for early transcription, this includes developing upper body strength, developing hand dominance, holding writing utensils and forming pre-writing shapes.
Once children, whatever the age, are equipped with the prewriting skills, we follow a handwriting scheme with fidelity, teaching and practicing groups of letters in ‘letter families’ – starting with single letters and moving fluidly to letter joins when children are ready.
Included in this booklet are a few things we hope parents, carers and any adults working with children can use to support children in their early transcription and Handwriting skills:
Early Transcription and Handwriting Progression
Check our the stages in handwriting progression to see where your child is and what they need to focus on
Handwriting Stage
Check out a break down of activities to engage in regularly for each stage of handwriting progression. Check children’s bookbags for practise sheets for those children in later stages.
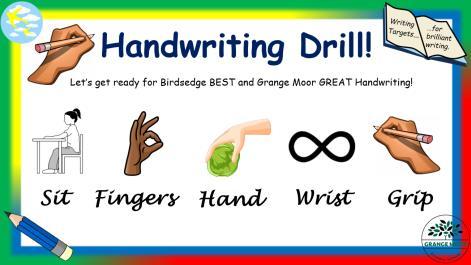
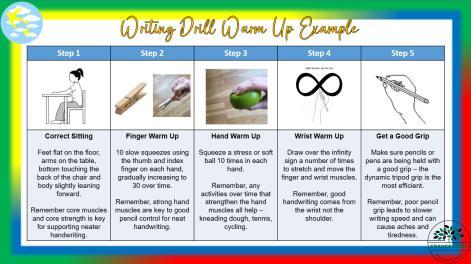
Handwriting Drill
Regular WarmUps using the tools in you child’s pack can help build and keep strong hands for better handwriting.
Pre Writing Stage Stage 1
-Developing upper body strength
-Developing hand dominance
-Holding writing utensils
-Forming pre-writing shapes.
Early Years Provision and Curriculum for mark making and early writing
-Sit correctly at a table, holding a pencil comfortably and correctly
-Begin to form lower-case letters in the correct direction, starting and finishing in the right place
-Form capital letters
-Form digits 0-9
-Understand which letters belong to which handwriting ‘families’ and to practise these.
2
-Form lower-case letters of the correct size relative to one another
-Start using some of the diagonal and horizontal strokes needed to join letters and understand which letters, when adjacent to one another, are best left un-joined
-Write capital letters and digits of the correct size, orientation and relationship to one another and to lower case letters
-Use spacing between words that reflects the size of the letters.
3
-Use the diagonal and horizontal strokes that are needed to join letters and understand which letters, when adjacent to one another, are best left un-joined
-Increase the legibility, consistency and quality of their handwriting (e.g. by ensuring that the down strokes of letters are parallel and equidistant.
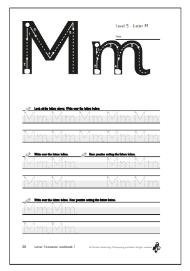
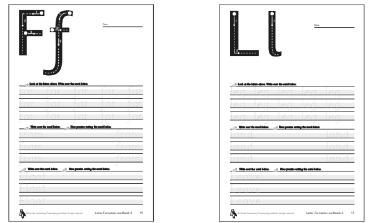
Morrells Letter Formation Stage 1, 2 and 3
Morrells Joining Letters Stage 1 Morrells Joining Letters Stage 2 and 3
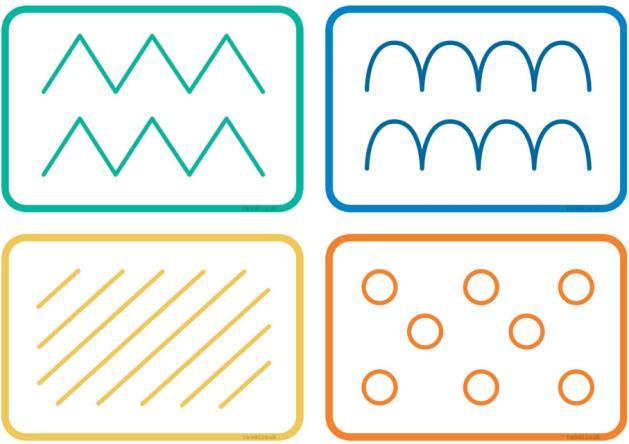
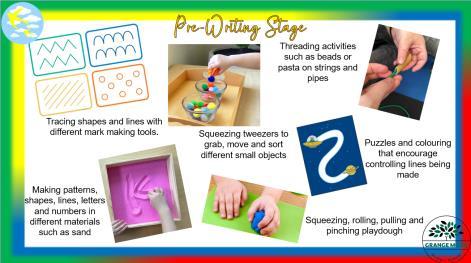
Tracing shapes and lines with different mark making tools.
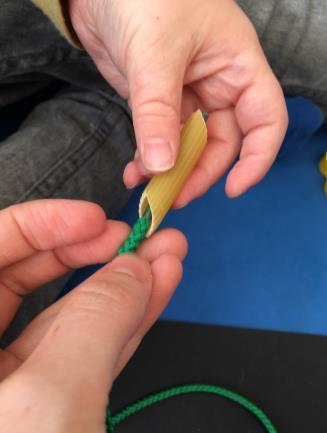
Threading activities such as beads or pasta on strings and pipes
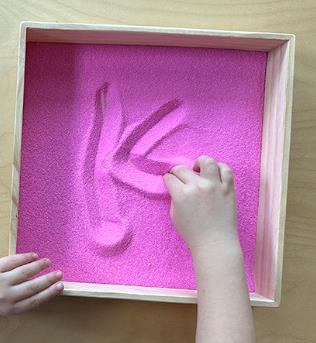
Making patterns, shapes, lines, letters and numbers in different materials such as sand
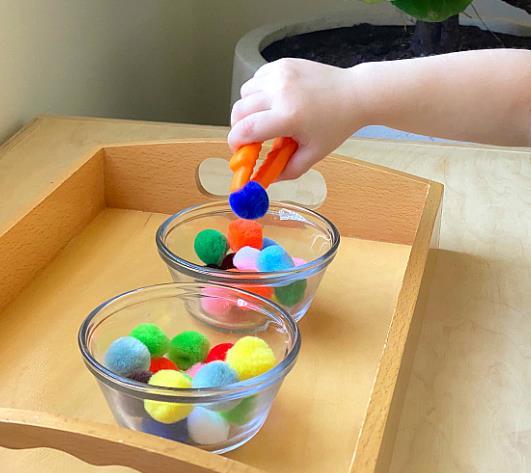
Squeezing tweezers to grab, move and sort different small objects


Puzzles and colouring that encourage controlling lines being made

Squeezing, rolling, pulling and pinching playdough
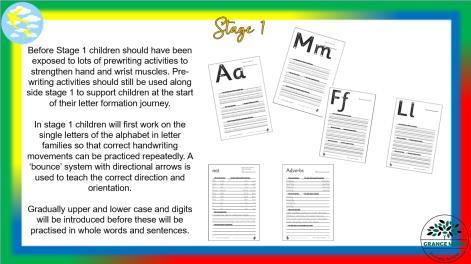
Before Stage 1 children should have been exposed to lots of prewriting activities to strengthen hand and wrist muscles. Prewriting activities should still be used along side stage 1 to support children at the start of their letter formation journey.
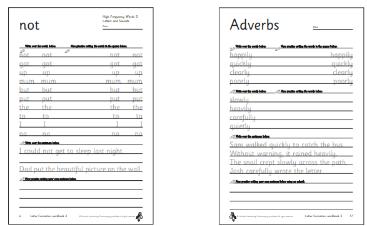
In stage 1 children will first work on the single letters of the alphabet in letter families so that correct handwriting movements can be practiced repeatedly. A ‘bounce’ system with directional arrows is used to teach the correct direction and orientation.
Gradually upper and lower case and digits will be introduced before these will be practised in whole words and sentences.
Before Stage 2 children should be confident in printing letters in words and sentences.
Over practice and repetition of Stage 1 should be used to ensure children are ready for stage 2 before this is introduced
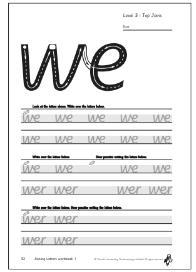
Stage 2 continues to use the ‘bounce’ technique to teach the correct diagonal and horizontal joins to master joined up handwriting.
Children first learn the baseline joins before moving on to round and top joins.
The aim of stage 2 is to develop a fluent handwriting style and positive joined up habits right from the start.
Once children are confident and fluent with joining letters in Stage 2, Stage 3 is introduced to enable progress to joining up whole words.
The ‘bounce’ technique is used to teach the correct diagonal and horizontal joins and provide further opportunities to practice cursive handwriting.
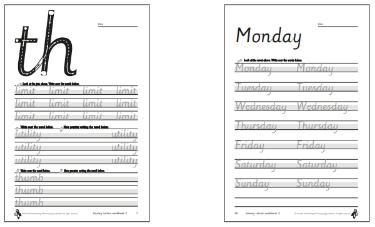
As children become more fluent in this, vocabulary and grammatical exercises are introduced to enable children to develop fluid and legible handwriting and gain speed and automaticity.
After completion of Stage 3 we would expect children to be fluent and confident in their handwriting style. However, opportunities to practice and apply their skills is important in ensuring this remains.
Children at Stage 4 should still have lots of opportunities for hand-written work and apply the skills and knowledge they have built up over the previous stage.
Warm-ups, fine motor activities and regular more open-ended cursive handwriting of spellings they are learning should be encouraged.


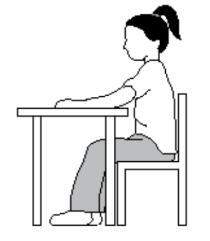


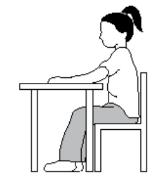
Feet flat on the floor, arms on the table, bottom touching the back of the chair and body slightly leaning forward.
Remember core muscles and core strength is key for supporting neater handwriting.
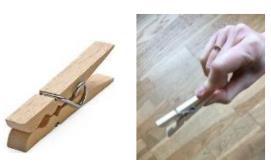
10 slow squeezes using the thumb and index finger on each hand, gradually increasing to 30 over time.
Remember, strong hand muscles are key to good pencil control for neat handwriting.

Squeeze a stress or soft ball 10 times in each hand. Remember, any activities over time that strengthen the hand muscles all help –kneading dough, tennis, cycling.
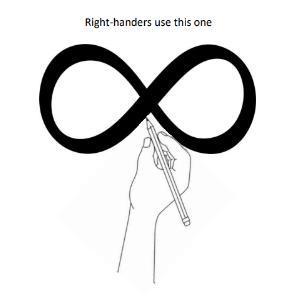
Draw over the infinity sign a number of times to stretch and move the finger and wrist muscles.
Remember, good handwriting comes from the wrist not the shoulder.
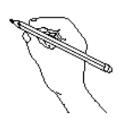
Make sure pencils or pens are being held with a good grip – the dynamic tripod grip is the most efficient.
Remember, poor pencil grip leads to slower writing speed and can cause aches and tiredness.