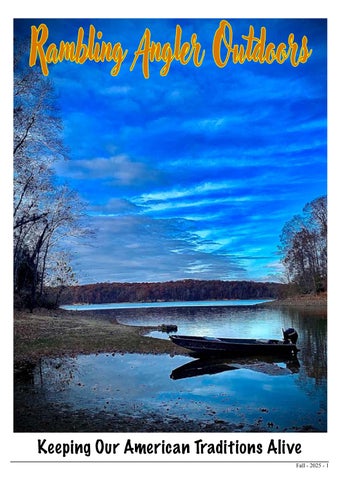
Rambling Angler Outdoors
EDITOR & PUBLISHER
Ken McBroom
EDITOR AT LARGE
Bill Cooper
CONTRIBUTORS
Bill Cooper
Troy Seal
Mike Schoonveld
Tom Berg

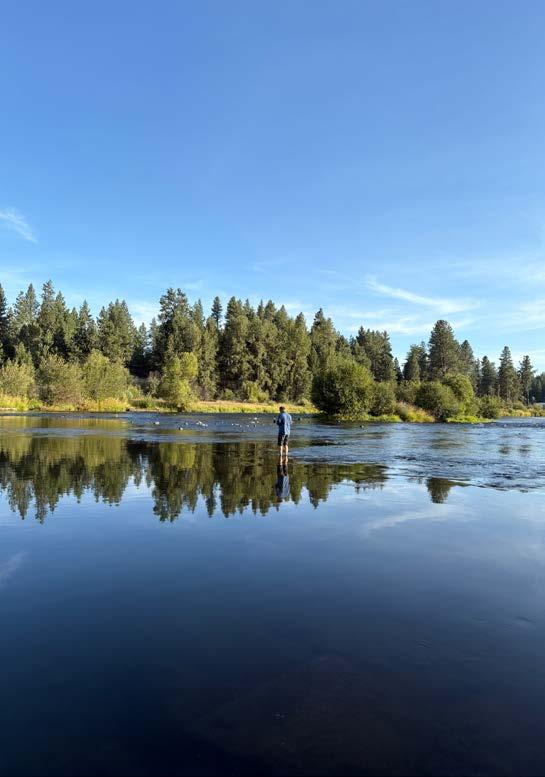
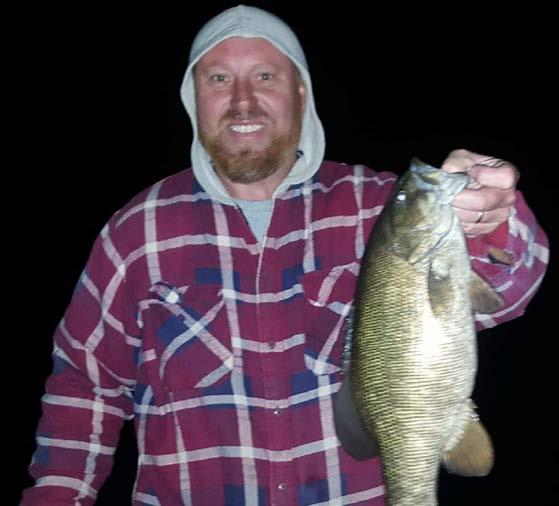
On The Cover
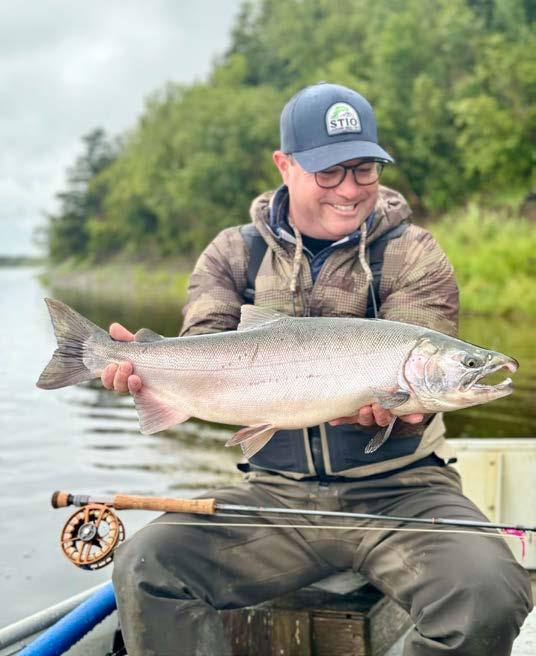
Bowhunting by Boat
Photo Ken McBroom
Fall is my favorite time of year. The crisp mornings after a long summer of heat and humidity sets the mood for the upcoming season. Fish begin to move up and feed up for the winter, turkeys are scratching the ridge tops for nuts and grubs, squirrels are burying their winter cache and bucks are on the move. Fall has always been a special time of year for me. There is no shortage of things to do and the weather is great.
As fall breaks over into winter there’s still plenty to do. Squirrels are busy and offer a great time afield. Bucks are rutting, giving you the most deer sightings, and maybe a buck of a lifetime.
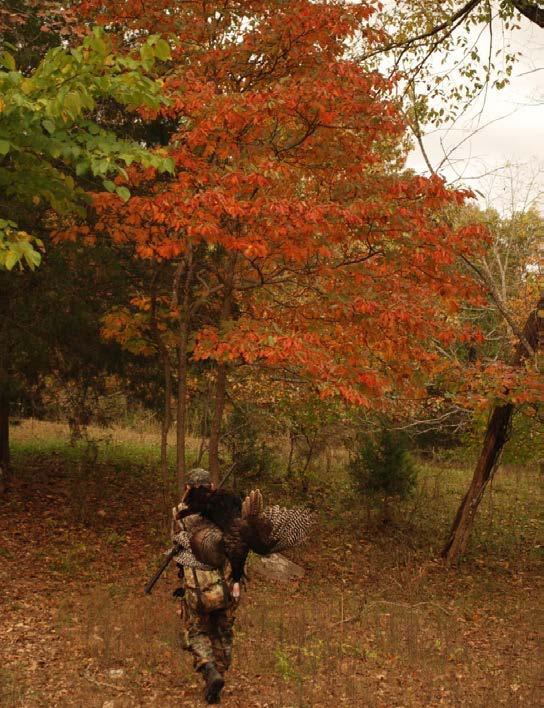
Fall is a great time to hunt turkeys and Bill Cooper shares two great articles about hunting turkeys in the fall. My personal best turkey came in the fall while bow hunting many years ago. However, I have never specifically targeted turkey in the fall but think that maybe I should. A man must decide what he wants to do in the fall and there’s but so much time to play.
What’s your favorite broadhead? I’ve been back and forth several times between fixed blade and mechanical broadheads and settled on fixed blades. I love the forgiveness in mechanical heads, but personally I’ve had a couple bad experiences with mechanical and prefer to make sure my bow is tuned well and sling those fixed heads from now on.
TOM BERG takes us right down the road from my home below Barkley Lake dam to catch some tailwater blue cats with some short rods. Check it out.
After being called out of retirement to work on big helicopters. After 20 years working in the bush of Alaska I once again find myself in some beautiful places with rivers full of trout and steelhead. I spent all this summer within sight of the Williamson River and even got a chance to wet a line in a great river with some big Rainbows.


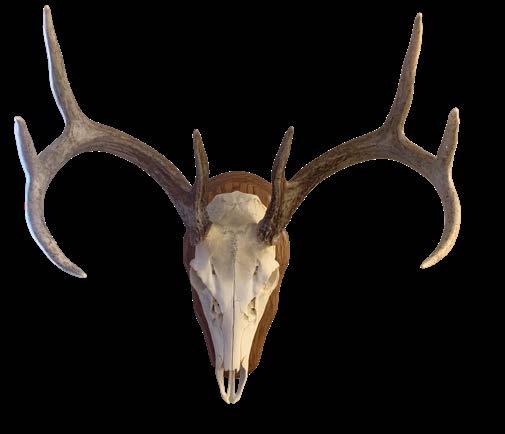
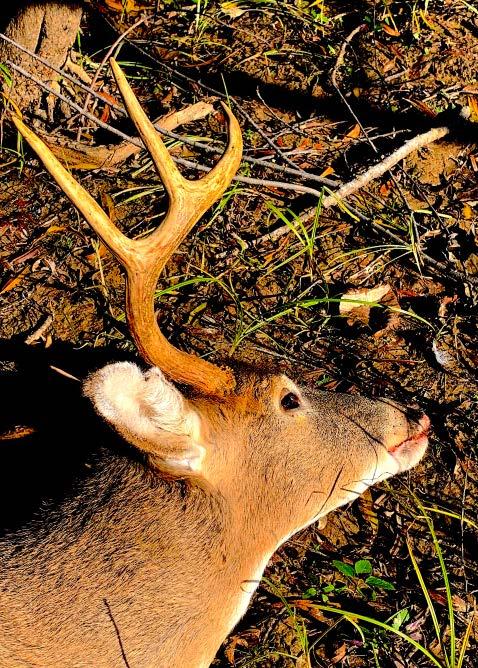
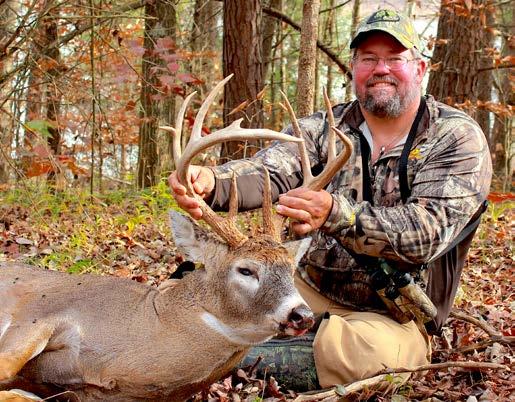
Deer season was a success and now you have another great buck to go with the other four already on the wall. The buck is a good one, but no better than any of your other mounts so the question arises. Do I fork over the $450 to have this nice eight-pointer mounted? There is an alternative and it is the European deer mount. You can send your skull off to a taxidermist if you want but that will be a hundred dollar bill so why not do your own. It’s really easy to do and the results will be just as good as the taxidermist. Here are the steps to creating a great mount that allow you to display your buck proudly with the others.
The first thing is to remove the skull from the neck with hacksaw or sawzall. You can leave the hide on the skull if you like but removing it will speed up the boiling process. Removing the hide from the skull is recommended and is not that difficult to do. Once the skull is ready you will need a pot large enough to submerge the skull completely. Don’t submerge the antler bases or they will discolor. If this happens you can color the antler bases with wood stain to match.
It is recommended that this process is done outside. You will need a burner to heat the pot of water to boil the skull. A turkey fryer is perfect if you have one or a propane burner on your grill. I used my camp stove to produce the mount in the photo and a large heavy duty pot I got at goodwill. Once you have the pot ready and the water warm add some Borax and stir. You can do this with just water but boiling your deer skull with borax helps to degrease and shrink the meat in those hard to reach cavities like the nasal passages and brain cavity.
This process can take several hours. Check the skull regularly and add water as needed. Use a knife and scrape the meat from the skull. Don’t get too aggressive, just remove what comes off easy then boil it a little more. Be sure to add a little water that was lost in the process and you can add a little more Borax at this time as well. A water hose will clean out the nasal cavities and all the little pockets. The pressure from the water hose makes this process easier and quicker as well. This is the time to remove the brain from the brain cavity. The borax shrinks the brain and will make it easier to remove from the small hole in the back of the skull. A metal coat hanger is a great tool for this step. Return the skull to the boiling water for a couple more hours. By now the lower jaws may have come loose just put them in the boiling water as well along with any teeth that might have fallen out during the process.
Now the skull is almost finished. Remove the skull from the boiling water one last time and inspect closely for any remaining meat and clean the skull thoroughly. If there is any meat still attached to the skull just boil a little longer. Once the skull is completely free of meat and cartilage and the brain cavity is clean it is time to glue the teeth and lower jaw in place. I have yet to lose any teeth but I know people that have so just be sure to glue the teeth in place before gluing the lower jaw. It is fairly obvious where the jaw connects so just trial fit the lower jaw then add a small amount of super glue at the contact points and hold in place until dry. Repeat for the other jaw and set aside for a while before handling, to allow the glue to completely set up.
There’s one more step you might want to do and that’s to bleach the skull. The skull, with this article, was not bleached. Bleaching the skull is a simple task, but one of personal preference. This process with the Borax seems to bleach the skull nicely. I skip this step myself. If you prefer a little whiter skull, here is what you’ll need. The peroxide, most of us keep around the house isn’t strong
enough. You’ll need at least 40% by volume. You can get this at hair salons. Pour the peroxide into a container and use a small paint brush to paint the skull thoroughly with the peroxide. Be sure to wear gloves and eye protection just to be safe. Make sure you get the peroxide in every nook and cranny so that the whitening is uniform throughout the skull. For those problem areas that just will not whiten use a paper towel and lay it on the problem area and saturate it with the peroxide. Let it stand for several minutes and check. Continue this process until the skull is whitened throughout.
Another step I skip, but is very popular is painting the skull with Elmer ’s glue. This process gives the skull a bit of a satin finish and helps to seal the skull and strengthen it as well. You want to use just regular Elmer’s glue but add about 50% water to thin the glue. Paint the glue on evenly getting into all the cavities again so it all looks uniform. The glue will also help hold the teeth in and will fill any cracks in the bone which makes it much easier to dust later on.
To display your skull you can purchase a nice plaque for around $40 or just hang it on a hook on the wall works too. Another option, if you’re handy with a saw and some wood, is to make your own. The European mount is a great way to preserve those memories of the hunt and save some money. It is also a great reason to get out of the house and create something you can be proud of and will last forever on your wall

Bill Cooper has published over 1,500 articles and hosted TV and radio shows over a half century as an outdoor communicator. Recognized on the floor of the Missouri House of Repesentatives in 2016 for his career of promoting the outdoors, Bill has stood the test of time through his unwavering love of the outdoors.
Bill is also a member of the Freshwater Fishing Hall of Fame and the Legends of the Outdoors Hall of Fame and still going strong. We welcome his experiences and outdoor communicator skills to Rambling Angler Outdoors and look forward to all the remarkable stories and adventures ahead.
Bill Cooper
I spent some time one Sunday afternoon in late August talking with Walter to get his views and ideas about fall turkey hunting. To say Parrott knows turkeys is a bit of an understatement.

Parrott has won more major turkey calling championships than anyone in the world and he’s the only person to win every major turkey calling contest. The list of championships is impressive: 5-time World Champion, 5-time Grand National Champion, 3-time Team Grand National Champion, Grand National Champion of Champions, 16-time U.S. Open Champion (Open Division, Friction and Champion of Champions) and has won World, The Masters, Mid-America Open and many state and local competitions. And, his numerous seminars, appearances and videos have educated tens of thousands of turkey hunters and outdoorsmen.
sound off like they do in the spring, but there are still plenty of turkey sounds to be heard in the fall woods.”
“As a result of gobblers not sounding off in fall,” Parrott says, “fewer hunters pursue fall turkeys because the birds can be far more difficult to locate.”
that are available to large flocks of birds is a primary tactic for consistently being successful at harvesting turkeys in the fall.”
“Lots of hunters think fall turkeys are difficult to hunt because they believe the myth that turkeys are not as vocal in the fall,” Parrott began. “Those guys are tuned in to the gobble of the wild turkey tom. True, they don’t
“A prime factor that sets the tone for fall turkey hunting tactics is the fact that a flock of 25 turkeys has 50 of the best eyes you will ever find in the woods,” Parrott lamented.
“All I attempt to do (in contest calling) is get judges to listen. With wild turkeys I have to scout, interpret sign, use my woodsmanship skills, locate birds, interpret their mood, sometimes scatter a flock and then attempt to call in a fashion that will convince the birds that they want to share my company.”
And hunting the real ghosts of fall — old gobblers — is the most challenging scenario of all.
“Fall gobblers are tough,” Parrott said. “Gobblers don’t sound off much in the fall and they often slip in and out silently. “Their ability to appear out of nowhere and vanish into thin air just as quickly would make Casper jealous.”
Parrott’s tactics for mature fall gobblers are simple. “Use raspy clucks and plenty of stealth. Listen a lot and plan on burning lots of shoe leather.”
“Food sources,” Parrott emphasized, “are one of the most important finds fall turkey hunters can make. Finding food sources
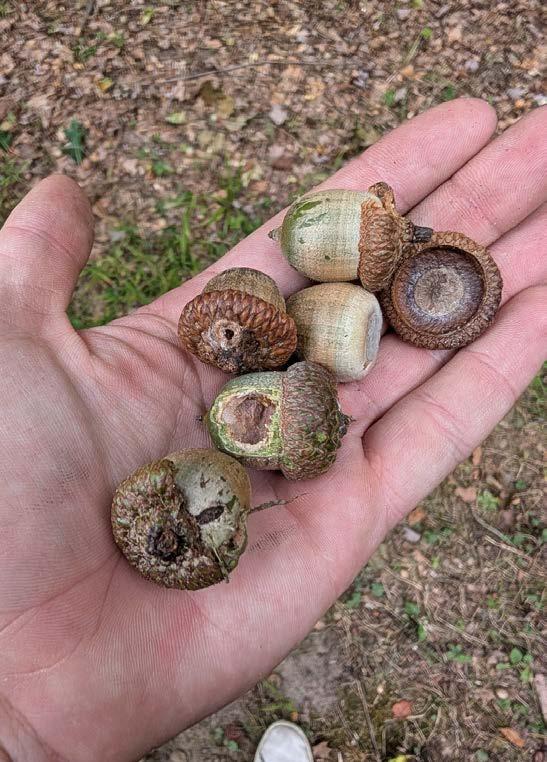
Parrott pointed out that turkeys spend the summer months chasing grasshoppers and other insects. That food source only lasts until the first heavy frost. Flocks will then begin to look for other food sources. In the heavily forested areas of the Midwest that means one thing: acorns.
“Knowing where the best acorn producing trees are in a given area is a great tactic to eliminate a lot of non-productive territory,” says Parrott. “And if you aren’t up to date on the quality of the acorn crop
in the area you plan to hunt, call the local conservation agent or US Forest Service office. They can tell you about the status of the acorn crop.”
Knowing your oak trees can pay off as well. White oaks bear acorns every season, unless a late frost wipes out the crop in the spring. It takes black oaks two seasons to bear a crop of acorns. As a result, black oak acorns often fill in the gap when the white oak acorn crop fails. Turkeys prefer white oak acorns, but will readily feed on back oak acorns.
After locating food sources, Parrott then scouts nearby areas thoroughly for other turkey sign. Scratchings in the leaves, droppings and discarded feathers are prime indica-
tors of turkey activity in an area.
“Early morning and late afternoon are the best times to listen in the fall because that is when the flocks are leaving the roost and going to roost,” Parrott instructed. “Those two time periods are when fall flocks are the most vocal. I call it the ‘chicken house effect’ because the flocks often sound like a hen house full of excited chickens.”
Parrott’s favorite fall turkey hunting tactic is to flush birds from the roost. “Doing so creates the ideal fall turkey hunting scenario.”
“I first try to locate roosting flocks with soft tree yelps, if they are not already vocal. I try to get them to come to me. If they don’t, I simply begin easing closer. Once I spot birds in the trees, I begin yelling and beating on trees with a stick. I don’t over-do it. There is a difference between scattering the birds and scaring them into the next county.”
Parrott sits down near the scatter point and lets the turkeys dictate the pace. As soon as he hears a poult’s “kee-kee” call, he begins to call, using both the assembly call and the calls of a dominant hen. But don’t wait too long, Parrott warns. The result is a lost flock; experienced hens can reassemble their poults in a hurry.
“Two of the most common difficult scenarios hunters face in the turkey woods,” Parrott pointed out, “are finding turkeys already off the roost and locating flocks with an obstacle in the way. When I locate flocks on the ground, I lay my gun down on my hunter orange vest, so I can find it again, and run at the turkeys to scatter them. Hearing turkeys across a big valley or a stream, or on the other side of thick cover, presents a challenge that takes ingenuity and stamina to overcome. Knowing where the turkeys are headed is paramount. Remember those food
sources, then, it is simply a matter of heading the flock off and setting up to scatter the flock or attempt to call them.”
Hunting open areas, such as plains or large crop fields present special challenges, according to Parrott. “A good set of binoculars are a must under these conditions,” Parrott said. “You can scan a lot of territory in a hurry. “
“Knowing a flock’s daily travel routine can save a lot of frustration. Using turkey decoys is also a good tactic because turkeys can see them from a long way off in those big, open areas. Challenging a dominant hen may just cause her to come over to investigate. And where mama goes, everybody goes.” Parrott added.
A final tip which Parrot shared about hunting fall turkey comes from a tactic he learned a long time ago from turkey hunting legend Ben Lee.
“Ben would take a cheap dime-store plastic whistle and remove the ball,” Parrott said. “Saying the words ‘pee, pee, pee’ into the empty whistle shell imitates beautifully the kee-kee of young fall turkeys.”
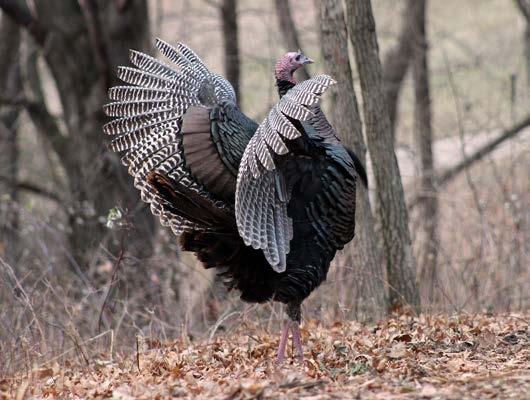
Standing high on a wooded ridge at daybreak, with fresh fall air blowing on your face and listening to the cackles, clucks and kee-kees of a flock of turkeys trying to reassemble after fly down is exhilarating. Toss in the dramatic colors of fall foliage and the company of a good friend and you have the makings of the perfect fall turkey hunt.
“’Oh, P.S.,” Parrott said. “I always carry as many turkey calls as I can to sound like a bunch of different turkeys. Turkey box calls, slates, glass, push-pulls, mouth and tube calls — they all pull those ghosts of the autumn woods to the gun.”
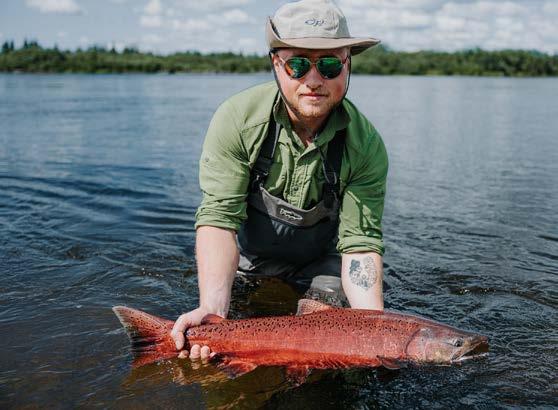
The Williamson River is a popular Oregon destination to hunt for big rainbow trout and brown trout too. Fishing the Williamson River is an experience that weaves together patience and anticipation. The river meanders through lush meadows and ancient forests, its waters hiding wild trout renowned for their size and cunning. Early morning mist lifts slowly to reveal a chorus of birdsong, while the rhythmic casting of a fly line becomes almost meditative. Each bend in the river offers a new possibility, a hidden pool where the current runs deep and secrets linger beneath the surface like a big Redband Trout.
As sunlight begins to filter through the branches, the river’s surface glimmers with subtle movement, hinting at life below. Anglers pause to take in the serenity—a deer stepping softly through the ferns, the distant sounds of waterfowl, the satisfying crunch of gravel underfoot. The Williamson is more than a destination; it is a living story, written in the language of water and willow. Whether you seek the thrill of a strike or simply the peace found in the hush between casts, the river rewards those who listen and linger, promising moments that resonate long after the day has ended.
The Williamson River in Oregon supports a notable population of redband trout, a distinctive type of rainbow trout valued by anglers. These trout migrate between Upper Klamath Lake and the river’s tributaries to spawn, and the lower river is especially recognized for its large, native redband trout.
Redband trout are a subspecies of rainbow trout distinguished by a bright red stripe along their body. They often retain their parr marks (juvenile markings) into adulthood and can grow to impressive sizes, with some exceeding 20 inches in the Williamson River.
These remarkable fish are known for their strength and elusive nature, making each encounter memorable. Throughout the summer and early fall, redband trout ascend from the vast waters of Upper Klamath Lake, their vibrant colors flashing in the dappled light as they navigate riffles and deep pools. Anglers prize them not only for their size—which can reach impressive proportions—but also for their spirited fight, a test of skill and patience.
The river’s pristine habitat supports a rich diversity of aquatic life, providing ample food for the growing trout.
Mayfly and caddis hatches fill the air with delicate wings, drawing trout to the surface in a flurry of feeding activity, especially in the evening just before dark. Along the banks, wildflowers bloom in riotous color, and the interplay of sun and shadow paints the water with shifting patterns. For those who walk its banks or drift quietly in a drift boat, the Williamson offers a rare connection to the wild—a reminder that some places still hold a sense of wonder, untouched by the rush of time.
Each visit to the Williamson River is both an adventure and a meditation, a chance to lose oneself in the rhythms of the water and the untamed beauty of Oregon’s high country. Whether casting for the legendary redband, soaking in the quiet, or simply watching the dance of light on water, the river welcomes all who seek its solace and challenge.
Those drawn to the Williamson often find themselves returning, compelled by stories shared around campfires and whispered along the riverbank. Local guides speak with reverence about the subtle art of reading the water— watching for the faintest rise, the shadow that flickers just out of reach. It is a place where tradition and nature meet: hand-tied flies drift along, meant to entice the river’s wary trout.
Seasoned anglers know that patience here is both a virtue and a necessity. In late summer, when the cottonwoods shimmer with golden leaves and the air turns crisp, the river takes on a different character—its current slows, its surface sometimes glassy and reflective. This is the hour of stealth, when a single, well-placed cast might tempt a trout from its comfortable spot by a log or boulder.
Beyond the fishing, the Williamson offers space to simply be, to listen to the hush of evening settle over the water, to watch clouds drift lazily overhead, or to trace the flight of an osprey as it wheels above the current its catch secure in its talons. Time moves differently here, each moment marked not by the ticking of a clock but by the natural pulse of the river itself. For many, that is the greatest catch of all.
So, whether your journey ends with a trophy-size redband or a memory etched in sunlight and song, the Williamson River grants its gifts freely to those who venture with open eyes and a patient heart. In its wild bends and shadowed pools, you may discover not just remarkable fish, but a renewed sense of wonder and connection to the world around you.
As a helicopter mechanic I am fortunate to be based near some great rivers, streams and lakes. This jobsite is within eyesight of the Williamson River in Chiloquin Oregon. We have been here a couple of months and a nest with 3 baby Ospreys rested atop a power pole. We were entertained daily as the baby osprey sang the “I’m hungry” song and recently watching them learn to fly. The osprey brought many trout to the nest and some in the good-sized range. Finally, me and co-worker Pete decided to take an evening and hang out on the river.
Pete ties flies and lives in Oregon so he has more of a clue to fishing these waters than I do. We spent several hours fishing the Williamson and it was nice. I walked the bank while Pete wet waded. I told him I was getting wet if he caught a fish but not risers on this evening. It felt good to be on a western river again where I spent so much of my youth. It was a great time.
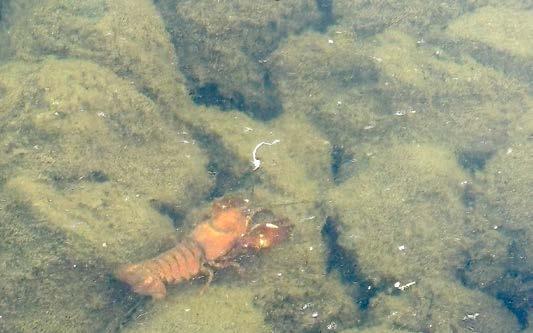
The Williamson offers many ways to fish it. Some available shorelines to fish from the bank. Tall grass will make for a difficult back cast if you don’t want to wade out but a spinning rod and reel works great. Check regulations but when we fished spinning tackle and fly tackle was ok and even bait. Try minnows or worms to catch rainbow trout and brown trout. I couldn’t find them listed as a live bait option but after seeing the big crawdads prowling along the rocky bottom, I would certainly consider crawdads for big trout.
Check regulations for the Williamson River, as there may be restrictions on bait use in certain areas or for certain species.
Seasons on the Williamson shape both the fishing and the mood of the river. Spring’s high water brings a flush of life—mayflies and caddis hatching in abundance, the banks shimmering with wildflowers, and trout more eager to rise to a well-presented fly. In contrast, autumn paints the cottonwoods copper and ochre, the river quieter, its secrets held closer. Local anglers talk of winter’s stillness too, when icy mornings and mist rising off dark pools remind you this land is as fierce as it is generous.
When it comes to fly fishing the Williamson, there are various techniques that anglers can use to increase their chances of success. Nymphing, dry fly fishing, and swinging bugs are all effective methods that can be utilized depending on the conditions and the behavior of the fish. Let's explore each of these techniques in more detail.
Nymphing is a popular fly-fishing technique that involves fishing with an imitation of the aquatic nymph stage of insects. Nymphs are underwater insects that are a crucial food source for fish. By using nymph patterns and fishing them below the surface of the water, anglers can effectively target fish that are feeding on these underwater insects.
Dry fly fishing is a technique where anglers fish with flies that float on the surface of the water. This method imitates adult insects that have landed on the surface of the water. When fish are actively feeding on the surface, dry fly fishing can be incredibly effective. Anglers must present the fly in a natural and enticing manner to entice the fish to strike.
Swinging bugs is a technique that involves casting a fly downstream and allowing it to swing across the current. This method is often used to imitate emerging insects or baitfish. By swinging the fly across the current, anglers
can trigger strikes from fish that are looking for food moving in the water. It requires skillful presentation and an understanding of fish behavior.
Each of these techniques has its own advantages and can be effective in different fishing scenarios. Nymphing is great for targeting fish feeding below the surface, dry fly fishing is ideal for surface-feeding fish, and swinging bugs can be effective when fish are looking for moving prey. Experienced anglers often use a combination of these techniques to adapt to changing conditions on the water.
Whether you are a beginner or a seasoned angler, mastering these different fly fishing techniques can help you become a more versatile and successful angler on the Williamson River. By understanding when and how to use nymphing, dry fly fishing, and swinging bugs, you can increase your chances of hooking into a few of the great trout the river has to offer.
According to Orvis Reports fisherman have the opportunity to fish with Hexagenia and PMD's in June and July, Hoppers and Tricos in August, and Mahogany Duns, BWO's, and October Caddis in the fall. Leech and baitfish patterns work all season long.
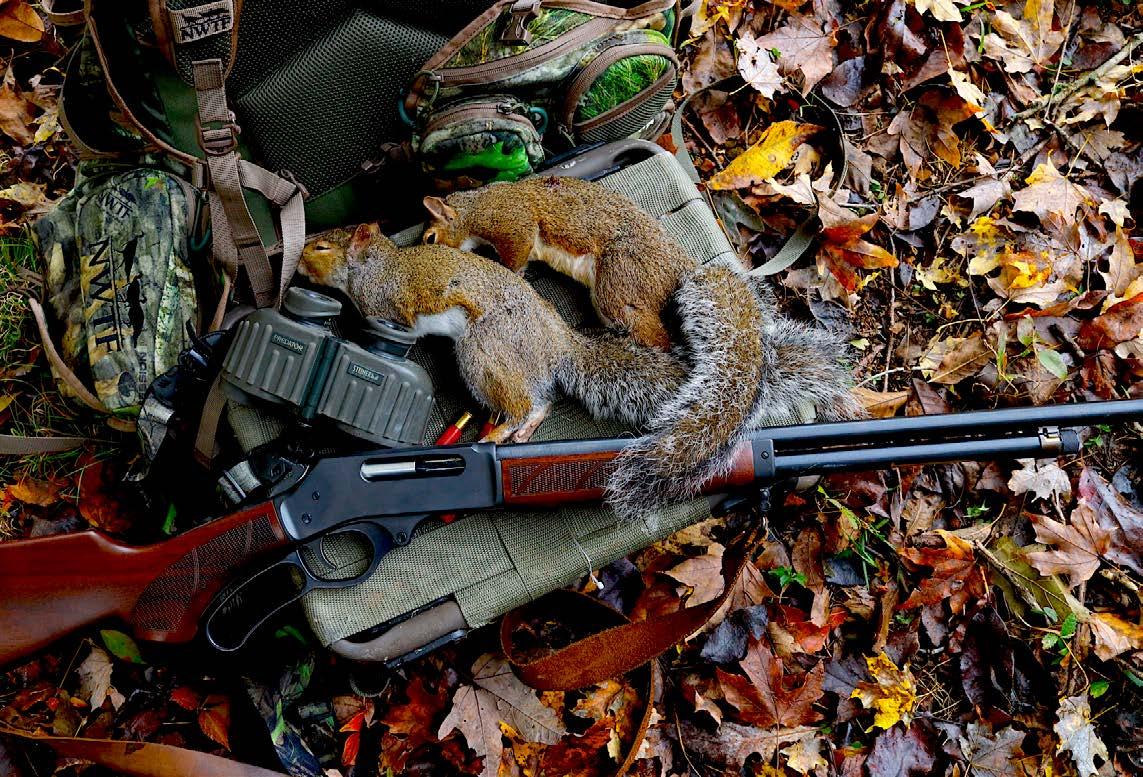
The first classroom for many hunters isn’t a deer stand or a duck blind. It’s a patch of hardwoods in September, where the air still carries summer but the leaves whisper of fall. Squirrels chatter in the treetops, acorns strike the forest floor like scattered rain, and you sit at the base of a tree with a small gun and a larger hope: to learn how to belong here. Squirrel hunting is the schoolhouse where woodsmanship is taught. Long seasons, forgiving bag limits, and a quarry that is both abundant and sharp-eyed make it accessible to beginners and humbling for veterans. In the quiet lessons of patience, observation, movement, and ethics, the fundamentals of hunting are passed down.
Sit long enough and the woods will test you. A squirrel vanishes at the faintest shuffle of boot or rustle of fabric. But if you let the forest forget you, the story changes. A branch trembles with a bouncing tail, claws rake bark, leaves scuff as something darts across the ground. Stillness rewards you with movement — a lesson every hunter carries forward.
Squirrels teach the art of seeing and hearing. Their sign isn’t a pawprint; it’s the litter of hickory hulls, acorn caps, or the faint scrape of teeth overhead. Sometimes it’s a sharp plop as a nut falls through leaves and lands at your feet. The bushytails sharpen your senses. Start with them, and you’ll soon notice deer trails pressed into leaf litter, or a turkey’s scratching under a beech. The woods become a story written in crumbs and echoes, and you learn how to read it.
No one slips through timber without sound, but you can learn to move with the rhythm of the woods. One step. Pause. Listen. Another. Jays and crows become sentries you heed. A wet morning forgives your footfalls; a dry day punishes every leaf you disturb. In this schoolhouse, you learn where noise lives, and how to time your movements in between the natural chorus. Navigation, awareness, and presence all start here.
If patience and movement are the how, food is the where. Squirrels orbit the nut trees, what biologists call mast trees — oak, hickory, walnut, beech.
“Mast” is simply a word for the fruiting bodies of trees and shrubs: acorns, beechnuts, hickories, walnuts, chestnuts. Even soft fruits like pawpaws or wild grapes fall into the category, though for squirrels the hard mast is king.
In September, early hickories draw them like magnets. As the season deepens, the oaks rain acorns steady and loud. By late fall, walnuts and beechnuts may be the hot ticket. Some years bring a bumper crop — “nut years” when squirrels are everywhere. Other years are lean, and the animals spread thin.
Sit beneath the right tree in its season and you begin to understand a deeper truth: the woods are
never static. They shift and pulse, and if you can read the nut crop, you can read the squirrels — a lesson that serves just as well in deer season, turkey woods, or while foraging.
A squirrel’s head is not a generous target. A clean shot requires patience and timing. You wait until the animal is clear of bark and branch, until you can take the shot you know you can make — or you don’t take it at all.
Hunters carry the responsibility of doing everything possible to reduce suffering. In a world where meat often comes shrink-wrapped from a shelf, the ordeal of the hunt is a reminder that food carries a cost. For us, meat comes only after effort, intention, and the finality of taking life. The least we can do — for the animal, for ourselves, and for the tradition we’ve inherited — is to make that harvest swift and clean.
Ethical hunting is not optional. It is how we honor the balance of the woods. Sustainable practices are the key to passing this tradition forward. These lessons do not only move from one generation to the next; they reach back across species, from those who first knapped stone points to take game to those of us carrying rifles and shotguns today. What we inherit is not just a method, but a way of living with the land — a way that honors the lives we take and the ground that sustains us.
Part of the beauty of squirrel hunting is its simplicity. A .22 rifle or small-bore shotgun, a sharp knife, a vest or bag. That’s enough. No complicated blinds, no excess gear. Just the woods, the hunter, and the quarry.
This is why squirrels so often mark the beginning. They are the hunt a grandfather shared with a .410, or the Saturday morning when a parent carried you along with a single-shot rifle. They are tradition made tangible, connecting seasons, families, and memory.
The lesson doesn’t end with the shot. Cleaning a squirrel is often the first test of responsibility, sometimes messy, often frustrating, but always instructive. It drives home that hunting is not just about pulling a trigger — it is about carrying responsibility all the way through.
And then comes the meal. Fried squirrel and gravy, a slow pot pie, a stew that fogs up the kitchen windows on a cold night. This is where the circle closes — food, family, memory — and where the true meaning of the hunt is revealed.
To call squirrel hunting a schoolhouse is no figure of speech. It truly shapes the hunter. The patience learned under hickories, the eyes trained on cut shells, the careful steps placed through wet leaves — these follow you into the deer woods, the turkey ridges, the trout stream, and the mushroom patch.
Opening day is here. Take your seat in the schoolhouse. Respect the lesson. Share the meal. Keep the tradition alive.

After 20 years as a helicopter mechanic in the Alaskan bush, and living on a boat in Southeast Alaska, my heart and soul is still and forever will be a part of Alaska. My writing career began in a tent in Chicken, Alaska and I owe Alaska a great deal for who I am and for inspiring me to write. I hope that you enjoy the stories herein as we bring you the great history, outdoor adventures and more from The Last Frontier. Ken McBroom
Tim Cammisa-Trout and Feather
By Daniel Rogers
Remote Alaska has a certain allure to fishermen worldwide that’s hard to put into words. It’s more than simply a place to catch trophy fish, avoid the crowds, and bring home some salmon for friends and family. Thousands of fly-fishermen, sightseers, and guides (like me!) return to this magical place year after year for the feeling of belonging, of connectedness with nature in untouched landscapes; an emotion that’s increasingly difficult to experience in the busy world we inhabit. Fly-out, overnight raft trips in Bristol Bay are the best way many have found to combine this feeling with the joy of fly-fishing.
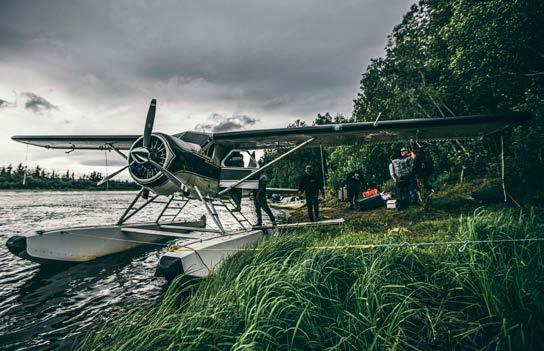
Guests arrive at Alaskan Remote Adventures in style, touching down at the lodge aboard a classic DHC-2 Beaver. Walker Edison
There are a whole lot of rivers and options when it comes to fishing Alaska, each offering unique species, fishing techniques, and landscapes. When planning an Alaska float trip, whether it be self-guided or through an outfitter, the main things I’d lookout for are time of year, the species you’re after, and the style of fly-fishing you prefer. When dealing with salmon in most Bristol Bay watersheds, the “prime time” for fishing tends to follow this schedule:
June & July: King salmon (Chinook), Sockeye salmon, and Chum salmon
August & September: Silver salmon (Coho), Dolly Varden, Arctic Char, and Rainbow trout
Times and species vary from river to river, so phone a friend or do your homework! Mosquitos are an unavoidable subject, and while you’re not likely to escape them completely, their numbers start to decline in late July. I wish I could tell you that one month is drier or sunnier than the next, but part of the fun of Alaska is you never really know ‘til your boots are in the water. Even if you’re hiring a private float plane and embarking on a self-guided expedition, Tim Cammisa, Alaskan outfitters, and I are happy to help point you in the right direction.
To get a feel for how the logistics typically go for these trips, I’ll use one of my favorites as an example, the Koktuli River. Beginning just north of Lake Iliamna, the Koktuli flows 60 odd miles NW before joining the Mulchatna River. Like many rivers in Bristol Bay, a wheel-plane flight is needed from Anchorage to Iliamna where you’ll board your float plane. There are a handful of ways to put together an expedition here:
• If you plan on bringing boats and everything else yourself, you can simply hire one of the great DHC-Beaver floatplane pilots at Rainbow River Aviation to fly you out and pick you up.
• If you’d like to rent gear and/or hire a guide for a week-long trip, Fish & Float Alaska has you covered.
• Float trip and lodge combo? Stay at a remote lodge that offers jet boat fishing. Alaskan Remote Adventures, where I guide on the Mulchatna River, has your back. This is my favoriteand blatantly biased - option.
• Thinking about joining a group of like-minded fly fishers for a week in Alaska with full lodging and a chef? Look no further than Tim Cammisa’s group trip this summer.
Whichever option you pick, the first day will look something like this:
1 Wake-up in Anchorage and have some breakfast.
2 Drive or Uber to Merrill Field Airport or Anchorage International for a morning flight to Iliamna.
3 Get shuttled over to your float plane, then load up!
4 Land on a smaller lake unofficially named “Koktuli Pond.” Offload your gear in kneedeep water, wave your pilot goodbye, and you (and your guide/s if you got them!) will take trips game-carting all the boats and supplies across the tundra to the river bank of the Koktuli headwaters.
From here on out, you’ll be rafting, fishing, and camping along a small, crystal clear river. The upper Koktuli is a gravel-lined creek amidst 50 open miles of rolling, vast tundra. By day two,
5 Inflate the boats and set sail!
you’ll find yourself surrounded in a thick spruce forest with animal life and leaping grayling. Moose, caribou, wolves, eagles, ospreys, and brown bears are abundant and call this river home.
Guides always have your back when it comes to the bears, and for those self-guided, bears in the summer months aren’t too hungry. Even better for us, they’re quite afraid of humans in any regions they have hunting seasons. Bear spray is always smart to have along. I’ve had a number of brown bears follow the scent trail of fire-cooked meat into camp on the Koktuli, and a friendly “Hey bear! Kindly f*** off please, this dinner isn’t yours” always seems to do the trick. Just pretend you’re talking to a crazy ex - have confidence, stand your ground, and if they won’t respect your boundaries, pepper spray will change their mind.
You made it to the part where I actually talk about fish! The fish of the Koktuli are highly season dependent; everything but the Arctic grayling revolves around the lifecycle of salmon.
In late June and early July, the river boasts trophy Arctic grayling that can be picked up by everything! This includes dry flies like big bushy #10 Stimulators (that mimic absolutely nothing natural flying around) and more natural #16 Adams. Don’t forget egg patterns and streamers, they are both hard to resist. Legend has it Koktuli grayling turned their nose up at Tim Cammisa’s sophisticated “Euro nymphs” because the flies look too much like a real bug for their liking!
By mid-July, salmon are making their way up the river. King and chum salmon are targeted with swung or stripped Dolly Llama streamers and egg sucking leech-
es. Be sure to carry a sink tip if the fish are in deeper water. Kings can often be persuaded with beads, whether high-sticked or carefully drifted under an indicator—an effective approach when they’re keyed in on eggs. There is a great chance that soft beads, when rigged correctly, can provide you with an aggravatingly effective setup, especially when targeting King salmon. See the diagram to learn how to setup this simple and effective rig.
Sockeye are not fond of biting and can be difficult to catch. They can easily be “flossed,” this is sometimes entertaining and does provide for a great fight, picture, and meal, but is about as sporty as shooting carp with a 10-gauge. The method involves drifting a long leader with a weight so that the fishing line naturally flows into the salmon’s mouth. Since salmon often keep their mouths slightly open while swimming upstream, the line slides through, and when the angler sets the hook, it usually catches in the corner of the fish’s mouth.
Keep in mind that sockeye WILL occasionally bitewhether this is a defensive strike, predator eradication tactic for protecting their eggs, or a true attempt to eat is up for debate. The previous sentence is for legal purposes only (note sarcasm!). Tim and I made a bet last year, and he unfortunately won by consistently convincing the sockeye to bite his fly.
Silvers hit the mouth of the Koktuli around the first week of August, and by mid August they’ll be just about everywhere. Silvers are the least picky of the salmon in the Koktuli; my favorite streamer colors are pink, orange, or blue. Go with a Zonker or marabou streamer, but on a good day, the fish will bite damn
near anything that moves. Later into August ,they get more aggressive and can be easily caught on top water with Poly Wogs like the Gurgler. It’s not uncommon to catch 50 silvers a day on the fly in the Koktuli and Mulchatna Rivers.
Leopard Rainbow trout, Dolly Varden, and char are gorgeous fish targeted all season, though things really start to pick up in late July and August. They closely follow spawning sockeye and chum, their sole focus is on stray eggs and flesh. As such, the best way to target them is finding a long stretch of bank with salmon lined up spawning, and drifting egg patterns, flesh flies, or a combination of the two. Stay awake, the strikes can be quick and aggressive!
Gear is truly trip-dependent, based on the level of comfort you require or weight that can be packed. Many outfitters will provide you with everything but a personal sleeping bag, so here’s the gist of what will either be included or you’ll be expected to bring for yourself:
Rods: 6- & 8-weights have you just about covered for trout and salmon. If you’re fishing a river that commonly lands 25 pound (or larger!) King salmon, throw a 10-weight in for good measure. Bring a floating line for trout, a sink-tip and floating line for the salmon.
Camping Gear: Pack windproof and rainproof tents, pads, and dry bags. Cots are amazing because often the camping spots are baseball-sized river rock, plus throw in an inflatable or packable pillow. Pack everything else you’d bring on a normal camping trip, such a cooking supplies and toiletries.
Clothing: Effective rain gear is essential. You’re not going to shower, and you’re probably not going to change unless you get wet. It’s always important to have backup base layers, but it doesn’t matter how many backups you have if your rain jacket or waders leak. For clothing, choose quick-dry pants & shirts, plus a mid-layer of fleece or down for insulation. A neck gaiter or buff is great for wind and bug protection, plus add lightweight boots for comfort in camp.
Survival Gear: Bear spray and/or gun if you prefer. If you bring your own gun self-guided, please only bring a 10 mm, 44 mag, 12 gauge with slugs & buckshot, or similar calibers. Don’t shoot unless you’ve already attempted bear spray or spraying isn’t an option. Bear spray deters, once you take your first real shot, you’re committed. Brown bears are known for their thick skull, don’t let yours be thicker.
Alaska is a place to dream dreams and forget you ever had any; the farther in you get, the farther out you get - Hamling Garland
Emergency Gear: Redundancy of fire starting materials is important. I keep a lighter and matchbook in my waders at all times, and it’s saved my life multiple times in Alaska. No one wants to build a bow-drill with damp spruce in the rain. Bring a quality PFD for the raft, plus a backup paddle.
Navigation: Some sort of satellite communication device is necessary if self-guided, otherwise guides will have them. A compass can be a lifesaver if technology fails, so also throw in extra batteries or a power bank.
First Aid: Add a first aid kit to your packing, some bug repellant, sunscreen, and lip balm. These, along with paracord & carabiners, will complete your packing.
Now comes the fun part: Which type of trip is best for you? The key in this is taking time to determine the type of Alaska experience you’re after. Choosing between a float trip and a lodge stay in Alaska comes down to your fishing style, adventure level, and comfort preferences—here are some thoughts to help to decide which experience is right for you.
◦ Pros: Complete immersion in nature, access to remote areas not even accessible by jet boat, and far more wildlife to see. A truly badass rugged experience!
◦ Cons: Requires more preparation, physical effort, and less “comfort”. You aren’t likely to catch as many fish as you would with access to a motorized boat - once you float over a good hole it’s hard to go back and target it again.
◦ Pros: Comfortable accommodations, guided fishing, boats quickly take you to the best spots on multiple rivers, meals will be fancier, and you can dress down and relax at the end of every day.
◦ Cons: Less adventurous, typically a little more expensive, less bragging rights when you get back home about how rugged you were all alone in the Alaska Bush.
COMBINING BOTH:
◦ Rafting your way to a lodge can combine the best of both worlds. After 3 or 4 days camping on the river, even the most rustic of lodges and a hot shower is mind-blowing. This is my preferred style of trip as the rafting is always an unforgettable experience, but finishing the week at a lodge with jet boats to access the best possible fishing perfectly wraps up the whole experience. When you’re ready to set up your perfect Alaskan experience, please reach out and I’ll be happy to get you pointed in the right direction. The untouched waters, incredible wildlife, and pure solitude of remote Alaska make for a fly fishing adventure you’ll never forget. Don’t wait too long—these pristine destinations are calling, and the best spots fill up fast!
This coming season will be my fourth year as a guide and assistant manager at Alaskan Remote
Adventures on the Mulchatna River. We offer full week lodge stays and float combos, with multiple river options including floating the Koktuli River down to the lodge on the Mulchatna River. We have a small, absolutely amazing team at ARA I’m lucky to call family. I also have the privilege of guiding as needed for Fish & Float Alaska, who offer a huge repertoire of river options.
I grew up in Eugene, Oregon where I learned to fly-fish the Mckenzie river and worked at a flyshop. After finishing college in Bend, Oregon, I decided I wasn’t ready to join the rat race and be an engineer in a cubicle (what’s wrong with my lazy generation, I know). A great college buddy and our Head Guide, Easton, asked if I’d come up and work with him, and I’ve been guiding the fishing and hunting seasons in Alaska ever since. In the off-season, I travel too much, have far too much fun, and fly planes in Montana. Follow my adventures on Instagram: @danielrogers620
This article appeared on the website Trout and Feather
Tim Cammisa, creator of “Trout and Feather,” website, has spent over a decade sharing fly-tying and fly-fishing knowledge through videos, guiding, and speaking at major events like The Fly Fishing Show. He leads trips to top destinations like Iceland and Alaska and is the author of Fly Tying for Everyone and Tying Euro Nymphs and Other Competition Favorites. Tim lives in Harmony, Pennsylvania, with his wife, Heather, and their children, Angelo and Fina.
Tim Cammisa
Trout and Feather tcammisa@gmail.com

It is our goal with this department to provide fly tying and fly fishing information. While we endeavor to cover all aspects of fly tying & fishing we want to hopefully inspire and recruit more people into warm water options and our content will reflect this. Expect some history and interesting stories that involves the art of fly fishing.
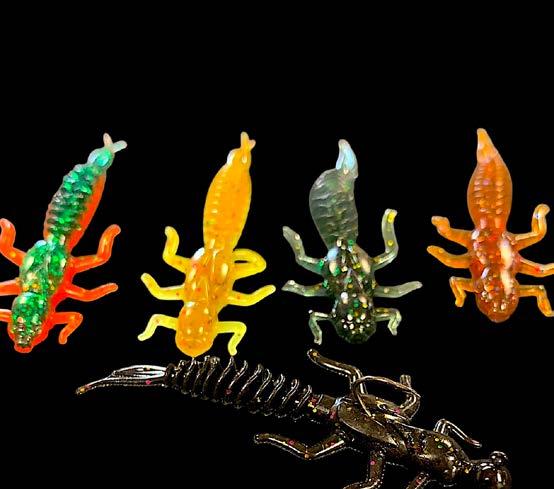
The Ugly Bug tied by Oregon fly tyer Pete Coman
The Ugly Bug is meant to represent a stonefly. The stonefly is a favorite on many rivers throughout the country. The Ugly Bug fly is a heavy weighted fly to get down in fast deep rivers like the Rogue River in Oregon where Pete Coman lives and drifts for steelhead year round. Pete ties his Ugly Bug for a fly shop in Shady Cove Oregon, The Fishin Hole Fly Shop a fly shop and deli where you can pick up some flies for your trip down the Rogue and a fresh lunch to take with you. The Fishin Hole Fly Shop offers guided trips down the Rogue.


After including Nash in our last issue I found a book collection by the author. If you like down to earth outdoor stories, this collection is a great read.
An avid shotgunner and wing shot, Buckingham was considered an authority on topics relating to waterfowl and upland birds, as well as the methods and tools used to hunt them. Although Buckingham pursued a variety of game in his lifetime, if his own writing is a true indication, it would seem that “Mr. Buck” possessed a special fondness for ducks and quail. He was active in a number of outdoor related activities such as Field Judging and a dedicated and influential participant in a number of worthy causes devoted to the betterment of hunting, sporting literature and the preservation of the American outdoor tradition. As such, Buckingham was given a number of prestigious awards for having used his voice to help the cause of conservation. He spoke out often and eloquently about the necessity of enforcing game laws and was a staunch advocate of the Migratory Bird Treaty Act of 1918. source wikipedia

Nash Buckingham (1880-1971) was indeed a notable figure in American outdoor literature and conservation. As an avid outdoorsman from Tennessee, he gained recognition for his engaging and skillful writing on hunting, particularly focusing on waterfowl and quail. Buckingham’s work is celebrated for its vivid storytelling, reflecting his deep respect for nature and wildlife.
By Bill Cooper
It’s the great turkey hunting debate. Which is the better hunting method, run and gun, or immediately set up, call and wait them out? With over 50 years of turkey hunting experience under my belt, I’ve watched many great turkey hunters from both sides of the fence with many gobblers flopping on the ground.
I’ve also witnessed quite a few heated arguments on the topic. Turkey hunters are a hard-headed lot, especially when they are defending their position about how they hunt wild turkeys. Successful turkey hunters carry egos as big as the shotguns they pack, and very few of them subscribe to the idea of admitting they are wrong about their turkey hunting tactics, especially when they have ample evidence to prove their point. Most video footage, photos, or buddies who witnessed said hunts to support
their theories.
I’m not suggesting that this grand argument will ever be resolved, at least not as long as there are two turkey hunters left in the woods. I do, however, hope to shed some light on the reasoning behind the thoughts of each camp on this most controversial of turkey hunting subjects.
Two of the most successful turkey hunters of all time, whom I’ve been personally acquainted with for decades, and whom I’ve hunted with many times are Ray Eye and Walter Parrott. They are both from the Missouri Ozarks and know one another very well. However, Eye is a die-hard supporter of the run and gun, call until their ears bleed camp, while Parrott is a staunch supporter of calling softly and hunting birds as if they were always look-
ing at you. Who can argue with these two super successful turkey callers and hunters?
I’ve been convinced for decades that most turkey hunters begin running and gunning because turkeys will not come to their calling, and they don’t know what else to do. They hear a turkey gobble at a distance and begin calling. When the tom doesn’t head their way in a few minutes, they chase after it. If they experience success with this method, running and gunning becomes their way of turkey hunting.
As long as I’ve known him, Ray Eye has been the ultimate call hard, go hard turkey hunter. I’ve hunted with him on several occasions when he had a turkey gobbling, but it did not gobble enough to suit him or did not come his way soon enough. I’ve heard him say it many times. “Let’s forget this gobbler and find one that wants to play.”
Ray Eye is an exceptional caller. He easily entices gobblers to do things that I could never get them to do. He is bold and aggressive. He calls long and loud and moves often if birds don’t cooperate quickly.
“Not every turkey in the woods gobbles on a given day,” Eye said. “I figure only about one in five gobbles the best of days. “So, I don’t like to spend a great deal of time on a bird that is don’t react well to my calls. I know from my experience that most of the time if one bird doesn’t work, I can move on and find one that will.”
At the other end of the spectrum is world class caller Walter Parrott. Parrott, too, is an exceptional caller and turkey hunter. However, he
prefers to call quietly and rely on his patience to work gobblers into range.
“Gobblers are crafty birds,” Parrott said. “I’ve seen many turkey hunters scare birds off before they even get started on a hunt by starting with loud calling. Turkeys hear much better than us. That’s why I always start calling very softly. If a bird responds, I set up and begin working it. If a bird does not respond, then I begin calling louder, especially on windy days.”
Parrott also believes in sitting tight to wait gobblers out. “Patience is key to killing gobblers consistently,” he said. “Impatient hunters have kept more gobblers alive than you can imagine. Calling too loudly and moving too quickly are common mistakes. Hunters so often scare toms away that they don’t even realize are nearby.”
“You can’t see far in the thick woods, and a gobbler’s eyesight is far better than ours,” Parrott said. “Moving too much and calling too loudly become your enemy. If you are having a tough time killing birds, you are more than likely committing these two big turkey hunting sins. My advice is to always to hunt wild turkeys as if they are looking right at you!”
There you have it, the best of both sides of the great turkey hunting argument. Choose your side or adapt to both sides of the fracas. Utilizing both tactics has worked for me. Of course, my family history dictates my behavior. A grandfather several generations removed belonged to both the Union and Confederate armies during the Civil War. Choosing sides often complicates matters.
Captain Mike Schoonveld
Just when I thought I had it figured out, I found out there’s more to cisco fishing at Grand Traverse Bay than I thought!
It reminds me of the time an acquaintance told me, “I took a charter on Lake Michigan once. The fishing was easy. We left the harbor, the captain and mate set some lines and our group caught fish all morning.”
He looked puzzled when I said, “Did you ever stop to think that maybe the captain knew what he was doing and was very good at it?”
Chances are, when anyone makes fishing look easy, they are probably very good at what they are doing. There’s a reason for the old adage: “ten percent of the fishermen catch 90 percent of the fish.”
Before my latest trip to Grand Traverse Bay, I’d been cisco fishing exactly twice. Each time, there seemed to be plenty of fish and they seemed willing to bite – easy fishing.
The first time was a few years earlier when a friend and I headed to GTB on a very impromptu trip. We only had a few hours to fish and not much more info than to “Head south from the boat launch, look for a dock on the shore with three flag poles and fish in 100 feet of water out from the dock.”
In the short time we had to fish we caught a handful of ciscoes and a whitefish. I didn’t think I’d become an accomplished cisco angler, but I did learn the fish were sporty fighters and they were quite tasty on the table.
A year later a different friend and I were at a writer’s meeting in Gaylord and used this as an opportunity to schedule a cisco fishing outing with Capt. Bob Hinds, operator of Central Coast Angling charters. He made it look easy. We left the boat ramp, motored out in the bay. Hinds quickly spotted a school of fish on his sonar, spot locked over them and we dropped our jigging spoons into the school and hooked up almost instantly. Repeat, repeat, repeat and in short order, we were back at the launch site with our limits.
I realized it was more than just luck as I watched what the captain was doing, how he used his electronics to locate and stay on the fish. I noted the lures we were using and asked plenty of questions. I was confident I’d be able to go back on my own and catch some cisco without relying on blind luck or a professional captain.
Some friends and I planned a two-day excursion in late October and showed up late morning full of optimism. Our optimism waned quickly that first day and my confidence was in the tank after a couple hours. We were fishing the same general area I’d fished with Capt. Hinds, we had similar electronics, similar tackle and jigs but the fish weren’t behaving as expected. There were no big schools of suspended fish like we’d targeted on my previous trips.
Experienced captains always have a plan when they hit the water, but they are quick to realize when that plan isn’t working. More important, they can quickly adapt and move on to an alternate plan if needed.
We had a Plan A and we tried several variations to see if we could get the plan jump started. With just a couple hours left on day one we scrapped Plan A and switched to trolling tactics. The boat was set up for trolling and we had some trolling gear along. Would our Plan B pay
off? Immediate success seemed to say yes. As soon as we set our two downriggers and started putting out our planer boards, bingo! One of the downrigger rods started bouncing. I grabbed it and caught a cisco. “Now we are on ‘em,” I thought. But when it was time to head in, we still had one cisco in the live well. We continued trolling on day two, working to refine our Plan B. We tried spoons, spinners and small plugs eventually finding small silver or predominantly silver spoons got the most hits. As we narrowed down our lure choices, dialed in the trolling speed and zeroed in on the most productive depths, our success improved.
The result wasn’t the easy limits we’d hoped for, but we ended the trip with more confidence than we started. How confident? When I go back next year, I’ll make it look easy.


Everybody loves grilled venison and sausage pizza. And when it’s a pizza, made with ingredients you took part in harvesting, it only gets better. This grilled pizza recipe is a simple recipe that will feed several. I am listing the ingredients I use in my grilled venison pizza but the sky is the limit. This recipe is simple and always great in a camp setting. The grilled venison pizza can be made in the oven if you can’t wait until your next camping trip. Let’s get started.
1/2 pound venison burger
1/4 pound spicy sausage
A can Pillsbury pizza crust
1 can of black olives
1 can of sliced mushrooms
A can of pizza sauce
8 oz feta cheese
1 bell pepper
In a skillet cook the venison burger and sausage until browned. Add the mushrooms, olives and green peppers and turn the heat down and cover. Stir the ingredients every couple minutes while you get your crust ready. The idea is to get your toppings hot before adding them to your crust so they warm nicely on the grill without burning your crust. Since the crust is in direct line with the flame or heat it will burn before heating all the toppings and melt the cheese. By heating all the toppings first it also begins to melt the cheese a little too.
The pizza crust for this recipe can be a mix or canned pizza dough or a pre-cooked pizza crust. As mentioned in the list of ingredients, an already prepared crust or even homemade pizza crust will work. If you use a pizza crust mix or make your own you will want to cook one side of the pizza crust on the grill first thing. You can cook the pizza crust directly on the grill rack or even better you can use a pizza stone. The stone will help keep your crust from burning by heating everything more evenly. Add the toppings. Adjust your venison pizza away from the heat using the grill grate to help keep you from burning the crust, especially with a pre-baked crust because it’s already cooked.
Now that your crust is ready you want to add your hot toppings to the cooked side of the crust. Spread your pizza sauce over the crust evenly. I add the feta cheese on top of the pizza sauce but you can put it on top with the mozzarella. Now add the hot toppings straight from the skillet onto the pizza. Spread them evenly covering the pizza sauce. Next add the mozzarella cheese. Do not skimp on the cheese. The cheaper cheese just doesn’t melt the same and doesn’t reheat as well as a premium cheese.
Place your venison pizza on the grill grate or stone and shut the top. Watch your venison pizza closely as it cooks. Shutting the top allows the toppings to heat up and really melts the cheese nicely on top. The toppings are already cooked so your primary concern is the crust and the cheese. Keep a sharp eye on the bottom of your crust or it will burn. This is where the pizza stone comes in handy. The crust isn’t in the direct line of fire, so to speak. Remove the pizza from the grill as soon as the crust is brown and the cheese has melted. Cut and serve.
This pizza is a great campsite dinner and a great way to enjoy the venison you or your friends have harvested. If you don’t have venison burger you can cut your venison up into very small pieces or even larger chunks, if that’s what you like. I usually don’t have my venison processed into burger, but my father-in-law shared some of his and it worked great for this recipe. I usually cut my venison up myself and it taste great. The next time you go camping do a little planning and surprise your friends and family with a great grilled venison pizza.
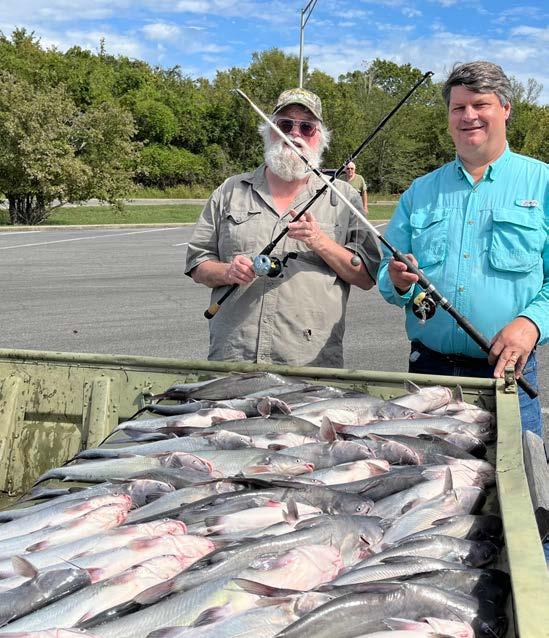
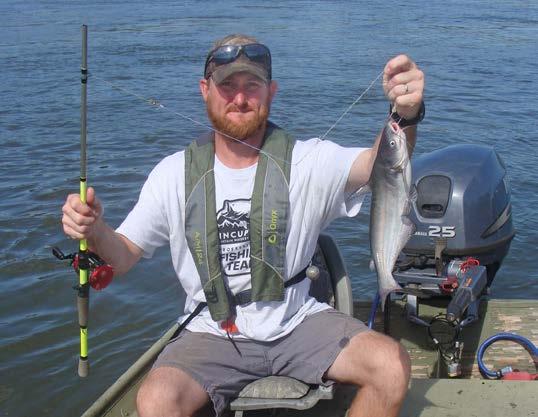
Earlier last fall, I found myself on a boat on expansive Kentucky Lake. I was participating in a friendly fishing tournament while attending the annual conference for the Association of Great Lakes Outdoor Writers (AGLOW). My fishing partner for the day was James Mitchell, a local bass club member and bass fishing enthusiast. The fishing was pretty good for us, and we caught several largemouth and smallmouth bass during the morning. The largest bass measured nearly 18 inches long.
I was planning to fish for bass again the next day with another local expert, and we were scheduled to meet at the Kentucky Dam Marina at 6:15am. But that evening at dinner, I overheard one of my outdoor writer friends, Kent Weil, at the next table talking about going fishing for catfish the next day. I asked him where he was going and he said “Just below the Barkley Dam on the Cumberland River – just a few minutes away from here. We’ll be fishing for blue catfish.”
I told Kent it sounded like great fun, and he invited me to go with him. “There’s plenty of room on the boat,” he said. But since I was already scheduled to fish with someone else, I reluctantly declined. The following morning, however, my fishing
guide had engine trouble on his boat once we got it in the water. Bummer! Luckily, I remembered Kent’s invitation and after a couple phone calls I was headed to the Barkley Dam with Kent and his new friend, local angler Tony Travis.
Tony Travis lives in nearby Gilbertsville, KY and has been fishing the Kentucky Lake area all of his life. One of the things he loves to do is fish for blue catfish below the Kentucky Lake Dam and the Barkley Dam. He is a real expert, too. In fact, at one time he was a successful commercial fisherman plying these waters.
It took only a couple of minutes to motor from the boat ramp to the waters just below the Barkley Dam, and that’s where Tony said we would catch some catfish bait. I
wondered if he was planning to catch some skipjack herring or smaller shad for bait, but he shook his head no. He said he was looking for silver carp.
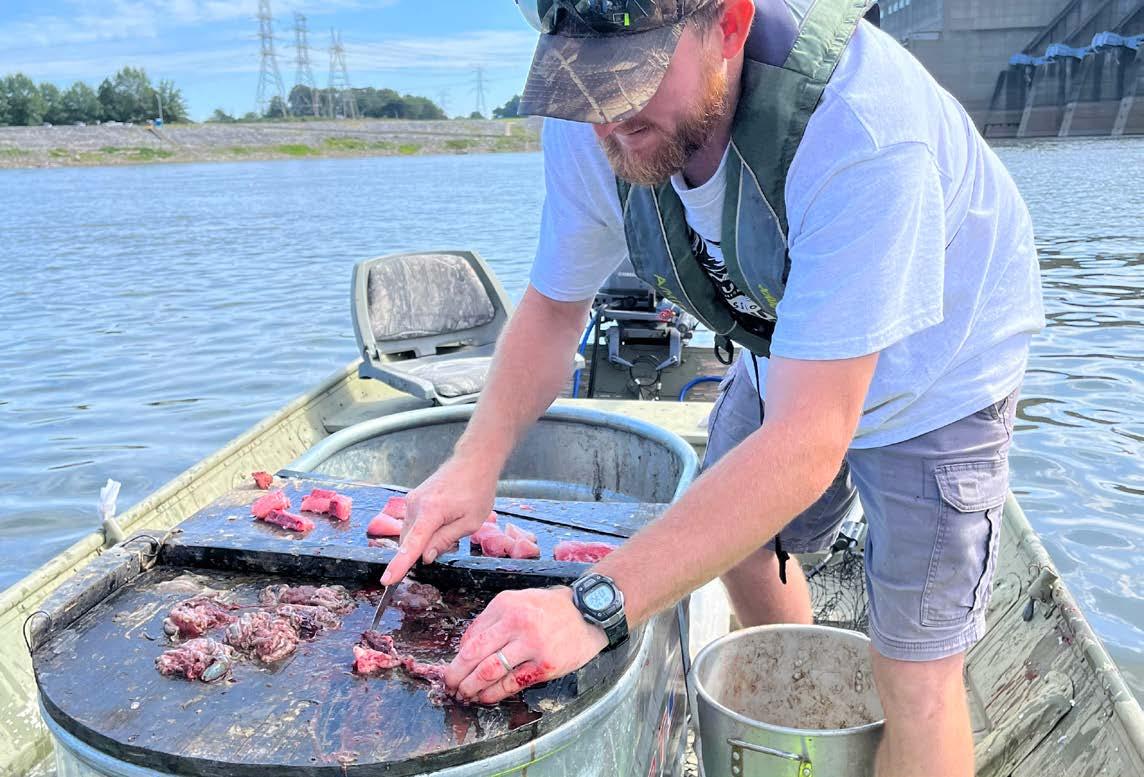
Silver carp are a species of invasive Asian carp that are present in the Cumberland River, and like many places where they have become established, they have become a real nuisance. So, we did our part to reduce the population by a few fish and soon had three silver carp in the boat. Tony got out his fillet knife and quickly cut them up so we could use them as bait.
Tony cut some fillets off of the carp and chopped them into bite-sized chunks, but what he was looking for was the guts. He explained that blue catfish really like
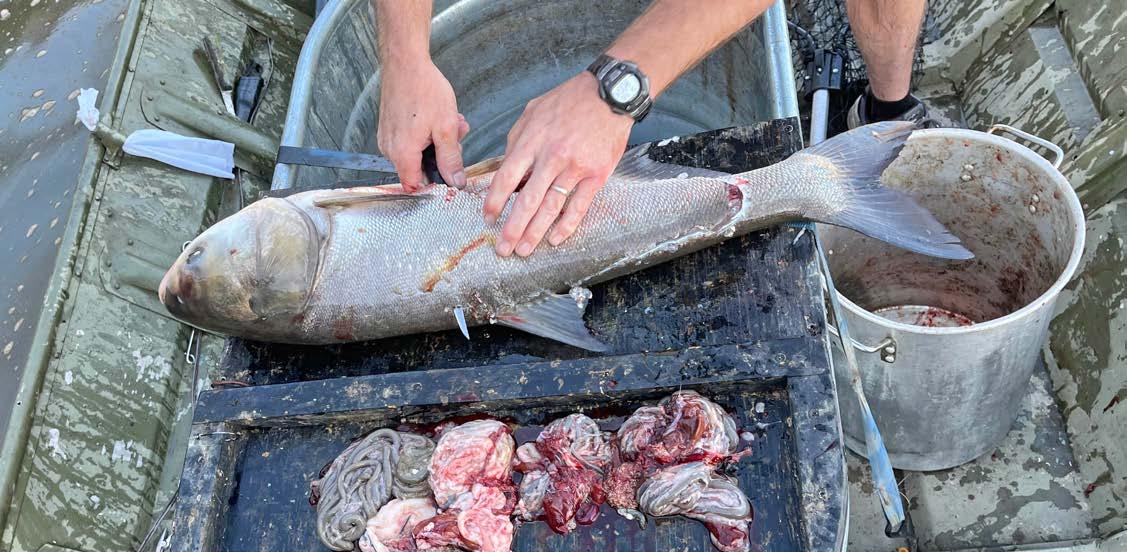
the guts for some reason, and even though the guts are very slimy and slippery, they actually stay on the hook really well. I wasn’t convinced until I put a glob of guts on my hook. Surprise! They stayed on the hook as well as any other bait!
Tony moved the boat 100 yards or so to a spot with lots of current, probably only 15 to 20 yards from shore. He slowed the engine enough to allow a leisurely drift downstream with the current. If he had killed the engine completely, the strong current would have made the boat drift much too fast for efficient fishing.
Our fishing rigs were very simple. Tony likes to use extremely short, stout rods, with a bottom-bouncing rig composed of a 5-ounce weight and a #4 circle hook. Tony instructed me and Kent to drop our baits to the bottom, but to keep them just “ticking” along the submerged rocks as we drifted. If we let them actually rest on the bottom, they would almost instantly get snagged on the rocks.
The water was only about 12 feet deep, and all three of us dropped our baits down near the bottom. Almost immediately, Tony and I both got a bite and hooked a catfish. Neither catfish was a giant, but they were both good “eater-sized” blue cats measuring 18 inches long. Both fish went into Tony’s large livewell.
As soon as we unhooked those fish, Kent hooked a catfish. His was closer to 19 inches, but before he finished measuring it I hooked another one. It was amazing – within seconds of the glob of carp guts hitting the bottom, a hungry blue catfish jumped on it. I fought mine to the surface and swung it aboard. Another cookiecutter blue cat which could have been a twin to the one Kent just caught.
By the time I dropped my fish into the livewell, we had drifted downstream far enough that we were evidently out of the hotspot. No more bites. But Tony said that was no problem. “Reel ‘em up, boys, and we will do another drift.” He motored back to the starting point of our first drift and slowed the boat again.
Each of us dropped our baits to the bottom and jigged them slowly, just enough to stay in contact with the bottom. The fish were still there and all three of us were suddenly hooked up again. It was a real fire drill! Water and fish slime was being splashed everywhere. Catfish were quickly unhooked and dropped into the livewell so that we could get our baits back into the strike zone.
This continued for some time, and every time Tony motored us back upstream to the area where we started, we caught fish. Sometimes one or two, and sometimes three or four fish on each drift. Surprisingly, we only caught blue catfish – no channel catfish
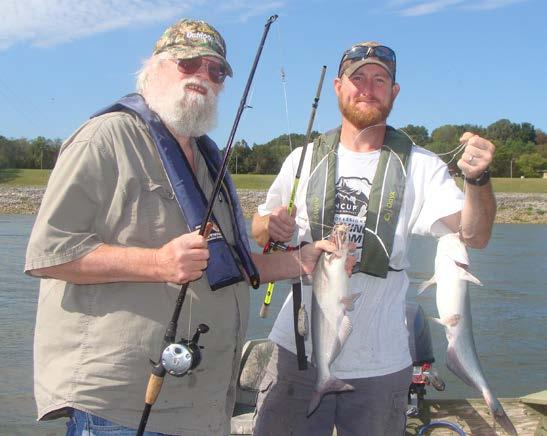
and no other species, either. All of the blue cats measured between 17-24 inches long, too, which were perfect eating size. By the time we quit, we had a total of 56 blue catfish in the livewell. It was enough fish for a colossal fish fry!
Tony explained that the Cumberland River is home to some giant blue cats, too, but they usually appear later in the springtime. “May and June is prime time for the big ones,” said Tony. I marked my calendar and I am planning to make a return trip next spring!
While exploring the Kentucky Lake area, we stayed at the Kentucky Dam Village State Resort Park near Gilbertsville. The resort is right on the water, so it couldn’t be more convenient. While myself and the other writers were out enjoying the local fishing, the wives had a great time shopping and seeing the sights in nearby Paducah and at the Land Between the Lakes. There is so much to do in this area that everyone in the family will enjoy their visit. Check it out at https://visitkylake.com/ and https://parks. ky.gov/. You’ll be glad that you did.
tackle tips and techniques
Troy is an avid angler from Bean Station Tennessee. Troy is a “nothing fancy” kind of guy well except maybe for his tackle. Troy is a multi-species angler but loves panfish, especially the sun fish. He has tinkered with and honed his tackle and techniques to target these great panfish. Fishing from a small aluminum boat without electronics or any of the modern day gadgets Troy loves getting old-school in a new world of fishing. We are happy to have Troy’s expertise within these pages and I think you will be too. Troy has the popular Facebook group The Bluegill Network
When the middle of summer arrives, I start dreaming about cool nights and frost in the mornings. Nothing stirs my spirit like the fall season. I was born on the first full day of fall, September 23rd. It doesn't matter if anybody in my family buys me anything for my birthday, I get exactly what I want, the good Lord gives me the file season every year right on time.
It's not the file hunting season alone. It's not the crisp cool weather alone. It's the thoughts of wing shooting and the cool weather and squirrel hunting and fall smile mouth on a blade or is Hank Parker calls it a spinner bug. Just like there's a thousand ways to die there's a thousand ways to catch smallmouth and one of my favorites If not my very favorite is at night in the file on a short arm spinnerbait with a Colorado blade on it. It's a great technique to catch bigger than average fish plus you catch the really aggressive fish that fight like a mad bull. There are some nights you will go through several spinnerbaits because the wire gets so twisted that it can't be reshaped properly, they will knock the blades off of them and you usually lose a few also because usually you're fishing Rocky structure.
There are several techniques that include boat control as a high priority. Growing up in East Tennessee if you fish from early age, spinnerbaiting at night was just something you did, something that was passed down. East Tennessee highland reservoirs are the same types of reservoirs in Eastern Kentucky, where this technique was born and where it is still a tradition.
When I was in my early twenties I fished with one of my best friends over 200 days a year. Much of that was spinnerbaiting and throwing a deep diving crankbait at night in the late summer and into the fall. It's kind of a transition time, it's not bad in the early season but it gets better as you get into fall in the night start getting kind of cold. Main lake humps, channel bends, main lake points and secondary points are all great places. Every lake is a little different in many of you probably have your types of structures that you use at certain times of the year. I would recommend on some of those places that you throw a spinnerbait at night in the fall.
As I said earlier, there are several techniques you can use with the spinnerbait: you can yoyo the spinnerbait, you can slow roll the spinnerbait, you can lift and drop the spinnerbait, or you can wind several turns and stop and let it flutter back to the bottom. My favorite spinner bait that I use is a half-ounce spinner bait that I mold myself. It has a short arm but not as short as many short arms, like a Zorro, which is an old school spinnerbait that many large smallmouths, largemouth, and spots also have become victims of.
I usually use a number four blade, which is not super big. A lot of people think you need a big Colorado blade at night, and some nights they prefer a four and a half size blade or even a five but day in and day out a number for Hildebrandt blade has been my most productive. It may seem that color would be irrelevant at night but trust me it is not. Brown and orange, black and red or black and blue or purple are great colors. Most of us use some type of crawl trailer or a twin tail grub on the spinnerbait a salt chunk from zoom is a pretty good trailer too.
Back to the retrieves, the retrieve that I use most is a slow roll with a stop to maintain bottom contact or to not let the spinnerbait get too high in the water column unless they are suspended which at that time a crankbait is usually a little better for suspended fish but sometimes they prefer a spinnerbait so never counted out. Much of the time earlier in this season we will catch them in 25 ft of water or so 25 ft seems to be the magic number many nights. But some nights they'll be in 10 ft of water. The pattern can last for four or six weeks or more if the weather is fairly stable in the winter draw down isn't too drastic. If I'm fishing humps, I just circle the hump in my boat and fish it from every conceivable angle until I start getting bites, and then I'll usually spot lock or anchor and kind of pick apart the spots that are on the spot. If I'm fishing secondary and main lake points and they're deeper most of the time, I'll set the boat up in shallow water very skinny water and cast out deep that way it's easier to maintain bottom contact, cranking two or three to maybe five cranks and then stopping it and let it fall on a tight line so it pendulums and you maintain fill of the blade.
Some nights just a perfectly solid steady retrieve is what it takes others it takes a stop and go or even maybe just a long file if you find fish on a bluff bank or towards the ends of a bluff bank on transitions. On 45° banks a one or two crank retrieve then pause, can be the ticket. It seems like that's where you catch the biggest fish sometimes and they will hit it from a run as if they're trying to break your arm.
Later in the year it gets cool at night, so a jacket and maybe even insulated bibs are a good idea. The heavy clothes are not only for the run, but it's been warm, and you're not acclimated to it frosting at night. It's some of the coldest nights I've ever spent on the water. It rivals duck season. Not only do your clothes need to be a little different than regular nighttime fishing done in the summer but your gear will probably be a little different too. I've loved spinnerbait fishing my whole life. It's one of my favorite lures for a type A personality like me, but I would never fish a nighttime spinnerbait on the combo that I use for shallow water spinnerbaiting or even deep water spinnerbaiting during the day.
During the day I use a 6'8 or 7 ft medium-heavy rod with a soft tip and a lot of backbone; however at night I prefer a ride a little shorter, say like a 6'6" rod and a power that's kind of like a softer medium-heavy or a stiffer medium that has more of a moderate action because I use braid. 50 lb braid tied directly to the spinnerbait, No FG knot, no extra step, and no breaking off at the leader and having to retie all that mess in the dark or over a lot while the bugs eat you alive.
Power pro makes a braid that glows under a black light, which is essential. If you've never fished at night with fluorescent line over a black light you have no idea what you're missing. It is so easy to see bites but the main reason is that it's easier to work your lure. When you see slack go in your line you know it's on the bottom when you're doing the lift and drop or the crank and stop retrieve. The reason you use the braid is so you can feel the vibration of the blade. Not so much for hook sets but for feel. Usually there's no need to even set the hook. They hit it so hard a hook set usually is just not necessary, maybe a sweep to the side and that's all you need.
Fishing with a spinnerbait at night in the fall is a great way to spend your time. I suggest you try it if you haven't. I'm warning you though it's more addictive than crack, good music or pretty girls. Good luck, my friends!!!
As a bowhunter, now going on 40 years, the topic of broadheads has always been at the top of the list. I started bowhunting using the old Bear Razorheads. I shot them with a Browning Nomad recurve and cedar shaft arrows. The first year I used the two-bladed Razorheads and the second year, at age 14, I was excited to get new broadheads by Bear with the bleeder blades. I thought WOW I’ll kill every deer in the woods. That was not to happen. It would be ten years later before I harvested my first deer. When mechanical broadheads came out it only complicated things for me and I think many other bowhunters.
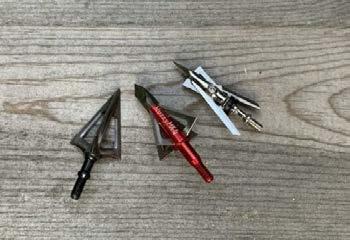
I killed my first deer with a bow at 42 yards. It was a doe shot with an old blood-trailer broadhead. I think these were one of the first major mechanical broadhead and man did it fly true. If you look at the bloodtrailer today next to the new mechanical and fixed broadhead on the market today, you will see how far broadhead technology has come.
The most discussed topic today concerning broadheads for deer hunting with a bow is whether to use mechanical or fixed blade. Each one has its advantages and its disadvantages. I will attempt to shed some light on each type of broadhead in the following article using tests done by those that are into testing I am not.
With the research along with my experience using both types of broadheads over 40 years as a bowhunter almost exclusively. I will in no way attempt to persuade anyone to use fixed or mechanical broadheads. I have changed models and types often over the years. While I’ve had good luck with both fixed and mechanicals I wouldn’t even know how to suggest to you a good choice. While I use fixed blade broadheads as of this writing I may be slinging mechanicals next season. So read the CLICK HERE TO CHECK THEM OUT
The Fixed blade broadhead is making a comeback in the bowhunting world. Fixed broadheads or fixed blade broadheads mean that the broadhead has blades that are stationary. Unlike the mechanical broadheads where the blades retract and expand upon contact. The fixed broadheads have been refined and honed into some great flying broadheads. In the beginning of mechanical broadheads the reason that they took the market and the archery hunting world by storm were their ability to fly true. I don’t mean to imply that fixed broadheads were incapable of flying true because they were and still are perfectly capable broadheads.
In the early days back in those Bear Razorhead days, a fixed broadhead could and did fly true. The one caveat to that was if your bow was tuned properly. There was also the fletching that was a big thing back then and still is when shooting fixed blade broadheads. Fletchings that cause the arrow to spin can help eliminate the planing effects of fixed broadheads. There are also arrow stiffness knocking points and other factors that are important to tuning a bow to shoot fixed blade broadheads accurately.
Many hunters moved to mechanical broadheads because the fixed blade broadheads tended to plane when shot. This was especially true with bows that were not tuned properly. The fixed broadheads were more forgiving than fixed broadheads. However, new engineering practices have made fixed blades more forgiving than they used to be. This shouldn’t be a reason to shoot a bow that isn’t tuned properly, but fixed blades shoot better than they used to.
This engineering include smaller blades, thinner blades, lighter fixed broadheads. These are just some of the improvements that I’ve noticed over the years. When it comes to fixed bladed broadhead designs. I focus my attention more on learning about the deer and the woods and less time tinkering with bows, arrows and gear.
I’ve owned just 3 compound bows in 40 years of bowhunting and 2 seasons with the Browning recurve when I first started. I still use the same arrows the only change being whatever Beman might have done to their ICS Hunter line. However, I have changed broadheads many times over the years. I think it’s just easy to swap them and see how they shoot. Usually, my change is when something happens with the broadheads I’m using that gets me looking for something different. Either a mechanical didn’t perform properly or a fixed blade broadhead flew like a wiffle ball knuckler.
The fixed blade broadhead has a couple of distinct advantages over mechanical broadheads. The first is its ability to cut on contact. With the cutting edge, the full length of a fixed blade broadhead the cutting begins on contact. This cut on contact advantage allows for better penetration and more complete pass throughs. Not only does a complete pass through cause more damage which is good for humane and quick kills. The complete pass through, especially when shot from a treestand, will help
with blood trails. An arrow that does not pass through the deer leaves the entry hole high and no exit wound low.
The exit wound is important for blood to exit the body leaving something for the bow hunter to track. Many deer have been lost because of internal bleeding with no exit hole. It is amazing how difficult a deer is to locate without this blood trail. Even deer that didn’t go far have been lost. only to find them a week later, as the buzzards circle, and it expired very close to where you were searching.
Another advantage to the fixed blade broadhead is it ability to crush through bone. Fixed blade broadheads are much stiffer than mechanicals and does a better job at breaking bone and continuing through the deer. No broadhead is meant to pass through bone. Fixed blade broadheads do a better job when needed. Rib bones on deer are thin. Either mechanical broadhead or fixed broadhead will smash through the ribs. While the shoulder is a tough place to get a solid penetrating shot. A bow with a rigid fixed blade broadhead you can shoot a deer in the shoulder whether accidentally or on purpose and get more penetration than with a mechanical broadhead. Even if the broadhead only smashes through the front shoulder bone or scapula it will penetrate enough to get to the vitals for a clean kill.
Another advantage to the fixed broadhead is the ability to resharpen the broadhead after sending it down range. Whether you hit the mark or missed and buried it in the dirt as long as you don’t center punch a rock you can maybe dig it out of the ground and sharpen the broadhead making it ready for another hunt. Mechanical broadhead are sharp as razor blades. To get this sharpness mechanical broadheads are made of light materials. A rib bone can break or bend these blades.
The only reason we can list disadvantages to fixed blade broadheads is because unlike the early days we have something to compare it to. When there was nothing but fixed blade broadheads available for bowhunters we could only compare brands and designs. Now with mechanical broadheads and hybrid broadheads there is plenty to compare. We wont talk about the hybrid broadheads which are those that incorporate a fixed blade with a mechanical design as well. I have never used these hybrid type blades so I don’t want to touch on those. If someone has used these types of broadheads please feel free to comment below and let us know what you think.
The disadvantages of fixed blade broadheads are few and far between. Really the only thing that I can think of would be the planing effect of a fixed bladed broadhead. Planing is where the broadhead will catch air and like an airplane wing will tend to take flight. The planing action is worse when shot from a poorly tuned bow. With the new designs in place today this planing effect is minimal. However, it is going to be more prominent than a mechanical broadhead. This is due to the blades on mechanicals being tucked away and out of the air.
Something else that adds to the planing effect of fixed blade broadheads is speed. With today’s high speed bows and the desire for faster arrow flight broadhead manufacturers were forced to redesign
their broadheads. This was to appeal to those that strived for the fastest arrow flight possible. This is also the reason for the explosion of mechanical broadheads probably in the late 80’s. We will get into that a little more in the mechanical broadhead section below.
Mechanical broadheads are those that have moveable blades that remain tucked in close to the main body opening up on contact with the animal you are hunting. There are many different designs today for mechanical broadheads and many have found an almost cult like following. Some of this could be from branding and hardcore marketing that is for sure. However, I know the bow hunting community is a close group. If the broadhead was junk the word would have definitely got around. The Rage broadhead comes to mind. There are plenty of people bashing the Rage broadhead but way more hunters that love them.
I’ve personally shot the Rage broadhead and loved how it shot. I killed a couple deer and then lost one when deer turned creating a sharp angle at the entry point. I thought it was a good hit, but I was unable to find the deer. Once again I went back to fixed blade broadhead once again. Remember earlier I mentioned that I have changed broadheads many times over the years and this would be an example of why. Full disclosure. I don’t know if it was the broadheads fault. I changed to a fixed blade after the hunt.
The biggest advantage of a mechanical broadhead is its ability to shoot close to a field point accuracy. I’ll go one step further. I feel that the mechanical broadhead not only flies more like a field point than a fixed blade, but more importantly it is much more forgiving. More forgiving when shot from a super fast bow just because of less blade to plane in flight. More forgiving for bows not tuned perfectly and I would say even with badly tuned bows. I feel that this is why the explosion hit about the same time that speed became popular as well as bow hunting itself.
As more people began to hunt with a bow the high tech archery equipment that was a large part of this surge also gave people a false belief that once set up the bow would never go out of tune. Bows get banged around a lot. Rest get moved, arrow weights change, nocking points slide on the string. All of these things can change the tune of your bow. This will affect the flight of the arrow off the rest. This out of tune bow will cause a fixed blade to begin its planing right out of the bow. This, I feel, is when people begin questioning their broadheads and try a mechanical broadhead. With the forgiveness of a mechanical broadhead it wins out over the fixed blade.
The bowhunter believes they shoot a mechanical broadhead better than a fixed blade. Actually, a fixed blade will shoot just as good when the bow has been tuned when accuracy wanes. Having said this. I feel that mechanical broadheads are a better choice for those that are not as apt to get their bow tuned each season. The forgiveness of the mechanical broadhead will shoot accurately from a less than perfectly tuned bow. Therefore, increasing the number of deadly shots from the archer and more recovered animals. This is the most important thing in bow hunting in my opinion.
Mechanical broadheads got popular around the same time that high tech compound bows came out.
Speed became popular. Marketing the speed that new bows could shoot an arrow led to mechanical broadheads as a way to get a little more speed out of the bow. At the same time, probably due to the fancy bows, marketing experts and the explosion in deer populations compared to just a few years earlier. All of these things created a mega-market for deer hunting and bow hunting. Mechanical broadheads were a part of this explosion.
Disclosure: I killed my first deer with a bow using the mechanical broadhead called the blood-trailer as mentioned above. This was before speed was as big a deal. Has anyone ever used the blood trailer broadhead? Comment below.
With the accuracy and speed that mechanical broadheads offer there are some disadvantages. Mechanical broadheads have weaker blades. They are usually razor like blades to keep the weight down and to help the mechanical parts work better. These thinner blades will break or bend easier when hitting bone or a rock.
The ability to swap blades after a shot doesn’t matter when they break or bend when striking bone on impact. I have personally had a mechanical blade snap on contact with a leg bone. The deer took a step just as I released the arrow. What was a clear shot through the heart became covered by the leg. When the mechanical broadhead hit this bone it snapped with the sound of a 22 rifle. The arrow deflected straight into the ground leaving me scrambling for another arrow. Thankfully I got another arrow in the buck and it was recovered. This shot left me reevaluating mechanical broadheads once again. I’m convinced that a fixed blade broadhead would have smashed through the bone and into the deer’s heart.
Another disadvantage, especially if you spot and stalk, is that the brush can catch the broadhead blades and deploy them. The o-rings and collars holding the closed mechanical broadhead blades in place. The bands will be cut when walking in thick brush stalking deer. This will cause the blades to open. There is nothing worse than making the perfect stalk and raising your bow only to see that your blades are deployed. I hunt from a treestand so this isn’t a factor for me but there are bow hunters that stalk deer on the ground.
Probably one of the biggest disadvantages of the mechanical broadheads is penetration or the lack of. I’ll say that part of this lack of penetration has to do with the desire to create a fast bow. Fast is good for several reasons but not for penetration. Weight is one of the major factors in kinetic energy. Kinetic energy is important for good penetration. The opening on impact with mechanical vs the cut on contact with fixed blade broadheads is a vital consideration when it comes to penetration. I feel that weight is the biggest factor.
If bow hunters would give up just a few feet per second and shoot a little heavier arrow with their mechanicals penetration would increase. With this said any shot in the right place should pass through on a whitetail deer. If you are shooting deer in the ribcage and the arrow does not pass through cleanly it is my opinion that you should work toward increasing your kinetic energy. No matter what type of broadheads you use.