STEREO AMPLIFIER
INSTRUCTIONS
EVOLUTION
STEREO AMPLIFIER OPERATING INSTRUCTIONS
IMPORTANT
This amplifier operates at high voltages. Do not attempt to operate it if it has been exposed to liquids or if the appropriate tubes are not in place.
Allow at least 30 minutes after turn off before removing the umbilical cable to allow the high voltage to drain.
UNPACKING:
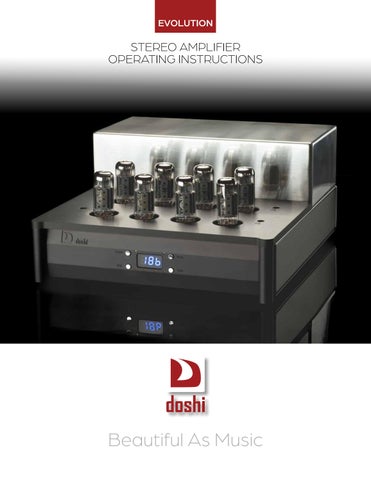
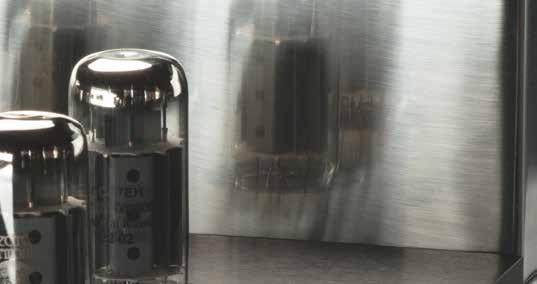
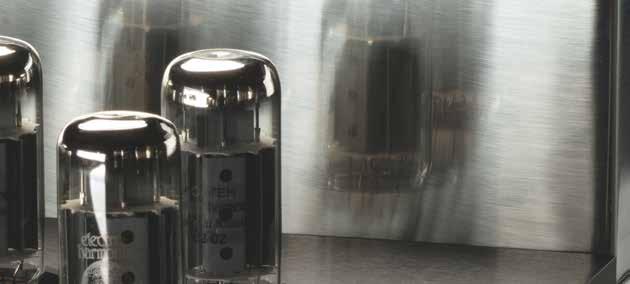
The Doshi Audio Amplifier is supplied in custom packaging, including tubes. Please unpack these from the carton and inspect to make sure that there is no damage from shipping. The tubes will be labeled V1(L/R) through to V4(L/R). Please refer to the illustration in the manual for correct installation.
INSTALLATION:
Install the supplied tubes into the audio unit. Please be extremely careful so the tube pins or sockets are not damaged. The Doshi Stereo amplifier uses teflon tube sockets with machined contacts. The clamping power of the socket results in a very secure fit and will need care in installation and removal.
Connect the input from preamplifier to either the RCA or XLR inputs. It is important to note that the Stereo amplifier uses a differential buffer for the XLR input which allows for connection with either Single ended or balanced sources. The Single Ended input is the direct input and would be preferred if the shortest signal path is desirable. Only one set of inputs can be used at a time. Use the input switch to switch between the two sets of inputs. Connect the speaker cable and power cord to the appropriate jacks and after inspecting the tube installation, switch the power switch located above the AC inlet to the on position. This operation only energizes the microprocessor controller. The amplifier is turned on via the power button to the top left of the display on the front.
POWER SWITCH:
REAR PANEL CONTROLS
DISPLAY SWITCH:
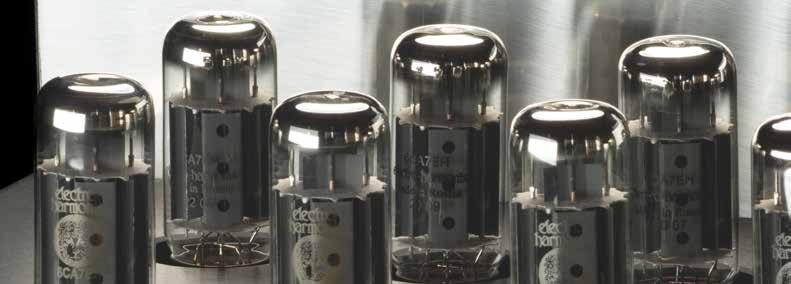
The button on the top left of the display window is the power button. These buttons (or any controls) only work when the rear power supply switch is turned on. Pressing the power button will activate the main relay switching the power amplifier on. The controller will indicate power on by lighting the top left led and blinking the top right led indication the amplifier in warm up/mute mode for 30 seconds.
MUTE SWITCH:
The Mute switch operates to mute the input and output to the amplifier. This function is activated on start up for 30 seconds and at any time after by depressing the button on the top right of the display. Please use this function when replacing input or speaker cables to prevent damage to amplifier or loudspeakers.
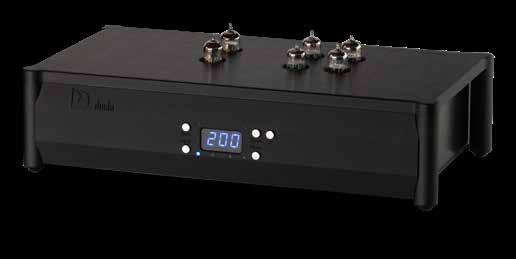
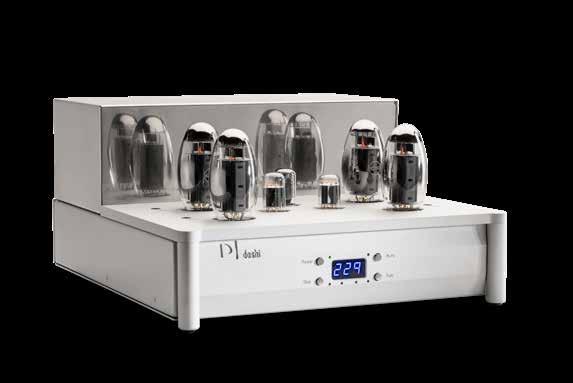
On start up, the front panel will display the elapsed hour meter for 30 seconds and then go dark with a single blue dot on the bottom right of the display to indicate power on. The display switch can be used to wake the display up at which point it will display the elapsed hours or tube bias reading depending on its last used position. Having the display in the on position makes the setting of bias easier.
FUNCTION SWITCH:
Depressing the function switch steps through the bias readings and elapsed hour meter. The led’s on the bottom of the display indicate the respective tube that is being displayed
DESIGN PHILOSOPHY
All Doshi Audio Evolution Series products are designed with sound quality and reliability as primary goals.
The use of passive components that are rated for many times their actual dissipation which results in low thermal stress and heat modulation. Circuits that use the minimum number of gain stages and zero feedback where possible provide a level of realism and serve to preserve the beauty of the music
The Evolution series Stereo Amplifier builds on successful V3 design. The Amplifier is a hybrid design with a solid state section based on a j-fet differential amplifier which drives a tube based output section based on the EL-34/6CA7 tube type. This unusual topology is used to create a amplifier with real world speaker drive capability of 65wpc while using only 2 gain stages and approximately 7db of feedback. The audio section is supported with a custom designed power transformer, regulated supplies and an innovative output transformer with separate screen windings to give the amplifier its sweet effervescent sound. Inputs are Single Ended/ Direct or XLR balanced via a differential to SE converter.
All Doshi Evolution series amplifiers feature comprehensively re-designed power supplies, the latest Clarity Cap Purity Series coupling capacitors, re-designed audio circuit boards. Carried over from the V3 series are the stainless-steel chassis, Mechanical isolation is provided in the form of isolation grommets for the audio circuit board and mass damping of the chassis in the form of the top plate. Outrigger legs add another layer of mechanical isolation. This results in a chassis that is resistant to mechanical and air-borne energy and allows the audio circuitry to function optimally.
BIAS PROCEDURE:
(for biasing new tubes, please see the notes section for further details)
1 - Allow the amplifier to come to temperature. Allow a run time of at least 30 minutes after turning the amplifier on to stabilize tubes.
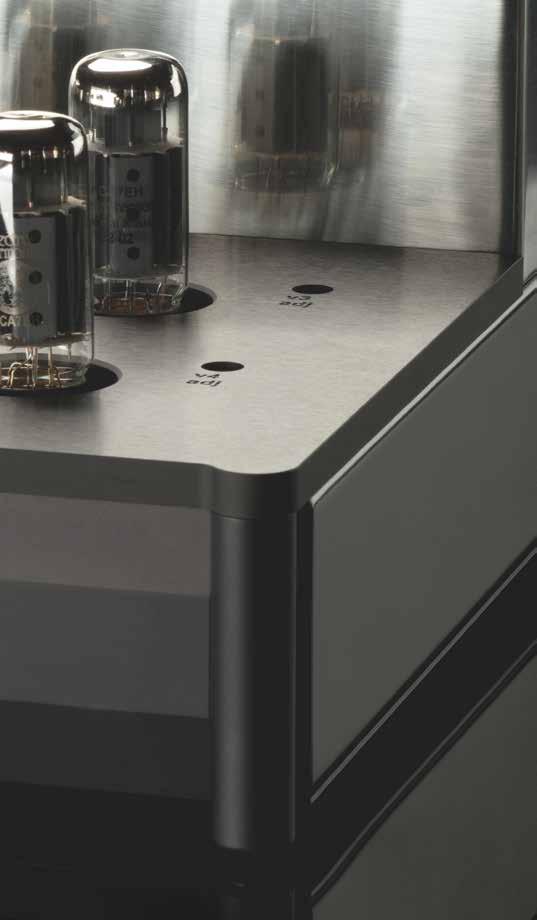
2 - Use the display and function to have the display on and the first LED from the bottom left to show indication. This means that you have selected to bias tube pair 1(tubes 1&3).
3 - Use the mute switch to mute the amplifier and begin the adjustment procedure.
4 - The display panel will display a 3 digit number corresponding to the bias setting. Using a small flat blade screw driver, adjust the trimmer potentiometer corresponding to the tube pair selected – this is V1 for tube pair 1 (tubes 1&3).
5 - Adjust the bias to be between 190 and 220 on the tube pair being checked. Please look at the notes section for an explanation on the audible effects of different bias levels.
6 - Using the function button, move to the reading for tube pair 2 (tubes 2&4) and adjust it to be close to the reading on the tube that was previously adjusted. Use trim potentiometer V2 for this adjustment.
7 - Using the function button and flat blade screwdriver step through the reading of all 4 tube pairs and adjust the to be close to each other. You may need to do this more than once since adjusting the tubes affects overall bias settings.
Check bias every month as tubes will age depending on use.
REAR PANEL CONTROLS:
INPUT PANEL:
One set of XLR and RCA connections is provided. The RCA (Single Ended input is the direct input and the XLR input is a differential input buffer. The RCA input is preferred for the shortest signal path.
Ground Lift –in the event that a ground loop is created between the preamplifier, amplifier and other processors, the ground lift switch can be used to break the ground loop if necessary.
SPEAKER CONNECTIONS:
The amplifier is supplied with one set of speaker connections. The output transformer is setup for a nominal 5 ohm load which will provide optimal coupling with speakers ranging from 4 ohms to 8 ohms. Other loads are provided with a custom order.
NOTES : BIAS AND SOUND QUALITY.
The amplifier bias setting can be used to subtly tailor the sound quality to suit the speaker and overall system tonality.
The amplifier factory bias settings are 190. Bias settings of lower than 200 will provide a more linear sound and can be used if the overall tonality is too warm.
Bias settings of over 210 can be used for systems where a touch of midrange prominence might be needed.
Do not go below settings of 175 or above 260 as too high a setting will affect tube life and too low a setting will reduce dynamic linearity.
TUBE REPLACEMENT:
Doshi Audio recommends replacement of output tubes after 3000 hours (or after the front panel hour meter has rolled over 3 times)
Tubes vary in quality and production batches and you may find that one particular pair is not biasing correctly anymore. In this case it may be earlier than 3000 hrs before a new tube set is needed. These can be purchased through Doshi Audio.
1 - Turn the amplifier on and let it warm up for 10 minutes, do not attempt to play music
2 - Mute the amplifier via the top right button on the front panel.
3 - Turn the display on via the bottom left button if it is not on already
4 - Step the function button through the 4 led indicators and observe the display, you will probably see a “0” or low reading around 85 (minimum).
5 - Turn the bias trimpot slowly clockwise until you read around 200. Move onto the next tube pair
6 - After all 4 pairs have been brought up to around 100, repeat the procedure so that all 4 pairs are now reading between 150 and 160. If this is a brand new set of tubes, Set the bias to 150 as they will go up in current as they burn in.
Check bias every month and adjust if it starts dropping 10 points below your preferred setting.

TUBE COMPLIMENT:
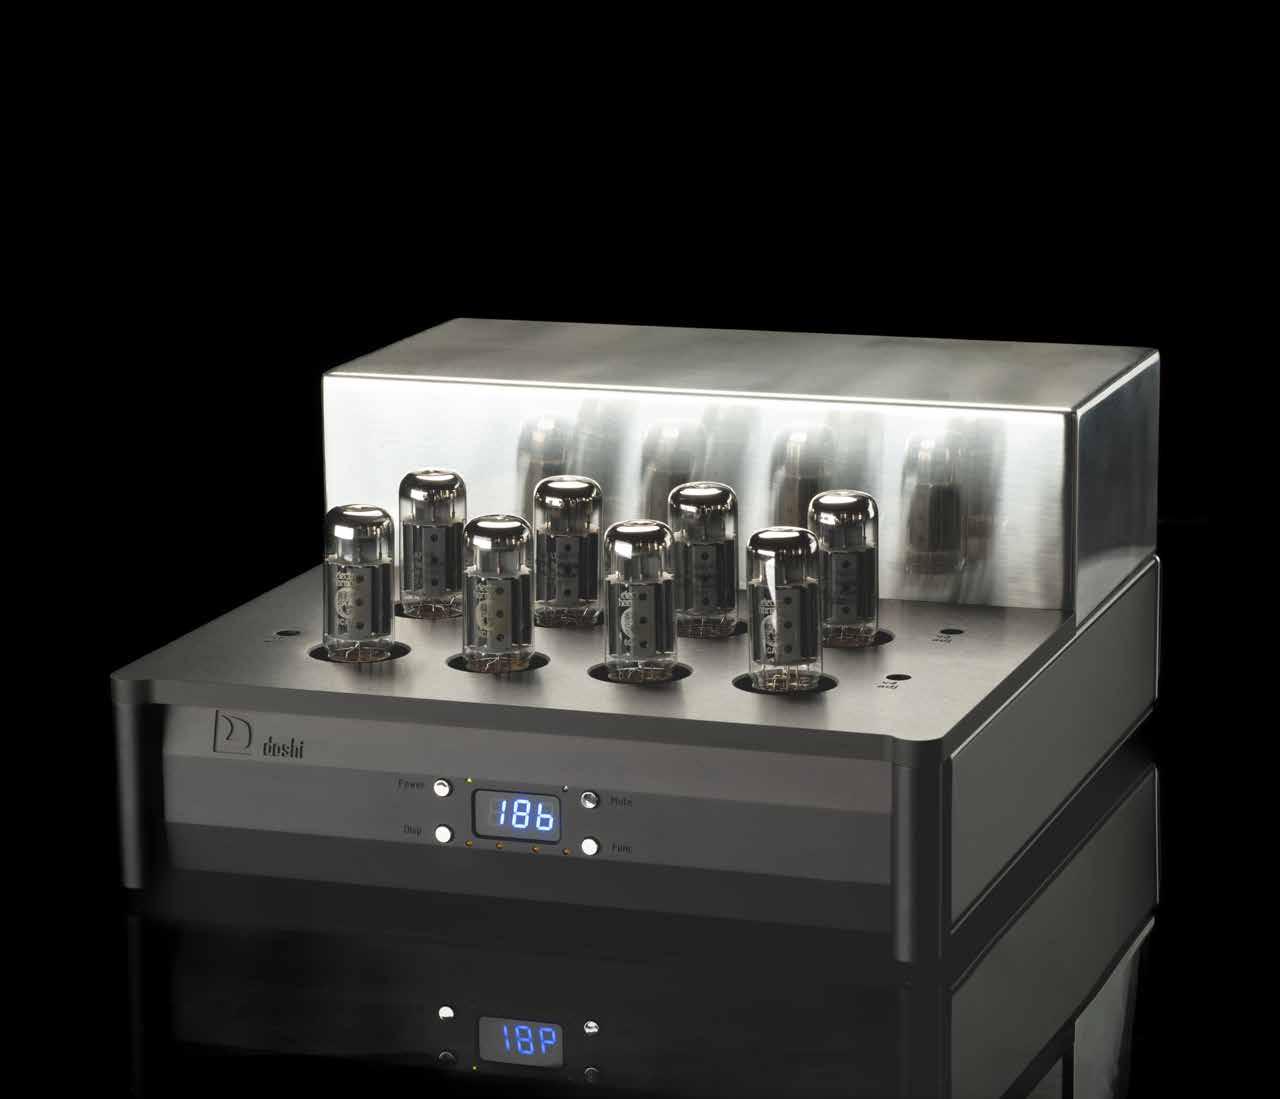
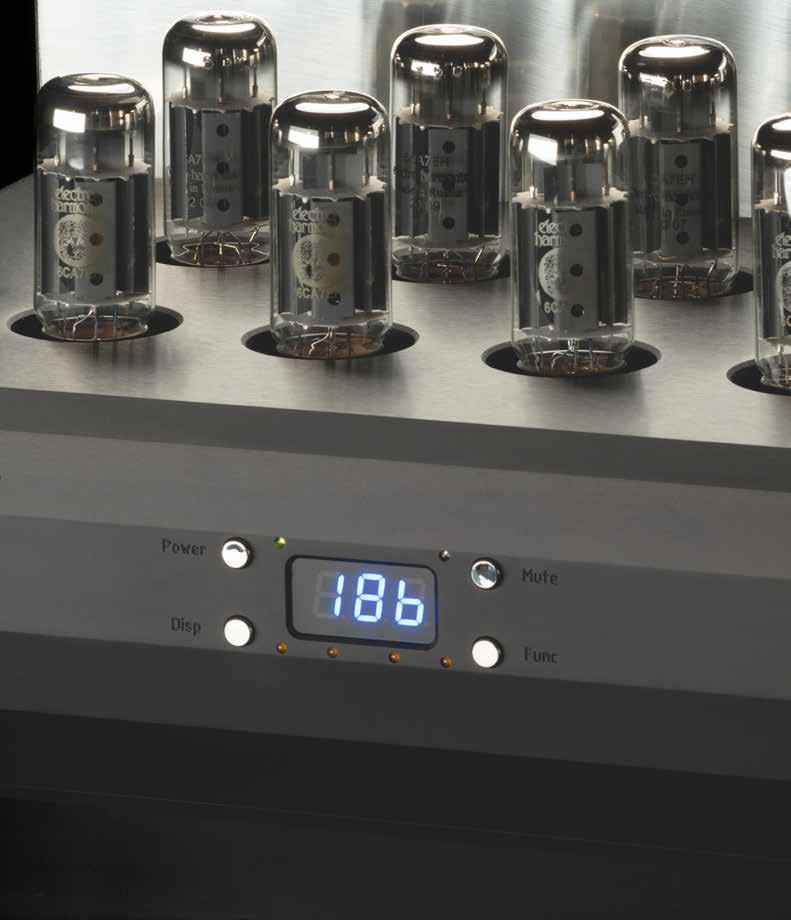
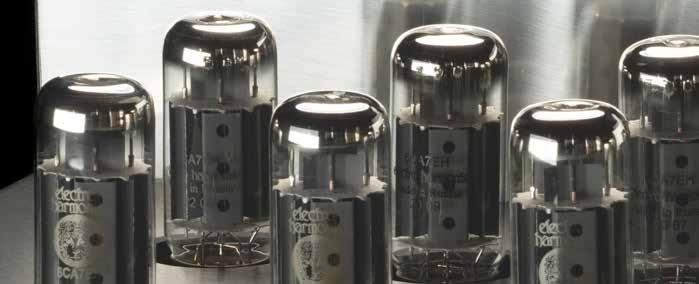
Output tube – El34/6CA7 (x4, matched pairs, total 8 tubes)
Different makes of the input tubes can be used to tailor the sound to the listeners taste. In the output section, Matched pairs of Electro Harmonix 6CA7 tubes are supplied. Any EL34/6CA7 type will work and provide subtle shifts in tonality and power. The Doshi Stereo amplifier uses the output tubes conservatively which provides for a long service life.
Amplifier Controller:
The amplifier controller is designed to shut the unit down should it detect an over current in any tubes or a fault with the bias supply. Should an output tube fail, the controller will turn the amplifier off but leave one of the 4 LED displays on to indicate which tube pair has failed.
SPECIFICATIONS:
Output power: Minimum 65W/ 5ohms. Output transformer stock supplied for 5 ohms, other output impedance available on special order
Input impedance: 47K ohm RCA / 20K ohm XLR
Noise: 80 db below 1W
There are no user serviceable parts accessible by the owner.
LIMITED WARRANTY:
Doshi Audio LLC (for U.S. sales) warrants this product against defects in material or workmanship for the time periods and as set forth below. Pursuant to this Limited Warranty, Doshi Audio LLC will, at its option, (i) repair the product using new or refurbished parts or (ii) replace the product with a new or refurbished product. For purposes of this Limited Warranty, “refurbished” means a product or part that has been returned to its original specifications. In the event of a defect, these are your exclusive remedies.
TERM:
For a period of 180 calendar days from the original date of purchase of the product, Doshi Audio LLC will, at its option, repair or replace with new or refurbished product or parts, any product or parts determined to be defective.
For a period of 24 months from the original date of purchase, Doshi Audio will repair the product free of labor costs
This Limited Warranty covers only the hardware components packaged with the Product.
INSTRUCTIONS:
To obtain warranty service, you must obtain a return authorization from the dealer that originally sold the product or Doshi Audio. You must deliver the product, freight prepaid, in its original packaging to Doshi Audio. Doshi Audio will not be responsible for any shipping damage or loss.
This Limited Warranty only covers product issues caused by defects in material or workmanship during ordinary consumer use; it does not cover product issues caused by any other reason, including but not limited to product issues due to commercial use, acts of God, misuse, limitations of technology, or modification of or to any part of the Doshi Audio product.
LIMITATION ON DAMAGES:
Doshi Audio LLC SHALL NOT BE LIABLE FOR ANY INCIDENTAL OR CONSEQUENTIAL DAMAGES FOR BREACH OF ANY EXPRESS OR IMPLIED WARRANTY OR CONDITION ON THIS PRODUCT.
DURATION OF IMPLIED WARRANTIES: EXCEPT TO THE EXTENT PROHIBITED BY APPLICABLE LAW, ANY IMPLIED WARRANTY OR CONDITION OF MERCHANTABILITY OR FITNESS FOR A PARTICULAR PURPOSE ON THIS PRODUCT IS LIMITED IN DURATION TO THE DURATION OF THIS WARRANTY.
Some states or jurisdictions do not allow the exclusion or limitation of incidental or consequential damages, or allow limitations on how long an implied warranty lasts, so the above limitations or exclusions may not apply to you. This Limited Warranty gives you specific legal rights and you may have other rights which vary
EVOLUTION SERIES
The V3 series was extremely well received by the press, dealers and customers. It has proven itself to be reliable, great sounding and distinctive in its “form follows function” looks. It was hard to improve upon in significant ways but we have achieved this goal in every area of performance and reliability.

LINE PREAMPLIFIER
MONOBLOCK AMPLIFIER
TAPE PREAMPLIFIER
PHONO PREAMPLIFIER