Install Canon Printer: Complete Setup Guide for Beginners
How to Install Your Canon Printer: A Step-by-Step Guide
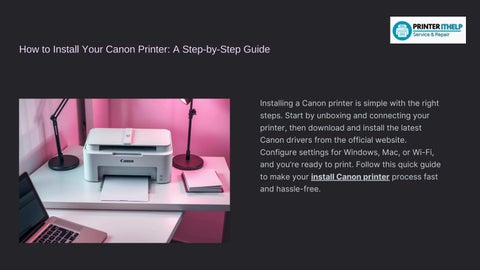
Installing a Canon printer is simple with the right steps. Start by unboxing and connecting your printer, then download and install the latest Canon drivers from the official website.
Configure settings for Windows, Mac, or Wi-Fi, and you’re ready to print. Follow this quick guide to make your installCanonprinter process fast and hassle-free.
Unboxing and Preparing Your Canon Printer
The first step to a successful setup is careful unboxing and preparation.
Confirm all components: printer, power cord, ink cartridges, USB cable, and setup CD/manual.
Choose a stable, flat surface near a power outlet and your computer. Remove all packaging materials and protective tapes meticulously to prevent obstructions.
Physical Setup: Power and Paper
Connect Power
Plug the power cord into the printer and then into a wall outlet, then power on the device.
Install Paper Tray
Carefully insert the paper tray into its designated slot until it locks securely into place.
Load Paper
Load your preferred paper into the tray and adjust the guides snugly to prevent misfeeds and jams.
Installing Ink Cartridges
Proper ink cartridge installation is crucial for print quality.
Open the printer's front cover; the cartridge holder will automatically move to the center.
Gently remove all protective tape and caps from the new ink cartridges.
Insert each cartridge into its corresponding color-coded slot until you hear an audible click, ensuring it's seated firmly.
Connecting Your Printer to Your Computer
Wired Connection
For a direct connection, use the supplied USB cable to link your printer to an available USB port on your PC.
Wireless Connection
For wireless setup, have your Wi-Fi network n password ready. Access the printer's control p Fi setup option and follow prompts to connect to your network.
Installing Printer Drivers and Software
Option
1: Setup CD
Utilize the supplied CD-ROM/DVD to automatically install the necessary drivers and software. Follow the on-screen instructions.
Option 2: Online Download
For the latest versions, download drivers and software directly from Canon’s official support site. Ensure you select your specific printer model.
Follow Prompts
Regardless of the method, carefully follow the on-screen prompts to complete the installation process for optimal functionality.
Adding
Your Printer on Windows via WSD
For Windows Vista, 7, 8, and Server users, Web Services on Devices (WSD) provides a straightforward way to add your network printer. Navigate to "Devices and Printers" from your Control Panel.
Click "Add a printer" and select the option to add a network printer using WSD.
Allow Windows to detect your printer and complete the setup, enabling seamless network printing capabilities.
Testing Your Printer Setup
Before diving into your projects, verify your printer's functionality.
Print Test Page
Initiate a test page print from your computer's printer settings to confirm basic connectivity and output.
Check Quality
Examine the test page for print quality, color accuracy, and proper alignment to ensure optimal performance.
Troubleshoot
Address common issues such as connectivity problems, driver errors, or paper jams if they arise during testing.
When to Contact Printer IT Help
Congratulations! Your Canon Printer is Ready to Use
You've successfully set up your Canon printer! Now you can enjoy seamless printing for all your work, school, and creative projects. Keep your printer software updated regularly for the best performance and access to new features.
Don't hesitate to reach out if you encounter any future issues or have questions – Printer IT Help is always here for you!