-check or money order (cash or credit card are options, but they must leave the application and return once it ’s ready to be picked up since no phone payments can be accepted)
-the application must include an e-mail address for communication
When receiving a Zone Verification Letter application:
1. Receive the application with a check or money order. (No payment, no work done.) If they desire to pay with cash or a credit card, they must make it known to you prior to us working on it.
2. Check that it is the correct application, with the $15 technology fee.
3. When the application arrives, the clerk should date stamp, initial it, and write the Due date on it based on the option checked and payment. Standard review time is 7 business days, but they can pay for expedited, per the application.
4. Log it into the ZVL Spreadsheet.
Processing a Zone Verification Letter application:
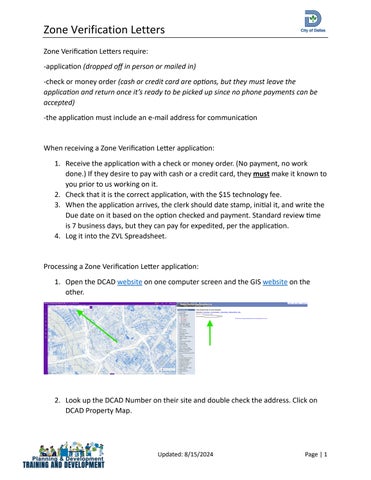
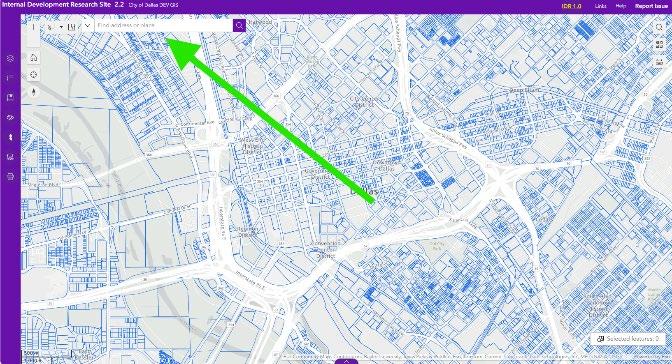
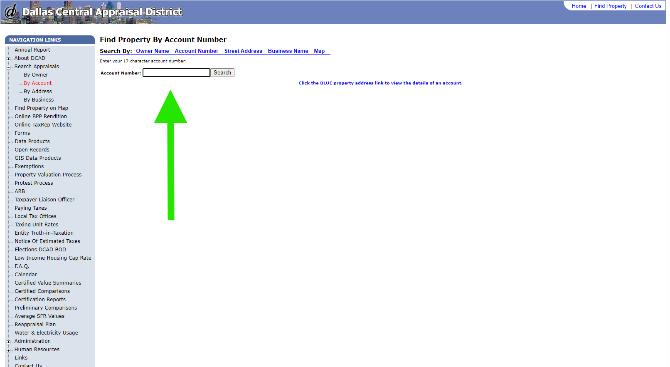
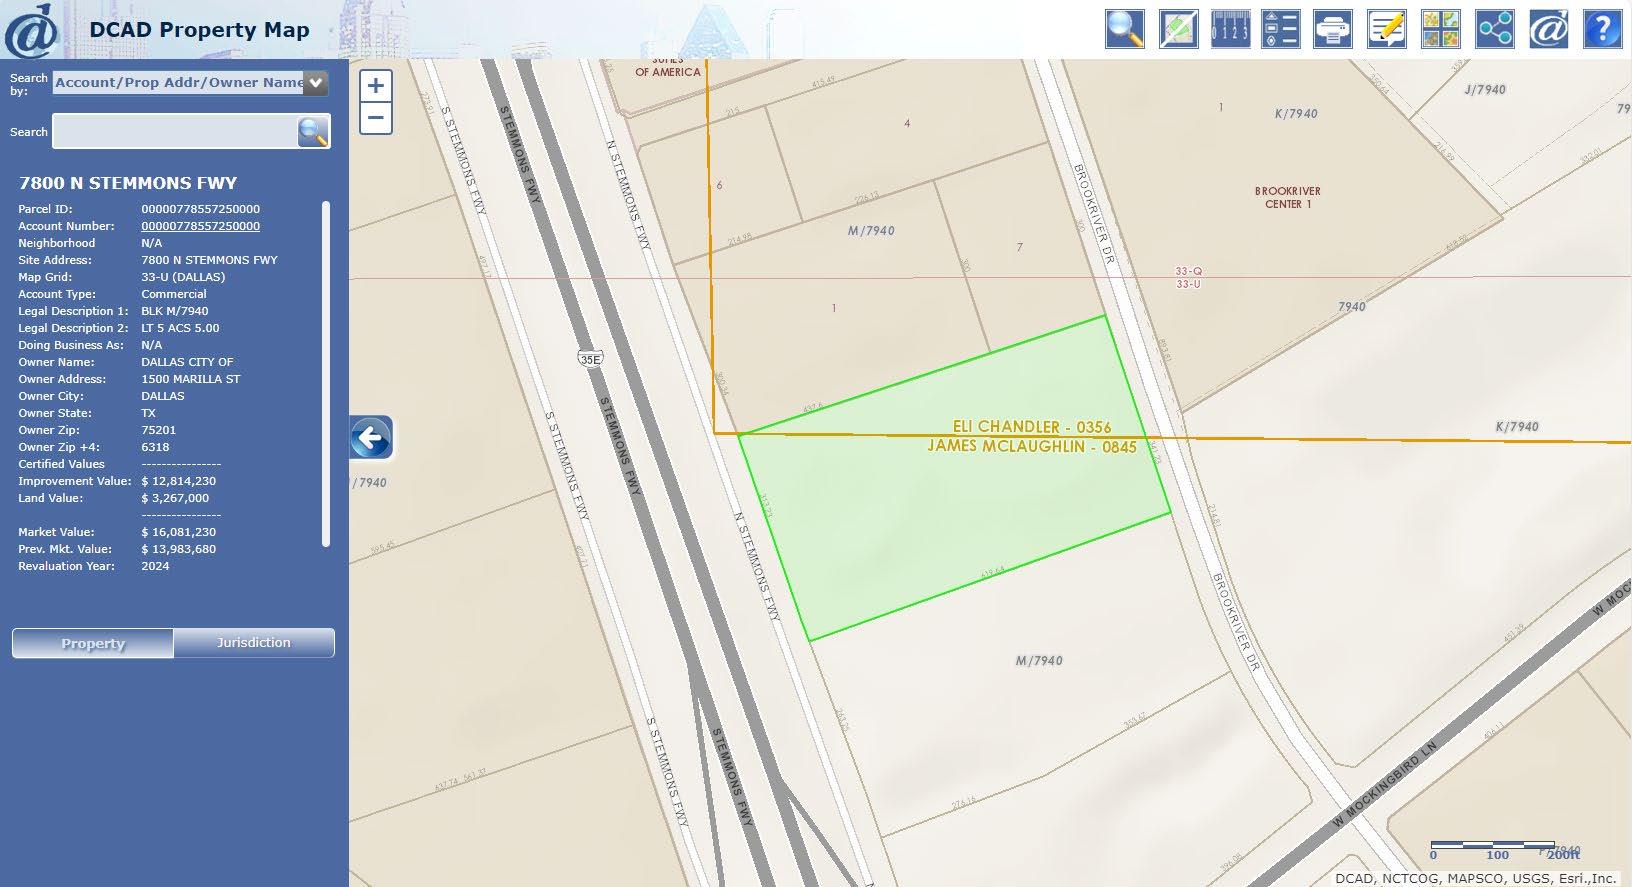
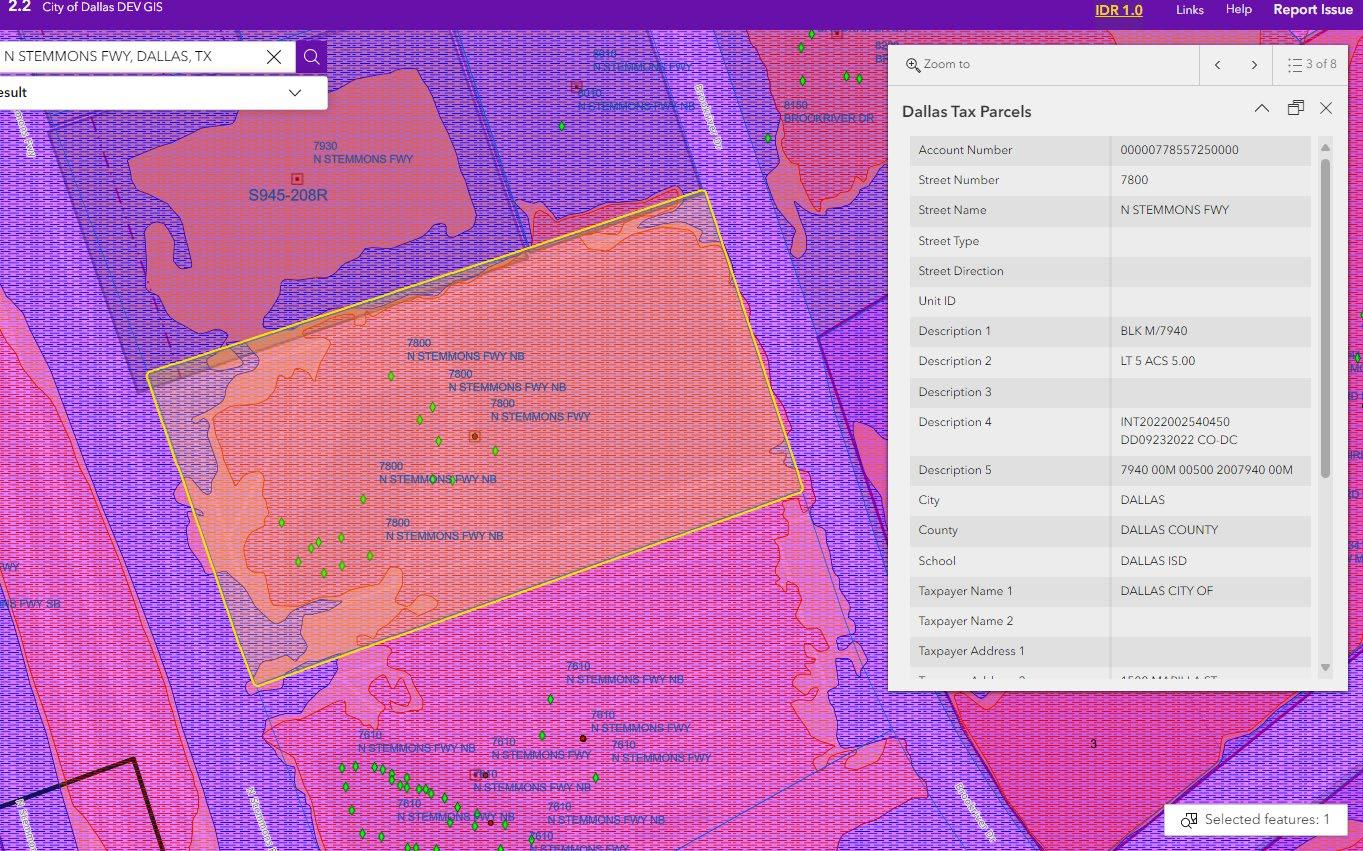
1. Open the DCAD website on one computer screen and the GIS website on the other.
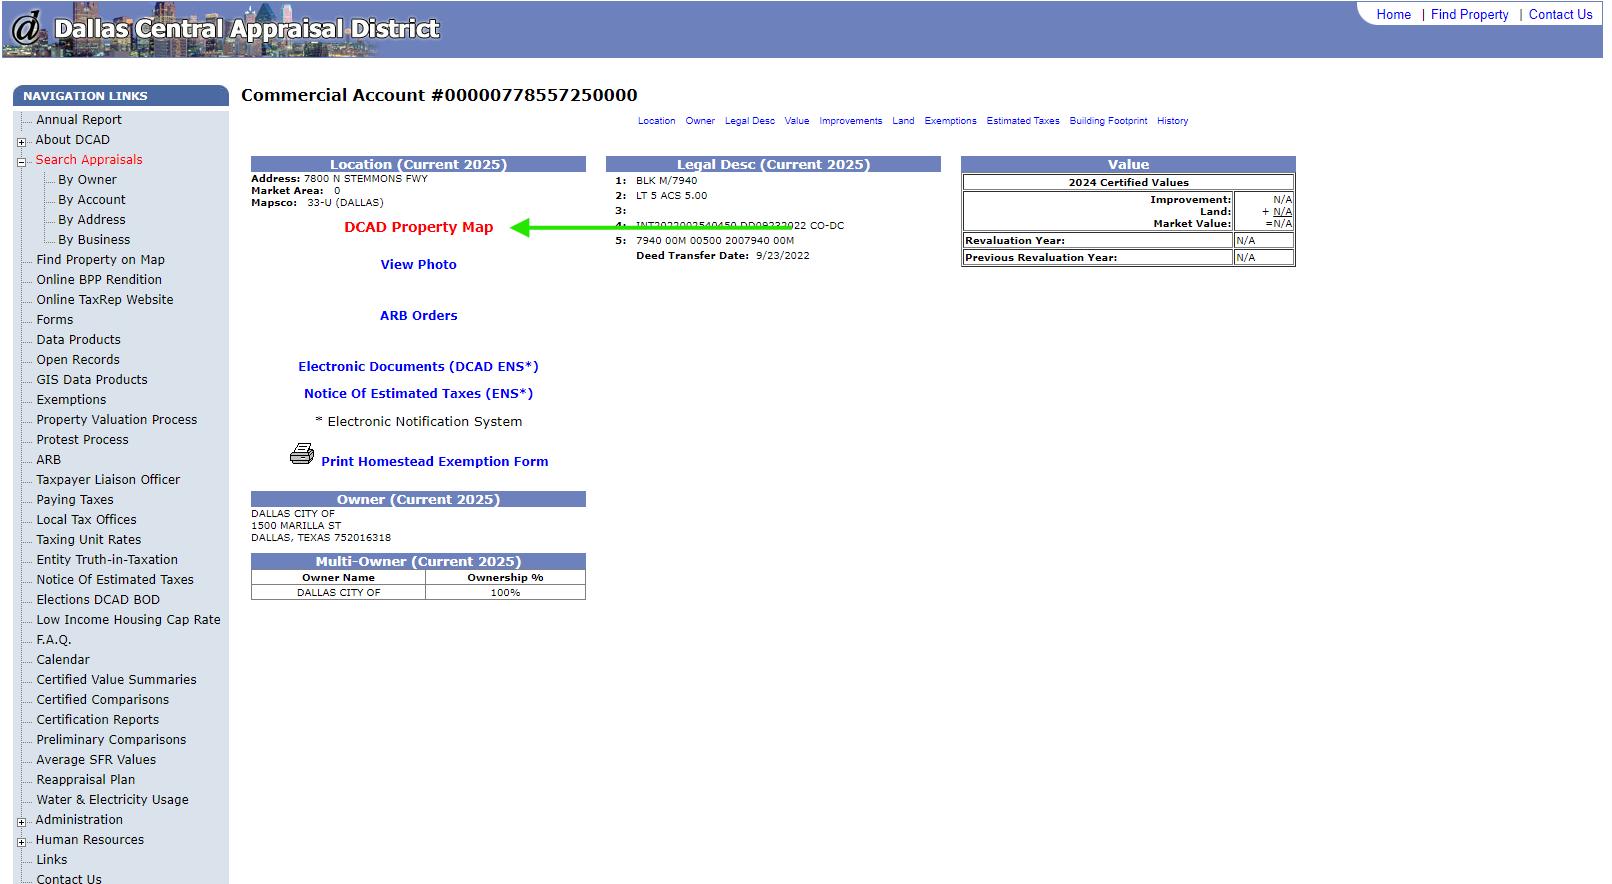
2. Look up the DCAD Number on their site and double check the address. Click on DCAD Property Map.
Zone Verification Letters
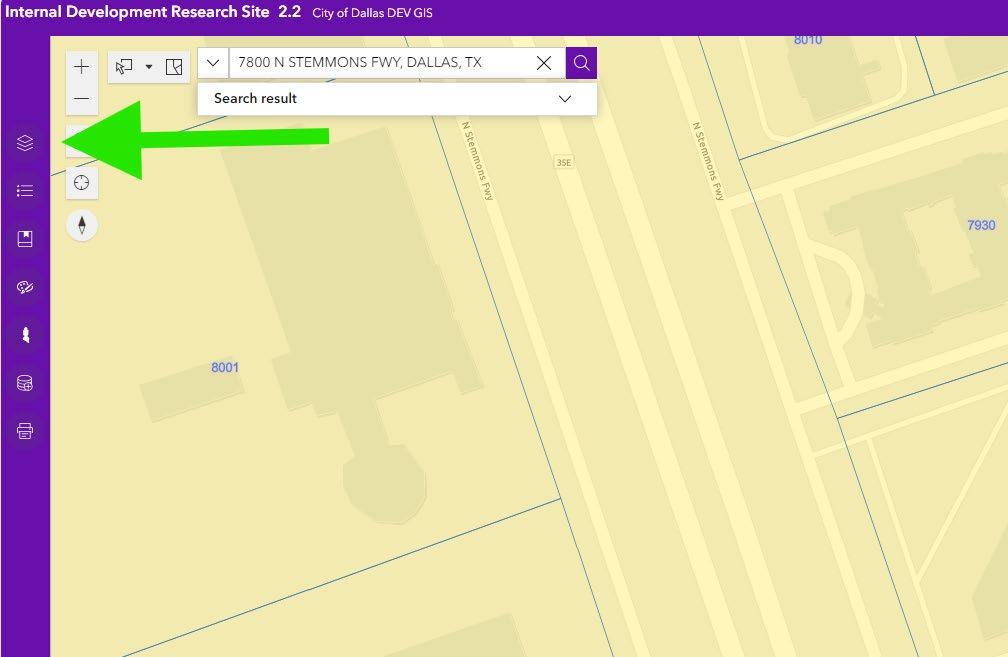
3. Look up the address on GIS. (Sometimes the circle on the map doesn’t take you to the correct place so look for the lot shape as well. This is why you should have the DCAD Property Map up so you can compare and find the correct location.
Zone Verification Letters
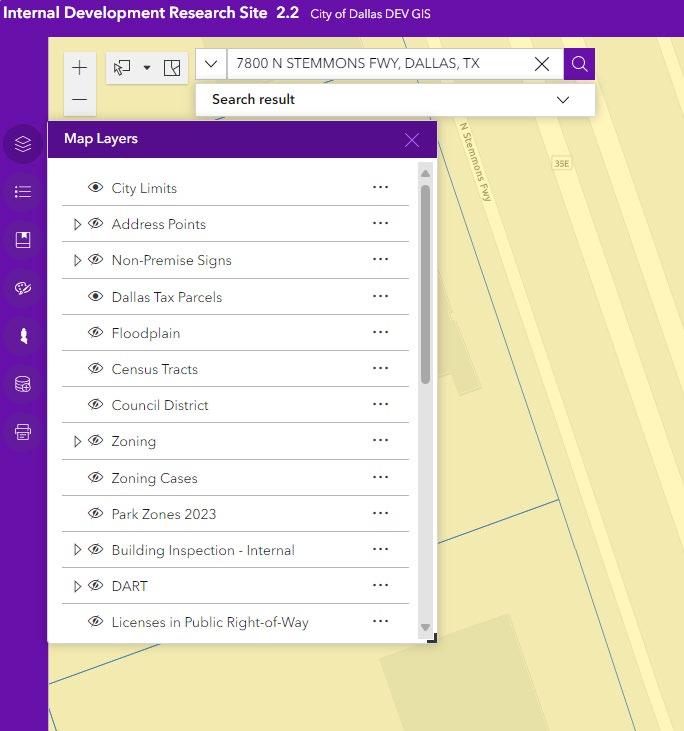
4. Turn on the following GIS Layers, by clicking the Layer button, then ensuring they are viewable (the eye is not crossed out)
i. City limits
ii. Address points
iii. Dallas tax parcel
iv. Zoning
v. Floodplain
vi. Plats
vii. Alcohol
Zone Verification Letters
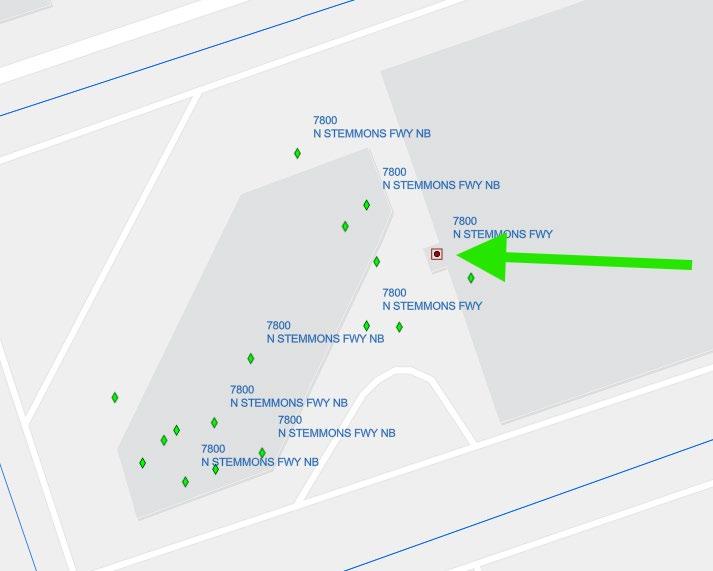
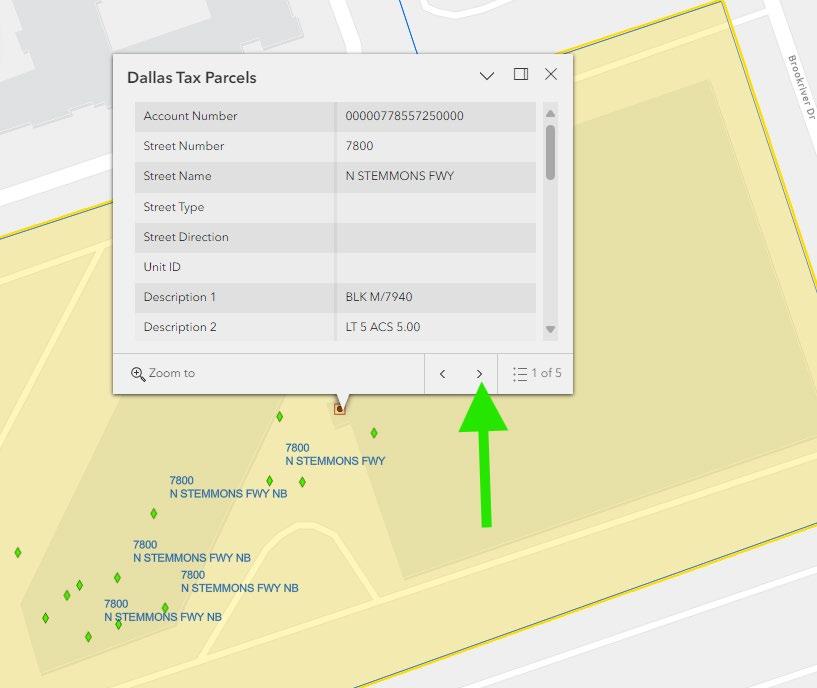
5. Select the correct property. The red dot with the square around it is ideal, but a green rhombus can be the only kind you see as well.
Zone Verification Letters
8/15/2024
Zone Verification Letters
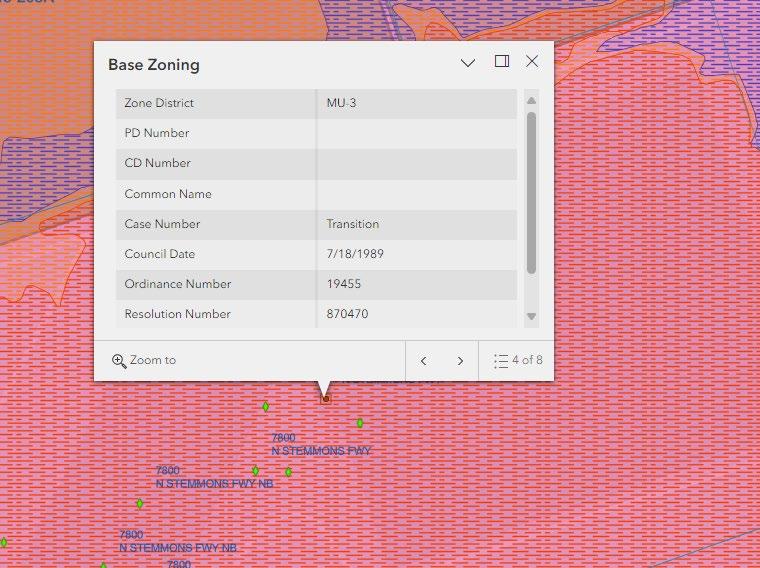
6. Go through the different filters and overlays you should have turned on and write what they are in the top right corner of the application.
i. Base Zoning (if it ’s split zoning, you need to specify which part of the lot is in which zone)
ii. Demolition Delay
iii. Verify easements
Zone Verification Letters
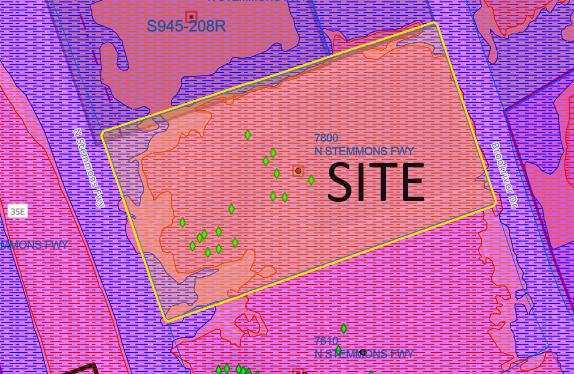
7. Take a screenshot of the GIS map and label the Dallas Tax Parcel area as “SITE” . Ensure the screenshot has the street name visible.
8/15/2024
Zone Verification Letters
This is a good example of the screenshot you would send the client. Notice you can see the street names on either side of the site and you also labeled the si te.
8/15/2024
Zone Verification Letters
8. In the Zone Verification Letter folder in the drive, create a folder titled by the street number and name of the letter you’re working on.
9. The screenshot should be titled: “Address_ Applicant Name_GIS.jpeg ” . In this example, you would title it: “7800 N Stemmons Applicant_GIS.jpeg ”
10. Place the screenshot in the proper folder.
11. Open the Zone Verification Letter folder in the drive.
12. Open the Templates folder.
13. Find the template you need based on the title. They are titled based on the zones written on the applications.
14. Open the template and update the
i. Customer name
ii. Address
iii. Reference line
iv. Zoning information (1st paragraph)
v. Regulation information (1st paragraph)
vi. Your name
vii. Your title
viii. Your signature
ix. Double check the footer is correct
15. Save the letter as a PDF titled: “Street Address_Applicant Name_ZVL.pdf ” .
16. If your letter used several zoning and regulation information that didn’t already have a template, create one by saving this new letter titled by the many zones and regulations and leave it in the templates folder. The only copy of the letter in the address folder should be a PDF version.
17. In POSSE: create a new job with the following steps:
i. New Job
ii. Miscellaneous transaction
iii. Click Ok
iv. Job description: Zoning Verification Letter with the address
v. Customer: type last name and first and press Tab
i. If the customer exists, check the address and click on the correct one.
vi. Fee Type: Zoning Verification
18. Write Misc. Transaction # on the application, your initials, and the date you processed it.
19. The folder titled with the location address should be in the shared drive and include:
Zone Verification Letters
i. ZVL
ii. GIS screenshot
iii. Receipt
20. Cash the check by going to the cashier and giving her the miscellaneous transaction #, the application, and the check.
21. Scan the receipt and attach it to the e-mail to the customer.
22. Go to the entry in the ZVL Spreadsheet and update the status to Complete.