
RESEDENTIAL PORTOLIO - 1 RAMAJI PRANAV 20111ID0007 THIRUVAIPATI BHARATH SANKAR 20111ID0003 INTEGRATEDPROJECTWORKREPORT INTERIORS PROJECT VASUMANYAM RESIDENCE Dr. YSR Architecture and fine arts university Kadapa Department of Interior Design

It is our great pleasure to acknowledge the roles of several individuals who were instrumental for completion of this integrated project work. We would like to thank all those who helped us with their valuable support during this entire project work
First and foremost we would like to thank our subject faculty &guide,Ar.D. Shravanya mam for her constant guidance, timely inputs and support throughout the semester.
The people who helped in this journey of bringing forth the best from our side to this project were our project company TASH Architects Firm Bangalore. we would like to thank them for helping us with their supportive, Information and guidance. we would like to thank project owner Mr. Vasumanyam and project supervisor Mr. Basha for their enormous support and permission for allowing us to use their site for our project
AspecialthankstoDr.YSRARCHITECTUREANDFINEARTSUNIVERSITY ourcollegeforgivingus this valuable subject of project work and their which helped us to develop our skills in interior design carrier. project work So we express our gratitude for their continuious support to complete this
1.
10.False
11.Wall
12.Pergola
13.Wooden
Name of the project : vasumanyam
residence Location : Kadapa
Project type : residential

Site area : 3425SFT
Built up area : 2798 SFT
No of floors : G+1 floors
Architect / Designer : TASH Architects
The site vasumanyam residence is located at nagarajupeta near sp bunglow area in Kadapa; Andhra Pradesh state in india
The site is located beside gangavaram street road along with proper views around the building and covering the major access from the rtc road to reach the site.
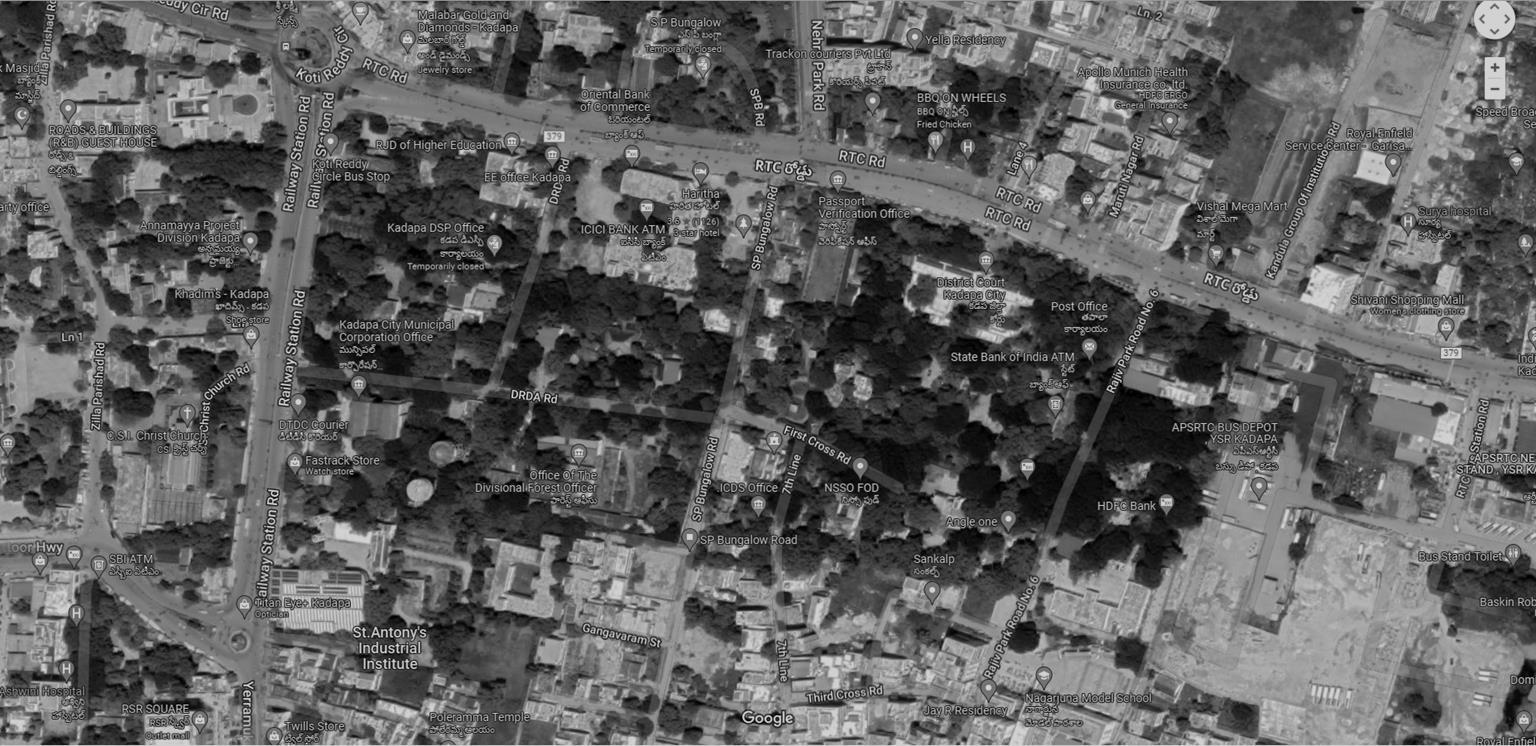

Accessible with public Transport
It is located nearby to apsrtc bustand kadapa
It is near to the centre of Kadapa bus stand so that there will be more convineint for the userfor transportation
Lack of proper road facility for reaching to the site
Air & sound Pollution as the site is located near to the main road

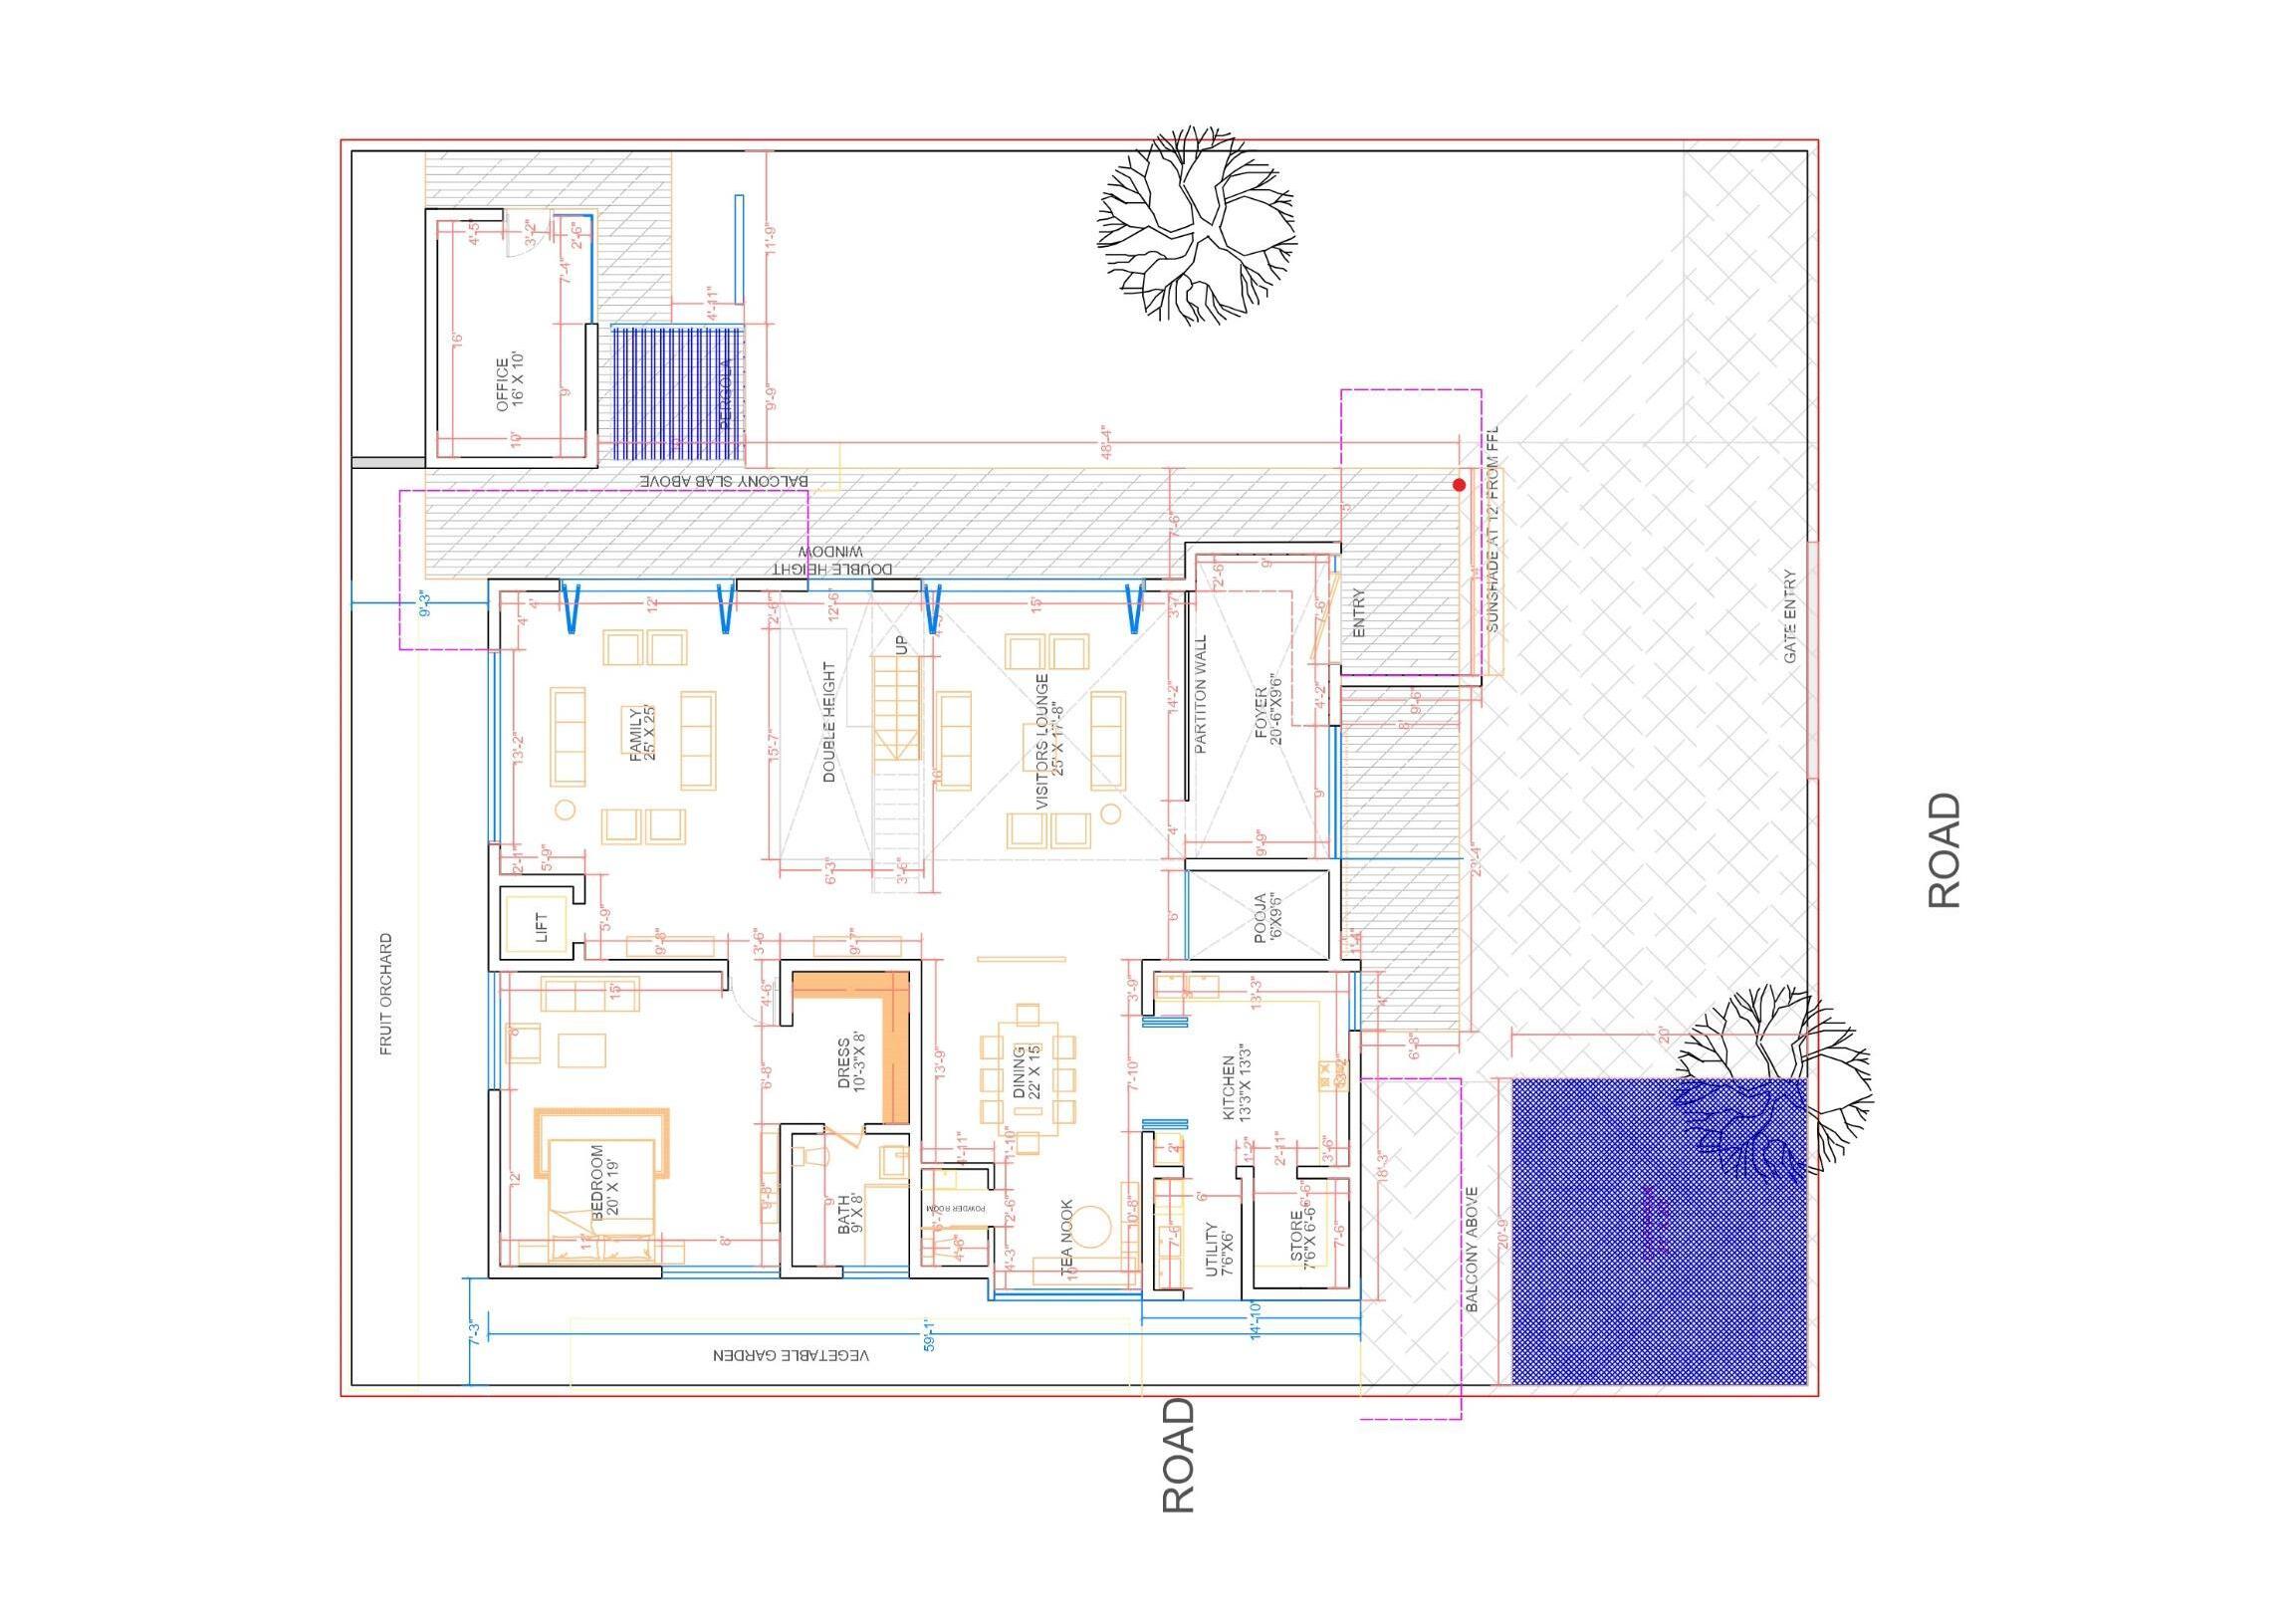
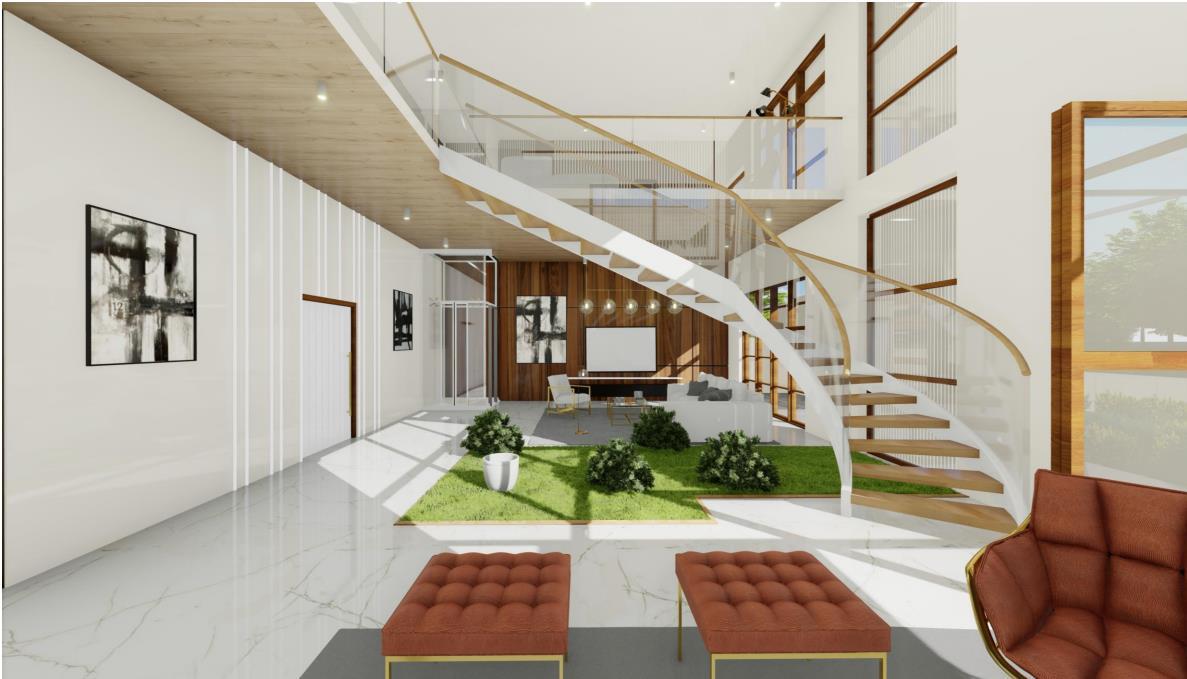
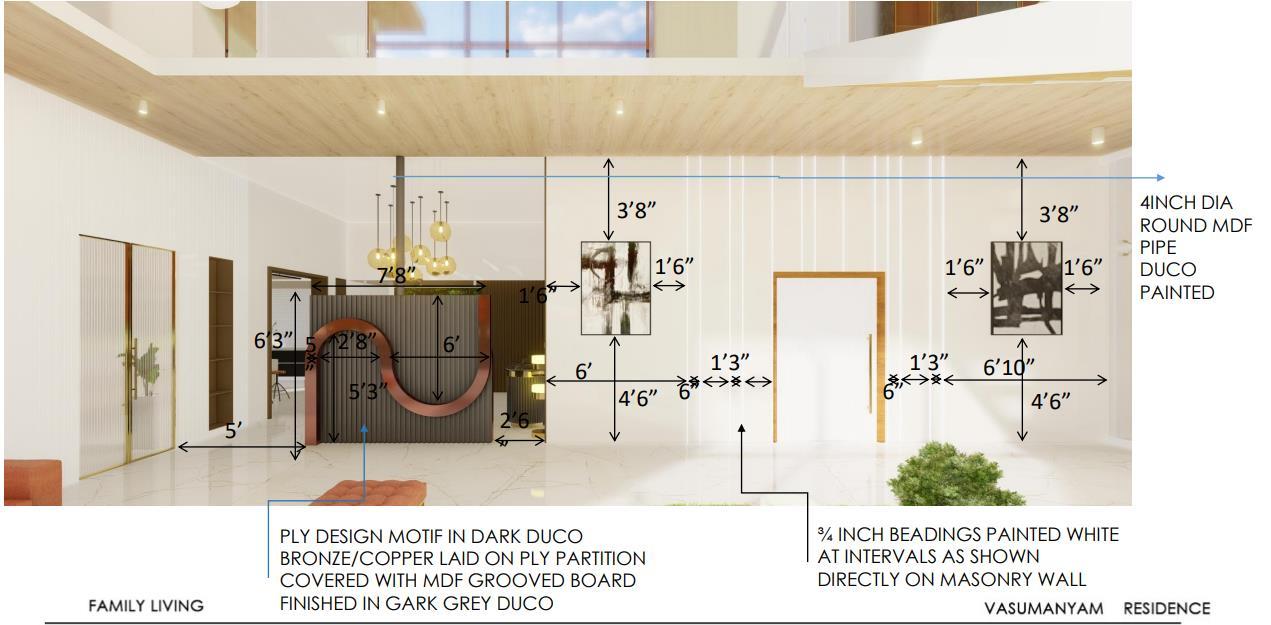
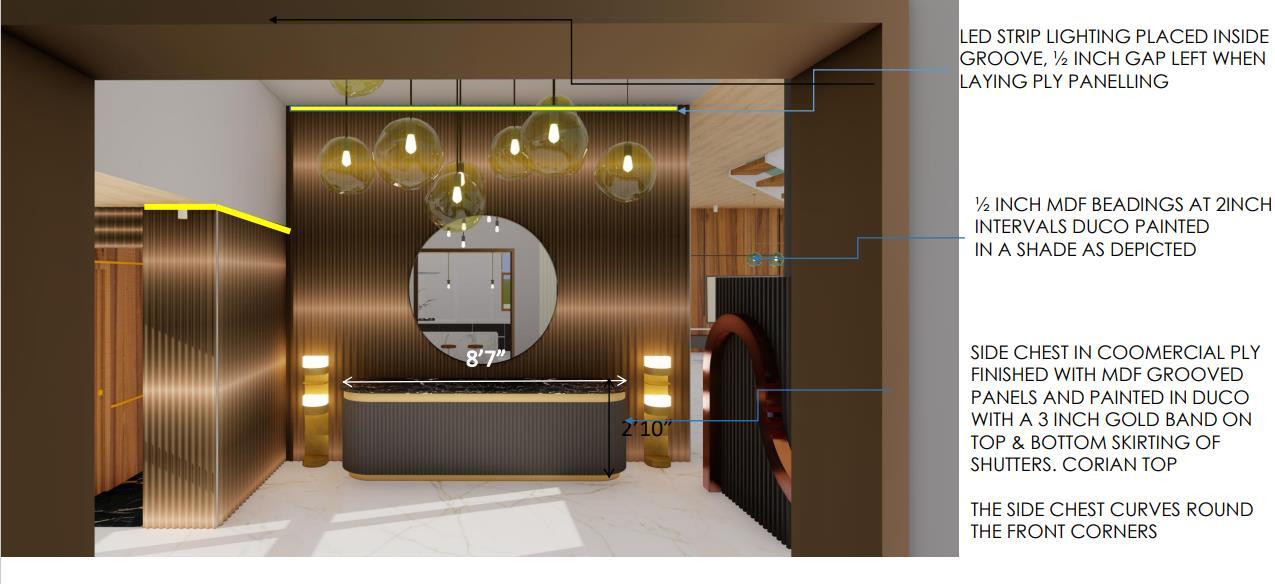
ENTRANCE FOYER
ENTRANCE FOYER
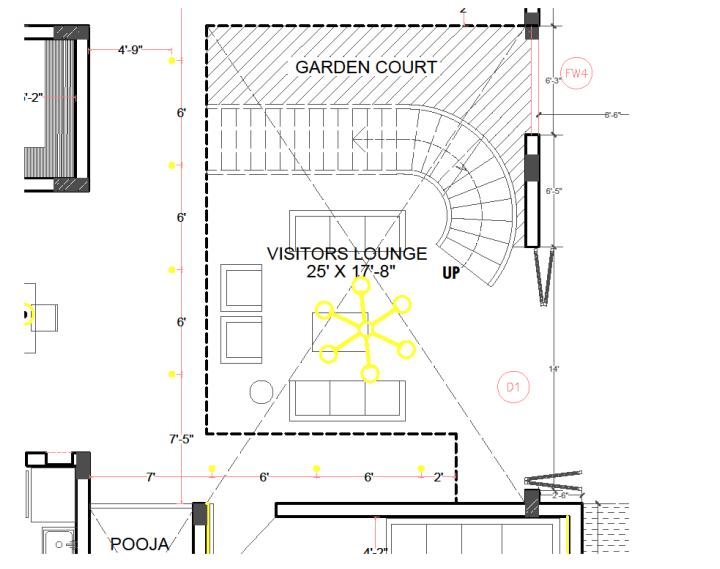
POOJA ROOM
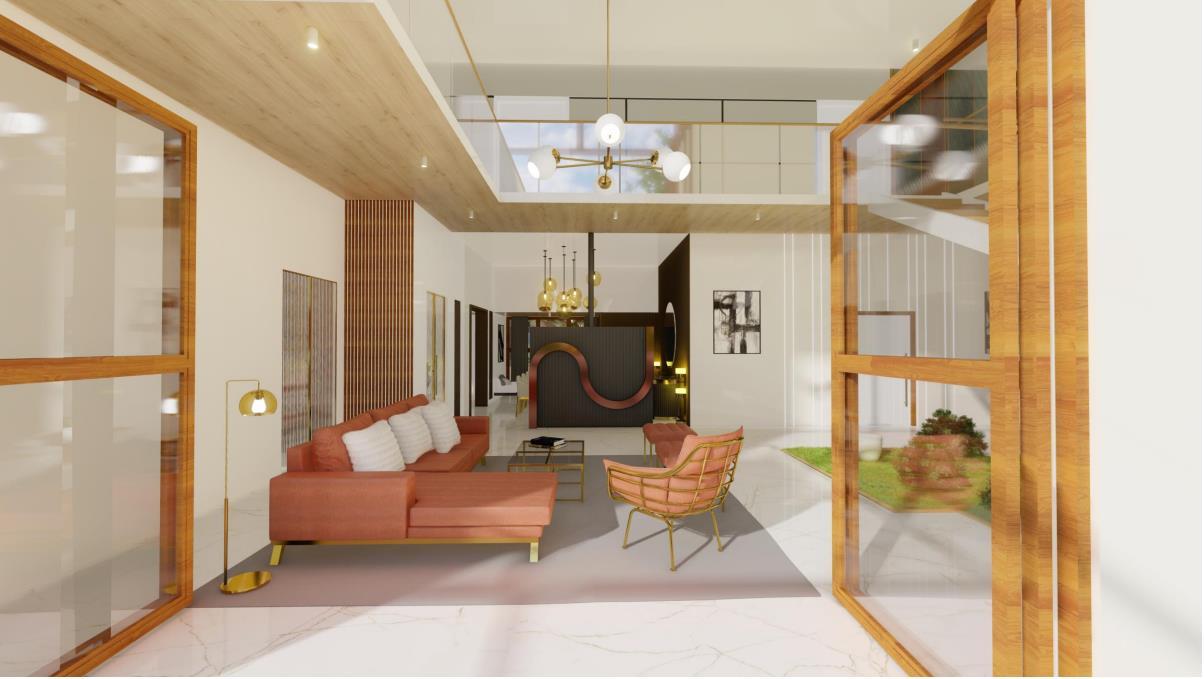
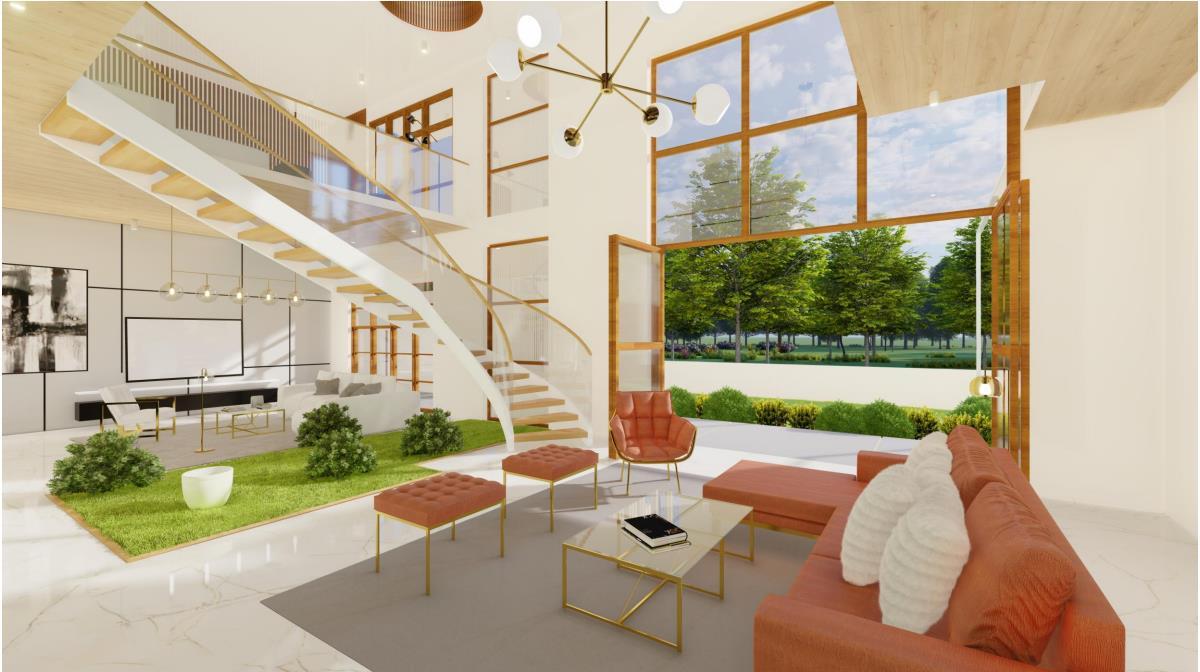
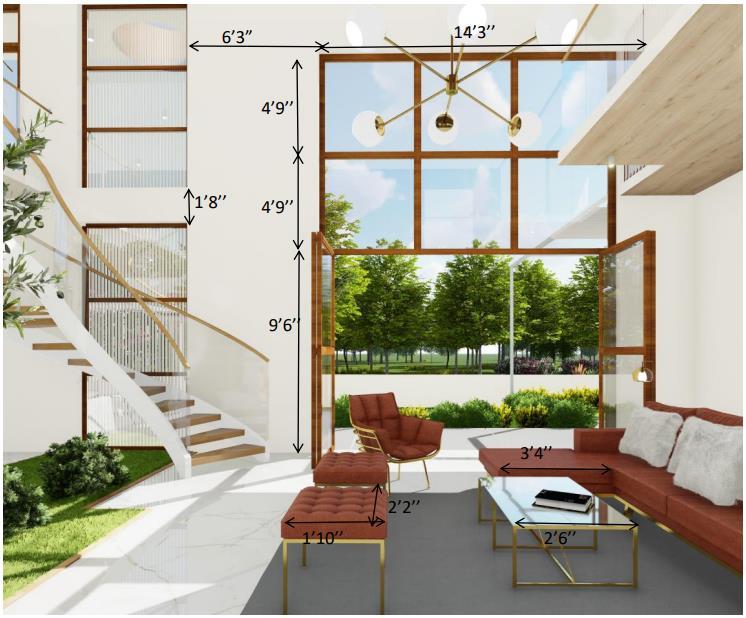
DRAWING ROOM
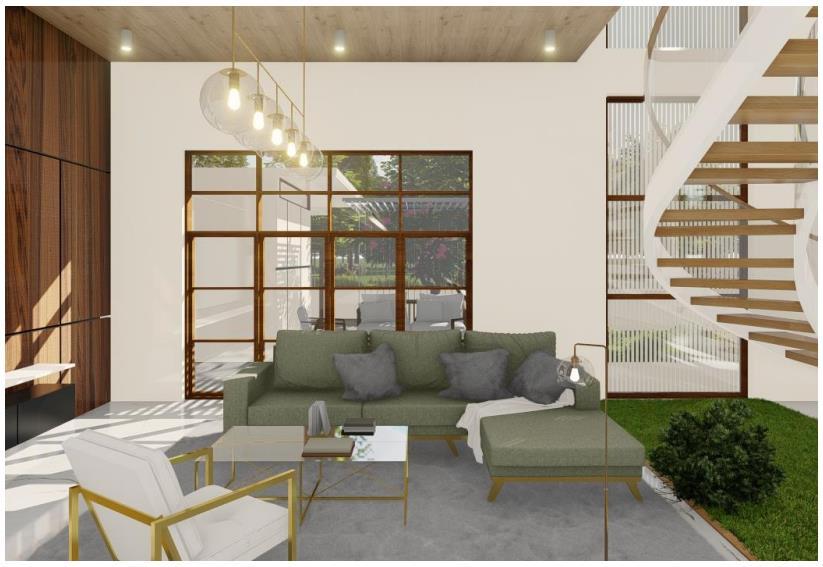
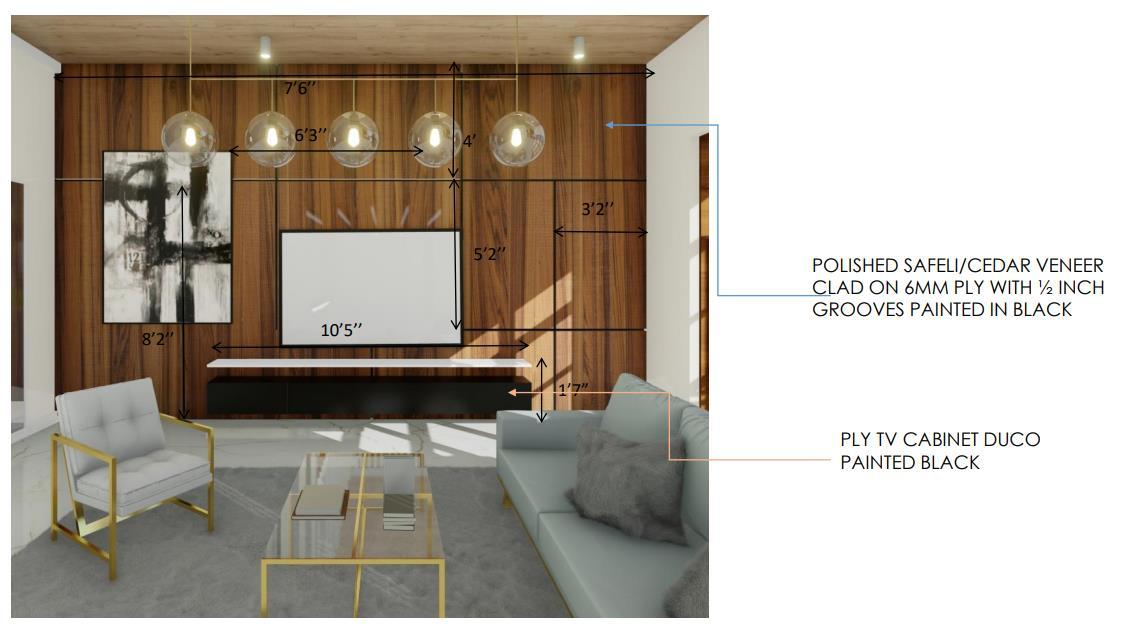
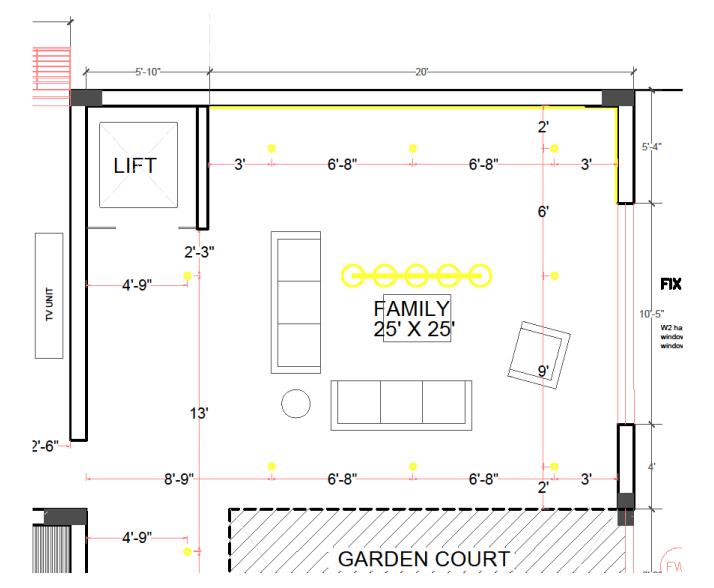
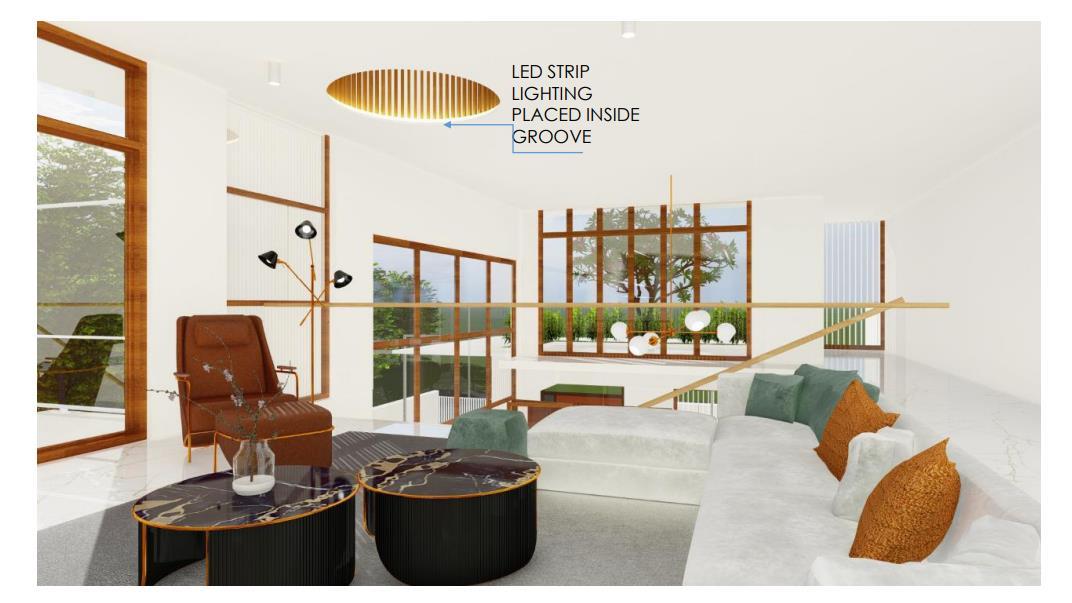
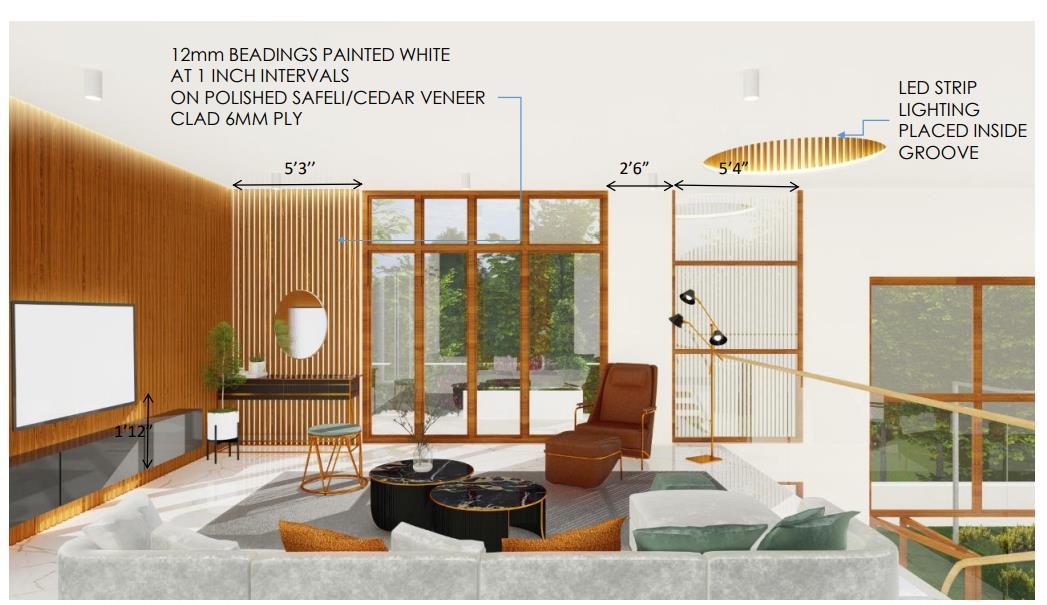
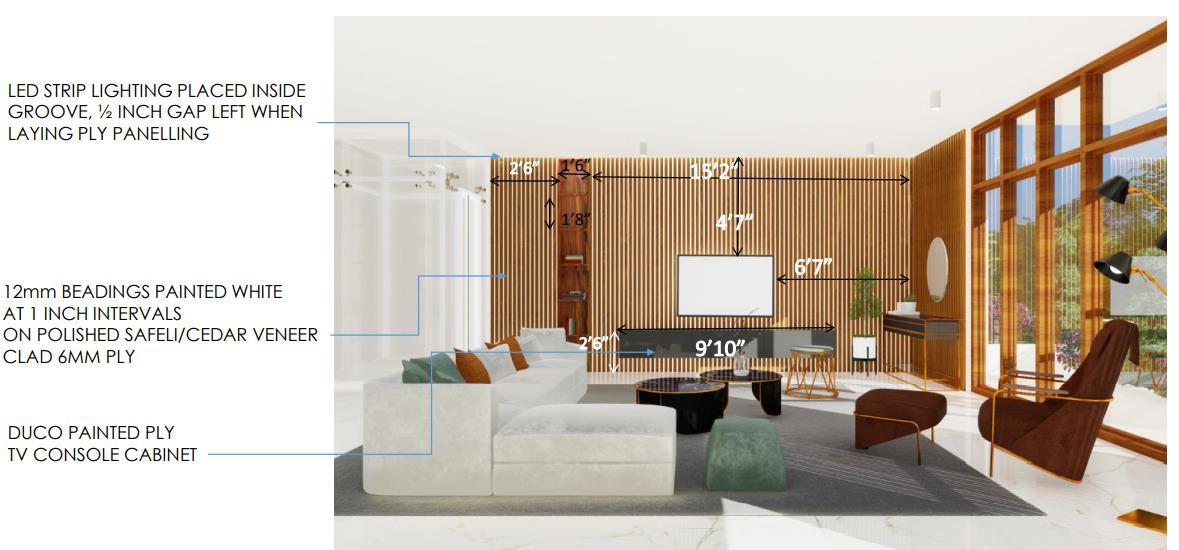
LIVING ROOM
DRAWING ROOM
STAIR CASE
POOJA
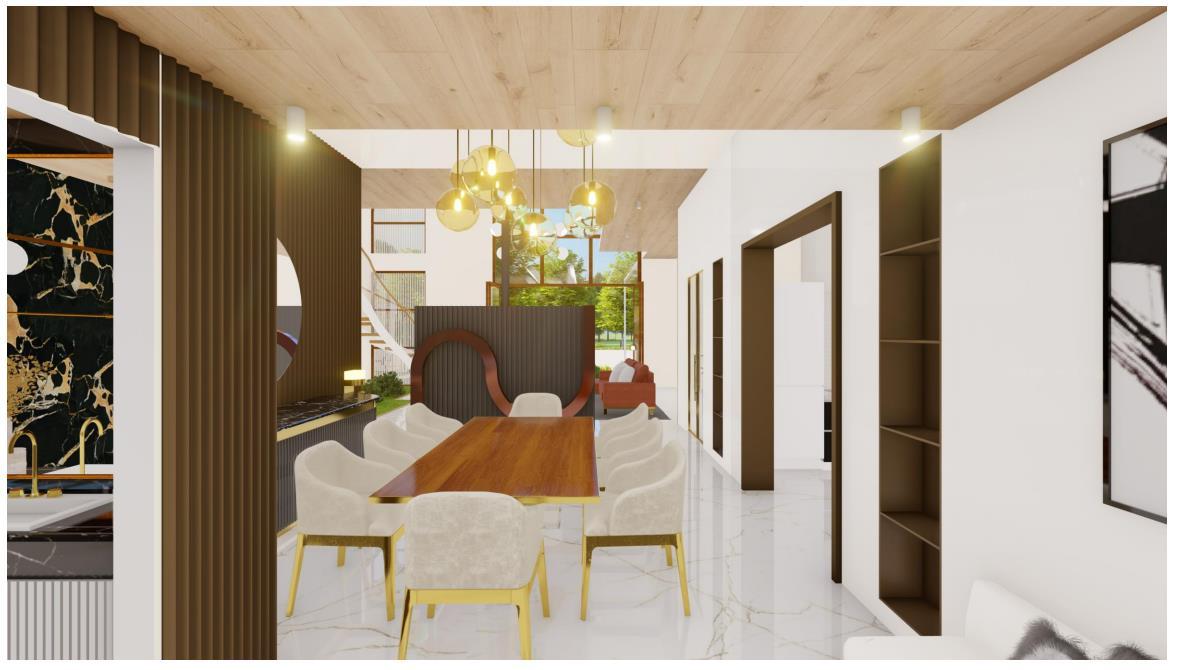
DINING AREA
KITCHEN
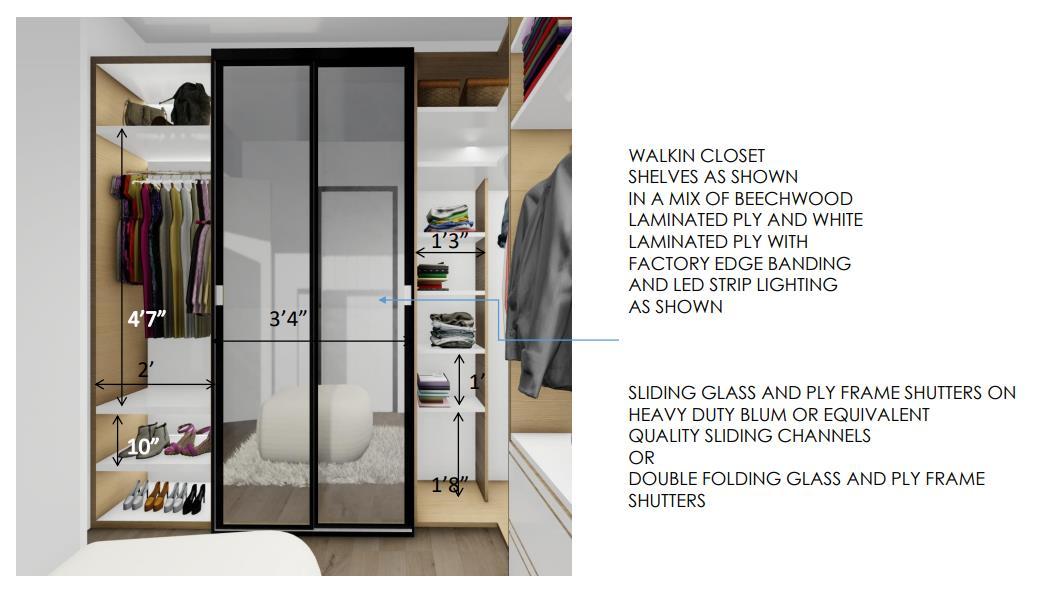
DRESSER
DINING AREA
TEA NOOK
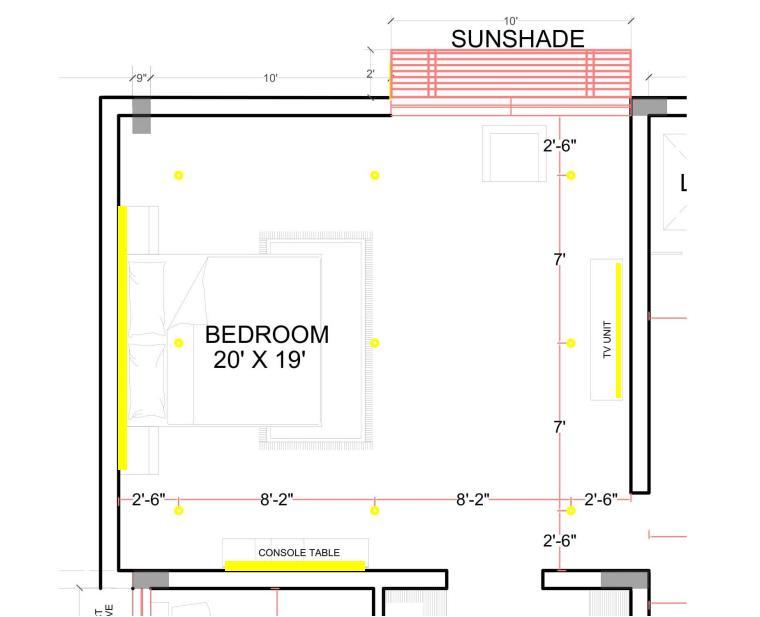
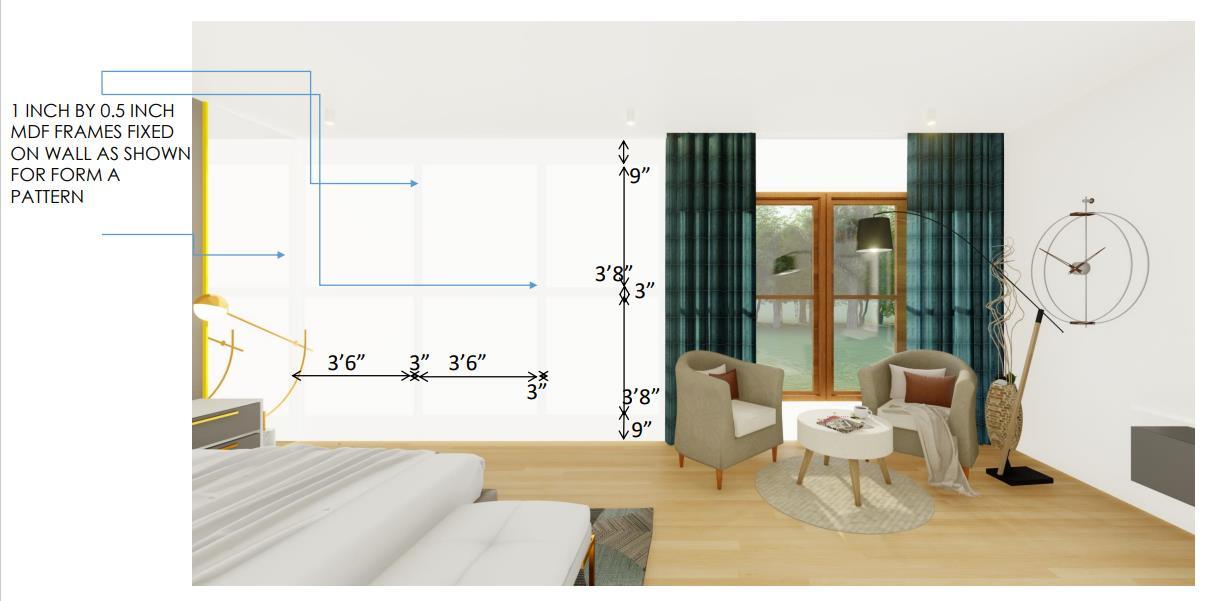
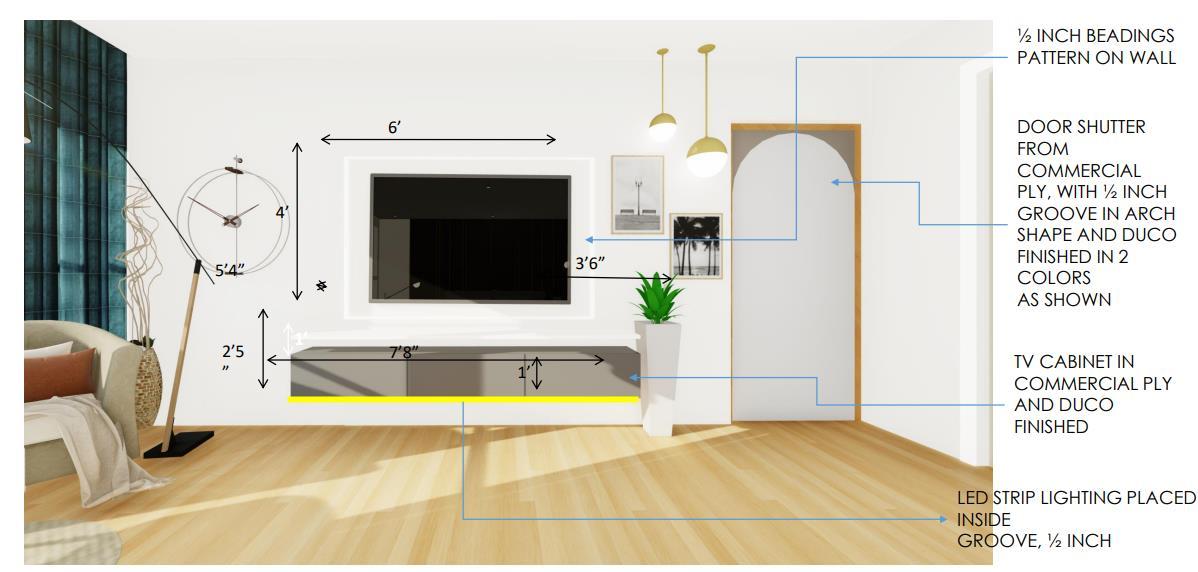
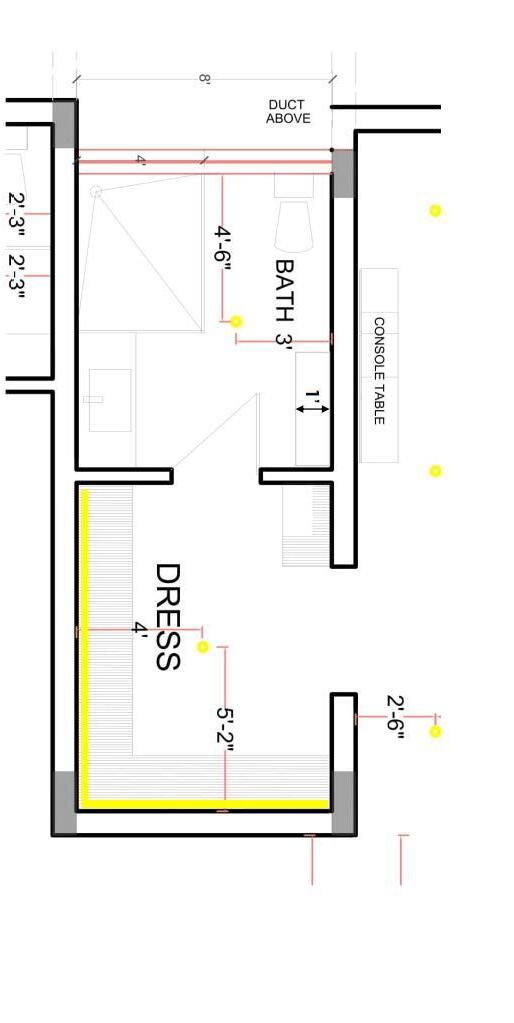
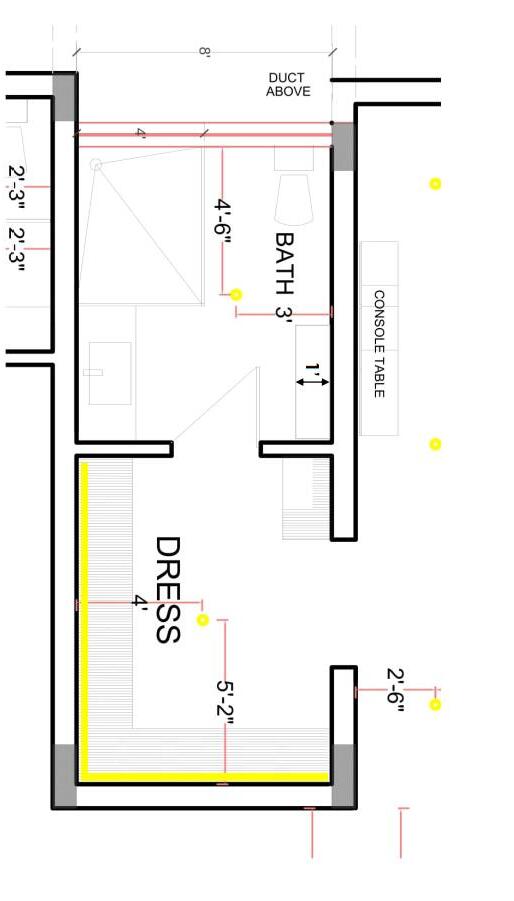
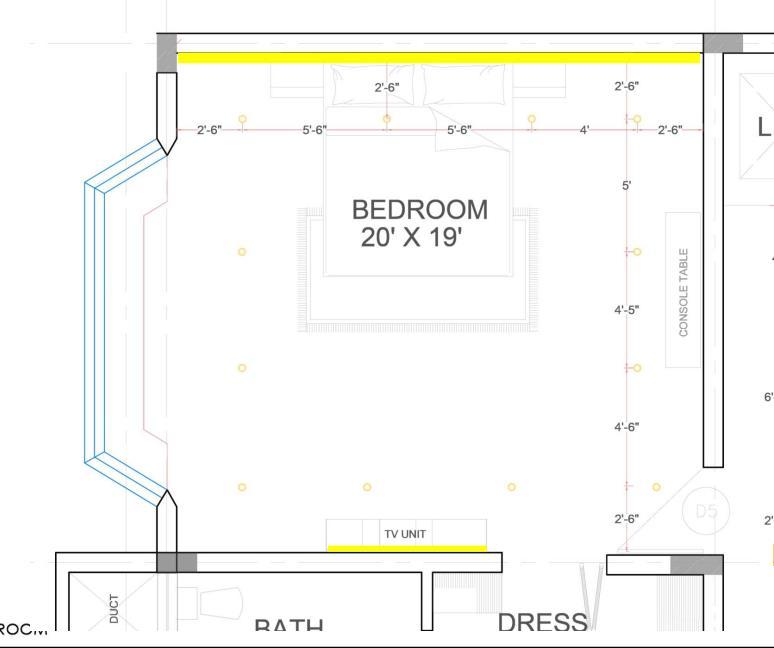
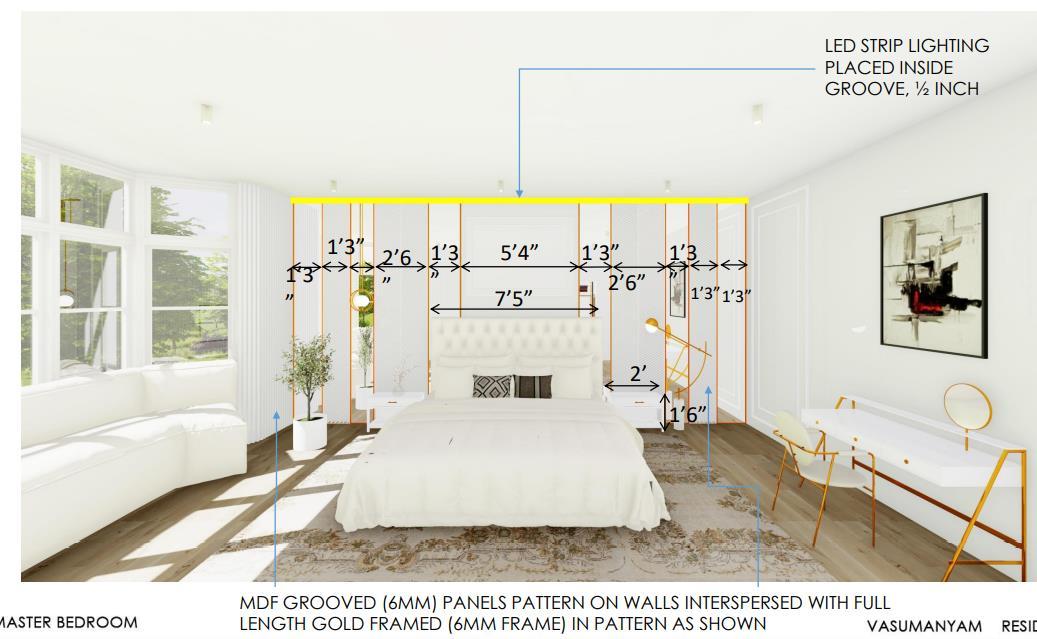
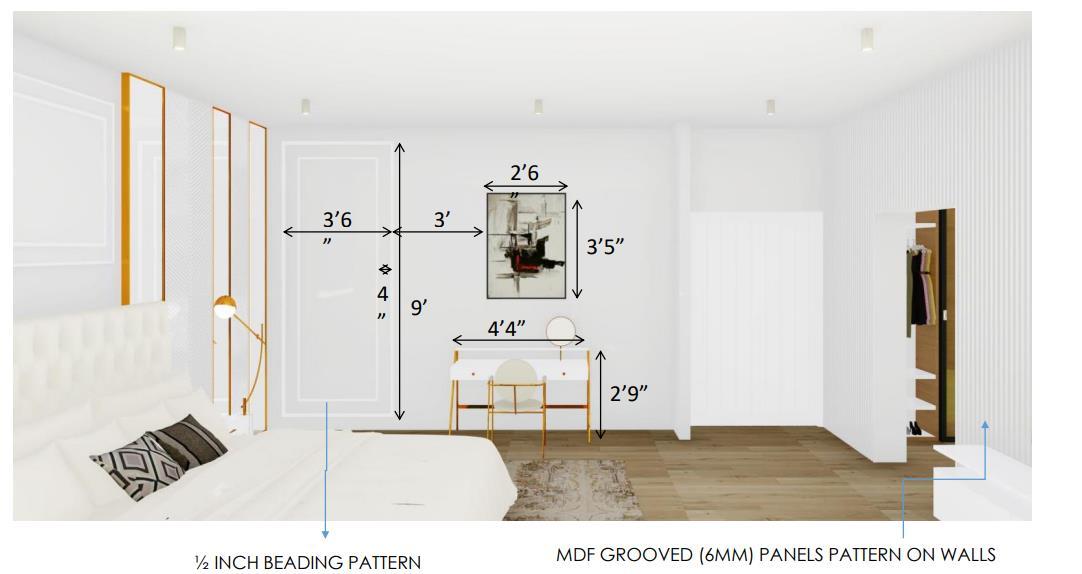
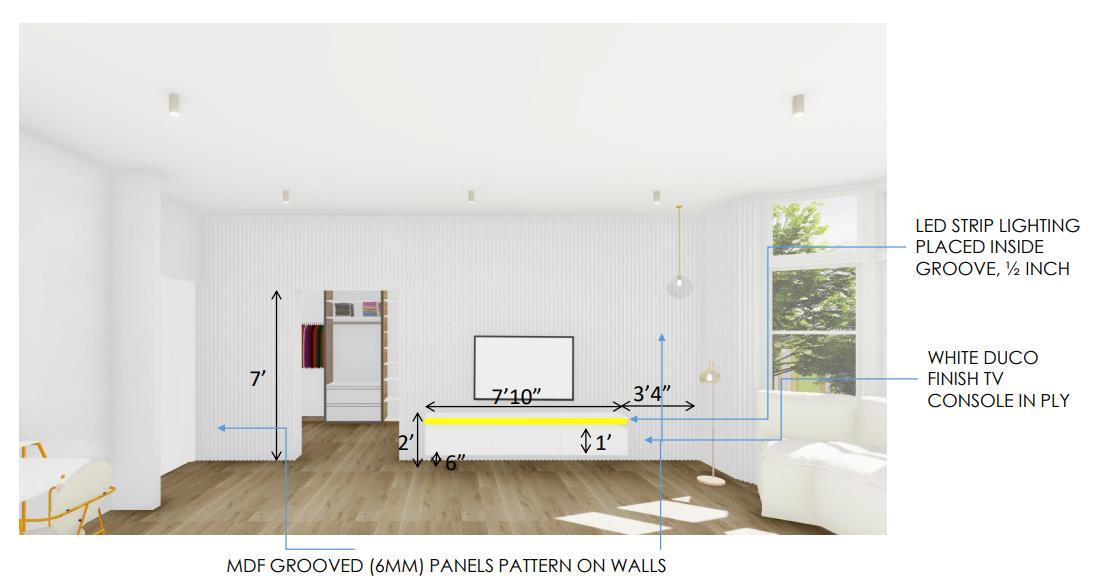
MASTER BEDROOM
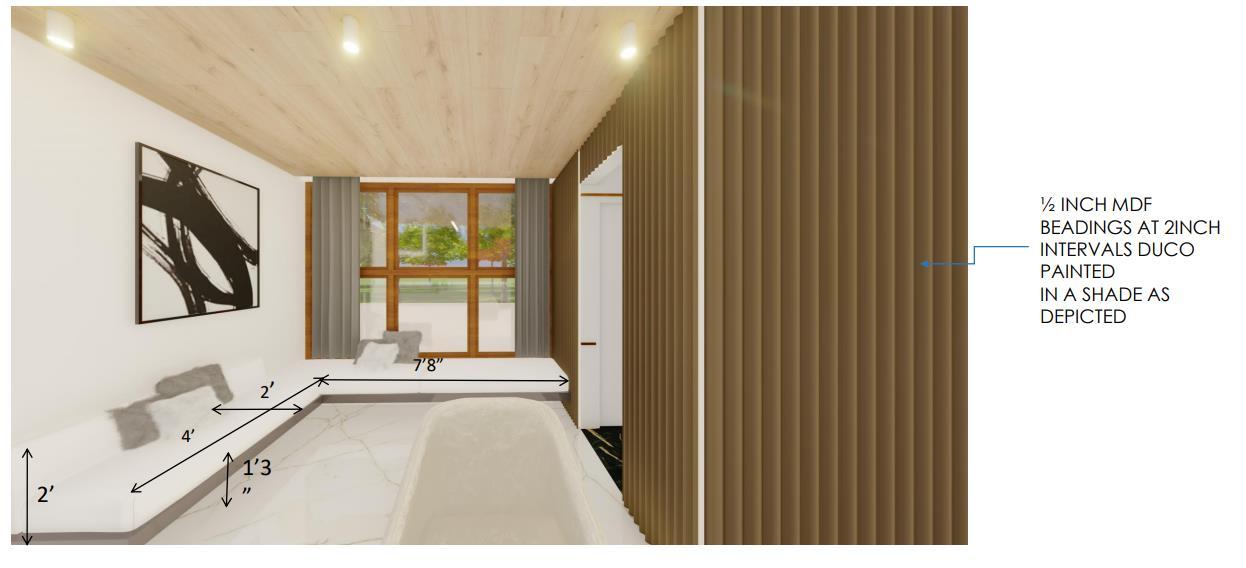
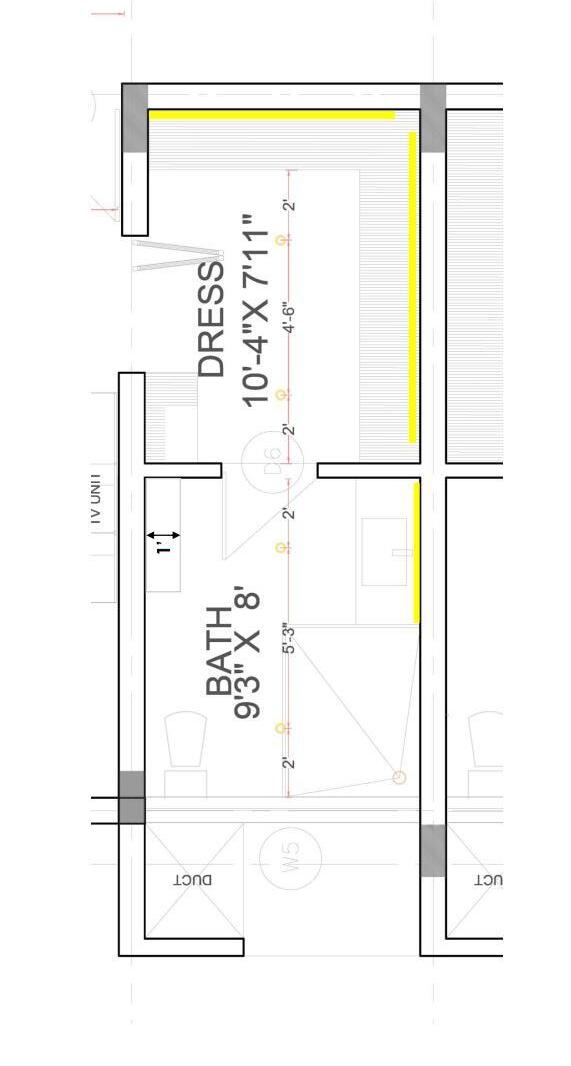
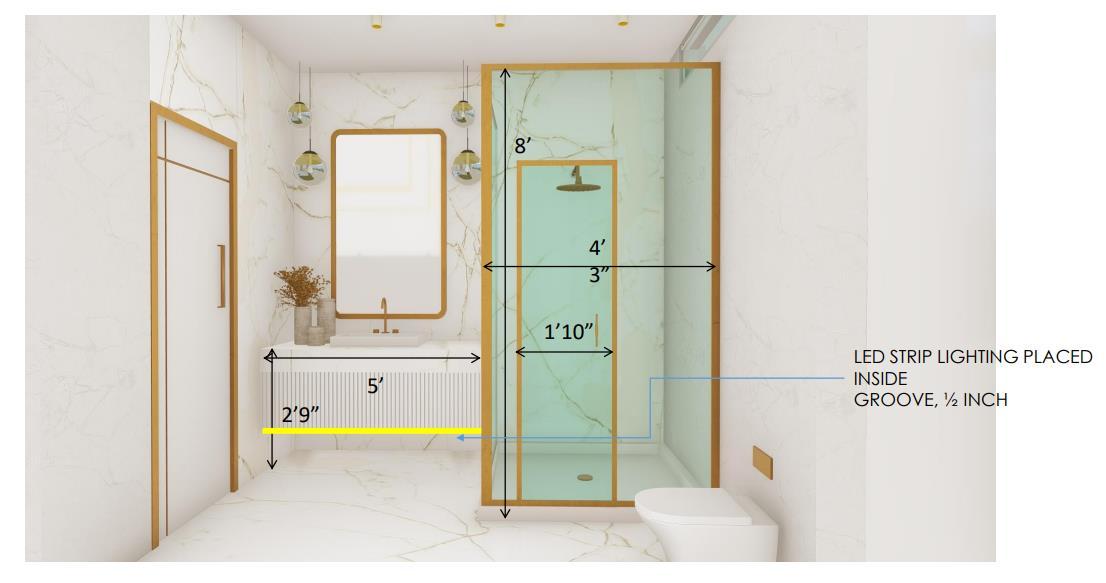
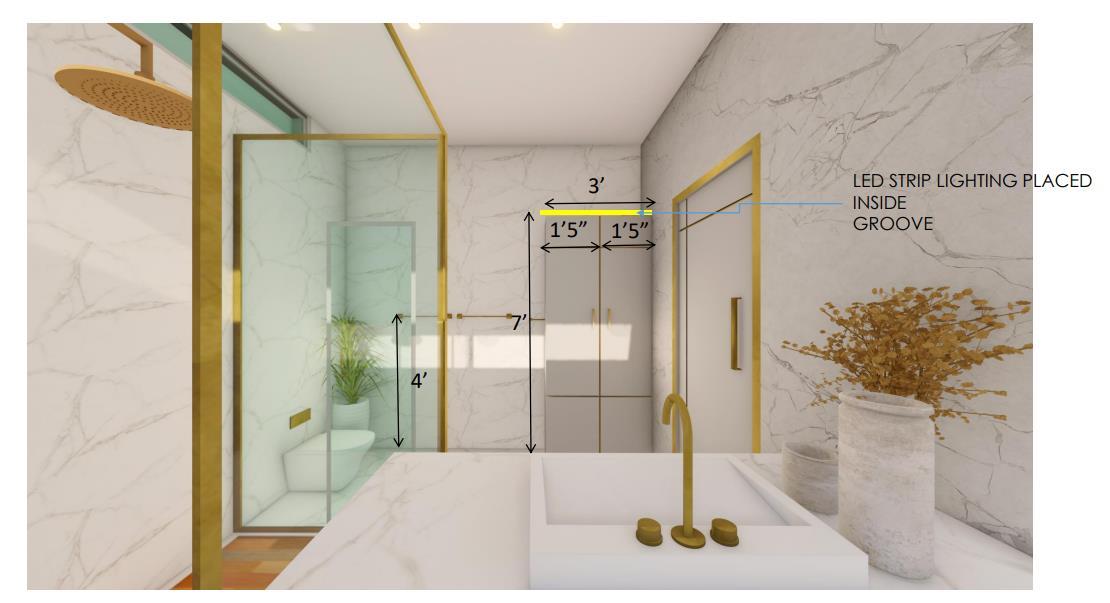
TOILET
KITCHEN
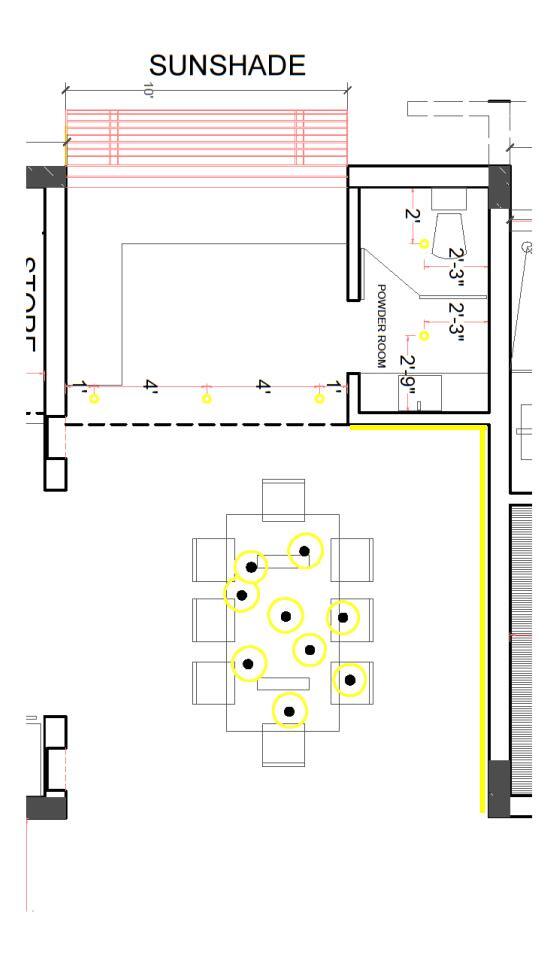
POWDER ROOM
TEA NOOK
LIVING ROOM
LIFT
MASTER BEDROOM
GROUND FLOOR ZONING LAYOUT
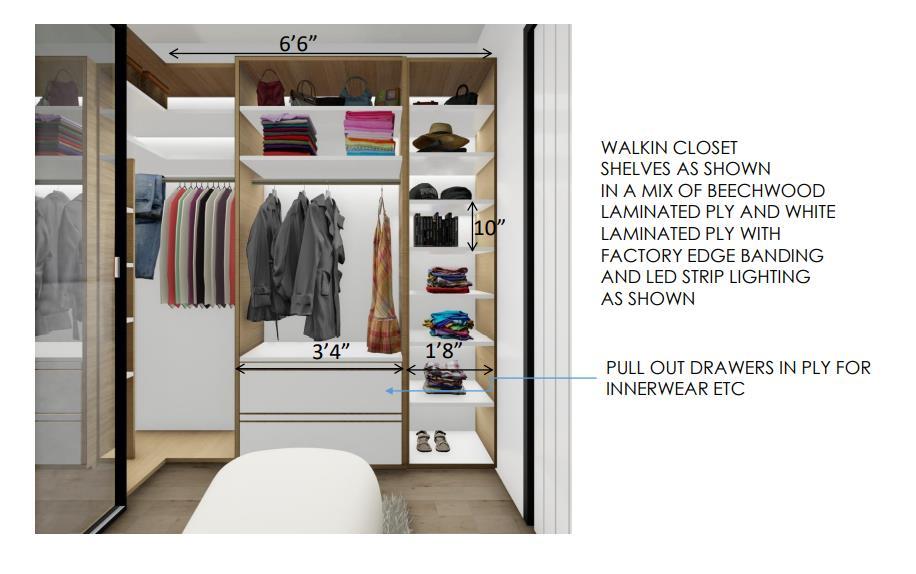
DRESSER
TOILET
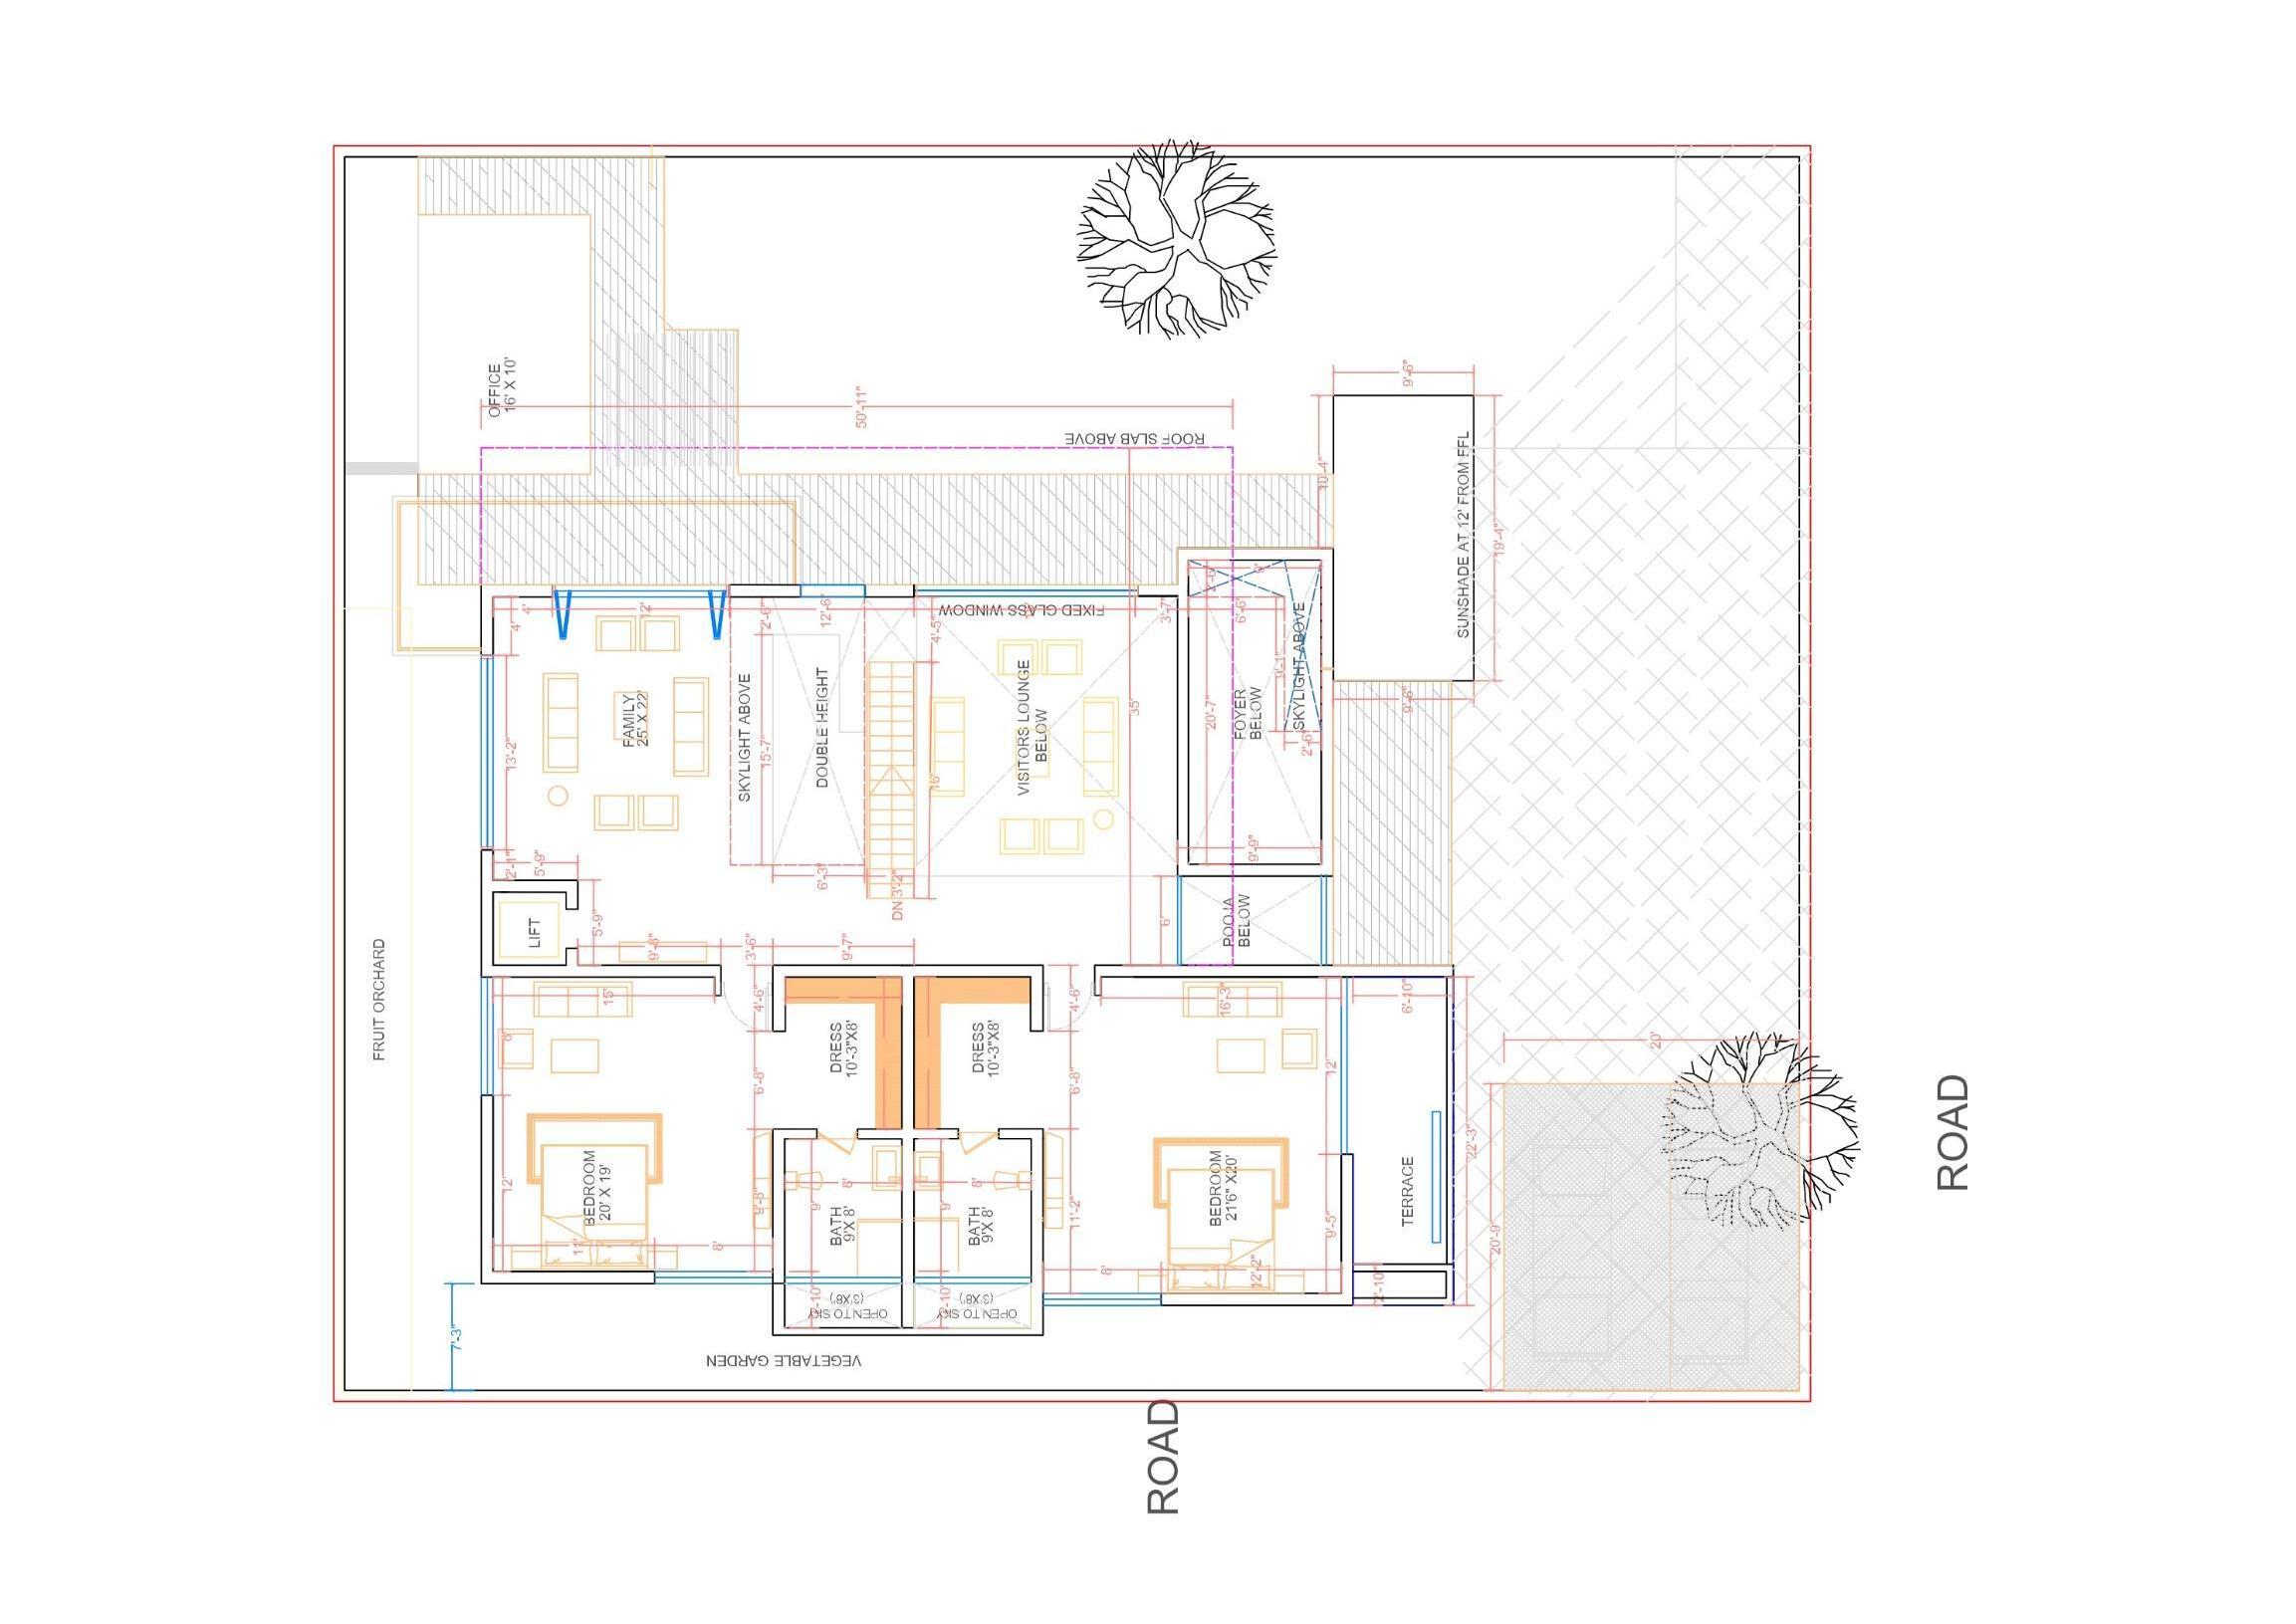
ENTRANCE FOYER
ENTRANCE FOYER
POOJA ROOM
DRAWING ROOM
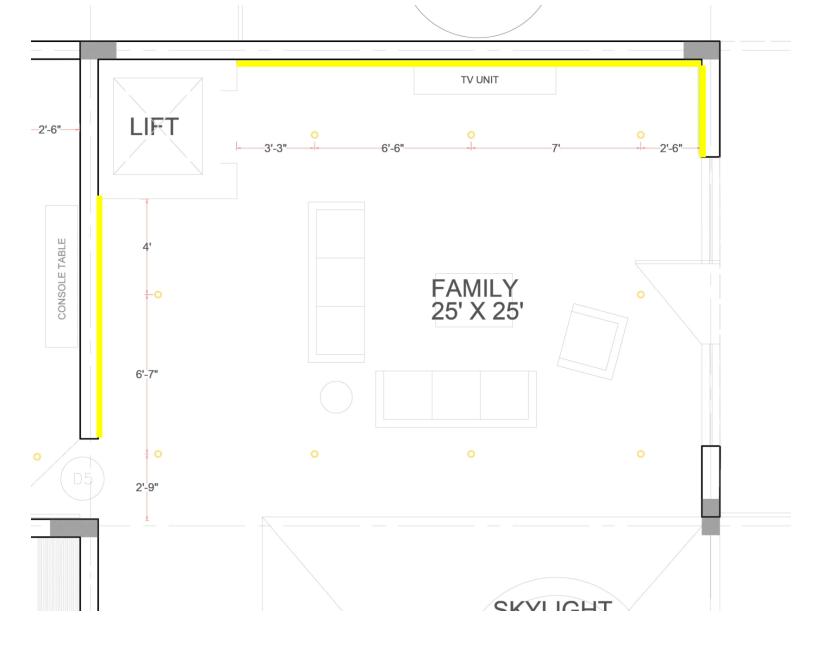
FAMILY LIVING
DRAWING ROOM LIFT
FAMILY LIVING
POOJA
LIFT
KIDS BEDROOM
DRESSER
DRESSER
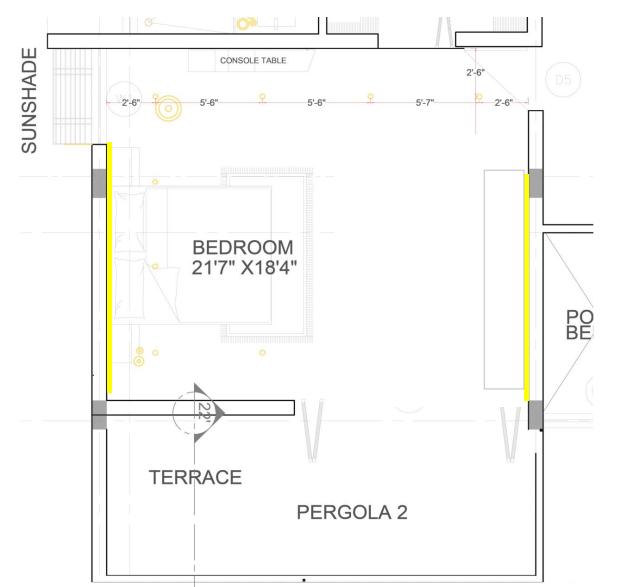
TERRACE
GUEST BEDROOM
KIIDS BEDROOM
TERRACE
DRESSER
TOILET
TOILET
FIRST FLOOR ZONING LAYOUT
TOILET
GUEST BEDROOM
DRESSER
TOILET
STAIR CASE

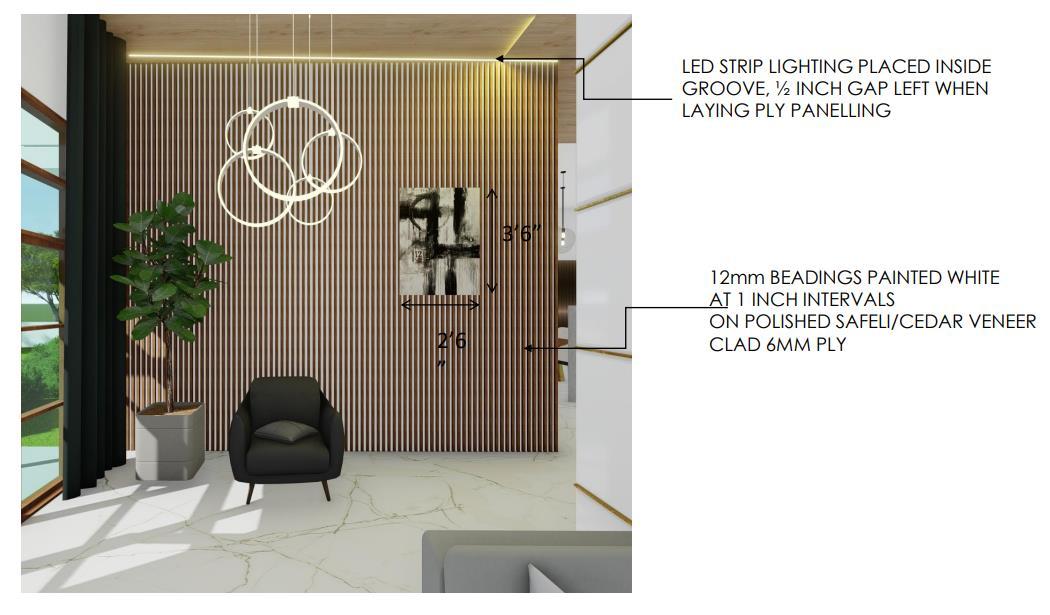

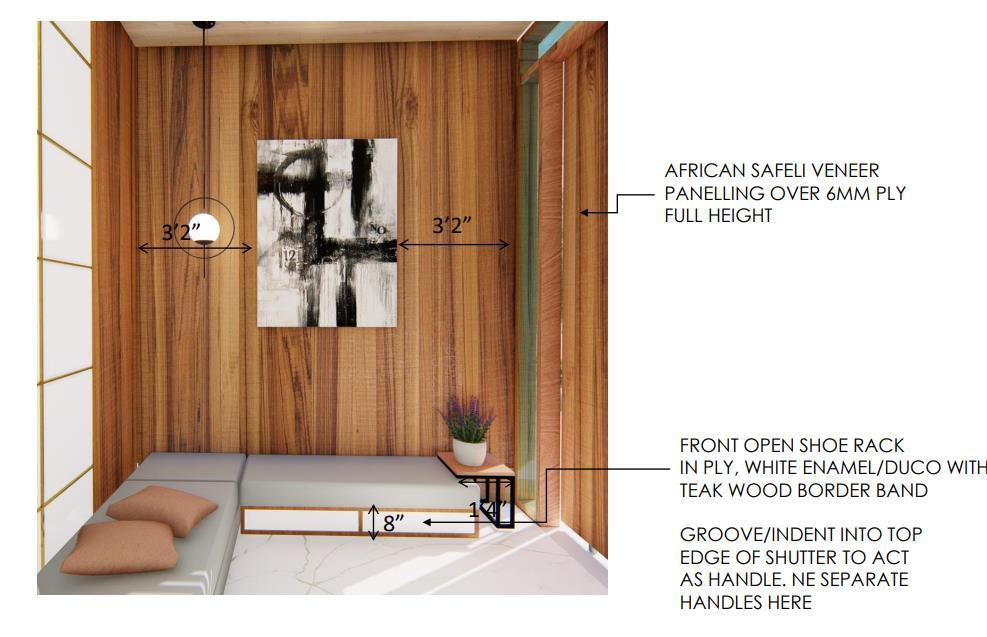
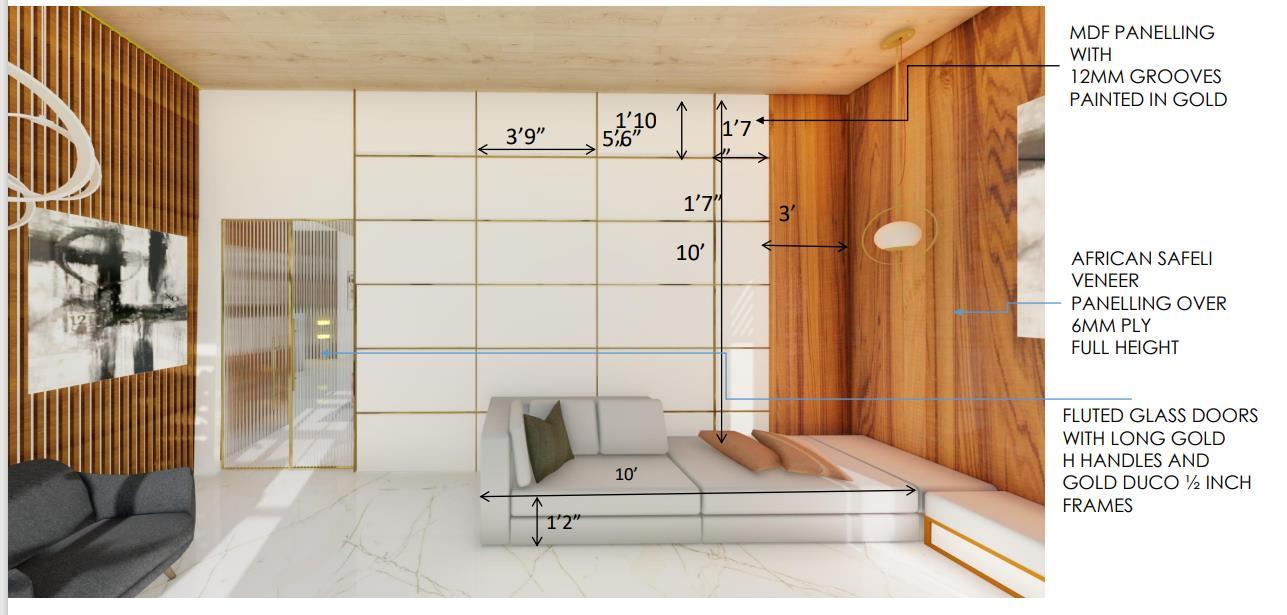

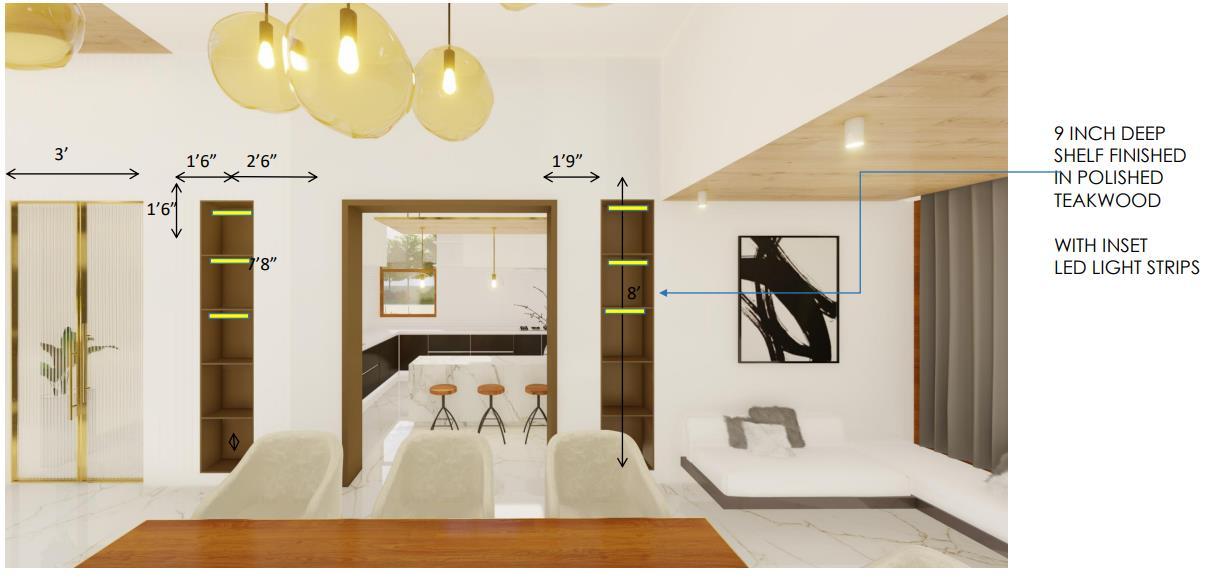
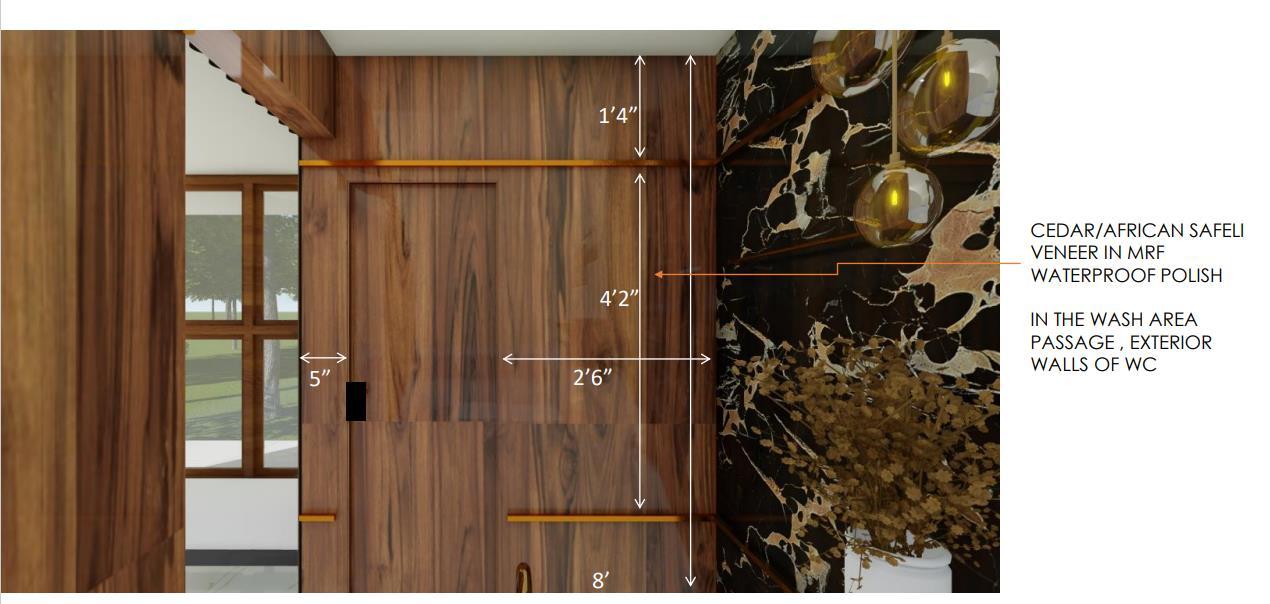
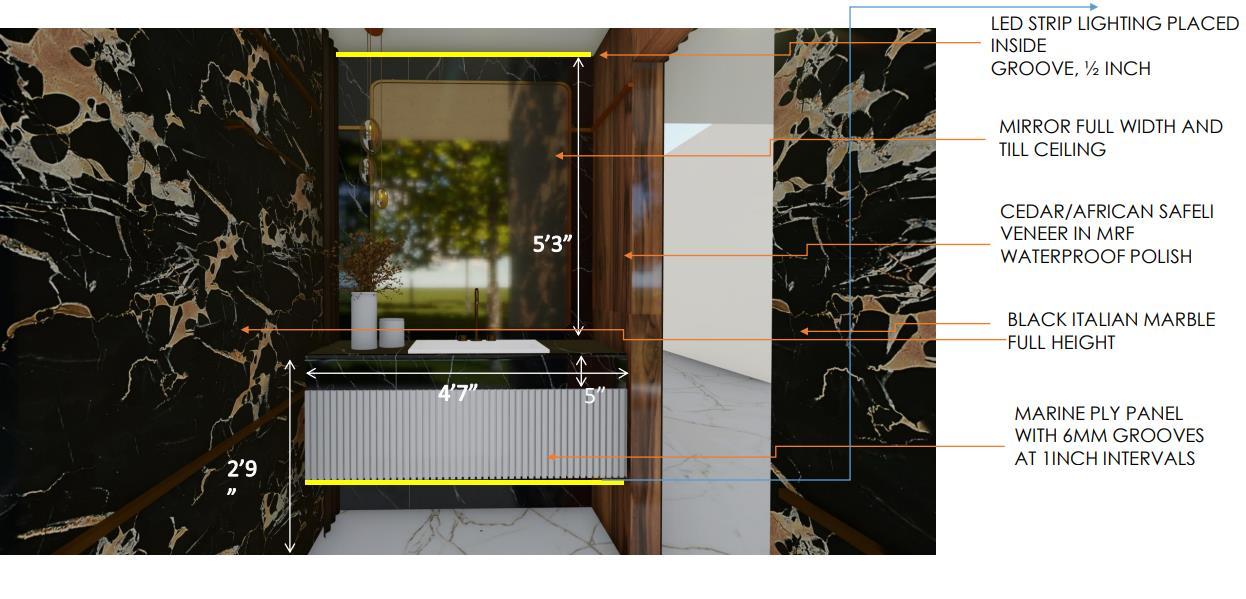
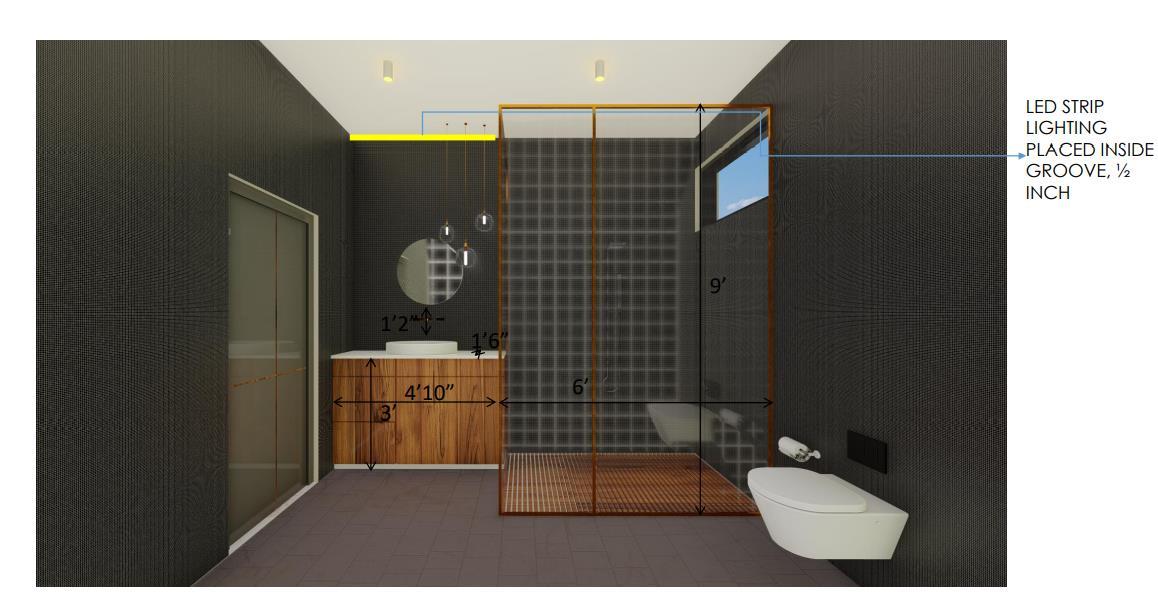
Detailed Drawings – Powder room


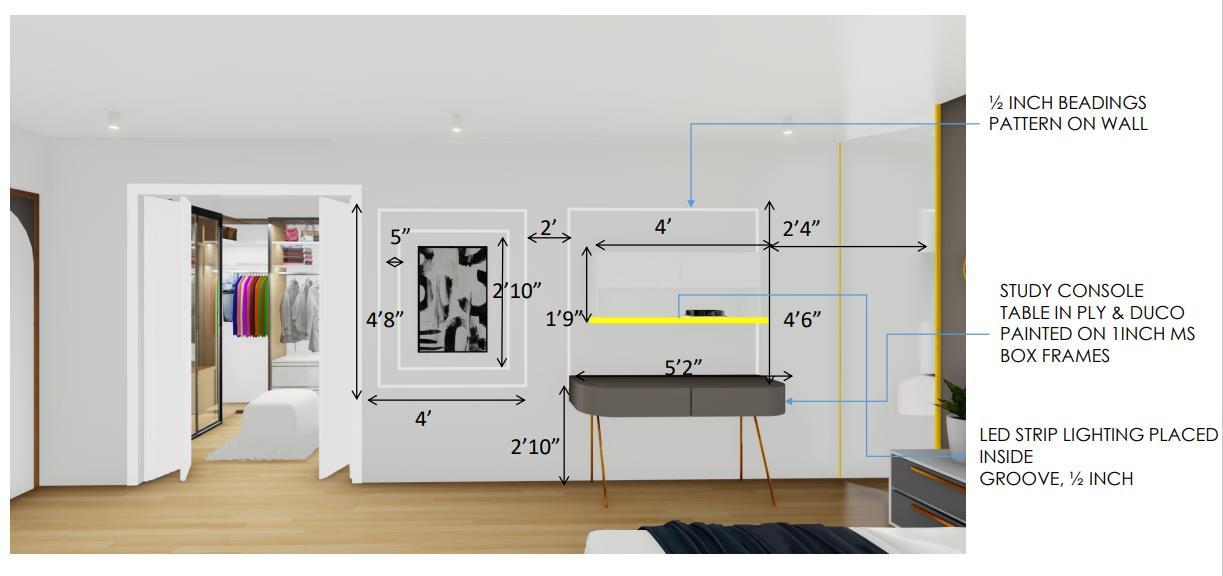
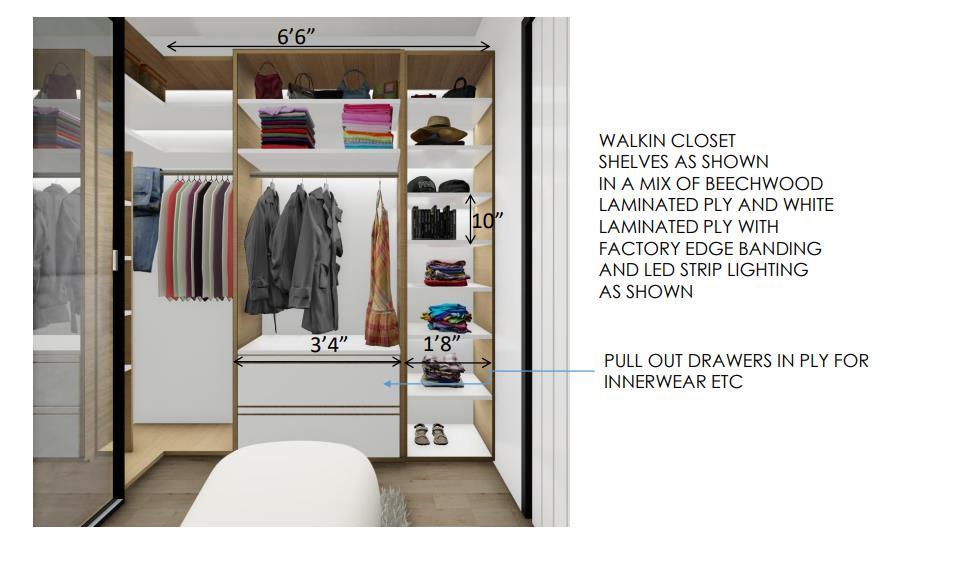
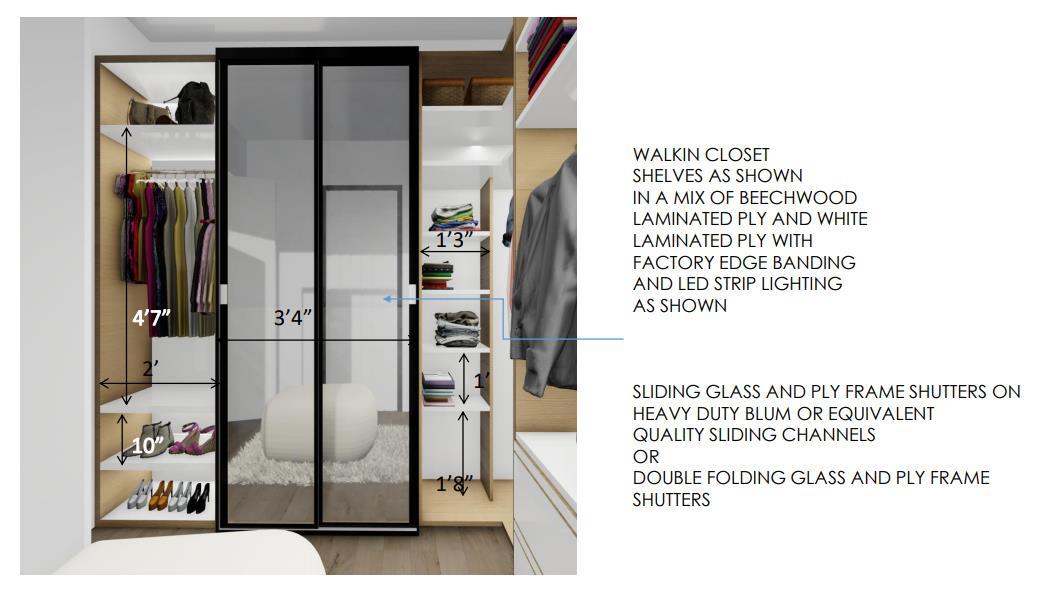
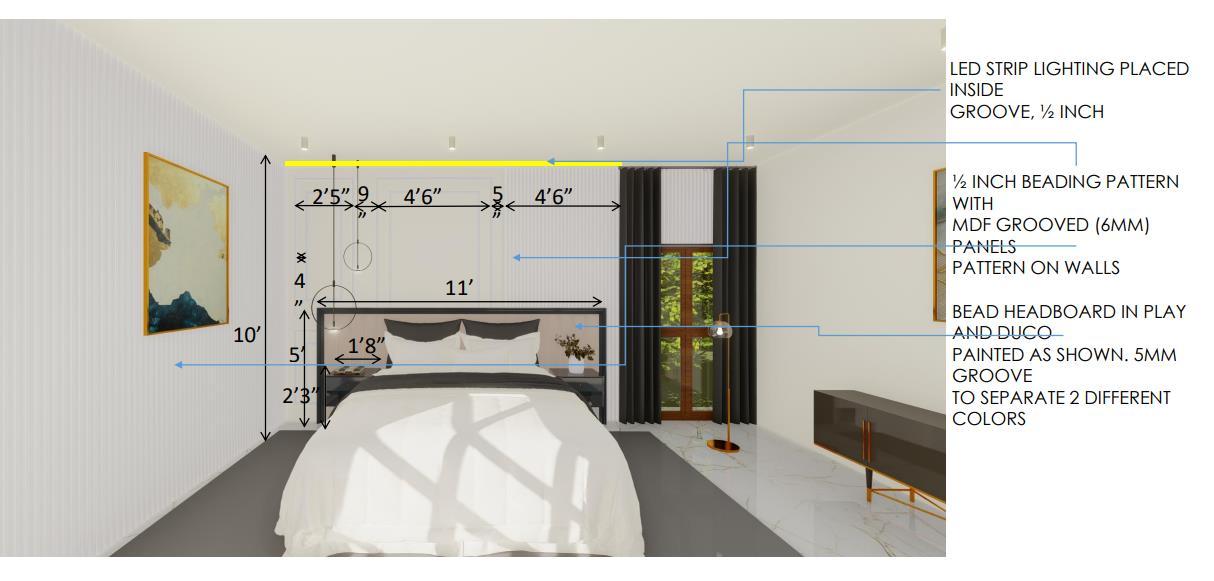
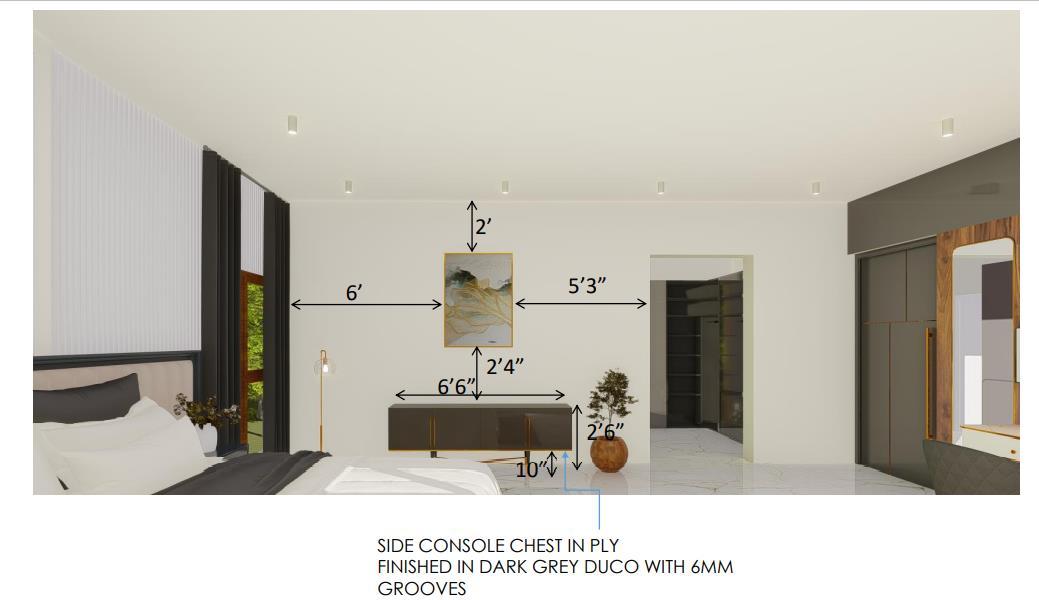
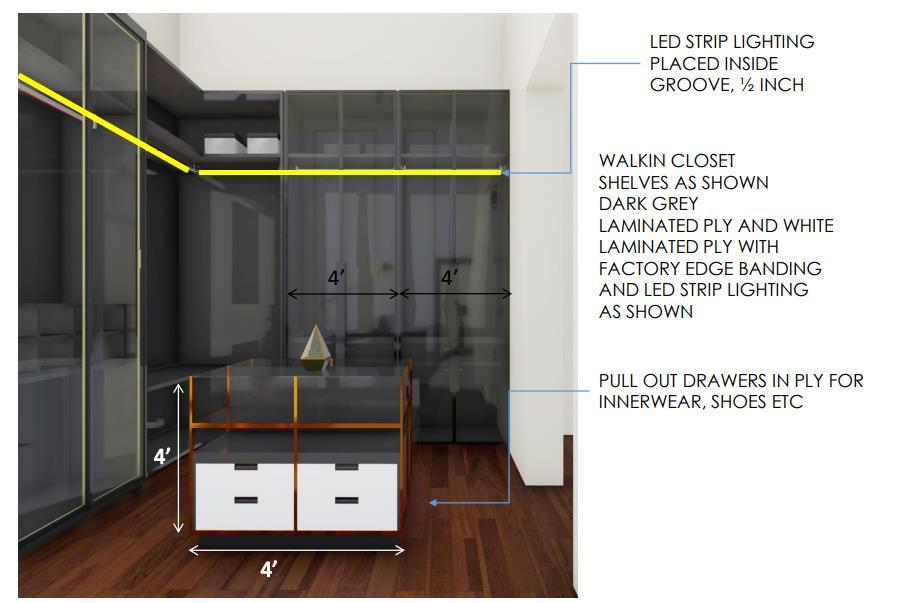
Detailed Drawings – Master bedoom dresser
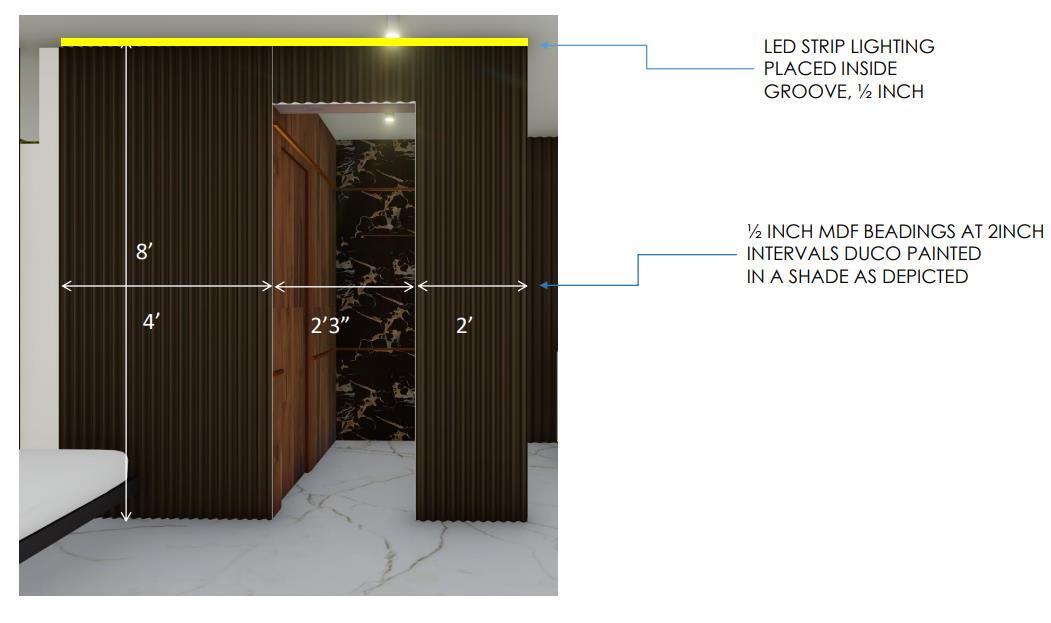
Detailed Drawings – Son’s bedoom
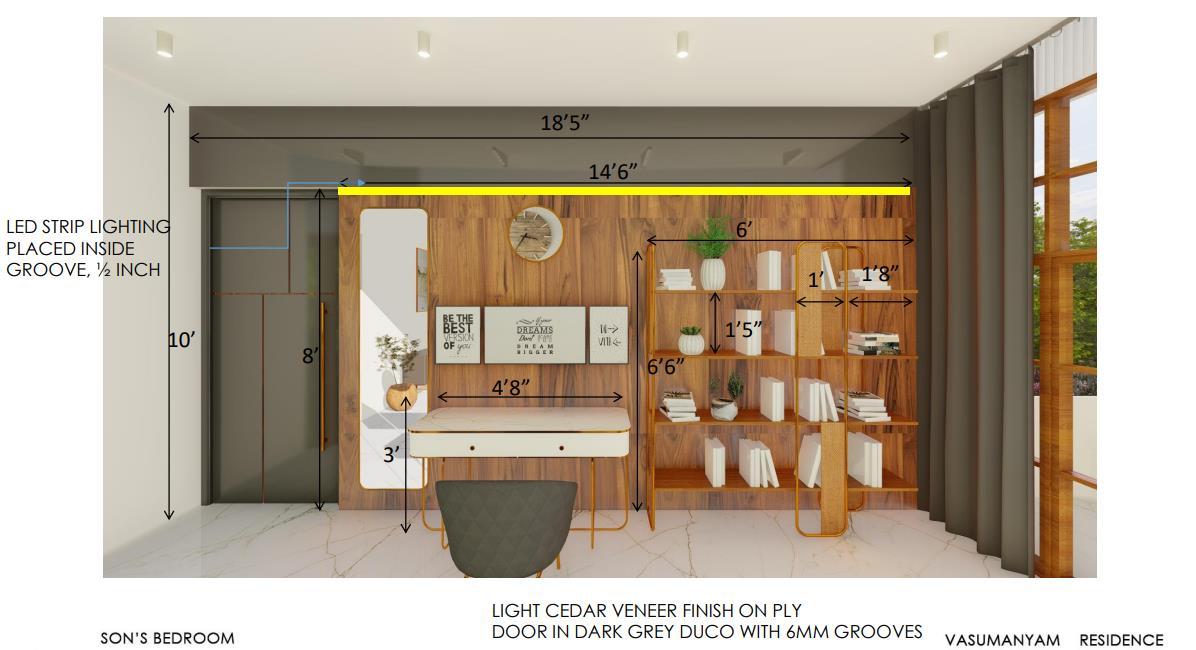
Detailed Drawings – Son’s bedoom
Detailed Drawings – Son’s bedoom toilet & dresser
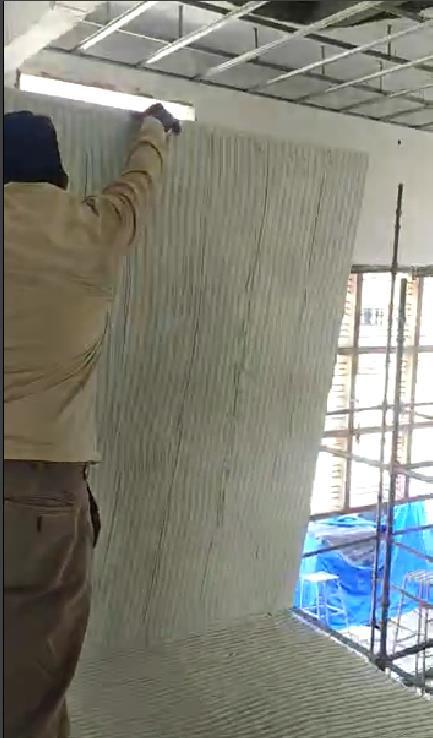
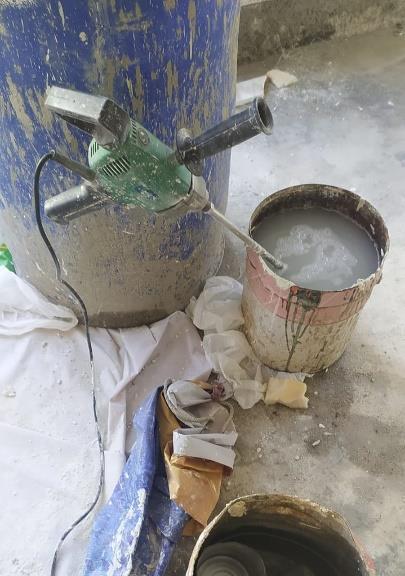
Preparation of surface by roughening the entire wall to be plastered.
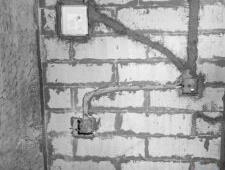
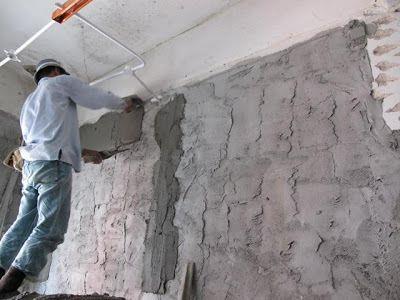
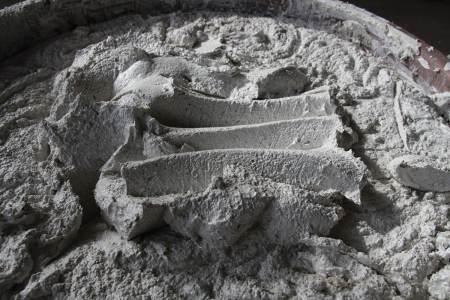
Mixing of the mortar with cement sand and water
Applying the base 1st coat The ratio of cement and sand for first coat plaster varies from 1:3
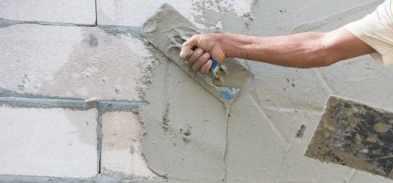
Applying the mortar to the wall
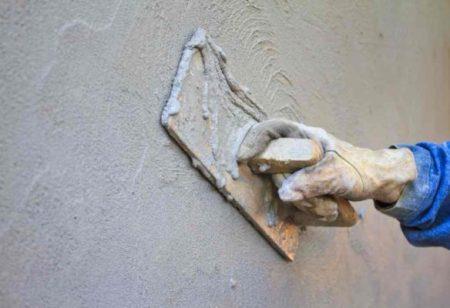
The ratio of cement and sand for second coat plaster varies from 1:4
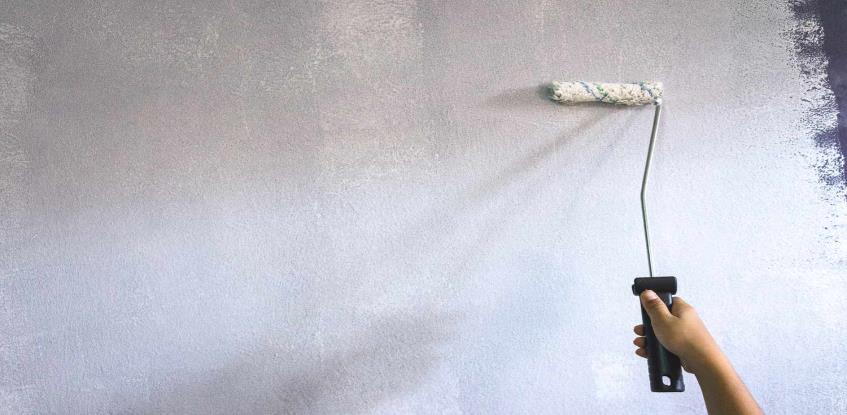
Applying cement and water mix for final finish until it comes to smooth finish
Applying the primer or undercoat base coat for the wall
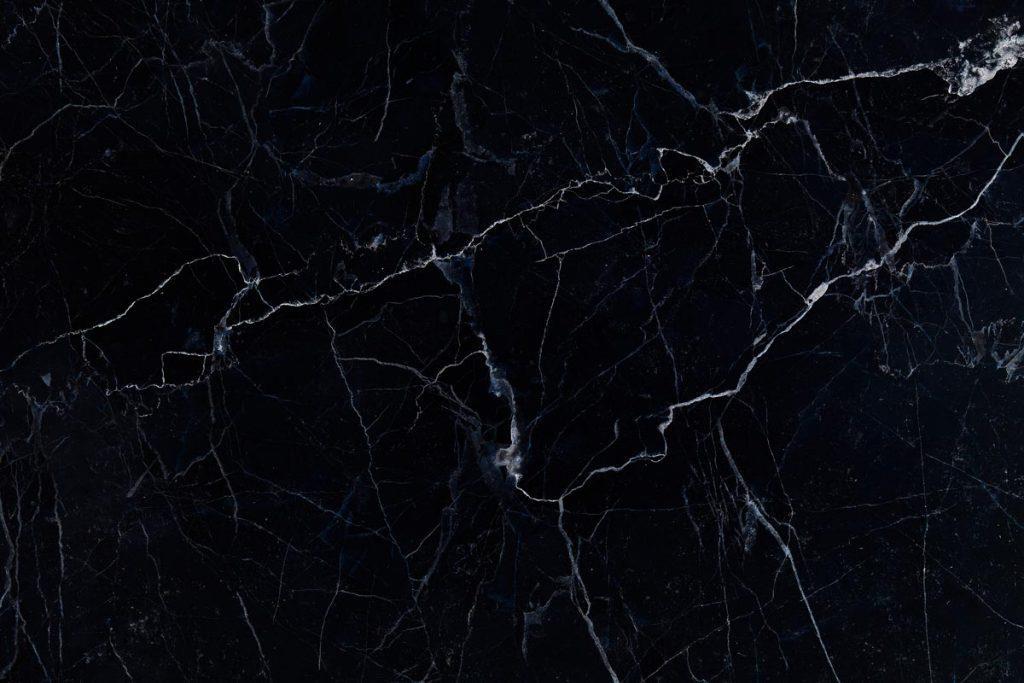
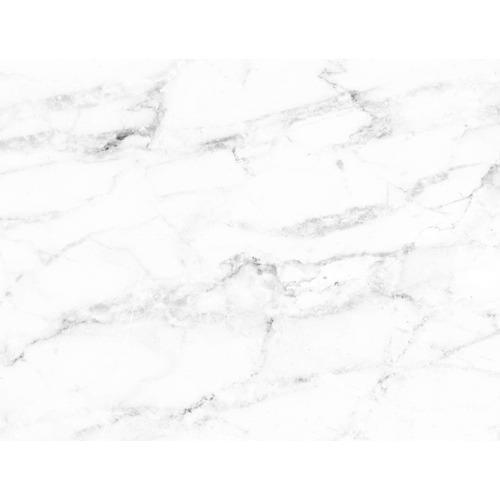
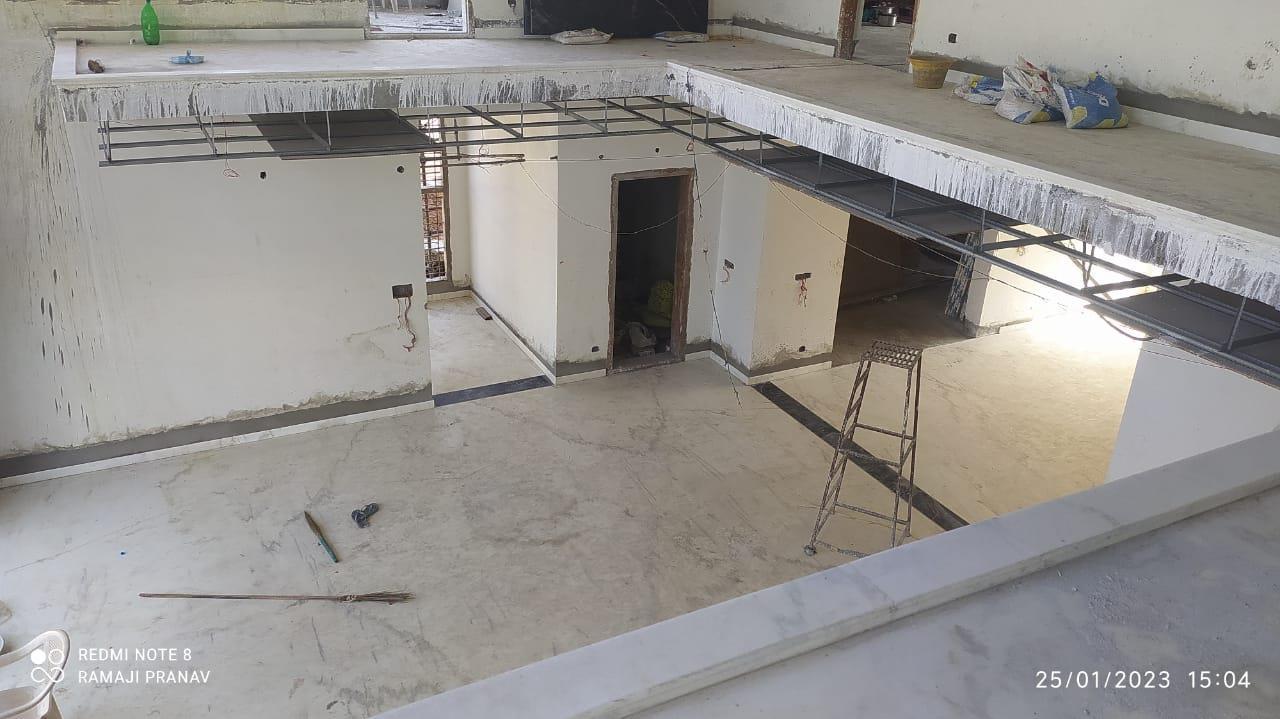
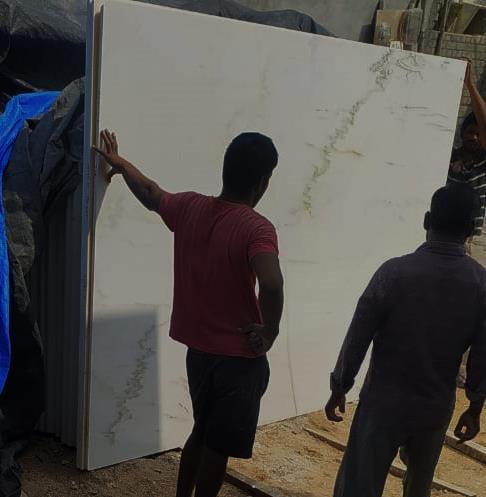
THIS FLOORING MATERIAL USED IS MARBLE FLOORING AND WOODEN

This slabs consists of 9’ x 5’ size
This slabs consists of 9’ x 5’ size
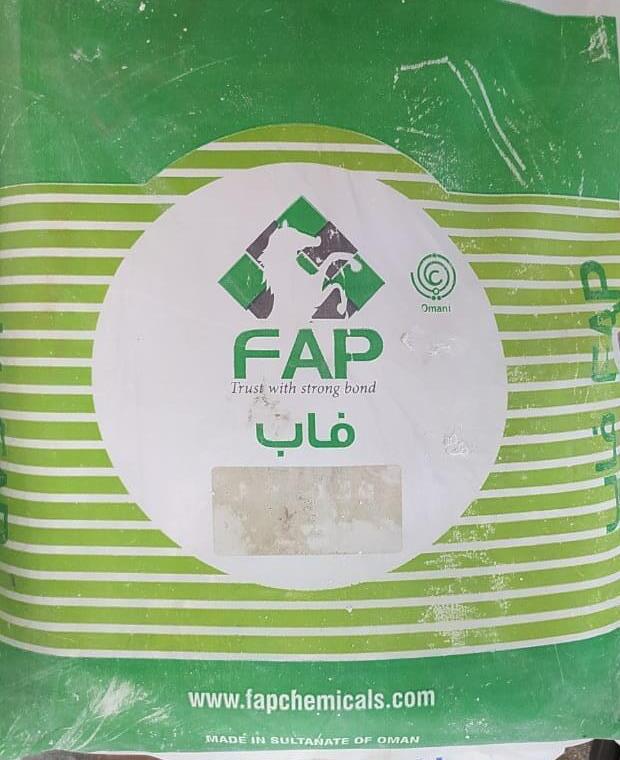
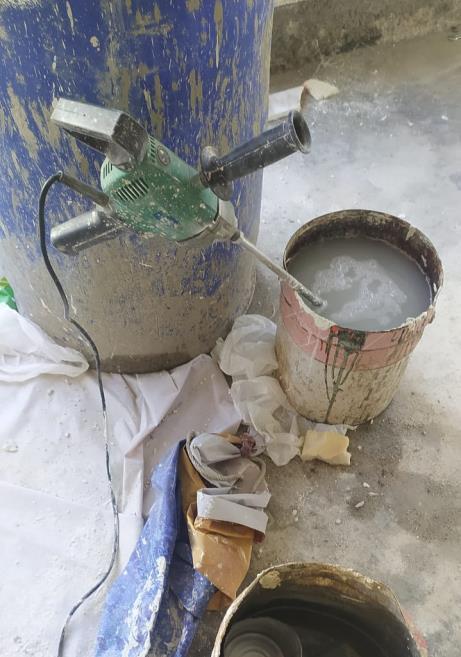
THIS A ACRYLIC BASED POLYMER ADHESIVES THIS GIVES THE FAST CURING AND MAKES MORE STRENGTH RATIO OF MIXING IT IS 20:6 ie 20 kgs of adhesive requires 6 litres of water
This slabs consists of 9’ x 5’ size
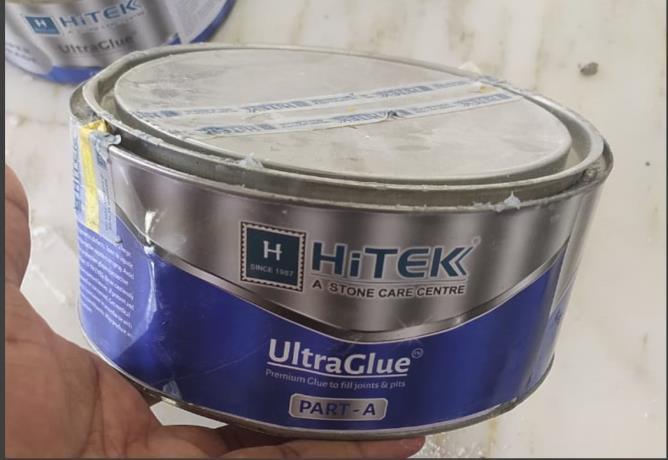
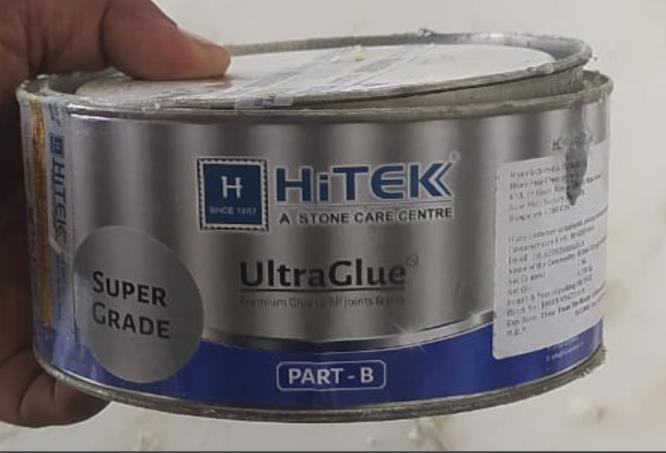
HiTek UltraGlue is a premium two component adhesive used to bond and fill cracks, holes & pits in marble, granite and artificial stone. It is best suitable for filling the joint and cracks of white marble. Its quick and strong adhesion permits to rectify big and small imperfections on valuable stones
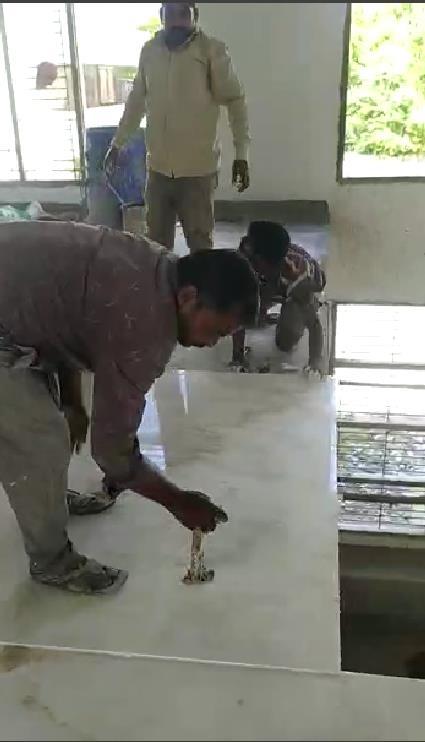
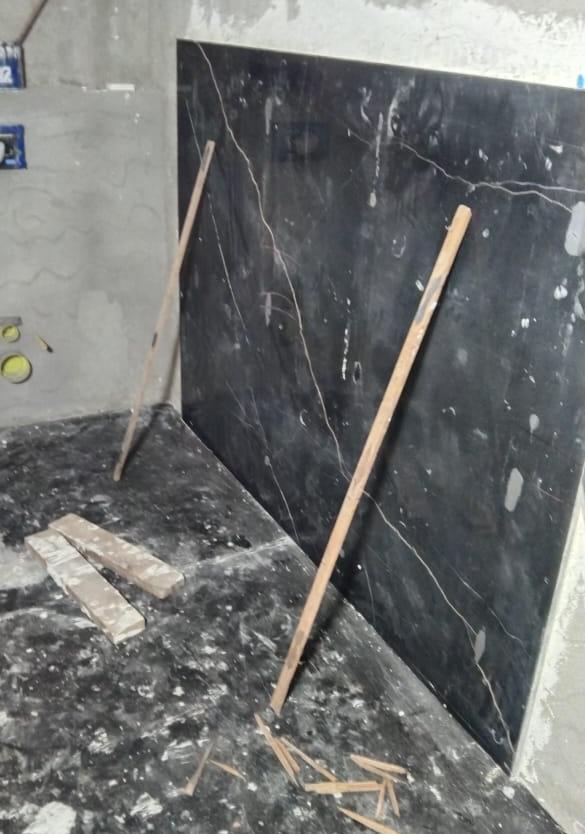
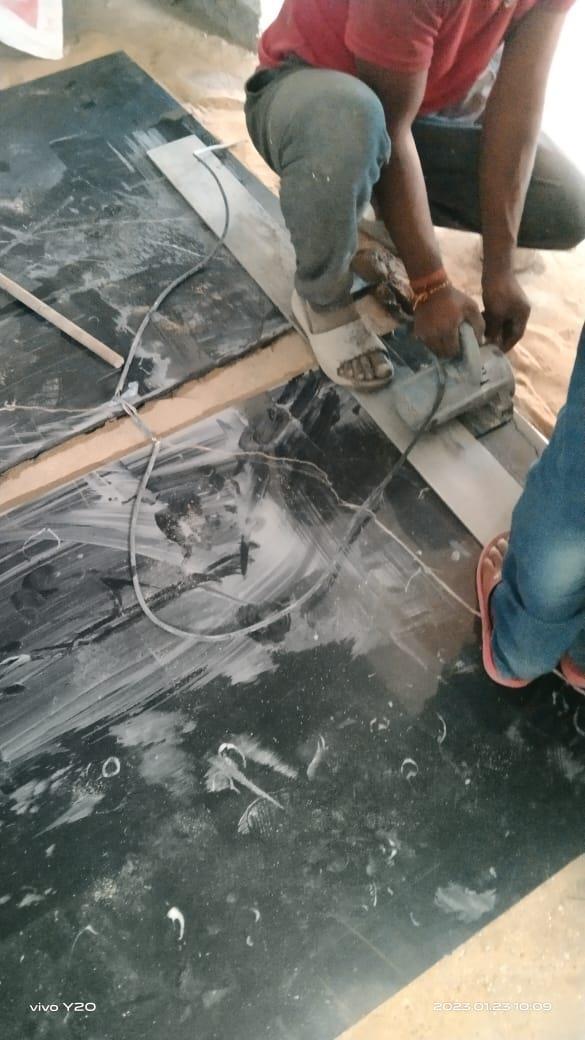
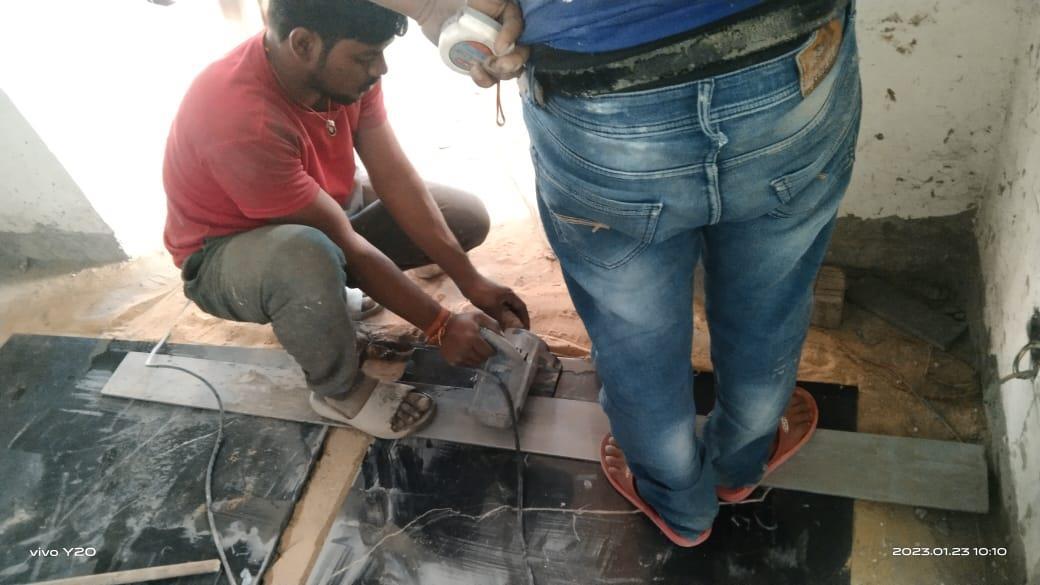
1. Checking the slab quality before application
2. Marble slab doesn’t have the perfect edges so it should be cut properly with saw cutter

3. Mixing of fap adhesive acrylic based polymer adhesive with 20:6 ratio ie 20kgs of adhesive with 6 litres of water
4. Apply the paste to the floor and then to the marble slab
5. Use the resin adhesive for joints
6. Stick it to the floor and arrange with some pressure
1. Checking of the quality of slab (if not layed)

2. Preparing the slab by cleaning the dust and by removing the epoxy
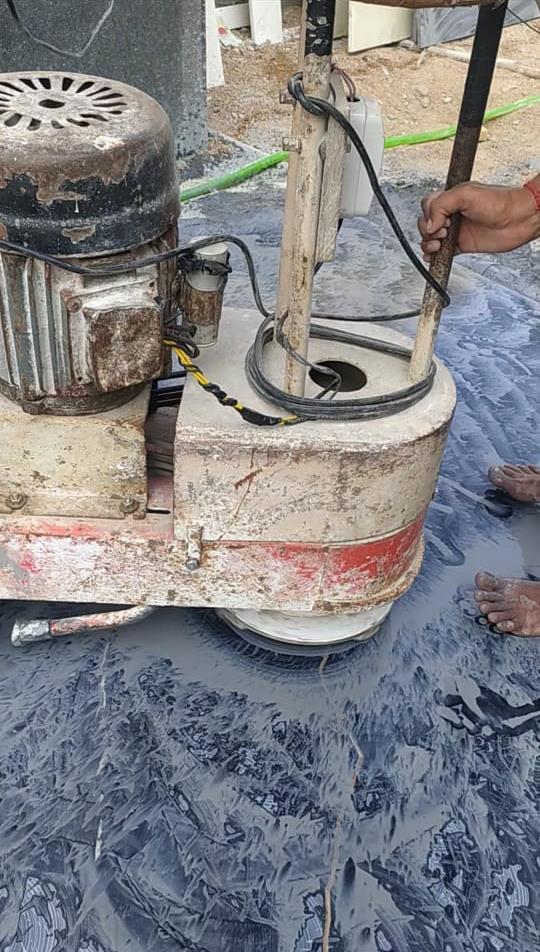
3. Bringing the polish machine to the slab
4. Note: any dust or sand should not come into the contact to the slab so avoid using the slippers nearby otherwise the slab will get wasted
5. Start polishing with the polish machine SURIE POLEX 3000
6. Totally 8 coats of repitive polishing should be done
7. 1st and 2nd coat should be ½ hour and the rest will be 15 mins each
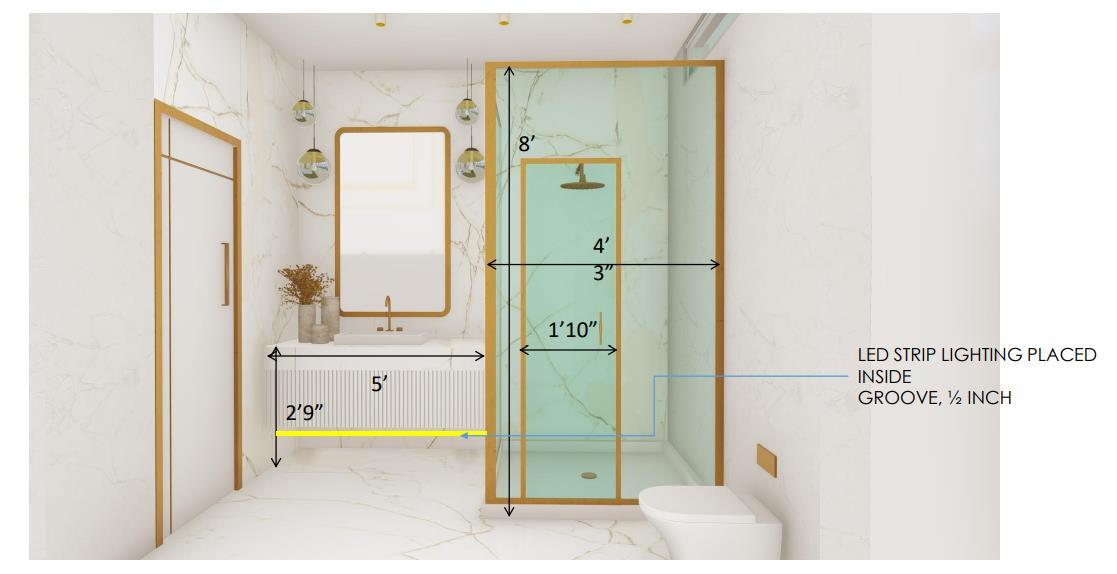
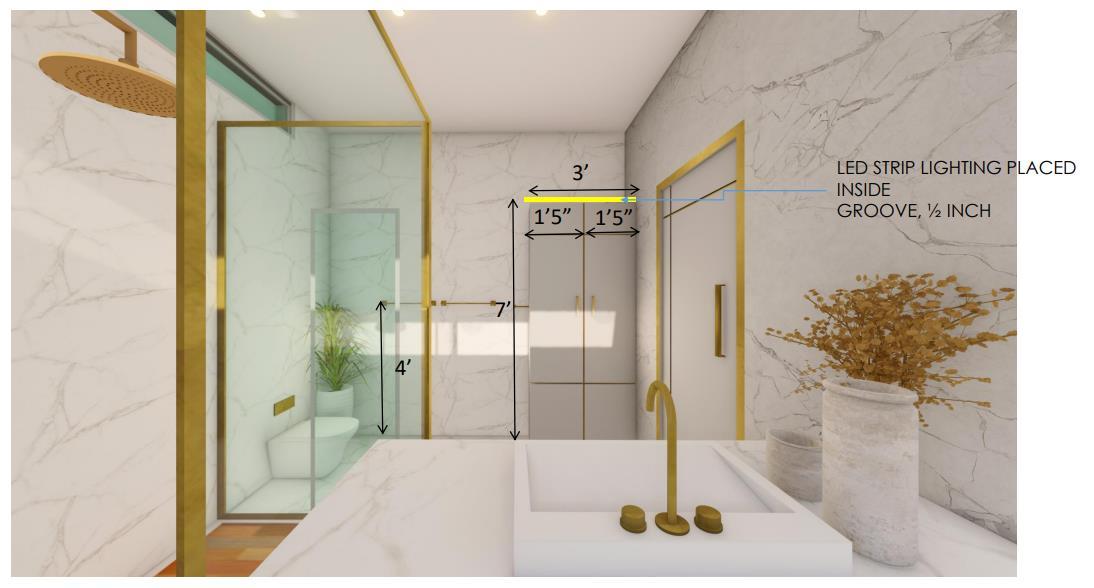
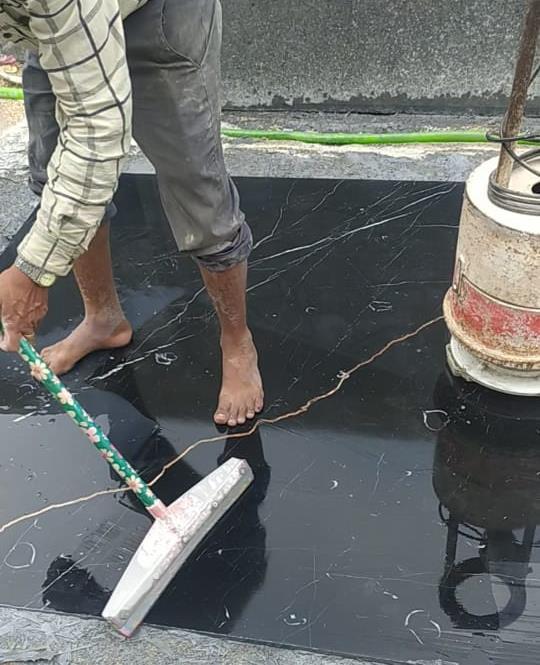
Metal strip of size 2 inch thickness and feet height strip
The top first floor view of the flooring which was done
Final finish of the flooring
Metal highlighter strips of 2 inch thichness strips are been used as flooring metal highlighters in this residence glued with the fap ashesive and the polish is applied to get the shiny finish
 Flooring of living room and drawing room

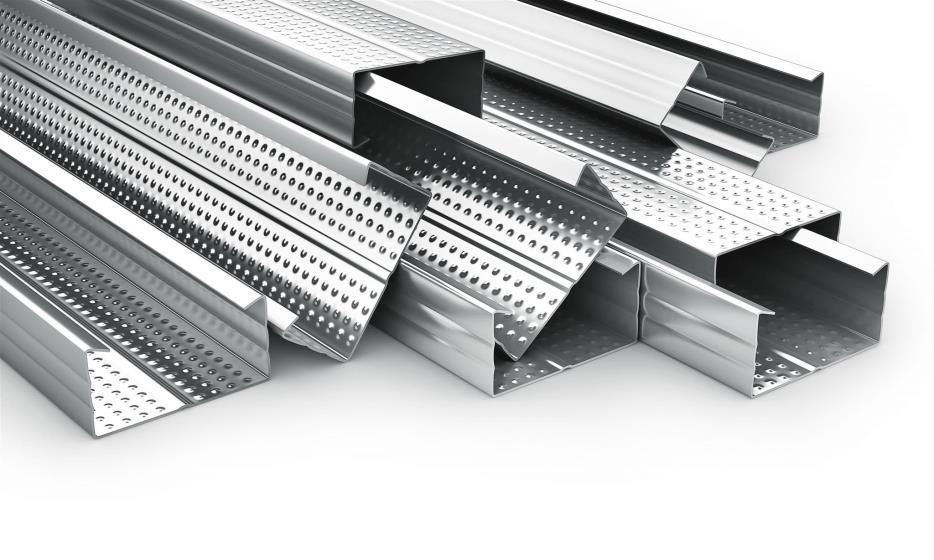
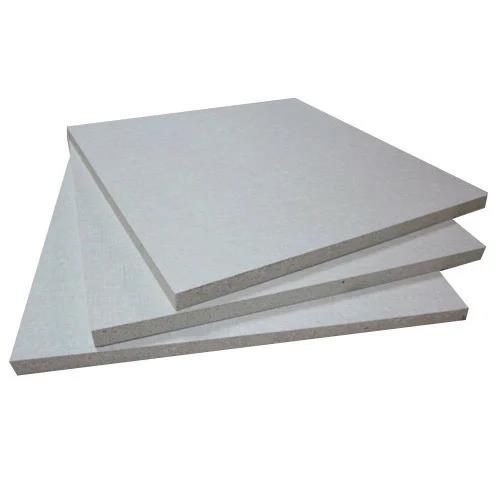
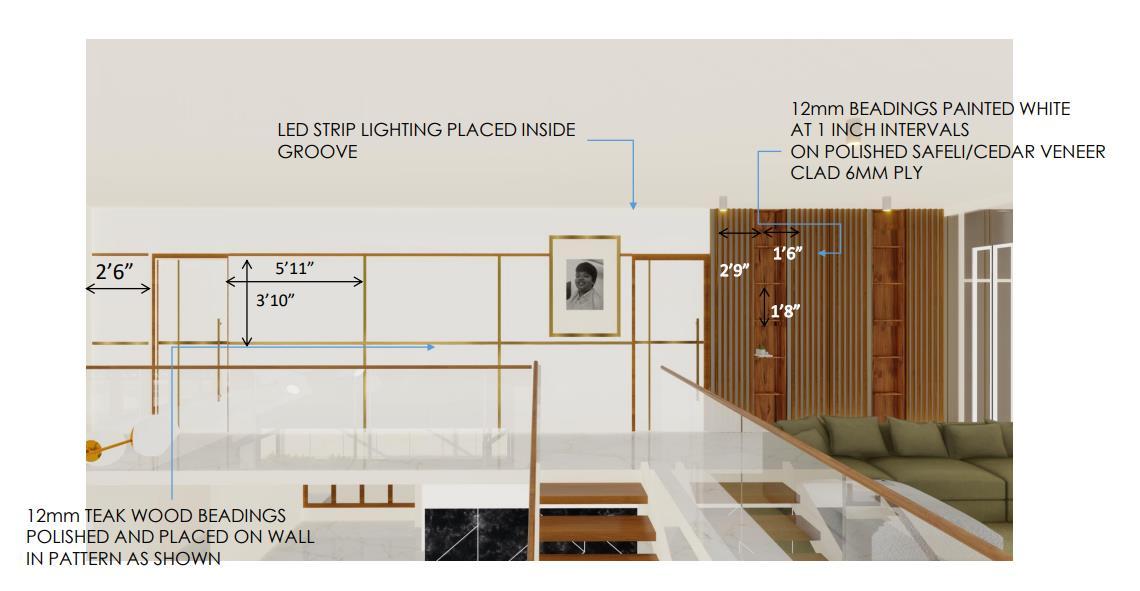
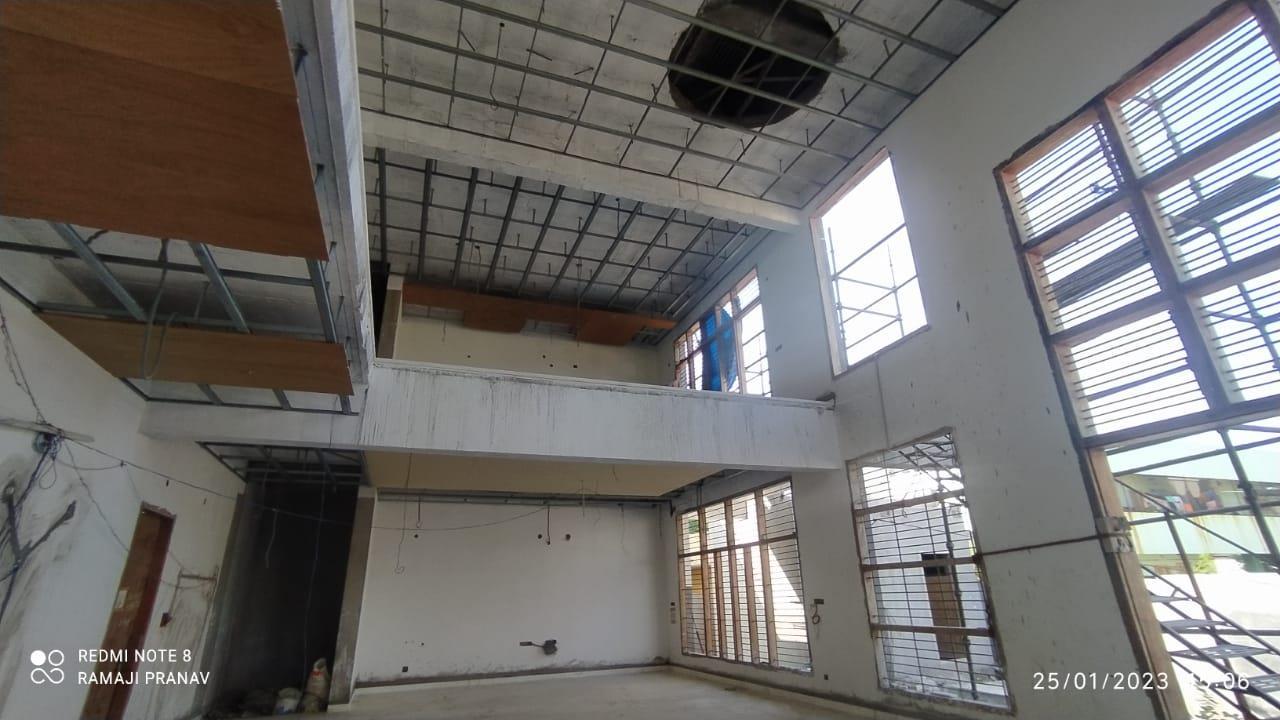
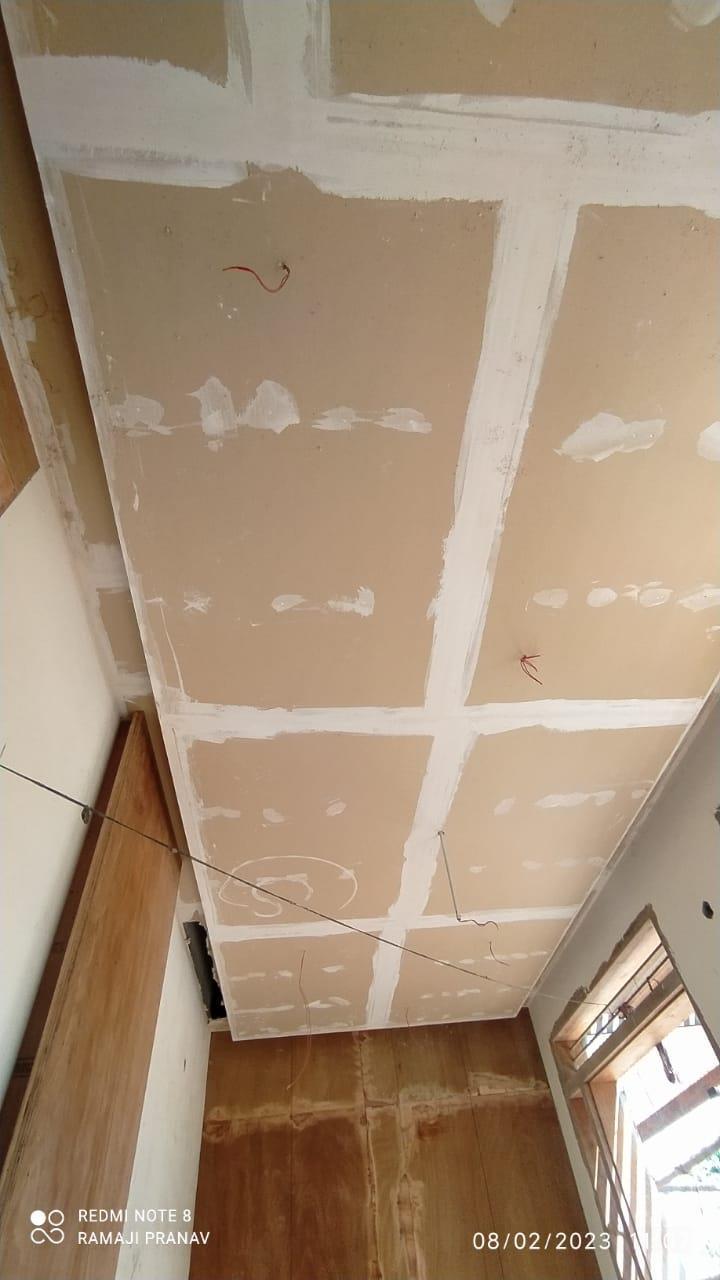
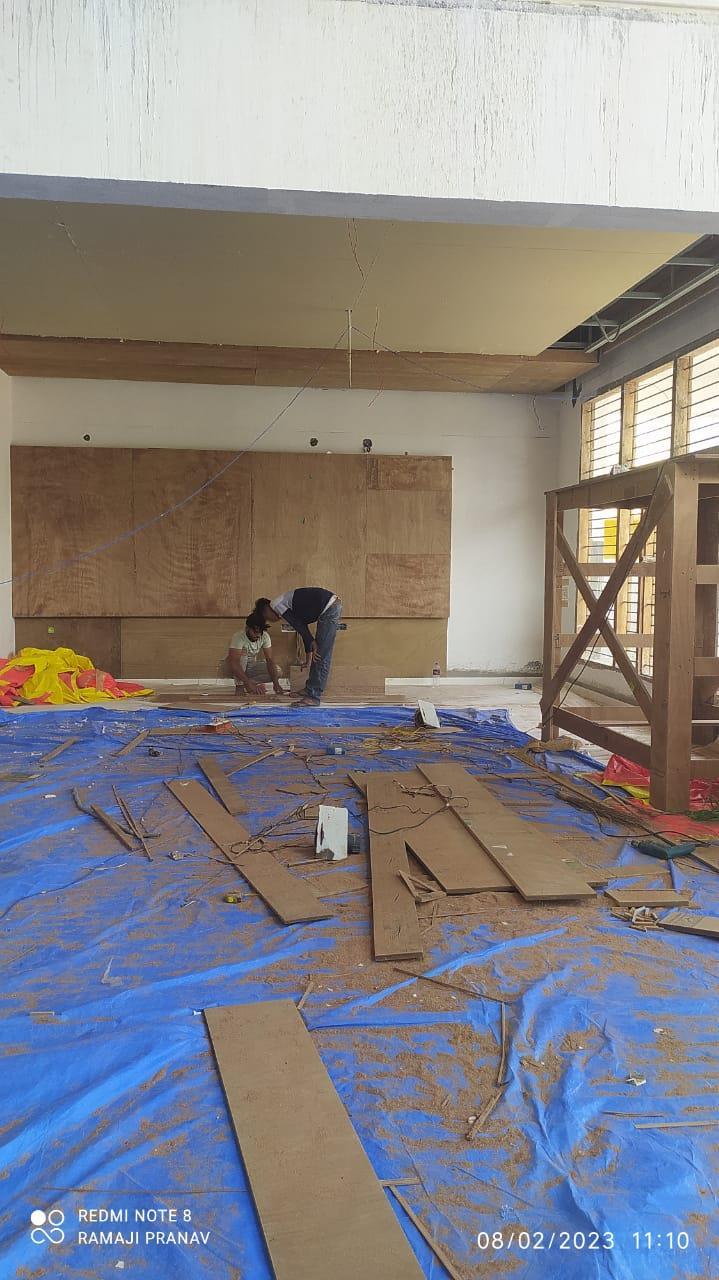
THIS FALSE CEILING DESIGN IS A CLUB OF GYPSUM BOARDS AND WOODEN BOARDS
This slabs consists of 8’ x 4’ size
This chanel sizes consists of 4’ and 2’s
THIS A ACRYLIC BASED POLYMER ADHESIVES THIS GIVES THE FAST CURING AND MAKES MORE STRENGTH RATIO OF MIXING IT IS 20:6 ie 20 kgs of adhesive requires 6 litres of water
This slabs consists of 9’ x 5’ size
HiTek UltraGlue is a premium two component adhesive used to bond and fill cracks, holes & pits in marble, granite and artificial stone. It is best suitable for filling the joint and cracks of white marble. Its quick and strong adhesion permits to rectify big and small imperfections on valuable stones
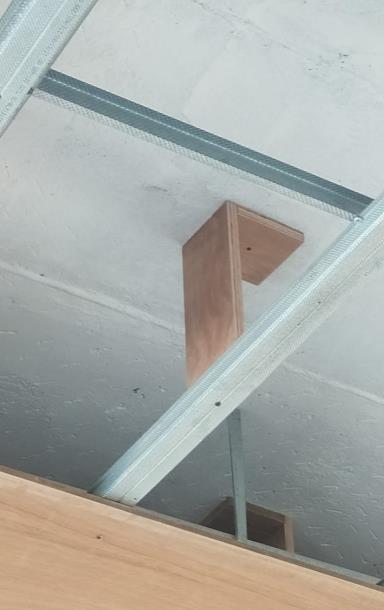
1. Metal Frame Installation: Install the metal frames to the existing ceiling using screws and nails
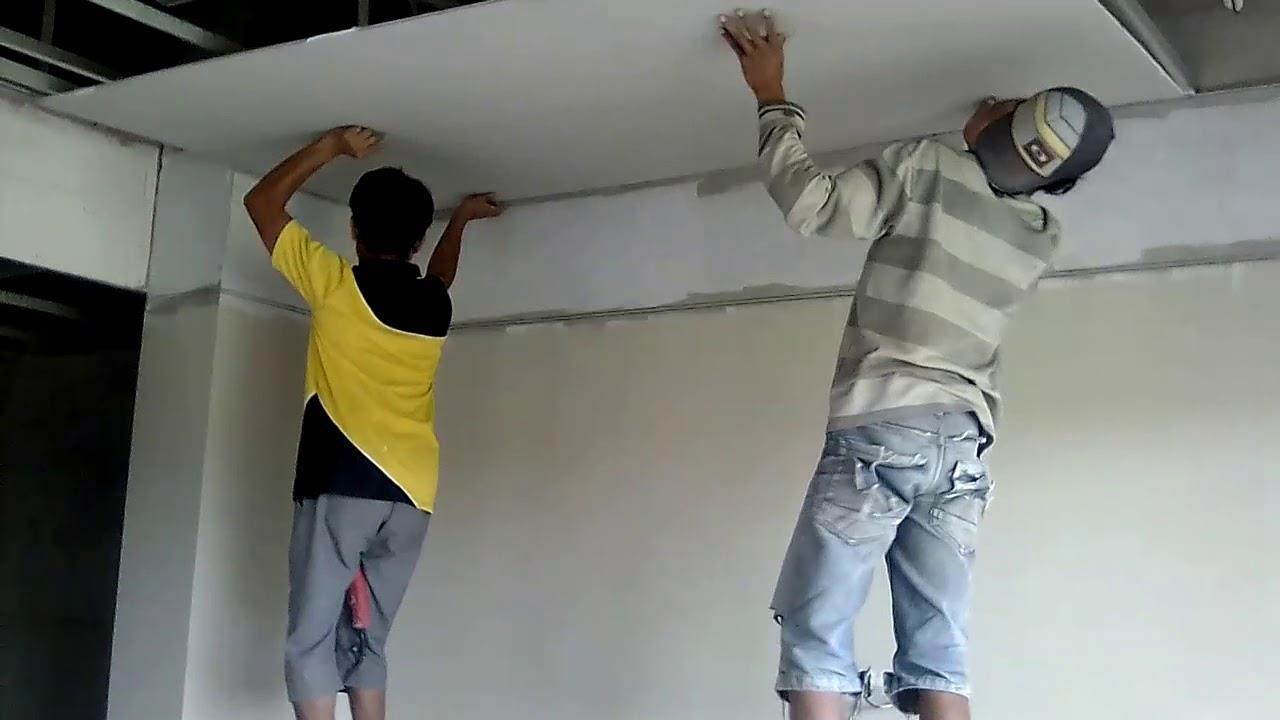
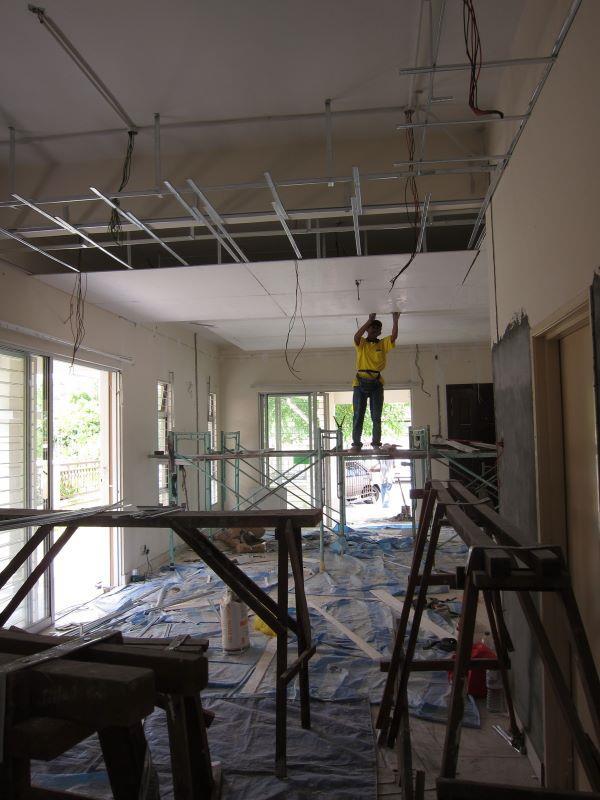
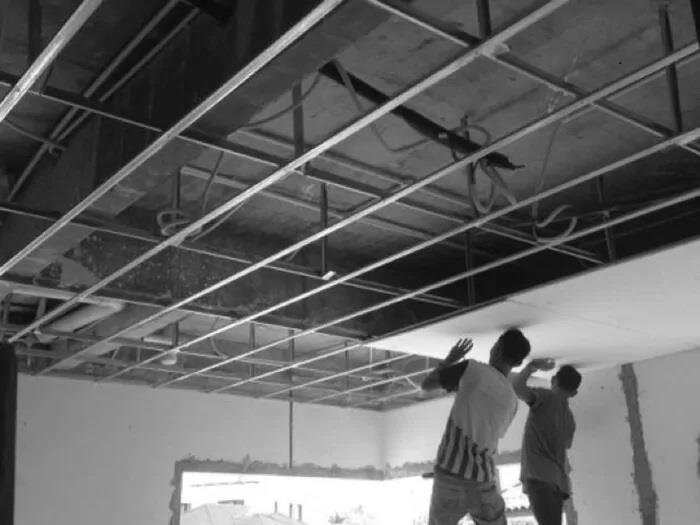
2. Fixing the Boards: Cut the gypsum boards to fit the frame, leaving a small gap between each board for expansion. Secure the boards to the metal frame using screws.
3. Joint Treatment: Apply joint compound to the gaps between the boards and smooth out the surface. Let the compound dry completely.
4. Finishing: Sand the surface to ensure a smooth finish and remove any rough spots. Apply primer and paint to match the existing ceiling color.
1. Cutting of plywood boards of sizes 8 x 4 feet
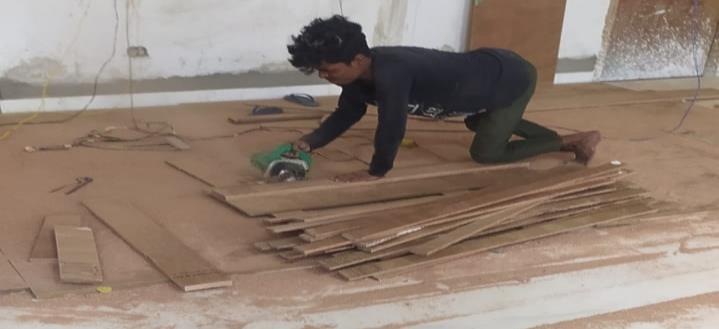
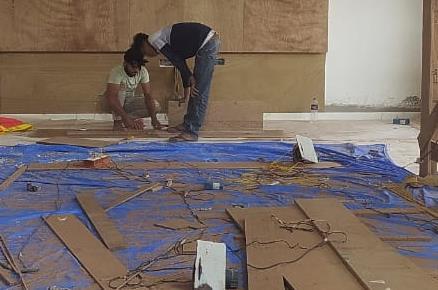
2. Cutting of wooden pieces into 12” x 4” size
3. Screwing the wooden piece to the ceiling through anchor fasteners

4. Attaching the 1 feet sized wooden board to the adjacent of ceiling attached wooden piece as shown in the images
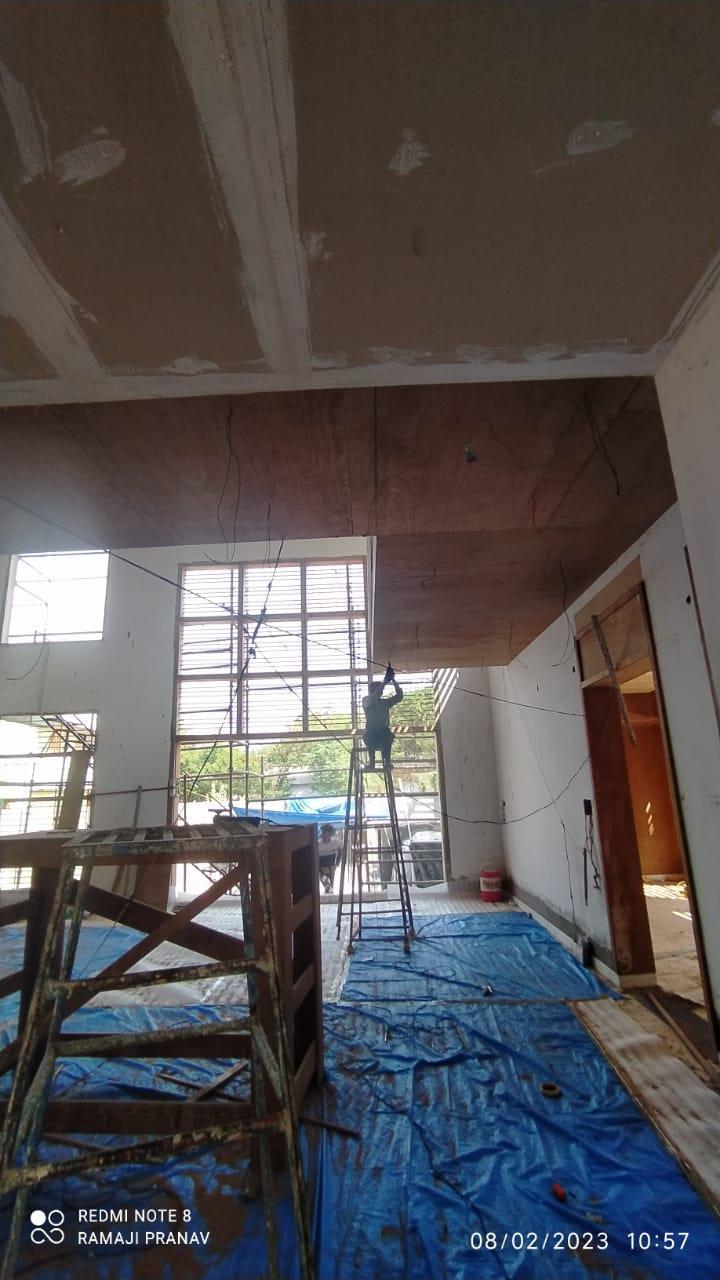

5. The upper layer is screwed to the aluminium channels and wooden boards
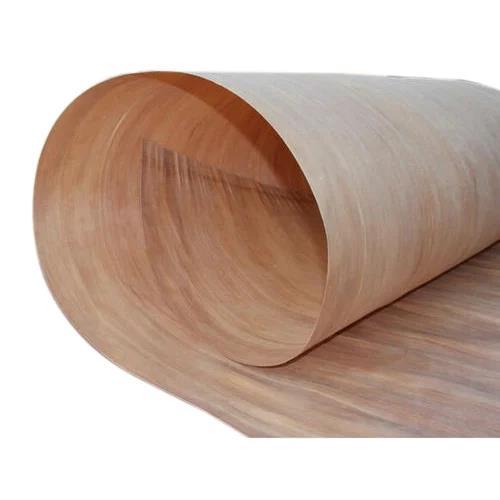
6. The venner layer is installed on the final finish having the size of 4 inch
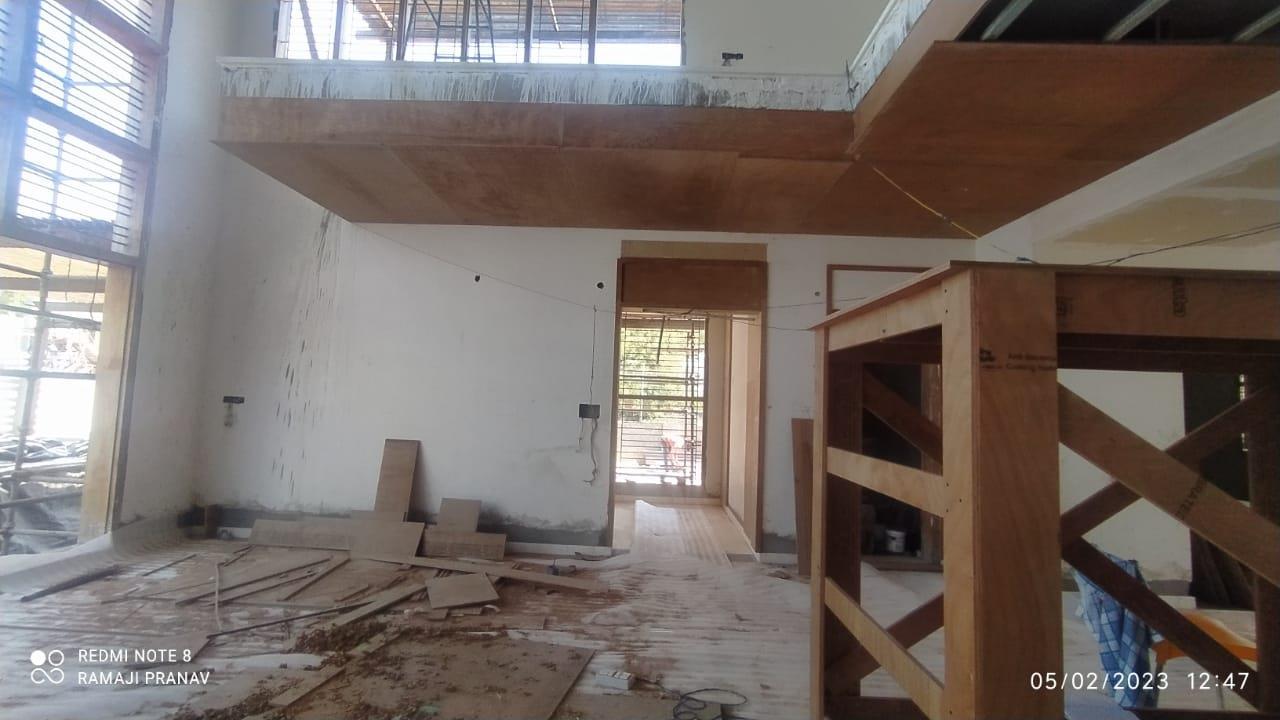
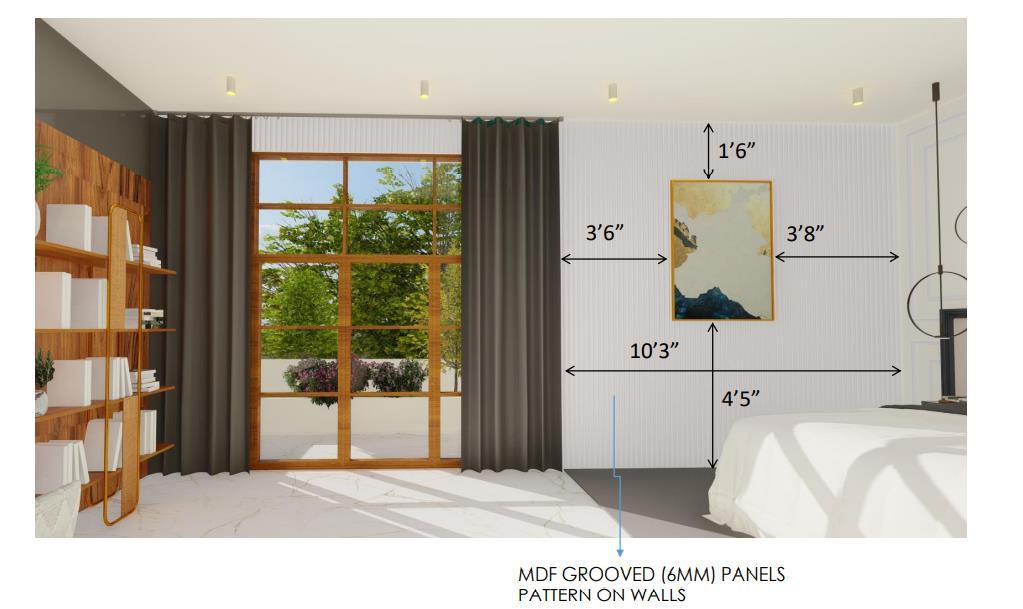
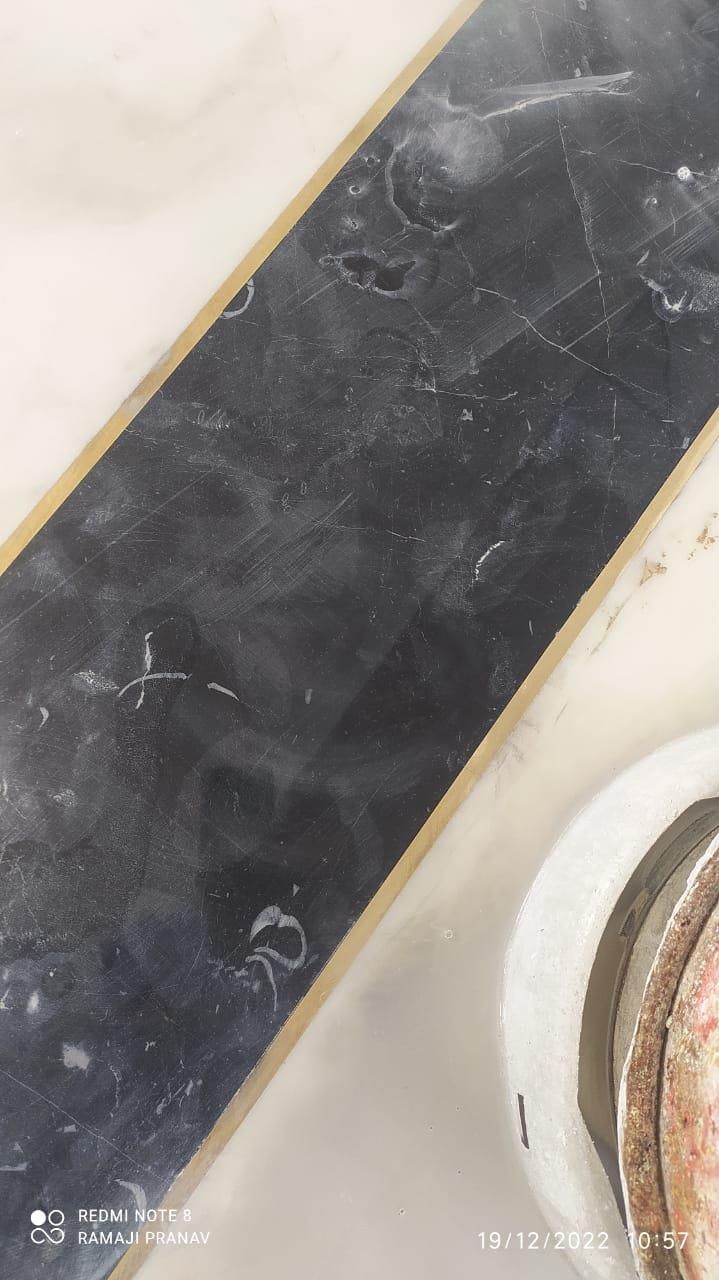
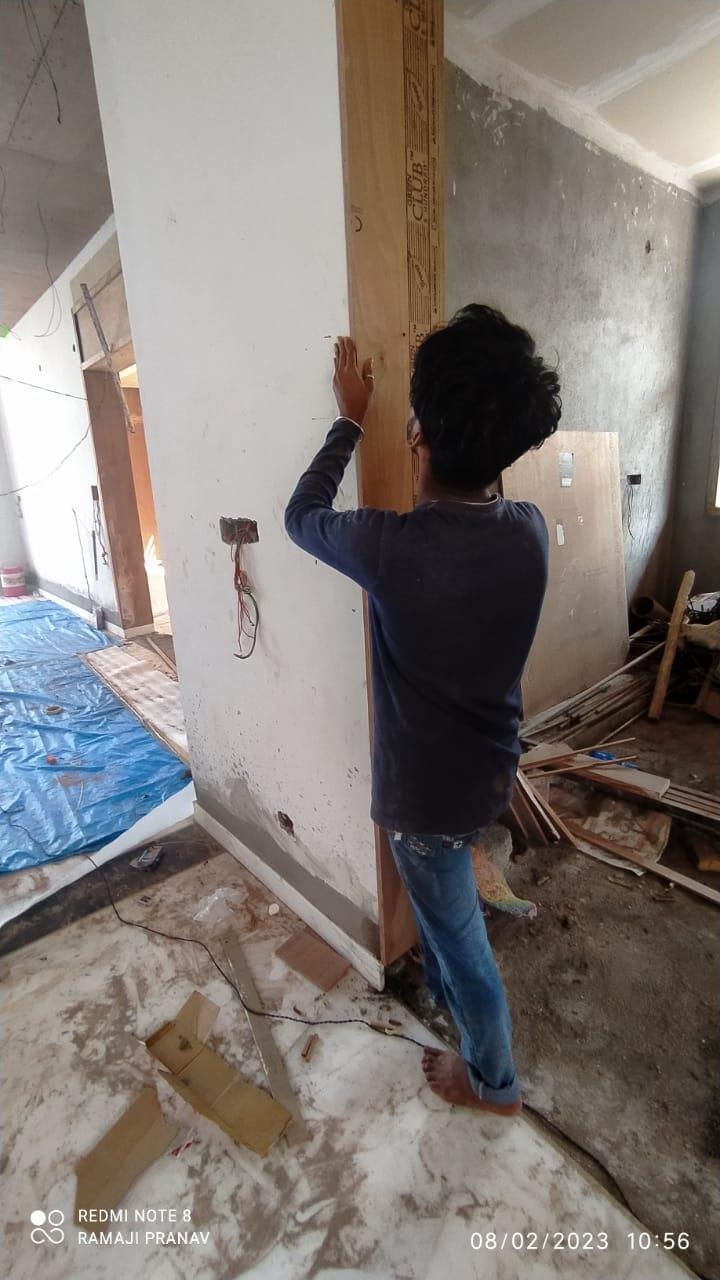
THIS WALL PANELING MATERIAL USED IS MARBLE SLANS AND PLYWOOD WITH VENIER COAT
This slabs consists of 9’ x 5’ size
This slabs consists of 8’ x 4’ size
1. The slab consists of in different sizes but they have used 9 x 5 feet slab
2. They have polished the slab before installation on the walls

3. They have cut the slab into different required sizes
4. They used fap adhesive of 1 : 20 ratio to stick it
5. Levelling of the slab on the walls is done
6. Then it is glued accordingly
7. Wall slabs are installed
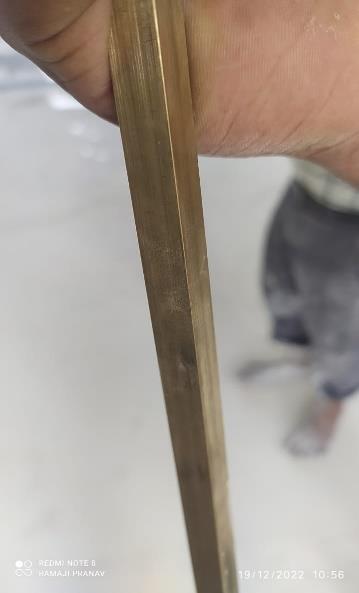
8. Metal highlighters are used of brass metal with thick ness 1.5 inch
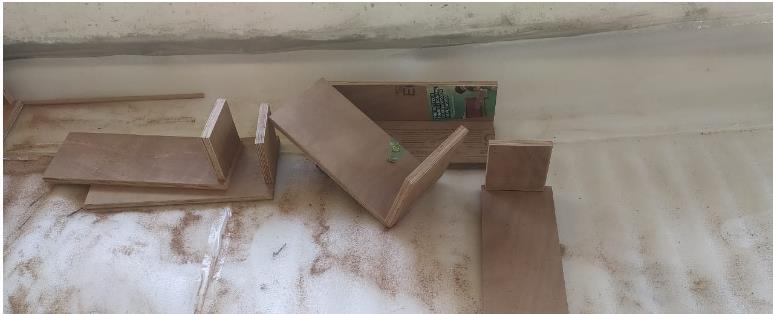
1. In this process wooden panels of 7 x 1.5 feet sized wooden blolcks are used to cover the wall door frames
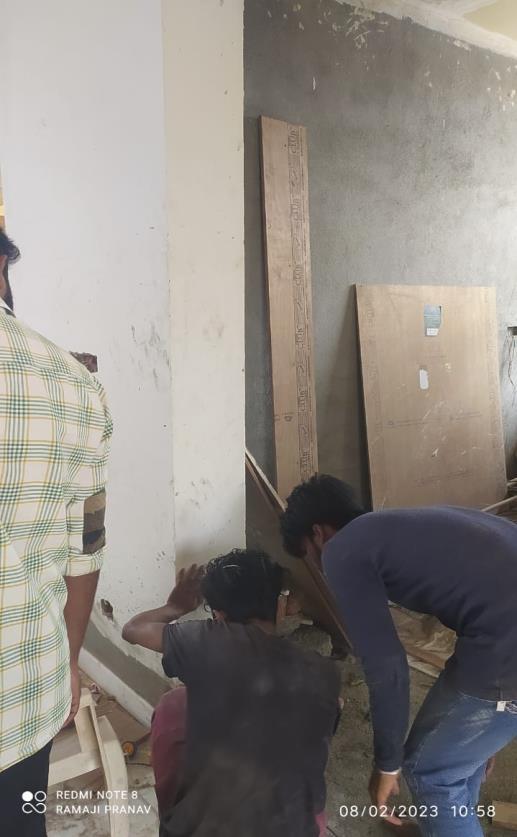
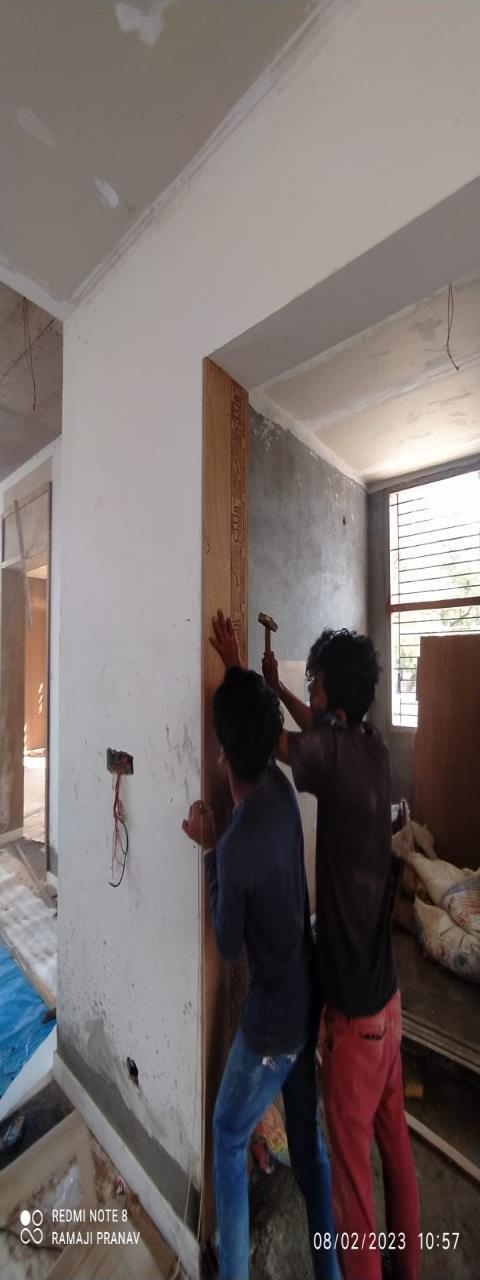
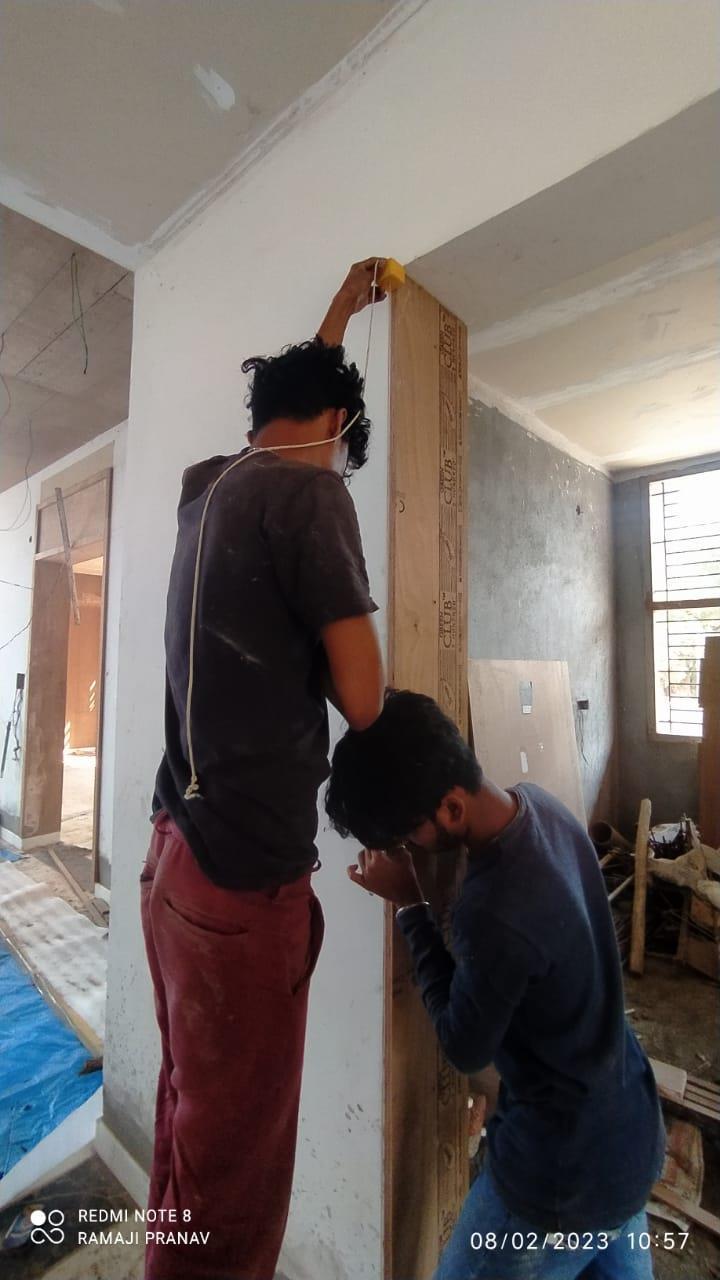
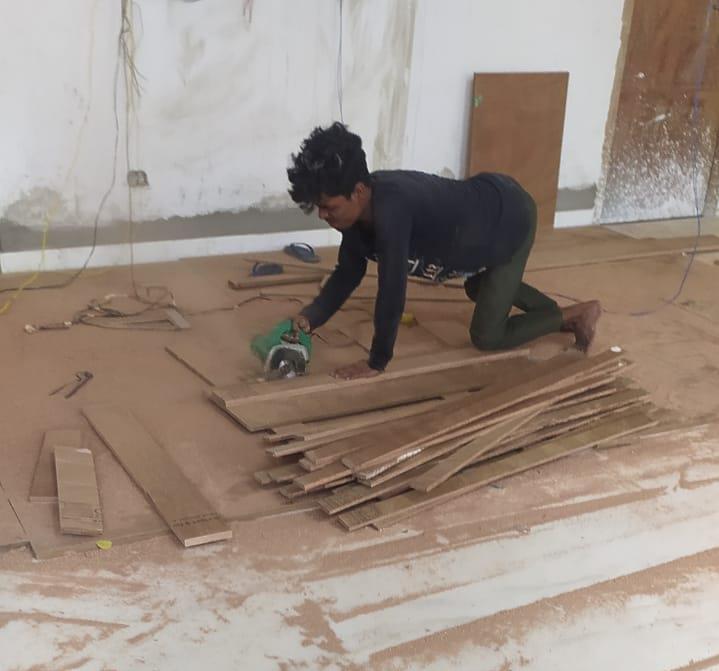
2. They have marked and cut the wooden blocks according
3. They have screwed it on the wooden blolcks to make hole on wooden blocks and on the wall
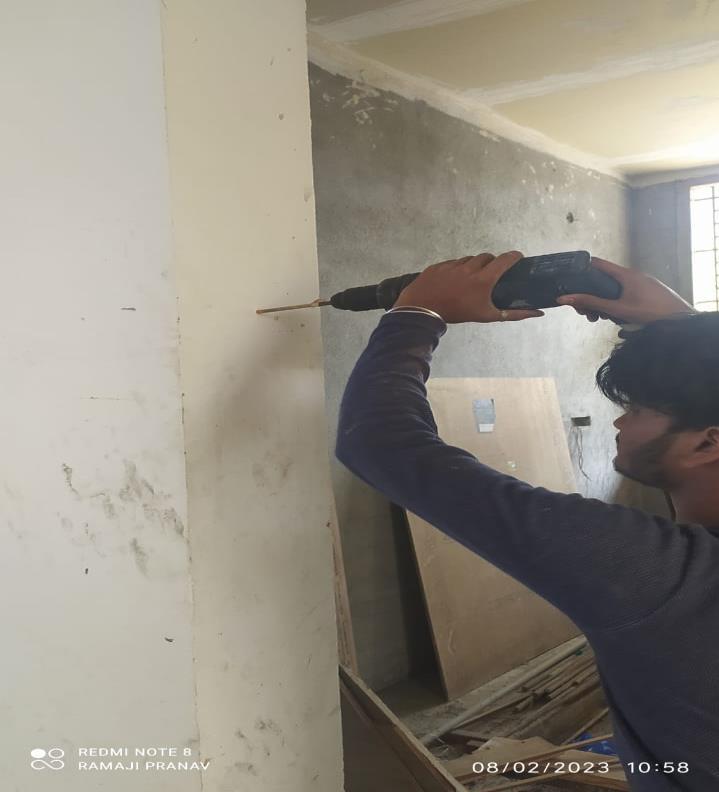
4. They have levelled it with water level it
5. They have used screws of size 2 to 2.25 inch screws to nail the surface
6. The final finish veneer of 4 inch is used to cover and polish is applied
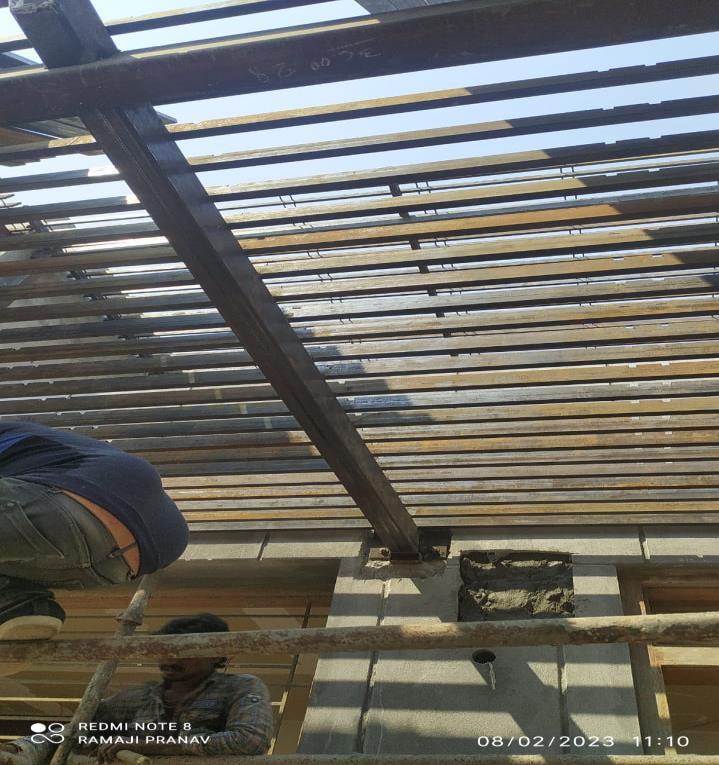
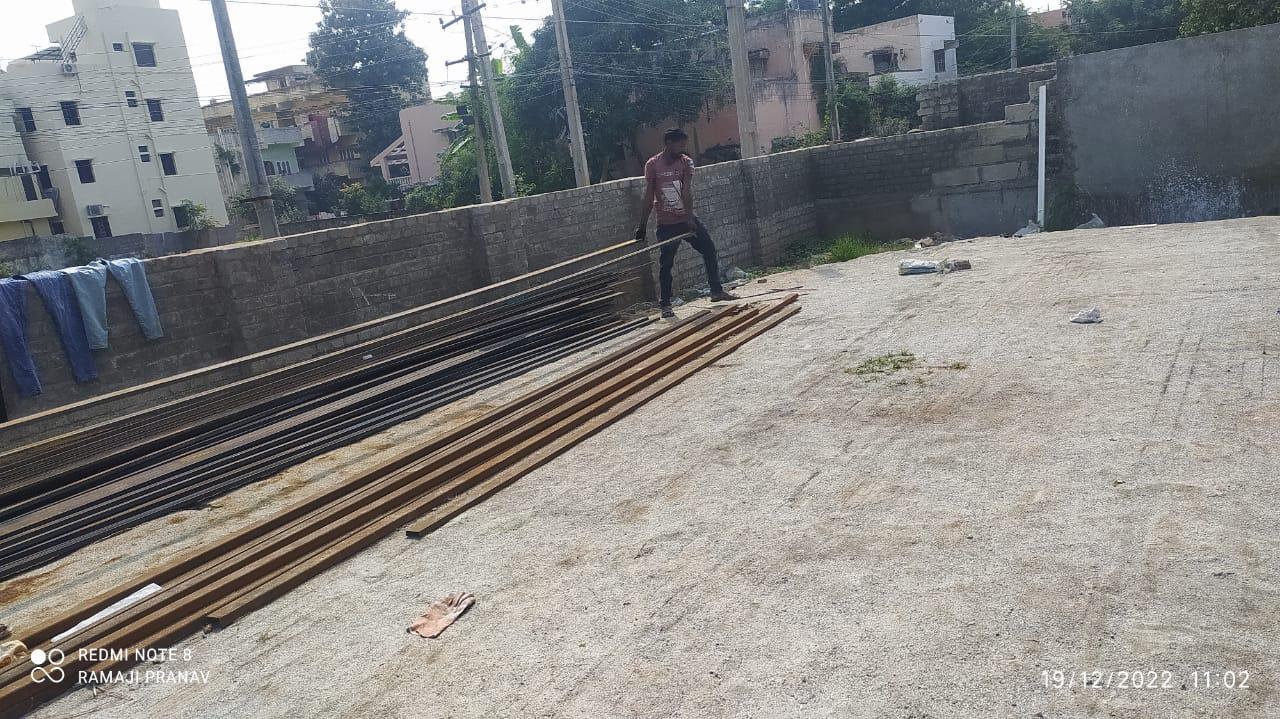
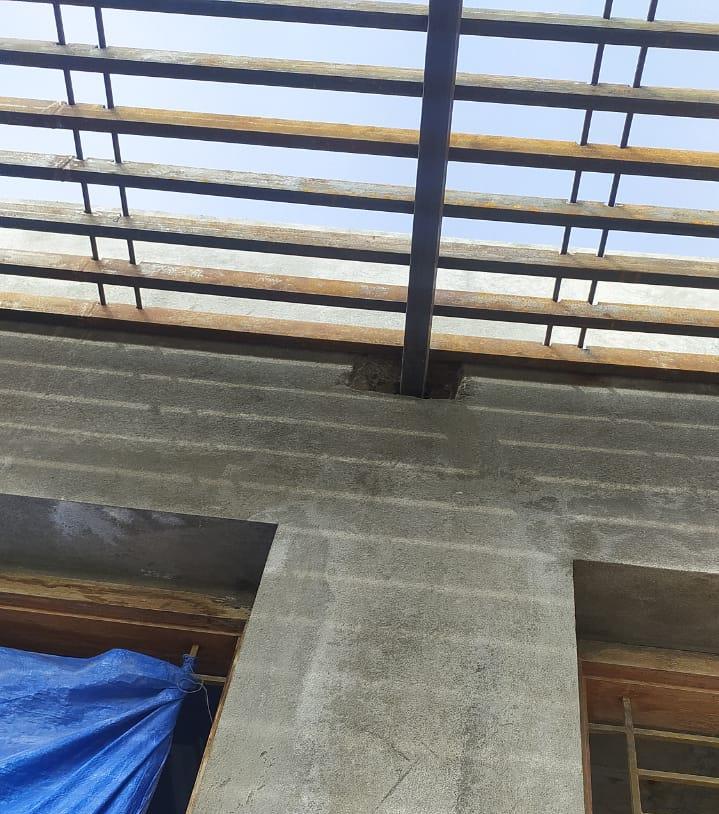
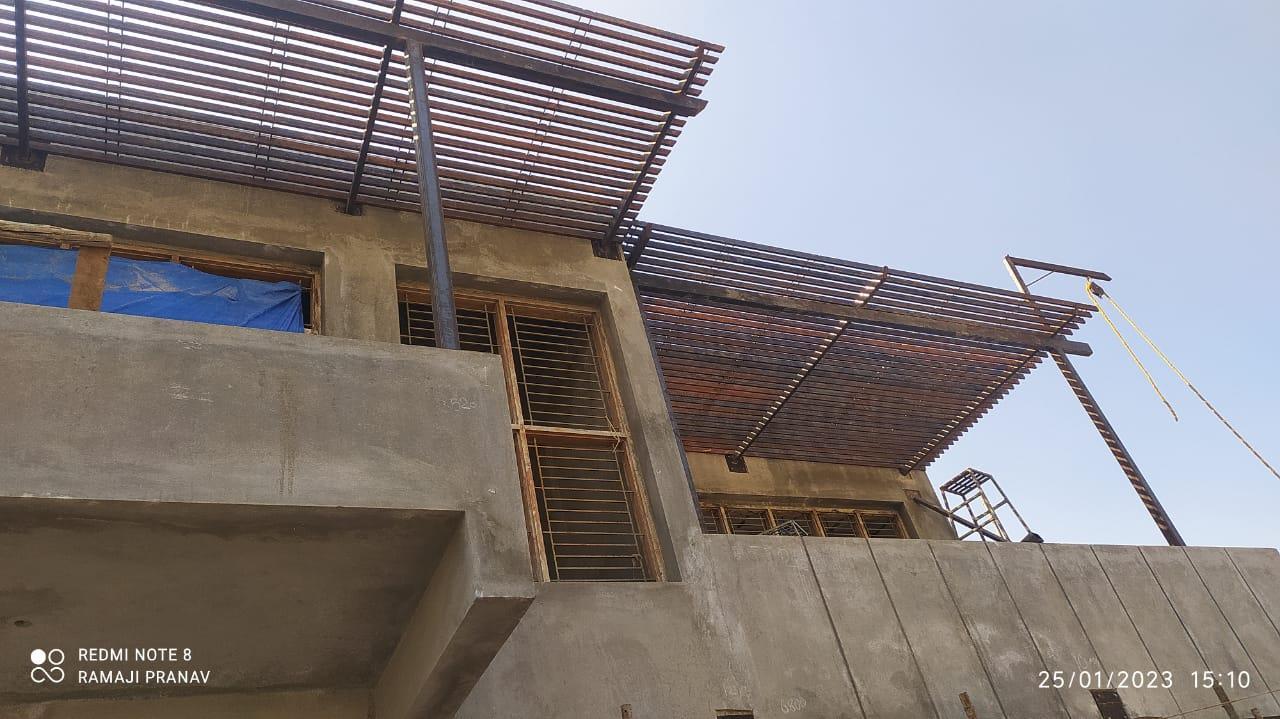
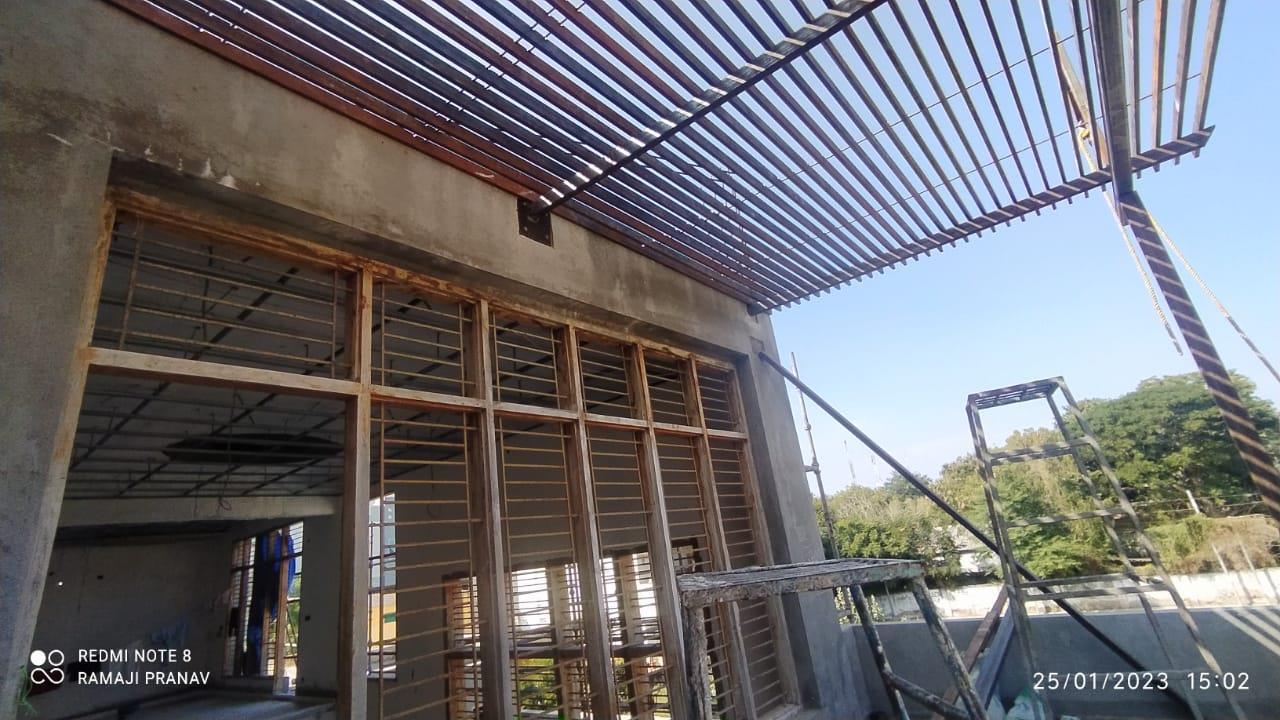
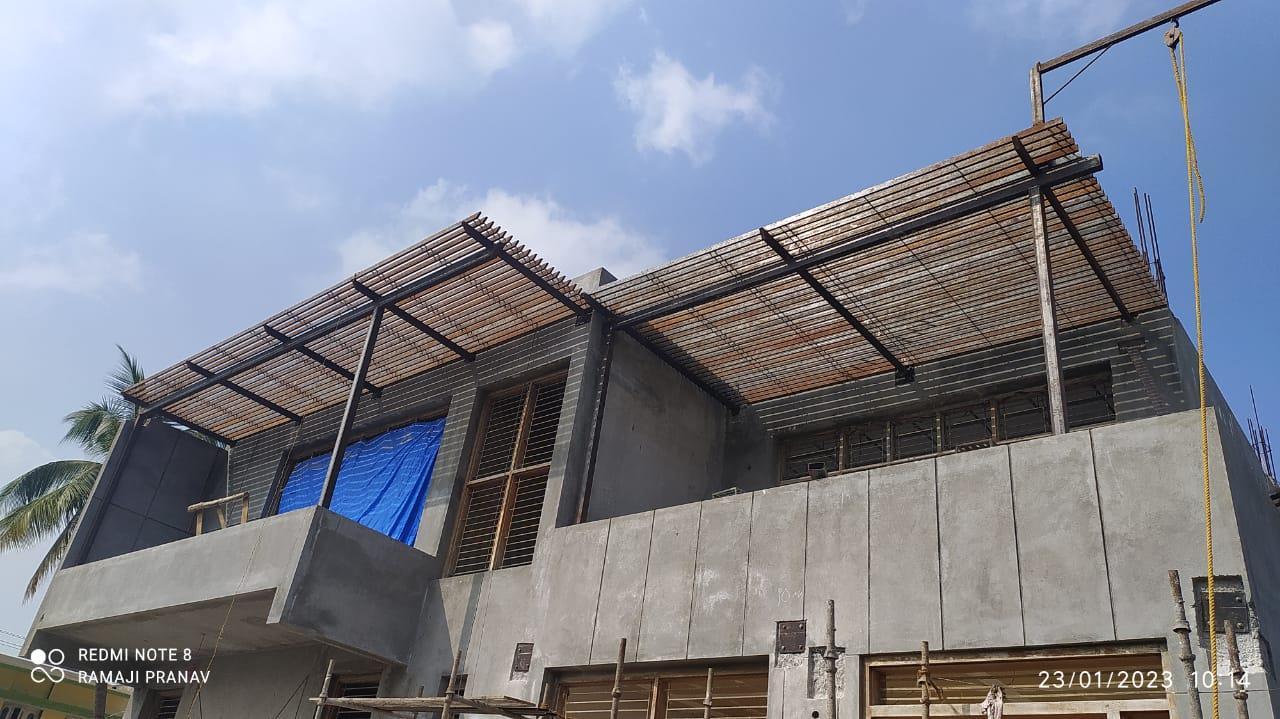
1. The pergola construction is made with steel blocks
2. Measurements are taken
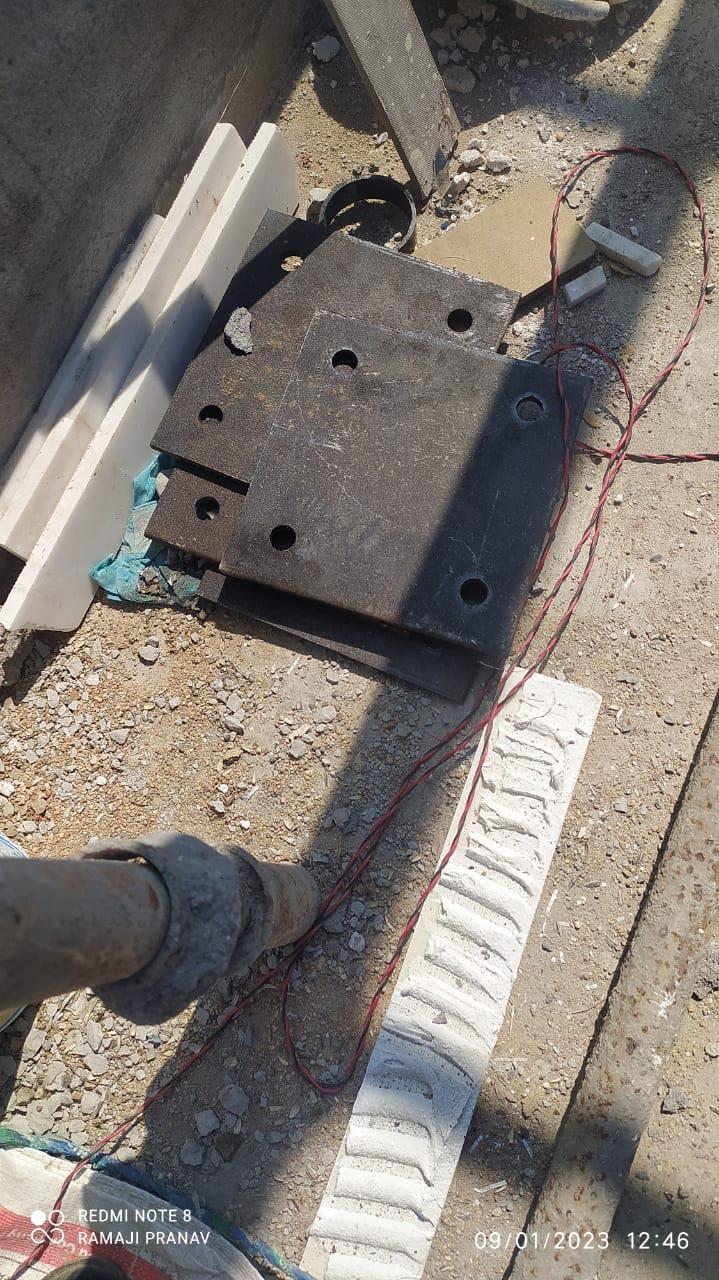
3. Metal coasts are taken and cut according to the drawings
4. The site is excavated by shallow method by using rectangular concrete spread footing
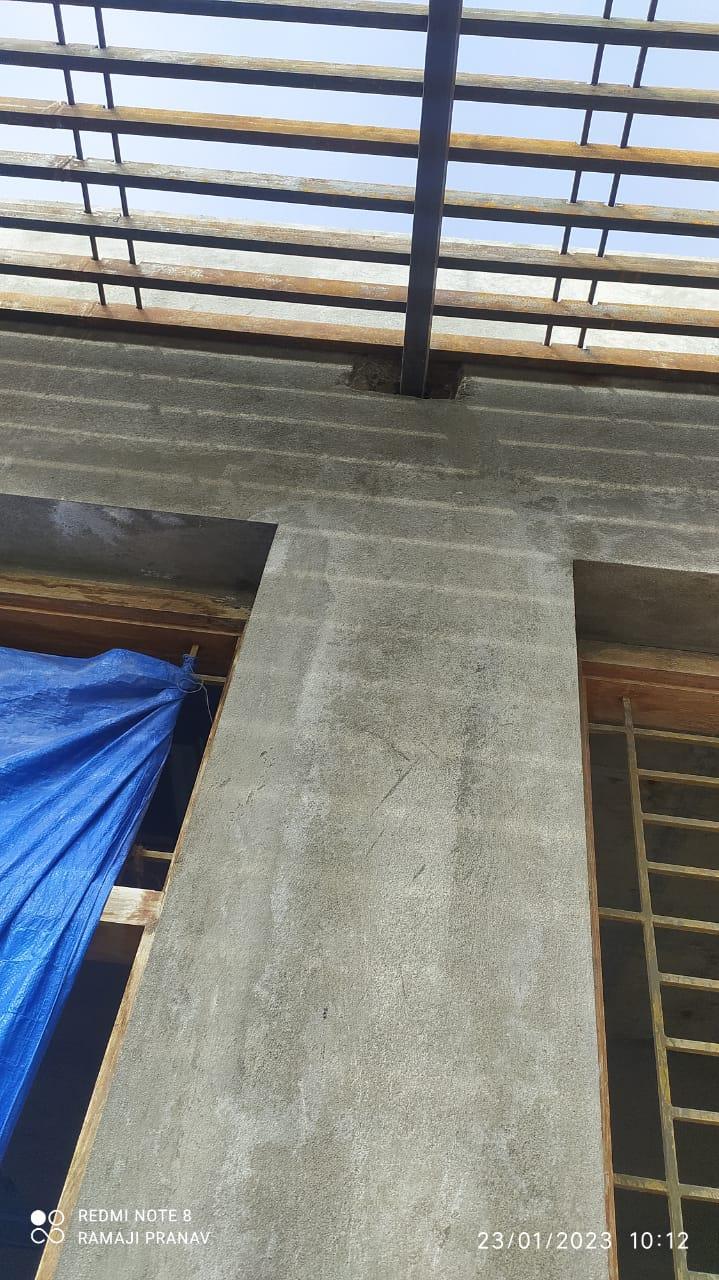

5. The columns are placed the metal coasts are raised
6. The truss are joined on the top of the pergola
7. Welding is done
8. Fiberglass of thickness 10 – 12 mm thickness is used.
In conclusion, the integrated project work report portfolio for interior design has provided valuable insights and knowledge on various aspects of the design process. The project has highlighted the importance of good space planning, construction materials, designing process, and construction knowledge in creating a functional and aesthetically pleasing space.
Through the course of the project, we have learned the importance of understanding client needs, project goals, and design constraints to develop a well-planned and executed design. We have also gained knowledge on different construction materials, their properties, and appropriate applications in different contexts. Additionally, and refining learned the
the designing process has taught us the significance of conceptualization, ideation, design ideas to develop a cohesive and visually appealing design. Finally, we have critical role of construction knowledge in ensuring the successful execution of a design and the importance of close collaboration between designers and construction professionals.
Overall, this project has provided us with valuable insights and knowledge, equipping us with the necessary skills to design functional and beautiful interior spaces. We hope to apply these learnings in future projects and continue to refine our design skills.