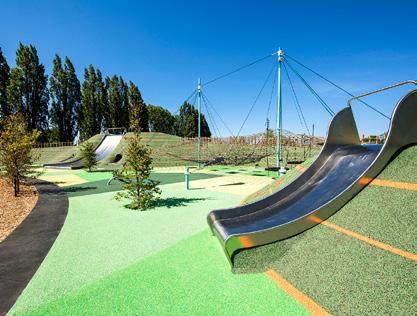
Success beyond the surface
playground surface. numatREC.co.nz
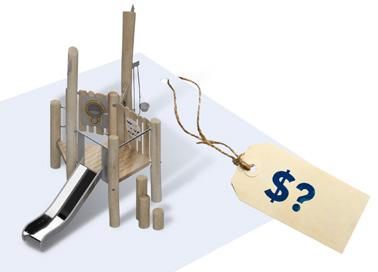
How to buy a
Welcome
Congratulations on taking the time to learn about the journey of surfacing your playground.
We’re here to act as a guide, helping you find your bearings and navigate your way through all the questions and concerns you might have.
Our commitment is to inform and advise with honesty and transparency. It is our hope that at the end of this guide, you’ll be able to make an empowered decision with all the relevant information in hand.
Even if you don’t end up working with us, we want each step of the process from choosing your compliant safety surface, to installation, to be a great experience. We feel this is the only way to operate in this modern information age.
In case you are not familiar with us, we surface play spaces – and we do it for customers all over New Zealand.
If you’d like to see what our customers say about us, take a moment to check out our case studies on our page numatrec.co.nz/case-studies
Contents
4. About
6. Budgeting for Your Playground Surface.
• How much will my playground surface cost? Budgeting for equipment and surfacing in new playgrounds
• Rule of thirds
8. Choosing the Right Surface for Your Project. Wet pour rubber
• Artificial turf Wood chip
• PVC Tile
12. Why Choose Wet Pour Rubber and Artificial Turf?
14 What is Wet Pour Rubber?
18 Which Type of Playground Surface Has the Best Warranty?
20. How Long Does it Take to Install a Play Surface?
• Compacted base
Geo textile Recycled rubber shock pad
• Durable TPV top layer
22. What are Some Common Mistakes People Make When Buying a Playground Surface?
Who is NumatREC?
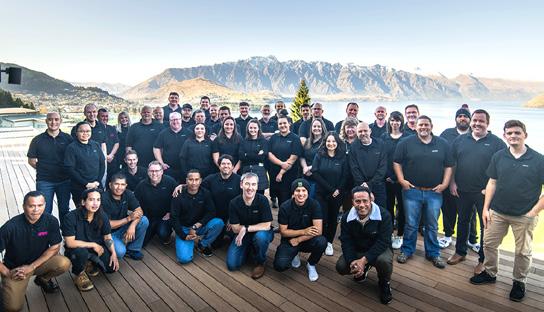
More than 25 years after being founded by father and son team, Peter and Mike Judd, NumatRec continues to be here to protect our children as they grow. Helping them thrive as individuals, and becoming part of fond memories; games won, friendships made, and days enjoyed with family.
NumatREC’s beginnings were down-to-earth. The business’s first home was a 20-foot container adjacent to the Judds’ auction rooms in Oamaru. There they began creating mats for playcentres and kindergartens from locally-sourced rubber chips using a secret family recipe.
At the time, the concept of playground safety was in its infancy. Hard surfaces were still the norm; under swings, slides and even adventure playgrounds.
.4 It's what's on the surface that counts
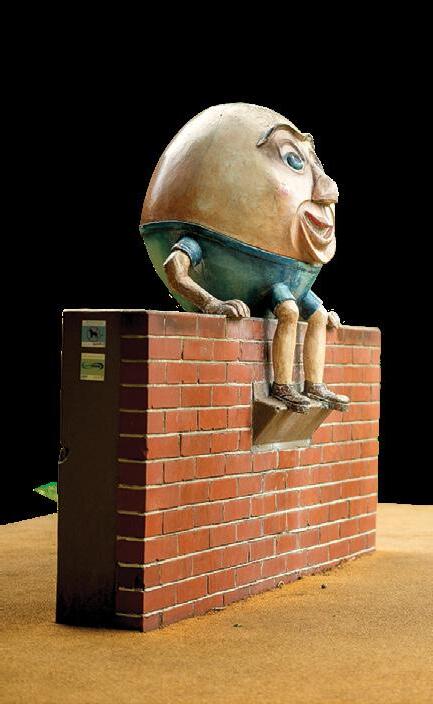
For the NumatREC team, it was hands-on from the start. Mats were manufactured in the morning and sold in the afternoon; the team often peeling off their gloves to take phone orders. The dedication paid off. An early, and iconic, installation was the “safe landing” for the nursery rhyme-themed Humpty
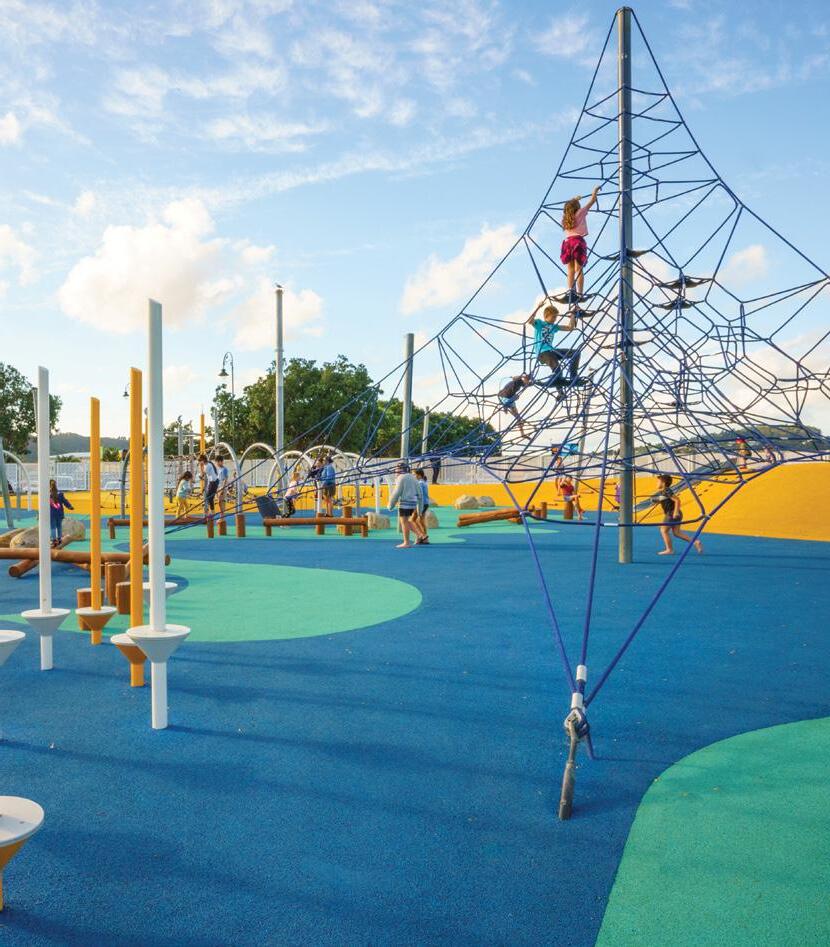
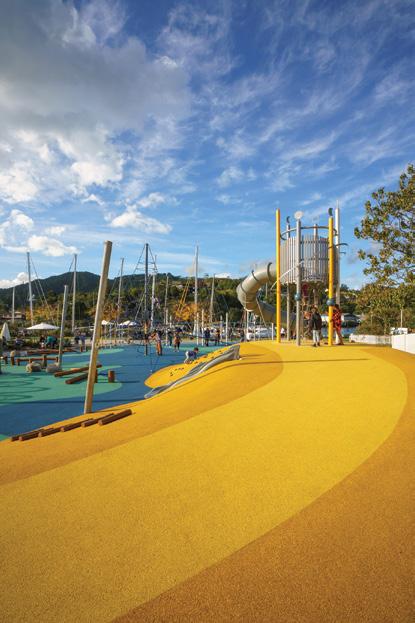
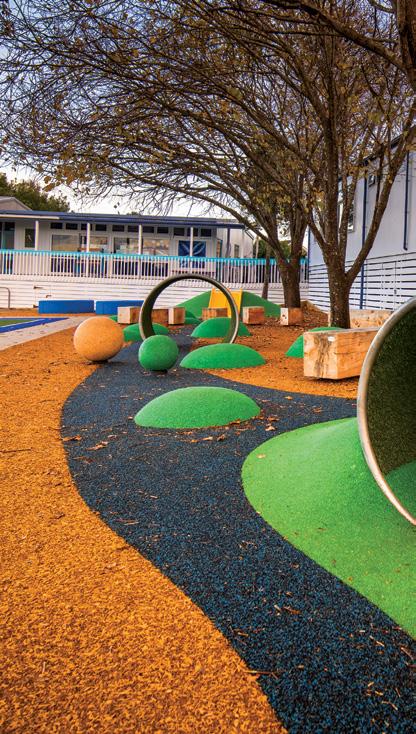
Built on innovation and hard work, it was a natural step for NumatREC to embrace new ideas and technologies from around the globe. Safety was still at the company’s heart. But they saw the potential for surfaces that would creatively use texture, colour, and shape to inspire play, and encourage fulfilled and healthy living for people of all ages and abilities. From playgrounds filled with children’s laughter to sports centres packed with cheering crowds.
It’s, maybe, summed-up best in NumatREC’s work on the Margaret Mahy Family Playground in Christchurch (the Southern Hemisphere’s largest). This ambitious project famously transformed an earthquake-devastated landscape into a sprawling wonderland which captures all the enrichment, fun and joy any child (and their family) could wish for.
And it’s just the start of the next NumatREC story.
Budgeting for your Playground Surface.
With those assumptions in mind…
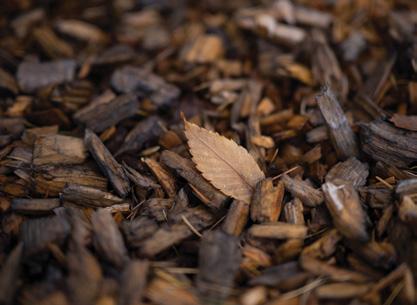
Woodchips
In this section, we provide the tools needed to determine a ballpark price for your playground surface.
In the following video, we give a quick overview of playground surfacing costs in New Zealand that will help you begin to plan your budget.
numatrec.co.nz/surface-cost/
How much will my playground surface cost?
Before we dive into the numbers, we need to highlight two assumptions that we’ve made in calculating the costs we’re going to share with you.
The first assumption is that you are looking at covering an area the size of the average school playground in New Zealand, which is around 250m2.
The second assumption we’ve made for the sake of this section is that you will be getting a professional company to install your surface. One that will handle all the required base preparation work for your surface, so those costs have been included in our cost ranges.
If you are installing a wood chips play surface, you can expect to pay between $6,000 and $16,000.
PVC Tiles
When it comes to PVC tiles, you can expect to pay between
$26,000 and $75,000.
Synthetic Turf
If you want to go for something a little more natural looking, you could opt for a cushioned synthetic turf surface. With this option you can expect to pay between $65,000 and $110,000.
Wet Pour Rubber
And if you want to go for the state-of-the-art wet pour rubber play surface, you can expect to pay between $85,000 and $135,000.
NOTE: Suggested costs are based on the average 250m2 playground and are indicative only.
All the costs we’ve listed so far are initial cost only. With PVC tiles, synthetic turf, and wet pour rubber there are few ongoing costs, but with wood chip surfacing you can expect to pay for top ups and replacements every 3 years.
Over a 10-year period, a 250m2 woodchip play surface will cost you a further $22,000 to $52,000 dollars in upkeep and maintenance.
Now, you might be asking yourself: why the wide range of prices for each surface type?
The answer is that these price ranges reflect the fact that there is a range of products out there, some that offer higher quality, longer durability, and better performance than other products. The higher the quality of the material used, the higher the price. Also, some playgrounds require more shock pad material than others, particularly if they have a lot of tall equipment where the falls are greater and require more cushioning.
Chapter 1
I’m building a new playground? How much should I budget for surfacing and equipment?
One of the first things people think about when planning a new playground is playground equipment. But there is far more to a playground than just the equipment. Factors like the design of the space, civil construction, project management and surfacing, are often a second thought but the reality is that they have a very big impact on the overall cost of your playground. So how much should you be budgeting for your playground project? Let’s break it down.
Equipment
When we talk about equipment this includes all the play items in your playground. Things like slides, swings, spinners, flying foxes etc. It also includes any outdoor furniture like seats and picnic tables.
Every playground project has its own allocated budget and parameters but as a rule of thumb, we suggest you aim to spend around 1/3 of your budget on equipment.
Surfacing
When it comes to budgeting for your surfacing, we’re only including the safety surfacing that’s installed after all the groundwork has been done and the equipment has been installed. For these costs, you should set aside another third of your budget.
The remaining 1/3 of your budget should be allocated to design, civil construction, landscaping, and project management.
Watch our playground budgeting video to learn more. numatrec.co.nz/budgeting/
1/3 Equipment.
1/3 Safety Surfacing.
1/3 Design, Civil Construction, Landscaping, and Project Management.
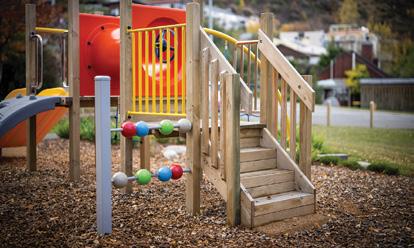
Choosing the right surface for your playground. Woodchip
With so many different options available, you may be wondering which type of playground surface is best for your project.
When it comes to surfacing materials for playgrounds, there are four main types of materials available here in New Zealand:
• Woodchips
• Interlocking PVC Tiles
• Artificial Turf
• Wet Pour Rubber
In this chapter, we will look at the advantages and disadvantages of each surface and hopefully help you find the right surface for your project.
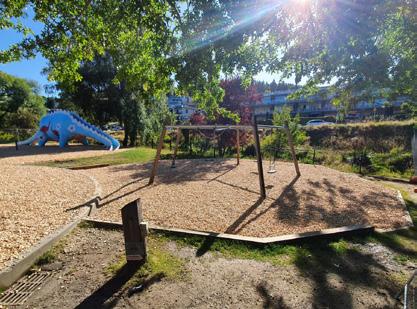
Woodchip is a very popular and common option for playground surfacing because of its affordability and natural look. Woodchip is laid to a depth of 400mm that after compaction gives a 300mm minimum depth which provides impact attenuation for critical fall heights up to three metres. If you’re looking for an affordable and environmentally friendly playground surface, woodchips are an excellent choice.
Advantages:
Compared to other playground surfaces, woodchip is probably the cheapest which is why you can find it in most playgrounds. Another plus is that the material keeps a very even temperature, so on a nice sunny day, it’s not going to burn bare feet. The natural look of woodchips is also a characteristic of the surface that a lot of people like. It blends in well with outdoor environments and adds a nice texture element to a playground.
Disadvantages:
One of the biggest disadvantages to woodchip surfacing is that there are ongoing costs. The surface requires annual top tops to maintain the appropriate Critical Fall Height requirements and then replacement every 3 years. The other major disadvantage is that woodchip surfacing requires constant maintenance to keep the space safe and tidy because it is a loose material.
Woodchips can really become a hassle to clean up and can often leave the space looking messy if it’s not frequently maintained. Woodchip surfaces are also not accessible. It can be difficult to manoeuvre over a woodchip surface for someone in a wheelchair or with disabilities. Finally, woodchip play surfaces can become soggy in winter and can harbour nasty surprises such as animal faeces, needles, and fungus.
Chapter 2
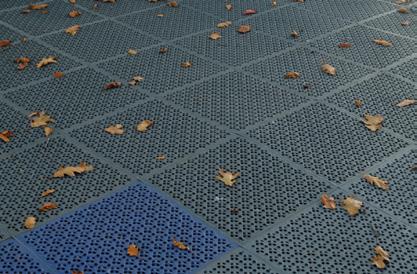
Interlocking PVC Tiles
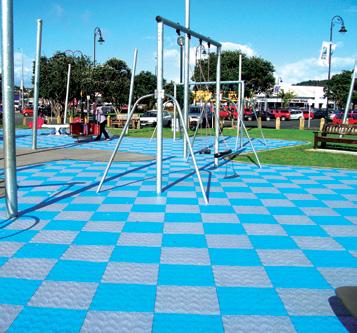
Interlocking PVC tiles are also common in a lot of playgrounds, creating a surface that is engineered by interlocking these tiles together over a cushioned shock pad for added safety.
Advantages:
Interlocking PVC Tiles are low maintenance, which is why they make for such a popular play surface. Unlike a woodchip surface, they don’t move around and are fixed into the space.
The cushioning shock pad underneath makes the surface comfortable and minimises the risk of injury. The tiles also offer a nice smooth and accessible surface for those with a disability.
Disadvantages:
There are a couple of downsides to interlocking PVC tiles. Firstly, they are not as durable as a seamless surface that has no joins. With time, tiles often come apart at the seams where they join, creating trip hazards.
Interlocking PVC tiles also only have one look, so if you are wanting more variety and creative freedom with your play surface design, this might not be the option for you. The last disadvantage with this play surface is that because the tiles are plastic, the surface does get quite hot and can end up being quite uncomfortable during a sunny day, so if you are considering installing interlocking PVC tiles in your space, we really suggest you consider some form of shading either from shade sails or utilising surrounding trees.
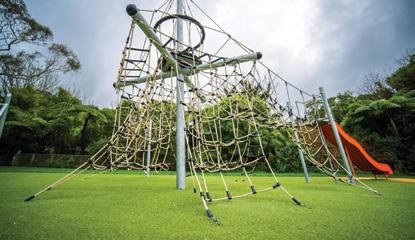
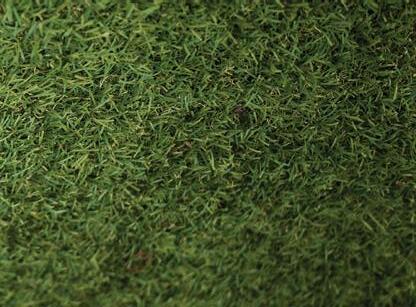
Artificial Turf
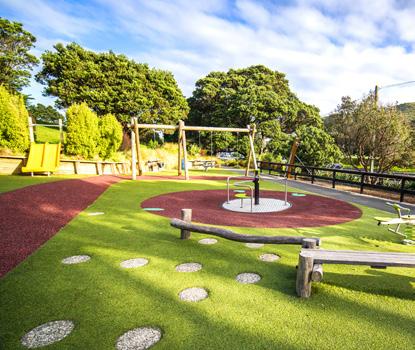
Artificial turf is a synthetic grass surface that has become quite popular because of its resemblance to real grass, only without the mess and dirt of the real thing. Artificial turf is usually installed over a layer of cushioned shock pad for added safety and can bring a great pop of green colour to your playground.
Advantages:
Artificial turf is a low maintenance surface. It doesn’t move around like woodchip and requires little effort to upkeep. An annual turf groom from a turf maintenance professional is all it really takes to keep your turf surface looking its best.
Depending on the turf product you install, artificial turf can look very realistic and can even feel like nice, lush grass. The natural look is definitely a very attractive feature of this surface and is a big reason why it’s so popular. This surface option is also easy to move around on for wheelchair accessibility, allowing people with a range of abilities to manoeuvre around the space.
Disadvantages:
The disadvantage of artificial turf is that it can start to come apart at the joins over time, especially in high traffic areas or where the surface gets a lot of wear. We often see this happening on features like mounds where children might often slide down or climb on, which is why we often recommend avoiding artificial turf on these elements, to avoid potential tripping hazards, and opting for a wet pour rubber surface instead.
Another disadvantage is that artificial turf does get very hot in the sun, in fact, it’s probably the hottest of the artificial playground surfaces out there. Like the interlocking PVC tiles, if you are looking at installing artificial turf in your project, we suggest you consider installing shading, to protect your surface (and its users) from getting too hot.
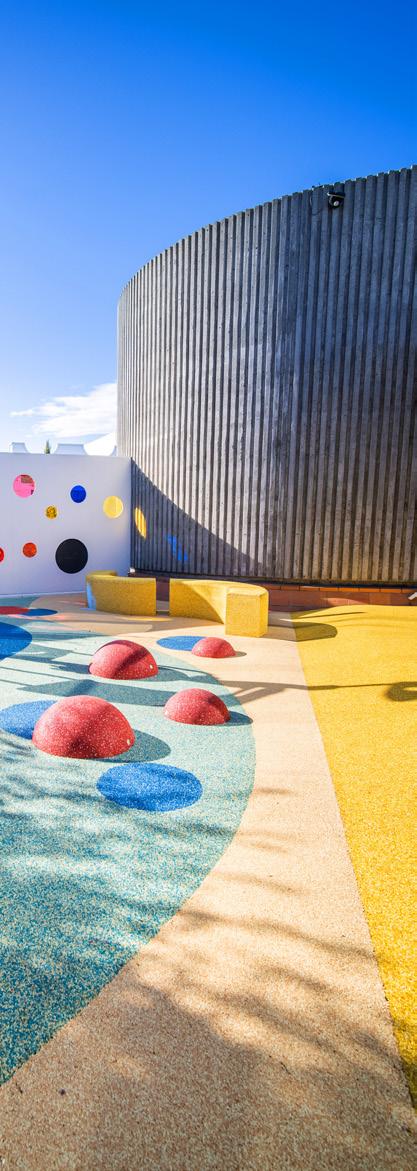
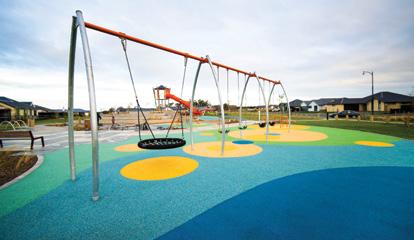
Wet Pour Rubber
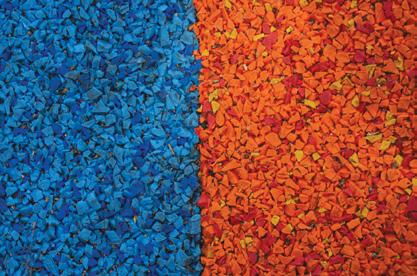
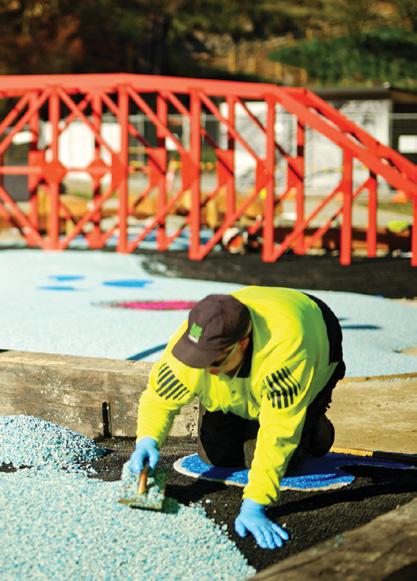
Wet pour rubber is a seamless rubber surface made from rubber granules that are mixed with a bonding agent to create a unique safety play surface. Wet pour rubber surfacing is installed in two parts. First a layer of poured rubber shock pad is laid to meet the critical fall height requirements, followed by a colourful top layer that is customizable to your design.
Advantages:
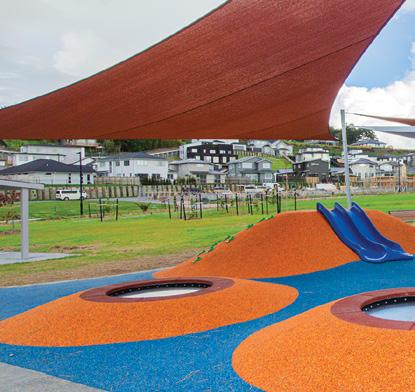
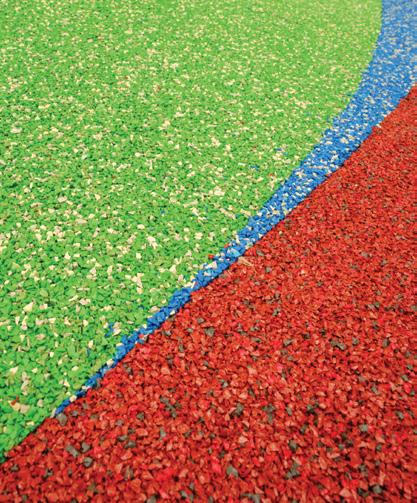
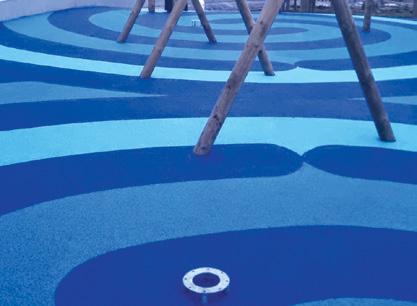
Compared to other play surfacing options, wet pour rubber gives you the most creative freedom in terms of aesthetics and design. There is a range of colours available to choose from. Combining them enables you to create your own unique colour-blend allowing you to fully personalise your project.
Along with the colour range, wet pour rubber also gives you the ability to create shapes, curves, lines, mounds, steppers, or whatever design you want, which makes this surface the ideal material for designers to work with when planning a play space.
Wet pour rubber requires very little maintenance. The surface is hard-wearing and highly durable, able to withstand volatile weather and a whole lot of traffic. It also makes for a great smooth wheelchair accessible surface.
.10 It's what's on the surface that counts
Disadvantages:
A disadvantage we commonly find with wet pour rubber is that like other artificial surfaces, it can get hot; so, like the others, if you are thinking about installing wet pour rubber in an area that is exposed to a lot of sun, you should consider some form of shading or stick with lighter colours which are less heat-absorbing. Another disadvantage to a wet pour rubber surface is the high initial cost when compared to other play surfaces.
Wet pour rubber tends to be more expensive than other options, which can mean that this might not be an affordable option within the budget of some projects. In saying that, when you consider the durability of the surface and the lack of maintenance cost to upkeep it, you will find that it has a similar cost over the long term as some of the other surfacing options.
Wet pour rubber lasts a long time, and you aren’t likely to need upkeep or replacing for many years.
Watch our video for a full comparison of each playground surface.
numatrec.co.nz/surface-comparison/
.11 It's what's on the surface that counts
Why Choose Wet Pour Rubber and Artificial Turf?
Safety
In this section we will answer the question: why choose wet pour rubber and artificial turf?
If you’ve looked around our website, you may have noticed that a lot of the surfaces we install are a combination of wet pour rubber and artificial turf. Seeing this, you may be wondering, why does NumatREC seem to prefer these surface types over others?
The short answer to this question is that we believe these surface types to be all round superior surfaces when it comes to the attributes our customers want in their playground surfaces.
The main areas where we see wet pour rubber and synthetic turf outperforming other surface types are:
• Safety
• Accessibility
• Range of colours
• Designability
• Durability
• Ease of maintenance
In the rest of this section, we’ll dive into each one of these desired attributes and show you why wet pour rubber and artificial turf surfaces are the best options to deliver them.
When it comes to safety, cushioned synthetic turf and wet pour rubber are excellent options. This is because they don’t move around like loose fill surfaces or pull apart like some tiles do, which means they are consistently safe. For ease of maintenance, these surfaces are great because they generally require very little, unlike loose surfaces that need constant attention.
Accessibility
With accessibility, wet pour rubber and artificial turf surfaces are fantastic. With their one-piece, seamless consistency they don’t have the inaccessibility issues of bark, woodchips, and pea-gravel. Tiles can be good here also but lack some of the other important attributes we look for in a play surface; things like designability and range of colours.
Chapter 3


Range of colours and designability
Here, wet pour rubber beats all other surface options out there. It’s range of colours and colour blends give you almost unlimited creative potential and its ability to mould over any shape means you can install it on slopes, walls, and even shapes like balls and cylinders. You name it! you can probably create it out of wet pour rubber.
Ease of maintenance
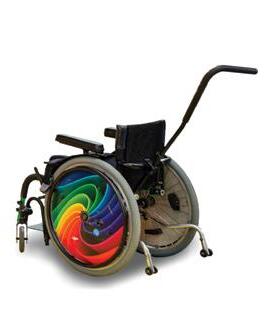
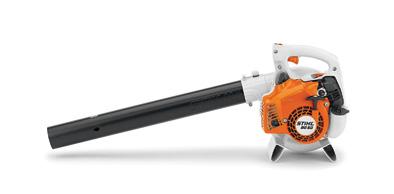
Being seamless, fixed surfaces, wet pour rubber and artificial turf require little in the way of maintenance. An occasional hose down or going over with a leaf blower is really all it takes to keep these surfaces looking good into the long term. In the case of artificial turf, a turf grooming machine can be used to bring your surface up to looking its best.
Durability
In terms of durability, wet pour rubber and artificial turf surfaces are the most durable surface types with wet pour rubber lasting slightly longer than artificial turf ones. For example, a high-quality wet pour rubber surface like Pour’n’Play, which is made from Rosehill TPV rubber granules, lasts at least 12 years in most situations, and can last up to 20 years in some cases.
Why combine these two surface types?
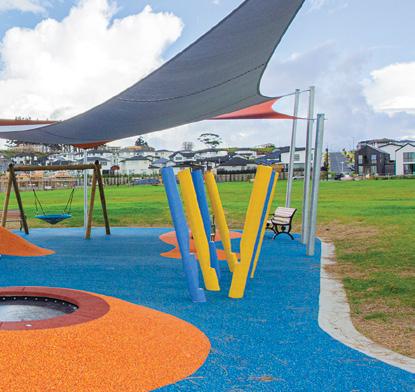
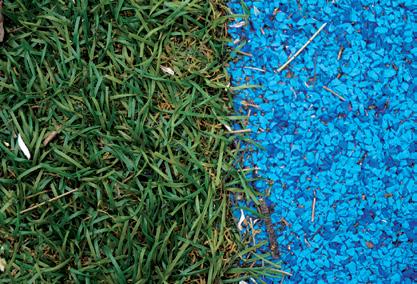
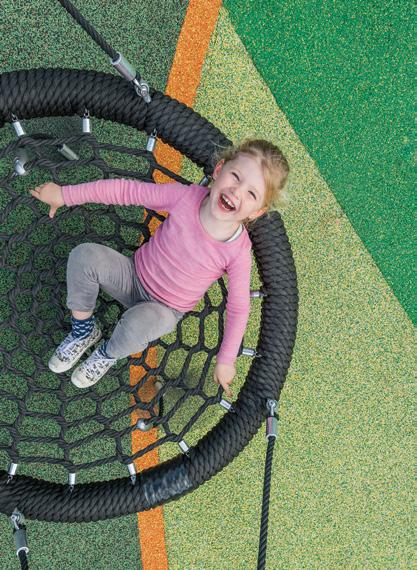
There are two main reasons why you should consider combining wet pour rubber and synthetic turf in your playground surface. Firstly, combining the two surfaces leads to interesting, and exciting, design possibilities. In short, wet pour rubber and synthetic turf together looks great and takes your playground design to that next level.
Secondly, it gives your playground something else that a single surface on its own can’t provide, and that is texture variation. Putting the two surfaces together presents the opportunity for sensory play, which is especially great for young children who are developing their sense of touch.
.13 It's what's on the surface that counts
What is Wet Pour Rubber?
Our most popular playground surface material is our wet pour rubber product Pour’n’Play, but you may be asking: What is wet pour rubber? In this chapter, we focus on wet pour rubber, what it’s made of, how much it costs, and how long it lasts.
What is wet pour rubber surfacing?
Wet pour rubber surfacing is a mixture of rubber granules bound together by a polyurethane resin binder that is then poured onsite providing a seamless rubber surface. The process of combining the two components of rubber and resin is similar to mixing concrete and results in an evenly combined product that can achieve that seamless finish with no separation.
In a playground installation, wet pour rubber surfacing is often installed in a two-part process. Firstly, a layer of larger granules is installed to provide cushioning
• Followed by a colourful, wear layer made up of smaller granules installed on top of the first layer.
What types of rubber are used in wet pour rubber surfacing?
There are a few different types of rubber granules that can be used to create a wet pour rubber surface. Recycled rubber from tyres is commonly used in the base layer of wet pour rubber installations because it provides excellent shock absorption while also re-purposing a waste product that would otherwise be incinerated.
Chapter 4
numatrec.co.nz/wetpour/
For the top layer, the main types of rubber used in New Zealand are:
• EPDM rubber granules or Mulch
Colour coated SBR rubber granules
Rosehill TPV rubber granules
Of these, Rosehill TPV rubber has the best UV stability and durability. This means it holds its colour and integrity longer than the other types of rubber granules. It’s because of these features that we use Rosehill TPV in our Pour‘n’Play wet pour rubber product.
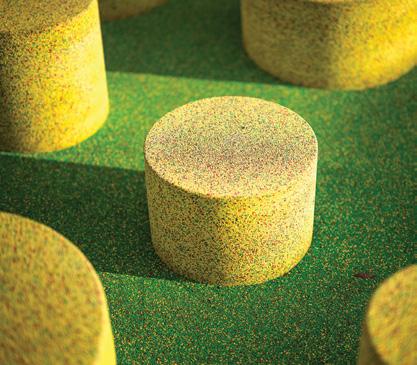
Different textures
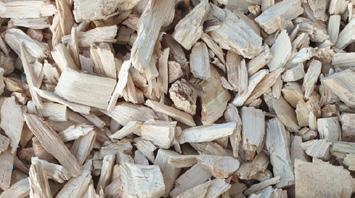
Wet pour rubber comes in a range of different textures and colours which gives you more options when designing your play surface. An example of a wet pour rubber surface that provides texture is our MulchSet product which is made from long rubber granules that are shaped and coloured to look like natural wood mulch. This surface looks so much like a natural bark surface that people often can’t tell the difference until they are standing on it!
Learn more about our MulchSet surface in the video below.
How long do wet pour rubber surfaces last?
Wet pour rubber surfaces can last for a long time. It has the longest product life when compared to other types of playground surfaces, like wood chip and PVC tiles which need replacing more frequently.
Depending on the types of rubber granules and binder used, wet pour rubber surfaces can last anywhere from 6 to 20 years and require minimal maintenance and repairs.
One thing to note here: not all wet pour rubber surfaces are equal. Surfaces made from colour coated SBR rubber tend to lose their colour rather quickly, exposing the black rubber granule underneath. Rosehill TPV rubber granules, like those we use in our Pour’n’Play product, are coloured right through, so they never lose their colour.
How much does NumatREC wet pour rubber cost?
Now that you have all the product details, let’s find out how much it costs?
The answer to this question depends on four different factors.
1. The size of the area.
The larger the area, the lower the cost per square metre.
2. The type of materials used on the surface.
The higher the quality of the materials used, the higher the cost.
3. The height of the equipment around which the surface is installed.
The higher the equipment, the thicker the base layer needs to be, requiring more rubber granules.
4. The level of surface design.
The more intricate the design, the longer it takes to install.
.15 It's what's on the surface that counts
numatrec.co.nz/what-is-mulchset/
How much does Pour’n’Play ® cost?
50
200 -
We’re not going to get into the cost of all the different wet pour rubber surface types, but we can take a look at the cost of NumatREC’s wet pour rubber surface, Pour‘n’Play® .
Pour’n’Play® is an excellent choice if you are looking for a safety surface that helps improve accessibility, reduces noise, and can stay looking fresh and colourful for years to come.
Pour’n’Play® also gives you the creative freedom to bring some personality into your space through endless design possibilities. It’s the perfect material to work with for those that want to make a statement with their play surface.
If you think Pour’n’Play® might be a good fit for you, call us on 0800 686 124 and one of our surfacing consultants will be happy to help you.
Size (m2) m2 Rate
100 $270
$390
200 $230
$350
-
-
100 -
-
400 $210
$330 Base Prep $50
Edging $30
$50
.16 It's what's on the surface that counts
-
- $90 m2
-
lm numatREC.co.nz
Pour‘n’Play® lasts longer
Numat’s most popular wet pour rubber surface, Pour’n’Play®, uses Rosehill TPV rubber granules that are more UV resistant than other types of rubber surfaces. This means that over time, the rubber experiences less fading, less cracking and hardening, and less chalking.
Some cheaper rubber surfaces are made from lower quality EPDM or SBR rubber granules. These surfaces are not as durable as Pour'n'Play and will fade and in the case of SBR rubber, lose their colour. Pour’n’Play® is made from highly stable and UV resistant Rosehill TV rubber which means it lasts longer.
Rosehill TPV rubber has the colour incorporated in the granule allowing it to keep its colour and stay vibrant over time.
Here are a few things to keep in mind when deciding whether Pour’n’Play® is right for your project:
Pour’n’Play® is not a DIY solution.
If you are looking for a DIY surfacing solution for your space, then Pour’n’Play® is not the right option for you. Pour’n’Play® requires specialist equipment to install so you will need some professional help to surface your area.
Higher initial cost.
Pour’n’Play® also has a higher initial cost than other surfaces like wood chips, or artificial turf, so if you have a small budget for your project, then Pour’n’Play might not be the right fit.
What is the size of your project?
The smaller the surface area the higher the per square metre cost of Pour'n'Play® This means projects under 50m2 are often uneconomical.
.17 It's what's on the surface that counts
Which type of Playground Surface has the best warranty?
Wood Chip Surfacing
Wood chip surfacing doesn’t generally come with a product warranty. After looking through all the companies that offer wood chip play surfacing in New Zealand, we couldn’t find any that offer a manufacturing warranty for this type of product.
Before you start your playground project, there are a few things you need to be aware of, one of those being warranties.
Every playground surface installation should come with a workmanship warranty that covers the quality of the installation as well as things like mistakes or defects in the surface that were caused during the installation process.
But what about the products themselves that are used in the installation?
In this chapter, we will look at the product warranties tied to the four most popular playground surfacing options out there and what you should expect from a manufacturer when it comes to product warranties.
This is nothing to be worried about. By its nature, woodchip surfacing is designed to break down over time and be replaced frequently, so it’s no surprise that suppliers don’t offer warranties on this type of playground surface.
PVC Tiles
When it comes to PVC tiles, you are most likely going to get both a product warranty and a workmanship warranty.
The workmanship warranty will be given by the person who installs the product. This will cover any things that may have gone wrong during the installation. The product warranty will come from the manufacturer. Sometimes, they are the same entity. The company might be responsible for both the manufacturing of your product and it’s installation.
In New Zealand, you can expect to get a product warranty for up to 6 years when it comes to PVC Tiles. For Example, Play Matta who is a New Zealand manufacturer of PVC tiles, provides a product warranty on their product that goes up to 6 years from installation.
Chapter 5

Artificial Turf
When installed properly, artificial turf can last a very long time. You will generally be covered by both a product warranty and a craftsmanship warranty when you purchase and install an artificial turf playground surface. Most companies in New Zealand offer at least a 5-year warranty on their playground turf systems.
Some artificial turf specialists, like TigerTurf and TeamTurf, offer 7 and 8-year warranties respectively on their playground turf systems.
Wet Pour Rubber
Wet pour rubber is generally known to be the hardest wearing and longest-lasting type of playground surface, so they tend to have reasonably long warranty periods.
Most play surfacing companies in New Zealand that provide wet pour rubber surfaces offer a product warranty of at least 5 years.
Because NumatREC uses a unique high-quality rubber and resin blend in its wet pour rubber surfacing, we can offer a warranty that lasts for up to 10 years. Our Pour’n’Play wet pour rubber product has the longest warranty available in the New Zealand market.
What to look out for when assessing product warranties!
There are a few things to keep an eye out for when assessing warranties for playground surfacing. The main one is, how long the company has been in business installing the product in New Zealand.
We’ve seen some businesses in the industry who are offering warranty durations that are longer than they have been installing surfacing in New Zealand. The last thing you want is an untested product failing in your playground. Just because the product warranty says 5 or 6 years, doesn’t mean the product has proven to last that long.
Look for companies who have an established track record with their product and ask for some local surface installations you can visit for yourself. Don’t hesitate to ask how long the product has been down at the sites you look at; in this way, you can determine for yourself how long-lasting the product is and see what the surface will look like over time. Asking these sorts of questions will help you establish whether the company’s warranty claims are legitimate.
.19 It's what's on the surface that counts
How long does it take to install a NumatREC play surface?
There are several elements to keep in mind that will affect the time it takes to complete your project and make sure everything goes smoothly. The following are some general guidelines on how long it takes to install a playground surface and some factors to keep in mind that will affect the duration of your surfacing project.
The level of design
The more detailed the design of your surface, the longer it will take to install. Adding more colours and shapes adds more complexity to the job and requires more time to complete compared to a surface that uses one colour or has a very simple design.
Vehicle Access
Access to the installation site is one aspect that many people overlook, but it can have a big impact on the cost and duration of your project. Having easy access to the site ensures materials can be moved in and out quickly and efficiently, cutting down on the time of your project installation. If access is poor, the surfacing materials will have to be manually wheelbarrowed in and out, which takes up more time.
Chapter 6
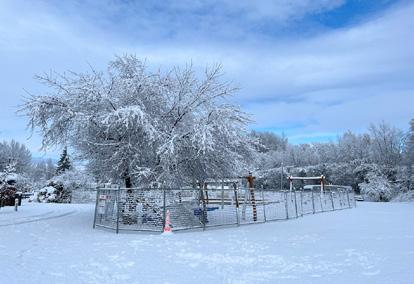
Weather
Unfortunately, this one is out of anyone’s control, but it does play a role in how long your project will take. NumatREC surfacing needs to be installed in fine weather. If it rains for more than a day, it can put a stop to work and slow the project down. We do our best to plan your project around the weather forecast to minimise disruptions.
How long does the average NumatREC surface take to install?
For the average 150–250m2 school playground surface, which includes 2-3 different colours, and some design, installation could take between 6-8 days, as long as there is good access and weather conditions are fine.
The installation would progress in two stages.
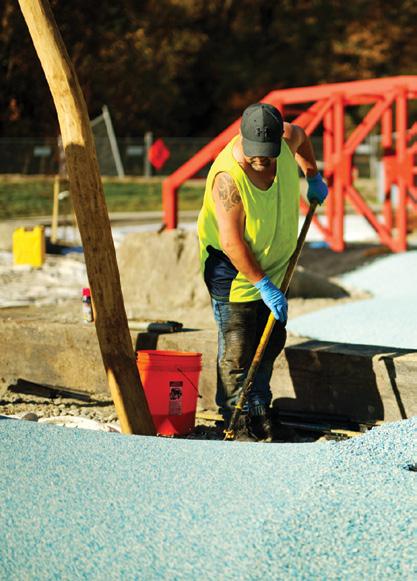
Stage 1:
The first stage requires 3-4 days of base preparation where the ground is dug out, filled, and compacted to prepare the site and make sure it’s ready for the rubber surfacing to be installed.
Stage 2:
Following the base preparation work, is another 3-4 days for the installation of that rubber surface. However, this stage could be reduced to 1-2 days in the case of a single colour surface or top-layer-only surface installation.
.21 It's what's on the surface that counts
What are some of the most common mistakes people make when choosing and installing playground surfacing?
We’ve worked in the playground industry for years now and in that time we’ve collected a lot of insight from our experience and have seen many of the mistakes people make when choosing and installing a surface for their playground.
In this chapter, we’ll examine the 11 most common mistakes and the things you can lookout for, so you don’t make them.
Mistake number 1:
Opting for the cheapest surface.
The first mistake we see people make is opting for the cheapest surface to save money. Choosing the cheapest option may seem a good idea at the time, but this often leads to regret later down the track when the surface needs replacing only a few years in. As with many things in life, you get what you pay for with playground surfacing. If you want a surface that’s going to look great and last for a long time, then you may have to pay a little more.
Mistake number 2:
Choosing a surface that’s not fit for purpose.
Play surfacing comes in many different types and it’s important to make sure you match the right type of surface to your play area. A classic example we see where this goes wrong is when people put wood chips on a sloped surface. Wood chips aren’t meant for slopes as they just slide off and create a big mess. For sloped areas you are much better to choose a one-piece surface that won’t slide, like Pour‘n’Play or MulchSet. Another common thing we see is when people use bark or wood chips in the under-two’s area of their early childhood centre. Young children just love to put small things in their mouths, which makes wood chip totally inappropriate for this type of area.
Mistake number 3:
Not accounting for equipment height.
The New Zealand Playground Standard stipulates the use of impact attenuated surfacing in your playground under and around play equipment. One of the common mistakes we see here is people not putting any safety surfacing under equipment, or under engineering their play surface for the height of the equipment.
This is often the case in DIY playground installations where the owner of the playground isn’t aware of the playground standard. This is why we recommend always speaking to a safety surfacing professional who can help you choose and install your surface to meet the safety requirements.
Mistake number 4: Setting and forgetting.
We’d all love to set and forget when it comes to our play surfacing, but unfortunately, it’s not that simple. Neglecting surface maintenance can lead to your surface becoming unsafe and may decrease its life span.
We recommend regular maintenance checks in keeping with the type of surface you’ve chosen. Remember, wood chip surfaces require weekly checks, annual top ups, and replacement every 3 years. Wet pour and artificial turf surfaces require less maintenance but should be cleaned or groomed once every 1-2 years.
Chapter 7
Mistake number 5:
Neglecting surfacing in your budget.
When you think of playgrounds, what ideas or pictures spring to mind? Slides, Swings, towers, see saws… equipment, right? But equipment is only a third of what makes up a good playground. There’s also design, civil construction, and surfacing among other things.
Unfortunately, when planning a playground, people often neglect surfacing only to find out later, after purchasing their equipment, that their remaining budget isn’t enough to cover the cost of the surfacing they need. You can avoid this by using our playground budgeting rule of thirds, which you can learn about in our playground budgeting video available in the learning hub on our website. numatrec.co.nz/budgeting
Mistake number 6:
Missing the opportunity to add games, a logo, or a theme.
Surface games, logos, and shapes installed into your artificial turf or wet pour rubber surface are a great way to add meaningful elements to your playground.
However, we sometimes see people choosing to go with all one colour or a full cover artificial turf and missing the opportunity to add more play value to their playground through the surface. We recommend working with a playground surfacing company who can help you design your surface to be more engaging and deliver maximum play value.
Mistake number 7:
Choosing the wrong colour.
This one can be seen as another missed opportunity. Surfaces like wet pour rubber offer a wide range of colours to choose from and the ability to blend colours to fit your playground's cultural or imaginative themes.
When selecting your colours, we recommend that you speak to a play surfacing professional who can help you match your colours to the playground’s surroundings, or equipment, or culturally significant elements.
Mistake number 8:
Not reading the fine print on product warranties.
When it comes to warranties, most of us don’t have the patience to read through the fine print. But it’s a very important part of what you are buying when you purchase a play surface. You need to know, how long does the company’s warranty last, what is covered, and what isn’t covered.
If you’d like to know more about play surfacing product warranties in New Zealand, check out our warranties video in the learning hub of our website. numatrec.co.nz/best-warranty
Mistake number 9:
Not checking your surface provider’s track record.
This is another common mistake we see where people neglect to check out the history of the surfacing providers they are considering. When buying a playground surface, we recommend you ask each company you are considering for a list of projects that are five plus years old that you can check out for yourself to see how well the product has lasted.
Mistake number 10:
Not considering site access.
When we talk about site access, we are talking about the ease with which we can get materials and equipment to site. If there is poor access, then it will be difficult to drive a truck up to the location to unload materials or machinery like diggers and compactors. This leads to greater cost of getting materials to site and this needs to be factored into your budget.
Mistake number 11:
Installing new surfacing around an old playground.
The problem with installing new surfacing around old playground equipment is that when the old equipment needs replacing, you often have to pull up some of the new surface with it. This often leads to a mismatch in the surfacing material which spoils the look of your surface. When considering the installation of a new surface it pays to ask whether any of the equipment needs replacing too.
So, there you have it, our list of the most common mistakes people make when choosing and installing a play surface. We hope this has been informative and will help you to avoid making any costly mistakes with your new play surface.
If you’d like to speak to one of our play surfacing consultants about which surface type is right for you, please contact us on 0800 686 124. We'd love to help.
.23 It's what's on the surface that counts
Call now: Our friendly New Zealand-based customer service team is ready to chat on 0800 686 124, or email us at info@numat.co.nz numatREC.co.nz
