


Robbie Gorr, a native of the Upper Ottawa Valley in Ontario, comes from a long tradition of gardening. He grew up in a family where gardens were part of the routine of life. His father maintained a large vegetable garden in the backyard and his mother supervised their award-winning front flower beds and landscaping. His father’s homestead farm just down the road was run by an uncle as a market garden with vegetables, flowers and fruit and he has many memories of his maternal grandfather working in his own English country-style garden. In creating his own garden and green spaces, Robb needed to live up to all those family traditions. Now, as a retired school teacher, he spends time between his favourite hobbies of gardening, family history research, writing and photography, and occasionally gets to blend some of them together as he did in the article included in this issue. y

Find additional content online with your smartphone or tablet whenever you spot a QR code accompanying an article. Scan the QR code where you see it throughout the magazine. Enjoy the video, picture or article! Alternatively, you can type in the url beneath the QR code.


Follow us online www.localgardener.net
Facebook: @CanadaLocalGardener
Instagram: @local_gardener
YouTube: @LocalGardenerLiving
Published by
Pegasus Publications Inc.
President Dorothy Dobbie dorothy@pegasuspublications.net
Editor & Publisher
Shauna Dobbie shauna@pegasuspublications.net
Art Direction & Layout
Karl Thomsen karl@pegasuspublications.net
Contributors
Ryan Agrey, Tessa Agrey, Penelope Beaudrow, Steven Biggs, Claire Dobbie, Dorothy Dobbie, Shauna Dobbie, Robbie Gorr, Christian Lajoie, Serena More, Robert Pavlis, Tim Pidduck, Micaela Soto, Theo Wouters.
Editorial Advisory Board
Greg Auton, John Barrett, Todd Boland, Darryl Cheng, Ben Cullen, Mario Doiron, Michel Gauthier, Mathieu Hodgson, Jan Pedersen, Stephanie Rose, Michael Rosen, Aldona Satterthwaite and Trudy Watt.
P rint Advertising
Gord Gage • 204-940-2701 gord.gage@pegasuspublications.net
Marketing Manager Micaela Soto • 204-940-2702 micaela@pegasuspublications.net
Subscriptions
Write, email or call Canada’s Local Gardener, P.O. Box 47040, RPO Marion Winnipeg, MB R2H 3G9 Phone: 204-940-2700 info@pegasuspublications.net
One year (four issues): $35.85
Two years (eight issues): $68.08
Three years (twelve issues): $98.40
Single copy: $12.95 Plus applicable taxes.
Return undeliverable Canadian addresses to: Circulation Department
Pegasus Publications Inc. PO Box 47040, RPO Marion Winnipeg, MB R2H 3G9
Canadian Publications mail product Sales agreement #40027604 ISSN 2563-6391
CANADA’S LOCAL GARDENER is published four times annually by Pegasus Publications Inc. It is regularly available to purchase at newsstands and retail locations throughout Canada or by subscription. Visa, and American Express accepted. Publisher buys all editorial rights and reserves the right to republish any material purchased. Reproduction in whole or in part is prohibited without permission in writing from the publisher.
Copyright Pegasus Publications Inc.


Masses of thyme in bloom, lavender and fans of iris foliage draw you in, and the shallow pool in the big piece of limestone seals the deal. We just couldn’t resist the image on the cover, by Tim Pidduck in his Belleville, Ontario garden (see page 48 for the full story).
Here are a few others we tried out to determine what picture to use.
Bright pink peonies striving to break through a wire support are enchanting, but peonies don’t really say winter. And this image has been floating around in our “possible covers” folder for a while, to the point where none of us remembers where it is from! Maybe we should use it in spring?
Gorgeous hostas take us back to a beautiful time spent in Stephanie Appleby’s garden near Halifax a few years ago, and this issue has a hosta story in it. The image, taken by David Johnson, was definitely under serious consideration.
The picture taken by Theo Wouters, with red geraniums punctuating the scene behind a bunch of ferns in his Pointe-Claire, Quebec garden (page 56) was another strong contender. In the end, we went for the brighter image.
Did we make the right choice? What do you think? y


Seaweed Magic is more than just a fertilizer. Made in Canada from seaweed harvested from the icy waters of Canada’s Atlantic coast, one 15 g packet gives you 125 litres of goodness you can use on your vegetables, flowers and houseplants, indoors and out. You can stock up on Seaweed Magic from Canada’s Local Gardener! 15 g for $12.95. Scan the link below or visit our webstore at localgardener.net

Try this for your kitchen! Canadian company Plantaform Technology Inc has introduced a revolutionary indoor garden that uses fog to grow plants twice as fast as traditional methods. This new fogponics system, inspired by NASA technology, uses only a nutrient-rich mist to feed plant roots, drastically cutting water usage by 98 percent and requiring only 60 watts of electricity.
Home gardeners can grow a variety of plants, from herbs and leafy greens to cherry tomatoes and edible flowers. This system is space-efficient, fitting into the corner of your home or office. It’s an attractive piece, about 2 feet high and wide, that looks like something from the Jetsons.
The garden features LED lights that adjust to the surroundings automatically to provide the perfect amount of light for each plant’s growth stage. The entire system is controlled by an app on your smartphone, but once you’ve set it up, you just wait for the edibles to grow and mature.
Designed and built in Canada, this indoor garden is a testament to sustainable innovation. It’s billed as accessible to the seasoned gardener or the complete novice. With the price and quality of produce these days, it sounds like a good idea. y
For more details, visit www.plantaform.com.

By Shauna Dobbie
Ipicked up a garden hose at the end of the GardenComm conference a couple of years ago. Tossed it into the trunk and figured I’d give it a go. What I didn’t realise is that it is the Dramm ColorStorm Premium Rubber Hose. Wow!
After replacing or fixing hoses year after year, this is the one I’ll be looking for from now on. It feels different, to begin with, because it’s rubber. It doesn’t kink! And it doesn’t break down over one season. I used it all spring-summer-fall in 2024 and it looks as good and performs as well as when I picked it up in August of 2023.
Plus, it comes in a variety of colours. Do you want a hose that blends in with your lawn? Choose Green. Want one that looks lovely among the daffodils? Choose Yellow. Always had a love affair with purple? Choose Berry.

Mine is red. And I love it. I’ve never felt this way about a hose before!
Details
ColorStorm Premium Rubber Hose
• 5/8 inches, 50 feet length
• Crush-proof nickel plated, brass fittings
• 340 psi pull strength – fittings will not pull off the hose

Discover the benefits of indoor hydroponic gardening with the Les Verts Terrace™:

Grow like a professional, no experience required
Taste the difference with gourmet, spray-free produce
Ultimate flexibility in what you can grow, including seedlings for your outdoor garden
All gardens come with a 90-day money back guarantee and a 5-year warranty
Featured Partner

Learn more at T&T Seeds or lesverts.com
• Hexagonal shape resists kinking
• 15% thicker wall – coils easily, flexible to –32 Celsius
• EPDM Rubber – won’t crack or separate
• Durable like car tires
• Acid resistant – used on farms, yards and food processing facilities
• Made in the USA y


Story by Shauna Dobbie, image courtesy of Proven Winners
The ‘Flavorette Pear’d’ rose is more than just a pretty face in the world of gardening. This innovative rose, developed by Proven Winners, invites both gardeners and food enthusiasts to discover a delightful blend of beauty and flavour. Its edible petals add an unexpected twist to traditional rose cultivation, combining ornamental charm with culinary versatility.
This rose is a deciduous shrub, growing to a height of 3 to 4 feet with a similar spread. It thrives in full sun, needing at least six hours of sunlight each day, and is hardy in USDA zones 4 through 8, making it a reliable choice for Canadian gardeners and beyond.
What truly sets ‘Flavorette Pear’d’ apart is its soft pink, bowl-shaped blooms, which feature thick, velvety petals that are edible. Not only are they a feast for the eyes, but they also surprise the palate with a subtle pear-like flavour. Imagine sprinkling the petals over a fresh salad for a delicate fruity note or infusing them into syrups and teas to create a unique culinary experience. The pleasant fragrance of the blooms also makes this rose a magnet for pollinators, bringing life and motion to your garden.

The plant itself has dark green foliage that contrasts beautifully with its blush-hued blooms, and it boasts a tidy, upright habit. It blooms on new wood throughout the summer, ensuring a steady display of flowers. Better yet, this rose is remarkably low maintenance. There’s no need to fuss over deadheading, as it keeps blooming without it. A light pruning in early spring – cutting the plant back by about one-third of its height – is all it takes to keep it flourishing. For the best results, prune just above a healthy bud.

Beyond the garden-to-table delights it offers, ‘Flavorette Pear’d’ fits seamlessly into a variety of landscaping styles. Its compact size makes it a perfect choice for borders, mixed beds, and mass plantings, while its ability to thrive in containers opens up opportunities for gardeners with limited space (though you’ll need to find the right spot for it through the winter; it won’t survive in a pot above the ground throughout most of Canada). Whether it’s gracing a balcony or stealing the show in a sunny corner of the yard, this rose is sure to charm.
As a hardy plant for zones 4 and up, ‘Flavorette Pear’d’ is well-suited to Canadian climates. It prefers well-draining soil and a sunny spot to thrive. While naturally resistant to disease, it benefits from good air circulation and watering at the base to keep its foliage dry and healthy. If you’re looking for a way to add a little culinary magic to your garden or bring a touch of elegance to your plate, this is a rose worth savouring. With its lush blooms, edible petals, and effortless care, this is one garden addition that’s as delightful to grow as it is to eat. y


BOB’S SUPERSTRONG GREENHOUSE POLY. 10 & 14 Mils. Pond liners. Resists hail, snows, winds, yellowing, cats, punctures. Long-lasting. Custom sizes. Free samples. Email: info@northerngreenhouse.com www.northerngreenhouse.com Ph: 204-327-5540 Fax: 204-327-5527 Box 1450 Altona, MB R0G 0B0
FLORABUNDA SEEDS Saving the Seeds of Our Past Heirloom Flowers, Vegetables, Herbs Wildflower Mixes - Unusual Varieties Non-GMO, Un-Treated Seeds www.florabundaseeds.com contact@florabundaseeds.com (P) – 705-295-6440
P.O. Box 38, Keene, ON K0L 2G0 Cross Canada Shipping
By Shauna Dobbie


The concept of keyhole gardens was popularised in the early 1990s by international aid organizations working in Lesotho, a small country in southern Africa. The goal was to provide a low-cost, waterefficient gardening solution that could help improve food security in regions facing drought and poverty.
Keyhole gardens draw inspiration from traditional agricultural practices, combining elements of permaculture, raised beds, and composting. The gardens are shaped like a keyhole when viewed from above: typically circular with a small notch (the keyhole) allowing access to the centre. The design has since spread across Africa and to other parts of the world where sustainable gardening is a priority.
At the core of the garden is a compost basket or pit, where organic kitchen scraps, grass, and manure are deposited. This is the heart of the garden, breaking down organic matter to enrich the surrounding soil.
The garden bed is built up around the compost basket, often using stones, bricks, or even recycled materials like tires. The raised design improves drainage and makes the garden easier to tend.
The soil within the bed is layered to maximize fertility and water retention. Layers typically include gravel or stones for drainage, followed by organic material like leaves, compost, and nutrient-rich topsoil. The sloped structure directs water and nutrients
from the compost basket to the plants, minimizing waste.
Keyhole gardens are a sustainable solution with a host of benefits. They are water-efficient, which is perfect for dry climates. They recycle nutri-
ents. The compact layout supports dense planting, providing a steady supply of vegetables, herbs, or medicinal plants. The raised structure makes them accessible to people of any age. And they are built to withstand challenging conditions like poor or rocky soil.
Keyhole gardens are typically used for quick-growing, nutrient-dense vegetables, like tomatoes, carrots, peppers and onions. Leafy greens and herbs round out the produce. Fastgrowing, resilient crops are favoured to ensure a continuous harvest and support food security. y

Story by Shauna Dobbie, image courtesy of Christian Lajoie

Christian Lajoie, of Le Safran de Smilax, is in his third year of growing saffron commercially in Québec, and it’s going well. In mid-November, when most commercial food growers are winding down for a break, Christian and his partner are hard at work harvesting the crop from the 100,000 crocus bulbs they planted just a couple of months earlier.
Saffron, the world’s most expensive spice, comes from the stigmas of Crocus sativus, a hardy perennial capable of thriving down to zone 3. Each flower produces only three red stigmas, which are hand-harvested, dried, and used as the coveted spice. Despite its delicate appearance, the saffron crocus is surprisingly resilient, thriving in well-draining soil and requiring a period of dormancy to produce flowers the following year.
The natural bloom time of saffron crocuses is October or November, which can pose a challenge in regions with early snow, like parts of the Prairies. Since saffron must be harvested while the flowers are in bloom, weather protection is essential. Christian notes that covering the planting area with a towel or row cover can shield the crocuses from early snow when it is forecast and ensure they survive the season.
Most saffron available in stores comes from Iran. However, by the time this saffron reaches your kitch-

en, possibly a couple of years after harvesting, much of its flavour and potency has been lost. The bioactive compounds responsible for saffron’s unique qualities – crocin (which provides colour), safranal (responsible for aroma), and picrocrocin (which contributes to taste) – degrade over time. Worse, not all saffron sold commercially is pure; adulterated products often include dyed corn silk, safflower threads, or turmeric.
Fresh saffron, however, delivers an intense, rich flavour and aroma that surpasses older or processed saffron. Its floral and earthy notes elevate both savoury and sweet dishes, even in small quantities. Beyond taste, fresh saffron also retains higher levels of its bioactive compounds, making it more potent both for culinary and medicinal purposes.
It’s no exaggeration to call saffron a labour-intensive crop. Harvesting requires precision and speed, as flowers must be picked early in the day before they wilt. With up to 150,000 flowers needed to produce just one kilogram of saffron, the effort justifies the spice’s hefty price tag, which can reach up to $10,000 per kilogram.
But for growers like Christian, the effort is worth it, not only for the potential profit but also for the satisfaction of growing a niche, highvalue crop that adds a touch of luxury to food.

Saffron has been used for centuries in traditional medicine, and modern research supports many of these claims. The spice’s properties make it a promising natural remedy for a range of conditions. Studies suggest saffron may: alleviate symptoms of premenstrual syndrome, improve erectile dysfunction, help regulate blood sugar and improve insulin sensitivity in diabetes, lower blood pressure and cholesterol, reduce the risk of macular degeneration, enhance cognitive function in Alzheimer’s patients, support mood improvement and reduce symptoms of depression and anxiety… and more.
Beyond its medicinal and culinary qualities, fresh saffron brings an element of elegance to any meal. From a simple saffron-infused risotto to intricate desserts, it adds both luxury and sophistication. For chefs and food enthusiasts, saffron offers an unmatched opportunity to create something truly special.
Christian Lajoie’s success demonstrates that saffron can indeed be grown commercially in Québec, even in the face of challenges like early snow and a labour-intensive harvest. His experience offers hope to other growers considering this unique crop and highlights the importance of local, fresh, and sustainable saffron production. And offers hope to a few gardeners considering adding it to the herb plot! y
Fleurs de Villes, the internationally acclaimed floral exhibition, recently concluded its ARTISTE showcase in Winnipeg, held from January 16 to 26, 2025, at The Leaf in Assiniboine Park. This event featured 15 unique floral mannequins crafted by local florists, each paired with an cultural organization. The installations celebrated various companies, including the Royal Winnipeg Ballet, Royal Manitoba Theatre Centre, Museum for Human Rights and more, offering visitors a sensory experience that highlighted the province's vibrant artistic community.
Fleurs de Villes was founded in 2016 by Canadian entrepreneurs Karen Marshall and Tina Barkley. Their vision was to create a unique blend of floral artistry and storytelling, celebrating both local florists and the communities they serve. The name, which translates to "Flowers of the Cities," reflects the event's mission: to bring stunning floral installations to urban settings worldwide.
The concept took inspiration from European flower markets and fashion exhibitions, combining both into an immersive floral experience. The inaugural event was held in Canada and was met with overwhelming success, leading to an expansion across multiple cities in North America and beyond.
At its core, Fleurs de Villes showcases life-sized sculptures dressed entire-

Photos by Micaela Soto


ly in fresh flowers, handcrafted by talented local florists. Each exhibition is themed, drawing inspiration from art, fashion, history, and culture. Over the years, themes have included Noël (a festive holiday edition), Voyage (a global travel-inspired theme), and Artiste (honouring influential artists and creatives).
Since its inception, Fleurs de Villes has grown into an internationally renowned event, with shows in cities across Canada, the United States, the United Kingdom, and Australia. It has collaborated with prestigious partners, including luxury shopping destinations, tourism organizations, and cultural institutions, helping elevate floral artistry as a celebrated public spectacle.

Following its success in Winnipeg, Fleurs de Villes is set to continue its Canadian tour with two upcoming shows:
• Toronto: May 7 to 11, 2025, venue to be determined.
• Calgary: July 4 to 13, 2025, at the newly expanded BMO Centre during the Calgary Stampede. Attendees can look forward to oneof-a-kind floral displays that promise to captivate and inspire.
With its commitment to supporting florists, artists, and communities, Fleurs de Villes has become more than just an event – it is now a movement that highlights the power of flowers to inspire, connect, and delight audiences around the world. y

Story by Penelope Beaudrow, photos by Serena More

Igrew up in a family where gardening wasn't just a hobby, it was a way of life. We cultivated our own vegetables, preserved the harvests, and raised hens for fresh eggs. For over 25 years, I maintained a large garden on our farm, but as time passed, it became too labour intensive. We decided to seed it in, and I created a smaller garden right outside the kitchen door, convenient for grabbing something while cooking.
Traditionally, my garden was solely a place to grow vegetables. However, I've found myself yearning for more: fresh herbs, medicinal plants, beautiful bouquets, and a space that is as aesthetically pleasing as it is functional. This desire led me to plan a beautiful kitchen garden, also known as a potager garden.
A potager garden differs from a standard vegetable plot by integrating beauty, functionality, and sustenance into one harmonious space. The term “potager” comes from the French word for a cook who makes thick soups. True to French sensibility, a potager garden isn’t just about vegetables; it’s about creating a charm-
ing, ornamental kitchen garden that looks as good as it tastes.
In my original vision, the kitchen garden is a distinct area bordered by an old rail fence on three sides, with the house forming the fourth boundary. A central water fountain serves as a focal point, making the garden both functional and visually appealing throughout the year.
Practicality is key in the layout. Wide paths will accommodate my wheelbarrow for easy access, and they'll be lined with wood chips to prevent soil compaction. Over the years, I've enriched the soil with compost and by burying small pieces of firewood deep into the ground to nourish it.
One of the charms of a potager garden is its everevolving nature. As one plant finishes its cycle, another takes its place, ensuring the garden is always in various stages of growth – freshly planted, maturing, or ready for harvest. Winter is my planning season; I spend the colder months pouring over catalogues (like Richters Herbs’ free plant and seed catalogue!) circling interest-


ing new varieties and getting excited for the coming season.
I plan to cultivate a mix of cool-season and warm-season crops. Early spring will see the planting of leeks, kale, lettuce, rainbow Swiss chard, beets, spinach, mesclun, parsley, marigolds, and calendula. Once warmer weather arrives, I'll introduce beans, basil, eggplants, tomatoes, peppers and squash.
Flowers are an essential component, not just for their beauty but for their practical benefits. Marigolds and nasturtiums will help deter pests, while cosmos and sunflowers attract pollinators. Edible flowers like calendula, lavender, and borage will add colour to salads and dishes and be used medicinally. To manage aggressive plants like horseradish, tansy, and mint, I'll grow them in containers to keep them from taking over.
After harvesting, I plan to immediately fill any gaps with fast-growing plants such as basil, bush beans, or lettuce to maintain a lush appearance. Crop rotation will be vital for garden health, and I'll save my garden designs each year to avoid replanting the same crops in the same spots.
Growing my own herbs for tea is one of my greatest joys. I'll cultivate anise hyssop, mint, lemon balm, and chamomile, as well as classic culinary herbs like basil, thyme, rosemary, sage, and oregano. Incorporating native plants, especially those at risk or endangered like American arnica, echinacea, white sage and sweetgrass, will add both beauty and ecological value to the garden.
In my potager garden, every plant will serve multiple


purposes. Thinnings will be utilized – for instance, closely planted onions can be harvested early as green onions, and baby greens can be thinned for salads. I'll make use of all plant parts, incorporating carrot and beet tops and garlic scapes into stocks, soups, salads, and even floral arrangements.
Careful planning is aimed at creating a garden that is both productive and beautiful. Companion planting will play a significant role: basil beside tomatoes, borage alongside squash and strawberries, and marigolds surrounding vegetables to deter pests. Other combinations like cabbage and dill with marigolds, kale with poppies, and purple beets with ornamental plants will enhance both functionality and aesthetics.
Perennials such as Good King Henry, lovage, asparagus, chives, walking onion, garlic, horseradish, sweet cicely, and rhubarb will have their place, providing long-term sustenance. The garden layout will focus on accessibility and beauty, with paths leading to the central fountain and well-framed garden beds. The edges of the garden will tie everything together into a cohesive and inviting space.
The ultimate goal of my potager garden is to create a joyful space that is alive and ever-changing, continually offering something fresh – be it flowers for the table, herbs for tea and medicine, or vegetables for nourishing meals. I envision a garden that is as delightful to behold as it is to harvest from, truly an extension of my home and my life. y
Penelope Beaudrow is the SME (Subject Matter Expert) / Head Herbal Community of Richters Herbs.
By Shauna Dobbie

One of the most enchanting qualities of roses is their fragrance – or fragrances, we should say, because they don’t all smell alike and some have no scent at all. The aroma of roses is a complex interplay of genetics, chemistry, and environmental factors.
The scent of roses comes from a blend of volatile organic compounds (VOCs) in the petals. This is why a heavily petalled David Austin rose is more fragrant than a simple single rose. Lots of things are better with simplicity, but the smell of roses isn’t one of them.
There are more than 400 VOCs, but only a few dominate the characteristic rose scent. Some of them are:
• Terpenes are responsible for citrusy or floral notes.
• Phenylpropanoids provide sweet,
spicy, and clove-like aromas.
• Fatty acid derivatives contribute green or fruity scents.
• Geraniol and citronellol are associated with the classic, sweet rose smell.
• Beta-damascenone is a powerful compound found in Damask roses, contributing to their rich and heady fragrance. (Damask roses are less hardy than many roses grown in Canada.)
Why some roses are more fragrant
Genetic factors. The genetic makeup of a rose determines its ability to produce specific VOCs.
Old garden roses like Damask and Bourbon roses are often highly fragrant because they were bred for scent rather than appearance.
Modern roses, especially hybrid teas, may have reduced fragrance due
to breeding priorities. Rose breeders often focus on attributes like disease resistance, bloom longevity, and colour, inadvertently reducing the production of VOCs.
Some buyers actually prefer scentless roses from the cut-flower trade. Roses that lack fragrance often have mutations in genes responsible for VOC production. Additionally, the energy a plant uses to produce scent may be diverted to other traits like larger flowers or longer-lasting blooms.
Environmental influences. The intensity of a rose’s scent is affected by external factors, including temperature, humidity and soil conditions. Warm, sunny days enhance the release of VOCs, making roses smell stronger. Moderate humidity amplifies fragrance perception, while
overly dry conditions can diminish it. And healthy, nutrient-rich soil is best for fragrant roses.
There is also the time of day to consider. Many roses release their strongest scent in the early morning or late evening when temperatures are cooler and moisture levels are higher.


Advancements in genetic research are helping scientists understand and enhance rose fragrance. Researchers have identified key genes involved in VOC production, such as one known as RhNUDX1, which controls the synthesis of beta-damascenone. This
knowledge could lead to the development of modern roses with both strong fragrance and desirable traits like disease resistance and long-lasting blooms. One example of success is the development of fragrant varieties like David Austin’s English Roses, which combine the beauty of modern roses with the scent of old garden roses. y
Rugosa roses, known for their hardiness and intense fragrance. They are an excellent choice for Canadian gardens. These two were bred in France over 100 years ago.
‘Hansa’ has a spicy, clove-like scent and double magenta blooms that repeat throughout the season. Zone 3.
‘Blanc Double de Coubert’ has a strong, classic rose scent. The blooms are semi-double and beautiful, pure white. Zone 3.
Explorer Series roses were developed in Canada specifically for cold climates. They are hardy and disease resistant. Though not as heavily scented, here are two that are more fragrant.
‘John Davis’ has a light, sweet fragrance. The pink blooms are big and climb or sprawl as shrubs. Zone 3.
‘John Cabot’ has a mild, fruity scent. It has semi-double, deep pink flowers with excellent repeat blooms. Zone 3.
Parkland Series roses were also bred in Canada for cold hardiness and disease resistance, with some fragrant varieties.
‘Morden Centennial’ has a light, sweet fragrance. Blooms are medium double pink and they are excellent in borders or for mass plantings. Zone 3.
‘Morden Blush’ is delicately scented and has pale pink blooms with a soft gradient to creamy white. Zone 3.
‘Adelaide Hoodless’ has a light pleasant scent and bright red, semidouble, long-blooming flowers. Zone 3.
Other fragrant roses bred in Canada, beloved for their strong scent.
‘Therese Bugnet’ has a rich, classic rose scent. Double, deep pink flowers on nearly thornless canes, making it a favourite in cold regions. Zone 2.
‘Wasagaming’ has a sweet, strong fragrance and large, semi-double, bright pink flowers. Zone 2.
‘Louise Bugnet’ has a strong, spicy and sweet scent. White blooms are often tinged with pink and thornless. Zone 2.
David Austin roses are less hardy but, good heavens, they smell glorious. These are for slightly warmer areas, in Ontario, Quebec, BC and the Maritimes. They were bred in England.
‘Gertrude Jekyll’ is one of the most fragrant Austin roses, with a classic old rose scent. Works as a tall shrub or short climber. Rich pink, full-petaled flowers. Zone 5 with winter protection.
‘Boscobel’ has a strong myrrh scent with hints of pear, almond and elderflower. Compact grower with salmon-pink, full flowers. Zone 5 with winter protection.
‘The Poet’s Wife’ has rich, fruity lemon overtones. The blooms are bright yellow and have that full, rosette shape. Zone 5 with winter protection.
Winter protection for David Austin roses means mulching heavily (up to 6 inches) around the base before winter, then mounding the soil 12 to 14 inches over the crown. Wrap the plant in burlap or use a rose cone for additional protection.
While it’s possible to grow David Austin roses in Zone 3 with significant winter protection, the effort may outweigh the results for some gardeners. Carefully selecting hardy varieties and taking proactive measures to shield them from the cold will give you the best chance of success.


Story by Shauna Dobbie, images courtesy of Proven Winners
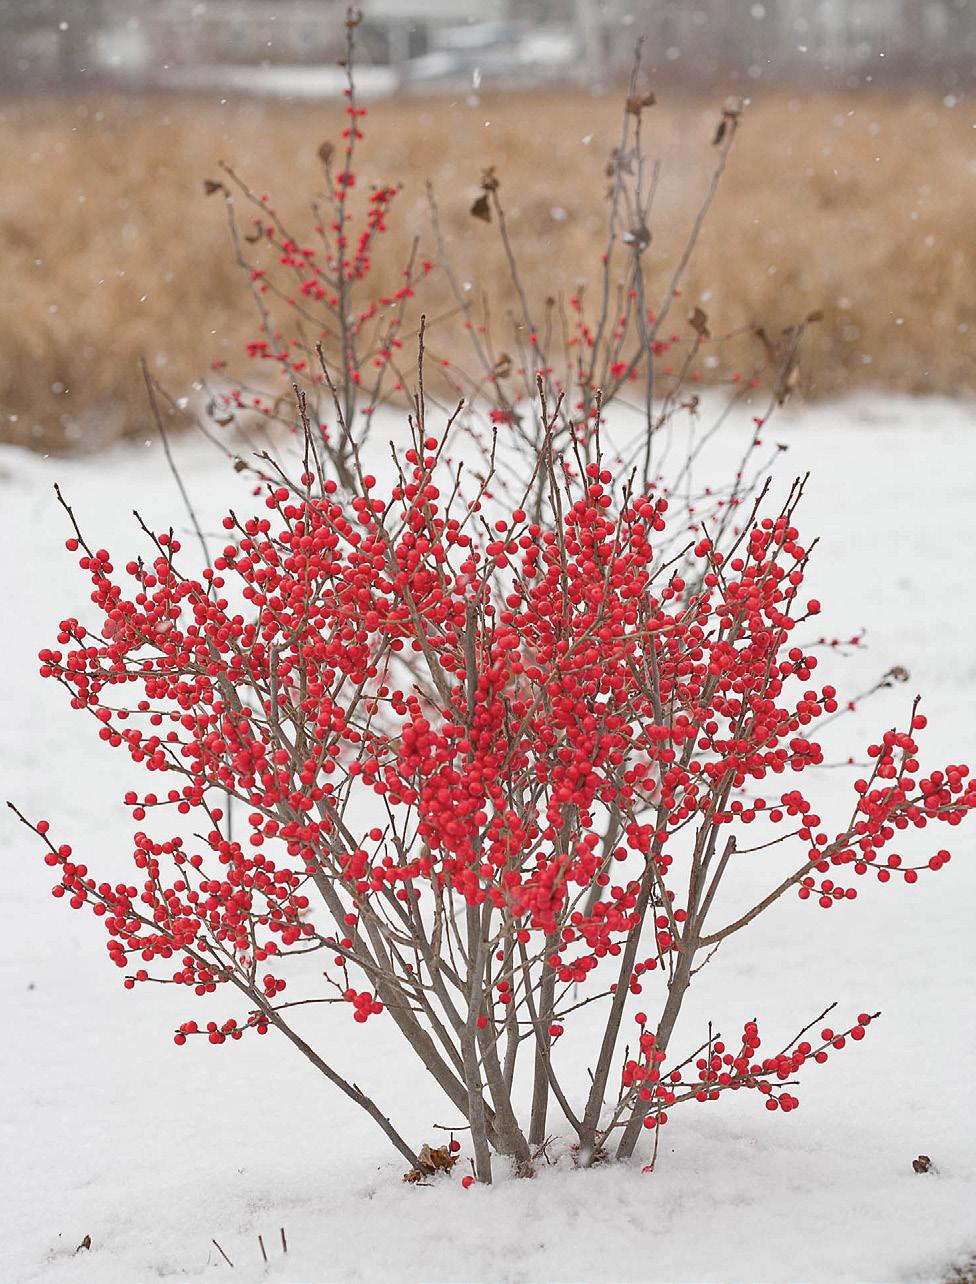
The berries are a crucial food source for over 50 bird species, including robins, cedar waxwings, and thrushes, during the lean winter months. However, they are not a bird’s first choice, meaning they often persist into late winter, when other food is scarce.
For humans and other mammals, though, they are mildly toxic. This characteristic helps the plant avoid over browsing but makes it safer for wildlife that have adapted to eat them.
Winterberry (Ilex verticillata) is a standout addition to any garden, particularly in areas with long, snowy winters. Unlike evergreen holly, which holds its glossy green leaves yearround, winterberry is a deciduous holly, meaning it loses its leaves in autumn. This characteristic allows its brilliant red berries – or yellow on certain varieties – to shine unobstructed, creating a stunning display against the starkness of winter landscapes. Native to North America, winterberry is well-suited to our gardens, offering both aesthetic and ecological benefits.
For those gorgeous berries, you will need at least two shrubs, a male and a female. At least one male shrub is needed for every three to five female shrubs to achieve proper pollination. Planting them within 40 feet of each other is ideal to ensure pollen transfer by wind or insects.
Winterberry thrives in hardiness zones 3 and up. It prefers acidic soils with a pH range of 5.0 to 6.5. This shrub naturally grows in wetlands and along streams, so it thrives in consistently moist conditions. While it can tolerate occasional standing water, it also adapts to drier soils once established, though regular watering is crucial during dry spells. In more alkaline soils, leaves will turn yellow and the plant will slowly die.
For optimal berry production, plant winterberry in full sun to partial shade. More sun typically results in a denser berry set, but it can still thrive in slightly shaded areas. Depending on the cultivar, winterberry shrubs can grow between 3 and 10 feet tall and wide. Compact varieties are perfect for smaller spaces, while larger ones are ideal for more expansive garden borders or hedges.
Winterberry is a boon for wildlife. Its flowers, though small and inconspicuous, attract bees and other pollinators in the spring. In winter, its berries serve as an essential food source for birds like robins, cedar waxwings, and bluebirds, especially when other food is scarce. However, the berries are not a preferred snack, as they are mildly toxic to humans and most animals, so they often last well into the winter.

This makes them particularly valuable as a source of late-season nourishment. On the other hand, deer and rabbits may browse on the branches, especially in winter when food is limited. This can strip the shrub of its ornamental appeal, so you may need to spray with a topical repellent to keep the berries.
Choosing a cultivar with proven berry retention, such as ‘Berry Poppins’ or ‘Berry Heavy’, either of which can be pollinated by ‘Mr. Poppins’, can also help ensure your winter display lasts. Protecting the shrubs from birds and deer can be tricky but planting multiple bushes can provide enough berries to share with wildlife while still leaving plenty for ornamental purposes.
Winterberry shrubs are a versatile addition to the garden. They work beautifully in mass plantings, as hedges, or as specimen plants. Their bright berries provide not only visual interest but also ecological benefits, making them a thoughtful choice for gardeners who want to support pollinators and birds. Whether you’re drawn to their cold-hardiness, low maintenance requirements, or winter beauty, winterberry is a plant that delivers. y

Want to know how to tell the difference between a male and a female winterberry holly? Stacey from Proven Winners will tell you how.

https://www.youtube.com/watch?v=OEJMQ-V-Mss&t=239s


Plan the ratio. Winterberry shrubs require male plants for pollination, but only female shrubs produce berries. Use one male plant for every three to five females.
Tuck males discreetly. Position male plants slightly behind the main hedge line or stagger them so they’re less noticeable. Placing them at the ends of the hedge or in inconspicuous corners can also help maintain a seamless look.
Optimise spacing. Space the shrubs 3 or 4 feet apart for a dense, natural appearance. Ensure male plants are no more than 40 feet from the nearest females to guarantee successful pollination.
Maintain uniformity. Prune male shrubs lightly to match the size and shape of the female plants. This will help them blend into the hedge while still allowing pollination.
Alternatively, you could plant a couple of males elsewhere in the yard, not far away from the hedge. Scan
Story by Shauna Dobbie, images by Dorothy Dobbie except where noted

The hosta is the queen of the shade garden. These sumptuous plants are a much loved choice for gardeners owing to their lush foliage, adaptability, and wide variety of sizes and colours. Native to East Asia, particularly Japan, Korea, and China, hostas have been cultivated for centuries and are a staple in gardens worldwide, particularly in regions like ours, where their hardiness shines.
Hostas are herbaceous perennials prized for their striking leaves, which come in an astonishing array of shapes, sizes, textures and colours. From deep emerald greens to blue-hued leaves that seem to shimmer, and even variegated varieties with cream or gold margins, hostas offer endless design possibilities. Their flowers, while secondary to the foliage, are charming in their own right, emerging on tall scapes in mid to late summer. These bell- or trumpetshaped blooms typically range from white to lavender and are often fragrant, adding an additional sensory dimension
to the garden.
One of the most appealing traits of hostas is their adaptability. While they are synonymous with shade gardening, many varieties tolerate partial to full sun, particularly those with gold or chartreuse leaves. However, most hostas prefer dappled shade or morning sun paired with afternoon shade. They thrive in rich, well-drained soil with consistent moisture but can tolerate periods of dryness once established. Adding organic matter such as compost to the soil enhances their growth and vigour.
Hostas are categorised by size, from diminutive varieties like 'Blue Mouse Ears' that stay under 6 inches tall to towering giants like 'Empress Wu,' which can exceed 4 feet in height and 6 feet in spread. This size diversity allows gardeners to use hostas as ground covers, border plants, or dramatic focal points in shaded landscapes. When designing with hostas, contrasting their leaf textures and colours creates a magnificent dynamic visual tapestry.

These perennials are surprisingly resilient, surviving in temperatures as low as -40˚ Celsius. In colder regions, a layer of mulch helps insulate their roots during the harsh winter months. In spring, hostas awaken from dormancy with tightly furled shoots known as “eyes”, quickly unfurling into their full glory.
With thousands of cultivars available, there's a hosta for every gardener, whether you're drawn to the understated elegance of a single-colour variety or the eye-catching brilliance of a bold variegated form. By choosing the right variety for your garden's conditions and providing minimal care, hostas will reward you with years of lush, dependable beauty, proving why they are perennial favourites in gardens across Canada and beyond.
One of the few challenges hostas face in Canadian gardens is their susceptibility to pests, particularly slugs and snails, which can mar their leaves with unsightly holes. Organic solutions such as diatomaceous earth, beer traps, or copper barriers help manage these pests. Deer and rabbits also find hostas delectable, so protective measures like fencing or deterrents may be necessary in areas with high wildlife activity.


Some hostas have been bred for slug tolerance. They have thicker leaves that are more textured and have a waxy cuticle on their leaves, all of which make them less appealing to slugs.
Another concern for hosta enthusiasts is the dreaded hosta virus X (HVX). It is a notable concern for hosta enthusiasts, including gardeners in Canada. First identified in 1996, HVX has since spread widely, affecting hosta plants across many regions. This virus is primarily transmitted through the sap of infected plants, often during propagation or through contaminated gardening tools.
Symptoms of HVX include dark green streaks or “ink bleed” marks along leaf veins, tissue collapse, and mottled or distorted leaf patterns. Unfortunately, there is no cure for infected plants. To prevent the virus from spreading, any hostas showing symptoms should be carefully removed and destroyed.
To reduce the risk of HVX in your garden, always purchase hostas from reputable nurseries or suppliers, inspect plants regularly for signs of the virus, and practise diligent sanitation by cleaning tools thoroughly after use. These preventative measures can help protect your garden


from this troublesome disease.
Propagation
Propagating hostas is straightforward, typically done through division. The best time for division is early spring as shoots emerge or in early autumn before frost sets in. Dividing hostas not only produces new plants but also rejuvenates older clumps that may have become congested.
Discover 400 different slug-resistant hostas from one of our favourite bloggers, Larry Hodgson.
https://laidbackgardener.blog/2022/01/20/ 400-slug-resistant-hostas-for-laidback-gardeners/
Hostas pair beautifully with a range of other shadeloving plants, including ferns, astilbes, and heucheras. Their bold foliage provides a perfect backdrop for more delicate textures and allows for stunning contrasts in the garden. For a truly spectacular display, combine hostas with spring bulbs like daffodils or snowdrops, which offer early-season interest before the hostas fully emerge. How to plant and care for hostas
Choose the right location. Select a spot with dappled shade or morning sun and afternoon shade. Some suntolerant varieties can handle more light, especially those with gold or chartreuse foliage. Any hosta that tends toward blue must be in partial shade.
Prepare the soil. Use rich, well-draining soil. Add organic matter like compost to improve fertility and moisture retention.
Plant properly. Dig a hole twice as wide as the root ball and deep enough so the crown is just at or slightly above
soil level. Space plants according to their mature size to allow for proper growth.
Water regularly. Hostas like consistently moist soil. Water deeply once or twice a week, more often during dry spells.
Mulch generously. Add a 2 to 3 inch layer of mulch around the plants to retain moisture and reduce weeds, but keep it away from the crown to prevent rot.
Fertilise sparingly. Use a balanced, slow-release fertiliser in spring as the plants begin to grow. Avoid over-fertilising, which can promote weak growth.
Divide when necessary. Divide clumps every three to five years in early spring or autumn to maintain vigour and propagate new plants.
Protect from pests. Control slugs and snails with organic methods like beer traps, diatomaceous earth, or copper barriers. Use deterrents to protect from deer and rabbits if needed.
Watch for disease. Check for signs of hosta virus X and remove any infected plants to prevent the disease from spreading.
Prepare for winter. Allow foliage to die back naturally in the fall, then remove it to reduce pests and diseases. Mulch lightly to protect roots during freezing temperatures. y
‘Blue Angel’. Large, blue-green leaves with a heavy texture. The tough leaves are unappealing to slugs and its size (3 feet tall by 4 feet wide) adds a dramatic statement to shady gardens.
‘Sum and Substance’. Giant, chartreuse leaves with a thick texture. Its robust leaves resist slug damage, and it thrives in a range of light conditions. Leave room for it! It grows to 3 feet high by 5 feet wide.
‘Halcyon’. Compact, blue-grey leaves with a smooth, thick texture.
Slugs avoid the tough foliage, making it ideal for smaller garden spaces. Height 18 inches, spread 45 inches.
‘June’. Variegated leaves with bluegreen margins and chartreuse centres. The thicker foliage resists slug attacks while adding visual interest to your garden. Height of 12 inches, spread of 30 inches.
‘Patriot’. Dark green leaves with white margins. Its thick leaves withstand slug damage and offer striking colour contrast. Attains a size of 24 inches tall by 48 inches wide.
‘Big Daddy’. Large, puckered, blue-grey leaves. The dense texture of the leaves makes this variety nearly slug-proof. Gets to 24 inches high by 36 inches wide.
‘Francee’. Green leaves with white edges and a slightly glossy finish. Its sturdy leaves repel slugs and maintain a polished look. Height of 30 inches by spread of 48 inches.
‘Mouse Ears’. Tiny blue spreader, maxing out at 8 inches high, but spreading to 18 inches wide. The foliage is thick and waxy.
Story and photos by Robbie Gorr

Decorating a memorial monument in a cemetery is one way of demonstrating the continuing affection and remembrance we have for departed loved ones. Too often we see those standard floral arrangements, pre-made and artificial, adorning graves and columbaria everywhere. They are convenient and practical, albeit expensive, and require little maintenance other than replacement when the bright flowers bleach in the sunlight or become weatherworn and torn. But wouldn’t it be a striking improvement if those fading floral bouquets could be replaced with real plants of continuing beauty and vibrant colour to create a living memorial tribute to beloved family or friends? This is where a few simple graveyard gardening tips can be indispensable.
Gardening in graveyards is a somewhat different task than gardening at home. For starters, you need to remember that you don’t own the land that you will be working. Graveyards are the legal property of some individual,
church, organization or municipality and you will need to find the rules and regulations of the cemetery to learn what you can and cannot do. These vary from place to place but are usually posted somewhere in the area, near the entrance or even at the caretaker’s shed. Where they are not posted, you will need to contact the propertyowning organization to obtain the information.
Having ascertained that in-ground plantings are permissible, the types of plantings that are acceptable and the amount of space you may use to establish your memorial garden, then it’s time to really begin. It’s wise to plan ahead by deciding on an arrangement and selecting appropriate plants. You need to consider your work space, the eventual size of mature plantings and the aesthetic appearance of your design layout as well as the amount of maintenance that may be required afterwards.
Most graveyards allow plantings that extend no further than the base of the memorial monument and up to a foot


It’s important to consider the mature size of any planting and whether it will overwhelm and obscure the monument or preferably enhance it.
away from it. Your bed can be rectangular, semi-circular or asymmetrical in shape or may even be mounded and raised, depending on what you intend to plant and how it will look against the monument.
You will want to remove all grass and weeds and possibly even some of the soil, depending on what you find. Adding or replacing it with some good humus-rich earth will benefit your endeavours as it will provide necessary nutrients for the plants and help hold water.
An enclosure created by some form of garden edging, plastic or sustainable like bamboo, old bricks, recycled wood, river rocks or any other available material will help to define your planting area. It will also serve to protect it from lawnmowers and trimmers and be a barrier to incursive grass and weeds.
Your selection of plants will be of vital importance. Choose plants that are heat-hardy and drought-tolerant to survive hot summer days. Don’t forget to consider the amount of sunlight as many cemeteries receive a great deal in generally open areas unless they are sheltered

by adjacent trees, shrubs or structures. And, of course, you must assess the amount of water they will receive from seasonal precipitation or require from maintenance visits.
There are some sturdy perennials that do well in graveyard conditions and are frequently seen as plantings there. These include hostas, daylilies, peonies, hydrangeas, cedar shrubs and even some varieties of shrub and ground cover roses but you will need to consider the size of fully-grown plantings and whether they will enhance or hide the monument. And while perennials can provide a consistent showing of greenery, the flowers usually provide only a temporary display of colour.
The use of annuals offers a much wider range of plants and colours to select for a continuous seasonal show. And there are many drought-tolerant and hardy species that require little or no deadheading including wax begonias, Supertunia petunias, million bells and impatiens. If you are planning to visit frequently over the growing season then your choice of annuals requiring some maintenance

Self-watering globes or a homemade plastic bottle reservoir can help provide moisture between your maintenance visits.

will increase further to include marigolds, other petunias and geraniums.
The design and layout of your plantings should consider first and foremost the position next to the monument and whether they will overwhelm or obscure the tombstone as they grow. Plants that grow taller perhaps could be placed at the sides while lower growing plants can take center place. Whether you choose a mix of plants and flower colours, a favourite pairing or a monochrome scheme, you might also want to consider whether your choices will complement the colour of the monument and its setting.
If you discover that in-ground plantings are not permitted perhaps container planting might be an option. If there is room on the base of the monument then a pot or planter might be added. There are several types of pot holders available for most sizes of monuments that fit over the tombstone and rest on the base providing side shelves suitable for pots or that have attached pots which can be planted. And then, of course, there are pot holders on stakes or pole basket hangers that can be placed in close proximity to the tombstone.
Similar considerations apply to container planting as to in-ground planting when making plant choices. And, as with any seasonal installation, the addition of fertilizer will ensure continued growth and bloom.
If you are unable to make regular visits to water or weed your cemetery garden it would be beneficial to add a layer of mulch to help retain moisture and prevent evaporation. Mulch also maintains soil temperature and inhibits weed growth. Another alternative is to add self-watering globes or a homemade reservoir as you might do for houseplants when you are absent for a time.
Following such practical tips and reliable advice will help you become a great graveyard gardener with the ultimate result being the creation of a colourful living memorial tribute to dearly loved family and friends. What more poetic epitaph for the departed than a vibrant show of life? y
Robbie Gorr is a retired elementary school teacher from Petawawa, Ontario in the heart of the Ottawa Valley. He is an enthusiastic gardener, at home and for a couple of family cemetery plots, as well as a genealogist, local historian, writer and photographer.


A’Bunadh Seeds
Cherhill, AB abunadhseeds.ca
Across the Creek Organics Pemberton, BC acrossthecreekorganics.ca
Agro Haitai Lynden, ON agrohaitai.com
Akène culture forestière Montreal, QC akene.ca
Annapolis Seeds Nictaux, NS annapolisseeds.com
Atlantic Pepper Seeds Harvey, NB pepperseeds.ca
Bass Lake Farms Oro-Medonte, ON basslakefarms.ca
BC Eco Seed Co-op BC bcecoseedcoop.com
BC’s Wild Heritage Plants Sardis, BC bcwildheritage.com
Bear Root Gardens Verona, ON bearrootgardens.com
Beautiful Blooms Leslieville, AB beautifulblooms.ab.ca
Berton Seeds Company Ltd Toronto, ON bertonseeds.ca
Brave About Veggies braveaboutveggies.ca
Bright Bush Farm Wembley, AB brightbushfarm.ca
Brother Nature Victoria, BC brothernature.ca
Bumble Seeds
Vancouver Island, BC bumbleseeds.com
Carrick Seeds Mildmay, ON carrickseeds.ca
Casey’s Heirloom Tomatoes Airdrie, AB caseysheirloomtomatoes.ca
Choked Up Salmon Arm, BC chokedup.ca
Circle Farms Heirloom Seeds Calgary, AB circlefarms.ca
Cochrane Family Seeds Upper Stewiacke, NS cochranefamilyfarm.com
CoCreative Seeds Turner Valley, AB cocreativeseeds.com
Common Sense Seeds Calgary, AB commonsenseseeds.ca
Croisee des Cultures
Sainte-Claire, QC croiseedescultures.com
Eagle Creek Seed Potatoes Red Deer County, AB seedpotatoes.ca
Eagleridge Seeds
Salt Spring Island, BC eagleridgeseeds.com
Early’s Farm and Garden Centre Saskatoon, SK earlysgarden.com
Early’s has been serving Saskatchewan growers with quality products and expert advice for over 118 years. Early’s
has one of the largest garden seed selections available all year long! Perfect for spring prep, or winter indoor gardening too! While placing your seed order on their website, you can check out their other gardening supplies, as well as lawn, yard care, pet and livestock items! Two retail locations open year-round
Eternal Seed Powell River, BC eternalseed.com
Ferncliff Gardens ferncliffgardens.com
Dahlias! Dahlias! Celebrating their 105th year providing Canadian gardeners with premium Dahlias! Located in Mission, BC, Ferncliff Gardens’ catalogue is a wonder to behold. If you are a serious collector of dahlias, this is the place to go. If you are new to dahlias, consider one of their special collections; you’ll be hooked!
Florabunda Seeds Keene, ON florabundaseeds.com
Franken Farm Bruce Peninsula, ON frankenfarm.ca
Full Circle Seeds
Sooke, BC fullcircleseeds.com
Gaia Organic Seeds Ottawa, ON gaiaorganics.ca
Garden Alchemy Seeds Mildmay, ON gardenalchemyseeds.ca
Garden Girl Seed Creston, BC gardengirlseeds.ca
Good Earth Farms Black Creek, BC goodearthfarms.ca
Greta’s Organic Gardens Ottawa, ON seeds-organic.com
Halifax Seed Company Halifax, NS halifaxseed.ca
Hawthorn Farm Organic Seeds Mount Forest, ON hawthornfarm.ca
Heritage Harvest Seed Fisher Branch, MB heritageharvestseed.com
Heritage Hobby Seed Ark Sudbury, ON heritagehobbyseed.com
Heritage Seed and Produce Kingston, ON heritageseedandproduce.com
Hope Seeds and Perennials Annapolis Royale, NS hopeseed.com
Hortinova Seeds Montreal, QC hortinova.ca
Howard Dill Enterprises Windsor, NS howarddill.com
Incredible Seed Company Bridgewater, NS incredibleseeds.ca
Jardin des Vie-la-joie
Sainte-Agathe-de-Lotbinère, QC vielajoie.com
Jardins de la Gaillarde Sherbrooke, QC jardinsdelagaillarde.ca
Kitchen Table Seed House Wolfe Island, ON kitchentableseedhouse.ca
La Ferme Cooperative Tourne-Sol Les Cedres, QC fermetournesol.qc.ca
La Ferme de l’Aube Boileau, QC lafermedelaube.com
La Finquita Wallace Bay, NS lafinquita.ca
La Société des Plantes
Kamouraska, QC lasocietedesplantes.com
Laughing Swan Farm Kamloops, BC laughingswanfarm.com
Le Jardin de Julie Rimouski, QC jardindejulie.com
Le Noyau Semences Stanbridge East, QC lenoyau.com
Le Potager Ornemental de Catherine
St-Appollinaire, QC potagerornemental.com
Les Jardins de l’Ecoumène Saint-Damien, QC ecoumene.com
Les Semences du Batteux Beaumont, QC lessemencesdubatteux.ca
Les Semences la Campagnarde Longueuil, QC lacampagnarde.ca
Lindenberg Seeds Brandon, MB lindenbergseeds.ca This is one company that still does things the old fashioned way: print off the order form from their website and you can fax it to them. Since 1935, the philosophy has been to supply quality seed at a fair price.
Manhattan Farms Vernon, BC manhattanfarms.ca
Mapple Farm Weldon, NB mapplefarm.com
Matchbox Garden Seed Company Caledonia, ON matchboxgarden.ca
Metchosin Farm Seeds Metchosin, BC metchosinfarm.ca
Moonglow Seeds Sturgeon County, AB growersblend.ca
Mount Royal Seeds Montreal, QC mountroyalseeds.com
Mumm’s Sprouting Seeds Parkside, SK sprouting.com
Natural Seed Bank Port Hope, ON seed-bank.ca
Natural Seeds Joliette, QC naturalseedscanada.com
No Coast Seeds Wroxton, SK nocoastseeds.ca
Northern Seeds Farrellton, QC northernseeds.ca
Northern Wildflowers Whitefish, ON northernwildflowers.ca
Norton Naturals Eastern Ontario, ON nortonnaturals.com
Oak Summit Nursery Brandon, MB oaksummitnursery.ca
OSC Kitchener, ON oscseeds.com
PEI Seed Alliance PEI peiseedalliance.ca
Pepper Merchant Toronto, ON peppermerchant.net
Perfectly Perennial St. John’s, NL perfectlyperennial.ca
Piebird Farm Sanctuary Nipissing, ON store.piebird.org
Prairie Garden Seeds Humboldt, SK prairiegardenseeds.ca
Rainbow Seeds Roachville, NB rainbowseeds.ca
Ravensong Seeds and Herbals Comox Valley, BC ravensongherbals.com
Rebecca’s Garden Victoria, BC rebeccasgarden.ca
Revival Seeds Mosher Corner, NS revivalseeds.ca
Richters Herbs Goodwood, ON richters.com
Root Cellar Gardens
South Giullies, ON rootcellargardens.com
Saanich Organics
Saanichton, BC saanichorganics.com
Sage Garden Greenhouses Winnipeg, MB sagegarden.ca
Salt Spring Seeds
Salt Spring Island, BC saltspringseeds.com
This company has been around for over 30 years. They sell heirloom and organic seeds, all produced on and around Salt Spring Island. Their focus is on sustainability and becoming self-reliant.
Saturday Seed Company Guelph, ON saturdayseedco.ca
Seed to seed Blockhouse, NS seedtoseed.ca
Seeds of Imbolc Fergus, ON seedsofimbolc.ca
Seedsaving Errington, BC seedsaving.ca
Semences du Grand-Portage Saint-Didace, QC semencesduportage.com
Semences Nouveau Paysan Saint-Cuthbert, QC nouveaupaysan.com
Small Island Seed Company Protection Island, BC smallislandseedco.com
Solana Seeds Repentigny, QC solanaseeds.netfirms.com
Sow Local Seeds Jeddore, NS sowlocalseeds.ca
SSOL Gardens Kamloops, BC ssolgardens.com
Stems Flower Farm Cookstown, ON stemsflowerfarm.ca
Stokes Seeds Thorold, ON stokeseeds.com/ca/

Sunshine Farm
Kelowna, BC sunshinefarm.net
This is a farm that offers vocational development opportunities to adults in the Community Living sector. They sell several certified organic seed varieties online.
Superior Seed Producers Thunder Bay, ON superiorseedproducers.wordpress.com
Sweet Rock Farm Gabriola, BC sweetrockfarm.ca
T&T Seeds
Headingley, MB ttseeds.com
Tatiana’s Tomatobase Columbia Valley, BC tatianastomatobase.com
Terra Edibles Foxboro, ON terraedibles.ca
Terre Promise Montreal, QC terrepromise.ca
The Secret Garden Blyth, ON thesecretgardenonline.org
Here at The Secret Garden, we specialize in beautiful flowers. We offer a special curated line of flower seeds available for order in our online shop which are shipped across Canada. All of our product is grown right here on our farm, offering you a slice of beauty from our enchanting world!
The Seed Company by EW Gaze St. John’s, NL theseedcompany.ca
Three Forks Farms Manitoulin, ON threforksfarms.com
Three Forks Seeds Gore Bay , ON threeforksseeds.com
Tiny Monster Lorette, MB tinymonstergarden.com
Twining Vine Garden
Fanny Bay, BC twiningvinegarden.com
Urban Harvest Warkworth, ON uharvest.ca
Urban Tomato Peterborough, ON urbantomato.ca
Veseys Seeds York, PE veseys.com
Founded in 1939, Veseys Seeds Ltd. is Canada’s largest, family-owned, mail order gardening company. Specialists in vegetable, herb, organic and flower seed, Veseys also offers Canada’s widest range of both spring and fall planting bulbs and perennials. In addition to seed and plant material the company has an extensive line of gardening tools that range from green-houses to planting accessories. Now celebrating 86 years of serving Canada’s home and market gardeners, all catalogues are free and may be requested on line or by calling 1-800363-7333. As their guarantee states “If you are not completely satisfied with your order upon delivery, Veseys will replace or refund with no questions asked”.
West Coast Seeds Delta, BC westcoastseeds.com
WH Perron Laval, QC whperron.com/en
Wild Rose Heritage Seed Lethbridge, AB wildroseheritageseed.com
William Dam Seeds Dundas, ON damseeds.com
Winnow Seed Company Krestova, BC winnowseedco.ca
Yonder Hill Farm Laconia, NS yonderhillfarm.ca
Zombie Seedz Granby, QC zombieseedz.ca y
We believe that this list is up to date as we go to press. If we have missed any, or if any are no longer in business, please let us know.


Story by Shauna Dobbie

Seed storage is a critical aspect of gardening that can significantly impact your planting success. While many gardeners save seeds from season to season, not all seeds have the same shelf life. Understanding how different storage conditions affect the viability of seeds can help you maximize your garden's potential.
The basics of seed storage
Seeds are living embryos that require proper conditions to maintain their viability until planting. Key factors affecting seed longevity include temperature, humidity, and exposure to light. The ideal storage environment for seeds is cool, dark, and dry to slow down metabolic processes and prevent mold or bacterial growth.
Longevity of seeds in a drawer
Storing seeds in a drawer at room temperature is a common practice, but it's not the most effective method for long-term storage. Here's
how long some common seeds can last in a drawer:
• Vegetables like lettuce, radishes, and carrots: 1 to 3 years
• Flower seeds such as marigolds and sunflowers: 2 to 3 years
These estimates assume that the seeds are kept in a relatively cool, dry place away from direct sunlight.
Enhancing seed longevity with refrigeration
Refrigerating seeds in airtight containers can significantly extend their shelf life by keeping them in a stable and controlled environment:
• Herbs such as basil and cilantro: up to 5 years
• Tomato and pepper seeds: 4 to 6 years
When storing seeds in the fridge, it's essential to use containers that prevent moisture entry, as excess humidity can damage seeds. y

Seed Type Shelf Life in Drawer Shelf Life in Fridge
Lettuce 2 to 3 years 5 years
Marigold ..................... 1 to 3 years ................. 3 to 5 years
Onion 1 to 2 years 3 to 4 years
Parsley 1 to 2 years 3 to 4 years
Pea 3 years 5 years
Pepper 2 to 3 years 4 to 6 years

The water test, where you put seeds in water to see if they float (bad) or sink (good) is not very reliable. It’s better to test for germination.
Paper towel test
Moisten a paper towel and lay it flat.
• Place about 10 seeds on half of the towel, spaced apart.
• Fold the other half over the seeds and roll or fold the towel to encase them.
• Place the towel in a plastic bag and seal it to retain moisture.
• Keep the bag in a warm spot out of direct sunlight.
• Check the seeds periodically for mold or drying out, remoistening the towel as necessary.
• After a week or two, count how many seeds have sprouted. This number will give you the germination rate. For example, if 7 out of 10 seeds germinate, the viability rate is 70 percent.

Seeds germinated in moist paper towels.
Soil test
For a more natural setting, use the soil test:
• Fill a small pot with moist seedstarting mix.
• Plant a specified number of seeds at the recommended depth.
• Keep the soil moist and in a warm location.
• As with the germination test, count the number of sprouts to determine the germination rate. With either method, you can grow the germinated seeds and use them. With the paper towel test, removing the embryo from the paper towel and putting it into soil may damage or kill it, though.
Story by Shauna Dobbie

Winter gardening may seem limited to those with heated greenhouses, but growing lettuce and other greens indoors can be both feasible and fulfilling. These leafy vegetables are perfect for indoor cultivation due to their cool-weather preference and relatively quick growing cycles. Here’s how you can successfully grow lettuce and greens indoors during the colder months. Select the right varieties
Choose varieties that are well-suited for indoor growth. Compact greens such as loose-leaf lettuce, spinach, and microgreens are ideal because they do not require much space and mature quickly. Varieties like ‘Tom Thumb’ lettuce or ‘Baby Spinach’ are particularly adaptable to container gardening.
Set up the space
• Containers. Use pots or containers 8 to 12 inches deep with good drainage and fill them with a high-quality potting mix. Avoid garden soil as it may not provide the proper aeration and drainage needed for indoor plants.
• Light. Greens need a good amount of light to thrive. A south-facing window can work, but in most cases, supplemental lighting, such as a full-spectrum grow light, will yield the best results. Keep lights on for about 12 to 16 hours per day.
• Temperature. Ideal growing temperatures for greens are between 18 and 22 Celsius. Avoid placing your plants near heat sources such as radiators or stoves, as these can promote bolting or drying out of the plants.
Planting and care
• Sowing. Plant your seeds by scattering them lightly across the soil surface, then covering them with a thin layer of soil. Water gently to moisten the soil without displacing the seeds.
• Watering. Keep the soil consistently moist but not waterlogged. Using a spray bottle to mist the soil can prevent it from drying out between waterings.
• Fertilising. Feed your greens with a balanced, watersoluble fertiliser every two weeks to ensure robust growth.

Managing humidity
• Humidifiers. Using a humidifier can help maintain optimal humidity levels, especially important in heated indoor environments that can become very dry during winter.
• Grouping plants. Create a mini-humidity zone by grouping several plants close together. This increases the moisture level in the air around the plants.
• Ventilation. Ensure there is some air circulation around the plants to prevent fungal diseases but avoid direct drafts from windows or doors.
Start harvesting your greens when they are young and tender, typically a few weeks after planting. For lettuce, snip leaves from the outside, allowing the inner leaves to continue growing. For cut-and-come-again crops like spinach, a gentle trim can yield multiple harvests from the same plant.
Regularly check your plants for signs of stress, such as wilting or yellowing, which could indicate poor light or nutrient deficiencies. Be vigilant about pests, such as fungus gnats. Natural remedies or insecticidal soaps can manage these effectively. Yellow sticky traps are also useful for catching adult gnats. For more severe infestations, applying a diluted hydrogen peroxide mixture (one part hydrogen peroxide to four parts water) can help kill gnat larvae without harming your plants. Be sure to treat all affected plants simultaneously to prevent the gnats from migrating from one plant to another. y


When the weather warms up again, it’s time to plant outside. Lettuce and greens are easy to grow and should be direct-sown into containers or into the ground outdoors.
Choose the right time. Lettuce prefers cooler weather, so plan your planting for early spring or late summer for a fall harvest. Avoid the hot midsummer months, as lettuce can bolt and become bitter in high temperatures. Select a suitable spot. Opt for a site that receives partial shade to protect the plants from intense midday heat or use a shade cloth during the hottest part of the day if full sun is unavoidable.
Soil preparation. Lettuce grows best in loose, welldraining soil. Enrich your garden bed with compost or aged manure before planting to improve fertility and moisture retention. This step is crucial for promoting rapid, healthy growth.
Water wisely. Consistent moisture is key to crisp, sweet lettuce leaves. Water your plants in the morning to allow foliage to dry before evening, reducing the risk of fungal diseases.
Mulch. Apply a layer of organic mulch around your lettuce plants to keep the roots cool, conserve moisture, and suppress weeds.
In the milder regions of Canada, kale can be a robust year-round crop due to its exceptional cold tolerance: down to -23 Celsius. Growth will slow down and stop when it gets really cold, but the plants will still be good to eat.
Varieties. Opt for cold-hardy varieties like ‘Winterbor’ and ‘Red Russian’ that can withstand low temperatures and even improve in flavour after a frost.
Winter protection. Plant into the ground (which is more protected in
winter than a raised bed) in a spot that will take a floating row cover or cold frame later in the year. Seed your crop in spring or later into the summer for big, mature leaves through winter.
Harvesting. Kale leaves can be harvested as needed by clipping the outer leaves, allowing the center to continue producing new growth.
If you can’t keep kale going through the winter, you should be able to harvest it through November and possibly December.
Story by Shauna Dobbie

As winter settles in, outdoor temperatures drop, and we begin to rely more on indoor heating. Alongside keeping us warm, this also brings a significant reduction in indoor humidity levels, creating an environment that can be stressful for both people and plants. Houseplants, which are often tropical in origin and accustomed to more humid conditions, can suffer in the dry air, leading to issues like brown leaf tips, dropping leaves, and an overall decline in health.
Why does indoor air become so dry in winter?
The answer lies in basic physics: cold air holds less moisture than warm air. When chilly, dry air is brought indoors and heated, it expands, but the amount of moisture in the air stays the same, lowering relative humidity levels. Depending on the type of heating system and the size of your living space, humidity can drop to levels as low as 20 or 30 percent, much lower than the 40 to 60 percent range that’s ideal for most houseplants.
Houseplant humidity tolerance
• High humidity lovers. Ferns, calatheas, anthuriums, and many aroids (like philodendrons and monsteras).
• Moderate tolerance. Pothos, snake plants, and ZZ
plants can tolerate lower humidity but still benefit from occasional misting or higher humidity.
• Low humidity tolerance. Cacti and succulents prefer dry air and can generally handle winter conditions without issues.
• Leaf damage. Dry air causes water to evaporate faster from a plant’s leaves, which can lead to desiccation. This often shows up as brown, crispy leaf tips or edges, particularly in plants like spider plants, peace lilies, and ferns.
• Stunted growth. In dry conditions, plants may struggle to absorb enough water through their roots to replace the moisture lost through their leaves, leading to stunted growth or slow development.
• Increased pest susceptibility. Dry, stressed plants are more vulnerable to common indoor pests like spider mites, which thrive in low-humidity environments.
• Reduced photosynthesis. Low humidity can also reduce a plant’s ability to carry out photosynthesis, as it affects the opening and closing of stomata (pores on the leaf surface). When stomata close to conserve water, photosynthesis – and thus plant growth – may decrease.

Here are some practical ways to help raise humidity levels around your plants, creating a more comfortable environment for them to thrive during the winter months.
1. Use a humidifier. A humidifier is the most effective way to increase humidity indoors. Place it near your plant collection, ideally with settings to maintain humidity around 40 to 60 percent.
2. Group plants together. Plants naturally release moisture into the air through a process called transpiration. By grouping plants closely together, they can create a small microclimate with higher humidity.
3. Mist… maybe. While misting can provide temporary relief, it’s usually not enough to significantly raise humidity levels. Additionally, misting plants with fuzzy leaves, like African violets, can lead to fungal issues. Use this method sparingly and supplement it with other strategies.

4. Relocate plants. If possible, place plants in naturally humid areas like bathrooms or kitchens. This works particularly well if the room has a bright window for natural light.
5. Cover or enclose. If you have a particularly delicate plant, consider placing it in a small greenhouse cabinet, covering it with a cloche, or using a clear plastic cover to create a mini-humid environment around it. This is especially helpful for plants like orchids or miniature ferns. Open the enclosure for about 10 minutes per day to allow for some air circulation.
How can you tell if your efforts are working? Look for signs of healthy, new growth, like unfurling leaves that look plump and green, and, ideally, no more crispy tips or edges. If your plants appear to be thriving, you may have found the right balance for your home environment. y
By Shauna Dobbie

When it comes to growing houseplants or starting seeds indoors, light is the most crucial ingredient for success. Without it, even the most carefully nurtured plants will struggle to grow. Understanding how light works for plants can transform your indoor gardening efforts into a lush, green triumph.
Light is the driving force behind photosynthesis, the process that allows plants to convert sunlight into energy. Without sufficient light, plants cannot produce the sugars and carbohydrates they need to grow and thrive. Seedlings in particular are incredibly lighthungry. They need bright, consistent light to develop strong stems and healthy leaves, which set the
stage for mature, fruitful plants.
Houseplants, too, have specific light needs. The light requirements of common houseplants often correlate with their native habitats. For example, tropical plants like monstera and philodendron naturally grow beneath a canopy of taller trees, making them more tolerant of indirect light. Succulents, on the other hand, evolved in arid, open environments and require direct, intense sunlight to thrive.
Assessing the natural light in your home is the first step to ensuring your plants get what they need. South-facing windows provide the brightest indoor light in the northern hemisphere, while east- and west-facing windows offer moderate
light. North-facing windows generally provide low light, making them best suited for shade-loving plants.
But the size of your windows makes a difference to how much light gets to the plants. So does their distance from the window. And the light loses strength even coming through the window! (See the sidebar.)
However, even the sunniest windows may not provide enough light during short winter days. Studies show that many houseplants experience slowed growth or even dormancy in winter due to insufficient light. Seedlings are especially vulnerable to low light levels, often becoming leggy and weak when they stretch for nonexistent rays.
To optimise natural light, keep

your windows clean and move plants as close to the glass as possible. If you notice your plants leaning toward the light, rotate them regularly to encourage balanced growth.
For plants that cannot take direct exposure, consider using sheer curtains to diffuse harsh light or put them further from the window.
For many indoor gardeners, natural light alone isn’t enough. This is where grow lights come in. Advances in LED technology have made artificial lighting more efficient, affordable, and effective than ever.
When choosing a grow light, it’s important to understand the type of light plants use. Plants primarily rely on red and blue wavelengths of light for photosynthesis. Red light encourages flowering and fruiting, while blue light supports vegetative growth. Full-spectrum LED grow lights mimic natural sunlight by providing a balance of all wavelengths, making them ideal for both houseplants and seedlings. To be clear, blue light won’t slow down flowering and fruiting, nor will red light slow down vegetative growth.
They will perform both of these functions perfectly well under white light, which includes both the red and blue parts of the spectrum. Research suggests that seedlings benefit most from light placed close to their tops, typically 2 to 4 inches
away. This prevents stretching and promotes sturdy stems. For houseplants, positioning grow lights 6 to 12 inches above the foliage usually works well.
Light duration is also key. Most houseplants thrive with 12–16 hours


of light per day, while seedlings may require up to 18 hours. Timers can simplify this process, ensuring your plants get consistent exposure without you having to remember to switch the lights on and off.
Recognising and addressing light stress
Too much or too little light can stress your plants, and knowing the signs can help you make adjustments. If your plant’s leaves are pale, small, or dropping, they may need more light. Watch for legginess, too. On the other hand, scorched or yellowed leaves can indicate excessive light exposure.
Seedlings suffering from light deficiency often exhibit leggy growth, with stems that are long and thin. Providing more light or situating it closer to the seedlings can quickly remedy this issue.
Giving your houseplants and seedlings enough light is both an art and a science. It takes some observation, experimentation, and adjustment, but the rewards are worth it y


Windows significantly reduce the amount of light that reaches your plants compared to direct outdoor sunlight. Several factors influence how much light a window cuts down, including its type, cleanliness, and any coatings or treatments applied to the glass. Here’s a breakdown:
Uncoated clear glass. A standard, clean, uncoated window can block approximately 10 to 25 percent of sunlight. This reduction occurs because glass absorbs and reflects some of the light that hits it. And you probably don’t have this kind of glass in your windows.
Low-E or tinted windows. Windows with special coatings, such as Low-E glass designed for energy efficiency or UV protection, can block 30 to 50 percent of sunlight, or even more. These coatings often filter out UV and infrared light, which may be beneficial for protecting furnishings but can reduce the quality of light for plants.
Double- or triple-paned windows. Modern insulated windows with multiple panes of glass and inert gas fillings reduce heat transfer but can also cut down on light by 25 to 40 percent. Each layer of glass adds a bit more absorption and reflection.
Dirty or obstructed windows. Dust, grime, or condensation on windows can further reduce light levels, sometimes cutting light by an additional 10 to 15 percent or more. Sheer curtains or blinds will block even more of the light, depending on their density.
Outdoor sunlight can exceed 100,000 lux (a measure of light intensity) in direct sunlight, while light levels indoors, even near a bright window, often drop to 5,000 to 10,000 lux or less. This drop in intensity can affect plants’ ability to photosynthesise effectively, especially for high-light species like succulents or tropical fruiting plants.
If your plants are not thriving despite being near a window, it might be worth supplementing their light with grow lights to ensure they receive sufficient intensity and duration for healthy growth.

Story by Shauna Dobbie

If you asked 20 houseplant experts to rank these common plants from easiest to most difficult, you would probably have 20 different lists. The fact is, any houseplant is easy if you have the perfect place for it and devote the perfect care; and any houseplant is awful if you don’t. (Well, maybe not the first three.)
Nonetheless, here is my ranking for today, though I will note: my phalaenopsis is still alive, my fiddle leaf fig is thriving, and I have never grown a parlour palm that didn’t curl up and die within a year.
Easy peasy
Pothos (Epipremnum aureum). For low-maintenance elegance, this a favourite. Its trailing vines can thrive in medium to bright, indirect light, and it’s nearly impossible to kill. Pothos is also known as “devil’s ivy” because it stays green even in low light.
Snake plant (Dracaena trifasciata). Also known as mother-in-law’s tongue, it is one of the toughest houseplants around. It thrives on neglect and can survive weeks without water. Interestingly, this plant releases oxygen at night (like orchids and aloe vera), making it a great choice for bedrooms.
ZZ plant (Zamioculcas zamiifolia). Nearly indestructible. It grows in low light and needs only occasional watering, making it ideal for busy plant parents. Its thick, glossy

leaves store water, and in its native Africa, its tubers are used to survive droughts.
Spider plants (Chlorophytum comosum). Easy-going and charming with arching, striped leaves and dangling "baby" plants. They’re great air purifiers and can adapt to various light conditions, although they prefer bright, indirect light.
Parlour palm (Chamaedorea elegans). A Victorian classic, known for its elegant fronds and tolerance of low light. It’s perfect for adding a touch of greenery to dim corners. This plant was featured in paintings by John Singer Sargent as a symbol of luxury.
Heart leaf philodendron (Philodendron hederaceum). A classic houseplant, it’s low-maintenance, adaptable, and can thrive in a wide range of light conditions. The name "philodendron" means "tree lover" in Greek, a nod to its climbing nature.
Jade plant (Crassula ovata). A classic succulent that thrives in bright, direct light. With its plump, glossy green leaves, it’s often considered a symbol of good luck and prosperity in feng shui. This slow-growing plant can live for decades, making it a long-term companion in your home.
Aloe vera. As practical as it is beautiful. Place it in bright, indirect sunlight, and it will reward you with its


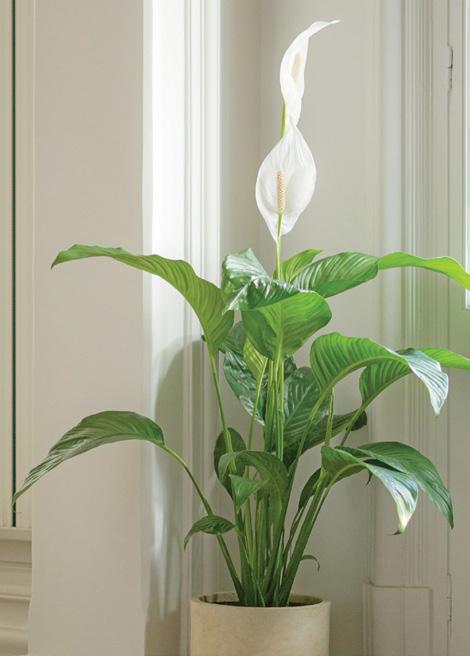


soothing gel that can treat minor burns and skin irritations. Its spiky rosette shape gives it an architectural look, perfect for minimalist décor.
Peace lily (Spathiphyllum). Known for their graceful white blooms that resemble calla lilies. They thrive in medium to low light and are forgiving if you forget to water them. Just water it when it droops.
Chinese money plant (Pilea peperomioides). Quirky and adorable, with round, coin-shaped leaves. They thrive in bright, indirect light and are easy to propagate. This plant, also called the pancake plant, was once a closely guarded secret in Scandinavia before becoming a global favourite.
Rubber plant (Ficus elastica). A beauty that tolerates a variety of light levels. This plant produces a milky sap that was once used to create natural rubber, lending it its name. Over time, it can grow into a striking indoor tree.
Monstera deliciosa. Famous for its large, perforated leaves that give any room a tropical vibe. It grows best in bright, indirect light and needs space to climb or sprawl. Its fruit, when grown outdoors, is edible and tastes like a blend of pineapple and banana.
Really challenging
String of pearls (Senecio rowleyanus). A conversation starter with its trailing strands of bead-like leaves. It thrives in bright light and dry conditions, making it ideal for sunny spots. Its "pearls" are actually water-storage structures that help it survive drought.
Boston fern (Nephrolepis exaltata). Lush, feathery plants that thrive in bright, indirect light and high humidity. They’re ideal for bathrooms or kitchens (with big windows) and were a staple in Victorian parlours.


Bird of paradise (Strelitzia reginae). Lives up to its name, producing dramatic, bird-like flowers in ideal conditions. Indoors, it rarely blooms, but its large, tropical leaves can still steal the show. This plant loves bright light and space to stretch out.
Prayer plant (Maranta leuconeura). The name comes from nightly leaf movements, folding up like hands in prayer. They thrive in medium to low light and enjoy high humidity. Their striking, patterned leaves make them a favourite among collectors.
Like throwing money down the drain
Fiddle leaf fig (Ficus lyrata). A dramatic plant with large, violin-shaped leaves. It’s a statement piece that needs bright, indirect light and consistent watering. Despite its beauty, it’s famously finicky, requiring stable conditions to thrive.
Calathea. Known for their stunningly patterned leaves, often resembling painted works of art. These plants thrive in medium light and high humidity. At night, their leaves fold upward, a characteristic shared with prayer plants.
Maidenhair fern ( Adiantum). A delicate beauty with soft, lacy fronds. It requires consistently moist soil and high humidity, making it a bit of a diva among ferns. The Latin name comes from the way water beads up and rolls off its leaves. ( Adiantos means “unwetted”.)
Common orchid (Phalaenopsis). Elegant and exotic, known for their long-lasting blooms. While they require bright, indirect light and careful watering, they reward you with flowers that can last for months. Interestingly, orchids grow attached to trees in the wild, absorbing moisture from the air. y

Imagine harvesting fresh vegetables year-round, even during the coldest winter months! With hydroponics, there's no need to store away your gardening tools when temperatures drop.
Instead, you can keep your garden flourishing indoors. Sound too good to be true? It’s not! Hydroponics makes it entirely possible. If you're curious about how to begin, this guide will introduce you to the essentials of hydroponic gardening and help you start your own indoor oasis.
What is hydroponics?
Hydroponics is a method of growing plants without soil, using a nutrient-rich water solution to feed them directly. While it might sound like a new trend, hydroponics has actually been around for thousands of years. Thanks to modern technology, it's now easier than ever to use at home and perfect for indoor gardening.
You might be wondering, “Why remove soil? Isn’t that what plants need to feed themselves?” In reality, plants need the nutrients found in soil, not the soil itself. In traditional gardening, microorganisms in the soil break down organic matter into nutrients that plants absorb. When growing indoors, soil is removed from the

ecosystem that supports this process, making it difficult to grow plants effectively. By eliminating soil and using hydroponics to deliver nutrients through water, you create an environment that mimics outdoor conditions but thrives indoors.
How does hydroponics work?
Hydroponic systems work by delivering water, nutrients, and oxygen directly to the plant roots. Instead of using soil, the roots are placed in or near a nutrient-rich water solution, allowing plants to absorb what they need whenever they need it. The water flows around the roots, providing both nutrients and oxygen to keep the plants healthy, and this process can be done either passively or with the help of pumps or aerators. To keep the plants stable, a grow media like clay pebbles or rockwool is used to hold them in place while the water system takes care of the rest.
Benefits of hydroponic gardening
Why should you start a hydroponic garden indoors? There are some amazing reasons that make it worth your while.
• Faster growth: Hydroponics creates the perfect growing environment, so plants can focus on growing
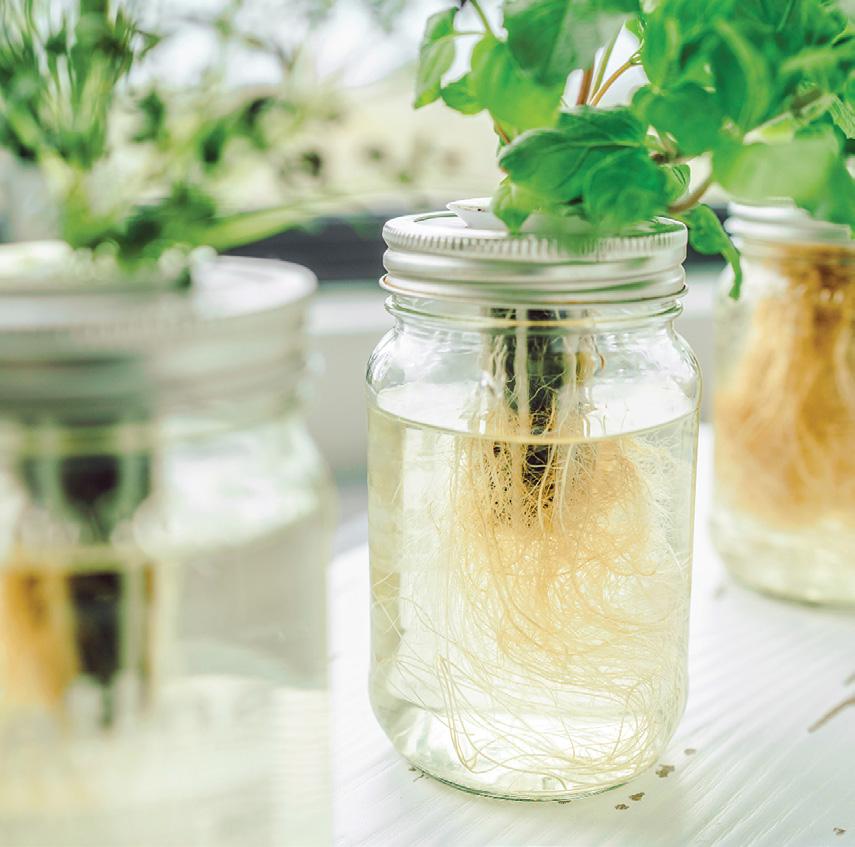
rather than searching for nutrients. This leads to faster, more robust growth – often twice as fast as traditional methods.
• Higher yields: With full control over light, water, and nutrients, hydroponic systems optimize conditions, allowing you to harvest up to three times more fruits and vegetables per plant.
• Grow anywhere: Whether you live in a tiny apartment or have a bigger space, you can set up a hydroponic garden almost anywhere – your kitchen, basement, or even a corner of the living room. You don't need a sunny window thanks to grow lights.
• Year-round growing: One of the biggest perks of hydroponics is growing fresh produce all year long. Since you control the environment, you can grow in any season – even during winter.
• Space efficiency: Hydroponic systems are designed for small spaces, with many growing vertically to maximize room. This is perfect for homes or apartments with limited space.
Now, to make the most of these benefits, it's important to choose the right system for your space and needs. There are several types of hydroponic systems available, but we’ll focus on three popular methods that are great for both beginners and experienced gardeners: Nutrient Film Technique (NFT), Kratky Method, and Deep Water Culture (DWC).
Nutrient film technique (NFT). The Nutrient Film Technique is a great option for growing leafy greens, herbs and you can even grow larger plants like tomatoes. In this system, a thin stream of nutrient-rich water flows through shallow channels where the roots are placed, providing the plants with constant access to nutrients and oxygen. While the roots do have room to expand in these channels, NFT systems are generally best suited for leafy greens and herbs. For larger plants like tomatoes and peppers, which develop more extensive root systems, some maintenance may be required to prevent root overcrowd-

ing. NFT setups are commonly used in vertical gardens, making them ideal for maximizing space in small indoor environments.
Kratky method. The Kratky method is one of the simplest hydroponic systems. It's passive, meaning it doesn't require electricity, pumps, or complicated equipment. Plants are suspended above a container filled with nutrient solution, and as the water level drops, the roots grow deeper into the solution. This low-maintenance method is perfect for herbs and short-term crops like lettuce. While it’s easy to set up and doesn’t need electricity, it’s not suitable for larger, long-term plants, and oxygenation can become an issue for plants with more complex root systems.
Deep water culture (DWC). Deep Water Culture is a popular system for growing larger plants such as tomatoes, peppers, and cucumbers. In a DWC system, plant roots are suspended in a large reservoir of nutrient-rich water that is continuously oxygenated using an air pump. This system provides plants with constant access to water, nutrients, and oxygen, resulting in fast growth and healthy plants. DWC is simple to set up and maintain, but it requires careful monitoring of oxygen levels in the water, as plants will struggle if they don't get enough air.
Ready to grow indoors?
Hydroponics offers a way to extend your growing season year-round, giving you the ability to harvest fresh vegetables even in the dead of winter. With faster growth, higher yields, and the ability to grow in small spaces, it’s a great option for anyone looking to keep their garden going inside. Whether you start with the simple Kratky method or jump into a more advanced NFT setup, hydroponics opens up endless possibilities for indoor gardening.
If you are wanting to learn more about hydroponics and how you can easily get set up check out Hope Innovations. They have an amazing 6 day challenge that takes you step by step learning everything about hydroponics and how to easily set up a system that will fit your lifestyle. y
Story by Steven Biggs

Apotted lemon tree is a great edible addition to an indoor garden. There’s the fruit. There’s the fragrant edible flowers. And there’s the fragrant lemon leaves…a versatile ingredient for great citrusy flavouring.
Lemon trees need winter protection in Canada. But they’re within reach of Canadian gardeners because they do well in pots and they do well in cool conditions.
The cold tolerance is no surprise. In places where lemons grow as a commercial crop, there’s a seasonality, with hot summers, and then cooler winters. In the context of a home garden, this means you have a number of options for keeping a potted lemon tree over the winter…even if you don’t have a greenhouse or
sunny window.
There are a few ways to keep potted lemon trees through the winter. Choose an option that suits the space you have available. One option is to grow your potted lemon tree like a houseplant. That’s what I did for many years with my first lemon tree. It was in front of the window, next to the reclining chair. So mid-winter I enjoyed the fragrance of the flowers while reclining with a coffee.

The lemon-as-a-houseplant route is the one I see most often, because people want to enjoy their lemon trees through the winter. Give your potted lemon tree bright light. And think about humidity. Lemons thrive in cool, humid winter conditions. Not quite what we have in the house. So the more humidity you can give it, the better.

https://www.foodgardenlife.com/grow-lemons
Don’t worry if the houseplant option doesn’t work in your space. There are other ways to get a potted lemon tree through a Canadian winter.
A cool, bright space works well. My friend Andrea has great results keeping a potted lemon tree in a bright attic window, where the wintertime temperature often hovers around 10 Celsius. These days, my lemon trees spend the winter in a minimally heated greenhouse, kept just above freezing.
My neighbour Santo kept his lemon tree in his garage for the winter. The garage was cold and dark, just above freezing, and with a window the size of a toaster. At that temperature, the plant simply stopped growing, so the dim light was OK. I’ve used the lemon-in-thegarage tactic when short on space elsewhere.
When possible, I suggest keeping potted lemon trees outdoors for the summer. Indoor light quality rarely compares to the light outdoors. And there’s something else, too: fewer pests. Outdoors, natural predators and parasites often help to keep pest populations in check. Top tips for success
• Buy a plant. Seed-grown lemon trees go through a “juvenile” stage when they don’t flower. (So no fruit, either.) This stage can last a few years. If you want fruit fast, get a tree from a nursery.
• Make the move indoors less stressful. If you move
your potted lemon tree from cool, moist fall conditions outdoors into a hot, dry, centrally heated home, it might drop lots of leaves. Reduce leaf drop by making the move indoors less stressful; do it earlier, when there’s less of difference between indoor and outdoor conditions.
• Mind the water. Lemon trees hate “wet feet.” If the soil is continuously wet, the roots rot. Keep the soil on the dry side of moist. If in doubt, stick your finger into the soil. If it feels damp, wait another day.
• Somewhere cool is best. Remember, the warm, dry air in the house isn’t ideal for your lemon tree. (But it’s great for insect pests!) If you have somewhere cool, that stays just above freezing, there’s less leaf drop and fewer bugs. Many homes have some sort of cool space…a sunroom, or a breezeway. Use the leaves!
If the idea of using lemon leaves in the kitchen interests you, there’s something important to know: You don’t eat the leaf. Instead, use it like a bay leaf, for flavour.
Add a lemon leaf when making a stock or sauce. Or put them on food you’re grilling, such as kebabs or wedges of cheese.
(Once I served a guest grilled halloumi cheese wrapped in a lemon leaf. Before I had time to explain that the leaf is removed before eating the gooey cheese inside, I heard crunching. The crunching of a charred leaf. Too late, I explained to my guest that the leaf adds great flavour but is too fibrous to eat.) y
Horticulturist Steven Biggs is the author of the book Grow Lemons Where You Think You Can’t. Find his tips for growing lemons, figs, and other exotic edibles at FoodGardenLife.com.
Story by Robert Pavlis, based on his book Food Science for Gardeners

Too bad they don’t put this on fresh produce.
What is nutrient dense food?
The National Cancer Institute defines it as “Food that is high in nutrients but relatively low in calories.” That seems like a logical definition, but doesn’t all produce meet this definition?
The US Department of Agriculture defines a nutrient-rich food index (NRF) based on nine nutrients that should be consumed (protein; fiber; vitamins A, C, and E; calcium; iron; potassium; and magnesium) and three nutrients that should be avoided (saturated fat, added sugar, and sodium). The idea behind NRF is to eat fewer calories and still get high amounts of the things your body needs. But this definition ignores other important compounds such as antioxidants and phytochemicals.
Without going into this in more detail, there is no single accepted definition for nutrient-dense food. Several new systems, such as nutrient profiling, are being developed because all of the current systems have flaws. Remember that vegetables contain thousands of chemicals and in many cases we still don’t know what role they play in our health. Without that knowledge, it is really impossible to define which nutrients are most important to us.
Have you ever seen a nutrient density number on any produce you buy? I haven’t either. Without that number, you can’t tell if the green pepper is healthier than the red one, or that the cherry tomatoes are healthier than the large beefeaters.
You might have heard that Brix can be used to measure nutrient density, but that is a myth. Brix is easily measured with a refractometer making it popular in gardening
circles. The problem with it is that it essentially measures sugar levels. For example, a grape has a low brix due to low sugar levels. Dry it into a raisin and the brix value is now high even though it is not more nutritious. It has just lost some water which causes the concentration of sugar to go up.
Gardeners have no way to measure the nutritional quality of the food they grow. Given this fact, how can you, as a gardener, evaluate gardening techniques to select the one that produces healthier food? Does compost or leaf mold produce a healthier bean? Will adding kelp make food more nutritious? There is lots of marketing hype and misinformation online that might sway you one way or the other, but the reality is that you have no way to evaluate the results for nutrition. You can only do things in the garden and hope it works. More importantly, online anecdotal information is useless unless it is backed up by lab analysis.
How do scientists measure nutrition? They don’t actually have a way to do that. We now know that there are at least 5,000 compounds that are important to our health and we can measure the amount of each one in food, but that requires a huge laboratory effort. As far as I know we have never done that for a single food item. That means we can’t accurately compare one food item to another.
When headlines in the news tell you that oranges are more nutritious than apples, they are basing that conclusion on the measurement of a few chemicals like vitamins and minerals. Since it ignores the vast number of


nutritious compounds this conclusion is not valid. We can say that an orange contains more vitamin C than an apple, but we can’t conclude one is more nutritious than the other.
• Organically grown food is not more nutritious than conventionally grown food.
Our scientific knowledge about nutrient density is much more limited than the popular press would have you believe. Many types of food have not even been tested, and where they have been tested, the work has looked at only a few specific nutrients. For example, we know almost nothing about phytonutrients. Given our limited knowledge, why is there so much advice given out in gardening circles?
• Food grown with synthetic fertilizer is generally more nutritious than that grown with organic fertilizer (compost).
• Heirlooms as a group are not more nutritious than hybrids, although individual cultivars might be better.
• Increased fertilization increases minerals in food and may increase other nutrients.
• Nutrient density varies significantly among cultivars, and cultivar selection seems to be more important than the way food is grown.
• Much of the information about nutrient density is still unknown.
What affects nutrient density?
Climate. Temperature, sunlight and drought can have significant effects on nutrition. A lot of plants can be grown in part shade, but most plants grow better, produce larger plants and food with higher nutrient levels when grown in full sun. Give them as much sun as possible, especially in colder climates.
Water is another factor under your control. Plants grow best when they don’t dry out or get too much water. Use a mulch, such as straw, to reduce fluctuations of water in soil and to reduce the need for watering. Growing in the ground requires much less water than raised beds and containers.
It is important to understand your climate and match the food you grow to your location. You never win fighting nature.
Soil. The type of soil and the level of both organic matter and plant nutrients has a dramatic effect on plant growth. There is a general feeling among new gardeners that all of our soil is of poor quality and unsuitable for growing food. As a consequence, there is a huge movement toward the use of containers and raised beds and a
general feeling that this is the only way to grow nutritious food. That is unfortunate because most soil is more than suitable for growing nutritious food, and growing in the ground not only reduces the cost, it also makes gardening much easier.
A lot of soil has lower organic matter levels than is ideal. This can be fixed by digging in more organic matter when you make the beds the first time and then practicing no-till gardening along with mulching. The soil will get better every year.
The nutrient levels in soil can have a significant effect on yield. The only way to know your level is to get it tested. Home kits sold by nurseries are almost useless, so get the testing done by a proper soil lab. An alternative is to add an inch or two of compost every year and grow stuff. If it grows properly, you probably don’t have a nutrient deficiency.
Genetics. Assuming you have a reasonable climate and decent soil, the factor that affects nutrient density the most is genetics. Unfortunately, there is almost no information available comparing one cultivar to another. All you can do is grow cultivars that produce well in your garden. A big tomato usually contains more nutrition than a small one.
Harvesting and processing food. Once the food is grown, nutrition is also affected by the way you harvest, store and process the food. We’ll have a look at some of these topics in the next article in this series. y
Robert Pavlis is an Ontario-based gardener, scientist and writer. You can order Food Science for Gardeners on Amazon.


Belleville, Ontario
Story and photos by Tim Pidduck
First of all, a little explanation is in order. I’m not a master gardener by any stretch of the imagination. Actually, I’m not expert enough in any aspect of gardening. So, I won’t be advising or telling you what to do, there are plenty of YouTube videos for advice and fixing problems. No, I’ve just been learning along the way like I’m sure so many of you have been doing.
My garden is not perfect, it’s not a well manicured lawn surrounded by deep luscious borders, nor is it the prettiest, the biggest or any other superlative you could possibly imagine. No, it is a garden of trial and error when time and


energy has permitted. Every once in a while, someone will ask, so Tim, when are you going to be done? I could respond and say it is in various stages from (almost) “done” to a very wild or raw state in some sections of the garden. Of course, for the intrepid gardener, the immediate answer is it will never be completed, which some people who are not gardeners will never understand, they just look at me like I’m crazy.
Truth be told, maybe gardening is not as it seems at first glance. Sure, it’s all about the plants, but when you seriously think about it, to me, gardening is merely a descriptive action for a gardener to insert their personality traits, quirks, and life experiences onto a landscape producing a garden tapestry. Okay, that’s the introspective look at my view of gardening, now on to the nuts and bolts of my garden.
Not unlike many, my urban city lot is a garden of two tales, the front and the back and their evolution.
The backyard is relatively long and a decent width thanks to the city planners of the late 1940s. My wife Theresa and I moved into our house in 1990 with the plan this would be our starter home. Well, I started working on the yard and it continues unabated 34 years later. Anyway, it was unloved with overgrown brush and a couple of sad Chinese elms. I needed a clean slate to put my detailed garden drawings (which I still have from 30+ years ago) into action. With the unbounded energy of a young and inexperienced man on a mission, I cleared the lot and hired a company to reshape the basic lay of the land.
The yard is a hill rising about 20 feet from the foot of the concrete deck to the back fence, with absolutely no flat place for anything. In fact, the tin shed left by the


previous owners was perched about half way up the hill with the doors facing downward. The grade was enough so if my lawnmower was positioned correctly, it would simply roll out on its own.
With a young family, we needed flat areas and with the muscle of a backhoe, an amphitheater shape was carved out of the lower layer, with the middle and back of the yard levelled as much as possible creating three distinct zones.
Over the years, I’ve been working with this basic landscape and trying to make a garden to provide our family spaces for living, growing and creating memories. Along the way, my boys have played modified games of rugby, dressed up in their Hallowe’en costumes romping around as knights and rescued toads from ongoing changes in the garden as my rock garden grew. Now, my granddaughter is laughing and giggling as we play “tag” around the perennial flowers.
Oh, yes, to create level places to plant perennials and hold the slope, I have tiered the garden extensively with weathered limestone rocks (over 700 and still counting) all individually placed and interlocked (as well as one can do so) for the inner bowl of the amphitheater. Actually, I’m on the second iteration of it, as I didn’t like the original rock I used. Theresa and now my neighbours definitely think I’ve gone over the edge of my slope.
I may have gone overboard, but along the way, I’ve come to realize as I’m shaping the garden, I’m not just a gardener. The garden has demanded other skill sets. So, at various times I’ve become a carpenter to build our deck (twice) and shed (which is still standing after


25 years), I’m an historian relying on past civilizations and adopting ancient methods to move up to 400 pound rocks (yes, I used rollers in my early attempts), or I’m a biologist as I recently saved a garter snake from an entanglement in garden netting this summer. The backyard, as it continues to evolve has certainly been an eye opener for me.
I think it has been for family, visitors and even complete strangers as well. I really wasn’t expecting people’s reactions. I always wanted the garden to be pleasant to view, but it seems many times the garden evokes a comment or emotion I wouldn’t have even considered. Folks will focus on various minute details like a plant struggling to grow out of a crack in a rock or a plant they’ve spotted and that it brings back memories of a loved one or the expanse of the garden as they walk up the hill. It’s a great feeling and gives me immense pleasure when a place resonates especially with people you don’t even know. Of course, this is one of the great gifts of gardening, a garden can be enjoyed and shared with so many others and it becomes a local garden, not just mine.
Perhaps this is the most evident in the front garden. Complete strangers including young children will stop and comment on the garden and its flowers. It’s rewarding and a great feeling giving me immense pleasure. Who knows, maybe it will create some memories or spur on another gardener?
Oh, I should mention, the front garden was once a poor lawn that struggled to grow in the shade of a Norway maple. A storm brought down the tree and after the entire front had been dug up to fix a sewer problem, I embarked on creating something totally different. I landed on a design that I hoped would be different and unique enough using a flat landscape, which of course is a complete opposite to the garden behind the house. To accomplish this, I wanted to use certain plants (grass included) mostly as shapes and in a flowing manner.
Anyway, the end result was a design which is very low at the front and gradually building to some height closer to the house. It also includes a number of pots to gain elevation at key points. My family rolls their eyes, but I’ve nicknamed the design the “Early Modern Canadiana Parterre” garden. Bit of a national twist for a humble home.
I’ll be adding more features, especially out back such as possibly a Japanese style teahouse and/or another shed for all of my paraphernalia. I’m currently working on a garden house, on which I’ve been using traditional Korean joinery – but that’s another story.
In the meantime, I can’t wait to spend more time planning and “playing” in the garden and as I’m doing so, the hours and days effortlessly slip away. Hopefully it does for all of us, as I believe it is a good sign each and everyone one of us is not just enjoying the gardens we create, but immersing ourselves into our passion and passionately enjoying it with family, friends and casual observers.
As I gaze over the garden from my lofty vantage point on the hill thinking I should fire up the pizza oven, I’m loving the garden and I’m feeling the energy and life emanating from it. Hopefully your local garden does the same for you too. I know it relaxes my soul. y


Pointe-Claire, Quebec
Story by Shauna Dobbie, photos by Claire Dobbie and Theo Wouters
In Pointe-Claire, Quebec, just outside of Montreal, stands the home of Theo Wouters and his late partner, Roger Thibault. Their property is a living testament to the transformative power of gardening. Over four decades, the couple turned an unremarkable backyard into a lush urban sanctuary that has captivated visitors and drawn recognition from horticultural enthusiasts.
Theo occasionally sends me emails. Sometimes, they’re just a few words; other times, they’re videos: a great blue heron wading in the pond, a turkey vulture in a tree, or snow falling softly on the garden. He sends pictures too, many too small to print, showing glimpses of their journey: young men in the 1970s building the pond, or Roger relaxing in a lounger, surveying the bare outlines of ponds to be dug in the grassy yard.


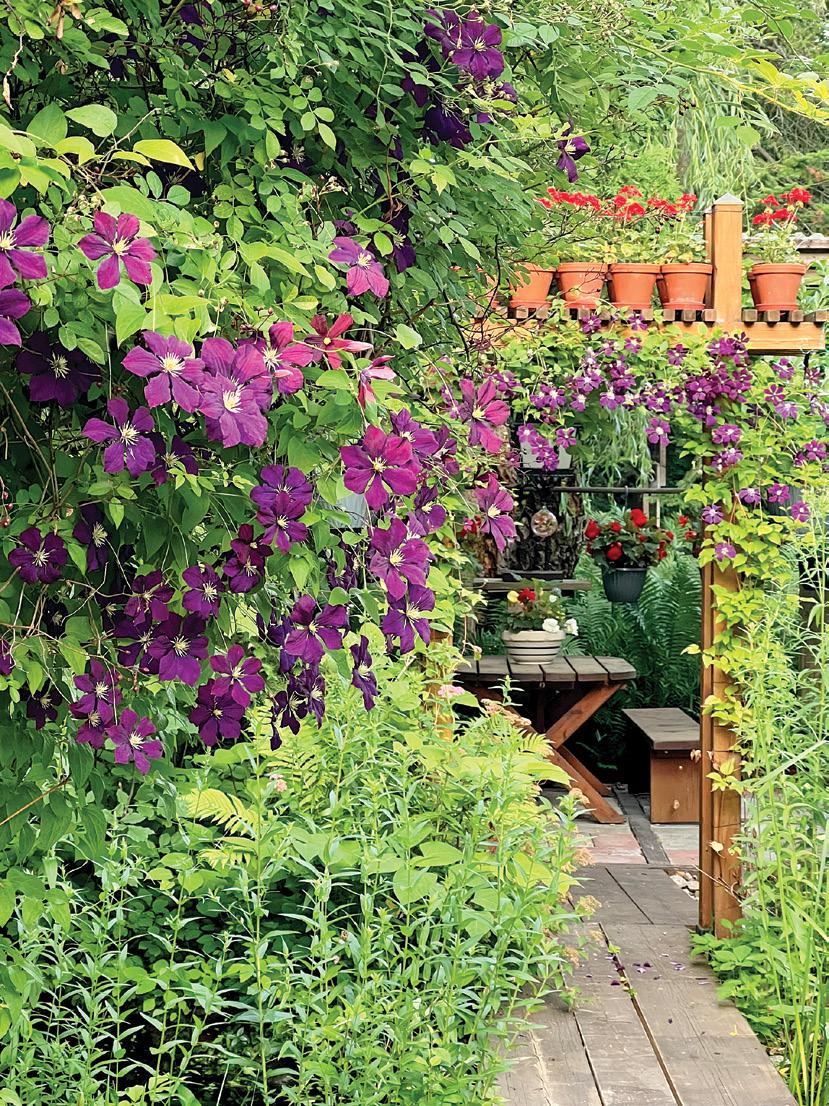


When they purchased the property nearly 50 years ago, the backyard was a typical suburban expanse: a lawn dominated by a solitary weeping willow. Seeking privacy and a sustainable alternative to traditional turf, Theo and Roger embarked on an ambitious gardening project. They replaced the lawn with rocks and stone walls, creating spaces for native plants. Rejecting chemical fertilizers, they embraced eco-friendly practices, becoming early adopters of sustainable gardening in the 1970s. Their work enhanced the garden’s beauty while fostering a thriving, self-sustaining ecosystem.
The garden’s evolution was shaped by natural processes as well. Birds, acting as unwitting gardeners, introduced seeds that grew into a diverse array of trees. The addition of two ponds, one stretching 50 feet and reaching depths of 6 feet, brought even more life to the space. Goldfish swim in the clear waters, while herons and other wildlife have become regular visitors. Despite challenges, such as predation by herons, Theo welcomes these interactions, seeing them as part of the garden’s dynamic ecosystem.
In the late 1970s, pond liners weren’t readily available, so the couple improvised. Both ponds were lined with materials now hidden beneath countless pounds of rocks, installed with help from some of Roger’s students. Decades later, the ponds are still holding strong, a testament to the couple’s ingenuity.
The Horticultural Societies of Pointe-Claire and Dorval have frequently featured the garden on their local tours, and visitors are often astonished at its capacity to transport them from suburban Montreal to a peaceful woodland


This tree may not be alive, but it is certainly not dead!

This image from the 1970s shows that the liners on the bottoms of the ponds are completely covered with stones.
retreat. The garden is a spot for many garden clubs to visit.
Beyond their gardening achievements, Theo and Roger were trailblazers in the fight for LGBTQ rights. In July 2002, they became the first same-sex couple in Quebec to be legally joined in a civil union, marking a historic milestone. Their activism included organizing marches against homophobia and engaging in legal battles to promote equality.
In May 2023, the City of Montreal honoured the couple for their contributions to social justice and the community’s cultural life. More recently, Theo – and Roger, posthumously – received the King Charles III Coronation Medal for their impactful work in the silent march against homophobia.
The garden of Theo and Roger is a profound example of how a shared vision and commitment can cultivate not only a botanical haven but also foster community spirit and social change. Their legacy continues to inspire, harmonizing human creativity with nature’s resilience and leaving a lasting mark on both their garden and society. y
The red tree on the patio was originally a tree of heaven, a notorious weed that gardeners love to hate when it sprouts from cracks in pavement. Roger and Theo dug it up from the roadside not long after moving into their home, thinking it was a sumac. They planted it in a container, curious when it failed to develop the signature cone-shaped seed clusters.
Eventually, they discovered it wasn’t a sumac but a tree of heaven. By then, it had already won their affection, and they cherished it until the day it died. Refusing to part with its memory, they painted the remains bright red and adorned it with decorated tin can lids. Today, the red tree stands as a striking art piece and a creative tribute to their shared history.
Scan me
Have a look at this little picture book the two wrote about the red-painted tree.

https://www.blurb.ca/bookshare/app/index. html?bookId=9327610
Story and photos by Shauna Dobbie

Someday, I hope to have a garden that inspires through the winter. I’ve seen them. Even my old garden in Toronto offered a bit of inspiration in the winter.
Here in my Winnipeg garden though… there is nothing. The vegetable garden is mostly flat and snow-covered. Even the few asparagus fronds have been bent and buried with snow. The haskaps aren’t tall enough to detect. And everything else was removed in the fall.
In the front, where we laboured over about a quarter of the yard, nobody can tell. There are the spikes of a few hosta blooms poking up; they look like weeds. The aronia shrubs near the sidewalk look bare and tortured. Maybe a second year of grow-
ing will give strength to some of the taller plants there and they will last as dried testaments that life is merely sleeping.
The two Ohio buckeyes look small without their leaves, and the gnarly patch of dogwoods, though a nice colour, just make me angry. (I want them gone!) The quarter of the garden, where the overgrown irises were that I removed (and saved), looks as flat as everything else.
We rush by it all when we go in the front door, eager for a bit of warmth. The only thing to admire is the straight lines of shoveling through the snow. (And I do admire them!)
Inside is a different story. My plants are all in good health, and my one phalaenopsis has rebloomed. I


got a couple of mushroom-growing kits for Christmas and they are well on their way to a dinner. I had to tape the light in the area into the off position to convince my husband not to leave it on.
Earlier in the winter I grew some lettuce in a fogponics egg-shaped thing sent to me by Plantaform to try out (see the notebook section). It was pretty cool to share the dining room with it for a few weeks, worry-free, and we had a huge amount of the very freshest lettuce imaginable at Christmas dinner.
I have a box of seeds from West Coast Seeds waiting for me in a cool dark area, and some new silicon seed-planting cells. I’m looking forward to getting going on that. This year is the year of carrots for me. I haven’t really succeeded with them yet, and I know that I’m not alone. Old hats at vegetable gardening may laugh at this, but a number of people have confided in me that they just can’t get them to grow big.
Two years ago, mine were the size of my pinkies. Last year, they got to the size of my middle fingers. This year, I’m going to focus on them and harvest when they are good, long carrots the size of carrots.
I’ve used my Veggie Pod, so it hasn’t been the soil, which is definitely rich and friable. They are not crowded; I don’t like to thin seedlings, so I plant pelleted seeds, a good 2 inches apart. And I don’t really cover them with soil.
This year I’ll plant them earlier. They only take


around 75 days to mature, so I’ve been making them the last thing I planted, sometime in June. They germinate best between 10 and 25 Celsius, so I can easily put them in in May. It’s possible that they’ve needed more water through the growing stage. Maybe I’ve been too stingy?
Also in my 2025 seed stash are cucumbers, peas and tomatoes; I’ve had success with these in the past. The cucumbers are for pickling, which is new. My husband and I enjoyed making jam last year and canning it for the first time, so we’re feeling adventurous.
One thing I’m trying for the first time is beans, which I expect to be easy. Another is broccolini, which should not be harder than the broccoli I grew last year.
Two more things I’m giving a go this year are watermelon and sesame seeds.
I have seeds for ‘Sugar Baby’ watermelon. I’m a little nervous about this because melons need eight to 10 weeks of hot, hot weather, which can’t be guaranteed, though it’s reasonably common in Winnipeg. I’ll put plastic on the ground under them, and a soaker hose under the plastic, to keep the soil warmer. And I will hope.
For sesame seeds… well, why not? They need 75 to 110 days and they will perish if the temperature goes below 10 Celsius. The average doesn’t go below 10 Celsius between June 1 and August 31, so I might just succeed. If it’s an above average year. y


