
L A U N D R Y
INSTRUCTIONS


L A U N D R Y


If you have any questions during the installation of this product, view further documents and videos on our website at wwww.ottiaustralia.com.au.
Variations
Only markout and make cuts when you have all items on site due to variations that occur with manufacturing.
• Prior to installation, unpack all items and inspect for any damage. Contact your store to advise of any damaged items. Keep all items in its protective carton until you are ready to install it
• It is very important that proper high-quality materials and silicones when installing you laundry
• Due to the nature of this sink, installations, it is recommended that butler sink installations be performed by trained and experienced installers - joiner, plumber or builder
• To ensure a safe and damage-free installation, two people should install the larger items such as stone tops and Tall Cabinets.
*All information in these instructions is based on the latest product information available at the time of publication
No claims for damages will be recognised once installation has begun.
PLEASE RETURN TO HOME OWNER - IMPORTANT CARE & WARRANTY INFORMATION INSIDE. For more information www.ottiaustralia.com.au

THIS ITEM MUST BE INSTALLED BY A QUALIFIED TRADESPERSON.
Please read the installation instructions BEFORE INSTALLATING BEGINS.
DO NOT markout or make cuts until you have all items on site due to variations that occur with this item.
•Observe all local plumbing and building codes for your state.
If the product is not installed in accordance with these instructions, your Otti Australia warranty may be void and the homeowner may have a claim against you (the installer)
IMPORTANT - It is the responsibility of the installer to make any adjustments after installation if required. Do not install if there is damage to the box or product.

Check that you have all tools, products and parts onsite. 1.
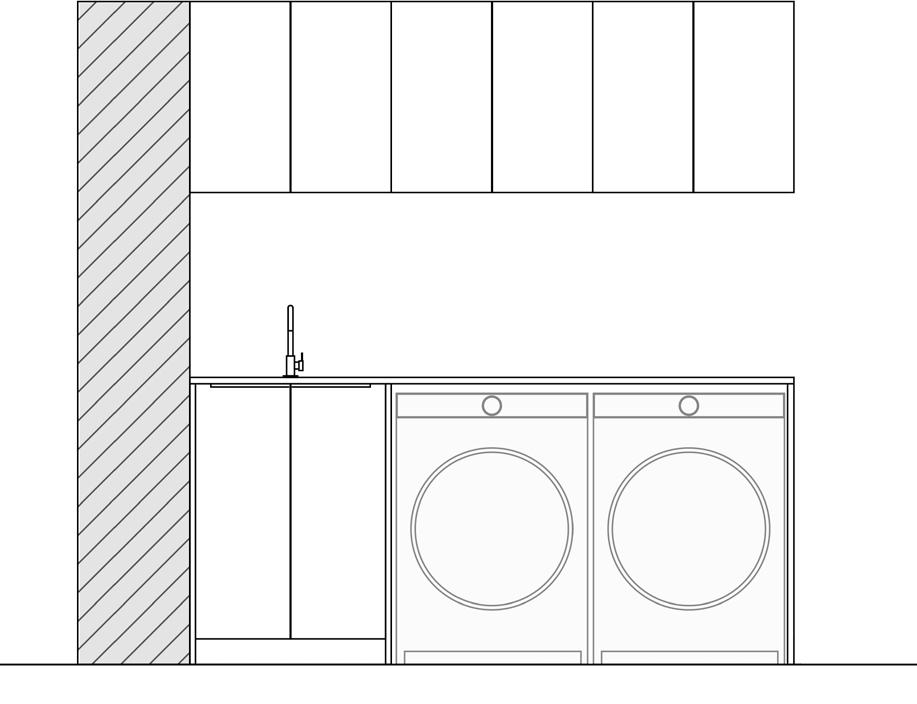
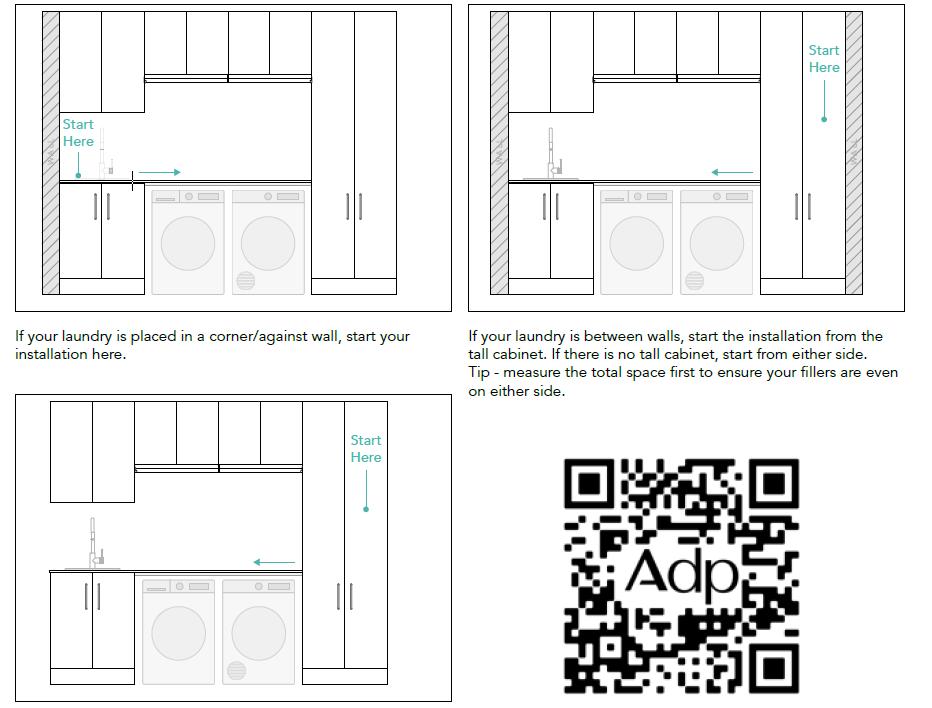
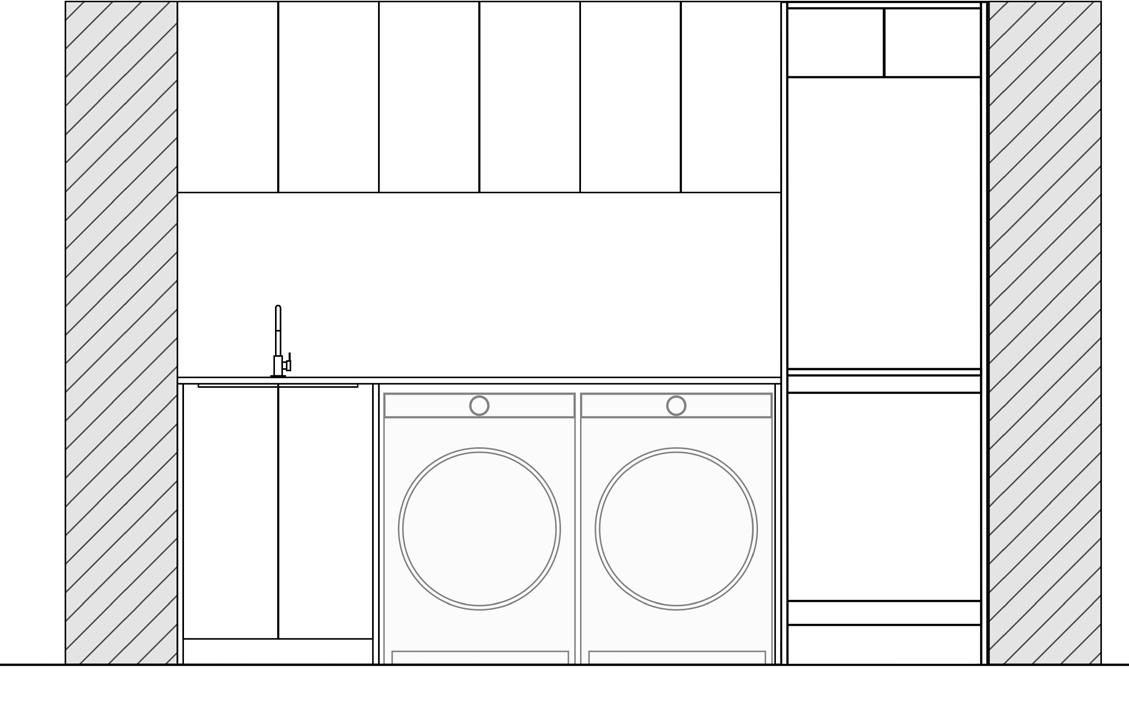
Identify which end of the design
Check that you have all tools, products and parts onsite. 1. Identify which end of the design you will start your installation from. See Below. 2. Install Floor Cabinets. 3. Install Tall cabinets. 4. Install Wall Cabinets 5. Step 1 Check
Check that you have all tools, products
Check
Check for damage upon receiving your laundry and also before installing. 6. Install End 7. Install Filler Panels 8. Install Benchtop & Sink 9. Make
6. Install End
6. Install End
7. Install Filler Panels
7. Install Filler Panels
8. Install Benchtop & Sink
8. Install Benchtop & Sink
9. Make Adjustments
your
Check that you have all tools, products and parts onsite. Any parts missing please contact your store to discuss, leave plenty of time to allow for missing parts to be shipped
Check that you have all tools, products and parts onsite. Any parts missing please contact your store to discuss, leave plenty of time to allow for missing parts to be shipped.
Check for damage upon receiving your laundry and also before installing.
9. Make Adjustments Enjoy your Laundry No claims for damages will be recognised once installation has begun.
Check for damage upon receiving your laundry and also before installing.
No claims for damages will be recognised once installation has begun.
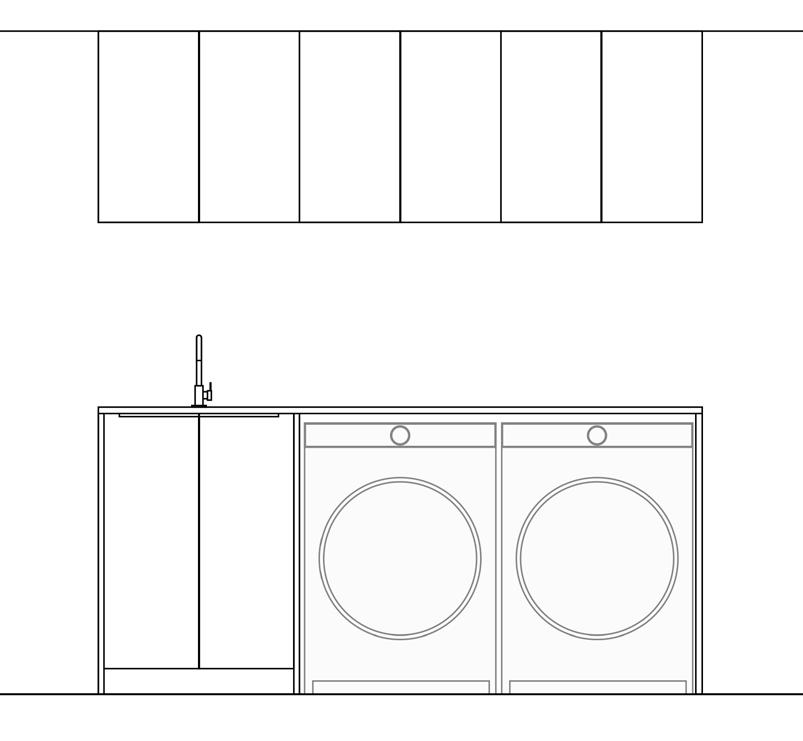

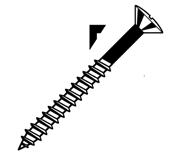


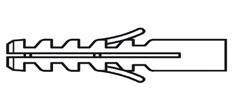

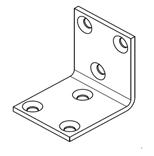
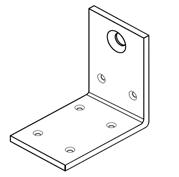
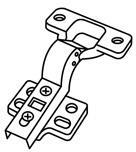
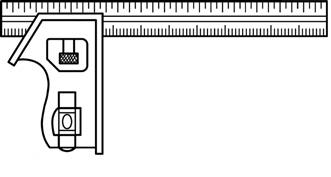
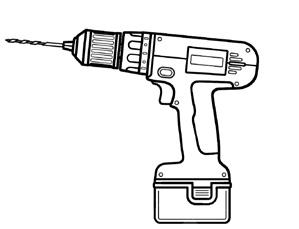


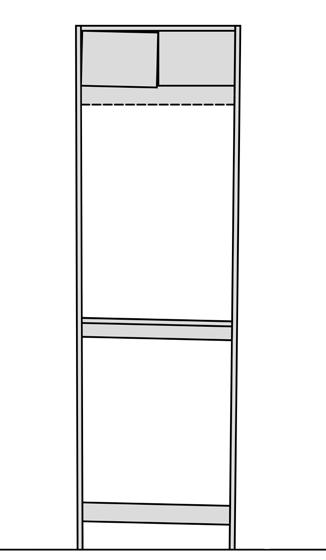
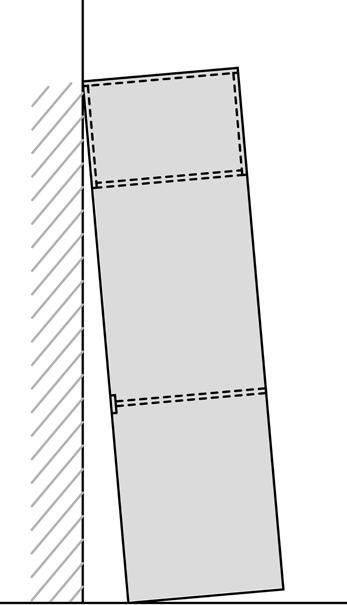
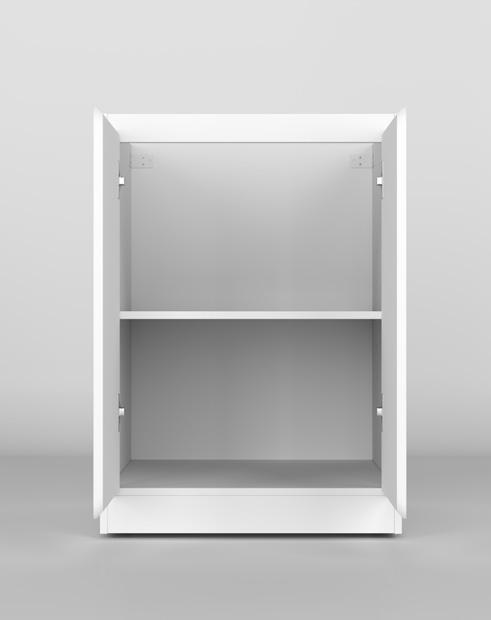
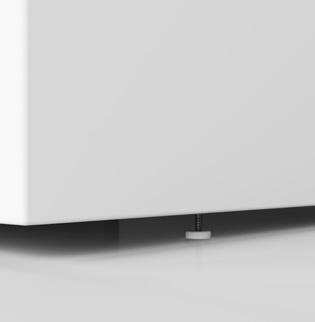

Check that you have all tools, products and parts onsite
Any parts missing please contact your store to discuss, leave plenty of time to allow for missing parts to be shipped
Check for damage upon receiving your laundry and also before installing.
This unit is Not Assembled, requires 2 people to assemble.
Remove all packaging, This unit is Flat Packed and required assembly.
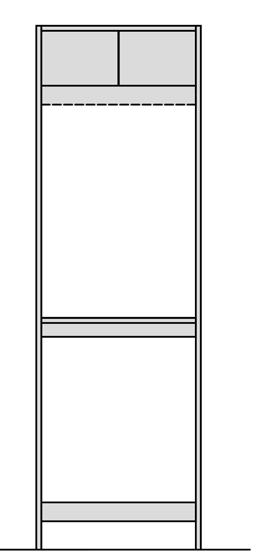
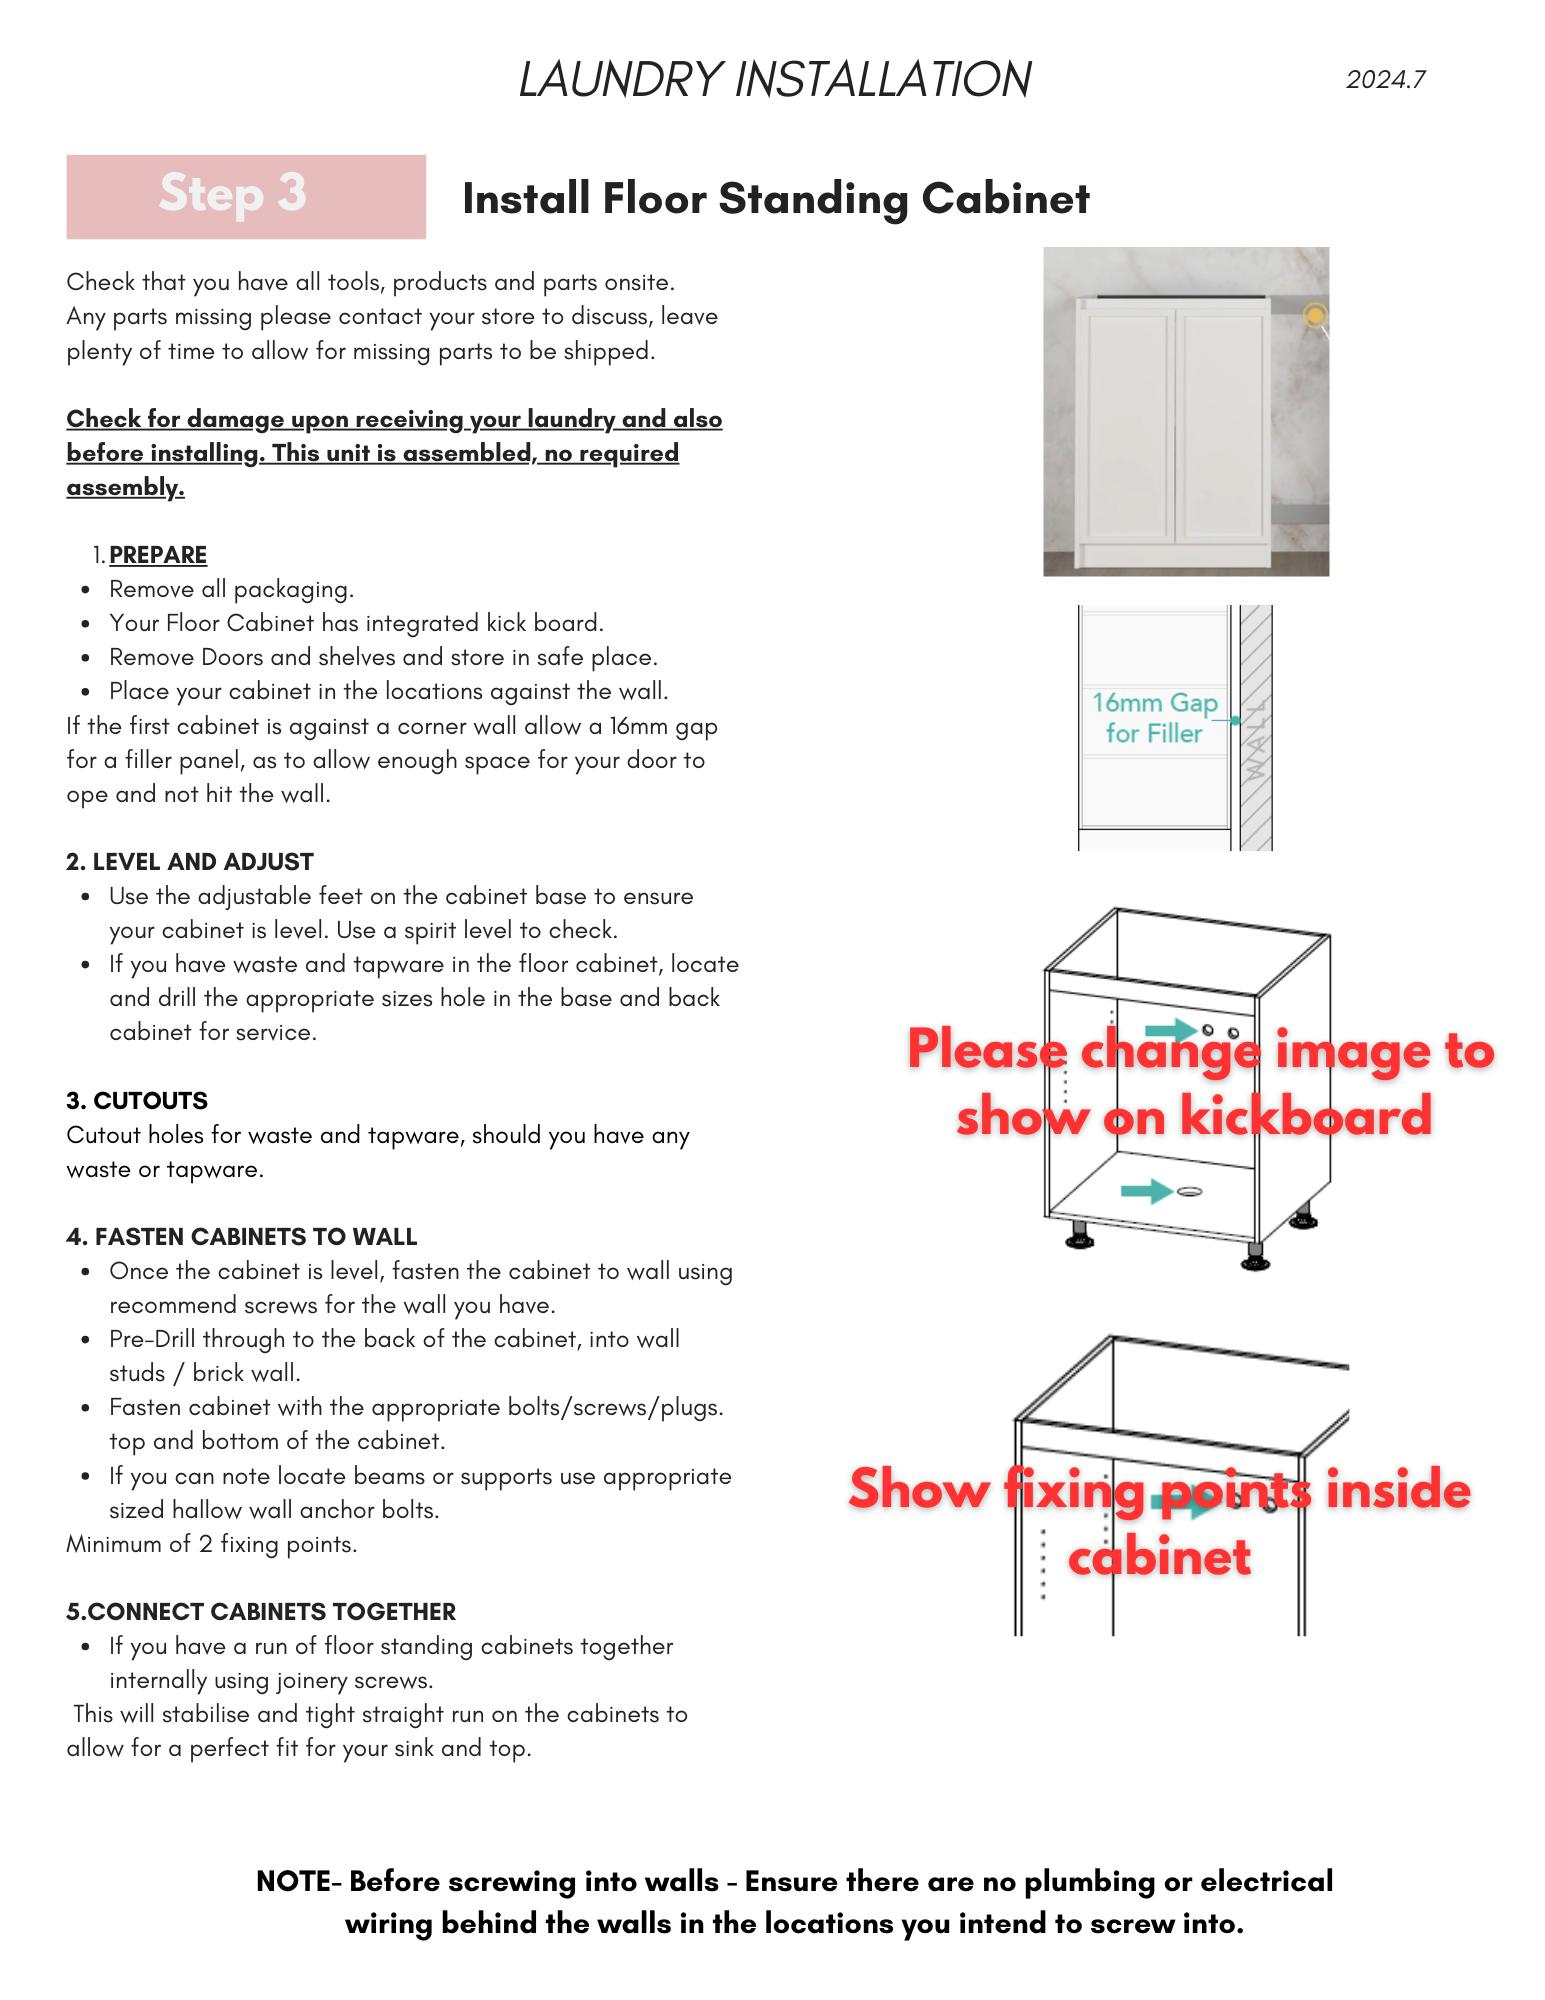
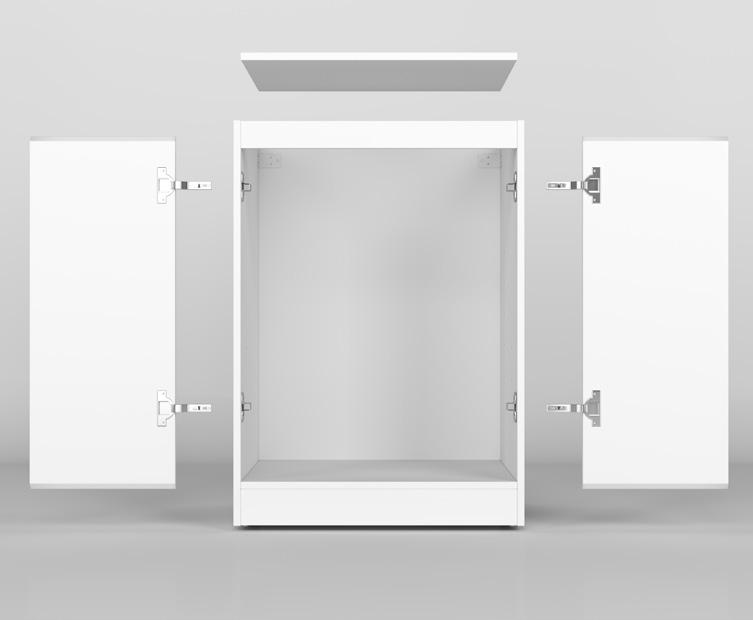
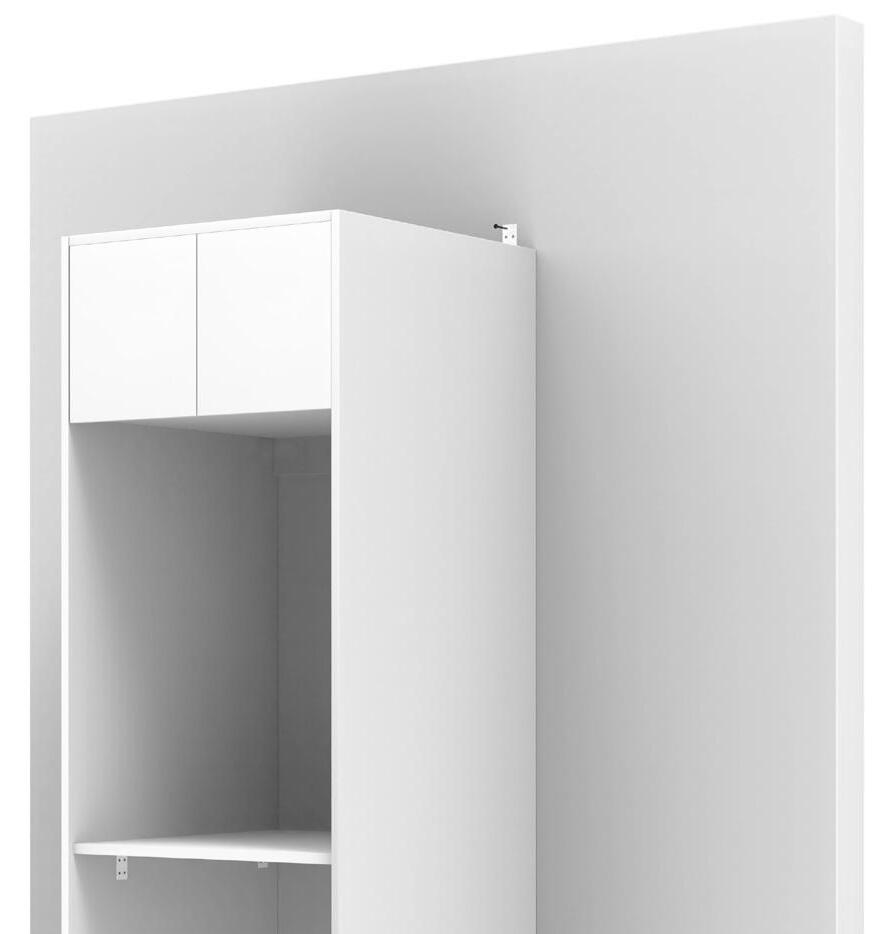
Your Tall Cabinet has integrated kick board. Remove Doors and shelves and store in safe place. Place your cabinet in the locations against the wall If the first cabinet is against a corner wall allow a 16mm gap for a filler panel, as to allow enough space for your door to open and not hit the wall
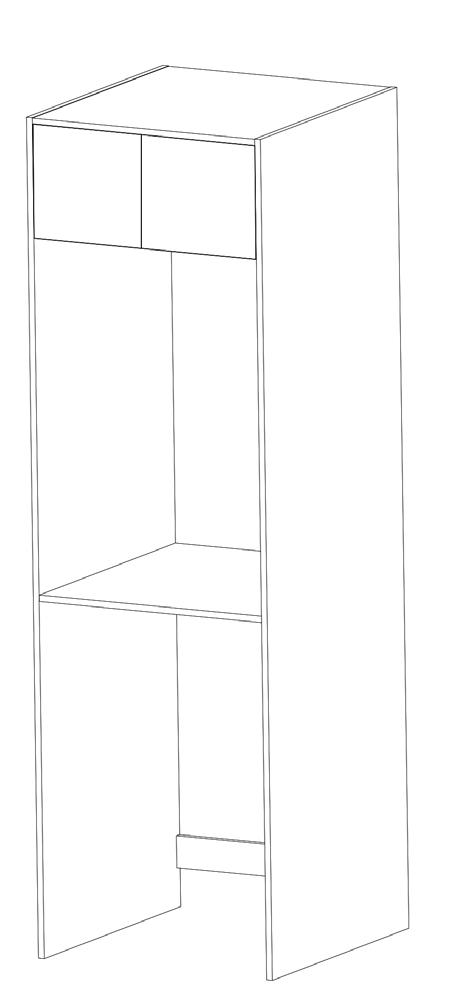
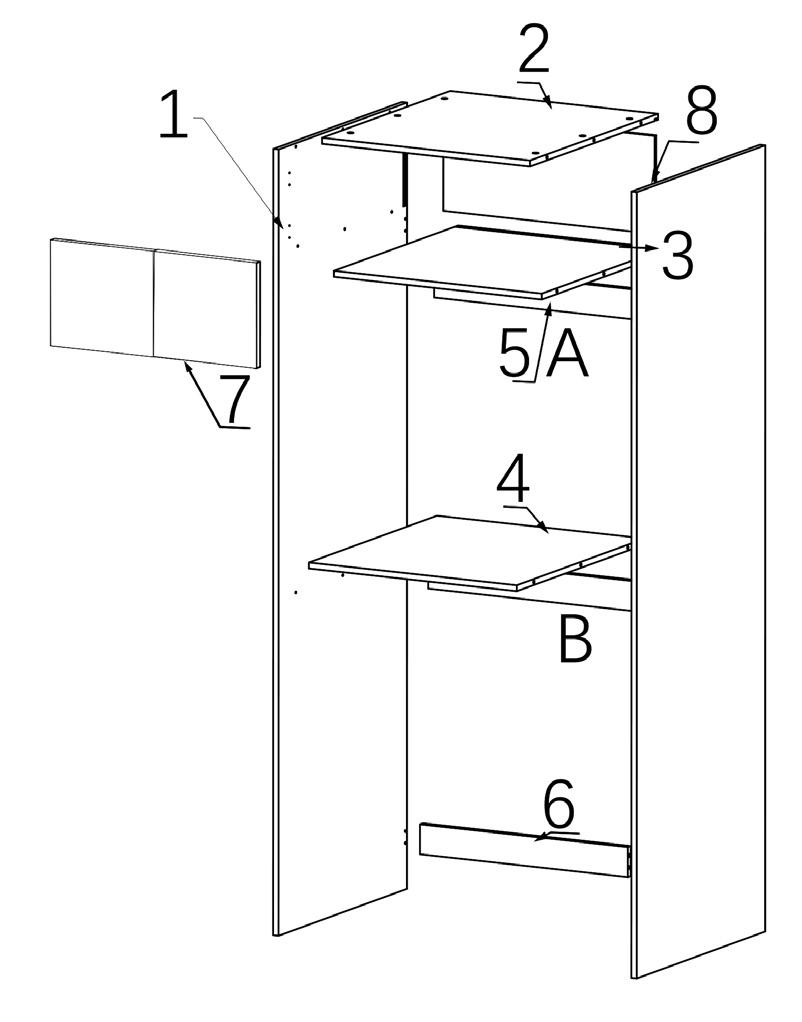
A. End Panel-1 & Shelves
Lay large side panel flat on a protected surface.
Install screw noggins into the end panel. Then line up shelves and rails with screws as pictured Press together Use soft mallet to press should you need more pressure
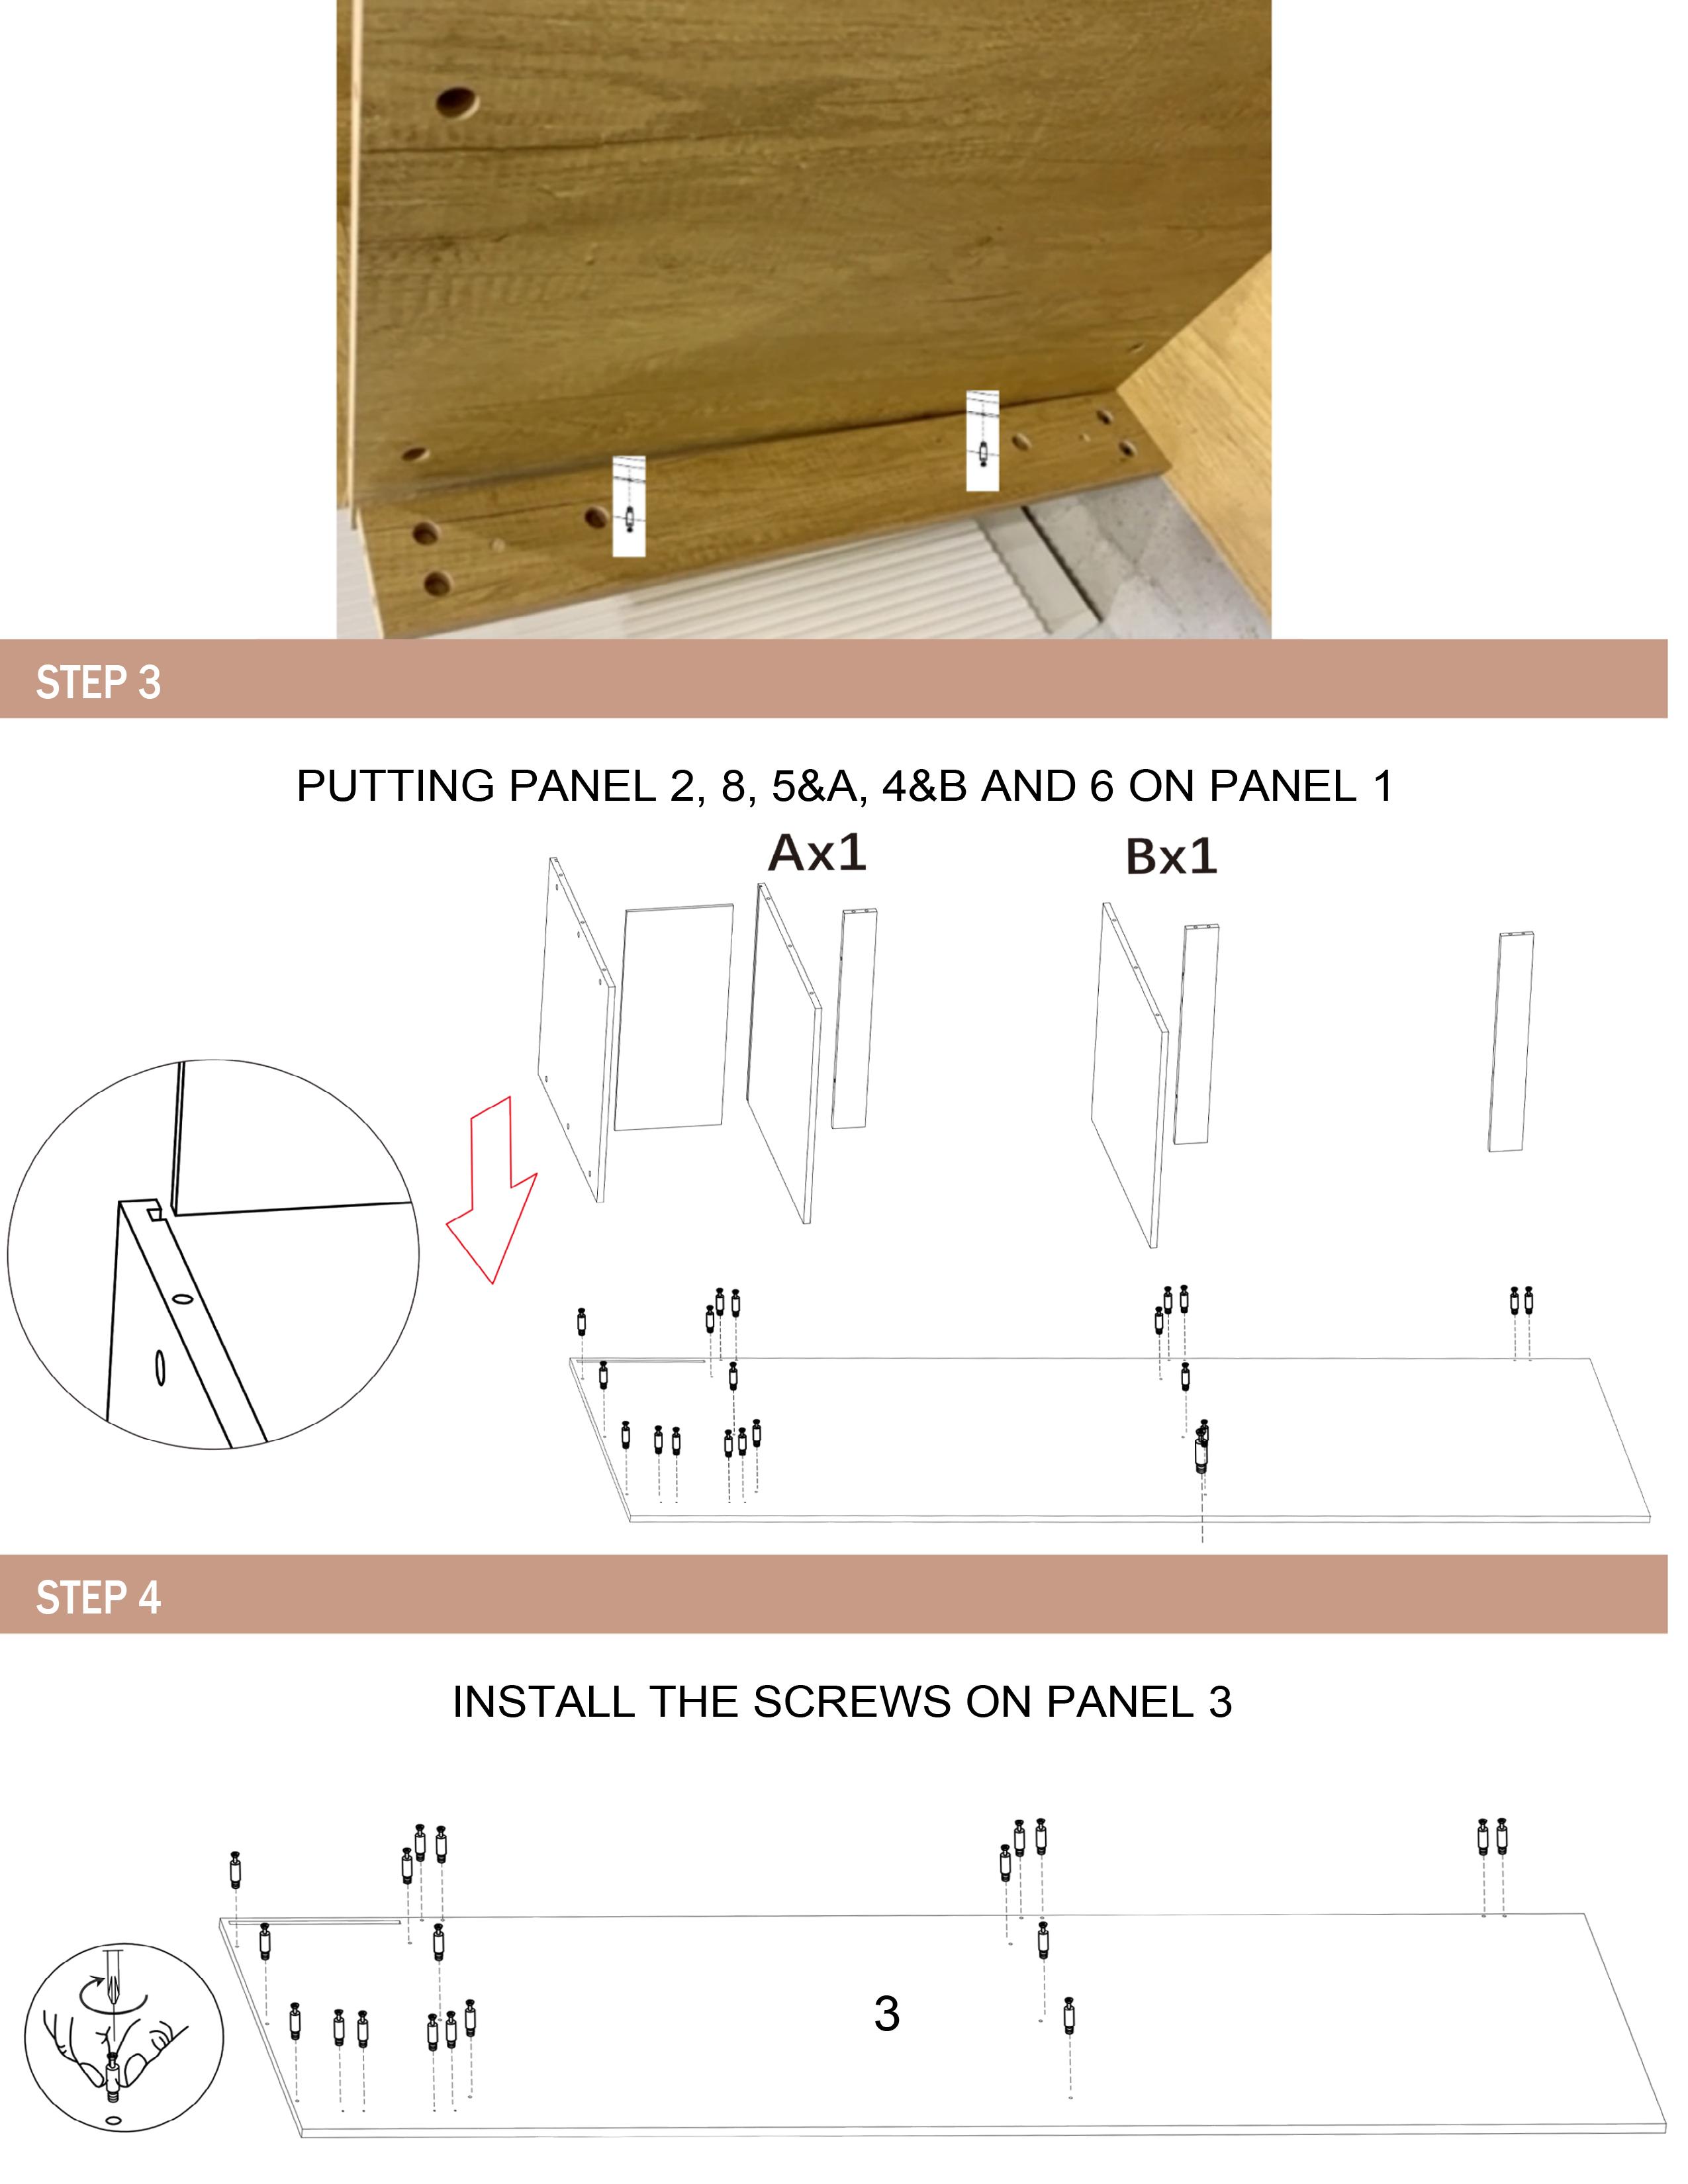
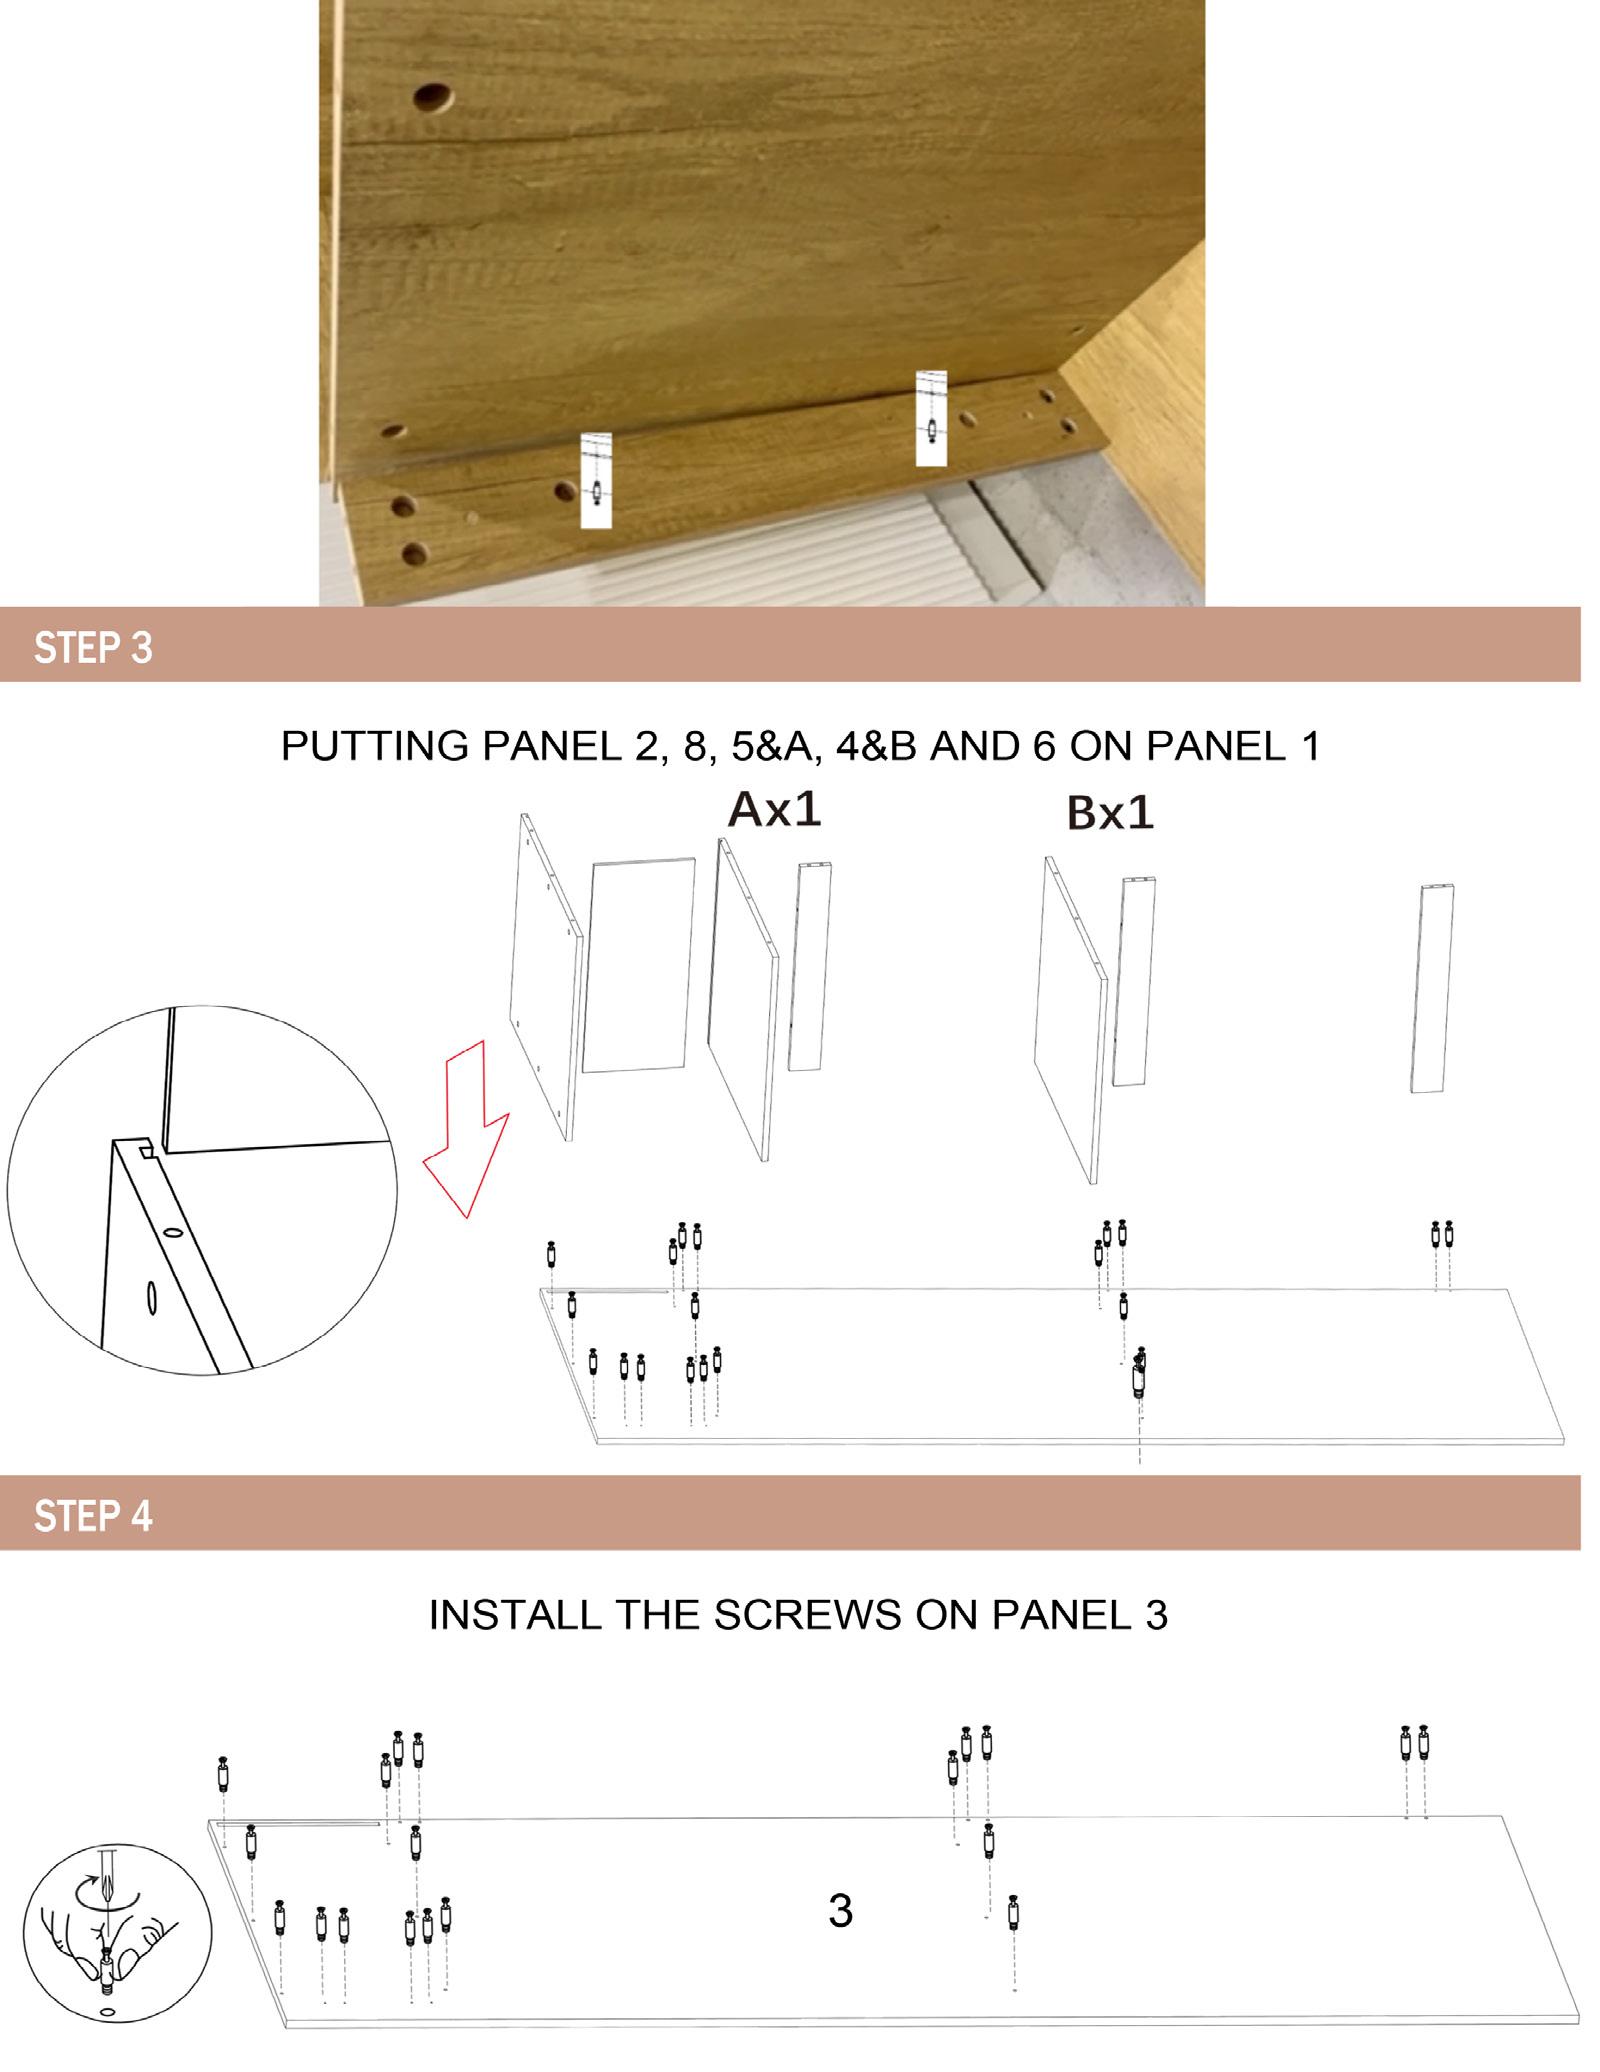
Install screw noggins and then add the other end panel. Line up and press together Use soft mallet to press should you need more pressure
Install screw locks on t end panels to lock in to end panels
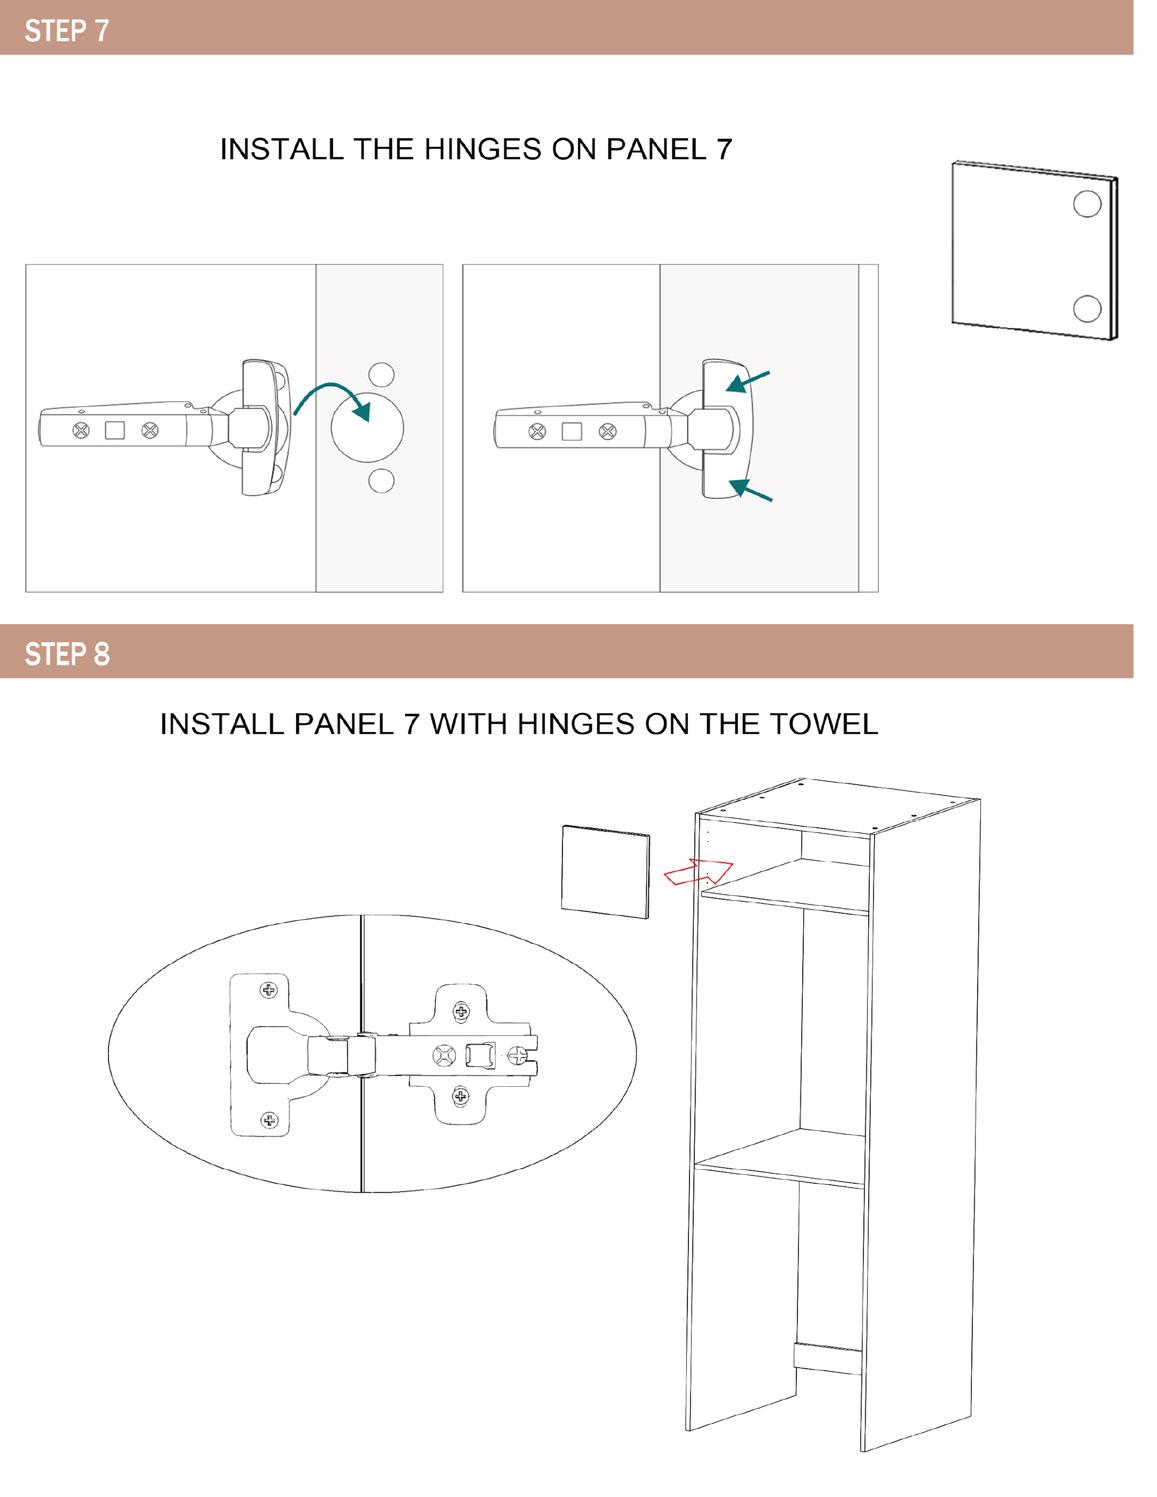
Install hinge onto the e screw into place. Install door to hinge us
the top of the top shelf and end panel and using screws.
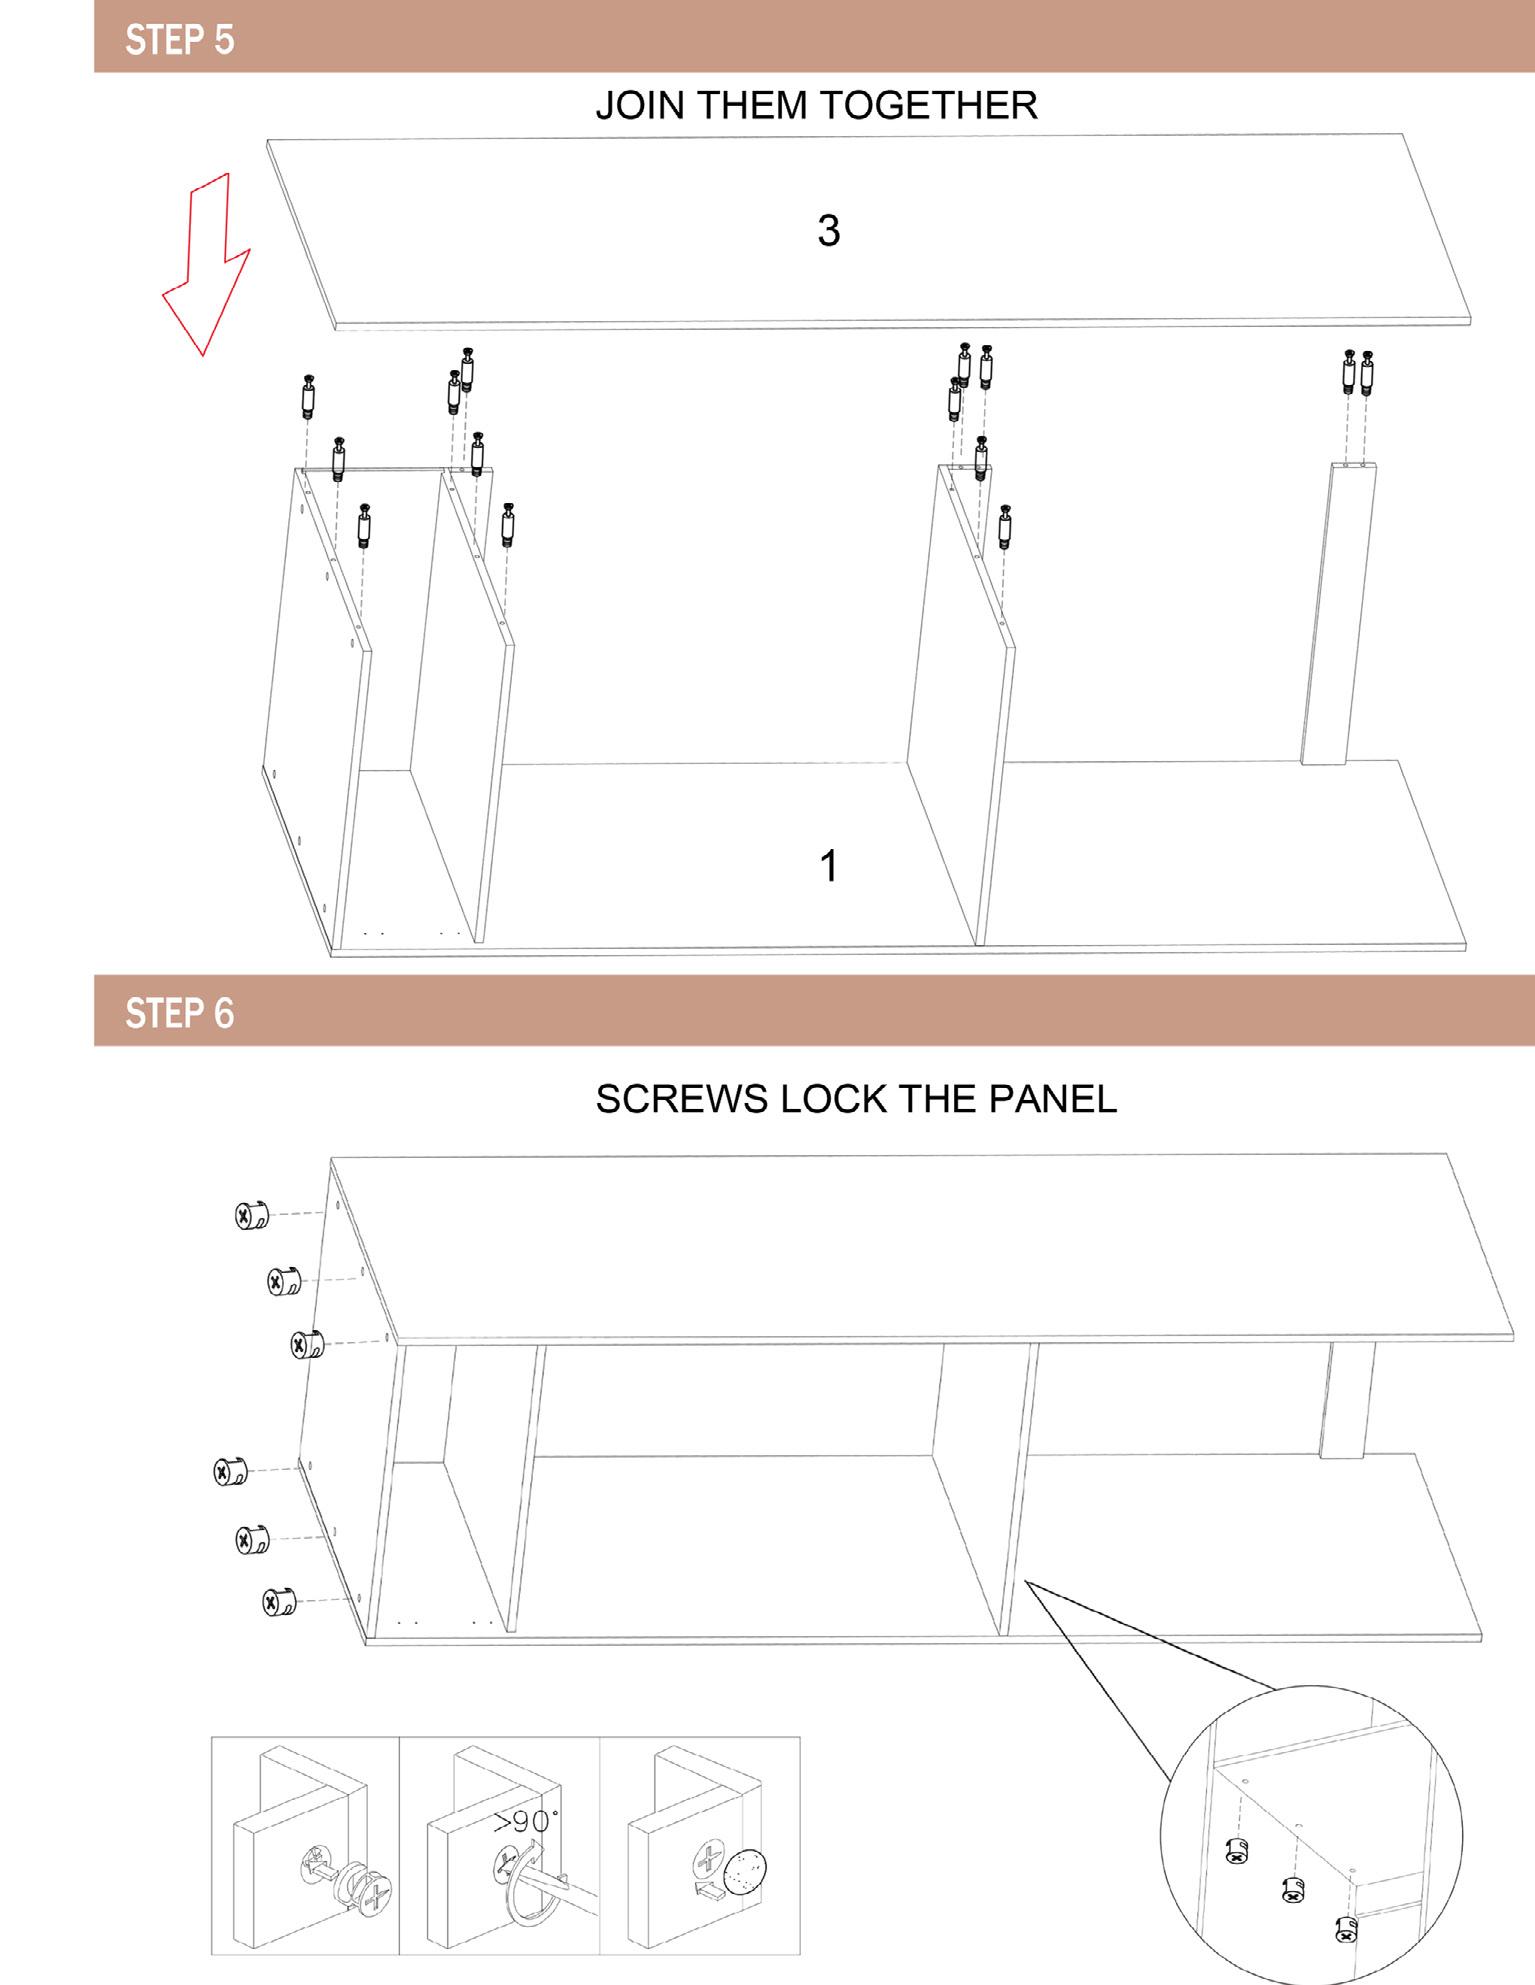
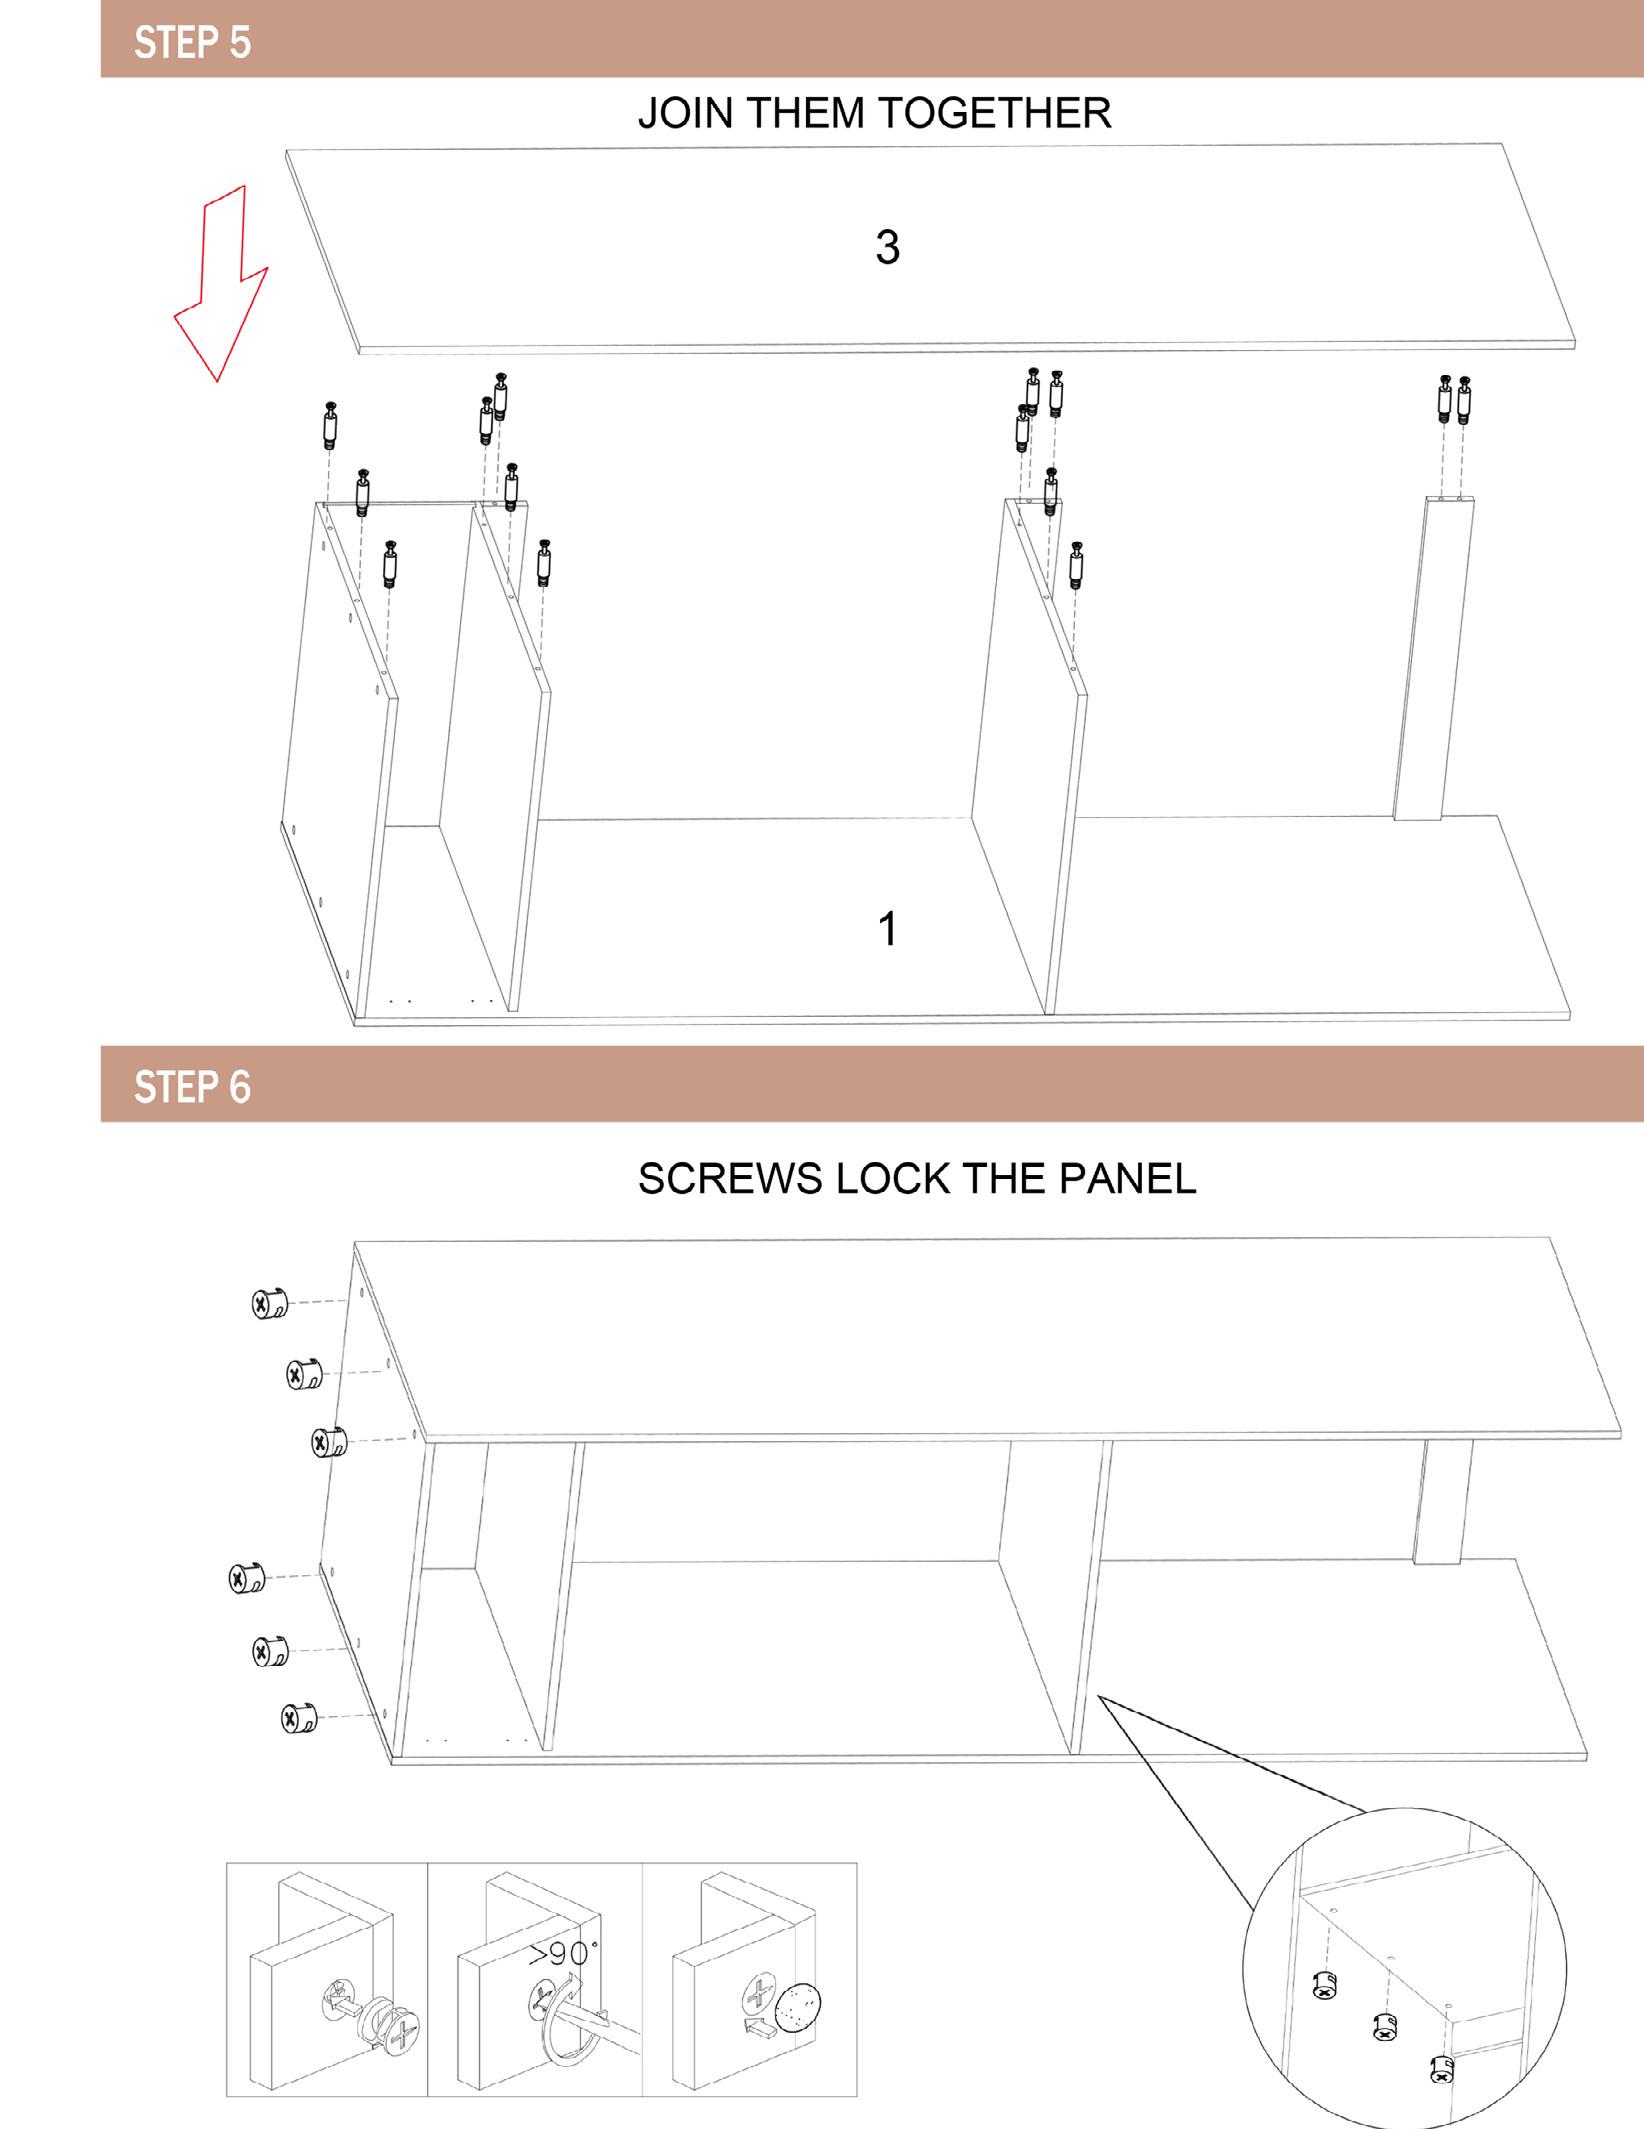
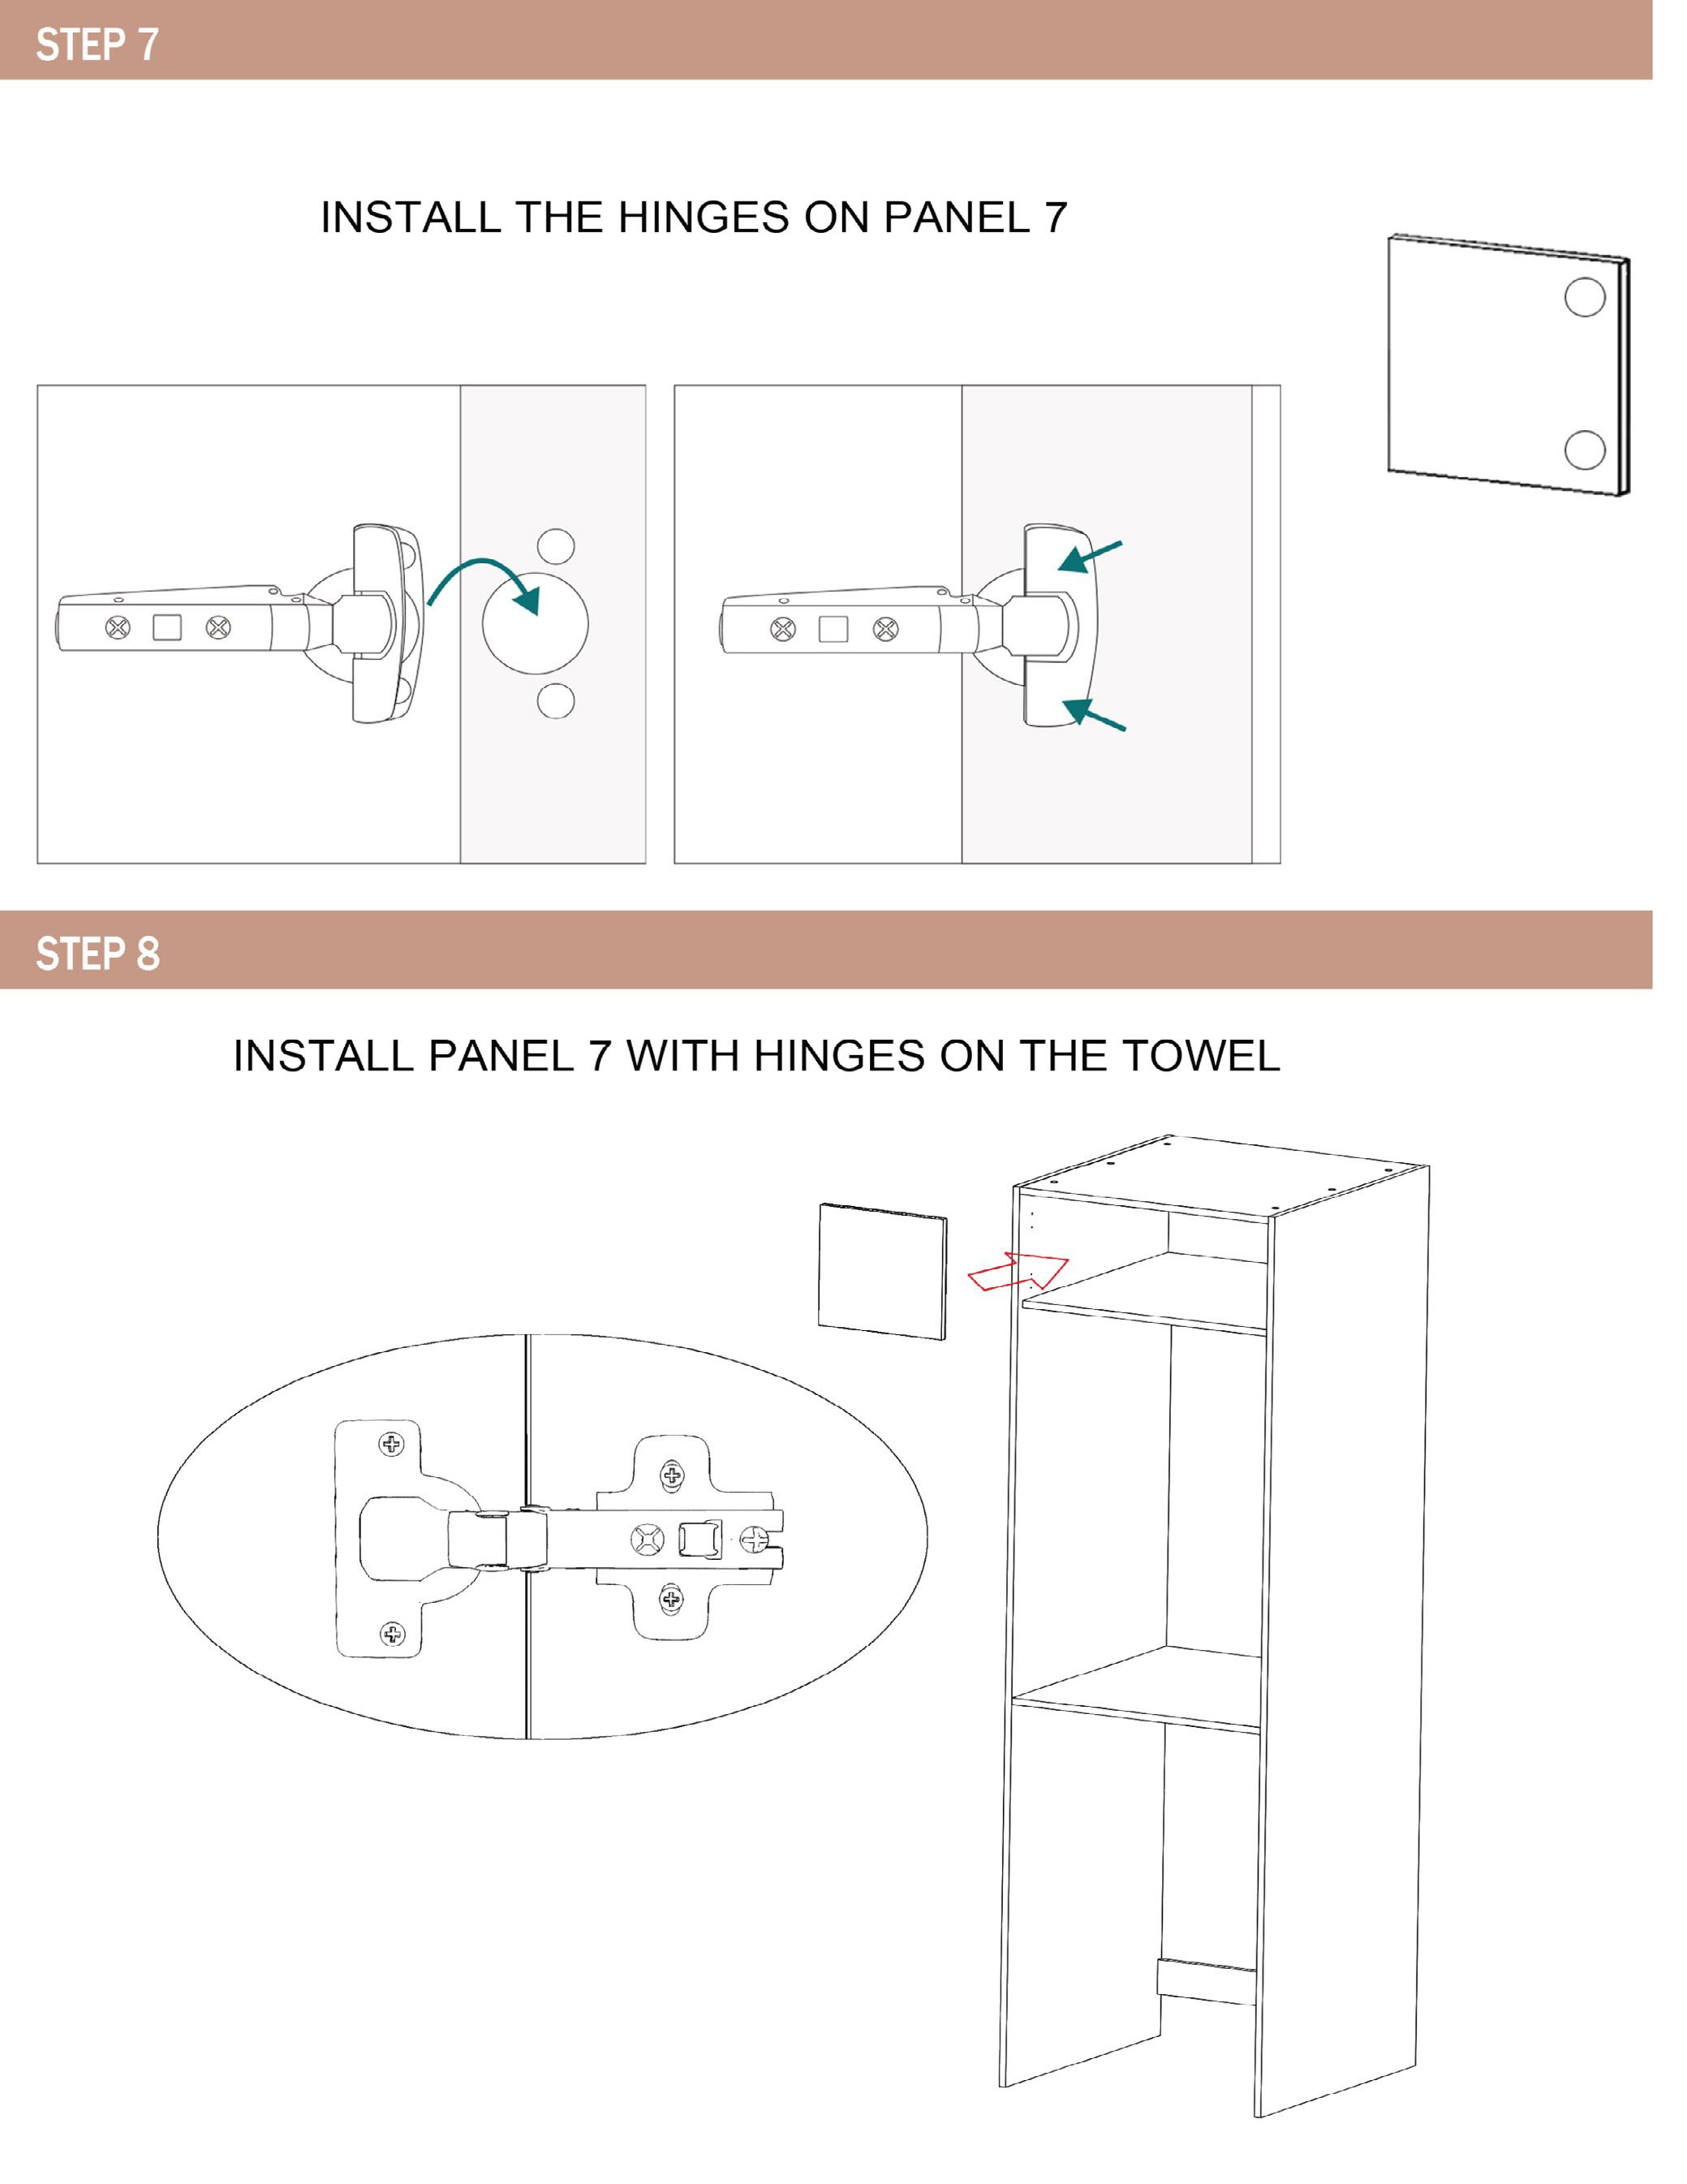

Continued
View Video Scan QR code

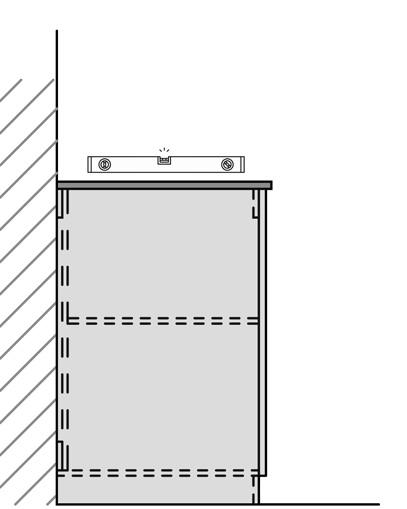
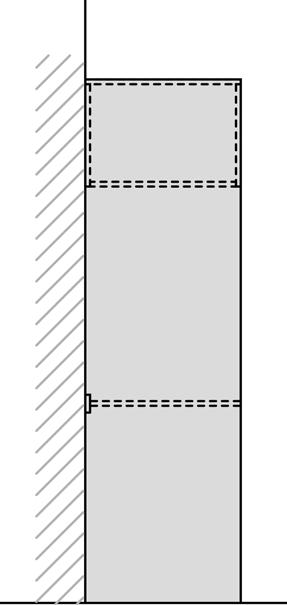
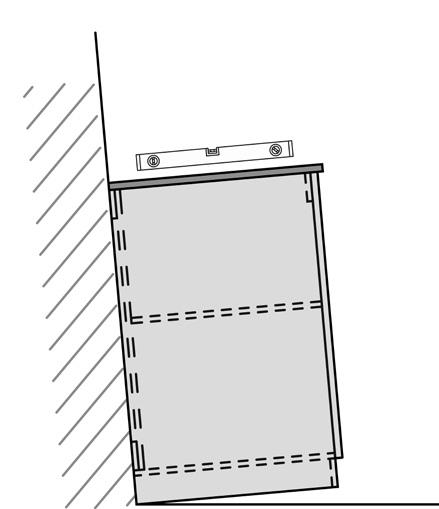
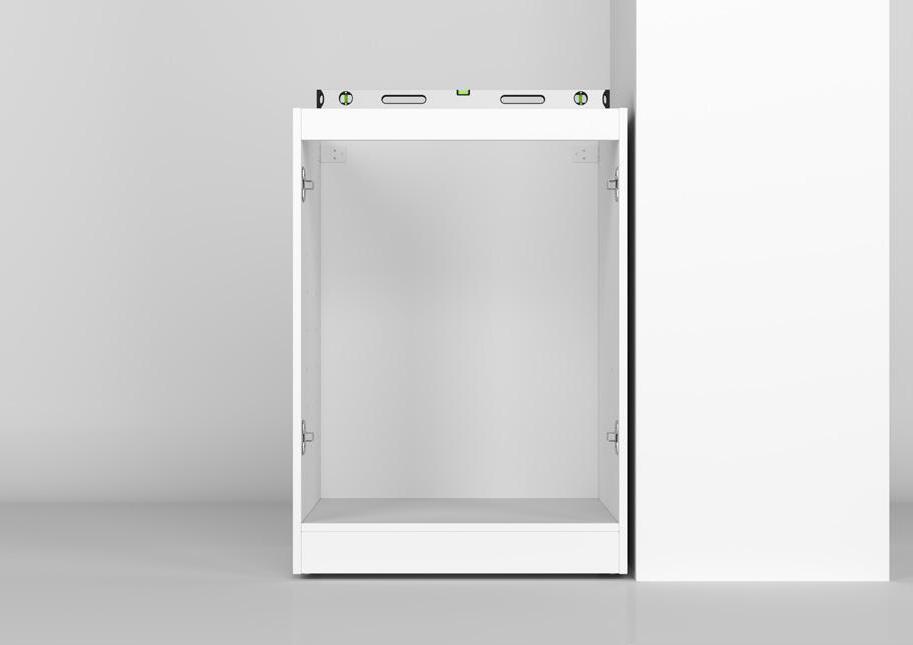
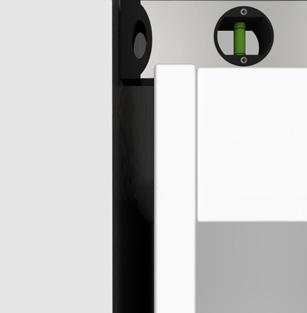
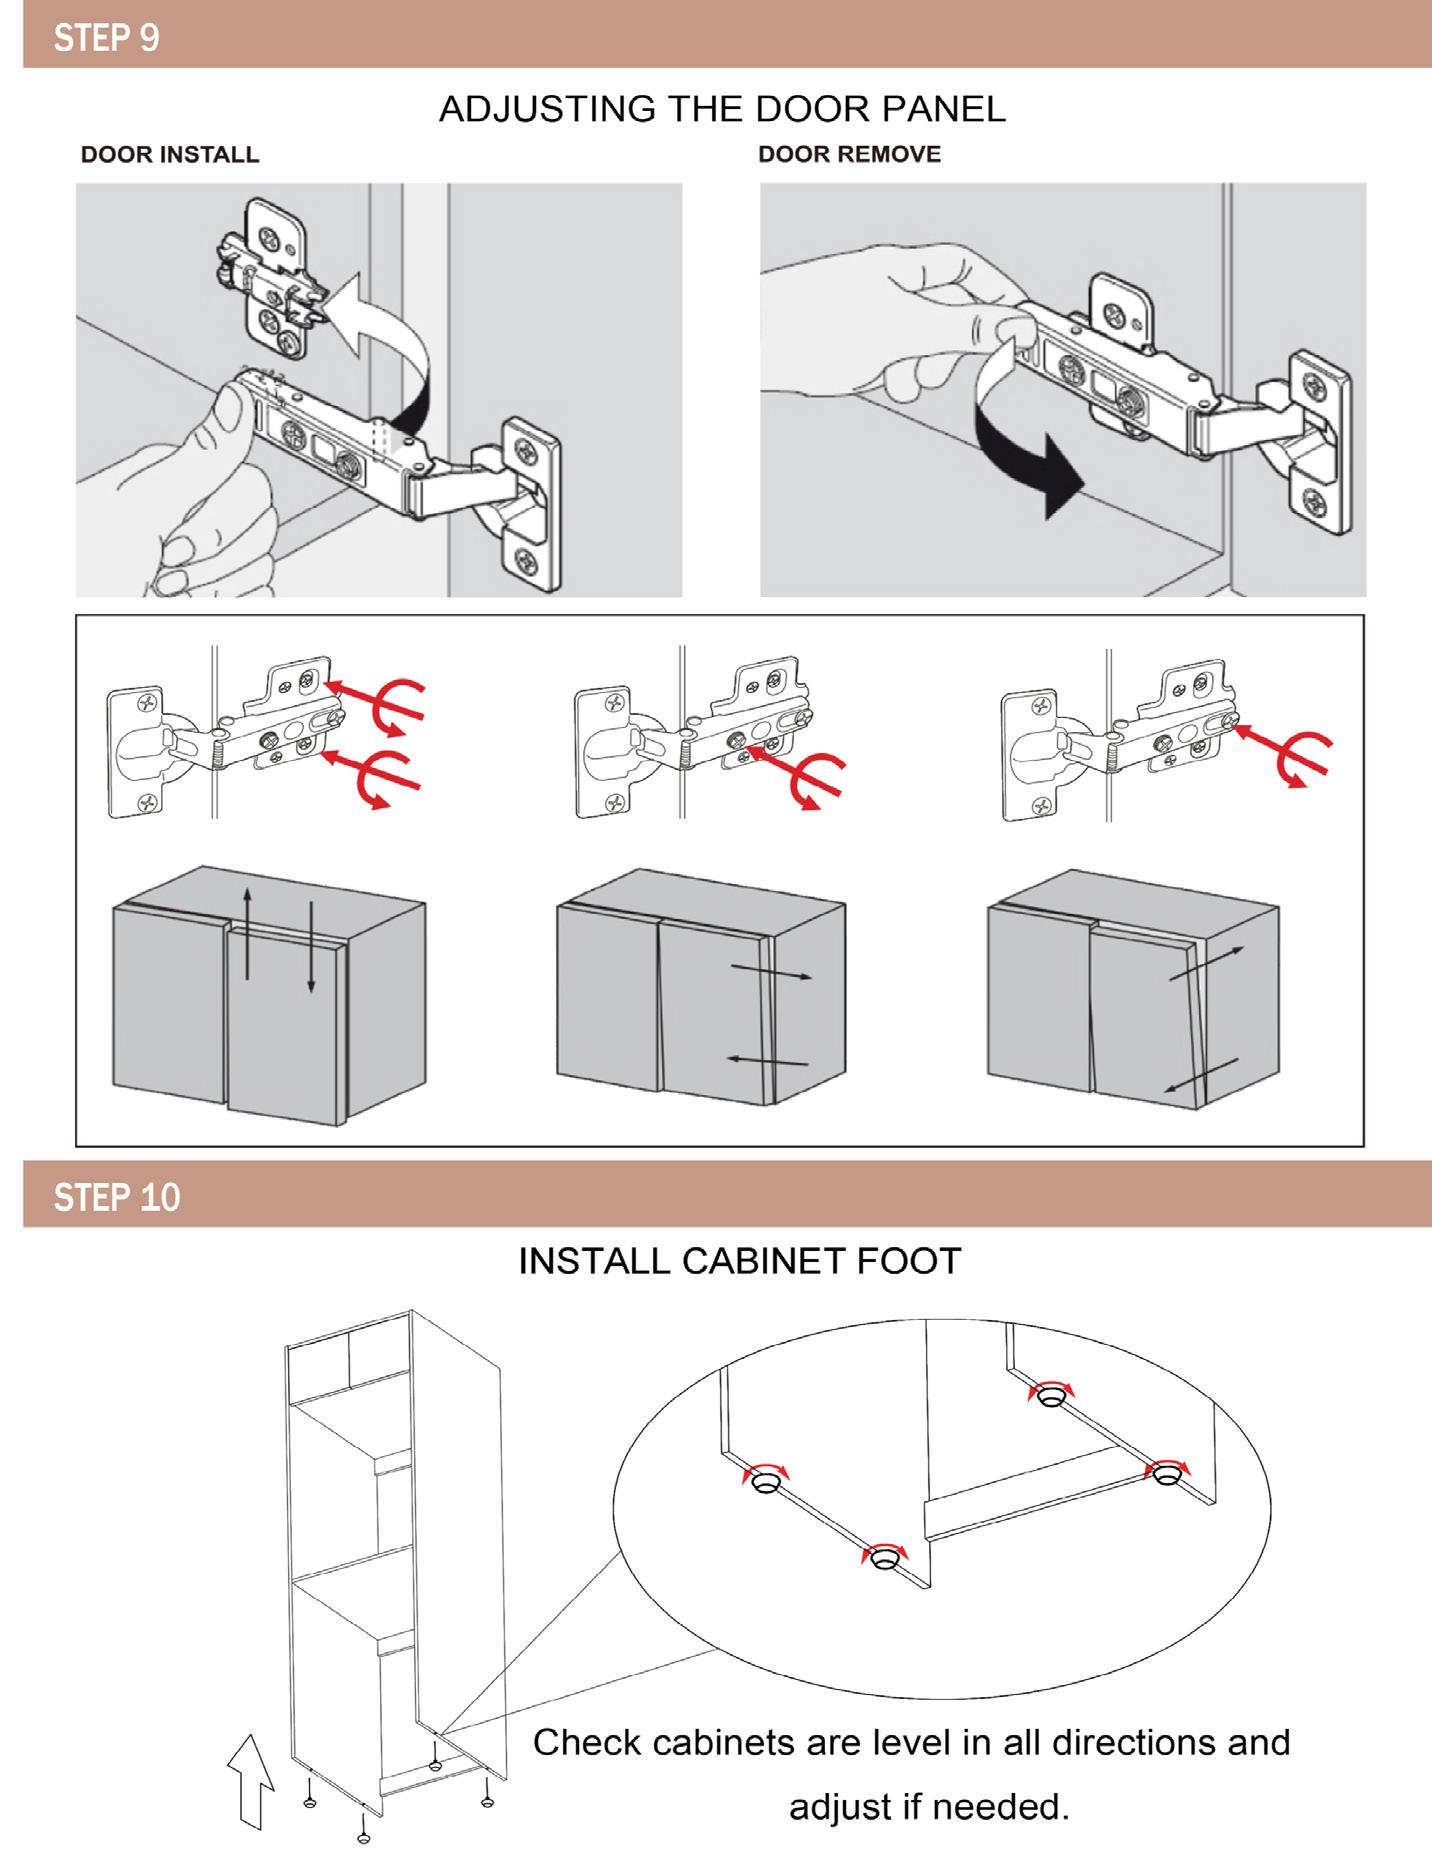
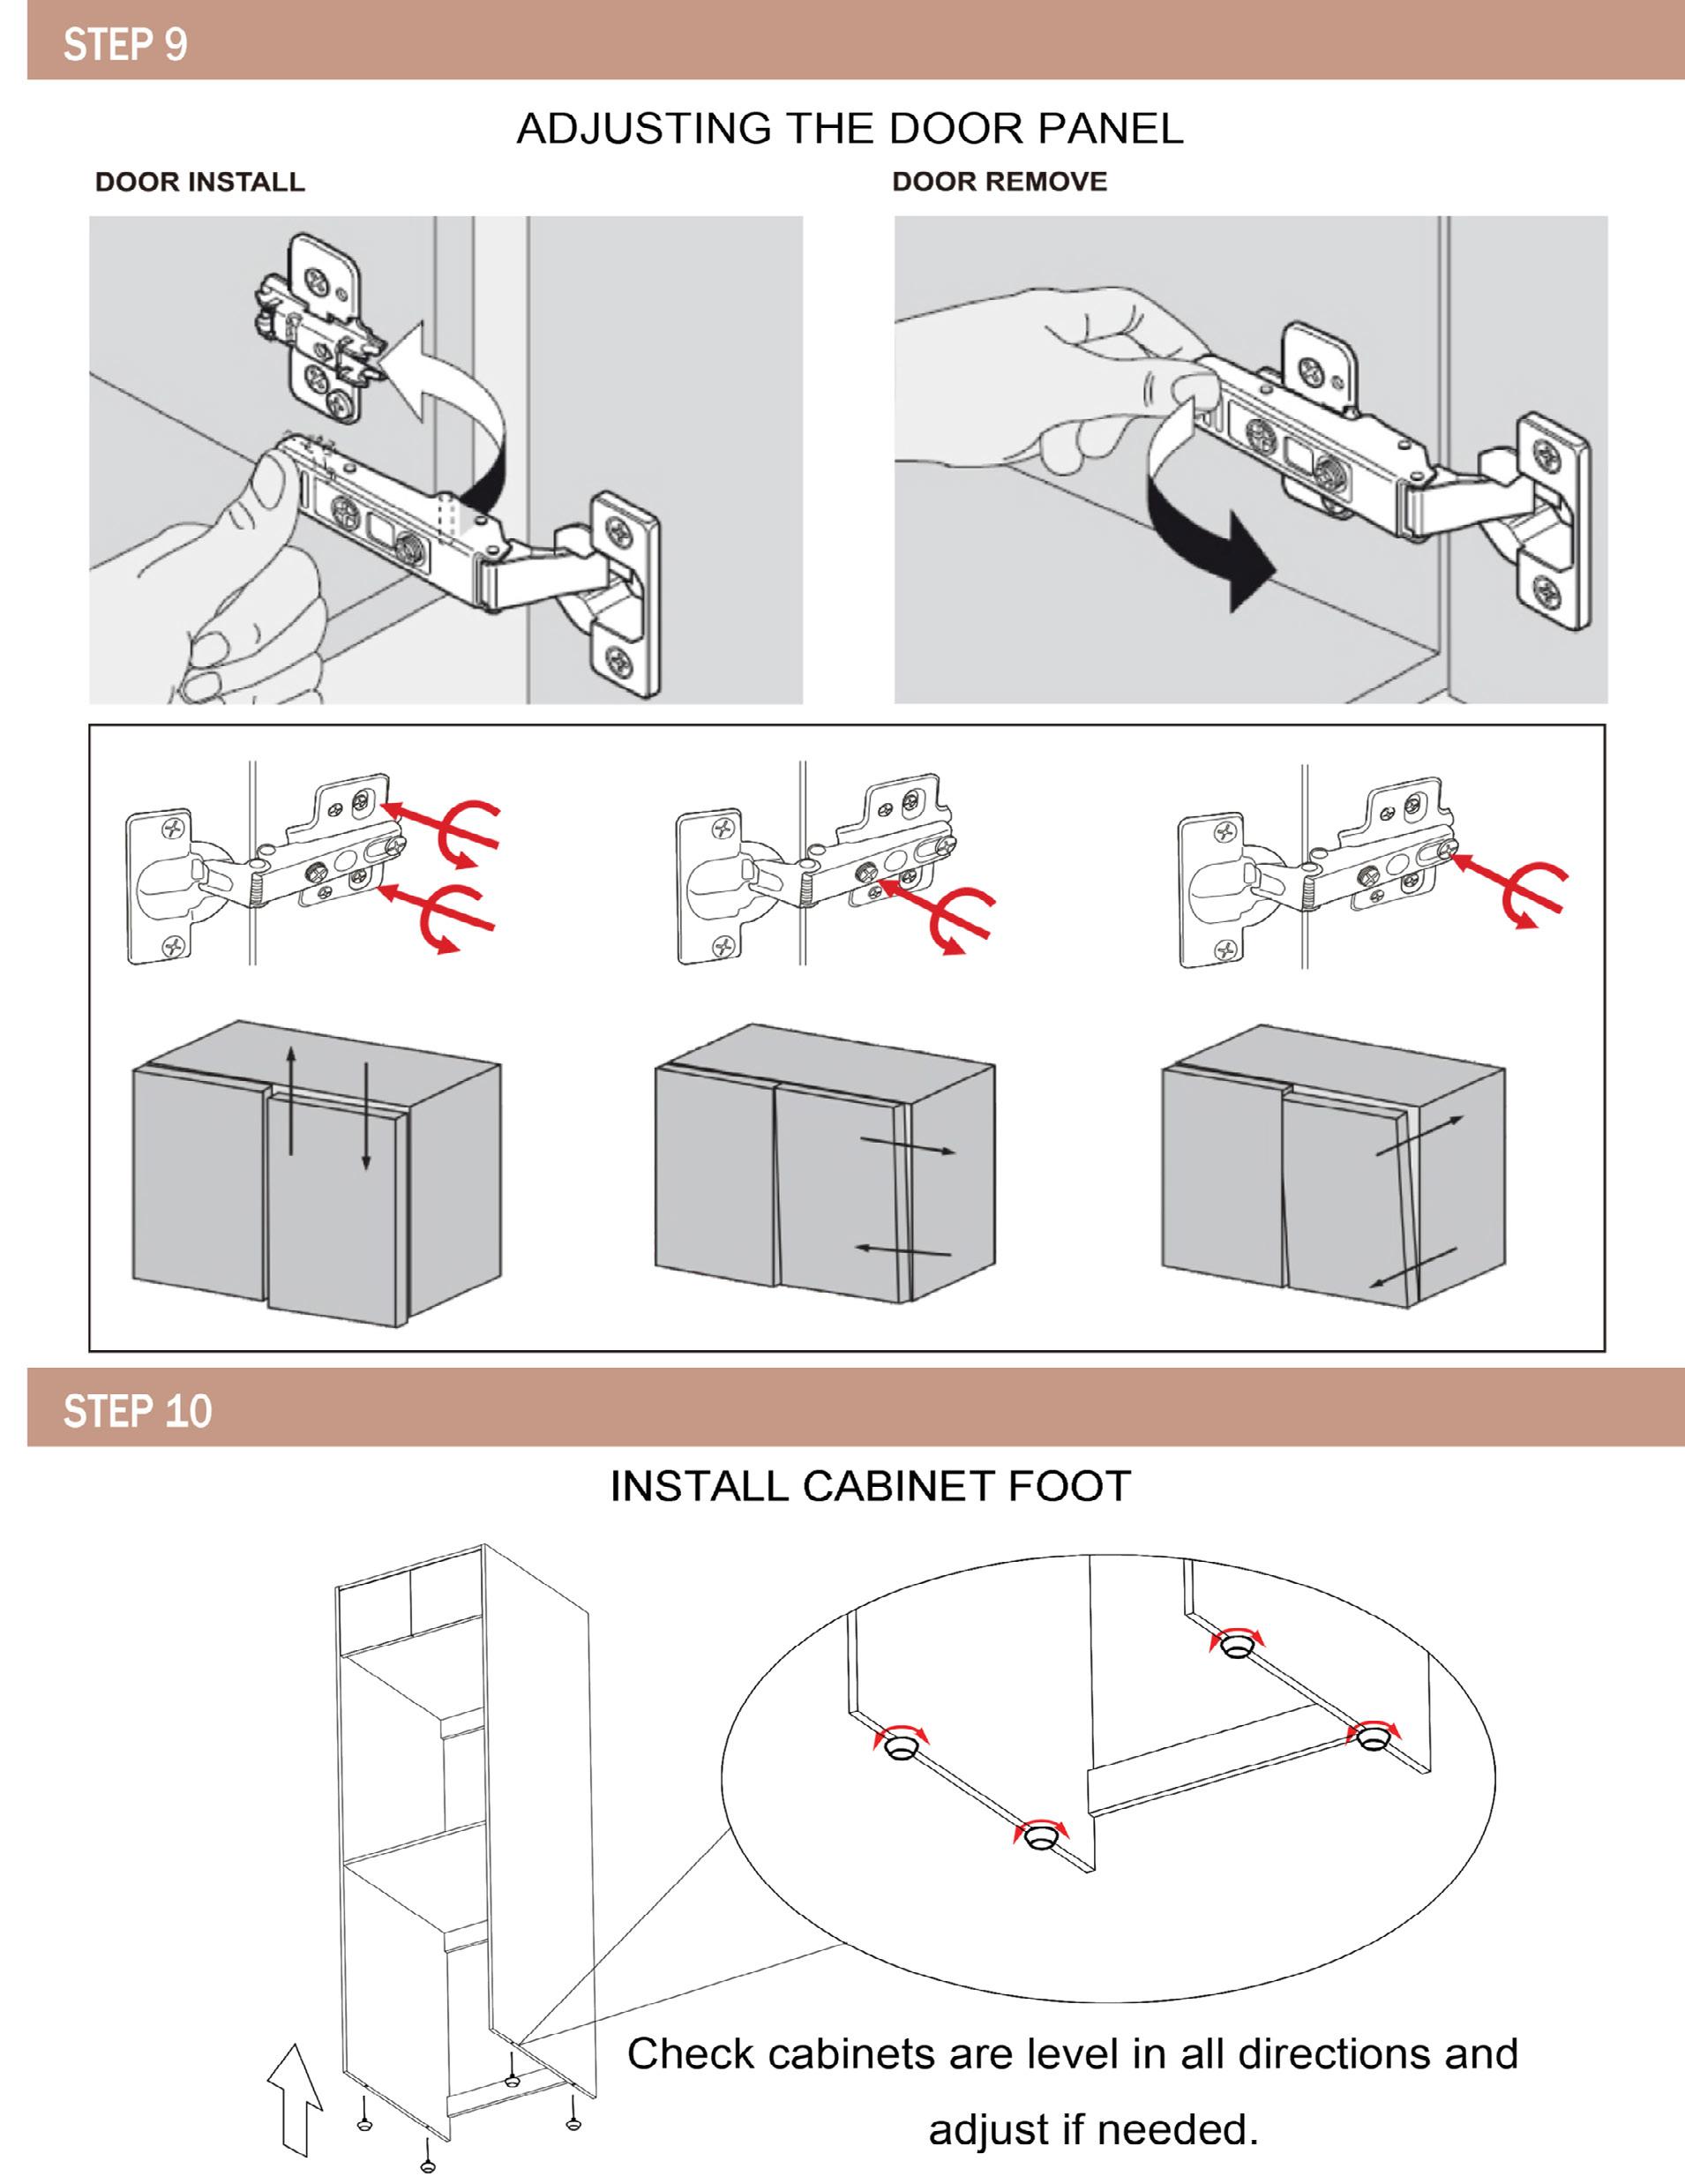
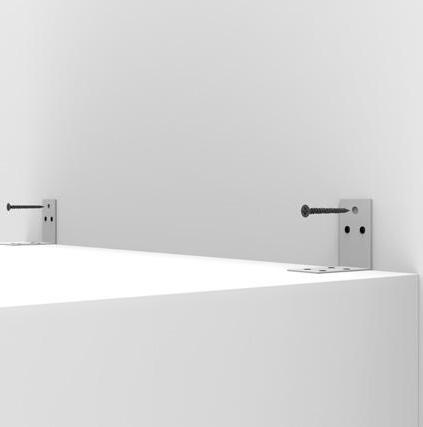
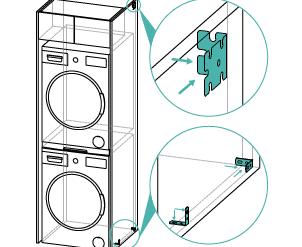
Use adjustable feet on the base of the cabinet to ensure your cabinet is level. Use a spirit level to check.
Once the cabinet is level, fasten the cabinet to wall using recommend screws for the wall you have
Pre-Drill through to the back of the cabinet, into wall studs / brick wall
Fasten cabinet with the appropriate bolts/ screws/plugs top and bottom of the cabinet
If you can note locate beams or supports use appropriate sized hallow wall anchor bolts
Minimum of 4 fixing points.
Check that you have all tools, products and parts onsite
Any parts missing please contact your store to discuss, leave plenty of time to allow for missing parts to be shipped
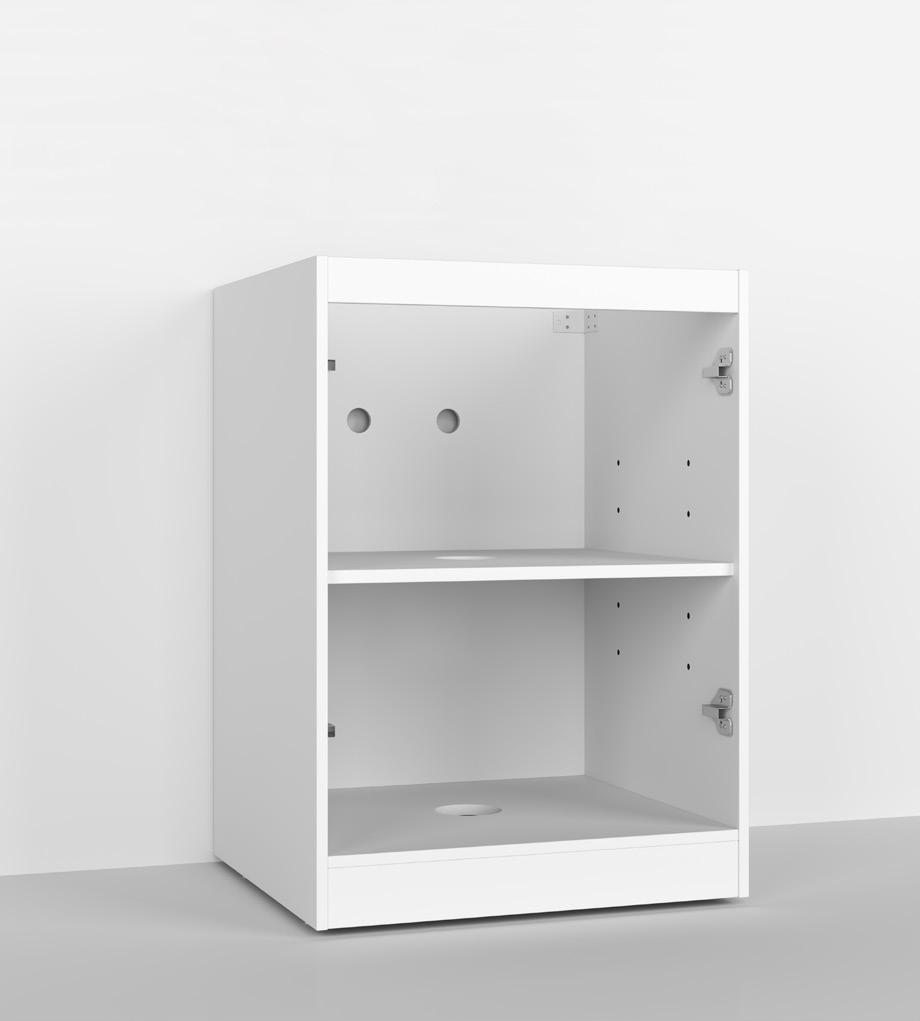
Check for damage upon receiving your laundry and also before installing. This unit is assembled .
Remove all packaging.
Remove Doors before installing and store in protected safe place.
Markout stud positions. This will be the location you will need to screw into studs to support weight of cabinets
If you have brick rendered walls, use screws and bolts to mount
Cabinet should line up and match the base cabinet
With the help of a second person , lift the cabinet into position; use cabinet stands to help
Check Level and ensure cabinets are aligned to each other
Once the cabinet is level and fastened to the wall; NOTE- Before screwing into walls - Ensure there are no plumbing or electrical wiring behind the walls in the locations you intend to screw into)
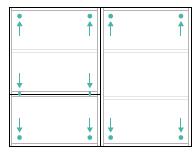
Fastening with Screws:- Pre-Drill for screw into wall and cabinet.while ensuring the cabinet is Level. It is recommended to fix 2 top and 2 bottom screw
Use filler panel if you have any gaps.
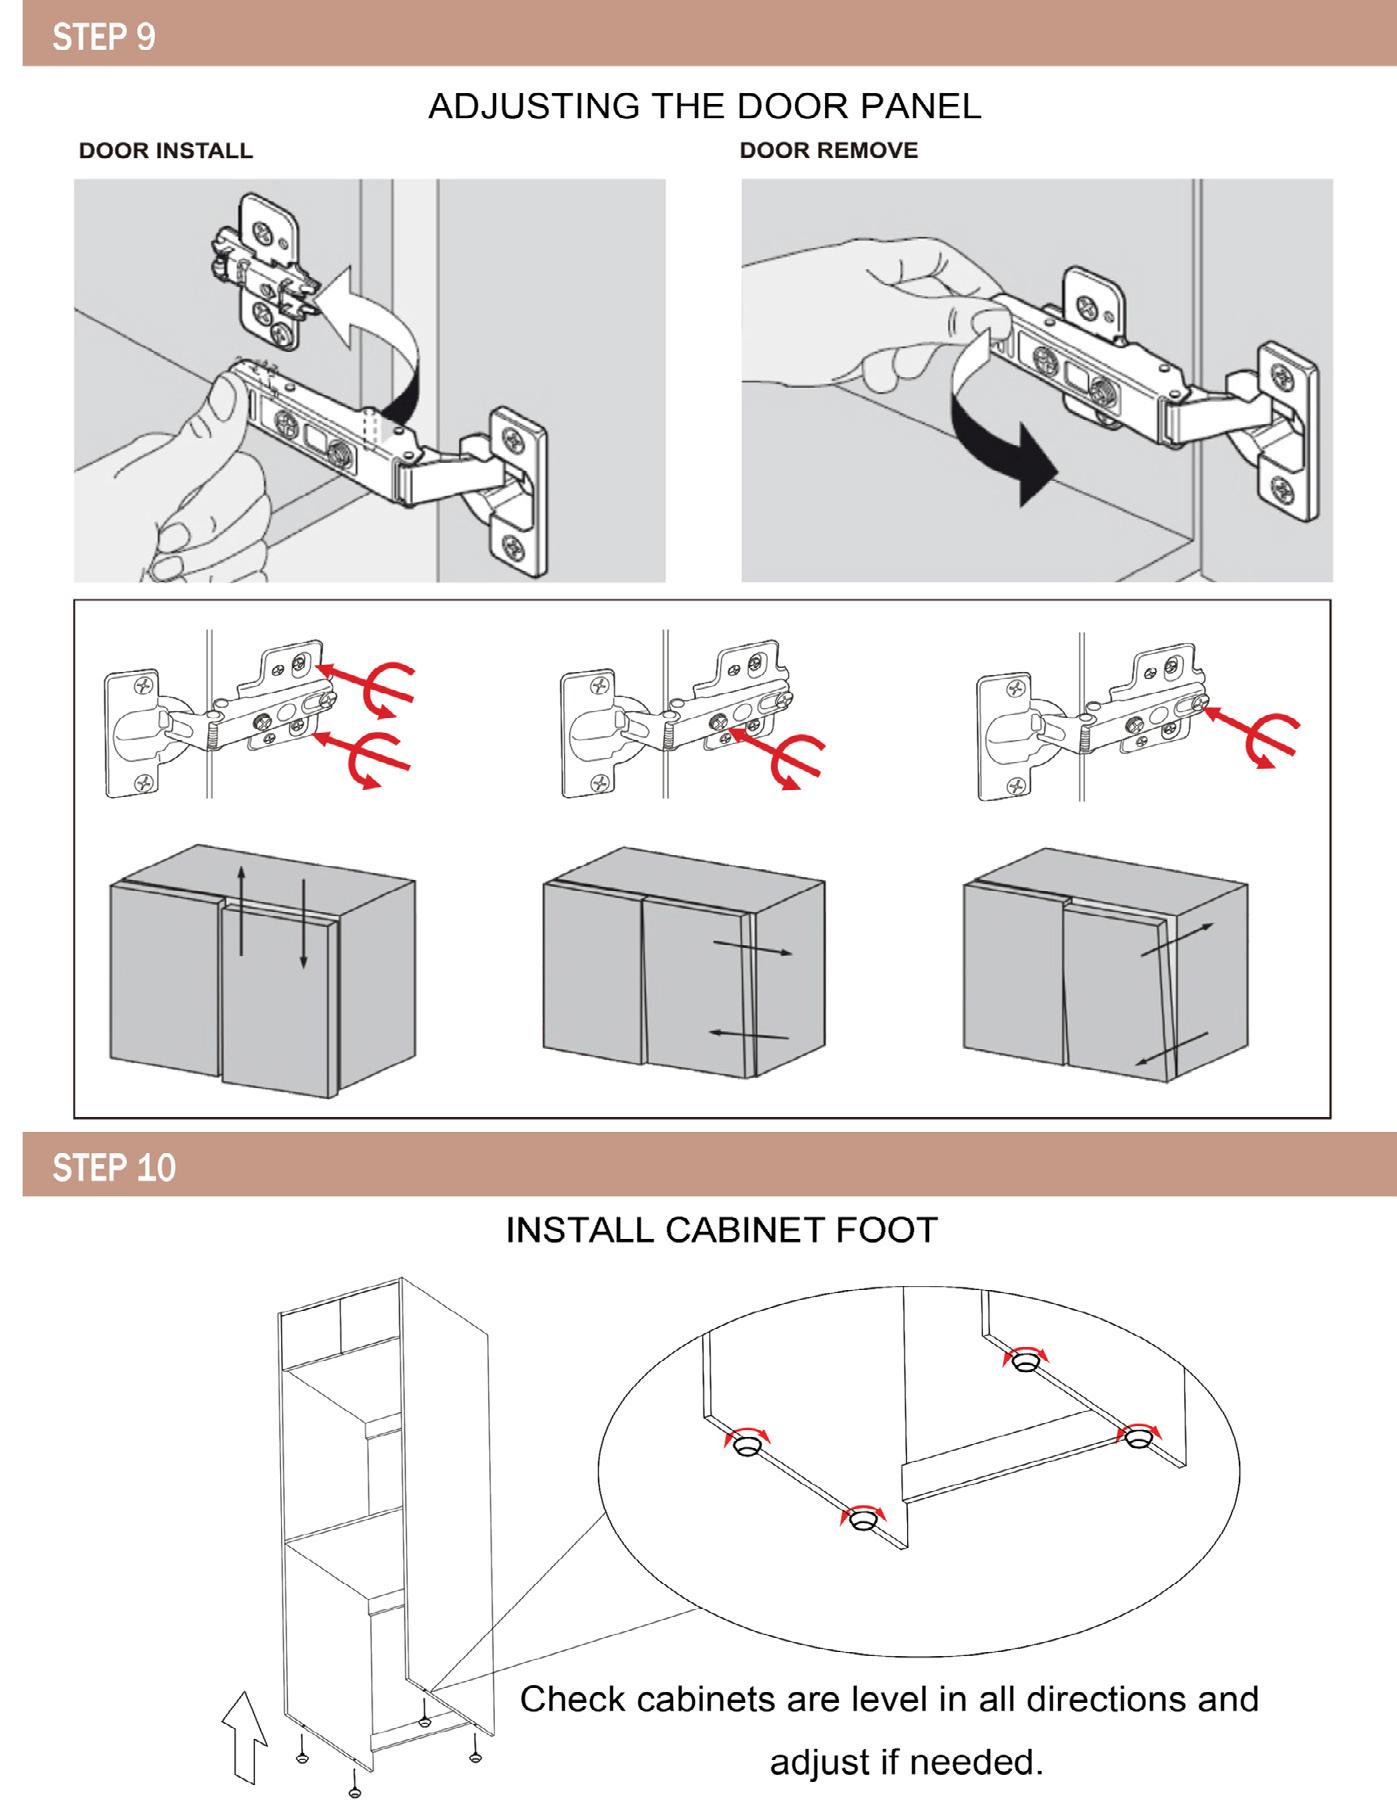
Install doors and adjust as pictured
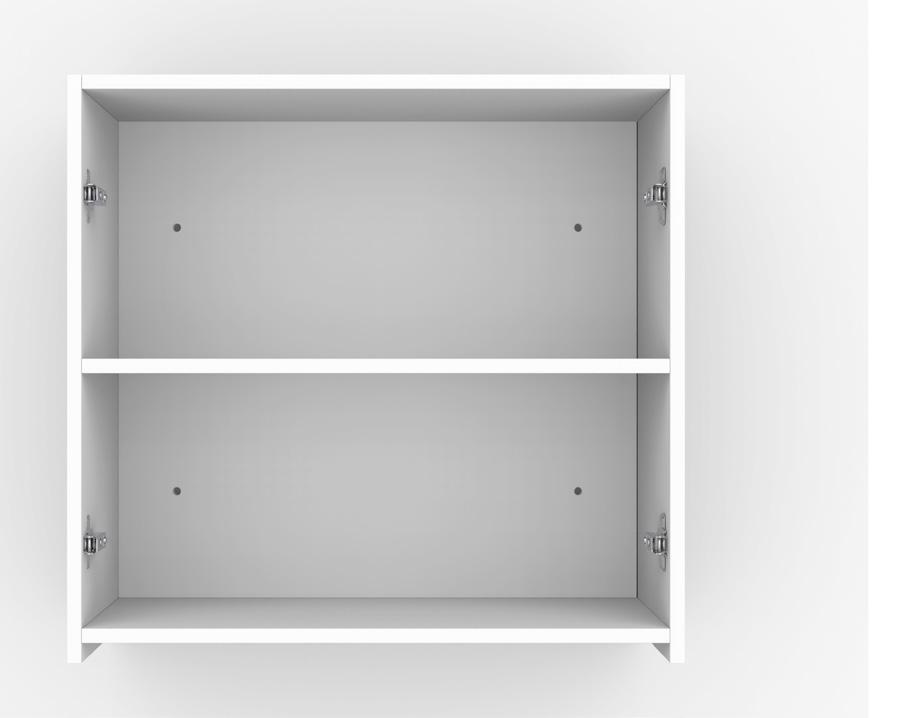
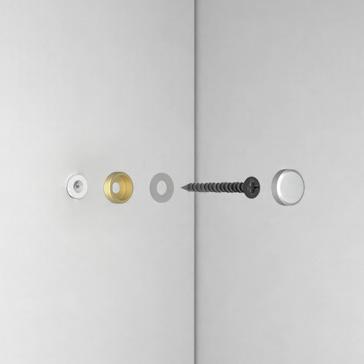
Check that you have all tools, products and parts onsite
Any parts missing please contact your store to discuss, leave plenty of time to allow for missing parts to be shipped.
Check for damage upon receiving your laundry and also before installing. This unit is not assembled requires assembly.
PREPARE 1
Remove all packaging
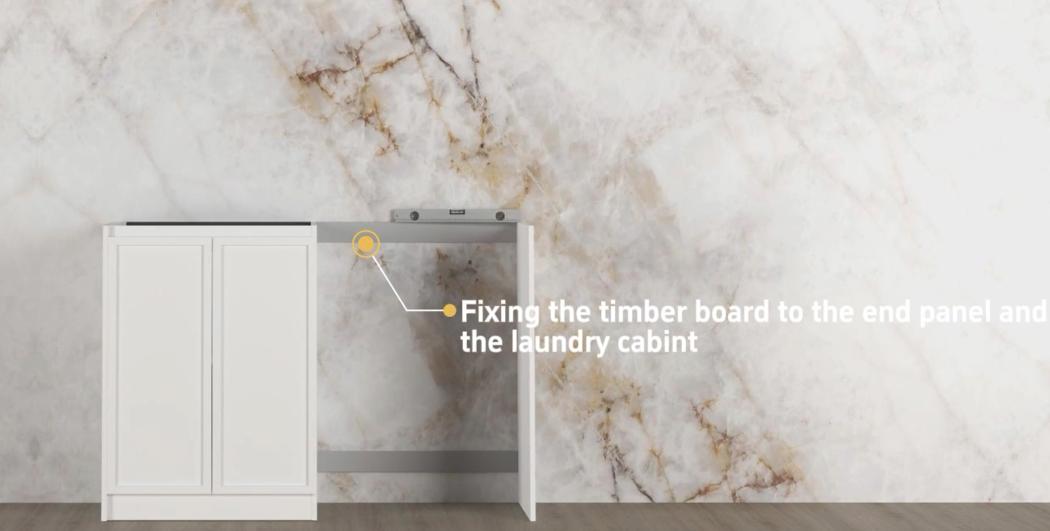
Once the cabinet is level and fastened to the wall;
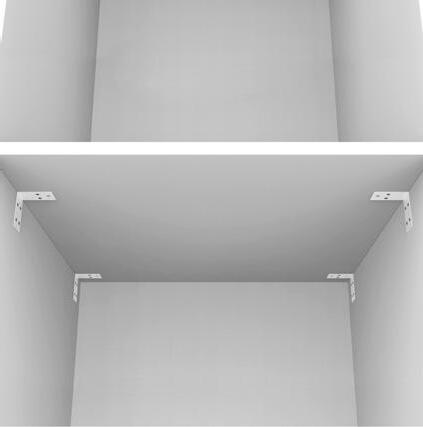
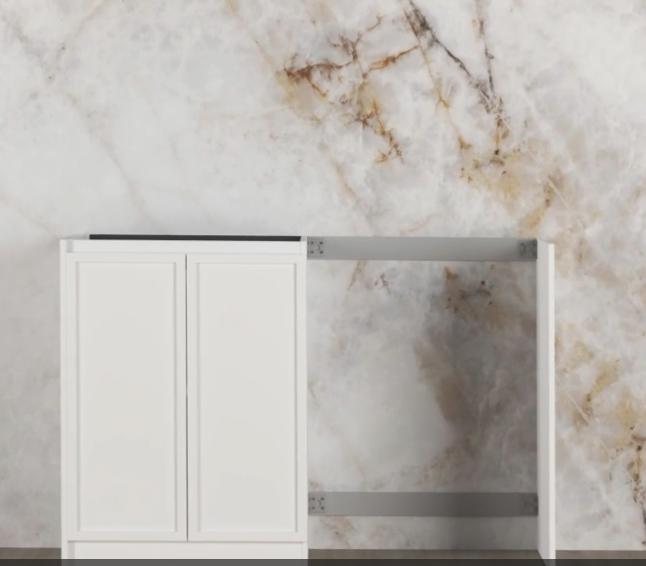
Mark out the location of the back rail
Ensure Top Rail is lined up with top of cabinet
Ensure rail is also level both at both ends
(NOTE- Before screwing into walls - Ensure there are no plumbing or electrical wiring behind the walls in the locations you intend to screw into)
Fastening with Screws:- Pre-Drill for screw into wall and cabinet.
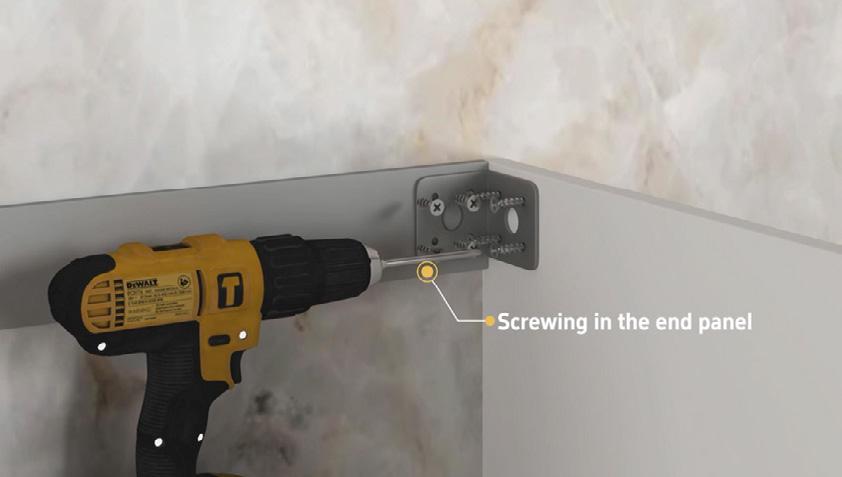
Fasten rail and L-Brackets with screws. Ensure the Rail is Level.
Fasten using Glue:- Run a bead of strong builders adhesive appropriate for the surface being mounted on Ensure the Rail is Level
Mount and fasten with L-brackets using screws, to rail and joinery
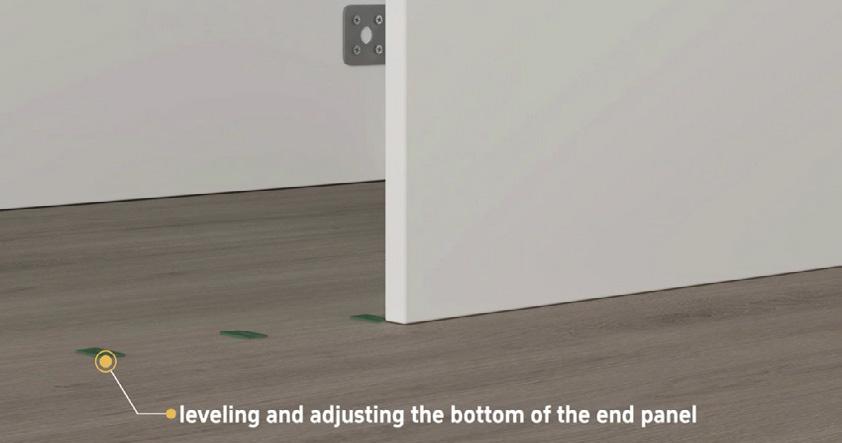
Ensure End Panel is level both top to bottom & front to back.
Use packers of different sizes if needed to ensure the end panel is level with the cabinet and rail use a spirit level to check
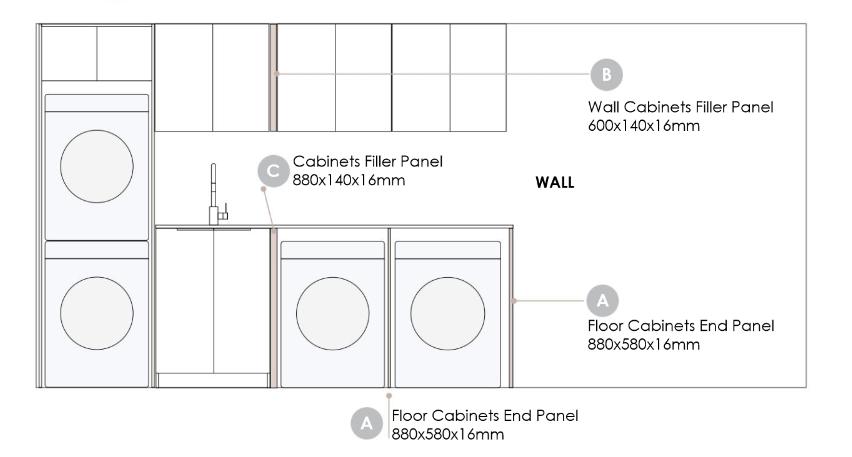


Wall Cabinets Filler Panel
600x140x16mm
Cabinets Filler Panel
880x140x16mm
Floor Cabinets End Panel
880x580x16mm
Floor Cabinets End Panel
880x580x16mm

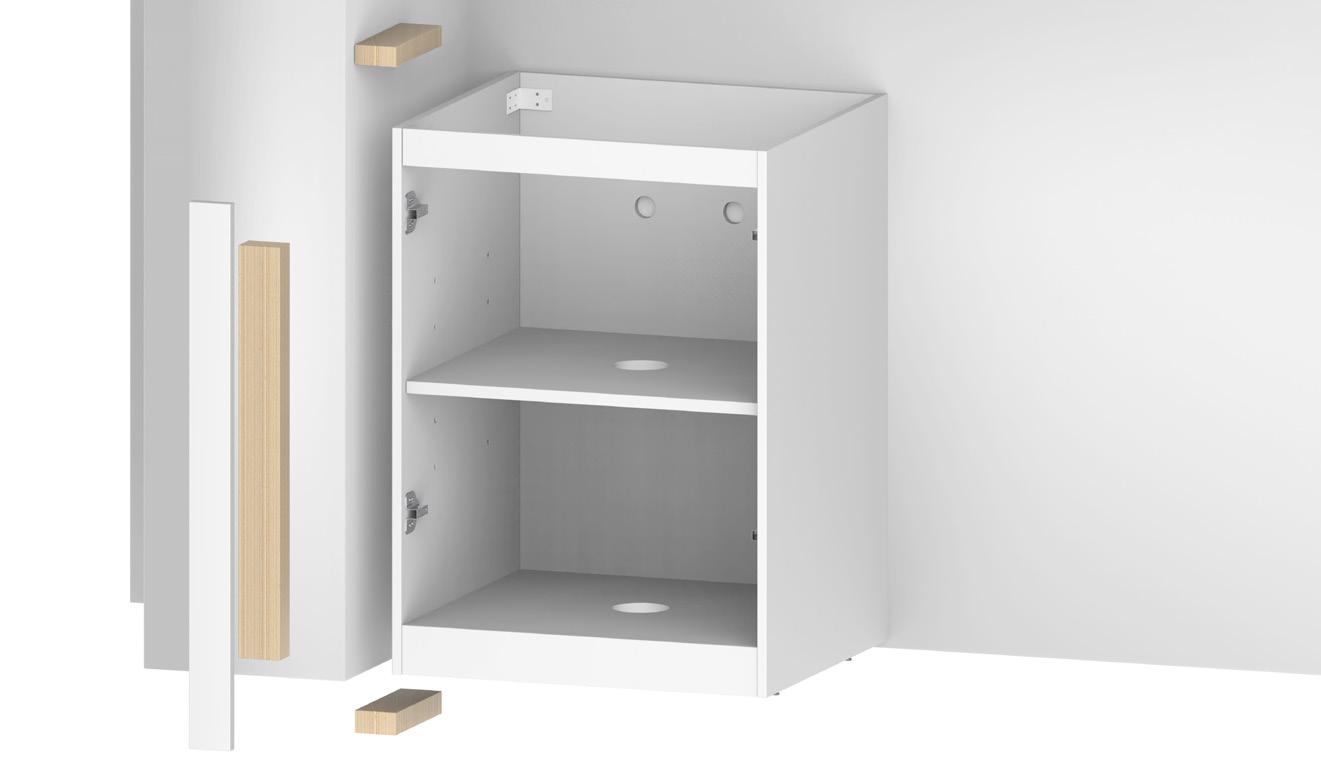
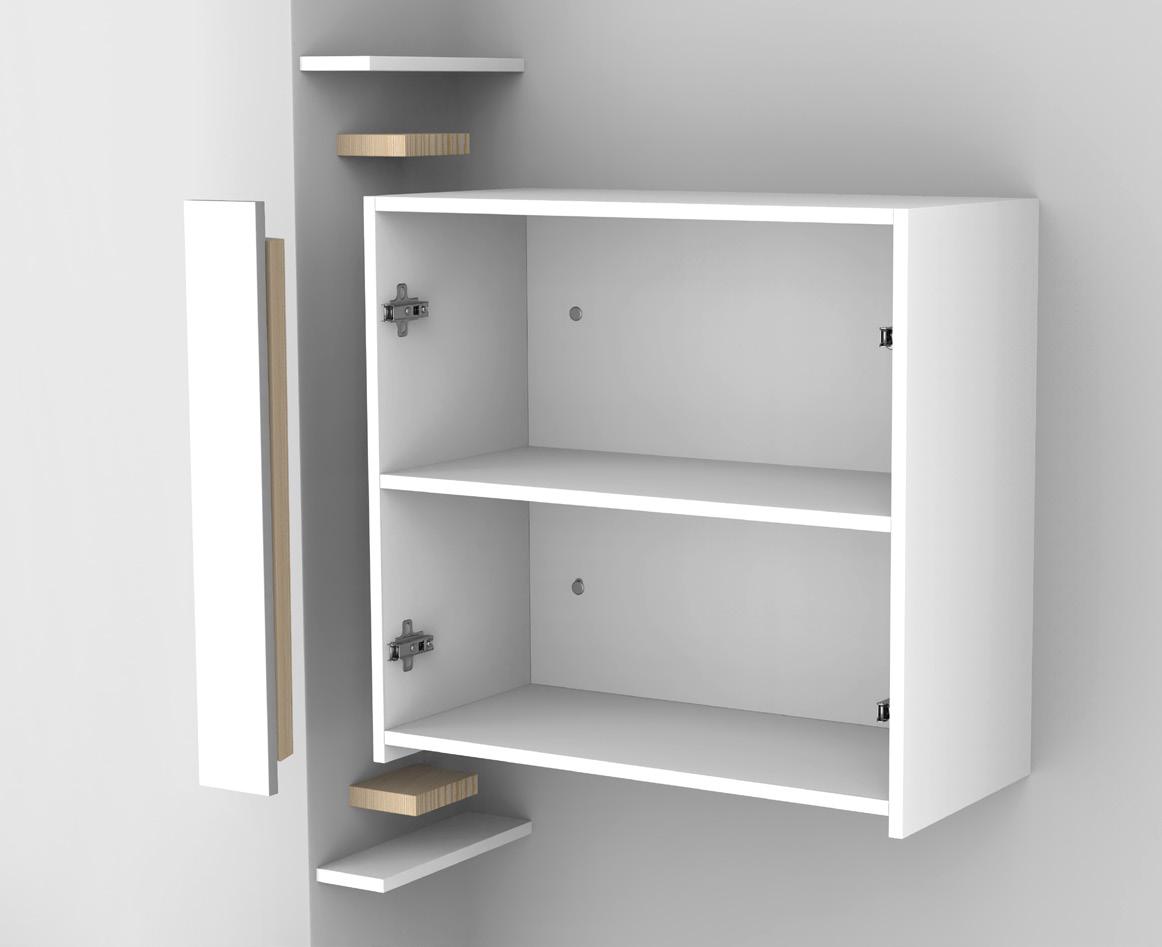
Measure the gap between wall and cabinet or between two cabinets
Note that the gap at the top and bottom may possibly vary
Cut a filler panel piece that will fit into the gap to conceal any gaps
Make sure you have measured width and also length from floor to top of the cabinet before you cut your piece.
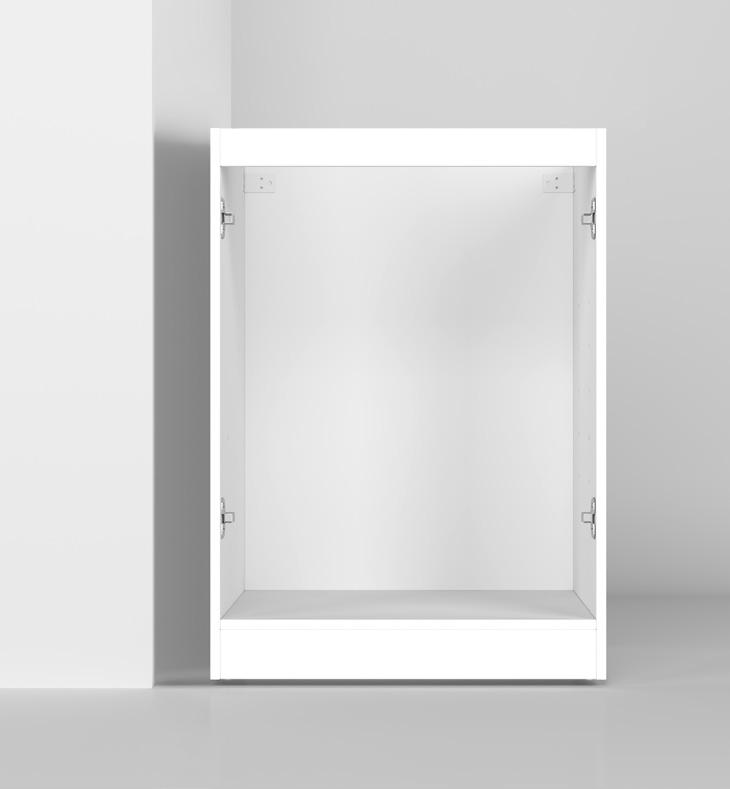
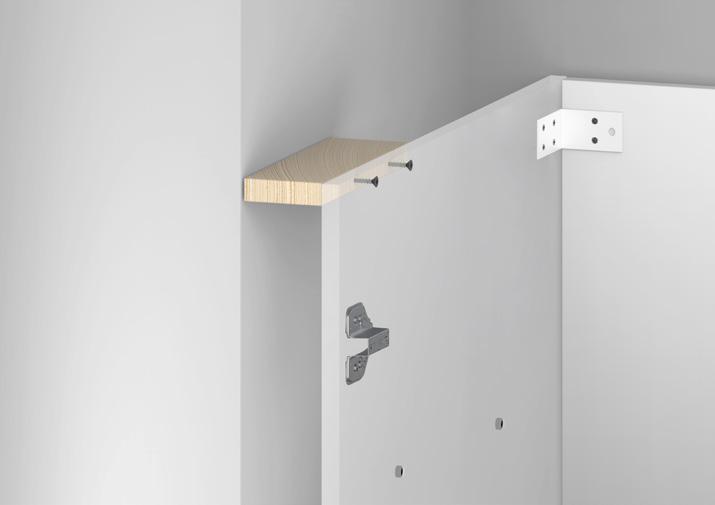
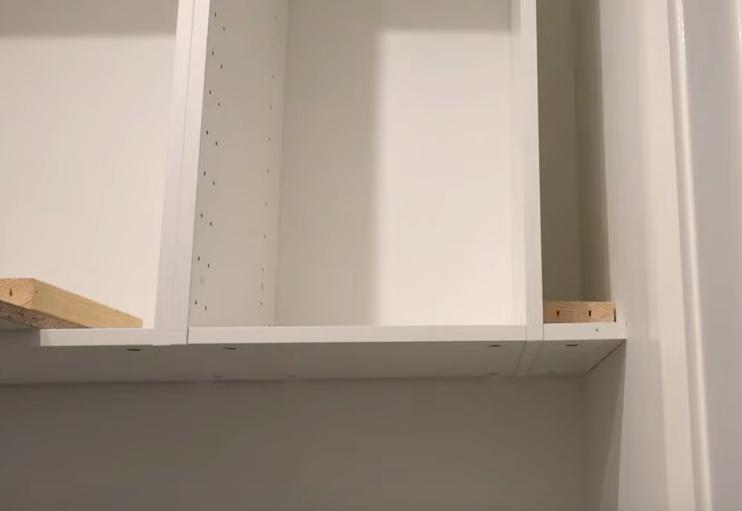
Measure and cut a filler panel strip to cover the gap.
Place filler strip between the cabinet and wall, or between 2 cabinets Before fastening make sure the panel width allows for the door next to panel to open. Plan the piece to get the perfect fit. Then fasten to the joinery, secure by securing in using screws internally
NOTE:- If the gap requires less than 16mm you may use a filler panel which will save you time and preparation while adding extra support to the top

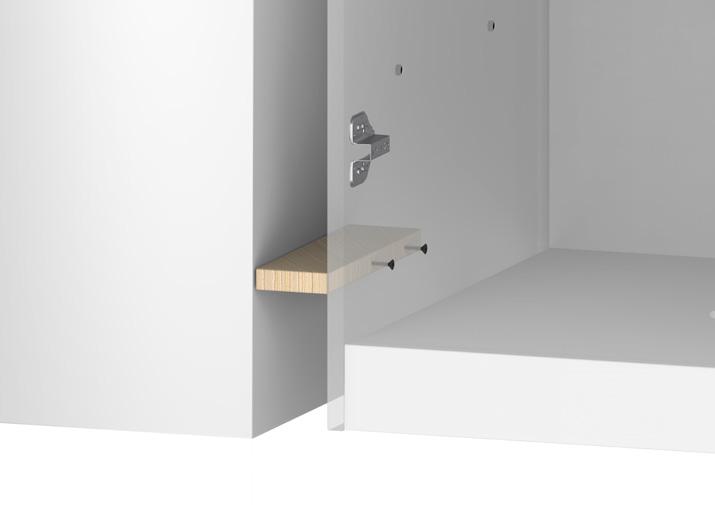
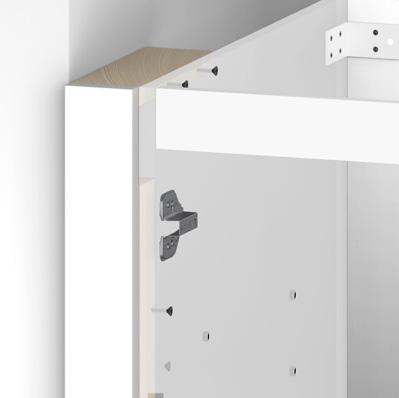
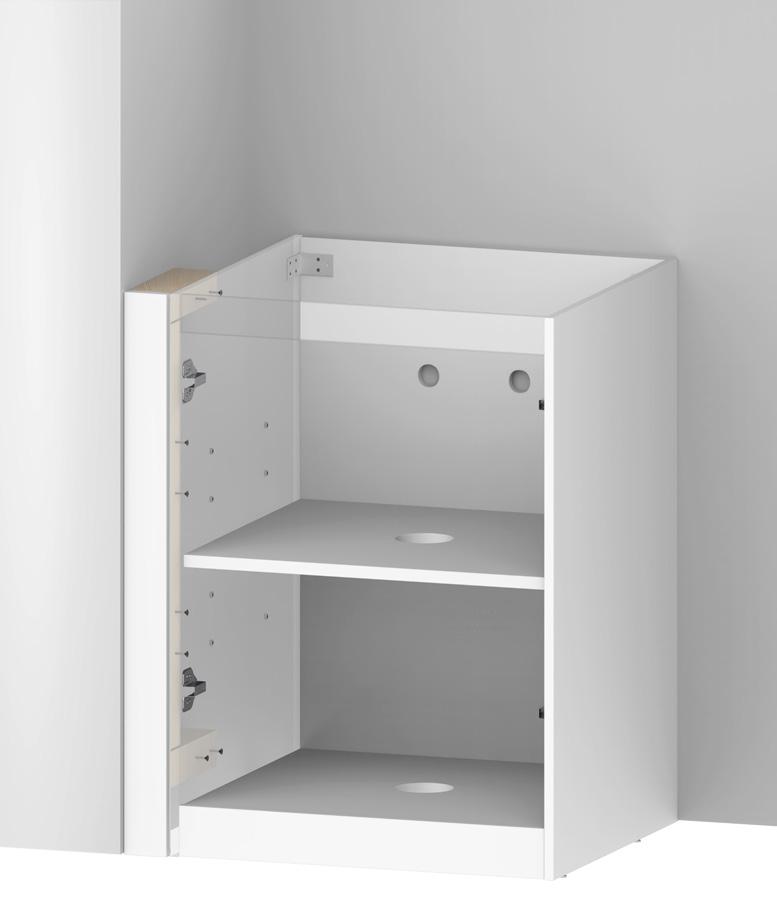
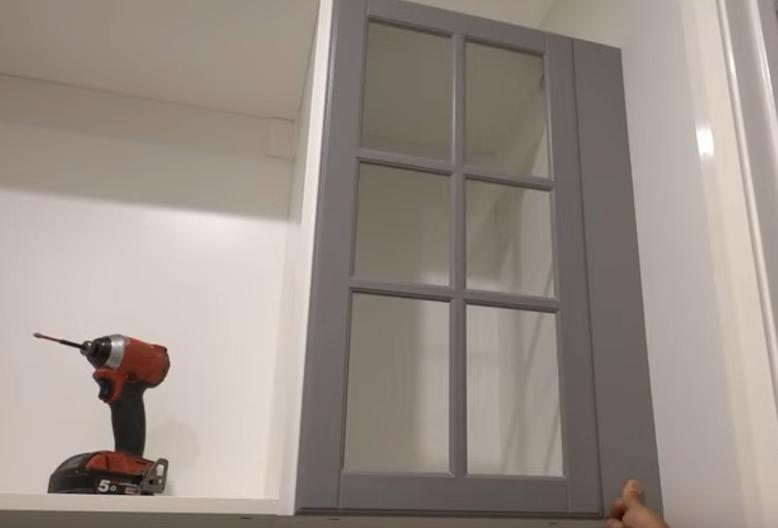
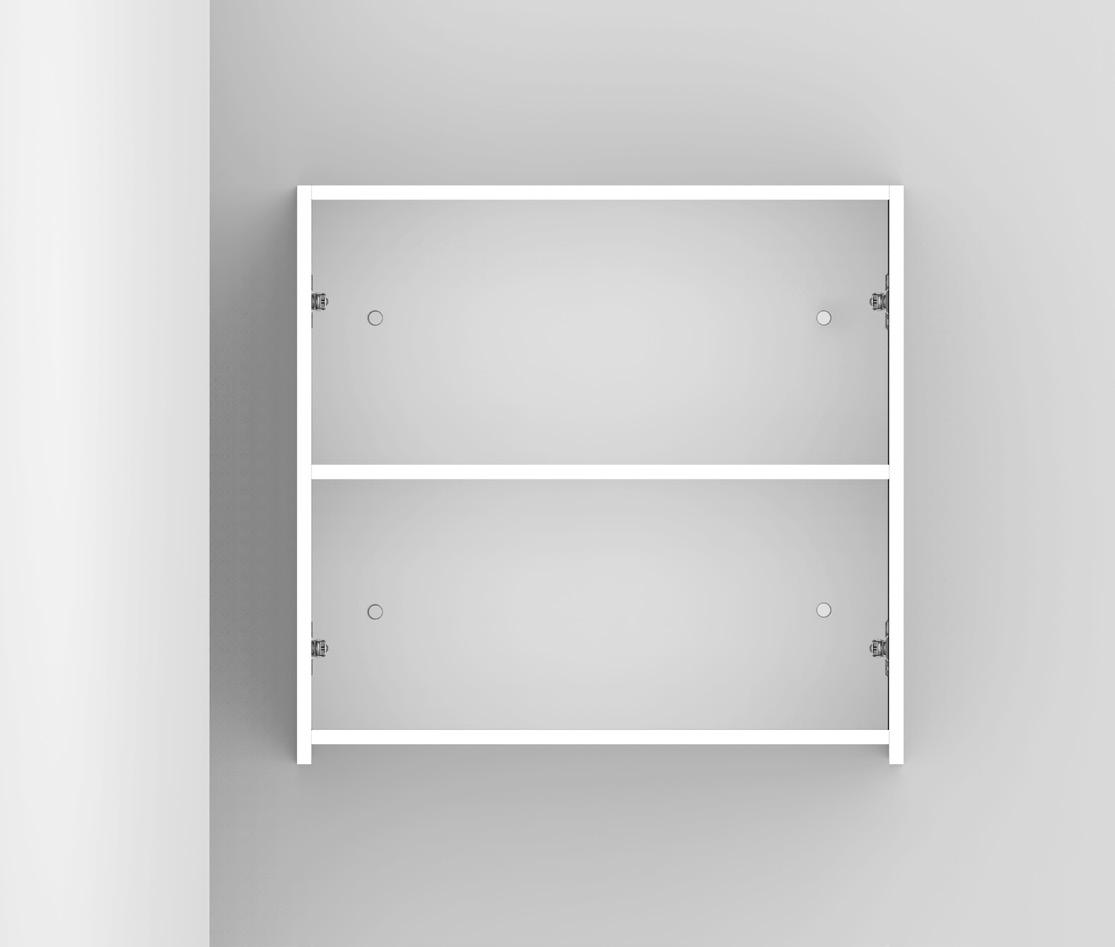

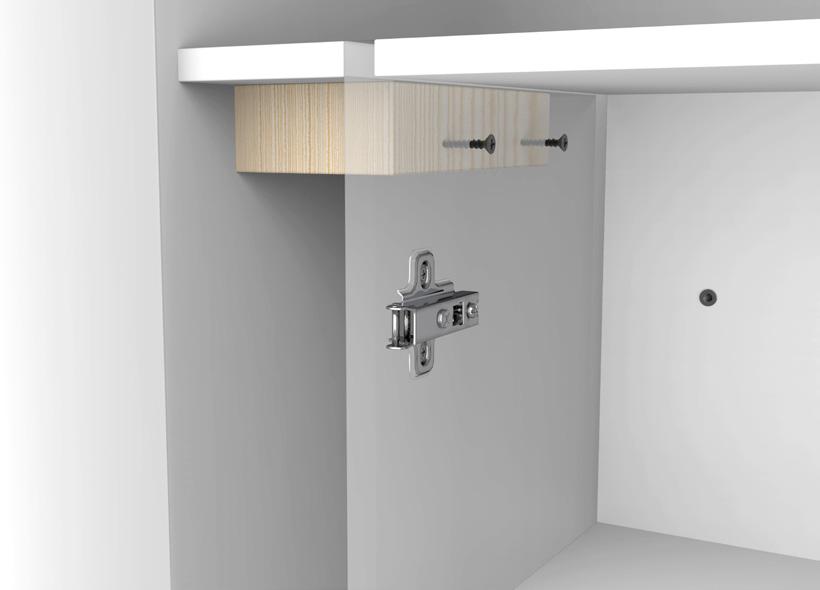
Measure the gap between wall and cabinet or between two cabinets.
Note that the gap at the top and bottom may possibly vary. Under Cabinet panel, Cut a piece cabinet that will fit into the gap as to conceal any gaps at the top and bottom the wall cabinets for a seamless look.

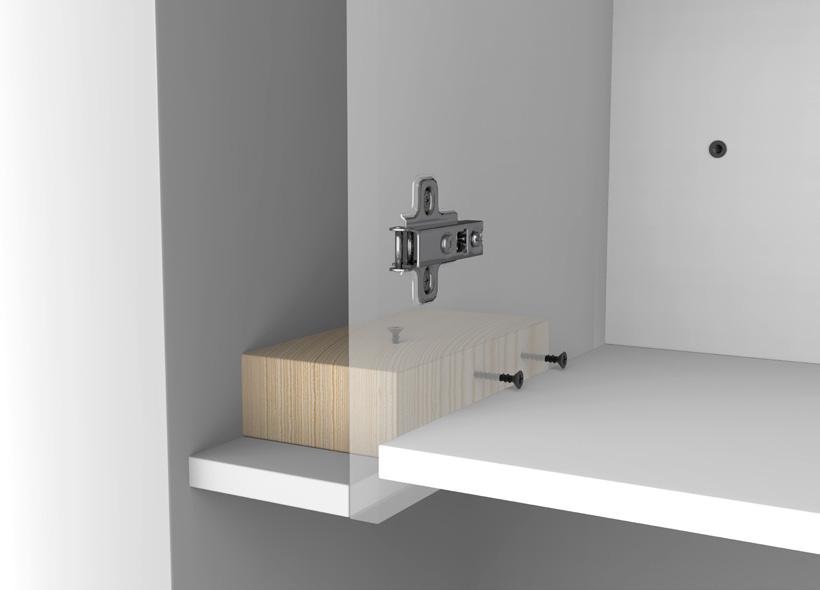
Measure and cut a filler panel strip to cover the gap
Place filler strip between the cabinet and wall, or between 2 cabinets
Before fastening make sure the panel width allows for the door next to panel to open Then fasten to the joinery, secure by securing in using screws internally.


Check that you have all tools, products and parts onsite Any parts missing please contact your store to discuss, leave plenty of time to allow for missing parts to be shipped.
Check for damage upon receiving your laundry and also before installing. This unit is not assembled requires assembly.
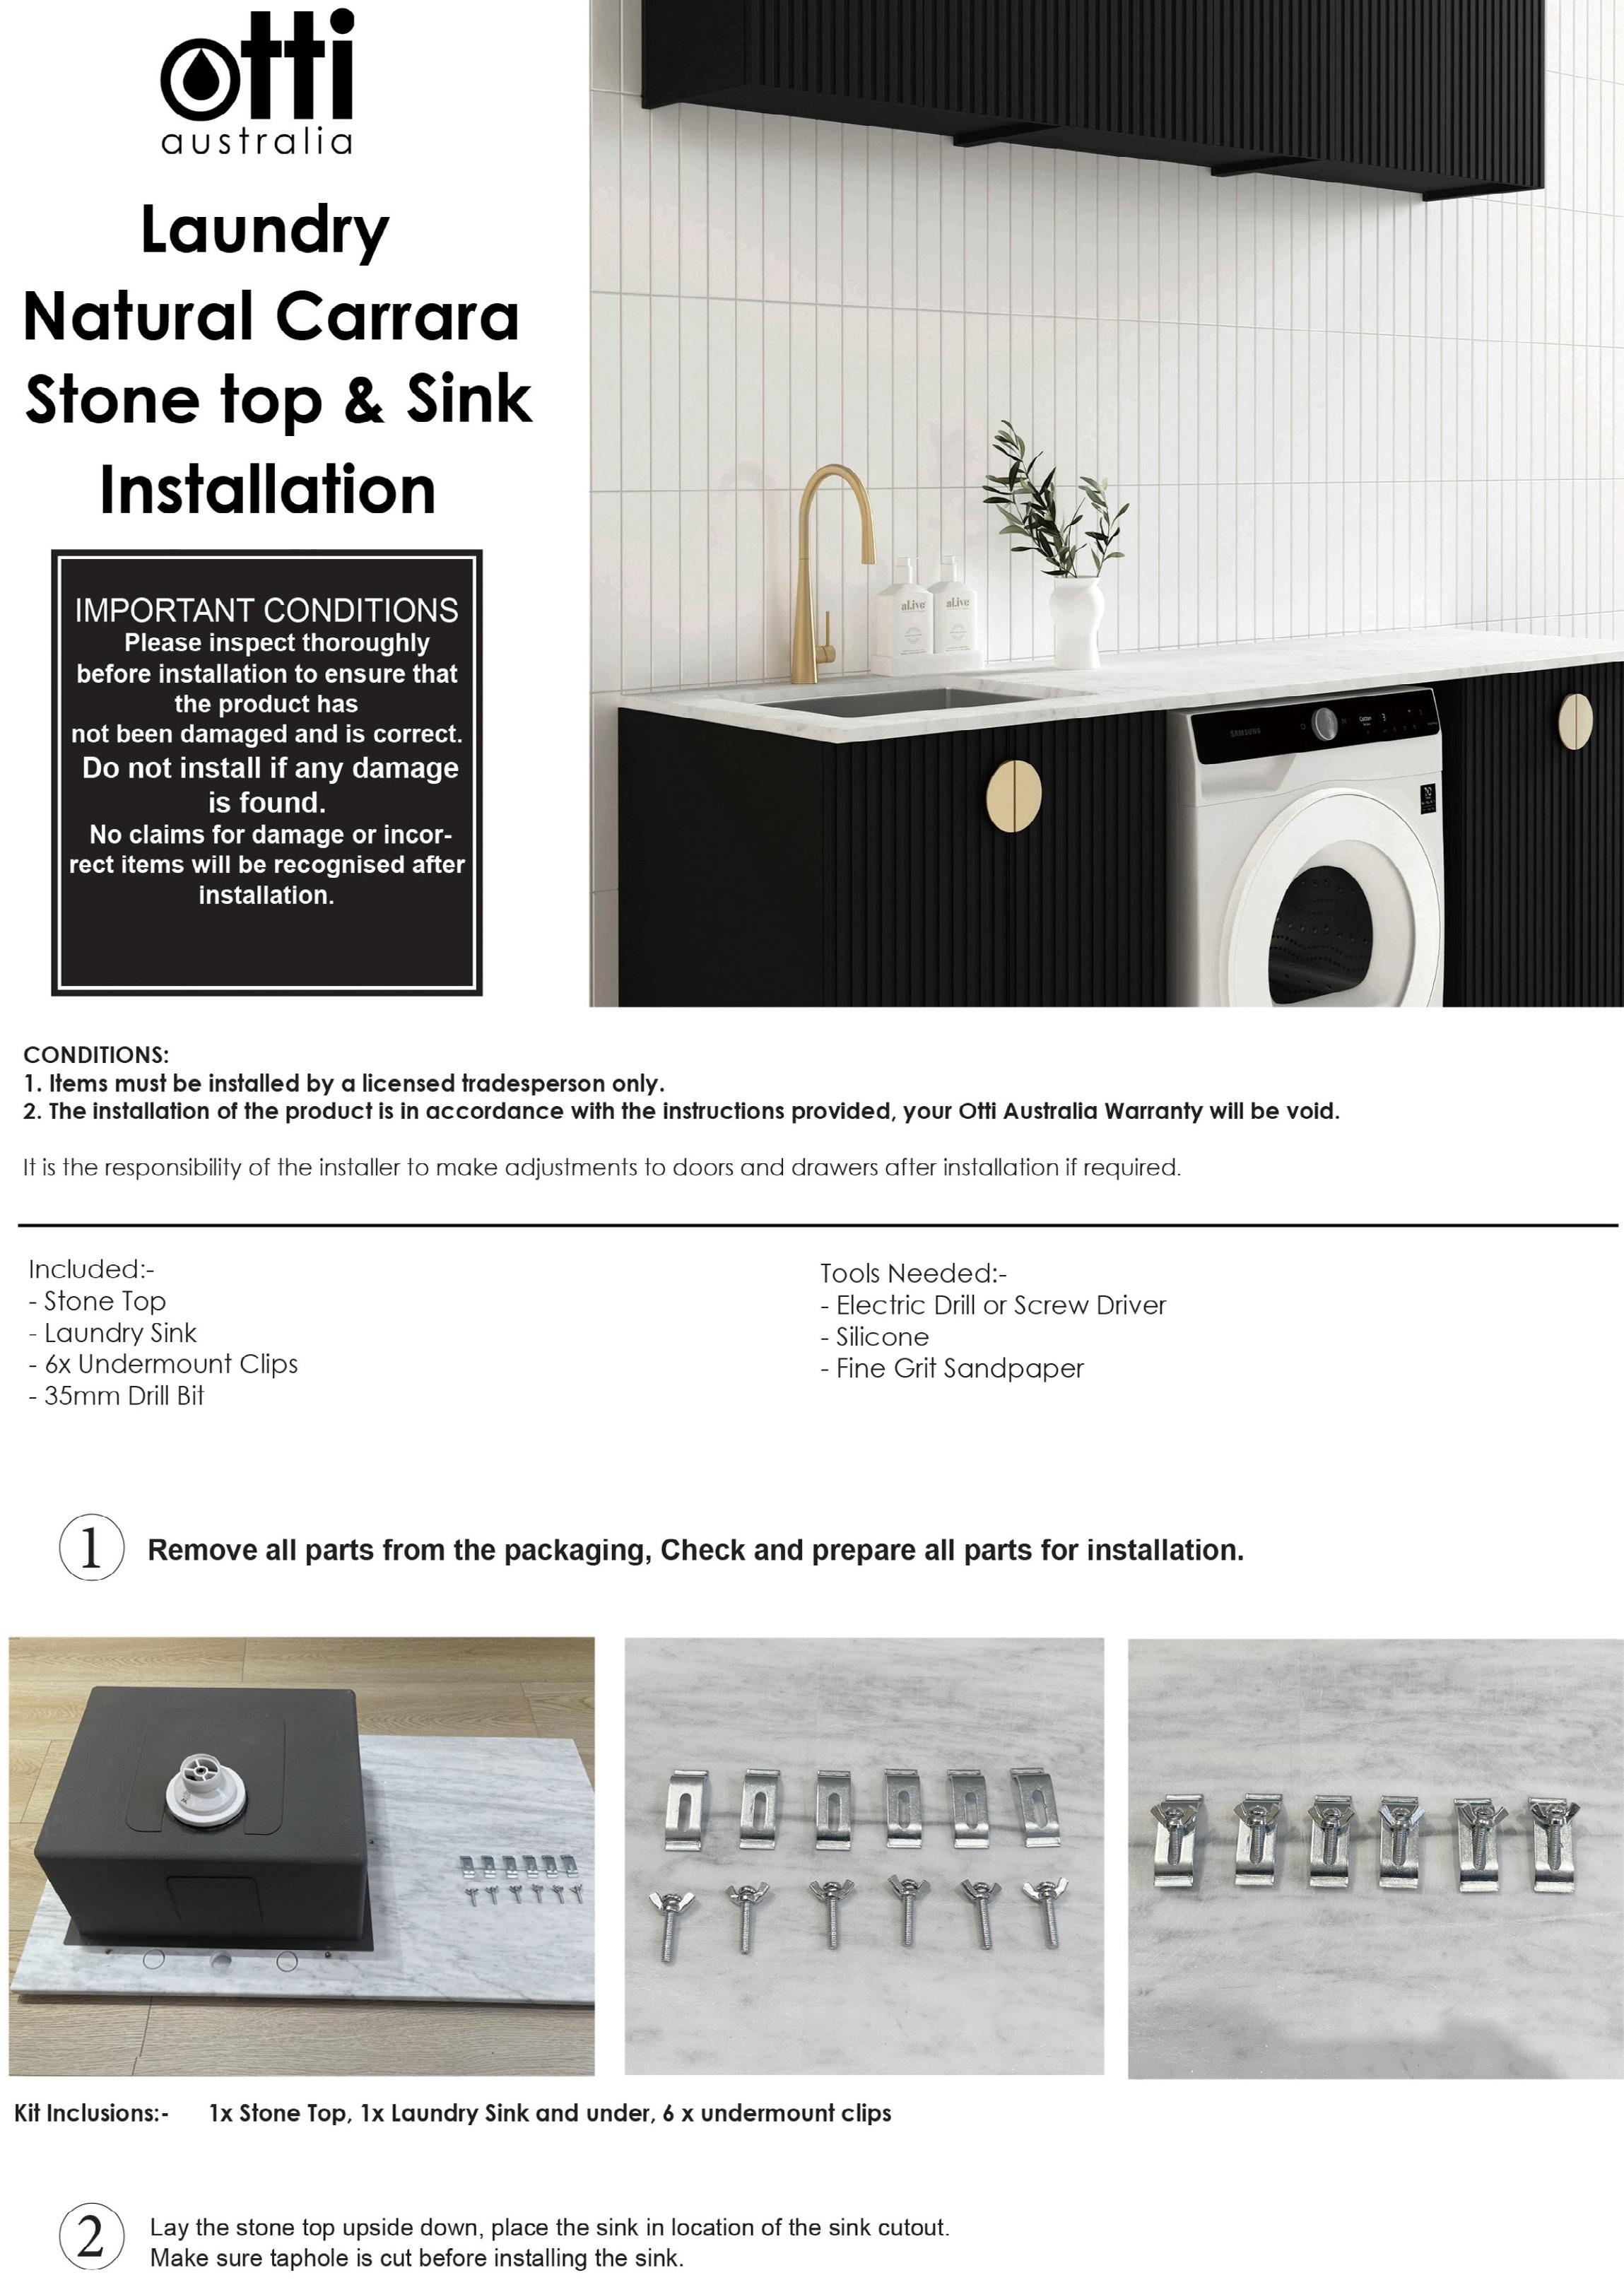
1. Items must be installed by a licensed tradesperson only.
2. The installation of the product is in accordance with the instructions provided, your Otti Australia Warranty will be void. It is the responsibility of the installer to make adjustments to doors and drawers after installation if required.
Included:-
- Stone Top
- Laundry Sink
- 6x Undermount Clips
- 35mm Drill Bit
Tools Needed:-
- Electric Drill or Screw Driver
- Silicone
- Fine Grit Sandpaper
Please note :- Undermount sink mounting is to be siliconed, rather than using clips.
LICENSED PLUMBER IS TO INSTALL SINK & TAP

NOTE
FOR ALL UNDERMOUNT SINKS YOU MUST USE SINK CLIPS &/or SILICONE
Check that you have all tools, products and parts onsite

Any parts missing please contact your store to discuss, leave plenty of time to allow for missing parts to be shipped
Check for damage upon receiving your laundry and also before installing. This unit is not assembled requires assembly.
1. Items must be installed by a licensed tradesperson only.
2. The installation of the product is in accordance with the instructions provided, your Otti Australia Warranty will be void. It is the responsibility of the installer to make adjustments to doors and drawers after installation if required.
Included:- Stone Top - Laundry Sink - 6x Undermount Clips - 35mm Drill Bit
Please inspect thoroughly before installation to ensure that the product has not been damaged and is correct. Do not install if any damage is found.
No claims for damage or incorrect items will be recognised after installation.
CONDITIONS:
Tools Needed:- Electric Drill or Screw Driver - Silicone - Fine Grit Sandpaper NATURAL CARRARA
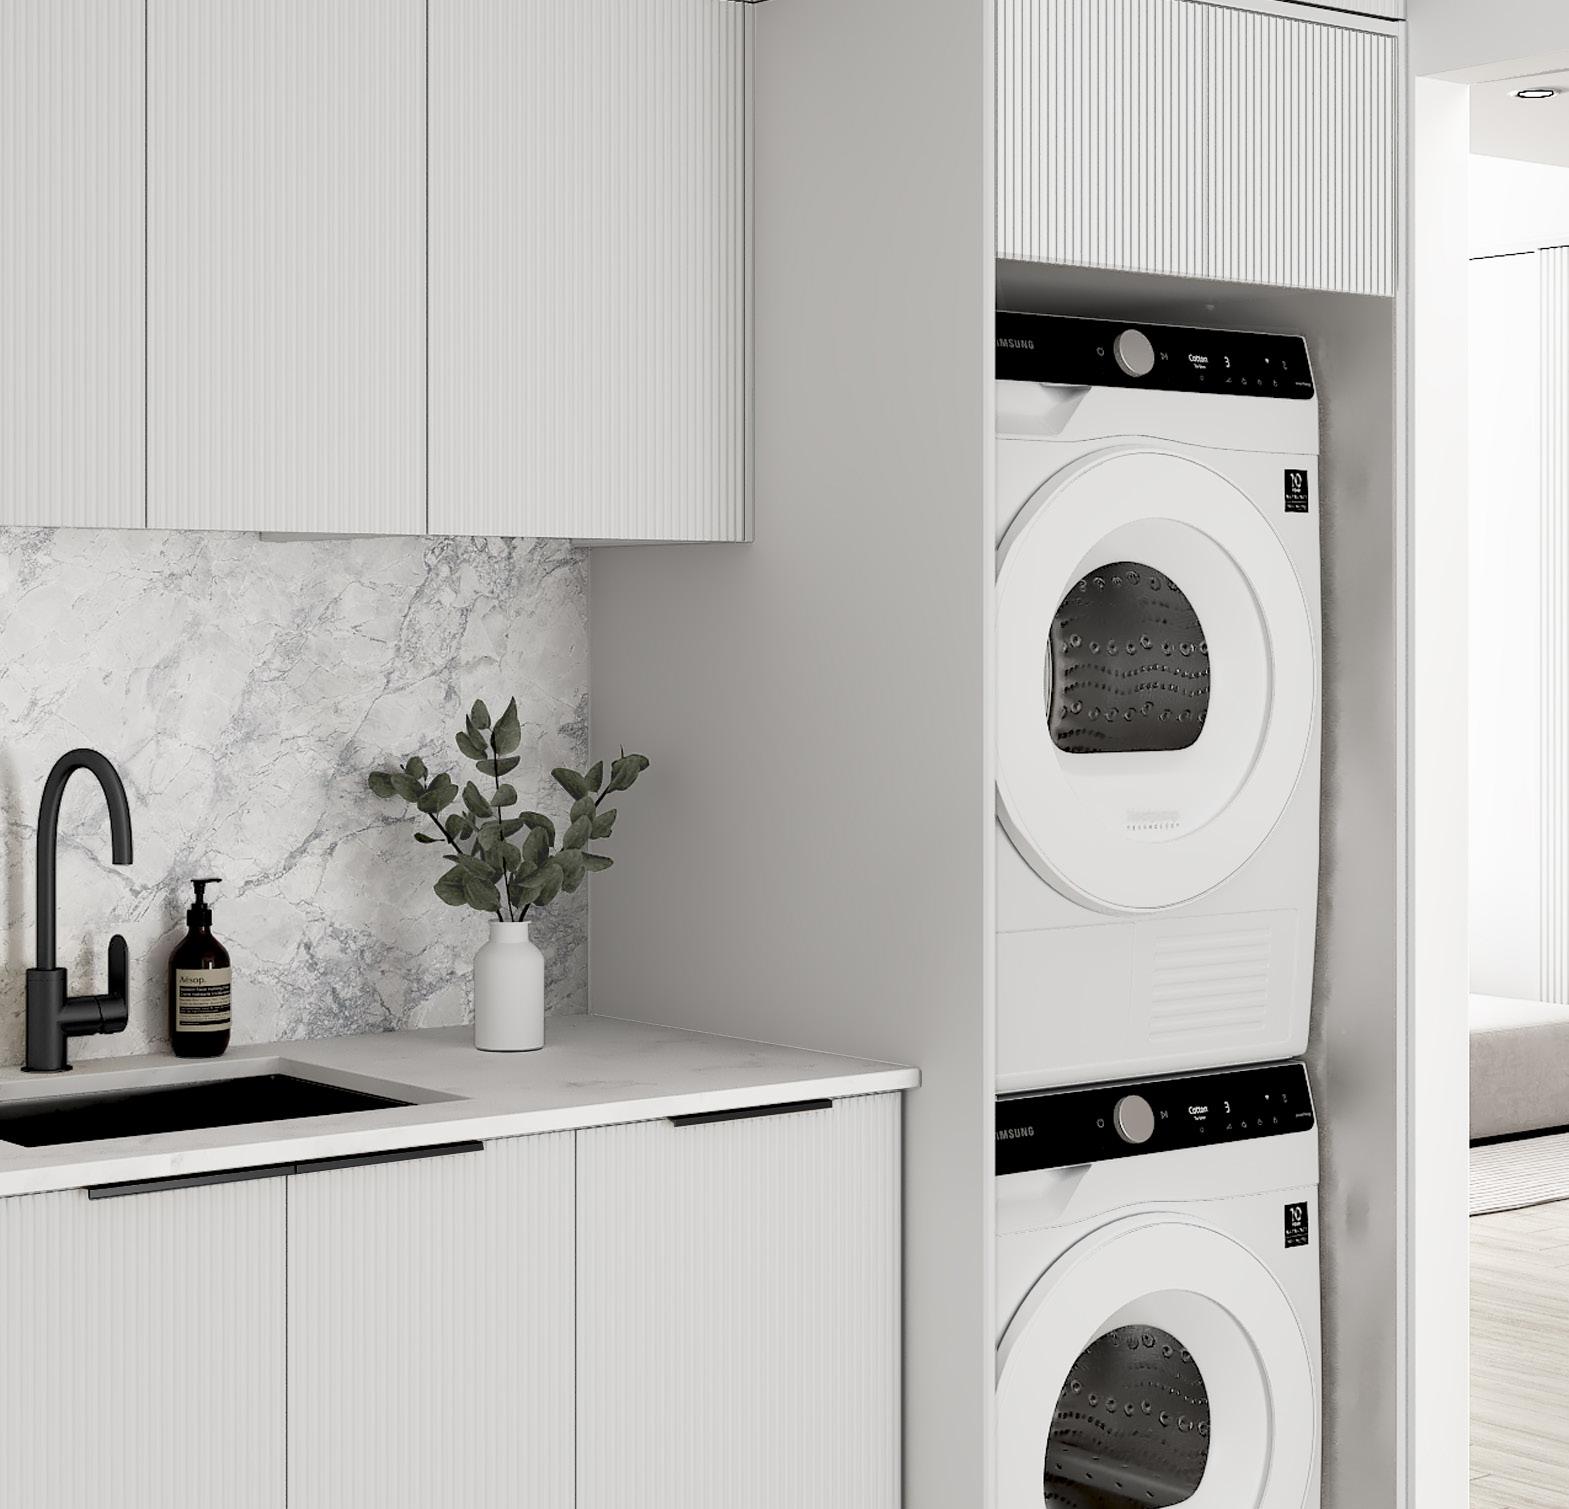
1. Items must be installed by a licensed tradesperson only.
2. The installation of the product is in accordance with the instructions provided, your Otti Australia Warranty will be void.
It is the responsibility of the installer to make adjustments to doors and drawers after installation if required
Included:- Stone Top - Laundry Sink - 6x Undermount Clips - 35mm Drill Bit
Tools Needed:- Electric Drill or Screw Driver - Silicone - Fine Grit Sandpaper
Remove all parts from the packaging, Check and prepare all parts for installation.
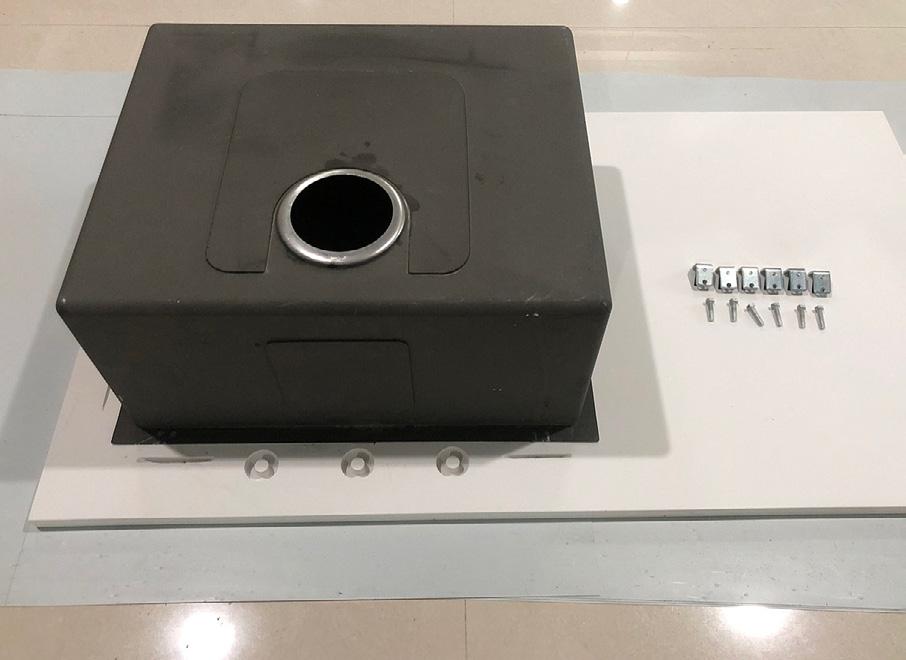
Please note :- Undermount sink mounting is to be siliconed, rather than using clips.
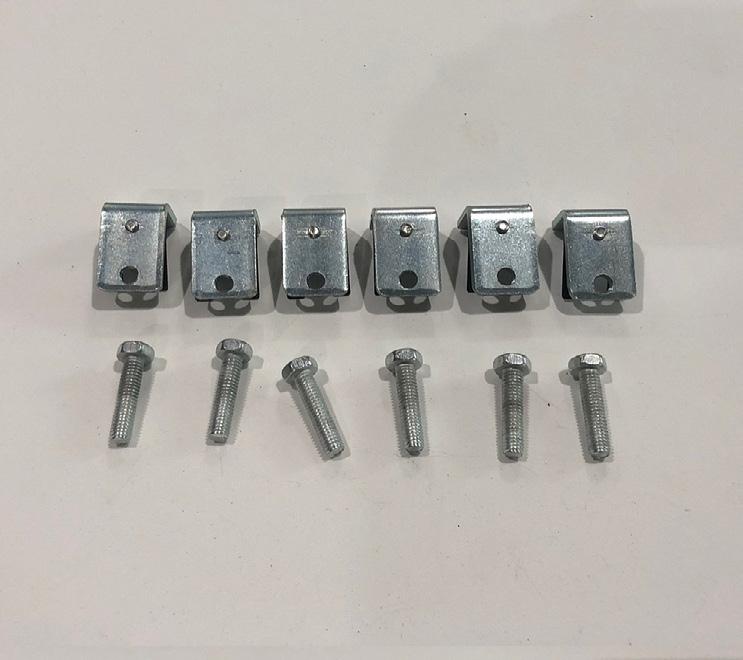
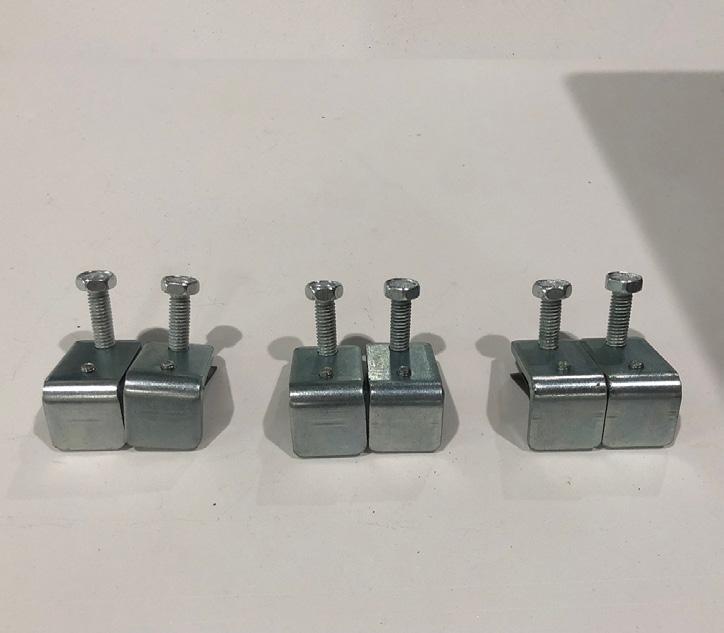

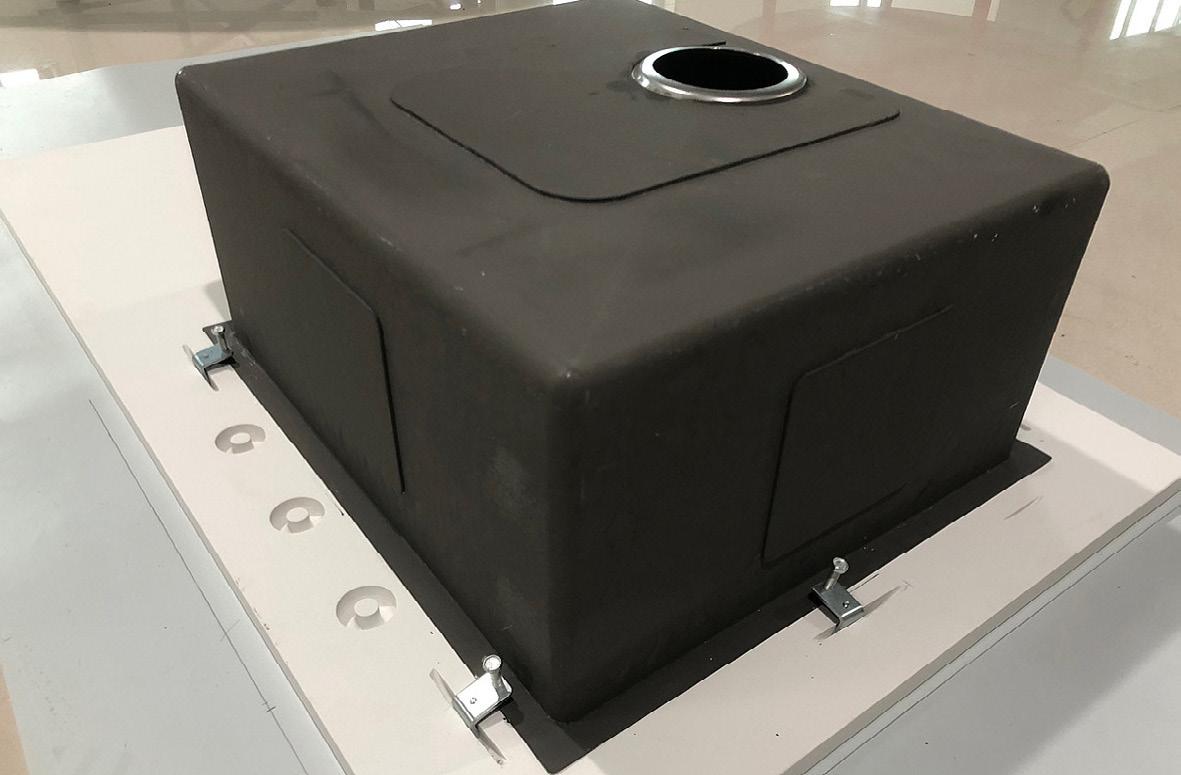
Attach the brackets to the sink
Before putting the sink into place, attach the brackets as per image instructions and make sure they are attached correctly this is to keep your sink in place.
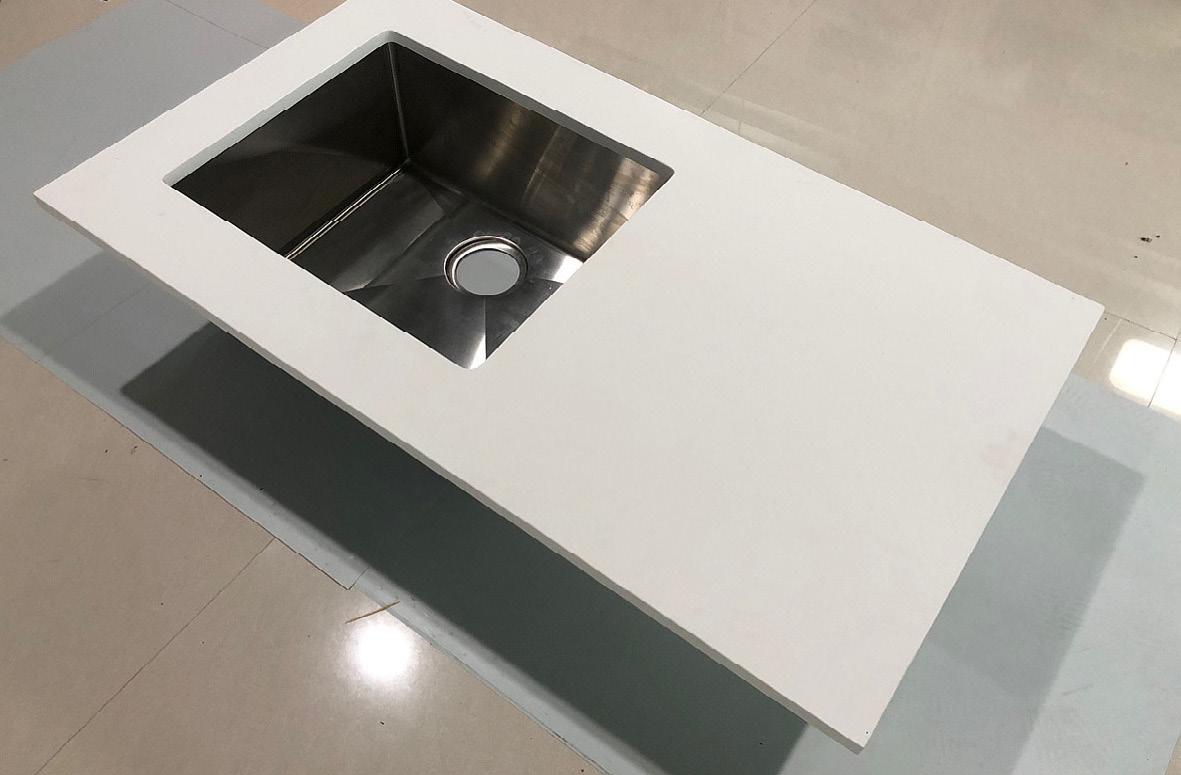
Attach the brackets to the sink
Before putting the sink into place, attach the brackets as per image instructions and make sure they are attached correctly this is to keep your sink in place.
Once the sink is installed ensure 2 people lift and place the stone top with sink assembled on top of the cabinet, in the location desired. Ensure sink does not move when placing the stone top in its final location and adjust sink brackets if required. 3 4 5
Place Stone top in Place
Once the sink is installed ensure 2 people lift and place the stone top with sink assembled on top of the cabinet, in the location desired. Ensure sink does not move when placing the stone top in its final location and adjust sink brackets if required. 3 4 5
Place Stone top in Place
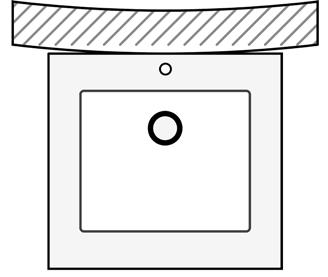
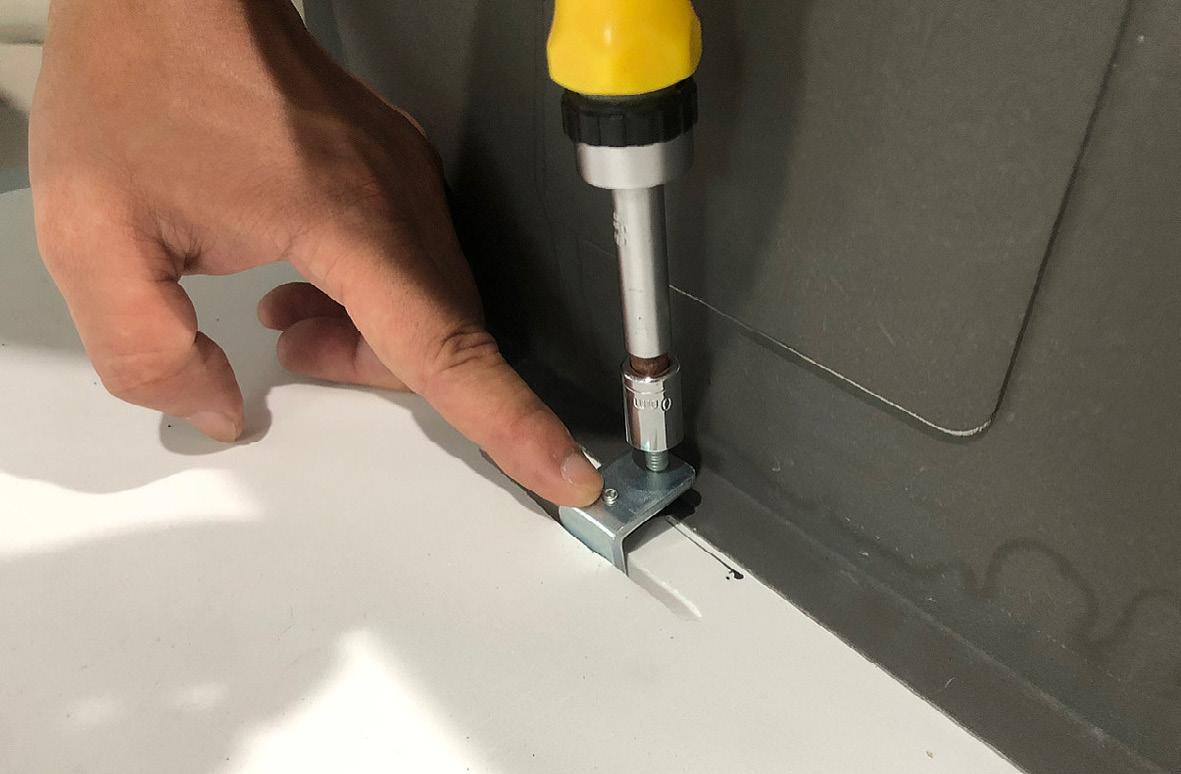
Insert the sink and tighten the brackets
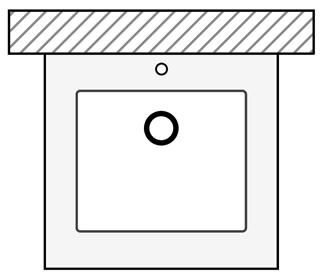
Insert the laundry sink into the hole in the benchtop, and make sure it is sitting straight. With a screwdriver, tighten the brackets so that the sink is secured underneath the benchtop for a tight finish. Repeat this step until all of the brackets are tight and the trough is secure.
Warranty
Product Warranty
The following conditions apply with respect of the warranty given in this certificate:
The following conditions apply with respect of the warranty given in this certificate:
-
Universal Pre-Driled Taphole
Check that you have all tools, products and parts onsite
Any parts missing please contact your store to discuss, leave plenty of time to allow for missing parts to be shipped
Universal Pre-Driled Taphole
Included:- Stone Top - 35mm Drill Bit - Reusable
Universal Pre-Driled Taphole
Tools Needed:-
- Electric Drill - Fine Particle Mask
(Pure White & Matte White & Cloudy Carrara )
Check for damage upon receiving your laundry and also before installing. This unit is not assembled requires assembly.
Included:Stone Top 35mm Drill Bit - Reusable 35mm
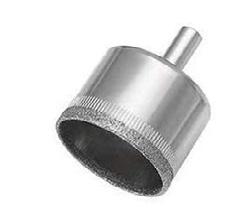
Tools Needed:- Electric Drill - Fine Particle Mask
P2 Respirator Dust Mask With Valve or of higher standard
Tools Needed:- Electric Drill - Fine Particle Mask
- Work Safety glasses - Silicone
P2 Respirator Dust Mask With Valve or of higher standard - Work Safety glasses - Silicone

Included:- Stone Top - 35mm Drill Bit - Reusable 35mm
P2 Respirator Dust Mask With Valve or of higher standard - Work Safety glasses - Silicone
1. Items must be installed by a licensed tradesperson only.
2. The ins he product is in accordance with the instructions provided ustralia Warranty will be void. It is th ility of the installer to make adjustments to doors and d r installation if required.
Included:-
- Stone Top - Laundry Sink - 6x Undermount Clips - 35mm Drill Bit
Tools Needed:-
1
- Electric Drill or Screw Driver - Silicone - Fine Grit Sandpaper
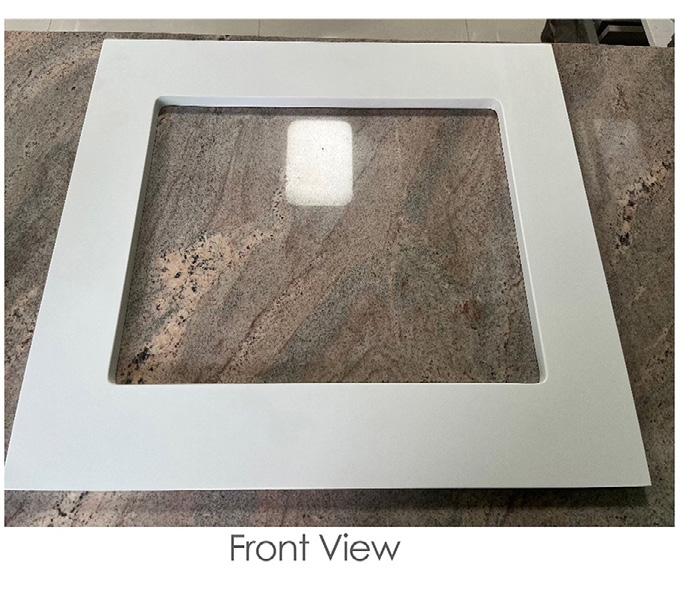
Place the stone top facing up and inspect for any issues. Do Not install if there is any damage.
Place the stone top facing up and inspect for any issues. Do Not install if there is any damage.
Place the stone top facing up and inspect for any issues. Do Not install if there is any damage.

3
2
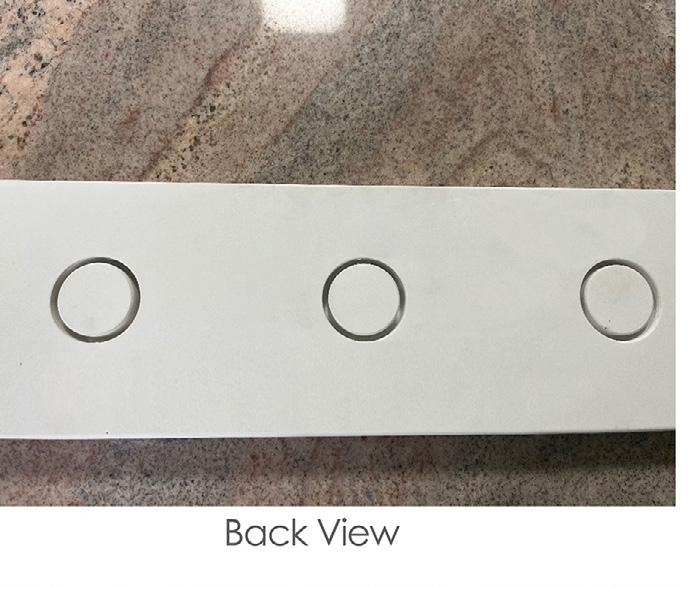
Turnover the stone top to see semi pre-drilled holes the manufacture have prepared.
Select one of these pre-drilled locations to drill out your taphole.
1 3
Using your pre-drilled hole guide, clamp and fasten down the stone top so there is no movement.
Use a drill bit provided or use a 35mm drill bit.
Using your pre-drilled hole guide, clamp and fasten down the stone top so there is no movement.
Using your pre-drilled hole guide, clamp and fasten down the stone top so there is no movement.
Use a small amount of water or vaccum on the stone surface when drilling through. Do Not Cut Dry cut the stone.
Use a drill bit provided or use a 35mm drill bit.
Use a drill bit provided or use a 35mm drill bit.
Ensure you wear protective gear before drilling - Fine Particle Mask
Use a small amount of water or vaccum on the stone surface when drilling through. Do Not Cut Dry cut the stone.
Use a small amount of water or vaccum on the stone surface when drilling through. Do Not Cut Dry cut the stone.
P2 Respirator Dust Mask With Valve or an of higher standard - Work Safety glasses
Ensure you wear protective gear before
Ensure you wear protective gear before
4 2
Turnover the stone top to see semi pre-drilled holes the manufacture have prepared. Select one of these pre-drilled locations to drill out your taphole.
Turnover the stone top to see semi pre-drilled holes the manufacture have prepared. Select one of these pre-drilled locations to drill out your taphole.
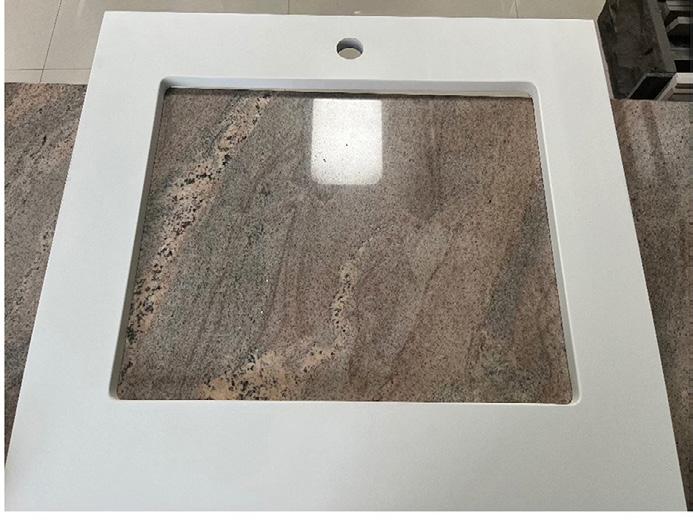
Remove any chipped piece of stone and smooth the edges of the tap hole with sandpaper or a file.
Please note :- Undermount sink mounting is to be siliconed, rather than using clips.
4
4 2
Remove any chipped piece of stone and smooth the edges of the tap hole with sandpaper or a file.
View Video Scan QR code
Remove any chipped piece of stone and smooth the edges of the tap hole with sandpaper or a file.
View Video Scan QR code
View Video Scan QR code

• OTTI AUSTRALIA products are produced from materials that are well suited to the laundry, however it is important that your laundry has well ventilated to avoid excessive moisture due to water sources.
• High humidity will lead to permanent dampness and mould, resulting in the deterioration of the materials.
• To maintain the finish on your cabinet use only a soft cloth and weak solution of non-abrasive detergent.
• To remove scratches, marks, etc. on two-pack polyurethane, rub gently with car cutting compound, car polish or household brass/ silver cleaner
• Goods used in construction are water/moisture-resistant, but not water-proof
Attach the brackets to the sink
Before putting the sink into place, attach the brackets as per image instructions and make sure they are attached correctly this is to keep your sink in place.
Insert the sink and tighten the brackets
• Rinse sink with water after use and wipe dry with soft cloth.
Insert the laundry sink into the hole in the benchtop, and make sure it is sitting straight. With a screwdriver, tighten the brackets so that the sink is secured underneath the benchtop for a tight finish. Repeat this step until all of the brackets are tight and the trough is secure.
• For stubborn stains, we recommend a mild non-scratch cleaner such as a vinegar-based cleaner with a non-abrasive sponge, then rinse well. Clean often to avoid to avoid limescale building up.
• DO NOT use steel wool to clean the sink, this will scratch the surface.
• AVOID strong bleaches, silver dip cleaners and aggressive chemicals such as denture cleanser and photo developing liquids. If it occurs, rinse thoroughly and wipe it dry quickly
• AVOID leaving citrus fruit juice, salt, vinegar, etc on your surface for prolonged periods These foods can cause pitting and corrosion
• Wipe clean with a soft damp cloth or sponge.
• For basic stains clean with mild detergents. You can use a non abrasive polish or Brasso for tougher stains.
3 4 5
Place Stone top in Place
• Our Stone tops have excellent heat and chemical resistant properties compared to other surfacing products, however to preserve the surface and protect against damage from heat, do not place hot items directly on the surface.
Once the sink is installed ensure 2 people lift and place the stone top with sink assembled on top of the cabinet, in the location desired. Ensure sink does not move when placing the stone top in its final location and adjust sink brackets if required.
The following conditions apply with respect of the warranty given in this certificate:
10 years - Stainless Steel Bowl
5 years - Stone top
10 years - Cabinet
12 months - Parts Components from the date of original purchase for domestic use.