Hello! My name is Oneziwe Jackson, but those who have met me have given me a nickname they see fit. So, you go ahead and give me one. I was born and bred in a small, rustic and dusty town called kuTsolo in the Eastern Cape. I think I was born with a spade (not a silver spoon) on my hand, my mother is just scared to say.
I grew up in a gardening/farming home. Almost all we ate we grew ourselves. Allow me to go down memory lane with you. Our grocery list only had a few things in, mostly 50kg maize meal (if we didn’t have a good maize harvest the previous year); Cooking oil for amagwinya (fat cakes); Flour and Salt.The restwe grew – let me not forget to mention that we ate a balanced diet.
I really loved the life we lived. Be it spending time in the garden ndiHlakula (weeding) or milking the sheep for the morning’s coffee/breakfast. Having a garden back home was a duty and gave us a sense of pride. I don’t recall a single home without one. Our mothers and grandmothers would talk over fences, mostly about their garden successes. Seeds were shared and bragging abounded.
In 2005, I moved to the urban areas. Currently residing in Cape town. Since then, I have lived in houses with limited to no gardening space. The spade I was born with just never stopped poking me to find use for it, despite the space constraints. In my desperate search for my spade’s duty, I encountered container gardening and I have never looked back – No, No, don’t get me wrong I still look back and go home to the Eastern Cape – But I have never looked back to having to buy everything on my plate.
I have even learnt the secrets of growing chickens in the urban areas –OMG! I digress- story for another day. Myjourneyhasbeenafulfillingoneand I felt a burning need to share it with YOU!
Table of Contents
1. Introduction
2. Choosing the right plants for containers
3. Planting Calendar (Right plants in the Right Season)
4. Seeds or Baby Plants
5. Prepare for success (Gear up)
6. Plants/Seeds: Where to buy?
7. Plants: What to look for
8. Let’s plan YOUR garden
9. Let’s grow some vegetables
10. Let’s grow some herbs
11. Space Saving
12. Clutter Control
13. Pest Management
14. Where to get help
15. Thank you.
Introduction
I wrote this eBook for YOU if…..
You have a wish to grow your own fresh vegetables, but ….
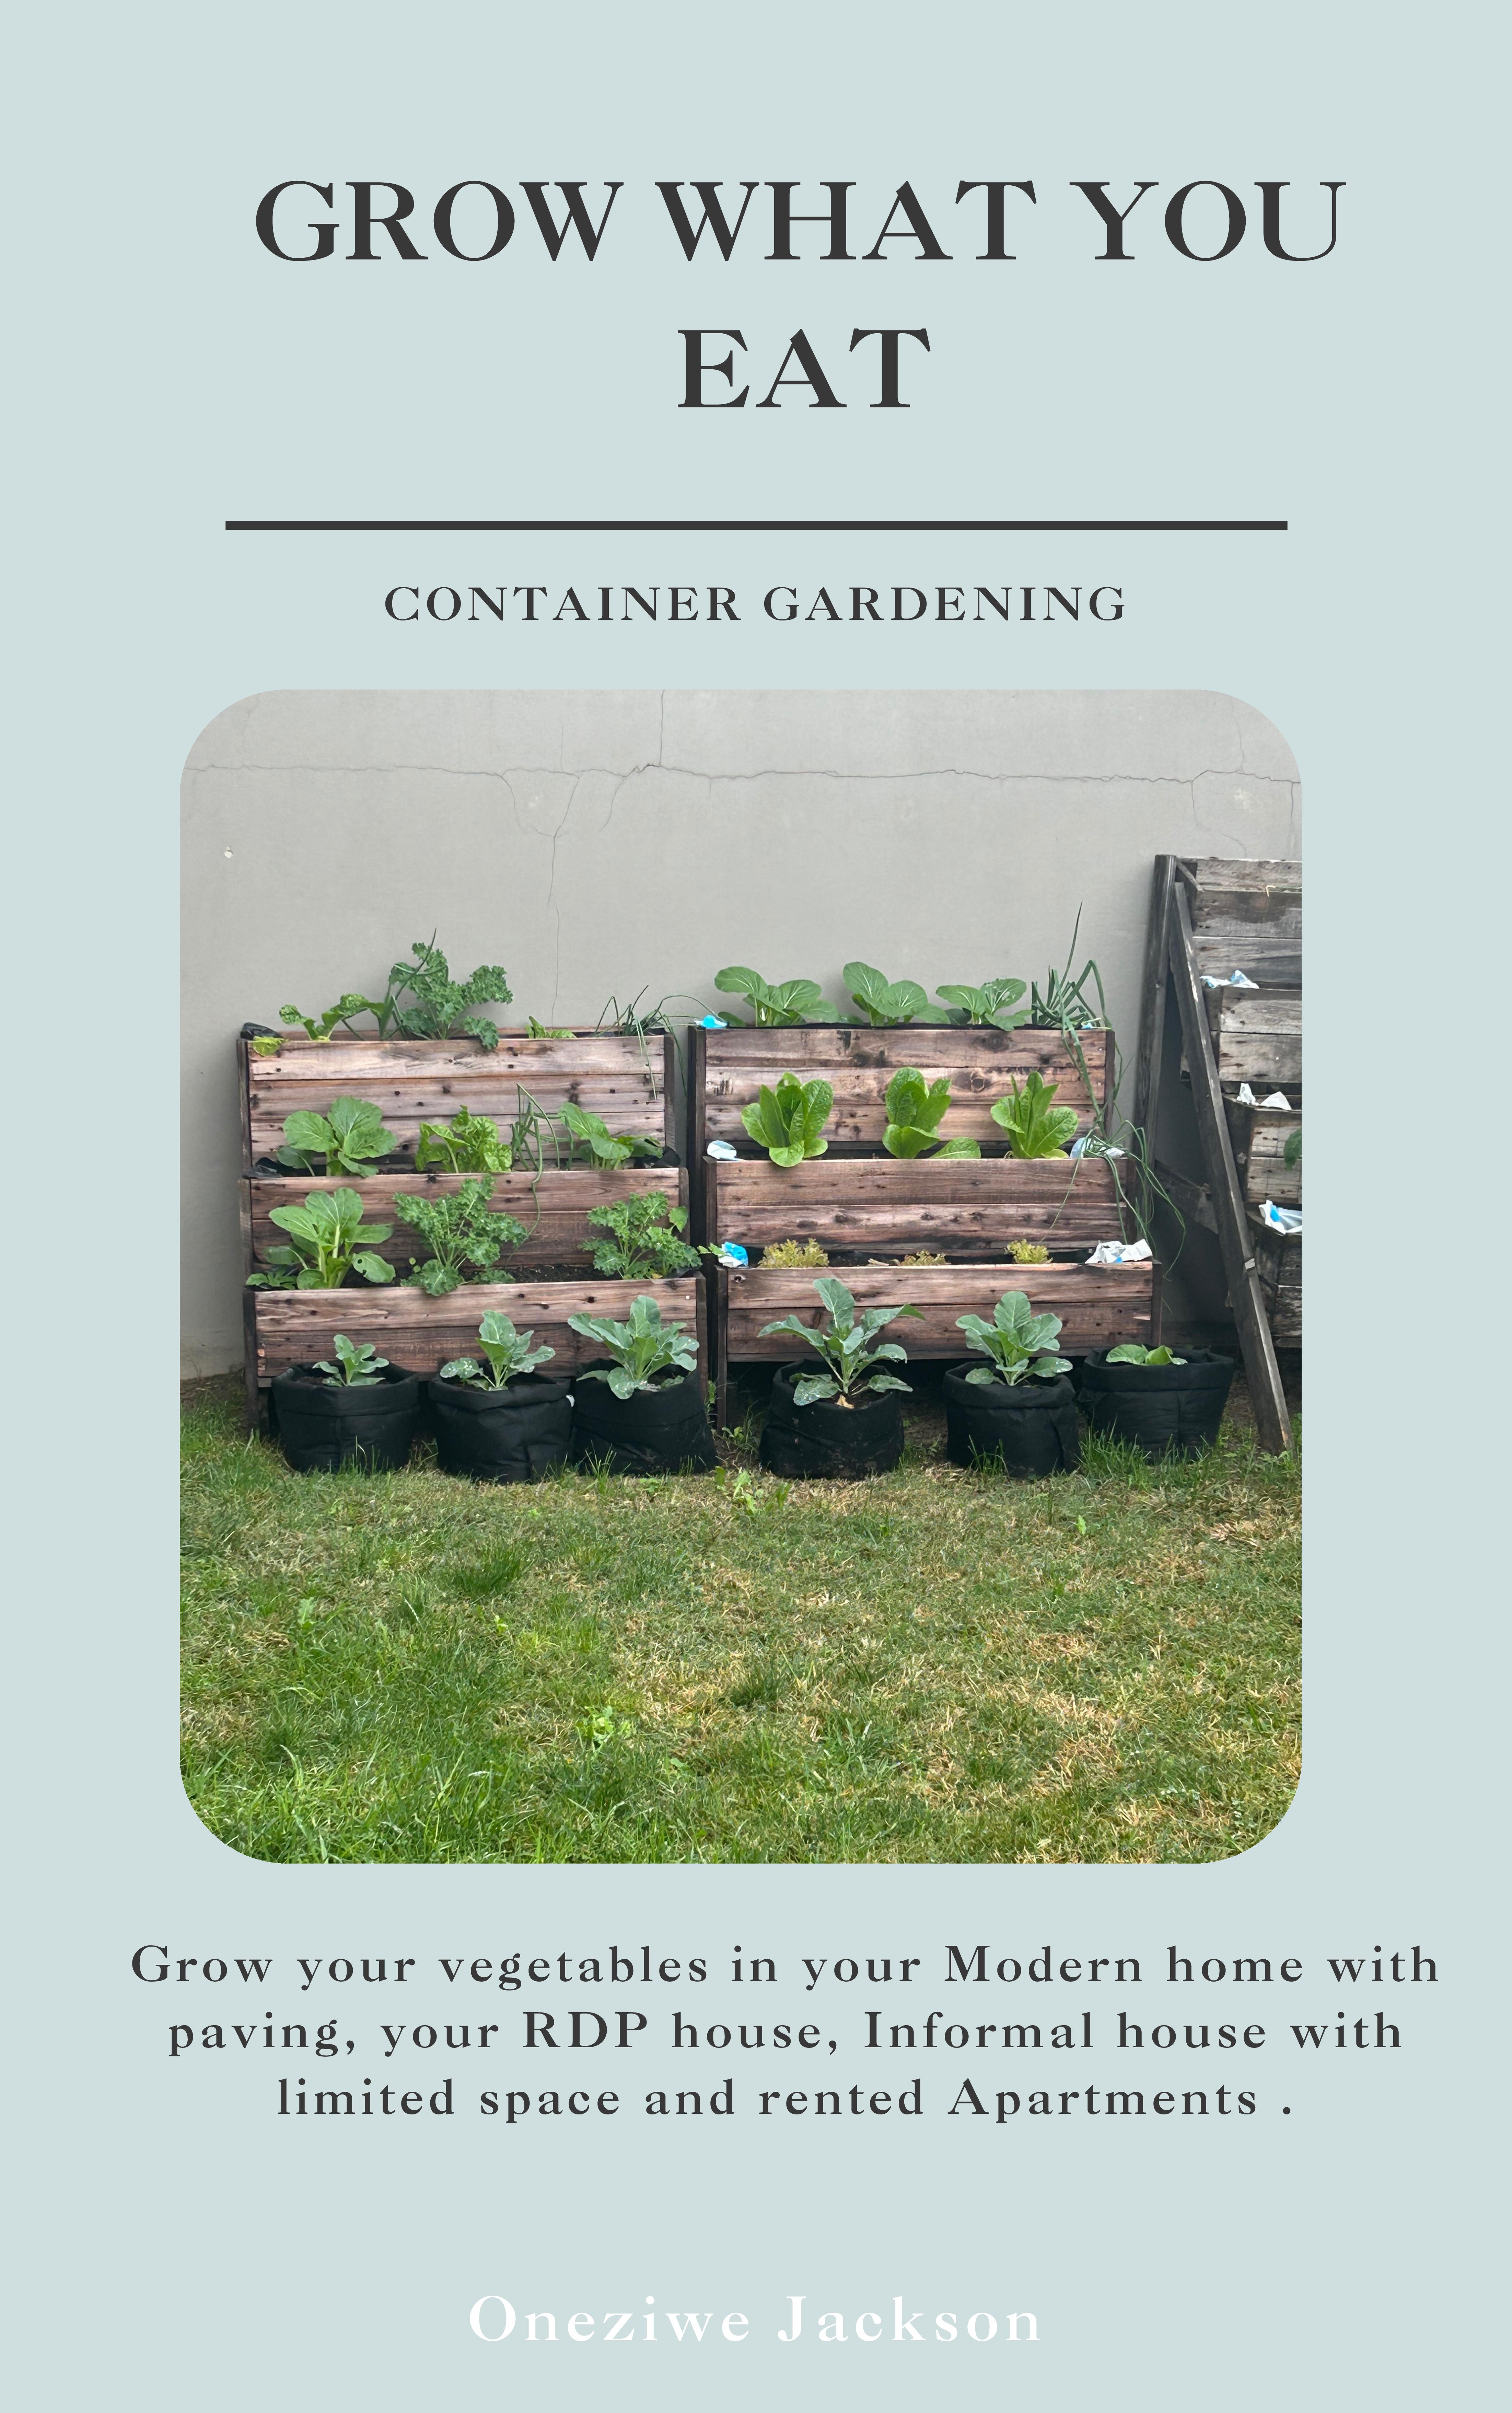
You don’t have real garden space. And there are a lot of practical reasons for this. Maybe you live in an apartment, a townhouse, an RDP house, an Informal House (also known asaShack)oryouhaveaperfectlyfine house but there is just no gardening yard space.
You have a modern home with paving and would not want to till that up to create gardening space, but you would love to grow what you eat.
You have a gardeningarea, but it’s too shaded (not enough sun reaching the area) for vegetables.
You have a gardening area, but the natural soil quality is not suitable for growing plants (due to poor drainage or low nutrients).
You aren’t flexible as you once were and don’t like bending over.
You probably could get down on the ground,butyou’drathernot,thankyou very much.
For all those conditions and more –container gardening might be the perfect solution. But maybe you don’t know how to get started because……
You’ve always lived in houses with small or no gardening space; you’ve never planted in your whole life.
You’re an experienced gardener, but this container thing is brand new to you and for any of the abovementioned reasons you would like to give it a go.
You tried many years ago and it failed. It would be like you starting all over again but this time with guidance for successful gardening.
You did your first container garden in 2020 when COVID 19 threatened our livelihoods, but the results were disappointing. You suspect you didn’t start with good coaching.
Someone in your family had a garden or just like me my family still has a
garden back at home in the Eastern Cape and you would like to have your own in the urban area where you live, but you don’t have anyone to teach you how to do container gardening
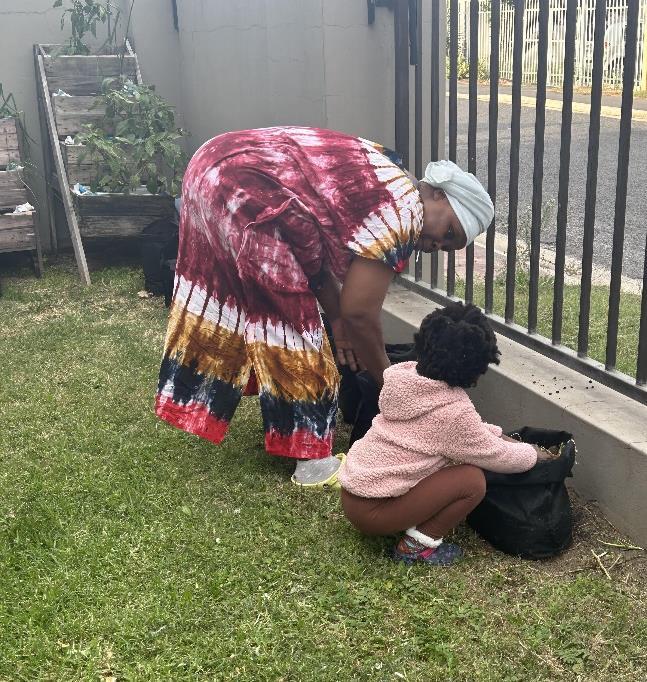
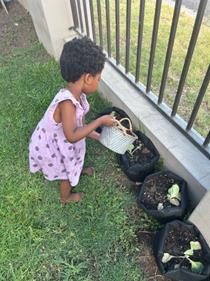
You want your family, especially your kids to learn how to grow their own food, but you don’t know how (because you have never done it yourself) and where (because you don’t have the space) to teach them.
For all of you, I make this promise: you will be surprised at the number of foods you can grow in just a few carefully planned containers.
I also promise you this: growing in containers is easier than growing the same plants in the ground. A lot easier.
And it's an amazingly fulfilling experience too. If you've never seen a seedcomeoutofthegroundandgrow proudly into a recognizable plant and then into a delicious lettuce for dinner tonight, you're in for an amazing experience. Plus, you'll have a reason to brag to your friends who don't have a garden.
Gardening is hope made real. Planting a seed comes with a promise from the universe that something visible, something real, will follow from the simple act. And if it's an edible seed, then there's the future promise of actual food. You commit in return to raising that youngplant to maturity and to selflessly share its bounty.
So just think, even if trying something new is hard, even if you sometimes wonder if it really made a difference in the long run, YOU, and that little seed brought life itself out of the soil. Don’t lose sight of that.
Good container plants
As a container gardener, you have a limited garden space. That’s a fact. Some garden vegetables grow on plants that take up a lot of space in relation to the eatable things they produce. That’s a fact. And that’s not good for you.
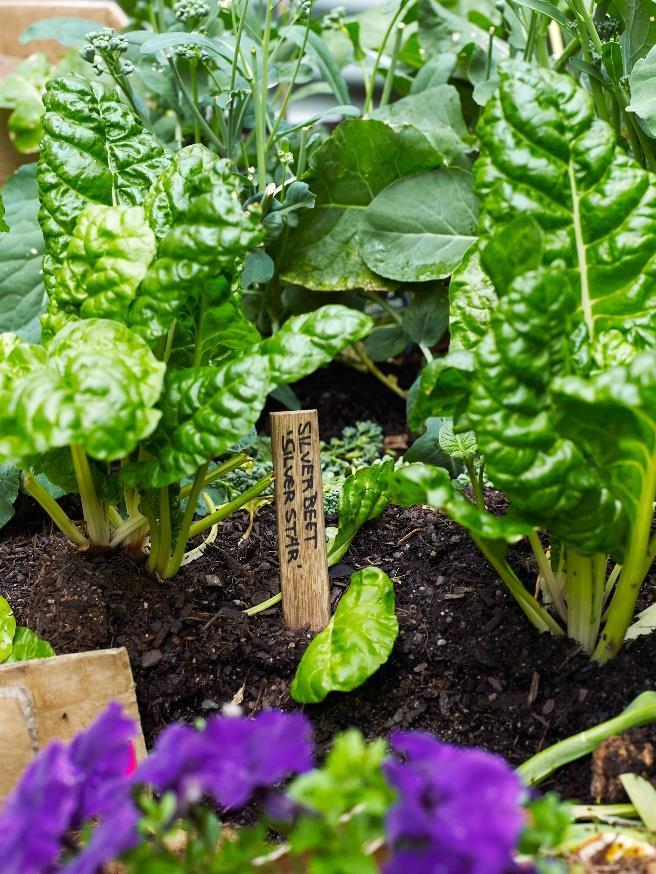
To increase your limited space, look at plants with a good ratio of eatable parts to overall size. Best ratio of all: this where we eat the entire plant, like spinachorotherleafygreens.That’sthe magic ratio.
To give you a mental picture of the ration concept, here are a few examples.
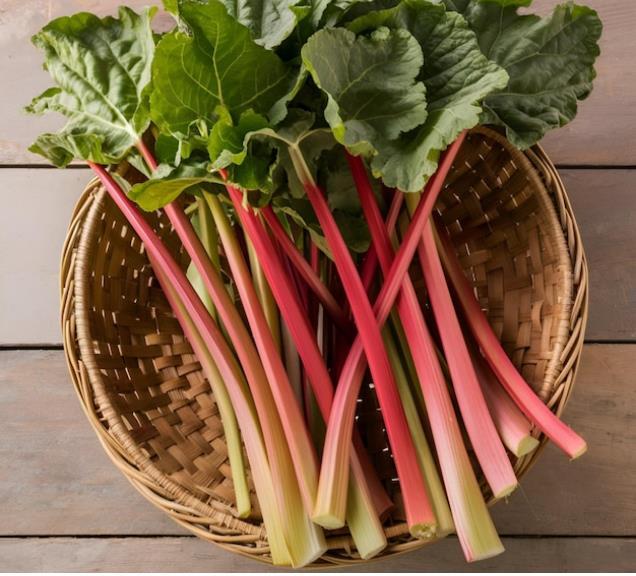
Bad Ratio: Rhubarb
A very handsome plant, but its leaves are the size of cabbage head and besides they are poisonous, only the stems are edible.
Extremely bad ratio: Cabbage (I love my cabbage and had to find a solutiontothisproblem)
That big green bowling ball from which you make coleslaw. Have you ever seen cabbage growing in the field? It’s way bigger than the trimmed-out version in your local supermarket. A mature plant will take up the entire space of one large container all by itself, will need an entire growing season to reach harvesting size, and from that you get one cabbage. One.
But if you really love your cabbage just like me, you can dedicate a few planting bags with one cabbage head in each bag, we will talk about the types of containers shortly.
Good Ratio: Compact cherry tomatoes, bush beans or peas, beetroots and radishes, leafy greens, almost all herbs.
When to plant?
Container gardening offers the flexibility of being able to move around your plants to extend their growing seasons by placing them in parts of your garden which present favourable conditions for the specific plant at that given time. Let’s look into some of the vegetable growing conditions:
Spinach and other leafy greens
A year-round vegetable, spinach copes well in semi shady and sunny conditions. It likes fertile, moist potting soil that doesn't dry out.
Carrots
Carrots grow best in full sun and light. Therefore, are suitable for your warm seasons.
Onion
Sunny and open site in well-drained soil enriched with organic matter such as compost or well-rotted manure.
Cabbage
Full sun (6 to 8 hours of direct sunlight per day) to get the best results. Cabbage is a heavy feeder; it quickly depletes the soil of nutrients and needs a steady supply of water and nutrients
throughout its growth. *(Use your homemade fertilizer)
Tomato
Sunny location and fertile, well-drained soil.
Green beans
Give them full sun and regular watering
Lettuce
Lettuce prefers a bright, open position with good air circulation. Lettuce is a cool-season crop, so in hot climates you may get better results growing it in a cooler, shadier spot, especially as the young plants start out.
What to use: Seeds or Baby plants?
As a beginner gardener you will mostly struggle with the decision of whether to start with seeds or baby plants (also called plantlets or seedlings). The choice is dependent on availability and timing, two connected criteria.
Baby Plants
You start with baby plants because it is way easier or because you only need two of something and not fifty.
Seeds
Youstartwithseedsbecausethereis no other choice. Either those items are available only as seeds, in which case your decision is preordained, or they are new that baby plants are hard to find. You’ll want seeds for these: beans, beets, carrots, peas and radishes.
In general, I strongly advise container gardeners to start with baby plants whenever possible, especially if they are inexperienced. Let the hard work of
getting them established be done for you by someone with a professional greenhouse.
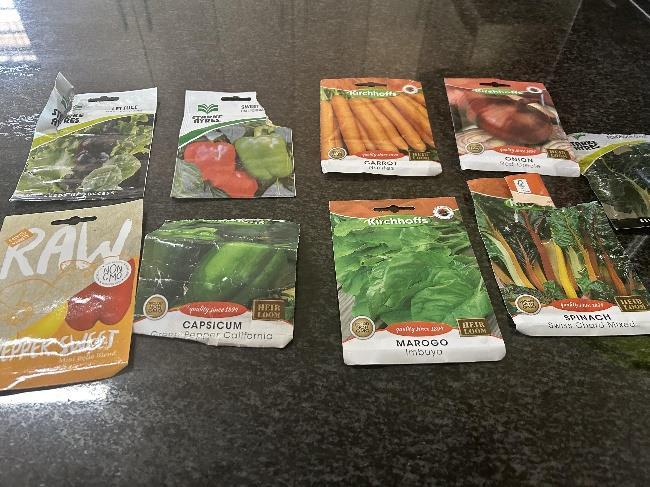
Plants or Seeds: Where to buy?
Some sources are noticeable: your favourite garden centre or the garden section of a big home improvement store. Now big supermarkets are starting to accommodate the growing market of gardeners and have gardening section where you can find seeds as well. Online gardening stores are also available and reliable. I use Seeds for Africa to get some seeds online.
Plants: What to look for?
You want baby plants that are strong and healthy; that much is obvious –and easy to spot. For best baby plants, look for their attributes:
Compact growth. The plant already shows signs of a tight, compact structure. Avoid plant that are tall and thin, stretched-out stem sections between two sets of leaves.
No obvious signs of distress. No dead or dying leaves.
Too-early flowers or fruits. This plant has been in the greenhouse for too long; it
will struggle to adapt to your outdoor space.
Not root-bound. Tight bundle of roots on the plant, deep inside its little container where you can’t see, and it means that the plant has been in that small container too long.
Prepare for success
If you are starting from zero, these are the pieces of equipment you need to get. Many are available online, and in nurseries or garden shops. Browse through the many alternatives. Then shopwhereyourheartandmoneylead you.
Hardware
Containers
The golden rule of containers is that every container must, unquestionably must have drainage holes. No exceptions, no excuses, no backtalk.
Ceramic: Good: Beautiful, rich colours and elegant forms that aren't found in any other media. Bad: Prone to breakage. expensive. occasionally lacks drainage holes.
Clay: Good. Traditionally looks good. widely available at affordable prices in a variety of sizes. The other good news is that the material is porous, allowing air to reach the roots. Bad: Heavy and breakable.
Plastic: Good: Long lasting. Inexpensive. Widely available in a broad range of sizes. Bad: Not specially good-looking, although we are now seeing newer and pretty colours instead of basic black.
Wood: Good: Made from renewable material, has a distinct look, which may or may not fit with your other design decisions. Bad: Not as widely available asotheroptions.Canbeexpensive.Will develop rot after several years of watering, unless it has been treated with wood preservative, which you don’t want because some of them are toxic.
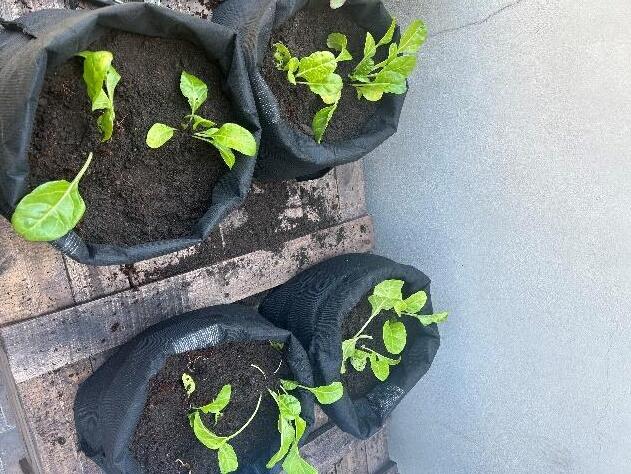
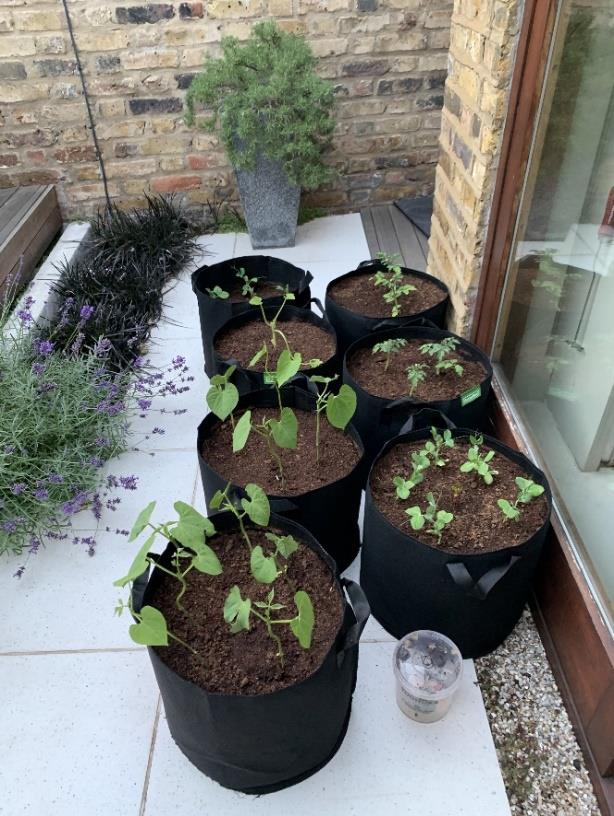
Fabric bags: Relatively new on the market, these are well worth knowing about. Good: Easy to move around (many of them have built-in handles). Attractive, slightly rustic look. Fabric is porous by nature, so air moves freely into the roots. When not in use and not filled with soil, they can be folded up and stored away. Bad: Tend to last only a few years.
Your clever ideas: We've only spoken about the types of containers you can buy at the store thus far. However, that is not the entire range of potential containers. Every time you see a container, keep your eyes open and ask yourself, "Could I make a garden container out of that?"
Tools
Good news here: you need fewer tools than you might imagine.
Trowel: You need it for digging holes so you can slip in your baby plants or gently remove plants that have passed their season.
Cultivator: Looks like a giant fork with the point bent down. Useful for lifting top layer of soil in your container when you are getting ready for planting.
Water Can: Essential and wondrously inexpensive. Or you can make a quick DIY version from milk bottles.
Gloves: Garden gloves will protect your hands from sharp thorns, broken pottery, and giant slugs. For more runof -the mill tasks like weeding and light pruning, you might decide you don’t really need them.
Software
Potting Soil: The easiest and most effective method is to buy potting soil from a nursery or garden centre. Seek for products that are labelled as "container soil," "potting soil," or anything similar. Scientifically speaking, it isn't even soil. It is a carefully balanced mixture of tree bark and
finely shredded peat moss, with an additional element added to prevent the other particles from settling into a dense mass.
Other special blends are those labelled asidealforacertaintypeofplant,such as vegetables or lawn grass. What’s going on there is that they have extra ingredients to support those plant categories: balanced fertiliser for vegetables and lots of nitrogen for lawns. POTTING SOIL TIP: Look through theshelvestofindbigpacksofgeneralpurpose potting soil. Try to pick it up. If it’s way lighter than you thought it would be, that’s the one you want.
Fertiliser: People often say that they are feeding their plants when they fertilize, but plants produce their own food through photosynthesis, which youmayhavestudiedinprimaryschool or high school, if you were fortunate enough. It's one of those delightful scientific mysteries. Both sunshine and specific chemical nutrients contained in healthy soil are necessary for that manufacturing process to take place. Fertilizers are designed to replace or strengthen nutrients that are completely absent or insufficient.
Criticalnutrients
Nitrogen (N) promotes leaf growth.
Phosphorus(P)promotesflowergrowth, and thus the fruits (vegetables) that come after the flowers.
Potassium (K) promotes root growth.
You want a fertiliser that matches your plant needs. Take time to read the labels if you are needing to buy one. A balanced fertiliser contains those three main nutrients in equal or nearly equal proportions, such as 10-10-10 or 8-10-7.
Homemade Fertiliser
Fertiliser tea is easy to make and can be applied to baby plants or to struggling plants to help them grow. Use these teas once or twice every second week. Apply on the leaves and roots either late in the evening or early in the morning before the sun rises.
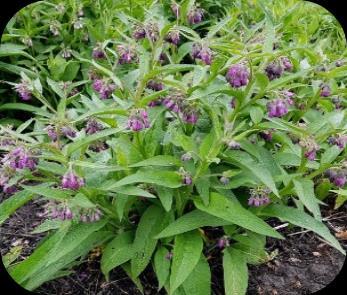
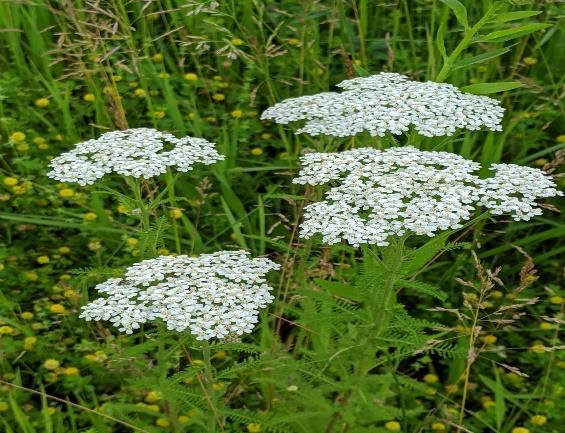
Fill half of a 20-litre bucket with your favourite plant (Yarrow, comfrey, dandelion).
Pour boiling water over the plants and leave them to rot, stirring occasionally, for approximately one month.
After straining the liquid, dilute it with water in a ratio of one litre of tea for every ten litres of water.
These plants took me back to childhood when I would run the fields with my brothers chasing the Dandelions. Be mindful of how good they are for your vegetables, when you visit nature again as they freely grow. But they can also be intentionally planted.
Remember!! Whatever your plant eats, you get to enjoy and nourish your body with later. Therefore, make sure they eat well if they the soil needs replenishment.
Comfrey: Coper, Iron, Manganese, Phosphorus and Potassium.
Dandelion: Calcium, copper, Iron, Magnesium, Phosphorus, Potassium and Sulphur.
Yarrow: Calcium, Copper, Magnesium, Phosphorus, potassium and sulphur
Water: Putting your finger a few centimetres into the soil will tell you if your veggie container needs water. Use water if it feels dry. The amount and frequency of watering you require will depend on several factors, including the time of year (watering more in hot and dry seasons), the type of potting soil you use, and how much of it is exposed to the sun or wind.
Watering in the morning helps preserve water since it won’t evaporate as quickly as it can in the hot afternoon sun.
Evenings are the second-best time to water your plants. If you do, though, make sure the foliage is dry. Diseases thrivewhenwaterremainsonleavesfor an extended period.
Let’s plan YOUR garden
Check the physical features of the space you’re planning to use for the garden.Howmuchsunlightdoesitget?
Do you have a good source of water? Is the area likely to experience strong winds?
What vegetables are you interested in growing? Make a Wishlist, take time to daydream and make it as long as you want.
What growing conditions do those plants need? Sunlight, water, any special attention? This will take some genuine research and, yes, I’m here to help with that.
How do all these growing conditions compareupagainstthecharacteristics of your potential garden space? Compare all three variables: your physical space with your wish list and your research into those plants. Do you need to make any changes?
Make sure you are aware of the typical weather conditions in your area. Will there be periods of extreme heat or cold? Next, determine which plants on your Wishlist require warm conditions and which ones thrive best in cool seasons. You'll need to adjust your list if your desired plants don't align with your weather conditions.
There is no point planting against your weather patterns and fail.
Do you know which plants on your list could logically be described as easy care and which are high maintenance? Does that align with your personal time availability? Study your list again and adjust as necessary.
Which of the plants on your list would you reasonably say require high maintenance and which are easy to care for? Is it in line with your personal availability? Review your list and make any required adjustments.
How adventurous are you and the other members of your home when it comes to trying new foods?
Can you find replacements if you had to remove any items from your list? This could be very important.
Let’s grow vegetables
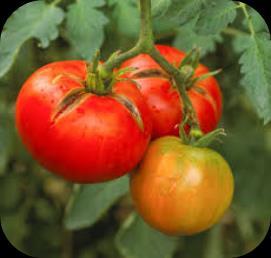
Tomatoes
There is simply nothing like tomatoes fresh from your garden, dead-ripe and dripping with the essence of summer, especially in comparison to the cardboard versions we often find in the grocery store. So, I’m not going to spend any time convincing you to include them in your garden; I’ll just give you a few pointers on tomato success and leave you and your true love alone to enjoy the results.
Tomato Basics
Start with baby plants wherever possible.
These are hot-weather plants that crave full sun; at least six hours a day is your goal.
Tomatoesneedlotsofwaterandstrong root system; provide both by planting deep.
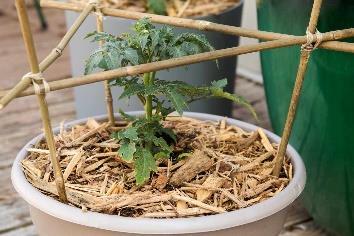
You need a deep container and at least 30 cm (Ruler long) soil.
Planting Tips
Tomatoes need three things for success: sun, lots of water, and a strong root system. Two of those are in your control, and you accomplish both with the same technique: Deep planting.
First, tip the tomato plant out of the pot it came in from the nursery; if it doesn’t come easily, give the whole thing a brief soak in water. Count the number ofsidebranchesonyourplant,fromthe very bottom to the top. Divide that number in half. Starting from the bottom, completely remove that many side branches; snip them off all the way back to the main stem.
Next in the biggest, deepest container you have, dig a deep hole; doesn’t have to be wide, just deep. Gently position your plant at the bottom,
spread the root ball a bit., and then evaluate the lowest set of branches should be slightly above the soil line. Adjust if needed by filling in the hole or digging I deeper. Then fill in around the plant with the potting soil removed to make the hole.
Support your tomato plants as they grow and become heavy with fruits.
Growing and Harvesting
Water: Tomato plants need a lot of water.Andtheydomostoftheirgrowth in summertime.
Fertiliser. A dose of fertiliser every couple of weeks, particularly when the plant starts setting fruits, is a good idea. Useeitherabalanced,all-purposetype or one formulated for vegetables or your homemade fertiliser tea.
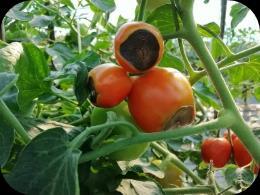
Possible problems: Tomato plants do occasionally come with problems, but we are willing to forgive because the benefits are so glorious.
One is blossom end rot, a term so descriptive you’ll know when you see it; a big, black mushy circle where the floweroriginallywas.Themostcommon cause is uneven watering, which we already know you won’t be doing.
Another problem is cracking or splitting of the outer skin; it’s unsightly but not fatal, except that it opens the door to other diseases and unwelcomed bugs. And guess what – it’s also caused by uneven watering, so you know how to avoid it.
Harvesting: This is mostly a matter of waiting patiently until those beauties
ate truly ripe and that is mostly gauged by colour,
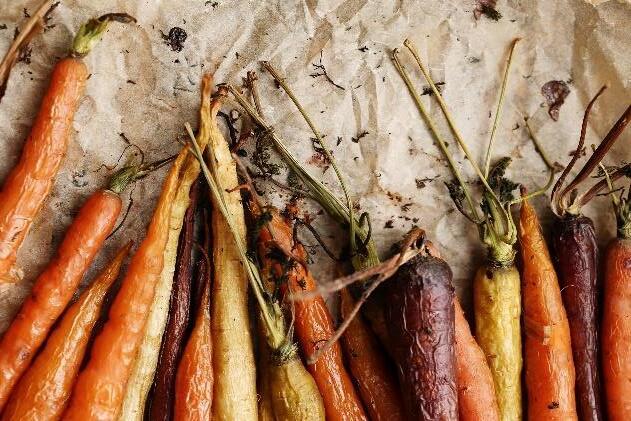
Carrots
Carrot Basics
Likes full sun
Grows best in cool seasons: Spring to early summer, then again in the fall. Start with seeds, and direct sow into container
Slow to germinate, so learn a few tricks
Needs consistent watering
Very few diseases.
Planting Tips
The hardest part about growing carrots is that the tiny seeds are very slow to germinate: ten to twenty days, on average. In the meantime, their soil bed must be kept evenly moist or else nothing happens; you will be patiently waiting in vain. Here is a trick:
In a small bowl, mix some radish seeds in with your carrot seeds. Approximately half and half, although precision is not important and, in any case, the carrots seeds are so tiny you couldn’t count them even if you wanted to. Mix the two together very wellandplantthemixturenottoodeep into the soil. The radishes will sprout much more quickly, showing you exactly where the carrot seeds are and keeping thesoil loose. Keep up with the watering; the baby radishes need it to stay crisp and tender, and the carrot seeds really need it.
Growing and Harvesting
Once you have the tiny baby plants on their way, your work is practically done. Not kidding; everything else is easy. Carrots are not prone to major diseases, and harmful insects don’t seem to like them. You just must focus on watering them. Like most root vegetables, carrots depend on steady, consistent supply of water for a tender texture.
Harvesting is also not complicated. If you know the anticipated harvest time or your orange beauties are showing through the soil, start by easing one out of the soil, if you are happy with. Grasp the plant at the base of the foliage, give it a little wiggle band pull gently.
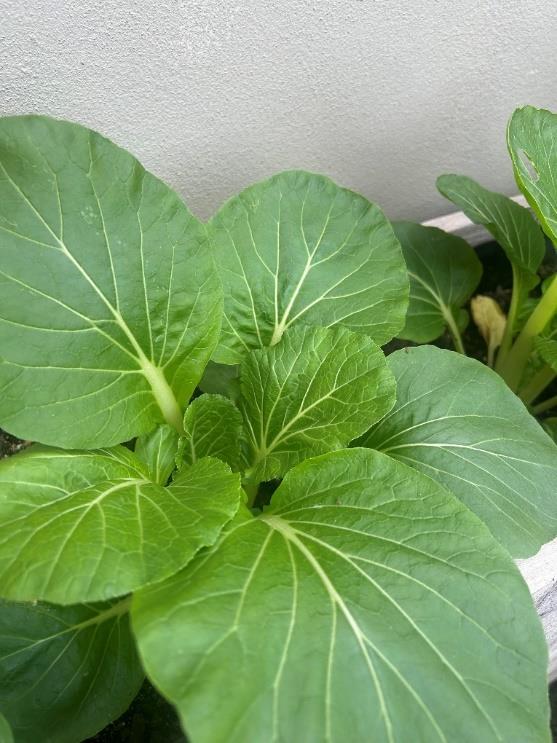
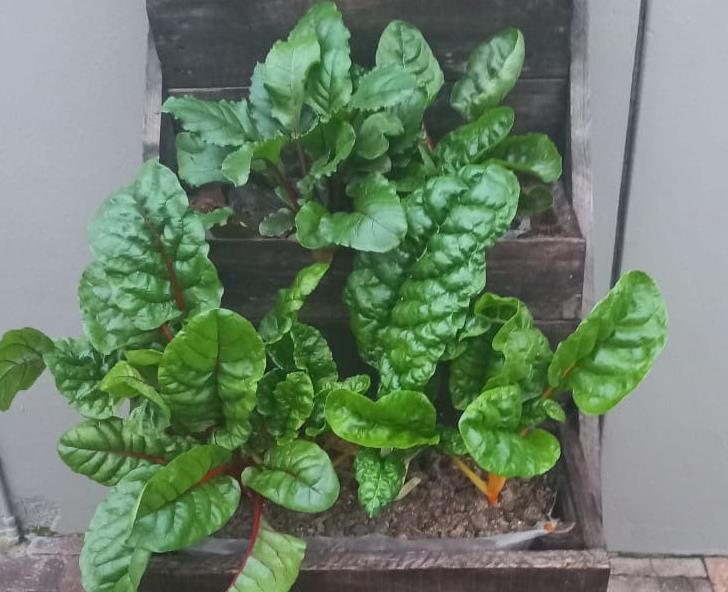
Leafy Greens
In this section I have grouped together four types of plants that are similar both in the garden and in your kitchen: chard, kale, mustard and spinach. I did this both to save space and to spare you the annoyance of reading the same things over and over again; I was more concerned with how you might use these plants than how a botanist might characterize them.
Leafy Greens Basics
These greens are happiest in full sun but won’t complain about partial shade.
As a group they do best in cool seasons, but many will tolerate the full range of weather patterns, from warm summer to very cold winters.
Start with transplants if you can; directsow seeds if you cannot.
Most are rapid growers, some as early as twenty days, although thirty to forty is more typical.
Steady,consistentwateringandadash of nitrogen-rich fertiliser will keep the plants producing tender, succulent leaves.
Planting and Growing Tips
Matureplantscanreachabigsizeboth in height and width. With that in mind, allowroomtospreadifyouareplanting transplants, or be prepared for removing some of the baby plants if you direct seed. In either case, do your first plant in early spring and again in late summer for an autumn crop
The plants themselves are quick to grow to size, but you can help them do even better with steady watering and light applications of a fertiliser high in nitrogen.
Harvesting: Remove mature leaves one atatime,withasharpknifeatthebase.
Green Beans
Important: within this category are two groups: pole and bush beans. Pole beans grow long vines that need the support of something tall, they can wrap around; bush beans grow as short, stocky plants that don’t need thatsupport.Containergardeners,stick with bush varieties. You are going to be buyingseedsforbeans,andyou’llhave lots to choose from; just make sure they are all the bush types.
Bean Basics
Give them full sun and regular watering
Start with seeds. You might find baby plants for sale sometimes, but they don’t work nearly as well as you would like them to. And the seeds are so easy to handle and so quick germinate, there’s no reason to hesitate.
Double-check the seed packet: that it is the bush type.
Plant seeds not far from the soil surface deep and your index finger apart, starting late spring
The first harvest is ready in fifty to sixty days.
Growing Tips
When I said beans were easy, I wasn’t kidding. Most varieties are disease resistant, and garden insects don’t find them appealing. Your biggest concern will be watering.Oncethese plants kick into full production mode, they need a stable watering routine. Be careful to water the soil, not the leaves; wet leavescantriggerbeanfungaldisease. For the same reason, don’t harvest beans right after rainfall.
Harvesting
Beans move so quickly through their cycle – from little flower to teeny bean pod to the full-blown thing ready to be picked- it will take your breath away. Once the plant hits that full-on production mode, it will pump out new harvest-ready beans every day, like an automatic, unstoppable machine.
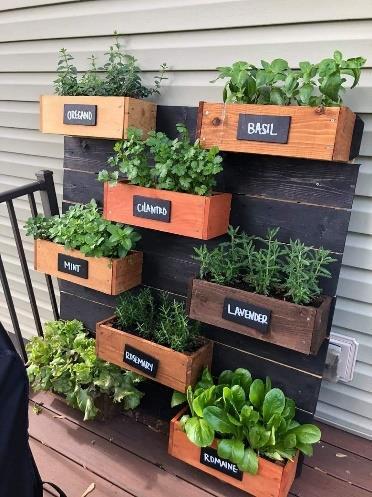
Let’s grow herbs
Rosemary
Beautiful rosemary might just be the essence of mediterranean herbs. It loves full sun and hot temperatures, doesn’t mind poor soil
Rosemary Basics
Start for baby plants where possible.
This is a perennial plant (it will live with you for more than 2 years)
Grow in full sun.
It’s sensitive to very cold temperatures.
Growing: A healthy rosemary plant needs two things: evenly moist soil (neither dried out nor waterlogged) and protection from deep cold.
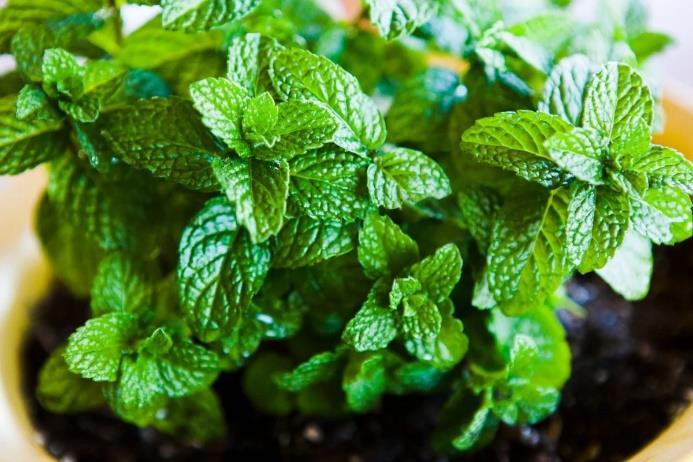
Mint
Even in a container herb garden, mint in a refined, dignified way will take over everything else. The solution is simple andbrilliant:dedicateonecontainerto mint only and enjoy its incomparable flavour and fragrance to your heart’s content
Mint Basics
These are perennial plants (they will live with you for more than 2 years)
Start with baby plants where possible
Full sun is best; partial sun/shade is possible.
Mint spreads like crazy, so grow it in its own pot.
Growing: The key thing to know about mintishowitgrows.Undergroundstems grow out sideways in all directions, and new stems, roots grow downward, and stems sprout upward. In one year, what started as a small baby plant will become a nice tight mass of minty goodness, in most seasons, but the plant may die down in winter and arise anew in spring, quickly forming into a large clump. Next year, larger still and so on.
Maintenance: Watering and keeping stems trimmed so they don’t get lanky – which you will do anyway as snip segments for summertime salads, wintertime stews and all-the-time hot and cold beverages.
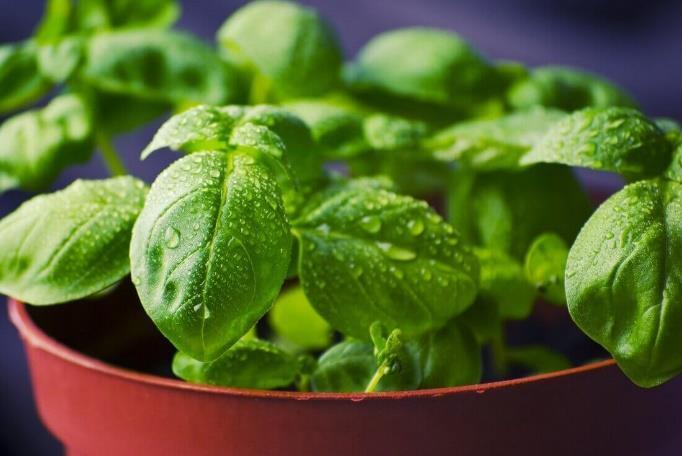
Basil
Lovely basil, favourite of many cooks, is also a gardener’s delight. Because it is such a handsome thing, with so many
wonderful varieties to explore, we forgiveitforbeingpickyaboutweather and needing our attention for watering.
Basil basics
Baby plants are recommended where possible, but starting from seeds is easier than you might think.
Basil thrives on hot weather
It prefers full sun.
Regularly pinching stems to encourage more leaves.
Growing Basil from Seed
In general, I think first-time container gardeners are better off starting with basil baby plants. But if circumstances call for starting with seeds, as they sometimes do, you will find that process much more manageable with basil than with most other plants.
The process is remarkably simple because you’re going to direct sow right into the big container. When the
weather has warmed up and it has you wanting your feet out of the blankets whenyousleeporhaveyouwishingthe mosquitos were not around so you can sleep with your windows open, plant a few seeds into their final container home. These seeds will germinate in seven to ten days. When they have two sets of true leaves, thin your little forest down to the strongest one.
Space saving ideas
I’m going to assume that your garden space is small- a balcony maybe, a small patch in front or at the back of your house. If I’m wrong, you won’t have to rely solely on these spacesaving ideas, but they might still come in handy for you.
Container pyramids: Three pots of exact same height with rims touching in the centre and fourth pot on top. Lots of planting space in small footprint.
Multiple Plantings in the Same container: The other way to get the most of you limited space is to make sure something is always growing in every square cm, using the technique called succession planting. In essence, it involves rotating plants in and out of the same container so that there is always something producing heartily and a minimum bare soil in-between.
Clutter control
You are going to produce a bountiful, beautiful garden; I know you are. But it’s all easy for clutter to accumulatetools, partially used bags of soil, not to mentionallthosenurserypotsyoudon’t knowwhattodo with.Ifyoudon’thave a garage, where will you put it all? And soon that clutter can overwhelm your pleasure in your garden. What we’re going to do is keep it from happening in the first place, by creating storage systems to corral the mess.
Storage Systems
There are many commercial products to choose from, including different versions of the same basic concept: a
storage cabinet made of waterproof material, designed for outdoor use. But that’s not the only route. With your clever brain and a few standard items from your favourite Big Box Storage or Home Improvement Store, you can put storage systems that just exactly fit your spaceandyourpersonalstyle.Hereare a few ideas.
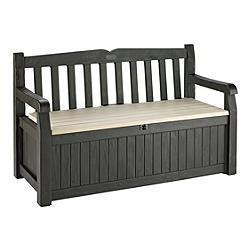
Dual-purpose bench. A bench is for sitting on while you watch the birds or daydream, but also provides a welldefined storage space underneath.
A beautiful box, repurposed. Keep aneyeoutforabeautifullargebox,like a child’s toy box, a blanket chest, or even a small chest of drawers. When you find one, visualise it standing on the end: Can you see that as a storagebox for your garden tools? If so, snag it.
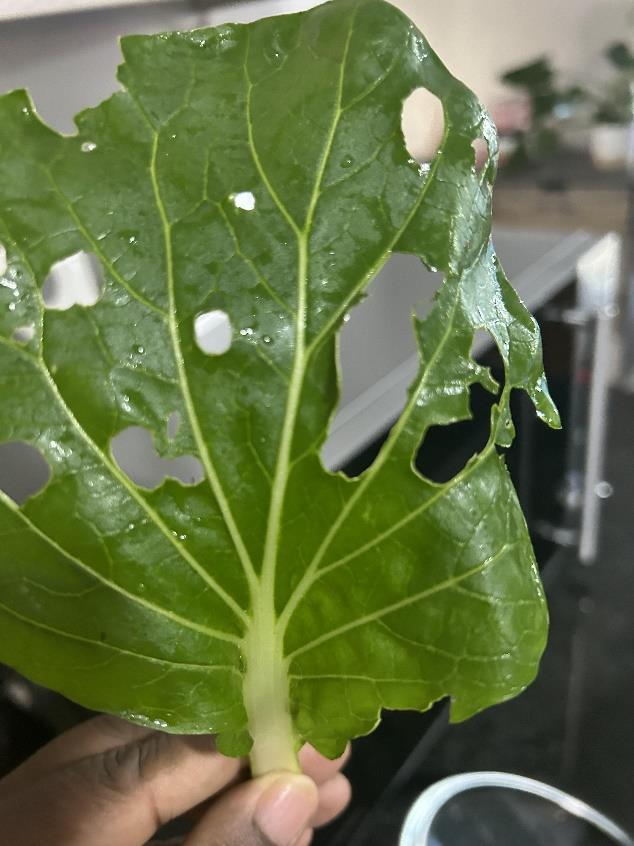
Keep the pests away
General pest control
Garlic, Onion and Chilli Spray.
Chop a full hand of garlic and four onions.
Add a tablespoon of crushed, dried, or fresh chilli.
Pour over 3 litres of boiling water
Close the container and allow to stand for 24 hours.
Add two tablespoons of cooking oil and two tablespoons of liquid soap (Dishwashing works well).
(This will also kill beneficial insects. Use only when necessary).
Anti-fungal spray
• 1L milk
• 1L water
Mix and use immediately.
Spray the top and bottom of the leaves. It is most effective if repeated weekly. It helps prevent fungal diseases such as powdery mildew and rust. It also increases the plant’s health and yield.
Where to get help
Does this all sound like a lot of work? It’s actually easier than you think, because you don’t have to do it all at once, and becausetheindividualstepsarekindof fun. There are probably millions of your fellow gardeners who can’t think of anything they’d rather do on a Sunday afternoon in January than browse through this year’s new seed catalogues.
And always remember this: you are not alone. There are multiple avenues for help, on all manner of questions large and small. Here is a list of some sources.
A friendly neighbour who’s a longtime gardener. Make this person your friend. It won’t be hard; gardeners are the nicest, friendliest people on earth. Look at me.
A local gardener group: Look for either garden club or an online group foryourowntown.Ifyoucan’tfindone, I am here for you.
The nursery in your town: Ask your neighbour or your garden club or your online community of gardeners.
Disclaimer
The information and material provided in this eBook is for informational and educational purposes only and should not be taken as professional advice.
Theauthorshallhaveneitherliabilitynor responsibility to any person or entity with respect to any loss or damage caused or alleged to be caused directly or indirectly by this guide.
Thank you!!
I thought this book is going to be about sharing the little I know. I had no clue that I knew so much, but I especially had no clue how little I knew. I hope you learn as much as I have in this journey. But most of all, I hope you are encouraged and feel equipped to start growing something.
Remember, gardening is not just about the harvest; it’s about the growth along the way – both plants and of ourselves. It’s about connecting with nature, understanding the rhythm on the seasons and appreciating the small blessings that occur daily in our little patches of earth.
Remember, you may not grow everything, but you can grow something.