Organize Your Homestead Stats Monitor your farm’s facts and figures to manage daily tasks and track your progress. Story and photos by Amy Fewell
I
’m a planner by nature, but implementing my plans is a completely different story. Last December, as 2018 neared, one of my top goals was to be more organized. After all, I was planning a homesteading con-
ference for October—I needed to be prepared! And organization has simply never been my strong suit. When my husband would ask me how much we had harvested the previous year, or how much money we had spent on the chickens, I would look at him blankly and wonder if he really thought I’d
kept up with all that. I could’ve thrown out a number off the top of my head, but I probably would’ve been hundreds of dollars off. I could’ve told you the initial startup cost of our homestead, and that’s about it. The yearly stuff? I was just wingin’ it! You can see my dilemma. My first issue was that I told myself I didn’t have time to keep track. But I realized that if I wanted a homestead that wasn’t a money pit, I needed to monitor all of our expenses, what we bought and sold,
Recording your farm data will reveal which changes you need to make next year.
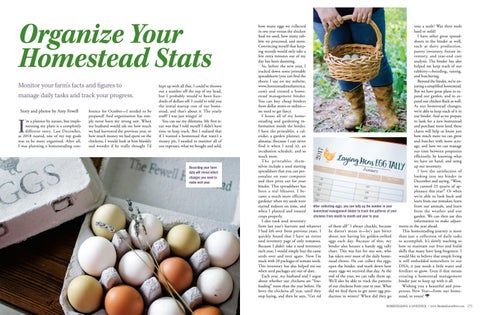
how many eggs we collected in one year versus the chicken feed we used, how many rabbits we processed, and more. Convincing myself that keeping records would only take a few extra minutes out of my day has been daunting. So, before the new year, I tracked down some printable spreadsheets (you can find the sheets I use on my website, www.homesteadersofamerica. com) and created a homestead management binder. You can buy cheap binders from dollar stores or online— no need to get fancy. I house all of my homesteading and gardening information inside the binder. I have the printables, a calendar, a garden planner, an almanac (because I can never find it when I need it), an incubation schedule, and so much more. The printables themselves include a seed starting spreadsheet that you can personalize on your computer and then print out for your binder. This spreadsheet has been a real lifesaver. I became a much more efficient gardener when my seeds were started indoors on time, and After collecting eggs, you can tally up the number in your when I planted and rotated homestead management binder to track the patterns of your crops properly. chickens from month to month and year to year. I also took seed inventory from last year’s harvests and whatever of them all!” I always chuckle, because I had left over from previous years. I he doesn’t mean it—he’s just bitter quickly found that I have an entire about not having his golden-yolked seed inventory page of only tomatoes. eggs each day. Because of this, my Because I didn’t take a seed inventory binder also houses a handy egg tally each year, I would simply buy the same chart. This was fun for our son, who seeds over and over again. Now I’m has taken over most of the daily homestuck with 20 packages of tomato seeds. stead chores. He can collect the eggs, This inventory has also helped me see open the binder, and mark down how when seed packages are out of date. many eggs we received that day. At the Each year, my husband and I argue end of the year, we can tally them up. about whether our chickens are “freeWe’ll also be able to track the patterns loading” more than the year before. He of our chickens from year to year. What loves the chickens all year, until they did we feed them to get more egg prostop laying, and then he says, “Get rid duction in winter? When did they go
into a molt? Was their molt hard or mild? I have other great spreadsheets in the binder as well, such as dairy production, pantry inventory, freezer inventory, and year-end cost analysis. The binder has also helped me keep track of our rabbitry—breeding, raising, and butchering. Beyond the binder, we’re enjoying a simplified homestead. But we have great plans to expand our garden, and to expand our chicken flock as well. As our homestead changes, we’re able to keep track of it in our binder. And as we prepare to look for a new homestead and purchase more land, these charts will help us know just how much more we can grow and butcher with more acreage, and how we can manage our time between properties efficiently, by knowing what we have on hand, and using up our inventory. I love the satisfaction of looking into my binder in December and saying, “Wow, we canned 25 quarts of applesauce this year!” Or when we’re able to look back and learn from our mistakes, learn from our animals, and learn from the weather and our garden. We can then use this information to make adjustments in the year ahead. This homesteading journey is more than just a collection of daily tasks to accomplish. It’s slowly teaching us how to maintain our lives and build skills that many have long forgotten. I would like to believe that simple living is still embedded somewhere in our DNA; it just needs a little water and fertilizer to grow. Even if that means creating a homestead management binder just to keep up with it all. Wishing you a beautiful and prosperous New Year—from our homestead, to yours!
HOMESTEADING & LIVESTOCK • www.MotherEarthNews.com 25
My farm, Le Potager d’Acadiana (The Acadiana Kitchen Garden), sits on an acre of land that hugs Bayou Bourbeaux near Arnaudville, Louisiana, about an hour from where I grew up. It’s my first season, and, after two years of planning, it’s hard to believe the moment is finally here. Although both of my grandfathers were raised on farms, college was presented as my only option growing up. So even as my interest in sustainable food grew, my burgeoning career as a journalist kept me in an office. Through my education, I discovered authors who revealed to me the flaws of America’s food systems: Wendell Berry, Michael Pollan, and Mark Sundeen. Their work introduced me to radically different ideas and helped shape what I wanted out of life. My aspirations included living a more sustainable life focused on local, homegrown food, but my career and location limited my ability to achieve this. At the time, I was living in an apartment outside Nashville, Tennessee, with only a balcony on which to grow a handful of plants. Most of my days were spent indoors, tied to a desk and a computer, supporting a system I increasingly didn’t align with.
Call to Action
From Cubicle to Cultivar
How to Leave the Office and Become a Farmer 30 THE BEST OF MOTHER EARTH NEWS
Hands-on apprenticeships cultivate opportunities to leave the city and lead an agrarian lifestyle. Story and photos by Jonathan Olivier
L
ately, my life has been consumed by farming. I’ve been obsessively poring over seed catalogs to ensure I choose plant cultivars suited to my climate in southwest Louisiana; I need to spread my compost and build a processing shed; and I’m still trying to decide exactly how many hens I want.
After a suggestion from a friend, I looked into Workaway (www. workaway.info), an organization that connects people willing to exchange labor for free room and board with hosts who need help with everything from child care to farming. A quick online search uncovered a vast network of folks across North America who were looking for field hands, offering me the opportunity to experience farming firsthand. I wanted to make a fundamental change, and it seemed that Workaway was my ticket. So, in December 2017 I quit my job, and vowed to cross the United States and Canada in search of farms with integrity. I wanted to learn all I could about sustainably growing food and raising animals, with the intent of one day starting my own farm. No longer would I work from a desk without exploring my agricultural inclinations. In less than two years, I traveled more than 30,000 miles and worked on 13 farms. I received a valuable education from farmers who weren’t just looking for an extra hand, but were also eager to pass on their knowledge to support the local food movement.
Why Volunteer? While starting a farm can feel like a daunting task, spending time beforehand as an apprentice is a terrific way to gain real-world experience and valuable knowledge that’ll help you along the way. Plenty of workshops and programs are designed to teach novice farmers, but most carry a hefty price tag. Volunteering attracted me because—although I wouldn’t be getting paid—my education would be free and empirical. Many paid farming gigs require experience, while most volunteer positions don’t. So, as a novice, I chose to volunteer on several farms to expose myself to an eclectic set of agricultural practices. Plus, if you’re unsure which region you’d like to live in, traveling to several can be instructive. I was in a unique position to undertake this journey as an unpaid worker. Although I quit my full-time job, I could work as a HOMESTEADING & LIVESTOCK • www.MotherEarthNews.com 31
Bring Garden Movement
for a more complex and useful set of movements. In essence, he could move his body in more healthful ways than he ever did as a bodybuilder. We know about the dietary and financial benefits offered by fresh, organically grown produce from our own fields and backyards, but when we begin to think of and use the garden as our own personal gym, those benefits multiply.
Into Your Life By Rachael Dupree
B
odybuilder Sam Sycamore fell head over heels for farming after suffering a biking accident that left him unable to continue his intense gym regime. Weakness in his
elbow led to chronic pain in his shoulder, and before long, he realized he couldn’t quite sustain his intense routine of biking, swimming, and weight lifting that had comprised his exercise routine for years. “My injuries forced me to confront difficult decisions
about how and why I use my body,” he says. Farming had once been something he’d thought he’d pursue in the distant future, but as he considered his health, his plans shifted. He decided to lease a 1/2-acre garden and a couple of acres of pasture to start up a smallscale, specialty-crop operation outside of Louisville, Kentucky. Sycamore discovered that doing chores around the farm traded repetitive gym exercises
FROM TOP: GETTY IMAGES/MUSTAFAGULL/GPOINTSTUDIO; PAGE 38: GETTY IMAGES/RYANJLANE
Move with intention through your garden routine to stretch and strengthen long-forgotten muscles.
Movement Permaculture Introducing dynamic, whole-body movements through work in your garden is a concept that Katy Bowman, biomechanist and author of the book Movement Matters, calls “movement permaculture.” Bowman calls typical gym movements, which focus on select muscle groupings and are typically detached from the natural world, “junk food movements.” In the long term, these junk food movements aren’t good for our bodies. “To practice movement permaculture is to move in such a way that you can keep moving—often moving with a higher range and quality— for the rest of your life,” she says. When Sycamore began living closer to the land and thinking about the sustainability of the food he grew and foraged, he realized that the movements that came along with those activities were more sustainable for his body too. Instead of doing repetitive squats at the gym, farming encouraged dynamic movements that used his whole body. “Working with plants and soil, I’m constantly moving in and out of a deep squat,” he says. “It’s a body weight squat, and because I don’t have the burden of an extra load weighing me down, I can fully complete that movement. I can do things like crab walk and engage the entire range of motion that the hips are capable of.” Junk food movements aren’t just relegated to the gym. Many modern farming technologies—from mechanized equipment to simple backyard garden tools—take away opportunities to engage our bodies to the fullest extent, and these movement monocultures can take a toll on our bodies.
Holding loads close to your body puts less strain on your arms and utilizes larger muscle groups.
“Tools reduce movement diversity and change the distribution of movement over the body. They increase repetitive movements on our muscles, creating under- and overuse depending on the tools used,” Bowman says. Simply rethinking your approach to gardening will introduce what Bowman calls “movement nutrients.” Her recommendations include: • Using different tools for one task. • Working at different times of day, allowing your body to adapt to fluctuations in light and temperature. • Gardening barefoot. • Working alongside a young or novice gardener.
Ditch the ‘Junk Food Movements’ When faced with questions about body movement, Sycamore turned to Jonathan Mead, founder of Uncaged Human (www.uncagedhuman.com) and co-creator of Embodied Strength (www.embodiedstrength.co). Both programs help people use their bodies in ways that reduce pain and prevent injury. Mead offers the following tips for gardeners who want to move away from movement monoculture. Switch positions often. Gardeners often hunch over or work in positions that use the same muscle groups repeatedly. This is a recipe for pain. “My mantra is, ‘The next position is NATURAL HEALTH • www.MotherEarthNews.com 39
‘Container’ Gardening
More than 4,400 plants, including collards, lettuce, spinach, and herbs, grow in the container. 68 THE BEST OF MOTHER EARTH NEWS
A Sustainable Food Source
Story by Jennifer Albert and Dalia Martinez
I
nside three shipping containers on the campus of The Citadel, a militar y college in South Carolina, cadets are learning how to grow lettuce crops in a controlled indoor “farm” setting, producing organic produce in an environment that can withstand unpredictable weather conditions and disease. The cadets’ hands-on education comes from The Citadel Sustainability Project, in which the first container functions as a hydroponic cultivation system for lettuce crops, the second container is a testing ground for various growing systems, and the third container will be outfitted by cadets who design and build the growing equipment as part of a corresponding independent study. The Citadel STEM Center of Excellence initiated the project in 2016 as an interdisciplinary collaboration. Of the 20 or so students who are members of the Sustainability Club, several are STEM Scholars. We also have electrical engineers who are completing a design project on hydroponics. We’ve had students from almost every campus department—engineering, biology, business—who have worked with the project. Prior to their graduation, Alex Richardson, who studied engineering, and Cameron Brown, who studied business, managed the growing container with the help of other students motivated by a passion and love for the environment. “Cadets are excited about The Citadel Sustainability Project because
FROM LEFT: STEFANIE SWACKHAMMER; THE CITADEL (2)
From the confined space of a shipping container, military college cadets grow and harvest hundreds of heads of lettuce per week for staff and students.
it incorporates biology, chemistry, computer science, business, engineering, and community outreach. It gives us the opportunity to collaborate with students outside of our own programs on a project focused on global population needs,” Richardson says. “And seeing people on campus eat and enjoy our crops is gratifying.” We’re currently working on growing more than 4,400 plants in the containers, including collards, lettuce, spinach, and herbs. The nutrients used to grow the crops are recycled within the system’s 100-gallon reservoir and are managed through a smartphone application. The app tracks the metallic minerals in the water and sends nutrients to the plants every 10 minutes. It also displays the water’s temperature and the container’s carbon dioxide and pH levels. The transformation from seed to harvest inside the container farm occurs in five weeks, compared with the 10 weeks the crops would need in an outdoor environment. Thanks to high-density crop production, the cadets harvest more than 800 heads of lettuce per week for the campus restaurant’s salad bar as well as events. Additionally, the cadets get to eat the fresh lettuce in the student mess hall. If the growing container is running at full capacity, the 320-square-foot space can yield about 40,000 heads of lettuce per year. Each container is valued at $115,000 after it’s outfitted. The cadets intend to make the project sustainable by putting profits from the crops toward the purchase of more containers. “Our self-propagating irrigation system uses up to 98 percent less water than conventional industrial farming does,” says Brown, who wrote the project’s business plan. “We want to expand, grow more, and sustain this Earth-friendly initiative, making our healthy produce available to more members of our community.” In addition to providing a sustainable food source, the goal of the project
From top: The container farm is installed in a corner of campus, leaving room for expansion. The project helps cadets gain hands-on experience in business, chemistry, engineering, and growing food.
is to help young entrepreneurs and members of other disciplines gain hands-on experience. We also try to bring in high school students. Last spring, students from Burke High School, which is next door to our campus, incorporated the farm into one of their projects. Then, a 10th-grade economics class wrote business plans for the container with data we provided, and followed up with two field trips to the container. The container farm is located in a back corner of campus near the marsh, with plenty of room for expansion. We’ve submitted a National Science Foundation grant application with The GEL Group, AmplifiedAg, and SuperGreen Solutions to design a system that would filter excess nutrients
out of treated wastewater and incorporate sustainable energy so the system could be viable anywhere. Ultimately, we’d like to expand the project to be able to produce more fresh food for the South Carolina Corps of Cadets, which comprises the college’s undergraduate population. Our advice for other schools thinking about starting a small, sustainable farm like ours: Include a faculty member who’s invested in the success of the project and understands that student interest will wax and wane depending on schedules. It’s also important to have a succession and mentoring plan for students who are learning. Seniors mentor juniors; juniors work with underclassmen. That will keep the farm going strong. GARDENING • www.MotherEarthNews.com 69
Building With Balecob This hybrid of cob and straw bale building techniques can offer unique flexibility to the natural builder.
Story by Kyle Chandler-Isacksen and Conrad Rogue Photos by House Alive
W
e live in exciting times for natural building! While building with earth is ancient and global in application, its renaissance in the Western Hemisphere goes back only 30 or 40 years, and that time has been tempered by codes and
regulations ill-suited to natural building. But the field is now growing like never before as people seek a greater sense of belonging in their homes and communities, sustainable alternative construction methods, and a more authentic existence. With this growth, natural builders continue to spawn innovations and creative solutions to the challenge of building beautiful, durable structures. Balecob is one such innovation.
Balecob is an infill technique that uses straw bales and cob to quickly create highly insulative, roof-supporting, and load-bearing walls without the need for wood framing for structural support. (Cob is clay, sand, and straw mixed with water.) In balecob walls, straw bales are stacked like bricks and stabilized by jamming cob into the seams. It’s a hybrid building technique that makes use of the best of both cob and straw bale construction, resulting in beautiful, natural, functional buildings. Balecob was pioneered by Ianto Evans and the Cob Cottage Co. in Oregon. I (Kyle) learned from Conrad Rogue of House Alive, who uses a slightly different technique. My hope is that, as people learn about balecob, they’ll appreciate how much sense it makes and decide to give it a go on their own buildings.
Moving Past Wall Systems Generally, we define a house by its wall system: timber frame, stick frame, concrete block, etc. The same is true in natural building: straw bale, cob, earthbag, and so on. Choosing one wall system can be limiting, and I believe the best houses are hybrids that utilize different materials in the right places. Do you have a lot of windows and doors on the south side? Consider cob or wood framing. What about a long, cold north wall? Go with balecob or straw bale. If you plan to stick frame your interior walls, consider filling them with light straw clay. By embracing flexibility, we can create houses that are more likely to meet our wants and needs. And, with natural materials and smart design, we can limit our ecological footprints too.
Balecob walls can be gently curved, much like cob walls, but offer much greater insulation.
plenty of thermal mass, though it isn’t very insulative by itself. Because of its malleability, cob is useful for leveling stem walls and other areas, making it a great tool to use in concert with earthbag, recycled concrete (“urbanite”), or other irregular foundation techniques. Cob is usually sourced locally—sometimes even made from the soil removed from a building’s foundation trenches—and is accessible to just about any builder. Straw bales are less durable than cob, but far more insulative, and their uniform size and shape offer an easy route
to rectilinear walls. Some of the labor of straw bale building is outsourced in the production of bales, which may be a positive or a negative, depending on your goals. Straw bales also take up a lot of space; much of their insulation comes from the sheer thickness of the walls they create. In short, cob is great for strength, mass, and curves; straw bales for volume and insulation. Both share low costs, fire resistance, and low tool and skill requirements; both also encourage community building projects. When we combine the best of both materials, we get the benefits of balecob, which is faster than either approach by itself; insulative and strong; and suitable for building curved and rectilinear walls.
Better Together: Cob and Straw Bales
Balecob lends itself to community building.
Because balecob is a blend of both cob and straw bales, it’s important to look at what each material offers the builder. Cob is strong and durable, and easy to shape however the builder pleases. It provides
A balecob wall rests on an impervious stem wall, with a layer of cob at the base and top to help compress and protect the bales.
A Good, Strong Base A balecob wall, from the ground up, has: Rubble trench. This foundation of loose stone, gravel, or “rubble” in a trench under the walls will provide support and drainage. Stem wall. A short wall of stone, earthbags, concrete, or other rigid, impermeable materials will bridge the DIY PROJECTS • www.MotherEarthNews.com 99
Low-Cost Rain Barrel
Aquaponics System Create an eco-friendly aquaponics system that will provide your family with fish and fresh greens for years to come. Story and photos by Lydia Noyes
A
s homesteaders, we're always experimenting with new functions for old or unused things. This is especially true of rain barrels, which we often have an excess of on our property. Our Appalachian homestead runs entirely on rainwater, so these barrels are invaluable to us, but sometimes we have far more than we need. Luckily, my husband found an innovative way to use them by creating an eco-friendly, self-sustaining aquaponics system that fits right in our home. For less than the cost of a regular fish tank, we can raise our own food for a miniscule amount of fossil fuels. It’s an exciting step for us toward self-sufficiency. In the past couple of years, we’ve experimented with many different forms of livestock and home-based butchering. We’ve successfully mastered raising, breeding, and butchering our own meat rabbits, and we've even raised our first pig in a pallet-constructed pen before butchering him on our property. But starting an aquaponics system was decidedly more tech-involved. Nonetheless, we think it was well worth the effort, as it’ll benefit our homestead for years to come.
What’s Aquaponics? By definition, aquaponics is a blend of aquaculture (the cultivation of fish) and hydroponics (growing plants in water instead of soil). The benefit of combining these two ideas is that plants and fish actually help each other thrive. Fish feces and uneaten food scraps infuse the water with nutrients, which act as a natural fertilizer for the plants growing above. And 116 THE BEST OF MOTHER EARTH NEWS
the pump aerates the water for the fish, keeping them healthy. It’s a closed-loop system in which waste is constantly recirculated for the benefit of all organisms. Plenty of professional aquaponics systems are on the market, but none come as cheaply as our simple rain barrel model. Best of all, our system has the capacity to hold more than 20 full-grown tilapia, ensuring that it’s
Materials & Tools • Food-grade 55-gallon barrels (2); 1 whole, 1 with at least 12 inches of the bottom intact • Drill with 3⁄8-inch bit • Jigsaw • Plexiglass • Permanent marker • Tape measure • Box of 1⁄4-by-1⁄2-inch stainless steel carriage bolts • Box of stainless steel washers • Box of 1⁄4-inch stainless steel nuts • Aquarium-safe silicone • Wrench • ¾-inch hole saw • ¾-inch tap • ½-inch PVC male adapters (2) • ½-inch PVC female adapters (2) • 1 foot of 4-inch PVC pipe for media guard • Bell siphon and 1⁄2-inch ball valve • 10 feet of ½-inch PVC pipe, or scraps and fittings, for inlet pipe • Submersible aquarium or pond pump, 400 gallons per hour (gph) • Gravel or expanded clay
9 1 11
well worth the space it takes up in our pantry.
Steps for Success The first part of any project is to gather up the tools and materials you’ll need (or pilfer them from other projects). For this project, you’ll need two food-grade barrels. The first barrel will function as the fish tank, and needs to be complete. The second barrel will be the grow bed, and since you only need the bottom 12 inches or so, you can cut a whole barrel or salvage what you need from another project. See “Materials & Tools” at left for the full list of what you’ll need to get started. 1 Drill a hole into the top of the first barrel (fish tank) as a starting point for the jigsaw. Using the jigsaw, cut away the barrel’s top or lid, but be sure to leave a small lip so the second barrel (grow bed) can sit on top later. Next, cut out two squares in the top third of the first barrel to serve as access points to the fish. 2 Next, you’ll need to cut the plexiglass to add a window to the fish tank barrel. Use the permanent marker to mark the plexiglass to your desired size, and then apply masking tape on the other side of the plastic over the marks. The tape will help prevent the plexiglass from fusing back together after it’s cut. Then, use the jigsaw to carefully cut the plexiglass. 3 Using the marker, designate the locations of bolt holes on the plexiglass. We spaced the holes about 2 inches apart and 1 inch in from the edge. Then, applying as little pressure as possible so as not to crack the plexiglass, carefully drill the holes.
6
4 Preheat your oven to 250 degrees Fahrenheit. Heat the plexiglass for about five minutes, or until it becomes pliable. Be sure to keep a close eye on it, or you could end up with a nasty mess of melted plastic in your oven. Wearing heatproof gloves, carefully remove the plexiglass from the oven, and place it inside the barrel in your desired window location. Hold the plexiglass in place for 10 minutes, or until it has cooled and molded to the shape of the barrel. 5 Now, using the holes you’ve marked on the plexiglass as a guide, start at a middle hole on the top edge and drill through the barrel. Once you’ve drilled a hole, insert a bolt from the inside, adding a washer and nut in the process. Continue drilling from the middle out, securing the bolts as you go. 6 After the plexiglass has been completely bolted to the barrel, use the marker to draw a window on the barrel 1 inch in from the bolts. Remove all the bolts and the plexiglass, and cut out the window using the jigsaw. 7 Run two beads of silicone around the window cutout on the inside of the barrel, one above the bolt holes and one below. Replace the plexiglass, and bolt it
10
into place. Make sure each bolt is fingertight before tightening them all with a wrench. The tighter you can make each bolt, the more watertight your barrel will be, so take your time! Once the bolts are secure, seal them with a bead of silicone. 8 Next, you’ll make the grow bed using the partial barrel. Use the hole saw to drill two holes in the bottom of the second barrel: one in the middle for the drain, and one closer to the side to feed the pump. Tap each hole with the ¾-inch tap, and thread in the male adapter from the top, adding the female adapter to the underside. 9 The next step is to create a media guard that will prevent debris from entering the pump. Pick up the 4-inch PVC pipe, and, on one end, drill a series of holes to allow water to flow through. 10 In the middle hole of the grow bed, set up the media guard, bell siphon, and inlet pipe. Make sure the end of the media guard with drilled holes is at the bottom of the barrel. If you’re not sure how to set up a bell siphon, check out a guide from the University of Hawaii, Mānoa, at www.simplyhydro.com/BIO-10.pdf. 11 Attach the pump to the underside so that it pumps water from the bottom
As a final touch, add a clamp light to the fish tank to enhance visibility.
barrel up to the grow bed before draining out of the middle. Now, it’s time to fill the grow bed with gravel or expanded clay, and start your plants. Once you add water and fish to the base, your system will be ready to go! The original instructions we followed for this low-cost system can be found at www.instructables.com. Search for “foodgrade barrel aquaponics system.” We couldn’t be happier with how well our rain barrel aquaponics system turned out. We’ve been able to harvest plenty of salad greens from the top, and the fish tank has supplied an abundance of fish dinners to share with friends and family. DIY PROJECTS • www.MotherEarthNews.com 117
Spinning a Yarn
get discouraged if your first results aren’t quite what you want; your hands need time to learn what they’re doing.
Tools of the Trade
Spinning seems like magic, but it’s no more than making string with a special stick. Learn how to make your own yarn with tools that have hardly changed since the Stone Age. By Caitlin Wilson
I
taught myself to spin when I was about 13 years old, using a spindle I made with a discarded CD and a pencil, and polyester stuffing for the fiber. My yarn was lumpy and bumpy. I learned to knit around the same time,
and focused on that for several years, but when my mom gave me a beautiful wooden drop spindle and 8 ounces of sheep’s wool, I took up spinning again. My yarn was still pretty lumpy, and I dropped my spindle so often that my housemates at the time threatened to banish me to the porch until I got the
hang of it. A word to the wise: Practice over carpet first. Your spindle—and your household—will thank you. With about 10 years of experience behind me, I can now spin lace weight yarn while I walk, talk, and read. Spinning is a physical skill that gets easier the more you practice it, so don’t
QUEREN KING-OROZCO (3)
Spindle weight and style affects the yarn you can make, from thick and squishy to whisper-fine. You may end up with a collection of spindles for different purposes.
or copper fibers integrated, and even paper yarn. I’m going to focus on wool, because it’s widely available, inexpensive, and easy to learn with. Sheep’s wool can be soft, scratchy, short, long, fine, coarse, or anywhere in between—and it doesn’t
with fiber up to a foot long, which is difficult for a beginner to manage, too. One of my favorite breeds to spin is Bluefaced Leicester, which is considered a medium wool—the lustrous fiber is usually around 4 to 6 inches long and reasonably soft. Finn, Targhee, Dorset, and Jacob are other good medium wools to start on, and if you’re very sensitive to scratchiness, Shetland sheep produce a fine, soft wool that’s still easy to spin. Look for wool top or roving to begin with. “Top” is made of fibers that have been cleaned and combed to run in the same direction. It’s ideal for making a smooth, dense yarn. “Roving” is clean fibers that have been carded, so they’re going in all different directions. It’s ideal for making a softer, fluffier yarn. Either one will do just fine to learn on.
Before you spring for a spinning wheel—which can easily cost several hundred dollars—look for a drop spindle (or “suspended spindle”). They’re generally inexpensive (you can find a goodquality spindle for about $10), portable, and sturdy. The most common type of spindle you’ll encounter has a whorl, which is a weighted disk, with a shaft running through the center. The whorl can be at the top or the bottom of the spindle, and many modern spindles have a hook on the top end of the shaft to make anchoring your yarn easier. Some ancient spindles are little more than shaped pieces of wood. You may also find supported Mingling Singles spindles in your search. Their Spinning yarn is a three-step shafts will be sharpened at the process: First, you’ll spin fiber bottom, and many come with a into a continuous strand spinners spindle bowl. These are useful for call “singles.” Knitters would call spinning extremely fine or short it “single-ply.” Then, you’ll wind fibers, such as cashmere or cotthe singles into a ball. Finally, ton, because they balance on their you’ll ply them into finished yarn. tips so the yarn doesn’t need to Yarn holds together through support the weight of the spindle. twist alone. When you make sinFor your first foray into spingles, you’ll be adding twist in one ning, stick to a drop spindle. It’s direction to your fiber, which will less specialized, which means make it hold together as long as you’ll be successful more often it’s under tension. Always make while you’re learning. The fibers From top: A spindle and some fiber are all you’ll need to sure the free end of your singles is that are best spun on a supported make yarn. Thin out your fiber to about half the thickness of anchored, whether in your hand spindle also tend to be more exyour thumb. It will compress as you spin it. or wrapped around your spindle. pensive and more challenging to If you let go, they’ll untwist and spin than a good-quality, medium wool. have to be plain white. While most turn back into fiber. wool produced for commercial mills is Plying, or twisting multiple singles What to Spin? white, sheep grow wool in a range of strands around each other in the opSpeaking of wool, let’s talk about colors, from white to deep cocoa brown posite direction, solves that problem. spinning fiber. You can spin almost and black. There are even sheep whose To make two-ply yarn, take two sinany fiber, though some are more difwool is naturally silver. gles strands (or both ends of the same ficult than others. Hand spinners You might know of Merino, a breed strand), attach them both to your typically work with plant or animal that produces very soft, very fine wool. spindle, and twist them around each fibers, and most often with wool, Merino is lovely, but the fiber is so short other in the opposite direction from silk, cotton, or flax—which becomes that it’s difficult for beginners to spin how you originally spun them. After linen as soon as it’s spun. Nowadays, (I should know; it’s what I started on). that, no matter which direction the yarn you can also find yarn made of nylon Other breeds, such as Teeswater and tries to untwist, it’ll be stopped by the or polyester, yarn with stainless steel Leicester Longwool, produce silky wool opposing twist. DIY PROJECTS • www.MotherEarthNews.com 127