Construct a fence that can envelope your compost while bringing life and diversity to your property.
By Laura Lavender
What if your fence was alive? As typical pressed-lumber and chain-link fences certainly aren’t beacons of life, a living fence may seem like a magical notion. What a marvelous way to incorporate yet more life and diversity into the garden! Yet, despite the concept sounding revolutionary, in truth, “living fences” can be found on many residential streets in the form of hedges.
What’s a Composting Fence?
A composting wall or fence, on the other hand, is more unconventional and adventurous than a hedge. A composting fence is essentially a solid noncompostable structure, usually two fences
with mesh walls built side by side with a pocket between them made to envelop compost. This compost-containing structure can be casual or a fancy latticed pergola-type structure. You can then fill your “hollow fence” with all kinds of compostables and allow them to decompose. Composting fences are generally filled with “brown” compost materials, such as fall leaves, branches, and perennial clippings, but anything goes! The resulting mass of natural material creates a screen that blocks noise and provides privacy. Additionally, the compost provides living spaces for insects and birds. And as humus is generated by the compost’s microorganisms, you can insert hardy plants into it through the mesh to clothe the composting fence in green.
Why a Composting Fence?
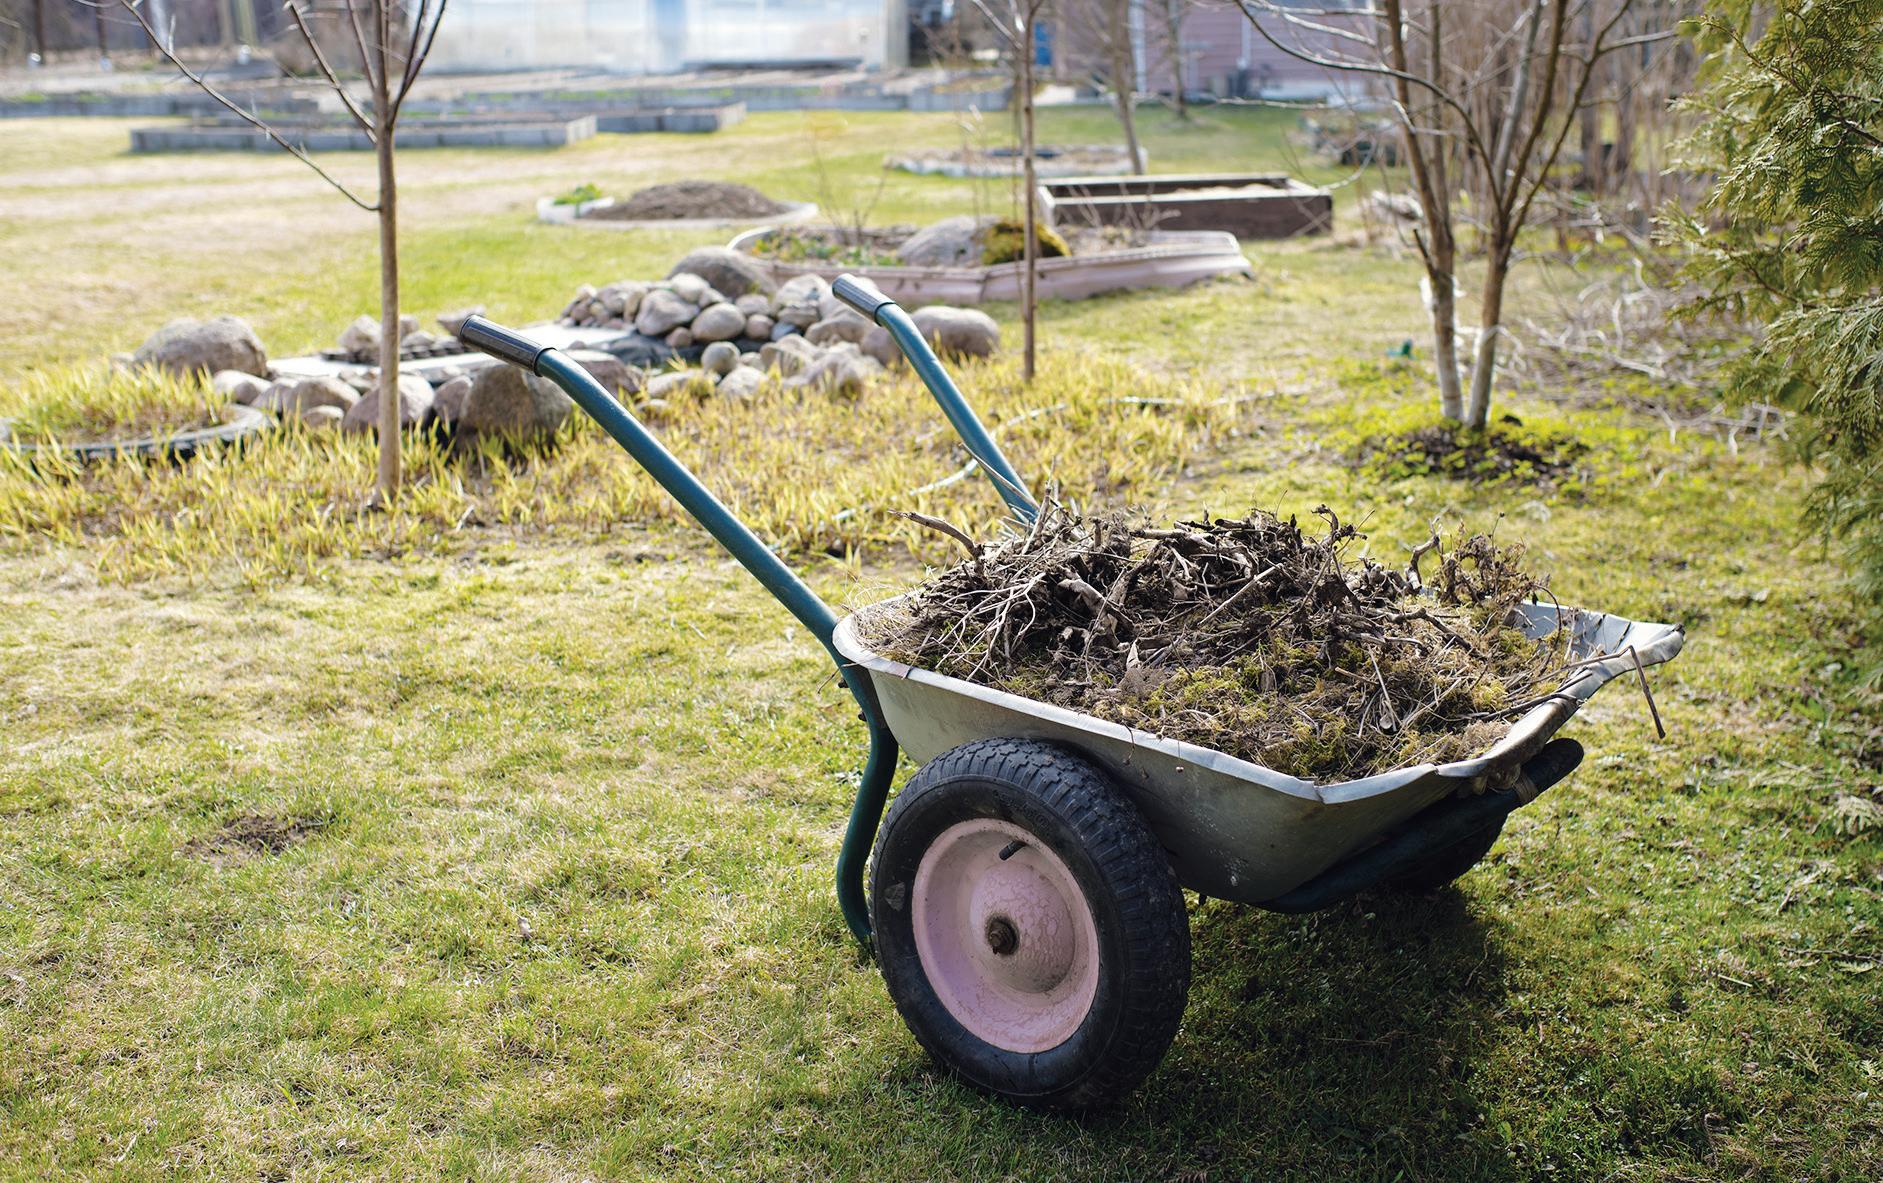
A composting fence appealed to me as a useful way of repurposing all the tree branches and trimmings that accumulate, even in our small yard. The usual destination for piles of tree prunings in spring is a landfill or, hopefully, municipal composting program. A composting fence provides a full-circle solution, creating a use for what’s usually waste.
We built our first composting fence as a privacy wall, providing a sheltered place to sit in full sun, blocking the path of wind and the view from the sidewalk. An overgrown lilac hedge supplied the fill for the fence, as the property was bordered on two sides by a dense, towering lilac hedge. Various gardening sources claimed that the best way to revive an ancient lilac hedge
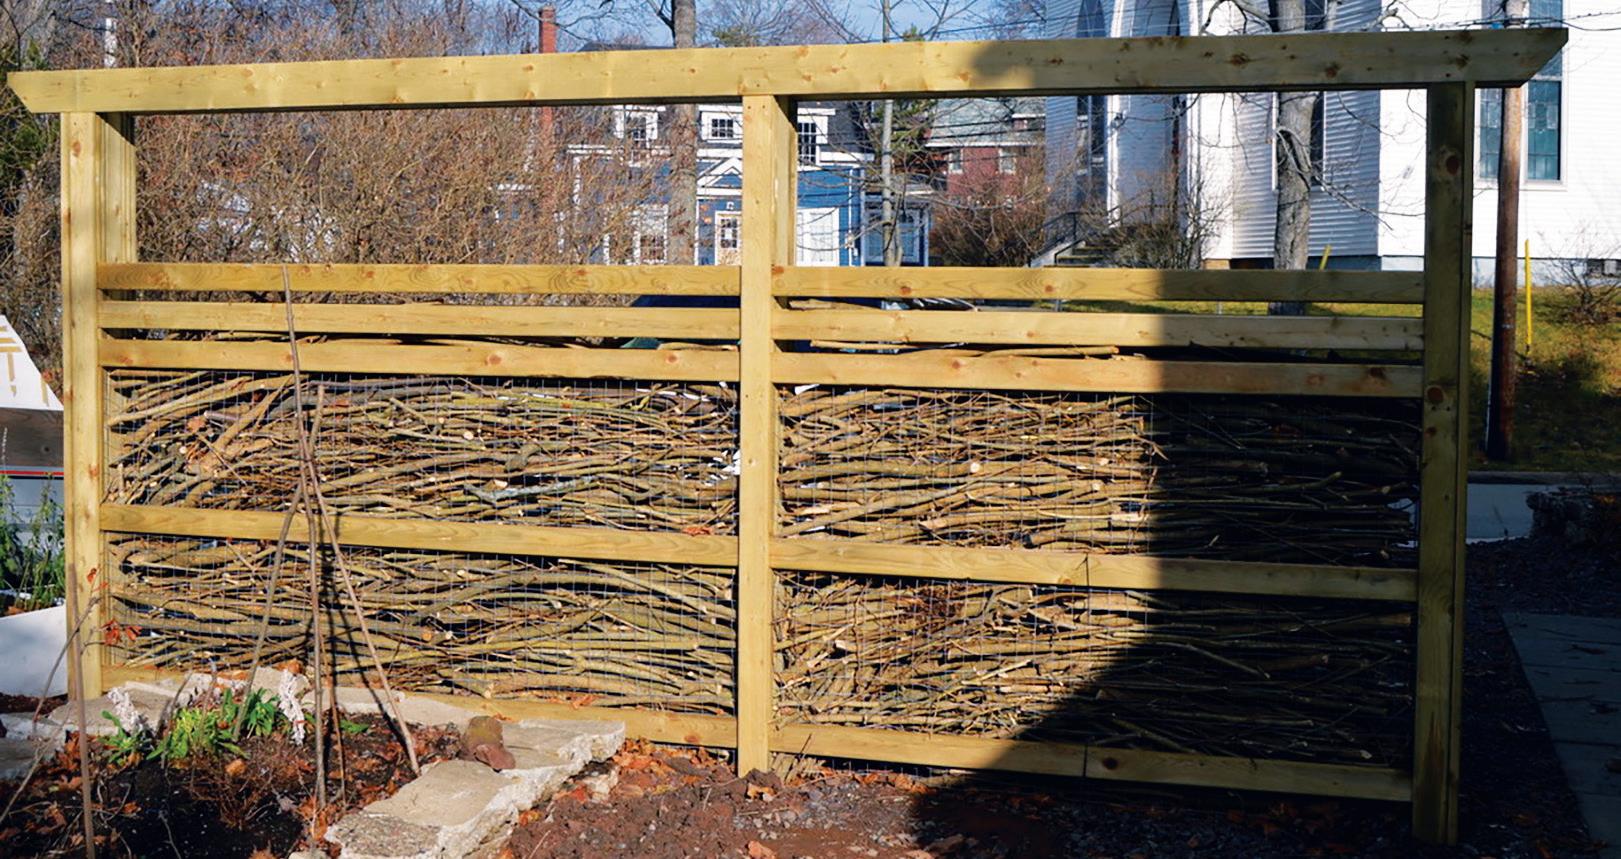
Composting walls break down yard waste while buffering noise and providing privacy.
was to cut all the old wood down to the ground. I did this, and it was effective, but this lilac-revival technique also created a dramatic pile of branches and small tree trunks, perfectly sized for filling a fence. Other items you can place in your composting fence include:
• Fall leaves
• Branches
• Tree trunks, sliced into circles, cut to the correct width to fit your fence
• Soil
• Grass clippings
• Pine cones
• Pine needles
• Rocks (for texture and color)
• Christmas tree branches
• Natural winter holiday decorations
• Old bouquets and houseplants
Additional Benefits
Along with serving as a receptacle for tree branches and fallen leaves, a composting fence offers additional benefits:
• Habitat for insects
• Extra planting space, once a spot in the fence has become humus or been filled with soil
• Shelter for birds
• Effective noise reduction
• Wind reduction
• Great privacy
• Excellent location for planting climbers that cling with aerial roots, such as climbing hydrangea
• Ideal spot for growing hardy perennials or edible plants, such as alpine strawberries, once planting space is available
I’m planning to plant alpine strawberries in my own composting wall. I already grow them in raised beds, but strawberries are an excellent plant for a vertical garden. Alpine strawberries could benefit from wall-type planting, as they’re delicate, and many creatures seem to find them delicious when they’re in moreavailable locations. They also tend to be hardy plants. I can’t imagine how anyone could ever have too many of these strawberries!
How to Build a Composting Fence
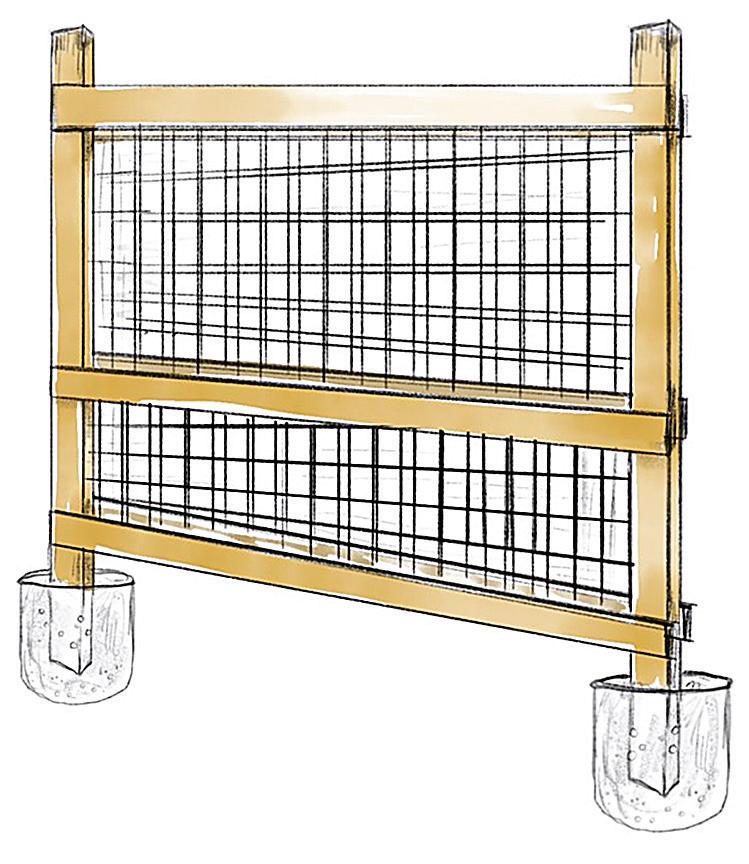
We built our composting fence using pressure-treated lumber for the fence posts and structure and welded-wire fencing for the mesh. We dug each fence posthole 3 feet down and set the posts in concrete. We attached two identical panels of wood and mesh to the fence poles, creating a narrow rectangular box open on the top and bottom.
After deciding on your location and measuring the distance between posts, dig 3-foot holes for each fence post. Ensure the posts are in a straight line and level. We used 10-foot posts, making the height of our fence 7 feet. We used Sonotube concrete tube forms and cement to set the posts. Because we built our fence in November (after cutting down our lilacs), we let the concrete dry for three days. In warmer weather, it will take a lot less time to set.
In our case, we used 4x4 pressuretreated posts. Initially, we planned to
attach metal mesh to the outside of the posts, but we realized we’d want a wider gap for the compost to enter. Therefore, we decided to attach 4-inch deck boards to the outside of the posts to give us the extra width for the compost’s easy insertion. We then stapled the mesh to the outside of the deck boards. The wider gap gave us the desired space to fill the fence with branches.
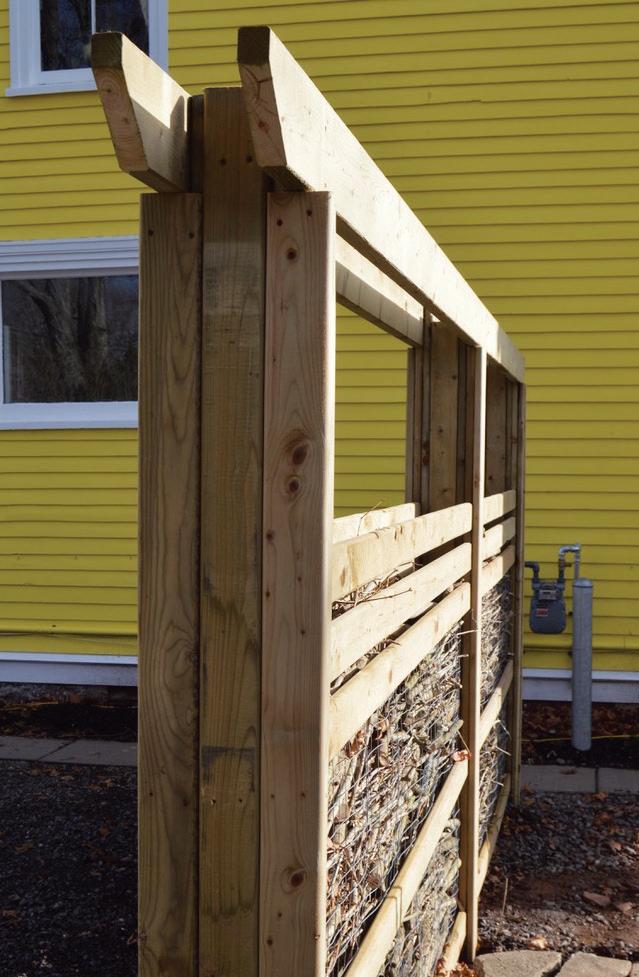
With the mesh attached to the outside of the boards, we used 16-foot 4-inch deck boards to run the length of the fence. These reinforced the mesh so the fence wouldn’t lose its shape after we added compost. We put one cross board at the top of the mesh, one in the middle, and one near the bottom. A gap is necessary at the bottom of the fence so the compost can exit over time. We added a couple of boards evenly spaced above the mesh to give us a little extra height for privacy and provide more area for climbing plants. We added a decorative brace mount at the top of the fence posts and ensured there would be ample space below the brace where we could comfortably add compost.
We covered the remaining exposed mesh on the posts with pieces of 4-inch deck boards. This left the posts completely covered, securing the mesh firmly to the posts and providing better support than the staples alone. We then added another 4-inch deck board on top to encase all of our work and give it a finished look.
With the exterior sides of the posts finished, we covered the two ends of the fence with three 4-inch deck boards. We had to cut all deck boards to fit our design. Our creation is a privacy wall; however, we plan to build composting fences around our property, and for those, we’ll be creating a simpler design.
Whatever design you use, the goal is to create a fence with space to add your compost, and to bring a bit of privacy and life to your surroundings. Your fence can be as decorative or as simple as you’d like. Best wishes for your composting fence adventures!
Your composting fence can serve as the destination for tree prunings, grass clippings, and more.
Energy-Efficient House Build an
by applying these sustainable design principles.
Sustainable Design Principles 1 Build with the Sun in Mind
To me, the art of permaculture is putting resources where they can do the most good with the least amount of effort. By building with conscious design principles, we can create homes that are aligned with natural forces and that will keep their inhabitants cozy year-round with very little energy.
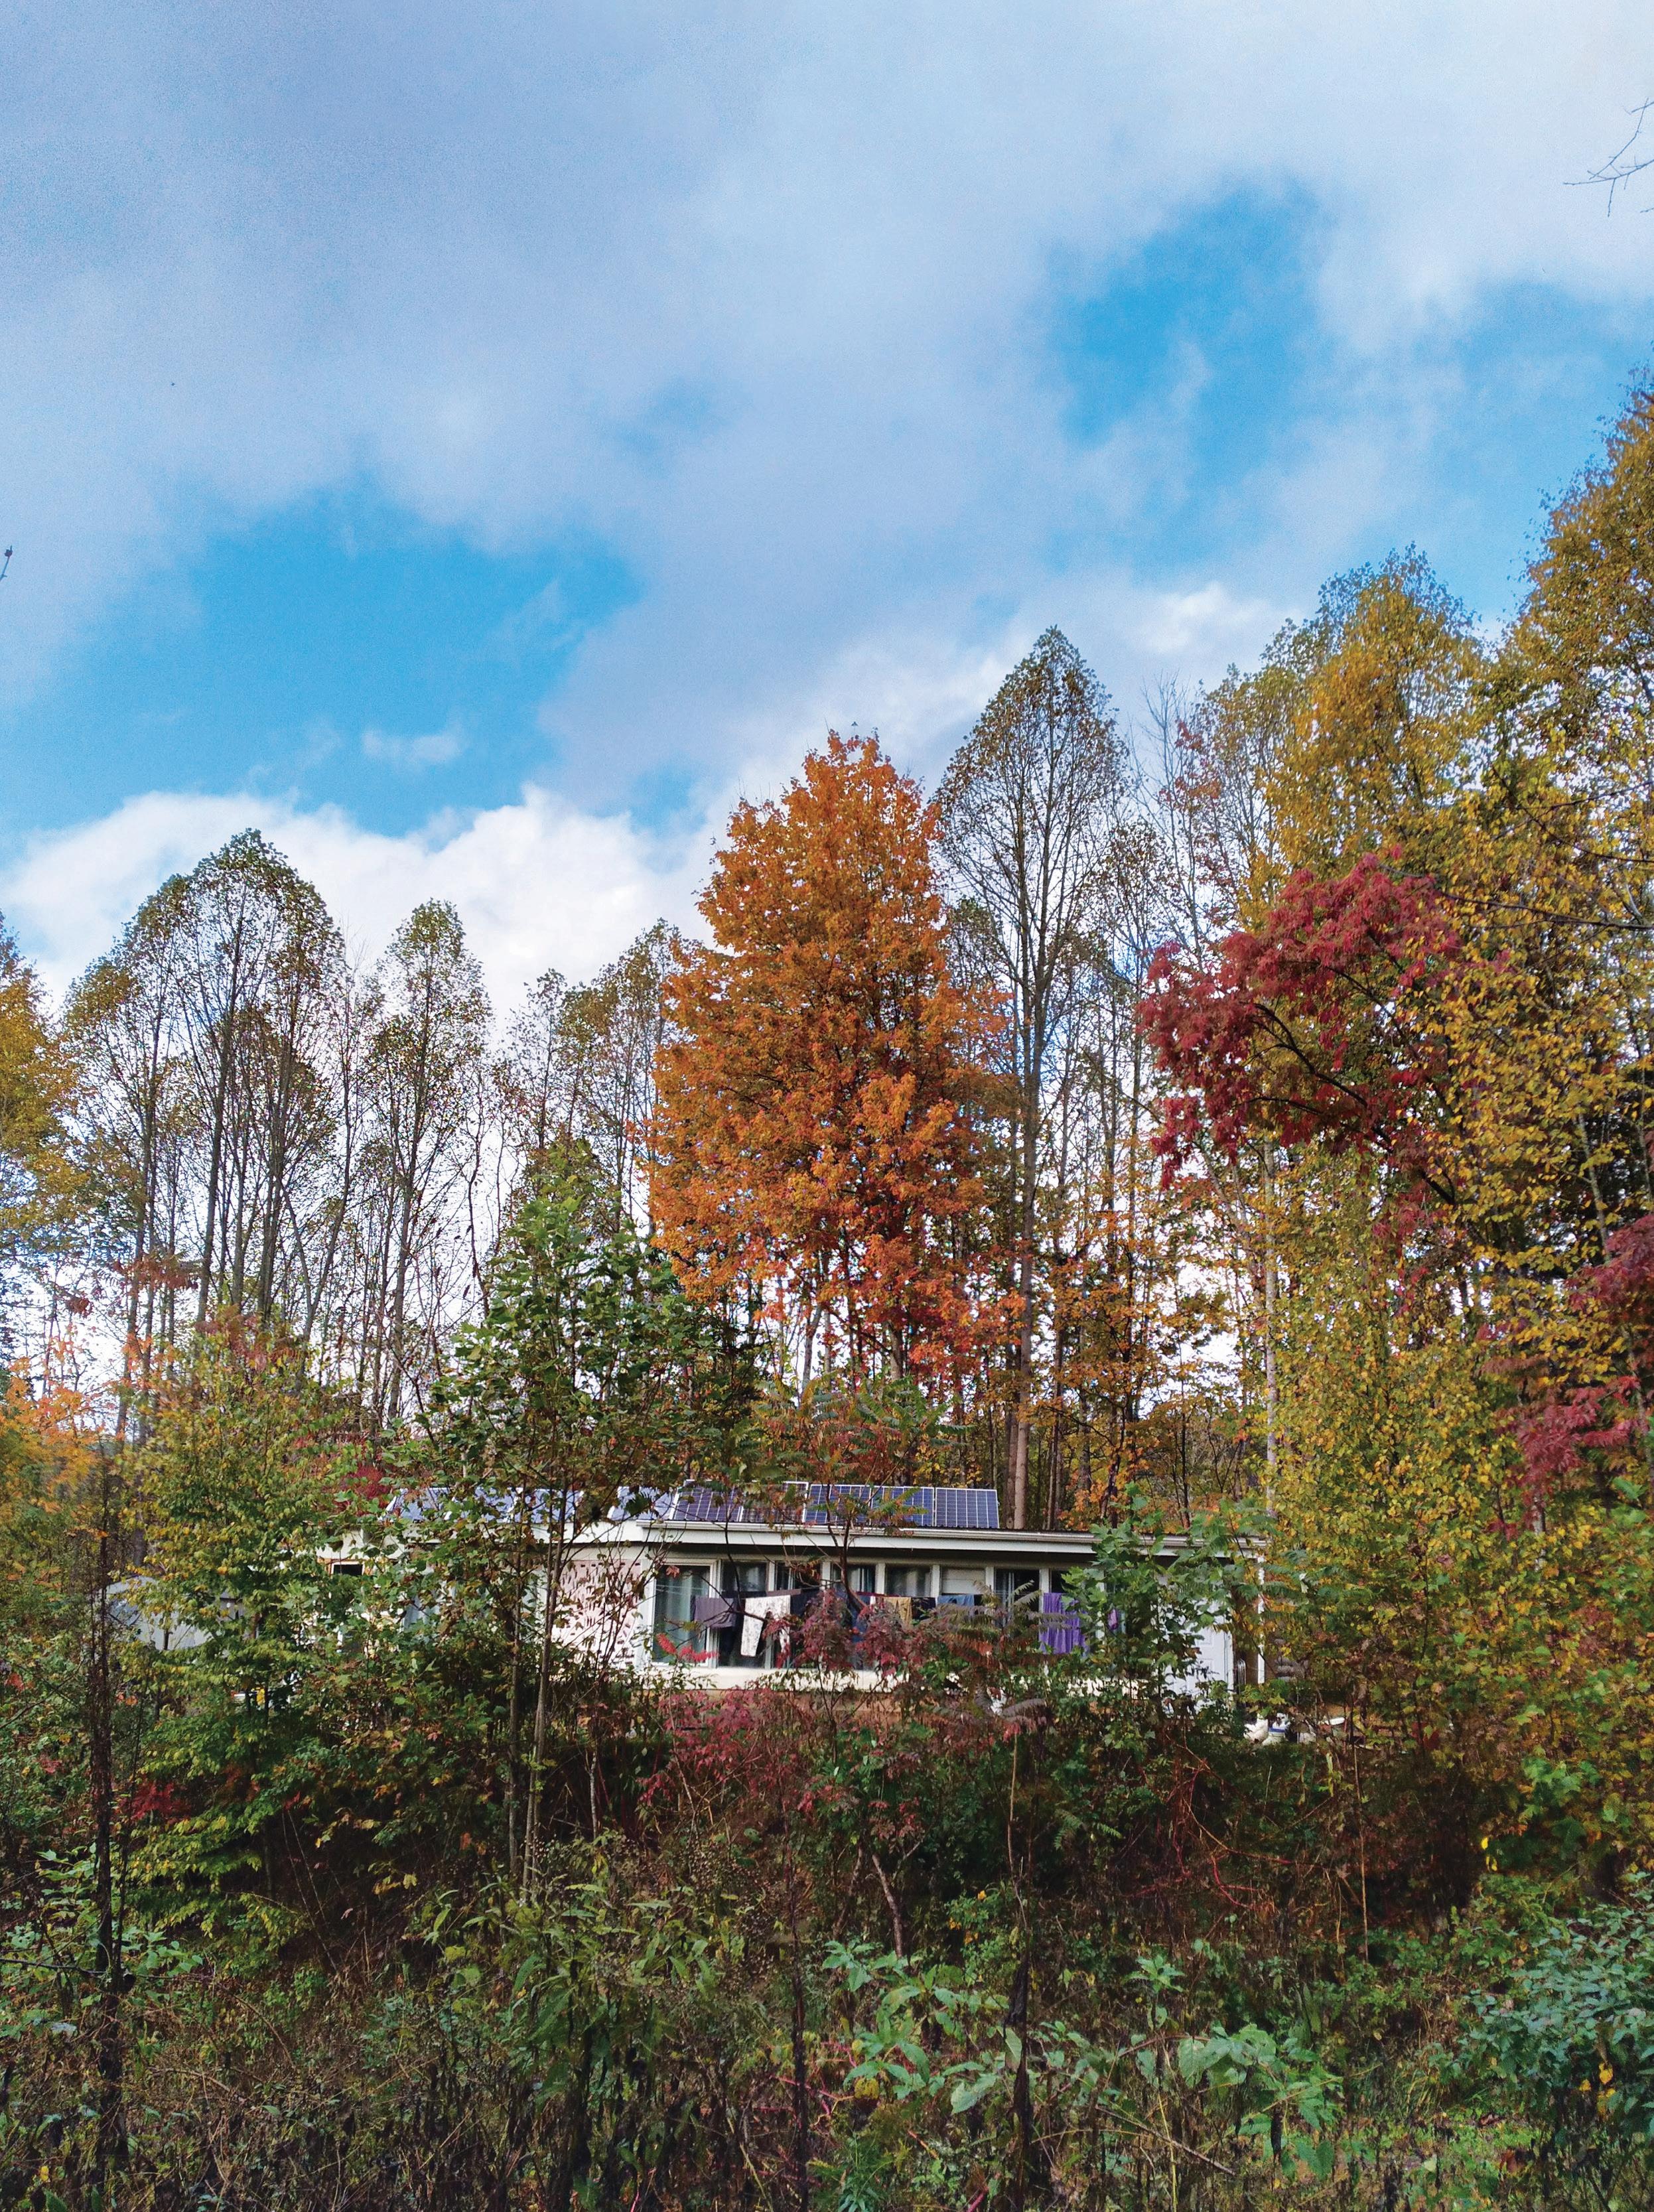
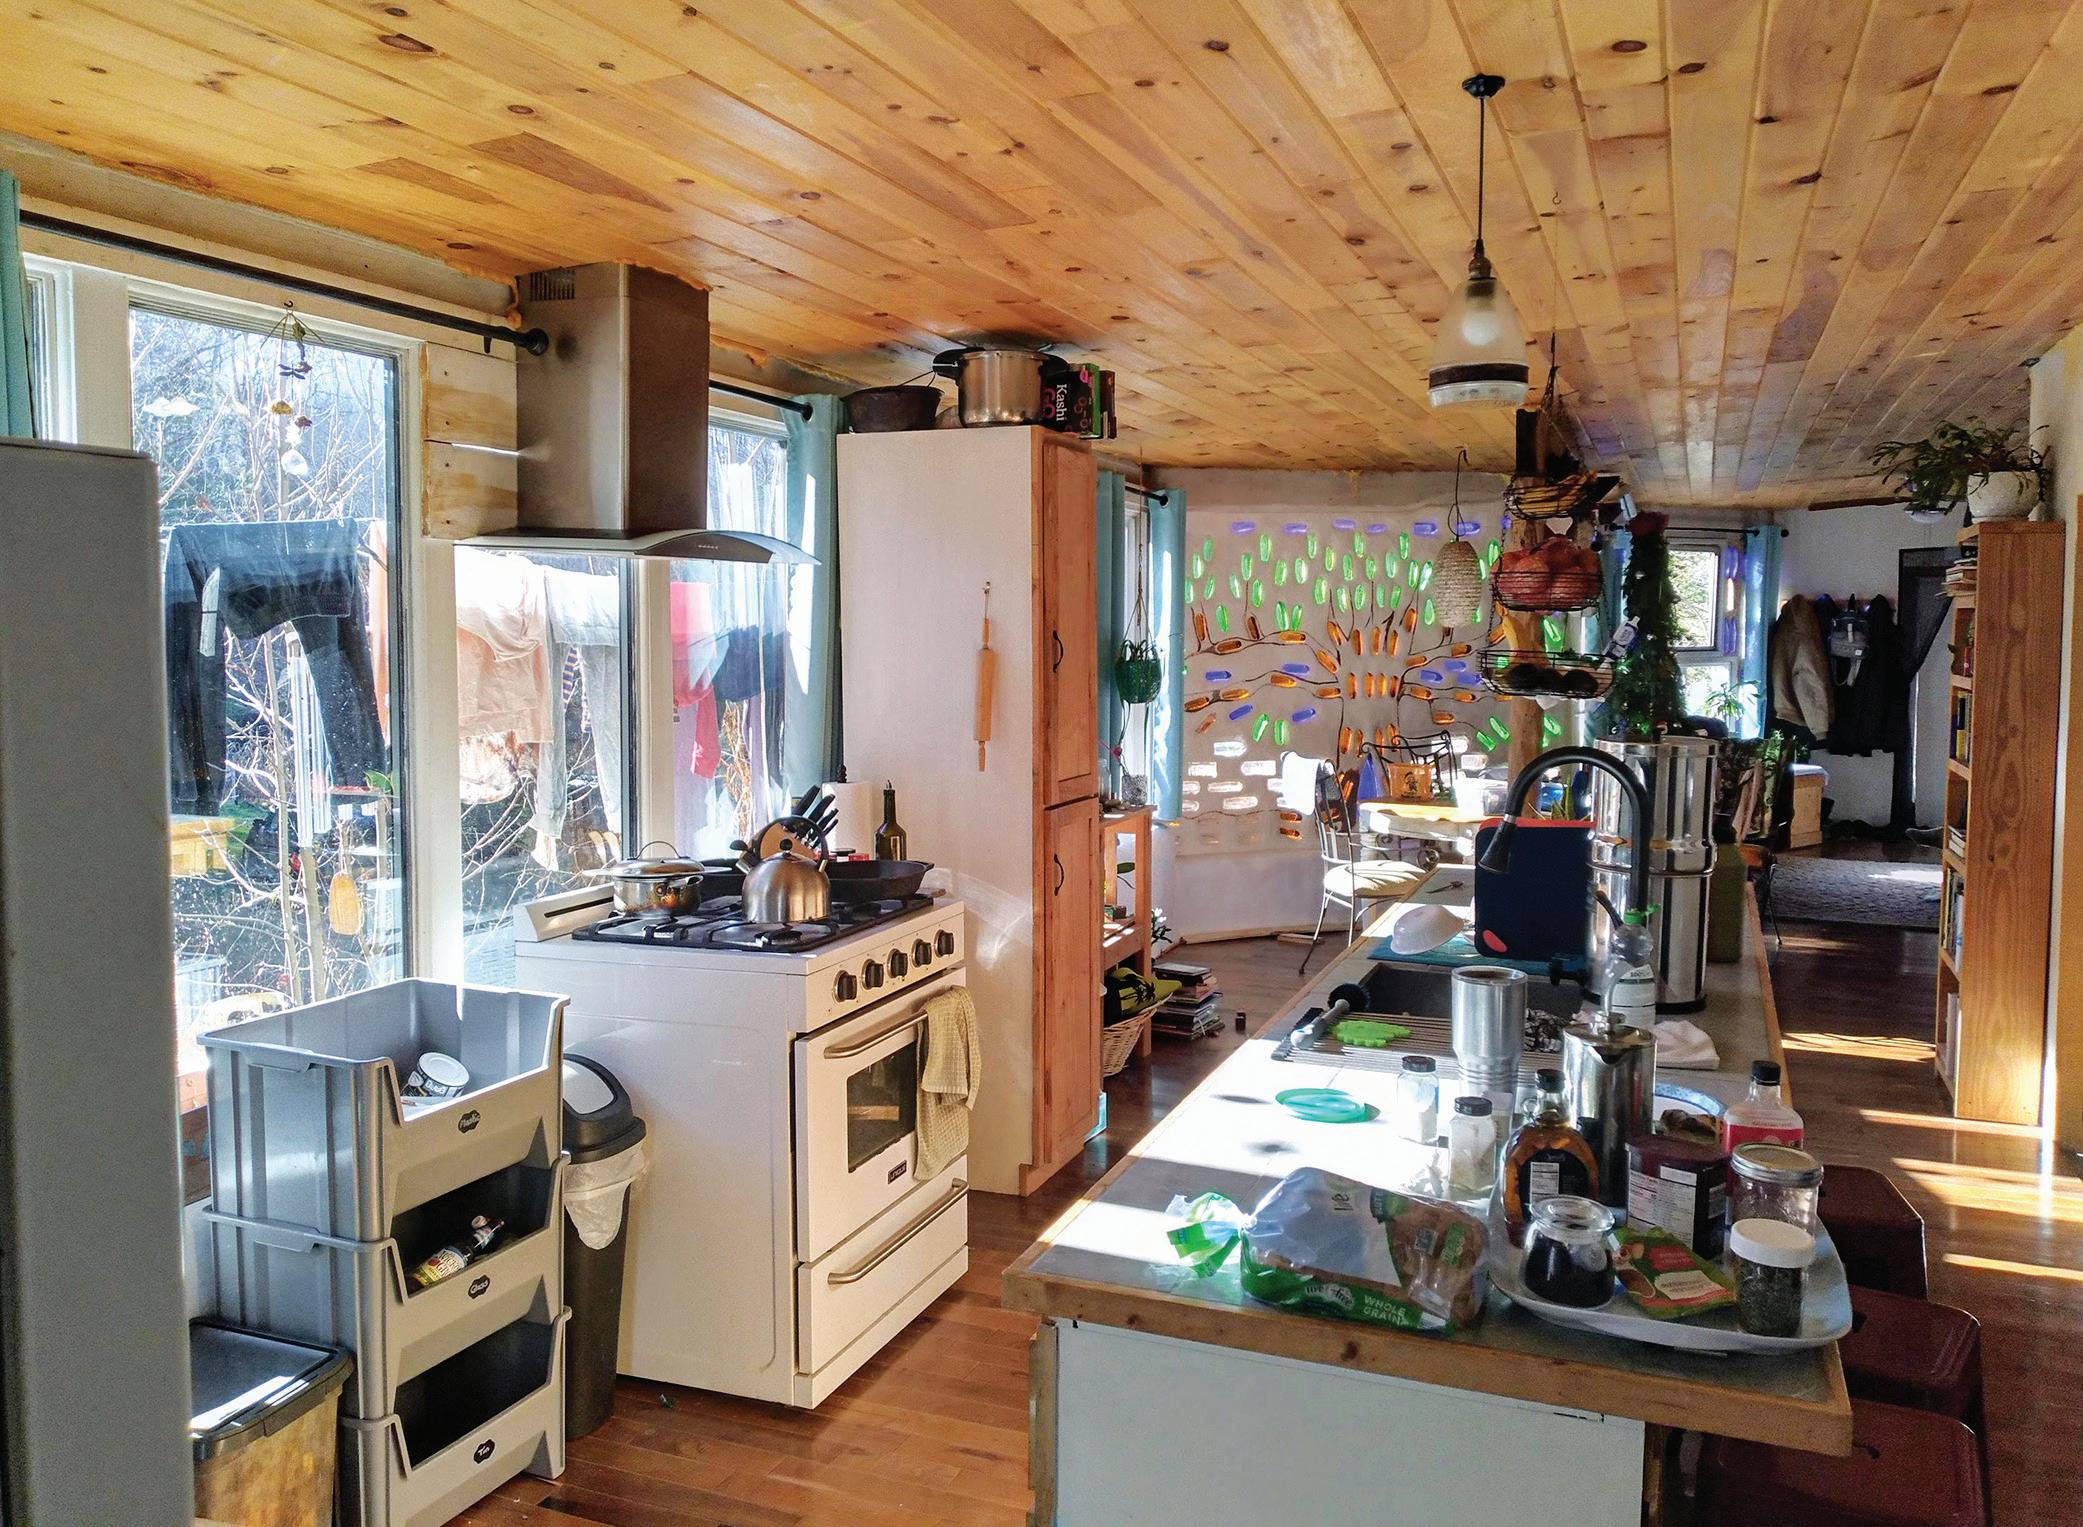
My wife, Mary Jane, and I built an Earthship-inspired earthbag house beginning in 2016. It gives us free heat on sunny winter days and keeps us relatively cool and dry in summertime, all without grid power and central air or heat. This summer, we installed a window AC unit, and we run it on drying mode to keep our humidity low and the mold out. What we’ve found is that, because of all the thermal mass in our home, it needs much less power to stay cool. The window unit, which was made for an area of 450 square feet or less, keeps our 1,000-square-foot house as cool as a cucumber, even on the hottest days.
That’s what prompts me to share these conscious design principles and their benefits with others. It’s unlikely the solution to humanity’s problems will come from “out there”; instead, it’s up to us to make the needed changes. The ball is in the court of those of us who value nature and a livable planet. That’s what drove me to start radically changing my life in 2007, and it’s what motivates me to this day. Humanity is capable of great intelligence and change; we just have to become aware of the necessity of eco-friendly design. If architects can incorporate these ideas into their buildings, homeowners and businesses will benefit from passive solar and thermal mass even if they have no idea what they are.
Nothing affects as many aspects of our lives as the sun. It’s responsible for warmth, rain, wind, and almost all of our planetary natural forces. Without the heat of the sun, the Earth would be a frozen, dead world. It’s astonishing we have a cosmic fireball floating in the sky that offers us extra warmth during the times of year we need it most!
The basics of passive solar design are easy: In the Northern Hemisphere, it’s ideal to have windows facing due south, and in the southern hemisphere, they should face due north. This helps keep the sun out when it’s more overhead in summer and allows the sun in when it’s closer to the horizon in winter. This setup gives homes free heat on sunny winter days. I’ve had folks come into our house
during those sunny days in winter; they were shocked to learn we didn’t have a fire going!
You can enhance this passive warmth by having a dark earthen, tile, or concrete floor and then allowing its thermal mass to absorb and store the sunlight. This can also make for toasty toes a welcome feature during chilly months!
Earthships have angled glass in front. In my climate, I find straight vertical glass with an eave above it to be a better choice: It blocks the sun in summer when you don’t want it and allows the winter sun to warm the house.
2 Thermal Mass Can Help Regulate Temperatures
Thermal mass is the ability to store different temperatures, a quality that many dense building materials have. These mate-
Story and photos by Morgan Caraway
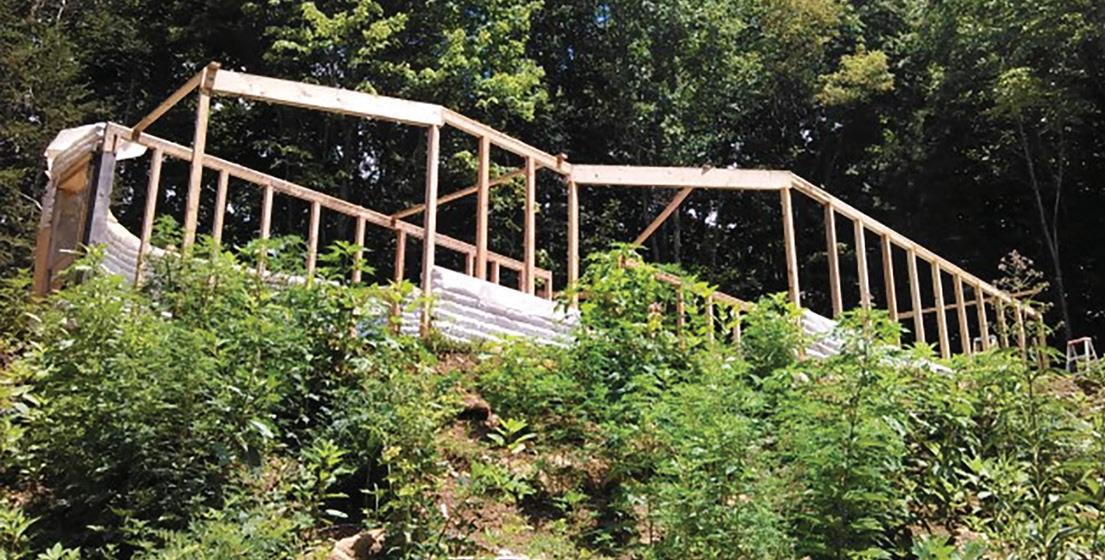
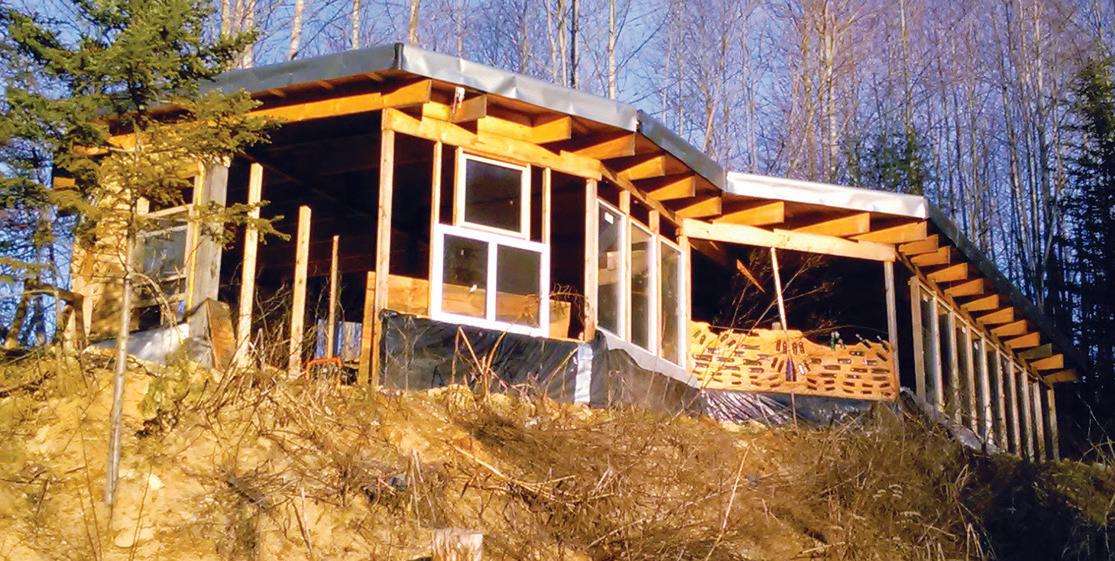
The earthbag house in different phases of construction. Partially burying a house improves its ability to absorb and store heat.
Sustainable design principles can help make your home more energy-efficient and Earth-friendly.
Elderberries A Wondrous and Wild Fruit
Elderberries are a healthy, flavorful addition to both your pantry and medicine cabinet.
By Jenny Underwood
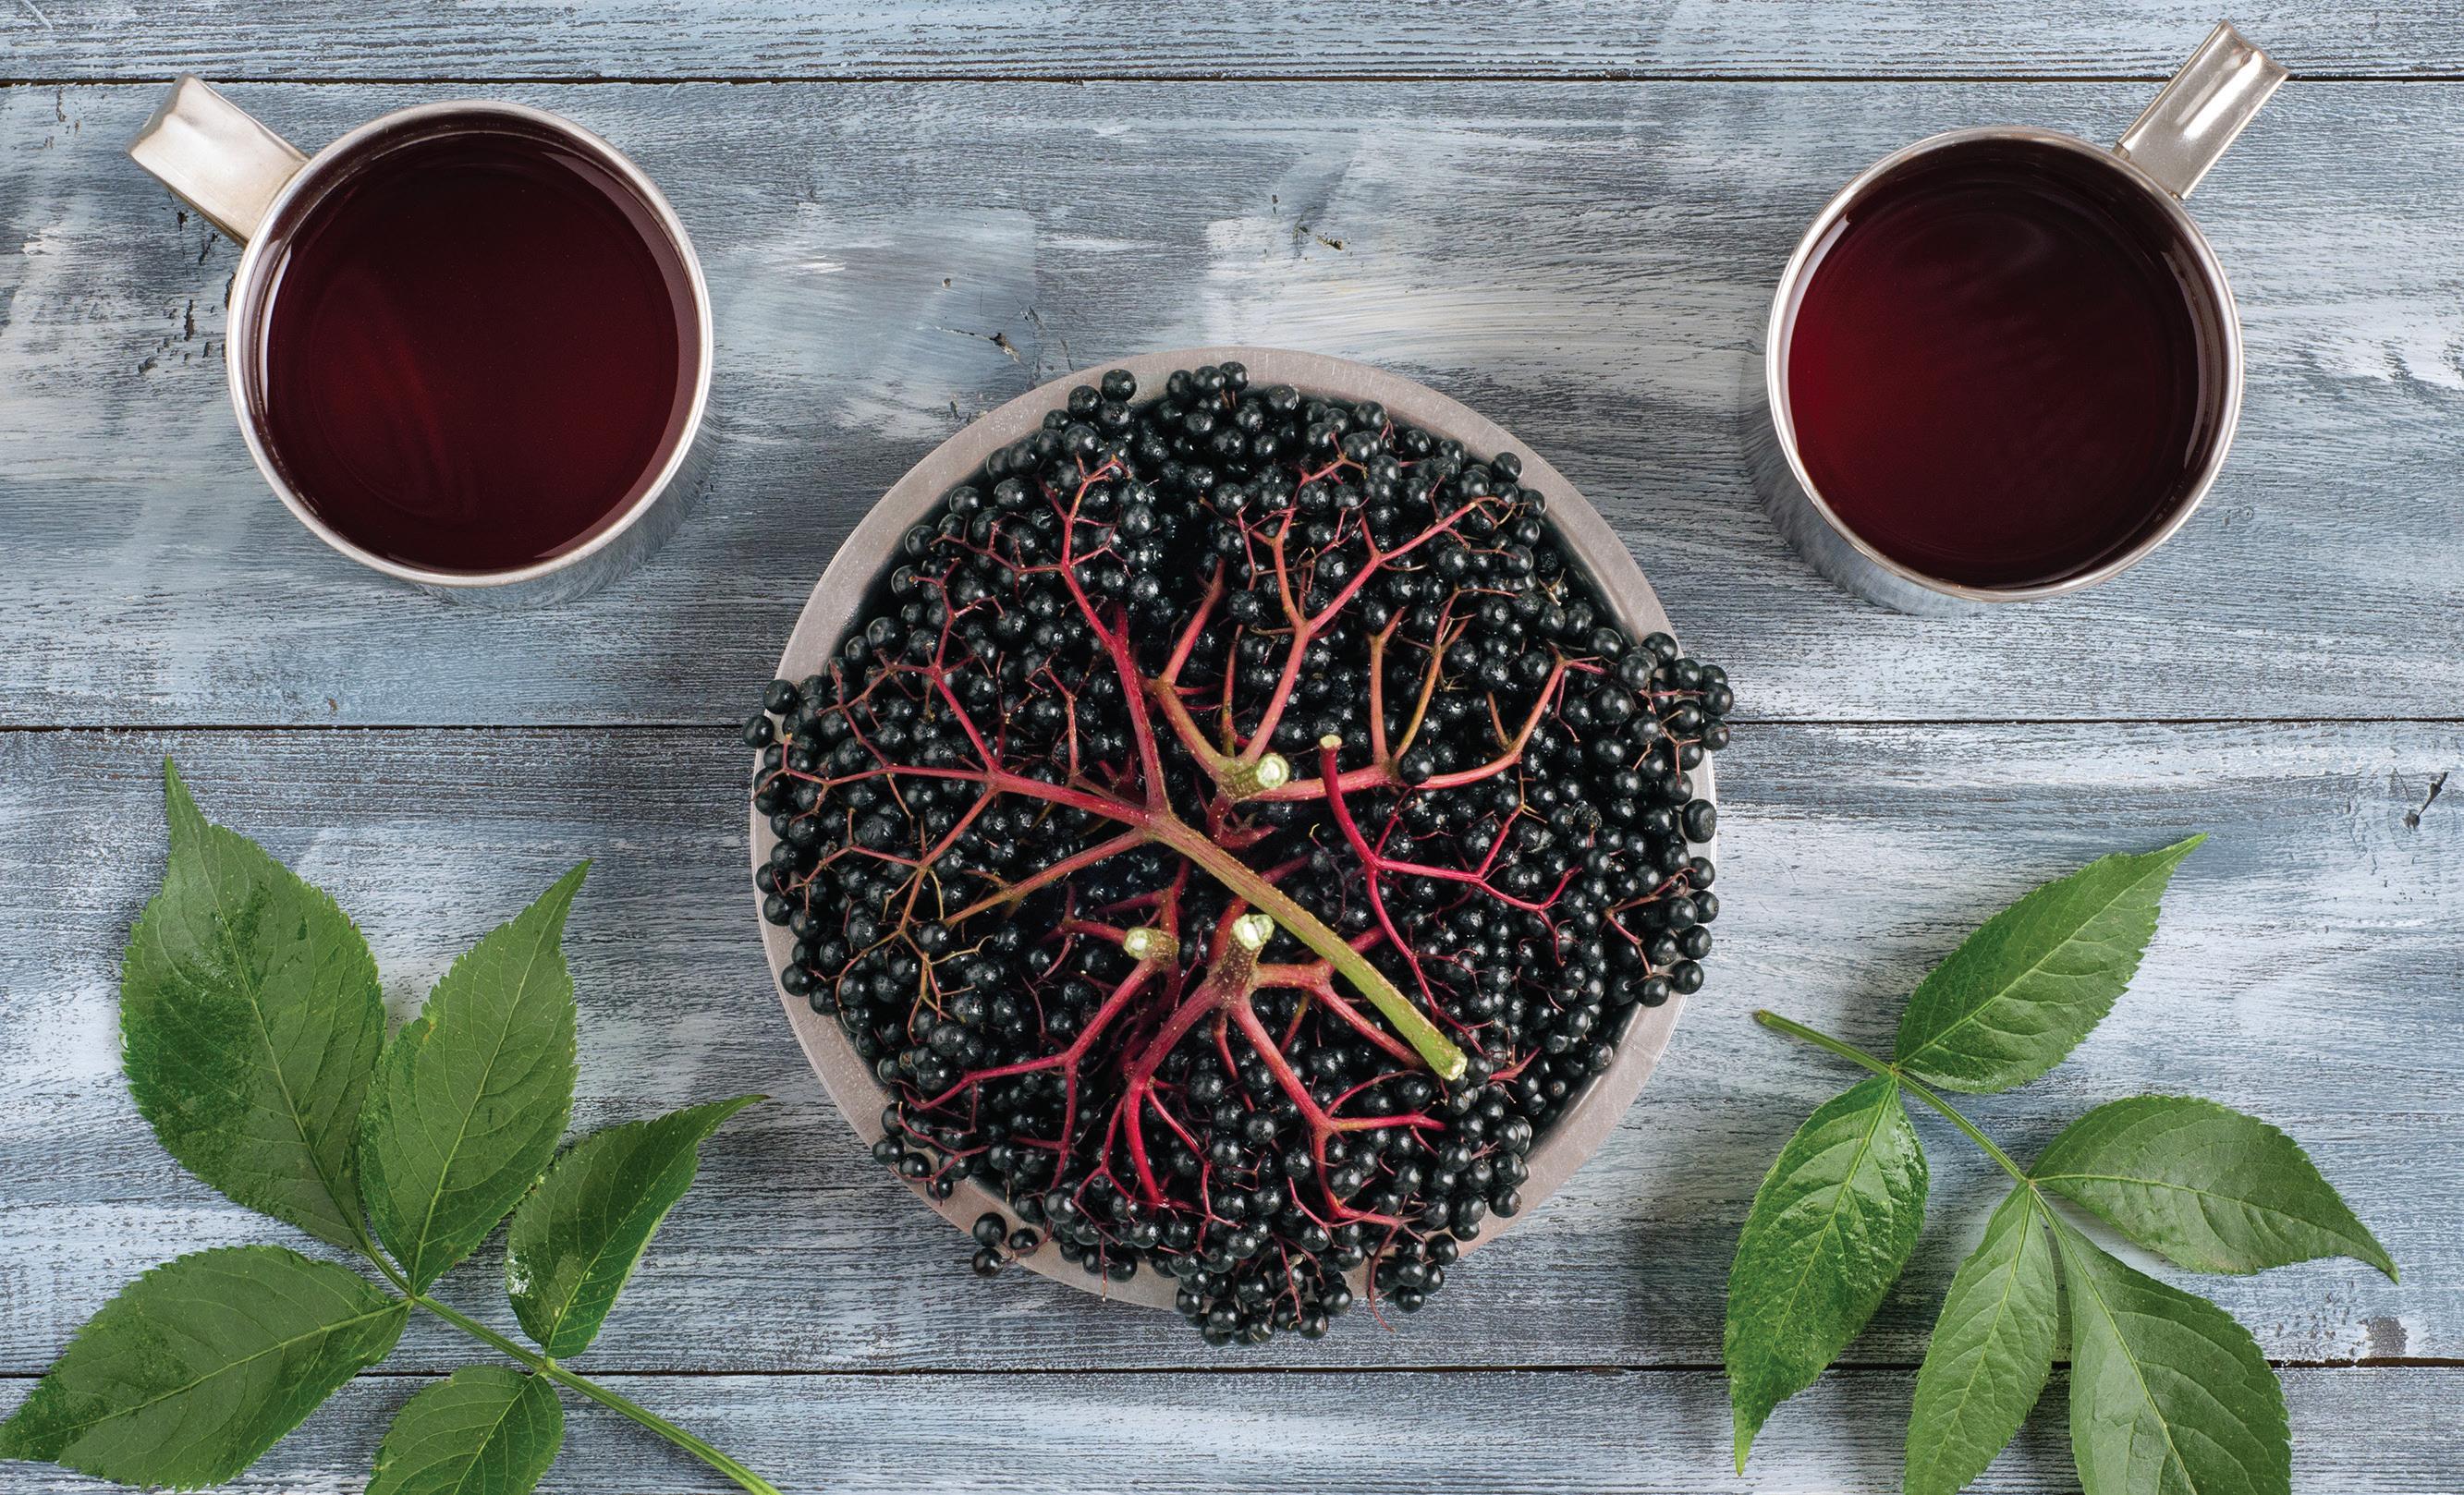
Elderberry. Some praise it; others caution against using it. But elderberry is full of antioxidants, minerals, and vitamins, and is a tasty addition to your apothecary and pantry.
Elderberry has been used by Native Americans for thousands of years. The
berries are unsafe to consume raw but edible once cooked. You can freeze or dry elderberries or turn them into jelly, juice, or syrup.
Gather Those Berries!
You can gather elderberries from the wild or grow your own. In our area, they’re so prolific that we gather gallons
of berries in late summer by clipping off wild clusters.
The easiest way to harvest the berries is freezing clipped clusters in large plastic bags. Then, gently hit the clusters over a large bowl or bucket, knocking off the berries. Alternately, you can gently comb them off with your fingers, but be prepared for purple stains!
Clean as much debris as possible from your berries, removing any stems, leaves, or green berries. Your berries can now be processed, dried, or frozen. To freeze, simply place cleaned berries into freezer bags or containers. Label and freeze for up to a year.
To dry, place on parchment paper and in a dehydrator or oven at 135 degrees Fahrenheit until thoroughly dried. Pinch to make certain they’re hard and no moisture remains. Store in
have been used throughout history to fight illness.
Elderberries
bags or glass jars. Check intermittently for any moisture. If you find moisture, discard the berries due to bacterial risk.
Juice It Up
You can use a few methods to prepare elderberries for jelly, syrup, or juice. The easiest method is with a steam juicer or electric pressure cooker.
To use an electric pressure cooker, place 1 quart berries in 1 cup water and pressure cook for 10 minutes. Allow to decompress naturally. Then, purée. Strain the purée through cheesecloth or a mesh bag, and strain a second time if you still see tiny seeds.
You can also gently boil the berries (1 quart berries to 1 cup water) on the stovetop. Simmer until soft. Top with the lid and allow to sit for 1 hour. Purée and strain as needed.
To use a steam juicer, place your berries in the chamber, put water in the bottom, and process for 30 minutes. Then, can the juice using the water bath method. Yield: 4 pints.
• 8 cups juice
• Sugar or honey (optional)
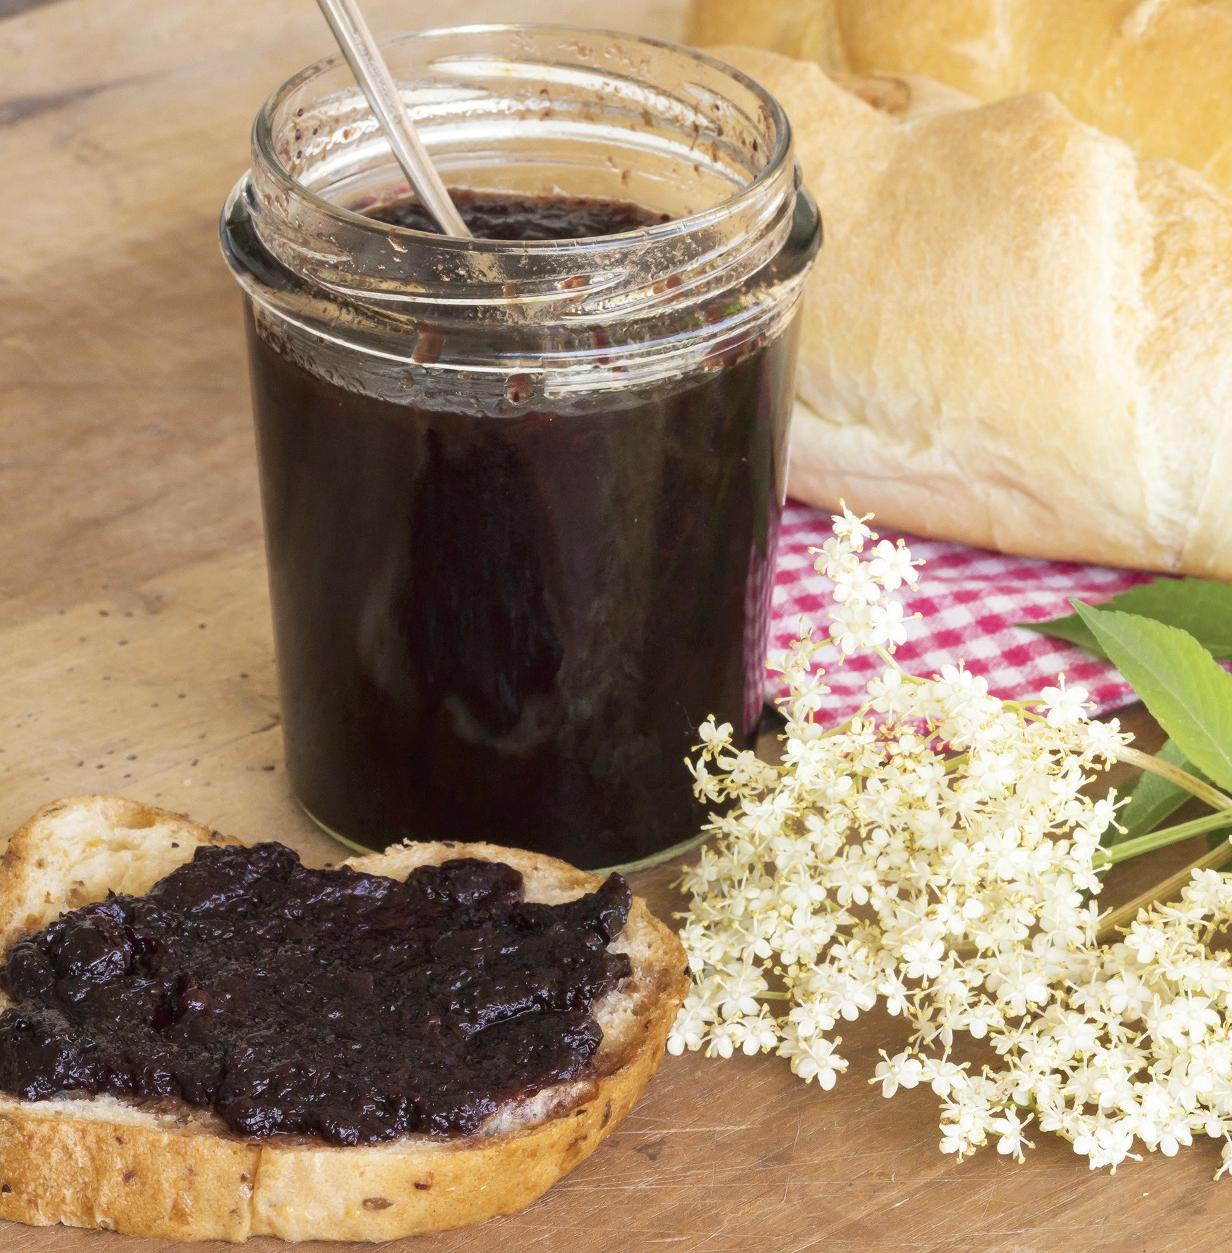
Hello, Jelly!
Elderberry jelly is delightfully sweet-tart and allows you to eat your medicine. Yield: 81⁄2 cups or 4 pints.
1 Measure your sugar in a bowl, removing 1⁄4 cup to mix in another bowl with the powdered pectin.
• 4 tablespoons lemon juice or 1 teaspoon citric acid
1 Elderberry juice is very tart! Bring your juice to a boil, adding sugar or honey to taste, if desired.
2 Prepare jars by washing well, and simmering the lids and rings.
3 Prepare the water bath canner by placing a rack in the bottom and pour-
Ingredients
• 31⁄2 cups sugar
• 1 package pectin
• 51⁄2 cups elderberry juice
• 2 tablespoons lemon juice
• 1 teaspoon cinnamon (optional)
2 Combine juices in a pot, and add sugar-pectin mixture.
3 Bring to a boil and add remaining sugar, and cinnamon, if desired.
4 Return to a boil and boil hard for 1 minute.
5 Remove from heat. Allow to set for a few minutes. A solid skim will form on top, and you can easily remove this with a spoon. This is delicious in muffins or on a biscuit!
6 Pour into hot, clean jars to 1⁄4 inch headspace and process in a boiling water bath canner for 12 minutes (or 5 minutes if jars are sterilized).
7 Remove and allow to set for 5 minutes. Remove jars and allow to cool on a towel in a warm, draft-free area for 16 to 24 hours.
8 Check seals, clean and label jars, and remove rings.
ing in several quarts of hot water. Put 2 tablespoons white vinegar in the canner to keep your jars clean.
4 Put 1 tablespoon lemon juice or ¼ teaspoon citric acid in each jar.
5 Fill each jar with hot juice to ¼ inch headspace.
6 Clean rims with vinegar-moistened cloth, place hot lids and rings, and finger-tighten.
Drink your medicine by making elderberry juice, a nutritious addition to any meal.
Bug ApocalypseOutrunning a
Many scientists call it the “sixth extinction.” Can technology provide a way out?
By Robert
Turner
Iremember as a child riding in the truck with my father and counting the bugs that hit the windshield. Bright greens, reds, and yellows splattered like a Jackson Pollock painting. Very few insects hit my windshield today when I drive that same stretch of road. Where have all the bugs gone?
I realize my observation is not scientific proof of a bug apocalypse. I could’ve
Robo-bugs like this may seem sci-fi, but farm robots are being tested.
conducted a more methodical experiment over the years, recording the species of bugs hitting my windshield after a specific number of miles on the same stretch of road, traveling a designated speed, and so on. My scientist friends might be impressed by my rigorous “bug windshield” experiment, but I’m not certain any journal would publish the findings.
Still, the drop in insect numbers is apparent. A 2014 study of 452 species of
insects found that 45% fewer of them flit across North America than did in the 1960s. Another study showed 81 species of butterflies declining by one-third over the past two decades. Related research suggests 30% fewer birds fly over our heads than did 50 years ago, and given that birds eat bugs, I believe these trends are related. The root causes appear to be many, including changing weather, habitat destruction, and pesticides. None of it bodes well for humans.
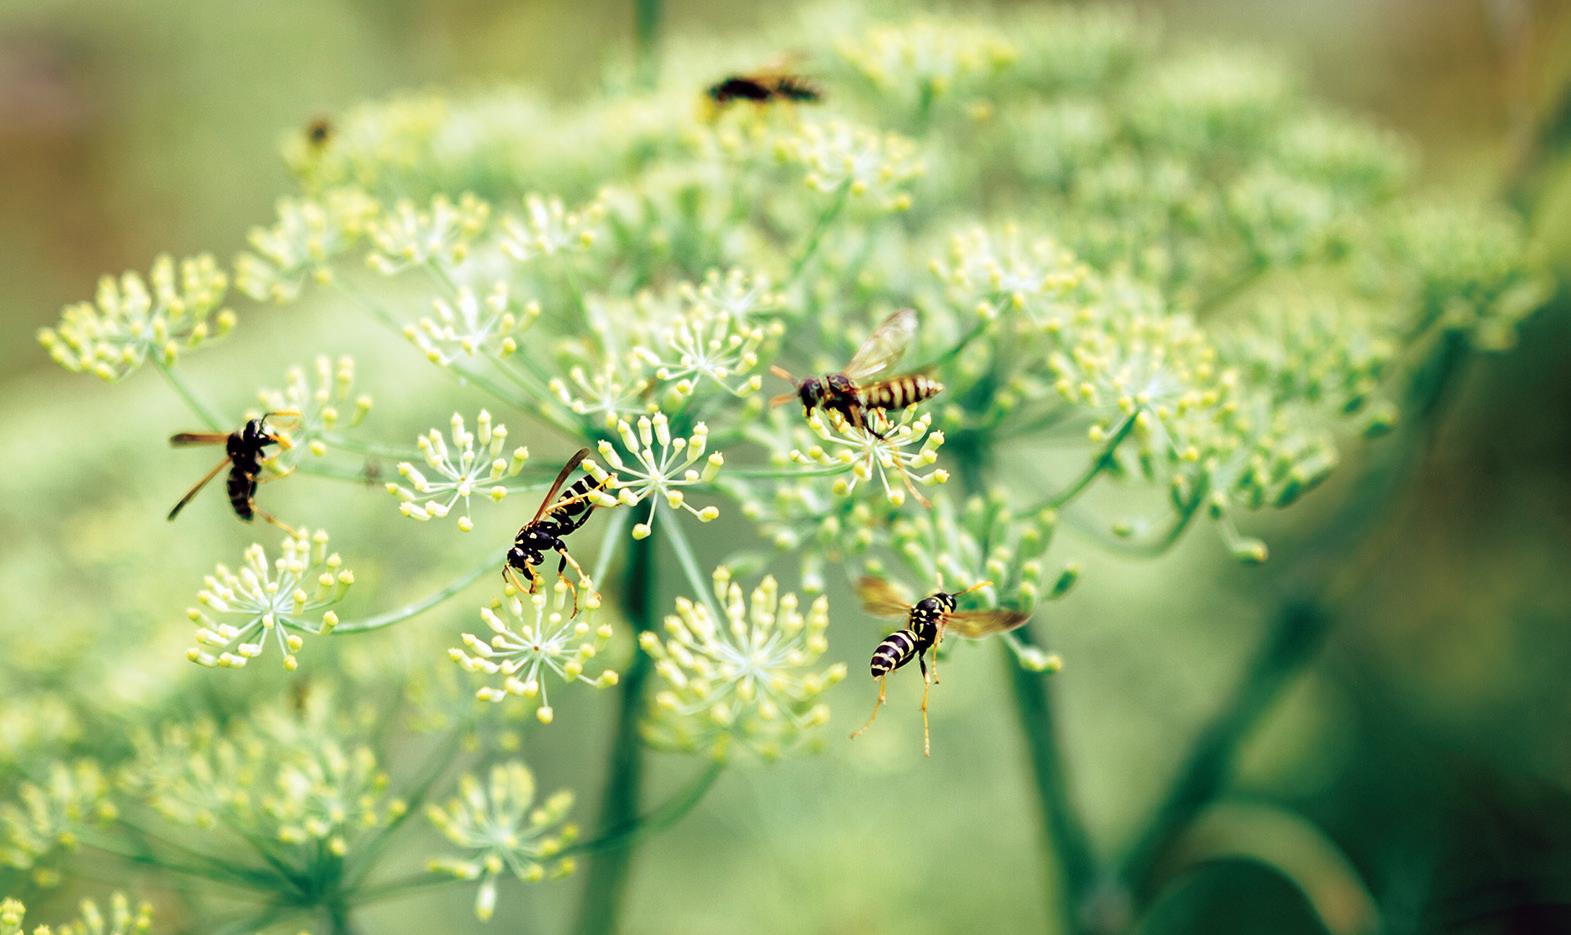
Problems for Pollinators
Renowned entomologist E.O. Wilson said that without insects, “the rest of life and humanity with it would mostly disappear from the land, and within a few months.” At least one-third of our fruit and vegetable crops depend on bees, syrphid flies, moths, and other pollinators, and yet, we’ve let industrial agriculture in the United States become nearly 50 times more toxic to pollinators over the past 25 years.
Much of America’s farmland toxification during this time frame can be attributed to a newer class of pesticides known as “neonicotinoids.” Starting in the 1990s, pharmaceutical company Bayer pressed farmers to use the chemical imidacloprid to treat corn kernels and other seeds to ward off early season thrips. By 2011, industry doused over 80% of U.S. corn with it, and today, neonicotinoids are among the most widely used insecticides in the world. Mounting evidence shows their proliferation closely corresponds to a sharp decline in pollinators. More lethal than DDT, neonicotinoids can remain toxic for two and a half years in the environment. They’re considered systemic insecticides, which means plants absorb them and incorporate the toxin into their tissues stems, leaves, and all (in other words, the parts we eat). Because neonicotinoids readily dissolve in water, and plants can only absorb about 5% of what’s sprayed on cropland, the rest contaminates soils and washes into streams, ponds, lakes, and wetlands.
The European Union banned neonicotinoids for field use in 2018. Canada restricted use of most neonicotinoids a year later. In the U.S., they continue to be widely used.
Glyphosate Fears
Big Ag showers the globe with another chemical perhaps even more harmful to humans than it is to insects. Glyphosate, the active ingredient in Roundup, is the most-used herbicide in the world. The World Health Organization has identified it as “probably carcinogenic” to humans, and the Centers for Disease Control and Prevention (CDC) found glyphosate in the urine of 4 out of 5 chil-
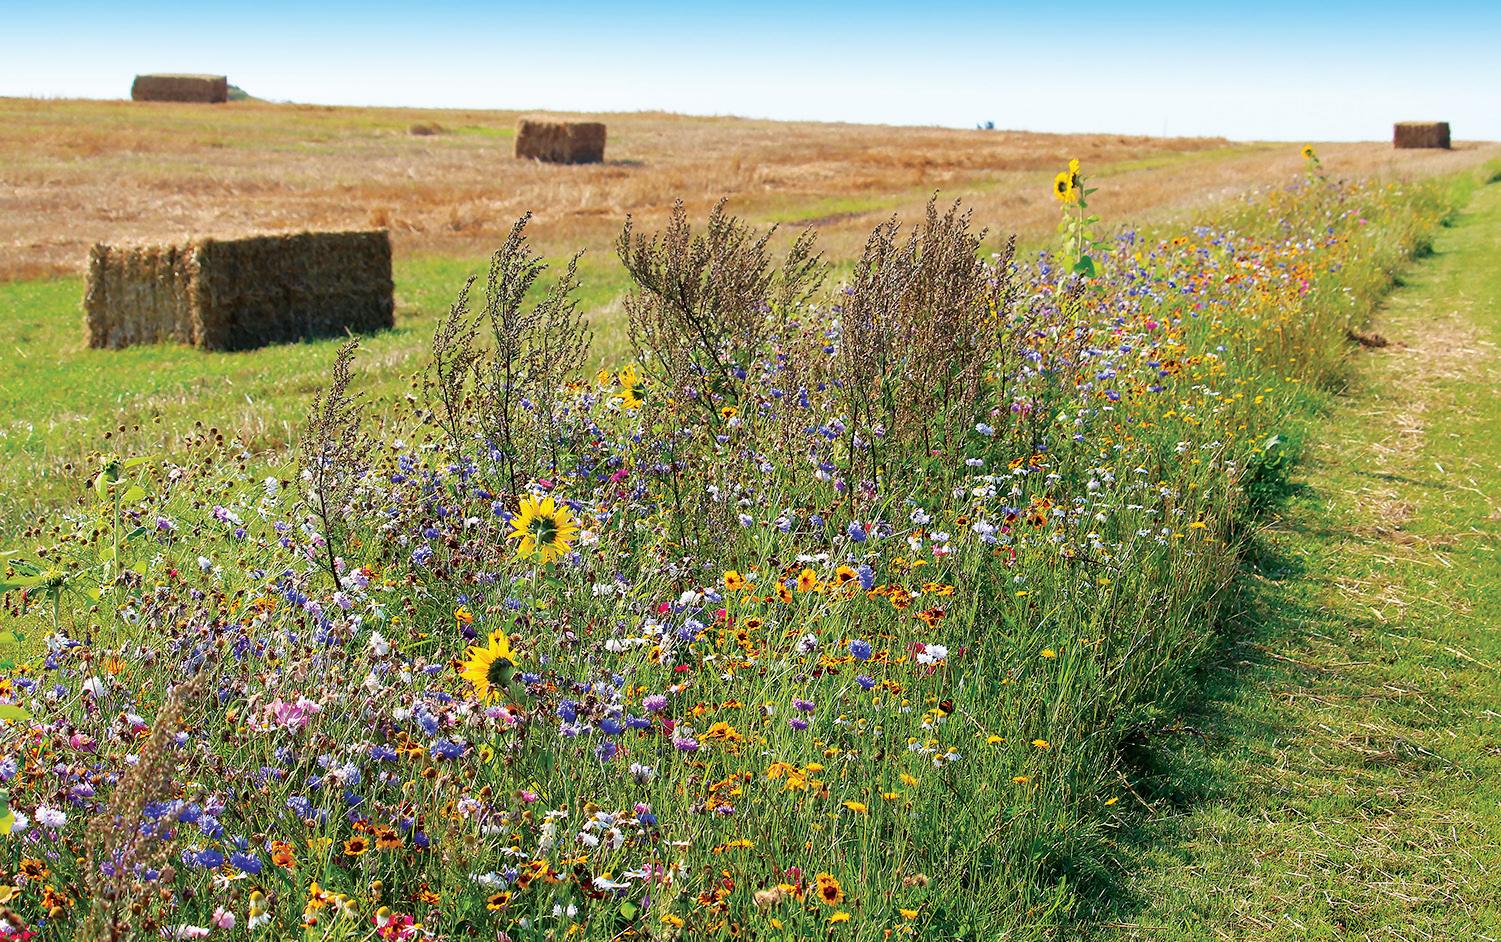
Wildflower strips planted alongside farm fields can reduce pests while improving yields.
Neonicotinoids inflitrate all parts of a sprayed plant, threatening a wide range of insects.
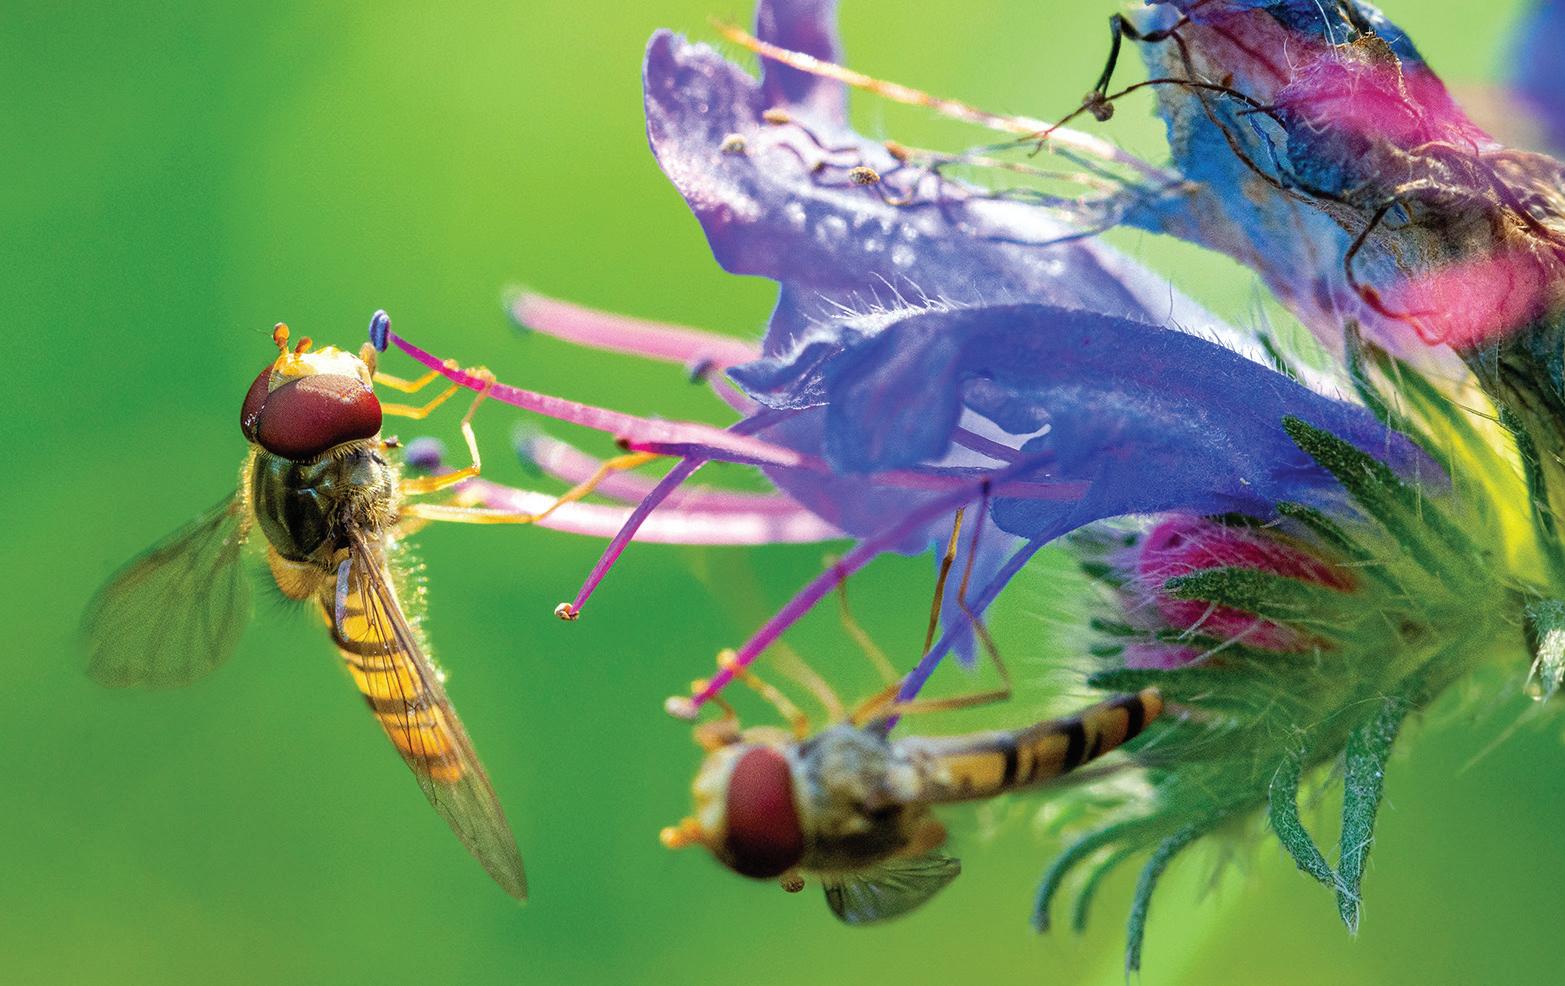
Undersung syrphid flies visit 70% of food crops, offering more pollination services than bees.