Your must-have guide to tools that make fall cleanup easier
Explaining siding replacement
What to expect during a successful siding project
Finding the edge
A local landscaper’s key to continued success in a competitive market
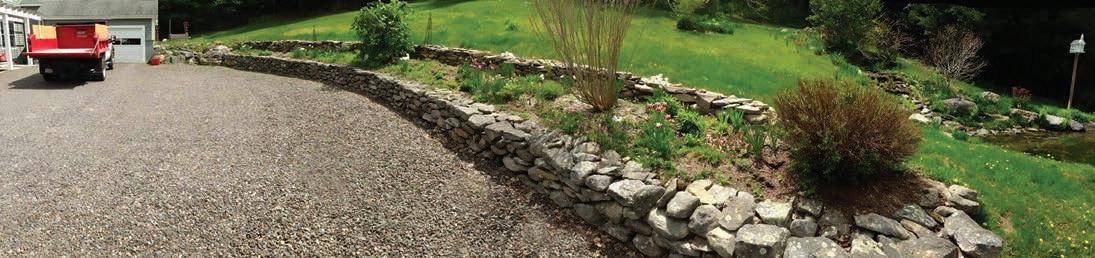
Finding the edge
How Reliable Yardworks stays ahead
On paper, many Reliable Yardworks projects follow the same broad steps: survey the site, plan the design, bring in materials, install with precision. But in practice, no two jobs are alike. Each project is tailored to the property and the people who live there, down to the smallest details — every edge, every curve, every plant.
That attention to detail isn’t just good business for owner Tom Quirk, it’s the foundation for something bigger. At Reliable Yardworks, Quirk and his crew are always looking for ways to go beyond, chasing what they call “the edge.”
The edge isn’t a gimmick or a sales pitch. It’s a deliberate way of working in a crowded industry where seemingly anyone with a decent truck owns a landscaping company. In that kind of market, standing out requires speed,
innovation, knowledge and follow-through.
Quirk knows this from experience. In 1981, he founded Reliable Yardworks to address a gap he spotted in the local landscaping market: the Berkshires lacked true landscape design expertise. Many companies focused on planting for color or shape, but ignored structure, scale and cost transparency. Quirk built his business to change that— that was his “edge” in the landscaping industry.
Today, sometimes finding the edge involves technology. Every project begins with a computer-aided design — first in 2D, then in full 3D — so clients can visualize their project before the first shovel hits the dirt. The 3D designs are enlarged, matted and presented professionally, turning a design consultation into a memorable event.
Sometimes, the edge is
speed. Reliable Yardworks answers emails within hours, especially if the message is about something that isn’t right. In an industry where many avoid callbacks for fear of losing money, Quirk and his crew see them as opportunities to build trust. For instance, if a patio starts collecting water after it’s been completed, they don’t hesitate to return, fix the issue and make sure the client is left satisfied.
Other times, the edge is education. When the busy season slows, Quirk and his crew invest in learning. They attend seminars hosted by industry leaders such as UNILOCK, Techo-Bloc and Cambridge Landscape. They study everything from soil chemistry to plant varieties that thrive in the Berkshires to ensure they can answer client questions with authority and confidence.
And sometimes, the edge is people. Reliable Yardworks employs a seasoned crew that understands quality work and cares about the result. Many of their team members have decades of experience they pride themselves on. Quirk notes that finding workers with the right dedication can be a challenge, but his team shows up, digs in and treats each property as if it were their own.
In the end, the edge is about relationships. Market shifts may drive up material costs and the weather can throw surprises, but Reliable Yardworks’ commitment to quality, promises kept and work that stands the test of time keeps them ahead.
If you have an idea for a landscaping project you’d like to bring to life, call Reliable Yardworks at (413) 4416465 or visit reliableyardworks.com.
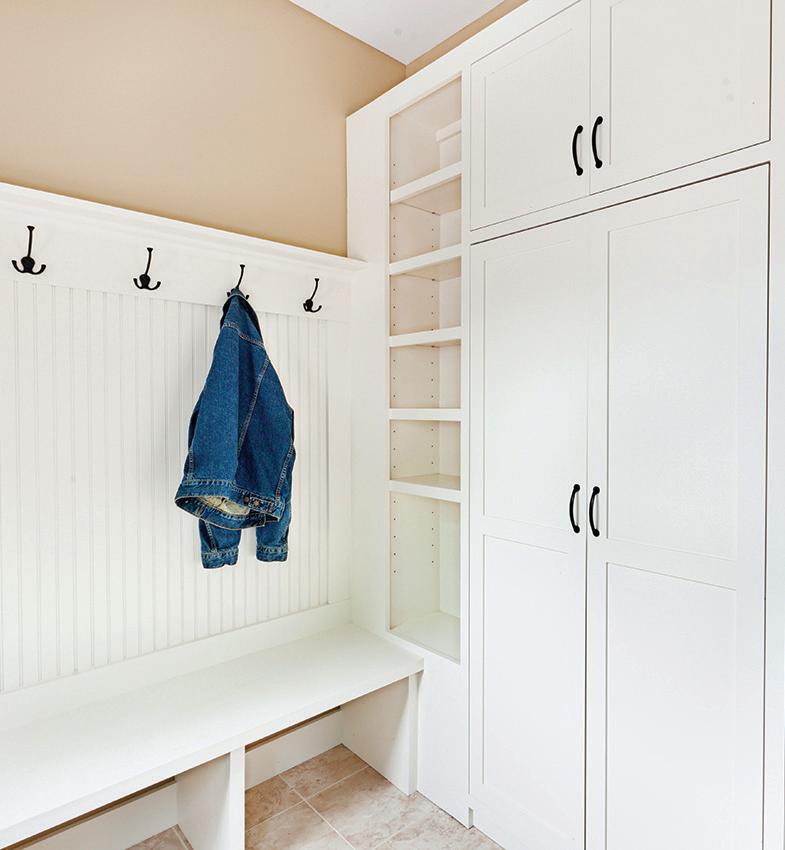
Is it time to put a mudroom in your home?
Considerations for room additions or space modifications generally involve rooms that will add value or function to a home. Mudrooms certainly fit that description, as they can add aesthetic appeal in more ways than one.
As the name implies, mudrooms are entire rooms or areas near entryways of homes where muddy shoes and other items can be stored. By having a set space for messy shoes and coats, homeowners do not need to worry about dirt and other debris being tracked throughout the home. Mudrooms also can provide a welcoming space for guests.
sion to $30,000 when a new foundation is needed and the build-out is extensive.
Budget-conscious homeowners can create a mudroom in an existing foyer or another entryway. Adequate storage is essential for any mudroom, and should include coat racks, hooks, a bench to facilitate removing shoes safely, shoe storage, and additional considerations, like shopping bag storage or umbrella holders. Creating a door from the outside into an existing laundry room can enable homeowners to use the space as both a mudroom and laundry area with minimal changes necessary.
Homeowners who have adequate space to add an entirely new room may have no difficulty putting in a mudroom. A mudroom addition is a job best left to a professional. Ideally, this new mudroom can be adjacent to an entry by the garage, or a side or back door. The footprint of the mudroom needn’t be too large, either. All it requires is a small amount of space to place a bench, coat hooks and shoe storage.
According to This Old House, homeowners also can convert a porch, create a mudroom by expanding into an adjacent room or closet, or even repurpose space in an attached garage. U.S. News and World Report indicates that a well planned and executed mudroom has the potential to increase a home’s value. Depending on the scope of the work, the average cost of a mudroom project ranges from $2,500 for a simple porch conver-
There are some extra considerations for mudrooms that homeowners should think about. The flooring, walls and furniture/storage used in the mudroom should be durable and easily cleaned. As wet and dirty shoes and clothing will be in the space, it’s essential to make clean-up a breeze. Look for nonslip flooring so entering the mudroom safely is not an issue.
Although a mudroom is a utilitarian space, creature comforts can be added to integrate the space with the rest of the home. Cover a storage bench with indoor-outdoor fabric that coordinates to the colors used in a home. Add some decorative drawer pulls and cabinet hardware to elevate the space. Washable throw rugs also can add some design appeal to the room.
Mudrooms can be useful spaces that add function and value to homes.
All-natural ways to keep pests out of the garden during your fall harvest
Fall is one of the most rewarding times in the garden. After months of planting, watering and weeding, crops finally reach maturity and baskets fill with fresh produce. Unfortunately, pests are just as eager to enjoy the bounty. From beetles and slugs to deer and rodents, many creatures look to the garden for a last feast before winter. The good news is that there are effective, all-natural strategies to protect your harvest without resorting to harsh chemicals.
ENCOURAGE
BENEFICIAL INSECTS AND WILDLIFE
One of the simplest ways to keep pests in check is to invite their natural predators. According to Home & Garden, ladybugs, lacewings and predatory wasps are excellent at controlling aphids and caterpillars. Birds help reduce beetle and grasshopper populations, while toads and frogs make a dent in slugs and snails. Providing habitat such as birdhouses, shallow water dishes or small brush piles creates a welcoming environment for these allies.
USE COMPANION PLANTING
Combining crops and herbs can deter pests and improve harvest yields. According to Old Farmer’s Almanac, garlic and onions, for example, repel aphids, beetles and even rabbits. Basil planted near tomatoes not only enhances flavor but also helps discourage flies and mosquitoes. Strong-scented flowers such as marigolds and chrysanthemums can confuse pests and attract pollinators at the same time. Nasturtiums act
as trap plants, luring aphids away from vegetables.
APPLY PHYSICAL BARRIERS
Physical barriers are an immediate, chemical-free defense. Lightweight row covers or mesh netting keep insects from landing on crops while still allowing light and water through. Cardboard collars around seedlings prevent cutworms from wrapping around stems. Copper tape around raised beds can deter slugs and snails, while fencing or fine netting can help keep deer and rabbits away.
KEEP THE GARDEN CLEAN
Pests thrive in cluttered or neglected spaces. Removing dead leaves, fallen fruit and excess weeds reduces hiding places and food sources for unwanted visitors. Regularly inspecting plants is essential; catching a pest problem early makes control far easier. Hand-picking insects like hornworms or squash bugs in the evening is a prime low-tech solution.
USE NATURAL REPELLENTS
Simple household solutions can discourage pests without harming plants. According to Better Homes & Gardens, a spray of water mixed with a few drops of castile soap can help control aphids, mites and whiteflies. Diatomaceous earth, sprinkled at the base of plants, works against crawling insects like slugs and beetles. Crushed eggshells scattered around plants also make a rough barrier that soft-bodied pests dislike crossing.
ROTATE
AND DIVERSIFY CROPS
Crop rotation helps break pest life cycles and prevents
soil from becoming a permanent home for specific insects or diseases. Mixing different vegetables and
herbs instead of planting in large single-crop blocks also makes it harder for pests to spread quickly.
KJ Home Improvement: Explaining the siding replacement process
The longer a person resides in a particular home, the greater the likelihood that various components of that residence will need to be replaced. Driveways, roofs, HVAC systems, and even appliances all have expiration dates.
Although siding on a home can be quite durable, there may be specific reasons why homeowners choose to or need to replace it at some point. Understanding what’s to come of the job can help homeowners prepare. No two siding jobs are exactly the same, and each project will be dictated by a host of variables, including which type of siding homeowners choose. According to local expert KJ Home Improvement, these general steps are commonplace during siding replacement projects.
• Choose siding: Homeowners are urged to consult with various siding installation companies about which products are available and ask each for an estimate. Budget, climate and other factors will narrow down siding materials. The Home Depot says popular siding types include vinyl, wood, fiber cement, metal, and stone. Siding can have almost any color or texture as well.
• Remove and relocate: Outdoor items close to the perimeter of the home must be moved out of the way so workers can access the siding. The job will require a dumpster to be dropped in front of the home or in the
driveway to collect debris, so homeowners should be prepared to leave space for it.
• Siding delivery: The new siding should be delivered prior to the installation start day. These materials will take up a lot of room and space should be made available so the installation team can access them without difficulty.
• Interior decor: Siding installation will include hammering, which can disrupt items on interior walls. It is best to have all wall hangings taken down to prevent damage.
• Old siding removal: On the first day of installation, removal of the old siding will happen first, according to Smart Exteriors. Siding, insulation and trim will be removed. In the event that
older, asbestos-based siding is on a home, contractors may safely remove and discard it, or go over that type of siding. Homeowners should inquire about this step during the company vetting process.
• Home inspection: Once all old material is gone, the exterior sheathing will be inspected to ensure it is in good shape. Signs of rot or loose boards will be considered and repaired, if necessary.
• New siding install: First workers will put on house wrap or some sort of insulation/water barrier product. Afterwards, siding boards are layered on in the design chosen. Nails or screws are used to attach the siding and seams will be caulked to prevent moisture penetration. If the homeowner has
chosen to have gutters and downspouts installed during the siding job, those will be fitted and installed as well.
• Clean up: The installation team will begin the process of thoroughly cleaning up the property. All tools will be removed and the property will be swept or blown to clean away debris. Crews typically use powerful magnets to grab stray nails and screws that have fallen into the lawn and elsewhere. The dumpster will be taken away shortly after the work is completed.
Need help replacing your siding? Whether you’re looking to upgrade your roof or fix a damaged wall, KJ Home Improvement’s father-and-son general contracting team can help. Call (413) 822-3556 for assistance.
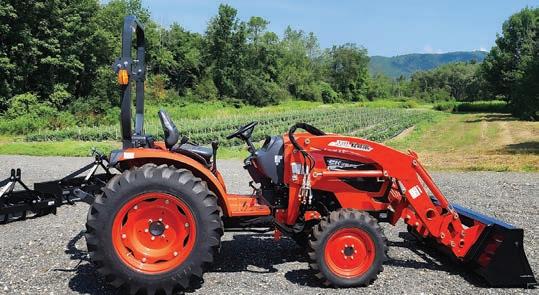
Power equipment built for fall in the Berkshires
Summer mowing season might be winding down, but in the Berkshires, fall brings a whole new set of outdoor projects. Brilliant foliage may draw leaf peepers from all over the world, but once the colors fade, homeowners and land managers are left with plenty of cleanup — from thick leaf piles to prepping driveways and fields for winter. With the right equipment, that work doesn’t have to be overwhelming. At H.D. Reynolds, Berkshire County’s trusted source for outdoor power equipment since 1937, they help customers get the most out of their machines year-round.
KIOTI TRACTORS: FALL’S ALLPURPOSE WORKHORSE
When it comes to versatility, few tools can match a compact or subcompact Kioti tractor. Whether you’re maintaining a few acres or a larger property, Kioti trac-
tors can be outfitted with attachments that make fall chores easier:
• Front-end loaders: Ideal for hauling away fallen branches, transporting mulch or moving heavy loads of leaves and debris.
• Box blades & grading tools: Perfect for leveling driveways or reconditioning gravel paths before the first snow.
• Brush hogs & fnish mowers: Keep fields or large lawns tidy, even late into the season.
• Snowblowers & plows: Attachments that let you transition seamlessly from fall cleanup to winter prep.
In the Berkshires, where properties often blend forested areas, fields, and long gravel drives, a Kioti tractor can be the difference between spending weekends battling projects or finishing them with ease.
SCAG MOWERS: MULTI-PURPOSE FALL CLEANUP
Even as the mowing season winds down, your Scag mower doesn’t need to go into storage just yet. With the right accessories, it can handle more than just grass:
• Mulching kits: Shred leaves into fine particles that fertilize your lawn naturally.
• Bagging systems: Collect leaves as you mow, cutting down on hours of raking.
• Power add-ons: Turbine-powered blowers or dethatchers turn your mower into a full-fledged cleanup machine.
• Easy swap grader blade (Turf Tiger II) – Prep driveways or dirt paths before frost sets in.
From compact residential models to heavy-duty zero-turns, Scag machines are built to extend their usefulness well beyond summer.
STIHL LEAF BLOWERS: FAST, EFFICIENT AND POWERFUL
For finishing touches, nothing clears leaves and debris faster than a Stihl leaf blower. No matter if you’re a homeowner managing a yard or a professional landscaper working large estates, Stihl offers models for every need:
• Handheld blowers: Lightweight and maneuverable, great for porches, walkways, and small yards.
• Backpack blowers: High-powered units that make short work of big cleanup jobs, even when leaves are wet and heavy.
• Battery-powered options: Quiet, low-maintenance, and perfect for neighborhoods or noise-sensitive areas.
Pairing a Stihl blower with a Scag mower or Kioti tractor creates a complete fall cleanup system — moving, collecting and finishing with professional-grade results.
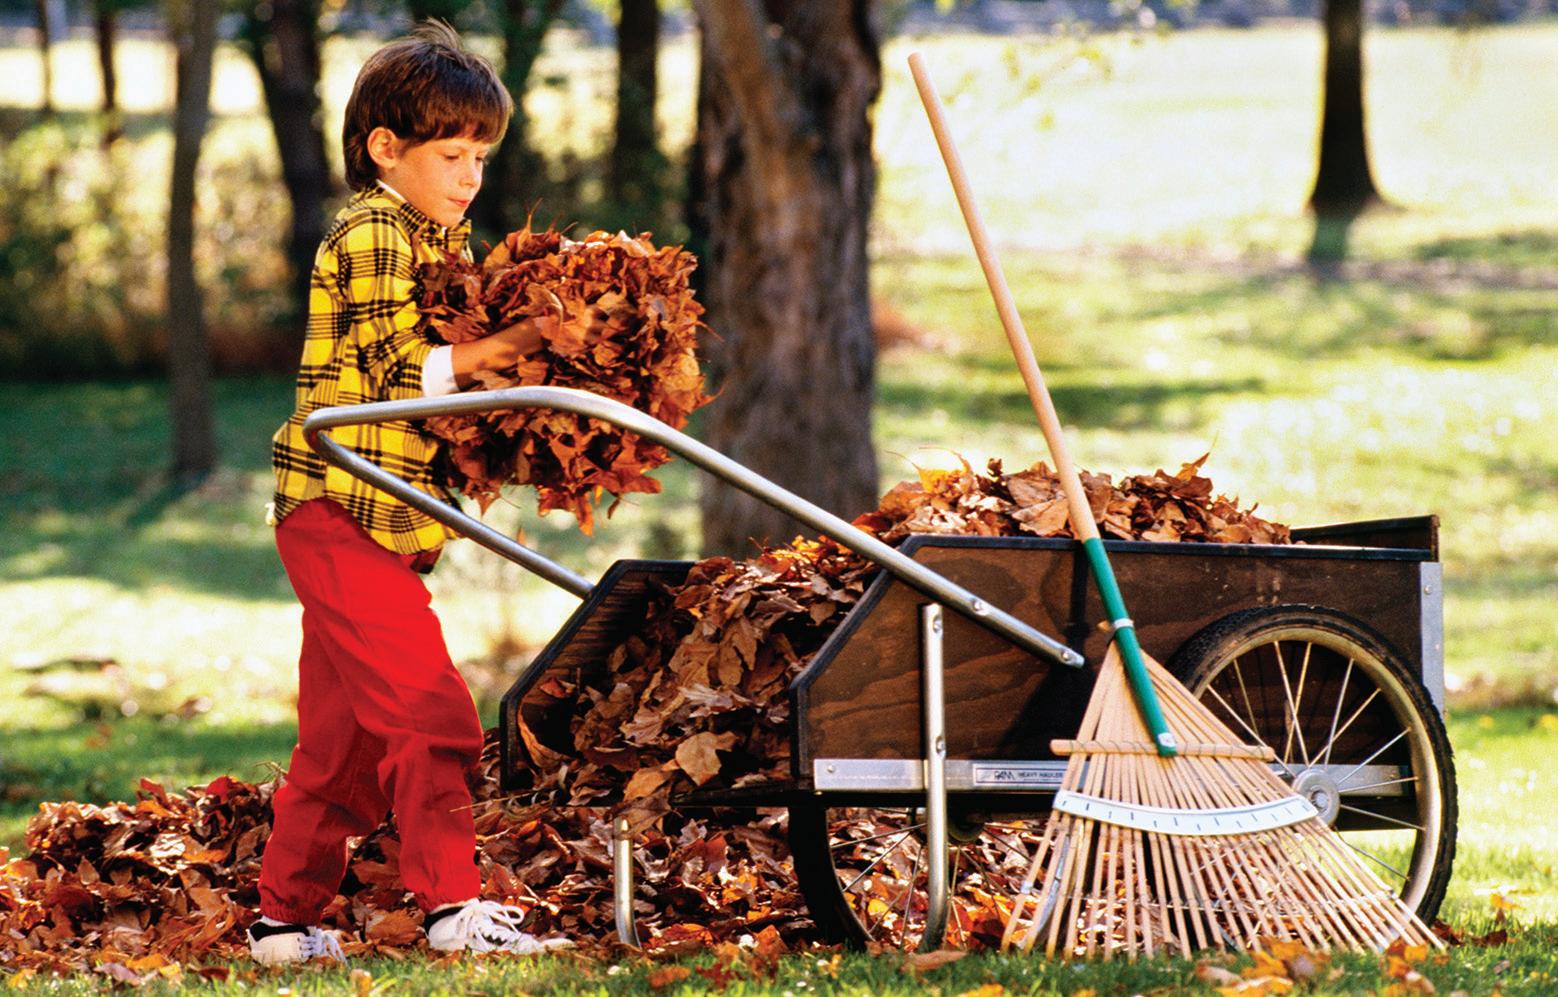
Taming the fall leaf pile: Tips for easier cleanup
Living in New England means embracing all the beauty of fall — crisp mornings, golden trees, and of course, leaves carpeting your yard faster than you can keep up with them. Leaf cleanup is one of those chores that sneaks up on you, and before you know it, the lawn is buried. But the good news is that with a few smart strategies and the right tools, you can make the job a lot easier (and maybe even more enjoyable).
THE RIGHT TOOLS FOR THE JOB
Not all rakes are created equal. If you’ve ever tried clearing heavy, wet leaves with a flimsy rake, you know how frustrating it can be. For thick piles under trees or damp corners, a steel tine rake is sturdy enough to handle the job. For big, open lawns covered in lighter leaves, a wide poly leaf rake is faster and easier on
your back. And when you’re working around flower beds or delicate shrubs, a smaller shrub rake is gentle enough to get the job done without damaging your plants.
If raking just isn’t your thing, a lawn sweeper or blower can speed things up considerably. Handheld blowers are fine for small yards, but if you’ve got a lot of ground to cover, a backpack blower or walk-behind vacuum can save you hours.
WORK SMARTER, NOT HARDER
One of the best time-savers is dividing your yard into zones. Instead of chasing leaves all over the property, finish one section at a time. Place a tarp at the edge of each area so you can rake or blow leaves directly onto it. When it’s full, just drag it to the curb or compost pile. This is a lot less work than stuffing endless bags, and it keeps you from feeling
like you’re circling the yard without making progress. Collapsible bins and trash grabbers are also underrated helpers. Scoop up stray debris without bending and save multiple trips to the compost pile.
MULCHING: LESS WORK, HEALTHIER LAWN
If bagging leaves feels like the most tedious part of the job, consider mulching them instead. A mulching mower chops leaves into tiny pieces that can stay right on the lawn, where they’ll decompose into natural fertilizer. Not only does this cut cleanup time dramatically, but it also leaves your grass healthier for spring. Just be sure to mulch on dry days — wet leaves can clog mowers and slow you down.
KEEP UP WITH IT
The easiest way to stay ahead of fall cleanup is to
tackle leaves regularly rather than waiting until the yard is buried. A quick pass every week or two keeps the task manageable and prevents thick, wet mats of leaves from smothering your grass.
DON’T
FORGET THE GUTTERS
While you’re at it, remember that leaves don’t just collect on the lawn. Gutters and downspouts can clog quickly this time of year, leading to water damage. Investing in gutter guards or giving them a quick clean during fall yard work can save a major headache down the road. With the right tools, a little planning and some smart shortcuts, fall leaf cleanup doesn’t have to be such a dreaded chore. Take it zone by zone, mulch when you can and remember: every pile you clear now means less work come spring.
fillingupthe calendar, andifyouwait,yourprojectcould getpushedinto DECEMBER…or evennext year. Theonlywaytoguaranteeyournew bathorshowergets installedthis f allis to lockin yourspo t rightnow!
Hardwood floors are coveted features in many homes. The National Wood Flooring Association says wood floors are the most environmentally friendly flooring options available. In the United States, the hardwood forests that provide flooring products are growing twice as fast as they are being harvested. Furthermore, wood floors can last for many generations and require fewer raw materials to produce than other flooring options. That means less waste may end up in landfills.
Hardwood floors can endure for decades in a home, but over time those same floors may need some tender loving care to keep them looking good and working as they should. Squeaky floors are a common nuisance that homeowners may experience. Squeaking is often caused by movement and friction between floorboards. Treating the problem involves identifying the underlying issue.
LOOSE HARDWARE
Squeaky floors may be due to the loosening of the hardware holding the floor in place, says The Home De-
pot. When nails or screws no longer are secured tightly, the boards can rub together. The noise heard is the sound produced by rubbing. Tightening or replacing the hardware can help reduce the squeaking.
COUNTER-SNAP KIT METHOD
This Old House says this kit method is a great way to fix squeaks without damaging the floor. Once the source of the squeak is located, drill a 3/32-inch pilot hole through the hardwood flooring. Then insert a screw through the kit s depth-control fixture and into the pilot hole, and drive it until it automatically snaps off below the wood surface. Follow this up by filling the hole with wood putty that matches the floor color. Once the putty is dry, lightly sand the area to blend.
USE A SHIM OR SHIMS
Sometimes the floor may squeak because of a gap between the joists and the subfloor. Filling the gap with a small piece of wood called a shim can help alleviate the gap or gaps.
DRIVE UP SCREWS
If a squeak is just in one spot, The Home Depot says
that you may be able to drive short screws from below into the subfloor.
SMALL GAPS
For small gaps between boards, sprinkle talcum powder or powdered graphite between squeaky boards to reduce friction. Wood filler applied with a putty knife also may work. For larger gaps, use a liquid filler designed for wood floors.
Homeowners also can visit their local home improvement center for other hardware solutions designed for underfloor repairs to remedy squeaks. Many work from underneath the floor and involve mounting plates or brackets to sure up the floor.
Squeaky floors can be problematic, but noises can be banished with some repair work.
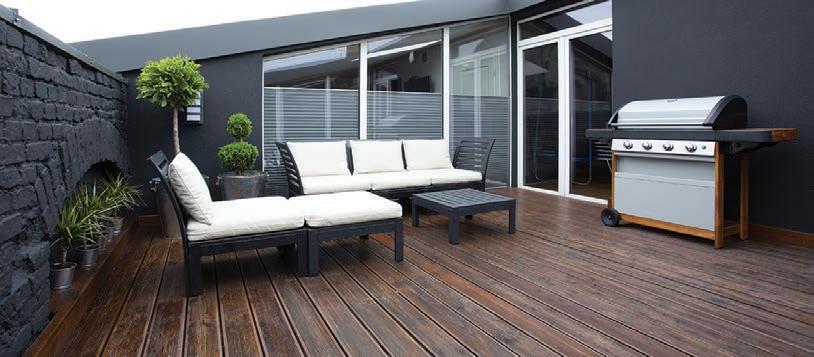
Winterizing your exterior living areas
When the summer entertaining season draws to a close, homeowners need to ensure their outdoor living areas can handle weather that’s right around the corner. Although outdoor furniture and other items tend to be durable, the impact snow, wind and ice can have on them may lead to damage over time. That is why many homeowners take steps to winterize their outdoor spaces and protect their belongings. Here’s a look at how to prepare for the winter to come.
• Furniture: Cover or store furniture to protect it from the elements. Covering it with weather-proof covers can be adequate if storing items indoors is not possible.
• Deep clean: Items that will be covered or stored should be thoroughly cleaned prior to being removed from spaces for the season. Lingering dirt and moisture can cause damage.
• Insulate and drain: Don’t risk damage to pipes, which can freeze and crack in the cold. Shut off the water supply to exterior faucets and drain water lines to prevent pipes from freezing and bursting. Use foam pipe insulation to prevent freezing and cover any exposed pipes.
• Apply mulch: After cleaning up garden debris,
think about applying mulch to garden beds and cover tender plants to protect them from the weather.
• Check gutters: Be sure that gutters and downspouts are clear of leaves and any additional debris. If gutters and downspouts are not cleaned, ice dams may form on the roof and cause water damage.
• Inspect and repair: Inspect walkways and driveways for any damage and make repairs now so water will not seep in and cause further issues with freezethaw cycles. Consider applying a sealant to protect surfaces from snow and ice.
• Pools and spas: It’s essential to follow the industry or manufacturer recommendations for closing down swimming pools and
spas for the season. While covers may not be essential in all climates, covering can help prevent leaves and other debris from getting in the water. Water should be expelled from pipes and tubing to prevent freezing and bursting. If space allows, consider moving the
pool pump indoors to prolong its longevity. Turn off the electricity to the outlet where the filter is plugged in. There may be additional, region-specific steps to winterize a property, but these pointers are a good starting point to protect outdoor spaces.