Projects Day 2024-25


Projects Day 2024-25
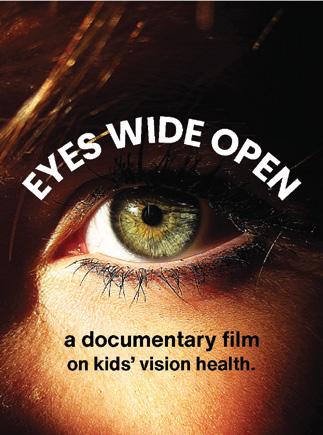
Project title : EYES WIDE OPEN
A documentary lm on kids’ vision health.

Through my project, I aimed to learn extensively about the most common refractive errors in children, and how this information could be presented effectively in the form of a documentary film. I broke this down into two major sub-goals.
The first one focused on helping me gain knowledge about refractive errors in children under the age of 18. I chose the three most common refractive errors that we see in today’s generation: myopia (short-sightedness), hypermetropia (far-sightedness) and astigmatism (cylindrical power). For each of these conditions, I decided to inquire into various different aspects, which included: anatomy, physiology, etiology, risk factors, diagnosis, impacts (on physical health, mental health and lifestyle), social stigma, and treatment options.
My next sub-goal involved learning how to create a documentary film that could effectively communicate scientific information to an audience. This involved learning the various steps involved in documentary production, and refining the skills required to follow them. This included storyboarding, collecting footage through online sources, collecting footage
using a DSLR camera, using iMovie and Canva to edit, etc. This sub-goal also included learning effective communication strategies which became important as I attempted to simplify information through the film to ensure it fulfilled its purpose in increasing awareness amongst the audience.
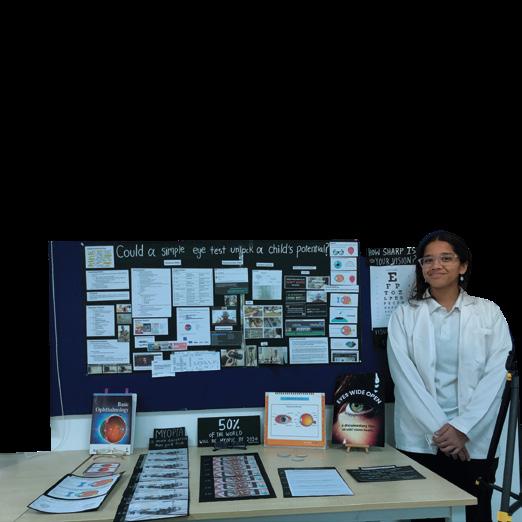
The product I created was a scientific documentary, titled “Eyes Wide Open,” about refractive errors in children. I aimed for it to explore the anatomy, physiology, etiology, risk factors, diagnosis, impacts, treatment, and popular misconceptions of myopia, hypermetropia and astigmatism. The target audience of my documentary was children of ages 10-18 and parents of all children below 18 years of age. I wanted it to successfully educate them about the topic in a way that is simple to understand, engaging, and relatable. The success criteria for my product included relevant & in- depth content, effective narration, comprehensive interviews, carefully planned structure, powerful cinematography, optimal sound design, effective editing, and audience engagement.
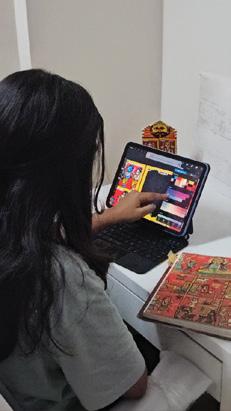
I began by storyboarding for the film, using all of the information I collected through my research. I did this by noting down different shot ideas on sheets of paper and then experimenting with the order in which they could be put. Next, I began contacting experts to request for interviews with them. I then learned to use a DSLR camera, which is what I used to film these interviews. I even collected B-roll footage of various local eye hospitals and clinics that would act as visual aid and fillers for the film. I turned to stock footage to fill the gaps of footage that I was missing.
Next I organised the footage chronologically, which helps me identify the areas that required my narration in addition to diagrams for explanation. I used Canva to create a few animated diagrams and then recorded voiceovers. Finally, I edited everything together on iMovie, making sure that I used transitions between clips, and added title slides to guide the audience. Though I was worried that the film was not having the effect that I wanted it to, I realised that adding background music helped bring it together.
1) What is the anatomy of the human eye?
a) What is the physiology of vision?
b) What are the most significant parts?
2) For Myopia, Hypermetropia and Astigmatism:
a) What is the anatomy and physiology?
b) What is the etiology?
c) What are the different types?
d) How do people with different power see?
e) What are the risk factors or causes?
f) At what age does it develop?
g) How frequently does it occur in children?
h) How does the power change overtime? Does it progress?
i) What are the biological consequences? Are there any extreme eye situations or diseases associate with it?
3) What non-biological impacts do these errors have on a child’s life? (Mental health, education, extracurriculars, social life, etc)
4) Diagnosis
a) What is the flow of events in an eye checkup?
b) What is the importance of each step? (Visual acuity test, Dilation, Anterior segmen examination, Retina examination, Autorefraction, Phoropter test)

5) Treatment
a) Types of glasses, contact lenses and refractive surgeries. Which is best for each condition?
b) How do these corrections function?
c) What are some of the newest treatments? Do they work?
6) What problems remain even after getting the eyes treated? (Economic pressure, social stigma, guilt and confusion).
-based
7) What are the projections for the future of refractive error correction?
8) What are the different types of documentaries? Which one would be most suited for my project? 1. What is the standard procedure followed by

I think that my personal project journey was quite enjoyable and something that I am proud of. In my opinion, the research phase of my project was the most successful because I was able to step out of my comfort zone as I did a more comprehensive inquiry than I had ever done before. I feel that I was able to learn in depth about the three refractive errors, because I made sure to evaluate and compare a variety of different articles, studies and interview responses to come to conclusions about the factors within the topic that remain grey areas for scientists. I was able to learn about causes and treatment options that I had never even heard of before. For these reasons I feel that my inquiry went really well.
Additionally, the process involved contacting experts to confirm confusing information with, which also went quite well, because I feel that I was able to maintain a professional attitude as I did this while getting all of the information I required. In fact, I realized that the most important nuggets of information within my documentary actually came from doctor interviews.
Furthermore, I think that the process of collecting footage not only went well, but was very enjoyable. Using the DSLR and manipulating its settings to capture different types of B-roll shots was exactly the type of hands-on work that I was looking forward to and I feel that it’s quality has ended up adding to my product’s professional look. I am also quite proud of the voiceovers that I created for my documentary. Comments from my target audience helped me appreciate this, as I learned that my voiceovers made the documentary fit its conventions. I as well, am happy with my narration’s pacing, voice modulation and script.
However, what I feel could have been better was the editing of my documentary. I believe that it could have been done more professionally and more decisively. This would have helped prevent
the problem of the film being too long for my target audience to be interested in. I feel that my dissatisfaction with the editing was mainly a result of my poor time management. I think that my journey would have been better had I managed my time more effectively. I realize that I was sort of slacking with my work which caused me to rush as deadlines began approaching within my action plan. For this reason, I was not able to edit my film as effectively as I wished to have done. This is something I will keep in mind as I take up future projects, remembering that a lack of consistency in work can hinder the quality of the results.
Moreover, I think that my personal project journey taught me to improvise solutions for unexpected challenges. One major hurdle was scheduling and conducting doctor interviews without disrupting their patient time while ensuring I got the necessary answers. I solved this by grouping similar questions, refining phrasing of questions, and asking for follow-ups, which helped progressively improve my interviews. Additionally, while editing, I faced poor audio quality in one interview video, so I learned to enhance the sound in iMovie without losing out on quality. I also found that the content in the interviews had more gaps in information than I expected, leading me to create more animations and voiceovers than planned. This disrupted my schedule, so I had to start doing a little extra work per day and used stock footage to fill extra gaps. These technical challenges refined my editing, filmmaking, and quick decision-making skills, teaching me to adapt quickly to achieve my goal.
My journey with personal project has helped me grow as a learner by expanding my knowledge and skills. It has also taught me valuable lessons that will stay with me throughout my academic life and future career. This project completely changed my understanding of refractive errors because I was able to gain an immense amount of knowledge on the topic. I initially thought vision issues were only caused by weak muscles or genetics, but I discovered they stem from factors like eye length and refractive power. I even explored causes such as sleep, outdoor time, and nutrition—learning that screen time isn’t as significant as I thought. I also realized how serious these conditions can be, having dangerous consequences such as retinal detachment that almost no one around me is aware of. I even learned about new treatments like atropine drops, Stellest lenses, and red-light therapy. I learned that the single-vision glasses that seem to be the only option for vision correction are actually the least effective of them all. Understanding the emotional stress parents feel through interviews with a psychologist and parents themselves, helped me empathize with my own family. Overall, the extensive research that I did during this project gave me knowledge has clarified the misconceptions that I previously believed in. It has also helped me further my knowledge as a science student and even equipped me to take better care of my loved ones.
During the process I have also developed and improved important skills. I significantly improved my research skills—interpreting scientific reports, skimming for credible sources, and organizing information using tools like Cornell notes and spreadsheets. These are skills I can carry with me for the rest of my life. I also gained technical skills while creating my documentary. I learned to handle a DSLR, record interviews, organize files, and edit videos using iMovie. I enjoyed making voice-overs, simple animations, and creatively enhancing my documentary. It was both a learning experience and something I truly had fun with. But most importantly, I learned to be more confident with my creative decisions. Though throughout the process I kept doubting my decisions in terms of camera angles, transitions, voiceovers, music, etc, I am quite satisfied with the final outcome, which helped me realise that sometimes being overly critical of my work before it is complete can be unnecessary. However, I did realise the importance of self evaluation.
Some criticism is still essential, because it helped me enhance my product at every step to help it reach my expectations.
My biggest takeaway from this project, was realising that the human body remains a mystery. Initially, I believed biology could answer every question about living beings, because, after all, we just need to study what is right in front of us. However, I soon learned that even simple questions can lack definitive answers. When I asked doctors why some children develop refractive errors while others don’t, they all explained that science has only theories, not certainty. This showed me that even seemingly straightforward topics remain unsolved puzzles for experts. The future of biology, especially in understanding something as fundamental as the human eye, holds immense potential.
Understanding the vast scope of science has strengthened my motivation to become a scientist. Not only did this project familiarize me with the depth of understanding scientists have on certain topics, but it also helped me realize the information that is missing. The idea of contributing to discoveries about the human body excites me, and I am now committed to preparing for a future in scientific research.
Additionally, my newfound knowledge of myopia, hypermetropia, and astigmatism allows me to make better decisions for my own eye health. I will monitor my astigmatism and myopia more closely, help my parents ask the right questions, and guide my brother and cousins in managing their vision effectively.
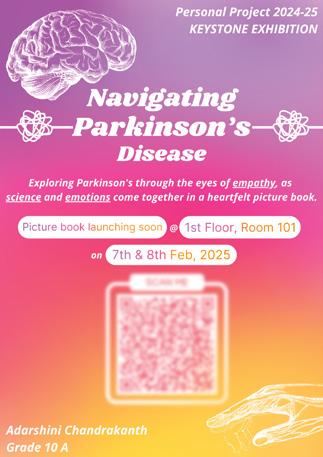
Project
: Navigating

My learning goal was to gain extensive knowledge on Parkinson’s Disease (hereafter referred to as 'PD') and to acquire the skills needed to present it through a simple, child-friendly narrative. Given the ambitious nature of this inquiry, I clarified its scope by outlining it through distinct subgoals.
First came understanding Parkinson’s Disease (PD). This involved exploring the intricate anatomical changes in the brain of someone affected by PD, delving into both the motor and cognitive symptoms that characterize the disease, and examining the psychological effects of the diagnosis—particularly how it impacts the self-esteem of the patient. Furthermore, I considered how the diagnosis affects not just the individual but also their family members.
The second subgoal centered around developing the necessary skills and techniques to create a child-friendly narrative. This meant delving into the role of picture books in shaping children’s thinking, studying the foundational components of a picture book, including its plot structure and typical illustration styles. I also aimed to understand how to use these elements to communicate complex ideas in a way that
would resonate with young readers, all while ensuring clarity and empathy.
My product goal was to create a picture book on how children feel and navigate the journey of having a senior citizen in their family diagnosed with PD. Through this, I also aimed to convey some appropriate scientific facts on PD to grade 5 and provide a digital resource bank for adults through backmatter (additional knowledge pages) and a QR code in the end of the book respectively.
The process started with ideating plots, characters, color schemes, illustrations and other elements and choices through visual tools such as mind maps, pros and cons tables, mood boards, thumbnails, storyboards, character sketches etc. Next, I manuscripted all the textual elements (including additional info-pages) of the book and mapped them to the visuals for clarity. Then, I explored the digital art tool of Krita to grasp its features. The main phase was creation, wherein I illustrated and colored both the story and visual aids for the backmatter. I used Canva for editing the illustrations and superimposing the text. Towards the end, I formated some knowledge and secondary sources already collated from my research process to create a resource bank and embedded it in the form of a QR code.
1. What anatomical causes and changes occur in the brains of Parkinson’s patients?
2. What are the motor symptoms caused by the above anatomical changes?
3. What are some hidden, cognitive and non-motor symptoms of PD?
4. What are the psychological impacts of reading picture books amongst young readers?
5. What is the format/structure of a picture book?
Skill-based
Ideating plot and visual elements, manuscripting, selecting illustrative styles and color schemes, using digital tools (Krita and Canva) to illustrate and edit the book.
This project introduced me to a range of new experiences, helping me embody the learner attributes of being an inquirer and a communicator, and ultimately shaping me into a more reflective and capable learner.
First, it made me a stronger inquirer. Unlike learning from a pre-created unit, this project required me to independently seek out and create my own learning experiences. While I previously relied on online sources like articles and videos to explore my curiosities, the limited digital information available on PD encouraged me to diversify my research methods. I ventured into primary sources by interviewing physicians, psychologists, patients, and authors to gain firsthand insight into PD, the impact of picture books on children's thinking, and the creative process behind them. Expert discussions offered me specific perspectives, such as comparing dopamine to a battery (an analogy by Dr. Steve Manjalay), that weren’t available in generic sources.
I also turned to books: reading handbooks like the APDA’s Parkinson’s Disease Handbook, patient memoirs like "My Degeneration" by Peter Dunlap-Shohl, and studying picture books for structure and tone. This strengthened my understanding that similar knowledge can be communicated through varied styles depending on the audience. Overall, I became more adept at choosing sources suitable to my line of inquiry and extracting relevant knowledge from diverse formats.
This project also developed me as a communicator, both in engaging with experts and writing for children. While contacting experts, I learned to craft professional, concise messages, frame relevant questions tailored to their expertise, and prepare through background research to enable meaningful discussion. These interactions built my confidence in conversing with people beyond my usual circles. Simultaneously, writing for my target audience (grades 3–5) was a new challenge. To simplify medical content in the book’s back matter, I used analogies and accessible language, which helped me internalize the concepts more clearly myself.
I encountered several challenges during product creation that helped refine my work ethic. For instance, I had initially allocated only a week to explore Krita, my illustration software. Though I learned a few tools, I didn’t delve deep enough, which later slowed down my workflow. A major setback occurred when I lost visible progress on an illustration despite saving frequently. After recovering it using a screenshot, I took time off illustrating to fully learn Krita, mastering features like different save options, shortcuts, filters, and lasso tools. This pause significantly improved my productivity. I began saving
each version systematically using a naming convention with version codes, an organizational habit that maximised my efficiency.
Another challenge was managing my emotions while illustrating. Creating thumbnails and experimenting with figure frameworks went smoothly, but when it came to executing full illustrations, I struggled to match my vision. I fixated on details, like whether wrinkles on a grandmother’s hand matched across pages, which led to frustration and disrupted my flow. To counter this, I kept a sheet nearby to vent through scribbles during moments of stress. If that didn’t work, I noted imperfections and revisited them during final edits, allowing me to complete the book rather than obsess over isolated pages. This revealed my deep emotional investment and perfectionist tendencies, motivating me to explore strategies to manage them in future projects.
Throughout this project, I gained valuable knowledge about Parkinson’s Disease (PD) and its broader impacts. Fueled by my passion for biology, this project allowed me to deepen my understanding of medical research, pathology, and caregiving.
Initially, I assumed PD was mainly a movement disorder. Through research, I discovered it’s a unique neurodegenerative condition, often called a “snowflake disease”, due to its highly varied symptoms. I learned how dopamine facilitates movement signals in the motor pathway, and how its depletion leads to symptoms like resting tremors. PD’s complexity became more evident as I explored how it affects other systems too, causing overlooked symptoms like drooling, facial masking, urinary incontinence, and blood pressure fluctuations. I also learnt that the decline of other neurochemicals like acetylcholine contributes to cognitive and psychological symptoms including depression, mood swings, fixations, and mental fog/fatigue. These findings highlighted the interconnectedness of body systems and how a disruption in one can result in cascading impacts on others.
I also learned how diagnosing PD is difficult due to its overlap with normal aging and lack of definitive tests. This emphasized how some conditions are hidden behind layers of symptoms and other naturally occuring processes.
A significant takeaway was learning to use accurate medical terminology. In my interview with Dr. Khushboo, she referred to PD as “Parkinson’s” and explained how this term covers a broader group of conditions: Parkinson’s Disease, Parkinsonism, and Parkinson’s Disorder, each with subtle differences. She also clarified the distinctions between “disease,” “disorder,” and “syndrome,” expanding my understanding of clinical language.
I also came to understand the difference between correlation and causation. One NIH/NIA article on neuroanatomical changes in PD emphasized that changes were “observed” rather than proven causes. This taught me how cautious scientific interpretation must be, especially when exploring complex conditions.
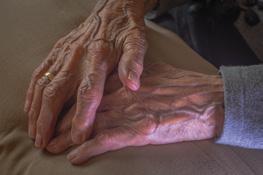
Most importantly, patient conversations gave me an empathetic view of caregiving. Many shared the emotional strain of diagnosis, not just from symptoms, but from fear of judgment, loss of independence, and guilt and worry of burdening loved ones. A key insight was that PD may affect many aspects of life but doesn’t define the person diagnosed. This, in connection to my prior learning in the IDU unit on healthcare introduced me to the idea of person-centered care. I now better appreciate the need to support emotional and spiritual well-being alongside physical health, something I’ve begun applying while caring for my grandmother.
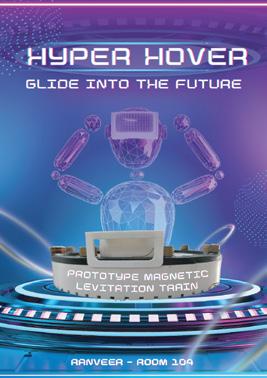
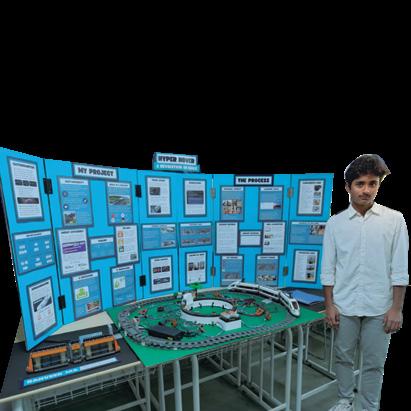
Project title : Hyper Hover

For my Personal Project, I will investigate the practicality of Magnetic Levitation trains in India, study how the current train infrastructure has developed, and learn how a MagLev is built from scratch. My sub-learning goals, specifically related to research are:
1. Learning about how trains have evolved, by thoroughly researching the development of different trains.
2. Learning about how trains are constructed commercially, using this knowledge to build my own MagLev train.
3. Learning about the political, social, and environmental implications of different types of trains.
These sub-learning goals will help me gain substantial knowledge about MagLev trains and learn important subject-specific information. However, I will need to acquire certain skills/information to build my product effectively:
1. Learning about circuits and how they help in managing electrical current, apply this to my product.
2. Learning about electronic components and how they can be implemented in my model to make it work.
3. Learning how to design 3 dimensional, irregular objects on AutoCAD or Siemens NX.
My final product is to build a model of a MagLev train, using my research to help me identify the different features/technology to integrate into it. It will consist of a base, track segment, Neodymium magnets, electromagnets, sensor circuit, and train. My research will help me design the train such that it aligns with traditional aerodynamic models. The various courses I have undergone will ensure that I utilize electronic components effectively while the training camp I joined over the summer will allow me to design the parts of my model on Siemens NX efficiently. The purpose of my product is to firstly build upon my skills in design, product development, and electrical engineering; as well as to educate people about the alternatives present to currently existing transportation systems. I believe that a physical, tangible model is the best way to represent my learning, as it allows me to directly apply my newly acquired skills and knowledge. While a video or book could also be effective products, they are not the most suitable options in my context. This is primarily because they simply would neither fully capture the depth of my research, nor provide me with enough challenges to grow.
1) What is a MagLev train?
a) What does "MagLev" stand for?
b) When and where was the first MagLev train developed?
2) How do MagLev trains work?
a) What are the basic scientific principles involved?
b) What are the types of magnetic levitation (electromagnetic suspension vs electrodynamic suspension)?
3) What are the components of a MagLev system?
a) What role do superconducting magnets or electromagnets play?
b) What infrastructure is needed (tracks, power supply, etc.)?
4) Where are MagLev trains currently operational?
a) Which countries use them, and on what routes?
b) What is the maximum speed achieved by any MagLev train?
5) How does MagLev compare with traditional rail systems?
a) Speed, Fuel, Maintanence?
6) What are the safety features of MagLev trains?
a) Are there any recorded accidents or failures?
b) What technologies prevent collisions or derailments?
7) What are the costs associated with building MagLev systems?
a) What is the cost per kilometer of MagLev track?
b) How does this compare to high-speed rail and metro construction?
1) Why are MagLev trains considered environmentally friendly?
a) How do they reduce carbon emissions compared to other transport modes?
2) What are the long-term benefits of adopting MagLev technology in India?
a) Consider economic, environmental, and social impacts.
3) How does magnetic repulsion or attraction result in levitation and propulsion?
a) What physics concepts are applied here (Lorentz force, etc.)?
4) Why has India not adopted MagLev technology yet?
a) Are there technological, financial, or political barriers?
5) What would be the most suitable Indian routes for MagLev trains?
a) How should we select these routes based on geography, population, and travel demand?
6) How would MagLev trains influence the future of urban mobility?
7) What role does government policy play in the implementation of advanced transport technologies like MagLev?
Skill-based
1) How can I simulate a basic MagLev train model for demonstration purposes?
a) What materials and tools are required for a working model?
2) What is the best method to explain magnetic levitation visually in a presentation?
3) How can I use Canva or PowerPoint to create a visually appealing report or presentation?
4) How do I collect and verify accurate data regarding train infrastructure in India?
5) How can I design a comparative chart to show MagLev vs metro/high-speed rail vs regular trains?
a) What metrics should I include (cost, speed, energy efficiency)?
6) What interview questions should I ask a railway engineer or urban planner?
Saying that this project has impacted me would be an understatement. Over the past few months, It has completely altered my daily routine. For example, instead of changing my attire or relaxing once I reached home, I would immediately check the mailbox to see if any new components had arrived, and promptly begin assembling/tuning them.
A strength of mine was immense patience and resolve. Despite there being numerous flaws in the initial prototype, I did not give up. I knew from my Eureka Science Fair experiences that there will always be a reward for toil. Fortunately enough, over the next few months, I was able to correct most of the flaws, and seek help from experts for the remaining. In contrast, a weakness of mine was maintaining my process journal. I tended to make entries 2-3 days late, which impacted the quality and volume of my work. Though I got a vast majority of the details correct, there would always be small nuances left out due to this lack of punctuality, which could be a telling factor. Perhaps, if I was more consistent with my process journal entries, the quality of this report may also have been greater.
A challenge that I faced at almost every stage of this journey was balancing academic endeavours with my Personal Project. I tended to get caught up in building my model right after I returned from school, which disrupted my regular schedule. On a few occasions, I was so engrossed that I completely forgot I had an important submission the following day. However, before this became a recurring issue, I created an Action Plan in adherence with Criterion Aiii, which helped me organize myself better. Furthermore, most of the challenges I faced were actually regarding the technicalities of my project. For example, each time I printed a 3D part, I realized that there was a minor flaw, and would have to reprint it. This proved to be both time-consuming and expensive, which was problematic. My parents were not satisfied with the large volume of money being spent on 3D printing, and advised me to be more mindful. To solve this problem, I consulted a professional CAD Designer who reviewed my designs and provided meaningful feedback.
During the course of this project, I have been able to gather significant knowledge on 3D design, Electrical Circuits, MagLev train functionality, and Indian Train Infrastructure. Enrolling in the two courses turned out to be a valuable decision, as they helped me design my product parts effectively. I was even able to make minute alterations to the 3D parts due to the knowledge that I had acquired. For example, when 15mm diameter magnets did not fit into the 15mm holes I had made, I realized that my 3D printer had not printed the holes accurately. From this, I learned that even machines had room for error. Thus, in my next design, I made the hole 16mm, taking into account the potential error that the printer would make (+/- 1mm). Next, I gained considerable knowledge in electrical circuits. Though the diagrams looked easy to interpret at first glance, in reality, they were complex and multifaceted. I learned that each component only had a specific voltage, current, and resistance at which it would function. Not to mention, there were 8-10 types of each component (e.g. DC motor, AC motor, Servo Motor, etc). In addition, the Printable Circuit Board (PCB) I used to assemble all the electric components only had a specific number of holes, which needed to be connected to each other with miniscule amounts of solder. If even one hole was incorrectly soldered, the entire board would need to be replaced. Furthermore, I gained knowledge about how MagLev trains function in general. Case studies of Japanese & Chinese commercial MagLevs, books, credible websites, and documentaries allowed me to grasp the concept without much hassle.
I understood that there were two main aspects when it came to functionality of a MagLev, levitation and propulsion. Magnets with opposing poles facing each other (NN or SS) would assist in levitation, whereas electromagnets would drive propulsion. The final aspect of my new knowledge was related to train infrastructure in India, the country in which I reside. Since I have always been curious about why the train infrastructure here is less advanced, I looked into government records, educational videos, and opinion articles about the same. Eventually, I learned that India’s disregard for scientific and technical innovation, coupled with low budget allocations towards public transport infrastructure, was one of the key reasons MagLevs had not yet made an appearance in India. I could resonate with this, as most of the advanced technology I saw in my country was either imported, or outsourced.
Since my project was heavily science-based, I learned many new physics concepts, particularly those which were not pertinent to my grade level. In a way, this was a challenge because these concepts were tough to grasp, but from an alternative perspective, it was a blessing in disguise, as going through this rigour would prepare me for the DP. Some of the concepts I learned included Electromagnetic Induction, Lorentz Force, Gyroscopic Stability, and Faraday’s Law. They were relevant especially while building my product. For example, I required the principles of Gyroscopic stability to design my track-car, and the principles of electromagnetic induction to construct my copper coils. In terms of 3D design, some concepts I gained exposure to were sketching, modelling, and assembling. Sketching allowed me to create a rough 2D blueprint of my parts, while modelling allowed me to convert these rough 2D blueprints into tangible 3D structures. Often, even simple tasks such as extruding/adding holes could take up to 20 minutes, due to complications with dimensions and alignment. Assembling helped me put all the parts together like Lego, which allowed for a real-time simulation of what the final product would look like.
Next, I consolidated my understanding on concepts related to circuits. Though I had already studied Potential Difference, Current, Resistance, Ohm’s Law, and Electrical Components in my physics lessons, this project allowed me to elevate my knowledge and take it to the next level. For example, before, I only conceptually knew why diodes were important. However, while building the product, I physically witnessed that they kept me safe by preventing the backflow of current (if current were to flow backwards, a short circuit would occur, possibly leading to a fire). Another such instance is when I used resistors in my circuit. Initially, I thought that resistors were meaningless, and merely used as a formality. However, I only realized how important they were when my train began travelling at a high speed and spinning out of control. I learned that the resistance was too low, causing excess current to flow, thereby energizing the coils to an unnecessarily high extent. Finally, the last few concepts I learned were pertaining to economics. I found that FDI, Externalities, Budgets, Competition, and Sustainability were central to understanding why India’s train infrastructure is less advanced.
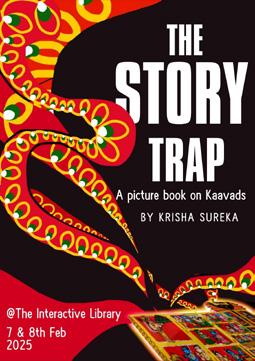
Project title : The story trap

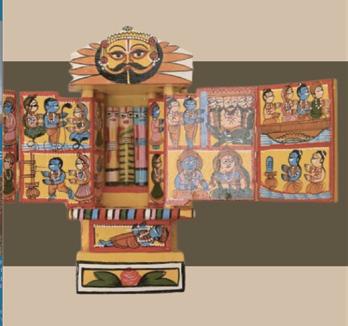
Through my personal project inquiry, my primary learning goal was to gain comprehensive understanding of the Kaavads and its culture, artform and storytelling style. This required me to explore the history of Kaavads, the Kaavad community and different aspects of its culture, as these have influenced the storytelling and art style significantly. Each community has its own narrative that influences the Kaavad’s style. These aspects also helped me achieve the goal about understanding its function more comprehensively. This is because the Kaavad has a lot more functions than just storytelling as it acts as a shrine, helps patrons undertake a pilgrimage and many more. I then used my second part of my learning goal to develop the skills to create my product which was learning how to creat a picture book. Under the aspect of exploring Kaavads, I had two sub-goals. First, it was to research and explore the culture and its history and the other was focused primarily on the art style and Kaavad creation.
This included understanding the Kaavad Anatomy, the iconography, and the narrative structure I first learn this through online courses and books, and then travelled to Rajasthan to create my own Kaavad and apply my knowledge to practice the skill. This helped me explore the traditional materials used, the process and also look at other kaavads by the artist. The second part of my learning goal which was to learn the skills of creating my product, I had to main sub-goals as well. This included learning how to write a fictional story for 9-12 year olds and learning how to use platforms such as Adobe Illustrator and Procreate, to create digital illustrations. This involved taking a month long course and practicing each tool in the software and creating different vector images to apply this to create my illustrations as well. Under learning how to write a fictional story, I learnt how each narrative element is applied in different contexts and how I can manipulate them to create my own engaging story to communicate information to my target audience.
My product goal was to create a unique fictional story that I would share using a picture book that aimed to inform the readers about Kaavad and explore the art style themselves. Since my product involved two aspects: writing the story and illustrating their corresponding images, I broke down my product goal to ensure I could work on each section efficiently.
I first began by brainstorming ideas and writing a story that pertained to my target audience, which was 9-12 year olds. I had created multiple story drafts that had different fictional plotlines, which I redrafted to shortlist the best one. I spent around 2 months on this aspect, as maintaining the word count and writing a well-thought-out plot at the same time was a challenge. I had rewritten the final script twice during this process to ensure the story had effectively integrated the different aspects of the kaavad and was comprehensible and engaging. I then focused on the illustrations for each page and formatting the text and dialogues to ensure only 20-30 words are present on each page. During this process, I first created a mood board, thumbnails, and rough sketches of the designs for each page. I did this on paper and also created a mock picture book to understand how the mini kaavad that was a part of the story would be structured. I then used these plans to digitally illustrate each page while focusing on the character’s look, the architecture of the house, designing the kaavad, etc. I worked on this for around a month and ensured to use unique illustration techniques and structures to make it appealing. Once I was sure about the illustrations, I then worked on the last two sections of the book, one was an interactive activity teaching the readers about the art style and allowing them to practice it, and the other was a small glossary which provided more in-depth information about Kaavads. Once I finished this, I then moved on to the formatting of the picture book and the text. This included designing the cover page, thinking about a name and ensuring that the text and illustrations were seen. This was an extremely precise process, as often a section of the illustration would enter the gutter of a picture book, and since many of my illustrations required two pages, this completely messed up the formatting. I then finally printed out the book and attached the pop-up mini kaavad.
1. What is the structure and process of making a kaavad and how are the important elements it relies on to narrate a story incorporated in the process?
2. What are the important art elements that shape kaavad art?
3. What are the origins of the kaavad and how has it evolved throughout the years?
4. What are the foundations of a fictional story ?
5. What are the important narrative elements and how do they differ for the target audience 10-13 years?
1. How has this artform impacted different significant stakeholders and what is the significance of this artwork to them? Includes artisans, citizens in the area, and storytellers?
2. How has the kaavad tradition influenced various cultural aspects and philosophies, and what is its current impact?
Skill-based
1. How do I paint this artform ensuring the important elements are met to narrate a written story?
2. How can I use narrative elements to write short stories for a picture book?
3. How are picture books designed and formatted for publishing?
4. How do I use adobe illustrator to create digital illustrations for a picture book?
5. How do I use tools like Adobe illustrator and Procreate to create and format a picture book including the cover?
My Journey as a Learner
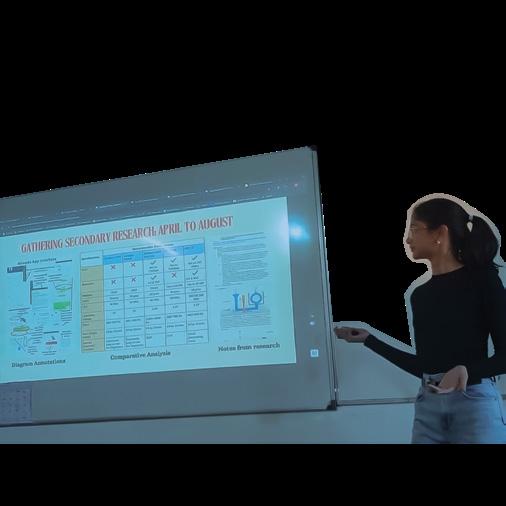
This project was my first research experience where I independently chose a topic and developed my knowledge and skills over the course of a year. One thing that went really well was how much I grew as a learner. I started off thinking I would rely mainly on websites and online courses to get the information I needed. But since the topic had very limited information available online, I had to shift my approach and rely on primary sources. This helped me learn how to structure my research and create a proper action plan. I also developed new skills like making questionnaires, identifying credible people to interview, and holding conversations that actually helped me understand the topic in more depth. These conversations really helped me make new connections and took my inquiry further.
Another part of the process that went well was learning how to be reflective. Since I wasn’t familiar with the topic and was learning something new from scratch, I had to reflect regularly on my strengths, weaknesses, and overall progress. This helped me ensure I could address my weaknesses and spend enough time on improving them.
Throughout this journey, I also became a risk taker. There were a lot of unfamiliar situations I had to face such as painting on wood, creating my own story, and making decisions without being completely sure of the outcomes. Initially, this was difficult and caused delays, especially when I had to change my original plotline since it didn’t fit the picture book format. But taking that risk helped me create a much more relatable and engaging story and taking this decision is something that really improved my product and ensure it was efficient.
A significant challenge I faced was creating a story that would pertain to the target audience’s preference. This required me to balance authenticity and creativity as incorporating traditional kaavad elements with a fictional story created a fine line as it could be considered offensive and against the tradition. Due to this the storyline was difficult to ideate as the target audience preferred an interesting plot however the stories in the tradition would not match this. Another challenge was adapting the artform to make it digitally. This is because creating the texture and structure of a wooden panel, the patterns and the layering technique of painting was difficult to incorporate. However, by applying the skills I learnt while learning the softwares I used different digital brushes such as a wooden one to replicate the texture and used the layer tool to use the same painting method. Another significant challenge was maintaining engagement and relatability in the story. This is because a picture book has a limited word count and creating a climax while setting the context is tough to showcase. Therefore I had to rewrite and create multiple drafts for the same story to make sure it was engaging and relatable even through a picture book. Maintaining a consistency while illustrating was also tough as the same character and objects were being made in different perspectives and without the same structure the illustrations would look disconnected and confusing to understand. I used multiple tools in the software to address this.
Through this project I was able to gain a lot of knowledge and skills that helped me both personally and academically. It helped me connect with a tradition that is an important part of my cultural identity and significantly increased my awareness about the values, beliefs, and practices that shape it. Before this journey, I had limited knowledge about Kaavads. However, through in-depth research, field visits, and conversations with experts, I explored its history, significance, and the communities involved in this tradition. This process allowed me to understand my culture better and understand how traditions like the Kaavad influence my identity, values and perspectives.
One of the first impacts of this project was the opportunity I received to undertake my own inquiry. Since I chose a topic that had minimal online resources, I had to learn how to rely on primary data collection. This meant creating relevant questionnaires, conducting interviews, synthesising new ideas and knowledge, and travelling to places like Bassi, Rajasthan to meet artisans.
This hands-on experience helped me develop as a self-directed learner and improved my research and communication skills. I became more confident in approaching people, asking questions, and applying their insights to my work.
Another major area of growth was learning a new art form. Painting in the Kaavad style was entirely new to me, and learning to paint on wood required patience, experimentation, and a willingness to step out of my comfort zone. As someone who previously focused on emotional expression through art, this project helped me see art as a way of storytelling and cultural preservation. This has enhanced my artistic ability and opened up a unique medium I plan to continue exploring in my future artworks. I also learned how structure, visuals, and narrative in Kaavad art are interdependent, and each choice has cultural meaning, which is something I aim to incorporate in my future artworks.
This project also helped me grow as a writer. Inspired by my love for reading, I had always wanted to write a story, and this project gave me the opportunity to do that. From developing a plotline to adapting it into a picture book, I significantly improved my creative writing, vocabulary, and ability to communicate ideas effectively. I also learned to take feedback and use it to refine my story, illustrations, and overall presentation.
Overall, this project not only allowed me to discover new knowledge and skills but also helped shape my identity, values, and interests. It has made me more open-minded, confident, and improved my ability to communicate.

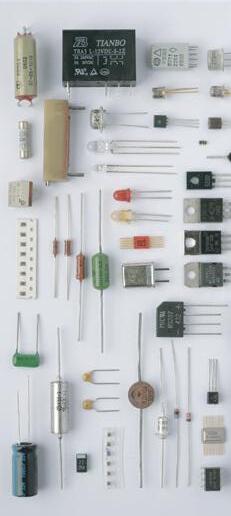
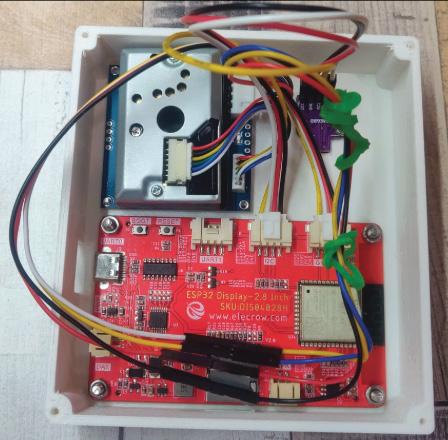
Through my personal project inquiry, my primary learning goal was to gain a comprehensive understanding of the various software and hardware components involved in the development of monitoring devices, specifically, air pollution monitoring devices. As such devices require gaining an understanding of functional visual and components, I broke this primary learning down into sections in order to explore each aspect in detail. Under the aspect of functionality, I had two sub-goals. First, was to to learn how to effectively code in a programming language, which would enable me to code for my project later on. As a part of this goal, I aimed to learn the various commands used in the C++ coding language and familiars myself with the Arduino IDE - a coding platform. My second sub goal was to gain a detailed understanding of basic electronics and hardware components, including the various components of an air quality monitors, such as micro controllers, LED screens, sensors, etc. This aspect also involved learning about the most durable and efficient existing component brands.
“ITS JUST ONE DAY WITHOUT A MASK”
SUHANI AGARWAL | ROOM 102 SAID millions everyday 7 & 8 FEB | 9 & 11 AM
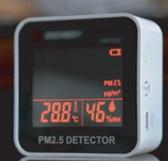
AIR POLLUTION AND AIR QUALITY MONITORING
Under the aspect of visuals, I had one sub goal, which involved learning how to use online 3D design platforms such as Fusion360 and TinkerCad, in order to learn how the outer casing of various devices are designed. I also explored various existing air quality monitoring products by companies such as Airveda and PurpleAir in order to understand the best visual features, brands and components to use in my air quality monitor. This helped me develop a standard to hold my product accountable to, and provided me with an in-depth understanding of what a functional air quality monitor.
My product goal was to integrate software and hardware components together to develop a fully functional indoor & outdoor air quality monitor that measured and displayed real time data on temperature, humidity, PM, and AQI levels to indicate air quality. Once again, because my product involved the development of visual and functional components, I found breaking down my product goal into the sections of hardware, software and design the most optimal way to achieve my goal.
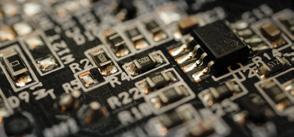
I first began by ordering all the necessary hardware components for my monitor, and then creating my code sketch alongside. I spent approximately 4 months on these two aspects, with primarily focusing on making the software aspect of my monitor completely functional. During this process, I created multiple drafts and versions of my code that I later on integrated into one. I then focused on assembling the hardware and software components together to display the readings gathered through my sensor onto a display screen. During this process, I also focused on designing the interface of the screen, while taking into consideration aspects such as color scheme, visual symmetry, etc. Once I was sure that the internal components and the screen of my monitor were working smoothly, I moved on to designing the 3D outer-casing on Fusion 360. I spent approximately three weeks doing this, making sure to be extremely meticulous with the dimensions and spatial organisation. I finally printed out my sketch and then assembled all the components together.
a) What are their components? Are they consistent across all monitors, or do they vary?
b) What are the features that make these monitors more accessible, user friendly and efficient?
c) What are the features that make these monitors less accessible, user friendly and efiecient?
1. What is the process of creating an air quality monitor?
2. How do laser-based sensors and light scattering sensors function?
3. How can can attractive and efficient user interfaces be developed?
4. What impacts a user’s experience of an Air Quality Monitor? What are the different factors considered?
Skill-based
1. How are 3D design platforms such as Fusion360 operated?
2. How does the C++ programming language work?
3. How are basic electronics (breadboards, micro controllers, sensors, htc) handled?
Overall, this inquiry was extremely enjoyable and fulfilling in terms of the knowledge that it allowed me to gain and the skills it enabled me to develop. In terms of my learning, I believe that one of my inquiry's biggest strengths was my ability to stay on schedule and keep my research relevant. By creating and strictly following a detailed week-by-week schedule of my personal project journey, I was able to keep myself accountable and make sure that I did not overwhelm or overburden myself. This immensely benefited me because it allowed me to enjoy what I was doing while ensuring that I achieved my objectives.
Secondly, in terms of my product, I believe that I was able to successfully present my final product as an effective culmination of my learning . Firstly, I was able to directly transfer my knowledge surrounding coding, handling electronics that I gathered through countless interviews, in person courses, books, articles, etc and design to create my final product. Secondly, I was able to effectively meet my success criteria and include the various features in my monitor that I had learnt about through my comparative analysis of existing monitor brands, including real-time display of data, color coded indications on air quality, etc. In certain aspects, I was even able to go well beyond my initial aims, such as by including a built in alarm that began beeping when air quality levels were dangerously high. Especially because the fields of engineering and electronics were completely new to me at the beginning of this inquiry, one of my greatest achievements through this inquiry was being able to transfer the theoretical knowledge I gained into an actual fully functional model of an air quality monitor.
One of my biggest challenges, especially as a beginner to coding, was developing the stamina needed to code and deal with code-related bugs. As coding is an extremely time-consuming process involving a lot of trial and error, there were numerous instances where my code would show “error” or not connect to the hardware. It took several attempts before I was able to get my code to successfully work. This therefore allowed me to exercise perseverance. Another issue I faced was related to accessing the right hardware components for my monitor. This led to multiple setbacks in terms of my timeline, as I had to wait for new products to arrive and repeatedly focus on a minor aspect of a hardware component instead of being able to move forward. Despite extensive research and verification, there were instances where the hardware I ordered was often not soldered or had a few specific complications that made in incompatible with my product, something I could only check once I had physical access to the hardware. The biggest challenge I faced with this was that there was no actual shortcut or straightforward way for me to access the right components on the first try - the process by nature would have to involve trial and error. I simply had to continue to improve my understanding of hardware in order to improve my expertise and knowledge of compatibility, in order to overcome this challenge.
Over the course of my project, I gained an unimaginable amount of knowledge related to electronic hardware, programming, basic electronics, 3D design, and so much more. This made me exponentially more knowledgeable regarding how monitoring devices and other gadgets are developed. software as well as air quality monitoring. Through my research and product creation, I developed the intended skills of coding and designing as well.
Specifically, my personal project enquiry allowed me to practice how take initiative and ownership of my learning in a way that I had not before. As I was the sole person responsible for the success of my project, this inquiry allowed me to understand how to undertake and carry out initiatives on my own without external assistance. By spending multiple hours using breadboards to create mini circuits, and reaching out to numerous experts and company founders myself, I was able to also improve my ability to use the resources at my disposal in a more effective manner.
This journey also helped me develop another vital skill: retrospective and evaluatory thinking. Since I had to retrace each step I made in my coding process and review areas where I might have made mistakes or overlooked crucial steps, I was able to expand my reflective thinking skills, improve my attention to detail and generally create a habit of continuous self-assessment. This greatly improved my critical thinking skills, since I was able to analyse, identify and fix mistakes a lot faster. This increased my overall efficiency while working, and hence helped me perform better academically and in everyday tasks as well.
Another big takeaway I had from my personal project inquiry was about being more open minded to step outside of my comfort zone. Previously, I had numerous pre-conceived notions related to the complexity of coding or electronics, and was immensely intimidated by the same. I created a misguided perception of these skills that in some ways held me back from actually exploring these concepts. However, I later on realised, that while it came with its own challenges, software development was not an insurmountable obstacle but rather something I was capable of pursuing and even excelling at. This made me realise the importance of being more open minded and acceptive of challenges and unfamiliar situations, something that will continuously help me in the future.
Apart from this, I was also able to develop more field and career specific skills such as C++ programming, blueprint designing, creating electronic circuits, and so on. Especially as computer science and design are possible career paths for my future, through this inquiry I was able to hone skills related to these fields, and understand that I have the acumen/potential to peruse these further.
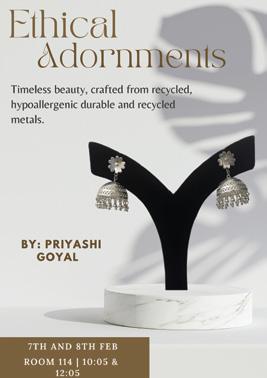
Project title : Ethical Adornments
Timeless beauty, crafted from hypoallergenic recycled durable and metals

My learning goal was to gain a comprehensive understanding of the jewelry design process, from concept to creation, with a specific focus on creating sustainable jewelry. I wanted to explore what it actually means for jewelry to be sustainable and understand the challenges the industry currently faces when it comes to sustainability. I also aimed to explore the different materials and processes used in jewelry-making, learning about their properties, strengths, and limitations, and how they affect the overall impact of a piece. Along the way, I planned to build important skills and techniques that would support my learning such as using design software, practicing technical drawing and learning how to budget and plan effectively. Ultimately gaining skills, techniques and knowledge to design my own piece of jewelry. To help me achieve my main goal, I broke it down into smaller, more focused subgoals. I started by researching the unsustainable practices in the jewelry industry to understand what the problems are and why change is needed.
From there, I moved on to learning about possible solutions, including which materials are considered more sustainable and why. I also looked into how the jewelry design process works, including the most commonly used techniques and materials, to get a clearer idea of how pieces are usually created.
My next goal was develop and apply skills. I began using Rhino design software to create digital models of jewelry and practiced developing my own ideas for a sustainable piece. My next goal was to design my own piece, using everything I had learned about materials, sustainability, and the design process. Lastly I aimed to prototype and fabricate the piece, bringing my design to life.
My product goal was to design and create a sustainable jewelry piece that is elegant and versatile, comfortable, and environmentally responsible. I aimed for the piece to be convertible allowing the user to wear it in different ways for different occasions while also being timeless, functional, and 100% recyclable. To ensure both aesthetic and ethical value, the jewelry would be crafted using high-quality recycled materials, and would prioritize user comfort, fine craftsmanship, and adaptability for future customizations or upgrades.
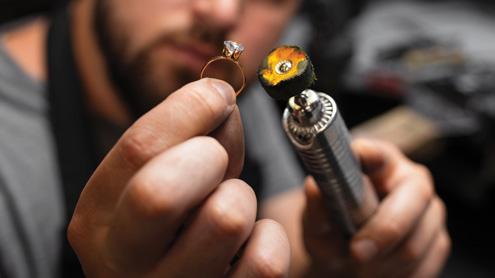
Because my product involved the integration of aesthetic, environmental, and technical design components, I found it most effective to break my process down into the stages of design, prototyping, and final production. I began with the design stage by researching sustainable materials and jewelry mechanisms that allow multi-functionality. Using this research, I developed a detailed CAD model and technical drawing. Next, in the prototyping phase, I created a wax model of the different components of the product and got feedback from experts. This phase allowed me to refine the form and functionality before moving to the final stage. During the final production, I focused on polishing and perfecting every detail, ensuring that the piece aligned with my goals of sustainability, convertibility, durability, and user-friendliness.
1. What are the most common metals used for jewellery design ?
2. What are the different properties of both common and unique metals?
3. What type of designs and trends will be relevant and wearable in the long run?
4. What are the steps in the jewelry design and production process?
5. How can different metal finishes (matte, polished, brushed) affect the final appearance and durability of jewelry pieces?
6. How do alloy compositions influence the strength, weight, and the asesthetics of jewellery?
1. What does the word sustainability mean with regard to jewelry industry?
2. If any what are the current challenges the jewellery industry currently faces with being sustainable and ethical?
3. How can jewellery be made more durable and skin friendly?
4. Why is material selection important in sustainable jewelry design?
5. How do cultural and societal shifts influence the types of jewelry designs that are popular over time?
Skill-based
1. How can I use design software like Rhino to create detailed and accurate 3D jewelry models?
2. How do I apply technical drawing skills to communicate my design ideas clearly?
Debatable
1. Can jewellery ever be truly sustainable?
One of the best parts of the project was turning research into a real piece of sustainable jewelry. When I started, I didn’t have much experience with designing or working with materials, and the idea of creating an original jewelry prototype felt quite overwhelming. But as I started exploring and learning on my own, I slowly began building the skills I needed. I studied how different metals are used in the industry and why many of them aren’t sustainable.
I also explored the environmental impact of mining and learned how recycled metals can offer more eco-friendly alternatives.
Learning to use Rhino was one of the most challenging parts of the process. I had never used 3D design software of this type before, so I began by watching tutorials and trying out basic tools. At first, I found it really confusing, but with practice, I was able to model shapes, adjust details like curves and thickness, and finally create a full 3D model of my earring design with the guidance of experts. Being able to take my sketches and actually turn them into a digital prototype felt really rewarding and made it all worth it.
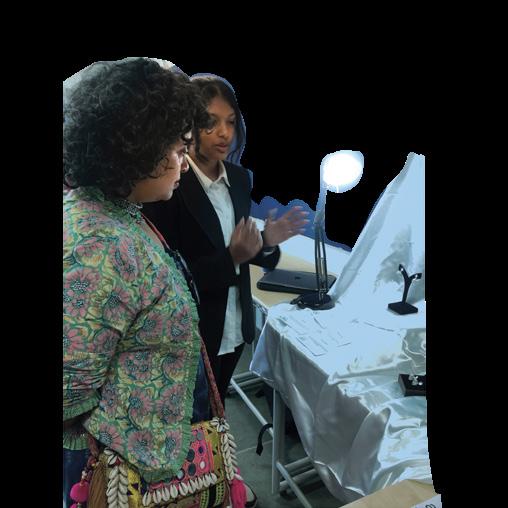
Reaching out and talking to experts also made a big difference. I spoke to people who work in jewelry manufacturing and asked them about things like material waste and sustainable sourcing. Their responses helped me make more informed decisions about my own design. For example, after learning how certain metals can cause irritation or aren’t easily recycled, I chose to explore recycled silver instead of traditional gold-plated options. I also reached out to the co-founder and design team of GIVA on multiple occasions not only for interviews but also workshops and sessions where I learned how to use Rhino and got a glimpse into how they ideate and create designs.
I faced two main challenges in my journey. The first challenge I faced was managing my time and balancing my personal project with academic pressure. I initially tried to keep weekends for the project and weekdays for schoolwork, but that quickly became unrealistic and led to delays. Eventually, I created weekly schedules, especially around exam time, where I would plan exactly how many hours I’d spend on each task, sometimes even writing down what part of the project I’d focus on. That strategy helped me stay more organized and productive.
Another challenge was figuring out where and how to create my final product. I reached out to several jewelers, but nothing worked out at first. It took a lot of persistence, but eventually an expert connected me to a factory in Jaipur. Since I could only travel during my winter break, I had to plan everything very carefully in advance from CAD files to the wax model so the production process would be smooth and efficient when I got there. These challenges taught me a lot about self-management, patience, and perseverance. I became better at communicating with experts, asking the right questions, and organizing my time. There were also moments when things felt uncertain or out of my control, but I learned how important it is to keep going. I learned to adapt, make changes, and improve my work and plans without getting discouraged. One of my biggest takeaways is that hands-on experience is essential. While research and interviews were useful, I only truly understood the jewelry-making process when I saw each step firsthand in the factory. Moving forward, I want to use the same approach in other subjects too.
Through this project not only did I gain new knowledge and skills but I also grew as a learner. At the start, I knew very little about jewelry or how it was made. Through the process, I not only learned about tools and how they are used. Understanding different materials was another big area of learning. I researched common metals like gold and silver, but also went into materials I hadn’t known much about before like tungsten carbide, zirconium, and palladium. I looked at their properties, their pros and cons, and how suitable they are for sustainable and hypoallergenic jewelry.
I didn’t just learn about jewelry design but also gained new knowledge in subjects like chemistry For example, in chemistry, I understood the process of electrolysis and how it is used to recycle metals like silver. I also became familiar with terms like anode, cathode, and how the process helps separate pure metal, something that helped me understand other chemistry concepts in class.
I also developed new technical skills that I can apply for future product design projects. For instance I moved from using a simple software like TinkerCAD to Rhino 8. I learned how to use tools to make detailed designs, add fillets, and fix errors when things didn’t work. This helped me make my designs more realistic and precise. Apart from software, I also improved my sketching and mood board creation skills and technical drawing, which made it easier to plan and visualize my final piece.
Another thing I learned was how important it is to keep an open mind. At first, I found it frustrating to make changes after getting feedback, but eventually I saw how helpful it actually was. Feedback from experts helped me avoid mistakes, like understanding why germanium wasn’t a good option for my piece. Being open to revising my plans helped me improve my final product and taught how helpful it is to consider multiple perspectives.
Overall, doing this project made me more curious and has encouraged me to keep exploring design and sustainability. Learning Rhino, learning about materials, and applying scientific knowledge has inspired me to continue working on creative, meaningful projects. I now feel more prepared to take on future challenges and look forward to building on what I’ve learned here
Project title : Lifelink
Your lifeline in an emergency

My main learning goal was to develop a comprehensive understanding of the different wearable devices that are focused on measuring human body metrics, learn about integration of software and hardware components, explore user interface designs, and acquire the skills to build a working prototype from scratch. To effectively achieve my learning goal, it was crucial to develop a strong understanding of the functionality, design, and user experience of existing wearable health-monitoring devices. This required in-depth research into leading products currently available in the market, such as the WHOOP band and the Apple Watch. I examined their features, including biometric tracking, data visualization, user interface, and how they collect and interpret health-related data. Analyzing these devices helped me identify the key components that make a wearable not only functional but also user-friendly and reliable.
Furthermore, it was equally important to explore the broader impact of wearable technology on people’s daily lives. These devices do more than track steps or heart rate - they actively contribute to promoting healthier lifestyles, supporting preventive care, and empowering users to make informed decisions about their well-being. For instance, wearables can detect irregularities in vital signs, track sleep quality, and encourage users to maintain activity goals, which can ultimately reduce health risks over time. By gaining insight into these real-world applications, I was able to align my project with actual user needs and contribute meaningfully to the rapidly evolving field of wearable health technology.
My main product goal was to develop a comprehensive understanding of both the software and hardware components necessary to build the prototype from scratch. I began with detailed research on wearable health technology, focusing on selecting the right sensors for ECG and SpO2, choosing a suitable microcontroller, and learning how to integrate everything using Arduino. With no background in coding or electronics, I completed a 15-hour Arduino course and followed online tutorials. These helped me break down complex topics like breadboarding and sensor calibration, giving me the skills to write the necessary code for my bracelet.
Developing the hardware was just as important. I used Fusion 360 to design the bracelet casing, despite being new to 3D modeling. After watching tutorials and experimenting, I created an ergonomic design that prioritized comfort and accuracy. For example, I added curvatures to improve skin contact with the sensor and included an adjustable Velcro strap and an emergency button placed for easy access during medical situations.
User interface design was another key focus. Since my target users included elderly individuals and those with heart conditions, I emphasized simplicity and comfort. Based on survey feedback and interviews, I avoided touchscreens and chose to display health metrics on a connected device to reduce complexity. Learning about accessibility helped me make thoughtful, inclusive design decisions. By combining technical research with user-centered thinking, I was able to create a functional prototype that balances innovation with empathy.
1. What are the most accurate health tracking devices currently available?
2. What are the most essential features of a wearable health device?
3. How do biosensors work?
4. What makes a wearable device accurate?
1. Should wearable devices be designed with fewer features to make them easier for elderly users?
2. Is it better to focus on style or function when designing wearable health devices?
3. Is biometric data from wearables reliable enough to be used for clinical decision-making?
4. Do users trust wearable devices to give them accurate health information?
1. What does it mean for a device to be “human-centered” in its design?
2. What makes a piece of technology “wearable”?
3. Can wearable devices shift the responsibility of health from doctors to individuals?
4. How might wearable technology create a divide between those who can afford it and those who can’t?
5. What impact can an emergency contact button have?
During my personal project journey, one of my biggest achievements was successfully transforming research into a fully functioning prototype. In the beginning, I had limited experience with hardware or software, and building a wearable device that could measure ECG and SpO2 levels, along with an emergency button, felt incredibly challenging. However, through consistent effort and deep engagement with learning resources, I gradually developed the knowledge and confidence I needed. I completed a full Arduino course, where I learned how to use breadboards, sensors, and wiring. I also explored numerous online articles and tutorials to understand how biometric sensors work. Applying this learning to design and build a real product from scratch was incredibly rewarding. It showed me the power of self-directed learning, especially when driven by curiosity and purpose.
Staying organized played a major role in helping me manage the complexity of the project. I maintained a detailed action plan, used checklists to monitor progress, and created structured folders to store important files. For instance, I kept my STL design files and Arduino sensor code well labeled and easy to access, which saved me time later in the process. This organization helped me stay on track, especially when working on more complex tasks like modeling the casing in Fusion 360. Since I had never used Fusion 360 before, I watched several tutorial videos and practiced repeatedly until I could design a casing that fit snugly around the user’s wrist while allowing the sensor to maintain full contact with the skin. I also added minor design features like a slightly curved bottom to improve comfort and accuracy.
Another valuable part of the process was reaching out to experts for guidance. I connected with the founder of Fourth Frontier, a company that creates health-monitoring wearables, and asked about the role of design in accuracy and user experience. He explained how product form can influence both performance and trust. I also interviewed a senior cardiologist from Manipal Hospitals, who provided medical insight into the usefulness of wearables in patient care and recovery. He mentioned that they were starting to use wearables to track post-surgery metrics and detect abnormalities in real time. These interviews gave me insights I would not have found on my own and helped guide many of my decisions, such as not including a touchscreen to keep the device simple and accessible for elderly users.
I faced two major challenges. The first was understanding the technical side of Arduino. Coming from a non-engineering background, I struggled to understand how components like resistors, microcontrollers, and sensors worked together. At times, I felt completely lost. To overcome this, I broke the problem down, focused on learning one concept at a time, and took detailed notes. For example, I struggled for days to get the ECG sensor to display accurate data, but after reviewing my wiring and going through multiple online forums, I found the issue and fixed it. The second challenge was managing my time, especially since Grade 10 came with multiple academic assessments. I reorganized my schedule, completed major project tasks during school breaks, and set aside two hours each day in the final month to focus entirely on assembling the product and writing the report.
This project taught me that learning is a step-by-step process that requires persistence and patience. Even when the material is unfamiliar or difficult, staying consistent leads to real progress. I have become more confident in my ability to learn independently, solve technical problems creatively, and manage complex tasks with structure and discipline. More than anything, this journey has shown me that challenges become manageable when approached with curiosity, effort, and a willingness to adapt. It has also deepened my interest in wearable health technology, especially as I discovered during an interview that two or three-lead sensor devices are not yet available, despite their potential for greater accuracy. This is something I would like to continue researching and possibly include in future versions of my product.
This project has been a deeply meaningful experience in my journey as a learner. Taking on such an ambitious goal pushed me far outside my comfort zone and encouraged me to develop skills I had never imagined needing. From the very beginning, I was challenged by unfamiliar concepts and tools, but I learned to approach each difficulty with a calm and thoughtful mindset. Rather than rushing through problems or relying on shortcuts, I took time to reflect and find solutions that made sense. One of the most important lessons I learned was the value of patience. For example, when I was coding the ECG and SpO2 sensors, I spent several days troubleshooting why the readings were inaccurate. After stepping away from the problem briefly and doing additional research, I was able to identify and correct the issue. This experience taught me that understanding takes time and that persistence is key to overcoming technical challenges.
I also discovered that I am capable of much more than I initially believed. At the start, I had little knowledge of electronics or coding, and many tasks felt intimidating. Some areas, like programming, were completely new to me and did not interest me much. However, as I engaged more deeply with the project, I began to enjoy the process of learning and creating. With consistent effort, I was able to turn my weaknesses into strengths.
This project has increased my confidence and shown me how much I can achieve with focus and persistence. It also sparked a genuine interest in wearable health technology, which I hope to continue exploring. I would like to improve my current prototype by refining its design and adding advanced features. During one of my interviews, I learned that devices with two or three lead sensors are not yet available, even though they could provide much more accurate data. This is something I would like to research further and possibly include in future versions of my product.
What made the experience even more meaningful was realizing the potential impact my product could have. The wearable I created is designed to support elderly users and those with heart conditions, helping them track vital health metrics easily and reliably. Knowing that a solution like this could contribute to early detection or emergency response, even in a small way, gave real purpose to my work.
Overall, this journey has taught me that learning is not a fixed process, but one that constantly grows and changes with every challenge. I now feel more confident in my ability to take initiative, adapt to new situations, and pursue ideas that matter to me. This experience has not only shaped the way I approach learning, but also helped me discover a meaningful area of interest that I hope to continue exploring in the future.