Beacon Dresser Instruction Sheet 71411

Page 1


Beacon Dresser

This should be easy, just follow our instructions and you will be back to Netflix in no time.

What you need

• Some of your favourite bubbly or your preferred relaxant

• Use the packaging carton as a working surface to prevent product damage during assembly

Estimated time for assembly
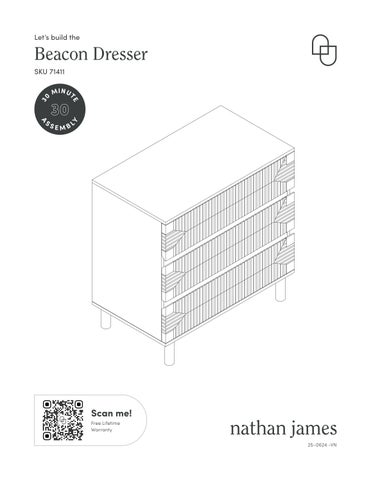
 Weight Limitation

The goods

IMPORTANT

1. Do not tighten bolts / screws completely until all bolts / screws are lined up and inserted into holes.

2. Do not over tighten screws and bolts to avoid stripping.

1

Alright, let’s get started! First, lay out the Left Side Panel (C), Right Side Panel (D), Top Panel (A), Drawer Front Panel-Top (J), and Drawer Front Panel-Middle & Bottom (P) on a soft surface.

Insert the M6*35mm Cam Bolts (1) into the designated holes, following the image below. Tighten using a Phillips head screwdriver.

Next, push the Back Panels (F) together as shown. Use Wooden Dowels (4) to secure. Step 2

Step 3

Cam Lock time! Push the Left Side Panel (C) and Right Side Panel (D) into the sides of the pieces you assembled in Step 2. Secure in place using the Cam Locks (3). See the next page for instructions on using Cam Locks.

Step 4

Now attach the Top Panel (A) to the pieces you assembed in Step 3. Secure in place using the 1/4” x 32mm Hex Button Head Bolts (5), the 1/4” x 16mm Flat Washers (7) and the Cam Locks (3).

Attach the Front Rails (B) to the dresser and secure in place using the Cam Locks (3). Step 5

Next, attach the Leg Frames (H) to the Bottom Panel (E) using the 1/4”*32mm Bolts (5) and Washers (7). Tighten to 75%. Step 6

Step

7

Flip the Bottom Panel (E) that you assembled in Step 5 so that the feet are on the ground. Further secure the Leg Frames (H) in place using the 1/4”*32mm Bolts (5) and Washers (7).

Then insert the Cam Bolts (1) into the Bottom Panel (E).

Step

8

Time to combine the pieces we’ve put together so far.

Insert the Wooden Dowels (4) into the sides of the assembled dresser.

Next, insert the 10*12mm Barrel Nuts (8) into the interior sides of the assembled dresser.

Attach the Bottom Panel (E) to the rest of the assembled dresser using the 1/4”*50mm Bolts (9) and Washers (7). Tighten to 75% using the Allen Key (14).

Tighten the Barrel Nuts (8) using a Phillips head screwdriver.

Attach the Middle Leg (I) by screwing it clockwise to tighten in place. Then attach the Foam Pads (6) to the bottom of the feet.

Insert the Cam Locks (3) into the back of the dresser. Tighten all hardware to 100%. Step 10

Attach the Drawer Bottom Panel Support (O) to the Drawer Front Panel-Top (J) and both Drawer Front Panels-Middle & Bottom (P) using the Wooden Dowels (2). Secure in place using the Cam Locks (3).

Attach the Drawer Right Side Panels (L) to the Drawer Front Panel-Top (J) and both Drawer Front Panels-Middle & Bottom (P) using the Wooden Dowels (2) and M4*35mm Screws (13). Then insert the 10*10mm Barrel Nuts (12). Step 12

Step 13

Don’t worry, this step is easy! Slide the Drawer Bottom Panels (N) into the Drawer Front Panel-Top (J) and both Drawer Front Panels-Middle & Bottom (P).

Step 14

Now attach the Drawer Back Panels (M) to the drawers in place on the drawers you assembled in Step 13.

Secure by inserting the Wooden Dowels (2) into the side of the Drawer Back Panels (M). Then insert the 10*10mm Barrel Nuts (12) into the panels and secure in place using the M4*35mm Screws (13).

Incorrect

Correct

Step 15

Time to finish these drawers! Attach the Drawer Left Side Panels (K) to the drawers by inserting the Wooden Dowels (2) into the side of the Drawer Left Side Panels (K). Then insert the 10*10mm Barrel Nuts (12) and secure in place using the M4*35mm Screws (13).

Finally, insert the M4*35mm Screws (13) into the sides of the drawers to secure the bottom panels in place.

Step 16

Before installing the drawer, please check that the device at the end of the slide rail is correct according to the figure below.

If the device is not in the right position, adjust the device to the correct position by hand. Refer to the next page.

Right Side Panel

Left Side Panel

Refer to the image below to correct the device at the end of the slide. Gently move the cylinder by hand to adjust. Step 17

Left Side Panel
Right Side Panel

Pull the inner ball bearing slides on each side all the way out until they stop. Step 18

Now slide the top drawer you’ve assembled into the dresser. Just a few more steps until your dresser is complete!

Note: You’ll need 2 people to assemble the drawers, so grab a friend. During installation, both sides must be installed at the same time. Step 19

Step 20

Step 1: Hold the inner ball with your hand and don’t let it move during installation.

Step 2: Align the grooves on the rails. The inner ball must stay close to the track.

Step 3: Hold the inner ball and insert the track until close to the drawer panel.

Step 4: Use both hands to push the drawer in slowly.

Step 21

Now slide the remaining drawers into place, one at a time.

For added safety, secure the dresser to the wall to prevent tipping. Use the M4*14mm Screws (15) to secure the Plastic Bracket (for Anti-Tip) (16) to the dresser. Thread the Plastic Tether (for Anti-Tip) (11) through the Bracket (16).

Now we’ll secure the anti-tip bracket to the wall.

To prepare your wall, use a 1/4” drill bit to drill pilot holes into the wall in preparation for the anchors.

Next, drill the Plastic Bracket (16) into the wall in the pilot holes you just drilled using the M4*35mm Screws (13).

Thread the Plastic Tether (11) through both parts of the Bracket (16) to secure to the wall.

Prepare your wall for Anti-Tip Kit Installation

Recommended Drill Bit: 1/4” Drill Bit pull through to secure

24

If the dresser is wobbly or unstable, simply adjust the feet until stable.

Step 25

You did it! Your new dresser is now complete!

No heartburn, when we handle the return

Give us a call 1-866-619-1004 or shoot us a message at help@nathanjames.com we will issue you a free replacement with zero hassle.

Our way Their way

Give us a call

Replacement

You

Re-package item

Schedule pick up

Track package

Replacement

You

We really don’t want you to go through the hassle of re-packaging your item and sending it back, because let’s be honest…nobody has time for that.

Safety first, fun later

We want your product to last as long as possible, so we recommend that you tighten the screws 2 weeks after assembly and for added safety check the tightness of all screws every 2 months.

For proper care and treatment, please check our website at NathanJames.com/products

Safe use of this product starts with you.

Use this product responsibly with the primary concern for your safety. Follow assembly instructions carefully and inspect product upon receipt and each use.

Nathan James and its parent companies cannot be held legally responsible for any injuries or death resulted from failure to follow instructions or improper use of this product.

Do

not modify the structure of this product in any way.

Our products have been tested to meet specific safety measures as they were originally intended to be sold. Any modifications will present the risk of creating significant safety issues which NJ will not be responsible for.

DO NOT use for commercial purposes

DO NOT frolic on dresser

DO NOT use dresser as foot stool

Proper use

DO NOT leave spilled liquid on dresser

DO NOT use dresser if damaged

DO NOT make temporary repairs

DO NOT use outdoors

We are only in business if you’re happy For

starters, thanks for being you.

Toll-free at 1-866-619-1004 Help@nathanjames.com NathanJames.com/help

We do our best to ensure your furniture arrives without any problems, but occasionally mistakes happen—as humans we are imperfect beings. In the event that a part is damaged or missing, we will be more than happy to provide you with replacement part(s) for free.

Warranty

This product comes with a lifetime warranty from the date of purchase. Please use your phone to scan the QR code to register your product or visit https://goo.gl/i9dk3q

Did we do alright? Please spread the love!

If you are happy with your product, tell your friends and family about us or even better leave us a review online. Spreading the word gives us the opportunity to make more people happy and keep our prices low for your next purchase.

Turn static files into dynamic content formats.

Create a flipbook
Issuu converts static files into: digital portfolios, online yearbooks, online catalogs, digital photo albums and more. Sign up and create your flipbook.