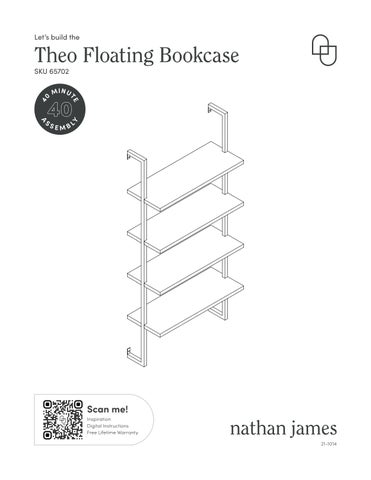
Theo Floating Bookcase Instruction Sheet

Page 1

Bookcase Let’s build the 21-1014 40 40 M I NUTE ASSE MBLY Scan me! Inspiration Digital Instructions Free Lifetime Warranty SKU 65702
Theo Floating

Ok, let’s get rolling

This should be easy, just follow our instructions and you will be back to Netflix in no time.

Estimated time for assembly

40:00

What you need

• Some of your favourite bubbly or your preferred relaxant

• Use the packaging carton as a working surface to prevent product damage during assembly

• Phillips head screwdriver (not included)

• Drill (not included)

• 1/4” Drill bit (not included)

• 5/16” Drill bit (not included)

Weight Limitation

55 lbs per shelf

Toll-free at 1-866-619-1004

Help@nathanjames.com

Nathanjames.com/help

What’s included

2
Description Qty A Shelf 4 B Side Upper Support 2 C Side Lower Support 2 1 M6*15mm Bolt 12 2 M4.2*32mm Screw for Non-drywall Anchor 4 3 Drywall Anhcor 4 4 Non-drywall Anchor 4 5 Allen Key 1 6 M4.2*50mm Screw for
Anchor 4
Drywall
Scan me! Inspiration Digital Instructions Free Lifetime Warranty

The goods

IMPORTANT

1. Do not tighten bolts / screws completely until all bolts / screws are lined up and inserted into holes.

2. Do not over tighten screws and bolts to avoid stripping.

3. Please use hand tools to assemble this product. Do not use power tools.

3
B A C 5 1 2 3 4 6

Let’s get this thing fired up! Assemble the side supports.

4
B 1 B C C 1
Step 1

Step 2

Let’s get those shelves in place! Consider this your workout of the day.

5
1 4 B C A A A A

Attach the second side supports to the shelves. You’re halfway there!

6
C B C B 1
Step 3

Step 4

Non-drywall application

Let’s get this bookcase attached to your wall! Note: the following steps are for non-drywall application. If you have drywall, skip to Page 9.

Tip from a friend to a friend: Tighten to about 90% and do not attach bottom screws into non-drywall anchors until the very last step!

7
4 4 2 2 4 4

Mark it

Chose your desired location on the wall, have your friend hold the bookcase in place and use a pencil to mark where the anchor will go.

1/4” Drill bit

Move bookcase to the side and following the mark you just made. With a 1/4” drill bit, drill 2 holes into the wall.

Phillips screwdriver

Following the mark you just made. Using your phillips head screw driver, screw the plastic anchors into the holes until they are flush to the wall. If you’re feeling strong, just go ahead and push it in. 4

All about the angle

Insert 1 screw through each metal bracket and into the drywall anchor. Tilt your phillips head screwdriver, and secure but do not over tighten.

4 2

8

Step 4 (cont.)

Drywall application

Let’s get this bookcase attached to your wall! Flip over to the next page for a closer look at how to use dry wall anchors!

Tip from a friend to a friend: Tighten to about 90% and do not attach bottom screws into drywall anchors until the very last step!

9
3 3 6 6 3 3

How to use drywall anchors

10
1. Drill hole with 5/16” bit 2. Pinch and insert 3. Begin tightening 4. Tighten to 100%

Step 5

The hard part is over! Hang your bookshelf on the top screws and tighten to 100%.

Lastly, tighten bottom screws to secure.

*Cue party music*

You did it! Order a celebratory pizza, you deserve it!

2 (Non-drywall) or 6 (Drywall)

11

No heartburn, when we handle the return

We really don’t want you to go through the hassle of re-packaging your item and sending it back, because let’s be honest…nobody has time for that.

12 Give us a call 1-866-619-1004 or shoot us a message at help@nathanjames.com we will issue you a free replacement with zero hassle.
Our way Their way Give us a call Replacement Replacement You Re-package item Schedule pick up Track package You

Safety first, fun later

We want your Theo Bookcase to last as long as possible, so we recommend that you tighten the screws 2 weeks after assembly and for added safety check the tightness of all screws every 2 months.

For proper care and treatment of wood and metal please check our website at NathanJames.com/products

Safe use of this product starts with you.

Use this bookcase responsibly with the primary concern for your safety. Follow assembly instructions carefully and inspect product upon receipt and each use.

Nathan James and its parent companies cannot be held legally responsible for any injuries or death resulted from failure to follow instructions or improper use of this product.

Do not modify the structure of this product in any way.

Our products have been tested to meet specific safety measures as they were originally intended to be sold. Any modifications will present the risk of creating significant safety issues which NJ will not be responsible for.

Proper use

DO NOT use for commercial purposes

DO NOT place on uneven floor or surface

DO NOT use as a step-stool or stand on bookcase

DO NOT put hot serving liquid directly on bookcase

DO NOT leave spilled liquid on bookcase

DO NOT use if bookcase is damaged or broken

DO NOT make temporary repairs

DO NOT use outdoors

13

We are only in business if you’re happy For starters, thanks for being you.

Toll-free at 1-866-619-1004

Help@nathanjames.com

NathanJames.com/help

We do our best to ensure your furniture arrives without any problems, but occasionally mistakes happen—as humans we are imperfect beings. In the event that a part is damaged or missing, we will be more than happy to provide you with replacement part(s) for free.

Warranty

This product comes with a lifetime warranty from the date of purchase. Please use your phone to scan the QR code to register your product or visit https://goo.gl/i9dk3q

Did we do alright? Please spread the love!

If you are happy with your product, tell your friends and family about us or even better leave us a review online. Spreading the word gives us the opportunity to make more people happy and keep our prices low for your next purchase.

14

Turn static files into dynamic content formats.

Create a flipbook
Issuu converts static files into: digital portfolios, online yearbooks, online catalogs, digital photo albums and more. Sign up and create your flipbook.