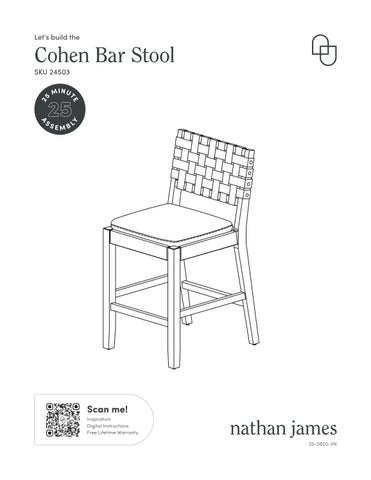
Cohen Bar Stool Instruction Sheet 24530

Page 1

Cohen Bar Stool

build the VN-24-0408 30 30 M I NUTE ASSE MBLY SKU 24530 Scan me! Free Lifetime Warranty
Let’s

This should be easy, just follow our instructions and you will be back to Netflix in no time.

What you need

• Some bubbly or your preferred relaxant

• Use the packaging carton as a working surface to prevent product damage during assembly

• Phillips head

Toll-free at 1-866-619-1004

Help@nathanjames.com Nathanjames.com/help

2
Ok, let’s get rolling What’s included
screwdriver Description Qty A Chair Back 1 B Seat Frame Assembly 1 C Left Front Leg 1 D Right Front Leg 1 E Front Footrest 1 F Side Stretcher 2 1 1/4” x 40mm Hex Button Head Bolt 2 2 1/4” x 60mm Hex Button Head Bolt 4 3 1/4” x 80mm Hex Button Head Bolt 4 4 1/4” x 12mm Lock Washer 10 5 1/4” x 19mm Flat Washer 10 6 M4 x 38mm Screw 6 7 Allen Key 1 8 Plastic Nail-in Footpad (Extra) 4 30:00 Estimated time for
300 lbs
assembly
Weight Limitation
Scan me! Free Lifetime Warranty

The goods

IMPORTANT

1. Do not tighten bolts / screws completely until all bolts / screws are lined up and inserted into holes.

2. Do not over tighten screws and bolts to avoid stripping.

3
A B C D E F F

Step 1

Let’s get this thing fired up!

Secure on the Chair Back (A) and the Seat Frame (B) using the 1/4 inch Flat Washer (5), 1/4 inch Lock Washer (4) and 1/4 inch x 40mm Hex Button Head Bolt (1).

We told you this was going to be easy!

Do not overtighten hardware. Tighten to 75% for now. 1 4 5 1 4 5 7

4
B
A

Step 2

Safety first, then comfort: let’s make sure your stool is is sturdy! Secure the Seat Frame (B) using the 1/4 inch x 80mm Hex Button Head Bolt (3), 1/4 inch Lock Washer (4), and 1/4 inch Flat Washer (5).

Do not overtighten hardware. Tighten to 75% for now.

3 4 5 3 4 5 7 x2

5

Step 3

Let’s secure those Front Legs (C) & (D) in place using the 1/4 inch x 60mm Hex Button Head Bolt (2), 1/4 inch Lock Washer (4), and 1/4 inch Flat Washer (5).

Consider this your workout of the day!

Do not overtighten hardware. Tighten to 75% for now.

6
D C 4 5 2 4 5
7 x2
2

Step

4

Now, screw on the Front Footrest (E) and Side Stretchers (F ). Use the M4 x 38mm Screws (6) to make this happen.

We’re almost to the finish line, just one more step to go!

You can tighten this step 100%!

If you are having trouble getting the screws to catch, it is recommended to carefully use an electric screwdriver or drill with necessary bit for this step.

Do not over-tighten; holes may become stripped.

7
F F E 6 6 x6

Issues with stretchers aligning at an angle?

If the stretchers are set at an angle when you are aligning them with their respective holes on the front & back legs, you have likely assembled the front legs incorrectly.

Re-check to confirm that the proper legs are installed in their intended position on the proper side of the stool.

The front legs are not interchangeable; therefore they may need to be rotated and swapped to the opposite side.

8
-OR-

Step 5

Carefully flip the stool over on a flat surface and make sure the legs are touching the ground evenly before tightening everything to 100%.

You did it! Go tuck your bar stool into your kitchen island and celebrate with some pizza!

9
x10

No heartburn, when we handle the return

Give us a call 1-866-619-1004 or shoot us a message at help@nathanjames.com we will issue you a free replacement with zero hassle

Our way Their way

Give us a call

Replacement

You

Re-package item

Schedule pick up

Track package

Replacement

You

We really don’t want you to go through the hassle of re-packaging your item and sending it back, because let’s be honest…nobody has time for that.

10

Safety first, fun later

We want your product to last as long as possible, so we recommend that you tighten the screws 2 weeks after assembly and for added safety check the tightness of all screws every 2 months.

For proper care and treatment, please check our website at NathanJames.com/products

Safe use of this product starts with you.

Use this product responsibly with the primary concern for your safety. Follow assembly instructions carefully and inspect product upon receipt and each use.

Nathan James and its parent companies cannot be held legally responsible for any injuries or death resulted from failure to follow instructions or improper use of this product.

Proper use

Do not modify the structure of this product in any way.

Our products have been tested to meet specific safety measures as they were originally intended to be sold. Any modifications will present the risk of creating significant safety issues which NJ will not be responsible for.

DO NOT use for commercial purposes

DO NOT frolic on bar stool

DO NOT use bar stool as foot stool

DO NOT leave spilled liquid on seat

DO NOT use bar stool if damaged

DO NOT make temporary repairs

DO NOT use outdoors

11

We are only in business if you’re happy

For starters, thanks for being you.

Toll-free at 1-866-619-1004

Help@nathanjames.com

NathanJames.com/help

We do our best to ensure your furniture arrives without any problems, but occasionally mistakes happen—as humans we are imperfect beings. In the event that a part is damaged or missing, we will be more than happy to provide you with replacement part(s) for free.

Warranty

This product comes with a lifetime warranty from the date of purchase. Please use your phone to scan the QR code to register your product or visit https://goo.gl/i9dk3q

Did we do alright? Please spread the love!

If you are happy with your product, tell your friends and family about us or even better leave us a review online. Spreading the word gives us the opportunity to make more people happy and keep our prices low for your next purchase.

12

Turn static files into dynamic content formats.

Create a flipbook
Issuu converts static files into: digital portfolios, online yearbooks, online catalogs, digital photo albums and more. Sign up and create your flipbook.