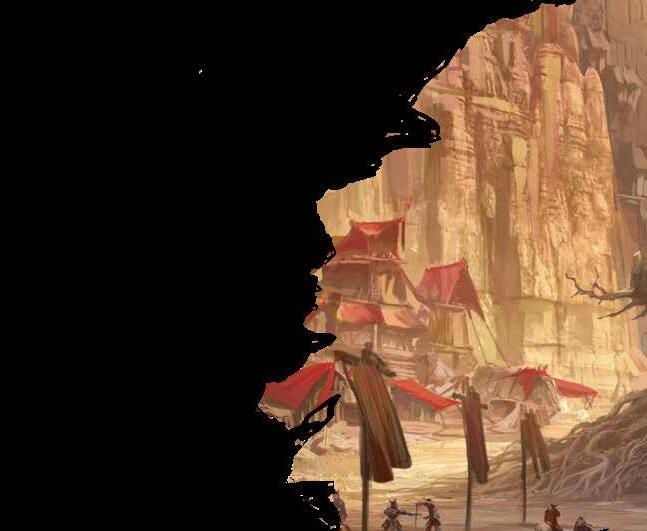
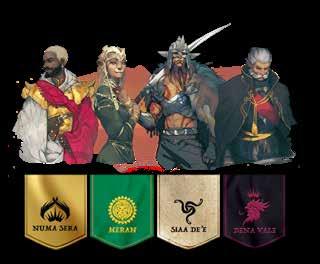
Vast, beautiful, and dangerous, the world of Ethera is full of unique cultures and kingdoms all vying for control of the landscape. From the ordained bloodline of Numa Sera to the valiant knights of Dena Vale, the majestic “cat people” of Meran, and the pillaging hordes of Siaa De’e, each force will stop at nothing to advance its power.
As the leader of your people, your goal is to amass resources and create the most powerful kingdom in all of Ethera so your name will be remembered long after you are gone. There are several ways to achieve this: by conquering strongholds, slaying your opponents’ heroes, mastering skills, or earning new class titles. You can rule benevolently, cruelly, or anything in between. The choice is yours.
Whichever path you take, you will need to acquire assets to advance your heroes and grow your kingdom. Through exploration of Ethera’s many distinct environments, you will uncover rare items and enlist new allies to assist in your campaign. But exploration also has its risks: Ethera is a dangerous place, full of ancient secrets and hidden obstacles. So be ever vigilant…
The winds of Numa Sera are blowing.
WINDS OF NUMA SERA TM CREATED BY Morgan Rosenblum & Jonny Handler
GAME DESIGN: Morgan Rosenblum & Jonny Handler
CREATIVE PRODUCER: Owen Rosenblum
ASSISTANT PRODUCER: Logan Dean
GRAPHIC DESIGN:
Ismail Nihad, Kevin Ilagan, Robbie Simmons
EDITING:
Jon Healey, Michael Rosenblum, Maya St. Clair.
ARTISTS:
Philipp Kruse, BarkBark Studio, Andrey Astakhov, Luigi Aimè, Eduard Petrovich, Eduardo Mello, Alessio Moroni, Valentina Taddeo, Reza Afshar, Valeria Kolevatova, Ren Spiller.
GAMEPLAY DEVELOPMENT: Szilágyi László Gábor, Patrick Brennan, Kim Brebach, Ari David, Adi Slepack, Offcut Games, Kicktester.
PLAYTESTERS:
Alex Cope, Eric Lipka, Josh Martin, Eliza Howard, Gabriel and Geoffrey Grove, Nunzio Lorè, J. Emory Parker, Brad Gansberg, David Erwin, Memphis Erwin, Alexander Erwin, Dawson Erwin, Timothy Brown, Bradley Woods, Logan Wynn, Myung-eun Kim, Gál József, Pásztor Balázs, Nemes Balázs, Bálint Kristóf, Ménesi Zoltán, Ágoston Márk Zalán, Kincses Dóra, Adam May, Cole Feeser, Michael Gaydos, Kenny Sabir, Michael Joss, David Knight.
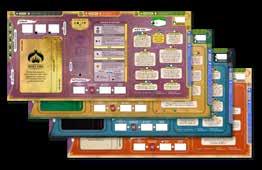
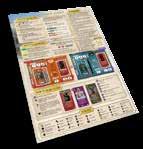
D 4 Kingdom Mats
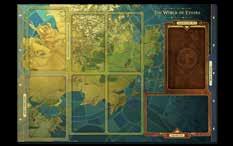
1 Map Board
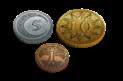
D 74 Capital Coins
D 1 First Player Token D 1 Battle Die
D 4 Dry Erase Markers
D 1 Quick Sheet
D 20 Class Cards
D 35 Skill Cards D 12 Hero Cards D 80 Exploration Cards
25 World Forge Item Cards
Stronghold Cards
ETUP
OBJECT OF THE GAME S
Winds of Numa Sera is a kingdom-building strategy game for 3 to 4 players where you will grow your kingdom, equip your heroes for adventure, and race to define your legacy. Be the first to unlock any 2 of 4 possible victory conditions to win the game.
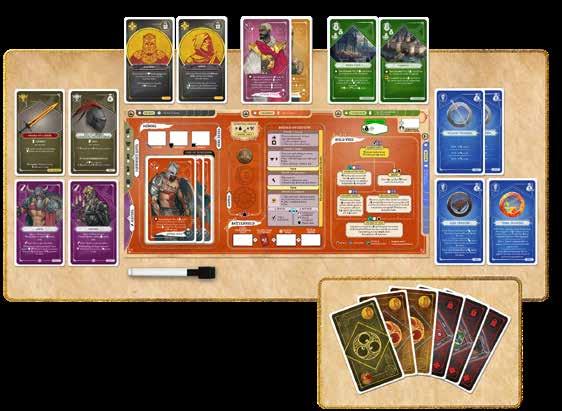
SET UP OVERVIEW
1. Assemble the play area.
2. Choose your kingdom and set your line of succession.
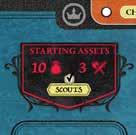
3. Distribute your starting assets & write in your stats.
4. Review the victory conditions and how to win.
5. Determine who goes first.
C Directions for how to set up and play the game are in blue text.
1. ASSEMBLE THE PLAY AREA
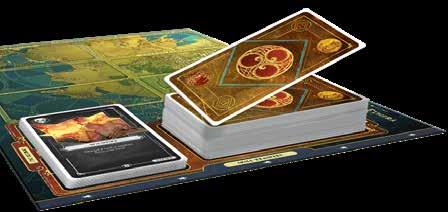
THE GAME CARDS
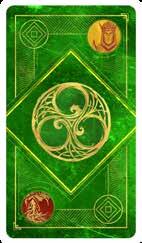
There are six types of game cards, which are identified by their different back colors.
C Separate the 6 types of cards into decks by their backside colors.
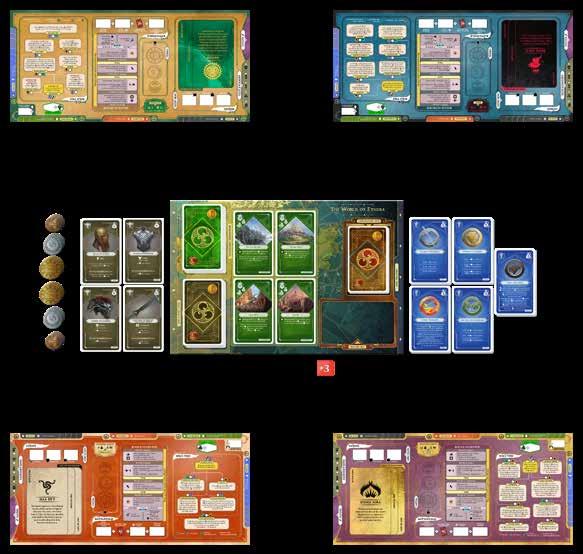
THE COMMUNAL PLAY AREA
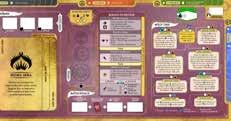
THE MAP BOARD
Place the map board in the center of the table. It shows:
D A map of Ethera and the continent of Numa Sera.
D Placeholders for the independent strongholds, World Forge items, exploration deck, discard pile, and the 5 skill card types you can obtain in the game.
THE WORLD FORGE
C Shuffle the World Forge deck (hazel back), and place it face down on the map board as shown.
C Draw the top four cards from the World Forge deck and place them
face up in the designated area next to the left of the map board, as shown. This constitutes the World Forge, the market where item cards are available for purchase.
THE SKILL MASTERS THE EXPLORATION DECK
C Separate all skill cards (blue back) by skill type (weapon, defense, forge, agriculture, lore).
C Ensure that there are a number of cards in each skill deck equal to 3
plus the number of players (for example, in a 3-player game you will need 6 of each skill card). Return all unused skill cards to the game box.
C Place these five decks face up in the skill masters area on the right side of the map board so they are visible to all players.
THE INDEPENDENT STRONGHOLDS
C Create the independent strongholds deck by randomly selecting a number of stronghold cards (green back) based on the player count as follows: select 8 or
10 cards for 3 or 4 players, respectively. Return any unused cards to the box.
C Shuffle the independent strongholds deck and place it face down on the map board as indicated.
C Draw the top four cards of the independent strongholds deck and place them face up on the map board as shown.
C Shuffle the exploration deck and place it face down on the map board as shown.
THE DISCARD PILE
The discard pile is where you place all discarded exploration cards. For more information about the discard pile, see page 21.
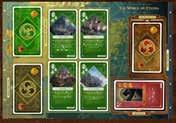
2. CHOOSE YOUR KINGDOM & SET
YOUR LINE OF SUCCESSION
C Choose one of four unique kingdoms to play, each represented by a kingdom mat that comes with its own distinct build tree, starting assets, and a unique triad of heroes.
While all of the kingdoms have their unique strengths, some are better suited for certain playing styles (victory conditions) than others, so choose yours wisely. For example, while one kingdom might have heroes with stronger attack stats, another might have a more advanced build tree.
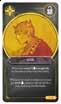
Numa Sera: Wealthy and insulated, the ordained bloodline of the eastern kingdom have an impressive infrastructure and know how to amass capital quickly.
Meran: Keen and honorable, the majestic guardians of the western kingdom are fierce fighters who throughout history have fended off invaders seeking to conquer their small but valuable region. They are resourceful and multitalented, capable of adapting quickly to new situations.
Siaa De’e: Strong and aggressive, the pillaging hordes of the southern kingdom take what they want, when they want it. They are ferocious attackers with battle in their blood, but they are poor at defending what little they have of their own.
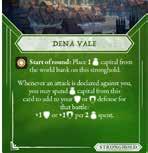
Dena Vale: Tough and resilient, the valiant knights of the northern kingdom are well-trained, self-sufficient, and skilled at defending what they conquer.
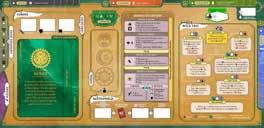
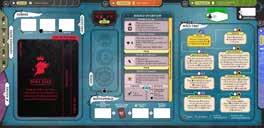
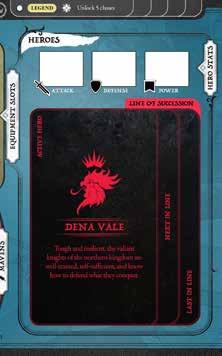
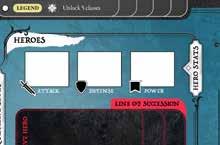
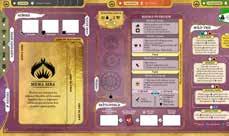
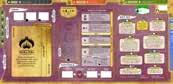
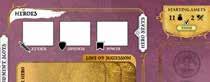
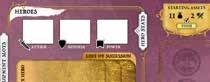
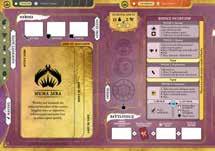
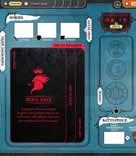
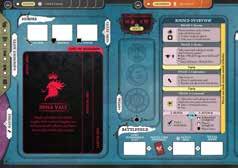
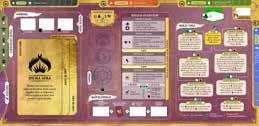
PLAYER AREA
Kingdom mats are divided into multiple sections, each serving a specific purpose. Cards you acquire throughout the game will be placed around your kingdom mat in specific areas, as seen in the player area layout above.
The white boxes and the various build tree, forge upgrade and victory path checkboxes on your kingdom mat can be written on and adjusted with the supplied dry erase markers.
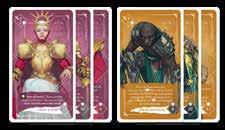
LINE OF SUCCESSION
C Take the 3 heroes matching your kingdom mat color. Each has different statistics and abilities. Arrange your 3 heroes into a spread of 3 cards that constitute your line of succession, with the active hero you want to start the game with on top.
The other heroes will come into play only if your active hero is slain. A slain hero is a hero whose power (health) is reduced to 0, as explained on page 37.
Player’s Hand
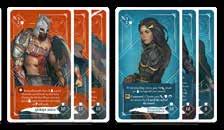
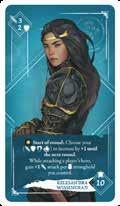
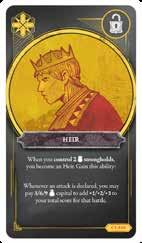
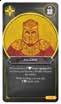
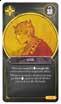
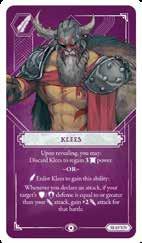
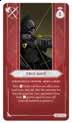
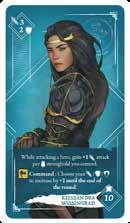
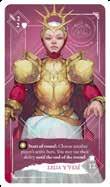
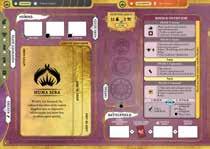
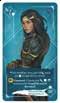
HOW TO READ A HERO CARD
Each hero has three base stats and an ability that gives them a unique set of strengths and weaknesses.
D On the upper left of every Hero card are two icons with numbers representing the hero’s base attack stat and their base defense stat.
D On the bottom right of every hero card is the hero’s maximum power stat. Power represents a mix of health and political power used to achieve things in the game.
C Write your active hero’s stats (with a dry erase marker) into the corresponding hero stat boxes above your active hero .
D The center scroll of each hero card features its ability. This ability is available to you only as long as that hero is your active hero. If your hero is slain during the game (if their power reaches 0), you lose the hero and their ability for the game, and the next hero in your line of succession becomes your active hero.
Any unused kingdom mats and hero cards (orange back) should be stored in the game box, as they will not be used in this game.
3 10 2
3.
DISTRIBUTE STARTING ASSETS
C Take your starting capital (currency) and battle cards as indicated on your kingdom mat.
CAPITAL
Capital is your currency. The game comes with capital coins of different amounts.
CAPITAL COINS
Place all capital you gain or take on your kingdom mat in the designated section.
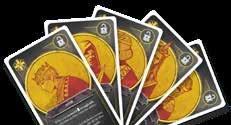
STARTING BATTLE CARDS
Each player gains a number of battle cards as shown on their player mat.
C From the exploration deck, separate and shuffle all the battle cards into a deck.
C Each player then draws the number of battle cards as indicated on their kingdom mats into their hand.
C Shuffle the remaining battle cards back into the exploration deck (brown back) and place it face down on the map board as indicated.
PRE-TICKED BUILD BLOCK
THE WORLD BANK
C All remaining capital coins should be placed near the board, within reach of the players. This is known as the world bank — where you pay capital to, and where you gain capital from.
C Read your kingdom’s pre-ticked build block ability. found on the upper right of your kingdom mat in your build tree.
This is explained further in the Build section. (p. 24)
DISTRIBUTE CLASS CARDS
C Distribute 1 copy each of the five class cards; Heir, Tyrant, Paladin, Rogue and Sage to each player. These cards can be stored in players’ hands or above their kingdom mats, face down, until they have been unlocked.
There are four unique victory conditions you can unlock by meeting their requirement and ticking the corresponding circle on your kingdom mat. Once achieved, victory conditions cannot be lost.
Control 4 strongholds at the same time. (p. 28)
Reach level 3 in any 2 skill types. (p. 16)
Unlock all 5 different classes. (p. 11)
Slay any 2 heroes. (p. 37)
The winner is the player who first achieves any 2 of the 4 victory conditions.
5. DETERMINE WHO GOES FIRST
The last player to visit a castle is the first player, and play continues clockwise from there. Or players can simply roll the dice, and the player who rolls the highest number becomes the first player. For each player, the players to their immediate left and right are their neighbors.
C The first player places the first player token in front of them. It makes no difference which side of the token is face up. It’s simply a personal preference.
C The second, third and fourth players in turn order collect 1/1/2 additional capital, respectively.
Now you’re ready to begin the game!
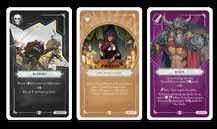
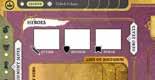
CLASS CARDS
Over the course of the game, you can unlock your 5 class cards by achieving specific goals. Classes are distinctions of status and prestige that result from the actions you take over the game’s 4 phases.
The back side of each class card shows what you need to achieve to unlock that class. Once unlocked, each class provides you with a specific ongoing benefit or ability.
C When you meet a class card’s criteria, take the matching class card from your hand and place it face up above your kingdom mat as indicated to show other players you have unlocked it.
D The five classes are Heir, Paladin, Rogue, Sage, and Tyrant.
D You can acquire multiple classes and gain the benefits of each of them simultaneously.
D Once a class requirement has been achieved, the class cannot be lost, even if you no longer meet the required conditions.
VICTORY CONDITION - LEGEND
Upon achieving, tick the corresponding circle on your kingdom mat to keep track of your progress toward victory.
S EQUENCE OF PLAY
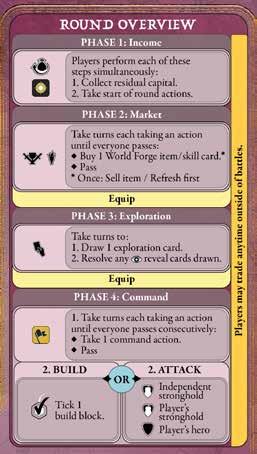
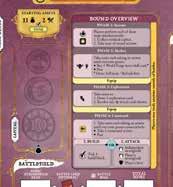
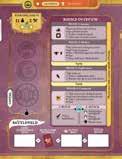
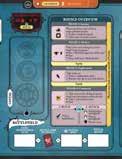
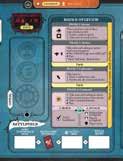
ROUND OVERVIEW
In Winds of Numa Sera, play continues until a player meets any 2 of the 4 victory conditions, at which point the game ends immediately.
Each round has four phases played in sequence. Players conduct these phases either simultaneously or by taking turns, as indicated on the round overview on your kingdom mat and described in detail over the following pages.
When taking turns in turn order during a phase, the first player takes their action first, followed by the next player clockwise and so on. When taking your turn, declare all actions before taking them so other players know what you are doing.
Once a phase is complete, move to the next phase, with the first player taking the first turn as usual.
PHASE SUMMARY
PHASE 1 - Income
1. Collect your residual income.
2. Take all your start of round actions.
PHASE 2 - Market
• Buy items and/or skills.
• Refresh items / Sell 1 item (once).
PHASE 3 - Exploration
1. Draw 1 exploration card.
2. Resolve any cards drawn with a
Once all players have completed their Phase 4 actions, that round ends, and the first player token is passed to the next player clockwise. reveal icon.
PHASE 4 - Command
1. Take Command actions (optional).
2. Build.
~OR~ Attack a hero or stronghold.
P HASE 1 Income
Players take these two steps in sequence:
1. Collect residual capital: Players simultaneously collect their total residual capital, as shown in the residual capital box on their kingdom mats. This total is the sum of your base residual capital and any additional residual you earn from other cards.
2. Take start of round actions: Players simultaneously resolve start of round abilities on cards in their kingdoms.
RESIDUAL CAPITAL
Residual capital is the total amount of capital you collect at the start of each round. Every kingdom starts the game with a unique amount of base residual capital, shown inside the residual capital box at the top of the kingdom’s build tree (outlined in green).
Throughout the game you can raise your residual capital amount by expanding your build tree, conquering new strongholds, and learning the agriculture skill, among other ways.
C Whenever you gain or lose cards that provide additional residual capital, adjust your total amount of additional residual capital in the corresponding kingdom box (outlined in green at the top of your build tree) using the provided dry erase marker. Note that your base residual capital amount is already printed in this box, so be sure to not count it twice.
P Example: Numa Sera has 3 base residual capital, has bought the agriculture skill (+2 residual capital), and has conquered the Dena Vale stronghold (+1 residual capital), earning them a total of 6 residual capital (3 base plus 3 additional) this round.
Start of round actions contribute in some way to your kingdom. When the game begins, typically the only start of round actions available will be from your active hero (and not all heroes have one). As the game progresses, you can acquire more start of round actions.
Any time a start of round action tells you to place capital on a card, take the capital from the world bank.
P Example: During the start of round step in the Income phase, Numa Sera places 1 capital from the World Bank onto their Dena Vale stronghold.
P HASE 2 Market
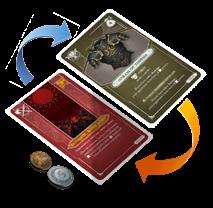
Starting with the first player, players may take as many turns as they can afford to take, buying a single item or skill card each time. Once per round they may sell an item.
BUY / SELL
In this phase, all rulers head to the market together, where they can buy new items from the illustrious World Forge and hire skill masters to train their lineages in different disciplines.
Beginning with the first player, take turns to:
Buy - Spend capital to buy either 1 item card from the 4 World Forge cards on display, refilling the space immediately, or 1 skill card (see skill card level costs, page 16).
Once per round, before buying an item from the market, you may spend 2 capital to refresh the market once. Set aside the 4 current World Forge items, then refill the market with 4 new items. Shuffle the previously displayed item cards back into the World Forge deck. You may then buy 1 of the newly displayed items, or pass instead.
Sell - Once per round, before buying an item from the market, you may sell a non-mythic item for half of its cost. Gain the capital, then shuffle the item back into the World Forge deck. You may immediately buy an item after selling one.
Pass - You may buy (or sell if you haven’t yet done so) again later if all other players don’t also pass.
Players may buy multiple cards in this way during the Market phase, one at a time, in turn order. The phase continues in turn order until all players have passed consecutively, at which point the Market phase ends. As long as the phase continues, any player may take an action again after passing.
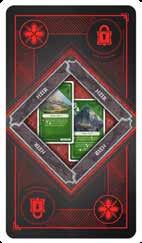
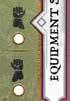
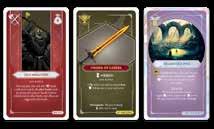
WORLD FORGE ITEM CARDS
EQUIP
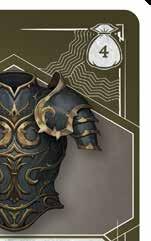
Cost to purchase
World Forge items you purchase are placed in your hand. You may hold any number of items in reserve this way.
World Forge items have a wide variety of effects. To use an item, your active hero must equip it into the corresponding equipment slot next to your kingdom mat. The slots limit how many items you may use at once. Only items equipped by your hero earn you their effects/abilities.
C If you wish to buy a World Forge item card, pay the required capital to the world bank, then take the item card into your hand or equip it to your active hero. Then draw the top card from the World Forge deck and place it face up in the vacant space.
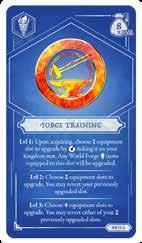
You may upgrade your equipment slots using forge training skill cards (page 16). Any item equipped in an upgraded slot uses its upgraded ability rather than its basic ability.
Some item cards can be used during battles. Capitalized text below the item’s equipment slot indicates in which battles, if any, the item can be used.
On your kingdom mat you have five equipment slots:
You may equip up to 5 items at once, or 4 if you use a two-handed weapon, which takes up both the left and right hand slots.
There are designated windows for you to equip/unequip items to your hero:
D Your active hero may equip or unequip items only during the Market or Exploration phases.
D If your hero is slain during battle, the next hero in your line of succession may immediately equip any mix of your slain hero’s items or other items in your hand.
D Some cards allow you to equip items immediately upon acquiring them.
C Place equipped items to the left of your kingdom mat as indicated.
C Whenever you equip an item that modifies your stats (attack/hero defense/stronghold defense) or residual capital, be sure to update any applicable white boxes on your kingdom mat.
When you wish to equip an item in a slot your hero already has filled, swap out the item card that is currently equipped to your hero and replace it with the new item you wish to equip. The unequipped item is returned to your hand. Be sure to adjust your stat boxes accordingly.
Some card effects subtract from your stats, and you can have negative attack and defense stats.
SKILL CARDS
Skill cards advance your hero and kingdom in a variety of ways. At the skill masters area to the right of the map board, you’ll find expert trainers whom you can pay to train your entire line of succession in new skills or to sharpen ones you already have.
You may buy training in any of the 5 skill types:
Weapon training
Defense training
Forge training
Agriculture training
Lore training
Each skill type has 3 levels of training players can buy. You must buy level 1 in a skill type first, and then level 2, before progressing to level 3. You may buy only 1 skill card at a time, but you may buy multiple skill cards over the same round or game.
Skill card costs: 8 capital x level. It costs 8 capital to buy your first level in any skill type. It costs 16 capital to buy your second card of the same skill type to advance to level 2, and 24 capital to advance to level 3.
C To buy a skill card, pay the required capital to the world bank, then take the skill card and place it on the right side of your kingdom mat as shown. As you acquire additional skill cards of the same skill type, place them behind the matching skill card in a spread stack so that other players can see how many you have. Update your stats (if applicable) with a dry erase marker.
Advance levels in a skill to unlock greater bonuses. You benefit only from the specific bonuses of your current skill level. For example, if you are at level 2, you do not get the bonuses of level 1 and level 2 combined, only those of level 2.
When a skill deck runs out, no one can buy more skill cards of that type.
VICTORY CONDITION - MASTER
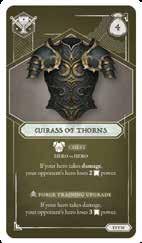
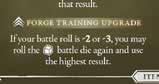
FORGE TRAINING SKILL
When you buy a forge training skill card, you must upgrade 1 equipment slot. Tick the selected slot on the left side of your kingdom mat. You may now use the item’s upgraded ability.
TRADE
At any time outside of battling, you may offer to trade with another player. You may do this for almost any reason, even in response to an exploration card being revealed, before its effect is resolved.
Other players may counter with their own trade offers too!
You may offer to trade cards and capital with other players, as well as trading promises to carry out future actions. Any trades that involve the immediate exchange of assets are binding, but there is no penalty for not fulfilling a future promise as part of the bargain.
To upgrade a two-handed item, you must upgrade two slots. If you have 2 one-handed items but only 1 upgraded hand slot, place a capital coin from the World Bank on the equipped item card to identify it as upgraded.
Whenever you acquire a skill card that modifies your stats (attack/hero defense/ stronghold defense) or residual capital, be sure to update any applicable white boxes on your kingdom mat.
For example, you could trade a skill card for capital, multiple battle cards, or the promise to attack a third player’s stronghold during a later Command phase. But traders beware! Your trading partner may not keep their word after you have already carried out your end of the deal.
The only cards that cannot be traded are heroes, classes, boons, and hazards.
P HASE 3 Exploration
EXPLORE
As your heroes journey across the lands of Ethera, their encounters will be represented by the cards you draw from the exploration deck. In this deck you will find powerful items, influential mavens, useful battle techniques, boons to help your hero, and terrible hazards to overcome.
Exploring is a mandatory action.
C Starting with the first player, players take the explore action by drawing a card from the top of the exploration deck.
C Then, starting with the first player, reveal and resolve any cards showing the reveal icon.
TYPES OF EXPLORATION CARDS
There are six types of exploration cards. Each type has a unique color scheme and icon, which can be found on the upper left corner of the card. The name of the card’s type is also displayed in text on the bottom right.
Some cards instruct you to destroy a card after use. Return them to the game box instead of to the discard pile.
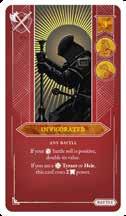
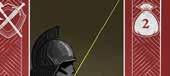
HOW TO READ A CARD
There is a system to reading each of 6 exploration card types:
Cost to play in battle
(If present) Class icon = class bonus or discount
Card name
Battle type usage: Any Battle, Hero vs Hero, or Stronghold Defense
REVEAL VS. HAND
After players have finished drawing exploration cards, any such cards with the reveal icon (maven, boons & hazard cards) must then be revealed and resolved, in turn order. These reveal cards are identified by the open eye icon at the bottom center of the card.
C Read the effects of such cards aloud.
Card type icon
(If present) Eye icon = reveal card to all, then resolve
Equipment slot icon
Body text: effect, ability, conditions
Card type
Some cards come with a choice that must be made to resolve the effect. Some effects may target multiple players.
C Resolve the effects as indicated.
A card is considered resolved when a player has taken all of the required actions as instructed on the card. Discard any such card after it has been resolved.
Exploration cards without the open eye icon go into your hand to be played or activated later; they should be kept hidden from other players. There is no limit to the number of cards in your hand.
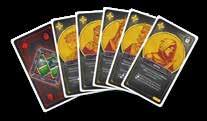
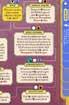
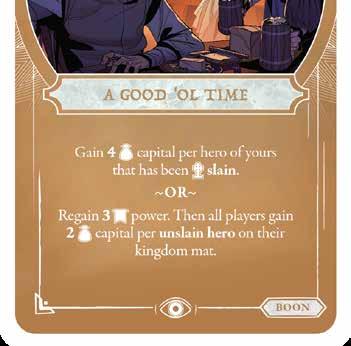
BOON CARDS HAZARD CARDS
Boon cards represent good fortune you encounter throughout Ethera. They generally provide rewards in the form of additional capital or allow you to regain lost power.
C If you draw a boon card, reveal it, read it aloud, and resolve its effects. If it offers you a choice of benefits, declare your selection, then adjust your kingdom mat (e.g., power stat and capital coins) accordingly to resolve the card.
Hazard cards are the exact opposite of boon cards. They generally have some sort of negative effect or risk.
C If you draw a hazard card, reveal it to all players. If the card offers you a choice, declare your selection and then adjust your kingdom mat (e.g., power stat and capital coins) accordingly to resolve the card.
4 4 3 3 8 8
C After resolving a boon card, place it face up on the discard pile.
D If a hazard card offers a choice, you may not choose an option if you do not have enough of the required resource. If you do not have enough of either resource, take the first option and pay as much as you have.
D If a hazard card’s effect reduces a hero to 0 power, the slain hero does not count towards a CHAMPION victory.
C After resolving a hazard card, place it face up on the discard pile.
Reveal Reveal
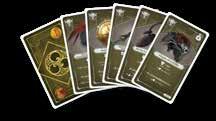
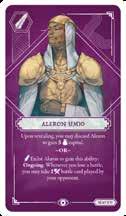
MAVEN CARDS
THE DISCARD PILE
Maven cards represent valuable courtiers whom you may either discard to gain resources from, or enlist as advisors to provide your kingdom with additional abilities.
C If you draw a maven card, reveal it to all players. Read it aloud and declare your choice.
C If you reject the maven, place the card in the discard pile and receive the designated benefit (capital/power). Note that you can regain power only up to your hero’s max power stat.
C If you enlist the maven, place the card to the left of your kingdom mat as indicated. Mavens never go into your hand.
Each maven card tells you when and how you may use their ability.
C If you wish to use a maven’s ability, declare it, and then take the action as indicated.
All discarded exploration cards go into the discard pile on the main map board face up. Players may inspect the contents of the pile at any point.
If the exploration deck is ever exhausted during the game, shuffle the discard pile to create a new exploration deck.
Reveal
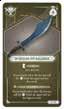
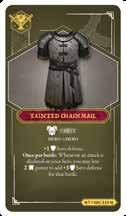
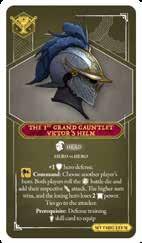
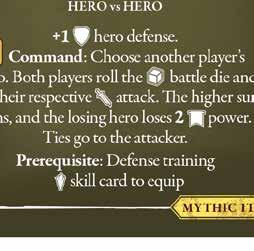
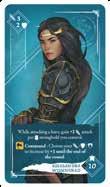
MYTHIC ITEM CARDS BATTLE CARDS
Mythic Item cards, are found only while exploring the world of Ethera. Mythic items are generally more powerful than World Forge items, and therefore they are not upgradable. They also come with a prerequisite you must meet in order to equip them.
Mythic items cannot be sold to the World Forge, but they can be traded to other players.
Some item cards can be used during battles. Capitalized text below the item’s equipment slot indicates in which battles, if any, the item can be used.
For more information on item cards, see the item cards section and the equip section (p. 15).
Battle cards can greatly sway the outcome of a battle, as they provide temporary bonuses or deductions to stats and rolls.
C If you draw a battle card, place it in your hand, ready to be played during battle.
D Battle cards can be played only during the type of battle specified on the card. Each player may use only 1 battle card per battle, or 2 per battle if they have unlocked the Paladin class (p. 12).
D Battle cards cost either capital or power to play. The cost is displayed in the upper right corner of the card. The icon behind the number determines whether the cost is in capital or power, but some cards and build blocks may give you discounts.
D Battle cards are discarded after they are played. Attacker discards first, then defender.
D Battle cards will be explained in further detail in the Attack section (p. 27).
Cost to play in battle
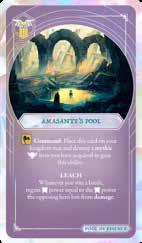
POOL OF ESSENCE CARDS
Pool of Essence cards represent legendary bodies of concentrated life energy known as Essence. Created by the First Ones and left to the world before they retreated into their eternal slumber, the pools are imbued with immense power and protected by a special creature called an Essential. Sworn to an ancient oath, the Essential’s sole purpose is to determine which of the pool’s few finders are worthy to gain its special ability.
Pool of Essence cards must be paid for as stated on the card.
Each Pool of Essence has a unique cost and ability.
C If you draw a Pool of Essence card, place it in your hand.
C As a command action, you may reveal the card and pay its cost. Then take the card and place it face up in the battlefield area on your kingdom mat to indicate that your active hero has been blessed and gained a pool’s ability. If your blessed hero is slain, return the pool card to your hand. You can pay again in a later Command phase to bestow the ability on your newly active hero.
You may only have 1 Pool of Essence card active at a time.
BUILD P HASE 4 Command
The competing factions in Ethera have different strengths and motivations, and each may unlock new powerful abilities or benefits.
1. COMMAND ACTIONS
As the game progresses, players may collect cards with a variety of minor command action abilities. These are used during step 1 of the the command phase.
Command actions are always optional, and may only be used once per round each.
Beginning with the first player, players take turns to either:
D Use a command action ability.
D Pass.
C When you take a build action, choose 1 valid build block on your kingdom board’s build tree to tick with the provided dry erase marker and gain a unique benefit or ability. Take any action indicated in the ticked block and, if necessary, adjust capital and stat boxes.
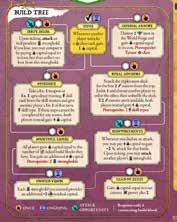
THE BUILD TREE
You may tick any build block directly connected to any previously ticked build block you have, including your starting build block.
If you pass, you may still take option 1 again. This step continues until all players have passed consecutively. In this way it is possible to use multiple command actions in the Command phase.
2. BUILD OR ATTACK
For the second step of the round, you must choose to either:
D Build
Once all players have passed, the first player then continues to the build or attack step. ~OR~ ~OR~
D Attack
You may not do both unless a build block also allows you to attack. Once each player has taken this action, the round ends, and the first player token is passed to the next player to start off the next round.
P In the example shown, you can’t tick Bountiful Empire because you haven’t yet ticked Efficiency. But you can tick Efficiency because you already have Tithe, the preceding build block in that sequence, ticked.
Certain build blocks have prerequisites, identified in red text, that you must achieve before ticking that block.
If a build block is connected by dotted lines, that means you need to have ticked only one of the connecting build blocks in order to tick that next build block.
THE TWO BUILD BLOCK TYPES
There are two different types of build blocks, each identified by a unique icon and color:
Once — When you tick this block, you receive the benefits immediately, but only once.
Ongoing — When you tick this block, you activate its benefit in perpetuity. Note that you will receive some of these benefits on other players’ turns.
Some build blocks also allow you to attack a specific target as part of your build action. This is designated by the attack opportunity icon.
Once players have ticked all of their build blocks, they can no longer build, and therefore must attack during Phase 4.
ATTACK - OVERVIEW
Attacking strongholds or rival heroes helps you achieve the Conqueror and Champion victories. When you attack, a battle starts between the attacker and a defender.
You may attack to conquer a stronghold or slay a rival hero. When you attack, your active hero is always the one attacking, and you can choose to attack 1 of 3 things as the target:
Independent stronghold
Player’s stronghold
Player’s hero
Each type of battle works in slightly different ways. In the following pages we explain how battle steps generally work, and then how each of the 3 types of battles work in detail.
Battle outcomes are affected by a mix of your Hero’s attack or defense stats, their abilities, bonuses from items or skills you may have purchased, build block or class abilities you may have unlocked, and powerful battle cards you can play to swing the tide of battle.
You may play battle cards or use item effects only if they are valid for the type of battle being fought:
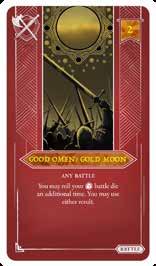
Cards labelled ANY BATTLE may be played in all 3 types of battles.
Cards labelled STRONGHOLD DEFENSE may be played only if you are defending a stronghold from attack.
Cards labelled HERO VS HERO may be played only while you are directly attacking a hero or your hero is defending against such an attack.
All battles follow these steps, modified slightly by the type of attack:
Step 1: Declare & prepare
Step 2: Battle cards
Step 3: Battle roll
Step 4: Outcome
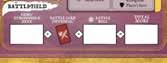
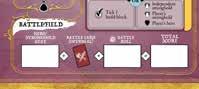
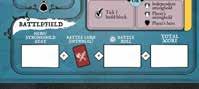
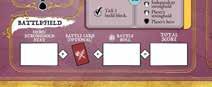
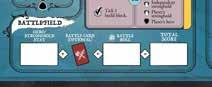
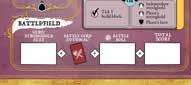
BATTLE STEPS
STEP 1: DECLARE & PREPARE
ATTACK vs PLAYER’S STRONGHOLD or HERO
The attacker declares their target, then writes the sum of their attack stat plus all valid passive attack modifiers, such as build block or hero abilities, into the battlefield hero / stronghold stat box on their kingdom mat and declares it as their attack stat.
1. The attacker declares their target and writes their attack stat and all valid modifiers into the battlefield stat box on their kingdom mat.
5. The defender then activates and announces all additional valid effects from optional or applicable cards or abilities (e.g. the Heir class card, build block / item / stronghold abilities, etc), modifies their battlefield hero / stronghold stat on their kingdom mat accordingly, and declares it as their defense stat.
ATTACK vs INDEPENDENT STRONGHOLD
If the attack is against an independent stronghold, there is no defender. The attacker follows steps 1 and 4 above, and uses the stronghold’s defense stat as its defense strength, unmodified by any other effects.
2. Before any other effects may be activated, a defending player may immediately play a battle card or ability that allows them to escape a hero vs hero battle, e.g. Mist or Escape battle cards, or Cole (a maven). If the defender successfully avoids the attack, the attacker may choose a different target to attack, a stronghold from the same player, an independent stronghold, or another player’s hero or stronghold.
3. Once an attack against a player is successfully declared, the defender writes the sum of their applicable defense stat ( stronghold or hero) and all valid passive defense modifiers, such as build block or hero abilities, into the battlefield hero / stronghold stat box on their kingdom mat.
4. The attacker then activates and announces all additional valid effects from optional or applicable cards or abilities (e.g. the Heir class card, build block / item / stronghold abilities, etc), modifies their battlefield hero stat on their kingdom mat accordingly, and declares their attack stat.
STEP 2: BATTLE CARDS
Participating players may play valid battle cards (see above) to improve their chances in battle.
3. All battle cards are revealed simultaneously, paid for, and resolved according to their rules. ~OR~
1. The attacker chooses and places 1 battle card first, face down.
2. The defender chooses and places 1 battle card face down.
Note - Only the attacker plays battle cards while attacking an independent stronghold.
STEP 3: BATTLE ROLL
Participating players each:
Roll the battle die, which modifies players’ ATTACK or DEFENSE by -3, -2, -1, +1, +2 or +3,
Adjust their battle roll with any applicable modifiers (from items or battle cards).
The attacking hero triggers any effects that alter or modify the battle roll or its result on their cards or build blocks first. Each item can be triggered only once in a battle.
When multiple effects or abilities impact a battle, resolve them in this order of priority:
If two opposing effects make a battle roll result count as both negative and positive, ignore the opposing effects (“such specific” is overkill here) while resolving any additional effects if possible.
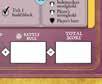
Total all the battlefield results and write the attacker’s total score (ATS) or defender’s total score (DTS) on their kingdom mat’s battlefield next to their battle roll result accordingly.
Note: Only the attacker rolls the battle die while attacking an independent stronghold. There is no battle roll on behalf of an independent stronghold.
STEP 4: OUTCOME
ATS vs DTS = OUTCOME
1. Compare results. Compare players’ ATS and DTS numbers. An independent stronghold’s DTS is its DEF stat unmodified.
2. Determine winner: The player with the highest result wins the battle. If tied, the attacker wins. In an attack on an independent stronghold, you win if your attack result is equal to or higher than the stronghold’s defense value.
3. Deal damage (slay hero?): In hero vs hero battles, or when you lose a battle as the attacker of a stronghold, the difference between results is dealt to the battle’s loser as damage. Reduce the losing hero’s power by that amount. Note: a hero defending a stronghold takes no damage if they lose.
D A hero reduced to 0 power by taking damage is slain. The winner moves them to the slain heroes area above their kingdom mat and gains any capital stored on them. (See Slain heroes, p. 37)
D Note: A hero may not take damage beyond their current power level. Any further damage dealt to that hero is ignored and does not carry over onto other heroes in the player’s line of succession.
4. Post-battle effects: Once the outcome has been determined, check for and resolve any post-battle effects (“After the outcome has been determined”), then adjust the power on any affected hero, if applicable. Any such effects do not change the outcome, although it is possible for another hero to be slain.
D Slay hero: A hero reduced to 0 power in this way is slain by the player who caused that power loss. Even defending heroes that don’t take damage in step 3 may still be slain through post-battle effects. It is also possible for both heroes participating in a battle to be slain this way.
6. Conquer stronghold: Take a stronghold you successfully attacked, placing it in your conquered strongholds area. If it is an independent stronghold, gain its loot in capital. If it was controlled by another player, gain any coins on it.
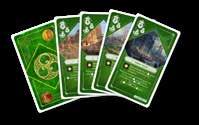
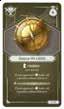
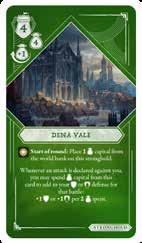
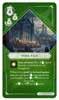
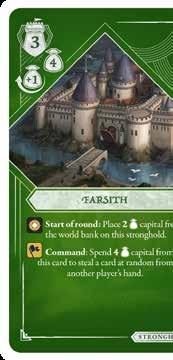
STRONGHOLD CARDS
Stronghold cards represent the castles or garrisons of Ethera. They offer their owner a mix of additional income and unique abilities, and controlling 4 strongholds represents 1 of the game’s 4 victory conditions.
Conquer an independent or controlled stronghold to gain the stronghold card and the benefits that come with it. The game starts with 4 visible independent strongholds on the map board.
When an independent stronghold is conquered, draw a new card from the independent stronghold deck to replace it.
Once conquered, strongholds are considered controlled.
HOW TO READ A STRONGHOLD CARD
= Stronghold’s defense stat
= Loot, the amount of capital gained immediately from the world bank when an independent stronghold is conquered.
= The amount of residual capital you can add to your residual capital box (income total) upon conquering.
Each stronghold has a start of round ability, which must be activated in the Income phase once the stronghold is conquered. Most of these earn you additional capital or accrue capital on themselves to be used to pay for their second ability.
The bottommost stronghold text tells you the effects that are gained by spending the capital that accrues on the card.
VICTORY CONDITION - CONQUEROR
control 4 strongholds at the same time, you become a and fulfill 1 of the 4
Upon achieving, tick the corresponding circle on your kingdom mat to keep track of your progress toward victory. This achievement cannot be lost, even if you no longer meet the required conditions.
WALKTHROUGH: PLAYER VS INDEPENDENT STRONGHOLD
You decide to declare an attack on the independent stronghold of Dena Vale.
STEP 1 : DECLARE & PREPARE
In order to conquer it, your attacker’s total score (ATS) must equal or exceed the stronghold’s defense stat of 4. Because the independent stronghold is the defender, no defender’s ability, effects or battle roll affects its defense stat.
STEP 2 : BATTLE CARDS
STEP 4: OUTCOME
The independent stronghold defender’s total score (DTS) is the same as its defense stat, 4, because independent strongholds do not get to make a battle roll or play battle cards.
Your attacker’s total score (ATS) of 4 is equal to or greater than the stronghold’s DTS of 4.
Attackers always win ties, so you win the battle. Gain the stronghold card and, because it was an independent stronghold, gain its 4 loot as well. Place the loot on your kingdom mat and the card in the conquered stronghold area above it, then update the residual capital total on your kingdom mat.
You opt to not play a battle card. See the Walkthrough: Player vs Player section for a walkthrough that shows utilization of battle cards.
STEP 3 : BATTLE ROLL
You roll the battle die and get a result of a -1, and have no way to modify that roll. 5 ATT -1 = 4 ATS.
Then, if possible draw a new independent stronghold card from the top of the stronghold deck and place it face up on the available stronghold space on the map board.
ALTERNATE RESULT EXAMPLE
If you had instead rolled a -3, your attacker’s total score (ATS) would have been 2, or 2 less than the independent stronghold’s defense stat. You would have lost the battle and taken the difference between your ATS 2 and their DTS 4 = 2 as damage. You would then subtract 2 from your hero’s current total power with a dry erase marker and end your turn.
WALKTHROUGH: PLAYER VS PLAYER’S STRONGHOLD
You decide to attack a rival player’s previously conquered stronghold, partly to gain the capital stored on it and the extra residual income it offers, and partly to deny your rival its benefits and to block them from achieving the Conquerer victory on a later attack. It carries some risk, however; if things go very badly, your hero might take damage or even be slain, while their hero is safe from taking damage as the defender of a stronghold.
STEP 1 : DECLARE & PREPARE
You declare an attack on another player’s previously conquered stronghold, Farsith.
In order to win the battle, your attacker’s total score (ATS) must equal or exceed the defender’s total score (DTS).
Your base ATT is 2, and you have the Weapon training skill at level 2, giving you another +2 ATT, plus an equipped item that gives you an additional +1 ATT, for a total of 5 ATT. This is already written in your Hero’s ATT box. You have no other effects that change this now, so you copy it to your battlefield hero stat box.
DEFENDER
The defender’s hero is present at the battle, and they will roll the battle die and may play a battle card as usual. But in stronghold defense battles, the defender uses the stronghold’s DEF rather than their hero’s DEF stat. Anticipating that someone would attack their stronghold, the defender has used their hero’s command ability during the Command phase to add +1 to their stronghold DEF until the end of the round.
The defender is also immune to taking damage as they are protected by the stronghold.
The defender copies their stronghold’s DEF (3) +1 = 4 into their battlefield stat box.
The attacker (ATT 5) has a slight advantage over the defender (DEF 4) at this stage.
STEP 2 : BATTLE CARDS
You opt to play a battle card and place it face down on your kingdom mat. Your opponent decides to play one too, placing it face down on their kingdom mat.
Both players then reveal their battle cards simultaneously and adjust their capital coins or power stat boxes to pay their card’s cost, as seen in the cards’ upper right corner. Your card costs 2 power to play, so you reduce your current power from 10 to 8 on your kingdom mat.
STEP 3 : BATTLE ROLL
You roll a -1, but your battle card, Good Omen: Gold Moon, allows you to roll your battle die a second time and take either number, so you roll again and get a +2. You choose the +2, which adds to your 5 ATT, giving you a total attack score (ATS) of 7.
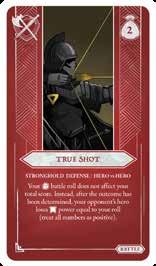
The defender rolls the battle die: a -3. However, their True Shot battle card instructs them to not count their battle roll towards their total defense score. So their defender’s total score stays unchanged at 4.
Your opponent spends 2 capital for their battle card.
The outcome is now determined as: 7 (ATS) - 4 (DTS) = 3. As the outcome number is 0 or higher, the attacker wins and gains the stronghold. If it had been negative, the defender would have won, kept the stronghold, and dealt that amount of damage to the attacking hero.
Place the stronghold above your kingdom mat, and place any capital coins that were on the card onto your kingdom mat. Both players adjust their residual capital boxes to reflect the change in control of Farsith and its +1 residual capital.
Heroes defending strongholds cannot take damage as they are not on the front lines of that battle, and are assumed to be able to escape if they lose. Therefore, the defending hero does not lose any power due to damage.
However, your hero does not leave the battle unscathed, thanks to the defender’s battle card, True Shot, which takes effect after the outcome has been determined, during post battle effects. True Shot turns their battle roll into a direct loss of power for your hero. They rolled -3, turned positive by their battle card effect, which then causes your hero to lose 3 power, taking it from 8 down to 5 power. So you have gained a stronghold but lost 5 of your 10 health in the process.
Check for any other post-battle (“After the outcome has been determined”) effects. In this case, there are no additional effects to be applied.
To conclude the battle, both players adjust their power stats accordingly (if they haven’t done so already) to reflect their current power level, and then players discard the battle cards they played (attacker first).
Now that you have two strongholds under your control, you have also unlocked the Heir class card and its ability. Place it above your kingdom mat as indicated.
ALTERNATE RESULT EXAMPLE
If you had instead rolled a -3 on both of your battle rolls, your attacker’s total score (ATS) would have been 2. As true shot ignores the defender’s roll of -3, that’s 2 less than the defender’s stronghold defense stat of 4.
You would lose the battle and, because attackers can take damage when attacking a stronghold, take the difference between your ATS 2 and their DTS 4 as 2 damage. You would then subtract 2 from your hero’s current total power with a dry erase marker, leaving you with just 6 health, before being hit by True Shots effect.
WALKTHROUGH: HERO VS HERO
During the Income phase, you see Kelesandra of Dena Vale is only on 4 power, and you suspect she might attack you later this round. So as a Start of Round action you use Lelia’s ability to copy Kelesandra’s ability for the round. You now have her ability available to use this round … and with your 2 strongholds adding +2 to your ATT, that might just be enough to win a battle against her, and maybe even slay her, before she comes after you.
In the Command actions step prior to you attacking, you copy Kelesandra’s ability and choose to gain +1 ATT per stronghold. Kelesandra’s player suspects she will be attacked this round, and chooses to increase her DEF +1 this round as her own command action.
ATTACKER
You have:
D base ATT 2
D weapon training skill at level 2, +2 ATT
STEP 1: DECLARE & PREPARE
You declare an attack on another player’s hero, Kelesandra of Dena Vale.
The defending player does not have any means to escape or prevent the attack, so the attack is successfully declared and a HERO VS HERO battle begins.
In order to win the battle, your attacker’s total score (ATS) must equal or exceed the defending hero’s total defense score (DTS). The greater the disparity between these totals at the end of battle, the more damage (loss of power) the losing hero will take as a result.
D your equipped Blessed Blade, +1 ATT
D your equipped helm, +1 ATT
D Kelesandra’s +1 ATT per stronghold ability and 2 strongholds, +2 ATT
D Kelesandra’s copied Command action, +1 ATT
This gives you a total of 9 ATT.
You currently have 6 power after regaining 1 power from Jonus’ Goblet in a previous round.
You unlocked the Heir class card when you conquered your second stronghold in a previous battle. You choose to activate its ability now, spending 3 capital to increase your ATT stat by +1 for this battle, bringing your total ATT stat to 10. You write 9 +1 into your Battlefield hero stat box.
ATTACKER
DEFENDER
Kelesandra has :
D base 3 DEF
D defense training, +1 DEF
D forge training upgraded Helm of Gathra, +2 DEF
D Tess of Temerith’s Armor, +1 DEF
That gives them a total of 7 DEF.
Kelesandra currently has 4 Power.
The defending player does not have any abilities to activate in this step, so the battle proceeds to the next step. At this point the defender is already at a disadvantage with a DEF stat of 7 vs your ATT of 10 for this battle.
Both you and the defender have already unlocked the Paladin class and are both able to play up to two battle cards each.
You opt to play 2 battle cards and place them first, face down on your kingdom mat. Your opponent, seeing that you are playing 2 battle cards, decides to play 2 as well, and places their cards face down on their own kingdom mat.
Both players then reveal their battle cards simultaneously, paying their costs in capital or power as specified, and adjust their respective capital coins or power stat boxes accordingly.
You roll the battle die and get a result of +3. However, your opponent’s battle card, Blinding Light, forces you to treat a positive roll as negative, and so your battle roll becomes a -3! Your Total Attack Score is 10 - 3 = 7.
Kelesandra as the defender then rolls the battle die and gets a result of +2. Her battle cards don’t affect her result, but her Axe of Gathra can be used in ANY BATTLE. With this positive roll it adds +1 to the total, making her defender’s total score 7 + 2 + 1 = 10!
STEP 4 : OUTCOME
The outcome is: 7 (ATS) vs 10 (DTS). The defending hero Kelesandra wins the battle, and your hero Lelia takes damage equal to the difference in scores, in this case 3 damage.
But hold on! You played Sell Swords, which allows you to halve any damage taken (rounding up). So rather than taking 3 points of damage, you take only 2, bringing your hero’s current power rating down from 6 to 4 rather than 3.
We’re not done just yet, though. The remaining two battle cards have effects that come into play “after the outcome has been determined,” which is now. You, the attacker, resolve your battle card first.
You played the battle card Crippling Blow, which causes Kelesandra to lose 2 power after the outcome has been determined. Kelesandra entered this battle with 4 power, and used 2 power to pay for Bad Omen: Blood Moon, leaving her with a current power rating of just 2.
Your Crippling Blow now reduces her power down to 0, which despite you losing the battle, still counts as you slaying her! You claim her slain hero card, placing it above your kingdom mat.
Despite the defender being slain, the effects of their battle card, Bad Omen: Blood Moon, still take effect, which forces your hero to lose additional power equal to your battle roll (treating all numbers as positive). You rolled a 3, so you lose an additional 3 power, bringing your hero’s current power from 4 down to 1 (after entering the battle with 6 power). You just narrowly avoided also being slain!
Check for any other post-battle effects from any cards or build blocks, and resolve them as indicated. In this case, Lelia uses Jonus’ Goblet, rolls a +2 and gains 1 power, back up to 2. She lives but is at great risk of being slain in a future attack, perhaps even by Kelesandra’s vengeful successor later this round.
Both players proceed to discard their battle cards (attacker discarding both of theirs first), and the battle is now officially over.
SLAIN HEROES
If a hero’s power reaches 0, that hero is slain.
D If your hero is slain by another player, the slaying player takes your slain hero card and places it above their kingdom mat face up as shown.
D If there was capital on the hero card when that hero was slain, the slaying player collects that capital and adds it to their kingdom mat.
VICTORY CONDITION - CHAMPION
D If your hero is slain while exploring or during battle with an independent stronghold (i.e., one not controlled by another player), tuck the (now slain) hero card face down behind the last hero in your line of succession with the orange back partially visible to all players.
ELIMINATION
Players are eliminated from the game in the rare event of all 3 of their heroes being slain. An eliminated player’s conquered strongholds are returned to the map board as independent strongholds, or shuffled into the independent stronghold deck if there is no room. Shuffle their World Forge items into the World Forge deck, and discard any remaining battle cards, mythic items, or Pools of Essence into the exploration discard pile.
In the highly unlikely event that all but 1 of the players have all their heroes slain and are eliminated, the surviving player wins the game.
END OF THE ROUND
Once all players have taken a turn, pass the first player token clockwise to the next player to begin the next round.
END OF THE GAME
A player wins and the game ends immediately when either: ~OR~
D They achieve 2 of the 4 victory conditions (see page 10).
D All other players have been eliminated.
I NDEX
A abilities: 8, 21, 23
active hero: 7
agriculture training: 16
attack/attacking: 25 attack stat: 8
attacker’s total score (ATS): 27
B
base residual capital: 13
battle cards: 22
battle/battling: 25 battlefield: 26
battle die: 27
battle roll: 27
battle steps: 26 blessed: 23
boon cards: 23
build: 24
build blocks: 24, 25 build tree: 24 buy: 14
C capital: 9 capital coins: 9
Champion victory: 37 chest (slot): 15 class cards: 11
command actions: 24
Command phase: 24 components: 2
conquer: 27, 29 cost: 16, 19, 23
Conqueror victory: 28 controlled stronghold: 28
D damage: 27 declare: 12
defender’s total score (DTS): 27
defense stat (hero): 8
defense stat (Stronghold): 28
defense training: 16 destroy: 18
discard: 19
discard pile: 5, 21
E enlist: 21
elimination: 37 equip: 15
equipment slots: 15
Exploration phase: 18
exploration cards: 18
F
first player token: 10, 37 forge training: 16
G
game cards: 4
H
hand: 19
hazard cards: 20
head (slot) 15 health: 7
Heir: 11 hero: 7, 8
I
Income phase: 13 independent stronghold: 5, 28 item cards: 15
K kingdoms: 6 kingdom mats: 6, 7
L
Legend victory: 11 levels (skills): 16 line of succession: 7 loot: 28