


Hardwood floors are coveted features in many homes. The National Wood Flooring Association says wood floors are the most environmentally friendly flooring options available. In the United States, the hardwood forests that provide flooring products are growing twice as fast as they are being harvested. Furthermore, wood floors can last for many generations and require fewer raw materials to produce than other flooring options. That means less waste may end up in landfills.

Hardwood floors can endure for decades in a home, but over time those same floors may need some tender loving care to keep them looking good and working as they should. Squeaky floors are a common nuisance that homeowners may experience. Squeaking is often caused by movement and friction between floorboards. Treating the problem involves identifying the underlying issue.
Squeaky floors may be due to the loosening of the hardware holding the floor in place, says The Home Depot. When nails or screws no longer are secured tightly, the boards can rub together. The noise heard is the sound produced by rubbing. Tightening or replacing the hardware can help reduce the squeaking.
This Old House says this kit method is a great way to fix squeaks without damaging the floor. Once the source of the squeak is located, drill a 3/32-inch pilot hole through the hardwood flooring. Then insert a screw through the kit’s depth-control fixture and into the pilot hole, and drive it until it automatically snaps off below the wood surface. Follow this up by filling the hole with wood putty that matches the floor color. Once the putty is dry, lightly sand the area to blend.
Sometimes the floor may squeak because of a gap between the joists and the subfloor. Filling the gap with a small piece of wood called a shim can help alleviate the gap or gaps.
If a squeak is just in one spot, The Home Depot says that you may be able to drive short screws from below into the subfloor.
For small gaps between boards, sprinkle talcum powder or powdered graphite between squeaky boards to reduce friction. Wood filler applied with a putty knife also may work. For larger gaps, use a liquid filler designed for wood floors.
Homeowners also can visit their local home improvement center for other hardware solutions designed for underfloor repairs to remedy squeaks. Many work from underneath the floor and involve mounting plates or brackets to sure up the floor.
Squeaky floors can be problematic, but noises can be banished with some repair work.
No one enjoys being in cramped quarters. Whether a person battles a legitimate case of claustrophobia when confined in tight spaces or simply prefers a place to stretch out, there’s no denying the appeal of a little extra room. That’s particularly so at home, where cramped spaces can make it hard to unwind.
When homeowners feel their walls are closing in on them, many choose to build space via a room addition. Room addition projects are extensive and expensive undertakings, with the home renovation experts at Angi estimating the average add-on costs $48,000. But Angi estimates such projects can cost as much as $72,600, or even more depending on the size of the space and the features chosen.
The financial commitment when adding a room is significant, but homeowners and residents also will need to prepare for a potentially lengthy disruption to their daily routines. Various online resources, including Angi, suggest room addition projects typically take around three to four months. With so much at stake, homeowners who think they might benefit from a room addition can look for various signs to help them determine if such a project is right for them.

while contributing to a more calming ambiance in common spaces that may no longer be overwhelmed by papers, toys and other items that can quickly take over a home that lacks space.
• Lifestyle hurdles: Millions of homeowners like to entertain friends and family, and that’s more manageable for some than it is for others. If interior or exterior spaces do not accommodate hosting, a room addition that expands an existing kitchen or living room might be the ideal renovation project.
need to restore fully functional status to their homes.
• Increasingly cluttered spaces: Cramped quarters without much space for people are perhaps the most notable sign that residents can benefit from some additional space in a home. Cluttered spaces suggest homeowners may have run out of room for their stuff, and a custom addition can provide that extra room
• Functionally challenged: A home that no longer has enough space to meet your needs is another sign a room addition might be in order. This very issue emerged for millions of professionals during the COVID-19 pandemic and has remained a challenge ever since. Indeed, an increase in days spent working remotely has left many homeowners grateful to work from home but desirous of a designated remote work space. A room addition to accommodate a home office can be just what remote workers
• Cost: While the sticker price of a home addition may (or may not) raise an eyebrow, the project is almost certain to prove more cost-effective than moving. According to data from the U.S. Census Bureau and the U.S. Department of Housing and Urban Development, the average sale price of a home in the United States reached $503,800 in January 2025. While that marked a roughly $16,000 decrease from a year earlier, it’s still a high figure that many homeowners aren’t willing to pay. A cost comparison detailing the price to move versus the price to build an addition may indicate that the latter option is a homeowner’s best bet.
A room addition could be the perfect renovation project for homeowners who need more space but still prefer to stay put.
Maintaining a sense of independence throughout retirement can inspire seniors to live their golden years to the fullest. For many seniors, nothing is more emblematic of their ability to stay independent than remaining in their homes. A number of variables can affect how long seniors stay in their homes, including the layout of the property and any potential safety threats that may arise as men and women age. Some small, safety-centric tweaks to a property can help men and women remain in their homes for as long as possible.
• Increase lighting in bathrooms throughout the home. Lighting is easily overlooked as a safety measure, but a well-lit space is easier to navigate. Increasing lighting in the bathroom and upgrading existing features to LED lighting can make it easier for seniors to navigate bathrooms at night. That’s a notable benefit, as seniors may need to make routine bathroom trips overnight.
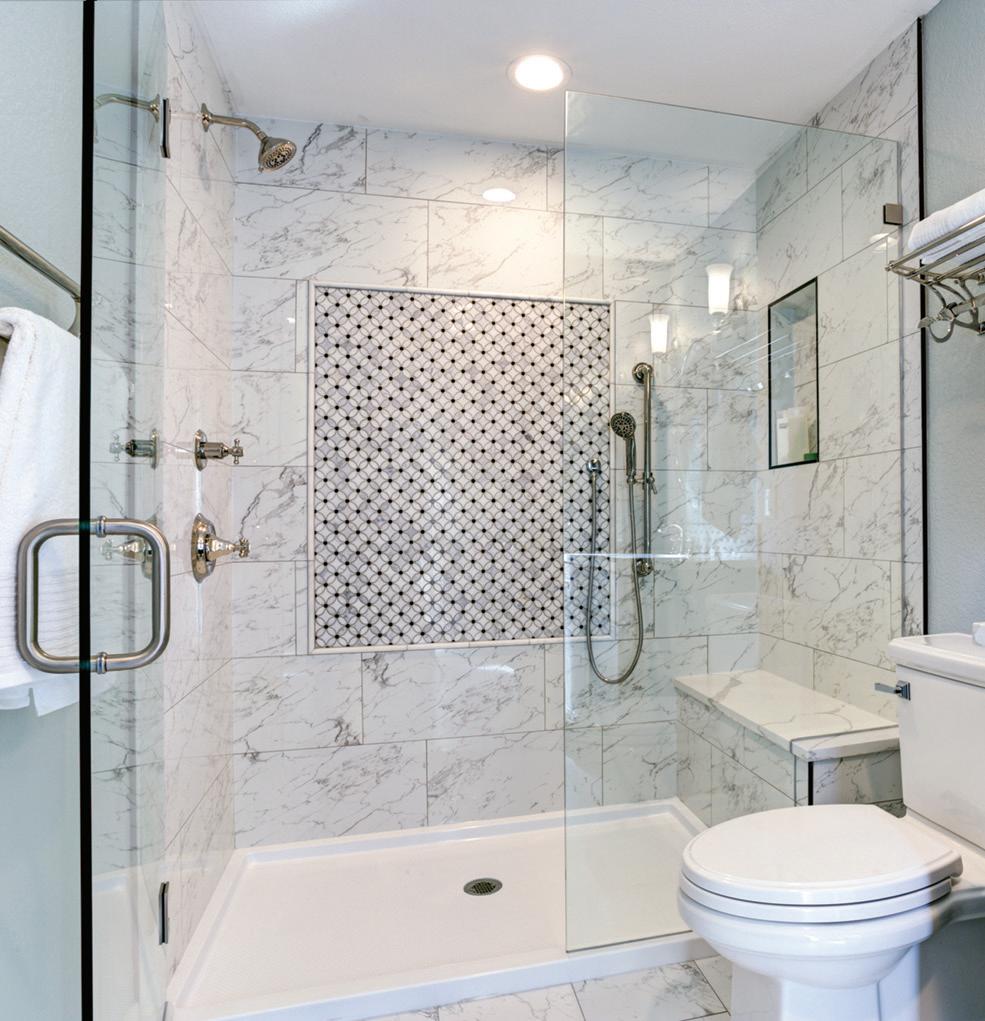
• Install grab bars. Grab bars are often found in public restrooms, but they’re equally useful in the bathrooms or private homes, particularly in seniors’ residences. Grab bars can be installed on both sides of all toilets and in the bathtub/shower stall so seniors can get up and down easily and reinforce their stability on wet surfaces.
• Invest in bathroom storage systems. A cluttered bathroom is a potential safety hazard. Items in cluttered bathrooms can easily end up on the floor, and that goes for bathing items like shampoo and soap as well. A bathroom storage
A walk-in shower with a bench and a handheld shower head can make bathing safer for seniors than a more traditional bathtub and shower setup.
system for a vanity and an organizer for bathing items inside a shower or tub can decrease the chance that items end up on the floor, where they can pose an injury risk for seniors who might struggle to bend over to pick them up or slip on fallen items when bathing.
• Renovate your existing shower. Seniors whose current bathrooms house a traditional shower setup that requires them to step over a tub can renovate the space and replace that feature with a walk-in shower. A walkin shower does not require seniors step over a bathtub, greatly reducing the risk of falls while bathing. Some additional shower renovations include installing a bench so seniors can sit down while bathing, ideally while using a hand-held shower head.
• Purchase non-slip materials for the bathroom. Non-slip floor mats in a bathroom are essential for anyone, and especially beneficial for seniors. A nonslip vanity storage bin and toothbrush holder also can ensure daily accessories remain accessible.
• Elevate toilet heights. Elevating toilet heights in bathrooms throughout the home can make it easier for seniors to sit down and get up when going to the bathroom. Toilets compliant with the Americans with Disabilities Act (ADA) are roughly 18 inches taller than standard toilets, which can make a big difference for seniors.
These are just a handful of ways seniors can make their bathrooms safer as they aspire to stay in their homes longer.


When the summer entertaining season draws to a close, homeowners need to ensure their outdoor living areas can handle weather that’s right around the corner. Although outdoor furniture and other items tend to be durable, the impact snow, wind and ice can have on them may lead to damage over time. That is why many homeowners take steps to winterize their outdoor spaces and protect their belongings. Here’s a look at how to prepare for the winter to come.
• Furniture: Cover or store furniture to protect it from the elements. Covering it with weather-proof covers can be adequate if storing items indoors is not possible.
• Deep clean: Items that will be covered or stored should be thoroughly cleaned prior to being removed from spaces for the season. Lingering dirt and moisture can cause damage.
• Insulate and drain: Don’t risk damage to pipes, which can freeze and crack in the cold. Shut off the water supply to exterior faucets and drain water lines to prevent pipes from freezing and bursting. Use foam pipe insulation to prevent freezing and cover any exposed pipes.
• Apply mulch: After cleaning up garden debris, think about applying mulch to

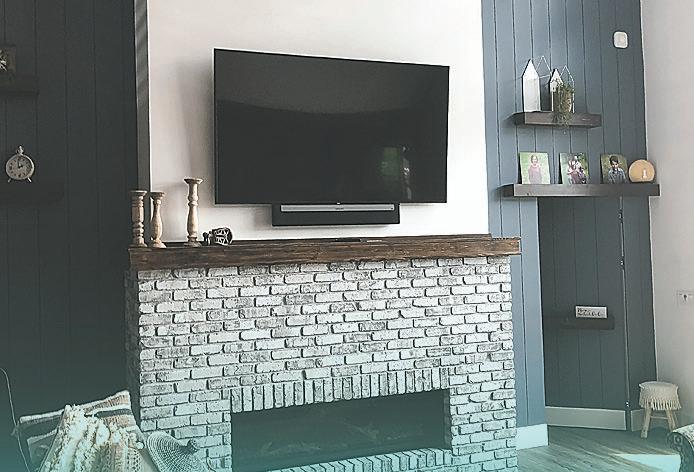
Aneed for more space compels many a homeowner to consider home renovations each year. While some homeowners decide to pull up stakes and move after realizing they need more room to maneuver at home, a real estate market marked by low inventory and high prices has made it more affordable for many property owners to stay put and convert existing spaces.
garden beds and cover tender plants to protect them from the weather.
• Check gutters: Be sure that gutters and downspouts are clear of leaves and any additional debris. If gutters and downspouts are not cleaned, ice dams may form on the roof and cause water damage.
• Inspect and repair: Inspect walkways and driveways for any damage and make repairs now so water will not seep in and cause further issues with freeze-thaw cycles. Consider applying a sealant to protect surfaces from snow and ice.
• Pools and spas: It’s essential to follow the industry or manufacturer recommendations for closing down swimming pools and spas for the season. While covers may not be essential in all climates, covering can help prevent leaves and other debris from getting in the water. Water should be expelled from pipes and tubing to prevent freezing and bursting. If space allows, consider moving the pool pump indoors to prolong its longevity. Turn off the electricity to the outlet where the filter is plugged in.
There may be additional, regionspecific steps to winterize a property, but these pointers are a good starting point to protect outdoor spaces.
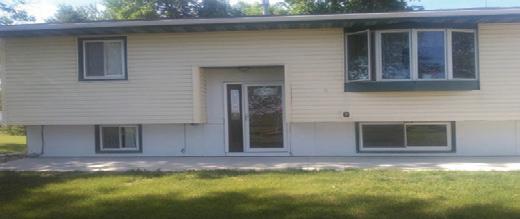
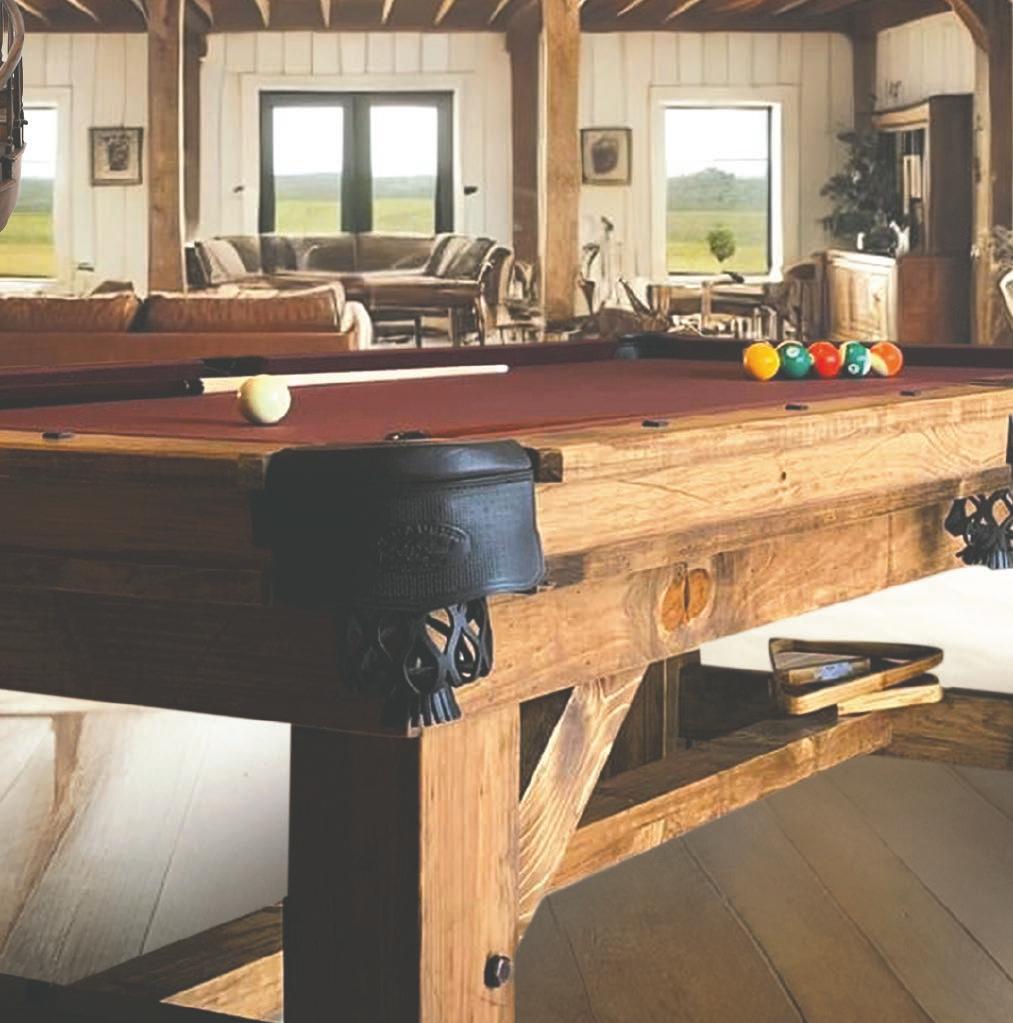
A garage conversion project is one way for homeowners to create more space in their current properties. Homeowners considering such renovations can benefit from a rundown of what a garage conversion entails and what to expect when the project is completed.
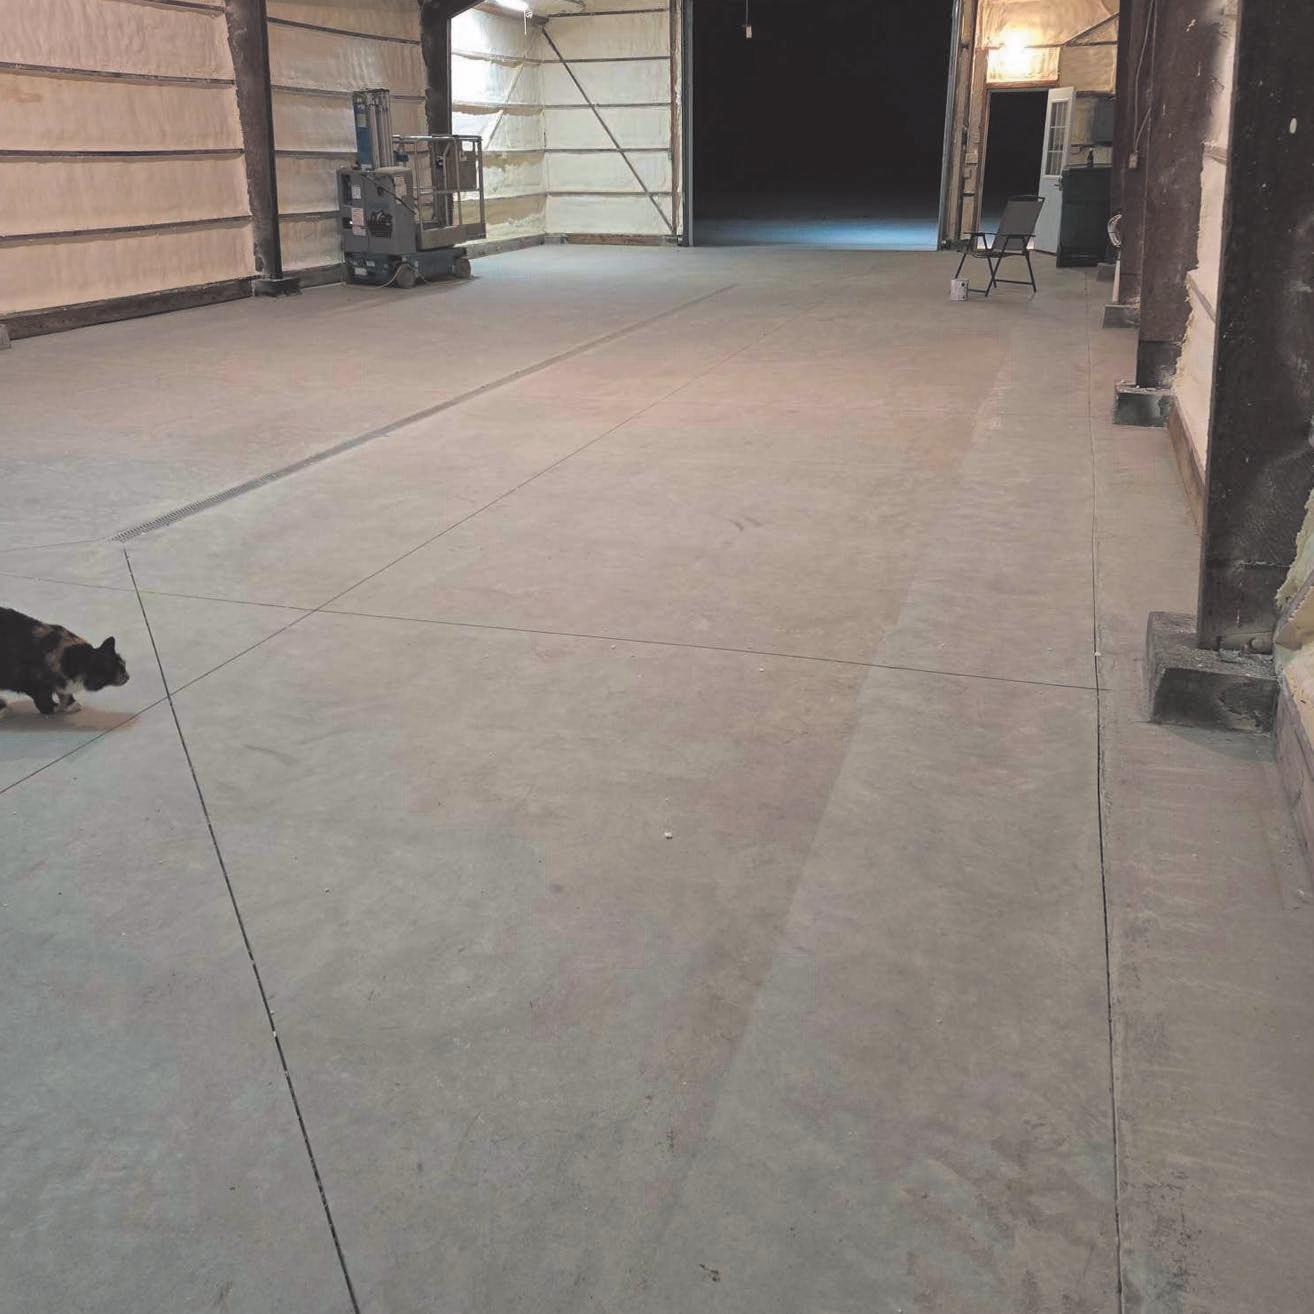
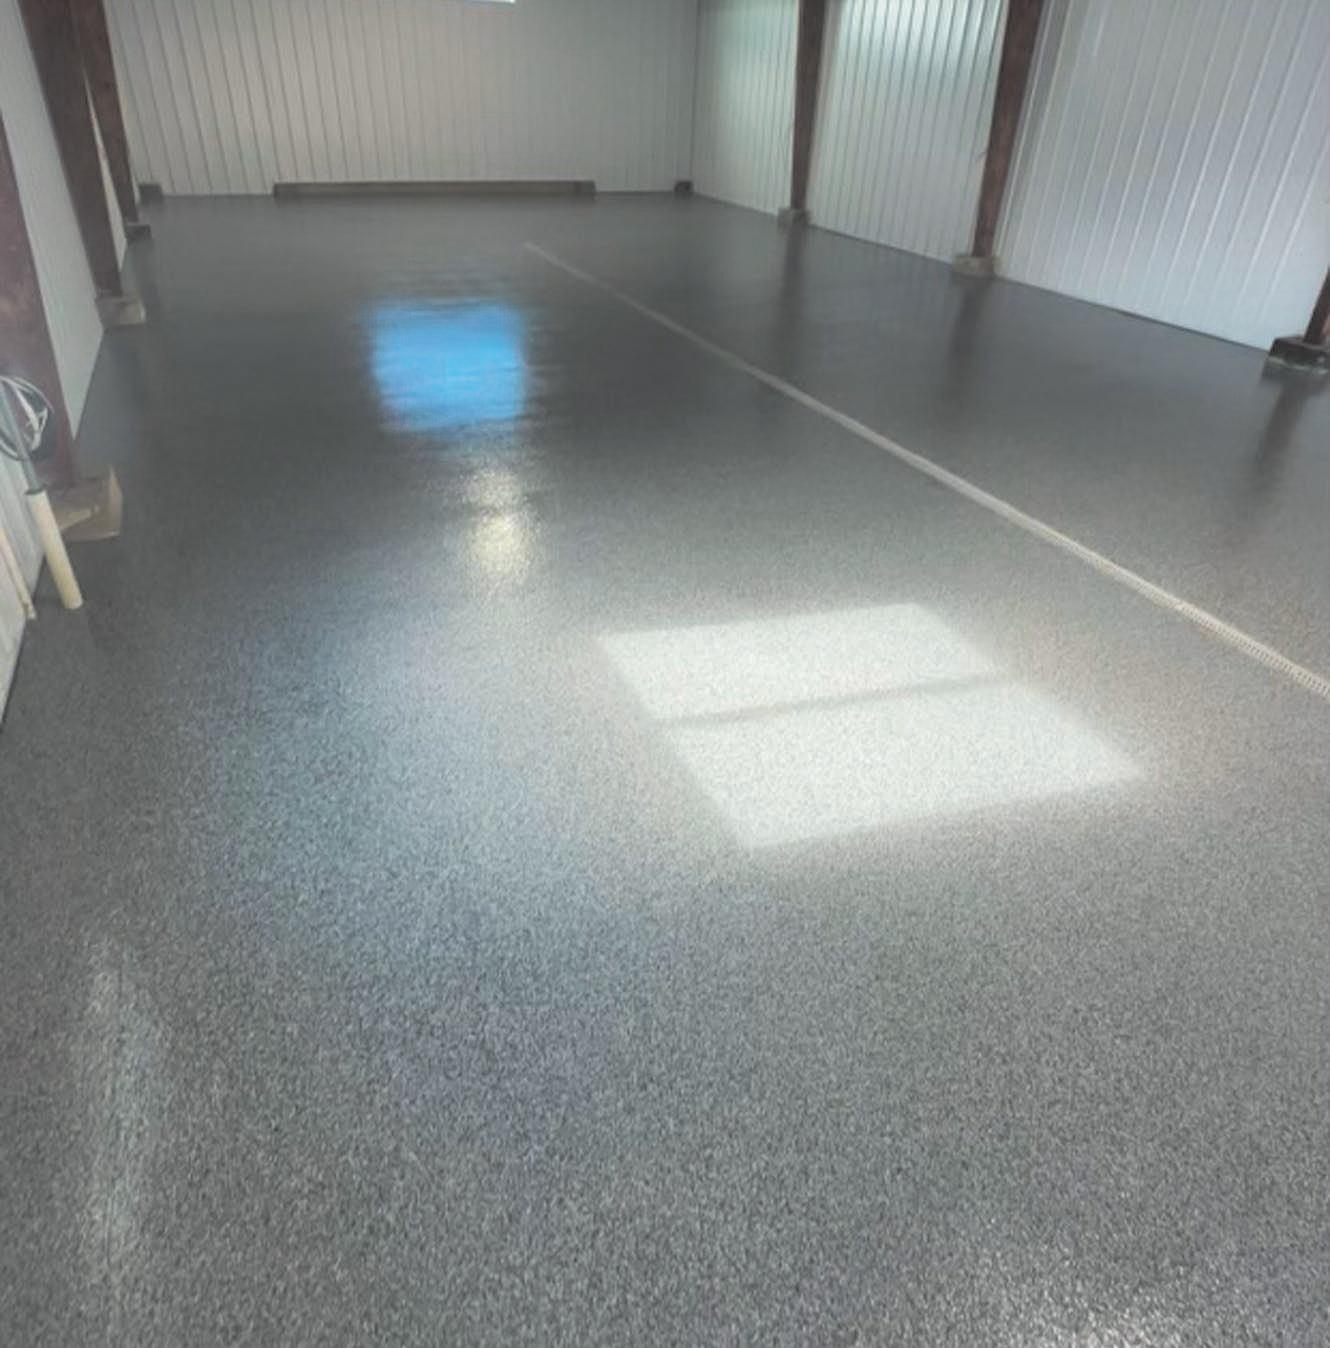
• A new floor will likely be part of the project. Whether you’re converting the garage into a living space or simply hoping to make it look nicer as a workshop or artist’s studio, the existing floor will likely need to be replaced. Many garages feature concrete flooring, which cracks easily (homeowners considering a garage renovation may already see cracks in an existing floor). When converting a garage, renovation experts will undoubtedly advise replacing the existing floor, and some will recommend polyaspartic floor installation. Various garage conversion experts note that polyaspartic flooring is ideal for garage spaces because it’s durable, resistant to damage that can be caused by chemicals and offers much more aesthetic appeal than a concrete floor.
• The room will need ventilation and heating and cooling. A garage used for traditional purposes (i.e., parking cars, storing lawn and garden tools, etc.) likely will not be connected to a home’s existing HVAC system and may not feature a window that can be opened or closed to allow for fresh air to enter the space. The space will need ventilation and heating and cooling capabilities if it’s being converted.
• Location and climate bear consideration. Before going forward with a garage conversion, homeowners should consider where they live and the local climate. Homeowners living in urban areas where parking is at a premium may be doing themselves (and future owners) a disservice by converting a space where they can presently park a vehicle into something else. In addition, people living in locales where outdoor activities like surfing, kayaking and cycling are popular will have to determine where items necessary for such activities will be stored if they decide to convert their garages into living spaces. Of course, garage renovation teams can incorporate storage into a design, so homeowners should not hesitate to discuss their lifestyle with contractors to ensure the room accommodates their hobbies after the conversion is complete.
• Zoning laws may or may not affect the project. Laws vary depending on where homeowners live, so it’s impossible to say with certainty if homeowners will or won’t run into zoning issues during a project. However, the design of the finished product may offer hints as to any permit-related hurdles homeowners may need to clear. For example, if the garage doors are staying and the space behind those doors is merely being converted with a new floor and other amenities that won’t change the look or function of the space, then homeowners may not encounter any permit issues. A need for permits and some restrictions may emerge if garage doors are being replaced by a new wall so the exterior space seamlessly blends in with the rest of the home. Investigate any potential restrictions prior to going forward.
Garage conversions can be a great way to add functional space to a property without building on to an existing home.


66% would prefer to buy a home with one home office space

Professionals might be returning to work in offices after years of pandemicrelated remote work, but that doesn’t mean home buyers aren’t still prioritizing home office space when shopping for a new place to call their own. According to a recent survey of home buyers conducted by the National Association of Home Builders, 66 percent would prefer to buy a home with exactly one home office space and 13 percent want at least two offices. Just one in five buyers indicated they do not want any home office space. The majority of buyers who want home office space prefer a medium-sized space, which the NAHB defined as between 100 and 150 square feet. Just 22 percent of buyers prefer a home office space larger than 150 square feet, while only 19 percent want a small space (less than 100 square feet). The NAHB survey indicates the enduring popularity of home office spaces, recognition of which can be particularly useful for current homeowners preparing to put their homes on the market as well as those looking to add office space.


Windows in a home are easily taken for granted. Even though residents look through their windows every day, it’s only when issues arise that people tend to give the windows much thought. Even if windows may not be foremost on the minds of homeowners, they are a notable component of every home. New windows also can be an expensive addition to a home, so it benefits all homeowners to gain an understanding of window replacement projects before they start shopping around for new windows.
• Windows are more complex than new homeowners may realize. Homeowners will need to choose between three commonly available window materials when picking new windows for their homes. Vinyl windows typically are the most affordable option, and opinions vary considerably regarding these products. Some tout their resistance to moisture, but others feel they lack the aesthetic appeal of costlier alternatives like fiberglass. Vinyl windows also can’t be painted, which some homeowners may find problematic. Fiberglass windows can be painted and are known for their strength and durability. Aluminum windows are strong and durable as well, but they may not provide as much thermal protection as some other options. Each window type has its own unique pros and cons, and homeowners are urged to do their homework to determine the best fit for them.
• Consider variables unique to your home. Climate is an important consideration when choosing windows, and that of course is unique to each homeowner. How hot or cold the local climate can be will affect how well windows insulate a home, so a window that’s best for one particular region may not be ideal for another. Homeowners are urged to investigate which window materials are best suited to their local climates. All windows protect against the elements, but some might provide more adequate insulation, which can help keep utility bills low and everyone inside a home more comfortable.
• Homeowners may need to decide between replacement windows or new construction windows. The window experts at Pella note that new construction windows are the primary option for newly constructed homes or room additions. Replacement windows are typically installed when homeowners need new windows but do not want or need to remove existing exterior cladding or trim. Replacement windows tend to be considerably less expensive than new construction windows, but the latter option merits consideration before making a final decision.
• It can be budget-friendly to replace more than one window at a time. Some, though not all, window installation companies charge a non-negotiable project fee, so it can be more financially savvy to replace more than one window at a time. Replacing windows piecemeal may require homeowners to pay the project fee for each installation, whereas homeowners who replace multiple windows at the same time will only incur that fee once. If homeowners know many windows in their home are in need of replacement, it can be financially advantageous to replace all that need it at once rather than breaking the project up and paying multiple project fees.
Window replacement projects require careful consideration so homeowners identify the best products for their home.


Rachael Cook

The longer a person resides in a particular home, the greater the likelihood that various components of that residence will need to be replaced. Driveways, roofs, HVAC systems, and even appliances all have expiration dates.
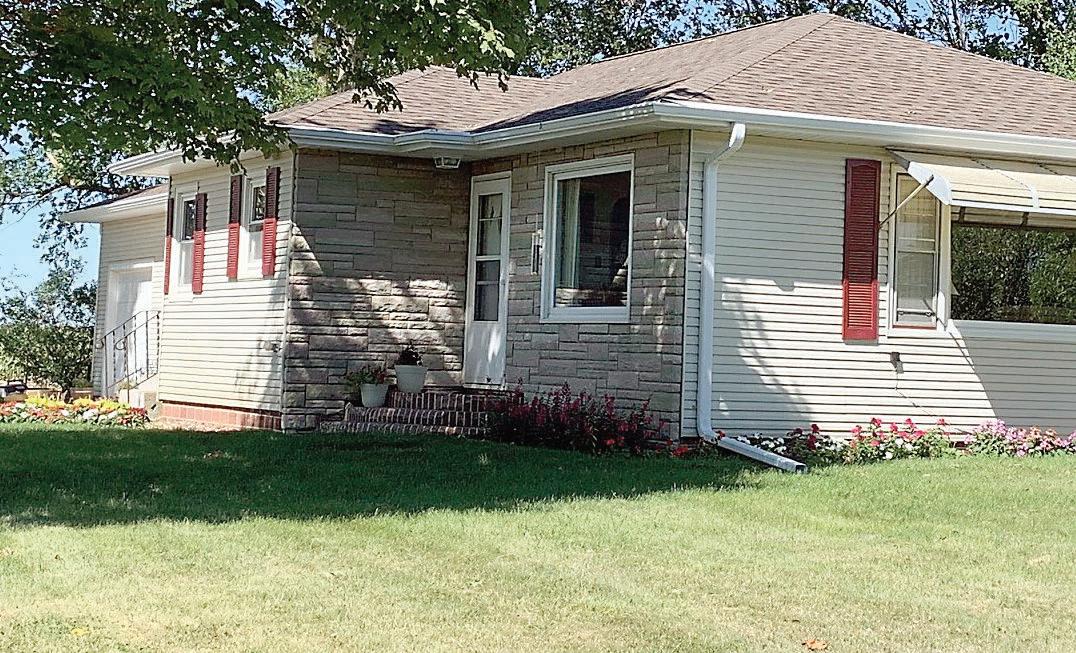
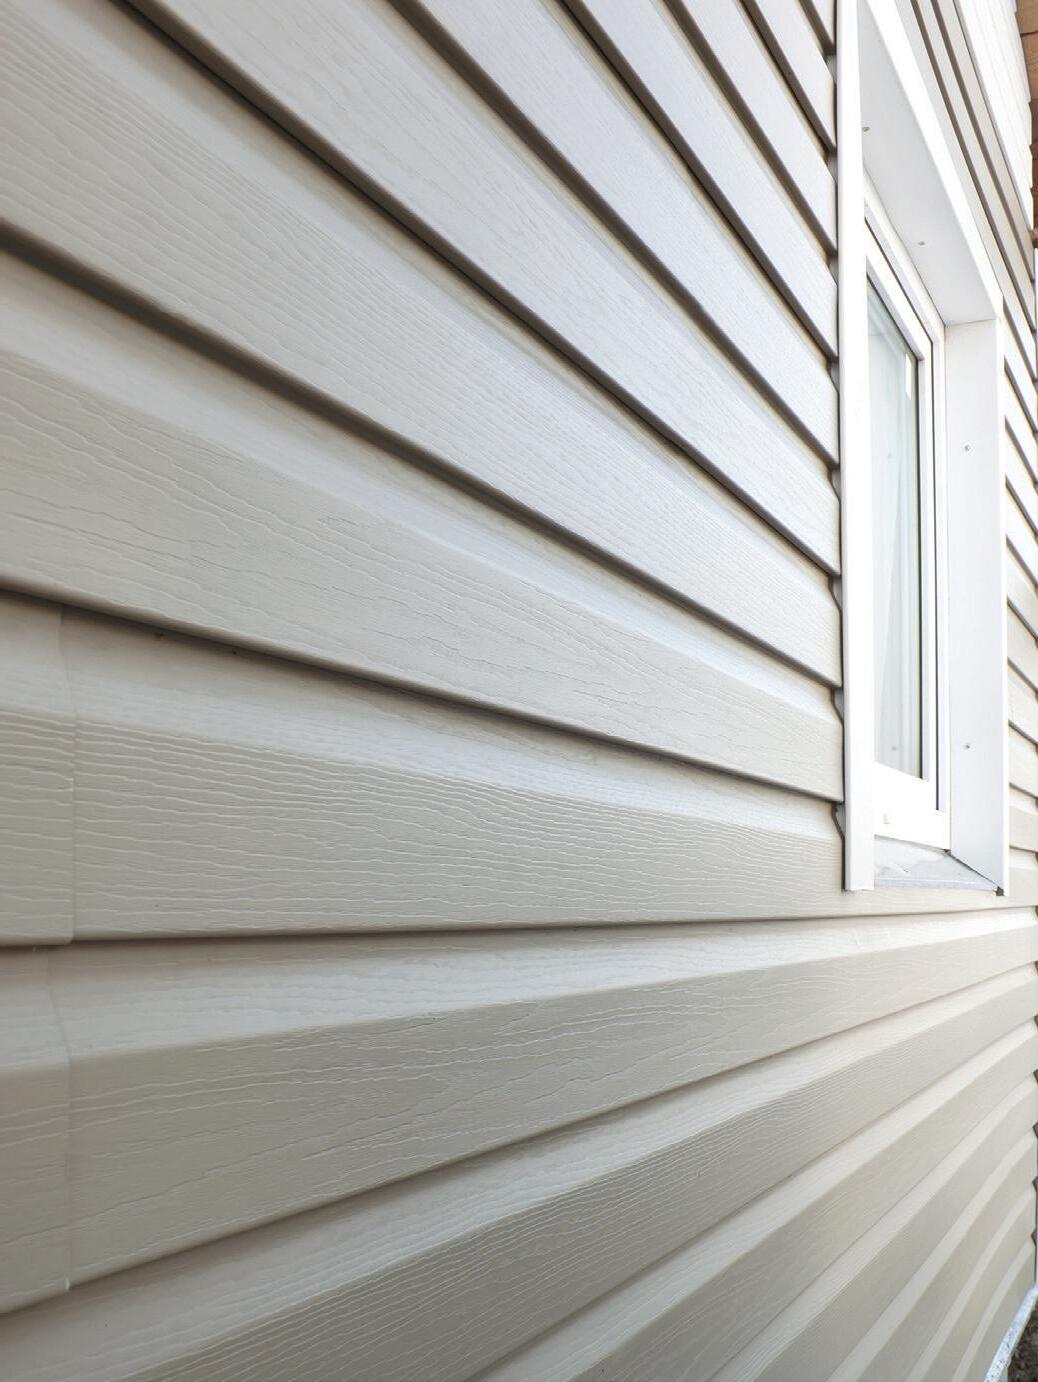
Although siding on a home can be quite durable, there may be specific reasons why homeowners choose to or need to replace it at some point. Understanding what’s to come of the job can help homeowners prepare. No two siding jobs are exactly the same, and each project will be dictated by a host of variables, including which type of siding homeowners choose. However, these general steps are commonplace during siding replacement projects.
• Choose siding: Homeowners are urged to consult with various siding installation companies about which products are available and ask each for an estimate. Budget, climate and other factors will narrow down siding materials. The Home Depot says popular siding types include vinyl, wood, fiber cement, metal, and stone. Siding can have almost any color or texture as well.
• Remove and relocate: Outdoor items close to the perimeter of the home will have to be moved out of the way so workers can access the siding. The job will require a dumpster to be dropped in front of the home or in the driveway to collect debris, so homeowners should be prepared to leave space for it.• Siding delivery: The new siding should be delivered prior to the installation start day. These materials will take up a lot of room and space should be made available so the installation team can access them without difficulty.
• Interior decor: Siding installation will include hammering, which can disrupt items on interior walls. It is best to have all wall hangings taken down to prevent damage.
• Old siding removal: On the first day of installation, removal of the old siding will happen first, according to Smart Exteriors. Siding, insulation and trim will be removed. In the event that older, asbestos-based siding is on a home, contractors may safely remove and discard
it, or go over that type of siding. Homeowners should inquire about this step during the company vetting process.
• Home inspection: Once all old material is gone, the exterior sheathing will be inspected to ensure it is in good shape. Signs of rot or loose boards will be considered and repaired, if necessary.
• New siding install: First workers will put on house wrap or some sort of insulation/water barrier product. Afterwards, siding boards are layered on in the design chosen. Nails or screws are used to attach the siding and seams will be caulked to prevent moisture penetration. If the homeowner has chosen to have gutters and downspouts installed during the siding job, those will be fitted and installed as well.
• Clean up: The installation team will begin the process of thoroughly cleaning up the property. All tools will be removed and the property will be swept or blown to clean away debris. Crews typically use powerful magnets to grab stray nails and screws that have fallen into the lawn and elsewhere. The dumpster will be taken away shortly after the work is completed.
Siding replacement is a big job but one that can offer immediate curb appeal once completed. It typically is not a do-ityourself project since it requires specific skills to ensure durability.


Here at K&H Corporation we are a mechanical and electrical contracting company in Webster City, IA. We are family owned and have been in business for over 50 years. We perform projects from residential service calls to multi-million dollar commercial and industrial projects. We are a Lennox dealer.


Spring is the season most often associated with lawn care, and for good reason. Grass starts growing in spring, and the season is a great time to fertilize many grasses in the hopes lawns can look their best and endure the hotter, dryer weather of summer.
Spring might mark the time when many homeowners begin tending to their lawns each year, but it’s important to recognize the significance of fall lawn care as well. Grasses vary, and homeowners are urged to identify which type of grass is in their lawn so they can ensure it gets the care it needs before winter’s first frost. Cool-season grasses like perennial ryegrass and Kentucky bluegrass are common in various regions, and the following strategies can help homeowners with these types of grasses tend to their lawns this fall.
• Stick to your recommended fertilization schedule. Homeowners who have been fertilizing since spring are urged to continue doing so in fall at the recommended interval. It’s easy to forget to fertilize in fall thanks to cooler temperatures that don’t call lawn care to mind and busier schedules after school starts again and summer vacation season ends. But many fertilizer manufacturers advise users of their products to fertilize
several times over the course of the year, including in fall. Stick to the intervals recommended on the packaging of the fertilizer you’ve been using, making sure not to forget to fertilize this fall.
• Conduct a soil test. A soil test can determine if the soil is lacking any nutritive elements it needs to come back strong in spring. Certain amendments can restore pH balance if necessary and foster stronger growth when lawns come back in spring.
• Aerate, if necessary. Soil can become compacted over time, and that can cause a range of problems for a lawn. Compacted soil can make it harder for water to reach the roots of grass, which weakens grass and makes it more vulnerable to damage during adverse weather events like drought. Compacted soil also makes it harder for nutrients in fertilizer to get into the soil. Aerating is best left to professionals, particularly in larger lawns, as the job can foster strong root development when done properly.
• Remove thatch where it’s excessive. Thin layers of thatch can benefit lawns by delivering nutrients from glass clippings and leaves to a lawn. However, when thatch is excessive, it can block air, water and even fertilizer from reaching the soil. Thatch often can be removed with a rake, but lawns with


Coolseason grasses still need watering even after summer gives way to fall.

especially thick layers of thatch may need to be scarified. Homeowners can take a DIY approach to scarifying or hire a landscaping professional to dethatch the lawn and remove the thatch from their properties.
• Continue to water the lawn. A coolseason grass will continue to require water into the fall. Though the lawn won’t need to be watered as frequently in fall as in summer, various lawn care professionals note cool-season grasses


still need roughly an inch of water each week in fall.
• Remove leaves as they fall. Fallen leaves can affect a lawn in much the same way as excessive amounts of thatch, blocking water and nutrients from reaching the soil. So it’s best to remove fallen leaves, especially when they begin to fall in large quantities. Fall is an opportune time to tend to a lawn to increase the chances grass grows back strong in spring.


Asuccessful kitchen renovation project requires careful planning and a detailed vision of what the space will look like upon completion. Whether a homeowner is thinking about giving the kitchen a major overhaul or just a minor refresh, bringing that vision to life doesn’t happen overnight. There is a process that must go into a kitchen renovation. Embarking on a kitchen remodel can be an exciting venture and homeowners may be eager to dive right in, but familiarizing oneself with what to expect prior to the start can help property owners navigate the process more smoothly.


elsewhere, or expect to be dining out throughout the remodel. The demo process may reveal any issues that will need to be remedied before the real work can begin, such as structural damage, leaks, mold, or other hiccups.
• Contractor work begins: It can take one to three weeks for contractors to install plumbing, mechanical components, electrical wiring, ductwork, and more, followed by structural needs and drywall, according to sink and faucet manufacturer Blanco. Flooring and cabinets will follow, and can take another week or more. Fabricating custom countertops is a lengthy process and can represent the bulk of a kitchen renovation timeline. Expect a few weeks for countertops to be measured, made and then installed.
• Appliances and finishing touches: Appliances will be delivered and hooked up at the tail end of the renovation. Finally, the backsplash, fixtures and lighting are put into place. The last leg of the remodel will include painting, trim work and installation of hardware on cabinets and drawers.
• Inspiration and design: The first phase involves dreaming up kitchen plans and making practical decisions regarding efficiency and functionality. Considerable time may be spent working with a designer and architect, which will involve choosing materials and a color scheme.
• Creating a budget: According to Angi, the average kitchen remodel costs $26,934, but price ultimately varies depending on the scope of the work. Costs may be less or more depending on the size of the kitchen and the materials chosen.
• Demolition: Before a homeowner can have a new kitchen, the old one must be removed. The real physical transformation begins with the demolition, which tends to be quick but messy. It is essential to set up an alternative “mini kitchen”
Once all the work is done, it is essential for homeowners to make sure everything is to their liking. According to HGTV and Kitchy Crouse of CK Interior Design, a regular kitchen renovation can take anywhere from six to 12 weeks. With so much time devoted to the space, homeowners should ensure it lives up to their expectations.
As the renovation begins, homeowners should remember that unexpected issues can arise, including delays due to material availability or unforeseen challenges. Maintaining an open communication with the contractor, asking questions and remaining flexible helps. Although a kitchen remodel is initially disruptive, it is an investment that ultimately enhances a home’s value.