Head & Cervical Placement
HEAD & CERVICAL PLACEMENT PRINCIPLE EXPLAINED
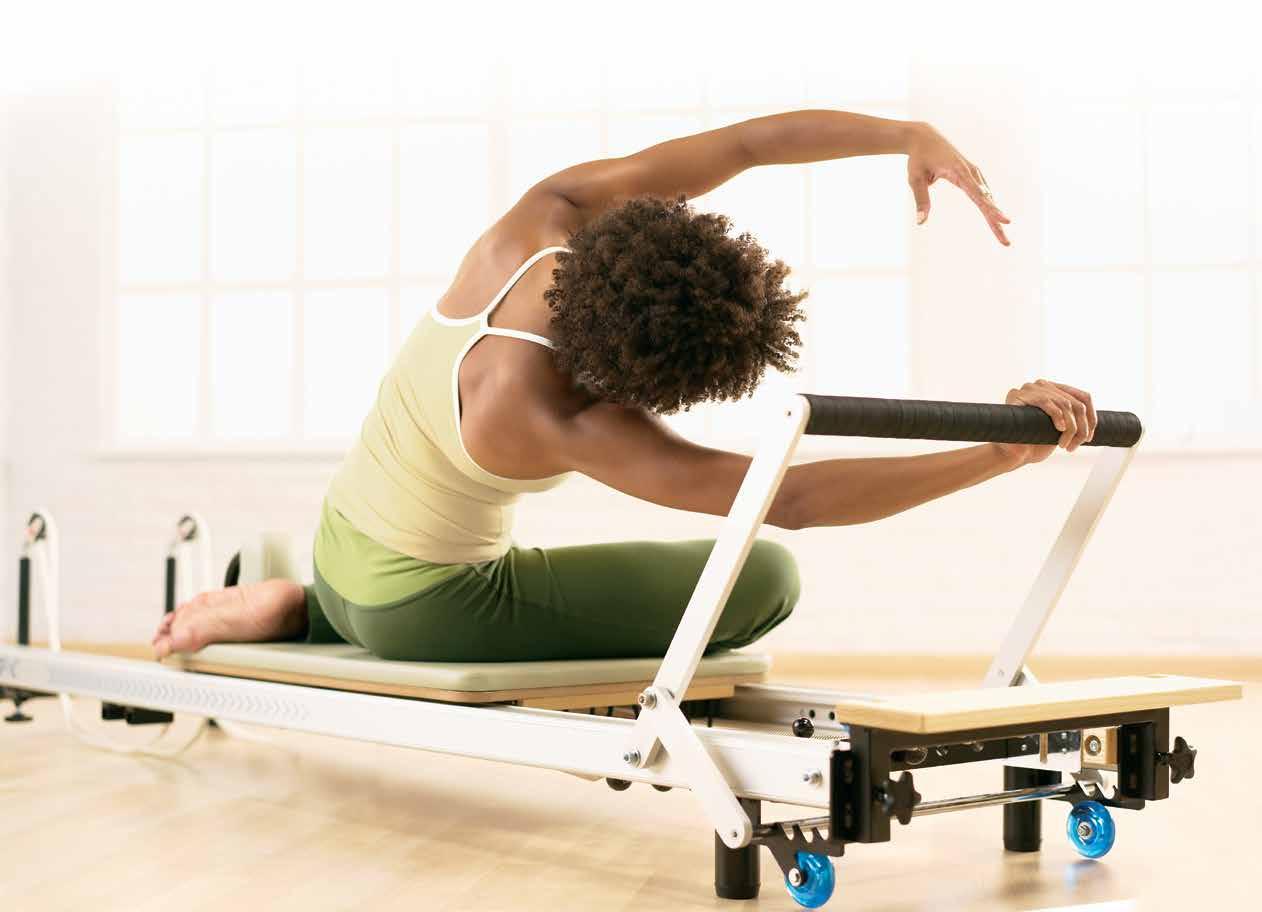
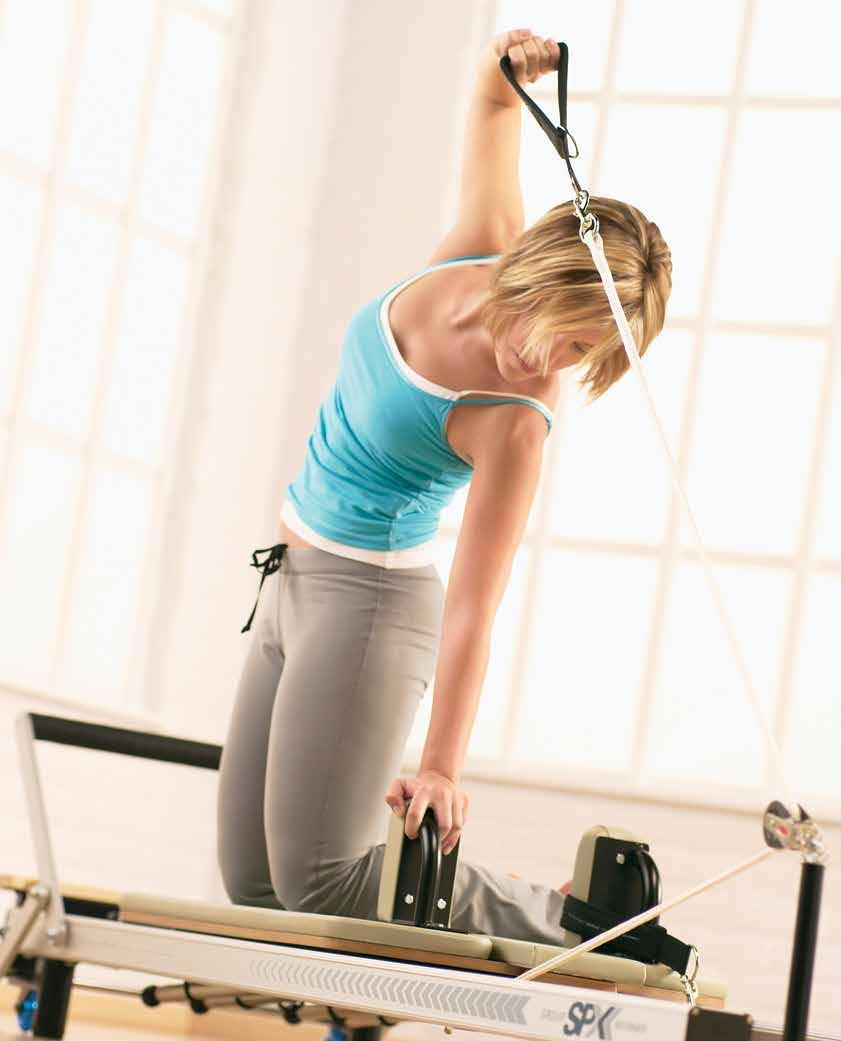
The cervical spine should hold its natural curve and the skull should balance directly above the shoulders when vertical. This relationship should also be maintained in all other starting positions.
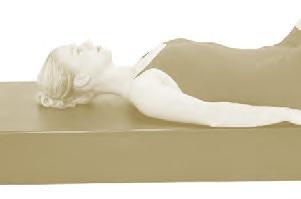
If there is a kyphosis (overflexion of the thoracic spine) or forward head posture, pads or foam cushions may be necessary in supine position to prevent the cervical spine from overextending and creating unnecessary tension.
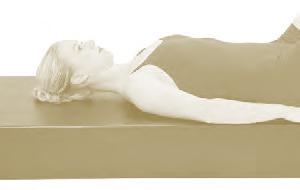
In most instances, the cervical spine should continue the line created by the thoracic spine during flexion, extension, lateral flexion and rotation. The idea of cranio-vertebral flexion should be incorporated anytime the thoracic spine moves into flexion. When flexing the upper torso from a supine position, focus on creating thoracic flexion and not overemphasizing cervical flexion. Cranio-vertebral flexion should come from lengthening the back of the neck away from the shoulders and flexing the cranium on the first two vertebrae of the cervical spine. Once cranio-vertebral flexion has been achieved, continue to slightly flex the cervical spine and then develop thoracic flexion.
In ideal cervical flexion, avoid jamming the chin into the chest. There should be enough room between chin and chest to fit a small fist.
When extending the upper torso from a prone position, pay particular attention to maintaining an even extension from the thoracic through the cervical spine. Avoid lifting the head too high and creating overextension and compression of the cervical spine.
Be aware that the eyeline will affect the cervical placement. When flexing the upper torso from supine, the eyeline should be appropriate for the amount of flexion to maintain proper alignment through the cervical spine. In thoracic extension, the focus should follow the same guidelines. When sitting in neutral, and through all movements, the gaze should ensure that the head, cervical and thoracic spine remain aligned.
& Cervical Placement
neutral cervical alignment
cranio-vertebral flexion
Head
HEAD & CERVICAL PLACEMENT PRINCIPLE EXERCISES
The following movements demonstrate the principle of head and cervical placement.
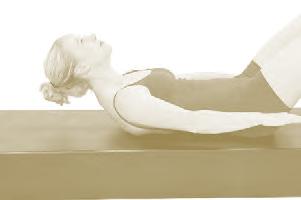
1. CRANIO-VERTEBRAL FLEXION [HEAD NODS]
STARTING POSITION
Supine, pelvis and spine neutral. Knees flexed, feet abducted hip - distance apart on mat. Arms long by sides, palms down.
To practice creating cranio-vertebral flexion before flexing spine off mat. Avoid jamming chin into chest, which results in overflexion of cervical spine.
INHALE drop eye focus slightly and tip head forward, leaving head on mat.
EXHALE return to neutral.
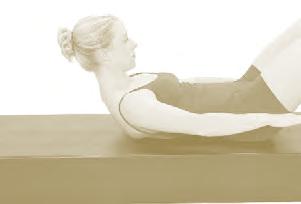
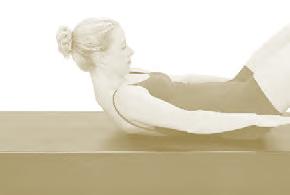
2. MODIFIED ABDOMINAL PREPARATION
STARTING POSITION
Supine, pelvis and spine neutral. Knees flexed, feet abducted hip - distance apart on mat. Head resting in hands.
INHALE lengthen back of neck.
EXHALE while maintaining length through back of neck, stabilize scapulae, contract abdominals to slide rib cage toward pelvis and flex thoracic spine. Maintain pelvis neutral throughout exercise, ensuring engagement of transversus abdominis.
INHALE hold flexion by maintaining abdominal contraction while expanding back and sides of rib cage. Allow weight of head to drop into hands, maintaining length in back of neck.
EXHALE return upper body to mat, allowing cervical spine to return to neutral once head is on mat.
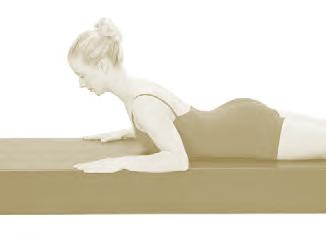
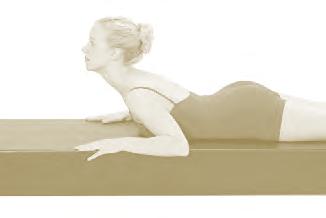
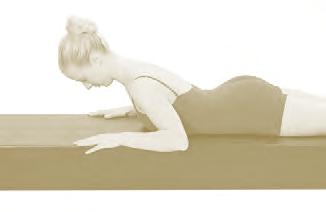
3. MODIFIED BREAST STROKE PREP
STARTING POSITION
Prone, pelvis and spine neutral. Hands on mat by shoulders, legs parallel and adducted. Place nose directly down toward mat using small foam cushion if necessary under forehead to support cervical spine (placing forehead on mat will create too much flexion of cervical, chin on mat creates too much extension).
INHALE stabilize scapulae on the back.
EXHALE maintain scapular stabilization and reach top of head away from tailbone to begin extending thoracic spine. Allow rib cage to open and maintain bottom ribs in contact with mat.
INHALE maintain extended position and breathe into sides of rib cage without losing abdominal engagement.
EXHALE stabilize scapulae and lower upper torso to mat, maintaining length of cervical spine.
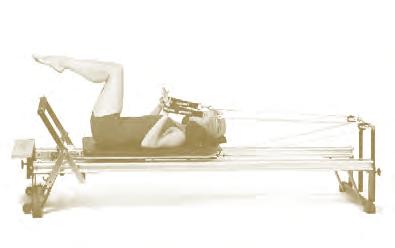
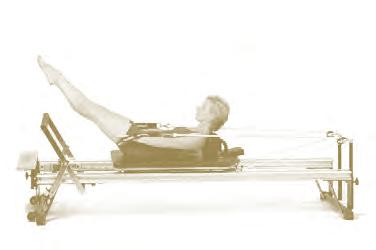
footbar position #1 or #4, 2 to 3 springs, headrest adjusted for individual
STARTING POSITION
Supine, imprinted position. Legs parallel and adducted in air, knees flexed (tabletop position). Elbows flexed by sides of body. Hands in straps, fingers long, palms facing away. Scapulae stabilized.
EXERCISE
To prepare, inhale…
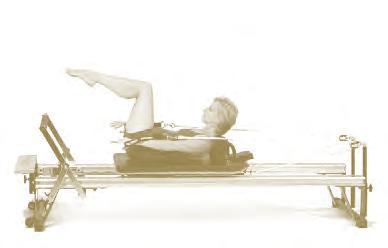
EXHALE lengthen back of neck, keep scapulae stabilized and contract abdominals to flex thoracic spine. Simultaneously, extend elbows, reaching arms by sides level with shoulders, and extend legs on a diagonal as low as imprint can be maintained.
Then…
INHALE for 5 counts, keeping upper body flexion, scapular and pelvic stability, while doing small vertical pulses with arms.
EXHALE for 5 counts while continuing to pulse arms.
Complete 10 sets (a total of 100 counts).
To finish…
INHALE remain in upper body flexion, flex knees and continue to reach arms.
EXHALE flex elbows and return upper body to carriage. Legs remain in the air.
NOTE: May be done starting in a neutral pelvic position and maintaining throughout, once strength is gained and ability demonstrated.
ESSENCE
TARGET MUSCLES: transversus abdominis to compress abdomen and stabilize lumbo-pelvic region; deep pelvic floor to aid in firing transversus; rectus abdominis and obliques concentrically to create and isometrically to maintain thoracic flexion and stabilize pelvis; latissimus dorsi and pectoralis major to stabilize arms challenged by resistance from behind; hip flexors, adductors and quadriceps isometrically to maintain position of legs; scapular stabilizers
STABILITY: lumbo-pelvic region against weight of legs; upper body in flexion; scapulae during arm movement
ENDURANCE: abdominals to maintain thoracic flexion and stabilize pelvis throughout
FOCUS
w maintain imprint throughout exercise
w stabilize thoracic flexion, rib cage and scapulae throughout to avoid neck tension
w stay wide across front and back of shoulder girdle with equal emphasis on anterior and posterior shoulder stabilizers to avoid protracting shoulders (carriage movement indicates loss of connection through shoulder stabilizers or pulsing from elbows)
w initiate movement of arms at shoulder joints rather than elbows
w avoid overworking rectus abdominis and flexing too high giving the appearance of popping abdominals
w avoid overextending or ‘locking’ elbows
w keep wrist long without any ‘breaking’
MODIFICATIONS
1. HEAD ON CARRIAGE. To practice breath with arm movement. Focuses on scapular stabilization and full breath pattern.
2. TABLETOP POSITION. Maintain knees flexed in the air. Ideal to release hip flexors or as an intermediate stage for those not strong enough to stabilize pelvis and lumbar region with legs fully extended.
3. NO STRAPS. Perform Hundred just as in Matwork, to reduce work of latissimus dorsi, scapular stabilizers and abdominals.
4. FEET ON FOOTBAR, NO STRAPS. To reduce workload on abdominals, making it easier to stabilize lumbo-pelvic region.
5. BREATHE IN STACCATO RHYTHM. Helps promote full breath pattern and avoid holding breath.
6. FLEX HIPS AND KNEES for 5 counts on inhale (to tabletop position), then extend legs for 5 counts on exhale. Challenges coordination.
7. USE A SPACER. Insert a rubber pad, foam cushion or small ball at knees and⁄or ankles to help maintain activation of hip adductors.
8. FITNESS CIRCLE. Place Fitness Circle resistance ring between ankles to add lower body resistance. Use in combination with modification 6, flexing and extending legs, or keep legs straight.
Modification 2
tabletop position
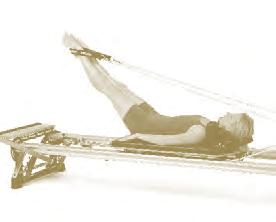
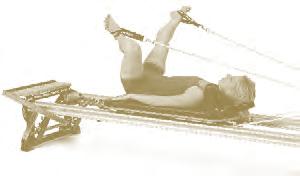
A.K.A. PAS DE CHAT
footbar position #4, 2 springs, headrest adjusted for individual
STARTING POSITION
Supine, pelvis and spine neutral. Feet in straps, ankles plantar flexed, toes gently pointed. Legs straight, adducted and laterally rotated, on a diagonal as low as pelvic stability can be maintained. Arms long by sides of body, palms down.
EXERCISE
INHALE maintain pelvic stability, legs laterally rotated, equal tension on both straps, and abduct one leg straight out to side. Simultaneously flex opposite knee, dorsiflex ankle and bring heel directly toward seat along a center line, as carriage moves in.
EXHALE extend flexed knee, plantar flex ankle, gently point toes and simultaneously adduct opposite leg, bringing legs together along center line to starting position, to move carriage out.
Complete 5 repetitions on each side, alternating.
NOTE: If stabilization cannot be maintained in neutral, begin in imprint and move pelvis toward neutral as legs abduct, return to imprint as legs reach on diagonal.
ESSENCE
TARGET MUSCLES: transversus abdominis to compress abdomen and stabilize lumbo-pelvic region; deep pelvic floor to aid in firing transversus; obliques to prevent spinal extension; obliques and multifidus to prevent pelvic rotation; hip extensors, quadriceps and adductors eccentrically as knee flexes, concentrically as knee extends; hip extensors and adductors of straight leg eccentrically as leg reaches to side, concentrically as leg adducts; lateral rotators to maintain rotation at hip
STABILITY: torso
MOBILITY: hip abduction and adduction; knee flexion and extension
COORDINATION: different but simultaneous movement of legs
FOCUS
w maintain pelvic stability so one hip does not hike toward rib cage and pelvis does not rock or rotate
w maintain sacrum area on carriage as legs move toward body
w engage abdominals to maintain pelvic stability, as legs move away from torso
w keep equal tension on both straps so both legs, although doing different actions, are involved in controlling movement of carriage
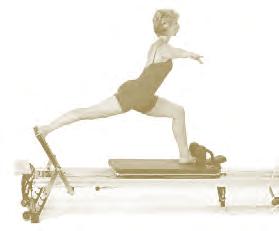
Stag
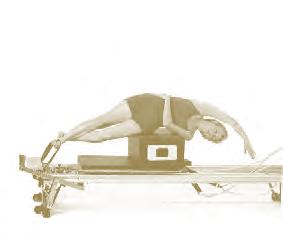
3. BOW & ARROW
footbar position #4, 2 springs, headrest flat
STARTING POSITION
Rest bottom hip on box facing side. Neutral pelvis and spine, with body in a long diagonal from feet to top of head. Top leg straight and parallel, foot hooked under footstrap. Bottom knee flexed slightly with foot hooked around back of top ankle. Bottom arm wrapped around waist. Top arm reaching overhead. Scapulae stabilized.
EXERCISE
INHALE laterally flex spine toward floor.
EXHALE lengthen from tail to head to return spine to diagonal line.
Complete 3–5 repetitions on each side.
ESSENCE
TARGET MUSCLES: transversus abdominis to compress abdomen and stabilize lumbo-pelvic region; deep pelvic floor to aid in firing transversus; internal and external obliques of side closest to footbar eccentrically as torso laterally flexes toward floor, concentrically to return; obliques and multifidus to prevent rotation; obliques and erector spinae to prevent forward flexion or extension
STABILITY: spine during articulation; scapulae
ENDURANCE: lateral flexors working against load throughout BALANCE: on side of hip
FOCUS
w keep pelvis, rib cage and head square to side, do not allow rotation
w prevent spine from flexing or extending, i.e. move only in coronal plane
w maintain scapular stability
w emphasize length of spine through diagonal position and a strong abdominal connection
Bow & Arrow
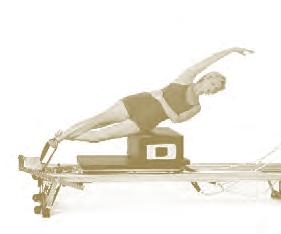
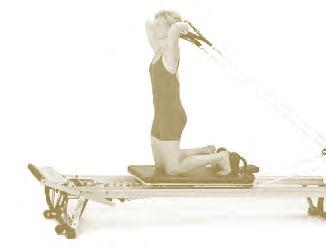
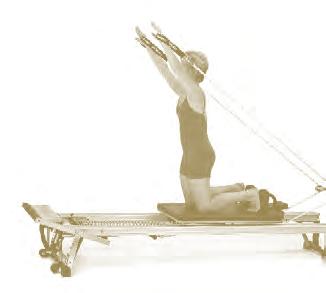
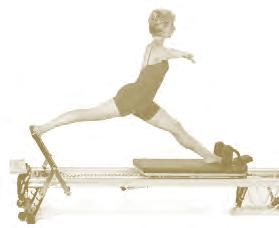
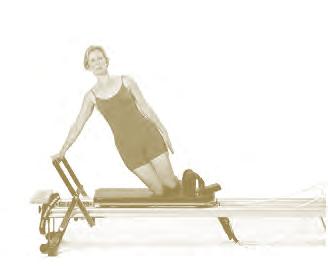
Star Prep
footbar position #1, 1 to 2 springs
NOTE: Trained professional must spot throughout exercise in case balance is lost.
STARTING POSITION
Kneel on carriage, facing side. Leaning on a diagonal toward footbar, propped up by underneath arm holding footbar. Top knee against front shoulder rest, bottom knee on carriage with pelvis, spine and hips neutral to make one line from knees to head. Scapula of supporting arm stabilized, arm straight with heel of hand on footbar and fingers long (preferably with fingers and thumb wrapped over bar so weight is resting on top of footbar). Top arm straight resting along top side, palm facing thigh.
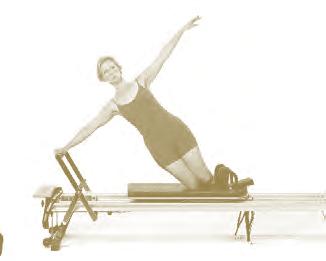
EXERCISE
INHALE maintain one line from knees to head, maintain scapular stabilization, and abduct supporting arm to press carriage out. Simultaneously, abduct top arm.
EXHALE maintain one line from knees to head, maintain scapular stabilization, and adduct supporting arm to pull carriage in. Simultaneously, lower top arm.
Complete 5 repetitions on each side.
ESSENCE
TARGET MUSCLES: transversus abdominis to compress abdomen and stabilize lumbo-pelvic region; deep pelvic floor to aid in firing transversus; obliques and erector spinae to stabilize spine in neutral; underneath obliques and hip abductors to prevent pelvis sinking toward floor; gluteus maximus, hamstrings and abdominals to stabilize pelvis in neutral; scapular stabilizers of supporting side, especially serratus anterior; deltoids and supraspinatus concentrically to initiate press out; latissimus dorsi, and teres major eccentrically to control shoulder abduction, concentrically to initiate shoulder adduction; obliques and multifidus to prevent rotation of spine
STABILITY: torso; pelvis on femurs challenged by lean; supporting scapula
MOBILITY: shoulder abduction and adduction
ENDURANCE: all stabilizers to maintain lean position during movement
FOCUS
w keep both sides of body even, both sides of waist equally long and pelvis in a line between knees and head, neither lifted toward ceiling nor sagging toward carriage
w keep pelvis and spine neutral, neither flexing nor extending, anteriorly or posteriorly tilting
w keep hips neutral, not flexed
w keep pelvis and torso squarely facing one side, avoid rotation
w maintain scapular stabilization of supporting side throughout; do not sink into that shoulder
w avoid locking or overextending supporting elbow