DO NOT USE THE BACK BUTTON –ALWAYS CLICK ON A TAB OR THE HEADING OF A PREVIOUS PAGE THAT YOU HAD SELECTED.
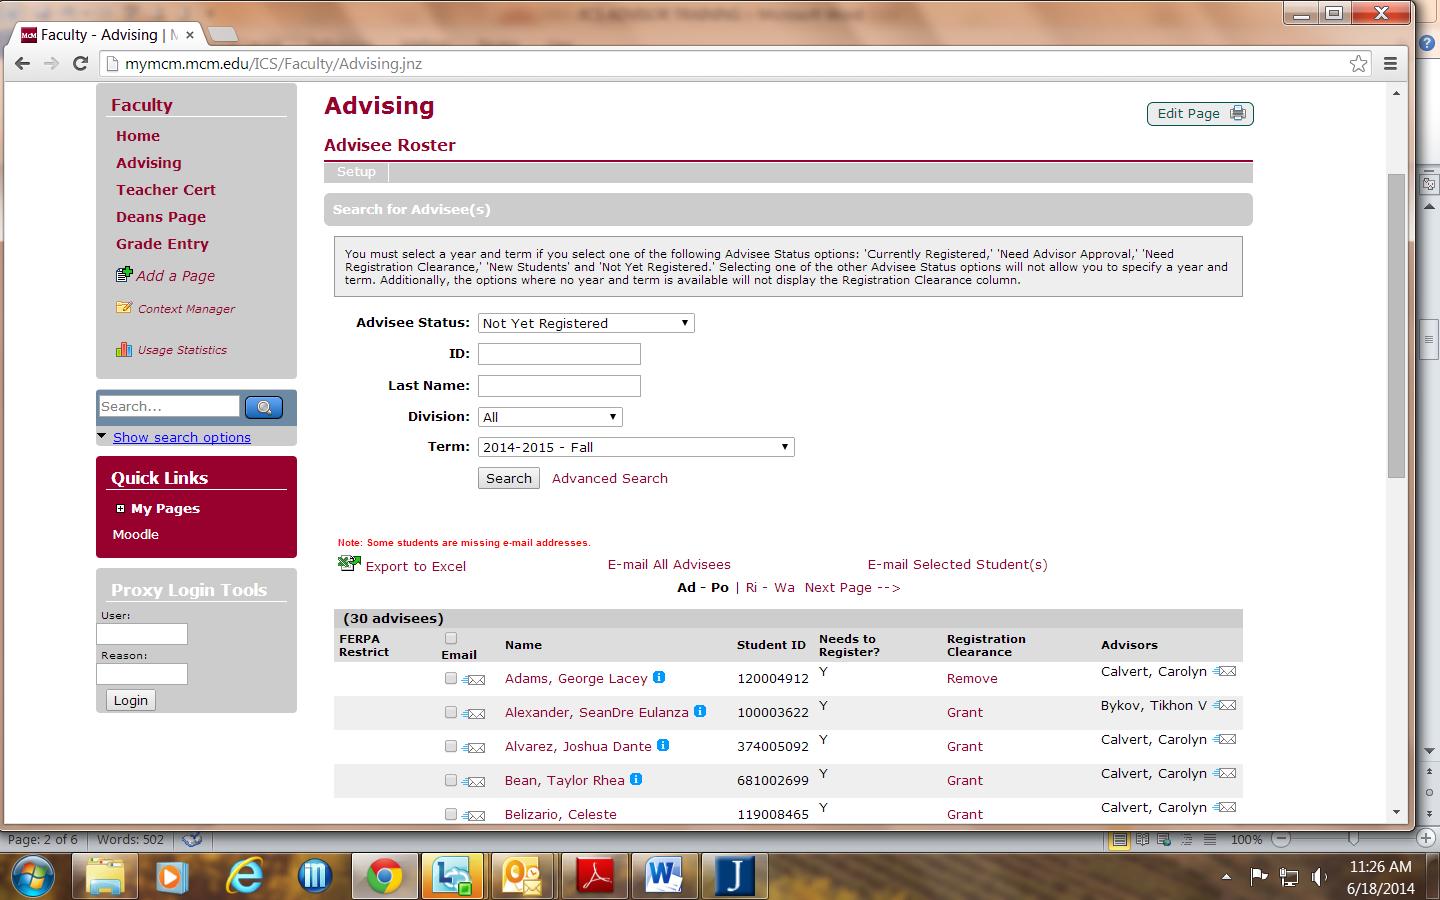
Open Faculty Tab STEP 1
• Select Advising (on left side of screen)

• Advisee Status
• Choose Needs Registration Clearance
• Term Box – Select 2022-2023 - FALL (or 2022-2023 SPRING, SUMMER I, II)
• Click SEARCH
You will see a list of advisees with the word GRANT beside their name Click GRANT (the word changes to REMOVE)
If the student’s name is still in the list, then click on the student’s name.
If the name no longer appears in the list go again to:
• Advisee Status
• Choose Not Yet Registered
• Click SEARCH
• Click on Student’s Name
The next screen will be:
ADVISEE DETAILS PAGE
If this type of box appears, see STEP 4 for information
Holds
Click on Add/Drop Courses (on right side of screen)
You will then see this screen:
If you know the department you can begin typing the course prefix in the Course Code box. (example: ENGL or ENGL1310)

You will get a list of courses ENGL courses. No titles, days, times – just course numbers. When you see the one you want, you can click ADD COURSE(S) and the student is registered in that course.
For ENTIRE SCHEDULE OF COURSES – (which will probably be more helpful in working with first year students)
Click COURSE SEARCH tab.
Make sure the TERM says 2022-2023 - FALL (or 2022-2023 SPRING, SUMMER I, II)
Click SEARCH
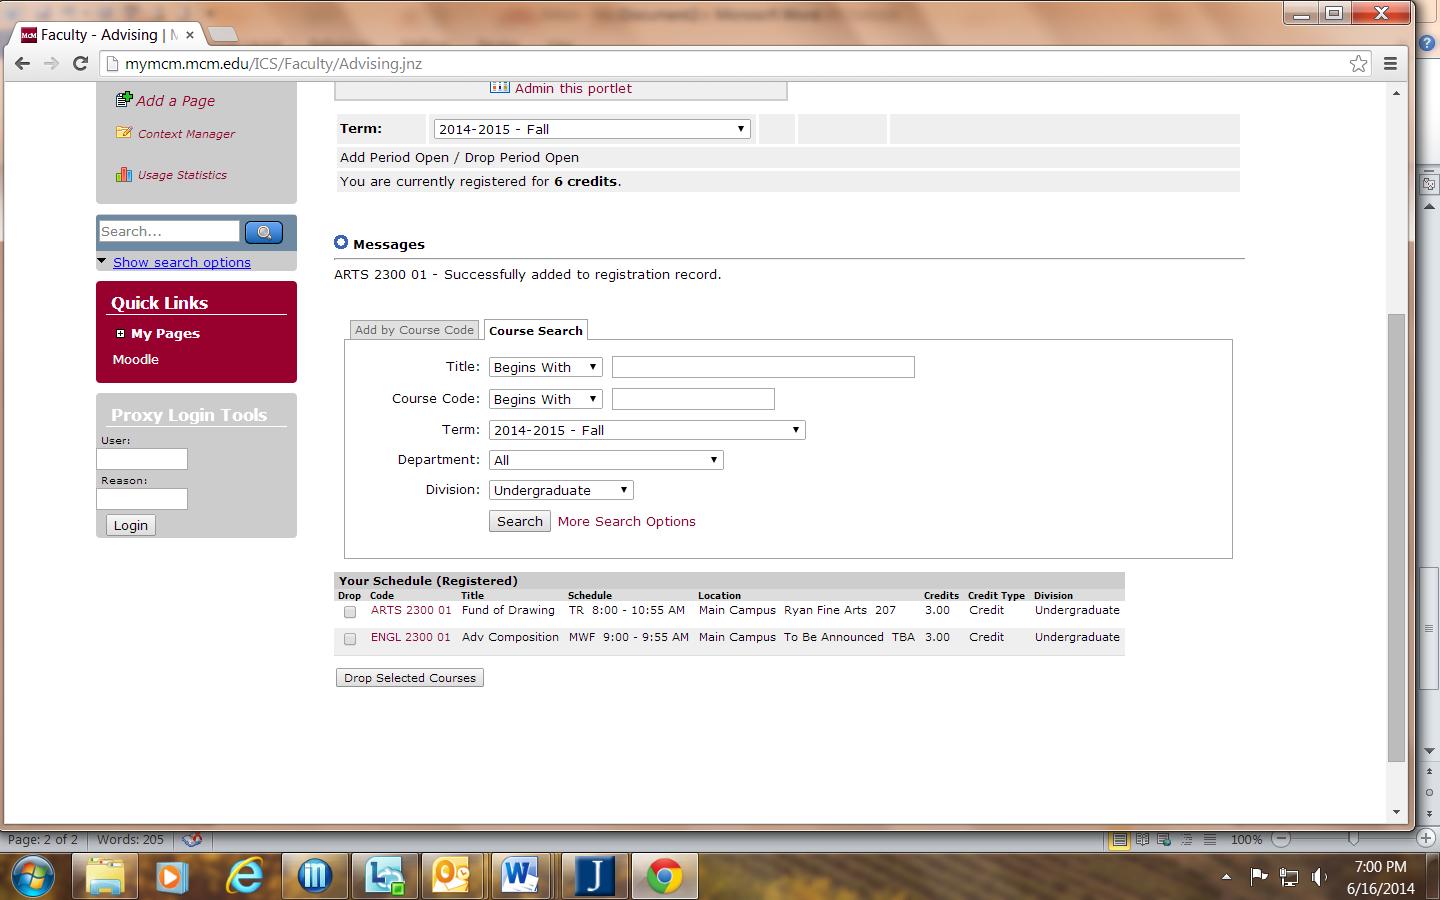
You will then see a course listing with ADD buttons on the left side of the course.
Click the ADD button of any course or all courses that you want to add to the student’s schedule.
Scroll all the way to the bottom of the page.
Click ADD COURSES

You can then see the courses you added with a DROP button beside them.

If you need to change the schedule
• Click the DROP button.
• Click Drop Selected Courses
It takes you back to the screen where you can search again for the course listing and ADD more courses.

PRINT SCHEDULE: To see or print a nice version of the student’s schedule
• Click on ADVISEE DETAILS (in the upper area of the screen/right under the heading)
• Click on STUDENT SCHEDULE (on right side)
Click on PDF at bottom that says MY COURSE SCHEDULE REPORT
This is a good version that has all the information on it if you would like to print a copy for your files and/or for the student.

STEP 2
ADDITIONAL TERM: If you now need to add classes for another term,
Click on ADVISEE ROSTER – and go back to STEP 1 and repeat for the different term(s) in which the student is enrolling.
STEP 3
NEXT STUDENT: When you are ready to register the next student, Click on ADVISEE ROSTER – start with STEP 1. Continue with STEP 2 to register student for more than one term.
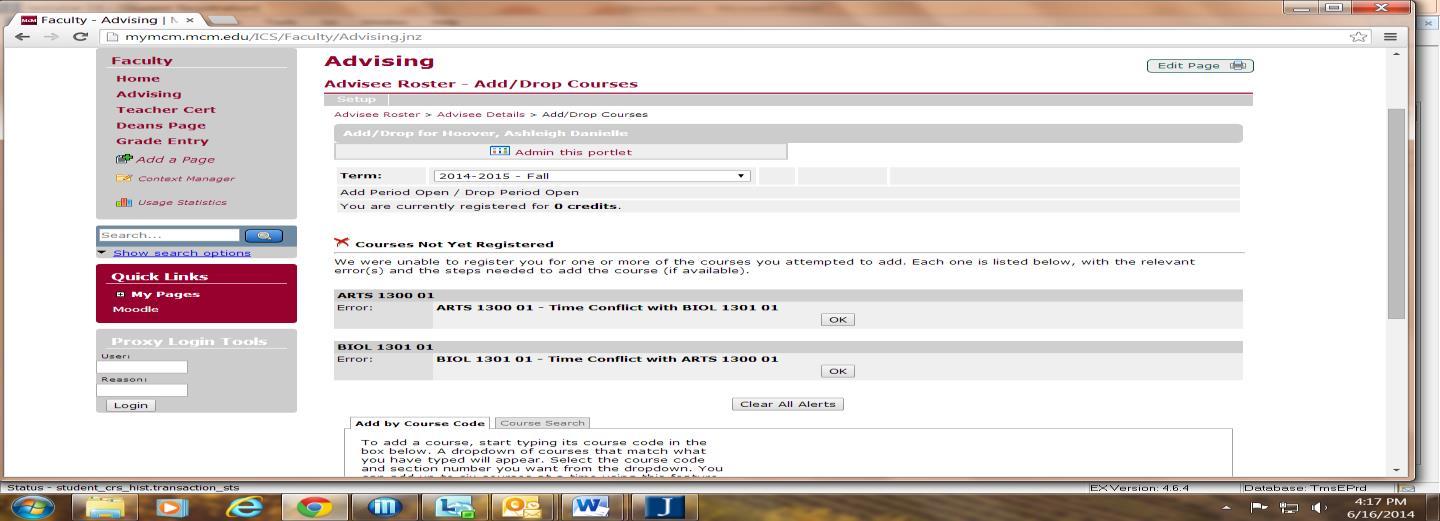
STEP 4 Examples: Unable to Add a Class
EXAMPLES of what you might see:
HOLDS
This box appears if the Student has any HOLDS. You can see a brief description or click on the + box and get information about which office to see regarding the hold.
MISSING PREREQUISITE(S)


