Thank you for choosing XTRIG. All our products are designed and manufactured to the highest standards using the best materials available. XTRIG products are race proven and ensure ultimate performance. XTRIG cannot be held responsible for incorrect assembly or the incorrect use
Please follow the installation instructions. Expert advice and correct installation of XTRIG products by an authorised XTRIG dealer are essential to ensure optimum safety and functionality.
Scope of delivery:
2x lower handlebar cups
2x upper handlebar cups
2x bolt M12x25 optional: M10x25
2x bolt M12x35 optional: M10x35

NOTE: Ensure that the offset direction is the same.

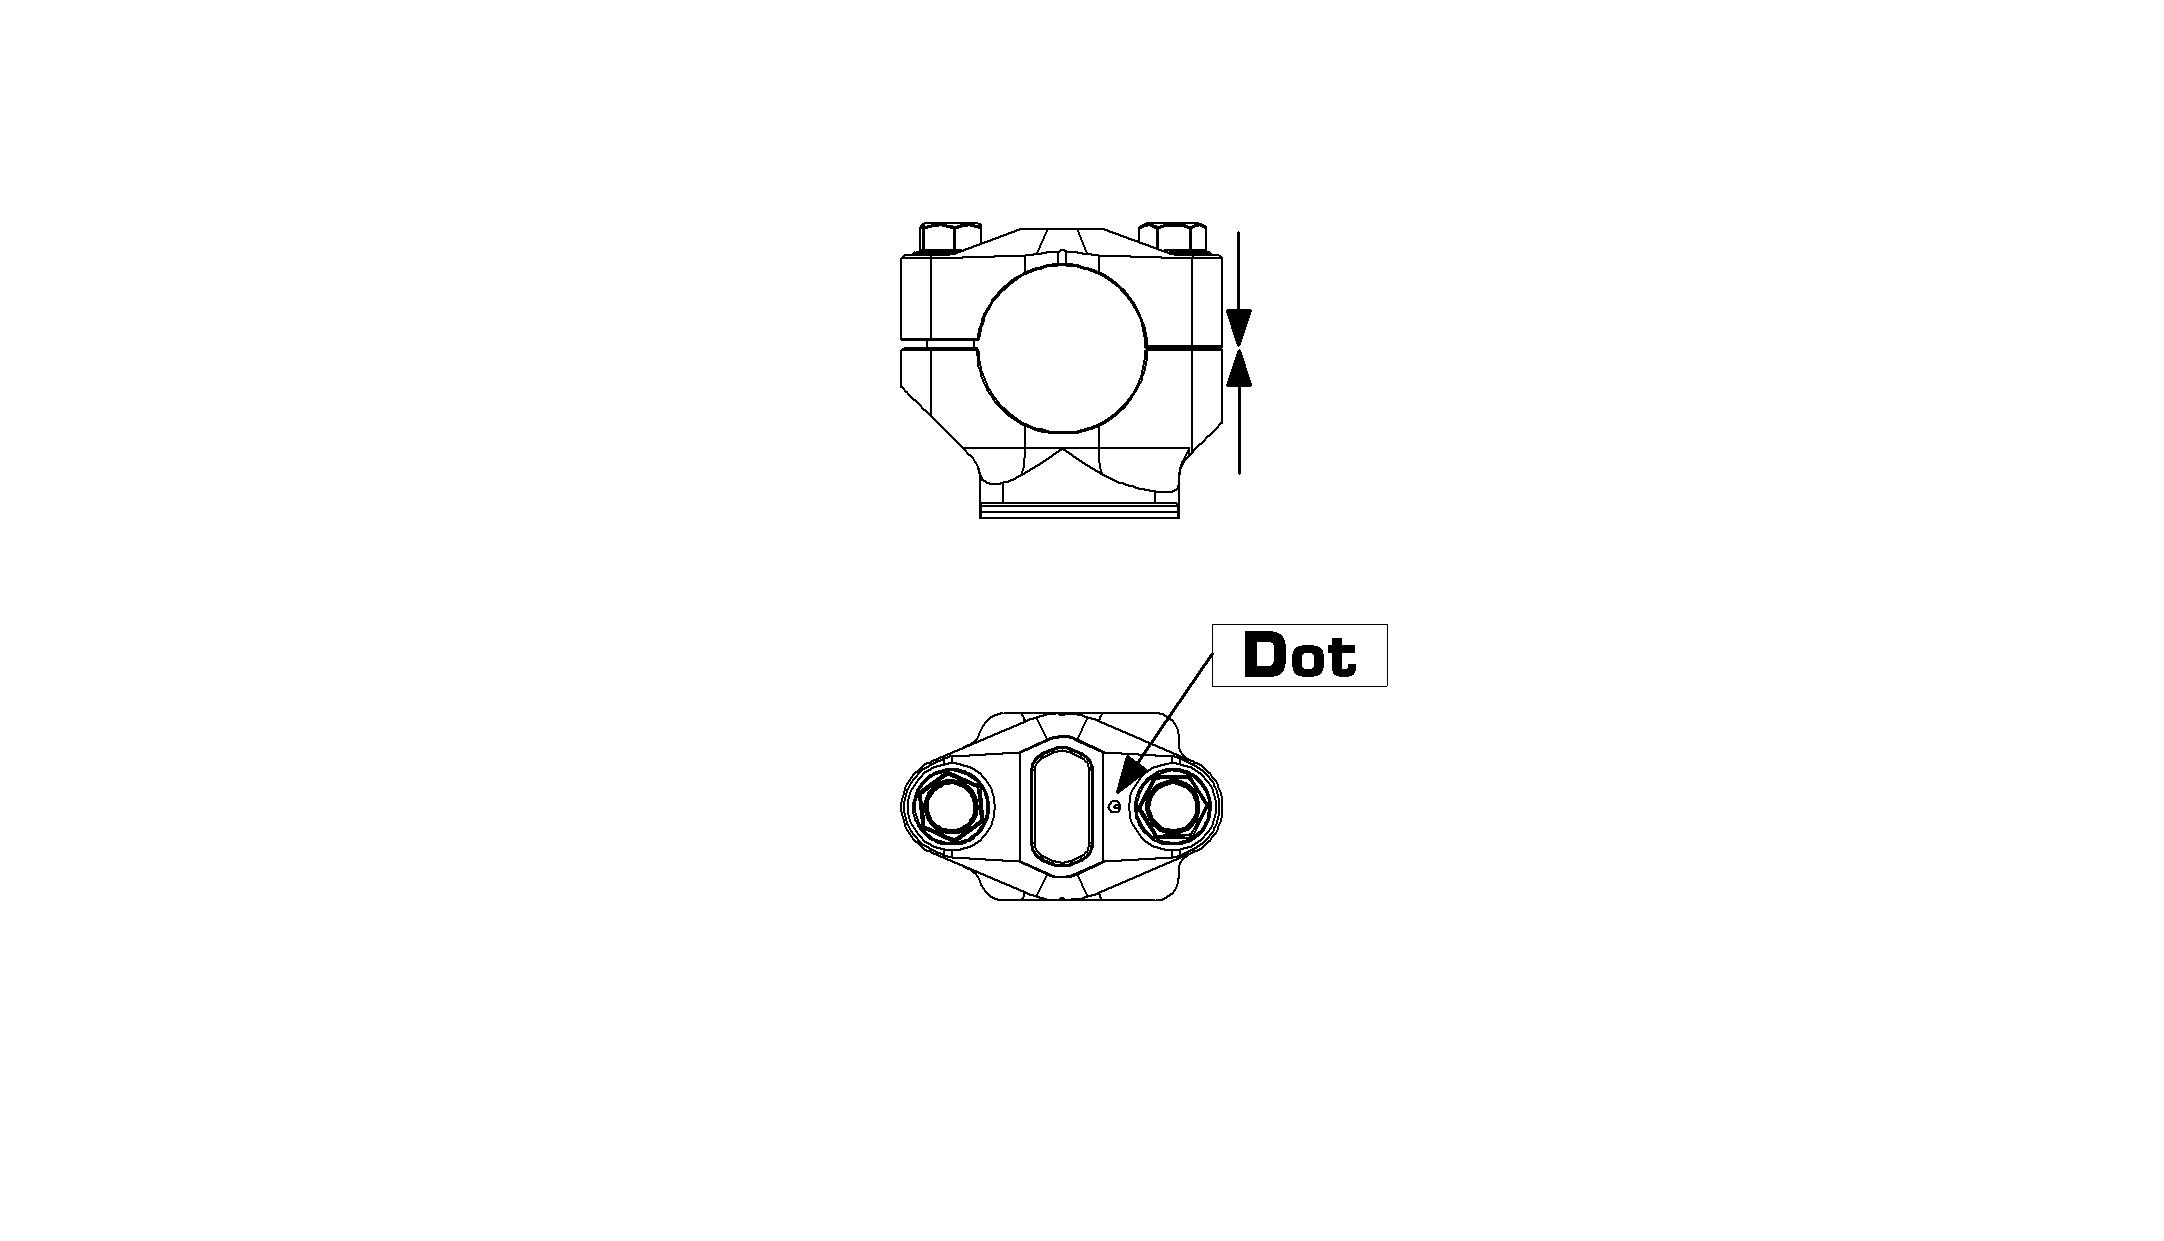
Pay attention to the same direction of point!
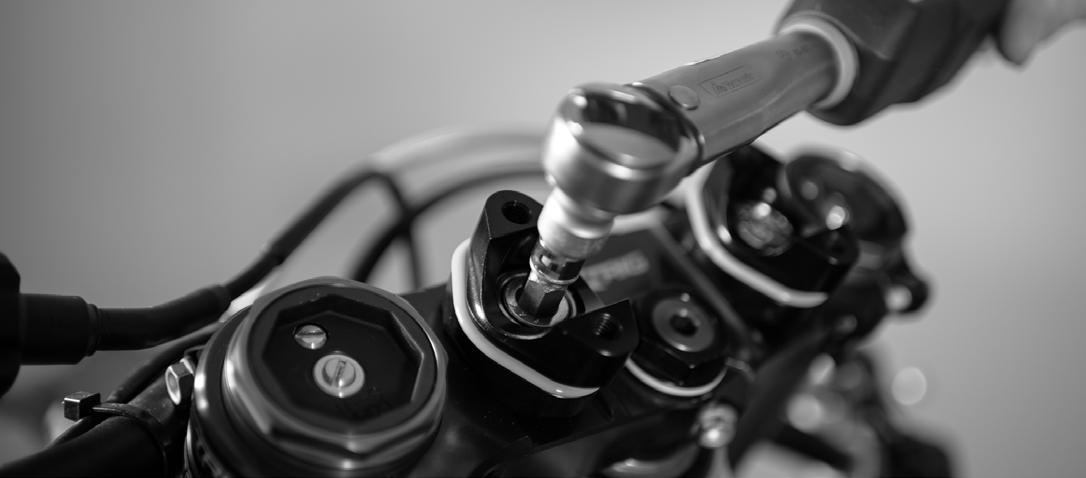
XTRIG handlebar mount for rigid mounting of the handlebar on XTRIG triple
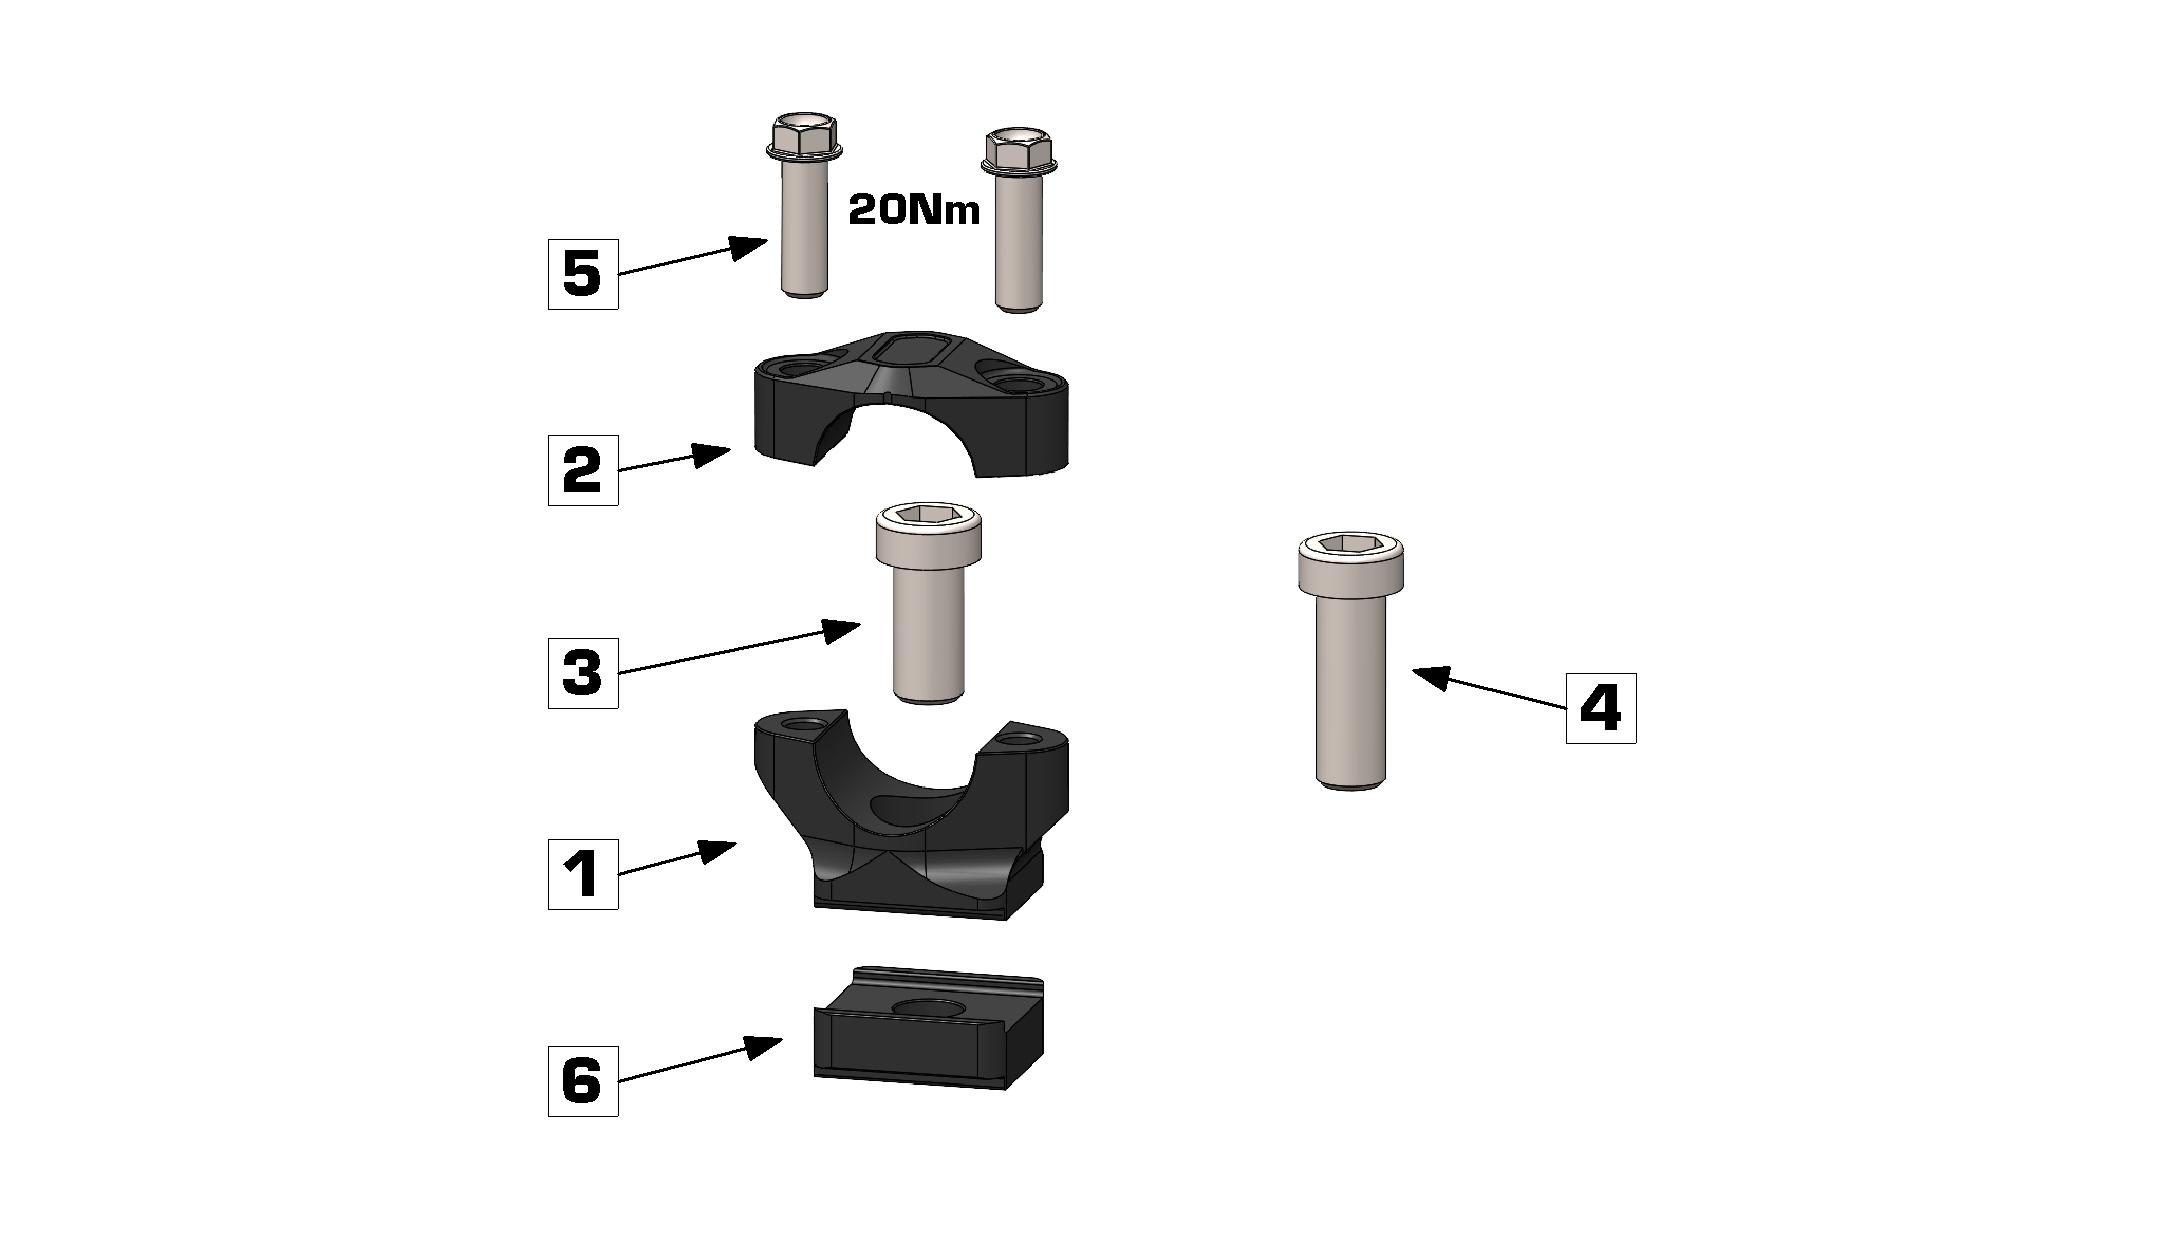
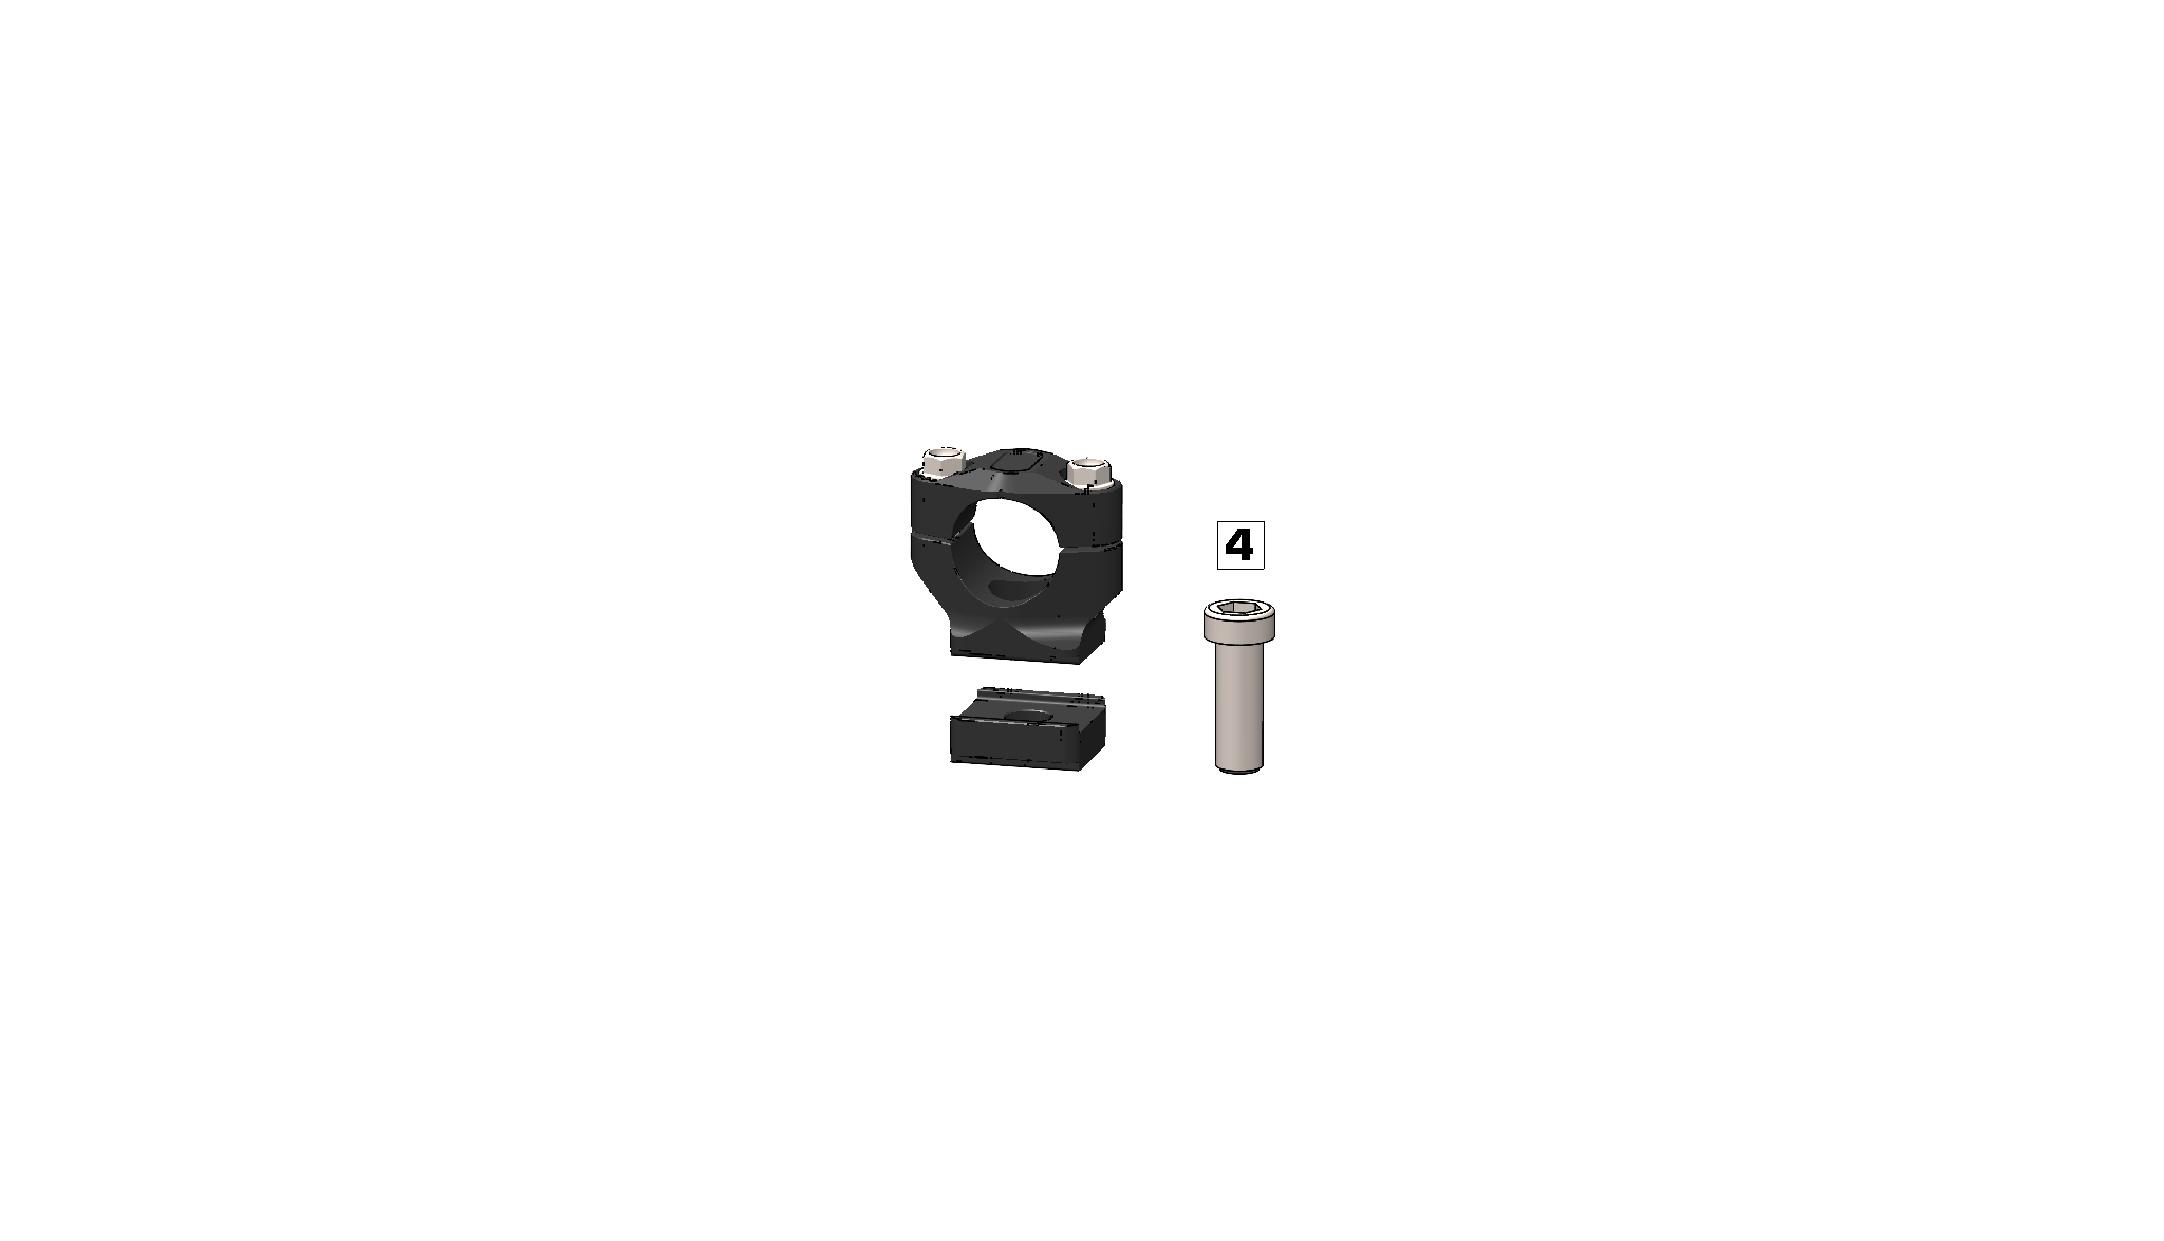
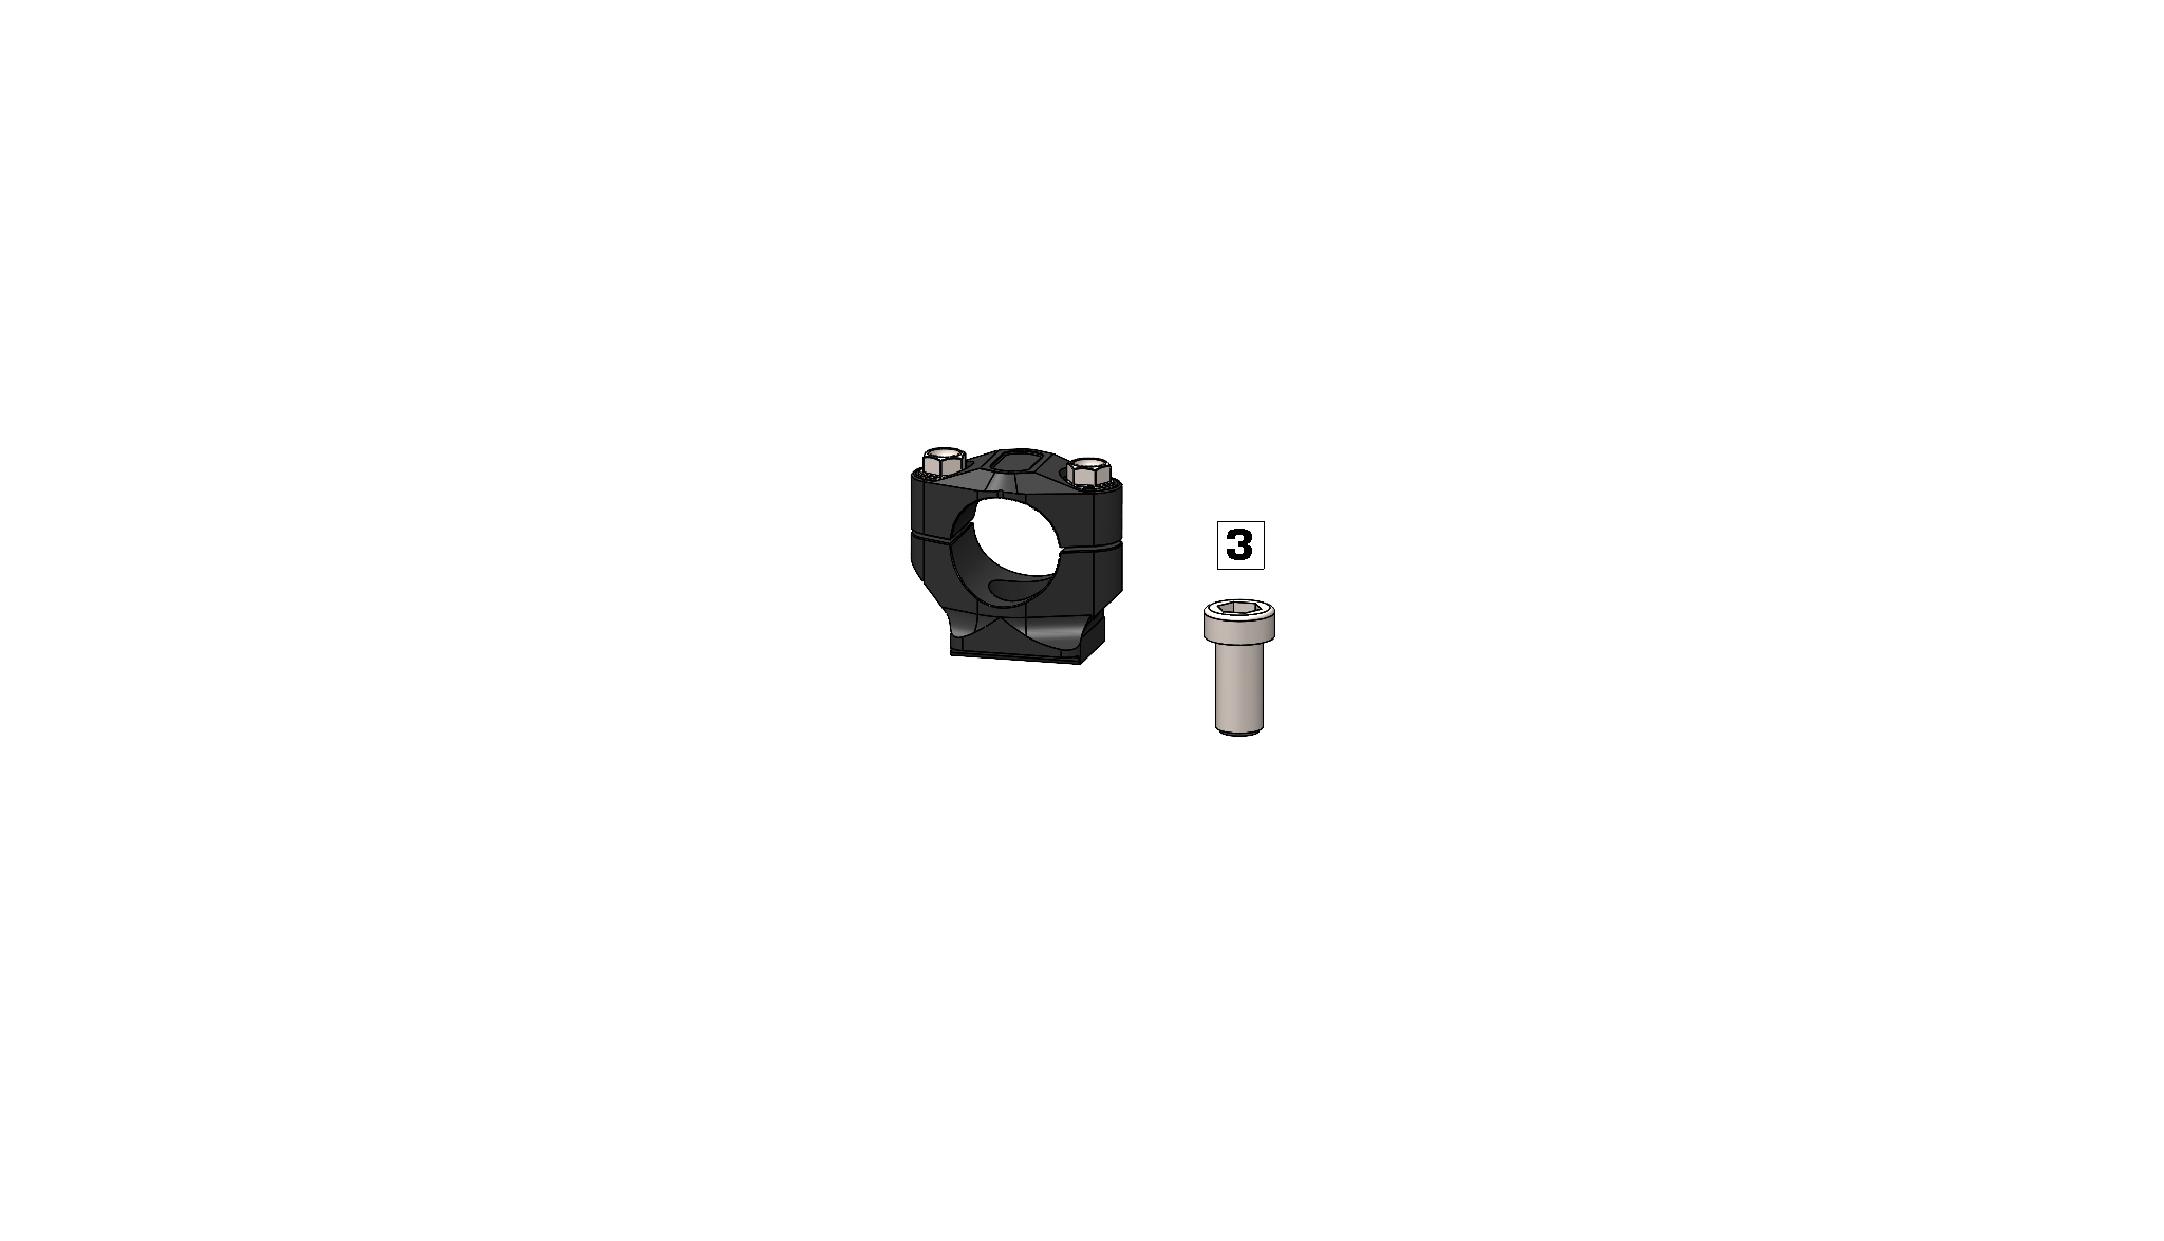
Screw on lower handlebar cup (1) with M12x25 or M10x25 bolt (3) For tightening torque, see table above. If desired, add handlebar spacer (6); use M12x35 or M10x35 bolt (4). (picture above)
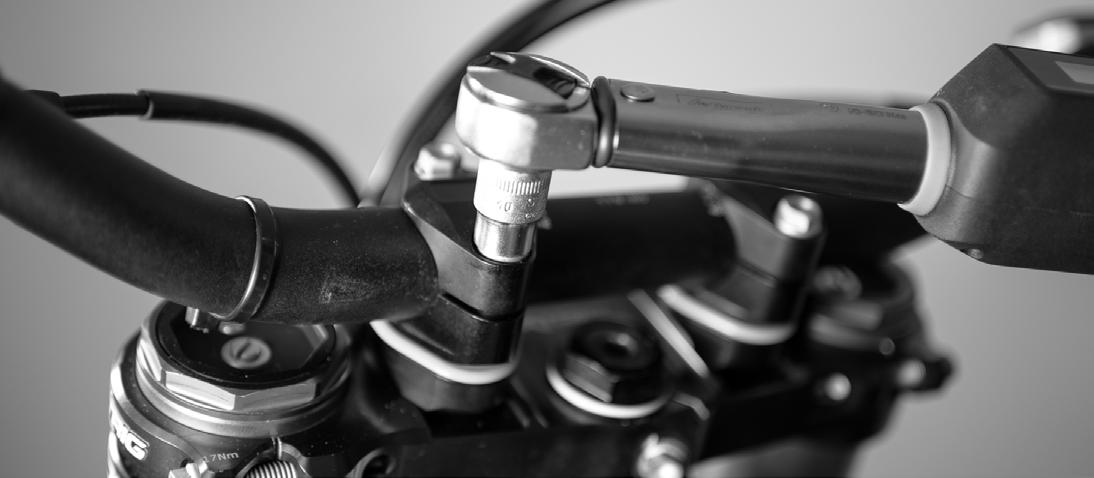
Place the handlebars and bring them into the desired position. Fit the handlebar cups on top (2) with the M8x25 bolts (5)
Tighten the M8x25 bolts (5) on the side with the dot on block. Then screw in the two remaining bolts and tighten everything with 20Nm.
M12x35 or M10x35
M12x25 or M10x25