Mobile OTP Login Pro for Magento 2
Mobile OTP Login Pro for Magento 2 enables quick and seamless customer login via mobile number, thus eliminating the need to remember passwords. Provide a secure login/register/reset password process through One Time Password (OTP).
Table of Content
4.
5.
6.
Settings 7. General Settings 8.
API 9.
Phone Numbers 10. Notification Settings 11. Layout 12. Frontend Customer Registration 13. Frontend Customer Login 14. Frontend Forgot Password
Frontend Mobile Number Update (My Account)
Mobile Login for Guest Checkout
Mobile Login in Default Register, Login & Forgot Password
1. Get MSG91 Credential 2. Get Twilio Credential 3. Generate reCAPTCHA Key
Configuration
SMS Gateway
Default Form
Test SMS
Copy
15.
16.
17.
Step 1:- First, log in to the MSG91 Dashboard using the below URL. https://msg91.com/
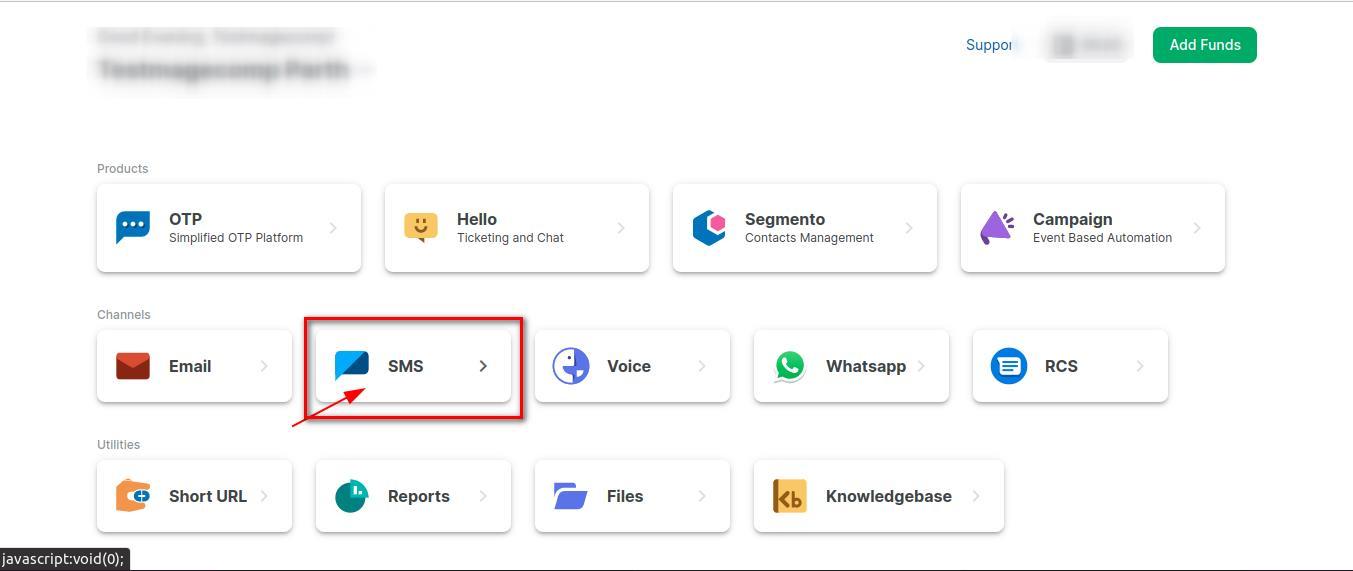
Step 2:- Now click on the SMS option.
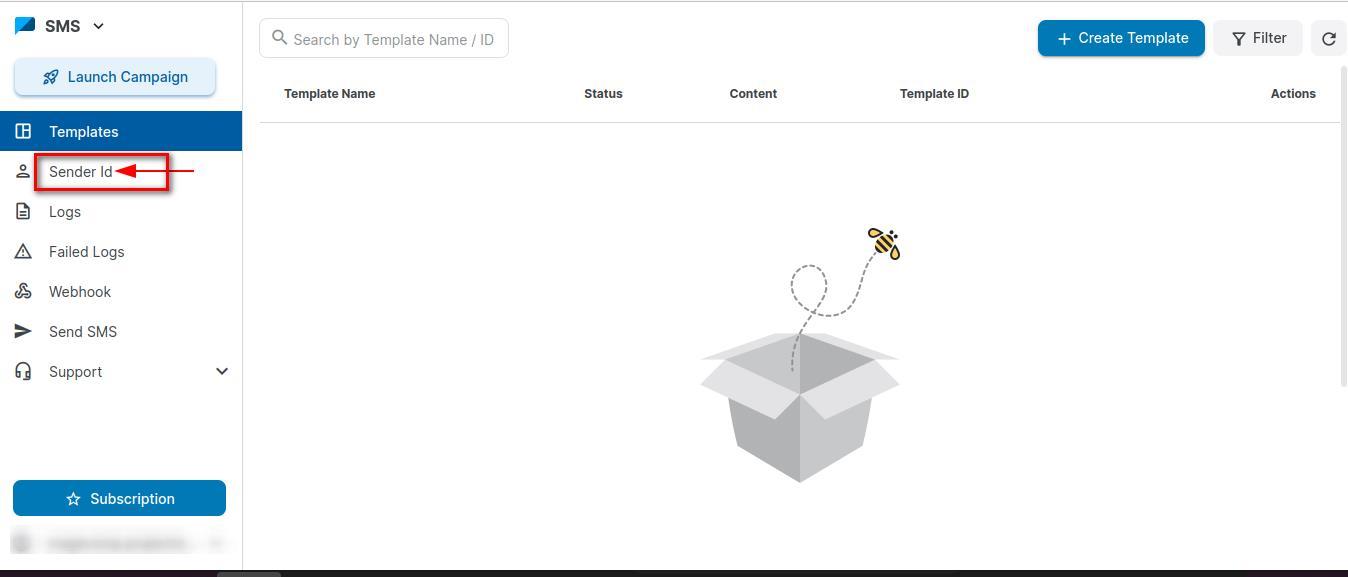
Step 3:- Now click on Sender Id.
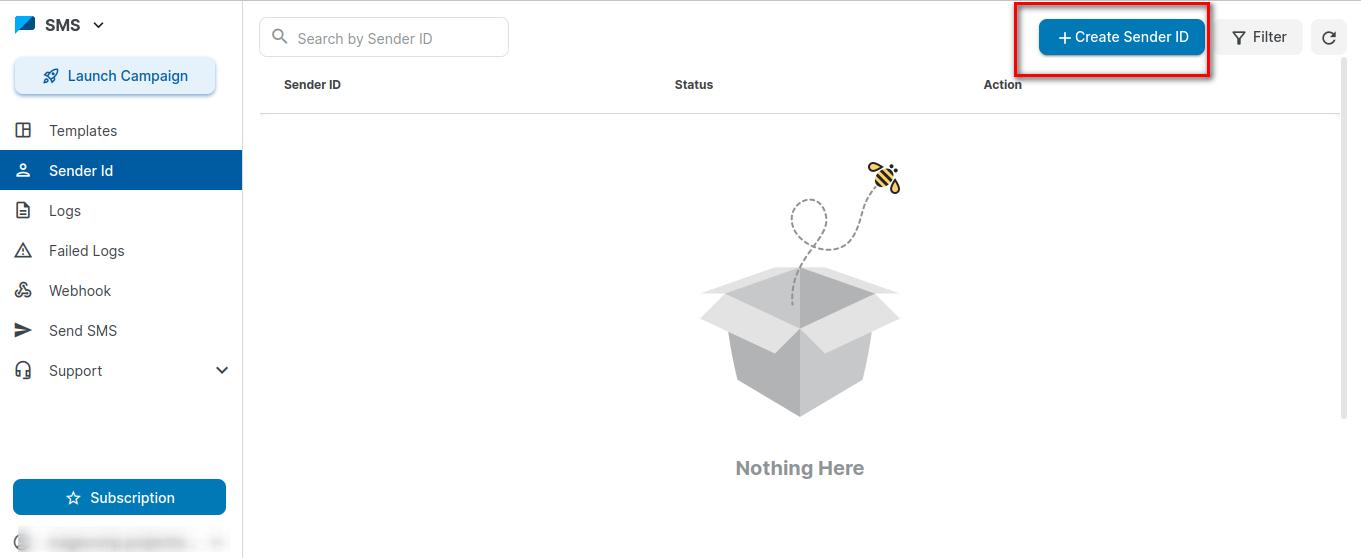
Step 4:- Now click on Create Sender ID.
1. Get
MSG91 Credential
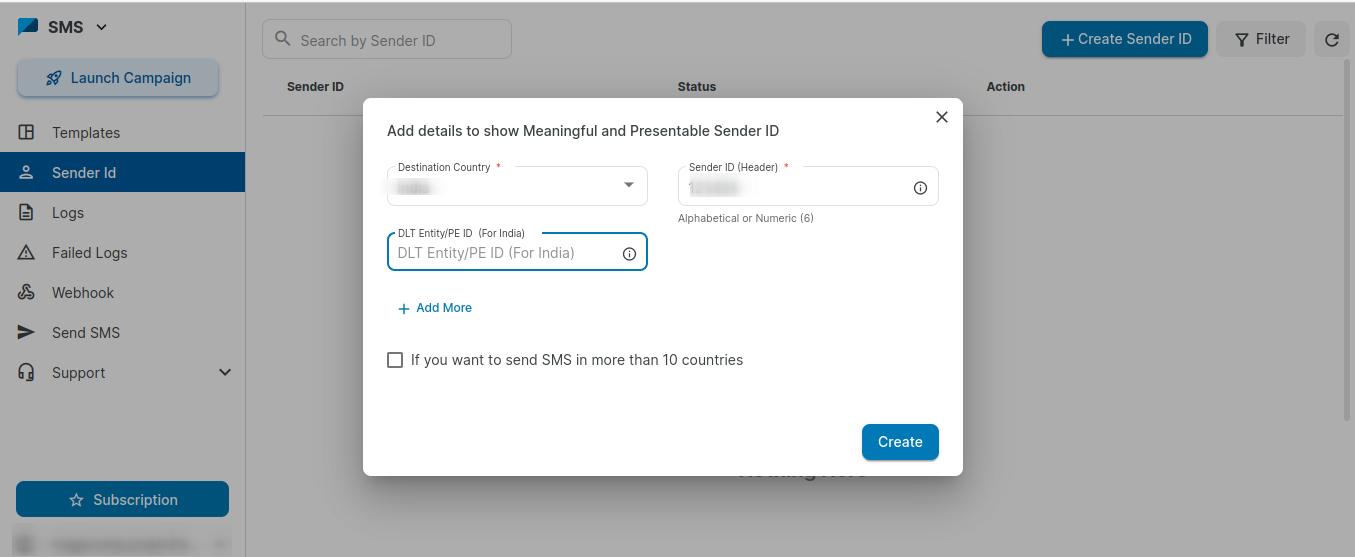 Step 5:- Select Destination Country , enter Sender ID and DLT ID and click on Create button.
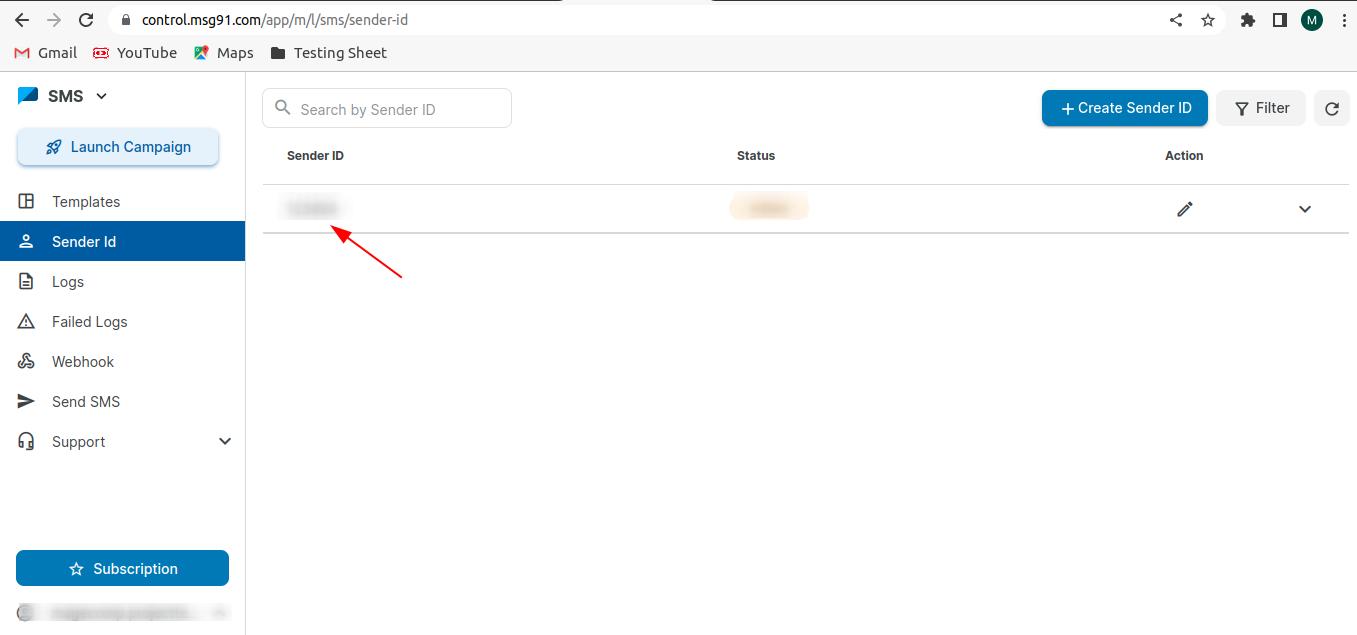
Step 6:- You can take the Sender ID from here.
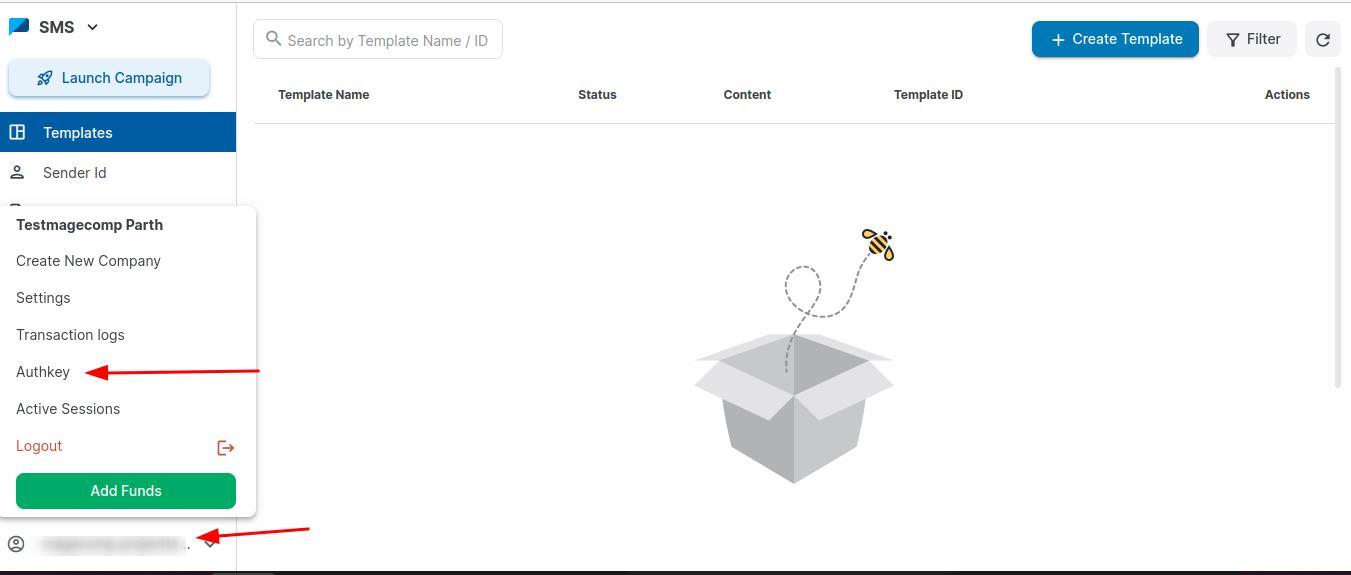
Step 7:- Now click on your Account and Authkey
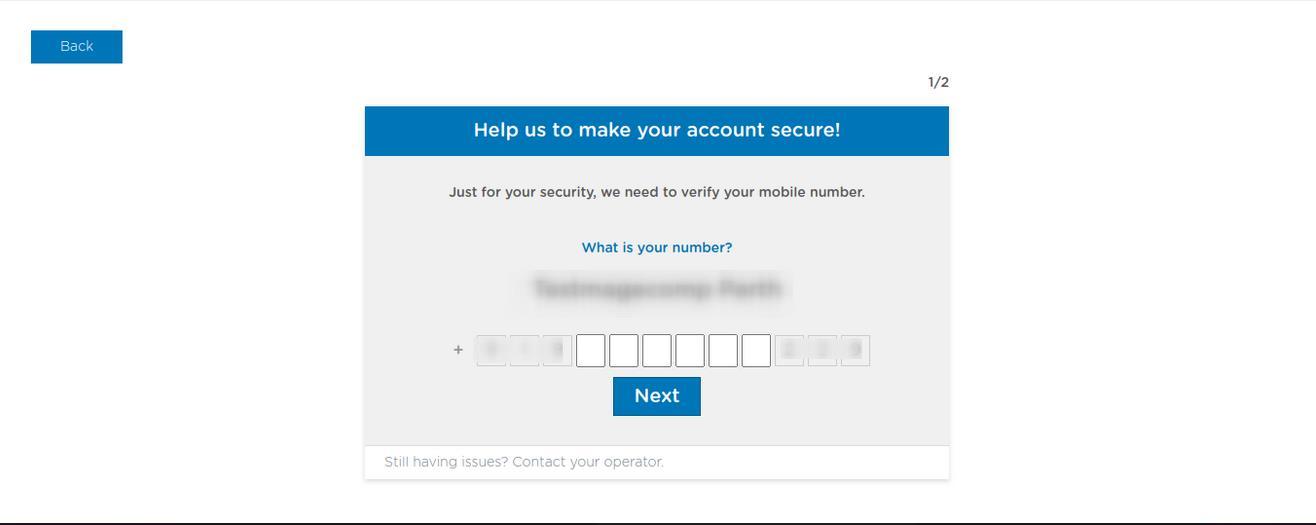
Step 8:- Enter your Mobile Number.
Step
Step
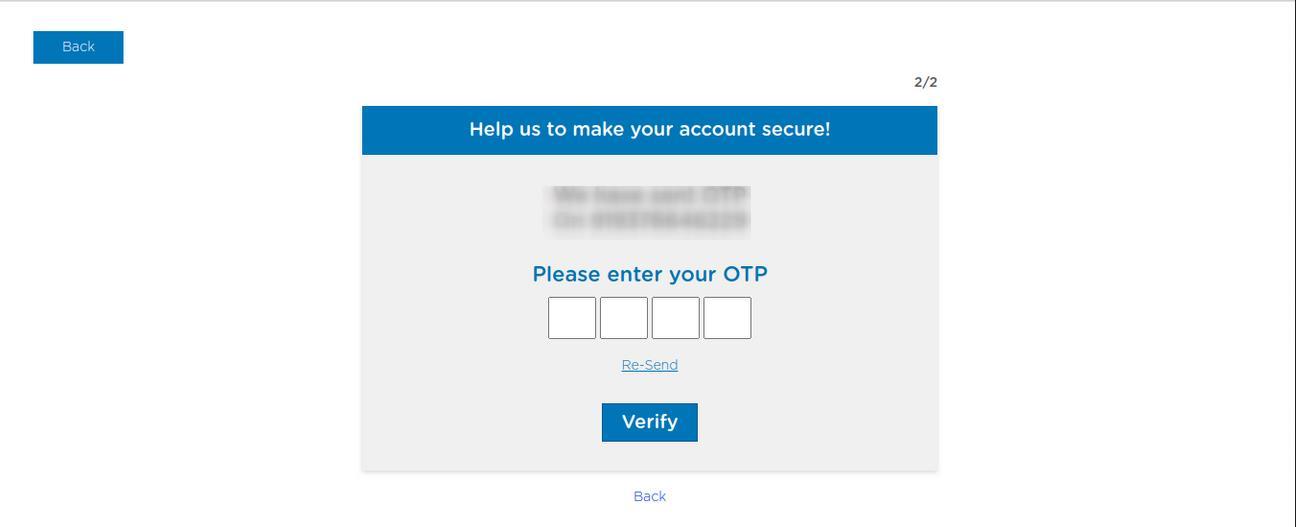
 9:- Enter OTP.
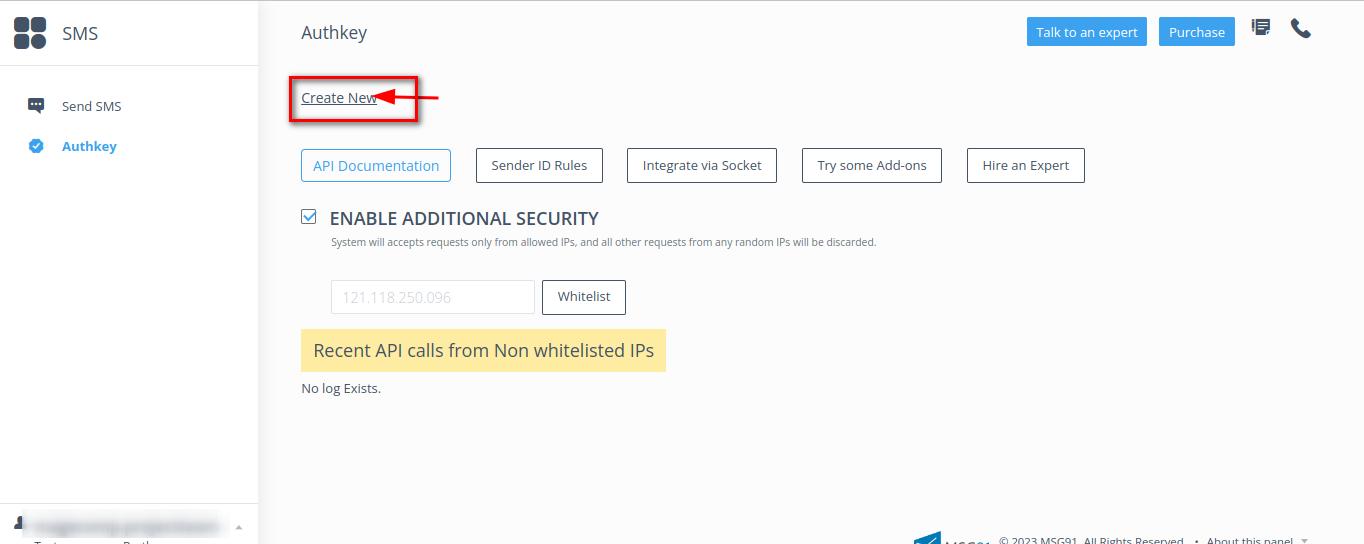
10:- Click on Create New option.
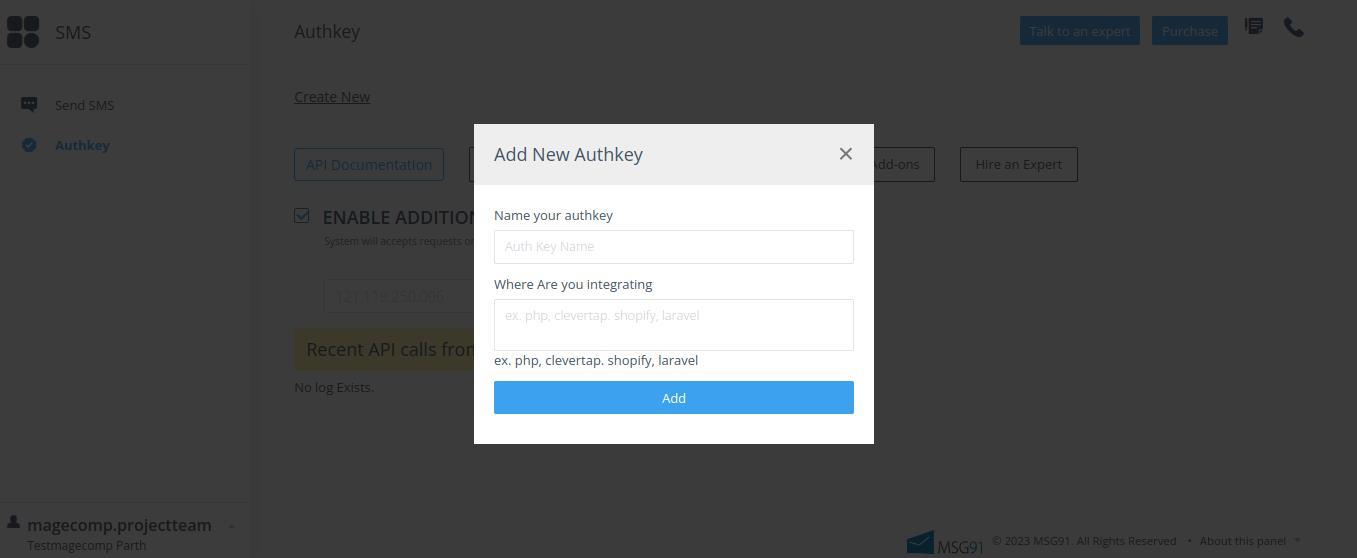
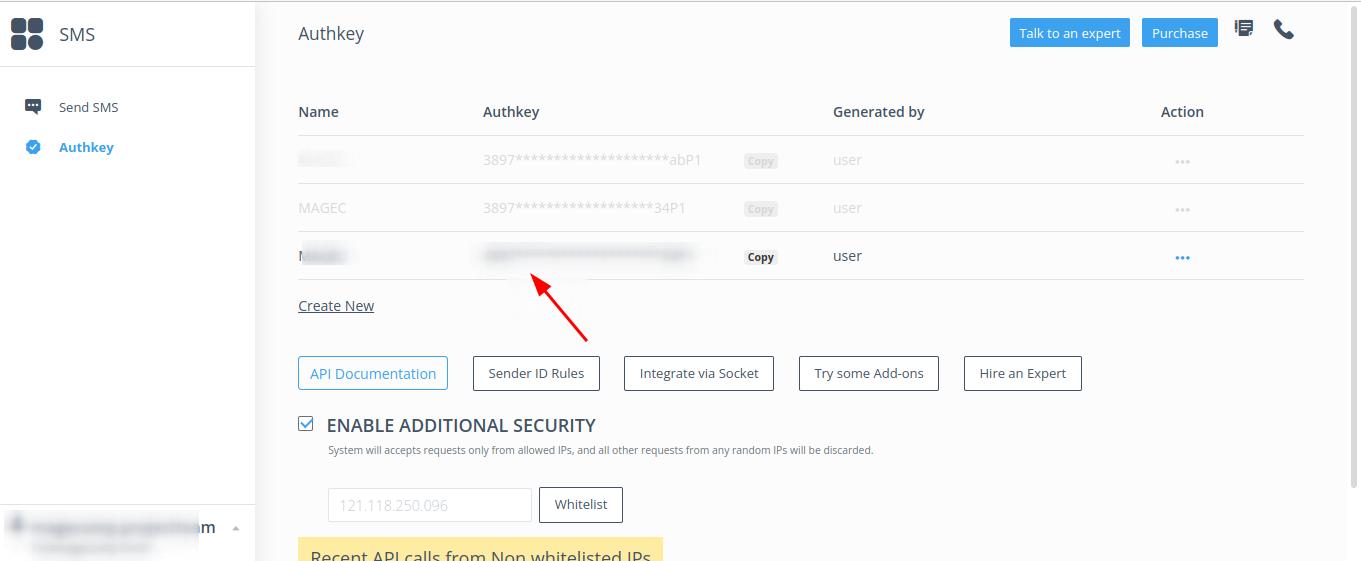 Step 11:- Enter Name of Authkey
Step 12:- Now Copy your Authkey.
Create DLT Template ID
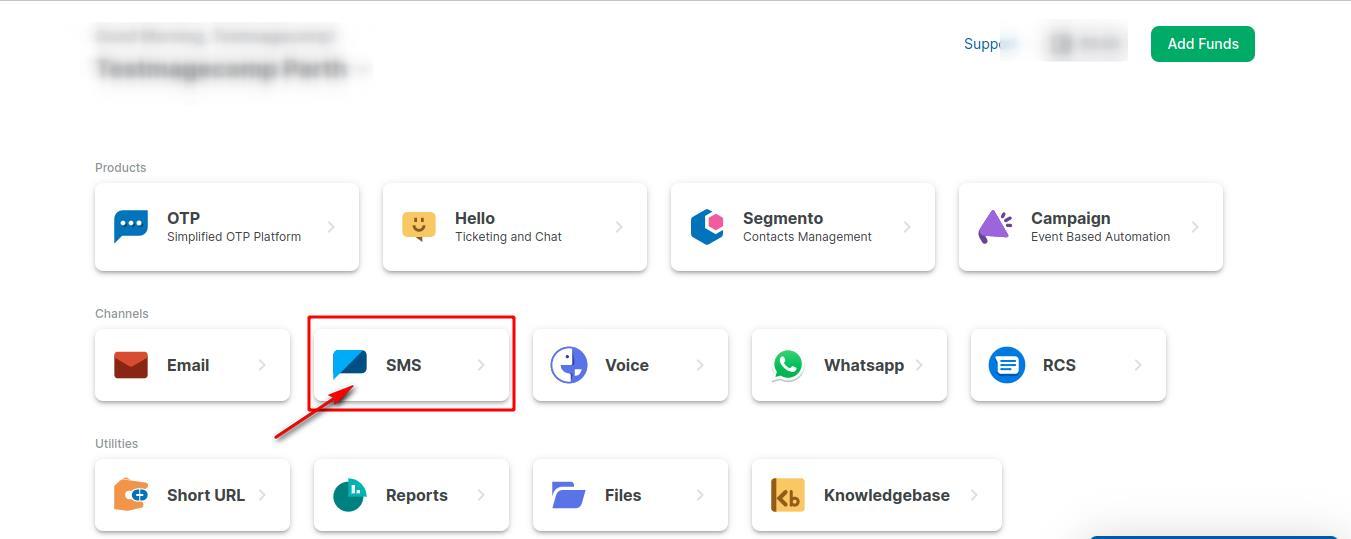
Step 1:- In MSG91 Dashboard, click on SMS.
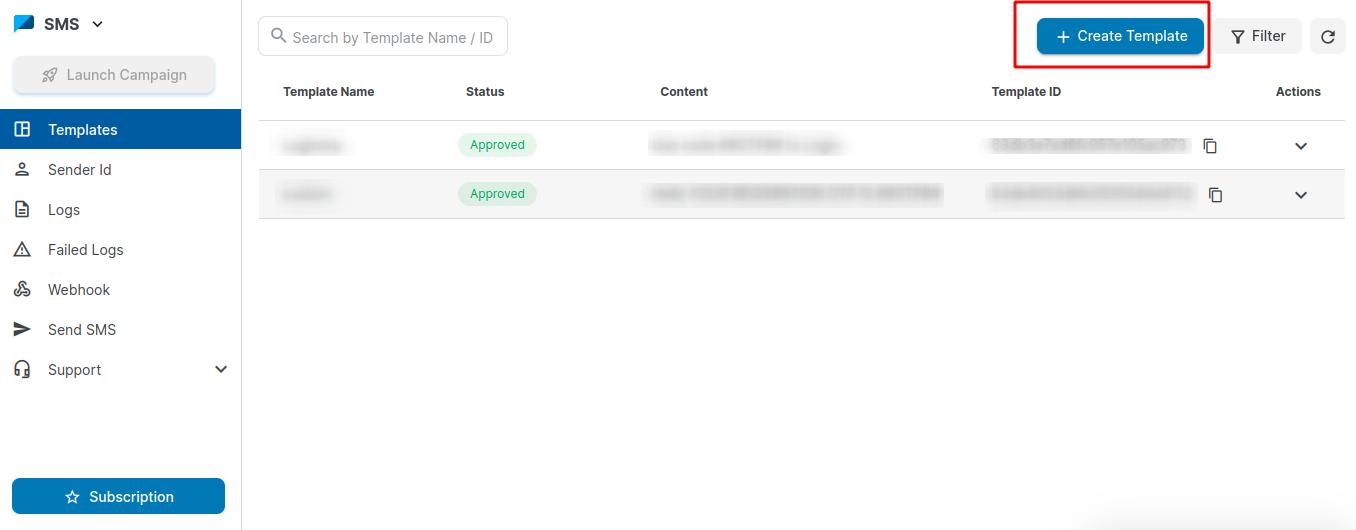
Step 2:- Click on Create Template.
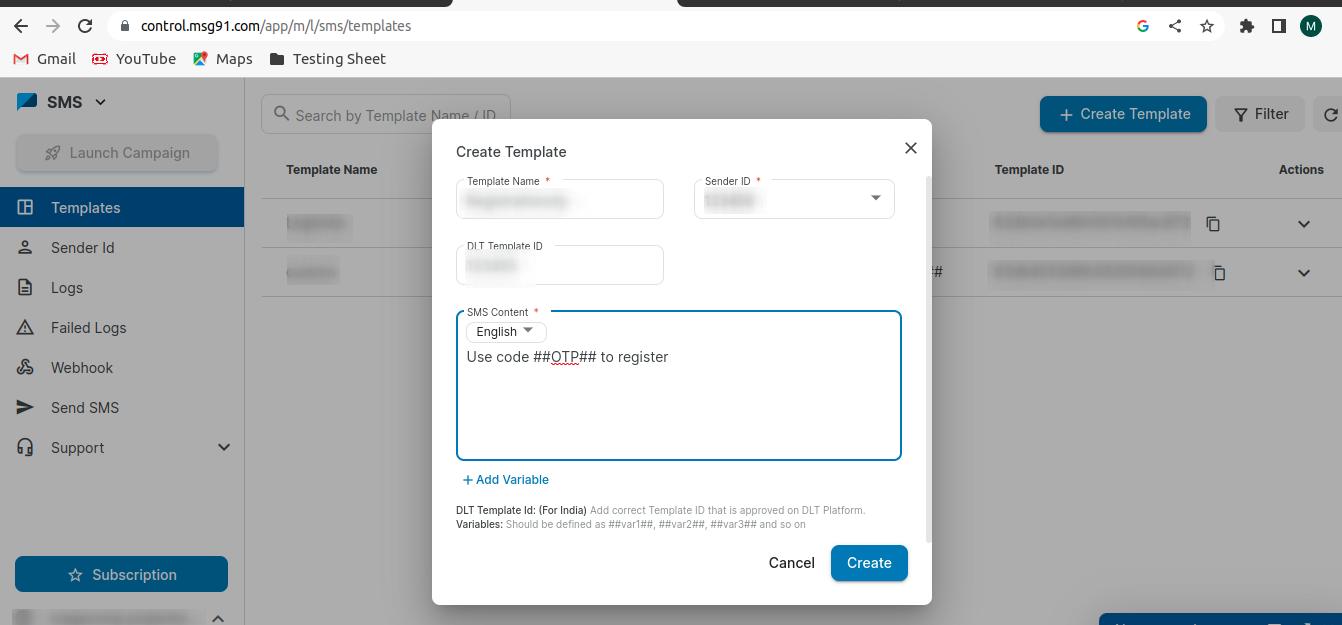
Step 3:- Add Template Name, Sender ID, DLT Template ID (only for Indian customers) and SMS Content And then click the Create button.
Create Campaign
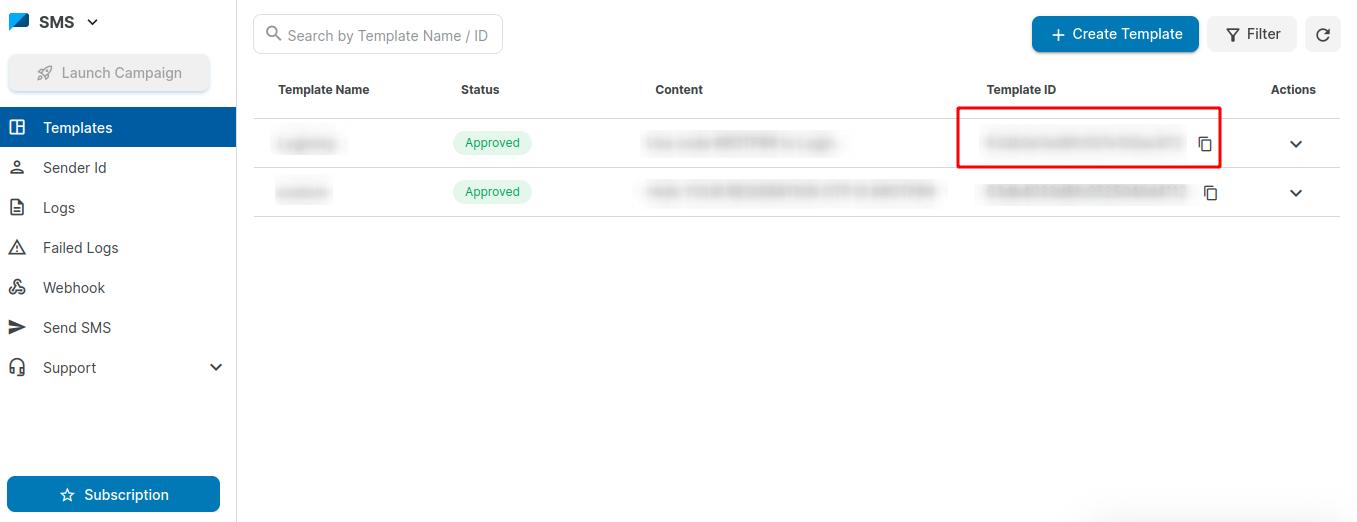
 Step 4:- After that, copy the Template ID.
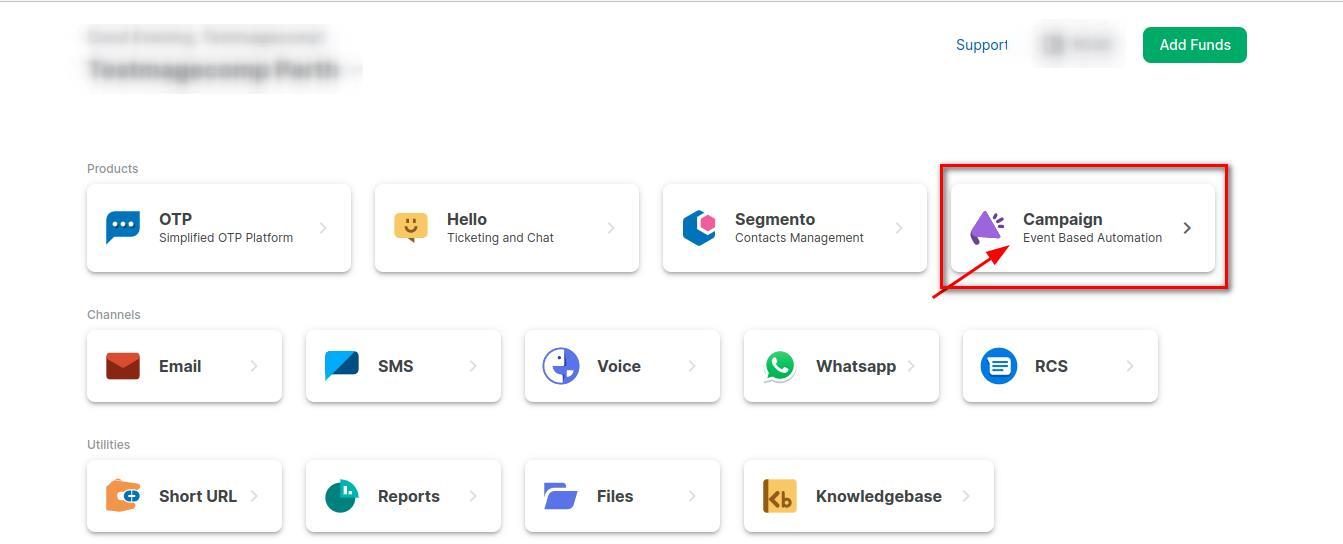
Step 1:- In MSG91 Dashboard, click on Campaign.
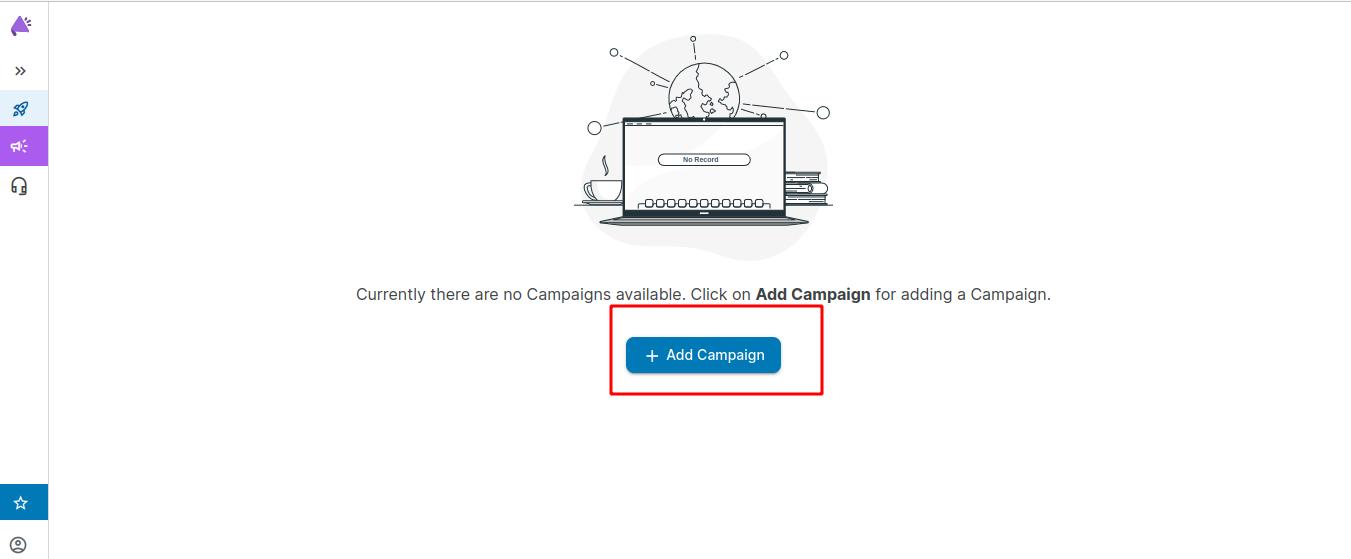
 Step 2:- After that, click on Add Campaign.
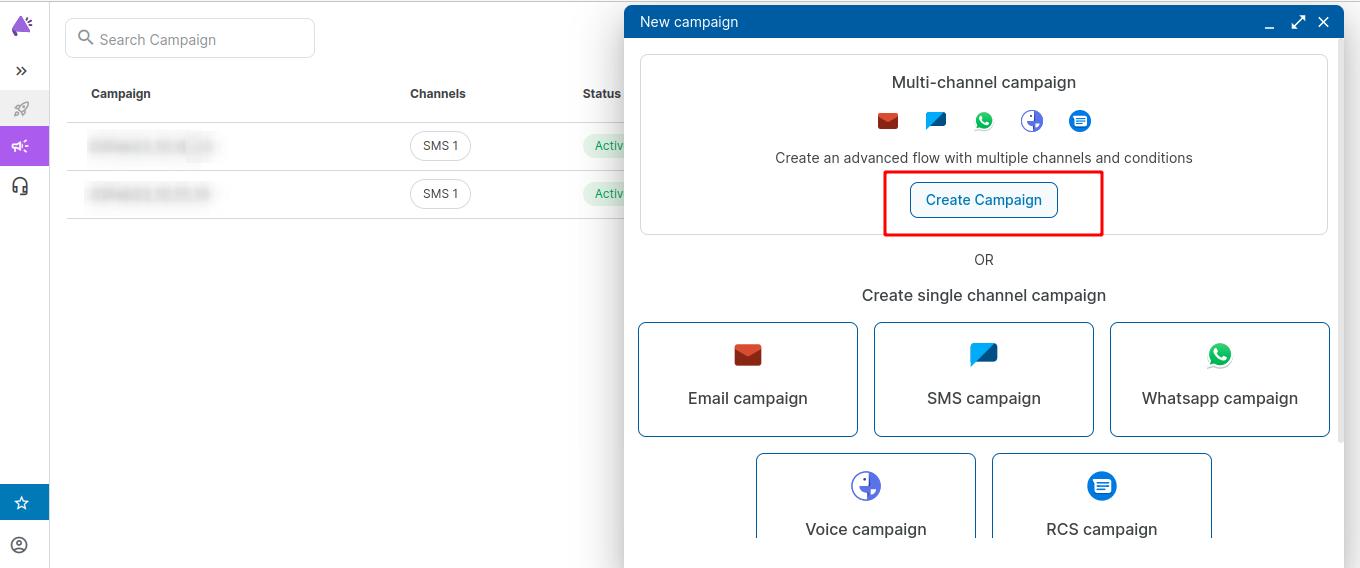
Step 3:- Click on Create Campaign.
Step 4:- Enter the Campaign name
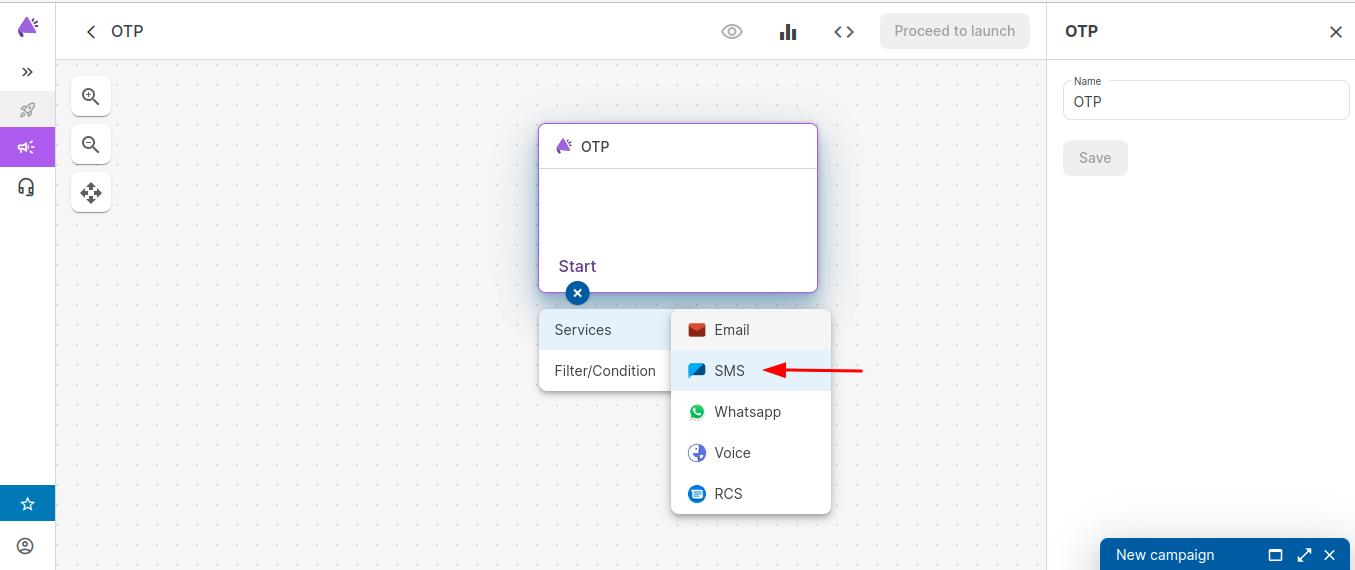
Step 5:- Click on Start and select SMS.
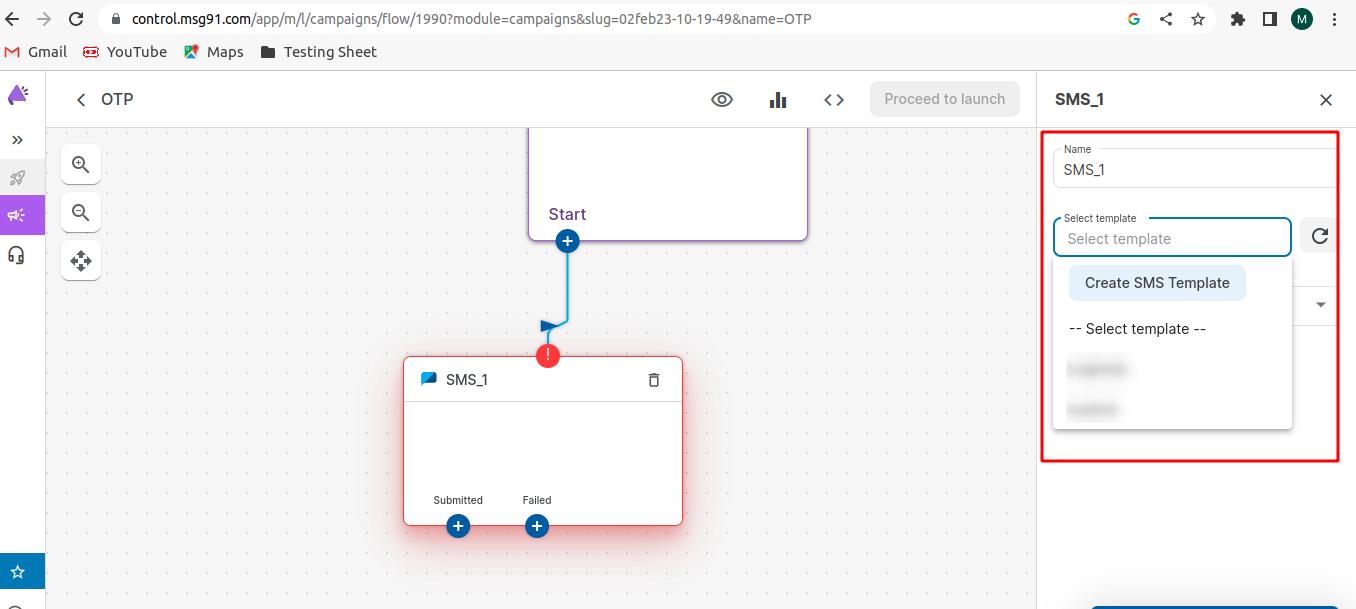
Step 6:- Select the Existing template, SMS Type, and click on the Save button.
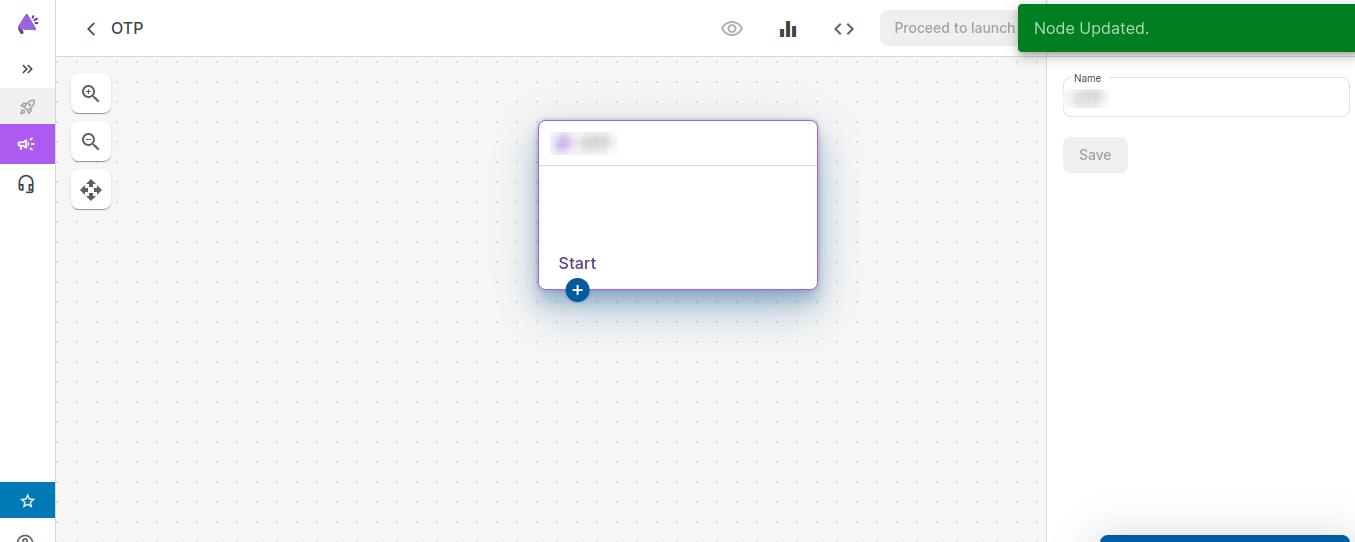
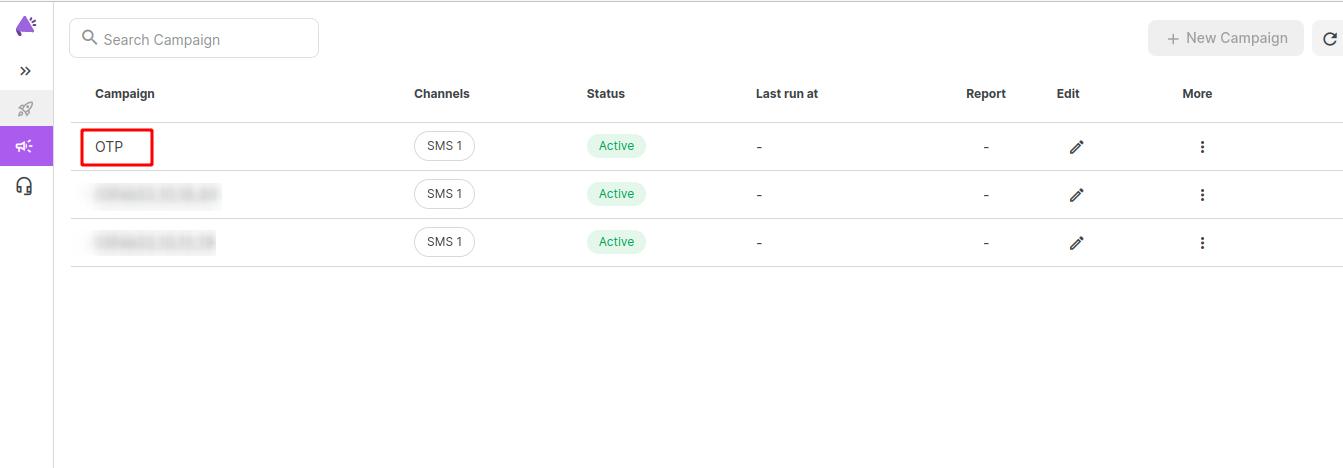
Step 7:- Now Campaign is created successfully, and that Campaign name you can add on the backend Campaign field.
2. Get Twilio Credential
Step 1:- First, log in to Twilio using the below URL.
https://www.twilio.com/login
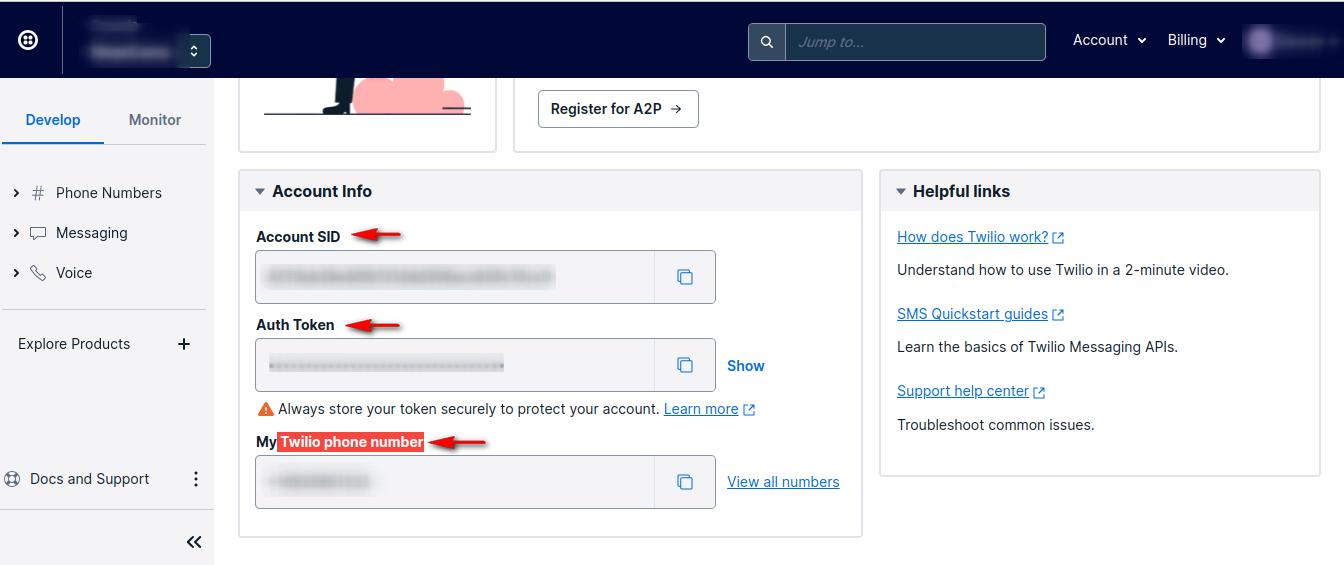
Step 2:- In your Twilio Dashboard, add Account SID, Auth Token and Twilio phone number in the Account Info section.
3. Generate reCAPTCHA Key
Step 1:- First of all, go to the below URL. https://www.google.com/recaptcha/about/
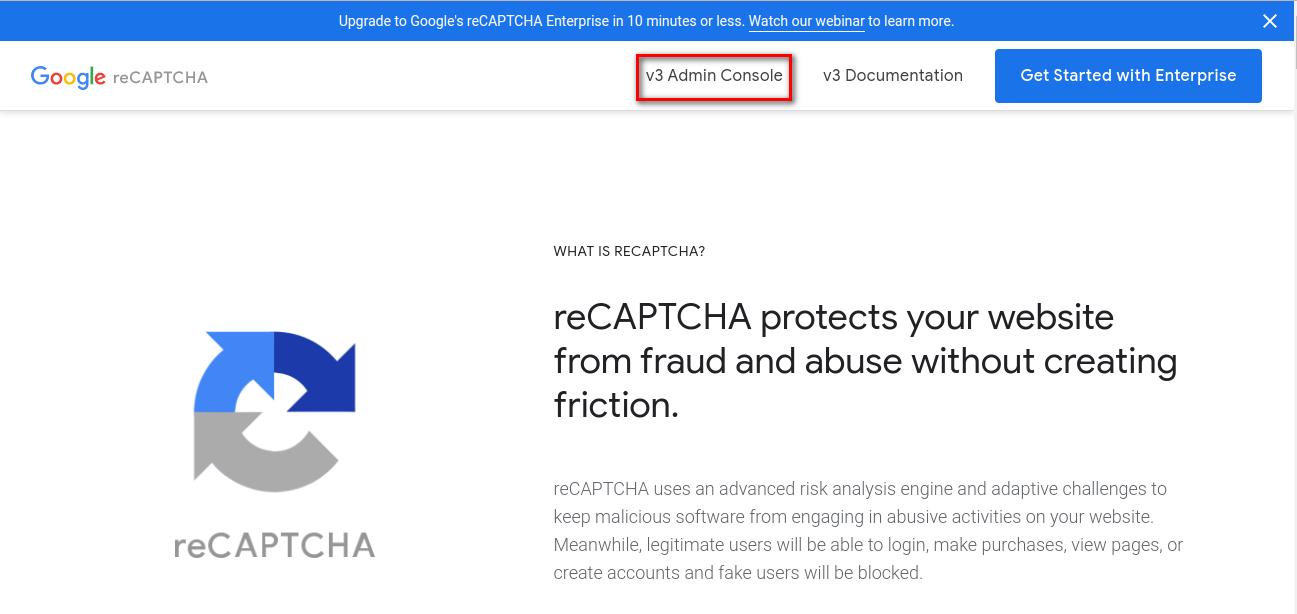
Step 2:- Click on the v3 Admin Console button.
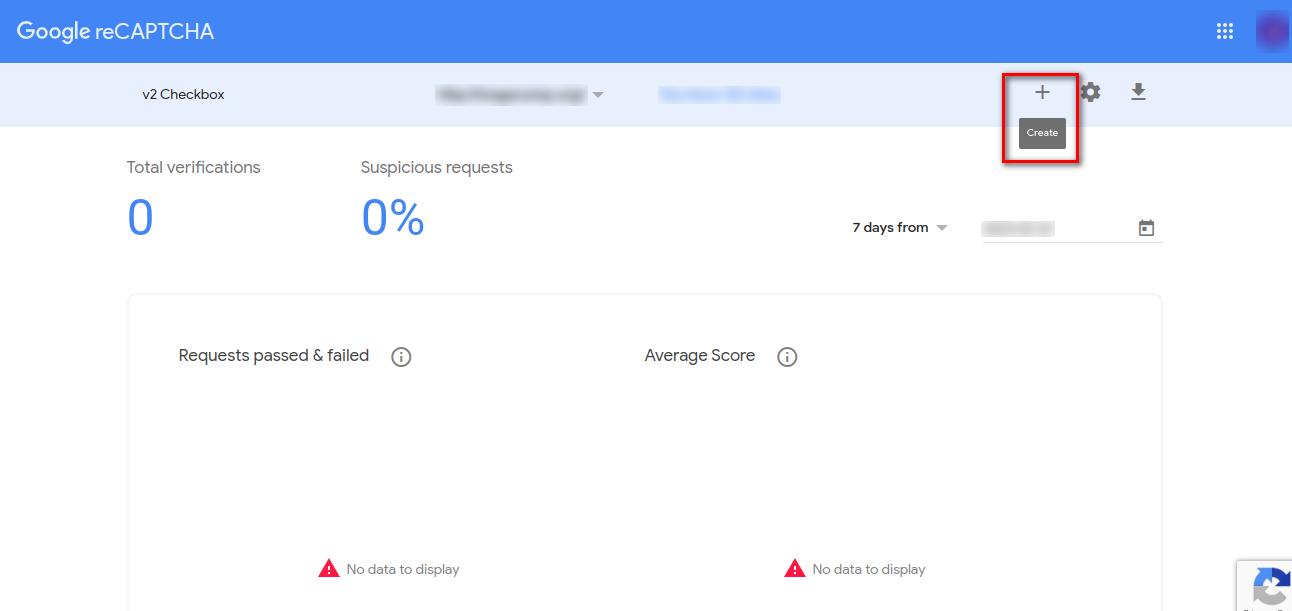
Step 3:- Now, click on create (+) sign.
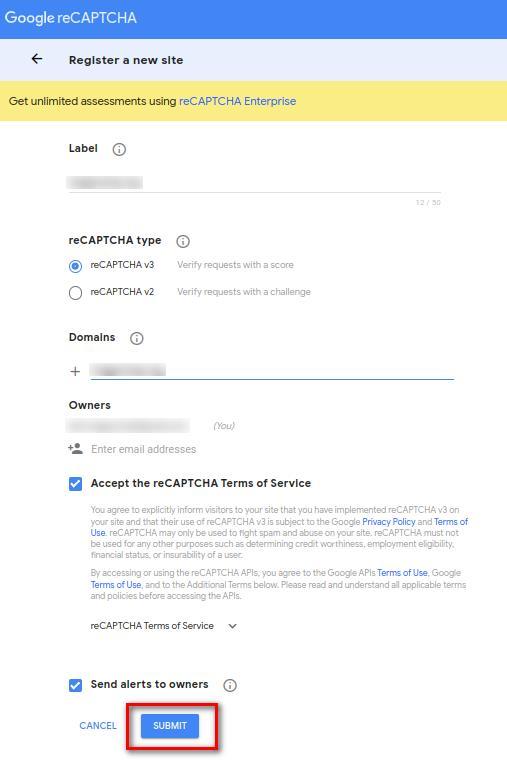
 Step 4:- Fill up all fields and then click the Submit button.
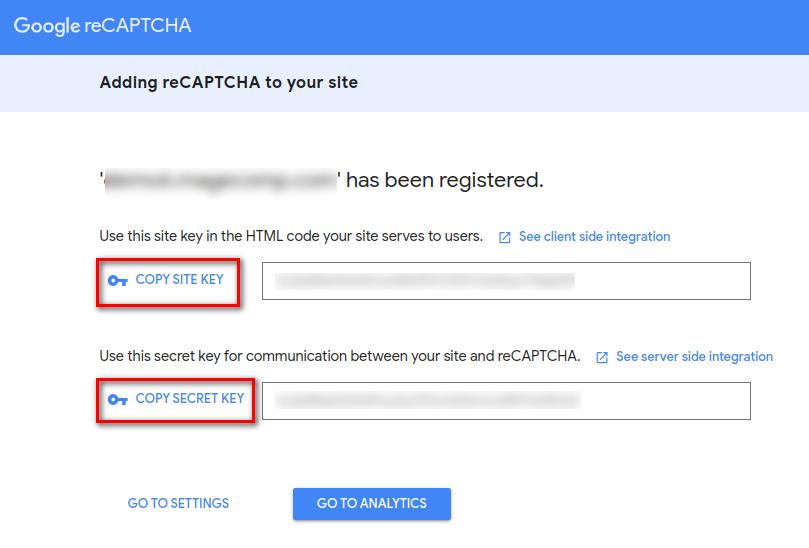
Step 5:- Once the registration is successful, the site key and secret key are generated randomly. You can Copy the Site Key and Secret Key from here.
4. Configuration
Once the extension is installed successfully, go to Stores > Configuration to configure the extension for use.
● Mobile Login: Enable or Disable Mobile OTP Login Pro Magento 2 Extension from here.

5. SMS Gateway
NOTE - We can integrate any SMS API Gateway on request. If you don’t want all SMS add-ons to be installed, you can go for anyone SMS addon installation.
For example,
Magecomp_Mobileloginmsg91
● SMS Addons are already added to our standard extension package.
● One SMS Addon is required to get a dropdown in SMS API configuration.
Msg91 Configuration
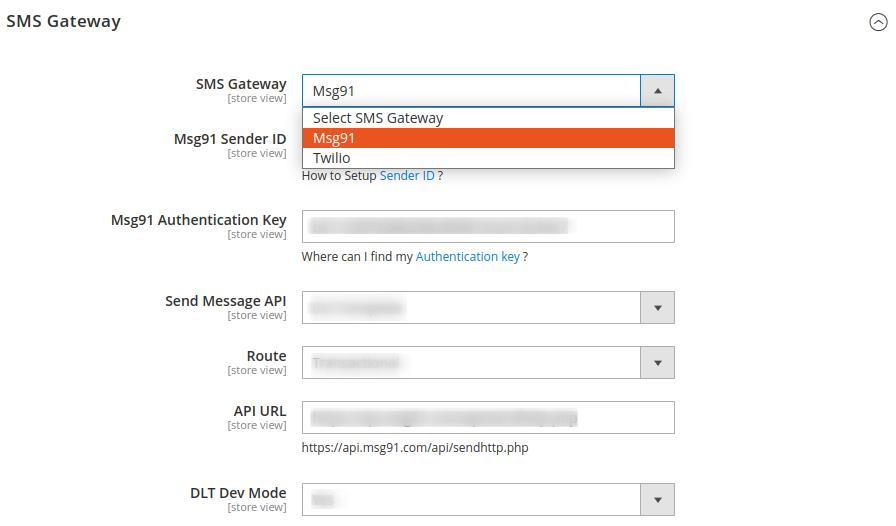
● SMS Gateway: Select MSG91 SMS Gateway from the dropdown.
● Msg91 Sender ID: Enter the sender ID or Name provided by MSG91.
● MSG91 Authentication Key: Enter the authentication key of MSG91.
● Send Message API: Select the API for sending messages as DLT Template or Campaign Template.
● Route: Select the route from the dropdown, whether you need to send it as promotional or transactional.
● API URL: Enter API URL for MSG91.
● DLT Dev Mode: Admin can activate the DLT dev mode from here.
Twilio Configuration
● SMS Gateway: Select Twilio SMS Gateway from the dropdown.
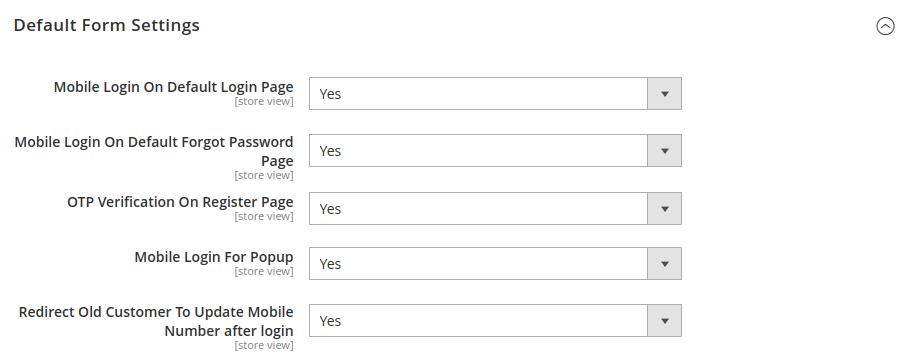
● NOTE: In order to use Twilio SMS Gateway, you need to run the ‘composer require twilio/sdk‘ command in the terminal.
● Twilio Account SID: You need to enter the Account SID from Twilio.
● Twilio Auth Token: Enter the Auth Token from Twilio.
● Twilio Mobile Number: Enter the mobile number that you have purchased at Twilio.
6. Default Form Settings
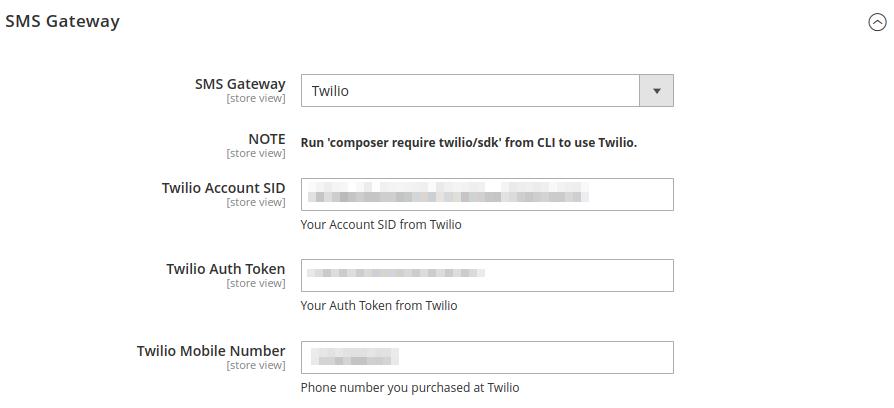
● Mobile Login On Default Login Page: Determine whether you want to provide Mobile Login functionality on Default Login Page.
● Mobile Login On Default Forgot Password Page: Determine whether you want to provide Mobile Login functionality on Default Forgot Password Page.
● OTP Verification On Register Page: Determine whether OTP verification is required on Default Register Page.
● Mobile Login For Popup: Enable Mobile Login Popup from here.
● Redirect Old Customer To Update Mobile Number after login: Determine whether the old customers get redirected to My Account to update their mobile number after login.
7. General Settings
OTP Settings
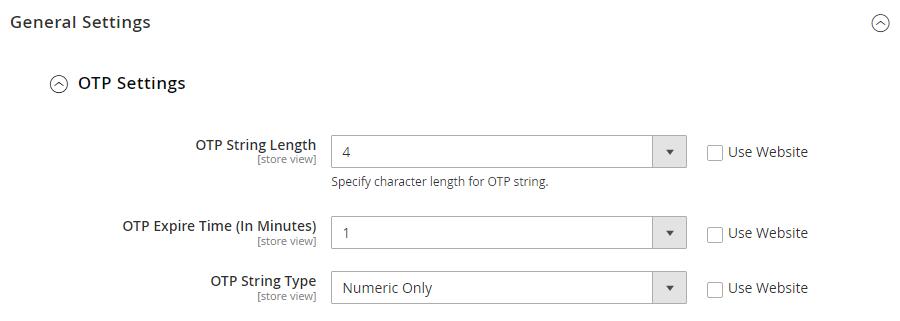
● OTP String Length: Set the length of the OTP string as 4 or 6.
● OTP Expire Time (In Minutes): Set the time after which the OTP expires. You can set 1, 2, 3, 4, or 5 minutes time for OTP expiration.
● OTP String Type: Set the type of OTP String as Numeric Only or Alpha Numeric.
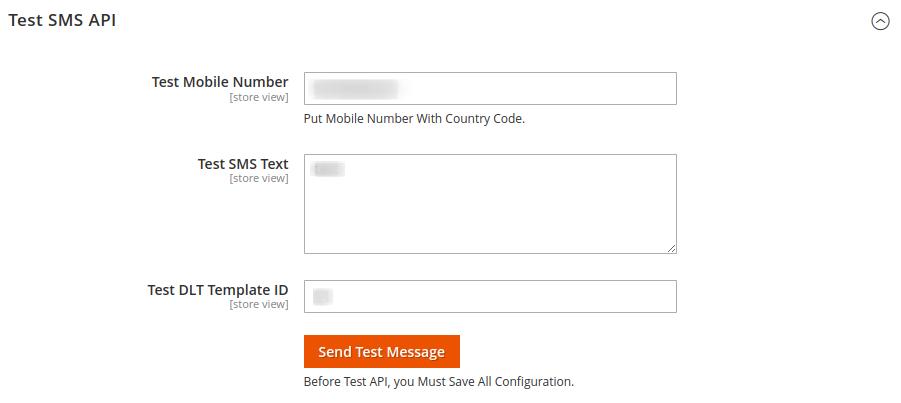
Email Settings
● Send Login Notification Email To User: Determine whether the admin will receive login notifications via email.
● Email Template For Admin Notify: Select the template for admin email notification.
● Email Sender For Admin Notify: Select the sender for admin email notification.
● Send Login OTP Email To User: Determine whether the customer will receive login OTP on email.
● Email Template For Send OTP: Select the template for sending Login OTP to customers.
● Email Sender For Send OTP: Select the sender for Login OTP.
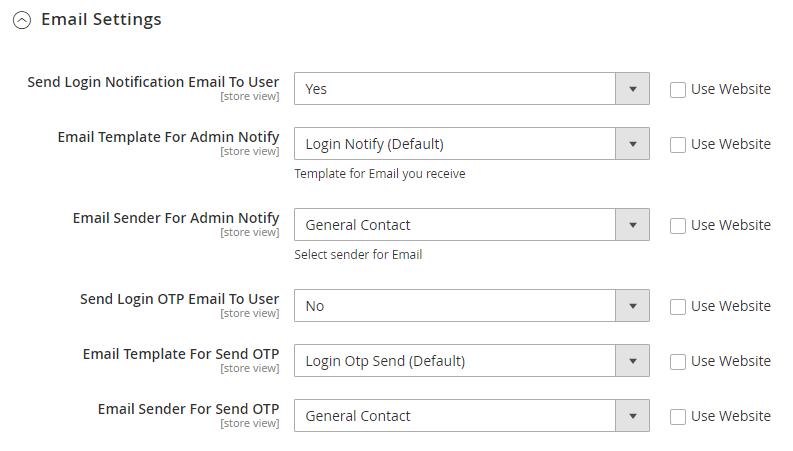
Phone Number Digit Validation
Select the country and allowed digits for validation. Admin can add countries according to the requirement and delete it easily.
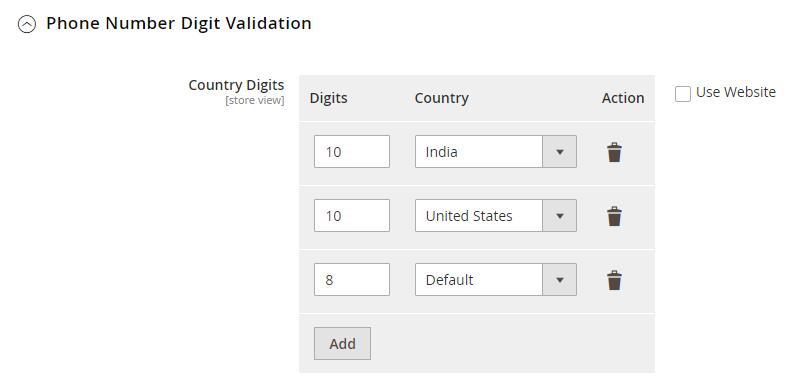
reCAPTCHA Settings
● reCAPTCHA Enable: Enable reCAPTCHA from here.
● reCAPTCHA Secret Key: Add the Secret Key generated from Google reCAPTCHA.
● reCAPTCHA Site Key: Add the Site Key generated from Google reCAPTCHA.
● reCAPTCHA On Registration: Determine whether you want to add reCAPTCHA protection on Registration.
● reCAPTCHA On Login: Determine whether you want to add reCAPTCHA protection on Login.
● reCAPTCHA On Forgot Password: Determine whether you want to add reCAPTCHA protection on Forgot Password.
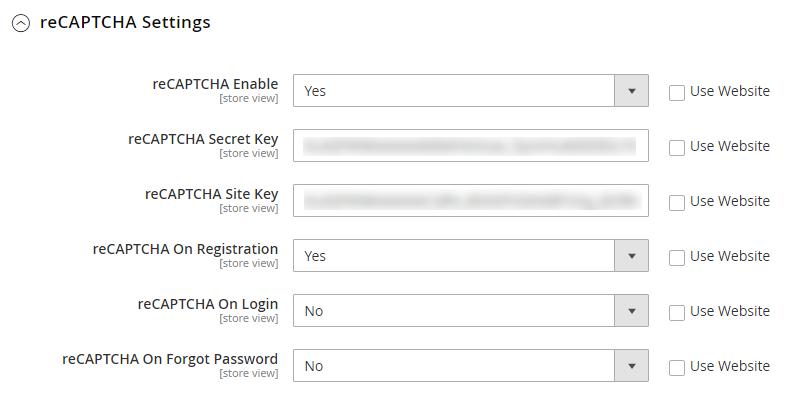
8. Test SMS API
● Test Mobile Number: Enter mobile number with country code for testing.
● Test SMS Text: Enter text for SMS for testing.
● Test DLT Template ID: Enter DLT Template ID. This is only for Msg91 SMS API users. Click on Send Test Message button to check the functioning and integration of SMS Gateway.
9. Copy Phone Numbers
This will copy all the Magento phone number field from the billing address to the Mobile Login phone number field at the website level.

10. Notification Settings
OTP at Registration
● Registration OTP Text: Set custom text using variables for sending OTP SMS for Registration.
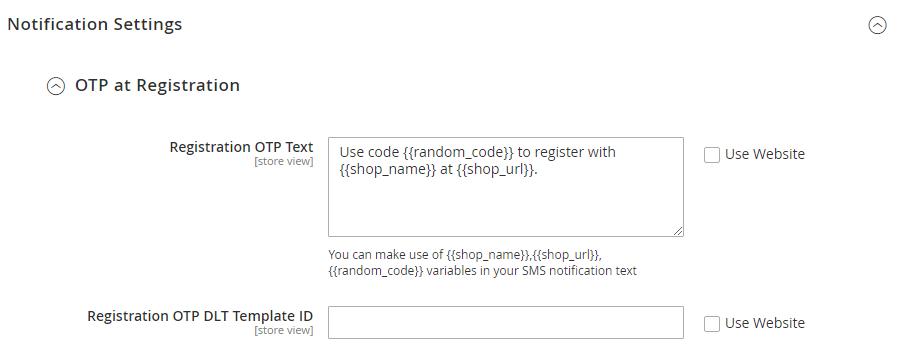
● Registration OTP DLT Template ID: Enter DLT Template ID. This is only for Msg91 SMS API users.
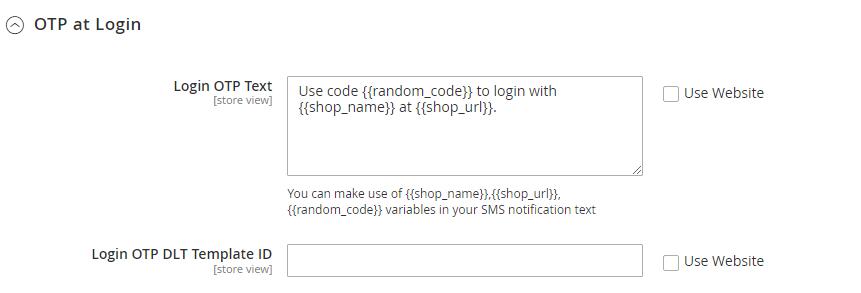
OTP at Login
● Login OTP Text: Set custom text using variables for sending OTP SMS for Customer Login.
● Login OTP DLT Template ID: Enter DLT Template ID. This is only for Msg91 SMS API users.
OTP at Forgot Password
● Forgot Password OTP Text: Set custom text using variables for sending OTP SMS to Reset Password.
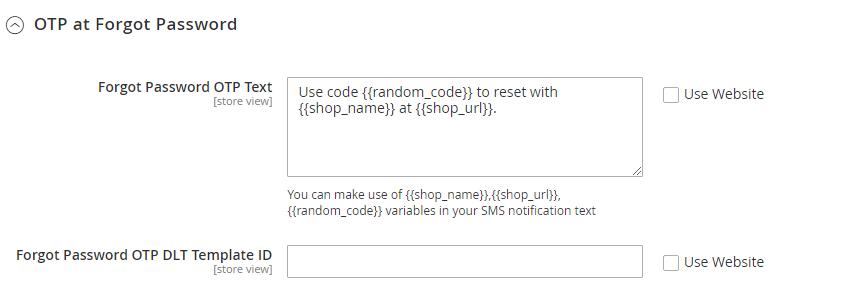
● Forgot Password OTP DLT Template ID: Enter DLT Template ID. This is only for Msg91 SMS API users.
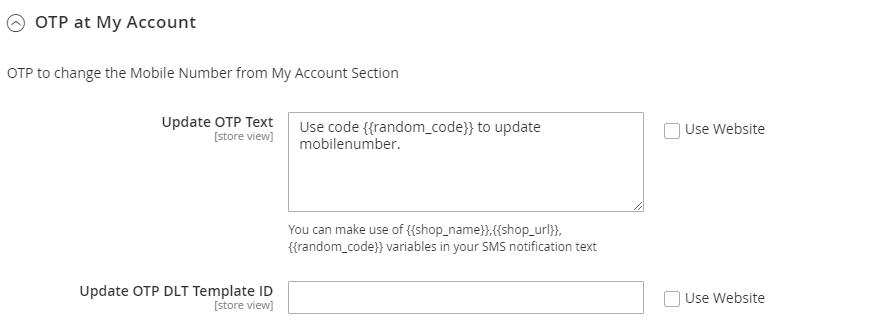
OTP at My Account
● Update OTP Text: Set custom text using variables for sending OTP SMS to Update Mobile Number.
● Update OTP DLT Template ID: Enter DLT Template ID. This is only for Msg91 SMS API users.
11. Layout
Standard Layout
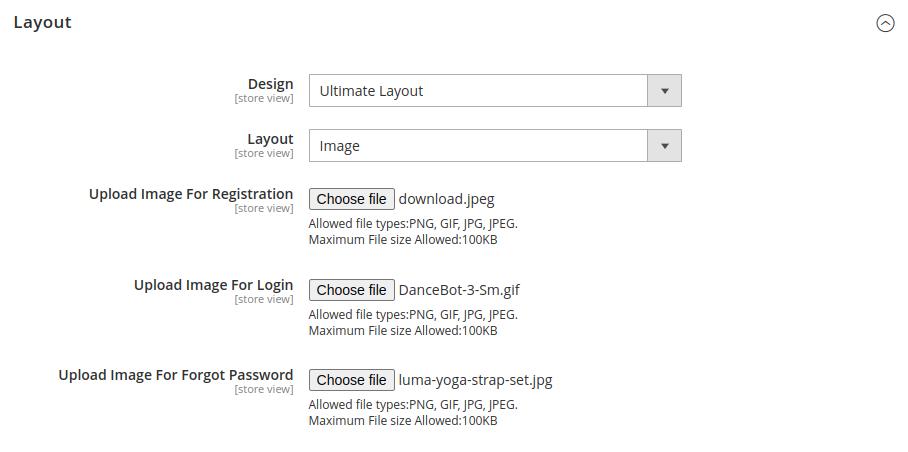
● Design: Select Standard Layout to apply the default layout style for Mobile OTP Login.

Ultimate Layout
● Design: Select the Ultimate Layout option here.
● Layout: Select the Image option here to add images for mobile OTP login.
● Upload Image For Registration: Upload your desired image for registration with OTP.
● Upload Image For Login: Upload your desired image for login with OTP.
● Upload Image For Forgot Password: Upload your desired image to update the password with OTP.
● Design: Select the Ultimate Layout option here.
● Layout: Select the Template option here to use templates for mobile OTP login.
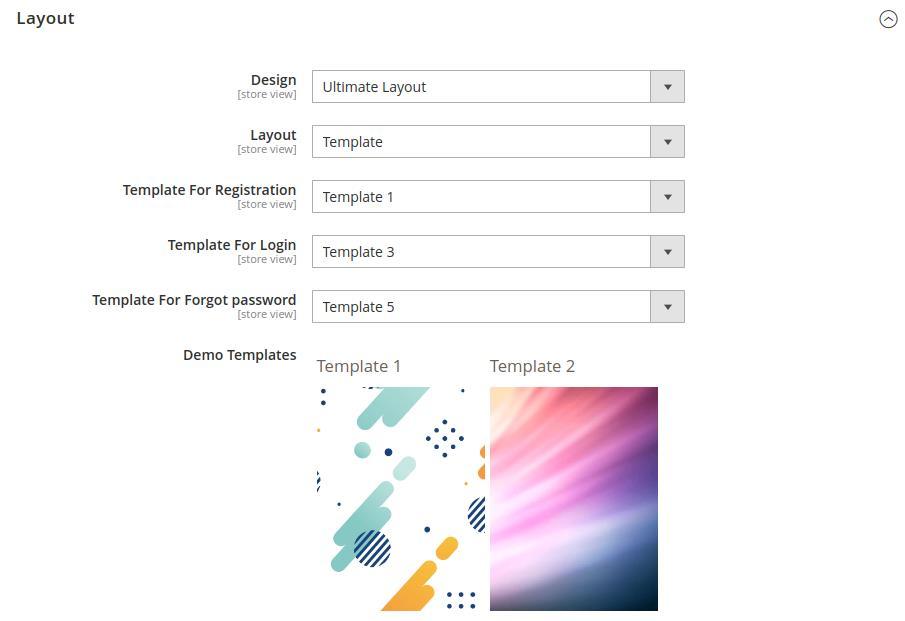
● Template For Registration: Select a template for registration with OTP.

● Template For Login: Select a template for login with OTP.
● Template For Forgot password: Select a template to update the password with OTP.
12. Frontend Customer Registration
Whenever a new user clicks on the register, they will be asked to enter the mobile number for verification using OTP.
If the mobile number digits do not match the country validation configured by the admin in the backend, it will show an error message.

Once the user enters the correct mobile number and clicks on the Send OTP button, they will receive an SMS with OTP for registration.
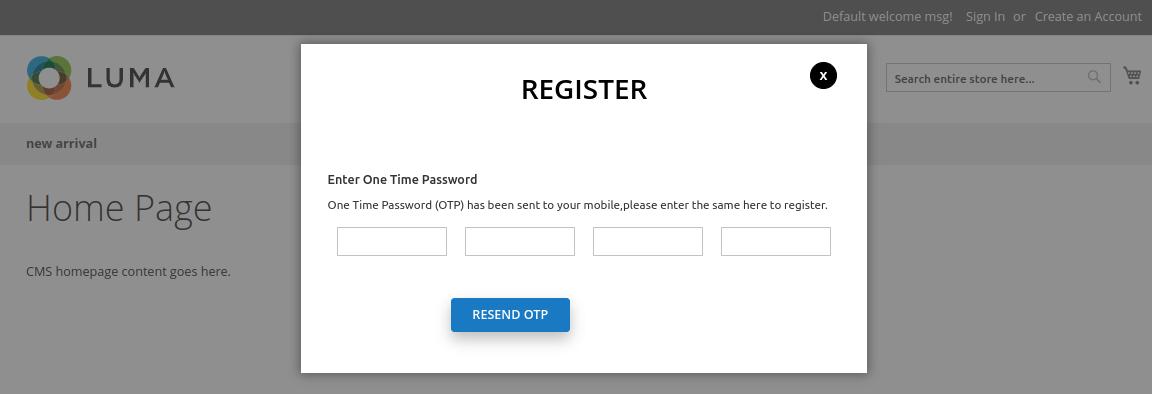
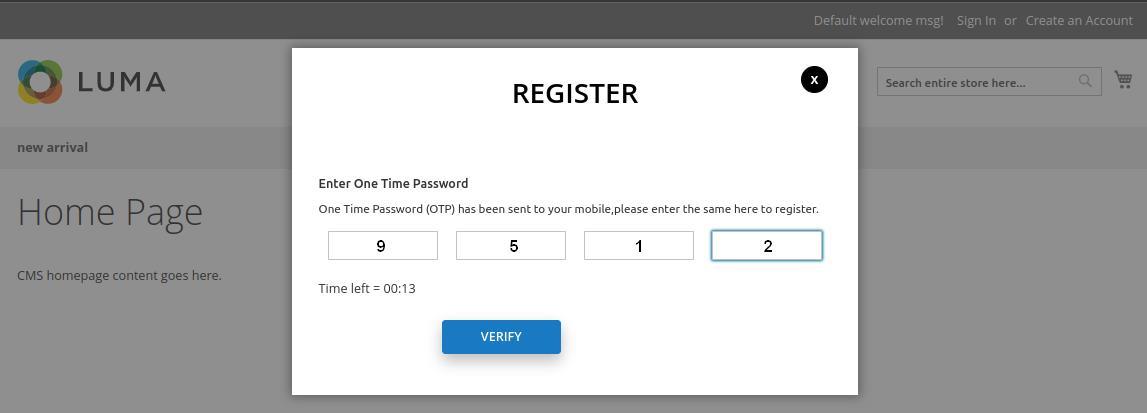
After entering the OTP, the user needs to click on Verify.
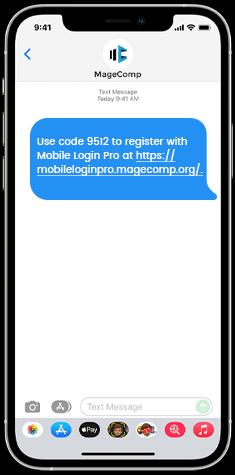
In case the OTP verification time is out, the user gets the option to Resend OTP.
Once the OTP is verified successfully, the user is redirected to enter the account details. Here users can add details like first name, last name, email ID and password. The Customer registration through OTP is protected by reCAPTCHA to avoid spam registrations.
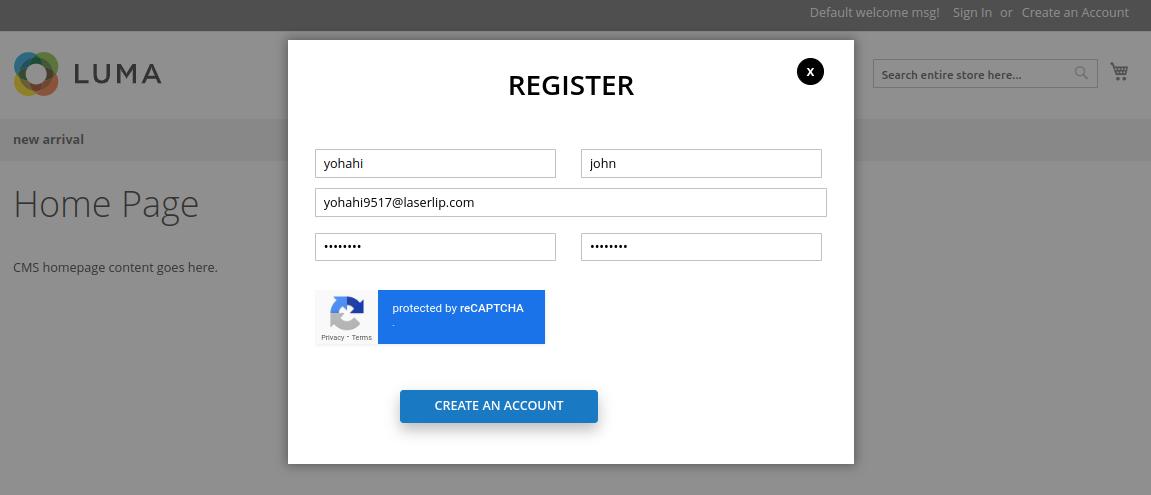
After that, when the user clicks the Create An Account button, the user will be redirected to the store's home page.
13. Frontend Customer Login
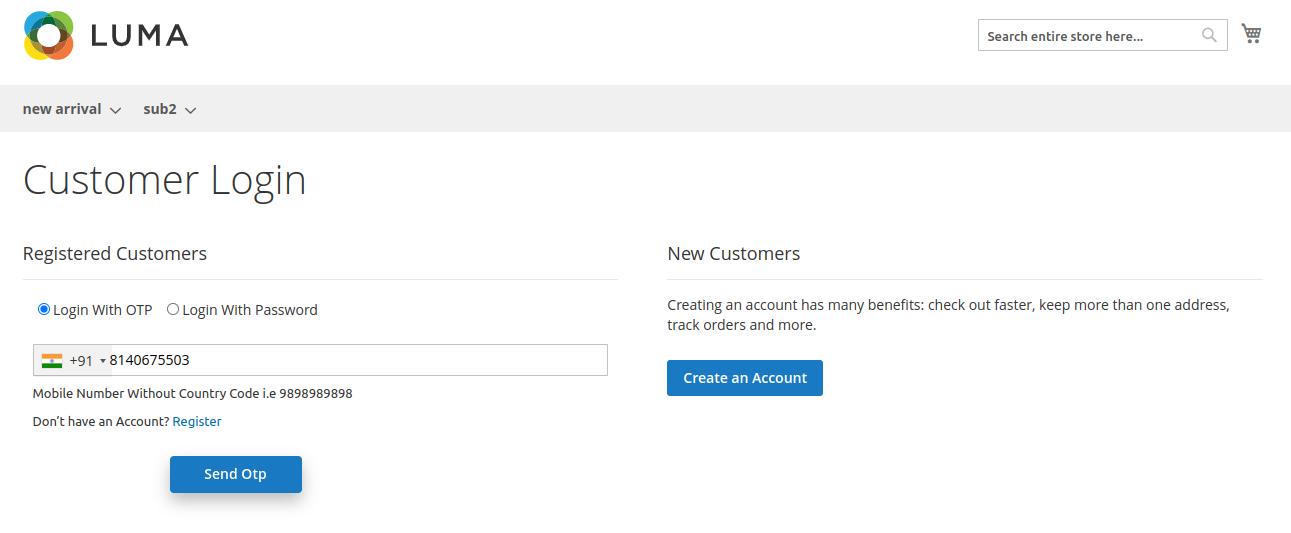
Once your customer is successfully registered to your Magento 2 store, they can quickly log in either using OTP or a password.
Login with OTP
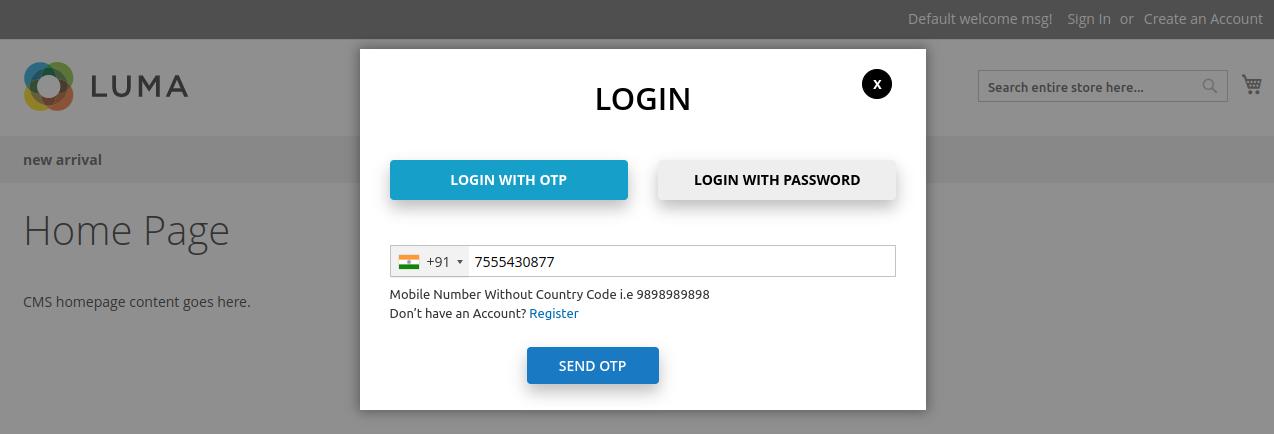
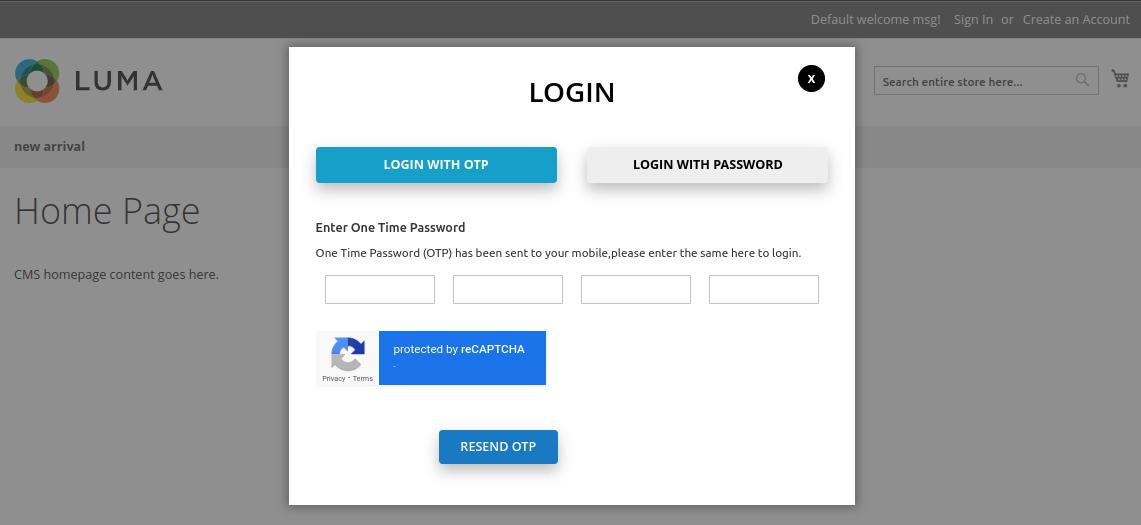
Whenever a customer chooses Login with OTP option, they will be asked to enter the mobile number for verification using OTP.
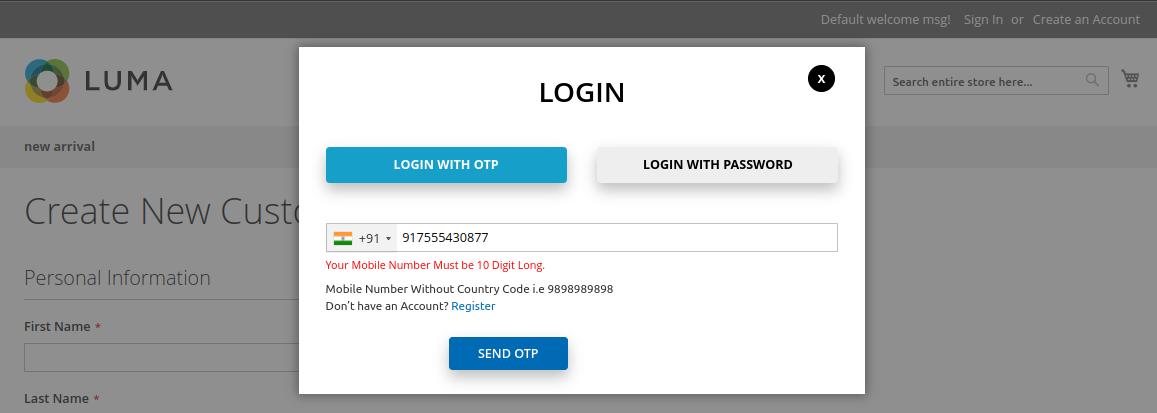
If the mobile number digits do not match the country validation configured by the admin in the backend, it will show an error message.
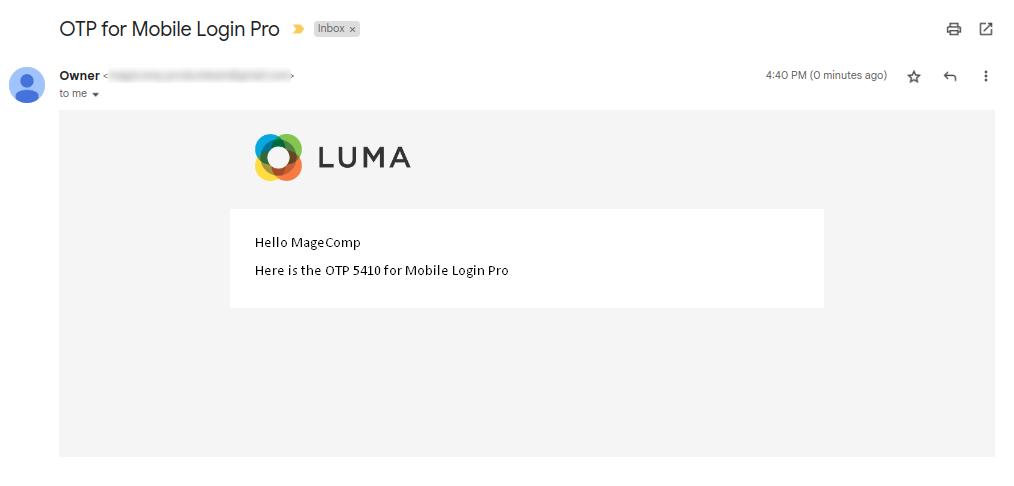
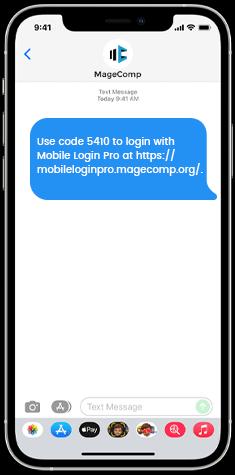
Once the user enters the correct mobile number and clicks on the Send OTP button, they will receive an SMS as well as an email with OTP for login.
SMS on Mobile Number with OTP for Login
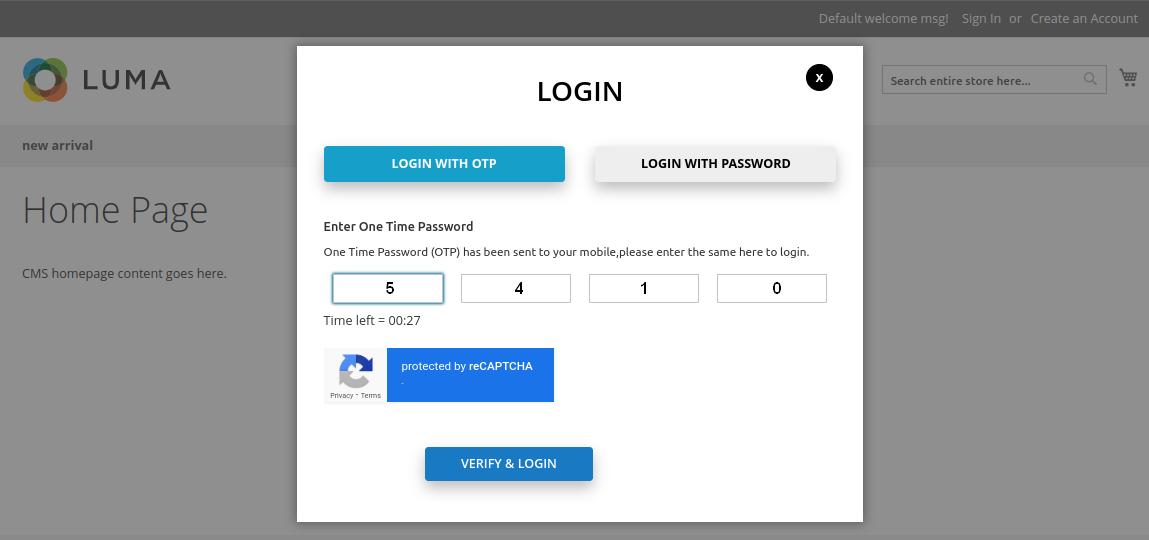
After entering the OTP, the user needs to click on Verify & Login.
Login OTP Email
In case the OTP verification time is out, the user gets the option to Resend OTP.
Once the OTP is verified, the login is successfully done. The old customer is redirected to the Update Mobile Number section on their My Account page. The Customer Login through OTP is protected by reCAPTCHA to avoid spam sign-in.
Login with Password
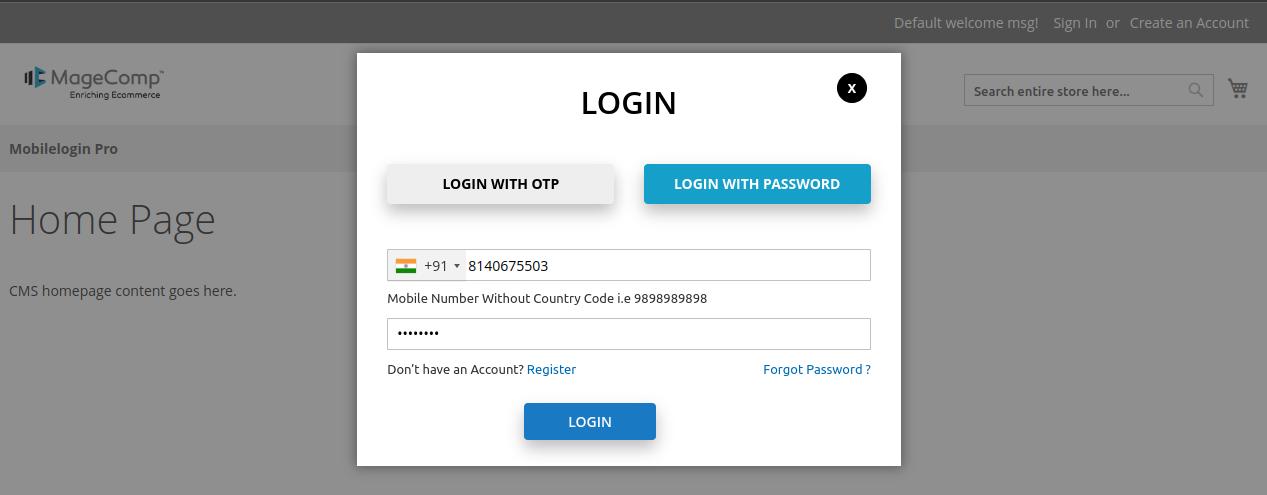
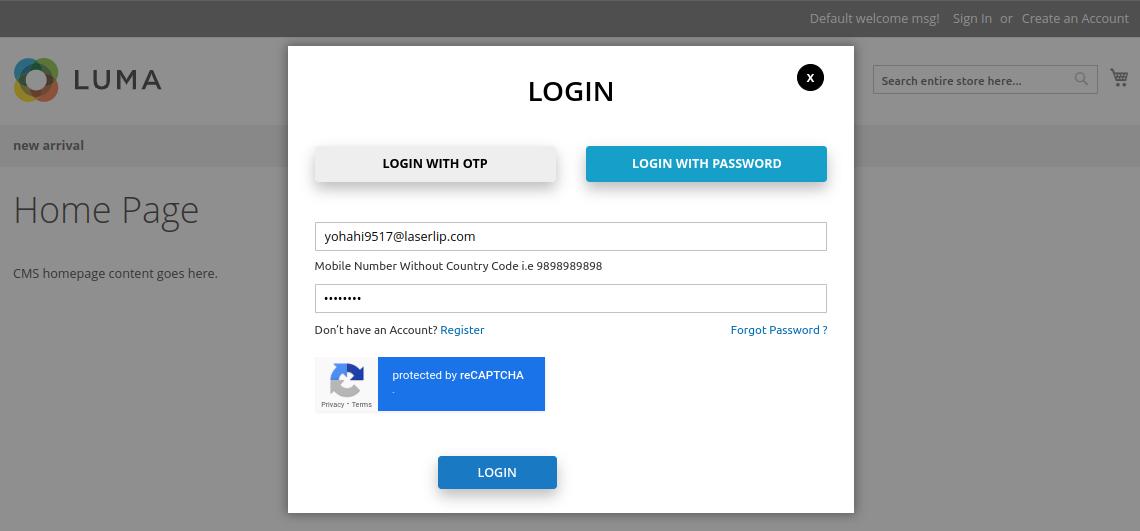
Whenever a customer chooses the Login with Password option, they will be asked to enter their email address/mobile number and password.
Email & Password
Once the login details are entered correctly, the login is successfully done. The old customer is redirected to the Update Mobile Number section on their My Account page.
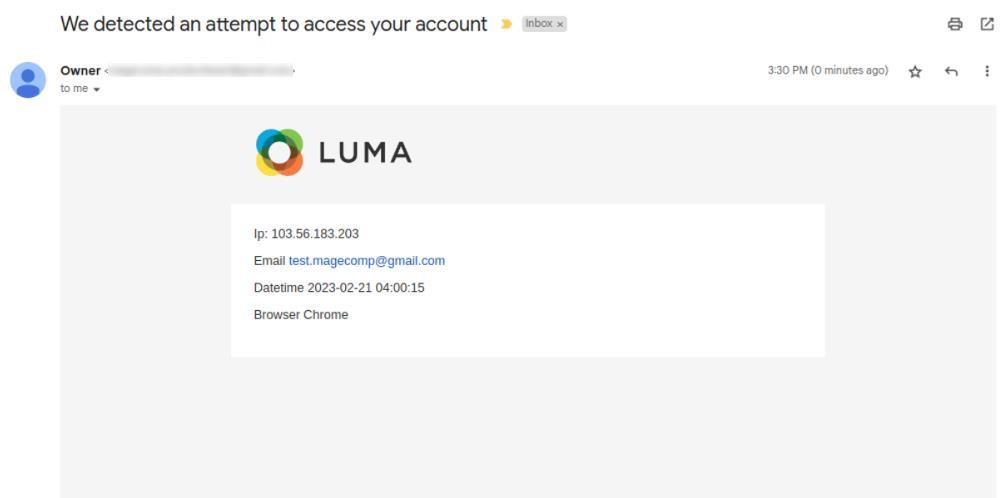
After successful login, the customer will be notified via email.
 Mobile Number & Password
14. Frontend Forgot Password
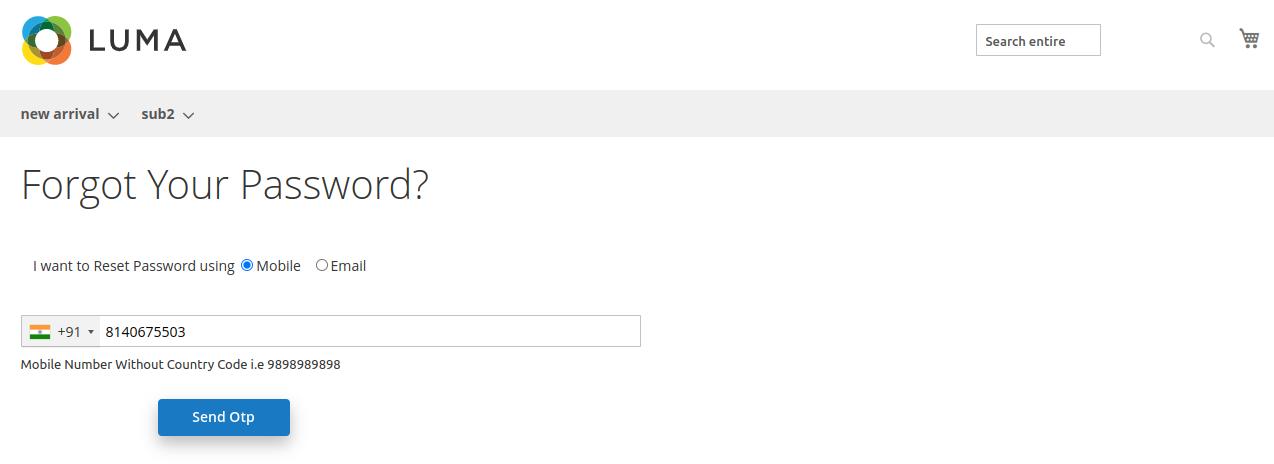
Whenever a customer clicks on the forgot password option at the time of login, the customer can reset the password either using mobile or email.

Reset Password using Mobile
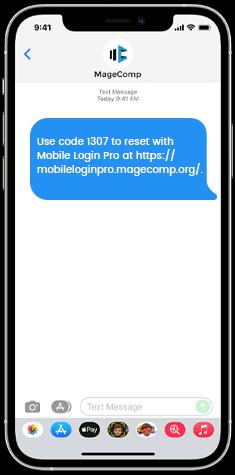
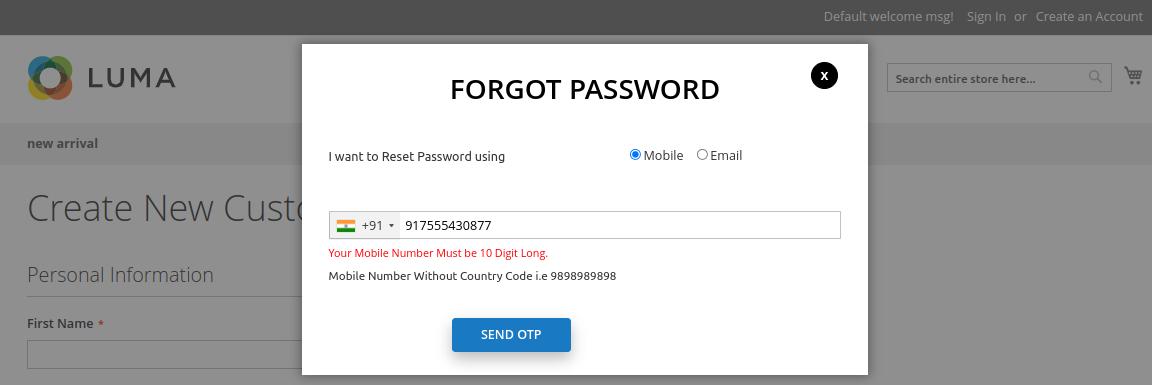
Whenever a customer chooses the mobile option to update the password, they will be asked to enter the mobile number for OTP.
If the mobile number digits do not match the country validation configured by the admin in the backend, it will show an error message.
Once the user enters the correct mobile number and clicks on the Send OTP button, they will receive an SMS with OTP for updating the password.
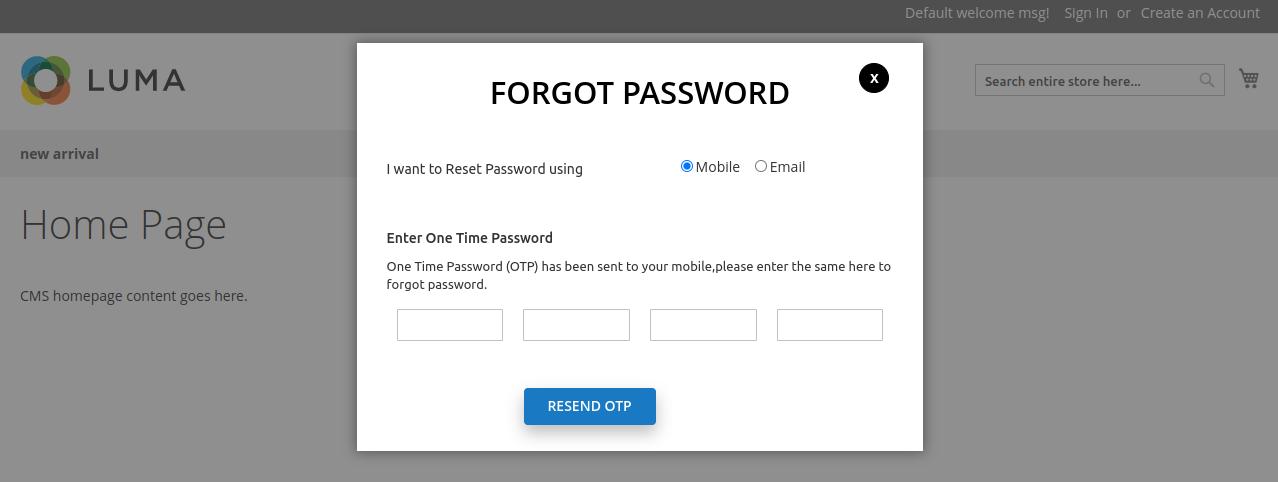
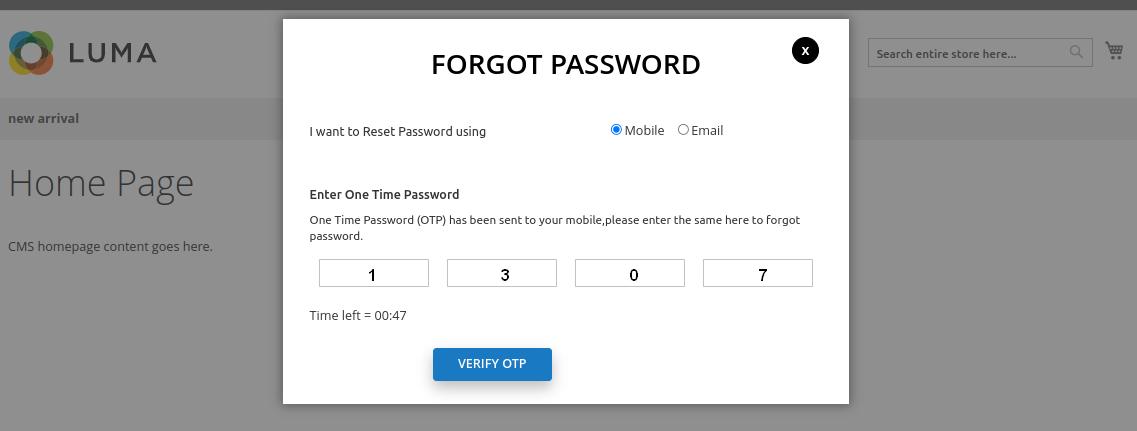
After entering the OTP, the user needs to click on Verify OTP.
In case the OTP verification time is out, the user gets the option to Resend OTP.
Once the OTP is verified successfully, the user is redirected to enter the new password. The Forgot Password through OTP is protected by reCAPTCHA.
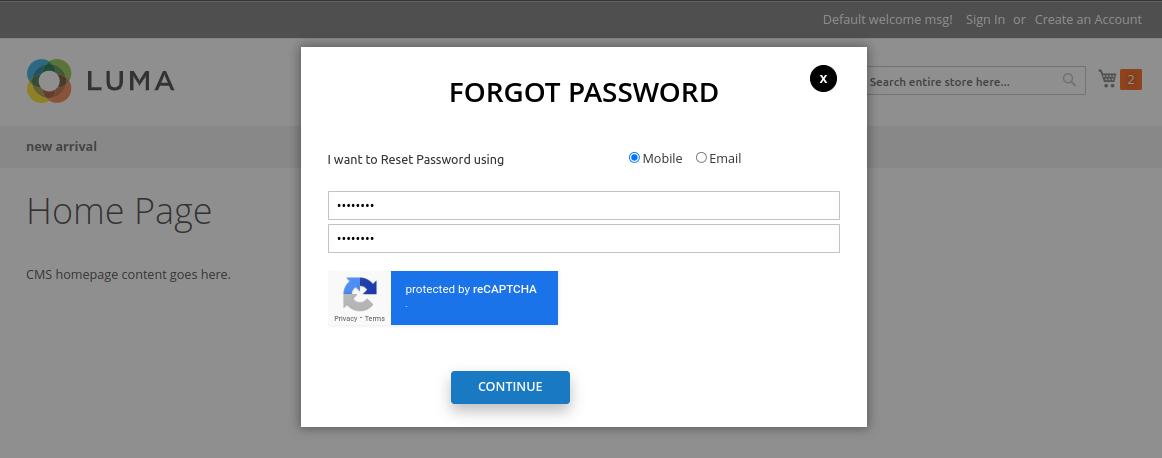
Clicking on the Continue button will successfully update the password.
Reset Password using Email
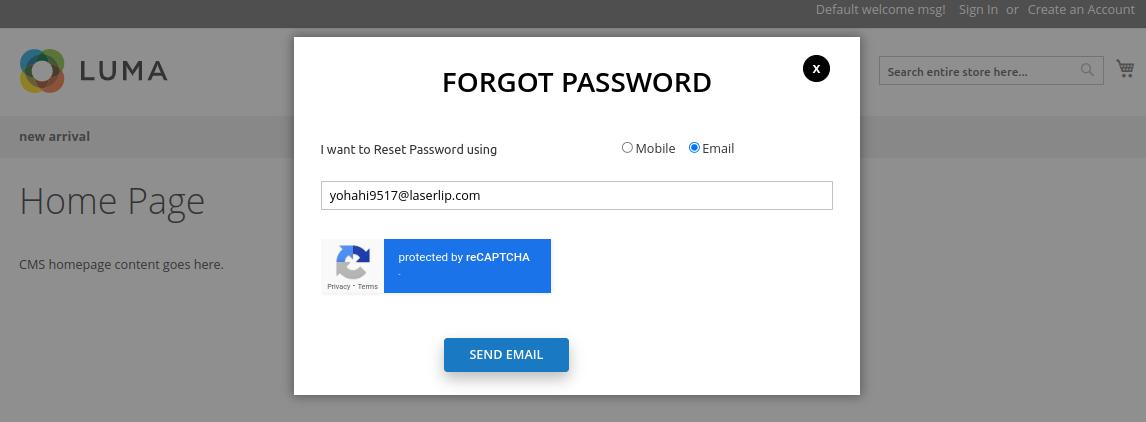
Whenever a customer chooses the email option to update the password, they will be asked to enter their email ID.
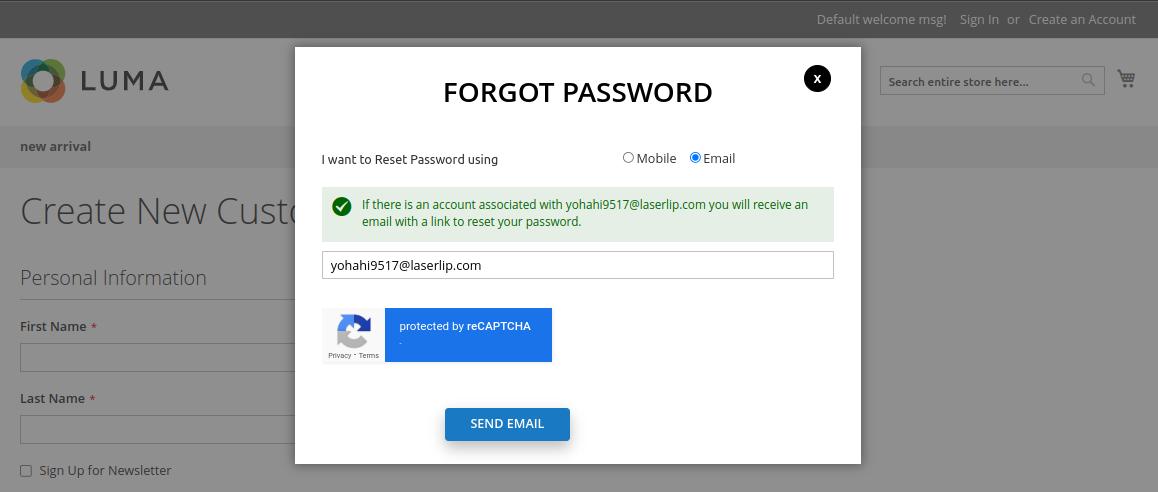
After entering the email, click on the Send Email button. The customer will receive an email sent message.
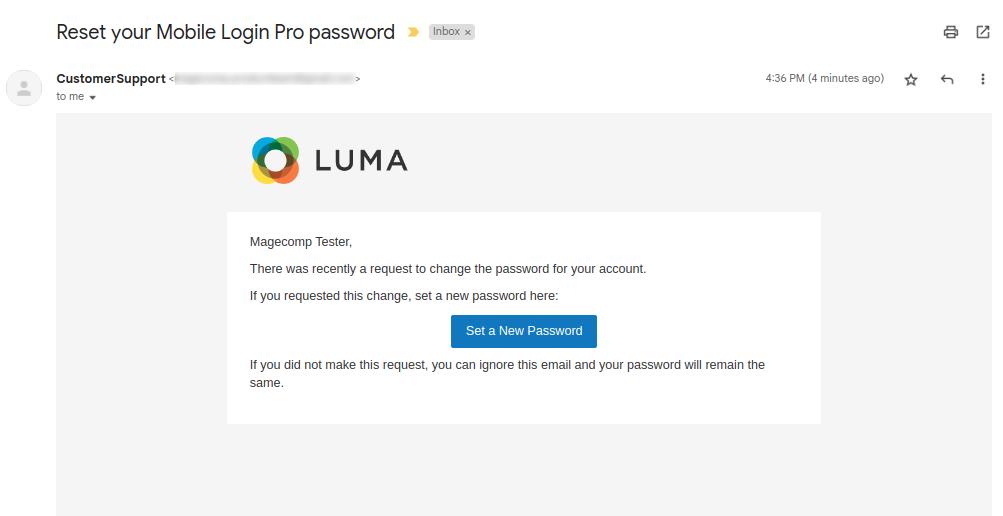
When the customer clicks on the Send Email button, an email will be sent to the customer with a reset password link. Check your email.
Clicking on Set a New Password, the customers can update their password.
15. Frontend Mobile Number Update (My Account)
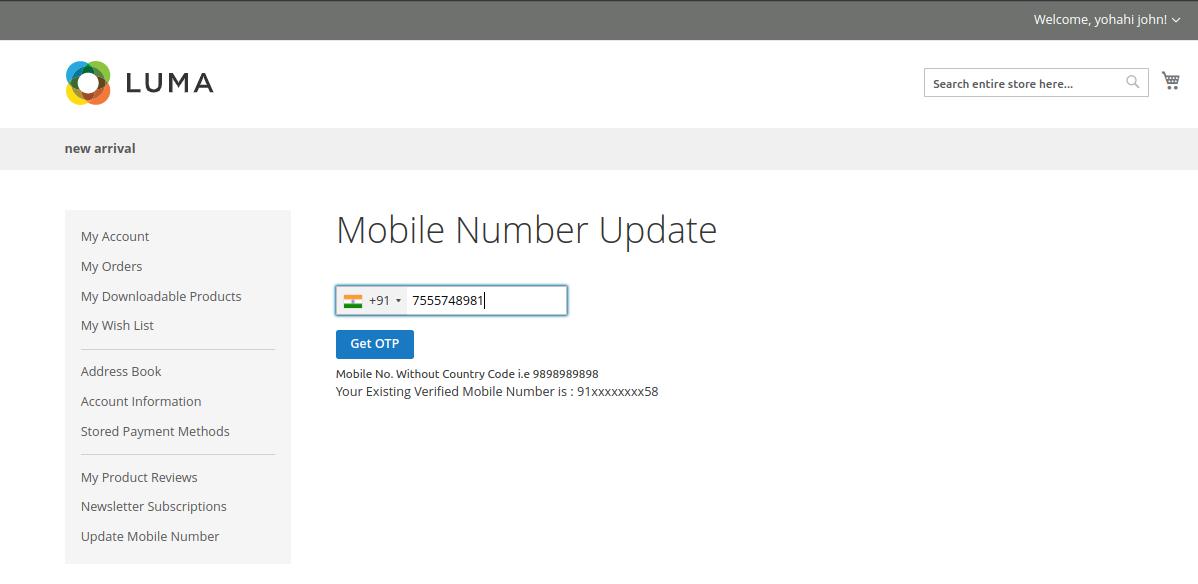
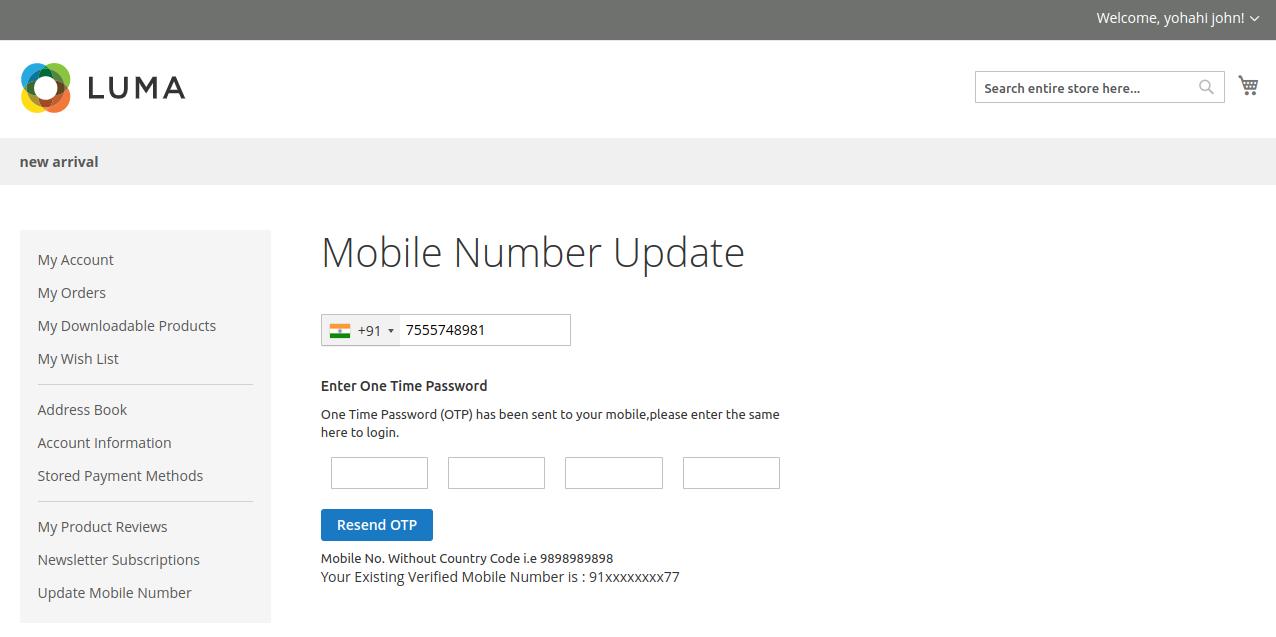
The customers can update their mobile number using OTP from the My Account section. Whenever a new user clicks on the Update Mobile Number in their My Account section, they will be asked to enter the updated mobile number for verification using OTP.
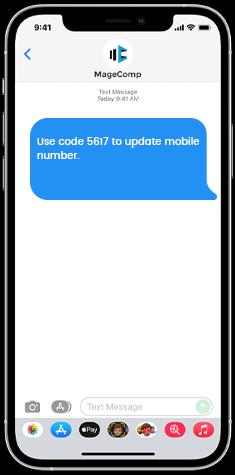
Once the customer enters the mobile number and clicks on the Send OTP button, they will receive an SMS with OTP for updating the mobile number.
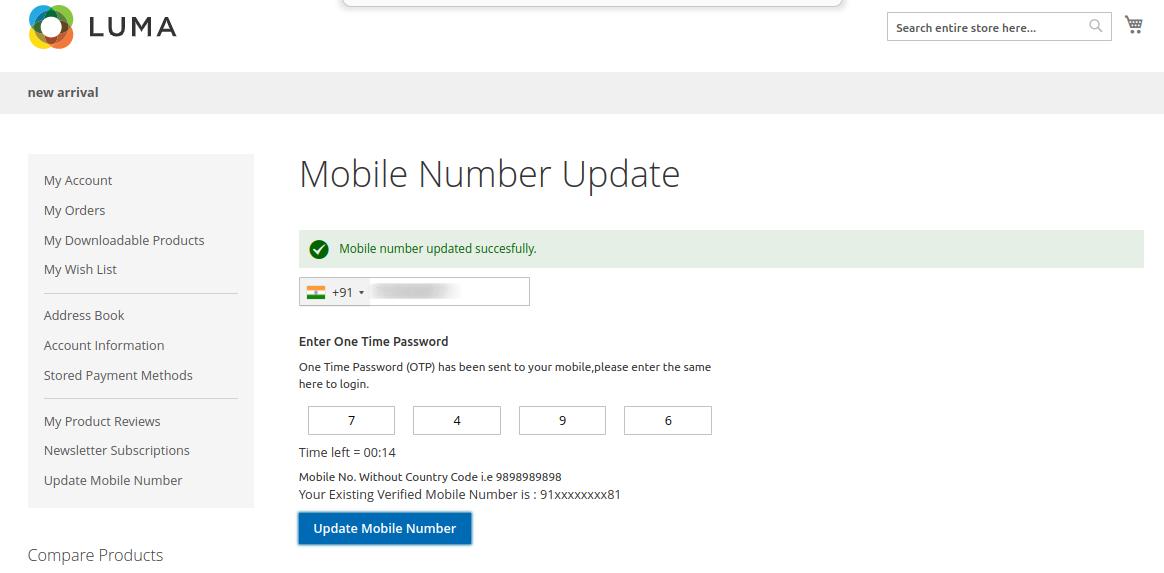
After entering the OTP, the user needs to click on Update Mobile Number.
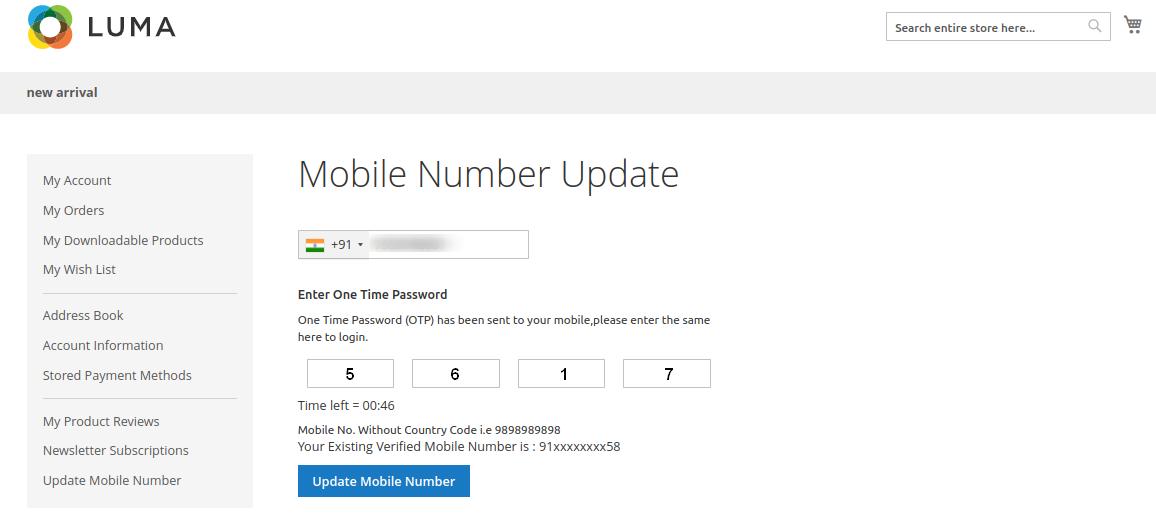
In case the OTP verification time is out, the user gets the option to Resend OTP.
Once the OTP is verified, the mobile number is updated successfully.
16. Mobile Login for Guest Checkout
Mobile OTP Login also supports Guest Checkout. Guest users can quickly log in with OTP as well as a password at the time of checkout.
NOTE - To enable Mobile OTP Login for guest users, make sure the Allow Guest Checkout field is set to No in the Magento default Checkout Options. For that go to Stores > Settings > Configuration > Sales > Checkout > Checkout Options.
17. Mobile Login in Default Register, Login & Forgot
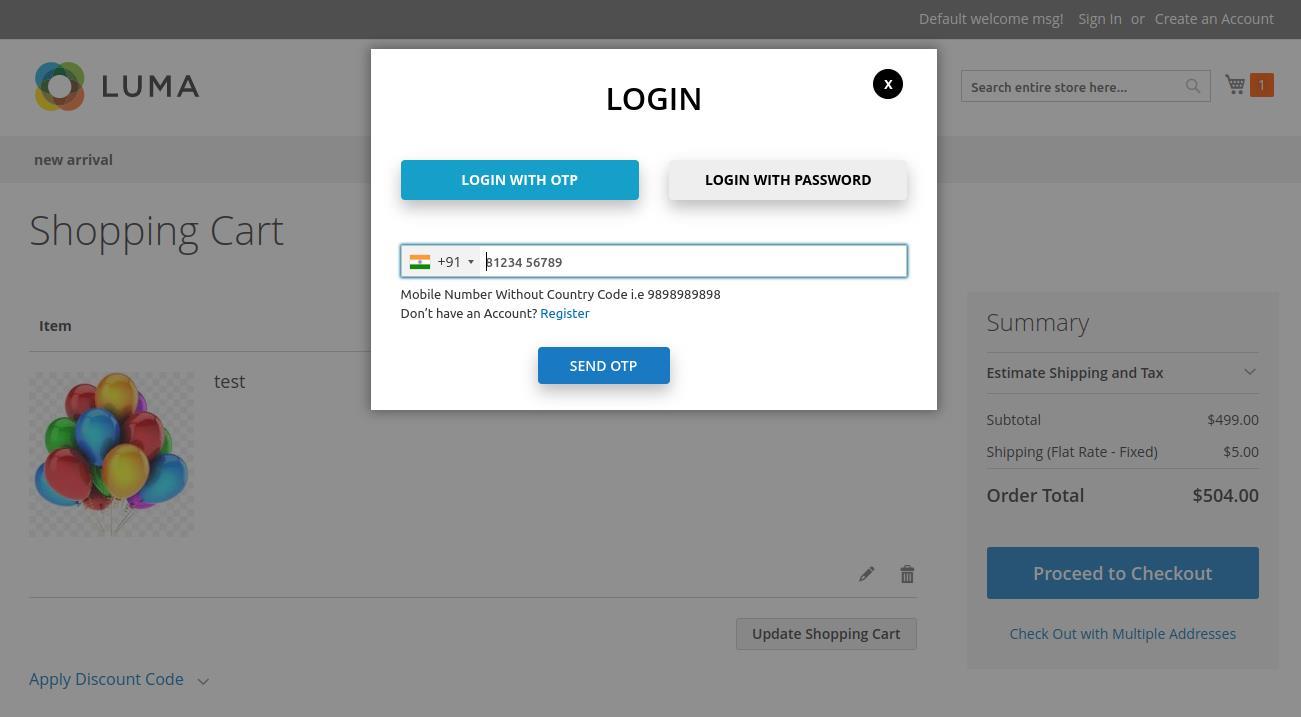
Password
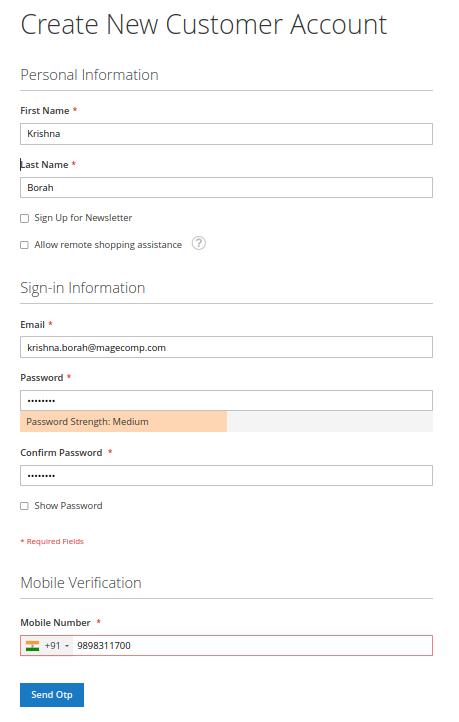
Mobile OTP functionality is also supported on the default Magento pages.
Default Registration Page
Default Customer Login Page
Default Forgot Password Page
If anything goes wrong, please contact us at support@magecomp.com


 Step 5:- Select Destination Country , enter Sender ID and DLT ID and click on Create button.
Step 6:- You can take the Sender ID from here.


 9:- Enter OTP.
10:- Click on Create New option.

 Step 11:- Enter Name of Authkey
Step 12:- Now Copy your Authkey.
Create DLT Template ID
Step 1:- In MSG91 Dashboard, click on SMS.


 Step 4:- After that, copy the Template ID.
Step 1:- In MSG91 Dashboard, click on Campaign.


 Step 2:- After that, click on Add Campaign.
Step 3:- Click on Create Campaign.


 Step 4:- Fill up all fields and then click the Submit button.


 Mobile Number & Password


