C L A S E 19

2 0 2 5


D I S E Ñ O

A S I S T I D O P O R

C O M P U T A D O R A

M A T E R I A L S

Mgtr.Arq. Luis Fernando Ruano Paz


3D modeling > FRONT + COORDINATES

2 0 2 5
D I S E Ñ O
A S I S T I D O P O R
C O M P U T A D O R A
M A T E R I A L S
Mgtr.Arq. Luis Fernando Ruano Paz
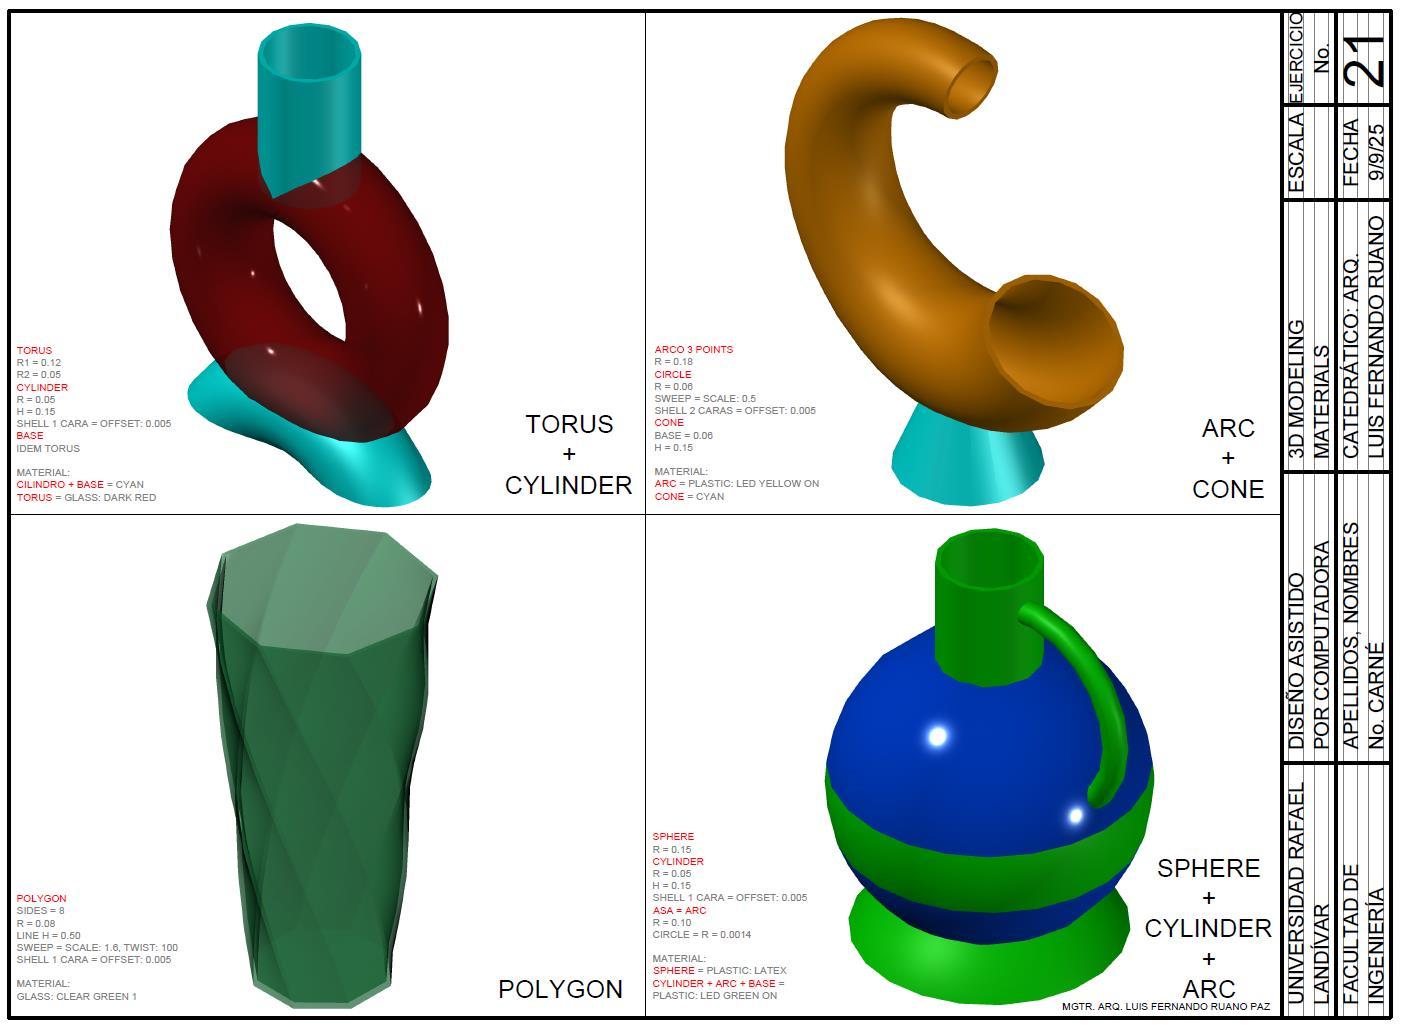
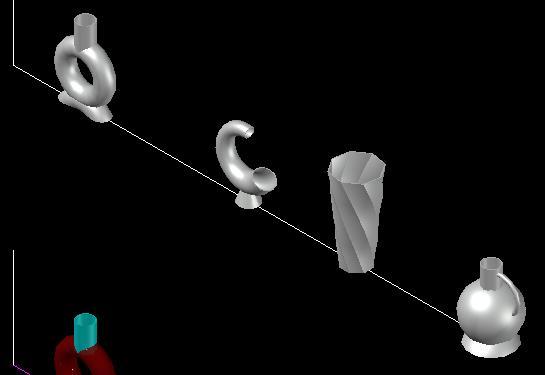
Torus + Cylinder (Front view + Front coordinate)
1. Torus: Center point R1=0.12 > enter > R2=0.05 > enter (se puede configurar desde properties)
2. Copiar Torus abajo: Comando SLICE > select object > enter > specify start point of slicing > click izq. a der > click > click en parte superior de línea.
3. Cylinder: Center point > click > radius > click > height > click Shell 1 cara: select 3D solid > click > seleccionar cara > enter > offset = 0.005 > enter > enter > enter

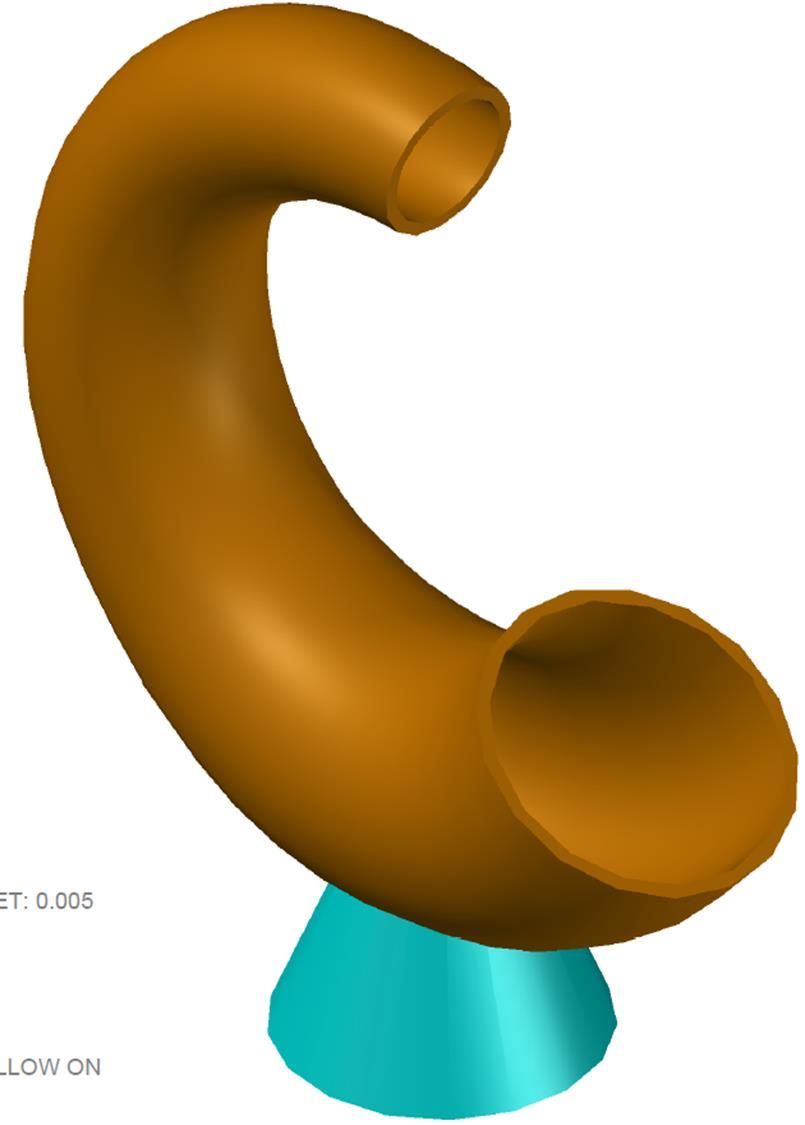
Arc +
(Front view + Front coordinate)
1. Arc 3-point: Tamaño +/- a Torus
2. Circle: r = 0.06
3. Sweep: click en circle > Mode > Solid > Scale = 0.50 > enter > Select sweep path
4. Shell 2 caras: select 3D solid > click > seleccionar las 2 caras > enter > offset = 0.005 > enter > enter > enter
5. Cone: En top coordinate > Base = 0.06 > enter > Height = 0.15 > enter
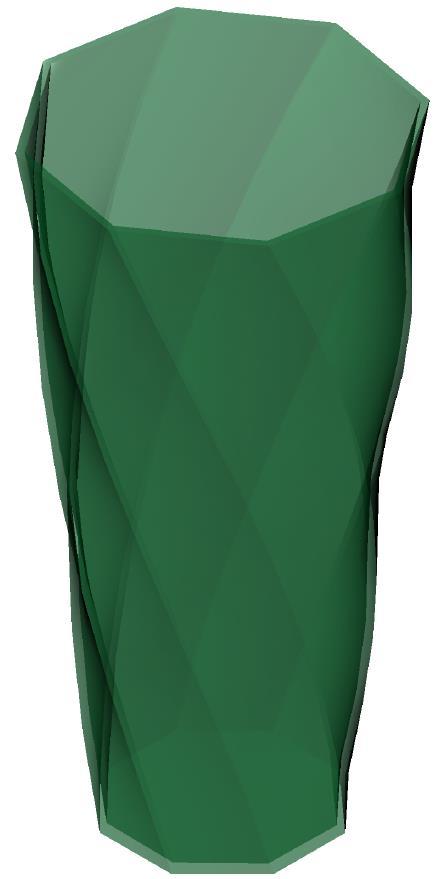
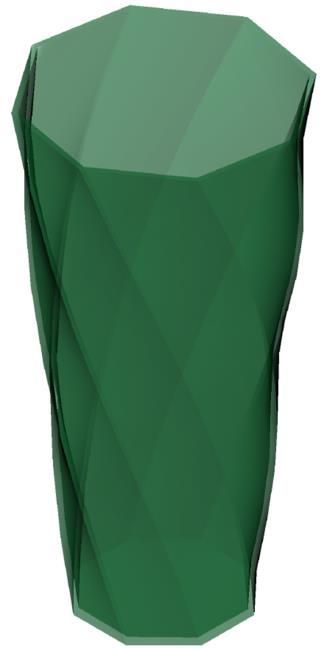
Polygon (Custom view + Top coordinate)
1. Polygon: sides = 8 > enter > R = 0.08
Line al centro > H = 0.50
2. Sweep: click en octágono > Mode > Solid >
Scale = 1.60 > enter > Twist = angle 100> enter >
Select sweep path
3. Shell 1 cara: select 3D solid > click > seleccionar la
cara > enter > offset = 0.005 > enter > enter > enter
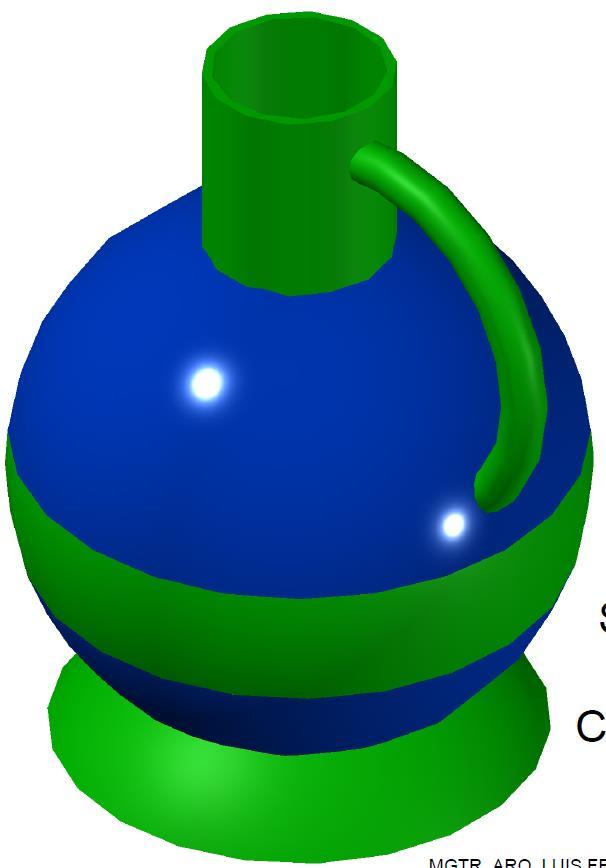
Sphere + Cylinder + Arc (Front view + Front coordinate)
1. Sphere: R = 0.15 > enter enter (se puede configurar desde properties)
2. Cylinder: Center point > click > R = 0.05 > enter > H = 0.15 > enter
Shell 1 cara: select 3D solid > click > seleccionar cara > enter > offset = 0.005 > enter > enter > enter
3. Copiar Sphere abajo: Comando SLICE > select object > enter > specify start point of slicing > click izq. a der > click > click en parte superior de línea.
4. Asa: Arc 3-point (en vista 2D wireframe)
Circle: r = 0.014
5. Doble slice > select object > enter > specify start point of slicing > click izq. a der > click > 2 veces

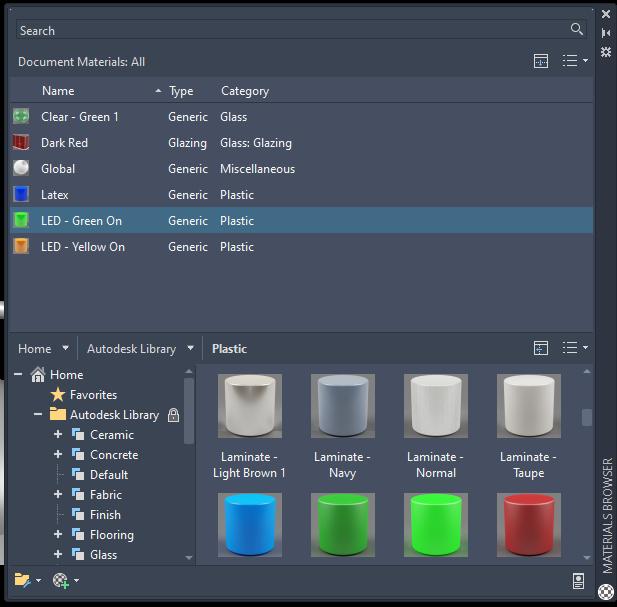

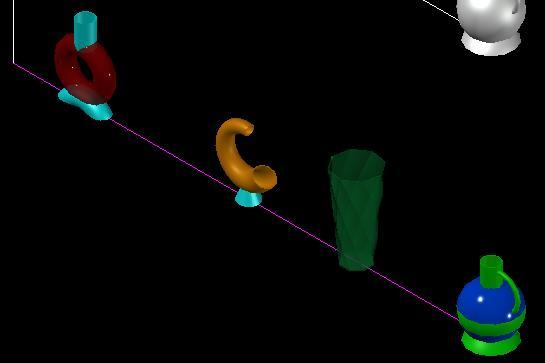
MATERIAL:
CILINDRO + BASE = CYAN
TORUS = GLASS: DARK RED
MATERIAL:
GLASS: CLEAR GREEN 1
MATERIAL:
ARC = PLASTIC: LED YELLOW ON
CONE = CYAN
MATERIAL:
SPHERE = PLASTIC: LATEX
CYLINDER + ARC + BASE = PLASTIC: LED GREEN ON