BIOFERMENTS
Making them on your farm
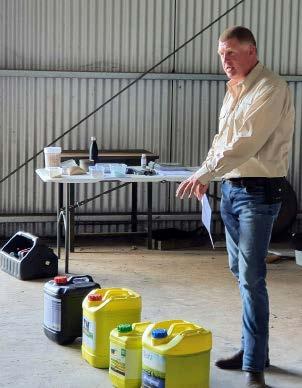
Author: David Hardwick at Soil Land Food
Technical Support: Gerry Gillespie, Dr Chandra Iyer at Green Microbes, Cetana Wong
Graphic Design: ST Creative Design
Photos: Soil Land Food
Acknowledgements: Soil Land Food wishes to thank the numerous farmers who have helped with practical tips and support on biofertilisers especially Mario Raccanello (Tully, Qld), Wes Spencer (Kotupna, Vic), the Attard brothers (Mackay), Fraser Pogue (Ardmona, Vic) and Bob Bright (East Feluga, Qld) who generously shared their experience.
There are a number of simple bioferment products you can make on the farm to improve soil condition, stimulate plant growth and improve plant health. These include biostimulants, biofertilisers and inoculants. This manual has some recipes for making these on farm using simple and effective fermenting methods.


Contents 06 Biological products: an introduction 08 Making bioferments: the basics 12 Base Cultures 18 Compost Inoculant 20 Hydrolysates 22 Biofertilisers
5
Biological Products: an introduction
Biologicals: the different technologies
Over the last few decades farmers around the world have started to apply biological products to crops and pastures. This is an emerging new area of agronomy. In Australia a wide range of biological products are now used by farmers. Many of these products are made with cultures of microbes.
There are three main methods used to make biological products:
Aerobic Cultures
These products are made using oxygen while culturing microbes. The best known examples are compost tea and aerated compost.
Fermentation Cultures
These products are made in cultures with low or no oxygen levels. Effective Microorganisms, fermented compost and bioferments are examples.
Vermi-products
These are based on the products of worms as they transform organic materials into stable products. Worm liquids and worm castings are two examples.
6
Biologicals: the types of products
The range of biological products available in Australia can be confusing. However there are actually only four main types of biological products.
Inoculants
These are products that contain living microbes that can benefit the crop-soil system in some way. The most well-known inoculant products are the legume inoculants, Rhizobia, a nitrogen fixing bacteria. Legume inoculants are used to coat legume seeds before planting. By adding these specialised bacteria to your paddock you can gain extra nitrogen into your soil.
Another example of an inoculant product is compost tea, which can contain a diverse range of microbes. More and more commercial inoculants products are coming onto the market. Some have a single strain of bacteria in them. Others are multi-strain products containing more than one microbe.
Biostimulants
These products contain non-nutrient compounds that are known to stimulate positively either the soil or plants. These compounds are sometimes called plant hormones or growth factors. They are often used to minimise crop stress. Seaweed is known to contain some of these compounds. Humic Acid products are another commonly used example of these type of products.
Biofertilisers
Fertilisers are products that contain nutrients or micronutrients for plant growth. Most fertiliser products contain nutrients in a soluble form. The nutrients in biofertilisers are in a biological form. This means the nutrients are attached to a carbon based compound. When nutrients are attached to carbon we say they are in an organic form. When nutrients are not attached to carbon we say they are inorganic. Nutrients in organic forms are more stable than soluble fertilisers and are better for soil health as they do not negatively affect soil biology when used correctly.
Blood and bone and chicken manure are examples of biofertilisers. Modern biofertilisers are often fermented, using microbes and carbohydrates to complex nutrients into biological forms.
Compound Biologicals
Some biological products have more than one function. They may contain beneficial microbes as well as containing stimulant compounds and/or nutrients. For example some worm liquids contain microbes as well as biostimulant compounds. These products are compound biological products.
7
Making Bioferments: the basics
Fermentation is the process of using a culture of specialised microbes to transform material into stable beneficial compounds under controlled conditions. It is how alcohol is made and many foods are preserved. A home brew is an example of fermentation!
Fermentation usually happens in conditions of low or no oxygen. There are a wide range of bacteria, yeasts and related organisms that can ferment. Many of these are called anaerobic microbes. Some of these microbes can also live in conditions with oxygen. They switch their activity depending on the level of oxygen.
During fermentation microbes create many different compounds known as secondary metabolites or fermentation byproducts. In a balanced, controlled ferment these products are beneficial and can include vitamins, enzymes, amino acids and organic acids. These compounds are biostimulants and may help with plant and soil management.
In a poor fermentation process products like gases and alcohol can be produced which may be toxic to plants at certain concentrations.
Depending on the culturing process you use, bioferments may also contain beneficial microbes like bacteria and yeast. Finally you can add nutrients to some bioferment recipes to make biofertilisers.
When making bioferments it is important to ensure a balanced complete fermentation process occurs. This will result in a range of beneficial compounds and microbes in the final product. The benefits of bioferments when used as part of a holistic, rational agronomy approach may include:
• Improving the uptake of nutrients
• Stimulating root growth
• Reducing plant stress
• Increasing plant health
• Cycling organic matter
• Improving a composting process
8
Culturing on farm: getting it right
Culturing microbes is not too complicated and you can make quality products on farm as long as you follow a few simple guidelines.
Use a balanced recipe
There are many different agricultural bioferment recipes on the internet and Youtube. No matter what recipe you follow, you need to get the right balance of a few key elements to get a quality culture.
1. Starter Culture - every bioferment will have a specific culture of microbes. You normally need to add a starter or base culture to help get the ferment going. To get a consistent result you need to inoculate the ferment.
2. Energy – the culture of fermenting microbes get this from simple carbohydrates like sugars. This energy can be supplied from molasses, sugar, fruits and some flours.
3. Nutrients – a culture needs a full range of nutrients and micronutrients. These can come from plant or animal biomass, added nutrients/minerals or high protein materials like nutritional yeast. Seaweed, molasses and mineral powders are also sources of micronutrients.
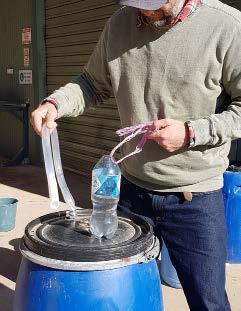
4. Air – different cultures require either a full level of oxygen, low oxygen or no oxygen. Controlling the oxygen level during the
culturing process is critical to get your chosen culture thriving. In some recipes you need to seal the lid and put on a fermentation lock. For other recipes you keep the lid loose and for others you may need to add oxygen.
5. Water – Liquid based cultures are done in water and it is important that you use a clean source of water. If using chlorinated water then it is a good idea to let it gas off for a few hours in your holding tank before making your culture.
6. Temperature – not too hot and not too cold is the rule for bio fermenting. The culture microbes need warm conditions. Ideal is 25OC to 30OC. You can successfully ferment below this range but under about 15OC it becomes very difficult to have success.
9
Follow the process
It is important to follow the steps carefully when making a bioferment. This ensures you get a consistent, quality product each batch. It is possible to adapt a recipe process. If you do decide to adapt a recipe then trial it first and make a note of the steps you followed. If you get a good result you can then repeat the process next time.
The process for making some of the bioferment recipes in this booklet has been tested as part of Soil Land Food’s Making Biofertilisers on your farm project. Other recipes have been shared by farmer collaborators and have been made over some years on farm. Finally our technical consulting microbiologist, Dr Chandra Iyer, has given input and guidance to our project.
Monitor the quality
It is important to ensure each batch of bioferment you make is of good quality. You can do this by monitoring the process as you go as well as the final product. Simple equipment like a pH meter along with your observation skills can help you track things. You can also send samples off to a lab to test quality if you want to invest more in checking the quality of your products.
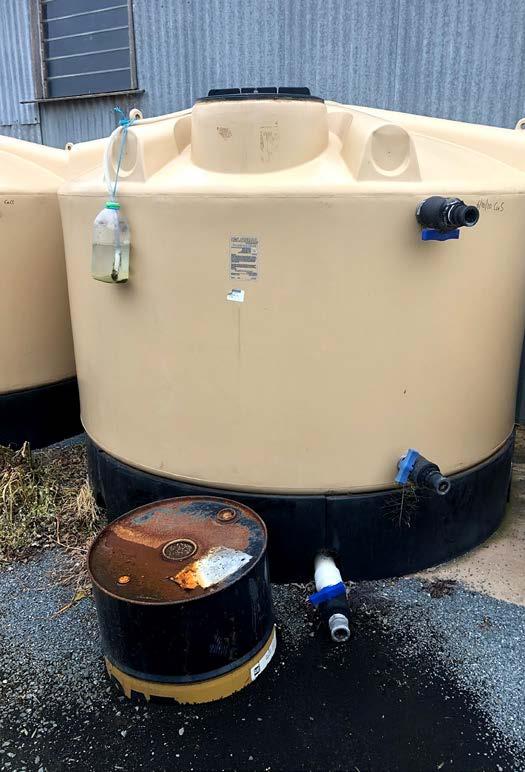
Use the right equipment
Generally fermentation creates acids so it is best to use non-corrosive equipment. Plastic is the best. Stainless steel is also fine but is more expensive. Do not use other materials.
Keep things clean
Finally, always use clean equipment when making bioferments. Thoroughly rinse equipment between batches and before use. Triple rinse second hand shuttles and storage containers with sanitisers so they do not contaminate your manufacturing. This will help ensure quality.
10
Using alternative ingredients
It is possible to swap some ingredients when making bioferments and get a similar result. Sometimes ingredients may not be available to use locally. Sometimes you may want to use a local source of material to get a locally adapted culture. For example some farmers like to use fresh cow manure from their own farm as a starter culture. At other times you may have access to wood ash or local minerals.
The recipes in this book are based on ingredients that can be fairly easily purchased and that are consistent in quality. This will result in a consistent end product. Where possible we have also given options for using local alternatives.
If you decide to use alternative ingredients then here are some tips:
• Using manures, paunch or other biomass inputs that have large amounts of solids can result in your ferment containing a lot of materials that can block filters and pumps. Extra steps to filter this off before using are required. One way to solve this issue is to make a slurry with the manure/ biomass and then strain the slurry, adding only the liquid portion in your ferment.
• Manure contains a range of bacteria and can be used successfully as a starter culture. However it is important to use fresh manure from a healthy cow that has not been treated with animal health chemicals for some weeks if possible.
• If you are in horticulture then you probably have a Food Safety system in place. Many Food Safety programs do not like manures in fertiliser programs because of the perceived risk to food safety from pathogens. Studies have shown that fermentation with lactic acid bacteria will eliminate any risks. Despite this many Food Safety programs may not allow you to use manure based biofertilisers. All the recipes in this book can be made without manures.
• Use very fine grade rock minerals, biochar or wood ash in ferments. The finer the product is the more available it will be to the culture microbes and the more value it will give you.

• When adding soluble nutrients to biofertilisers it is recommended not to use much nitrate or chloride based nutrients. Sulphate forms of most soluble nutrients are best. Use technical grade products that dissolve easily in water. It is best to use quality products that may cost a little more but will give you a consistent result.
• Certified organic farmers need to choose ingredients compliant for organic certification. The recipes in this manual are not organic compliant but can be adapted.
11
Base Cultures
These recipes are for the starter cultures that you use to make all the other products. They are also called Serums. You can also use these products on their own. They can be used to reduce odours in animal sheds and manure piles. There are 2 main Base Cultures. One is made with kefir, a European style youghurt. The other is made with rice and milk. The dominant microbial group in the culture is lactobacillus bacteria, along with some other bacteria and yeasts.
There are some commercial products that can be used instead of these base cultures. They are sometimes called Effective Microorganisms (EM) or sometimes Lactos. Look for ones based on a lactic acid bacteria culture. The farm made ones are usually much more economic. They also store for a long time so you can make a batch and then use it as needed for a year or two.
If they are not used within a few weeks of making then seal the container tightly for long term storage. It should last for at least 6 to 24 months but it should be checked regularly to see if it is stable. Store in a shady location. If it is giving off gas you can take the lid off for a few hours every month or so.
12
13
LAB Culture (LAB Serum)
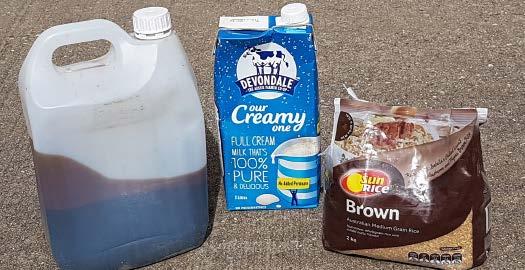
This is a simple starter culture based on using rice, water, molasses and milk. It makes a culture of mainly fermenting bacteria called Lactobacillus. This recipe is ideal when you are working remote as milk powder, rice, molasses and water are available in most places.
Ingredients & Equipment
Clean waternon-chlorinated
Rice - any type
Molasses
Milk – must have lactose. Can be made from milk powder
Batch Quantities
200* litres
Buckets - 10 and 20 litre
Measuring Jug - clean
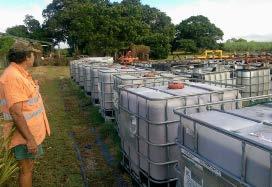
200L Barrels and 1000L
IBCs - clean with lid
pH tester - for liquids
Rice 1.5 - 2 kg
Water 125 L
Milk^ 70 L
Molasses 10 L
1000 litres
Rice 5 kg
Water 625 L
Milk^ 350 L
Molasses 50 L
14
* For the 200 litre batch size a 180 or 220 litre drum (44 gallon) can be used. Just use slightly more or less water. ^ Milk can be made from milk powder.
METHOD
LAB Culture
1000 litre batch
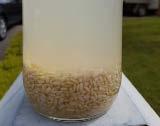
Make rice water
• Add 175 litres of water to a 200 litre barrel or IBC.
• Add rice to the water.
• Leave for 3 - 7 days in a sheltered place with a loose fitting lid.
• Check the rice water each day. The liquid should change during this time. It should smell slightly sour and may have a slightly milky colour to it.
• When the liquid rice water has soured somewhat, decant the water off and keep it.
• Throw away the rice.
• This liquid rice water is a culture mainly of Lactobacillus species.
Make whey
• Now add this rice water to the milk in a 1000 litre IBC with a wide lid.
• Cover with a loose fitting lid and store for a few days until it curdles and milk solids separate.
• Remove and discard the solids with a scoop. Keep the creamy-yellow whey.
• You should have about 450 litres of whey.
Make culture
• Then add equal parts water (approx 450 litres) to this liquid whey.
• Add in 50 litres of molasses to the product.
• Leave for around 10 days with the lid loosely on.
• Protect from insects with mesh if needed.
• It will stop bubbling and giving off gas when it is finished.
• This is your stable LAB Culture product.
• Check the pH of the product. It should be at 4 or just below.
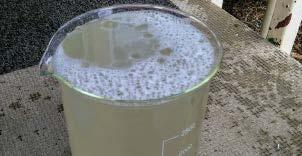
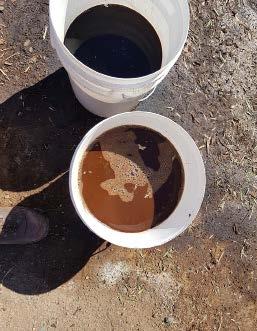
• Visually check the liquid. It should be light to mid brown colour with a slightly sweet-sour smell.
• Store the product in a cool, shady place with the lid tightly on.
• Check fortnightly and let gas out if needed.
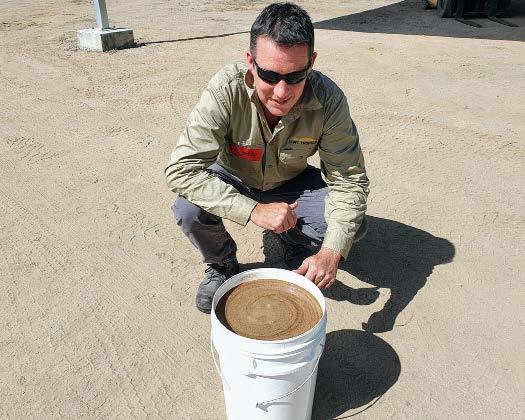
If it is not used within a few weeks of making then seal the container tightly for long term storage. It should last for at least 6 to 24 months but it should be checked every few weeks to see if it is stable. Some light brown, pink or light grey yeasts may colonise the surface over time. This is OK. The pH should remain around 4 or under. The smell should remain the sweet/sour smell of lactic acid and molasses. If it is giving off gas you can take the lid off for a few hours every month or so.
15
KAB Culture (KAB Serum)
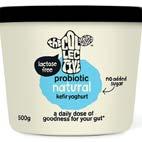
This is a simple starter culture based on kefir or filmjoilk (types of European yoghurt), water, molasses and milk. It makes a culture of fermenting bacteria containing lactobacillus along with other bacteria and yeasts. Commercial yoghurts have reliable quantities and strains of bacteria in them so this culture will give you a consistent culture each time. It takes less time to make KAB culture than the LAB Culture. It is also a more diverse culture than the rice water so we recommend using this starter culture if you can when making biofertilisers. However kefir is not available at all supermarkets across rural Australia.
Ingredients & Equipment
Clean waternon-chlorinated
Kefir or Filmjolk
Molasses
Milk – must have lactose. Can be made from milk powder
Buckets - 10 and 20 litre
Measuring Jug - clean
200L Barrels and 1000L
IBCs - clean with lid
pH tester - for liquids
16
Quantities 200* litres Kefir/ Filmjolk 4 L Water 140 L Milk^ 30 L Molasses 20 L 1000 litres Kefir/ Filmjolk 15-20 L Water 700 L Milk^ 150 L Molasses 100 L
Batch
* For the 200 litre batch size a 180 or 220 litre drum (44 gallon) can be used. Just use slightly more or less water. ^ Milk can be made from milk powder.
METHOD
KAB Culture
1000 litre batch
Method: KAB Culture
• Add the water to an IBC/barrel
• Mix the molasses with the water and mix thoroughly
• Add the milk
• Add the kefir or filmjolk
• Agitate until mixed
• Leave for around 10 - 20 days with the lid loosely on.
• Protect from insects with mesh if needed.
• It will stop bubbling and giving off gas when it is finished.
• This is your stable KAB Culture product.
• Check the pH of the product. It should be at 4 or just below.
• Visually check the liquid. It should be light to mid brown colour with a slightly sweet-sour smell.
• Store the product in a cool, shady place with the lid tightly on.
• Check fortnightly and let gas out if needed.
If it is not used within a few weeks of making then seal the container tightly for long term storage. It should last for at least 6 to 24 months but it should be checked every few weeks to see if it is stable. Some light brown, pink or light grey yeasts may colonise the surface over time. This is OK. The pH should remain around 4 or under. The smell should remain the sweet/sour smell of lactic acid and molasses. If it is giving off gas you can take the lid off for a few hours every month or so.

17
Compost Inoculant
This culture contains microorganisms that help to compost organic materials under low oxygen conditions. It is used when making fermentation compost. It can also be used to reduce odours in animal sheds and manure piles. You use the LAB or KAB culture to start this recipe, adding other ingredients to it. It can be made easily on the farm. It is best made in a large wheelie bin or 1000 L IBC. This inoculant is diluted in water and added to the compost material as you are setting up the compost pile. This product needs to be used within a few weeks of making.
For more information on how to make a fermentation compost using this inoculant and what rates to use it at, see the Fermentation Composting Fact Sheet by Soil Land Food.
Ingredients & Equipment
Clean water - non-chlorinated Seawater – or equivalent*
Base Culture – KAB or LAB Culture
Molasses
Blood & Bone Meal
Bran – rice or any cereal
Fresh green leafy plant material
Measuring Jug / Buckets
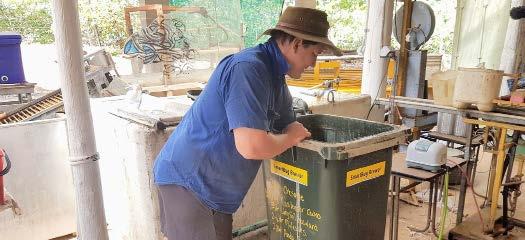
Wheelie Bin / 1000L IBC - with lid
Hessian sack & string – coffee or potato sack
Basalt powder/Wood ash - optional
Seaweed liquid or meal - optional
*If you do not have access to seawater you can make it by adding 1 cup of sea salt to 7 litres of clean water. If you need a larger quantity then just multiple this recipe, keeping the ratio the same.
18
Batch Quantities Wheelie Bin (180 - 200 litres) Water 160 L Green leafy material 15 – 20 L Blood & Bone 3 kg Bran 3 kg Basalt powder/Wood ash 1 kg Seaweed 1 kg Molasses 3 L Seawater 7 L Base Culture 7- 10 L
1000 litres IBC Water 800 L Green leafy material 100 L Blood & Bone 15 kg Bran 15kg Basalt dust* 5 kg Seaweed Meal* 5kg Molasses 15 L Seawater 28 L Base Culture 50 L
METHOD Compost Inoculant
Make liquid
• Fill bin or IBC with half the water
• Add molasses, seawater and Base Culture (KAB or LAB Serum) to the Bin/IBC. You can also add seaweed liquid instead of meal if available.
• Now add the balance of water to the Bin/IBC.
Add extras
• Prepare hessian ‘teabag” by placing fresh green leafy plant material (grass, weeds, herbs, fresh seaweed etc.), blood and bone meal and bran into the sack and closing it with string. You can add basalt rock dust or seaweed meal if available.
• Place the ‘teabag’ sack into the Bin/IBC and secure to the side so you can readily access it.
• Close the lid loosely on the Bin/IBC and leave the mixture to activate for 5 days.
Activate the culture
• Every day open the lid to check on the mixture. Jiggle the ‘teabag’ sack at least once a day every day for the 5 days.
• After 5 days remove Hessian tea bag and discard the contents of the tea bag.
• The liquid is your compost inoculant.
• Store the product in a shaded cool place with the lid loosely on.
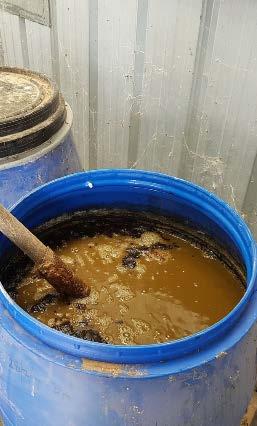
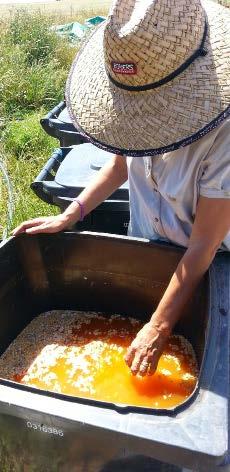
The product should have a bright, orange, mid brown colour. Some light brown, pink or light grey yeasts may colonise the surface over time. This is OK. The smell should remain the sweet/sour smell of lactic acid and molasses.
It is applied to compost at 1 litre per every 10 cubic meters of material as you set up a compost windrow. It can be diluted in water before applying it to the compost.
19
Hydrolysates
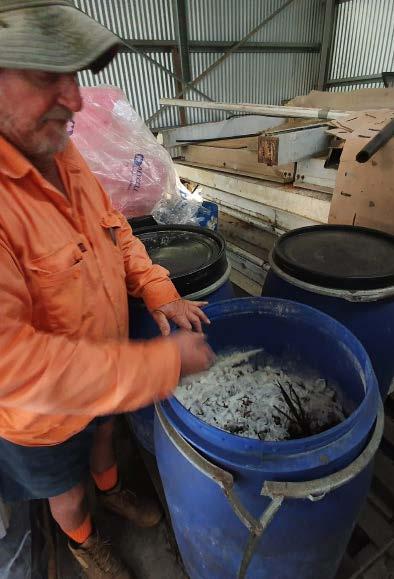
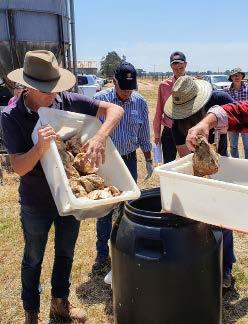
A hydrolysate is a high protein bioferment made with material such as fish biomass, animal carcasses or food scraps. These are macerated (smashed up) and then fermented with a starter culture, water and a carbohydrate source like molasses. Sometimes the biomass is pre-processed to help break it down. This can be chemically, usually with potassium hydroxide, or physically with a mincer. The result is a bioferment with both fertiliser value and a range of biostimulants. There has been a fair amount of research showing that the compounds in hydrolysates, including amino acids and organic acids, are very beneficial to plant growth and health.
Ingredients & Equipment
Clean water - non-chlorinated
High Protein biomass – animals and/or vegetable
Starter Culture – KAB or LAB Culture Measuring Jug / Buckets
Molasses
200 L Barrel / 1000L IBC - with fermentation lock
20
Batch Quantities * Recipe is done by volume not weight 200* litres High protein biomass 80 L* Water 80 - 100 L Base culture 16 L Molasses 11 L 1000 litres High protein biomass 400 L* Water 400 L Base culture 80 L Molasses 55 L
METHOD
Hydrolysate
Prepare the culture
• Macerate the biomass using a mincer, insinkerator or smash with a spade. You may need to add water to help this process.
• Fill barrel or IBC with biomass
• Add the water to the biomass
• Add the Base Culture to the mix
• Add molasses to the mix
• Mix thoroughly but not too vigorously
• Check you have a 10 - 20 cm gap between the top of the culture and the lid. Top up with water if you need.
Ferment the culture
• Seal the ferment with a fermentation lock.
• Ferment for at least 2 months (60 days).
• Monitor the ferment by checking that gas is coming out of the fermentation lock.
• You can also check the ferment by briefly removing the lid to check it is active after 2 weeks. Make sure to reseal it again.
• It will stop bubbling and giving off gas when it is finished.
• This is a stable Hydrolysate product.
• Check the pH of the product. It should be at 4 or just below.
• Visually check the liquid. It should be light to mid brown colour with a slightly sweetsour smell.
• Store the product in a cool, shady place with the lid tightly on.
• Check fortnightly and let gas out if needed.
This product may need to be filtered before use. If it is not used within a few weeks of making then seal the container tightly for long term storage. It should last for at least 6 to 24 months but it should be checked every few weeks to see if it is stable. Some light brown, pink or light grey yeasts may colonise the surface over time. This is OK. The pH should remain around 4 or under.
The smell should remain the sweet/sour smell of lactic acid and molasses. If it is giving off gas you can take the lid off for a few hours every month or so. Sometimes this culture may start to go putrid. It will darken in colour and start to emit a foul smell. In this case you can add more Base Culture at 10% and molasses at 10% by volume to stabilise it.
21
Biofertilisers
Biofertiliser products can be used for growing crops or pastures. There are a wide range of recipes for making biofertilisers.They are sometimes called Biols. These are bioferments to which nutrients are added. In all recipes nutrient elements are added to the recipe before or during fermentation.
The nutrients in biofertilisers are in a biological form. This means the nutrients are attached to a carbon based compound. When nutrients are attached to carbon they are in an “organic” form. When nutrients are not attached to carbon they are “inorganic”. During fermentation, as the culture microbes grow, they digest the nutrients turning them into biologically based compounds. Nutrients in this form are sometimes called chelated or complexed. Nutrients in biological forms are more stable than soluble fertilisers and are better for soil health when used correctly as they do not negatively affect soil biology.
insoluble in the water. For example mixing phosphorous and calcium together in the same tank will lead to an insoluble phosphorous salt forming. Making biofertilisers is more complex than making soluble liquid fertilisers. The goal is to complex (chelate) the nutrients biologically. It is not a black and white science as it depends on the culture dynamics as well as the nutrient combinations.
Therefore when making biofertilisers you can add nutrients that may usually react in water. This is because the culture will balance the reactions. However, you still need to be careful when adding different nutrients. It is also important not to add more nutrients than the culture can digest.
Biofertilisers can be made using soluble, “chemical” nutrients, or by using mineral, “natural”, forms of nutrients. They can also be made with major nutrients or micronutrients (trace elements). You can make single nutrient biofertilisers or multi-nutrient biofertilisers.
Usually when making soluble liquid fertilisers the goal is to dissolve the nutrients fully. It is important not blend certain nutrients as they can have a chemical reaction and become
The three biofertiliser recipes in this booklet are designed to be simple and follow the above principles. We have also avoided using chloride and nitrate based nutrients to optimise the fermentation environment. You are welcome to adapt these recipes and add or replace nutrients as you like. Just follow the principles in this booklet and you cant go too far wrong! There are options in the recipes that use soluble nutrients and options for certified organic farmers.
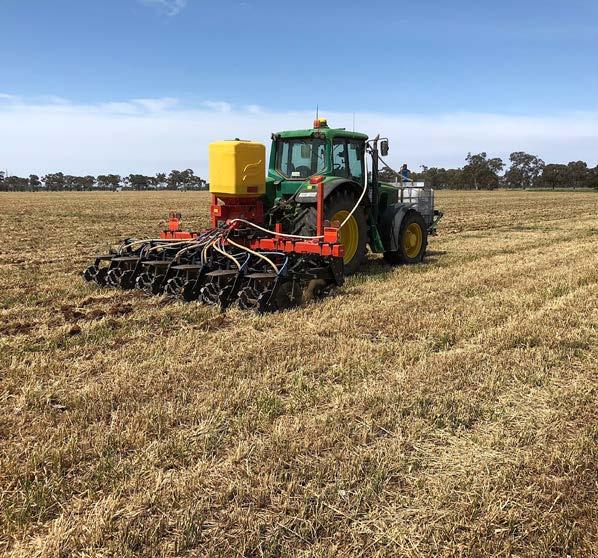
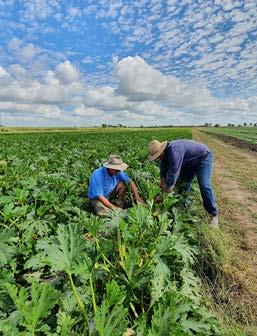
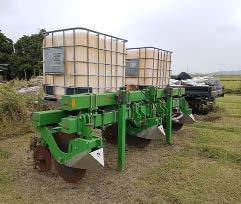
Biofertilisers can be applied between 5 and 50 litres per hectare. 5 to 10 litres is the rate usually used in dry land cropping. You can also tank mix other fertilisers and biologicals with the biofertiliser just before application. Dilute in water for application.
22
23
Biofert P Plus + Micronutrients
This is a Biofertiliser recipe with Phosphorous plus Potassium, Calcium, Magnesium, Sulphur and micronutrients. It is low in soluble Nitrogen. It is a biofertiliser designed to support the developing root system of growing plants. It can also be applied as a foliar spray.
1000L Batch Ingredients
• Water - 650 to 700 litres
• Base Culture (KAB or LAB Serum) - 100 litres1
• Molasses - 100 litres
• Milk - 50 litres - Can be made from milk powder
• Liquid Seaweed - 5 to 10 litres
• Nutritional Yeast - 0.5 to 1 kg2
• Sea Salt - 0.5 kg
• MKP Fertiliser (Campbells MKP) - 25 kg3
• Micronutrients Mix Fertiliser (Campbells Trace It Total) - 4 kg4
• Calcium Thiosulphate Fertiliser (Campbells Thio Cal) - 5 litres5

• Magnesium Sulphate Fertiliser (Campbells Mag Sulphate) - 5 kg6
• Extras7
Options
1 You can substitute some of the Base Culture with fresh cow manure slurry if you like. We recommend including at least 50 litres of Base Culture. To make a manure slurry, mix 1 part water with 1 part fresh manure. Leave covered for 2 hours. Then filter the slurry before mixing it in to the biofertiliser. This lowers the risk of suspended materials causing blockages in the final product. You can also add 1/2 kg of bakers yeast to the recipe.
2 Vegemite, Marmite or soy flour can be used instead.
3 You can substitute this with micronised rock phosphate and soluble potassium sulphate in whatever ratios you want.
4 You can leave the Micronutrients out of the recipe if you want. Alternatively you can just add single micronutrients like Zinc, Copper, etc. Add them in at 3 - 5 kg to the 1000 litres. No more than 15 kg total micronutrients is suggested.
5 You can substitute this with liquid lime or liquid gypsum. Use a high grade liquid calcium product that is properly micronised. You could also use Calcium Chloride instead. Certified Organic farmers cannot use Thiocalcium or Calcium Chloride.
6 You can leave the Magnesium Sulphate out if you have adequate to high magnesium in your soils.
7 Extras you can add into the recipe include biochar, basalt powder, wood ash, seaweed, zeolite or humic acid. Add no more than 10 kg of these extras in total. Always use very fine grade materials to reduce the risk of equipment issues when handing.
24
METHOD
Biofert P Plus - 1000L IBC
Mix ingredients
• Add 500 litres of water to the IBC
• Dissolve the Sea Salt, MKP and Micronutrients into this 500 litres of water
• Separately dilute the molasses with 100 litres of water
• Add this molasses/water mix into the 500 litres of nutrient water thoroughly
• Add in the Kefir Culture to the IBC and mix well
• Add in the Milk, Liquid Seaweed and Nutritional Yeast to the IBC
• Agitate until everything is well mixed
• Dissolve the Thio Cal and Mag Sulphate into 100 litres of water
• Add this 100 litre mixture to the IBC
• Agitate again until all is mixed.
• Top up with extra water to 900 - 950 litres total as needed.
• Check you have a 10 - 20 cm gap between the top of the culture and the lid.
• Top up with water if you need.
Ferment the culture
• Seal the IBC and apply an airlock for fermentation.
• Ferment for at least 60 days
• Monitor the ferment by checking that gas is coming out of the fermentation lock.
• You can also check the ferment by briefly removing the lid to check it is active after 2 weeks. Make sure to reseal it again.
• It will stop bubbling and giving off gas when it is finished.
• This is a stable Biofertiliser product.
• Visually check the liquid. It should be light to mid brown colour with a neutral to slightly sweet-sour smell.
• Store the product in a cool, shady place with the lid tightly on.
• Check fortnightly and let gas out if needed.
Store in a shady location. Once fermented it can be stored for at least 6 months under a tight seal. Check it every 2 weeks to ensure it is stable. You can use any brand of soluble nutrients but use quality products. We suggest Campbells Fertilisers because they are of high quality. We do not represent that company! Filter product before use.
25
Biofert Ca Plus + Micronutrients
This is a Biofertiliser recipe with Phosphorous plus Potassium, Calcium, Magnesium, Sulphur and micronutrients. It is low in soluble Nitrogen. It is a biofertiliser designed to support the developing root system of growing plants. It can also be applied as a foliar spray.
1000L Batch Ingredients
• Water - 650 to 700 litres
• Base Culture (KAB or LAB Serum) - 100 litres1
• Molasses - 100 litres
• Milk - 50 litres - Can be made from milk powder
• Liquid Seaweed - 5 to 10 litres
• Nutritional Yeast - 0.5 to 1 kg2
• Sea Salt - 0.5 kg
• Calcium Thiosulphate/Calcium Chloride - 50 litres3
• Micronutrients Mix Fertiliser (Campbells Trace It Total) - 4 kg4
• Potassium Sulphate Fertiliser (Campbells Solu K) - 5 kg5
• Magnesium Sulphate Fertiliser (Campbells Mag Sulphate) - 5 kg6
• Extras7
Options
1 You can substitute some of the Base Culture with fresh cow manure slurry if you like. We recommend including at least 50 litres of Base Culture. To make a manure slurry, mix 1 part water with 1 part fresh manure. Leave covered for 2 hours. Then filter the slurry before mixing it in to the biofertiliser. This lowers the risk of suspended materials causing blockages in the final product. You can also add 1/2 kg of bakers yeast to the recipe.
2 Vegemite, Marmite or soy flour can be used instead.
3 You can substitute this with liquid lime or liquid gypsum. Use a high grade liquid calcium product that is properly micronised. You could also use Calcium Chloride but use half the amount when using Calcium Chloride. Certified Organic farmers cannot use Thiocalcium or Calcium Chloride.
4 You can leave the Micronutrients out of the recipe if you want. Alternatively you can just add single micronutrients like Zinc, Copper, etc. Add them in at 3 - 5 kg to the 1000 litres. No more than 10 kg total micronutrients is suggested.
5 You can substitute this with wood ash if you like.
6 You can leave the Magnesium Sulphate out if you have adequate to high magnesium in your soils.
7 Extras you can add into the recipe include biochar, basalt powder, wood ash, seaweed, zeolite or humic acid. Add no more than 10 kg of these extras in total. Always use very fine grade materials to reduce the risk of equipment issues when handing.
26
METHOD
Biofert Ca Plus - 1000L IBC
Mix ingredients
• Add 500 litres of water to the IBC
• Dissolve the liquid lime, Potassium Sulphate and Magnesium Sulphate into this 500 litres of water
• Separately dilute the molasses with 100 litres of water
• Add this molasses/water mix into the 500 litres of nutrient water thoroughly
• Add in the Kefir Culture to the IBC and mix well
• Add in the Milk, Liquid Seaweed and Nutritional Yeast to the IBC
• Agitate until everything is well mixed
• Dissolve the micronutrients into 100 litres of water
• Add this 100 litre mixture to the IBC
• Agitate again until all is mixed.
• Top up with extra water to 900 - 950 litres total as needed.
• Check you have a 10 - 20 cm gap between the top of the culture and the lid.
• Top up with water if you need.
Ferment the culture
• Seal the IBC and apply an airlock for fermentation.
• Ferment for at least 60 days
• Monitor the ferment by checking that gas is coming out of the fermentation lock.
• You can also check the ferment by briefly removing the lid to check it is active after 2 weeks. Make sure to reseal it again.
• It will stop bubbling and giving off gas when it is finished.
• This is a stable Biofertiliser product.

• Visually check the liquid. It should be light to mid brown colour with a neutral to slightly sweet-sour smell.
• Store the product in a cool, shady place with the lid tightly on.
• Check fortnightly and let gas out if needed.
Store in a shady location. Once fermented it can be stored for at least 6 months under a tight seal. Check it every 2 weeks to ensure it is stable. You can use any brand of soluble nutrients but use quality products. We suggest Campbells Fertilisers because they are of high quality. Filter product before use.
27
Biofert Maxi Micros
This is a Biofertiliser recipe with a range of micronutrients. It is a biofertiliser designed to supply a range of micronutrients to support soil and plant systems. It can also be applied as a foliar spray. You can customise the recipe to focus on one or a few micronutrients or you can make a broad spectrum version.
1000L Batch Ingredients
• Water - 650 to 700 litres
• Base Culture (KAB or LAB Serum) - 100 litres1
• Molasses - 100 litres
• Milk - 50 litres - Can be made from milk powder
• Liquid Seaweed - 5 to 10 litres
• Nutritional Yeast - 0.5 to 1 kg2
• Sea Salt - 0.5 kg
• Calcium Thiosulphate/Calcium Chloride - 5 litres3
• MKP Fertiliser (Campbells MKP) - 5 kg4
• Magnesium Sulphate Fertiliser (Campbells Mag Sulphate) - 5 kg5
• Micronutrients Mix Fertiliser (Campbells Trace It Total) - 30 kg6
• Extras7
Options
1 You can substitute some of the Base Culture with fresh cow manure slurry if you like. We recommend including at least 50 litres of Base Culture. To make a manure slurry, mix 1 part water with 1 part fresh manure. Leave covered for 2 hours. Then filter the slurry before mixing it in to the biofertiliser. This lowers the risk of suspended materials causing blockages in the final product. You can also add 1/2 kg of bakers yeast to the recipe.
2 Vegemite, Marmite or soy flour can be used instead.
3 You can substitute this with liquid gypsum or liquid lime. Use a high grade liquid calcium product that is properly micronised. Certified Organic farmers cannot use thiocalcium.
4 Organic farmers can substitute MKP with a mixture of rock phosphate and potassium silicate at 3 kg each. Use super fine rock phosphate (colloidal).
5 Use tech/horticulture grade that dissolves in water.
6 Use a high quality multi-element micronutrient product that is fully soluble. Alternatively substitute the multielement product for one or a few micronutrients. Use no more than 30kg of micronutrient products in total. Use no more than 2kg of any Cobalt product in total.
7 Extras you can add into the recipe include biochar, basalt powder, wood ash, seaweed, zeolite or humic acid. Add no more than 10 kg of these extras in total. Always use very fine grade materials to reduce the risk of equipment issues when handing.
28
METHOD
Biofert Maxi Micros - 1000L IBC
Mix ingredients
• Add 500 litres of water to the IBC
• Dissolve the micronutrients into this 500 litres of water
• Separately dilute the molasses with 100 litres of water
• Add this molasses/water mix into the 500 litres of nutrient water thoroughly
• Add in the Kefir Culture to the IBC and mix well
• Add in the Milk, Liquid Seaweed and Nutritional Yeast to the IBC
• Agitate until everything is well mixed
• Dissolve the Liquid Lime, MKP and Magnesium Sulphate into 100 litres of water
• Add this 100 litre mixture to the IBC
• Agitate again until all is mixed.
• Top up with extra water to 900 - 950 litres total as needed.
• Check you have a 10 - 20 cm gap between the top of the culture and the lid.
• Top up with water if you need.
Ferment the culture
• Seal the IBC and apply an airlock for fermentation.
• Ferment for at least 60 days Monitor the ferment by checking that gas is coming out of the fermentation lock.
• You can also check the ferment by briefly removing the lid to check it is active after 2 weeks. Make sure to reseal it again.
• It will stop bubbling and giving off gas when it is finished.
• This is a stable Biofertiliser product.
• Visually check the liquid. It should be light to mid brown colour with a neutral to slightly sweet-sour smell.
• Store the product in a cool, shady place with the lid tightly on.
• Check fortnightly and let gas out if needed.
Store in a shady location. Once fermented it can be stored for at least 6 months under a tight seal. Check it every 2 weeks to ensure it is stable. You can use any brand of soluble nutrients but use quality products. We suggest Campbells Fertilisers because they are of high quality. Filter product before use.
29
Important Information
When using bioferments it is important to apply the product using a sound agronomic decision-making process. Soil tests, tissue tests and/or assessing visual performance of the soil/crop/pastures are important tools to help make an informed decision. This booklet has been prepared as general information only. It is provided in good faith and based on the most appropriate technical information available. The information provided is given as a guide only and is not intended to substitute for professional agronomic advice. Results from using bioferments depend on many factors beyond the control of Soil Land Food. Where materials are mentioned other suitable similar materials may be available from alternate suppliers. Those mentioned are just those that Soil Land Food is familiar with. These recipes are not compliant for certified organic farmers. If you a certified organic farmer you will need to adapt these recipes. Soil Land Food accepts no liability arising from use of the information in this booklet for any loss, damage or injury. The user takes the information in this Booklet on these terms.
References
Kalema & Chacon; 2010. Organic fertilisers and bio-ferments; a practical manual for smallholder farmers; Louis Balk Institute
Reddy, R; 2011. Cho’s Natural Global Farming. SARRA
30
Chontal et al; 2019. Nutrient content of fermented fertilisers and its efficacy in combination with hydrogel in Zea Mays L. International Journal of Recycling Organic Waste in Agriculture
Plamer, N; 2020. The Regenerative Growers Guide to Garden Amendments. Chelsea Green.
Notes
Bioferments: making them on your farm
2021 - 2022
is an extension project initiated by Soil Land Food in partnership with Returning Organics to Soils to help develop capacity in Australian farmers to make quality compost, biofertilisers and biostimulants on farm using applied fermentation technologies. The project is developing a range of simple and effective recipes for bioferments that can be made on farm and conducting testing to validate the quality of the recipes. These are freely available to farmers. We aim to do field efficacy trials of the products in the next stage of the project.