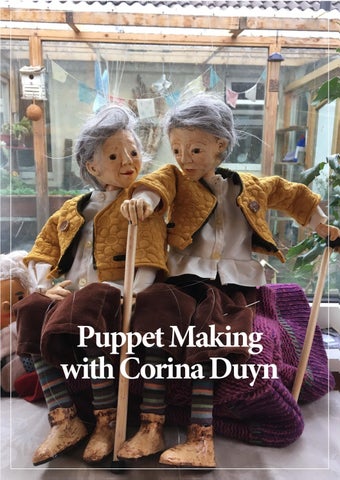

![]()


Updated January 2026
Dear puppet-maker-in-the-making, thank you for your interest.
First a few notes
This course material was created by Corina Duyn and draws on over four decades of experience. Corina made her first doll at the age of 10. Her first puppet, aged 15. Mostly self taught through books including by Dutch Doll Artist Wil van der Spiegel and Marlaine Verhelst, and many international artists over the following decades. Corina became a well known doll and puppet maker under the name of ‘Fantasy Folk’ until illness ME changed her life in 1998.
Corina taught this puppet making course in her studio, in a group home for teenagers. During illness at the Irish Wheelchair Association (2015) and in her studio in Lismore (2016-2018). Later, as her illness progressed, as well as questions arising from people who wanted to do an online course she started teaching remotely.
These written and visual instructions as well as related YouTube instruction videos were created in 2019 with teaching support in mind. When Corina moved into full time care in 2021 she became unable to support students but made the unedited material free to access, so her work would not be lost. Any mention of online support, or mention in videos ‘for registered students only’ is no longer applicable.
In 2026 this compilation of her teaching guides into one book came about with help of Creative Waterford and Red Heaven Design. The introduction notes in each chapter have been updated and detailed instructions in the chapters are the original content created in 2019 for her students. Please note: some images and text may have minor display issues due to older content files being unavailable.
1) Introduction
2) Sculpting the Head
3) Hands and Feet/Shoes
4) Body and Cross
5) Painting; Clothing and Hair suggestions
“Best of luck with your puppet. Enjoy the enchanted adventures of the life of a puppet. By the way, the puppet decides who it is going to be!”
-Corina Duyn

facilitating the
The journey on how I got to share my work with you.

Born in the Netherlands in the early 60’s, I made tiny dolls clothes on a hand-singer-sewing machine since I was about 7 I still have some of these clothes, and the fabric doll I made with my aunt when I was ten.
To make my first puppet at age 15, I followed the instructions in ‘Karakterpoppen’ (Character dolls) by Jeannette Hildersley, published in 1974. I was hooked. I borrowed several doll making books from the library, and purchased many others over the following decades. I followed a short course and private module with amazing Dutch Doll Artist Marlaine Verhelst in the ’90. Other than that all my work has been self-taught.
The work I create now is a compilation of all these experiences and explorations. Mixing and matching the techniques I learned, and adapted to my needs. Life’s circumstances have certainly played a roll too. During the ‘90 I created ‘Fantasy Folk’ Artist Dolls. As it was my living, some dolls/puppets were a design range, although still all original pieces. I also did some teaching in my studio and in a group home for young people during 1997/8. There I realized the power of the arts, of creating dolls and puppets. I realized that ‘the clay would not lie’. That our emotions, thoughts, desires, fears, make their way from our brains, through our hands and into our work. This experience was a pivotal moment in my own creative development and subsequent work.
Becoming ill in 1998 changed the output, design and intensity of my work. You can see some of the created works on my website – follow ‘art’ links, and images used in my books, see ‘writing’ During the early years of learning to live with Myalgic Encephalomyelitis (M.E.), I was unable to sculpt as I had lost the ability to hold tools, or have the energy to hold my arms up. As I spend many years housebound - my world became small. However, this gave me the opportunity to closely observe the birds. Nature became my teacher and made its way into my creations.
Illness and resulting disability dictated the method by which I could sculpt again many years later. I adapted tools, and found new ways to work. Mostly twenty minutes at the time. But small segments of time still result in finished work. It just all takes a little longer…
During 2015/6 I was well enough to teach again. I facilitated a puppet-making project with other people with disabilities. Over the period of about 8 months we created nine puppets stepping out of the Disability Box. We created a short film: ‘Life Outside the Box’ (See puppet blog) We all had support staff. Without this practical support I could not teach. This project let to invitations to give talks about Puppetry, Disability and Health (see my blog for transcripts of my talks, and Youtube for recordings), in Ireland, UK, and via Skype in Brazil and Chile. A life altering experience.
My physical health has unfortunately taken many steps backwards again - which in a way is how you ended up being on this course … The year after facilitating ‘Life Outside the Box’, I started teaching in my studio, which is in the garden. The benefits were plenty: I could set up the workspace a day in advance, and three students could continue to work in my studio when I needed to go inside to rest. It was a good compromise. I loved seeing the puppets evolve: each telling their own stories. Making puppets remains a wondrous journey of discovery.
During one of these courses I was communicating with Linda Crowhurst, a woman living with severe M.E. for 25 years. Her husband Greg is her full time carer. Both amazing advocates for our illness.
During one communication she expressed that Greg would love to make a puppet. I wrote: “There is always a way”. This was the start of creating my distant learning puppet making course. Some of the material you will explore was initially created for Greg, who made ‘Johnny Toes’. The course as you see it now, has been created in response to questions from my students as went along. It will explore more basic sculpting, and more advanced techniques.
Last year my ability to teach even a small group in my studio became impossible. Over the course of a year, while teaching a few people via distant learning in Ireland, Scotland and India, I created more instruction films and documented all stages of puppet making through photos and written instructions.
But even these fully guided distant learning courses are now beyond my physical ability. Feeling a sadness to have all that work hidden on my computer, I decided to release them out of obscurity and share them with interested creatives like yourself.
It brings me joy to think that people all over the world can taste a little of the magic which is making puppets, or dolls.
During 2019/2020 I worked on a puppet film with the working title ‘Invisible Octopus’. This was made possible through an Arts & Disability Ireland ‘Connect’ mentoring bursary with Dr. Emma Fisher. You can read about this project on my blog. https://corinaduyn.blogspot.com/2026/02/ exploring-invisible-octopus-project.html
Puppetry, although I can no longer create remains part of my world. Some of the puppets became central to the exhibition: ‘I brought the dream of flying’ at GOMA https://www.corinaduyn.com/site/i-brought-the-dreamof-flying/ 2023 about moving into long term care.
Some puppetry images also made their way into my collage book ‘In bed I cut words’ https://www.corinaduyn.com/site/in-bed-i-cut-words/
Enjoy the process of exploring your world through the enchanting art of puppetry. Welcome on board. Please explore my website/blog and social media pages to read about my work, see imagery, watch puppet movies, learn about my illness and the associated challenges, explore my books, or read transcripts of my talks.

-For a glimpse into my previous precious studio (2018) and meet some of my students, see https://m.youtube.com/watch?v=eIq9MkAdZO4 Recorded by Nationwide, RTÉ National Television.
-A lecture video The ‘Power of the Puppet’ (2021) for the Puppetry Therapy Diploma at the Muñecoterapia in Chile is free to access on YouTube with English, Spanish, and Dutch subtitles. https://youtu.be/j5cFBtk5Oao
Website: www.corinaduyn.com
Puppetry page: https://www.corinaduyn.com/site/puppetry-2/ Blog: www.corinaduyn.blogspot.ie
Youtube videos: https://www.youtube.com/user/flyingonlittlewings
Instagram: www.instagram.com/corinaduyn
Life Outside the Box: http://lifeoutsidethebox-puppetproject.blogspot.com
Corina Duyn © 2019/2026
o you might need other tools, props and paint etc. depending on the development of your particular puppet/doll.
o The instruction on how to make the head, hands and feet for a puppet are (mostly) the same for making a doll with a wire body.
o If you just like to make the head, instructions are also given on how to place them on a ‘bust’.
• DAS air-drying clay. White. Available in 500 grams and 1 kg. It is available from craft shops and online. For example Specialist Crafts and Amazon.
• Sculpting tools. See details below.
• Dowel of about 30 cm long, diameter of a broom handle, or inner core of a ‘clingfilm’ roll.
• A bottle or tall jar, with neck/top opening wide enough to fit the dowel.
o Have the head of your puppet right in front of you, so find a bottle and length of stick to achieve this.

• Strip of cotton, approx. 3 cm wide, 5 to 6 meter long. A torn up old sheet is perfect.
• Plastic doll eyes- if required (approx. 12 mm, with 9mm iris). Instructions are also given in the course on how to sculpt the eyes – this actually gives your puppet more individuality as eyes can be created to size.
• A smooth plastic placemat, or oilcloth to work on.
• A roller, rolling pin or bottle to roll out clay. (I use a rubber roller used for print making)
• Clingfilm, or tin foil.
• A small jar of water.
• A well sealed tub or zip-lock bag to keep the remaining clay in.
• A nail brush or sponge to clean your hands with after using the clay. Wet wipes are great too.
• Sandpaper: fine sandpaper, super fine black - ‘glass’ sandpaper, and wire wool. See below.
• A dust mask if allergic to fine dust (when sanding the clay)
• In terms of paint, this depends on what your puppet/doll is going to become and what your tolerance for paint/varnish smells are. Instructions are given on various options.
• A selection of small brushes for painting.

•
• Set of pliers, for cutting and bending wire. Sharp small scissors
• Fabric for the clothing, and hair – we will discuss this later in the project.
o All details of these will be given with the Body/Cross part of the course
• Glue- (superglue) and PVA glue.
• Wooden puppet body: dowel, plywood, body stocking, stuffing, small screw eyes, small open hooks and wire.
• Collected images from magazines of faces, hands and feet, perhaps clothing you like.

The sculpting tool is actually for leather, but it great for working on the features. Both sides can be used, depending on the detail required.

The brush (Round Short Handled Watercolour Brush - Size 8) is for wetting the dry clay base (when the clay is dry, between each session, you need to wet the clay, slightly, with water, for the new clay to stick the previous work). The brush is also wonderful for even finer detail, say around the eyes, or around the nose and mouth. Play around with both tools. Do not use this brush for painting!
My main tools really are my thumbs and index fingers I use both hands at the same time, for example around the shaping of the nose, to feel if both sides are equal in size and shape. See videos.
Also, for example to smoothen the base of the head you made in the first session, it is great to slightly wet your hands and smoothen the clay.
If you have very warm hands, the clay will dry out much quicker. I would advise the wipe your hands on a damp cloth while you are working, so your hands don’t become caked with clay.
Experiment what works best for you. Some people prefer the tools, others are more tactile and use the tools very little.
The Knife is a very sharp kitchen pairing knife with a smooth blade. So please be careful! I use the knife if there is any detail on the sculpted parts I don’t like, or are too much. For example, the head base is too big on the left, and I like the right side better- it is perfectly ok to cut off the part you don’t like. It is also useful to cut the leg dowel into shape.
Sandpaper
I use two kinds of sandpaper- the rougher (brown) one, and the black ‘glass’ sandpaper. Also steelwool.
These are used to correct any imperfections, and can almost be a like a sculpting tool – taking away detail instead of adding.
You will often see me referring to sanding before adding any more detail. See sanding video
Do the sanding over a sheet of newspaper and discard this before starting to work with fresh clay again and use a mask if allergic to dust.
Never mix sanded clay dust with new clay!
Drying the clay
When you are finished working, and are happy with the results so far (we keep adding, and correcting detail- the head/hands/feet are made during several sessions so don’t despair!) place the sculpted part near a source of heat: a radiator, a stove. But not in an oven. Depending on the source of heat, and thickness of clay, the clay will dry in a few hours, or a day.
If you want to work a little further on a particular part, wrap you work in cling-film and keep it in an airtight container.
It is easiest to build the features one step at the time, on dried clay.


Updated January 2026
Dear puppet-maker-in-the-making, please read Introduction notes before you start the course.
Included in this section are:
oStarting the Base of Head
oBuilding up the face
oAdding Ears
oA short introduction about sculpting the head
oNose, lips (and eyebrows for puppet with glass eyes)
oFinishing the head and Neck
oThe videos and written instructions are interchangeable. I suggest you watch, and read both at each step of the sculpting process. (2.04) indicates the length of the videos.
Please make sure to watch the Youtube videos in HD.
© 2019/2026 www.corinaduyn.com
Corina Duyn www.corinaduyn.com 2019
This part of the course is definitely the most exciting for the maker, and for me as a teacher. At each step in the making you can see a character evolve. And it is rarely what you imagine it would be. As I said before, the puppet decides who or what is it going to be. We of course have some control over how big a nose, what shape the chin, etc., but for some reason one’s thoughts translate through the clay into the head. I have seen students redo the shaping of the face many times, as they didn't like the emerging character. She gave up at trial number six… the puppet looked the same every time.
I always advise my student to really engage with the process. Don't just make a puppet… Communicate with it. What is it telling you? Ask it questions. Sounds weird, but it works.
During the course I facitiated with the people with disabilities, one participant was going to make a young man on a skateboard. It turned into a monk wearing an orange robe. Another participant had a young woman in mind. She made an old lady, full of attitude, in designer clothes and a dog in her handbag. Stunning work. All telling a story. One young participant said that the many physical challenges he faced by working on the puppet dictated how it eventually turned out. (A biker wearing a leather jacket). All so true. Go with it.
Glass eyes, or sculpted eyes…

With the sculpting of the head I have given two options: one using glass eyes- which can be bought online, or from me. (Send me an email €5 per set of eyes, incl. postage). The other option is to sculpt the eyes. This is a little more tricky to sculpt but… the benefit from this is that eyes can be sculpted in any size or shape. It can add to the character you are creating. (Image: head being sculpted by Jackie O’Flynn)
The PDF’s and videos are interchangeable between the sculpted and glass eyes. Please read and watch all the videos (appropriate sections) to see what the options are. I would recommend to experiment. You can Always start again! If you don't like it at first, cut and sand the additional features off and start again. (Although you have been warned that the same might appear again…)
In the videos and written instructions I often refer to at how students make the nose, mouth, ears etc. too big. Sometimes your character needs that… Mostly they don't Look around you, look in the mirror; look at your family and friends. Cut out images from a magazine. Collect images from the Internet. Explore. It is amazing that we really have very little knowledge on how our face (and hands/feet etc) is constructed. In this course I hope you can see the world around you in a new way!
Take your time with each step. Really take your time. And enjoy the process.
Corina September 2019
Accompanying video links for sculpting the head (highlight and copy the links and add to search box in your browser if viewed in ISSUU book)
• Video: Base of Head https://youtu.be/YUlf1zsD6X0 (10.08)
• Video: Building the face- (glass eyes) https://youtu.be/EvZbDlTKzHA (8.04)
• Video: Building the face- (sculpted eyes) https://youtu.be/R6FltP40F8w (7.26)
• Video: Nose, lips (and eyebrows for puppet with glass eyes) https://youtu.be/b782Lj-t9TI (13.57)
• Video: Sculpted eyes, and adding cheeks: https://youtu.be/zJ8-EYmFJek (11.05)
• Video: Adding features & ears https://youtu.be/5WlXQAozgzE (15.57)
• Video: Finishing the head: https://youtu.be/CYGp2X4jdKU (3.10)
• Alternative option of adding head to a bust, is not supported by a video


You willneed the stick, the longstrip of cotton, and some clingfilm.Watchthevideo...
Hold the stick in your left hand (if right handed).
Hold the end of the strip on the stick with your thumb.
Wrap the strip over the top.The first few times just go around the top.
For the following rotations, wrap the strip Diagonally..
This is easiest done by turning the stick 90 degrees.
Wrap one more bit from bottom right, to left top..
Turn 90 degrees and do the same wrappeing again..
This way you get a nice shape head.
All quite tightly.
If there is a knot in the strip, don't worry. I try to put it somewhere over the top, and put the nest bit tightly around it, so it 'disappears'.
Use up all the fabric.
If you're happy with the shape, wrap the head shape in cling film tightening it at the neck. Needsbe with a piece of cellotape, or masking tape but the cling film usually sticks to itself.
A common error is that peoplejust wind it around on top of the previous /�er and end up with a long, flat head.


Take about a quarter pack of DAS clay, and roll it out to a thin layer, about 3mm. (keep the rest of the cl� in the foil and put it in a tub or sealed bag) You can use a small bottle, or rollingpin. (There is a slight scent from the cl�. When the cl� is dry, there is no scent from it.)
Drape the clay over the top of the head. Squeeze the clay together on both sides. Take the knife or a scissors, to cut around the head. Put the reamining clay back in the bag or tub.
With the sculptingtool, smoothen the seam, which is now visible, neatly together. Gently pull one side over the other and paste together with the sculpting tool. Add a tiny bit of water on the tool if required. And use your thumb and index finger to smoothen the clay. See what works best for you. Ifyou have warm hands, the cl� might dry and create smallcracks. Keepyour hands slightfy damp l?J dipping yourfingerstips in a bowl of water. Not too wet! Do same on the other side.
When seams are hardly visible, smoothen the whole head in your hands, with slightly damp hands. The smoother you can get this, the easier it is to work on the head later. Decide which part of the head is the front. Uusuallly the most flattened side.
There might be a bit of give between the fabric and the cl�. Don't worry about that.


Smoothen the head with slightly damp hands
Cut the neck off with the sharp knife
Choosewhich part is most likely the front of the head
See drawing reference onpositioning of eyes.
The following instructions are for use with glass eyes
Sculpting eyes will be discussed in dedicated video.
Push the eyes into clay As a rule, there is one size eye between the two eyes.
Make sure the eyes look FORWARD! ,not pointing in different directions
Add little bits of clay to secure them in the right position.
The head will look like E.T...but not for long
Don't worry about uneven parts in the head. Leave it to dry fully - near a source of heat. Not in an oven


This PDP shows the already added eyes, but instructions are the same for the head with the sculpted eyes. The video shows the face without plastic eyes. Again instructions are the same for both.
Most of the facial features start of as a 'sausage'. See photos of size of each... Wet the clay with a tiny bit of water (with your brush or by hand) where details will be added. This counts for every stage.
Forehead:
With your hands, paste the 'sausage' on the forehead, and smoothen it out. See what works best for you: using your fingers, or the sculpting tool. Smooth the added piece (again this countsfor each addedfeature) all around the edges, to create a seamless transition between the existing clay and the added clay.
Make sure the forehead does not end up as a squared top.
Add the bottom of the head in the same way.


The head will look strange at this stage... don't worry as more detail will be added later. The aim of this stage is to build a general shape of the head. More 'padding' can be added at any stage.


Smoothen out the chin area of the head
Again, make a 'sausage' and put this under the eyes. This is to build a base of nose and cheeks
If required- depending on the head you like to make, add more clay to the sides. Of course if you like a skinny face, you don't do this.
Again, try to make sure both sides of the face are the same. It is quite difficult to do this 100%, but see how close you can get. Spend some time on this. Also, try to smoothen the clay out as much as you can., unless you like character lines/features. Your puppet/doll will "tell" you what how it would like to look. Go with it!.


When you are happy with the result - Leave the head to dry before adding further detail


The nose is often made too large. Again it depends on your character, but I would suggest to start kind of small-ish. You can always add more later. I suggest to take a piece of clay about the size of one eye. Shape it like a teardrop, by squeezing one side with your fingers Then create the bottom of the nose by pushing your thumb against the clay.

Wet the dry clay face and Place the nose on the face.
The top of the nose is about the same level as the top of eye. Smoothen the clay all around - very important! - and make sure the nose is well attached. Use your fingers, the sculpting tool and the brush to create finer detail


With the sculpting tool, create the airways, and to push out the nostrals. Have a look at your own nose, or of another human being, to see how a nose is formed. Again, it depends on yourcharacterif you want a 'realistic' nose or a characternose!

You can push the nose up a little, or shape the nose with your fingers. Make it longer, thinner, fatter... The final detail can be created with the brush. Slightly wet the brush first, and squeeze the fibers together in a point, or flat.
I would leave the head to dry before adding more detail for now. It is easier to work on the head when you don't accidentally hit a wet part and destroy your work.
When the clf!Y is dry, look at theface. See if there is anything you are not happy with. It is advisable to sand off a,ry parts you don'tlike. But make sure to clean the work suiface wellbefore starting to add new clf!Y. Do NOT mix sanded off clay with wet clay!!!

To make the mouth, there is a tendenry to make it too big, and have the lips stick out too much. Be aware of this!
Take a piece of clay the size of the eye. Shape it a little with your fingers. Place it under the nose, and smoothen out the top of it. Leave the bottom bit, or attach it a litte to create the idea of an open mouth. Have a look atyour own, or someone else's mouth and look at the different Wt?JS a mouth can be shaped: Open, closed, angry, laughing Up toyou, whatyou Makel
Look at the photos on the different stages to make sure the mouth is in the right place, and has some of a normal mouth's features. Again your character will decide!


Take a piece of clay the size of the eye ball. Shape it a little with your fingers. Place it under the upper lip, and smoothen out the bottom part it. Leave the bottom bit, Have a look atyour own, or someone else's mouth and look at the different Wt!JS a mouth can be shaped: Open, closed, angry, laughing...Up toyou, whatyou Makel

To create the upper eyelids roll out a very thin layer of clay. Cut it in half - one for each eye. and place it over the eye. Moulding the top into the clay. Using te sculpting tool and your fingers The part that goes over the eye, smoothen this with your (slightly damp) fingers, or with a damp brush. You can shape the damp bristlesflat or round withyourfingers to make the 'peifect' tool

Build the lower eyelids in the same way.
Again, be creative. You might want slight!J closed ryes, or wide open. Rounded rye/ids, or slanted aapanese) See what worksforyour puppetface.


By adding more clay for thecheeks, or chin, or forehead, at the side of the head, around the mouth.. you create more of the character of your puppet.
Communicate withyour puppet, 'ask' it who it is, who is wants be be, what it would like to represent. With puppets, the rype of characteris endless. They don'thave to look like human beings. Mt!Jbeyour is inspired � nature,folklore, animals, .... There are no rules.
Add clay.Leave it to dry, cut or sand away parts you don't like, and have another look at another time. You know when it is done... Don't try to copy the face that appeared under my hands! This is only a how to guide.


To make the ears, roll out a piece of clay, see size guide of first photo. Cut it in two halves, and roll into balls. Flatten it between thumb and index finger (alternate hands to get both ears) , but leave a raised side for the 'outer-ear'. The ears are placed in the middle of the head (seen sideways) and in between the top of the eye and bottom of nose. Attach the ear like you did with all the other parts: smoothing the new clay into the dry clay. Use your sculpting tool, fingers, and/or brush. Sculpt the detail. If you want a realistic ear, look at images in magazines, or at yourself a person nearby.
Of course, the size and shape ofyour puppet'sear depends again onyour character. Thry don't even have to look like ears... Thry can be wing shaped, or leaf, or pixie ears, long, short, thick, thin ...


Well done.
You have created your puppet-head.The sculpting part is completed (but until it is painted, it can still be worked on, if you like ) You can now remove the stick, and pull out the cotton strip.


To finish, have a good look if both sides are the same shape. Lut or sand the pans you would like to remove. Use the roughest sandpaper, then the black fine sandpaper, and to finish of the steel-wool. Around the eyes you can gently cut with the knife to create sharppr detail .


Have a last look at what might needs more attention. For example, you might wantto smoothen theneck opening. It needs to be wide enough for the neck-stick, and some extra space in order for the head to move around.
Use the knifeto cut a nice smooth, levelneck opening, and use the sandpaper and steel wool to smoothen in out nicely.
Sand any other parts of the head if it still needs finetuning.

I will explain later on how to attach the head to the stick. This is just to show approximate space needed around the stick..

This puppet-head ended up being a butterfly. Wings painted on silk by


If you like making the head, but are not interested to make a puppet, here are instructions on how to add the head to a base - a bust.
You can also add the head to a large stone or piece of wood. The DAS clay will stick to any surface as long as it porous. Make sure to wet the base well with water before adding the dry head/neck.
Have fun.
Attaching a sculpted head to a base (1)


Needed: sculpted head, clay, sculpting tool, water, toillet roll, tin dowel, or inner from tinfoil, plastic pipe (fit inside neck opening - and cut to lenght), tinfolil, scissors, masking tape, pen.


Cut the toilet roll in half and place over each other. Put the nexk 'dowel' on it and draw a circel around it. Cut the hole, see, and stick the 'dowel' into it. Making sure the neck is right lenght.


Tape the dowl into place with masking tape.


Wrap tinfoil all around to make a bit stronger. put some newspaper, or tinfol inside the bottom of the base, again to make it a bit stronger.

Make sure the head fits nice and snug. Add more tinfoil if needed to make it fit well on the neck. Turn the head the way you would like to to look. It does not necessarily have to look forward Tape all of it, including underneath the base, with masking tape.


Roll out a sheet of clay. Wet the masking tape and bottom of head, as well as inside the head. Wrap clay around the base neck, as well as underneath Smooth the edges out like we did with the puppet head making

Make sure the bottom is perfectly flat, otherwise it won't stand properly.
Leave to dry


When the clay is dry, play around with ideas to finish your sculpture.
Use natural materials, or add sugar or sand into the clay to suggest hair
Roll leaves or lace into clay and drape it around the shoulders.
Cut some fabric, knit a hat...
Use Plaster of Paris bandage and wrap it around the head as 'hat' and around the shoulders as scarf
Let your imagination go wild.
You can leave the piece in the original colour of the clay - white. Or you can paint it, with acrylic, water colour, or follow the painting instructions for the puppet making. Or simply add a layer of varnish.
In terms of painting - try it out first on the bottom of your sculpture, or on a dried piece of clay, before you paint your sculpture.
You can add piece of velt at the bottom of the piece to protect the surface it might be standing on.
Enjoy!!

In this piece I took a wasps nest apart.
Puppet Making with Corina Duyn - Sculpting the Head
Corina Duyn 2026 www.corinaduyn.com


Updated January 2026
Dear puppet-maker-in-the-making, please read Introduction notes before you start the course. Included in this section are:
oA short introduction about sculpting hands and fee
oSculpting option for ‘Easy Hands
oInstructions on more Detailed Hand
oBase for feet – for fabric or sculpted shoes, or with sculpted toe
oThe videos and written instructions are interchangeable. I suggest you watch, and read both at eac step of the sculpting process. (2.04) indicates the length of the videos.
Please make sure to watch the Youtube videos in HD of the videos.
© 2019/2026 www.corinaduyn.com
I hope you enjoyed making the head of your puppet? I wonder whom it decided to become. Were you surprised? Happy? Maybe not overly happy? If this was your first attempt, please don't be discouraged. Keep going. It is all a learning process. My students often say, “but you make it look so easy…” Well, yes. I have been making dolls and puppets for over four decades…
So now you are here – ready for making hands and feet.
As I wrote before, this course was created in response to me not being able to teach in person anymore due to increased level of illness. But also on request of people who could not possibly travel to me. The written and photographic instructions and the videos are interchangeable. I strongly suggest that you have a quick look at both before you start on this next adventure.
About 25 years ago I traveled to work with Dutch Doll Artist Marlaine Verhelst, to learn how she sculpt hands and feet. She is still the master! Over the decades I have adapted her methods to use in my own work. (If you want to perfect your detailed hand/feet making skills, please sign up for her courses too). I have explored many different sculpting methods and created my own, and use them what ever seems right for the particular work I am doing.
The detailed hands are beautiful and expressive and delicate, but can be a little tricky to make. If you have not sculpted before, perhaps start with the ‘Easy Hands’. However … I love you to give the other method a go. Try it out. Nothing to loose!
If your puppet will be used for performances, then perhaps sculpt the Easy Hands as they are a little more sturdy. Whatever you decide to do. Enjoy the process. Take your Time!!
In terms of the feet, well, there are many possibilities. You can have bare feet (photographic and written instructions included). Or sculpted shoes, perhaps with doll socks underneath. Or just make the base for the feet and buy some doll shoes or socks. Or perhaps make the shoes out of leather or fabric. Maybe feet don't have to look like real feet… The possibilities are endless.
I suggest you have a good look at your puppet and decided what you think is right. Perhaps explore some images on the Internet, or look in magazines, or at your own shoes… If my puppets have shoes, they are often modeled on my own. I put the shoes on the table in front of me.
Explore! And have fun.
Corina
Videos links:
o Sculpting clay hands - easy option: https://youtu.be/ElKWN_IOCjs (4.42)
o Hands (1) base/fingers https://youtu.be/wq9dH_cYKYs (17.
o Hands (2) detailinghttps://youtu.be/ANHqP5-ncRM (9.22)
o Feet/shoes base: https://youtu.be/kGmY-hwtw-8 3.41

Hands don't always have to look like normal hands. These two images are hands- in the makingby Louise Clark, who is making a 'tree-woman'. The hands on the left will be placed on the tree. The hands on the right are part of the puppet.

A hand-in-the-making- by Jackie O'Flynn.
The basket is for now covered in clingfilm, to protect it from the clay. There just is enough of a gap between the thumb and the palm/fingers to allow the basket to be removed, so the hands can be painted more easily.
A few other samples of hands (all dolls/puppets/culptures by Corina Duyn)


Make a long 'sausages' out of the clay, about four times the height of the head. About the width of the mouth. Cut in two (for right and left arm)
Shape it like the first image to create the forearm and hand (like a mitten)
Hand part is about one-third of the length Flattening the 'mitten' part somewhat

With a small scissors cut the fingers and thumbs. Make sure you have a right and a left hand.
Shape the fingers with your hands and tools to smoothen the sharp edges left behind from using the scissors.
Bend the finger to whatever position you would like them in. Remember hand are rarely completely flat..


Add the small wires, as in the picture at the elbow side to create the elbow joint. And secure into place by adding a little clay between the wires.
This forearm will be connected to the upper arm which has a screw eye in it.


P:Pl-.a.J

General notes on starting the hands:
The length of the palm is approximately the same as from puppet chin to tip of nose of your puppet. The width of the palm is about the same as the length.
The top where the fingers are going to be attached, need to flat on top, and not too thin otherwise it be difficult to attach the fingers. Have a look at your own hands: There has to be room for four fingers. So try to see how thick the fingers are going to be. A bit of maths again. So, top of palm divided by 4, is about the thickness of the top of the palm.
Forexample,myownhand:thewidthof mypalmisabout8cmwide. Each finger is about 2cm wide. The top of the palm (where fingers are attached) is also roughly 2 cm thick.
The thickness of the underarm is about the same thickness at the palm side, but gets thicker towards the elbow. The length from palm to elbow is about the same lenght as the wooden dowel for the upperarm.

Roll a 'sausage', about 15 cm long and 1.5 cm in diameter. Cut in half.
.... Of course ifyou want much bigger hands- or longer forearms - depending onyour character, you adapt according!J In general, the palm of the hand is about the same size as fromyour chin tojust above the tip of your nose.
The hands are going to be formed where the clay was cut, this assures an equal size to start the hands with. Flatten that part with your thumb or index finger. To create the palms.
To make the wrists, roll the clay in between your two index fingers.
Work on the making both hands of equal shape and size.
Put both h�ds together and cut away any clay that is sticking out too much


Making sure that there is a right and a left hand. The part where the index finger will be attached later on,it slightly higher than where the pinky finger will be.

sideview of hands withoutfingers look a little likefeet without toes... no worries!.
1 Smoothen the edges as much as you can, especially where the fingerswill be att_aoJed. Sanding, when the clt!J is fulfy dry, willfine-tune this. Cut both pieces the same length!
Now decide what your handwill DO. Is it holding something? Does tn.e wns1. needs to be bend? Which way? Look atyour own hands... Perhaps have someone take phoro of your hands, back, front, sidewf!Ys, doing whatyour puppet will do. This will be hugefy benJfjcial when we get to the detailing stage.
For the elbow joint, push the piece of thin wire int0 the day (elbow side) and secure this further by adding a little bit of cla in between the loop. Dry the hands on a stick to keep the shape .,


To start working on the fingers, first make sure that both bases for the hands are the same. Adjust them by either cutting them to size, if necessary, followed by sanding.Making sure that the part where the fingers will be attached is smooth! As before, do the sanding over a newspaper, which you put aw� when you're done. Do not mix dry and wet cl�!
Roll out a 'sausage' about the size of the base of hands you've made.This will be more than enoughfor all the fingers and thumbs. Take fresh cl� from the pack, not rerycled cl�. This is to prevent the cl� being a little too dry, with the possibiliry of tiny cracks in the cl�. Make sure that the cl� does not dry out too much. Cracks willprevent thefingersfrom being strong enough. Wet your hands a ti,ry, tiny bit if necessary.
Roll the clay with your fingers.I put my fingers in the middle of the strip, and during the rolling movement, move them towards the outer ends of the strip. Repeat this movement until the strip is thin enough, ie, that there is room for four fingers... Cut the strip in half and put the cut ends side by side.

Now measure the length of the fingers.In general (but tailor this to the character of your puppet), the index finger is about the length of the palm ofyour hand. Look at your own hands. Cut the two fingers the same length. The middle finger is slightly longer, the ring finger about the same as the index finger.The pinky finger a good bit shorter. For the thumbs, cut quite large pieces, as we are including the whole thumbfrom wrist to fingernail.
Wrap one set of fingers and both thumbs in a slight/y damp piece of tissue or kitchen towel, for later use.
***If the hands are to hold a prop of some kind, wrap this verytightlyin clingfilm, so it won't get covered in clay. And if at all possible, it would be great to be able to gently remove the prop in order to paint the hands!!!


To add the thumb, look at your own hand and see how long it is in comparison to the fingers. Push the thumb against the side of the hand (beside the index finger), and attach the base of the thumb against the palm. Again, it depends on what the thumb does, where it should be attached. ie, on the side of the hand, or more inside the palm.
Smoothen all sides, including in the gap between the thumb reaches the hand (top most right image) The nail of the thumb is on the side, not on top like with the fingers.

Repeat all the steps for the second hand. Taking into account that eachhand can hold a different position.
Let them dry fully before adding the detail of knuckles and muscles. Check that the fingers are not bend in an unnatural shape, unless that is desired!


Before addingthe detail of knuckles andmuscles, it is important to sand the hands first. Use the fine sandpaper (black) and the steel-wool to finish off.Again!Remember to do this on a newspaper and put aside before working with the clt!JI Also make sure that the finger tips are smooth Keepyourcharacterin mind. Rough hands? beautiful delicate hands?Kids hands?Puffy hands? Oldperson's hands(more wrinkles/muscles).Look at images of hands in magazines oronlineifyou need some inspiration
Take a small piece of clay (about the size of the palm of the puppet hand), and roll it very thinly.. Wet the top of the hands with water.
Cut a piece of this thin strip and place it where the knuckle would be and leading towards the palm. The three 'muscles'you are adding lead to the centreof the wrist. (checkyourown hands). The pin�fingerdoes not real(y show a muscle. but might want a knuckle.
This detail also depends on what the hands is doing- what position it is in. Afist shows more knuckles than an open hand., but less muscle...
Attach firmly to the hand leading from the index finger, using the tool, then your fingers. (dip them in water first)


Make this as smooth, or keep it rough, depending on your puppet character.
Repeat this step for the three knuckles and muscles.Possibly addingthe knuckle for the pinky finger.I find that a slightly damp finger is great to smoothen the clay.
Do this detailing of the other hand. And come back later to add the knuckles on fingers.


To add the knuckles on the fingers, place tiny balls of clay in the right places. Again, look atyour own hands, when are knuckles real(y visible... Smoothen out with the tool and your fingers. The brush can also be a helpful tool. Make tiny cuts on the knuckleswith the knife, to suggest more detail. Thisshows up nicely whenpainted. Old hands have more lines than oun hands


If you want the little lines, but no knuckles, slighly damped that area and cut in it with the knife. Do same for thumb knuckles. This is a bitbigger than on the fingers. See where thry need to go.
Leave to dry fully, before working on the inside of the hand! Do this detailing on the other hand.
Sand again if required, when FULLY dry.

For the detail of the palm of the hands, and the wrists, again look at your own hands, or improvise to suityour puppet-character.
Normally, there will be extra padding required at the base of the thumb, at the wrist, and on the palm. Again, add as much detail as you would like, or your puppet-character requires. I added more clay around the wrists, as they were to thin. The wrist isjust slight!J thinner than the base of the hand.
I also added the small roll of clay at the base of the fingers. Attach this firmly on the palm side but not fully where the fingers start. It gives a lovely natural detail to leave a small gap. Also ad� some clay around the thumb. Base, palm and top. Again, the detail depends on if the hand is open or closed, or holding a prop. In terms of a prop, make sure this stillfits proper!J after palm details are added.


Do this detailing on the other hand. Sand again if required, when FULLY dry. And add more detail if required. As

e.-a .. isnot: r-� &°8ition is 0.-�-Ut:Whet:heritb •w•-ung
th., chief e •s c0111 ><ecut1ve of which "-.li�en�abtyhonest. _ article, she says: ·hallow. so fickle ·vonh be dete� "-if at five ·..,ryonicp heartt\:i.sound .lanhear1 t ,,�nthe; �.,ayoun us,therei bortionsot] d "fam, n'.tl


If your puppet is going to have shoes, or socks made from fabric, or leather it is still important to get the base of the legs/feet made
Wet the stick by dippingit into a bowl of water. It will make the clay stick
Mould some clay around thelongest of the sticks. Making sure that the slanted part is at the back. It is the back of the knee joint.
It can be a bit tricky to get the clay on right. But don't worry at this stage what it looks like.

This is just the first stage, a bit like the base of the head. But DO try to make them as equal in size and shape as you can.
Size wise, well that depends on what you would like your puppet shoes to be like. Up to you! When dry, adjust any big imperfections, and make the soles of the feet flat.
If you like the legs and feet to be shaped a bit more, add clay when the first layer is dry.


Fitted over the clay feet-base
Each student's sculpted feet bases are unique


Having made the base of the feet, we can now start at putting on the toes.
Unlike with the fingers, the toes and their muscles/tendons are put on at the same time.
Make sure that the basic shape of the feet is correct- ie. not to flat. See first image. The toes are actually quite long. Look atyour ownfeet, orprint out imagesfrom the internet. or cut out of magazines.
Roll out a long strip of clay. Like the fingers, there needs to be room for 5... Although the little toe goes more towards the side than on the front.
Cut strips to the length of the toe, all the way to the ankle. See images below. Wet the dry clay of the foot, and add the big toe. Making sure it is well attached, also under the toe!


Repeat the action for the 5 toes. The nail indentation can be made by gently stroking the sculpting tool over the end of the toes.


As I suggested, the little toe can be attached a bit more to the side. Work on both feet at the same time, to make sure they are the same!

Let the feet dry before addingany details. And sand away any parts you don't like.

Adding detail, on the side and underneath the foot. Again - look atyourown feet, orimagesoffeet.


When fully dry, sand again anything your don't like or needs to be smoothened out. Ready for painting!

I added some detail to these feet, but are of course dependent on the character of your puppet

MetakingJohnnyDwyeroutofhis boxatBrokenPuppetSymposium inCork2017 Photo:NikPalmer.
Puppet Making with Corina Duyn - Hands and Feet/Shoes
© Corina Duyn 2026 www.corinaduyn.com


Updated January 2026
Dear puppet-maker-in-the-making, please read Introduction notes before you start the course.
Included in this section are:
oA short introduction about the body and cross
oList of accompanying videos
oThe videos and written instructions are interchangeable. I suggest you watch, and read both at each step of the sculpting process. (2.04) indicates the length of the videos.
Please make sure to watch the Youtube videos in HD.
© 2019/2026 www.corinaduyn.com
I imagine that your puppet head, hands and feet have been sculpted at this stage, maybe even painted. Or maybe you are working ahead and already starting on the creation of the puppet body. Whatever stage you have reached, well done so far.
Over the past four decades I have used a very simple, but effective wooden puppet body. A slightly updated version created during one of my studio classes, will be discussed in the accompanying material.
But… there are many, many ways to make a puppet body. Due to more physical challenges imposed on me by illness, I have explored and designed new types of puppet bodies and ways to animate my puppet. Who knows, I might share these designs some day too…
I’d suggest that you have a look online too at alternative ways to make the body, and perhaps make your own design, using my instructions as a starting point.
The cross design was given to me about 30 years ago by one of Ireland’s leading puppeteers at that time. Eugene Lambert, now sadly passed away. I met him at a puppet show in Dungarvan, and he invited me to his theatre in Dublin. Eugene kindly gave me the animation cross he used for his puppets.s.
When I was still working full time as a Doll Artist during the ‘90’s I also had a range of very simple wooden puppets. Each with a different painted face, unique clothing, and funky hair. In response to one of my distant learning puppet making students, I created a short instruction on how to adapt this cross for her puppet. Through Skype tutorial I realized that she would have difficulties with the advanced cross. There is always a way!
Please use my instructions as starting point, or follow as directed. Up to you.ou Stringing up after having fully finished your puppet can be rather tedious. So take your time!
There is also a short video on how to animate your puppet, to show you which strings corresponds to which puppet body part. Watch your puppet come to life!
Enjoy!
Corina Duyn
Videos for puppet Body: B
• Assembling the wooden body https://youtu.be/ALjK0WxLnIM (8.14)
Cross and strings
• Assembling puppet and cross, adding strings, and stringing up https://youtu.be/vOV235Tu4q8 (15.31)
• Animating your puppet https://youtu.be/cby6fJ9N6es (5.50)


LI have used the body design on the left for about 40 years. It is a simple but effective design.During the teaching of classes in my studio, we created a more curved design: the body on the right.It is this design which is discussed how to assemble.
The dowels for the limbs supplied to me were square.I prefer the rounded dowels, but itworked just fine. I did sanded off the edges to make them less sharp.
The most significant difference between the two wooden bodies above is the way the legs areattached.
There are many, many ways to make a puppet body. These are just two.Further in this document is also a simple cloth body as alternative.
I have seen puppet bodies made from plastic drinking bottle, foam. cardbaord... Limbs madefrom dowels. corks, plastic tubing... Play around with what works best for your puppet.


Assembling


Assemblling for the 'new body' type.
Attaching arms to body: Make a loop out of thin wire Hook the upper arm screw eye through the loop. Squeeze the wires together arm push through the hole in the shoulder Bend the wires flat against the wood.
Alternativefy - add a largerscrew-rye asshoulderjoint to hook upper arm screw ryeonto it.


If the feet or shoes are sculpted on to the lower legs, please have them completelyfinished, painted and all, before attaching to the body!
Sculpting the feet/shoeswhile attached to the body is not really possible
If shoes are made seperately, the legs can be attached to the body at this stage
See video
Drill a hole from hip to groin.
Cut two pieces of the strongerwire
Measuring from middle of 'groin' to about 1 cm outside of 'hip'.
Push wire through the hole in the 'hip'; through the upper leg; and into the hole in the 'groin'.
Make sure that that knees are both to the front! Slanted parts are at the back!!
Use super-glue in the holes tosecure the wire.
Bend the 'hip'swire and hammer against the side of the body.
Make sure the upper leg does NOT get glued onto the wire!


The sculpting tool is a handly tool to screw the closed screw eye into the wood.
Neck: Two of the larger screw eyes, one on either end.
Keep the bottom screw eye (in the chest) open a little bit. Don't attach the neck dowel until head is painted!
More about this later.
Upper arms - closed screw eyes on both ends.


sideviewofthekn Joint. Theslantedpartisattheback.
A small 1Screwrye on top of knee, (where string will be attached to) is on the top knee-front.


You might need to open the slit in the wood a bit more by sanding it. Fold a piece of rough sandpaper in half, and rub it inside the slit.
The knee joint has a piece of ribbon, or leather glued in the slot provided. See video. Do this part of the assembling when the feet, or shoes are totally finished!
The easiest way to do this is to cut a piece of leather/ribbon, which iswider than the dowel. Slot it into place in upper dowel. If it slides in well, remove it, add superglue into the slid and quickly replace the leather/ribbon.
Repeat this for the lower part of the kee joint. Making sure that the slanted part are on the same side, and both legs have equal length!
Take your time with this.

Cut a piece of tube-grip, or sock, orbaby tights, and fit it over the body.
Cut the hip-parts out and hand sew the groin part. Or fold bottompart and add a little super glue to keep in place
Leave the top open so you can add stuffing to fill out the body at a later stage, when you have more of an idea on whatyour puppet is going to look like....
Also make sure the neck can move freely
Watch the video.


An alternative to the wooden body, is one made of cloth.
Use cotton (old sheet/pillow case). The fabric has to be subtle, so not to restrict movement of the puppet.
To get the size right, measure the size of the head, which is one-seventh of the overall size of your puppet.
Cut the fabric as per figure
Fill the body, VERY lightly, and tie strings around the joints
The body needs to be able to move with ease.
To attach the head to the cloth body, follow the instrucions on "adding neck to head"
Glue the lower end of the dowel in the neck opening.

tie string around the joints

See video instructions
Attach the wire through the head, through the screw eye on top of the neck dowel and out the other hole above the ears.
Loop the ends into a closed loop, bigger than the hole above the ears.


Hook the head onto the open screw eye on the chest, although...., depending on the clothing this is easier done after the puppet has been dressed
Make sure the screw eye is well closed and head securely attached.


Hook the lower arms onto the hook in the upper arm. Close the screw eye well afterwards

Attaching the lower legs-please refer back to the earlier Assembly Instructions
Dress your puppet before adding the strings. Suggestions for clothing and hair are given separately. Of course the dressing up is totally dependent on the character of your puppet!.
I recommend to put a string or wire on the hooks above the ears, and hang your puppet. It is the best way to explore clothing


You will need:
• Square or round dowels for the cross. See images above and below Same design.
• Strong wire (clothes hanger is fine)
• Screw eyes - like used for the body
• Two small beads


Watch the video!
Instructions the same for the 'square dowels'
Push the longest of the thin dowels through the upright handle and glue into place (woodglue) The shorter of the thin dowel goes at the back of the handle, again, glue into place.
Screw eyes/hooks into Main upright dowel:
Attach the open - largest hook at the top
Another open hook just above the holes for the wire, at the front
Another open hook just below where the thin dowel crossbar is, again at the front.
Screw eyes/hooks into other dowels:
Smalll closed screw-eyes at the end of both thin dowels. Small closed screw-eyes at each end of the longer (leg) dowel, and one in the middle (to hook onto the main upright dowel). The leg bar is detachable.
Cut two lenghts of strong wire about 20 cm long.
Make a 90% bend and push through the hole which is at a few centimeters from the top.
Put the bead on it, and create a loop to keep it in place (Glue- if nessesary)
At the other end, create a loop with a set of pliers. Make sure the loop is closed, otherwise it won't hold the string in place.
Watch the ASSEMBLING and ANIMATED YOUR PUPPET videos!
Lengths of strings (fishing line) required: (total 6 meters. If you want longer strings, calculate according!J **) This measurement will haveyour hand holding the cross between 80 or 90 come of the ground, with the puppet'sfeet on thefloor.
You can also use coloured strong thread. Just make sure it does not fray or break easily.
• Head: 75 cm. This is one string, which when attached to the cross, will go from one side of the head to the other. Attach to one side of the head for now, through the wire loop above the ears. Make several knots in the string.
• Shoulders: 50 cm for each shoulder. Attach to the screw-eye which functions as the shoulder joint, by sticking a needle through the fabric. (or under the clothing if the srew-eye is accessible) Make several knots, then thread the string with a needle through any other layer of clothing. Making sure this keeps the clothing in the right position.
• Back: 60 cm. Attach at the back of the trousers, and through the 'body-stocking'. Make a few knots, and with the needle bring the thread through the layers of fabric, in an upward fashion.
• Legs: 80cm each. Attach with a few knots to the screw-eye on the top of the knee. And with needle thread it through the trousers, again in a slightly upward fashion. Otherwise it will make the trousers go up a little.
• Hands: 60 cm each. Attach either to the cuff of the sleeves, or in between the fingers (with a small knot-, or to a small screw-eye inserted into the clay. The position of where the string is attached depends on what the hands is going to do, and if it is holding a prop.
Or insert a small screw eye into the wrist.
Attach it in such a way that if you want the thumb to be upright,you attach to the thumb. If you want the palm of the hand toface upwards,you attach to that side, or the back of than hand Both hands can be strung different!J.
To measure the strings, take up the position you will have when manipulating the puppet. (Standing, sitting, kneeling). Hold the cross in your hands as in the ANIMATING YOUR PUPPET video.
Attach the string above one ear. Push it through the hook on cross ( as in video and instructions), and to the wire above the other ear.Tighten the string at such a length in which the puppet is standing upright and you are comfortable holding the cross.
If the length of this string is longer than in the instructions, please add also extra length to the shoulder, back, legs and hand strings. (A bit of mathematics)
Please watch the video for more detailed instructions

(depending on puppet, strings might be attached to fabric, or string around the wrists)


Head and shoulders:
head string-from wire above ears.
Shoulder, through thefabric and shoulder wire


Only when Totally happy that all strings are attached in the right wqy, and at the right lenght, can you add a tiny drop of superglue where the string is attached to the cross.


Alternative cross
Square dowel, approx 1 cm square, 15 cm long
Glue or tie the middle of cross together. In this cross there is a small piece chiseled out to make the two halves fit together. Glued in place
Holes through two sides and a small screw eye at from of cross. SEE VIDEO
Side strings go to the legs.
Back string is looped connecting to the wire on either side of the head or via a wire from ear to ear. This will make it easier to avoid the puppet strings getting tangled up.
One looped String through the screw eye, to which the hands are attached at either end


Updated January 2026
Dear puppet-maker-in-the-making, please read Introduction notes before you start the course.
Included in this section are:
oA short introduction about the finishing touches for your puppet: painting, clothing and hai oList of accompanying video
o The videos and written instructions are interchangeable. I suggest you watch, and read both at each step of the sculpting process. (2.04) indicates the length of the videos.
Please make sure to watch the Youtube videos in HD.
© 2019/2026 www.corinaduyn.com
A short introduction about the finishing touches for your puppet: painting, clothing and hair
Well done so far! You have made the sculpted parts for your puppet, and perhaps have created the puppet body and cross. And hopefully had some thoughts on how you will dress your puppet.
Painting
In terms of painting your puppet, there are various options. You can just use acrylic if you want a very colourful expressive puppet. (No instructions for this are given). Or the more gently features painted with watercolour over base layers of gesso; or emulsion and undercoat followed by watercolour wash and varnish. The latter I have used for my puppet and dolls for decades. It is a bit more involved, but does create subtle tones.
If you go this route, please watch the video and follow instructions of first two layers of painting before starting on the colour wash guidelines outlined in this document. .
A helpful tip: Use a coat hanger with added hooks for drying the painted parts. And add a wire to the puppet head so it can hang while drying. Don’t forget to paint the dowel for the neck! I suggest you paint this while not yet attached to the head.
If you sculpted the eyes: the instruction on painting, are available as video, and are not discussed in this document.

Video: Painting: https://youtu.be/RE4VdXNVWXI (21.08)
Video: Painting sculpted in eyes: https://youtu.be/qdHc-rZR7Ok (10.24)
Oh, the joys of this part of the project. I said it many times before to my students, even when it comes to deciding on the clothing, it seems that the puppet decides what it will wear.
I have included two very basic patterns for a pair of trousers and a dress. I can not possibly advise you in this document on what your puppet needs, although, of you are stuck, you can avail of email or Skype support.
In general:
Your puppet needs to be able to move freely, so:
o Tight trousers, or tops don’t really work
o Do you want the joints to show, or would you like them covered
o Use soft flowing fabric
o Stiff fabric like leather won't work
o Go to second hand shops to look for the material you like to use, buy an old dress, scarf… It is cheaper than buying new fabric.
o Or buy baby clothes, or doll clothes (second hand). These days they are often quite ‘adult’ like.
o Make the clothing just a little bigger than you would do for a doll
o Explore the internet to see what type of clothing would be great for your puppet
o Be adventurous
o New to dress making? Google Youtube videos on making basic clothing, there are plenty of free tutorials
o There are also many free patterns available on Google too
o Have a think about any other props?
Hair
Again I have included some suggestions for hair. From sculpted hair, (obviously do this before you paint!), to using doll wigs, mohair, or teddy bear ar fur.
The possibilities are endless.
Hats can be sculpted, sewn from leather, or simply use the toe and foot part of a pair of socks…
Explore what your puppet wants. Have fun with it.
When all is done, go to the ‘stringing up’ section in the Body and Cross tutorials, to finish your puppet.
I hope you enjoyed the course, and please do share a photo with me of your finished puppet. littlewings@corinaduyn.com
Thank you for coming along on this adventure.
Corina Duyn
© Corina Duyn 2019 www.corinaduyn.com
Before you start painting, add wire to the head


To attach the wire in the head for painting, put the neck dowel into the head to determine where the hole for the wire must go.
It is important that it is centred as it will make the head centred.
The neck is only inserted to find the correct position. See video! The holes are made just above the ears.

You will need:
• White emulsion
• Off white undercoat
• Matt clear varnish
• High gloss varnish – if eyes are painted (not glass eyes) or high gloss nail varnish
• White spirits
• Water
• Watercolour for tinting: white, umber, ochre, red, black, and any colour you might like, for example if your puppet has natural colours, like green, etc.
• Soft Brushes (please don't use the brush you had for sculpting) – for the base coats and finer brushes for the tinting, painting of lips, eyes etc.
• Dish to mix watercolours on
• Protective Gloves
• Sticks to stir the paint
• Blusher for the cheeks
- Work in a well ventilated space when using the off white undercoat and varnish –
- And take time between each step in the painting process –
- There is an alternative painting method, see below
- And if you want to use acrylic, please be aware that the colours would be very strong, but your puppet might need this.
- Experiment at the back of the puppet’s head, or any other part which will not be seen, or make a sample piece of clay, to experiment on.
Process:
Watch the video!! Make sure to adjust Youtube settings so you can view in HD, detail is important
• First layer is white emulsion
o Paint over Everything – including eyes, into nose etc, and the neck
• Second layer is off white undercoat
o Paint over Everything – including eyes, into nose etc. and the neck
• See images below and video for tinting instructions
o The wash is made up of a mixture of white, ochre, red, black – please mix until you have the right tint for you puppet – experiment on a part which won't be seen
• When happy with adding the tinting, the features and any other parts which you like to paint varnish all with Matt Clear Varnish
Some instructions of alternative way to paint and varnish if you can’t use oil based paint:
• Mix flesh acrylics with white gesso for the base colour of the head and hands, and bare feet.
• Tinting and detailing and shadowing: for example mix up burnt umber, cadmium white, and (crimson) red, perhaps some black. As in the previous instructions, put it on and wipe it of again, so it will stay in the deeper parts.
o However, as the base coat is not an oil based paint, it the tinting colour dries up quickly, so wipe after very soon after applying.
o The results are slightly different from the normal painting process, but a good alternative.
• It is ok o use a spray varnish or even hair spray to seal the paint.
• If eyes are painted (not glass eyes) or glass eyes got damaged, in stead of the high gloss varnish you can also use a high gloss clear nail varnish.
After completing the first two layers of paint (see Written instructions above & video) and having FULLY let the paint dry, it is time for tinting
The wash consists of tiny amounts of white, ochre, red, and black watercolour from tubes - experiment with mixing what is right for your puppet.

Cover all the clay parts with the wash - Leave it dry for a few minutes and wipe off the excess paint. Make sure it stays in the deeper parts as this is what will give your puppet character and creates 'shadows'.
Tinting process is same for head, hands and feet. and neck
Painting of lips, eyes, nails and any other features, again use water colour - see video. The cheeks can be highlighted with powder blusher.


Instructions for painting eyes - see separate video

When happy with adding the tinting, the features and any other parts which you like to paint varnish all with Matt Clear Varnish.


Back of dress with opening at the back

Front of dress (- fold line


Measure the circumference of chest and add at least one centimeter to have a little extra space.
Your puppet needs to be able to move freely. Make sure the fabric is soft flowing.
Sleeve:
The rounded part is for the shoulder. measure the arm opening in the dress. Make it larger if you want the sleeve to be more 'puffy'.


cut 4 times
A simple, but very effective loose fitting Trousers
Draw your own shape and cut twice from soft flowing fabric.
Allow space for the seams when cutting
Measure total circumference of the waist Measure the height between waste and crotch Measure lenght of leg
When cutting, allow extra fabric for seams and make sure there is enough width to have the legs move freely.
Tight trousers don't really work Use soft flowing fabric
*googleyoutube videos on making basic clothing
And look up free patterns of google-images. The clothingyou decide to makeforyour puppet is totalfy dependent on the character.


Use natural materials... or roll leaves or lace into the
and


For long hair, which is tied up like in 'Birth Dance', (image on the left) glue long strips of mohair with either PVA or hot glue gun or super glue, hanging downwards over the face, and go all the way around the head. Then gather up the hair and tie it up.
Making sure you do not see the bare scalp between the hair.
You can glue some of the mohair on the scalp before you tie it up to cover it.
If puppet wears a hat, draw the outline of the hat on the head and glue on hair just above this line
For 'Johnny' on the right I used long Teddy Bear fur. It comes as a piece of fabric which can be cut. After cutting it to shape I glued in onto the head with hot glue gun.

For 'The Girls' I used a doll wig. I only had one, so took it apart and devided it up for the two puppets. Doll wigs can be bought online.


